
Using Digital Locker Functions of Google · PDF fileWhat Is A Digital Locker An online storage...
38
Digital Lockers
Transcript of Using Digital Locker Functions of Google · PDF fileWhat Is A Digital Locker An online storage...

Digital Lockers

Table of Contents
What ARE Digital LockersPurposeLogging InUploading filesSharing your files with others

What Is A Digital Locker

What Is A Digital Locker
An online storage space for any of your files.A website or "networked" drive that you can access from any computer connected to the internet.A connected location that makes sharing files with other connected users possible.

Purpose

Purpose
Easy way to store and protect files from accidental deletion or loss.
Everything is backed up multiple times by Google.Quickly access your own files as well as share them with others regardless of where you, or they, are.Easy way to keep the same file synced across different machines.

Logging In

Open browser and go to IPS homepage

Select the proper login from the Quicklinks pulldown

Enter your username, password, and click "Sign in"

Uploading Files

The list above details what types of files can be uploaded to Google Docs AND edited.
Microsoft Word (.doc, .docx), OpenDocument text (.odt), StarOffice text (.sxw)Rich text (.rtf), Plain text (.txt), HTML (.htm, .html)
Microsoft PowerPoint (.ppt, .pps)
Microsoft Excel (.xls, .xlsx) files, OpenDocument spreadsheets (.ods)
Comma-separated values (.csv)

ANY file can be uploaded to Google Docs and shared with others, the only limitation is size and
compatibility
REMEMBER....

From the main Google Docs screen, click 'Upload'

If this is a document you wish to edit, check the "Convert documents..." button. Otherwise click
"Select files to upload"
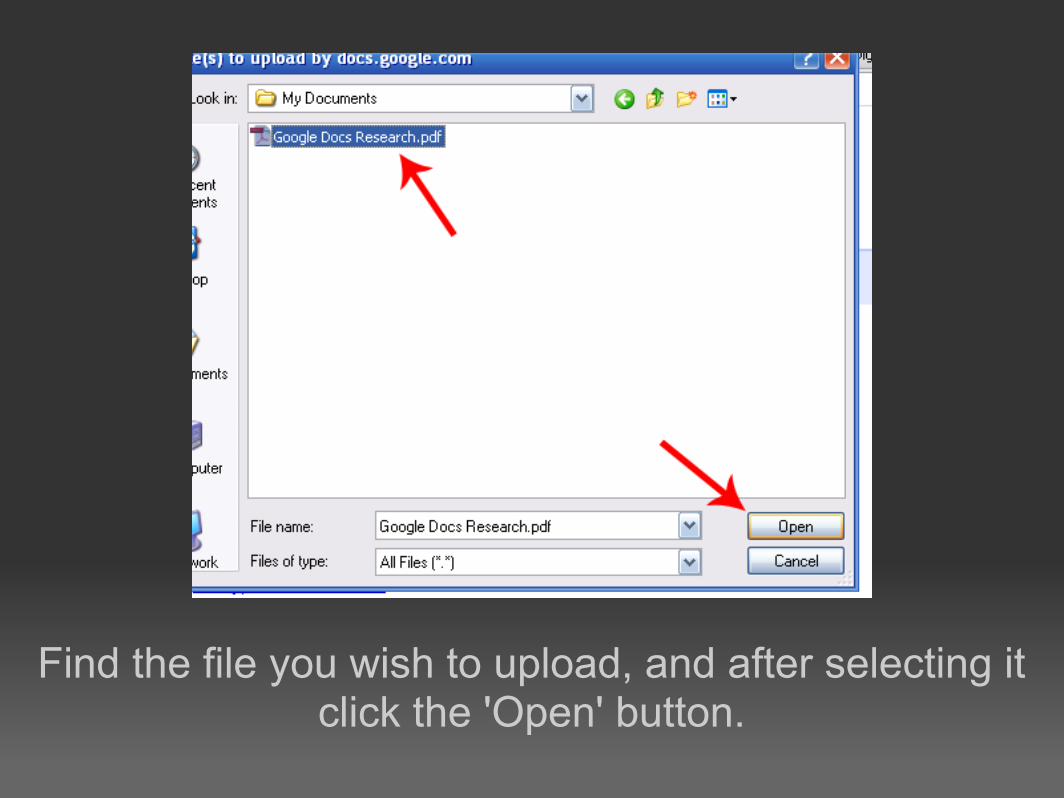
Find the file you wish to upload, and after selecting it click the 'Open' button.

At this point you will see that the file has been selected for upload. If you wish to add additional
files click 'Select more files'

When you have selected all the files you wish to upload, click the 'Start upload' button.

As the file uploads, you will see a progress bar display the time remaining until it is complete.

When the file has been uploaded a green check mark will appear indicating it is done.

The new file will appear in your list of files at the top if your files are organized in reverse chronological
order.

Sharing Files

Select the file you wish to share, click the 'Share' button, and choose 'Invite people'

When the sharing dialog box appears, the first step is to choose who you will share with. Either enter their email addresses individually (separated by
commas) or select 'Chose from contacts'.

Additionally, you can select whether the individual(s) you are sharing this file with will have the rights to
make changes (To edit) or simply view (To view) the file. Be careful what you choose, however there is
always a backup (we'll discuss that later).

Your recipient can receive an email notification that you have shared this file with them. Enter what you want the email subject line to be and the body of the
message to say.

Simply selecting "Send" will dispatch the email and alert the user that they have a newly shared file to access. Selecting 'Add without sending invitation'
will grant the user(s) you choose permissions without sending that email.

If you select to add the recipient without inviting, you will receive this warning dialog asking you to confirm.

Likewise, if you are adding an individual outside of our domain (like a student with an @dawggle.net
address) it will again ask you to confirm.
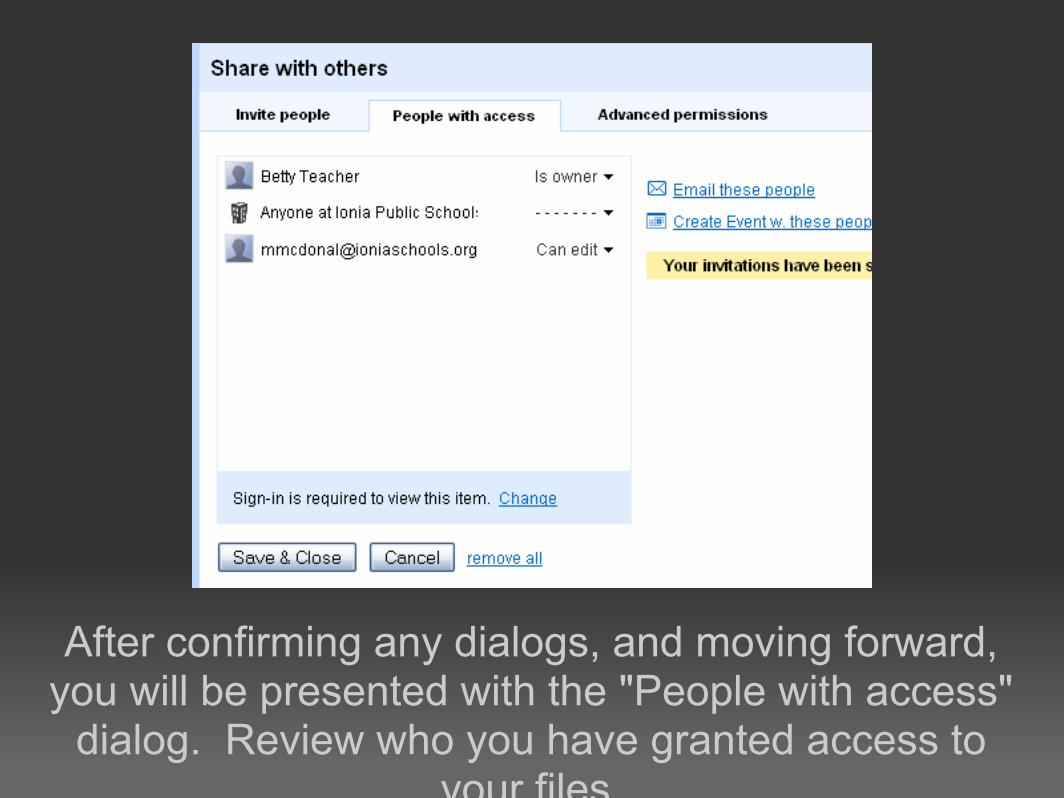
After confirming any dialogs, and moving forward, you will be presented with the "People with access"
dialog. Review who you have granted access to your files.

If you notice a mistake, you can simply choose what type of permissions you want that user to
have. When you are done, click "Save & Close."

After the file name and folder(s) that it is in, you will see how many individuals the file is shared with (if
it's even shared).
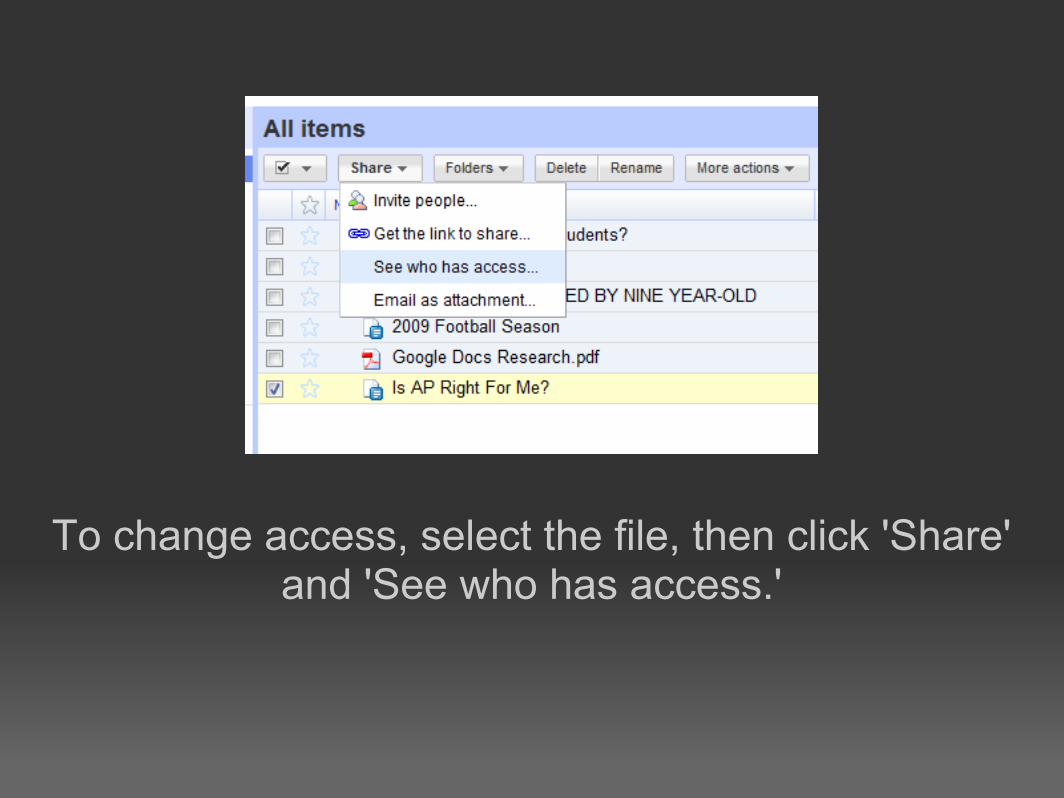
To change access, select the file, then click 'Share' and 'See who has access.'

This will bring up the 'People with access' dialog where you can alter permissions for individuals.

Real World Scenario's
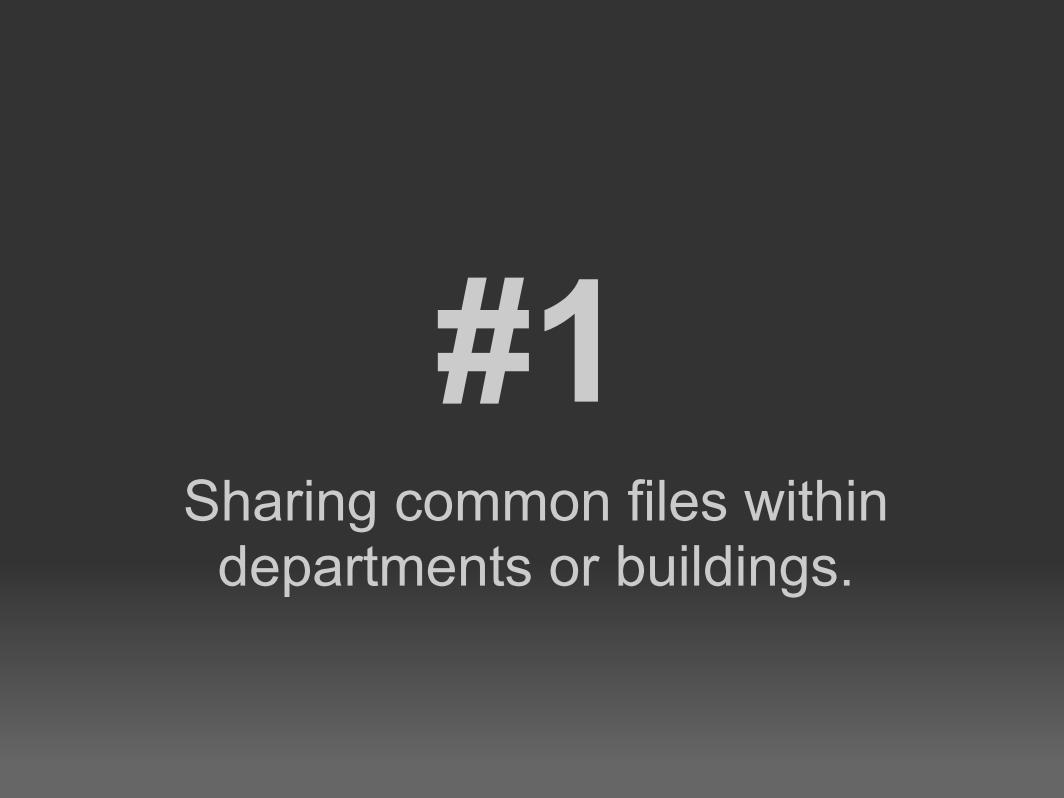
#1Sharing common files within
departments or buildings.

#2Ever lost a file?
Yeah, I have too....

?'s


![Digital Multifunctional System - Sharp · PDF fileMax. A3 (11" x 17"), min. A6*2 (5 1/ 2" x 8 / 2") [AR-6031N/6026N] ... Digital Multifunctional System General Original paper size](https://static.fdocuments.us/doc/165x107/5aa1914a7f8b9a07758bc743/digital-multifunctional-system-sharp-a3-11-x-17-min-a62-5-1-2-x-8-2.jpg)


