Using Celerra AntiVirus Agent - emc.com · EMC® Celerra® Network Server Release 6.0 Using Celerra...
120
EMC ® Celerra ® Network Server Release 6.0 Using Celerra AntiVirus Agent P/N 300-009-952 REV A01 EMC Corporation Corporate Headquarters: Hopkinton, MA 01748-9103 1-508-435-1000 www.EMC.com
Transcript of Using Celerra AntiVirus Agent - emc.com · EMC® Celerra® Network Server Release 6.0 Using Celerra...

EMC® Celerra® Network ServerRelease 6.0
Using Celerra AntiVirus AgentP/N 300-009-952
REV A01
EMC CorporationCorporate Headquarters:
Hopkinton, MA 01748-91031-508-435-1000
www.EMC.com

Copyright © 2010 - EMC Corporation. All rights reserved.
Published September 2010
EMC believes the information in this publication is accurate as of its publication date. Theinformation is subject to change without notice.
THE INFORMATION IN THIS PUBLICATION IS PROVIDED "AS IS." EMC CORPORATIONMAKES NO REPRESENTATIONS OR WARRANTIES OF ANY KIND WITH RESPECT TOTHE INFORMATION IN THIS PUBLICATION, AND SPECIFICALLY DISCLAIMS IMPLIEDWARRANTIES OF MERCHANTABILITY OR FITNESS FOR A PARTICULAR PURPOSE.
Use, copying, and distribution of any EMC software described in this publication requires anapplicable software license.
For the most up-to-date regulatory document for your product line, go to the TechnicalDocumentation and Advisories section on EMC Powerlink.
For the most up-to-date listing of EMC product names, see EMC Corporation Trademarks onEMC.com.
All other trademarks used herein are the property of their respective owners.
Corporate Headquarters: Hopkinton, MA 01748-9103
2 Using Celerra AntiVirus Agent 6.0

Contents
Preface.....................................................................................................7
Chapter 1: Introduction...........................................................................9System requirements.............................................................................................10Restrictions.............................................................................................................10User interface choices...........................................................................................12Related information..............................................................................................13
Chapter 2: Concepts.............................................................................15AntiVirus partners.................................................................................................16CAVA features........................................................................................................16
Load balancing and fault tolerance..........................................................17scan-on-first-read.........................................................................................17Updating virus definition files..................................................................17Scan on write................................................................................................18Sizing tool.....................................................................................................18CAVA Calculator.........................................................................................19Virus-checking continuation......................................................................19Scanning after definition file update (manual process).........................19
The CAVA virus-checking client.........................................................................20
Chapter 3: Installation Path..................................................................23Basic installation....................................................................................................24Trend Micro ServerProtect installation..............................................................25
Chapter 4: Configuring the Domain User Account............................27Domain user account overview...........................................................................28
Using Celerra AntiVirus Agent 6.0 3

Determine the interface name on the Data Mover...........................................28Create a domain user account.............................................................................30
Create with Active Directory on a Windows Server..............................31Create from User Manager for Domains..................................................32
Create a local group on each Data Mover..........................................................33Assign the EMC virus-checking right to the group.........................................34Assign local administrative rights to the AV user............................................36
Chapter 5: Configuring viruschecker.conf..........................................39Create and edit viruschecker.conf.......................................................................40Define AV server IP addresses in viruschecker.conf........................................40Send viruschecker.conf to the Data Mover........................................................41(Optional) Define VC scanning criteria..............................................................42viruschecker.conf parameters..............................................................................43
Chapter 6: Installing Third-party Applications....................................49Install Symantec SAV for NAS ...........................................................................50Install Symantec Endpoint Protection ...............................................................54Install McAfee VirusScan.....................................................................................56Install Computer Associates eTrust....................................................................58Install Sophos Anti-Virus.....................................................................................60Install Kaspersky Anti-Virus...............................................................................62Install Trend Micro ServerProtect.......................................................................66
Chapter 7: Installing CAVA....................................................................69Install CAVA...........................................................................................................70Complete the CAVA installation for a Windows Server..................................72
Chapter 8: Managing the VC Client....................................................73Start the VC client..................................................................................................74Stop the VC client..................................................................................................75Update the viruschecker.conf file........................................................................75Verify the installation............................................................................................76
Chapter 9: Managing CAVA.................................................................79(Optional) Install Celerra AntiVirus Management snap-in............................80Display virus-checking information...................................................................81Audit virus-checking information......................................................................82Start, stop, and restart CAVA...............................................................................83
4 Using Celerra AntiVirus Agent 6.0
Contents

Perform a full file system scan.............................................................................84Check the status of a file system scan.......................................................85Stop a file system scan................................................................................86
Enable scan-on-first-read......................................................................................87Update virus definition files................................................................................88Turn off the AV engine..........................................................................................88Turn on the AV engine..........................................................................................88Manage CAVA thread usage................................................................................89
Adjust the maxVCThreads parameter......................................................90View the application log file from a Windows Server.....................................91Enable automatic virus detection notification...................................................92Customize virus-checking notification..............................................................93Customize notification messages........................................................................95
Chapter 10: Monitoring and Sizing CAVA............................................97Install the CAVA Calculator.................................................................................98Start CAVA Calculator..........................................................................................99Uninstall the CAVA Calculator............................................................................99Configure the sizing tool....................................................................................100Enable the sizing tool..........................................................................................101Create the cavamon.dat file................................................................................102Start the sizing tool..............................................................................................102Size CAVA.............................................................................................................103(Optional) Gather AV statistics with cavamon.vbs .......................................103
Chapter 11: Managing the Registry and AV Drivers........................105EMC CAVA configuration Registry entries.....................................................106EMC AV driver Registry entry..........................................................................106Manage the EMC AV driver...............................................................................106
Chapter 12: Troubleshooting..............................................................109EMC E-Lab Interoperability Navigator............................................................110Error messages.....................................................................................................110Known problems.................................................................................................111EMC Training and Professional Services.........................................................112
Glossary................................................................................................113
Index.....................................................................................................117
Using Celerra AntiVirus Agent 6.0 5
Contents

6 Using Celerra AntiVirus Agent 6.0
Contents

Preface
As part of an effort to improve and enhance the performance and capabilities of its product lines,EMC periodically releases revisions of its hardware and software. Therefore, some functions describedin this document may not be supported by all versions of the software or hardware currently in use.For the most up-to-date information on product features, refer to your product release notes.
If a product does not function properly or does not function as described in this document, pleasecontact your EMC representative.
Using Celerra AntiVirus Agent 6.0 7

Special notice conventions
EMC uses the following conventions for special notices:
CAUTION: A caution contains information essential to avoid data loss or damage to the systemor equipment.
Important: An important note contains information essential to operation of the software.
Note: A note presents information that is important, but not hazard-related.
Hint: A note that provides suggested advice to users, often involving follow-on activity for aparticular action.
Where to get help
EMC support, product, and licensing information can be obtained as follows:
Product information — For documentation, release notes, software updates, or forinformation about EMC products, licensing, and service, go to the EMC Powerlinkwebsite (registration required) at http://Powerlink.EMC.com.
Troubleshooting — Go to Powerlink, search for Celerra Tools, and select CelerraTroubleshooting from the navigation panel on the left.
Technical support — For technical support, go to EMC Customer Service on Powerlink.After logging in to the Powerlink website, go to Support ➤ Request Support. To opena service request through Powerlink, you must have a valid support agreement.Contact your EMC Customer Support Representative for details about obtaining avalid support agreement or to answer any questions about your account.
Note: Do not request a specific support representative unless one has already been assigned toyour particular system problem.
Your comments
Your suggestions will help us continue to improve the accuracy, organization, and overallquality of the user publications.
Please send your opinion of this document to:
8 Using Celerra AntiVirus Agent 6.0
Preface

1
Introduction
EMC Celerra AntiVirus Agent (CAVA) provides an antivirus solution toclients using an EMC Celerra Network Server. It uses industry-standardCommon Internet File System (CIFS) protocols in a Microsoft WindowsServer. CAVA uses third-party antivirus software to identify and eliminateknown viruses before they infect files on the storage system (for example,the EMC Symmetrix storage system). User interface choices on page 12lists supported third-party antivirus software.
This document is part of the Celerra Network Server information set andis intended for system administrators responsible for implementing viruschecking on their Celerra Network Servers.
Topics included are:◆ System requirements on page 10◆ Restrictions on page 10◆ User interface choices on page 12◆ Related information on page 13
Using Celerra AntiVirus Agent 6.0 9

System requirements
For the latest system requirements, consult the website or documentation of the particularthird-party AntiVirus (AV) engine manufacturer. The AV engine version might differdepending on the operating system.
For minimum system requirements of AV engines, contact the appropriate third-partyvendor. CAVA supports 32-bit and 64-bit Windows environments and correspondingthird-party engines.
For EMC® Celerra® Network Servers, search the EMC E-Lab™ Interoperability Navigatorfor system requirements.
Restrictions
The following are known limitations at the time of publication.
Note: The Celerra Network Server Release Notes contain the most up-to-date product issues.
AV engines
Currently, no known limitations exist for the number of AV engines configured in theviruschecker.conf file. All AV engines are surveyed every 60 seconds (by default) todetermine which AV engines are online and available. This implies that configurationswith many AV engines might experience some delays due to network latency.
Kaspersky Anti-Virus
Kaspersky Anti-Virus for Windows Servers Enterprise Edition is supported with CelerraEvent Enabler (CEE) version 4.5.1 as of Celerra version 5.6.46.
CAVA pool
Each Data Mover should have a CAVA pool consisting of a minimum of two CAVAservers. This is specified in the Data Mover’s viruschecker.conf file. Chapter 5 providesmore information.
CEE and Windows 64-bit operating systems
To run CEE on Windows 64-bit operating systems, the Celerra-to-CEE communicationsmust be over Microsoft Remote Procedure Call (MS-RPC). The version of CEE that runson Windows 64-bit operating systems is supported with Celerra version 5.6.45 or laterand CEE version 4.5.0.4 or later.
10 Using Celerra AntiVirus Agent 6.0
Introduction

Compatibility with MPFS
Starting with NAS version 5.0, CAVA is available for MPFS. However, CAVA cannotshare the same host as the MPFS client for Windows.
Databases
You should not set up realtime scanning of databases. Accessing a database usuallytriggers a high number of scans, which in turn can cause a large amount of lag whenaccessing data.
To ensure that the database files are virus free, use the AV engine to schedule regularscans when the database is not in use.
File-level retention
EMC strongly recommends that the AV administrator updates the virus definition fileson all resident AV engines in the CAVA pools, and periodically runs a full file systemscan of the file system to detect infected file-level retention (FLR) files. Using File-LevelRetention on Celerra provides detailed information about FLR files.
To run a full file scan from the Control Station, use the server_viruschk -fsscan command.When an infected FLR file is discovered, the resident AV engine records the presence ofthe infection and its location in the log file of the resident scan engine. Although anadministrator cannot fix or remove the infected file, the file's read access can be restrictedto make the file unavailable. The infected file can only be deleted after its retention datehas passed.
The scan-on-first-read functionality of CAVA does not detect a virus in an FLR file.
Non-CIFS protocols
The Celerra antivirus solution is only for clients running the CIFS protocol. If NFS orFTP protocols are used to move or modify files, the files are not scanned for viruses.
Restricted Group GPO
CAVA requires the antivirus domain account (AV user account) to be in the localadministrators group of the Celerra CIFS server. If the Celerra CIFS server has RestrictedGroup GPO enforced and the AV user account is removed from the local administratorsgroup, after the next CAVA restart the status will change from ONLINE toAV_NOT_FOUND. To ensure that the CAVA status remains ONLINE, you must eitherinclude the corresponding AV user account in the Restricted Group, or remove theRestricted Group.
Restrictions 11
Introduction

Windows Server 2008
If you are using Windows Server 2008, you must manually compile the cava.mof filewhile using the EMC cavamon sizing tool.
User interface choices
The Celerra Network Server offers flexibility in managing networked storage based on thesupport environment and interface preferences. This guide describes how to configureCAVA by using the command line interface (CLI).
You can also perform some of these tasks by using the following Celerra managementapplications:
◆ Microsoft Management Console (MMC) snap-ins
◆ Active Directory Users and Computers (ADUC) extensions
Installing CelerraManagement Applications includes instructions on launching Unisphere, andon installing the MMC snap-ins and the ADUC extensions.
For additional information about managing your Celerra:
◆ Learning about EMC Celerra in the EMC Celerra Documentation on Powerlink
◆ EMC Unisphere online help
◆ Application’s online help system in the EMC Celerra Documentation on Powerlink
12 Using Celerra AntiVirus Agent 6.0
Introduction

Related information
Specific information related to the features and functionality described in this guide isincluded in:
◆ Celerra Network Server Command Reference Manual
◆ Online Celerra man pages
◆ Celerra Network Server Parameters Guide
◆ Managing Celerra for a Multiprotocol Environment
◆ Configuring and Managing CIFS on Celerra
◆ Microsoft’s website for WMI information
◆ Symantec SAV for NAS documentation
◆ McAfee VirusScan documentation
◆ Computer Associates eTrust Threat Management Agent documentation
◆ Sophos Anti-Virus documentation
◆ Trend Micro ServerProtect for EMC documentation
◆ Symantec Endpoint Protection documentation
EMC Celerra Network Server Documentation on Powerlink
The complete set of EMC Celerra customer publications is available on the EMCPowerlink® website at http://Powerlink.EMC.com. After logging in to Powerlink, clickSupport, and locate the link for the specific product technical documentation required.
Celerra Support Demos
Celerra Support Demos are available on Powerlink. Use these instructional videos tolearn how to perform a variety of Celerra configuration and management tasks. Afterlogging in to Powerlink, click Support. Then click the link for the specific product required.Click Tools. Locate the link for the video that you require.
Celerra wizards
Celerra wizards can be used to perform setup and configuration tasks. Using Wizards toConfigure Celerra provides an overview of the steps required to configure a CelerraNetwork Server by using the Set Up Celerra wizard.
Related information 13
Introduction

Use of the term Windows Server
As the CAVA implementation for Celerra is the same for Windows Server 2003 andWindows Server 2008, the term Windows Server is used in the document to depict boththese operating systems.
14 Using Celerra AntiVirus Agent 6.0
Introduction

2
Concepts
The Celerra Network Server is resistant to the invasion of viruses becauseof its architecture. Each Data Mover runs data access in realtime software,which is an embedded operating system. The Data Mover is resistant toviruses because third parties are unable to run programs containing viruseson a Data Mover.
Note: The AntiVirus server used to check files cannot reside in a Virtual DataMover. It must be located in a physical Data Mover.
Although the Data Mover is resistant to viruses, Windows clients alsorequire virus protection. Virus protection on the client reduces the chancethat the client will store an infected file on the server, and protects theclient if it opens an infected file.
The Celerra antivirus solution uses a combination of the Celerra NetworkServer Data Mover, CAVA, and a third-party antivirus engine. The CAVAsoftware and a third-party AV engine must be installed on a WindowsServer in the domain.
Note: McAfee 8.0i can be installed on a workstation in addition to or in place of aserver. The McAfee 8.0i documentation provides more information.
Topics included are:◆ AntiVirus partners on page 16◆ CAVA features on page 16◆ The CAVA virus-checking client on page 20
Using Celerra AntiVirus Agent 6.0 15

AntiVirus partners
EMC has partnered with and supports the following AV engines:
◆ Symantec SAV for NAS and Endpoint protection◆ McAfee VirusScan◆ Computer Associates eTrust Threat Management Agent◆ Sophos Anti-Virus◆ Kaspersky Anti-Virus for Windows Servers Enterprise Edition◆ Trend Micro ServerProtect for EMC Celerra
This list was correct at the time of publication. The EMC E-Lab Interoperability Navigatorand the Celerra Network Server Release Notes provide the latest list of supported AV enginesand versions.
Chapter 6 contains further information about supported third-party antivirus software.
CAVA features
When CAVA is used with one of the supported third-party antivirus applications listed inAntiVirus partners on page 16, the following features are available:
◆ Load balancing and fault tolerance on page 17◆ scan-on-first-read on page 17◆ Updating virus definition files on page 17◆ Scan on write on page 18◆ Sizing tool on page 18◆ CAVA Calculator on page 19◆ Virus-checking continuation on page 19◆ Scanning after definition file update (manual process) on page 19
16 Using Celerra AntiVirus Agent 6.0
Concepts
Load balancing and fault tolerance
You can use the CAVA Calculator and the CAVA sizing tool to help determine the numberof CAVA servers the system requires. The CAVA Calculator can help you prior to installation,and you can use it to run what-if scenarios after installation. The CAVA sizing tool collectsinformation from a running environment to give you a recommendation on the number ofCAVA servers needed. EMC recommends that if fault tolerance is a concern, you shouldconfigure a minimum of two AV servers in the network. If one of the AV servers goes offlineor cannot be reached by the Celerra Network Server, having two AV servers ensures thatfile scanning capability is maintained.
If you have more than one AV server on the network, the Celerra Network Server balancesworkloads among the AV servers by distributing the scanning jobs in a round-robin fashion.For example, if one AV server goes offline, Celerra Network Server distributes the scanningload among the other available AV servers.
Note: Each file is scanned by one AV server. You cannot configure CAVA so that a file is simultaneouslyscanned by multiple AV servers running different AV software.
scan-on-first-read
CAVA uses the access time of a file to determine if a file should be scanned. The access timeis compared with a time reference stored in the EMC CAVA service. If the file’s access timeis earlier than the reference time, the file is scanned on read before it is opened by the CIFSclient. You can set the access time by using the server_viruschk command. Celerra NetworkServer Command Reference Manual provides more information about the server_viruschkcommand.
CAVA updates the scan-on-first-read access time when it detects a virus definition fileupdate on the AV engine.
Updating virus definition files
CAVA can automatically detect a new version of the virus definition file and update theaccess time. To use this feature you must have scan-on-first-read enabled. Currently, thelatest versions of all supported third-party antivirus engines support automatic patternupdates. The Celerra Network Server Release Notes and the EMC E-Lab InteroperabilityNavigator provide the latest information on other antivirus products.
CAVA features 17
Concepts

Scan on write
CAVA initiates a scan after a file is modified and closed. If a file is opened, but there are nomodifications made to it, it is not scanned upon closing it.
Sizing tool
The CAVA sizing tool runs on Windows-based systems. The tool assists the systemadministrator in determining how many AV engines are necessary to provide adequate AVscanning across the Celerra Network Server.
The tool gathers information based on the specified CAVA servers queried, and returnsstatistics on each CAVA server.
When you install CAVA on the AV servers, the CAVA sizing tool, cavamon.exe, is alsoinstalled. In addition, you can use the VB script, cavamon.vbs, to monitor the AV servers.However, cavamon.vbs does not perform sizing.
The heuristic in the sizing tool is set to size the CAVA environment for an average 60-percentsaturation level (or workload level) in all AV servers in the environment. Users wanting touse their own heuristic for sizing can use the cavamon.vbs script for gathering CAVAstatistics. These statistics can then be used as input to custom algorithms.
Configure the sizing tool on page 100 describes configuration procedures.
Sizing tool configuration overview
Configure one or more AV servers in the network as the monitoring CAVA sizing toolserver—this is the server that you use to monitor and size all other AV servers. Themonitoring system, and all AV servers that you want to monitor, must be running theWMI subsystem. WMI is built into Windows Server 2003 and 2008.
Note: The CAVA sizing tool must run on an AV server—you cannot run the sizing tool from anyWindows Server in the domain.
The CAVA sizing tool must be enabled on the AV servers you monitor; however, youdo not have to configure the sizing tool on these servers. If you want the ability to monitorCAVA from multiple servers in the network, you can enable and configure the CAVAsizing tool on multiple servers.
The monitoring sizing tool server:
◆ Monitors all other Windows Servers running CAVA.
◆ Monitors and gathers statistics on the AV engines.
◆ Gathers and lists workload information for each individual AV engine.
18 Using Celerra AntiVirus Agent 6.0
Concepts

◆ Provides recommendations on how many AV engines are required to provide optimalantivirus protection.
CAVA Calculator
CAVA Calculator is a utility that assists you in determining the number of CAVA serversfor the environment prior to installation. CAVA Calculator can be installed and runindependent of CAVA and the Celerra Network Server, whereas the sizing tool uses theactual workload. This utility is installed as part of the Celerra Event Enabler framework.System requirements on page 10 provides more information.
Virus-checking continuation
This feature stores the paths of all unscanned files whenever virus scanning is interrupted,such as in the following circumstances:
◆ Data Mover restarts — The list of unscanned files is stored in a directory reserved by thepanic handler software. When the Data Mover restarts, the virus checker reads the listof unscanned files, and then scans the files.
◆ Virus checking is stopped or a file system is unmounted — The list of unscanned files isstored in a special file on the file system. When the virus checker is restarted or the filesystem is remounted, the virus checker reads the unscanned list and scans the files.
The list of unscanned files is stored in the /.etc/viruschecker.audit file on each Data Mover.Use this command to manually update this file.
Action
Store the list of unscanned files by using this command syntax:
$ server_viruschk <movername> -audit
where:
<movername> = name of the Data Mover
Scanning after definition file update (manual process)
To check files after the third-party antivirus definition file is updated, you must run theserver_viruschk -set accesstime command. CAVA also supports scanning for compressedfiles (for example, files with the .zip extension), if the third-party antivirus software (AVengine) supports the scanning of compressed files.
CAVA features 19
Concepts

The CAVA virus-checking client
The virus-checking (VC) client is the agent component of the Celerra Network Server softwareon the Data Mover. The VC client interacts with the AV engine, which processes requestsfrom the VC client. Scanning is supported only for CIFS access. While the scan or otherrelated actions are taking place, access to the file from any CIFS client is blocked.
The VC client does the following:
◆ Queues and communicates filenames to CAVA for scanning.◆ Provides and acknowledges event triggers for scans. Possible event triggers include:
• A file is renamed on a Celerra Network Server.• A file is copied or saved to a Celerra Network Server.• A file is modified and closed on a Celerra Network Server.
Note: Table 1 on page 21 provides a detailed list of scanning triggers.
◆ Requests a virus check by sending the universal naming convention (UNC) pathnameto CAVA.
◆ Allows the AV engine to perform the correct user-defined action on the file when thefile is discovered to contain a virus. User-defined actions may include:
• Curing or repairing the file• Renaming the file• Changing the file extension• Moving the file to a quarantined area• Deleting or purging the file
Note: The AV engine maintains full access to the file being scanned while performing theuser-defined action on the file. After completion, the AV engine returns control of the file to theVC client.
◆ If CAVA reports that the file was successfully scanned, the Celerra Network Server allowsthe file to be available to the client.
◆ If multiple instances of CAVA have been installed, the VC client sends scanning requeststo the CAVA servers in a round-robin method.
Basic VC client configuration
The VC client can be configured by using the server_viruschk command and theviruschecker.conf file. An alternative method uses the Celerra AntiVirus Management
20 Using Celerra AntiVirus Agent 6.0
Concepts

snap-in. (Optional) Install Celerra AntiVirus Management snap-in on page 80 providesmore information.
Full file system scan
An administrator can perform a full scan of a file system using the server_viruschk-fsscan command. To use this feature, CAVA must be enabled and running. Theadministrator can query the state of the scan while it is running, and can stop the scanif necessary. A file system cannot be scanned if the file system is mounted with the optionnoscan. As the scan proceeds through the file system, it touches each file and triggers ascan request for each file.
Scanning quick glance chart
Table 1 on page 21 explains when virus scanning occurs.
Table 1. Scanning quick glance chart
Does scanning occurOn the Data Mover
YesRead a file (scan-on-first-read)
YesMove or copy a file
YesCreate and save a file
YesModify and close a file
YesRestore from a backup, only if it needs to restore a file (write)
NoRename: New name (extension is not in masks= and is in excl=)1
NoRename: Original filename (extension is not in masks= and is notin excl=), new name (extension is not in masks= and is not in excl=)has same extension1
YesRename: Original filename (extension is not in masks= and is notin excl=), new name (extension is in masks= and is not in excl=)has different extension1
NoRename: Original filename (extension is in masks= and is not inexcl=), new name (extension is in masks= and is not in excl=)1
1 If masks=*.*, renames will not trigger scanning. If the masks option does not equal *.* (that is, *.exe,*.bat), then a trigger will occur.
The CAVA virus-checking client 21
Concepts

Table 1. Scanning quick glance chart (continued)
Does scanning occurOn the Data Mover
Note: masks= and excl= are defined in the viruschecker.conf file. The masks= is set to *.* and theantivirus engine is configured to scan all files.
Note: When virus checking is enabled, two clients cannot concurrently write to the same file. Thefirst client that requests the file, opens the file for write access; the second client must wait untilthe file is closed by the first client, and, if the first client modified the file, until the file is checkedby the AV servers.
22 Using Celerra AntiVirus Agent 6.0
Concepts

3
Installation Path
The CAVA installation process varies depending on the third-partyantivirus software that you use. This chapter outlines the tasks necessaryto install CAVA. The tasks necessary to complete each task are located inthis chapter and Chapter 4.
Topics included are:◆ Basic installation on page 24◆ Trend Micro ServerProtect installation on page 25
Using Celerra AntiVirus Agent 6.0 23

Basic installation
If you are installing one of the following third-party antivirus software applications, use theinstallation path shown in Table 2 on page 24:
◆ Symantec SAV for NAS
Note: SAV for NAS version 5.1.x requires using CAVA version 3.6.2 or later.
◆ McAfee VirusScan
◆ Computer Associates eTrust
◆ Sophos Anti-Virus
◆ Kaspersky Anti-Virus for Windows Servers Enterprise Edition
◆ Symantec Endpoint Protection
Table 2. Basic installation procedure
ProcedureActionStep
Chapter 4Create a domain user with the EMC virus-checking right.1.
Chapter 5Configure virus-checking parameters on the Data Movers.2.
Chapter 6Install the AV engine on the Windows AV server.3.
Chapter 7Install CAVA on the Windows AV servers.4.
Chapter 8Start the virus-checking client on the Data Mover.5.
Verify the installation on page 76Verify the CAVA installation.6.
24 Using Celerra AntiVirus Agent 6.0
Installation Path

Trend Micro ServerProtect installation
If you are installing Trend Micro ServerProtect for EMC Celerra, use the installation pathshown in Table 3 on page 25.
Table 3. Installation procedure for Trend Micro
ProcedureActionStep
Chapter 4Create a domain user with the EMC virus-checking right.1.
Chapter 5Configure virus-checking parameters on the Data Movers.2.
Chapter 7Install CAVA on the Windows AV servers.3.
Install Trend Micro ServerProtect on page 66Install the Trend AV engine.4.
Chapter 8Start the virus-checking-client on the Data Mover.5.
Verify the installation on page 76Verify the CAVA installation.6.
Trend Micro ServerProtect installation 25
Installation Path

26 Using Celerra AntiVirus Agent 6.0
Installation Path

4
Configuring the Domain UserAccount
This chapter describes how to configure the AV user (domain user) accountwith the EMC virus-checking right. Having this account allows the DataMover to distinguish CAVA requests from all other requests.
Topics included are:◆ Domain user account overview on page 28◆ Determine the interface name on the Data Mover on page 28◆ Create a domain user account on page 30◆ Create a local group on each Data Mover on page 33◆ Assign the EMC virus-checking right to the group on page 34◆ Assign local administrative rights to the AV user on page 36
Using Celerra AntiVirus Agent 6.0 27

Domain user account overview
The CAVA installation requires a Windows user account that is recognized by Celerra DataMovers as having the EMC virus-checking privilege. This user account enables the DataMover to distinguish CAVA requests from all other client requests. To accomplish this, youshould create a new domain user, assign to this user the EMC virus-checking right locallyon the Data Mover, and run the CAVA service in this user context.
Table 4 on page 28 provides an overview of configuring the AV user (domain user) withthe EMC virus-checking right. The user account that you create in the following proceduresis the preferred user account that should be configured with EMC virus-checking access.
You can also configure a local user account with access rights even if it is on a stand-aloneserver. Configuring and Managing CIFS on Celerra provides more information on local users.
Table 4. Overview of configuring the AV user
ProcedureActionTask
Determine the interface name on the DataMover on page 28
Determine which Data Mover interface to use when creating the localgroup.
1.
Create a domain user account on page 30Create a domain user account (AV user).2.
Create a local group on each Data Moveron page 33
Create a local group on each Data Mover in the domain and add theAV user to the group.
3.
Assign the EMC virus-checking right to thegroup on page 34
Assign the EMC virus-checking right to the local group.4.
Assign local administrative rights to the AVuser on page 36
Assign local administrative rights to the local group on each AVserver.
5.
Optional method
For a Windows Server, you can accomplish Tasks 2 through 5 using the Celerra AntiVirusManagement snap-in. Installing Celerra Management Applications provides installationinstructions.
Determine the interface name on the Data Mover
You must identify the CIFS interface for the Data Mover before you create a local group ona Data Mover. Frequently, a Data Mover is configured with more than one CIFS interface.If this is the case, choose one CIFS interface for each Data Mover and use the same CIFSinterface throughout the CAVA configuration.
28 Using Celerra AntiVirus Agent 6.0
Configuring the Domain User Account

To obtain the interface name, run the following server_cifs command from the ControlStation.
If you do not want to use the default CIFS interface for virus checking, you must specifyanother CIFS interface by setting the CIFSserver=parameter in the viruschecker.conf file.(Optional) Define VC scanning criteria on page 42 provides more information.
Action
Display all CIFS interfaces configured on a Data Mover by using this command syntax:
$ server_cifs <movername>
where:
<movername> = name of the Data Mover
Example:
To display the CIFS interfaces configured on server_2, type:
$ server_cifs server_2
Output
server_2 :32 Cifs threads startedSecurity mode = NTMax protocol = NT1I18N mode = UNICODEHome Directory Shares DISABLED
Default WINS servers = 172.16.20.15:172.16.21.15Enabled interfaces: (All interfaces are enabled)Disabled interfaces: (No interface disabled)
DOMAIN CAPITALSSID=S-1-5-15-c6ab149b-92d87510-a3e900fb-ffffffff>DC=BOSTON(172.16.20.10) ref=2 time=0 msDC=NEWYORK(172.16.20.50) ref=1 time=0 ms
CIFS Server (Default) DM32-ANA0[CAPITALS] (Hidden)Alias(es): CFS32_0Comment='EMC_Celerra_File_Server'if=ana0 l=172.16.21.202 b=172.16.21.255 mac=0:0:d1:1d:b7:25if=ana1 l=172.16.21.207 b=172.16.21.255 mac=0:0:d1:1d:b7:26
CIFS Server DM32-ANA1[CAPITALS] (Hidden)Alias(es): CFS32_1Comment='EMC_Celerra_File_Server'if=ana0 l=172.16.21.202 b=172.16.21.255 mac=0:0:d1:1d:b7:25if=ana1 l=172.16.21.207 b=172.16.21.255 mac=0:0:d1:1d:b7:26
Determine the interface name on the Data Mover 29
Configuring the Domain User Account

Create a domain user account
You must create a domain user account on the Windows domain controller. The CAVAservice is running in the context of this user.
Use one of the following sections to create the domain user account:
◆ Create with Active Directory on a Windows Server on page 31◆ Create from User Manager for Domains on page 32
30 Using Celerra AntiVirus Agent 6.0
Configuring the Domain User Account

Create with Active Directory on a Windows Server
1. Log in to a Windows Server as the Domain Administrator.
2. From the taskbar, click Start and select Settings ➤ Control Panel ➤ Administrative Tools➤ Active Directory Users and Computers.
3. In the console tree, right-click Users, and select New ➤ User from the shortcut menu. TheNew Object - User dialog box appears.
4. In the New Object - User dialog box, do the following:
a. Specify the First name, Last name, and User logon name. For the logon name, usesomething that refers to virus checking, for example, virususer.
Note: You can give the domain user any name you want, although it should have acontext-appropriate name. The name virususer is used as an example in this guide.
b. Click Next. The Password dialog box appears.
5. In the Password dialog box, do the following:
a. Type a password and confirm the password in the appropriate fields.
b. Select Password never expires.
c. Click Next. A confirmation screen appears.
d. Click Finish. The New Object - User dialog box closes.
6. Go to Create a local group on each Data Mover on page 33.
Create a domain user account 31
Configuring the Domain User Account

Create from User Manager for Domains
You create a domain user account from User Manager for Domains on a Windows Serverwithout Active Directory.
1. Start User Manager for a Windows Server without Active Directory:
• Click Start on the Windows taskbar, and select Settings ➤ Control Panel ➤Administrative Tools ➤ Computer Management. Select Local Users and Groups.
2. Right-click the Users folder and select New User. The New User dialog box appears.
3. In the New User dialog box, do the following:
a. In the Username box, type a name. For example, virususer.
Note: You can give the domain user any name you want, although it should have acontext-appropriate name. The name virususer is used in this guide.
b. Type a password and confirm the password in the appropriate fields.
c. Clear User Must Change Password at Next Logon.
d. Click Add to save the new virususer account.
e. Click the Groups button. The Group Memberships dialog box appears.
4. In the Group Memberships dialog box, do the following:
a. Select Administrators from the Not a Member Of list.
b. Click Add. The Administrator group is added to the Member Of list. The virususeraccount should be a member of the Domain Users group and the Administrators group.
c. Click OK. The Group Memberships dialog box closes.
d. Click OK. The New User dialog box closes.
5. Go to Create a local group on each Data Mover on page 33.
32 Using Celerra AntiVirus Agent 6.0
Configuring the Domain User Account

Create a local group on each Data Mover
To assign the EMC virus-checking right to the domain user you just created, you must firstcreate a local group on the Data Mover and assign the user to this group. Then assign theEMC virus-checking right to the group. Use this procedure to create a local group in aWindows Server.
1. For systems with Active Directory, in Active Directory Users and Computers, double-clickEMC Celerra and click Computers.
2. In the Computer pane, right-click the CIFS server you want to manage and select Managefrom the shortcut menu. The Computer Management window appears.
3. Under System Tools, double-click Local Users and Groups.
4. Right-click Groups and select New Group. The New Group dialog box appears.
5. In Group name, type a group name (for example, viruscheckers) and in Description, typea description.
6. Click Add. The Select Users, Computers, or Groups dialog box appears.
7. In the Select Users, Computers, or Groups dialog box, do the following:
a. Type the name of the AV user account that you created in Create a domain user accounton page 30.
b. Click Check Names.
c. Click OK to close the Select Users, Computers, or Groups dialog box.
d. Click OK. You return to the New Group dialog box.
8. Click Create, and click Close. The group is created and added to the Groups list. Go toAssign the EMC virus-checking right to the group on page 34.
Create a local group on each Data Mover 33
Configuring the Domain User Account

Assign the EMC virus-checking right to the group
Now that you have created the domain user, you must distinguish this user from all otherdomain users by assigning the EMC virus-checking right. This right is not a domain privilege,but rather it exists locally in the Data Mover and is added to the local group that you createdin Create a local group on each Data Mover on page 33.
Note: You cannot use Microsoft’s Windows Local Policy Setting tools to manage user rights assignmentson a Data Mover because the Windows Local Policy Setting tools do not allow you to remotely manageuser rights assignments.
Use this procedure to assign the EMC virus-checking right to the group in a Windows Server.
1. Click Start and select Settings ➤ Control Panel ➤ Administrative Tools ➤ CelerraManagement. The Celerra Management window appears.
Note: Installing Celerra Management Applications provides information on installing the CelerraManagement Console.
2. Do one of the following:
• If a Data Mover is already selected (name appears after Data Mover Management),go to step 4.
• If a Data Mover is not selected:
• Right-click Data Mover Management and select Connect to Data Mover.• In the Select Data Mover dialog box, select a Data Mover using one of the following
methods:
• In the Look in: list box, select the domain in which the Data Mover you wantto manage is located, and select the Data Mover from the list.
OR
• In the Name box, type the computer name, IP address, or the NetBIOS name ofthe Data Mover.
3. Double-click Data Mover Management, and double-click Data Mover Security Settings.
4. Click User Rights Assignment. The assignable rights appear in the right pane.
5. Double-click EMC Virus Checking. The Security Policy Setting dialog box appears.
6. Click Add. The Select Users or Groups window appears.
7. In the Select Users or Groups window do the following:
34 Using Celerra AntiVirus Agent 6.0
Configuring the Domain User Account

a. Select the CIFS server from the Look in: list box.
b. Select the antivirus group that you created in Create a local group on each Data Moveron page 33.
c. Click Add. The group name appears in the lower window.
d. Click OK. You return to the Security Policy Setting dialog box.
8. Click OK. The EMC Virus Checking policy now shows the Data Mover local group. Goto Assign local administrative rights to the AV user on page 36 to continue.
Assign the EMC virus-checking right to the group 35
Configuring the Domain User Account

Assign local administrative rights to the AV user
You must assign local administrative rights to the AV user on each AV server. You mustrepeat this procedure for each AV server.
Note: If the AV server is a domain controller, the virus-checking user account should join the DomainAdministrator group instead of the local administrator group. This is because the local administratorgroup is not managed on a domain controller.
Use this procedure to assign local administrative rights to the group in a Windows Server.
1. Click Start and select Settings ➤ Control Panel ➤ Administrative Tools ➤ ComputerManagement. The Computer Management window appears.
2. From the Action menu, select Connect to Another Computer. The Select Computer windowappears.
3. In the Select Computer window:
a. Select the virus-checker server.
b. Click OK to close the Select Computer window.
4. In the Computer Management window:
a. Expand System Tools.
b. Expand Local Users and Groups.
c. Click Groups. The group names appear in the right pane.
5. Double-click the Administrators group. The Administrators Properties dialog box appears.
6. Click Add. The Select Users or Groups window appears.
7. In the Select Users or Groups window:
a. Select the domain from the Look in: list box.
b. Select the AV user account that you created in Create from User Manager for Domainson page 32.
c. Click Add.
d. Click OK to close the Select Users or Groups window.
8. Click OK to close the Administrators Properties dialog box.
36 Using Celerra AntiVirus Agent 6.0
Configuring the Domain User Account

9. Repeat steps 1–8 for each AV server in the network. On completion of the steps, go toChapter 5.
Assign local administrative rights to the AV user 37
Configuring the Domain User Account

38 Using Celerra AntiVirus Agent 6.0
Configuring the Domain User Account

5
Configuringviruschecker.conf
The viruschecker.conf file defines the Celerra virus-checking parametersfor each Data Mover in the domain. For CAVA to work properly, someparameters, such as the addr parameter, must be configured. Otherparameters are optional and you can configure them if you want to controlthe scope and style of the virus scanning.
This guide describes only the command-line procedures. In a WindowsServer environment, you can also use the Celerra AntiVirus Managementsnap-in to modify the CAVA parameters on the Data Mover. CelerraAntiVirus Management is installed as a Microsoft Management Console(MMC) snap-in to the Celerra Management Console. Installing CelerraManagement Applications provides instructions on installing the snap-in.
Note: A template file for viruschecker.conf resides on the Control Station in the/nas/sys directory. This file should not be edited directly but can be copied toanother directory such as /nas/site for editing with a text editor.
Topics included are:◆ Create and edit viruschecker.conf on page 40◆ Define AV server IP addresses in viruschecker.conf on page 40◆ Send viruschecker.conf to the Data Mover on page 41◆ (Optional) Define VC scanning criteria on page 42◆ viruschecker.conf parameters on page 43
Using Celerra AntiVirus Agent 6.0 39

Create and edit viruschecker.conf
Ensure that the viruschecker.conf file resides in the /.etc directory on the Data Mover beforeediting. You can either create a new viruschecker.conf file or retrieve the existingviruschecker.conf file and edit the contents:
◆ If the viruschecker.conf file does exist in the /.etc directory, type the following commandto retrieve this file for editing:
$ server_file <movername> -get viruschecker.conf viruschecker.conf
◆ If the viruschecker.conf file does not exist in the /.etc directory, copy the templateviruschecker.conf file from the /nas/sys directory on the Control Station to anotherdirectory, such as /nas/site for editing with a text editor.
Define AV server IP addresses in viruschecker.conf
1. Open the viruschecker.conf file using an editor.
2. Locate the addr entry.
3. Add the IP addresses of all Windows Servers running CAVA software. Use colons toseparate multiple Windows Server IP addresses.
Example:
The first entry below identifies a single Windows Server, the second entry identifiesmultiple Windows Servers, while the third entry identifies an FQDN:
addr=192.16.20.29addr=192.16.20.15:[2510:0:175:111:0:4:aab:ad2]:[2510:0:175:111:0:4:aab:a6f]:192.16.20.16:192.16.20.17addr=wichita.nasdocs.emc.com
Note: IPv6 addresses should be enclosed in square brackets to separate them from the colon delimiterthat is used between multiple addresses.
The addresses entered represent the Windows Servers that the Data Mover will send theUNC path of the files to scan. For multiple server installations, the UNCs are sent in around-robin fashion to all Windows Servers configured with CAVA and the AV engine.
4. Save and close the viruschecker.conf file.
40 Using Celerra AntiVirus Agent 6.0
Configuring viruschecker.conf

Send viruschecker.conf to the Data Mover
You must put a copy of the viruschecker.conf file on each Data Mover in the domain.
Note: If you customize a Data Mover’s viruschecker.conf file by configuring the CIFSserver= parameter,ensure that you put the customized viruschecker.conf file on the correct Data Mover.
Action
Copy the viruschecker.conf file from the Control Station to the /.etc directory on the Data Mover by using this commandsyntax:
$ server_file <movername> -put viruschecker.conf viruschecker.conf
where:
<movername> = name of the Data Mover
NoteOutput
◆ Repeat this command for each Data Mover within thedomain.
◆ If the viruschecker.conf file is missing from the /.etc di-rectory, the VC client will not start.
server_2:done
The following documents provide more information:
◆ Celerra Network Server Command Reference Manual provides detailed information on theserver_file command.
◆ Managing Celerra for a Multiprotocol Environment provides details on mounting a filesystem.
Send viruschecker.conf to the Data Mover 41
Configuring viruschecker.conf

(Optional) Define VC scanning criteria
You can configure the masks= parameter in the viruschecker.conf file to scan files with aspecific extension, for example, the extension .doc or .docx for Microsoft Word documents.If you have multiple CIFS interfaces on a Data Mover, you can set the CIFSserver= parameterto specify which interface the Data Mover uses to communicate with the AV servers.
viruschecker.conf parameters on page 43 provides a complete list of viruschecker.confparameters, including mask.
1. Open the viruschecker.conf file using an editor.
2. Locate the masks= entry.
3. Type the entry for the list of files to be scanned.
Examples:
In the following example, all files are scanned:
masks=*.*
In the following example, only .exe, .com, .doc, .docx, and .ppt files are scanned:
masks=*.exe:*.com:*.doc:*.docx:*.ppt
4. Type the NetBIOS name of the Data Mover.
CIFSserver=<netbios_name or IP address>
Determine the interface name on the Data Mover on page 28 provides more information.
Example:
CIFSserver=dm53-ana0
Note: If this parameter is not set, the default NetBIOS name on that Data Mover is used. If you setthis parameter, ensure that you use the same interface that you used in Create a domain useraccount on page 30.
5. Save and close the viruschecker.conf file.
42 Using Celerra AntiVirus Agent 6.0
Configuring viruschecker.conf

viruschecker.conf parameters
Table 5 on page 43 provides additional parameters that can be configured within theviruschecker.conf file, or for use with the Celerra AntiVirus Management snap-in.
The masks= parameter can greatly affect virus-checking performance. It is recommendedthat you do not use masks=*.* because this setting scans all files. Many files cannot harborviruses, therefore, masks=*.* is not an efficient setting. Most AV engines do not scan all files.The masks= and excl= parameters in the viruschecker.conf file should be equal to or a supersetof the masks= and excl= settings used by the AV engine.
Table 5. Parameters in the viruschecker.conf file
ExampleDescriptionParameter
masks=*.exe
In the following example, only .exe, .com,.doc, .docx, and .ppt files are scanned:
masks=*.exe:*.com:*.doc:*.docx:*.ppt
Configures file extensions that will bescanned.
masks=
excl=pagefile.sys:*.tmpDefines files or file extensions to ex-clude during scanning.
excl=
Single IP address:addr=192.16.20.29
Multiple IP addresses:addr=192.16.20.15:192.16.20.16:[2510:0:175:111:0:4:aab:ad2]:[2510:0:175:111:0:4:aab:a6f]:192.16.20.17
Note: IPv6 addresses should be enclosedin square brackets to separate them fromthe colon delimiter that is used betweenmultiple addresses.
FQDN:addr=wichita.nasdocs.emc.com
Note: If an AV server is going to betemporarily or permanently removed, deleteits IP address from this file before shuttingdown the EMC CAVA service.
Sets the IP addresses for the AVservers, or an FQDN.
Note: The use of link-local networkaddresses for defining CAVA serversis not supported.
addr=
viruschecker.conf parameters 43
Configuring viruschecker.conf

Table 5. Parameters in the viruschecker.conf file (continued)
ExampleDescriptionParameter
CIFSserver=CIFS_Host2Identifies the interface on the DataMover used by the CAVA Client<CIFS_server_name>(NetBIOS name, compname, or the IPaddress) of the CIFS server on theData Mover. If the parameter is notgiven, the Data Mover uses the firstCIFS server that it finds.
Note: The use of link-local networkaddresses for defining CAVA serversis not supported.
CIFSserver=<CIFS_server_name>(optional)
maxsize=0xFFFFFFFFSets the maximum file size for files thatwill be checked. Files that exceed thissize are not checked.
Type a hexadecimal number with aprefix of 0x. The maxsize must be lessthan or equal to 0xFFFFFFFF.
If the parameter is not given or is equalto 0, it means no file size limitation isset.
The file size is in bytes with a 4 GBmaximum.
maxsize=<n>(optional)
highWaterMark=200Edits the highWaterMark parameter.
When the number of requests inprogress becomes greater than thehighWaterMark, a log event is sent tothe Celerra Network Server.
The default value is 200.The maximumis 0xFFFFFFFF.
highWaterMark=<n>(optional)
lowWaterMark=50Edits the lowWaterMark parameter.When the number of requests inprogress becomes lower than lowWa-terMark, a log event is sent to the Cel-erra Network Server.
The default value is 50.
lowWaterMark=<n>(optional)
44 Using Celerra AntiVirus Agent 6.0
Configuring viruschecker.conf

Table 5. Parameters in the viruschecker.conf file (continued)
ExampleDescriptionParameter
ReadWriteTime=60 secondsSets the timeout value in seconds foran AV engine to scan files. The defaultvalue is 120 seconds.
ReadWriteTime=<n>(optional)
Note:
ReadWriteTime is a DWORDtype parameter that is stored atthe following registry location:
HKLM\Software\EMC\CelerraEventEnabler\CAVA\Configuration\SAVSE
RPCRetryTimeout=4000Sets the timeout of the RPC retry. Thetimeout is set in milliseconds.
The default value is 5000 milliseconds.The maximum is 0xFFFFFFFF.
RPCRetryTimeout=<n>(optional)
RPCRequestTimeout=20000Sets the timeout of the RPC request(in milliseconds).
RPCRequestTimeout=<n>(optional)
Works with RPCRetryTimeout. Whenan RPC is sent to the CAVA server, ifthe server answers after theRPCRetryTimeout, the Data Mover re-tries until RPCRequestTimeout isreached. If RPCRequestTimeout isreached, the Data Mover goes to thenext available CAVA server.
The default value is 25000 millisec-onds.
Note: This value should be equal tothe SAV for NAS Container File Pro-cessing Limits value. Install SymantecSAV for NAS on page 50 containsdetails.
viruschecker.conf parameters 45
Configuring viruschecker.conf

Table 5. Parameters in the viruschecker.conf file (continued)
ExampleDescriptionParameter
User account:msrpcuser=ceeuser
Domain.user account:msrpcuser=CEE1.ceeuser
Specifies the name assigned to eithera simple user account or user accountthat is part of a domain that the EMCCAVA service is running under on theCEE machine.
msrpcuser=(optional)
surveyTime=60Specifies the time interval used to scanall AV servers to see if they are onlineor offline. This parameter works withthe shutdown parameter shown next.If no AV server answers, the shutdownprocess begins using the configuredshutdown parameter. This is the onlyparameter that triggers shutdown.
The default value is 10 seconds.
min=1, max=3600.
surveyTime=<n>(optional)
shutdown=cifsSpecifies the shutdown action to takewhen no server is available.Works withthe surveyTime parameter.
Options include the followingparameters:
◆ shutdown=cifs— Stops CIFS if no AV server isavailable. (No Windows clients canaccess any Celerra share.)
If strict data security is importantin the environment, you shouldenable this option to preventaccess to the files if all AV serversare unavailable. If this option is notenabled, and all AV servers areunavailable, clients can modifyfiles without any virus checking.
Note: shutdown=CIFS should bedisabled if less than two CAVAservers are configured.
shutdown=
46 Using Celerra AntiVirus Agent 6.0
Configuring viruschecker.conf

Table 5. Parameters in the viruschecker.conf file (continued)
ExampleDescriptionParameter
shutdown=no◆ shutdown=no— Continues retrying list of AVservers if no AV server isavailable. Two watermarks exist(low and high); when each isreached, an Event log is sent. Usethe Event log to take correctiveaction on the Data Mover toensure that virus checking isfunctional.
shutdown=viruschecking◆ shutdown=viruschecking— Stops the virus checking if noAV server is available. (Windowsclients can access Celerra shareswithout virus checking.)
The default is shutdown=no.
viruschecker.conf parameters 47
Configuring viruschecker.conf

48 Using Celerra AntiVirus Agent 6.0
Configuring viruschecker.conf

6
Installing Third-partyApplications
Install one of the third-party AV engines on each participating AV serverbefore installing CAVA (except for Trend Micro ServerProtect, which youinstall after installing CAVA).
Note: The EMC E-Lab Interoperability Navigator and the Celerra Network ServerRelease Notes provide the latest list of supported AV engines and versions.
CAUTION: All packages except Trend Micro ServerProtect for EMC Celerramust be installed prior to installing CAVA. Install Trend Micro ServerProtecton page 66 provides more information.
Topics included are:◆ Install Symantec SAV for NAS on page 50◆ Install Symantec Endpoint Protection on page 54◆ Install McAfee VirusScan on page 56◆ Install Computer Associates eTrust on page 58◆ Install Sophos Anti-Virus on page 60◆ Install Kaspersky Anti-Virus on page 62◆ Install Trend Micro ServerProtect on page 66
Using Celerra AntiVirus Agent 6.0 49

Install Symantec SAV for NAS
Symantec SAV for NAS resides on an AV server and interfaces with CAVA version 3.6.2(or later) for SAV for NAS versions 4.3.X and 5.1.X using the NATIVE and Internet ContentAdaptation Protocol (ICAP) protocols, respectively. The application that requires antivirusscanning links to the Symantec library of scanning API calls, using these protocols. SymantecSAV for NAS version 4.3.X uses the NATIVE protocol, and version 5.1.X uses the ICAPprotocol for the deletion of the infected files.
Note: You must change the SAV for NAS service from SYSTEM to the same user that is running CAVA,otherwise access problems can result. Domain user account overview on page 28 provides moreinformation about configuring the domain user and assigning access rights.
1. Install the SAV for NAS software. The Symantec documentation provides specificinstallation steps.
2. Navigate to the SAV for NAS Status page. Click Configuration.
50 Using Celerra AntiVirus Agent 6.0
Installing Third-party Applications

3. If you are using SAV for NAS 4.3.X, select Native protocol then skip to step 5.
4. If you are using SAV for NAS 5.1.X, select ICAP protocol, and type 1344 in the Port numberbox to support Symantec SAV for NAS version 5.1.X.
Note: In order for SAV for NAS 5.x to work with Celerra, ICAP needs to accept requests from IPaddress 127.0.0.1. In 5.1.x, this can be done by either leaving the bind address field blank thatincludes all addresses, or by specifying 127.0.0.1.
While using SAV for NAS 5.1.X, perform the following:
a. Stop the Scan Engine Service.
Install Symantec SAV for NAS 51
Installing Third-party Applications

b. Open a command prompt, navigate to the directory where the scan engine has beeninstalled, and run the following command:
java -jar xmlmodifier.jar -s /policies/Misc/HonorReadOnly/@valuefalsepolicy.xml
c. Restart the Scan Engine Service.
If the above setting is not specified, SAV for NAS will not be able to delete the infectedfiles because CAVA will not accept any scan requests.
5. Click LiveUpdate. Click LiveUpdate Now to get any new definition files.
Note: You can upgrade CAVA support for Symantec from SAV for NAS version 4.3.X or any othervendors version to Symantec SAV for NAS 5.1.X using the Modify option on the initial CAVAinstallation screen.
Setting exclusions
When using SAV for NAS and SAVCE on the same machine, the temporary scan directoryof SAV for NAS must be set in the Exclusions section of the File System Auto-Protectconfiguration menu in the SAVCE main console. This is to ensure that the AV enginetakes action on all infected files that the virus scan detects.
52 Using Celerra AntiVirus Agent 6.0
Installing Third-party Applications

1. Navigate to the SAV for NAS Status page. Click Configuration and Resources.
2. Specify a temporary directory for scanning.
Note: Allow enough room for this directory to grow because it can become several GBs in size.If a local AV solution is used, make sure to also exclude this directory from scanning. A localAV solution on the AV server must not be allowed to scan the temporary working directoryin use by SAV for NAS.
Setting container handling policies
The SAV for NAS Container File Processing Limit for the time to extract a file should beequal to the RPCRequestTimeout value set in the viruschecker.conf file (the default is25000 milliseconds). To access the limit, from the Scan Engine’s menu select Policies ➤
Filtering ➤ Container Handling and set the Time to extract file meets or exceeds: value.
Modifying LimitChoiceStop settings
The LimitChoiceStop parameter controls container violations actions. If this is set to false,the scan engine allows access to a file that is violating some of the container policies (suchas max extract time exceeded) and will only log this error. If this is set to true (the defaultsetting), the scan engine blocks access to (deletes) the file on the container violations.
You need to set the LimitChoiceStop parameter to false. Failure to perform this stepresults in an AV_INTERFACE error and CAVA will not become online.
ActionStep
Edit the filtering.xml file that resides in the SAV install directory.1.
Set the LimitChoiceStop option to false.2.
Install Symantec SAV for NAS 53
Installing Third-party Applications

Install Symantec Endpoint Protection
Symantec Endpoint resides on an AV server and interfaces with CAVA version 4.5.2.2 (orlater) for Symantec Endpoint Protection version 11.04.
1. Install the Symantec Endpoint software. Symantec documentation provides specificinstallation steps.
2. Open the Windows Registry Editor and navigate to:
HKEY_LOCAL_MACHINE\Software\Symantec\Symantec EndpointProtection\AV\Storages\Filesystem\RealTimeScan
3. Right-click RealTimeScan and select New > Binary Value.
4. In the Value name text box, type DisableAlertSuppression.
5. In Value data, type a value of 01.
6. Click OK.
7. Open Symantec Endpoint Protection.
8. Click Antivirus and Antispyware Protection Options.
54 Using Celerra AntiVirus Agent 6.0
Installing Third-party Applications

9. Select Enable File System Auto-Protect.
10. For File Types, select All Types.
11. Ensure that Scan files on network drives is selected.
12. Click OK.
Install Symantec Endpoint Protection 55
Installing Third-party Applications

Install McAfee VirusScan
1. Create a temporary directory on the hard drive of an AV server to interface with CAVA,and extract the VirusScan release files into that directory. McAfee’s documentationprovides specific installation steps.
2. Install and start the application.
Note: If you are upgrading VirusScan, create a backup copy of the MCSHIELD.EXE file. Copy thisfile to a different directory or rename the file with a different extension.
3. Open the VirusScan On-Access Monitor, and click Properties. The VirusScan Propertiesdialog box appears.
4. On the VirusScan Properties window, click Detection. The Detection tab appears.
5. From the Detection tab, select the following:
a. In Scan Files, select:
• When writing to disk• When reading from disk• On network drives
b. b. In What to scan, select All files.
56 Using Celerra AntiVirus Agent 6.0
Installing Third-party Applications

Note: If you are running McAfee version 7.1 or later, it is critical to have When reading fromdisk selected.
6. Click Apply.
7. On the VirusScan Properties window, click Actions. The Actions tab appears.
8. From the Actions tab, do the following:
a. From the When a threat is found list, select one of the following options:
• Clean files automatically. This automatically cleans the infection (if it can be cleaned).If the infection cannot be cleaned, the file is left in place and the extension VIR isappended to the filename.
• Delete files automatically. This automatically deletes infected files.
b. Click Apply.
Note: Optionally, you might want to configure the Response to user options.
9. Close the VirusScan Properties window. Go to Chapter 7.
Install McAfee VirusScan 57
Installing Third-party Applications

Install Computer Associates eTrust
1. Install the eTrust application on an AV server to interface with CAVA. ComputerAssociates’ documentation provides specific installation steps.
2. Start the application, and navigate to the eTrust Threat Management Agent window.
3. On the eTrust Threat Management Agent window, click the Scan tab.
4. On the Scan tab, select the following:
• Under Direction, select Incoming and Outgoing Files.• Under Safety Level, select Secure.• Under Infection Treatment, select any of the options.
5. Click the Advanced tab.
6. On the Advanced tab, select the following:
58 Using Celerra AntiVirus Agent 6.0
Installing Third-party Applications

Under Protected Areas, select Protect Network Drives. You can also select ProtectFloppy Drives and Protect CD-ROM if desired.
•
• Under Advanced Protection and Realtime Pop-up Messages, select the desired options.
7. Click Selection, and click Advanced. The Advanced Detection Options dialog box appears.
8. Under Antivirus Engine, select Heuristic Scanner, for infections whose signatures havenot yet been isolated and documented.
Note: The settings under NTFS File System are optional.
9. Click OK to save the changes. Go to Chapter 7.
Install Computer Associates eTrust 59
Installing Third-party Applications

Install Sophos Anti-Virus
1. Install Sophos Anti-Virus on a server that will interface with the CAVA server. Sophos’documentation provides specific installation steps.
2. Right-click the Sophos icon (a blue shield) in the system tray and select Open SophosAnti-Virus.
3. On the Sophos Anti-Virus home page, click Configure Sophos.
4. Select On-access scanning. The On-access scan settings for this computer dialog boxappears.
5. On the Scanning tab, ensure that Enable on-access scanning for this computer is checkedand select On read.
60 Using Celerra AntiVirus Agent 6.0
Installing Third-party Applications

6. On the Options tab, select Scan for adware/PUAs and Scan for suspicious files (HIPS).
7. On the Cleanup tab in Viruses/spyware, select Automatically clean up items that containvirus/spyware. Select Delete to delete items that cannot be cleaned up.
8. Click OK to close the dialog box.
9. Close the Sophos program. Go to Chapter 7.
Install Sophos Anti-Virus 61
Installing Third-party Applications

Install Kaspersky Anti-Virus
1. Install Kaspersky Anti-Virus for Windows Servers Enterprise Edition on a server thatwill interface with the CAVA server. Kaspersky’s documentation provides specificinstallation steps.
2. Open the Kaspersky Anti-Virus MMC Console.
3. In the left pane, select Real-time protection and then Real-time file protection. The Real-time file protection window appears.
4. In the right pane, select Configuring protection scope. The Configuring protection scopetab appears.
5. On the Configuring protection scope tab, select Network places and click Settings.
6. On the General tab:
62 Using Celerra AntiVirus Agent 6.0
Installing Third-party Applications

• In Objects protection, select All objects and Scan alternate NTFS streams.• In Compound objects protection, select all six checkboxes.
7. On the Actions tab, in Actions to be performed on infected objects, select one of thefollowing options:
• Block access and disinfect• Block access and disinfect; delete if disinfection fails• Block access and delete• Block access and perform recommended action
Note: Block access does not work with CAVA.
In Actions to be performed on suspicious objects, select one of the following options:
• Block access and quarantine• Block access and delete• Block access and perform recommended action
Install Kaspersky Anti-Virus 63
Installing Third-party Applications

Note: Block access does not work with CAVA.
8. On the Performance tab:
• In Exclusions, clear Exclude objects and Exclude threats.• In Advanced settings, clear Stop if scan takes longer than (sec) and Do not scan
compound objects larger than (MB), and select use iChecker technology and use iSwifttechnology.
9. In the left pane, right-click Real-time file protection and select Properties. The Real-timefile protection Properties dialog box appears.
64 Using Celerra AntiVirus Agent 6.0
Installing Third-party Applications

10. On the General tab, select On access and modification.
11. On the Schedule tab, select one of the scheduling options.
12. Click OK to close the Real-time file protection Properties dialog box.
13. Close the Kaspersky Anti-Virus program. Go to Chapter 7.
Install Kaspersky Anti-Virus 65
Installing Third-party Applications

Install Trend Micro ServerProtect
Before you begin
Trend Micro ServerProtect for EMC Celerra must be installed after installing CAVA. Chapter7 provides instructions on installing CAVA.
If CAVA is not installed on the ServerProtect target AV server, you will receive this servererror message:
Before installing ServerProtect, you must install the EMCCelerra AntiVirus Agent (CAVA.
Procedure
ServerProtect for EMC Celerra resides on an AV server and interfaces with CAVA. To protectthe Celerra Network Server system and the AV server, the default setting for the ServerProtectReal-time Scan function is Incoming & Outgoing. EMC strongly recommends not to changethis setting.
Note: The Trend Micro documentation provides specific installation and configuration steps.
1. Start ServerProtect. The Management Console window appears. Figure 1 on page 67shows the ServerProtect Management Console window.
2. Select Enable real-time scanning, and select the following:
• Under Scan file type, select Selected files.• Under Scan options, select Scan floppy boot area, MacroTrap, and Scan mapped network
drive.
Note: Ensure that you have selected Scan mapped network drive, for CAVA to function with ServerProtect 5.58.
• Under Compressed files, select Scan compressed files.
Leave all other settings as they are.
When you have completed the steps, the Management Console window should look likeFigure 1 on page 67.
66 Using Celerra AntiVirus Agent 6.0
Installing Third-party Applications

3. Click Apply to save the changes. Go to Chapter 8.
Figure 1. Trend Micro ServerProtect Real-time Scan options window
Install Trend Micro ServerProtect 67
Installing Third-party Applications

68 Using Celerra AntiVirus Agent 6.0
Installing Third-party Applications

7
Installing CAVA
CAVA should be installed on each server in the domain that you want toact as an AV server. If you plan on using the CAVA Calculator, you alsoneed the Microsoft .NET Framework installed. If you do not have the .NETFramework, it is installed during the installation of the CAVA Toolspackage.
Note: You should configure at least two AV servers in the network. If one of theAV servers goes offline or cannot be reached by the Celerra Network Server, havingtwo AV servers ensures that file scanning capability is maintained.
Topics included are:◆ Install CAVA on page 70◆ Complete the CAVA installation for a Windows Server on page 72
Using Celerra AntiVirus Agent 6.0 69

Install CAVA
Before you begin
This section provides important information that you should be aware of before installingCAVA:
◆ Removing old versions of CAVA: If an AV server has a previous version of CAVA installed,remove that version of CAVA, reboot, and then install the new version of CAVA. Usethe Windows Control Panel’s Add or Remove Programs window to remove old versionsof CAVA. You must have local administrative privileges to remove programs.
Note: If you do not remove the previous version of CAVA before upgrading, you can choose theRemove option on the initial installation screen to first remove the previous version, then continuewith the installation.
◆ Reinstallation of CAVA: During a reinstallation of CAVA, you might see an overwriteprotection message if the installation files were previously unpacked to the temporarydirectory. If this happens, do the following: From the Overwrite Protection messagewindow, click Yes to All to overwrite the existing files. This process ensures that the latestversion of the files exist in the temporary directory.
◆ Celerra Event Enabler CD: You must have a copy of the Celerra Event Enabler CD toinstall the latest version of CAVA on each server.
Procedure
1. Insert the Celerra Event Enabler software distribution CD into the CD drive of theWindows Server where you want to install the Celerra Event Enabler software. If WindowsAutorun is enabled and the InstallShield Wizard window appears, skip to step 6; otherwise,go to step 2.
2. From the Windows taskbar, click Start and select Run. The Run dialog box appears.
3. From the Run dialog box:
a. Click Browse to locate the EMC_CEE_Pack executable file on the Celerra Event EnablerCD.
b. Select the EMC_CEE_Pack executable file for either 32-bit (_Win32) or the 64-bit (_x64)version of the software and click Open.
c. Click OK to start the InstallShield Wizard.
The Welcome to the InstallShield Wizard for EMC Celerra Event Enabler Framework Packagewindow appears:
• If you have the most current version of InstallShield, the License Agreement windowappears. Skip to step 7.
• If you do not have the most current version of InstallShield, you are prompted toinstall it. Go to step 4.
70 Using Celerra AntiVirus Agent 6.0
Installing CAVA

4. Click Next. The Location to Save Files window appears.
5. Click Next.
Note: Do not change the location of the temporary directory.
The Extracting Files process runs and returns to the Welcome to the InstallShield Wizardwindow.
6. Click Next. The License Agreement window appears.
7. Click I accept the terms in the license agreement, and click Next. The Customer Informationwindow appears.
8. Type a username and organization, and click Next. The Setup Type window appears.
9. Select Complete, and click Next. The Symantec SAV for NAS window appears.
10. If you are using Symantec antivirus software, select Work with Symantec SAV for NASand the option for the SAV version that you are using; otherwise, click Next. The Readyto Install the Program window appears.
11. Click Install. After the program is installed, the InstallShield Wizard Completed windowappears.
12. Click Finish. The EMC Celerra Event Enabler Installer Information window appears andprompts you to restart the server.
13. Click Yes. The machine restarts.
Note: Clicking No cancels the restart.
After you finish
To complete the installation for a Windows Server, see Complete the CAVA installation fora Windows Server on page 72.
Install CAVA 71
Installing CAVA

Complete the CAVA installation for a Windows Server
1. From the Windows taskbar, click Start ➤ Settings ➤ Control Panel ➤ Administrative Tools➤ Services.
2. Double-click EMC CAVA in the Service list. The EMC CAVA Properties window appears.
3. From the EMC CAVA Properties window, click Log On.
4. Select This account, and click Browse to locate the virususer account created in Chapter4. The Select User window appears.
5. Click Locations. The Locations window appears.
6. Navigate to the domain where the virususer account exists, select the domain location,and click OK. The Select User window now contains the location.
7. Click Advanced.
8. Click Find Now.
9. Select the virus user's account from the list, and click OK.
10. For this user account, type the account’s password in both the Password and Confirmpassword fields.
11. Click OK. The following message appears:
The new logon name will not take effect until you stop andrestart the service.
12. Click OK.
13. Stop and restart the EMC CAVA service. Start, stop, and restart CAVA on page 83provides instructions on using the EMC CAVA services.
72 Using Celerra AntiVirus Agent 6.0
Installing CAVA

8
Managing the VC Client
Before starting the VC client, you should have appropriately installed andconfigured CAVA. After virus checking has been started, you should verifythe installation.
Topics included are:◆ Start the VC client on page 74◆ Stop the VC client on page 75◆ Update the viruschecker.conf file on page 75◆ Verify the installation on page 76
Using Celerra AntiVirus Agent 6.0 73

Start the VC client
Before you begin
Before starting the virus-checking service:
◆ The administrator must issue the following command from the Control Station:
/nas/sbin/server_user server_2 -add -md5 -passwd <msrpcuser>
The administrator then must follow the prompts for entering information.
<msrpcuser> is the name assigned to either a simple user account or user account that ispart of a domain that the EMC CAVA service is running under on the Celerra EventEnabler machine. For example, if the EMC CAVA service is running under a user calledceeuser, the viruschecker.conf file entry would be msrpcuser=ceeuser. If ceeuser is amember of a domain, the entry would be msrpcuser=domain.ceeuser.
◆ Ensure that the CIFS services are configured and started. Managing Celerra for aMultiprotocol Environment provides details.
◆ Ensure that CAVA is installed and running on all AV servers. Chapter 7 provides moreinformation.
Procedure
Action
To start the VC client on the Data Mover, use this command syntax:
$ server_setup <movername> -Protocol viruschk -option start
where:
<movername> = name of the Data Mover
Example:
To start the VC client on server 2, type:
$ server_setup server_2 -Protocol viruschk -option start
NoteOutput
If CAVA is not running on a Windows Server in the domain, you will receive the followingerror message:
server_2 : done
RPC Error from checkerxxx.xxx.xxx.xxx
Celerra Network Server Error Messages Guide provides more information.
After you finish
74 Using Celerra AntiVirus Agent 6.0
Managing the VC Client

You must start the virus-checking client (VC client) on the Data Mover by using theserver_setup command or using the Celerra AntiVirus Management snap-in. The VC clientcommunicates with CAVA on the AV servers.
Stop the VC client
Action
To stop the VC client, use this command syntax:
$ server_setup <movername> -P viruschk -o stop
where:
<movername> = name of the Data Mover
Update the viruschecker.conf file
When making subsequent changes to the viruschecker.conf file, use the server_viruschkcommand with the update parameter to load the file into memory. This updates theviruschecker.conf file without stopping the virus-checking services.
Note: Celerra AntiVirus Management snap-in provides an alternative method to update theviruschecker.conf file. (Optional) Install Celerra AntiVirus Management snap-in on page 80 providesinstructions on using the snap-in.
Use this procedure while the VC client is running.
ActionStep
From the Control Station, use this command syntax to copy the viruschecker.conf file from the Data Mover:1.
$ server_file <movername> -get viruschecker.conf viruschecker.conf
Edit the copied viruschecker.conf file with a text editor.2.
Use this command syntax to copy the modified viruschecker.conf file to the corresponding Data Mover:3.
$ server_file <movername> -put viruschecker.conf viruschecker.conf
where:
<movername> = name of the Data Mover
Stop the VC client 75
Managing the VC Client

ActionStep
Update the viruschecker.conf file on the Data Mover by using this command syntax:4.
$ server_viruschk <movername> -update
where:
<movername> = name of the Data Mover
Example:
To update the file on server 2, type:
$ server_viruschk server_2 -update
Output:
server_2 : done
Verify the installation
Confirm that virus checking is operating properly by using one of the following methods:
◆ Use a placebo virus to trigger the AV engine. A placebo, or benign virus, does not infecta Windows Server or the Data Movers. To download the Eicar antivirus eicar.com.txtfile, visit Eicar online at:
http://www.eicar.org/anti_virus_test_file.htm
You can use the step below to check if the infected file is deleted.
Action
To make sure that the infected file was found and deleted, use this command syntax:
$ server_viruschk <mover_name> -audit
where:
<mover_name> = name of the Data Mover
Example:
To check if the infected file is found and deleted, type:
$ server_viruschk server_2 -audit
Output
Total Infected Files : 1Deleted Infected Files : 1Renamed Infected Files : 0Modified Infected Files : 0
These fields display only if the infected files are found. They remain visible until the Data Mover is rebooted or theCAVA service has been restarted.
76 Using Celerra AntiVirus Agent 6.0
Managing the VC Client

◆ Mimic the client’s access to files on the Data Mover for various levels of access. Forexample, perform a write from one client followed by multiple reads from other clients,or copy a number of files from one directory to another on the Data Mover.
Verify the installation 77
Managing the VC Client

78 Using Celerra AntiVirus Agent 6.0
Managing the VC Client

9
Managing CAVA
Topics included are:◆ (Optional) Install Celerra AntiVirus Management snap-in on page
80◆ Display virus-checking information on page 81◆ Audit virus-checking information on page 82◆ Start, stop, and restart CAVA on page 83◆ Perform a full file system scan on page 84◆ Enable scan-on-first-read on page 87◆ Update virus definition files on page 88◆ Turn off the AV engine on page 88◆ Turn on the AV engine on page 88◆ Manage CAVA thread usage on page 89◆ View the application log file from a Windows Server on page 91◆ Enable automatic virus detection notification on page 92◆ Customize virus-checking notification on page 93◆ Customize notification messages on page 95
Using Celerra AntiVirus Agent 6.0 79

(Optional) Install Celerra AntiVirus Management snap-in
In a Windows Server environment, use the Celerra AntiVirus Management snap-in to modifythe CAVA parameters on the Data Mover. Installing CelerraManagement Applicationsprovidesinstructions on installing the snap-in.
Open the Celerra AntiVirus Management snap-in
To open the Celerra AntiVirus Management snap-in, click Start on the Windows taskbar,and select Settings ➤ Control Panel ➤ Administrative Tools ➤ Celerra Management. TheCelerra Management Console appears.
For assistance in using the Celerra AntiVirus Management snap-in, click Help in thetoolbar.
Note: The CIFS services must be configured and started on the Data Mover before you can changeCelerra virus-checking configuration parameters.
80 Using Celerra AntiVirus Agent 6.0
Managing CAVA

Display virus-checking information
Action
To display the virus checker information, use this command syntax:
$ server_viruschk {<movername>|ALL}
Example:
To display the virus checker information on server 2, type:
$ server_viruschk server_2
NoteOutput
No arguments.server_2 :10 threads started1 Checker IP Address(es):172.24.101.217 ONLINE at Tue Jan 25 23:29:04 2005(GMT-00:00)RPC program version: 3CAVA release: 3.3.5, AV Engine: Network AssociatesLast time signature updated: Tue Jan 25 23:28:142005 (GMT-00:00)1 File Mask(s):*.*No File excludedShare \\127_SVR2SH1\CHECK$RPC request timeout=25000 millisecondsRPC retry timeout=5000 millisecondsHigh water mark=200Low water mark=50Scan all virus checkers every 60 secondsWhen all virus checkers are offline:Continue to work with Virus Checking and CIFSScan on read if access Time less than Tue Jan 2523:28:14 2005 (GMT-00:00)Panic handler registered for 65 chunks
Displays the virus checker configura-tion.
ALL
Executes the command for all DataMovers.
Display virus-checking information 81
Managing CAVA

Audit virus-checking information
Action
Audit the virus checker information by using this command syntax:
$ server_viruschk {<movername>|ALL} -audit
Example:
To audit the virus checker information on server 2, type:
$ server_viruschk server_2 -audit
NoteOutput
No arguments.server_2 :Total Requests : 244Requests in progress:1
NO ANSWER from Virus Checker Servers: 0ERROR_SETUP:0FAIL: 0TIMEOUT: 0min=1837 uS, max=183991 uS average=30511 uS
0 File(s) in the collector queue1 File(s) processed by the AV threadsRead file ‘/.etc/viruschecker.audit’ todisplay the list of pending requests
Displays the virus checker configuration.
ALL
Executes the command for all Data Movers.
-audit
Displays the status of the virus checker, such ashow many files have been checked and theprogress of those that are being checked.
82 Using Celerra AntiVirus Agent 6.0
Managing CAVA

Start, stop, and restart CAVA
Use the EMC CAVA service to start, stop, pause, or resume services on the AV server.Through the Services window, you can manage the CAVA service if it fails to start on restart.
You can access the CAVA service from a Windows Server by using this procedure:
1. From the taskbar, click Start, and select Settings ➤ Control Panel ➤ Administrative Tools➤ Services.
2. Scroll to EMC CAVA.
3. Right-click EMC CAVA and click Start, and select either Stop, Pause, Resume, or Restart(whichever is appropriate) from the shortcut menu.
Start, stop, and restart CAVA 83
Managing CAVA

Perform a full file system scan
An administrator can perform a full scan of a file system using the server_viruschk -fsscancommand from the Control Station. To use this feature, CAVA must be enabled and running.The administrator can query the state of the scan while it is running, and can stop the scanif necessary. A file system cannot be scanned if the file system is mounted with the optionnoscan. As the scan proceeds through the file system, it checks each file and triggers a scanrequest for each file.
Note: If a file system is unmounted during a full file system scan with -fsscan, the scan stops, and therecan be files that might not have been touched by the scan, which means there can still be infected filespresent. Upon remount, -fsscan must be restarted to scan any remaining files for infection.
Although a single file system can have only one scan running on it at a time, you can scanmultiple file systems simultaneously. However, scanning multiple file systems can causethe lowWaterMark and highWaterMark parameters to be reached, and an event log to besent. You might need to increase the lowWaterMark and highWaterMark parameter valuesin this case. The viruschecker.conf parameters on page 43 provides more information aboutparameters.
Use this command syntax to perform a full file system scan.
Action
To start a scan on a file system, use this command syntax:
$ server_viruschk <movername> –fsscan <fsname> -create
where:
<movername> = name of the Data Mover
<fsname> = name of the file system
Example:
To start a scan on ufs1, type:
$ server_viruschk server_2 –fsscan ufs1 -create
Output
server_2 : done
84 Using Celerra AntiVirus Agent 6.0
Managing CAVA

Check the status of a file system scan
Action
To check the status of a scan on a file system, use this command syntax:
$ server_viruschk <movername> –fsscan <fsname> -list
where:
<movername> = name of the Data Mover
<fsname> = name of the file system
Example:
To check the scan of a file system (in this example, ufs1), type:
$ server_viruschk server_2 -fsscan ufs1 -list
Output
server_2 :FileSystem 24 mounted on /ufs1:8 dirs scanned and 22 files submitted to the scan enginefirstFNN=0x0, lastFNN=0xe0f34b70, queueCount=0, burst=10
Perform a full file system scan 85
Managing CAVA

Stop a file system scan
Action
To stop a scan on a file system, use this command syntax:
$ server_viruschk <movername> –fsscan <fsname> -delete
where:
<movername> = name of the Data Mover
<fsname> = name of the file system
Example:
To stop a scan on ufs1, type:
$ server_viruschk server_2 –fsscan ufs1 -delete
Output
server_2 : done
86 Using Celerra AntiVirus Agent 6.0
Managing CAVA

Enable scan-on-first-read
You can enable the CAVA scan-on-first-read functionality using the server_viruschkcommand. The command sets the reference time on the virus-checker configuration file.The Data Mover uses the access time of a file during an open to see if the file must be scanned.This time is compared with the time reference that is in the virus checker configuration onthe Data Mover. If the access time of the file is less than this reference, the file is scannedbefore it is opened by the CIFS client. The time reference is updated with a field of theresponse of the virus checker only if the time given in this field is greater than the timereference. CAVA sets the access time when it detects a virus definition file update. Theaccesstime=now option sets the reference time to the current time. The accesstime=noneoption disables the time scan (scan-on-first-read) functionality. The reference time is storedin memory and in the viruschecker.dat file located in the /.etc directory. The time is persistentafter a stop or start of the virus-checker service or after restarting the Data Mover.
Use this command to enable the scan-on-first-read functionality.
Action
To enable scan-on-first-read, use this command syntax:
$ server_viruschk <fsname> -set accesstime=0205231130.00
where:
<fsname> = name of the file system
Example:
To enable scan-on-first-read on file system server 2, type:
$ server_viruschk server_2 -set accesstime=0205231130.00
Output
server_2 : done
Enable scan-on-first-read 87
Managing CAVA

Update virus definition files
CAVA can automatically detect a new version of the virus definition file and update theaccess time. When a CIFS user accesses a file, the file is scanned with the latest virusdefinitions, even if it has not been modified since the previous scan. Each time CAVA receivesan update, an entry in the Event Log is made. Updates are made through a CAVA heartbeat.To use this feature you must have scan-on-first-read enabled.
Note: Currently, McAfee version 8.0i supports automatic detection of virus definition updates. TheCelerra Network Server Release Notes and EMC E-Lab Interoperability Navigator provide the latestinformation on other antivirus products.
Turn off the AV engine
Use this procedure to turn off the AV engine on an AV server. If you do not, thevirus-checking capability of the AV server is compromised and the CIFS files stored on theCelerra Network Server might be susceptible to virus infection.
1. Exclude the AV servers from the list of servers providing virus-checking capability tothe Celerra Network Server. Define AV server IP addresses in viruschecker.conf on page40 provides more information.
2. Stop the EMC CAVA service. Start, stop, and restart CAVA on page 83 provides moreinformation.
3. Disable the third-party realtime scanning feature from the AV server. The third-partyapplication’s documentation provides more information.
Turn on the AV engine
If you turned off the AV engine on an AV server, use this procedure to restore the viruschecking to its fully operational configuration.
1. Enable the third-party realtime scanning feature from the AV server. The third-partyapplication’s documentation provides more information.
2. Start the EMC CAVA service. Start, stop, and restart CAVA on page 83 provides moreinformation.
3. Include the AV servers from the list of servers providing virus-checking capability to theCelerra Network Server. Define AV server IP addresses in viruschecker.conf on page 40provides more information.
88 Using Celerra AntiVirus Agent 6.0
Managing CAVA

Manage CAVA thread usage
Celerra AntiVirus Agent uses four types of threads to handle virus checking:
◆ Normal Data Mover CIFS threads — Serve CIFS requests from any CIFS client.◆ Reserved Data Mover CIFS threads — Serve CIFS requests from the external AV servers
only.◆ Data Mover viruschk threads — Issue antivirus check requests to CAVA threads on the
external AV servers.◆ CAVA threads on each external antivirus (AV) server — Service the requests issued by
viruschk threads on the Data Movers.
By default, 20 threads run on each external AV server. The default number of CIFS threadsthat run on a Data Mover depends on Data Mover memory. By default, three CIFS threadsare reserved for AV activities (these are the reserved Data Mover CIFS threads). By default,each Data Mover runs 10 viruschk threads.
In general, you should set the number of reserved threads for the VC client equal to thenumber of AV checking servers. However, this number should not be set higher than halfthe number of CIFS threads. Adjust the maxVCThreads parameter on page 90 providesinformation on setting the maxVCThreads parameter. Managing Celerra for a MultiprotocolEnvironment provides more information on setting the number of normal CIFS threads ona Data Mover.
You can set the number of viruschk threads using the server_setup command.CelerraNetworkServer Command Reference Manual describes how to set viruschk threads using server_setup.Chapter 11 describes how to change the default number of CAVA threads.
If virus checking is enabled, a file usually must be scanned for viruses before the file can beaccessed. Occasionally, if the VC client runs out of threads, file access requests cannotprogress because there are no VC threads available for virus scanning—in effect, a deadlockoccurs between file access requests and virus-checking requests.
For these situations, the VC client has special threads reserved for breaking deadlocks. ThemaxVCThreads parameter specifies the number of special threads reserved for the VC client.The number of reserved threads is configured by default and can be set by modifying themaxVCThreads parameter in the /nas/site/slot_param, or the/nas/server/slot_<x>/param files. Generally, the default setting for maxVCThreadsis appropriate for most networks and does not need to be set.
Manage CAVA thread usage 89
Managing CAVA

Adjust the maxVCThreads parameter
Use this procedure to adjust the maximum number of threads reserved for breakingdeadlocks.
CAUTION: Do not change other lines in the parameter file without a thorough knowledge of thepotential effects on the system. Contact EMC Customer Service for more information.
ActionStep
Log in to the Control Station.1.
Type the following:2.
$ server_param {<movername>|ALL} -facility cifs -modify maxVCThreads-value <new_value>
where:
<movername> = name of the Data Mover
<new value> = the maximum number of threads reserved for virus checking
Restart CAVA with the new parameter by typing:3.
$ server_viruschk <movername> -update
where:
<movername> = name of the Data Mover
90 Using Celerra AntiVirus Agent 6.0
Managing CAVA

View the application log file from a Windows Server
1. From the taskbar, click Start, and select Settings ➤ Control Panel ➤ Administrative Tools➤ Computer Management.
Note: Another way to open Event Viewer is to click Start on the Windows taskbar, and select Settings➤ Control Panel ➤ Administrative Tools ➤ Event Viewer.
2. Under System Tools, double-click Event Viewer, and click Application Log.
3. In the right-hand pane, locate the entries for EMC Checker Server.
View the application log file from a Windows Server 91
Managing CAVA

Enable automatic virus detection notification
When CAVA detects an infected file, CAVA can automatically send notification to the clientthrough Windows pop-up messages when the Windows Messenger service is enabled. Foradministrators, events are logged in the system log.
Use this procedure to enable messaging on a Windows Server.
1. Select Start ➤ Settings ➤ Control Panel ➤ Administrative Tools ➤ Services.
2. In the Services window, right-click the Messenger service entry and select Properties.The Messenger Properties dialog box appears.
3. Select Automatic from the Startup type list. Click Apply.
4. Click OK to exit.
92 Using Celerra AntiVirus Agent 6.0
Managing CAVA

Customize virus-checking notification
You can customize the type of virus-checking notification CAVA sends and who receivesnotification by modifying the viruschk.notify parameter on the Data Mover. The defaultvalue for the viruschk.notify parameter is 7. Table 6 on page 93 provides details on theparameter values. This guide describes only the command-line procedures. Unisphere onlinehelp gives information on using the graphical user interface to modify parameter values.
Table 6. viruschk.notify parameters
Comment/DescriptionValueParameterModule
Setting the value of the parameter deter-mines the type of notification CAVA sendsand upon which type of event it is sent:
0= A log event is sent to the Control Stationif a file is deleted or renamed.
1= A log event is sent to the Control Stationif a file is deleted, renamed, or modified.
2= A Windows message and a log event aregenerated if a file is deleted or renamed.
3= A Windows message is sent to the clientif a file is deleted or renamed. A log eventis generated if a file is deleted, renamed, ormodified.
6= A Windows message is sent to the clientwhen a file is deleted, renamed, or modified.A log event is generated if a file is deletedor renamed.
7= A Windows message and a log event aregenerated when a file is deleted, renamed,or modified. This is the default.
0–3, 6, 7 (default)
4, 5 are not allowed
viruschk.notifycifs
Each third-party antivirus vendor varies slightly on which type of event triggers notification.Table 7 on page 93 lists the types of events supported by the third-party vendors. Third-partyvendor documentation provides more information.
Table 7. Event trigger type
cleanShredCopyRenameMove or quaran-tine
DeleteVendor
XXXComputer Associates
XXMcAfee
XXXXXSophos
Customize virus-checking notification 93
Managing CAVA

Table 7. Event trigger type (continued)
cleanShredCopyRenameMove or quaran-tine
DeleteVendor
XSymantec (SAV forNAS)
XXXSymantec EndpointProtection
XXXTrend Micro
94 Using Celerra AntiVirus Agent 6.0
Managing CAVA

Customize notification messages
Use this procedure to customize notification messages that are displayed when CAVAdetects a virus.
ActionStep
Log in to the Control Station as root.1.
Create and edit the cifsmsg.txt file in a text editor.2.
Use this syntax to customize a message:
Note: Use # at the beginning of a sentence if you want to add comments to this file.
$error.FileDeletedByVC=<message line 1><message line :><message line n>.$error.FileRenamedByVC=<message line 1><message line :><message line n>.$warning.FileModifiedByVC=<message line 1><message line :><message line n>.
Note: The last line must be a period (.).
3.
Save and close the file, then type:4.
$ server_file <server_x> -put cifsmsg.txt cifsmsg.txt
where:
<server_x> = name of the Data Mover
To affect the changes you made to the cifsmsg.txt file, restart (stop and start) the CIFS service on the DataMover by using this command syntax:
5.
$ server_setup <server_x> -P cifs -o stop
$ server_setup <server_x> -P cifs -o start
where:
<server_x> = name of the Data Mover
If you have also changed the parameter, as described in Customize virus-checking notification on page 93,restart the Data Mover (instead of restarting CIFS) to affect all changes at once.
Customize notification messages 95
Managing CAVA

96 Using Celerra AntiVirus Agent 6.0
Managing CAVA

10
Monitoring and SizingCAVA
You can use CAVA Calculator to estimate the number of CAVA serversthat you might need prior to installing CAVA. You can also use the CAVAsizing tool to monitor the CAVA usage on the network and determine theoptimal number of CAVA servers, based on system usage.
Topics included are:◆ Install the CAVA Calculator on page 98◆ Start CAVA Calculator on page 99◆ Uninstall the CAVA Calculator on page 99◆ Configure the sizing tool on page 100◆ Enable the sizing tool on page 101◆ Create the cavamon.dat file on page 102◆ Start the sizing tool on page 102◆ Size CAVA on page 103◆ (Optional) Gather AV statistics with cavamon.vbs on page 103
Using Celerra AntiVirus Agent 6.0 97
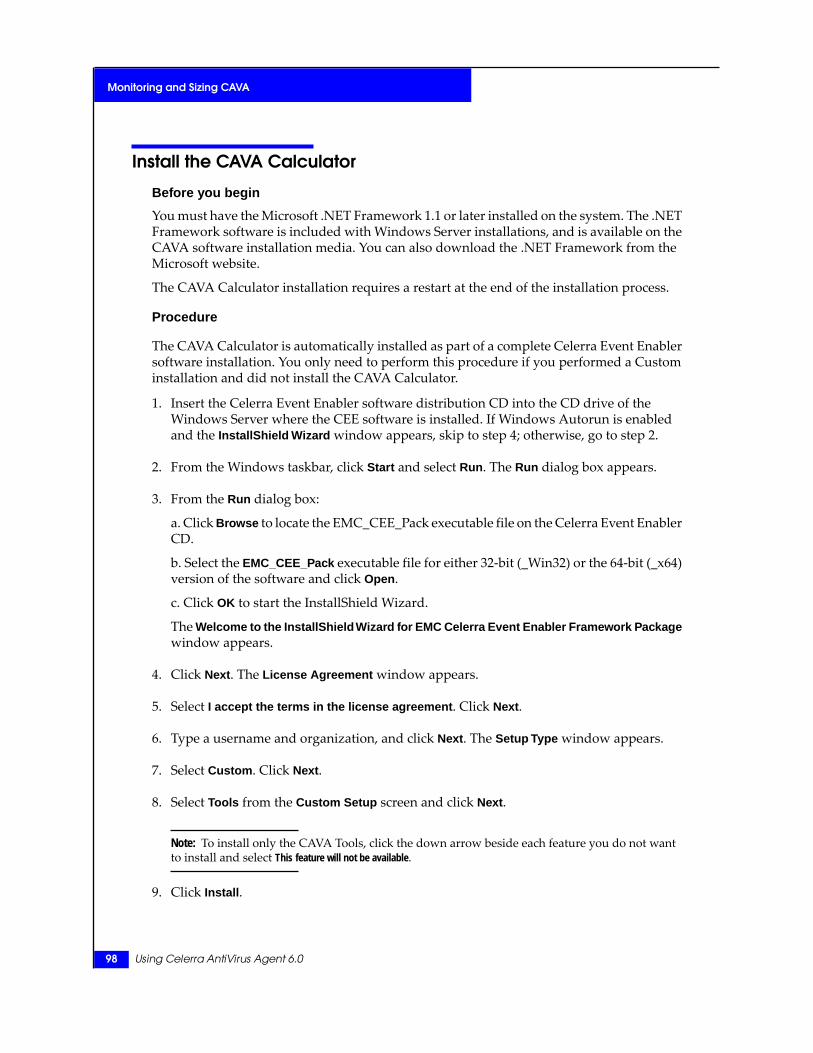
Install the CAVA Calculator
Before you begin
You must have the Microsoft .NET Framework 1.1 or later installed on the system. The .NETFramework software is included with Windows Server installations, and is available on theCAVA software installation media. You can also download the .NET Framework from theMicrosoft website.
The CAVA Calculator installation requires a restart at the end of the installation process.
Procedure
The CAVA Calculator is automatically installed as part of a complete Celerra Event Enablersoftware installation. You only need to perform this procedure if you performed a Custominstallation and did not install the CAVA Calculator.
1. Insert the Celerra Event Enabler software distribution CD into the CD drive of theWindows Server where the CEE software is installed. If Windows Autorun is enabledand the InstallShield Wizard window appears, skip to step 4; otherwise, go to step 2.
2. From the Windows taskbar, click Start and select Run. The Run dialog box appears.
3. From the Run dialog box:
a. Click Browse to locate the EMC_CEE_Pack executable file on the Celerra Event EnablerCD.
b. Select the EMC_CEE_Pack executable file for either 32-bit (_Win32) or the 64-bit (_x64)version of the software and click Open.
c. Click OK to start the InstallShield Wizard.
The Welcome to the InstallShield Wizard for EMC Celerra Event Enabler Framework Packagewindow appears.
4. Click Next. The License Agreement window appears.
5. Select I accept the terms in the license agreement. Click Next.
6. Type a username and organization, and click Next. The Setup Type window appears.
7. Select Custom. Click Next.
8. Select Tools from the Custom Setup screen and click Next.
Note: To install only the CAVA Tools, click the down arrow beside each feature you do not wantto install and select This feature will not be available.
9. Click Install.
98 Using Celerra AntiVirus Agent 6.0
Monitoring and Sizing CAVA

10. Click Finish.
11. The EMC CAVA Installer Information window appears.
You need to restart the system to complete the installation. Click Yes to restart immediatelyor No to restart at a later time.
Start CAVA Calculator
1. Click the EMC CAVA Tools icon. The CAVA Tools window appears.
2. Select File ➤ New if the CAVA Calculator is not in the CAVA Tools workspace.
The CAVA Calculator’s online help provides more information about using CAVA Calculator.
Uninstall the CAVA Calculator
The CAVA Calculator is automatically uninstalled when the Celerra Event Enabler softwareis uninstalled, and cannot be uninstalled by itself. Only use this procedure if you want touninstall Celerra Event Enabler.
1. Insert the Celerra Event Enabler software distribution CD into the CD drive of theWindows Server where the CEE software is installed. If Windows Autorun is enabledand the InstallShield Wizard window appears, skip to step 4; otherwise, go to step 2.
2. From the Windows taskbar, click Start and select Run. The Run dialog box appears.
3. From the Run dialog box:
a. Click Browse to locate the EMC_CEE_Pack executable file on the Celerra Event EnablerCD.
b. Select the EMC_CEE_Pack executable file for either 32-bit (_Win32) or the 64-bit (_x64)version of the software.
4. Click Next.
5. Select Remove and click Next.
6. Click Finish.
Start CAVA Calculator 99
Monitoring and Sizing CAVA

Configure the sizing tool
Before you begin
The user account on the primary sizing tool server must have local administrative privileges.
Procedure
Table 8 on page 100 lists the actions you must perform to configure the sizing tool.
Table 8. Actions for configuring the sizing tool
ProcedureActionTask
Enable the sizing tool on page 101Enable the sizing tool on the monitoring sizing tool server and on allAV servers that you want to monitor.
1.
Create the cavamon.dat file on page 102Create the cavamon.dat file on the monitoring server.
Note: Only needed if you use cavamon.exe to run the sizing tool.
2.
Start the sizing tool on page 102Start the sizing tool on the monitoring server.3.
Size CAVA on page 103Size CAVA.4.
(Optional) Gather AV statistics with cava-mon.vbs on page 103
Optionally run cavamon.vbs.5.
100 Using Celerra AntiVirus Agent 6.0
Monitoring and Sizing CAVA

Enable the sizing tool
Enable the sizing tool on the primary sizing tool server and on all AV servers that you wantto monitor.
Note: If you enable the CAVA sizing tool and you want to enable local file system scanning on the AVserver, you should exclude the %SYSTEMROOT%\system32\wbem\ directory from directories tobe scanned.
1. Open the Windows Registry Editor by running regedit.exe.
2. Locate the Sizing entry in the left pane of the Registry Editor in theHKEY_LOCAL_MACHINE\SOFTWARE\EMC\CAVA\Sizing directory.
3. Double-click the Sizing entry located in the right pane. The Edit DWORD Value dialog boxfor Sizing appears.
4. In the Value data field, type 1. Click OK.
5. (Optional) To control how often CAVA sends information to the sizing tool, double-clickthe SampleIntervalSecs entry. The Edit DWORD Value dialog box for SampleIntervalSecsappears.
6. (Optional) In the Value data field, type a number between 1 and 60 (seconds). The defaultvalue is 10. Click OK.
Note: Do not type any decimal value greater than 60. Any number greater than 60 is not supportedin Visual Basic.
7. Close the Registry Editor.
8. Restart CAVA, as described in Start, stop, and restart CAVA on page 83.
Enable the sizing tool 101
Monitoring and Sizing CAVA

Create the cavamon.dat file
If you run the sizing tool by running cavamon.exe (as opposed to using the scriptcavamon.vbs) you must create a cavamon.dat file. The cavamon.dat file contains the nameor IP address of each AV server that the sizing tool monitors.
Note: The cavamon.vbs script takes its input from the command line interface (CLI) when the scriptis run.
Use this procedure to create the cavamon.dat file.
1. Create a text file, named cavamon.dat, in the Program Files\EMC\CAVA directory.
2. Add a line for each AV server you want to monitor. The file must contain either the IPaddress or machine name of each AV server. Monitoring will operate properly with bothtypes of entries in the file.
To find the name for a Windows Server, click Start in the taskbar, and select Control Panel➤ Settings ➤ System:
• On a Windows Server, click the Computer Name tab.
Note: Each AV server listed in the cavamon.dat file must have the CAVA sizing tool enabled.
3. Save and close the file.
Start the sizing tool
1. From the Program Files\EMC\CAVA directory, run cavamon.exe.
2. Click Get Stats to start the monitoring process. The output is automatically updated everyinterval with the CAVA population statistics.
Note: Every interval (set in the sizing tool Registry entry with a default of 10 seconds), the sizingtool captures information about the AV servers defined in the cavamon.dat file.
3. Click Stop Stats to stop the monitoring process.
102 Using Celerra AntiVirus Agent 6.0
Monitoring and Sizing CAVA

Size CAVA
To start an analysis, click Size in the CAVA Monitor dialog box. The sizing tool collects datafor 10 successive intervals, and then feeds this data into its heuristic algorithms. After thetool completes its session, the Size box shown at the bottom of the CAVA Monitor windowdisplays the recommended numbers of AV servers.
(Optional) Gather AV statistics with cavamon.vbs
Action
From a command window on the sizing tool system, run the following command. Use as many AV server machine namesas necessary:
cscript cavamon.vbs <machine_name_1> <machine_name_2> <machine_name_3>
where:
<machine_name_n> = machine name or IP address of the AV server you want to monitor
Example:
To get AV statistics, type:
cscript cavamon.vbs \\WIN910108
NoteOutput
◆ The CAVA sizing tool must be enabled on all AV serversyou want to monitor.
◆ If you have any problems while running the script,download and install the Windows Script Host (availableat www.microsoft.com).
Server:\\WIN910108AV Engine State:UpAV Engine Type:TM ServerProtectFiles Scanned:127899Health:GoodMsec Per Scan:19.85Saturation %:3.45Scans Per Second:0CAVA State:NORMALCAVA Version:2.2.1
Size CAVA 103
Monitoring and Sizing CAVA

104 Using Celerra AntiVirus Agent 6.0
Monitoring and Sizing CAVA

11
Managing the Registry andAV Drivers
CAVA provides Windows parameters that you can set to modify thebehavior of CAVA. You edit the parameters through the Windows RegistryEditor. For information about editing the Registry, view the ChangingKeys and Values online help topic in the Registry Editor (regedit.exe).
Note: Editing the Windows Server Registry can cause serious problems that mightrequire a reinstallation of the operating system. It is advisable to create a backupcopy of the Registry files before editing them. You should edit the followingparameters only if you have an in-depth knowledge of CAVA and the MicrosoftRegistry.
Topics included are:◆ EMC CAVA configuration Registry entries on page 106◆ EMC AV driver Registry entry on page 106◆ Manage the EMC AV driver on page 106
Using Celerra AntiVirus Agent 6.0 105

EMC CAVA configuration Registry entries
There are two user-configurable Registry entries for CAVA configuration:
◆ AgentType — Currently, the only supported AgentType is driver. This option allowsfor future support of other possible interfaces as they become available.
◆ NumberOfThreads — Determines the number of threads which the CEE framework usesto process incoming requests from Celerra:
• Minimum value = 1
• Default value = 20 (decimal)
To access the AgentType entry from the Registry Editor, use this directory path:
HKEY_LOCAL_MACHINE\SOFTWARE\EMC\Celerra EventEnabler\CAVA\Configuration
To access the NumberOfThreads entry from the Registry Editor, use this directory path:
HKEY_LOCAL_MACHINE\SOFTWARE\EMC\Celerra Event Enabler\Configuration
EMC AV driver Registry entry
Use this directory path to access the Windows Registry to ensure that the EMC AV driveris properly configured:
HKEY_LOCAL_MACHINE\SYSTEM\CurrentControlSet\Services\EMCVirCk
The correct settings for the EMC AV driver are:
◆ ErrorControl = 1
◆ Start = 2
◆ Type = 1
If the settings are different from those indicated, modify them.
Manage the EMC AV driver
The EMC AV driver (EMCVirCk) is a Windows Server driver. Use this procedure to managethe AV driver.
1. From the taskbar, click Start, and select Settings ➤ Control Panel ➤ Administrative Tools➤ Event Viewer.
2. From the Event Viewer window, select System Log.
106 Using Celerra AntiVirus Agent 6.0
Managing the Registry and AV Drivers

3. In the right pane, double-click EMCVirCk in the Event Viewer’s System Log list. The EventProperties window appears.
4. Ensure that a loaded successfully message appears in the Description field. If the driverwas not loaded successfully, restart the AV server.
5. Click OK to close the Event Properties window.
Manage the EMC AV driver 107
Managing the Registry and AV Drivers

108 Using Celerra AntiVirus Agent 6.0
Managing the Registry and AV Drivers

12
Troubleshooting
As part of an effort to continuously improve and enhance the performanceand capabilities of its product lines, EMC periodically releases new versionsof its hardware and software. Therefore, some functions described in thisdocument may not be supported by all versions of the software orhardware currently in use. For the most up-to-date information on productfeatures, refer to your product release notes.
If a product does not function properly or does not function as describedin this document, contact your EMC Customer Support Representative.
Problem Resolution Roadmap for Celerra contains additional informationabout using Powerlink and resolving problems.
Topics included are:◆ EMC E-Lab Interoperability Navigator on page 110◆ Error messages on page 110◆ Known problems on page 111◆ EMC Training and Professional Services on page 112
Using Celerra AntiVirus Agent 6.0 109

EMC E-Lab Interoperability Navigator
The EMC E-Lab™ Interoperability Navigator is a searchable, web-based application thatprovides access to EMC interoperability support matrices. It is available athttp://Powerlink.EMC.com. After logging in to Powerlink, go to Support ➤ Interoperabilityand Product Lifecycle Information ➤ E-Lab Interoperability Navigator.
Error messages
All event, alert, and status messages provide detailed information and recommended actionsto help you troubleshoot the situation.
To view message details, use any of these methods:
◆ Unisphere software:
• Right-click an event, alert, or status message and select to view Event Details, AlertDetails, or Status Details.
◆ CLI:
• Type nas_message -info <MessageID>, where <MessageID> is the messageidentification number.
◆ Celerra Network Server Error Messages Guide:
• Use this guide to locate information about messages that are in the earlier-releasemessage format.
◆ Powerlink:
• Use the text from the error message's brief description or the message's ID to searchthe Knowledgebase on Powerlink. After logging in to Powerlink, go to Support ➤Search Support.
110 Using Celerra AntiVirus Agent 6.0
Troubleshooting

Known problems
Table 9 on page 111 describes known problems that might occur when using CAVA andpresents workarounds.
Table 9. CAVA known problems and workarounds
WorkaroundSymptomKnown problem
The shutdown= option in the viruschecker.conffile specifies the shutdown action to take whenan AV server is not available.
Upon failure of the AV server, aVC client thread polls the AVserver in the background. Thisenables the VC client to recon-nect to the failed AV serverwhen it is operational.
Note: All AV engines are polledevery 60 seconds (by default) todetermine which AV engines areonline and available.
AV Server Failover
If you have configured more than oneserver, and if one of the AV servers fails,file scanning is redirected to other avail-able AV servers. If none of the AVservers are available, the Data MoverCIFS service proceeds without anyvirus-checking capabilities.
CAVA can be configured to prevent all CIFSclient access to any Celerra share when AVservers are unavailable.
The shutdown= parameter in Table 5 on page43 provides details.
To avoid this condition, EMC recommends thatyou disable the directory cache on the ma-
The Data Mover‘s server_log willcontain the following SMB2 errormessage:
Using Microsoft SMB2
When using Microsoft SMB2 as theprotocol between AV engines and the
chines on which CAVA and AV engines arerunning by using the following procedure:
file not foundCelerra, the Microsoft Redirector usesa local cache for directory metadata on 1. Open the Windows Registry Editor and
navigate to HKLM\System\CurrentCon-trolSet\Services\LanmanWorkstation\Pa-rameters
the machine where the AV engine re-sides. By default, this cache is invalidat-ed every 10 seconds. As a conse-quence, the updates that are made tothe server share during this period might 2. Right-click Parameters and select New >
DWORD Value.not be seen in the cache. It is possibleunder these conditions that AV engines
3. For the new REG_DWORD entry, type aname of DirectoryCacheLifetime.
will not scan the files requested by CA-VA, as the Redirector intercepts thescan and returns a file not found error. 4. Set the value to 0 to disable
DirectoryCacheLifetime.This failure to scan occurs because thecontents of the Redirector’s cache and
5. Click OK.the actual directory structure on theserver share do not match. 6. Restart the machine.
Known problems 111
Troubleshooting

EMC Training and Professional Services
EMC Customer Education courses help you learn how EMC storage products work togetherwithin your environment to maximize your entire infrastructure investment. EMC CustomerEducation features online and hands-on training in state-of-the-art labs conveniently locatedthroughout the world. EMC customer training courses are developed and delivered by EMCexperts. Go to EMC Powerlink at http://Powerlink.EMC.com for course and registrationinformation.
EMC Professional Services can help you implement your Celerra Network Server efficiently.Consultants evaluate your business, IT processes and technology, and recommend waysthat you can leverage your information for the most benefit. From business plan toimplementation, you get the experience and expertise that you need without straining yourIT staff or hiring and training new personnel. Contact your EMC representative for moreinformation.
112 Using Celerra AntiVirus Agent 6.0
Troubleshooting

Glossary
A
AV engineThird-party antivirus software running on a Windows Server that works with the CelerraAntiVirus Agent (CAVA).
See also AV server, CAVA, VC client, and virus definition file.
AV serverWindows Server configured with the CAVA and a third-party antivirus engine.
See also AV engine, CAVA, and VC client.
AV userSpecific domain user either created or selected as the account configured for the virus checking.Use this account when configuring all of the Windows Servers with CAVA and the AV engine.
C
CAVA CalculatorTool that estimates the number of CAVAs required to provide a user-defined level of performancein a CAVA pool, based on user information. The tool can be run at any time, even if there is noCAVA present.
CAVA sizing toolProgram that monitors all CAVAs in the network, and sizes the network to find the ideal numberof AV servers. When you install CAVA on the AV servers, the CAVA sizing tool, cavamon.exe,is also installed.
Celerra AntiVirus Agent (CAVA)Application developed by EMC that runs on a Windows Server and communicates with astandard antivirus engine to scan CIFS files stored on a Celerra Network Server.
See also AV engine, AV server, and VC client.
Using Celerra AntiVirus Agent 6.0 113

Celerra AntiVirus Management snap-inMicrosoft Management Console (MMC) snap-in to the Celerra Management Console. You canuse the Celerra AntiVirus Management snap-in with CAVA and a third-party AV engine. Thesnap-in is used to view or modify the CAVA parameters located in the /.etc/viruschecker.conffile. The Celerra AntiVirus Management online help provides more details.
Celerra Event EnablerFramework that provides the working environment for the CAVA and CEPA facilities.
Celerra Event Publishing Agent (CEPA)EMC-provided agent running on a Windows Server that provides details of events occurringon the Windows server. It can communicate with the Celerra Network Server to display a listof events that occurred.
Common Internet File System (CIFS)File-sharing protocol based on the Microsoft Server Message Block (SMB). It allows users toshare file systems over the Internet and intranets.
E
EMC AV driverPart of the CAVA software package, and configured automatically during installation.
EMC CAVAName of the Windows Server 2003 and Windows Server 2008 framework service, which housesthe CAVA and CEPA facilities.
EMC_CEE_Pack.exeExecutable file that installs the Celerra Event Enabler framework software, including CAVA.This file is located on the Celerra Event Enabler CD.1
M
Microsoft Management Console (MMC)Extensible common presentation service for management applications included in the Windowsoperating system.
See also MMC snap-in.
MMC snap-inManagement tool an administrator can add to the interface of a Microsoft Management Console(MMC).
See also Microsoft Management Console.
1 Previous to CAVA 4.0, the name of the executable was EMCCAVAPack.exe and was located on theCAVA CD.
114 Using Celerra AntiVirus Agent 6.0
Glossary

N
network file system (NFS)Network file system (NFS) is a network file system protocol that allows a user on a clientcomputer to access files over a network as easily as if the network devices were attached to itslocal disks.
V
virus definition fileFile containing information for a virus protection program that protects a computer from thenewest, most destructive viruses. This file is sometimes referred to as a virus signature updatefile, a virus pattern update file, or a virus identity (IDE) file.
See also AV engine, AV server, CAVA, and VC client.
virus-checking client (VC client)Virus-checking agent component of the Celerra Network Server software that runs on the DataMover.
See also AV engine, AV server, and CAVA.
W
Windows Management Instrumentation (WMI)Microsoft implementation and supporting infrastructure for the Common Information Model.
Using Celerra AntiVirus Agent 6.0 115
Glossary

116 Using Celerra AntiVirus Agent 6.0
Glossary

Index
Aaddr parameter 43antivirus partners 16auditing, VC client 82AV driver
managing 106Registry settings 106
AV engine restrictions 10AV engines
Computer Associates eTrust 58installing 49Kaspersky 62McAfee AV 56Sophos 60supported 16Symantec SAV for NAS 50Trend Micro ServerProtect 66turning off 88turning on 88
AV servers, installing CAVA 69
Bbasic VC client configuration 21
CCAVA
Calculator 19features 16installing 69monitoring 100overview 9restarting 83sizing 103sizing tool 18, 100starting 83
CAVA (continued)starting the VC client 74stopping 83stopping the VC client 75system requirements 10VC client 20
CAVA Calculatorinstalling 98starting 99uninstall 99
CAVA pool restrictions 10cavamon.dat file 102cavamon.vbs file 103Celerra AntiVirus Management snap-in 80CIFS interface name, determine 28CIFSserver parameter 44CLI 12Computer Associates eTrust AV engine
installing 58creating a domain user 30creating a local group 33creating viruschecker.conf file 40customizing notification messages 95customizing virus-checking notification 93
Ddatabase restrictions 11defining CAVA servers 40definition file, scan on update 19determine CIFS interface name 28domain user, creating 28, 30
overview 28
Eediting viruschecker.conf file 40EMC E-Lab Navigator 110
Using Celerra AntiVirus Agent 6.0 117

enable scan-on-first-read 87error messages 110eTrust AV engine, installation overview 24
Ffault tolerance 17file-level retention restrictions 11full file system scan 21, 84
perform 84
HhighWaterMark parameter 44
Iinstallation, verifying 76installing
CAVA 69, 70CAVA Calculator 98Celerra AntiVirus Management 80Computer Associates eTrust AV engine 58Kaspersky AV engine 62McAfee AV engine 56SAV for NAS AV engine 50Sophos AV engine 60Trend Micro ServerProtect AV engine 66
KKaspersky Anti-Virus restrictions 10Kaspersky AV engine
installation overview 24installing 62
known limitations 10, 111
Lload balancing 17local administrative rights
assigning in Windows 2008 36assigning in Windows Server 2003 36
local group, creating 33from Windows Server 2003 33
log file, viewing 91lowWaterMark parameter 44
Mmasks parameter 43maxsize parameter 44
McAfee AV engineinstallation overview 24installing 56
messages, error 110Messenger service 92Microsoft.NET Framework 98monitoring CAVA 100MPFS restrictions 11MS-RPC restrictions 10
Nnon-CIFS protocol restrictions 11Norton AV engine
installation overview 24notification messages 92, 95
customizing 95
Ppanics. Data Mover 19perform full file system scan 84
RRegistry
AV driver 106CAVA configuration entries 106
related information 13restarting, CAVA 83restrictions 10RPCRequestTimeout parameter 45RPCRetryTimeout parameter 45running CAVA Calculator 99
SSAV for NAS AV engine, installing 50scan full file system 84scan on write 18scan-on-first-read, enable 87scanning
on first read 17when it occurs 21
scanning criteria, defining 42scanning quick glance chart 21server_viruschk 81services, Messenger 92shutdown parameter 46sizing tool 18, 100, 101, 102
cavamon.dat file 102enabling 101starting 102
118 Using Celerra AntiVirus Agent 6.0
Index

sizing tool (continued)stopping 102
snap-ins 12, 80Sophos AV engine
installation overview 24installing 60
startingAV engine 88CAVA 83CAVA Calculator 99sizing tool 102
stoppingAV engine 88CAVA 83sizing tool 102
surveyTime parameter 46system requirements 10
Tthreads, viruschk 89Trend Micro ServerProtect AV engine 25, 66
installing 66troubleshooting 109
Uuninstalling CAVA Calculator 99updating virus definition files 17, 88user interface choices 12
VVC client
VC client (continued)auditing 82starting 74stopping 75
virus definition files, update 88virus definition files, updating 17virus-checking
client 20continuation 19defining criteria 39displaying configuration 81excluding files 43notification, customizing 93rights, assigning in Windows Server 2003 34
viruschecker.conf filecreating and editing 40defining CAVA servers 40defining scanning criteria 42overview 39parameters 43sending to Data Mover 41updating 75
viruschk threads 89viruschk.notify parameter 93
WWindows 64-bit operating systems restrictions 10Windows Messenger service 92Windows Server 2003
creating a local group 33creating a user account 30
Windows Server 2008creating a user account 30
write, scan on 18
Using Celerra AntiVirus Agent 6.0 119
Index

120 Using Celerra AntiVirus Agent 6.0
Index