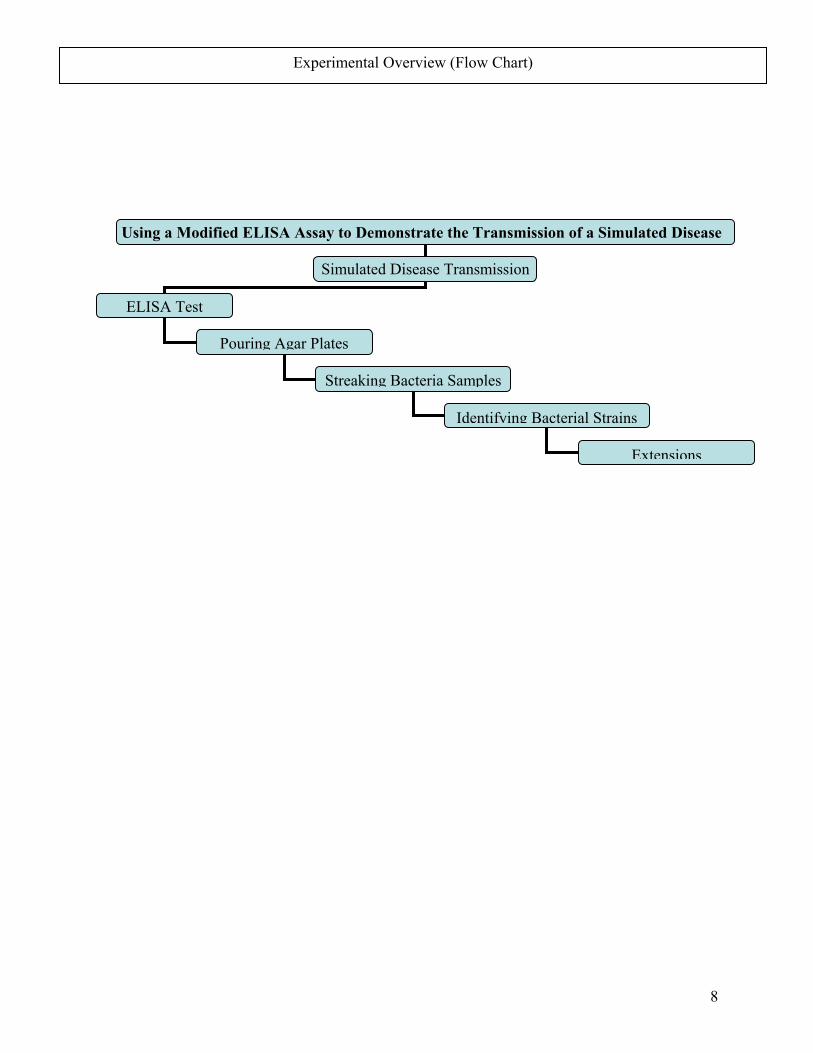
Using a Modified ELISA Assay to show the …...Using a Modified ELISA Assay to Demonstrate the...
43
Using a Modified ELISA Assay to Demonstrate the Transmission of a Simulated Disease and the Subsequent Identification of the Bacterial Agent Aurora Merry 1 , Kara Jon Christesen 1 . AAI John H. Wallace High School Teacher Fellowship, Salem High School, Salem, NH 03079 Abstract: Students simulate disease transmission by sharing “body fluids”, then use an ELISA assay to determine the rate of transmission of the simulated disease. Through the ELISA assay, students determine if they are carriers of the disease. If students are carriers for the disease, then they swab, grow, and identify the type(s) of bacteria that caused the disease using microbiology techniques. Note: All fluids are simulated! Real body fluids are not shared. Specific inoculations will be made for “carriers”. Prior to the above simulation, a brief mini-unit will be taught using a PowerPoint presentation. The purpose of this will be to demonstrate lab safety techniques, use of lab equipment (ELISA, microbiology techniques), and general safety precautions necessary to perform the simulation. Objectives : The objectives for this unit are multifaceted. Through research, laboratory exercises, and presentations, students will apply their knowledge to real life epidemiology study. • To demonstrate proper lab safety precautions • To illustrate how disease spreads through a population/rate of transmission • To research the spread of communicable diseases in the United States • To learn how an ELISA is performed and its applications (forensics, research, and diagnostic tests) • To understand the antibody-antigen interaction • To learn a sterile technique to plate and identify bacteria • To learn disease characteristics caused by specific bacterial strains • To identify various strains of bacteria in a sample
Transcript of Using a Modified ELISA Assay to show the …...Using a Modified ELISA Assay to Demonstrate the...

Using a Modified ELISA Assay to Demonstrate the Transmission of a Simulated Disease and the Subsequent Identification of the Bacterial Agent Aurora Merry1, Kara Jon Christesen1. AAI John H. Wallace High School Teacher Fellowship, Salem High School, Salem, NH 03079 Abstract: Students simulate disease transmission by sharing “body fluids”, then use an ELISA assay to determine the rate of transmission of the simulated disease. Through the ELISA assay, students determine if they are carriers of the disease. If students are carriers for the disease, then they swab, grow, and identify the type(s) of bacteria that caused the disease using microbiology techniques. Note: All fluids are simulated! Real body fluids are not shared. Specific inoculations will be made for “carriers”. Prior to the above simulation, a brief mini-unit will be taught using a PowerPoint presentation. The purpose of this will be to demonstrate lab safety techniques, use of lab equipment (ELISA, microbiology techniques), and general safety precautions necessary to perform the simulation. Objectives: The objectives for this unit are multifaceted. Through research, laboratory exercises, and presentations, students will apply their knowledge to real life epidemiology study.
• To demonstrate proper lab safety precautions • To illustrate how disease spreads through a population/rate of transmission • To research the spread of communicable diseases in the United States • To learn how an ELISA is performed and its applications (forensics, research, and
diagnostic tests) • To understand the antibody-antigen interaction • To learn a sterile technique to plate and identify bacteria • To learn disease characteristics caused by specific bacterial strains • To identify various strains of bacteria in a sample
Table of Contents
Overview of Unit……….……………………………………………………………………. 3 Student Section Overview………………………………………………………….………… 7 Experimental Overview (Flow-Chart)………………………………………………………....8 Teacher Guide Pre-Lab Preparation…………….………………………………….………… 9 Simulated Disease Transmission Protocol Teacher Section………………..…….………… 13 Simulated Disease Transmission Protocol Student Section……….………..…….………… 19 ELISA Protocol Teacher Section……………………………….……………….…..……… 23 ELISA Protocol Student Section….…………………………….…………………..……… 28 Pouring Agar Plates Protocol Teacher Section..…………………………………………… .33 Pouring Agar Plates Protocol student Section....…………………………………………… 34 Streaking Bacterial Samples Teacher Section……………………………………………… 35 Streaking Bacterial Samples Student Section….…………………………………………… 37 Identifying Bacterial Strains Teacher Section……………………………………………… 39 Identifying Bacterial Strains student Section…………………………………………….….41 Extensions...………………………………………………………………………………….43
2

I. Overview
a. Concepts covered in unit i. Lab safety
ii. Scientific method iii. Disease transmission iv. Antibody-antigen interaction v. How an ELISA (Enzyme Linked-Immuno-Sorbent Assay) is performed and
applications of the ELISA test vi. Significance of a sterile technique
vii. How to plate and identify bacterial strains b. General goals of lab exercises
i. To teach importance of lab safety and use of sterile technique ii. To successfully perform an ELISA and analyze results
iii. How to culture bacteria using sterile technique iv. How to identify various bacterial strains
c. Recommended placement for the unit within a biology course i. Placement will vary depending on school district curricula
ii. Possible placements include, but are not limited to: 1. Classification of living things, specifically Kingdom Eubacteria
(Monera) 2. Human anatomy, physiology, and health 3. Microbiology/Immunology
d. Technical skills acquired by students i. Pipetting into microwells
ii. Making and pouring of agar plates iii. Isolating bacterial strains using sterile technique iv. Plating bacterial strains using sterile technique v. Identification of bacterial strains
e. Relevance to students’ lives i. Knowledge of disease transmission
1. How quickly disease can spread under everyday conditions 2. How easy it can be to contract a disease caused by bacteria on a daily
basis ii. Knowledge of diagnostic procedures
f. Relation to other scientific concepts i. Classification and use of a dichotomous key
ii. Human anatomy and physiology iii. Human health iv. Microbiology v. Immunology
II. Science Background a. Elisa b. Agar/ID
3

III. Student Outcomes a. General Description
i. Elisa ii. agar/ID
b. Student outcomes i. To demonstrate proper lab safety precautions
ii. To illustrate how disease spreads through a population/rate of transmission iii. To research the spread of communicable diseases in the United States iv. To learn how an ELISA is performed and its applications (forensics, research,
and diagnostic tests) v. To understand the antibody-antigen interaction
vi. To learn a sterile technique to plate and identify bacteria vii. To learn disease characteristics caused by specific bacterial strains
viii. To identify various strains of bacteria in a sample c. Relationship between technical procedures and science concepts
i. All procedures are performed to gain a better understanding of the above concepts
ii. Technical procedures are a practical application of said concepts IV. Learning Objectives
a. Qualitative and quantitative learning objectives i. To demonstrate proper lab safety precautions; qualitative and quantitative
ii. To illustrate how disease spreads through a population/rate of transmission; qualitative and quantitative
iii. To research the spread of communicable diseases in the United States; quantitative (if extension is completed)
iv. To learn how an ELISA is performed and its applications (forensics, research, and diagnostic tests); qualitative
v. To understand the antibody-antigen interaction in the ELISA; qualitative and quantitative
vi. To learn a sterile technique to plate and identify bacteria; qualitative vii. To learn disease characteristics caused by specific bacterial strains;
qualitative (if extension is completed) viii. To identify various strains of bacteria in a sample; qualitative and quantitative
b. Demonstration of student knowledge; Students will: i. Safely follow various lab protocols
ii. Determine the rate of disease transmission iii. Perform and apply ELISA iv. Model antibody-antigen interactions v. Perform a bacterial culture using sterile technique
vi. Identify various bacterial strains V. Time requirements
a. Single class periods needed for general instruction b. Double class periods needed for exchange of fluids and performance of ELISA,
preparing and plating of bacteria, and identification of bacteria
4
VI. Advance preparation a. Simulated Disease Transmission see “Teacher Section” b. ELISA test see “Teacher Section” c. Pouring Agar Plates see “Teacher Section” d. Streaking Bacterial Samples see “Teacher Section” e. Identifying Bacterial Strains see “Teacher Section”
VII. Materials and Equipment a. Simulated Disease Transmission see “Teacher Section” b. ELISA test see “Teacher Section” c. Pouring Agar Plates see “Teacher Section” d. Streaking Bacterial Samples see “Teacher Section” e. Identifying Bacterial Strains see “Teacher Section
VIII. Student Prior Knowledge and Skills; Students must know: a. How to use a dichotomous key b. How to correctly use a microscope c. General characteristics of microorganisms d. How to follow a lab protocol
IX. Student Expectations a. Formal laboratory report including:
i. Background information/introduction ii. Experimental design/materials/procedure
iii. Data and analysis iv. Conclusion
b. Presentations on various pathogenic organisms X. Anticipated Results
a. Results will vary based upon simulated ‘fluids’ and bacterial strains available to each teacher
b. Results are dependent upon initial number of infected students XI. Classroom Discussion
a. “Stop and Think” i. What are some different disease-causing agents?
ii. How does disease spread? iii. If one person in this room were infected with an airborne disease, what do
you think the chances are that you will be exposed or infected with this disease?
iv. How quickly do you think disease spreads? Does the rate of transmission vary? Why or why not?
b. Analysis questions i. What percent of the class became infected?
ii. What characteristics make a bacterium either Gram positive or Gram negative iii. See analysis questions for “ELISA Protocol”
c. Discussion questions i. Are you surprised by the results obtained from this exercise? Why or why
not? ii. How can you apply this knowledge to help you maintain a healthy, disease-
free lifestyle?
5

iii. How can you apply this knowledge to prevent the spread of disease? XII. Assessment
a. Assessment of laboratory reports and presentations vary due to individual teacher’s formats
b. Sample rubric for a laboratory report: c. Sample rubric for a presentation:
6

STUDENT SECTION:
I. Rationale a. The purpose of this unit is to familiarize students with the cause, diagnosis, and
spread of disease in a community. b. Introduction
i. Students will simulate disease transmission by sharing “body fluids”, then use an ELISA (Enzyme Linked-Immuno-Sorbent Assay) to determine the rate of transmission of the simulated disease. Through the ELISA assay, students determine if they are carriers of the disease. If students are carriers for the disease, then they swab, grow, and identify the type(s) of bacteria that caused the disease using microbiology techniques. Note: All fluids are simulated! Real body fluids are not shared. Specific inoculations will be made for “carriers
ii. Overview of appropriate science background 1. How to use a dichotomous key 2. Characteristics of microorganisms 3. How to follow lab protocol
iii. Procedures 1. ELISA(Enzyme Linked-Immuno-Sorbent Assay) 2. Isolation bacterial strains 3. Pouring agar plates 4. Plating bacterial strains 5. Identifying bacterial strains
iv. Explanation of Equipment Use 1. How to use a micropipette 2. Streaking and isolation of bacteria
II. Materials i. Per group (Please refer to separate lab protocols for list of materials for
class- materials per group to be determined after lab is taught) b. Safety Equipment
i. Safety goggles ii. Lab aprons
iii. Emergency eye wash station III. Procedure (Please refer to separate lab protocols for each procedure) IV. Data Collection (Please refer to “Data Collection” section within each lab protocol) V. Discussion/Analysis (Please refer to “Analysis and Conclusion” section within each
lab protocol)
7
Using a Modified ELISA
ELISA Test
Pouring A
Experimental Overview (Flow Chart)
Assay to Demonstrate the Transmission of a Simulated Disease
Simulated Disease Transmission
gar Plates
Streaking Bacteria Samples
Identifying Bacterial Strains
Extensions
8
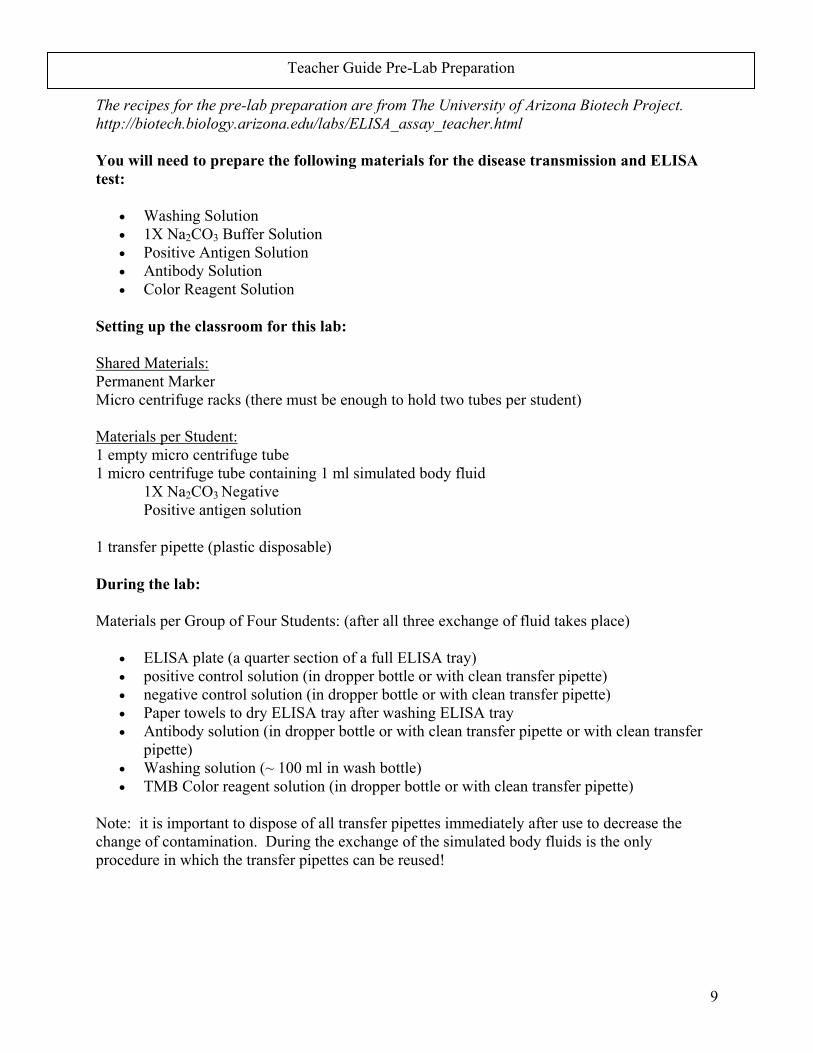
The recipes for the pre-lab phttp://biotech.biology.arizon
You will need to prepare thtest:
• Washing Solution • 1X Na2CO3 Buffer So• Positive Antigen Solu• Antibody Solution • Color Reagent Soluti
Setting up the classroom fo
Shared Materials: Permanent Marker Micro centrifuge racks (there Materials per Student: 1 empty micro centrifuge tub1 micro centrifuge tube conta 1X Na2CO3 Negative Positive antigen solut
1 transfer pipette (plastic disp
During the lab:
Materials per Group of Four
• ELISA plate (a quarte• positive control solut• negative control solut• Paper towels to dry E• Antibody solution (in
pipette) • Washing solution (~ 1• TMB Color reagent s
Note: it is important to dispochange of contamination. Duprocedure in which the transf
Teacher Guide Pre-Lab Preparation
reparation are from The University of Arizona Biotech Project. a.edu/labs/ELISA_assay_teacher.html
e following materials for the disease transmission and ELISA
lution tion
on
r this lab:
must be enough to hold two tubes per student)
e ining 1 ml simulated body fluid
ion
osable)
Students: (after all three exchange of fluid takes place)
r section of a full ELISA tray) ion (in dropper bottle or with clean transfer pipette) ion (in dropper bottle or with clean transfer pipette) LISA tray after washing ELISA tray dropper bottle or with clean transfer pipette or with clean transfer
00 ml in wash bottle) olution (in dropper bottle or with clean transfer pipette)
se of all transfer pipettes immediately after use to decrease the ring the exchange of the simulated body fluids is the only er pipettes can be reused!
9

Teacher Guide Pre-Lab Preparation
Preparation of Materials:
Bacteria to identify for positive tests:
1. Culture in nutrient broth any Gram negative or Gram positive bacteria that are available per the instructions of the specific bacteria. A good choice would be a Gram positive and a Gram negative bacterium that is relatively safe to work with.
2. Add 1ml of bacteria broth culture to student tubes that tested positive for the pathogen upon completion of the ELISA test so they can identify the strain of bacteria that caused the simulated disease.
Washing Solution: 1X PBS with 0.1% Tween 20
1. Dissolve 160 g NaCl, 4g KCl, 22.4 g Na2HPO4, and 4g KH2PO4 in deionized or distilled water to give final volume of 1000 ml buffer. This is 20X PBS.
2. Dilute 50 ml of 20X PBS to 950 mL with deioinized or distilled water for each class. Add 10 ml 10% Tween 20 to buffer. This buffer (1X PBS, 0.1% Tween 20) can be stored indefinitely at room temperature.
This buffer is used to wash plates after antigen addition and after antibody addition.
Sodium Carbonate: 1X Na2CO3 Buffer Solution
1. Dissolve 3.2g Na2CO3 and 5.86 g NaHCO3 in deionized or distilled water to final volume of 200 mL. This is a 10X Na2CO3 concentrate. This solution can be stored indefinitely in the refrigerator.
2. To make a 1X Na2CO3 buffer solution for classroom use, add 20 ml 10X concentrate to 180 ml deionized or distilled water. This solution can be stored indefinitely in the refrigerator.
3. Give 1 ml of the 1X Na2CO3 buffer solution to each student as simulated body fluid. Distribute 1 ml aliquots in micro centrifuge tubes as a negative control for the ELISA test.
10
Teacher Guide Pre-Lab Preparation
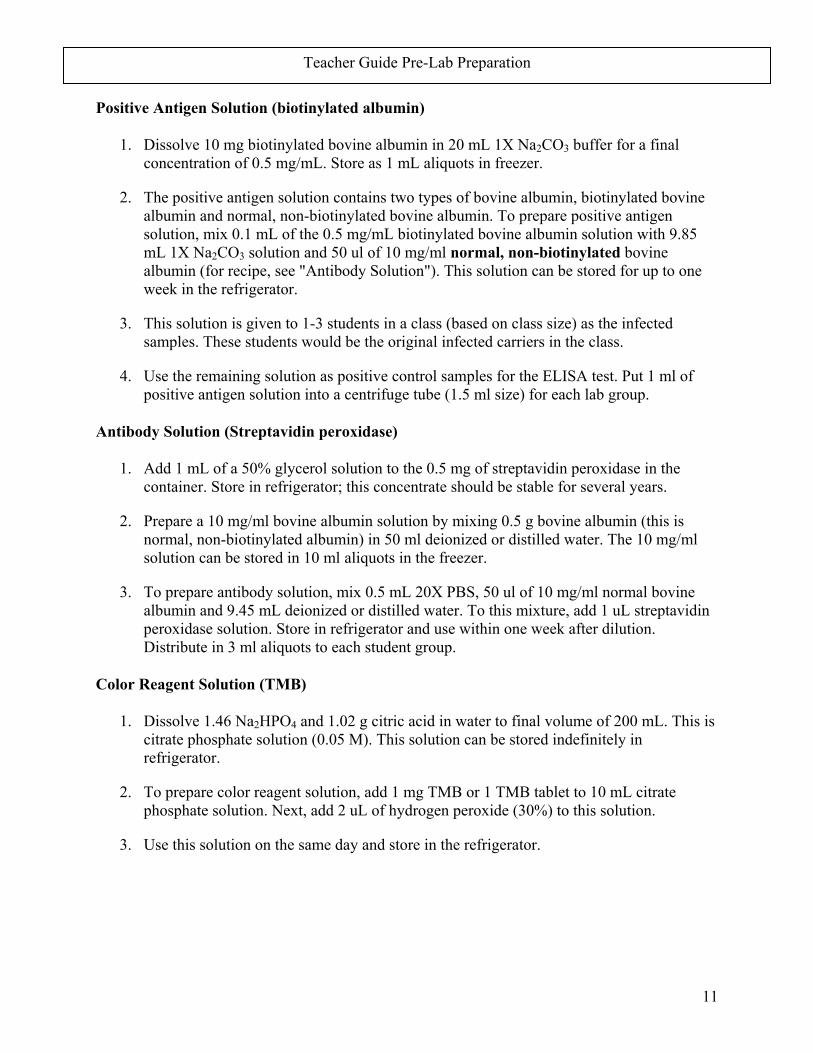
Positive Antigen Solution (biotinylated albumin)
1. Dissolve 10 mg biotinylated bovine albumin in 20 mL 1X Na2CO3 buffer for a final concentration of 0.5 mg/mL. Store as 1 mL aliquots in freezer.
2. The positive antigen solution contains two types of bovine albumin, biotinylated bovine albumin and normal, non-biotinylated bovine albumin. To prepare positive antigen solution, mix 0.1 mL of the 0.5 mg/mL biotinylated bovine albumin solution with 9.85 mL 1X Na2CO3 solution and 50 ul of 10 mg/ml normal, non-biotinylated bovine albumin (for recipe, see "Antibody Solution"). This solution can be stored for up to one week in the refrigerator.
3. This solution is given to 1-3 students in a class (based on class size) as the infected samples. These students would be the original infected carriers in the class.
4. Use the remaining solution as positive control samples for the ELISA test. Put 1 ml of positive antigen solution into a centrifuge tube (1.5 ml size) for each lab group.
Antibody Solution (Streptavidin peroxidase)
1. Add 1 mL of a 50% glycerol solution to the 0.5 mg of streptavidin peroxidase in the container. Store in refrigerator; this concentrate should be stable for several years.
2. Prepare a 10 mg/ml bovine albumin solution by mixing 0.5 g bovine albumin (this is normal, non-biotinylated albumin) in 50 ml deionized or distilled water. The 10 mg/ml solution can be stored in 10 ml aliquots in the freezer.
3. To prepare antibody solution, mix 0.5 mL 20X PBS, 50 ul of 10 mg/ml normal bovine albumin and 9.45 mL deionized or distilled water. To this mixture, add 1 uL streptavidin peroxidase solution. Store in refrigerator and use within one week after dilution. Distribute in 3 ml aliquots to each student group.
Color Reagent Solution (TMB)
1. Dissolve 1.46 Na2HPO4 and 1.02 g citric acid in water to final volume of 200 mL. This is citrate phosphate solution (0.05 M). This solution can be stored indefinitely in refrigerator.
2. To prepare color reagent solution, add 1 mg TMB or 1 TMB tablet to 10 mL citrate phosphate solution. Next, add 2 uL of hydrogen peroxide (30%) to this solution.
3. Use this solution on the same day and store in the refrigerator.
11

Teacher Guide Pre-Lab Preparation
Sources of Laboratory Materials
Below is a table that contains an example of sources for the materials necessary to perform this experiment. Most materials can be purchased through a variety of scientific supply companies.
Item Source Item # Quantity Price Biotinylated albumin Sigma Co. A8549 10 mg
TMB (3, 3', 5, 5'-Tetramethylbenzidine) tablets
Sigma T3405 50 tablets
TMB (3, 3', 5, 5'-Tetramethylbenzidine) powder
Sigma T8767 1 g
Streptavidin peroxidase Kirkegaard and Perry
14-30-00 0.5 mg
Bovine albumin Sigma A4503 ?????? Tween 20 Sigma P1379 100 mL
Flexible assay plates-U bottom VWR 62406-220 50 per pack (lids optional)
Fine tip transfer pipets, Samco VWR 14670-330 5 ml Microfuge tubes, 1.7 ml VWR 20170-331 500 per pack
Sodium chloride Sigma S9888 500 g Potassium chloride Sigma P3911 500 g
Disodium phosphate Sigma S9390 100 g Potassium phosphate Sigma P0662 500 g
Dibasic sodium phosphate Sigma S0876 100 g Citric acid Sigma C7129 100 g
Sodium carbonate Sigma S1641 500 g Sodium bicarbonate Sigma S6014 500 g
Glycerol Sigma G7893 500 mL Hydrogen peroxide (30%) Sigma H1009 100 mL
Any Gram Positive and Gram Negative
Any supply catalogue
12

Lab Protocol for Simulated Disease Transmission Purpose: The purpose of the disease transmission activity is to share simulated body fluids with three classmates of your selection. This is in preparation for the following sections that will determine “infected” individuals, culture samples of “pathogen”, and identify the type of bacteria that caused the infection. The way in which a communicable disease is spread can be represented by sharing simulated body fluids.
Shared Materials: Permanent Marker Micro centrifuge racks (there must be enough to hold two tubes per student) Materials per Student: 1 empty micro centrifuge tube 1 micro centrifuge tube containing simulated body fluid (1ml) 1 transfer pipette (plastic disposable) Most simulated body fluids will initially be negative for the pathogen. One will be positive (for classes of less than 20 students, for each increment of 10 students add an additional positive tube initially. This allows one student out of 20 to have a tube that contains the pathogen before sharing occurs. (Choose an outgoing student for the initial positive tube this will ensure it gets shared widely- DO NOT allow students to know who has the positive solution!). Solution in the positive tubes will be positive antigen solution (see pre-lab preparation) Solution in the negative tubes will be 1X Na2CO3 (see pre-lab preparation) Please see preparation for instructions on solution preparation.
Simulated Disease Transmission Protocol Teacher Section
13

Procedure:
Simulated Disease Transmission Protocol Teacher Section
1. Using the marker provided, label both of your tubes with your initials. 2. Label one tube with S (sharing) and the other with NS (non-sharing). 3. Use the transfer pipette to transfer half of the simulated body to the empty tube. (now
each tube should have an equal volume of the simulated body fluid in it) 4. Put your NS tube with your initials aside in the designated rack. (set rack aside to avoid
confusion)
Note: use the S (sharing) tube for the directions below
5. When your instructor tells you, find one member of your class to share the simulated body fluid with. (wait until all students are ready)
6. Use a transfer pipette to combine both fluids in one of the S tubes (either yours or your partners).
7. Gently mix the contents by using the pipette to siphon some of the fluid mix and then to expel it back into the tube. Complete this for approximately three to five times to ensure complete mixing of the fluids.
8. Once the fluid has been completely mixed, use the transfer pipette to transfer one-half of it into the other S tube (either yours of your partners dependant upon which tube is empty).
9. Record the name of the student that you made your first exchange with in the table provided. (wait until all students have had ample time to share fluid and record their exchange partner)
10. When your instructor gives the direction to complete the second exchange, move about the room and find a second person to exchange the simulated fluid with.
11. Complete the procedure to share the simulated body fluids (#6-8). 12. Record the name of your second contact in the table provided. (wait until all students
have had ample time to share fluid and record their exchange partner) 13. When your instructor gives the direction to complete the third exchange, move about the
room and find a third person to exchange the simulated body fluid with. 14. Complete the procedure for sharing simulated body fluids (#6-8). 15. Record the name of your third contact in the table provided. 16. Place your tube in the rack provided to complete the simulated EILSA on to determine
the # of infected individuals from the activity. Solutions should be stored in the refrigerator for later use in the ELISA for up to one week. Note: there is an alternative available to show the spread of diseases if the teacher elects not to do the ELISA due to limited time or funds.
14
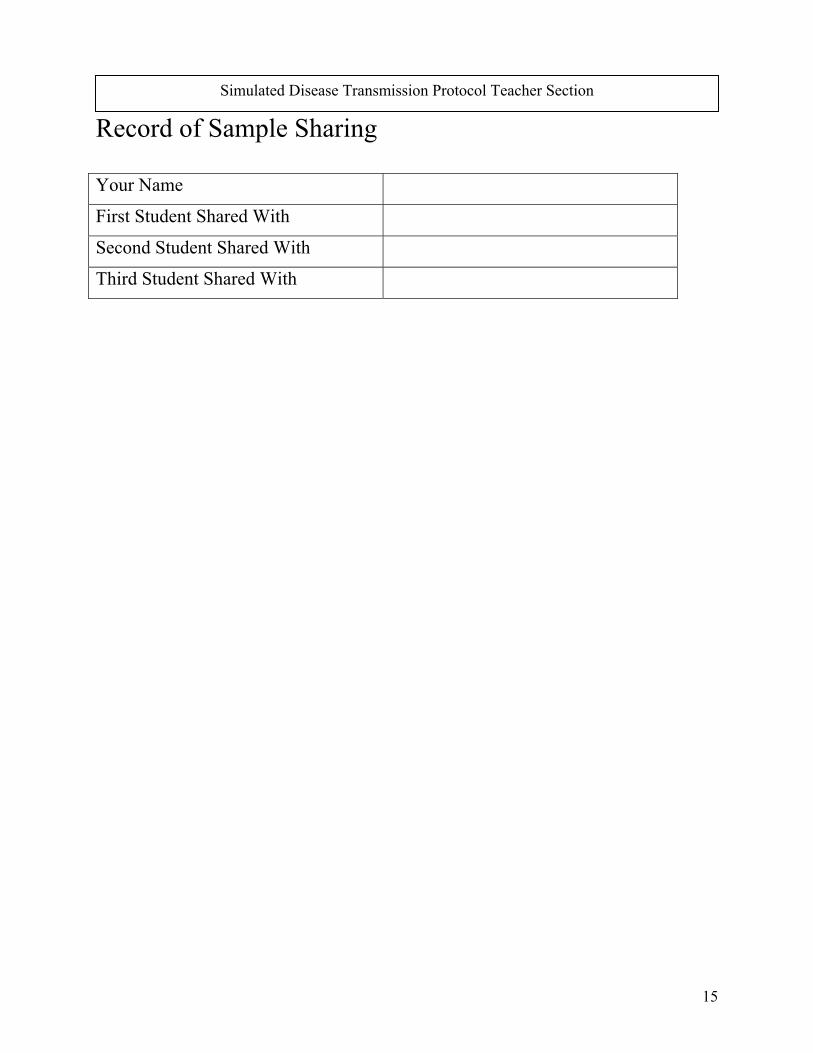
Record of Sample Sharing Simulated Disease Transmission Protocol Teacher Section
Your Name First Student Shared With Second Student Shared With Third Student Shared With
15
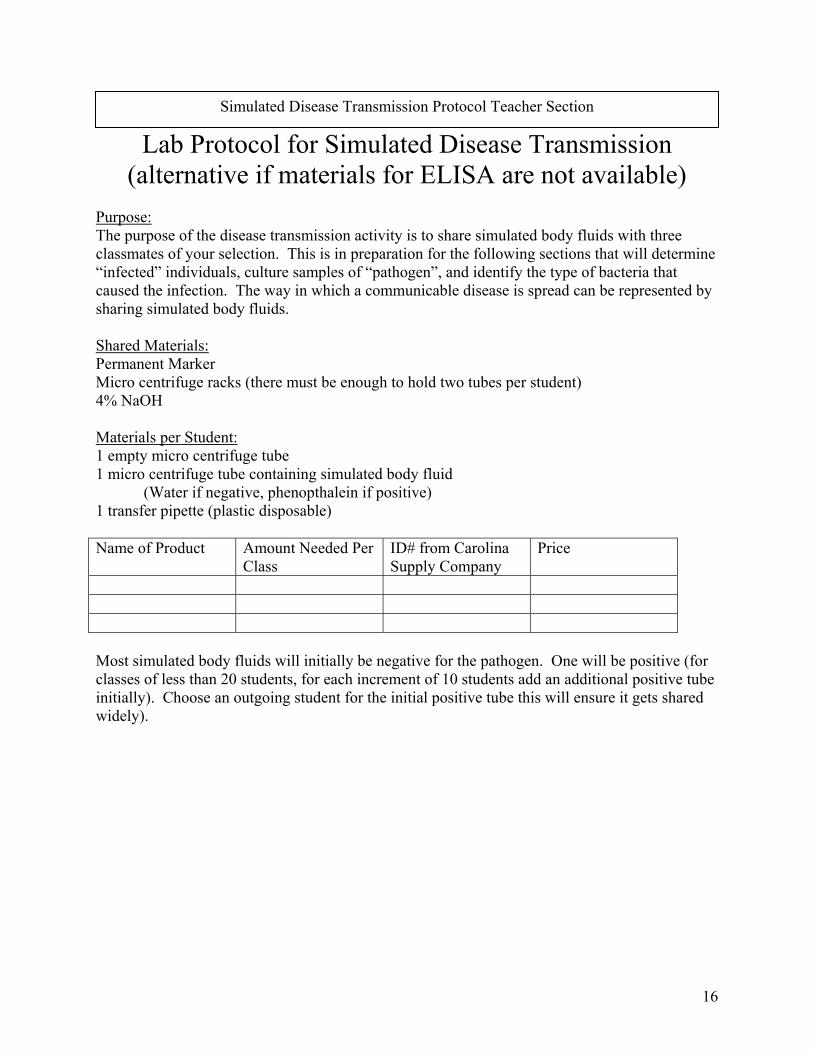
Lab Protocol for Simulated Disease Transmission (alternative if materials for ELISA are not available)
Simulated Disease Transmission Protocol Teacher Section
Purpose: The purpose of the disease transmission activity is to share simulated body fluids with three classmates of your selection. This is in preparation for the following sections that will determine “infected” individuals, culture samples of “pathogen”, and identify the type of bacteria that caused the infection. The way in which a communicable disease is spread can be represented by sharing simulated body fluids.
Shared Materials: Permanent Marker Micro centrifuge racks (there must be enough to hold two tubes per student) 4% NaOH Materials per Student: 1 empty micro centrifuge tube 1 micro centrifuge tube containing simulated body fluid
(Water if negative, phenopthalein if positive) 1 transfer pipette (plastic disposable) Name of Product Amount Needed Per
Class ID# from Carolina Supply Company
Price
Most simulated body fluids will initially be negative for the pathogen. One will be positive (for classes of less than 20 students, for each increment of 10 students add an additional positive tube initially). Choose an outgoing student for the initial positive tube this will ensure it gets shared widely).
16

Simulated Disease Transmission Protocol Teacher Section
Procedure: 1. Using the marker provided, label both of your tubes with your initials. 2. Label one tube with S (sharing) and the other with NS (non-sharing). 3. Use the transfer pipette to transfer half of the simulated body to the empty tube. (now
each tube should have an equal volume of the simulated body fluid in it) 4. Put your NS tube with your initials aside in the designated rack. (set rack aside to avoid
confusion)
Note: use the S (sharing) tube for the directions below
5. When your instructor tells you, find one member of your class to share the simulated body fluid with. (wait until all students are ready)
6. Use a transfer pipette to combine both fluids in one of the S tubes (either yours or your partners).
7. Gently mix the contents by using the pipette to siphon some of the fluid mix and then to expel it back into the tube. Complete this for approximately three to five times to ensure complete mixing of the fluids.
8. Once the fluid has been completely mixed, use the transfer pipette to transfer one-half of it into the other S tube (either yours of your partners dependant upon which tube is empty).
9. Record the name of the student that you made your first exchange with in the table provided. (wait until all students have had ample time to share fluid and record their exchange partner)
10. When your instructor gives the direction to complete the second exchange, move about the room and find a second person to exchange the simulated fluid with.
11. Complete the procedure to share the simulated body fluids (#6-8). 12. Record the name of your second contact in the table provided. (wait until all students
have had ample time to share fluid and record their exchange partner) 13. When your instructor gives the direction to complete the third exchange, move about the
room and find a third person to exchange the simulated body fluid with. 14. Complete the procedure for sharing simulated body fluids (#6-8). 15. Record the name of your third contact in the table provided. 16. To determine if you are infected, use a clean transfer pipette to add 10 drops of 4%
NaOH to your S micro centrifuge tube. If it turns pink, you have been infected. If not, you have not been infected.
17. To determine if you were the original infected carrier, obtain your NS micro centrifuge tube and add ten drops of 4% NaOH to it. If it turns pink, you were an originally infected individual if not, you were not infected originally.
17
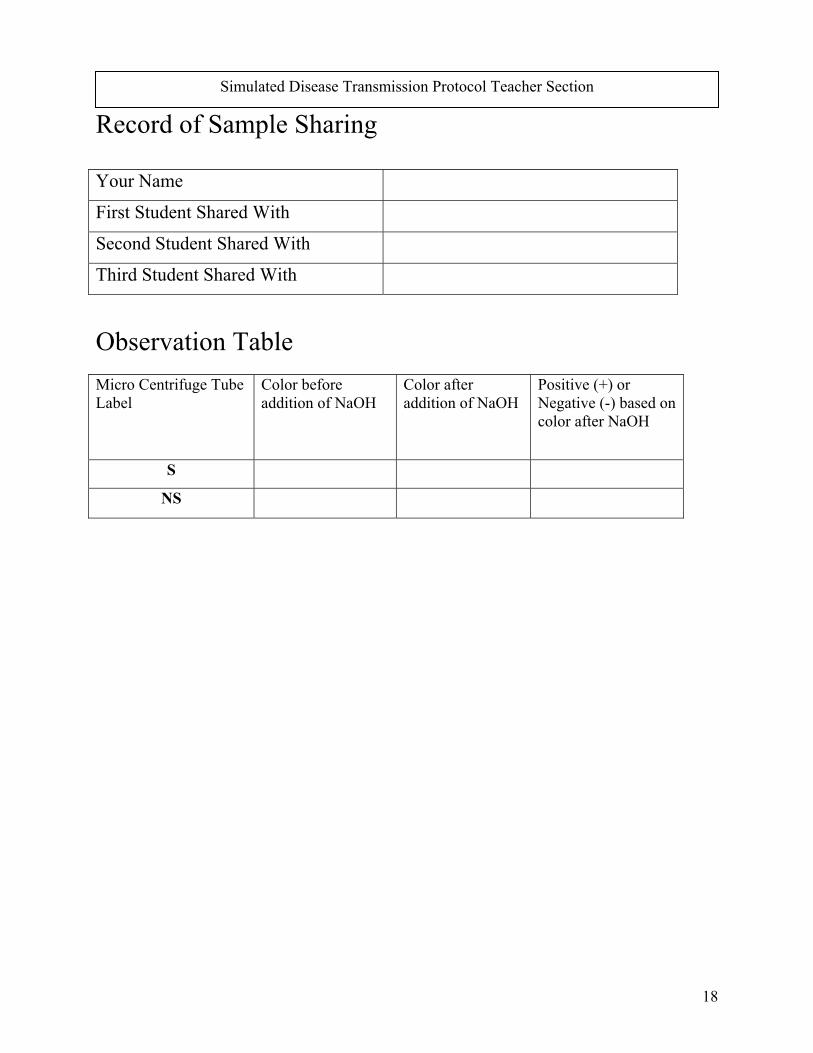
Record of Sample Sharing Simulated Disease Transmission Protocol Teacher Section
Your Name First Student Shared With Second Student Shared With Third Student Shared With Observation Table Micro Centrifuge Tube Label
Color before addition of NaOH
Color after addition of NaOH
Positive (+) or Negative (-) based on color after NaOH
S
NS
18
Protocol for Simulated Disease Transmission Student Section
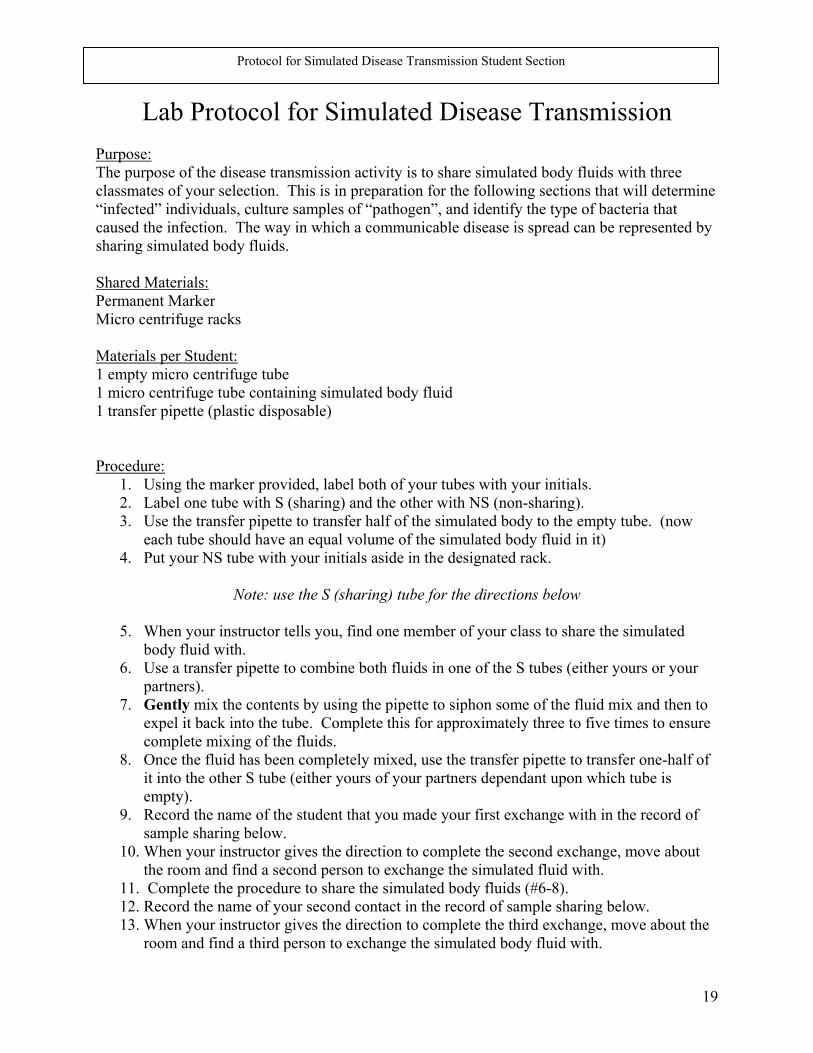
Lab Protocol for Simulated Disease Transmission Purpose: The purpose of the disease transmission activity is to share simulated body fluids with three classmates of your selection. This is in preparation for the following sections that will determine “infected” individuals, culture samples of “pathogen”, and identify the type of bacteria that caused the infection. The way in which a communicable disease is spread can be represented by sharing simulated body fluids. Shared Materials: Permanent Marker Micro centrifuge racks Materials per Student: 1 empty micro centrifuge tube 1 micro centrifuge tube containing simulated body fluid 1 transfer pipette (plastic disposable) Procedure:
1. Using the marker provided, label both of your tubes with your initials. 2. Label one tube with S (sharing) and the other with NS (non-sharing). 3. Use the transfer pipette to transfer half of the simulated body to the empty tube. (now
each tube should have an equal volume of the simulated body fluid in it) 4. Put your NS tube with your initials aside in the designated rack.
Note: use the S (sharing) tube for the directions below
5. When your instructor tells you, find one member of your class to share the simulated
body fluid with. 6. Use a transfer pipette to combine both fluids in one of the S tubes (either yours or your
partners). 7. Gently mix the contents by using the pipette to siphon some of the fluid mix and then to
expel it back into the tube. Complete this for approximately three to five times to ensure complete mixing of the fluids.
8. Once the fluid has been completely mixed, use the transfer pipette to transfer one-half of it into the other S tube (either yours of your partners dependant upon which tube is empty).
9. Record the name of the student that you made your first exchange with in the record of sample sharing below.
10. When your instructor gives the direction to complete the second exchange, move about the room and find a second person to exchange the simulated fluid with.
11. Complete the procedure to share the simulated body fluids (#6-8). 12. Record the name of your second contact in the record of sample sharing below. 13. When your instructor gives the direction to complete the third exchange, move about the
room and find a third person to exchange the simulated body fluid with.
19
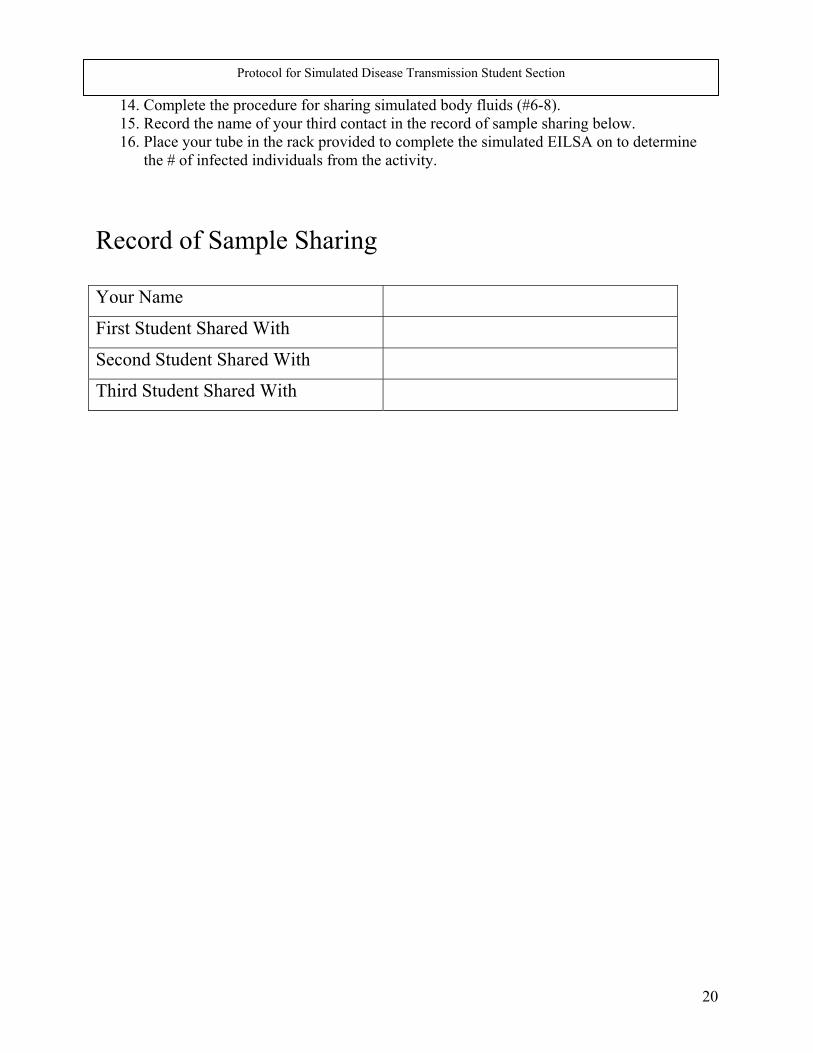
14. Complete the procedure for sharing simulated body fluids (#6-8).
Protocol for Simulated Disease Transmission Student Section
15. Record the name of your third contact in the record of sample sharing below. 16. Place your tube in the rack provided to complete the simulated EILSA on to determine
the # of infected individuals from the activity.
Record of Sample Sharing Your Name First Student Shared With Second Student Shared With Third Student Shared With
20
Protocol for Simulated Disease Transmission Student Section
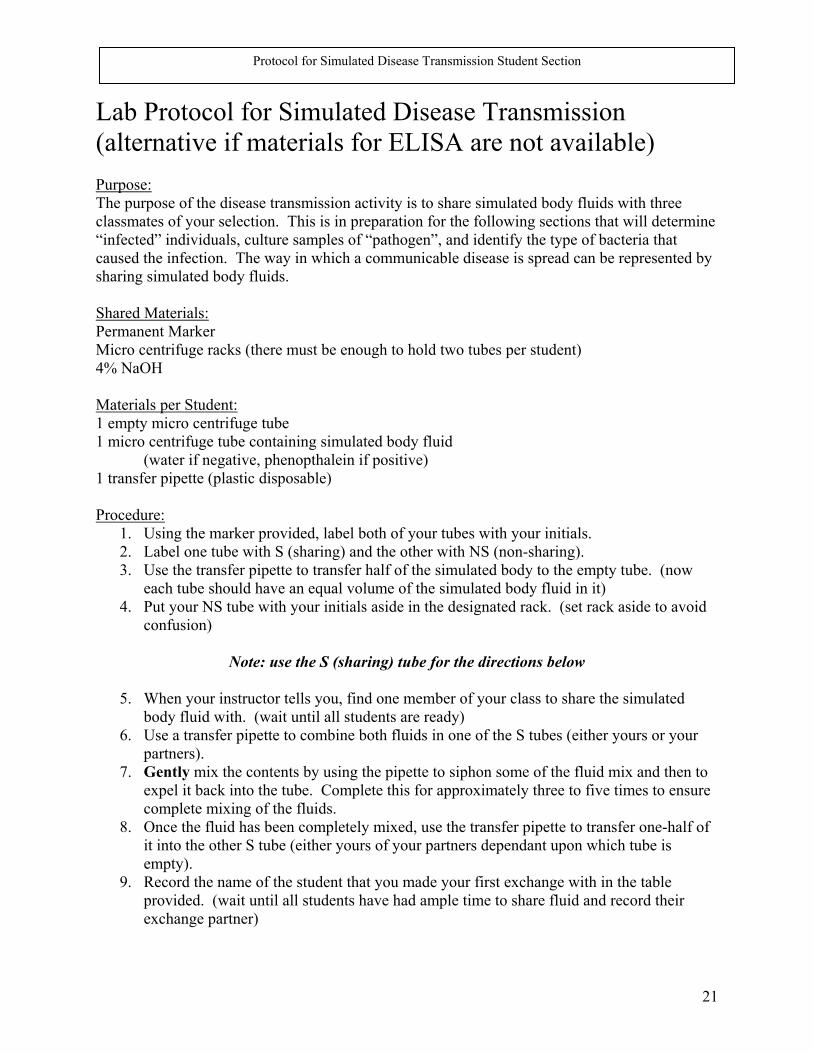
Lab Protocol for Simulated Disease Transmission (alternative if materials for ELISA are not available) Purpose: The purpose of the disease transmission activity is to share simulated body fluids with three classmates of your selection. This is in preparation for the following sections that will determine “infected” individuals, culture samples of “pathogen”, and identify the type of bacteria that caused the infection. The way in which a communicable disease is spread can be represented by sharing simulated body fluids.
Shared Materials: Permanent Marker Micro centrifuge racks (there must be enough to hold two tubes per student) 4% NaOH Materials per Student: 1 empty micro centrifuge tube 1 micro centrifuge tube containing simulated body fluid
(water if negative, phenopthalein if positive) 1 transfer pipette (plastic disposable) Procedure:
1. Using the marker provided, label both of your tubes with your initials. 2. Label one tube with S (sharing) and the other with NS (non-sharing). 3. Use the transfer pipette to transfer half of the simulated body to the empty tube. (now
each tube should have an equal volume of the simulated body fluid in it) 4. Put your NS tube with your initials aside in the designated rack. (set rack aside to avoid
confusion)
Note: use the S (sharing) tube for the directions below
5. When your instructor tells you, find one member of your class to share the simulated body fluid with. (wait until all students are ready)
6. Use a transfer pipette to combine both fluids in one of the S tubes (either yours or your partners).
7. Gently mix the contents by using the pipette to siphon some of the fluid mix and then to expel it back into the tube. Complete this for approximately three to five times to ensure complete mixing of the fluids.
8. Once the fluid has been completely mixed, use the transfer pipette to transfer one-half of it into the other S tube (either yours of your partners dependant upon which tube is empty).
9. Record the name of the student that you made your first exchange with in the table provided. (wait until all students have had ample time to share fluid and record their exchange partner)
21
Protocol for Simulated Disease Transmission Student Section
10. When your instructor gives the direction to complete the second exchange, move about the room and find a second person to exchange the simulated fluid with.
11. Complete the procedure to share the simulated body fluids (#6-8). 12. Record the name of your second contact in the table provided. (wait until all students
have had ample time to share fluid and record their exchange partner) 13. When your instructor gives the direction to complete the third exchange, move about the
room and find a third person to exchange the simulated body fluid with. 14. Complete the procedure for sharing simulated body fluids (#6-8). 15. Record the name of your third contact in the table provided. 16. To determine if you are infected, use a clean transfer pipette to add 10 drops of 4%
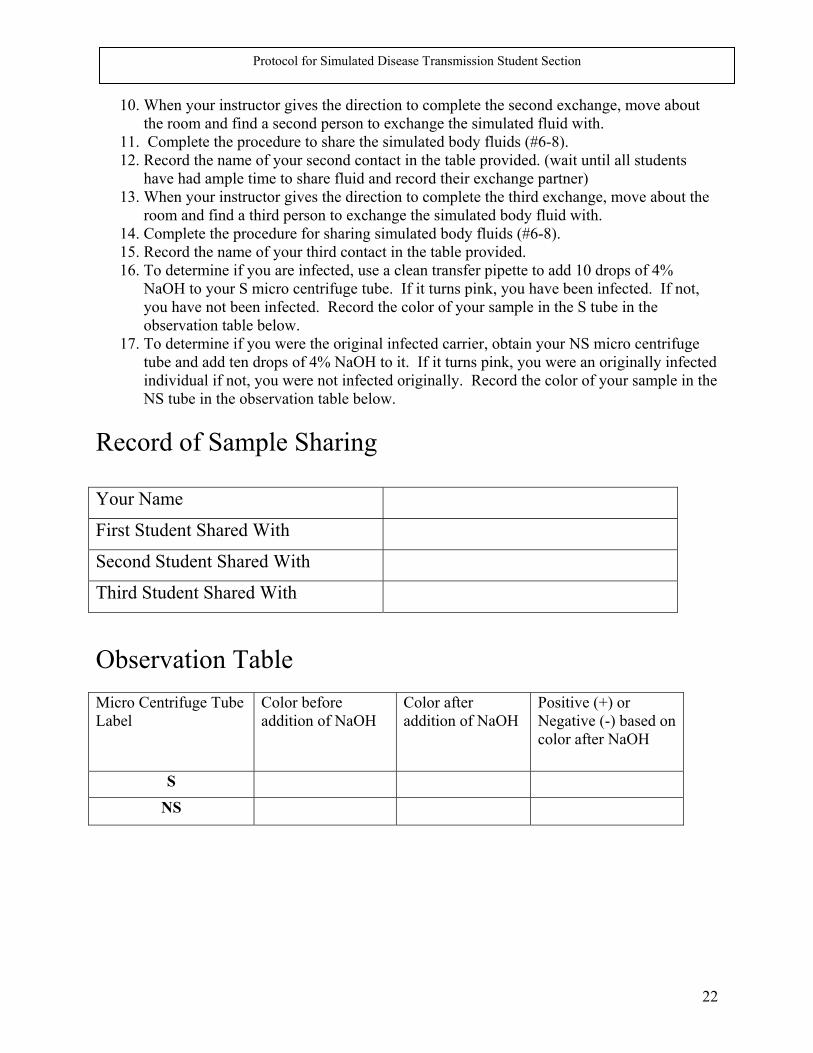
NaOH to your S micro centrifuge tube. If it turns pink, you have been infected. If not, you have not been infected. Record the color of your sample in the S tube in the observation table below.
17. To determine if you were the original infected carrier, obtain your NS micro centrifuge tube and add ten drops of 4% NaOH to it. If it turns pink, you were an originally infected individual if not, you were not infected originally. Record the color of your sample in the NS tube in the observation table below.
Record of Sample Sharing Your Name First Student Shared With Second Student Shared With Third Student Shared With Observation Table Micro Centrifuge Tube Label
Color before addition of NaOH
Color after addition of NaOH
Positive (+) or Negative (-) based on color after NaOH
S
NS
22

ELISA Protocol Teacher Section
ELISA Protocol using Shared Simulated Body Fluids Purpose:
The purpose of an ELISA is to determine if a particular protein is present in a sample. Using a plate reader, the quantity of protein can also be determined based upon optical densities- the amount of colored product. The amount of color (intensity) is directly proportional to the amount of original antibodies in the serum. There are two main variations on this method: you can determine if and how much antibody is in a sample, or you can determine if and how much protein is bound by an antibody. In this procedure you determine if there is antibody in the sample of simulated body fluid that was exchanged previously.
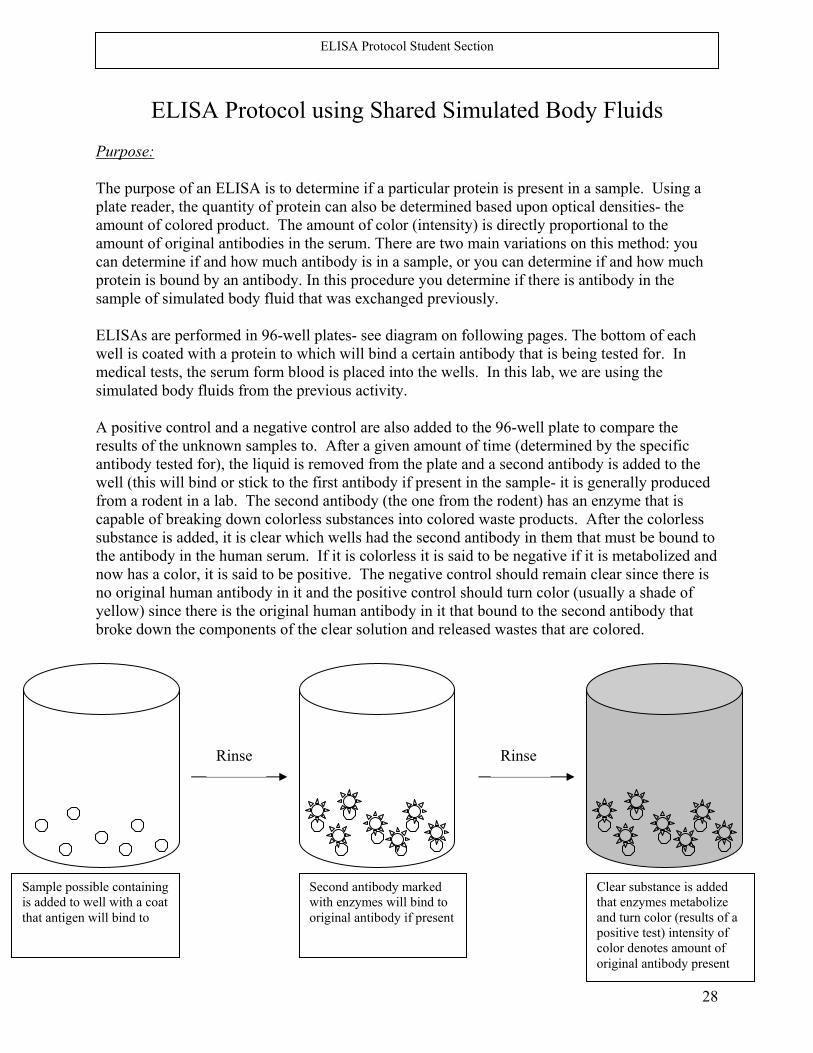
ELISAs are performed in 96-well plates- see diagram on following pages. The bottom of each well is coated with a protein to which will bind a certain antibody that is being tested for. In medical tests, the serum form blood is placed into the wells. In this lab, we are using the simulated body fluids from the previous activity- since some have the positive antigen, only some will test positive using the ELISA.
A positive control and a negative control are also added to the 96-well plate to compare the results of the unknown samples to. After a given amount of time (determined by the specific antibody tested for), the liquid is removed from the plate and a second antibody is added to the well (this will bind or stick to the first antibody if present in the sample- it is generally produced from a rodent in a lab. The second antibody (the one from the rodent) has an enzyme that is capable of breaking down colorless substances into colored waste products. After the colorless substance is added, it is clear which wells had the second antibody in them that must be bound to the antibody in the human serum. If it is colorless it is said to be negative if it is metabolized and now has a color, it is said to be positive. The negative control should remain clear since there is no original human antibody in it and the positive control should turn color (usually a shade of yellow) since there is the original human antibody in it that bound to the second antibody that broke down the components of the clear solution and released wastes that are colored.
Rinse Rinse
Sample possible containing is added to well with a coat that antigen will bind to
Second antibody marked with enzymes will bind to original antibody if present
23
Clear substance is added that enzymes metabolize and turn color (results of a positive test) intensity of color denotes amount of original antibody present

Materials per Group:
ELISA test plate Positive and negative control Paper towels Antibody solution (in droppe Washing solution (in wash bo Color reagent solution (in dro
Materials per Student:
S (shared) micro centrifuge tu NS (not shared) micro centrif
Procedure for ELISA Test:
1. Using your transfer pipette, awells. Record which wells costudent's on the ELISA plate
2. Using the dropper in the bottwells and three drops of a neg(This is to do a positive contrthe results if the test is negati
3. Leave the plate on the lab tabgroup have added their solutiThis will allow time for the apathogen.
4. Shake off the fluid into a neahas emptied from each well. of your hand flat then pretendpropelling your hand towardsfrom the wells.
5. Tap the plate upside down onComplete five times to ensur
6. Add washing solution to thesolution, and shake off fluid atimes.
7. Add three drops of the antibo
8. Allow five minutes incubatiodescribed in #4.
ELISA Protocol Teacher Section
solutions (in dropper bottle)
r bottle) ttle) pper bottle)
be from disease transmission activity uge tube from disease transmission activity
dd three drops of your sharing tube fluid into each of three ntain your fluid to avoid confusing your wells with another provided in the data/observation section of this lab.
le, add three drops of a positive control solution into three ative control solution into a different set of three wells.
ol- the results if the test is positive and a negative control- ve)
le undisturbed for five minutes after all members of the on and the positive and negative control have been added. ntigen to bind to the antibody if the fluid is positive for the
rby sink or designated container, making sure that the fluid To do this, SECURELY hold the ELISA plate in the palm that you have a fly swatter and quickly snap your arm the sink. Complete this three times to remove most liquids
to the paper towel to remove any excess liquid or bubbles. e it is as dry as possible.
wells by gently filling all wells from the bottle of washing s in #4. Repeat the washing procedure a total of three
dy solution to each well.
n time on the lab table and then shake off the fluid as
24

ELISA Protocol Teacher Section
9. Add washing solution to the wells as done in step 7, and repeat washing a total of three times as described in #6.
10. Add three drops of the color reagent solution to each well.
11. Record your observations of the color after five minutes of all of your wells as well as the positive and negative control wells.
12. Each group will record the results of the tests in the data table. Be sure to record whether you are infected. You will also record your test results and list of partners on a overhead to be shown to the class.
13. Given the classroom data, determine the original infected carriers. After identifying potential sources of the disease, you can confirm your analysis by performing another ELISA assay on the non-shared samples.
25

ELISA Protocol Teacher Section
Data and Observations:
Mark off the sections that are for each group member and the positive and negative controls in the sample ELISA plate drawn below.
Use a colored pencil to indicate the color of each well after the ELISA is complete. Then use a black pen to write a “+” (positive) or a “-” (negative) on each well on the drawn ELISA plate below.
26

ELISA Protocol Teacher Section
Analysis Questions:
1. What is the purpose of an ELISA test?
2. What are the medical applications of an ELISA test?
3. Compare your results with the group that tested fluids from the same potential carriers. Did you have identical results?
4. How could you explain a reason why two groups from #2 may have differing results?
5. Why was it necessary to run positive and negative controls?
6. What was the purpose of washing the plates before a new solution was added?
7. In medical diagnostics, sometimes a false positive result is given. What does that mean?
8. In the experiment that you did what is one error that could result in a false positive test.
9. In medical diagnostics, sometimes a false negative result is given. What does that mean?
10. In the experiment that you did what is one error that could result in a false negative test?
11. How is the presence of an antibody detected in a sample during an ELISA?
12. After doing the lab, would you agree or disagree with the following statement:" When you kiss someone, you are also kissing everyone that they have previously kissed." Explain your answer.
27
ELISA Protocol Purpose:
The purpose of an ELISA is to detplate reader, the quantity of proteiamount of colored product. The aamount of original antibodies in thcan determine if and how much anprotein is bound by an antibody. Isample of simulated body fluid tha
ELISAs are performed in 96-well well is coated with a protein to whmedical tests, the serum form bloosimulated body fluids from the pre
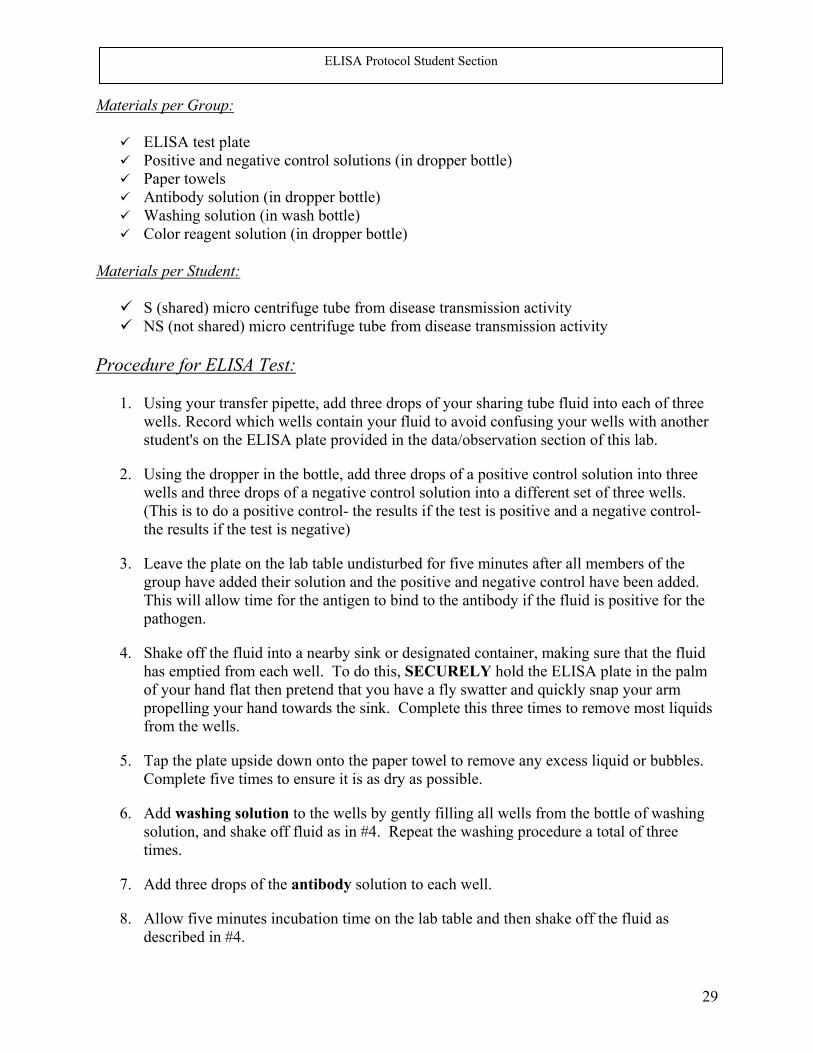
A positive control and a negative results of the unknown samples toantibody tested for), the liquid is rwell (this will bind or stick to the from a rodent in a lab. The secondcapable of breaking down colorlessubstance is added, it is clear whicthe antibody in the human serum. now has a color, it is said to be pono original human antibody in it ayellow) since there is the original broke down the components of the
Rinse
Sample possible containing is added to well with a coat that antigen will bind to
Swo
ELISA Protocol Student Section
using Shared Simulated Body Fluids
ermine if a particular protein is present in a sample. Using a n can also be determined based upon optical densities- the mount of color (intensity) is directly proportional to the e serum. There are two main variations on this method: you tibody is in a sample, or you can determine if and how much
n this procedure you determine if there is antibody in the t was exchanged previously.
plates- see diagram on following pages. The bottom of each ich will bind a certain antibody that is being tested for. In d is placed into the wells. In this lab, we are using the vious activity.
control are also added to the 96-well plate to compare the . After a given amount of time (determined by the specific emoved from the plate and a second antibody is added to the first antibody if present in the sample- it is generally produced antibody (the one from the rodent) has an enzyme that is s substances into colored waste products. After the colorless h wells had the second antibody in them that must be bound to If it is colorless it is said to be negative if it is metabolized and sitive. The negative control should remain clear since there is nd the positive control should turn color (usually a shade of human antibody in it that bound to the second antibody that clear solution and released wastes that are colored.
Rinse
econd antibody marked ith enzymes will bind to riginal antibody if present
Clear substance is added that enzymes metabolize and turn color (results of a positive test) intensity of color denotes amount of original antibody present
28
Materials per Group:
ELISA test plate Positive and negative contr Paper towels Antibody solution (in dropp Washing solution (in wash Color reagent solution (in d
Materials per Student:
S (shared) micro centrifuge NS (not shared) micro cent
Procedure for ELISA Test:
1. Using your transfer pipette,wells. Record which wells student's on the ELISA plat
2. Using the dropper in the bowells and three drops of a n(This is to do a positive conthe results if the test is nega
3. Leave the plate on the lab tgroup have added their soluThis will allow time for thepathogen.
4. Shake off the fluid into a nehas emptied from each welof your hand flat then pretepropelling your hand towarfrom the wells.
5. Tap the plate upside down Complete five times to ensu
6. Add washing solution to thsolution, and shake off fluidtimes.
7. Add three drops of the anti
8. Allow five minutes incubatdescribed in #4.
ELISA Protocol Student Section
ol solutions (in dropper bottle)
er bottle) bottle) ropper bottle)
tube from disease transmission activity rifuge tube from disease transmission activity
add three drops of your sharing tube fluid into each of three contain your fluid to avoid confusing your wells with another e provided in the data/observation section of this lab.
ttle, add three drops of a positive control solution into three egative control solution into a different set of three wells. trol- the results if the test is positive and a negative control- tive)
able undisturbed for five minutes after all members of the tion and the positive and negative control have been added. antigen to bind to the antibody if the fluid is positive for the
arby sink or designated container, making sure that the fluid l. To do this, SECURELY hold the ELISA plate in the palm nd that you have a fly swatter and quickly snap your arm ds the sink. Complete this three times to remove most liquids
onto the paper towel to remove any excess liquid or bubbles. re it is as dry as possible.
e wells by gently filling all wells from the bottle of washing as in #4. Repeat the washing procedure a total of three
body solution to each well.
ion time on the lab table and then shake off the fluid as
29
9. Add washing solution to thtimes as described in #6.
10. Add three drops of the colo
11. Record your observations opositive and negative contr
12. Each group will record the you are infected. You will ato be shown to the class.
13. Given the classroom data, dpotential sources of the diseELISA assay on the non-sh
ELISA Protocol Student Section
e wells as done in step 7, and repeat washing a total of three
r reagent solution to each well.
f the color after five minutes of all of your wells as well as the ol wells.
results of the tests in the data table. Be sure to record whether lso record your test results and list of partners on a overhead
etermine the original infected carriers. After identifying ase, you can confirm your analysis by performing another ared samples.
30

Data and Observations:
Mark off the sections that arnegative controls in the sam
Use a colored pencil to indiccomplete. Then use a black each well on the drawn ELI
ELISA Protocol Student Section
e for each group member and the positive and ple ELISA plate drawn below.
ate the color of each well after the ELISA is pen to write a “+” (positive) or a “-” (negative) on SA plate below.
31
Analysis Questions:
1. What is the purpose of a
2. What are the medical app
3. Compare your results wiDid you have identical re
4. How could you explain a
5. Why was it necessary to
6. What was the purpose of
7. In medical diagnostics, s
8. In the experiment that yo
9. In medical diagnostics, s
10. In the experiment that yo
11. How is the presence of a
12. After doing the lab, wouyou kiss someone, you aExplain your answer.
ELISA Protocol Student Section
n ELISA test?
lications of an ELISA test?
th the group that tested fluids from the same potential carriers. sults?
reason why two groups from #2 may have differing results?
run positive and negative controls?
washing the plates before a new solution was added?
ometimes a false positive result is given. What does that mean?
u did what is one error that could result in a false positive test.
ometimes a false negative result is given. What does that mean?
u did what is one error that could result in a false negative test?
n antibody detected in a sample during an ELISA?
ld you agree or disagree with the following statement:" When re also kissing everyone that they have previously kissed."
32

Lab Pr
Purpose: The purpose of creating agarbacteria on. The first microbiculture bacteria on! We, howAn agar–filled petri dish provon in order to isolate clones ocontaminated and easily drie MATERIALS: hot plate (must be able to heaelectric balance weighscoopula magne
Name of Product
AmountPer C
Nutrient Agar 100 gra
Petri Dishes 2Sterile Swabs 2
Procedure:
1. Using a scoopula andbalance prior to addin
2. Carefully empty the a3. Fill the beaker with 14. Place the beaker on th5. Heat the agar solution6. Allow the solution to
transparent. 7. Using thermal gloves8. Carefully fill each pe9. Cover the petri dishes
then invert to refrigerthe surface of the aga
10. Clean up all materials
Pouring Agar Plates Protocol Teacher Section
otocol for Pouring Agar Plates
plates is to have a medium (plural = media) to culture, or grow, ologists, in the 1800s, would use fresh, thinly sliced potatoes to ever, are going to use agar. It looks like Jello, but don’t be fooled! ides a large surface area in which you can streak bacterial samples f individual cells. However, this same surface is easily
s out. You must be very careful when preparing your agar!
t AND stir) distilled or deionized water ing dish 1 Liter beaker nutrient agar tic stirrer petri dishes thermal gloves
Needed lass
ID# from Carolina Supply
Company
Price
ms (?) ER-78-5300 $27.95/100 gram package
4 ER-19-9278 $14.80/20 dishes 4 ER-70-3032 $19.70/200
swabs
a weighing dish, mass out 24 g of nutrient agar. Be sure to tare the g nutrient agar to the weighing dish. gar into a 1 L beaker. L of either distilled or deionized water. e hot plate and add the magnetic stirrer to the beaker. until it boils.
boil until all powdered agar is dissolved and the liquid is
, remove the beaker from the hot plate. tri dish 2/3 of the way with agar. to avoid contamination from the air. Let the agar cool and solidify, ate (this will lessen the amount of condensation that accumulates on r. thoroughly!
33

Lab Prot
Purpose: The purpose of creating agar plbacteria on. The first microbiolculture bacteria on! We, howevAn agar–filled petri dish providon in order to isolate clones of icontaminated and easily dries o MATERIALS: hot plate (must be able to heat Aelectric balance weighingscoopula magnetic Procedure:
1. Using a scoopula and a balance prior to adding
2. Carefully empty the aga3. Fill the beaker with 1 L4. Place the beaker on the 5. Heat the agar solution u6. Allow the solution to bo
transparent. 7. Using thermal gloves, re8. Carefully fill each petri 9. Cover the petri dishes to
then invert to refrigeratethe surface of the agar.
10. Clean up all materials th
Pouring Agar Plates Protocol Student Section
ocol for Pouring Agar Plates
ates is to have a medium (plural = media) to culture, or grow, ogists, in the 1800s, would use fresh, thinly sliced potatoes to er, are going to use agar. It looks like Jello, but don’t be fooled! es a large surface area in which you can streak bacterial samples ndividual cells. However, this same surface is easily ut. You must be very careful when preparing your agar!
ND stir) distilled or deionized water dish 1 Liter beaker nutrient agar stirrer petri dishes thermal gloves
weighing dish, mass out 24 g of nutrient agar. Be sure to tare the nutrient agar to the weighing dish. r into a 1 L beaker. of either distilled or deionized water. hot plate and add the magnetic stirrer to the beaker. ntil it boils. il until all powdered agar is dissolved and the liquid is
move the beaker from the hot plate. dish 2/3 of the way with agar. avoid contamination from the air. Let the agar cool and solidify, (this will lessen the amount of condensation that accumulates on
oroughly!
34

Lab Protoc
Background: To obtain colonies of bacteriaallow the bacteria to proliferasolidified, you should have a sample. You will be performing a quasample by dragging them (lite‘clumps’ of bacteria as you stwill be left to grow singly herof the agar plate will producecolony. In today’s lab, you w MATERIALS: prepared agar plates sterile swabs laboratory apron Procedure: TEACHERS- Rpositive in the ELISA! NOTE: You must wear glov
1. Hold the tube from wYou want to hold the
2. Remove the cap from3. Remove the sterile sw
longer be sterile! 4. Submerge the cotton t
tube. Again, do NOT 5. Cap the tube and plac6. Remove the cover fro7. Perform a quadrant st 1
Streaking Bacterial Samples Teacher Section
ol for Streaking Bacterial Samples
from your sample, you need a smooth surface and nutrients to te. This is why you made nutrient agar plates. Once the plates have very smooth surface upon which you can spread your bacterial
drant streak. This method enables you to dilute the bacteria in the rally!) across the agar surface. This process will leave microscopic reak, until only a few cells are left on the swab. These few cells e and there. It is assumed each single cell deposited on the surface a progeny of clones that will eventually grow into a bacterial ill use a sterile swab to inoculate your agar plates.
Positive ELISA samples test tube rack latex or nitrile gloves safety goggles permanent marker
emember to add bacteria to student samples that tested
es, goggles, and an apron at all times!
hich you will obtain the inoculum (bacterial sample) in one hand. tube at an angle so that nothing falls into the tube to contaminate it. the tube using your other hand. ab from its packaging. Do NOT let it touch anything, or it will no
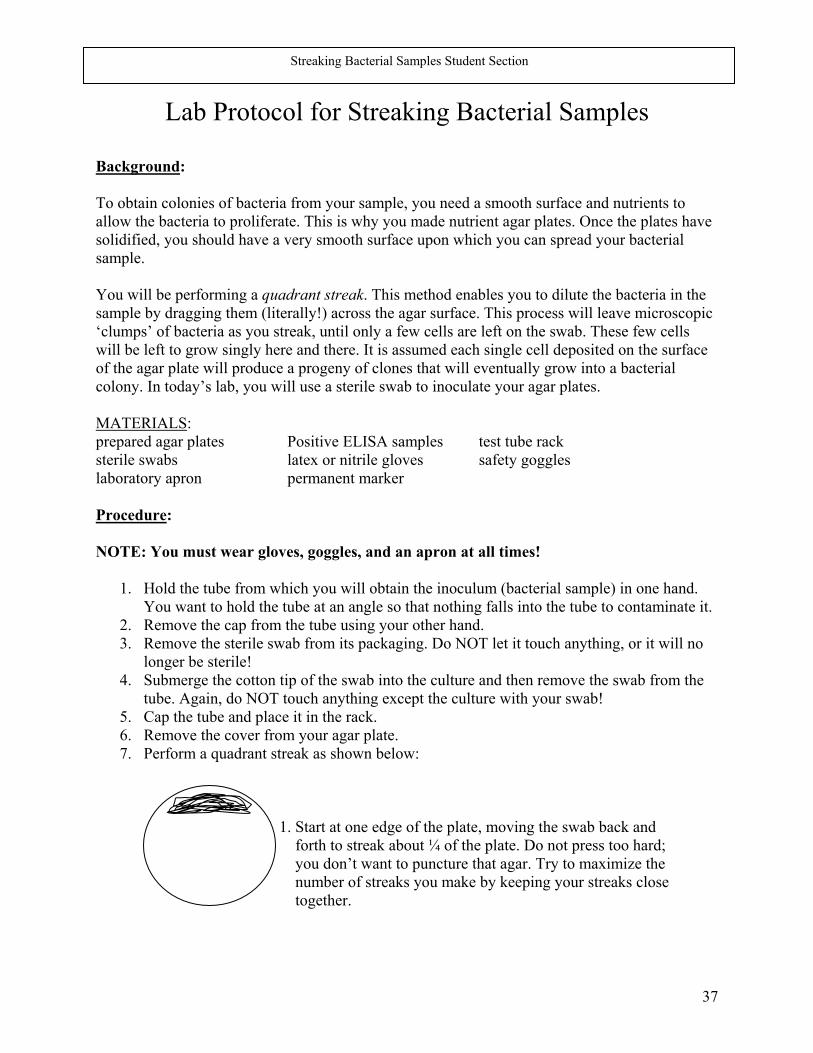
ip of the swab into the culture and then remove the swab from the touch anything except the culture with your swab! e it in the rack. m your agar plate. reak as shown below:
. Start at one edge of the plate, moving the swab back and forth to streak about ¼ of the plate. Do not press too hard; you don’t want to puncture that agar. Try to maximize the number of streaks you make by keeping your streaks close together.
35
Streaking Bacterial Samples Teacher Section
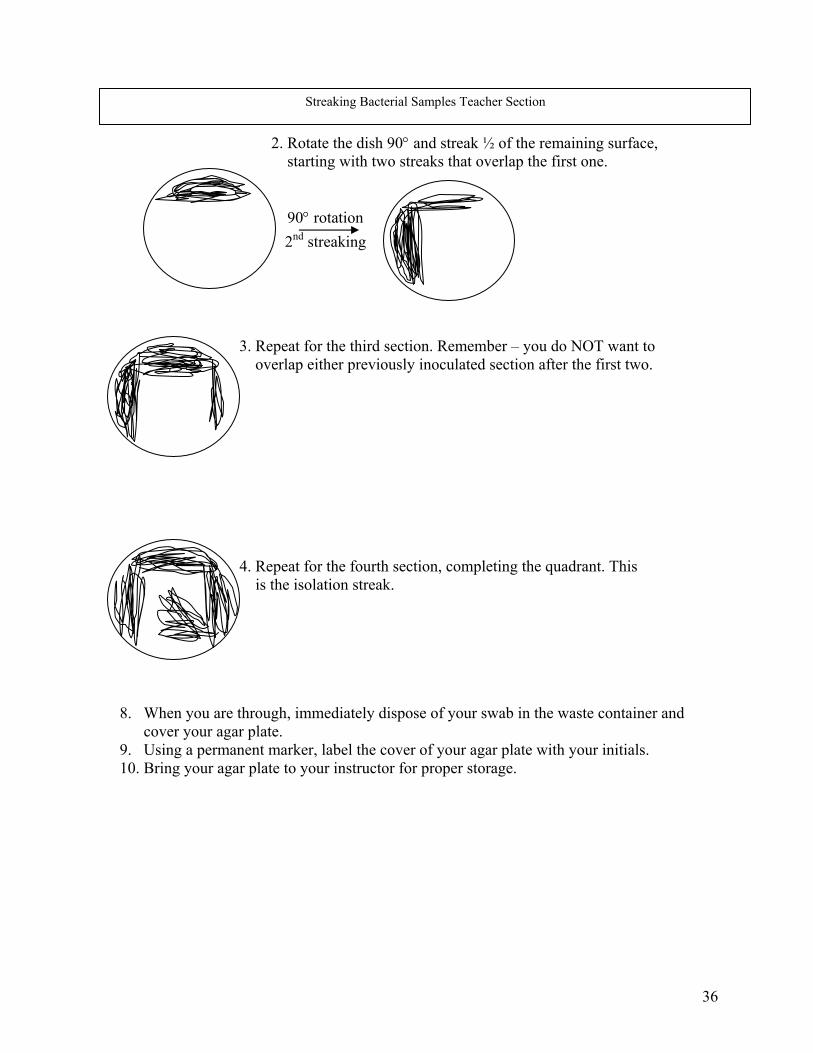
2. Rotate the dish 90° and streak ½ of the remaining surface, starting with two streaks that overlap the first one. 90° rotation 3. Repeat for the third section. Remember – you do NOT want to overlap either previously inoculated section after the first two. 4. Repeat for the fourth section, completing the quadrant. This is the isolation streak.
2nd streaking
8. When you are through, immediately dispose of your swab in the waste container and
cover your agar plate. 9. Using a permanent marker, label the cover of your agar plate with your initials. 10. Bring your agar plate to your instructor for proper storage.
36
Lab Protoc
Background: To obtain colonies of bacteriaallow the bacteria to proliferasolidified, you should have a sample. You will be performing a quasample by dragging them (lite‘clumps’ of bacteria as you stwill be left to grow singly herof the agar plate will producecolony. In today’s lab, you w MATERIALS: prepared agar plates sterile swabs laboratory apron Procedure: NOTE: You must wear glov
1. Hold the tube from wYou want to hold the
2. Remove the cap from3. Remove the sterile sw
longer be sterile! 4. Submerge the cotton t
tube. Again, do NOT 5. Cap the tube and plac6. Remove the cover fro7. Perform a quadrant st 1
Streaking Bacterial Samples Student Section
ol for Streaking Bacterial Samples
from your sample, you need a smooth surface and nutrients to te. This is why you made nutrient agar plates. Once the plates have very smooth surface upon which you can spread your bacterial
drant streak. This method enables you to dilute the bacteria in the rally!) across the agar surface. This process will leave microscopic reak, until only a few cells are left on the swab. These few cells e and there. It is assumed each single cell deposited on the surface a progeny of clones that will eventually grow into a bacterial ill use a sterile swab to inoculate your agar plates.
Positive ELISA samples test tube rack latex or nitrile gloves safety goggles permanent marker
es, goggles, and an apron at all times!
hich you will obtain the inoculum (bacterial sample) in one hand. tube at an angle so that nothing falls into the tube to contaminate it. the tube using your other hand. ab from its packaging. Do NOT let it touch anything, or it will no
ip of the swab into the culture and then remove the swab from the touch anything except the culture with your swab! e it in the rack. m your agar plate. reak as shown below:
. Start at one edge of the plate, moving the swab back and forth to streak about ¼ of the plate. Do not press too hard; you don’t want to puncture that agar. Try to maximize the number of streaks you make by keeping your streaks close together.
37
2. 3. Rep over 4. Rep is th 8. When you are through
cover your agar plate.9. Using a permanent ma10. Bring your agar plate
Streaking Bacterial Samples Student Section
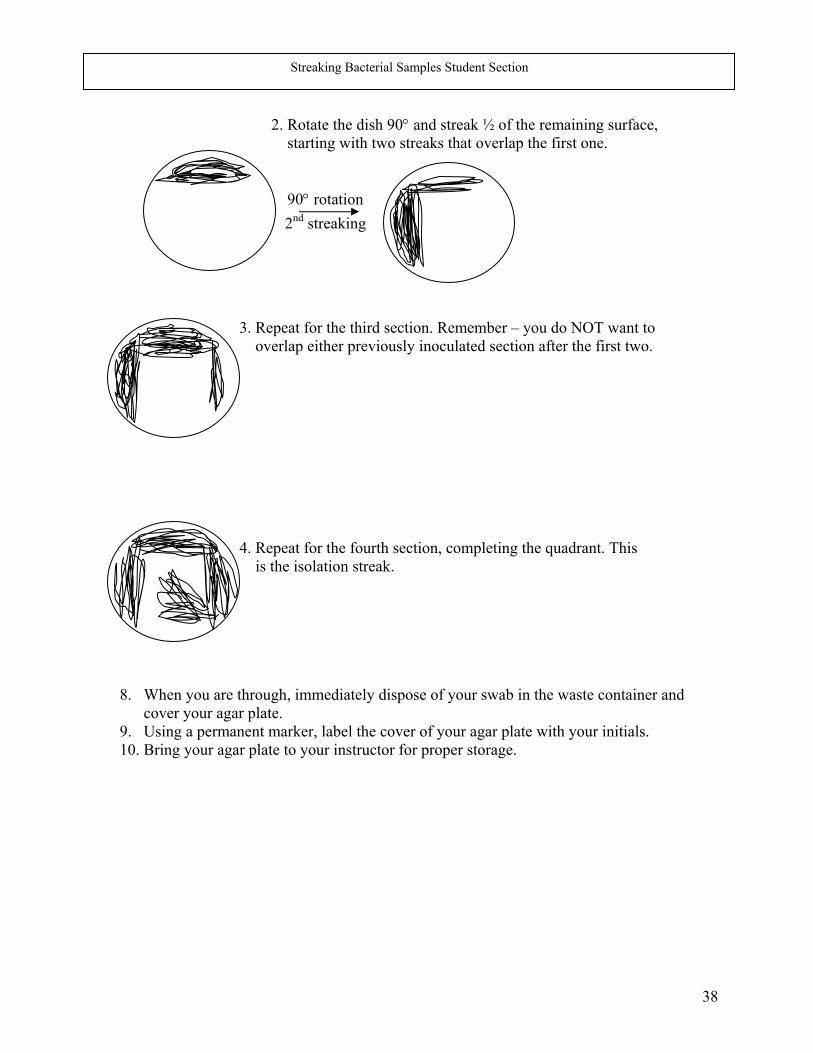
Rotate the dish 90° and streak ½ of the remaining surface, starting with two streaks that overlap the first one.
90° rotation
eat for the third section. Remember – you do NOT want to lap either previously inoculated section after the first two.
eat for the fourth section, completing the quadrant. This e isolation streak.
2nd streaking
, immediately dispose of your swab in the waste container and rker, label the cover of your agar plate with your initials. to your instructor for proper storage.
38

Lab ProPurpose: The purpose of this lab issingle most commonly uTHE GRAM STAIN!!! This staining procedure cpositive bacteria are charpeptidoglycan structurGram negative bacteria hprocedure involves applystaining ALL of the bactbinding between the dyedecolorization removes tGram positive cells retaiprocess. A red counter-stwill then show up as pin Prior to the staining procan isolated bacterial colomicroscope slide and arefixation kills the bacteriaduring the staining proce MATERIALS: crystal violet Gram’s iodine safranin safety goggles distilled/deionized water
Procedure A: The NOTE: You must wear 1. Place one drop of wa2. Using the cotton tip o3. Gently ‘smear’ the ti
your smear to the cenedges!
4. Spread the sample ev5. Let the slide air-dry. 6. Give the slide to inst7. Be sure to clean up a
Identifying Bacterial Strains Teacher Section
tocol for Identifying Bacterial Strains
to identify the type of bacterium in your fluid sample by using the sed staining procedure in microbiology…
an identify Gram positive bacteria or Gram negative bacteria. Gram acterized by having very thick cell walls that include a e as well as polysaccharides and/or teichoic acids whereas ave very thin walls that lack the peptidoglycan structure. This ing a basic dye, such as crystal violet, to your bacterial isolates,
eria present. A mordant, such as iodine, is used to improve the and the bacteria. The stain is then decolorized using alcohol. This he crystal violet-iodine combination from Gram negative cells. n the crystal violet-idoine combination throughout the decolorization ain, safranin, is added after the decolorization. Gram negative cells k, where Gram positive show up as purple.
edure, you must create a bacterial smear. This allows you to select ny to stain and view under the microscope. Bacteria are applied to a ‘heat-fixed’, meaning that the slide is held over a flame. The heat- and makes them stick to the slide so that they are not washed off dure.
95% alcohol microscope glass microscope slide latex or nitrile gloves sterile swabs lab aprons Bunsen burner water dropper
inoculated agar plates with colonies
Bacterial Smear
gloves, goggles, and aprons at all times!
ter in the center of your microscope slide. f the sterile swab, remove an isolated colony from your agar plate.
p of the swab in the drop of water on the slide. Limit the extent of ter to the slide. Be careful to stay on the slide; do not slip off of the
enly over the center of the slide.
ructor to heat-fix the sample for you. ll materials thoroughly.
39
Identifying Bacterial Strains Teacher Section
Procedure B: The Gram Stain NOTE: You must wear gloves, goggles, and aprons at all times! The staining procedure must be performed over a sink.
1. Obtain your cooled microscope slide from your instructor. 2. Gently flood the sample with crystal violet by steadily dropping the stain over the
sample. Once the sample is covered, let the stain sit for 1 minute. 3. Rinse off the excess stain with a gentle stream of distilled or deionized water. Be sure to
hold the slide at an angle towards the sink. 4. Add Gram’s iodine to the smear while it is still moist. Again, flood the smear and allow
the iodine to sit for 1 minute. 5. Rinse off the excess iodine with a gentle stream of distilled or deionized water. Be sure to
hold the slide at an angle towards the sink. 6. Decolorize the smear using 95% acetone alcohol. Gently flood the smear, while holding
the slide at an angle towards the sink, until no more color comes off. 7. Rinse off the excess alcohol with a gentle stream of distilled or deionized water. Be sure
to hold the slide at an angle towards the sink. 8. While still moist, flood the smear with safranin. Allow the safranin to sit for 30 seconds. 9. Rinse off the excess safranin with a gentle stream of distilled or deionized water. Be sure
to hold the slide at an angle towards the sink. 10. Allow the slide to air dry. 11. Once the slide is dry, you can look at it under the microscope. 12. Identify whether your sample is Gram positive or Gram negative.
40

Identifying Bacterial Strains Student Section
Lab Protocol for Identifying Bacterial Strains
Purpose: The purpose of this lab is to identify the type of bacterium in your fluid sample by using the single most commonly used staining procedure in microbiology… THE GRAM STAIN!!! This staining procedure can identify Gram positive bacteria or Gram negative bacteria. Gram positive bacteria are characterized by having very thick cell walls that include a peptidoglycan structure as well as polysaccharides and/or teichoic acids whereas Gram negative bacteria have very thin walls that lack the peptidoglycan structure. This procedure involves applying a basic dye, such as crystal violet, to your bacterial isolates, staining ALL of the bacteria present. A mordant, such as iodine, is used to improve the binding between the dye and the bacteria. The stain is then decolorized using alcohol. This decolorization removes the crystal violet-iodine combination from Gram negative cells. Gram positive cells retain the crystal violet-idoine combination throughout the decolorization process. A red counter-stain, safranin, is added after the decolorization. Gram negative cells will then show up as pink, where Gram positive show up as purple. Prior to the staining procedure, you must create a bacterial smear. This allows you to select an isolated bacterial colony to stain and view under the microscope. Bacteria are applied to a microscope slide and are ‘heat-fixed’, meaning that the slide is held over a flame. The heat-fixation kills the bacteria and makes them stick to the slide so that they are not washed off during the staining procedure. MATERIALS: crystal violet 95% alcohol microscope Gram’s iodine glass microscope slide latex or nitrile gloves safranin sterile swabs lab aprons safety goggles Bunsen burner water dropper distilled/deionized water inoculated agar plates with colonies
Procedure A: The Bacterial Smear NOTE: You must wear gloves, goggles, and aprons at all times! 1. Place one drop of water in the center of your microscope slide. 2. Using the cotton tip of the sterile swab, remove an isolated colony from your agar plate. 3. Gently ‘smear’ the tip of the swab in the drop of water on the slide. Limit the extent of
your smear to the center to the slide. Be careful to stay on the slide; do not slip off of the edges!
4. Spread the sample evenly over the center of the slide. 5. Let the slide air-dry. 6. Give the slide to instructor to heat-fix the sample for you. 7. Be sure to clean up all materials thoroughly.
41
Identifying Bacterial Strains Student Section
Procedure B: The Gram Stain NOTE: You must wear gloves, goggles, and aprons at all times! The staining procedure must be performed over a sink.
1. Obtain your cooled microscope slide from your instructor. 2. Gently flood the sample with crystal violet by steadily dropping the stain over the
sample. Once the sample is covered, let the stain sit for 1 minute. 3. Rinse off the excess stain with a gentle stream of distilled or deionized water. Be sure to
hold the slide at an angle towards the sink. 4. Add Gram’s iodine to the smear while it is still moist. Again, flood the smear and allow
the iodine to sit for 1 minute. 5. Rinse off the excess iodine with a gentle stream of distilled or deionized water. Be sure to
hold the slide at an angle towards the sink. 6. Decolorize the smear using 95% acetone alcohol. Gently flood the smear, while holding
the slide at an angle towards the sink, until no more color comes off. 7. Rinse off the excess alcohol with a gentle stream of distilled or deionized water. Be sure
to hold the slide at an angle towards the sink. 8. While still moist, flood the smear with safranin. Allow the safranin to sit for 30 seconds. 9. Rinse off the excess safranin with a gentle stream of distilled or deionized water. Be sure
to hold the slide at an angle towards the sink. 10. Allow the slide to air dry. 11. Once the slide is dry, you can look at it under the microscope. 12. Identify whether your sample is Gram positive or Gram negative.
42

These extensions may be done at the discrestudents a more in-depth understanding of used in higher level classes where students
Research the spread of communica Research the antibody-antigen inter Research disease characteristics cau
Extensions
tion of individual teachers. They are designed to give concepts introduced in this unit. They would best be were able to do independent research.
ble diseases in the United States action sed by specific bacterial strains
43