User’s Guide for HemaTrax®-CT V 3 - Digi-Traxs Guide HemaTrax … · list that can be customized...
20
User’s Guide for HemaTrax®-CT V 3.4 July 2017
Transcript of User’s Guide for HemaTrax®-CT V 3 - Digi-Traxs Guide HemaTrax … · list that can be customized...

User’s Guide for HemaTrax®-CT V 3.4
July 2017

Opening HemaTrax®-CT
1. The installation will create a shortcut on the desktop named HemaTraxCT 3.4.
Double click to start the program. The alternate method is to select Start, All
Programs, HemaTraxCT, HemaTrax-CT 3.4.
2. The HemaTrax-CT Login screen will appear. Select the User. There is, by default, one user in the database. User Name: Administrator Password: admin Administrator level users may manage users once logged in.
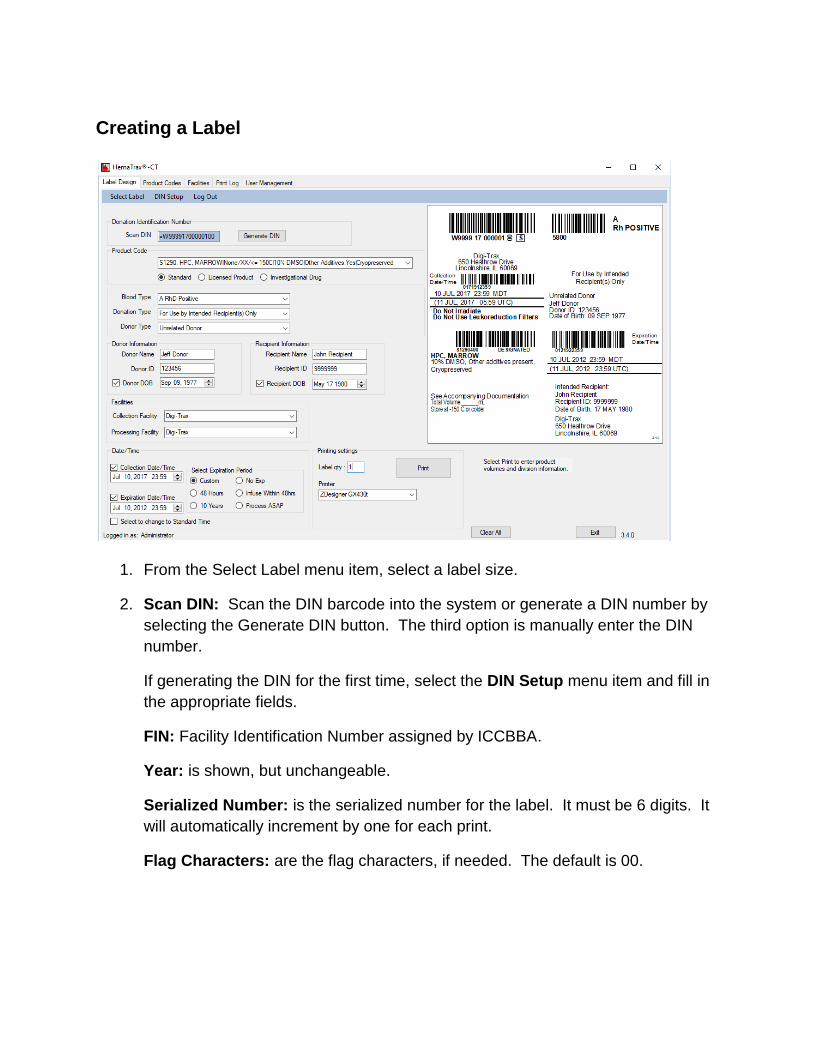
Creating a Label
1. From the Select Label menu item, select a label size.
2. Scan DIN: Scan the DIN barcode into the system or generate a DIN number by
selecting the Generate DIN button. The third option is manually enter the DIN
number.
If generating the DIN for the first time, select the DIN Setup menu item and fill in
the appropriate fields.
FIN: Facility Identification Number assigned by ICCBBA.
Year: is shown, but unchangeable.
Serialized Number: is the serialized number for the label. It must be 6 digits. It
will automatically increment by one for each print.
Flag Characters: are the flag characters, if needed. The default is 00.

3. Product Code: Select the product code from the drop down list. This Quick Pick
list that can be customized and product codes can be added or removed. See
the Edit Product Code section.
If the product is a licensed product, select the Licensed Product button.
The License Number text field will appear. Enter the license number and
it will appear on the label.
If the product is an investigational drug, select the Investigational Drug
button to add that text to the label.
4. Blood Type: Select Blood Type.
ICCBBA allows for special messages instead of Blood Type if the Donation Type
is "For Nonclinical Use Only." If a special message is required instead of blood
type, select "Special Message" from the Blood Type dropdown menu (it will
default to Special Message if "For Nonclinical Use Only" is selected). Once
selected, a Special Message selection box will appear. Select the correct
special message to the right of the Blood Type dropdown.
5. Donation Type: Select Donation Type
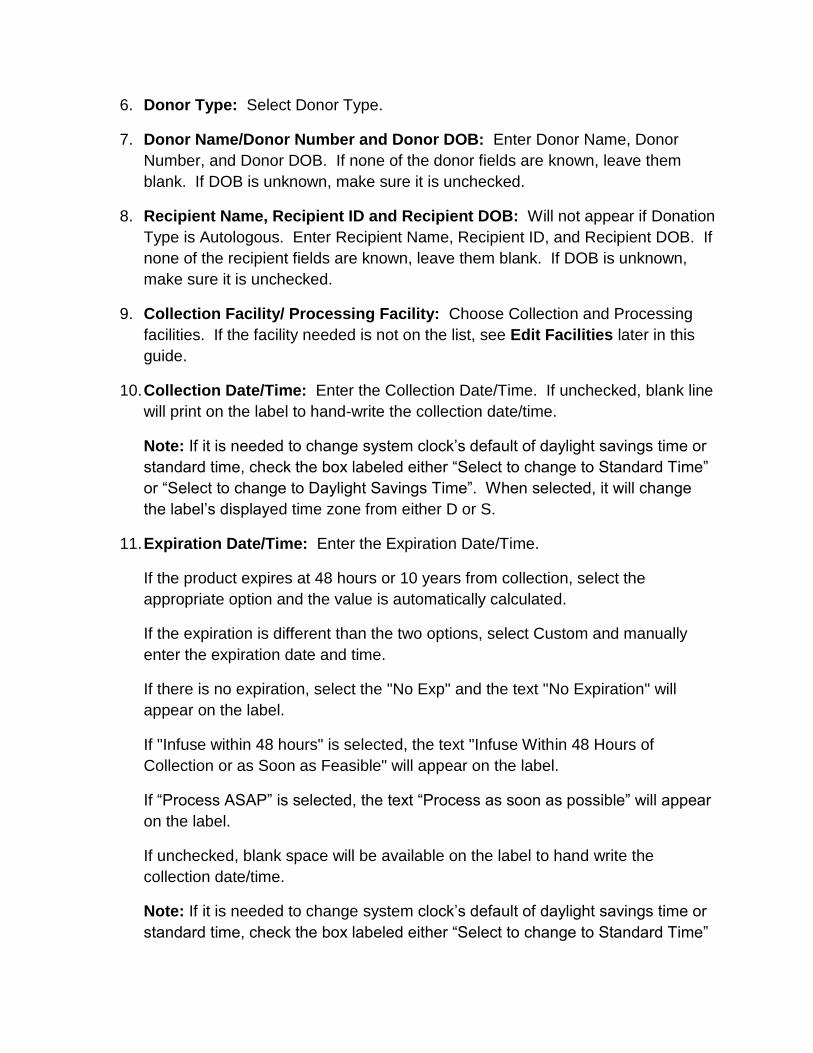
6. Donor Type: Select Donor Type.
7. Donor Name/Donor Number and Donor DOB: Enter Donor Name, Donor
Number, and Donor DOB. If none of the donor fields are known, leave them
blank. If DOB is unknown, make sure it is unchecked.
8. Recipient Name, Recipient ID and Recipient DOB: Will not appear if Donation
Type is Autologous. Enter Recipient Name, Recipient ID, and Recipient DOB. If
none of the recipient fields are known, leave them blank. If DOB is unknown,
make sure it is unchecked.
9. Collection Facility/ Processing Facility: Choose Collection and Processing
facilities. If the facility needed is not on the list, see Edit Facilities later in this
guide.
10. Collection Date/Time: Enter the Collection Date/Time. If unchecked, blank line
will print on the label to hand-write the collection date/time.
Note: If it is needed to change system clock’s default of daylight savings time or
standard time, check the box labeled either “Select to change to Standard Time”
or “Select to change to Daylight Savings Time”. When selected, it will change
the label’s displayed time zone from either D or S.
11. Expiration Date/Time: Enter the Expiration Date/Time.
If the product expires at 48 hours or 10 years from collection, select the
appropriate option and the value is automatically calculated.
If the expiration is different than the two options, select Custom and manually
enter the expiration date and time.
If there is no expiration, select the "No Exp" and the text "No Expiration" will
appear on the label.
If "Infuse within 48 hours" is selected, the text "Infuse Within 48 Hours of
Collection or as Soon as Feasible" will appear on the label.
If “Process ASAP” is selected, the text “Process as soon as possible” will appear
on the label.
If unchecked, blank space will be available on the label to hand write the
collection date/time.
Note: If it is needed to change system clock’s default of daylight savings time or
standard time, check the box labeled either “Select to change to Standard Time”

or “Select to change to Daylight Savings Time”. When selected, it will change
the label’s displayed time zone from either D or S.
12. Label Qty: Enter a label quantity.
13. Printer: Select the printer.
14. Print: The Print Volumes pop-up window will appear. If you have selected a
label quantity greater than 1, the Print Volumes window will appear for each label
you intend to print.
15. Product Volumes: Enter any applicable product volume, anticoagulant volume,
heparin concentration, anticoagulant volume, or specific anticoagulant for that
label.
If no information is entered, there will be a blank line to manually write the
volume on the label.
Note: Product codes will only use the volumes applicable for that product. If a
particular product does not have an anticoagulant, for example, the value you
entered will not appear on the label.
16. Divided Product: If the label is a divided product, enter the division for that
particular label. A0, B0, C0 or Aa, Ab, Ac, etc.
17. Update Preview: Once completed, you can select Update Preview to view the
label prior to printing.
18. Print: Select Print to print the completed label. If printing more than one label, a
second Print Volumes window will appear. Repeat steps 15-18 and print again.

Get Data/Reprint a Label
Data from a previously printed label can be selected again from the print log. The user can then repopulate the Label Design tab to reprint a label or make an addition to the label.
1. Select the Print Log tab.
2. Find and select the record you wish to reprint/get data.
3. Get Data: To reprint your label, or if a change needs to be made (a different
label size, product code, etc) select the Get Data button. The data from that record (DIN, Product Code, Donation Type, etc.) will be repopulated into the Label Design tab.
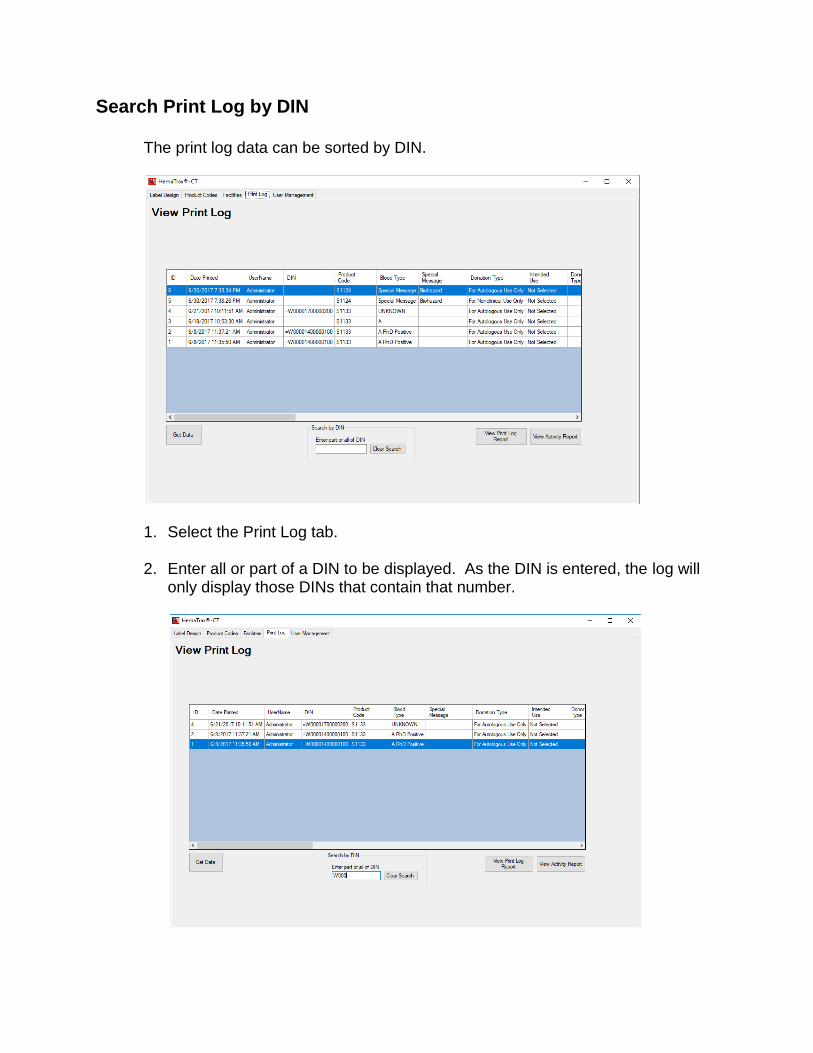
Search Print Log by DIN The print log data can be sorted by DIN.
1. Select the Print Log tab.
2. Enter all or part of a DIN to be displayed. As the DIN is entered, the log will
only display those DINs that contain that number.

View Print Log Report
HemaTrax®-CT has a print log report available to view, export, print.
1. From the Print Log tab, select the View Print Log Report button

2. Select the Start and End date of the records to view and select the Go button.
3. A report is generated and can be printed. If the user's security access is level 3 (administrator), the data can be exported to a Microsoft Excel or PDF file.

View Activity Report
HemaTrax-CT keeps track of a variety of user activity within the software. The activity report allows users to view, export or print the log.
1. From the Print Log tab, select the View Activity Report button

2. Select the Start and End date of the activity to view and then press the Go button.

3. A report is generated and can be printed. If the user's security access is level 3 (administrator), the data can be exported to a Microsoft Excel or PDF file.

Add or Delete a Product Code to/from the Quick Pick List
The user can configure the quick pick list of product codes in the Label Design section of the software.
1. Select the Product Codes tab to arrive at the Edit Product Codes page.
2. Enter Code to Add/Delete: Type the code you wish to add or delete in the
Enter Code to Add/Delete field.
You can use the ICCBBA Product Code List below to look up the code you
wish to add.
3. Add/Del Code: Select the Add/Del Code button to add the code to the quick
pick list. If already on the quick pick list, selecting the Add/Del Code button
will delete the code from the list.

Adding a Custom Product Code
HemaTrax-CT allows you to enter a user defined product code if necessary. 1. In the User Created Product Code section, enter the product code, user
defined description, component class, core condition, attributes, irradiate, leukoreduction, and attached documentation text.
2. The newly created product code can now be added to the quick pick list.
3. ICCBBA has reserved A0000-D9999 as available numbers for user defined product codes.

Adding/Editing Facilities 1. Select the Facilities tab to go to the Edit Facilities page.
2. Adding a Facility: Begin typing on the line indicated by a star character.
Enter Facility Name, Address Line 1 and Address Line 2.
3. To save the change, select the Save Changes button.
4. Delete a facility: Select the line containing the facility to be deleted by
clicking on the right facing arrow. The entire row will be highlighted. Press
the delete key on your keyboard.

5. The line will disappear. To save the change, select the Save Changes
button.
Note: You may not delete the "Not Selected" facility. It is required if there is
no Facility selected for the label design.

Adding/Editing Users
1. Select the User Management tab to go to the User Management screen.
2. Add a User: Enter the user’s First Name, Last Name, Security level and Password in the appropriate fields.
3. Press the Add User button to save the new user.
4. Inactivate User: Select the user to activate/inactivate and press the Active/Inactive button. The record color will change and reflect the user as Inactive/Active. When inactive, the user will no longer be able to login until made active again.

Reset Password or Security Level: Select the user that requires a new password or a change in security level.

Other User Configurable Features
Auto-Logout: Set the time, in minutes, before the software will log out the current user and require a login to enter. 0 disables this feature.
Password Expiration: Set the time, in days, before the software will inactivate a user's old password and require a new password. 0 disables this feature Note: The Administrator account password will never expire.