
User Guide Ulead Systems, Inc. May 2005ftp.ulead.com/pub/Manual/dps4/DPS4E.pdf · The Slide Toolbar...
68
User Guide Ulead Systems, Inc. May 2005
Transcript of User Guide Ulead Systems, Inc. May 2005ftp.ulead.com/pub/Manual/dps4/DPS4E.pdf · The Slide Toolbar...

User GuideUlead Systems, Inc.May 2005

English edition for Ulead CD & DVD PictureShow 4, May 2005.
© 1992-2005 Ulead Systems, Inc. All rights reserved. No part of this publication may be reproduced or transmitted in any form or by any means, electronic or mechanical, including photocopying, recording or storing in a retrieval system, or translated into any language in any form without the express written permission of Ulead Systems, Inc.
Software licenseThe software described in this document is furnished under a License Agreement, which is included with the product. This Agreement specifies the permitted and prohibited uses of the product.
Licenses and trademarksICI Library © 1991– 2004 C-Cube Microsystems.
All rights reserved. Ulead and the Ulead Systems logo are registered trademarks and Ulead CD & DVD PictureShow is a trademark of Ulead Systems, Inc. Intel, Pentium and MMX are registered trademarks and/or trademarks of Intel Corporation. Microsoft, Windows, DirectX and/or other Microsoft products referenced herein are either trademarks or registered trademarks of Microsoft Corporation. Adobe, the Adobe logo, and Acrobat are trademarks of Adobe Systems Incorporated.
All other product names and any registered and unregistered trademarks mentioned in this manual are used for identification purposes only and remain the exclusive property of their respective owners.
Sample filesFiles provided as samples on the program CD can be used for personal demonstrations, productions and presentations. No rights are granted for commercial reproduction or redistribution of any sample files.
North & South AmericaUlead Systems Inc.http://www.ulead.comSupport: http://www.ulead.com/tech
InternationalUlead Systems, Inc.http://www.ulead.comhttp://www.asiapac.ulead.comhttp://www.ulead.com.twSupport: http://www.ulead.com/techhttp://www.asiapac.ulead.com/techhttp://www.ulead.com.tw/tech
JapanUlead Systems Inc.http://www.ulead.co.jpSupport: http://www.ulead.co.jp/tech
GermanyUlead Systems GmbHhttp://www.ulead.deSupport: http://www.ulead.de/tech
ChinaUlead Systems, Inc.http://www.ulead.com.cnSupport: http://www.ulead.com.cn/tech
United Kingdomhttp://www.ulead.co.ukSupport: http://www.ulead.co.uk/tech
Francehttp://www.ulead.frSupport: http://www.ulead.fr/tech
CD & DVD PICTURESHOW USER GUIDE 3
Welcome to Ulead CD & DVD PictureShow .6
Getting Started ...........................................6CD & DVD PictureShow at a glance ............................ 6
ORGANIZE ................................................................ 6THEME ...................................................................... 7BURN ....................................................................... 7
Understanding your project elements ......................... 7Slideshow album, slideshows, and slides ......................... 7Theme ........................................................................ 8
Setting your preferences .......................................... 8Starting a project .................................................... 9Relinking missing files ............................................ 9
Understanding the workspace ...................10The Organize tab ..................................................10
The Slideshow Toolbar ................................................ 10The Slideshow List ...................................................... 11The Slide Toolbar ....................................................... 11The Slide Panel ........................................................ 11Output Format Selection Menu and Capacity Bar ............ 12
The Theme tab ......................................................12The Control Panel ....................................................... 12
The Burn tab ........................................................14
Organize ...................................................15Creating a slideshow ...............................................15
Creating a photo slideshow .......................................... 15Creating a video slideshow .......................................... 16Getting photos and videos from a digital camera ............ 16Using Batch Collect ..................................................... 17
Modifying your slideshow contents ............................18Changing a slideshow’s title text and thumbnail .............. 18Adding images to your slideshow .................................. 19Arranging slides inside a slideshow ............................... 20Splitting a Slideshow .................................................. 20ExpressFix ................................................................ 21Decorating your photos ............................................... 23Adding descriptions .................................................... 23Multi-trim Video ......................................................... 24
Using Display Reminder ..........................................26

4 CD & DVD PICTURESHOW USER GUIDE
Playing back a slideshow .........................................26Saving a photo as a separate file .............................27
Theme ...................................................... 28Applying a theme to your slideshow album ................28Customizing menus ................................................29
Modifying onscreen text .............................................29Modifying background music .........................................30Specifying a menu background image ............................30Motion Menu on DVD slideshows ...................................31Using Pan & Zoom and Motion filter to your menu ...........31Using a video as a menu background .............................32
Customizing your slideshows ...................................32Adding and editing background audio ............................34Deleting an audio clip ..................................................34Rearranging the order of the audio clips .........................35Trimming an audio clip ................................................35Adding sound annotation to slideshows ..........................36Applying a frame ........................................................36Applying a transition effect to your slideshow .................37Applying Pan & Zoom to your slideshows ........................37Using Audio & Effect ....................................................38Customizing background and description ........................43
Adding a First Play Video .........................................43Previewing your slideshow album .............................44Saving the slideshow as a separate video file .............45
Burn ......................................................... 46Burning your project to disc ....................................46Creating a disc image file or DVD folder ....................47
Printing CD index and CD label ................. 48Printing CD label ....................................................48Printing CD index ...................................................49
Appendices ............................................... 51Appendix A: Organize .............................................51
Slideshow Toolbar .......................................................51Slide Toolbar ..............................................................51
Appendix B: Dialog Boxes .......................................52Add Description ..........................................................52

CD & DVD PICTURESHOW USER GUIDE 5
Audio & Effect ............................................................ 53Add Photos ................................................................ 54Audio Recorder .......................................................... 55Decorate ................................................................... 55Get from Digital Camera ............................................. 55Text & Background ..................................................... 56Preferences ............................................................... 57Print CD Index ........................................................... 58Print CD Label ............................................................ 60Output Options .......................................................... 62Relink ....................................................................... 63TWAIN ...................................................................... 64WIA ......................................................................... 64
Appendix C: Remote Control ....................................65
Index ........................................................66

6 CD & DVD PICTURESHOW USER GUIDE
Welcome to Ulead CD & DVD PictureShow Ulead® CD & DVD PictureShow 4 makes it easy to create entertaining photo album slideshows suitable for any occasion. Turn your photos into dynamic slideshows complete with music, transitions, captions, narration and eye-catching effects in just three steps. Over 60 Instant-Show™ theme templates in categories such as Family, Holidays and Vacation combine meaningful themes with rich special effects for stunning results. Dramatic pan and zoom motion effects and transitions guarantee your slideshows look like they were made by a pro! You can even correct problem photos with ExpressFix™, the built-in photo editor. It’s easy to produce outstanding slideshows every time.
Getting Started
CD & DVD PictureShow at a glanceCreating projects in CD & DVD PictureShow involves a three-step process where you can Organize your photos into a slideshow album, apply a creative Theme to it, and then Burn it onto a CD or DVD. The process is illustrated below:
ORGANIZE
Import and organize your
photos and videos
Modify and enhance them
Arrange them easily into a slideshow

CD & DVD PICTURESHOW USER GUIDE 7
THEME
BURN
Understanding your project elementsIn order to build a properly organized slideshow, it is important to understand the basic elements of a project and how each of them is related.
Slideshow album, slideshows, and slides A slideshow album is composed of the photo and video slideshows as well as your project menu. A slideshow is made up
Apply a great looking theme to your
slideshow album with a few mouse clicks
Customize your chosen theme to suit your
moods by designing your own menu or customizing each
slideshow
Watch your project come to life with a fully
functional preview
Specify your disc burner and
recording settings
Specify files, such as photo, video, or project files, to include on disc
Burn your projects to CD or DVD and share them with family and
friends

8 CD & DVD PICTURESHOW USER GUIDE
of either a collection of your photos or a single video file. A slide includes the photo, its decorations and captions.
ThemeCD & DVD PictureShow untangles the complexity of designing your slideshow album through its Theme feature. A theme determines the overall appearance of your slideshow album by applying corresponding slideshow and menu elements. These elements include visual styles, motion effects, and background music.
Setting your preferencesBefore creating your project, you must first specify the working folder and the TV system that your project will use. Select File: Preferences or press [F6] to open the Preferences dialog box. Click the General tab, and then specify the location, where your

CD & DVD PICTURESHOW USER GUIDE 9
project temporary files will be stored, in Working folder. Specify also the TV system that your project will use in the Output Settings tab. (See “Preferences” on page 57).
Starting a projectWhen you run CD & DVD PictureShow, it automatically opens a new project and lets you start creating a slideshow. A new project always uses CD & DVD PictureShow's default project settings. To see and modify these settings based on your preferences, select File: Preferences.
You must also specify the output format before creating your slideshow album. To do this, select the output format in the Output Format Selection Menu.
Always save your project for future editing by selecting File: Save.
To open an existing project, select File: Open.
Relinking missing files
To relink a file:
1. Select File: Relink. Missing files are displayed in the Relink dialog box. You can manually find the missing file, and then click Apply to relink the new path to the program.
2. You can also use Smart Search to find the missing file(s) quickly. Click Smart Search to open the Search Folder dialog
When the source files of your slideshows are moved from their original locations, their links to the program are broken. When this happens, the affected slides will be replaced with a warning image during playback or when working in the Theme tab. To address this, you must relink the new location of the missing files to the program.

10 CD & DVD PICTURESHOW USER GUIDE
box. Select the directories where the program will perform the search. Click OK.
3. CD & DVD PictureShow automatically locates the missing files and displays the searched paths under Search results. Click Apply to link the new image path(s) to the program.
Understanding the workspaceThe user interface of CD & DVD PictureShow allows you to work with ease in making your slideshow album. It provides a three-step workflow where you can easily organize photos, select a theme, and then burn your project to a disc.
The Organize tab
The Slideshow ToolbarThe Slideshow Toolbar provides two options: to create a slideshow or delete an existing one. There are several ways to create a slideshow. You can manually import photos or videos from local drive or get them from a digital camera. You can also use the Batch Collect feature for a faster way of creating slideshows. (See “Slideshow Toolbar” on page 51).
Slide toolbar
Slide Panel
SlideshowList
SlideshowToolbar
Capacity BarOutput FormatSelection Menu

CD & DVD PICTURESHOW USER GUIDE 11
The Slideshow ListThe Slideshow List displays thumbnails of all created slideshows. A slideshow can be a set of images or a single video. Click a slideshow thumbnail to display included images in the Slide Panel. Right-clicking a photo or a video slideshow displays corresponding context menu for quick access to some commands.
The Slide ToolbarThe Slide Toolbar provides different tools that you can use to modify the slides within your slideshow. It lets you customize the slides by fixing common digital photo problems, breaking down video clips into multiple segments, saving photo within a slideshow and much more. (See “Slide Toolbar” on page 51).
The Slide Panel The Slide Panel displays the slides included in the selected slideshow.
Right-clicking the Slide Panel displays corresponding context menu to give you access to some options not available in the user interface.

12 CD & DVD PICTURESHOW USER GUIDE
Output Format Selection Menu and Capacity BarSelect the disc output format of your project using the Output Format Selection Menu. The Capacity Bar, on the other hand, shows the current recording capacity on the output disc. It also displays the used space on the disc.
The Theme tab
The Control PanelThe Control Panel comprises three tabs. Use the Gallery tab to apply a theme template to your slideshow album. To customize an applied theme, use the Menu and Slideshow tabs.
Gallery tab Select a theme in the Control Panel to apply predefined styles to your slideshow album. Use the navigation controls in the Preview Panel to browse menu pages. To preview the applied theme, click Preview in the Preview Panel. The navigation control switches to the Remote Control to simulate the controls in a CD or DVD
Output Format Selection Menu
Capacity Bar
Control Panel
Preview Panel

CD & DVD PICTURESHOW USER GUIDE 13
Player. After selecting a theme, you can go directly to Burn tab to record your project to disc.
Menu tab You can customize the settings of your project menu in the Menu tab. You can change the audio and image background, or assign a video to make it a motion menu.
To restore the menu default settings, click Reset in the Control Panel. (See “Customizing menus” on page 29).
Slideshow tab When you switch to the Slideshow tab in the Control Panel, the Preview Panel displays navigation controls that allow you to preview the selected slideshow. Click Browse to select other slideshows included in your project. You can also customize the

14 CD & DVD PICTURESHOW USER GUIDE
slideshow settings of the applied theme in this tab. (See “Customizing your slideshows” on page 32).
The Burn tab
The Burn tab provides you different options in recording your project to a CD or DVD. (See “Burn” on page 46).

CD & DVD PICTURESHOW USER GUIDE 15
OrganizeBegin creating your project in the Organize tab. Here, you can set up the framework of your project by putting together images prior to applying a theme.
Creating a slideshow
Creating a photo slideshowYou can create a slideshow by manually locating photos from your local drive. You can then add each one of them to create a photo slideshow.
To create a photo slideshow:
1. Click New Slideshow: New Photo Slideshow to open the Add Photos dialog box. Browse for photos to include in the slideshow.
2. Click Add to create a new slideshow with the photos you selected. Click Close.
3. The slideshow is now added in the Slideshow List. To create another slideshow, simply repeat this procedure.
In CD & DVD PictureShow, you can easily create an image or video slideshow using its four simple methods.
To create a slideshow, click New Slideshow on the Slideshow Toolbar.
Tip: To add multiple photos, press [Ctrl] while selecting the files in the Add Photos dialog box.
Tip: To add all photos in a folder, click Add All.
16 CD & DVD PICTURESHOW USER GUIDE
Creating a video slideshowAside from images, you can also use a video file or flash file as a slideshow. Each video or flash file added to your slideshow album counts as a separate slideshow.
To create a video slideshow:
1. Click New Slideshow: New Video Slideshow to open the Open Video File dialog box.
2. Locate the video file or flash file to use, and then click Open to add the file to your project. The video is now added as video slideshow in the Slideshow List.
Getting photos and videos from a digital cameraYou can create a new slideshow by acquiring photos or small-sized videos from a digital camera. Here, all files taken using your digital camera are transferred to your local drive and imported as new slideshows.
To get photos or videos from a digital camera:
1. Click New Slideshow: Get from Digital Camera to open the Get from Digital Camera dialog box.
2. Locate the folder of your card reader or your digital camera by
clicking . The device name, along with the number of
pictures available in it are displayed in the dialog box.
3. Specify the folder where the images will be transferred in Destination folder. To create a new folder within the directory you specified, select Create a new folder and enter a folder name.
4. Click Import to start the transferring process. While acquiring, all the images in your digital camera are transferred to the specified folder and are imported into the program as a new slideshow.
5. Click OK. The acquired images are now added as a new slideshow in the Slideshow List. (See “Get from Digital Camera” on page 55).

CD & DVD PICTURESHOW USER GUIDE 17
Using Batch CollectThe Batch Collect feature searches your hard drive for photos, videos, or even existing slideshows created in Ulead Photo Explorer, and it automatically creates slideshows according to the respective directory names of the searched files.
To use the Batch-Collect feature:
1. Click New Slideshow: Batch Collect to open the Batch Collect dialog box.
2. Select the folders where the program will search for files.
3. Under Files to collect, select the types of files to search for such as images, videos, or slideshows. To specify how long each slide will stay visible during the slideshow in Photo duration.
4. Click OK to begin the search. When a certain file is found in your hard drive, CD & DVD PictureShow automatically creates a slideshow based on the corresponding folder name of the searched file.
5. After the search process, click Close. The slideshows are added in the Slideshow List.

18 CD & DVD PICTURESHOW USER GUIDE
Modifying your slideshow contentsAfter creating all the slideshows for your project, you can now start customizing each slideshow by adding more images or splitting over-loaded slideshows into two. You can also arrange the order of appearance of the slides during slideshow playback. Each slide can be improved by adding captions, decorating them with text or clipart, or by improving their display quality using the ExpressFix feature.
Changing a slideshow’s title text and thumbnailIn the Organize tab, you can change a slideshow’s thumbnail as well as its title text. To change the slideshow’s title text, simply click the title of the selected slideshow, and then enter a new title.
You can also change a photo slideshow’s thumbnail, select the slide to use as the slideshow’s thumbnail in the Slide Panel. Drag the slide to the front of the list. Whichever slide is in front will be the default thumbnail of the slideshow.
Tip: You can also set a slideshow thumbnail by right-clicking the slide and selecting Set as Slideshow Thumbnail.

CD & DVD PICTURESHOW USER GUIDE 19
To change a video slideshow’s thumbnail:
Adding images to your slideshowYou can add images to already existing slideshows by clicking Add Photos on the Slide Toolbar. In the Add Photos dialog box, simply locate the image folder, select the image files to insert, and then click Add.
Another way to add images to your slideshow is by acquiring images from other imaging devices like scanners.
To acquire images using TWAIN or WIA:
1. Click Add Photos on the Slide Toolbar to open the Add Photos dialog box.
2. Click Acquire and select TWAIN or WIA depending on the type of scanner or digital camera you are using.
3. Follow the dialog box instructions to specify file names and folder to use for saving images.
4. Make sure you select Add acquired images to slideshow. Otherwise, the acquired images will only be saved to the destination folder and will not be added to the slideshow you are working on.
Right-click the video slideshow thumbnail and then select Set as Slideshow Thumbnail. Drag the slider to the frame to use as your slideshow thumbnail. Click OK.
Note: WIA (Windows Imaging Acquisition) is a feature in Microsoft Windows ME and Windows XP that enables applications to directly interact with imaging devices such as scanners or digital cameras. If you have CD & DVD PictureShow installed in either of these Windows systems and your imaging device is WIA compatible, you can directly acquire images without the need to install device drivers.

20 CD & DVD PICTURESHOW USER GUIDE
Arranging slides inside a slideshowArrange the order of appearance of your slides in a slideshow according to image file names or the date the image files were modified using the Auto-arrange feature.
To arrange slides inside a slideshow:
1. Select the slideshow to arrange in the Slide Panel.
2. Click Auto-arrange on the Slide Toolbar.
3. Select Ascending by name or Descending by name to arrange the images according to their file names or Ascending by date or Descending by date to arrange them according to their dates they were modified.
Splitting a SlideshowUse Split Slideshow to divide the slideshow into smaller ones. This option provides you a faster method of rearranging your slideshows instead of manually removing the slides and creating a new slideshow.
To split a slideshow:
1. Select the slideshow to split in the Slideshow List.
2. In the Slide Panel, select the slide at the point where you want to split the slideshow.
3. Click Split Slideshow on the Slide Toolbar.
4. Specify a name for your new slideshow, and then click OK.

CD & DVD PICTURESHOW USER GUIDE 21
ExpressFixExpressFix is a timesaving tool that provides quick fixes to common digital photo problems such as improper color, unbalanced exposure, and out of focus conditions. Through a step-by-step interface, ExpressFix analyzes photos and presents various options to fix them. It also features Beautify Skin, which allows you to smoothen skin tones of portrait photos.
To apply ExpressFix:
1. Select a photo in the Slide Panel then click ExpressFix on the Slide Toolbar to open the ExpressFix dialog box.
2. Photo enhancement options are presented as Steps. Under Steps, you can apply these enhancements to your image:
• Overall Exposure Adjusts brightness and contrast of the whole image.
• Subject Exposure Adjusts the brightness of subject or background separately.
• Color Cast Adjusts the color temperature, making it cooler or warmer.
• Color Saturation Adjusts color hues.
• Focus Adjusts from soft to sharp focus.
• Beautify Skin Retouches skin areas by removing blemishes, softening its tone, and changing its color.
Click to select a step and make adjustments. While in a particular step, click Do not apply if you do not want to apply that particular enhancement.

22 CD & DVD PICTURESHOW USER GUIDE
3. Under Presets, click a thumbnail to apply a quick fix.
4. For finer adjustments, click Custom. Under Custom adjustment, the center thumbnail shows the current state of your photo and the surrounding thumbnails represent different changes that can be applied. Click the thumbnails to apply changes.
If results are not satisfactory and you want to remove the custom adjustments in a step, click Reset.
If you go back to the Presets section, a Custom thumbnail is added.
5. When you have applied changes in a step, a check mark will be displayed in that step. Click Next, or to skip steps, just click a desired step.
6. To go back to previous steps, click Back or click a specific step. Since ExpressFix applies enhancements in the order specified
Note: Thumbnail variation determines the incremental changes for the thumbnails. Drag the slider up or down to have a lesser or greater application of changes.
CD & DVD PICTURESHOW USER GUIDE 23
under Steps, enhancements after the current step will be removed from the image when you go back to previous steps. Before you exit the dialog box, remember to click on the remaining steps to reapply them.
7. The last step is Beautify Skin. This step lets you smoothen coarse and uneven skin.
8. When you are satisfied with all the enhancements, click OK.
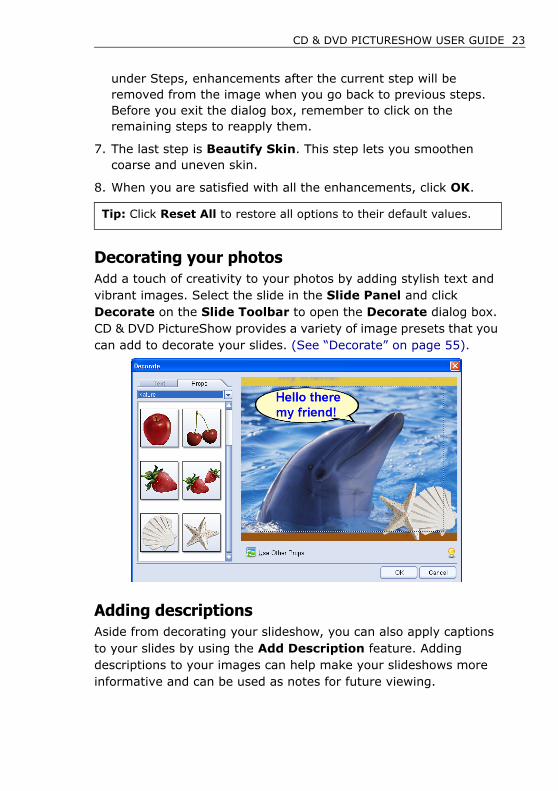
Decorating your photosAdd a touch of creativity to your photos by adding stylish text and vibrant images. Select the slide in the Slide Panel and click Decorate on the Slide Toolbar to open the Decorate dialog box. CD & DVD PictureShow provides a variety of image presets that you can add to decorate your slides. (See “Decorate” on page 55).
Adding descriptionsAside from decorating your slideshow, you can also apply captions to your slides by using the Add Description feature. Adding descriptions to your images can help make your slideshows more informative and can be used as notes for future viewing.
Tip: Click Reset All to restore all options to their default values.

24 CD & DVD PICTURESHOW USER GUIDE
The position of descriptions on your slide depends on the selected theme or photo frame. When there’s no theme or photo frame applied to the slide, the descriptions are placed on the rightmost corner of the slide.
To add descriptions to your slideshow:
1. Select a slide in the Slide Panel.
2. Click Add Description on the Slide Toolbar to open the Add Description dialog box.
3. Use the navigation buttons to select the slide. Enter description, and then click OK.
Multi-trim VideoThe Multi-trim Video feature is a method for breaking down a video clip into multiple segments. It gives you complete control
Tip: You can add descriptions to multiple slides at once. Press [Ctrl] to select the slide(s) or right-click in the Slide Panel and click Select All.
Tip: Click Apply to All to apply the description to selected images in the slideshow.
Description on a slide with photo frame
Description on a slide without photo frame

CD & DVD PICTURESHOW USER GUIDE 25
over the clips you wish to extract, making it easy for you to portion your video that you want to keep for your slideshow.
To use Multi-trim Video feature:
1. Select a video or flash slideshow in the Slideshow List then click Multi-trim on the Slide Toolbar to open the Multi-trim Video dialog box.
2. In the Multi-trim Audio dialog box, view the whole clip first by
clicking to determine how you want to mark segments.
3. Drag the Jog Slider until you get to the part of the video that you want to use as the beginning frame of the first segment. Click Start.
4. Drag the Jog Slider again, this time, to the point where you want the segment to end. Click End.
5. Do steps 3 and 4 repeatedly until you have marked all the segments you want kept or removed.
6. Click Play to view the trimmed video.
7. Click Ok.
Tips:
• To mark segments, you can also press [F3] and [F4] while playing the video.
• Click Invert Selection to toggle between marking segments that you want to retain or marking segments that you want taken out from the clip.

26 CD & DVD PICTURESHOW USER GUIDE
Using Display ReminderThe Display reminder feature allows you to identify if slides in your slideshow meet the target display size of the slideshow album. It simply marks the images whose display sizes are smaller than the slideshow’s target display size specified in the Preferences dialog box. This way, you can make necessary adjustments to these images in order to meet the slideshow’s preferences.
To use display reminder:
1. Select File: Preferences to open the Preferences dialog box.
2. Select Display reminder in the General tab.
3. Click OK. Images with lower display sizes are marked with an icon at the lower right corner.
Playing back a slideshowYou can preview your slideshows to check the order, captions, and decorations even before applying a theme to it. To preview a slideshow, right click a slideshow and select Play, or double-click the slideshow’s thumbnail. During playback, you can navigate through the slideshow using the navigation controls located at the upper right corner of your computer screen.

CD & DVD PICTURESHOW USER GUIDE 27
Saving a photo as a separate fileYou can save your photos as a separate file after fixing them.
To save your photo:
1. In the Slide Panel, select the photo you want to save as a
separate file and click in the Slide Toolbar.
2. In the Save As dialog box, enter a file name and the location where to save the file then click Save.

28 CD & DVD PICTURESHOW USER GUIDE
ThemeApply a menu and slideshow design template to your slideshow album or customize your own in the Theme tab.
In this section you will learn to:
• Apply a theme to your slideshow album.
• Customize your disc menu appearance, or add motion menus and audio.
• Customize your slideshow photo frame, effects, and audio.
Applying a theme to your slideshow albumFor speed and ease in designing your slideshow album, simply select from the list of theme presets in the Gallery tab. All the backgrounds, effects, and audio that come with the theme are automatically applied to your slideshow album.
Tip: Select Use Theme slideshow settings to apply the different effects like transition effects, pan & zoom, and audio to your entire project.
To apply a theme to your project:
1. Click the Gallery tab.
2. Select a theme category from the drop-down list. All the theme presets are displayed below the category.
3. Select a theme and click Apply. You can also double-click the selected theme to apply it to your slideshow album. To know the menu and slideshow settings
of the selected theme, click .

CD & DVD PICTURESHOW USER GUIDE 29
Customizing menusThe menu is one of the first things your audience will see when viewing your slideshow album. Creating an impressive menu is a good way to capture your audience’s attention as well as provide them with an easy way of navigating through the disc. To customize a theme's menu settings, click the Menu tab under Theme.
Modifying onscreen text You can customize the text in your menu in the Preview Panel. Here, you can edit the text or change its font attributes. You can also remove text in your slideshow. Simply right-click to access corresponding context menus.
You also have the option to choose whether or not to display the slideshow numbers by selecting Show slideshow number in the Menu tab.

30 CD & DVD PICTURESHOW USER GUIDE
Modifying background musicAside from the music template that comes with a selected theme, you can specify your own or remove the existing background audio of your menu.
To specify a background music to your menu:
Specifying a menu background imagePersonalize your project menu by replacing the theme's background image with your preferred image.
To specify a menu background image:
1. Click and then select
whether to replace or remove the default background audio of the current menu page or all the pages. Locate the audio file to use in the Open Audio File dialog box.
2. Click Open.
1. Select Background image.
2. Click to display its options.
Specify whether to use the background image for the current page only, or for all pages.
3. Locate the file to use as your background image and then click Open to apply it to your menu.
Some menu templates from the Gallery tab have decorations over the background image. These decorations are kept even if you change background image.

CD & DVD PICTURESHOW USER GUIDE 31
Motion Menu on DVD slideshows
Using Pan & Zoom and Motion filter to your menuApart from using a still image for your menu background, you can choose to liven up your project menu by animating its background image. You can use the Pan & Zoom effect, which animates your background image by moving your image from one fixed point to another and by changing the viewing distance, or you can also use the Motion filter, which contains several different types of animations to apply to your image.
To use Motion filter:
1. Click Motion filter under Background image.
2. Select the effect you want to use from the list.
Animate your DVD menu to make it more interesting to your audience. By selecting Motion menu in the Menu tab, each slideshow thumbnail in your menu will play a quick preview of the slides. You can also apply Pan & Zoom and Motion filter to your menu if this option is selected.
To apply the Pan & Zoom effect:
1. Click Pan & Zoom under Background image.
2. Select the effect you want to use from the list.
Note: Duration determines how long the motion menu will play before it loops back to the start. The effects continuously play back as long as the disc menu is on display.
Original theme

32 CD & DVD PICTURESHOW USER GUIDE
Using a video as a menu backgroundYou can also use videos as your menu background besides images.
To use a video as your menu background:
Customizing your slideshowsIn addition to selecting and applying a theme to your project, you can also customize the theme's slideshow settings. This allows you more control over the general look and feel of each of the slideshows in your project.
1. Select Background Video.
2. Click the button and then specify whether to use a background video for the current page only, or for all pages.
3. Locate the file to use as background video and then click Open.
Note: Duration determines how long a video will play before it loops back to the start. The video continuously plays back as long as the disc menu is on display.
Note: Properties of previously customized slideshows are kept intact even if you change the theme of your slideshow album. To apply the properties of the selected theme, click Reset in the Slideshow tab, and then corresponding theme properties will take effect on customized slideshows.
CD & DVD PICTURESHOW USER GUIDE 33
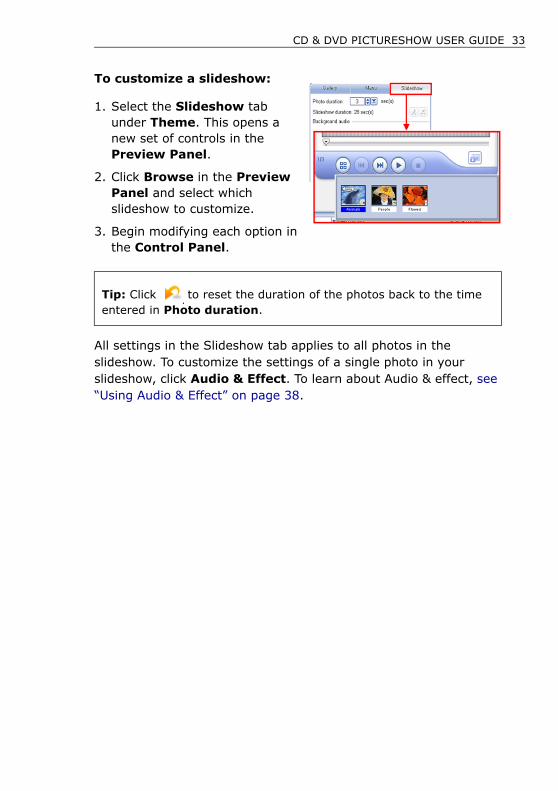
All settings in the Slideshow tab applies to all photos in the slideshow. To customize the settings of a single photo in your slideshow, click Audio & Effect. To learn about Audio & effect, see “Using Audio & Effect” on page 38.
To customize a slideshow:
1. Select the Slideshow tab under Theme. This opens a new set of controls in the Preview Panel.
2. Click Browse in the Preview Panel and select which slideshow to customize.
3. Begin modifying each option in the Control Panel.
Tip: Click to reset the duration of the photos back to the time entered in Photo duration.

34 CD & DVD PICTURESHOW USER GUIDE
Adding and editing background audio Set the mood for your slideshow by using your own music as background.
To play the audio clip repeatedly when the audio duration is shorter than the slideshow duration, select Loop audio.
You can match the slideshow duration to the audio duration by
clicking . Click to undo the action.
Deleting an audio clip
Select the audio clip you want to remove and click .
To add background music:
1. Select the Slideshow tab under Theme.
2. Click Browse in the Preview Panel and select the slideshow to customize.
3. Click Add Background Audio and locate the audio file to use in the Open Audio File dialog box.
Tip: You can also use music from an audio CD as your slideshow background music.
4. Click Open.
5. Repeat steps 3 and 4 to add more audio files.
CD & DVD PICTURESHOW USER GUIDE 35
Rearranging the order of the audio clipsMove the position of the audio clip by selecting the audio clip you
want to move and clicking either or .
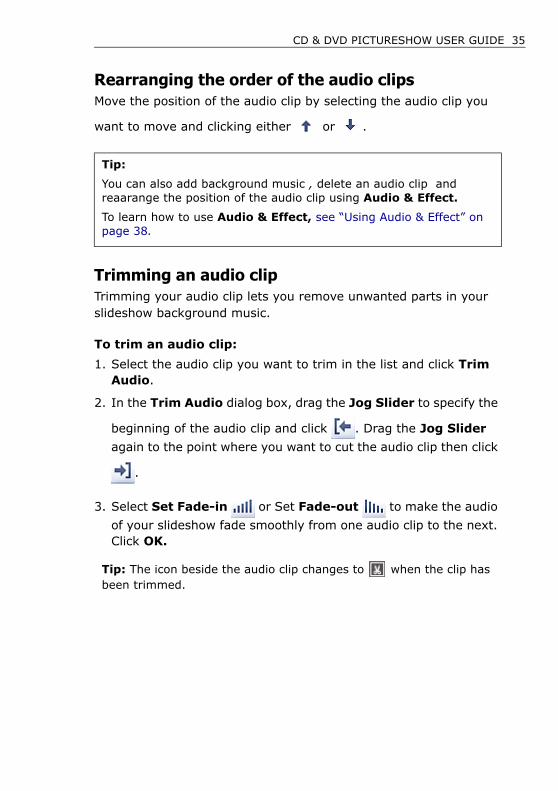
Trimming an audio clipTrimming your audio clip lets you remove unwanted parts in your slideshow background music.
To trim an audio clip:
1. Select the audio clip you want to trim in the list and click Trim Audio.
2. In the Trim Audio dialog box, drag the Jog Slider to specify the
beginning of the audio clip and click . Drag the Jog Slider
again to the point where you want to cut the audio clip then click
.
3. Select Set Fade-in or Set Fade-out to make the audio
of your slideshow fade smoothly from one audio clip to the next. Click OK.
Tip: The icon beside the audio clip changes to when the clip has been trimmed.
Tip:
You can also add background music , delete an audio clip and reaarange the position of the audio clip using Audio & Effect.
To learn how to use Audio & Effect, see “Using Audio & Effect” on page 38.

36 CD & DVD PICTURESHOW USER GUIDE
Adding sound annotation to slideshowsAside from using background music, you can also combine sound annotations to your slideshow. Sound annotations are like narrations being heard, along with the background music, during slideshow playback.
To learn how to add sound annotion, see “To add a sound annotation:” on page 42.
Applying a frameAdd style to your slideshow photos by applying a photo frame. The program provides with you plenty of frames to choose from.
To apply a frame:
1. Click Browse in the Preview Panel and select the slideshow whose photos you want to apply a frame to.
2. Click Photo Frame in the Slideshow tab.
3. Select a frame category and then select a frame from the list to apply to your slideshow.

CD & DVD PICTURESHOW USER GUIDE 37
Applying a transition effect to your slideshowTransition effects determine how one photo turns into the next within a slideshow.
To apply slideshow transition effect:
Applying Pan & Zoom to your slideshowsPan & Zoom is applied to photo slideshows, and it emulates the pan and zoom effect of a video camera.
To apply slideshow Pan & Zoom effect:
1. Click Pan & Zoom in the Slideshow tab.
2. Select a category and then select an effect from the list to apply to your photo.
1. Click Browse in the Preview Panel and select which slideshow you want to apply the transition effect.
2. Click Transition Effect in the Slideshow tab.
3. In the Transition Effect Settings dialog box, select a transition category and then select a transition effect from the list to apply to your photo.
4. Type in your desired duration and click OK.

38 CD & DVD PICTURESHOW USER GUIDE
Using Audio & EffectYou can customize the settings of each photo in your slideshow by using the Audio & Effect dialog box. To open the Audio & Effect dialog box, click Audio & Effect in the Slideshow tab.
To add background music:
1. In the Folder tree, select the folder where the background audio clip is located.
2. In the Browse pane, select the audio clip you want to add to your slideshow then click Add Background Audio.
Tip: You can also drag the audio clip onto the sound track to add it.
To add background audio starting at a certain photo in the slideshow, drag and drop the file onto the desired photo in the photo list.
To play the audio clip repeatedly when the audio duration is shorter than the slideshow duration, select Loop audio.
To trim audio:
In the storyboard, select the audio clip you want to trim then click
. To learn how to trim the audio clip, see “Trimming an audio
clip” on page 35.
To adjust the position of the audio clip
There are two ways to adjust the position of the audio clips.

CD & DVD PICTURESHOW USER GUIDE 39
Using drag and drop:
Drag the audio clip from the storyboard onto the desired photo, the audio clip will start playback from that photo.
Using Adjust Position:
1. Right-click the audio clip on the storyboard and select Adjust Position to open the Adjust Position dialog box.
2. Select whether to make the audio clip Move forward or Move back then enter how many second to move the audio clip.
3. Click OK.
To customize Pan & Zoom effect for a single photo:
Pan & Zoom is applied to still images. To apply this effect, select the
photo on the storyboard and click . In the Pan & Zoom dialog
box, you can either choose Preset or Custom for your slideshow.
Preset:
Select a pan & zoom effect you want to apply to your photo.
Custom:
Click Custom to open the Pan & Zoom dialog box. In the Pan & Zoom dialog box, the Start, Middle and End tabs and the
crosshairs in the Image Window represent the three points (or key frames) in the image clip where settings can be customized to produce the pan and zoom effect. When customizing each key frame, use the Image Window to focus on an area or to pan the image; use the tab settings to customize the zooming effect.

40 CD & DVD PICTURESHOW USER GUIDE
The procedure below shows an example of how to first zoom in on a subject, then pan and zoom out to show the whole image.
To apply Pan & Zoom:
1. Drag the Start key frame, represented by the left crosshair in the Image Window, to the subject you want to focus.
2. Zoom in on the subject by minimizing the marquee box or by increasing the Zoom ratio.

CD & DVD PICTURESHOW USER GUIDE 41
3. Set the Pause time to the amount of time to stay on the subject before panning and zooming out.
4. Click the End tab. Drag the End key frame, represented by the right crosshair in the Image Window, to the center of the image. Zoom out to show the whole image by enlarging the marquee box or by setting the Zoom ratio to the lowest value.
5. Click to preview the effect.
6. Click OK to apply the effect to the image.
To customize transition effect for a single photo:
On the sound track, select the photo you want to customize the
transition effect and click .
To learn how to use the Transition Effect Settings dialog box, see “To apply slideshow transition effect:” on page 37.
Tips:
• Click the Anchor boxes to move the marquee box at fixed positions in the Image Window.
• To zoom in or out of a fixed area without panning the image, select No panning.

42 CD & DVD PICTURESHOW USER GUIDE
To add a sound annotation:
1. Select a photo on the sound track and click on the photo slide to open the Photo Options dialog box.
2. Select Enable sound annotation to add a sound clip to the selected photo.
3. Click Select audio file and locate the audio file you want to use. You can also directly record your own using Record Audio. Click
to start the recording process.
4. Click Play Slideshow to preview the result of the combined background music and sound annotation.
To adjust the duration of a photo:
On the storyboard, select the photo whose duration you want to
change then click . In the Photo Options dialog box, select
whether to use the original or a customized duration.
Note: Embedded sound is enabled when the selected photo contains embedded sound.
Tip: Select Same as sound annotation to match the photo duration to the sound annotation duration.

CD & DVD PICTURESHOW USER GUIDE 43
Customizing background and description
Adding a First Play VideoYou can add a short video clip that plays at the very beginning before the menu screen is shown. This is often used to display introduction messages and copyright protection warnings.
To add a First Play Video:
1. Click the Gallery or the Menu Tab.
2. In the Preview Panel, click First Play Video.
3. In the Open Video File dialog box, select the video file then click Open.
By accessing the Text & Background Settings dialog box in Text & Background, you can also use colors or textures, apart from Photo Frame as background to your slideshows. Applying a theme to your slideshow album disables most of the functions in this dialog box. To use them, remove the layout style in Photo Frame.
In this dialog box, you can also customize the properties of your slideshow descriptions.

44 CD & DVD PICTURESHOW USER GUIDE
Previewing your slideshow albumSee how your menu and the slideshows look like when played on a CD or DVD player. Use the Preview Panel to simulate a typical CD or DVD remote control that you can use to play or navigate through your slideshow album.
To preview your slideshow:
1. Click the Gallery or the Menu Tab.
2. In the Preview Panel, click Preview. The Navigation Controls switches to a remote control. Use the remote control to preview your slideshow.
You can also specify what action to take after a slideshow is finished playing back. To specify, click Options in the Preview Panel and in the dialog box that opens, select either Back to Menu or Continue to play the next clip.
Remote Control in DVD Remote Control in VCD/SVCD

CD & DVD PICTURESHOW USER GUIDE 45
Saving the slideshow as a separate video fileSave a specific slideshow from your project as a video file.
1. Click the Slideshow tab under Theme.
2. Click Save Slideshow as Video File and select a video quality from the list.
3. Enter a location where you want to save the video in Save in.
4. Type in a file name and click Save.
Tip: Select Customize to set your own video format and settings.

46 CD & DVD PICTURESHOW USER GUIDE
BurnThis is the final step in the slideshow creation process. Go to Burn tab and specify the settings to use for burning the slideshow disc.
Burning your project to discLet everyone see your photos. Record your slideshow album to a CD or DVD disc so you can play it on a CD or DVD player.
To burn your project to a disc:
4. Click Burn Now to output your project to a disc.
1. Under CD/DVD recorder, enter a disc name under Disc volume label.
2. Locate the disc drive to use for burning in Drive, and then the number of disc copies to create.
3. Select Record to disc. This burns your project to DVD, SVCD, or VCD depending on which type you selected in the Output Format Selection Menu.
Tip: Click Options to specify drive information, project file to include on disc, and other advanced settings. (See “Output Options” on page 62).
Tip: Click Erase Disc to delete the contents of the CD-RW/DVD-RW/DVD+RW.
CD & DVD PICTURESHOW USER GUIDE 47
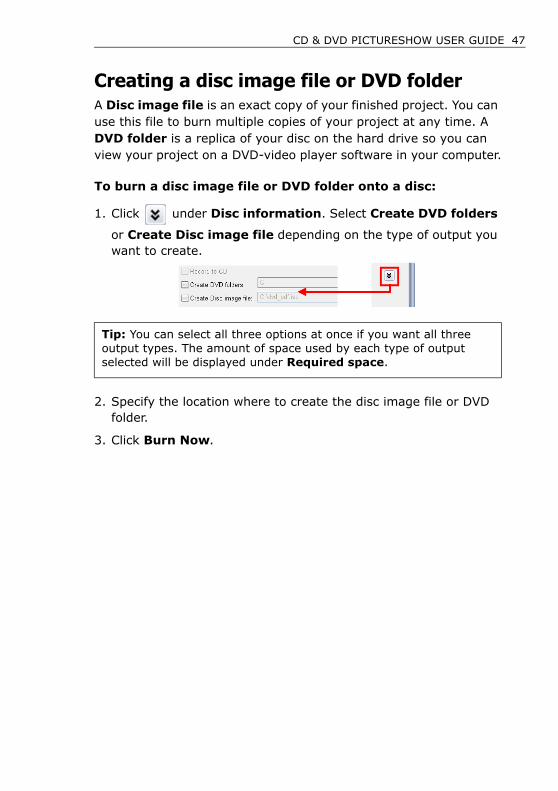
Creating a disc image file or DVD folderA Disc image file is an exact copy of your finished project. You can use this file to burn multiple copies of your project at any time. A DVD folder is a replica of your disc on the hard drive so you can view your project on a DVD-video player software in your computer.
To burn a disc image file or DVD folder onto a disc:
1. Click under Disc information. Select Create DVD folders
or Create Disc image file depending on the type of output you want to create.
2. Specify the location where to create the disc image file or DVD folder.
3. Click Burn Now.
Tip: You can select all three options at once if you want all three output types. The amount of space used by each type of output selected will be displayed under Required space.

48 CD & DVD PICTURESHOW USER GUIDE
Printing CD index and CD label Print index pages and custom-designed labels for your slideshow discs.
Printing CD label
1. Click and select Print CD Label.
2. Under Output options, select the Printer and Paper size to use for printing. Click the available buttons to choose between portrait and landscape orientation.
3. If you will be designing and printing dual label stickers on a single page, click the CD icons in Edited CD label to switch between the two labels and create different designs for each.
4. To apply a solid color as the base for the CD label, click the color box and select a background color.
5. Click Add Image to select one or more images to add on the CD label. To resize an image, drag the surrounding handles. To move an image, click and drag it to the desired position on the label.
6. Click the Image tab.
7. Adjust Brightness, Contrast and Transparency levels of each added image.
8. To add text, double-click on the CD image in the preview window and type your text.
9. Click the Text tab.
Tips: If you added several elements, such as images and text, on the CD label:
• Press [Ctrl] and click each element to select multiple elements. • Right-click the selected elements and select commands from the
menu to align the elements, arrange their order, etc.

CD & DVD PICTURESHOW USER GUIDE 49
10. Format each added text by changing the font type, size, style, text color and alignment. Adjust the text Transparency level accordingly.
11. Select the Shadow to add a drop-down shadow to the selected text, and click the color box to set the shadow color. Adjust the X/Y offset values to set the shadow position in relative to the position of the text.
12. Click Save CD Label to save your work on a CD label file (*.UPL).
13. Click Print to print the CD label.
Printing CD index
1. Click and select Print CD Index.
2. In the General tab, select the Printer and Paper size to use for printing. Click the available buttons to choose between portrait and landscape orientation for the printed pages. Also specify the number of Copies to print.
3. Click the Layout tab.
4. Choose how to print thumbnails on the paper size selected in the General tab.
• Fit selected paper size Uses the full paper size when printing thumbnails.
• Fit CD cover size Prints thumbnails within the standard CD cover size. The selected paper size will not be completely filled up.
Tip: The shadow position can also be flexibly adjusted by simply dragging the shadow. The shadow has a round, green handle which you can click and drag to adjust its position.

50 CD & DVD PICTURESHOW USER GUIDE
5. Choose what contents to print on the index pages. You can print Slideshow thumbnails only, Slideshow photos, All photos (continuous printing), or print a single slideshow only.
6. Specify the number of rows and columns to print on each index page.
7. Click the Text tab.
8. Select the check boxes of items you want printed on the index pages. To print a disc title, type the desired title in the provided text box. Click Font beneath each item to apply varying font types or styles.
9. Click Print to print the CD index pages.
Tip: The Enlarge thumbnail size option affects only low-resolution photos. When selected, original photos will be scaled up to fit the thumbnail frame size, which may result in poorer print quality. When cleared, photos will only be scaled to at most double their original size, which enhances thumbnail prints.

CD & DVD PICTURESHOW USER GUIDE 51
Appendices
Appendix A: Organize
Slideshow ToolbarNew Photo Slideshow
Browse for image files in your hard drive, and then add them to create a slideshow.
New Video Slideshow
Browse for a video file to create a video slideshow.
Get from Digital Camera
Transfers images or videos from your digital camera to your hard drive, and then creates corresponding slideshows in the Slideshow List.
Batch Collect Automatically locates every image or video file in the selected hard drive/s or folder/s. Slideshows are automatically added according to the searched directory names.
Slide Toolbar
Add PhotosOpens a dialog box from which you can add more photos to the selected slideshow.
Insert Blank
Slide
Inserts a blank slide in the Slide Panel. Click the arrow to select a color.
Delete PhotoRemoves the selected slide(s) in the Slide Panel.
Auto-arrangeSorts the slides into descending or ascending order based on their image file names or dates of creation.
Split
Slideshow
Divides the slideshow into two. The selected slide in the Slide Panel marks the starting point where the slideshow will be divided.

52 CD & DVD PICTURESHOW USER GUIDE
Appendix B: Dialog Boxes
Rotate LeftRotates the selected slide(s) 90 degrees counterclockwise.
Rotate RightRotates the selected slide(s) 90 degrees clockwise.
ExpressFix
Opens a dialog box where you can apply quick fixes to common digital photo problems.
DecorateOpens a dialog box from which you can add text, clipart, or images to the selected slide.
Multi-trim Video
Opens a dialog box where you can break down a video or flash slideshow into multiple segments.
RestoreRestores the original state of the slide.
Add
Description
Opens a dialog box from which you can add text to describe the selected slide(s).
Show/Hide
Filename
Shows or hides image file names in the Slide Panel.
Change
Thumbnail Size
Select the display size of slide thumbnails in the Slide Panel.
Save Photo as a separate file
Saves the selected photo in the slideshow as a separate file.
Add DescriptionCurrent Photo Displays the photo where the description
will be displayed.
Slide Toolbar

CD & DVD PICTURESHOW USER GUIDE 53
Description Enter the text description for the photo.
Apply to All Applies the description to the selected photos.
Audio & EffectMoves to the previous directory.
Moves to the next directory.
Moves to the previous folder.
Plays back the selected audio clip.
Add Background Audio
Adds the selected audio file to the slideshow.
Total Duration (audio/slideshow)
Displays the current slideshow and audio durations.
Selects the first slide in the slideshow.
Selects the previous slide.
Selects the next slide.
Selects the last slide in the slideshow.
Removes all inserted audio files from the slideshow.
Removes the selected audio file from the slideshow.
Opens the Trim Audio dialog box where you can cut the duration of the audio clip and apply fade-in and fade-out effects.
Add Description

54 CD & DVD PICTURESHOW USER GUIDE
Click to match the slideshow duration to the audio duration.
Click to undo match slideshow to audio duration.
Select to drag the slider to specify background audio volume.
Plays back the slideshow including the inserted audio files and sound annotations.
No. of photos/duration
Displays the number of photos selected on the Timeline and their total duration.
Opens the Pan & Zoom dialog box where you can set a specific or customized pan & zoom effect for your selected photo.
Opens the Photo Options dialog box where you can set the duration and add a sound annotation to the selected photo.
Opens the Transition Effects dialog box where you can set a specific transition effect for the selected photo.
Loop Audio Select to play the slideshow background music repeatedly.
Add PhotosAdd Adds the selected photo(s) to the current
slideshow.
Add All Adds all the photos in the current folder to the current slideshow.
Acquire Import photos from a TWAIN or WIA device and transfer them to the slideshow.
Default Duration Enter a value or drag the slider to specify how long the photos will be displayed during slideshow playback.
Audio & Effect

CD & DVD PICTURESHOW USER GUIDE 55
Audio RecorderDuration Displays the length of the audio recording.
Start Recording Click to begin audio recording.
Stop playback/recording
Click to stop playback or recording action.
Play selected sound file
Click to play back the recorded audio file.
Microphone Drag the slider to specify the recording volume of the microphone.
DecorateText Allows you to add text or modify the text
attributes on the current slide.
Text settings Specify text font, size, and style to apply to the photo.
Transparency Adjust the opacity level of the text, a higher value makes text less visible.
Shadow Select to apply a shadow to the text. Click the color box to specify its color.
X-offset Enter the horizontal distance of the shadow from the text.
Y-offset Enter the vertical distance of the shadow from the text.
Transparency Adjust the opacity level of the shadow, a higher value makes the shadow less visible
Use Other Props Click to add extra photos as decorations.
Props Select from available preset objects to use as decorations.
Get from Digital CameraImport Click to begin importing photos or videos
from the camera.

56 CD & DVD PICTURESHOW USER GUIDE
Refresh Click to refresh the camera memory card contents.
Destination folder Specify the directory where the imported photos will be saved.
Create a new folder
Select and then create a new folder in the specified directory where the imported photos will be saved.
Erase camera contents after transfer
Select to empty camera after photos have been transferred.
Renumber images to make sure that each file name is unique
Select to create index files of photos.
Split photo slideshow automatically
Automatically splits the imported photos into slideshows according to their dates or based on the specified number of photos per slideshow.
Text & BackgroundBackground Select to use an image or color as slide
background. Use the boxes to specify a color or to locate an image file to use as a texture.
Fit to Screen Click to allow photos to be proportionally resized to fit on the screen.
Onscreen text Select to display slide/slideshow information such as Slideshow title, File name, Date taken, and Description on the screen during playback.
Position Specify which part of the screen you want the description to appear.
Font Click to specify font style, size, and attributes.
Get from Digital Camera

CD & DVD PICTURESHOW USER GUIDE 57
Use text background
Select to use a color as background for the text.
Transparency Set the opacity level of the text background. A higher value makes the background less visible.
PreferencesGeneral
Working folder Specify the directory where the project will be saved.
Display reminder
Select to mark photos in the slideshow whose display sizes are smaller than the specified slideshow display size. These marks are represented by a white cross at the bottom right of the photo.
Photo duration Specify how long a slide stays on the screen during slideshow playback.
Use Joliet file system
(for long file names)
Select to allow long file names to be recorded on the disc. Note: If you choose not to use the Joliet file system, the standard naming convention of 11 characters will apply to your files. File names longer that 11 characters are truncated and the tilde (~) is added.
Check Ulead’s Web site every ___ days
Automatically checks Ulead’s Web site at a specified number of days interval for product news and updates.
Text & Background

58 CD & DVD PICTURESHOW USER GUIDE
Output Settings
TV system Specify whether your disc can be played on an NTSC or PAL player. NTSC is predominant in North America and many Asian countries. PAL is the standard used in Europe and the South Pacific. Use the Select the target country or region option to automatically determine which video format to use based on the country you choose.
Navigation controls
Specify what action to take after your slideshow playback is finished.
Disc Format Settings
Click SVCD Options to specify which SVCD format to use on your disc.
Show title-safe area
Set the viewable area of the text in the Preview Panel. This acts as a guide to ensure that the text is not truncated when viewed on a TV screen. Recommended values are NTSC:12%, PAL:10%.
Apply anti-flickering filter
Select to reduce the blinking effect and improve display quality for TV viewing. Leave this on if you plan to play your slideshow primarily on a TV.
Apply color filter
Select to configure PictureShow to confine its color palette to those visible in the NTSC and PAL filter color space to make sure that all the colors are valid. Clear for monitor display only.
Print CD IndexPrint Page Click to print the CD index page
Print All Click to print all CD index pages.
General
Printer name Select a printer to use.
Preferences

CD & DVD PICTURESHOW USER GUIDE 59
Paper size Select a paper template to work on.
Copies Enter the number of copies to print.
Layout
Fit to selected paper size
Select to layout the photo thumbnails on the selected type of paper.
Fit to CD cover size
Select to layout the photo thumbnails on a standard CD cover.
Print range Select which photos and how to print the index.
Slideshow thumbnails
Select to print only the thumbnails of each slideshow.
Slideshow photos
Select to print all the photos in each slideshow. Printing photos begins on a new page for each slideshow.
All photos Select to print all photos in each slideshow continuously without creating new pages for each slideshow.
Thumbnail layout
Enter a number or drag the slider to specify the number of photos per row and column in each index page.
Enlarge thumbnail size
Select to enlarge the thumbnail size so that they fit the frames.
Reset Click to restore all settings to their default values.
Text
Show disc title Click to show the disc title on the index page.
Show slideshow title
Click to show the slideshow title on the page.
Show page number
Click to display the page number.
Show title on first page only
Click to show the slideshow title on the first page only.
Print CD Index

60 CD & DVD PICTURESHOW USER GUIDE
Print CD LabelGeneral
Printer Select which printer to use.
Printer properties
Click to open a dialog box where you can set your printer properties before printing.
Paper size Select a paper template to work on or create your own customized template.
Copies Specify the number of copies to print.
Currently selected label
Displays a preview of the currently selected paper template.
Texture Select to use an image file as your disc label background. Click Browse to select the image file to use.
Color Select to use a solid color as your disc label background. Click the color box to select your desired color.
Transparency Adjust the transparency of the background by entering a value or using the slider.
Image
Brightness A higher value increases the brightness of your image.
Contrast A higher value makes midtone colors in the image stand out more.
Transparency A higher value makes the image more transparent.
Fit to Window Stretches and resizes an inserted image proportionally so that it is centered horizontally and vertically and its edges cover the sides of the disc label.
Shadow Select to apply a shadow to the image.
Shadow color Click to specify a shadow color.
X-offset Enter the horizontal distance of the shadow from the selected image.

CD & DVD PICTURESHOW USER GUIDE 61
Y-offset Enter the vertical distance of the shadow from the selected image.
Transparency Adjust the transparency of the shadow by entering a value or using the slider.
Text
Wrap Text Select to wrap the text into a circle. Enter the number of times you want to repeat the text in Count.
Fit to Window Click to fit the text into the disc label. Selected text will be stretched proportionally and centered vertically and horizontally.
Shadow Select to apply a shadow to the text.
Shadow color Click to specify a shadow color.
X-offset Enter the horizontal distance of the shadow from the text.
Y-offset Enter the vertical distance of the shadow from the text.
Transparency Adjust the opacity level of the shadow, a higher value makes the shadow less visible
Add Image Click to select an image to add on the label.
Add Text Click to add text on the label.
Options
Load Disc Label
Click to open a previously saved disc label project.
Save Disc Label
Click to save your disc label project.
Show/Hide Disc
Click to show/hide the outline of the disc for better alignment of images or text.
Show/Hide Grid
Click to show/hide gridlines for laying out images and text symmetrically.
Print CD Label

62 CD & DVD PICTURESHOW USER GUIDE
Clear Content Click to remove all objects and background from the disc layout. This is useful when starting over with your design.
Output OptionsDrive Information Specify the settings for your burning
device.
Drive Select the disc burner to use to burn your slideshow album.
About Click to show information about the burning engine used in this software.
Recording speed Select the recording speed that you want to use to burn your slideshow album.
Files to include on disc
Choose additional items that you want to include on the disc.
Photo files Select to include photo files used in your slideshows on the disc.
Video/Audio files
Select to include the video and sound files used in your slideshows on the disc.
Project file Select to include the CD & DVD PictureShow project file that you created on the disc for later use.
Copyright Select to include copyright information on the disc to be burned.
Print CD Label

CD & DVD PICTURESHOW USER GUIDE 63
Advanced Settings
Perform writing test before recording
Select to simulate the recording process before burning onto a disc. This checks if the system speed or CD-ROM/DVD-ROM speed is fast enough to send data to the burner device at the specified write speed.
If your burning device has Buffer Underrun Protection and it is enabled, you can clear Perform writing test before burning to save time when burning.
Enable buffer underrun protection
Select to ensure an uninterrupted flow of data to minimize the risk of error in the burning process.
Format DVD+RW
Select to format the DVD+RW disc before burning. Enabling this option will prolong the burning process but will ensure successful burn.
Do not close disc
Select to be able to further modify disc contents at a later time.
RelinkMissing files Displays the files in the slideshow which are
either deleted or moved to another location.
Search results Displays the search results for the missing files after the Smart Search option has been used.
Smart Search Click to perform a search for the missing files. Specify the folders to search in the Smart Search dialog box.
Apply Click to link the searched results to the program.
Output Options

64 CD & DVD PICTURESHOW USER GUIDE
TWAINSelect data source Specify the type of TWAIN device to use to
acquire photos.
Folder to save images
Specify the folder where acquired photos will be saved.
File Format Select the file format to use for your photos.
File name prefix Enter a prefix to use as part of the file name for the acquired files. The specified prefix is added before the number of the acquired file. (Ex. Pic12)
Add acquired images to slideshow
Select to import acquired images directly into your slideshow.
WIAFolder to save images
Specify the folder where acquired photos will be saved.
Add acquired images to slideshow
Select to import acquired images directly into your slideshow.

CD & DVD PICTURESHOW USER GUIDE 65
Appendix C: Remote ControlThe Remote Control allows you to simulate the behavior of your project’s titles and menus. Use the buttons available on the Remote Control to preview your slideshow album. The available buttons on the Remote Control will depend on the type of media (DVD, VCD, or
SVCD) you are working on.
1 Direction Buttons (DVD) Use to navigate through your menu page in your DVD project.
2 Enter (DVD) Activates the selected button.
3 Menu (DVD) Goes to the last visited menu of your DVD project.
4 Top Menu (DVD) Goes to the first menu of your DVD project.
5 Go to previous menu Goes to the previous menu.
6 Play/Pause Toggles between playing back your project and temporarily stopping the playback of your title.
7 Stop Ends project playback.
8 Go to next menu Goes to the next menu.
9 Back Goes back to edit your slideshow album.
10 Digit buttons and Return (VCD/SVCD/DVD)
Click a number to play a tittle assigned to that number. Click Return to go back to the last visited menu page.

IndexAAdd Description 23Add Photos 19Adding a First Play Video 43Auto-arrange 20
BBatch Collect 17Browse 33Burn
Burning your project to disc 46
Burn tab 14Burning your project to disc 46Burn 46
CCapacity Bar 12Control Panel 12
Gallery tab 12Menu tab 13Slideshow tab 13
Customizing menus 29Customizing your slideshows 32
Adding and editing back-ground audio 34
Adding sound annotation to slideshows 36
Applying Pan & Zoom to your slideshows 37
Selecting a slide layout style 36
To add background music 38
DDecorate 23Dialog boxes
Pan & Zoom 39Display Reminder 26
GGallery tab 12, 28Get from Digital Camera 16Getting Started 6
MMenu
Modifying background music 30
Modifying onscreen text 29
Motion Menu on DVD slideshows 31
Pan & Zoom and Motion filter 31
Specifying a menu back-ground image 30
Using a video as a menu background 32
Menu tab 13, 29Background image 30Background Video 32

Motion filter 31Motion menu 31Pan & Zoom 31
Modifying slideshow contents 18Motion filter 31Motion menu 31
NNew Photo Slideshow 15
OOpen Audio File dialog box 30Organize
Creating a slideshow 15Batch Collect 17Creating a photo slide-
show 15Creating a video slide-
show 16Getting photos from a
digital camera 16
Modifying your slideshow contents 18
Adding descriptions 23
Adding images to your slideshow 19
Arranging slides in-side a slide-show 20
Changing a slide-show’s title text and thumbnail 18
Decorating your pho-tos 23
Organize 15Output Format Selection Menu 12
PPan & Zoom 31, 37Pan & Zoom dialog box 39Playing back a slideshow 26Preferences 8Preview Panel 29, 33, 44Previewing your slideshow al-bum 44Print CD Index 49Print CD Label 48Printing CD index 49Printing CD index and CD la-bel 48Printing CD label 48
SSetting your preferences 8Slide Panel 11Slide Toolbar 11Slideshow album, slideshows, and slides 7Slideshow List 11Slideshow tab 13, 34
Slideshow Toolbar 10Split Slideshow 20Starting a project 9
TTheme 8, 28
Customizing menus 29Customizing your slide-
shows 32Theme tab 12TWAIN 19
VVideo Slideshow 16
WWhat’s new? 6WIA 19Workspace 10
Burn tab 14Organize tab 10
Capacity Bar 12Slide Panel 11Slide Toolbar 11Slideshow List 11Slideshow Toolbar 10
Theme tab 12


