User Guide to Mini6410 Android 041611
84
____________________________________________________________________________________________________________________ Address: Room 1701,Block A2, Longyuan Plaza, 549# Longkouxi Road, Guangzhou, China, 510640 Website: http://www.arm9.net Email: [email protected] Tel: +86-20-85201025 Fax: +86-20-85261505 1 / 84 User’ s Guide to Mini6410 Android REVISION ORIGINATOR SCR REV DATE 0.1.0 FriendlyARM Co., Ltd March 28th, 2011 FriendlyARM Co., Ltd Confidential: This document and information contained in it shall not be reproduced by, used by, or disclosed to others except as expressly authorized in writing by FriendlyARM Co., Ltd. FriendlyARM Co., Ltd Guangzhou, China copyright@2010
-
Upload
suman-wadhwani -
Category
Documents
-
view
409 -
download
6
Transcript of User Guide to Mini6410 Android 041611

____________________________________________________________________________________________________________________
Address: Room 1701,Block A2, Longyuan Plaza, 549# Longkouxi Road, Guangzhou, China, 510640
Website: http://www.arm9.net Email: [email protected]
Tel: +86-20-85201025 Fax: +86-20-85261505
1 / 84
User’s Guide to Mini6410 Android
REVISION ORIGINATOR SCR REV DATE
0.1.0 FriendlyARM Co., Ltd March 28th, 2011
FriendlyARM Co., Ltd Confidential:
This document and information contained in it shall not be reproduced by, used by, or
disclosed to others except as expressly authorized in writing by FriendlyARM Co., Ltd.
FriendlyARM Co., Ltd
Guangzhou, China
copyright@2010

____________________________________________________________________________________________________________________
Address: Room 1701,Block A2, Longyuan Plaza, 549# Longkouxi Road, Guangzhou, China, 510640
Website: http://www.arm9.net Email: [email protected]
Tel: +86-20-85201025 Fax: +86-20-85261505
2 / 84
COPYRIGHT STATEMENT
The content (content being images, text, programs and scripts) of this English
manual is copyright © FriendlyARM Co., Ltd. All rights expressly reserved.
Any content of the manual printed or downloaded may not be sold, licensed,
transferred, copied or reproduced in whole or in part in any manner or in or on any
media to any person without the prior written consent of FriendlyARM Co., Ltd
including but not limited to:
transmission by any method
storage in any medium, system or program
display in any form
performance
hire, lease, rental or loan
Requests for permission to reproduce material from this manual should be addressed
to FriendlyARM Co., Ltd.
____________________________________________________________________________________________________________________
Address: Room 1701,Block A2, Longyuan Plaza, 549# Longkouxi Road, Guangzhou, China, 510640
Website: http://www.arm9.net Email: [email protected]
Tel: +86-20-85201025 Fax: +86-20-85261505
3 / 84
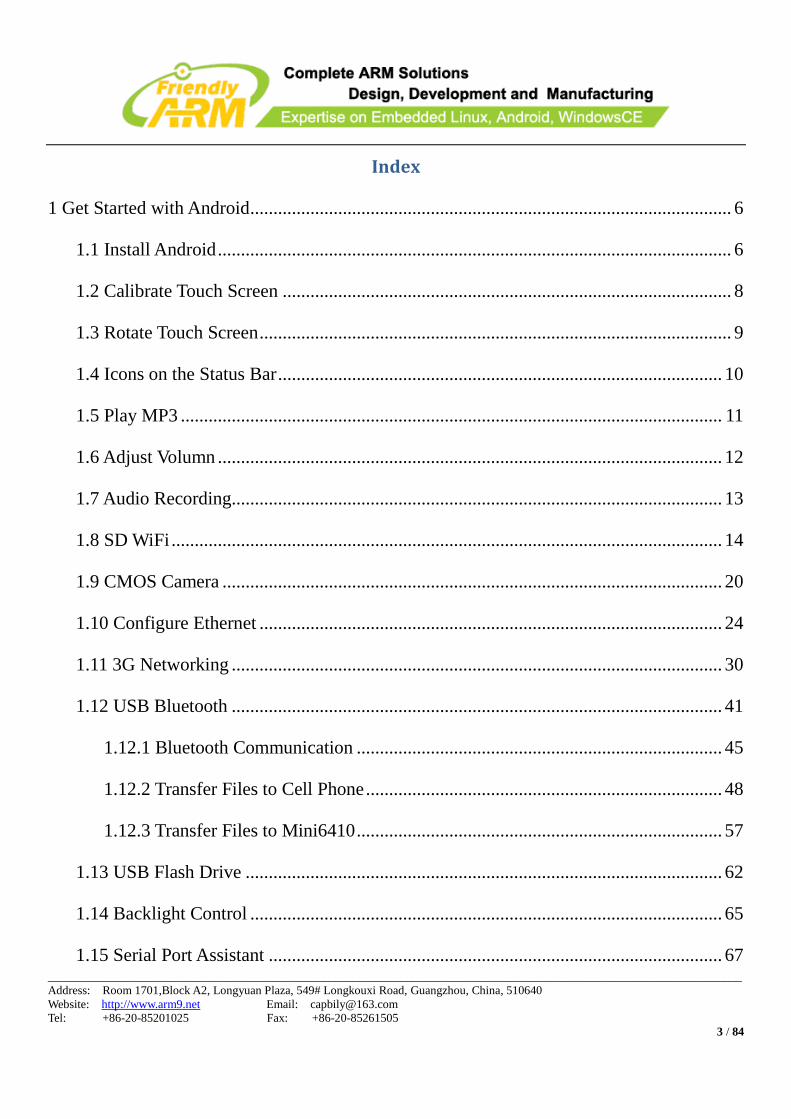
Index
1 Get Started with Android ........................................................................................................ 6
1.1 Install Android ............................................................................................................... 6
1.2 Calibrate Touch Screen ................................................................................................. 8
1.3 Rotate Touch Screen ...................................................................................................... 9
1.4 Icons on the Status Bar ................................................................................................ 10
1.5 Play MP3 ..................................................................................................................... 11
1.6 Adjust Volumn ............................................................................................................. 12
1.7 Audio Recording.......................................................................................................... 13
1.8 SD WiFi ....................................................................................................................... 14
1.9 CMOS Camera ............................................................................................................ 20
1.10 Configure Ethernet .................................................................................................... 24
1.11 3G Networking .......................................................................................................... 30
1.12 USB Bluetooth .......................................................................................................... 41
1.12.1 Bluetooth Communication ............................................................................... 45
1.12.2 Transfer Files to Cell Phone ............................................................................. 48
1.12.3 Transfer Files to Mini6410 ............................................................................... 57
1.13 USB Flash Drive ....................................................................................................... 62
1.14 Backlight Control ...................................................................................................... 65
1.15 Serial Port Assistant .................................................................................................. 67

____________________________________________________________________________________________________________________
Address: Room 1701,Block A2, Longyuan Plaza, 549# Longkouxi Road, Guangzhou, China, 510640
Website: http://www.arm9.net Email: [email protected]
Tel: +86-20-85201025 Fax: +86-20-85261505
4 / 84
1.16 LED Testing ............................................................................................................... 69
1.17 PWM Buzzer ............................................................................................................. 70
1.18 ADC Testing .............................................................................................................. 71
1.19 I2C-EEPROM ........................................................................................................... 72
2 Set up Android Development Environment ......................................................................... 74
3 Set up Android Compiler ...................................................................................................... 75
3.1 Android Development and Compiler .......................................................................... 75
3.2 Uncompress and Install Source Code ......................................................................... 75
4 Configure and Compile U-Boot ........................................................................................... 78
5 Configure and Compile Linux Kernel .................................................................................. 79
6 Create Android ..................................................................................................................... 80
7 Create or Run File System ................................................................................................... 82
7.1 Make YAFFS2 Image .................................................................................................. 82
7.2 Make UBIFS Image .................................................................................................... 83
7.3 Make EXT3 Image ...................................................................................................... 83
____________________________________________________________________________________________________________________
Address: Room 1701,Block A2, Longyuan Plaza, 549# Longkouxi Road, Guangzhou, China, 510640
Website: http://www.arm9.net Email: [email protected]
Tel: +86-20-85201025 Fax: +86-20-85261505
5 / 84
The Mini6410 system has enabled almost all and the latest features of Android
such as 3G networking, USB Bluetooth, flash drive auto mounting and Ethernet
setting. The 3G networking feature detects a USB network card automatically
and supports all three systems: WCDMA, CDMA2000 and TD-SCDMA.
The version we used when we compiled this manual is Android-2.3.2
The bootloader that Android uses is very similar to the one for Linux. The only
differences lie on the configurations. Actually Andorid’s file system maks it
special and when we talk about the Andoid system we are talking about its file
system

____________________________________________________________________________________________________________________
Address: Room 1701,Block A2, Longyuan Plaza, 549# Longkouxi Road, Guangzhou, China, 510640
Website: http://www.arm9.net Email: [email protected]
Tel: +86-20-85201025 Fax: +86-20-85261505
6 / 84
1 Get Started with Android
1.1 Install Android
Note: running an ext3 Android system from the SD card on a 128M board may not be
smooth or can even fail. We suggest you install Android to the Nand Flash.
You can burn an Android system to your board via USB download or SD card or just run
it from your SD card as follows
Step1: burn a Superboot to your SD card with SD-Flasher.exe
Step2: copy the whole image directory in the shipped CD to your SD card
Step3: open “\images\FriendlyARM.ini” in the SD card make these changes: “Action=Run”
and “OS=Android”
Step4: toggle the S2 switch to SDBOOT, insert your SD card, power on and your Android
will be loaded
On your first system boot a calibration screen will pop up, please follow the “十” to
calibrate your screen.

____________________________________________________________________________________________________________________
Address: Room 1701,Block A2, Longyuan Plaza, 549# Longkouxi Road, Guangzhou, China, 510640
Website: http://www.arm9.net Email: [email protected]
Tel: +86-20-85201025 Fax: +86-20-85261505
7 / 84
The Mini6410 board has 8 user buttons and their definitions are listed here
User Button Function User Button Function
K6 Up K8 OK
K5 Down K7 Cancel
K4 Left
K3 Right
K2 Menu (pressing “menu” and
keeping it down for a while
you will see the screen rotate)
K1 Home

____________________________________________________________________________________________________________________
Address: Room 1701,Block A2, Longyuan Plaza, 549# Longkouxi Road, Guangzhou, China, 510640
Website: http://www.arm9.net Email: [email protected]
Tel: +86-20-85201025 Fax: +86-20-85261505
8 / 84
1.2 Calibrate Touch Screen
After you burn an Android into your board you will see a calibration screen on the very
first system boot. The following screen shows the system uses a 1-wire precise touching
LCD (marked in red).
The following screen shows the system uses an ARM LCD (marked in red).

____________________________________________________________________________________________________________________
Address: Room 1701,Block A2, Longyuan Plaza, 549# Longkouxi Road, Guangzhou, China, 510640
Website: http://www.arm9.net Email: [email protected]
Tel: +86-20-85201025 Fax: +86-20-85261505
9 / 84
Follow the prompt, click on “十” to calibrate and you will enter the system after your
calibration is done. If you don’t position your pen properly the calibration process will restart
until you are done successfully
1.3 Rotate Touch Screen
After Android 2.3 is loaded by default it will display vertically. To switch to a horizontal
screen please press the menu key (k2) and keep it down for a while it will change.

____________________________________________________________________________________________________________________
Address: Room 1701,Block A2, Longyuan Plaza, 549# Longkouxi Road, Guangzhou, China, 510640
Website: http://www.arm9.net Email: [email protected]
Tel: +86-20-85201025 Fax: +86-20-85261505
10 / 84
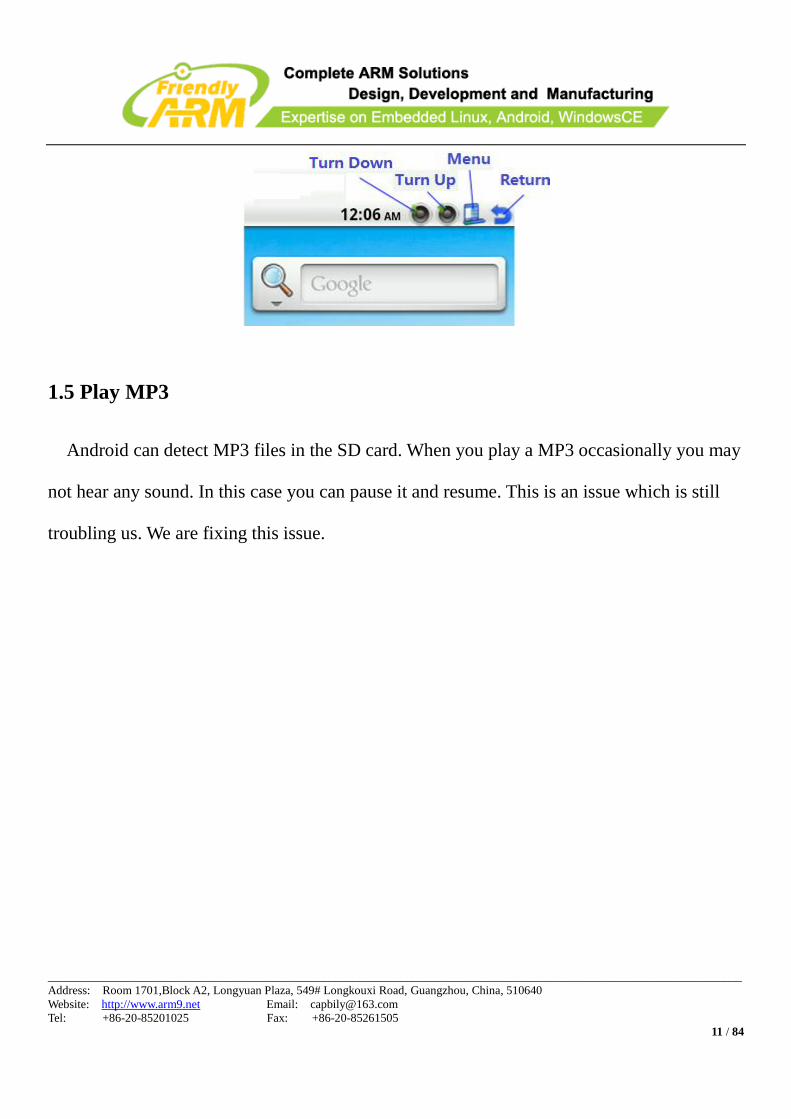
1.4 Icons on the Status Bar
We added four shortcut icons on the status bar in Android2.3, which allow users to easily
operate the system from the touch screen
____________________________________________________________________________________________________________________
Address: Room 1701,Block A2, Longyuan Plaza, 549# Longkouxi Road, Guangzhou, China, 510640
Website: http://www.arm9.net Email: [email protected]
Tel: +86-20-85201025 Fax: +86-20-85261505
11 / 84
1.5 Play MP3
Android can detect MP3 files in the SD card. When you play a MP3 occasionally you may
not hear any sound. In this case you can pause it and resume. This is an issue which is still
troubling us. We are fixing this issue.
____________________________________________________________________________________________________________________
Address: Room 1701,Block A2, Longyuan Plaza, 549# Longkouxi Road, Guangzhou, China, 510640
Website: http://www.arm9.net Email: [email protected]
Tel: +86-20-85201025 Fax: +86-20-85261505
12 / 84
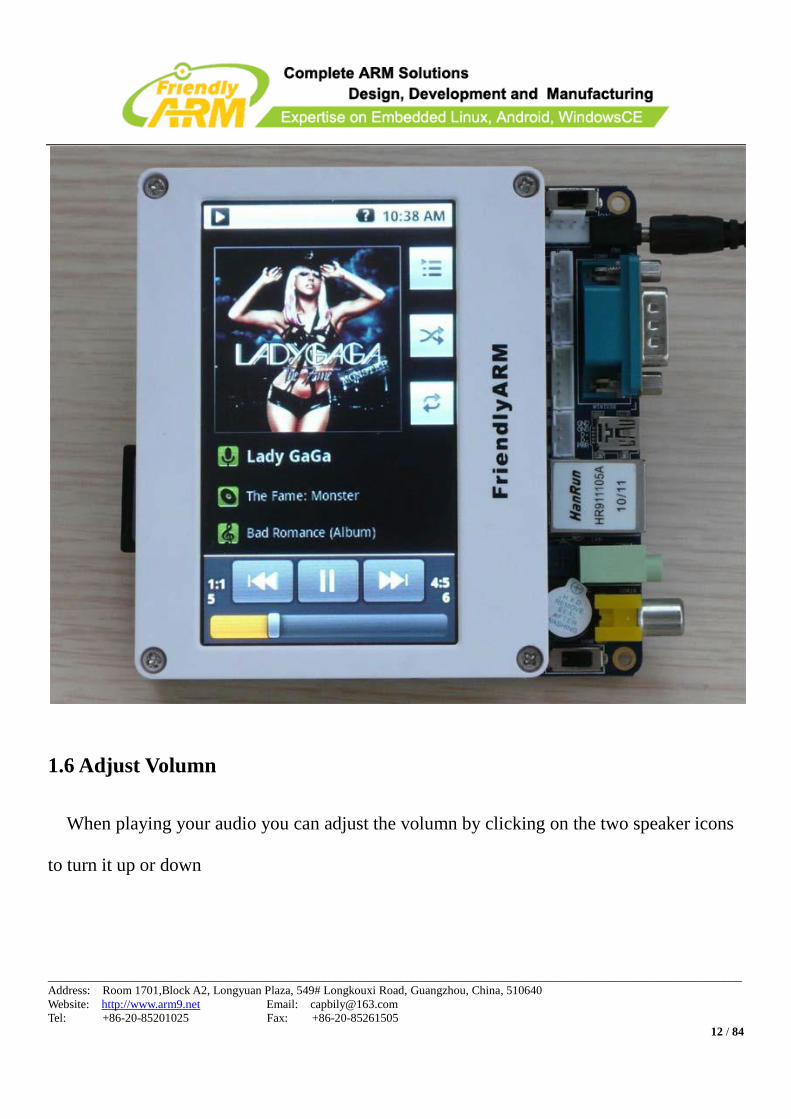
1.6 Adjust Volumn
When playing your audio you can adjust the volumn by clicking on the two speaker icons
to turn it up or down
____________________________________________________________________________________________________________________
Address: Room 1701,Block A2, Longyuan Plaza, 549# Longkouxi Road, Guangzhou, China, 510640
Website: http://www.arm9.net Email: [email protected]
Tel: +86-20-85201025 Fax: +86-20-85261505
13 / 84
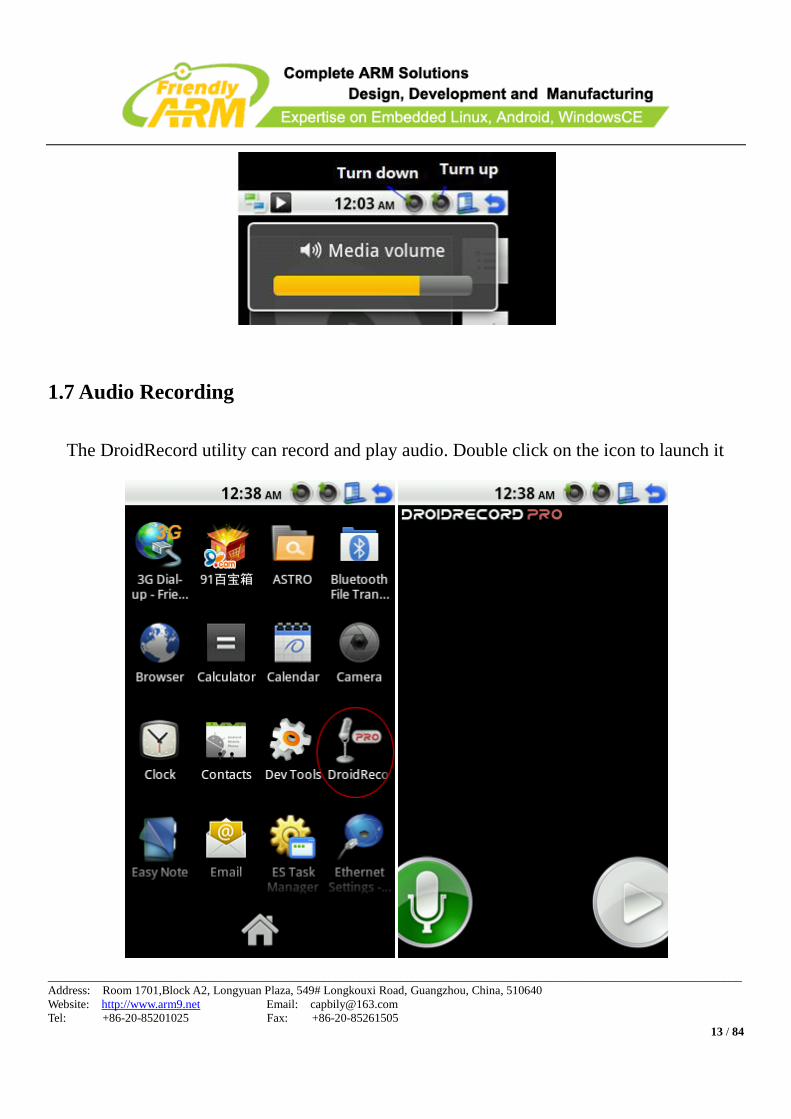
1.7 Audio Recording
The DroidRecord utility can record and play audio. Double click on the icon to launch it
____________________________________________________________________________________________________________________
Address: Room 1701,Block A2, Longyuan Plaza, 549# Longkouxi Road, Guangzhou, China, 510640
Website: http://www.arm9.net Email: [email protected]
Tel: +86-20-85201025 Fax: +86-20-85261505
14 / 84
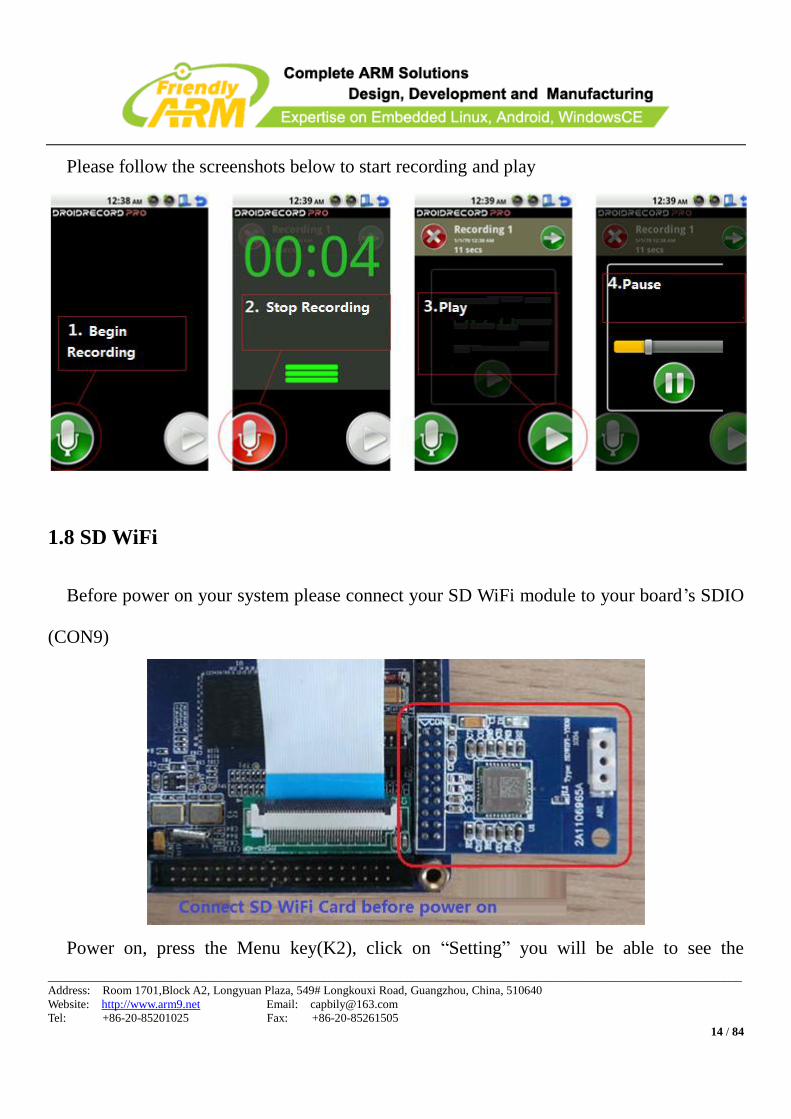
Please follow the screenshots below to start recording and play
1.8 SD WiFi
Before power on your system please connect your SD WiFi module to your board’s SDIO
(CON9)
Power on, press the Menu key(K2), click on “Setting” you will be able to see the

____________________________________________________________________________________________________________________
Address: Room 1701,Block A2, Longyuan Plaza, 549# Longkouxi Road, Guangzhou, China, 510640
Website: http://www.arm9.net Email: [email protected]
Tel: +86-20-85201025 Fax: +86-20-85261505
15 / 84
following menu
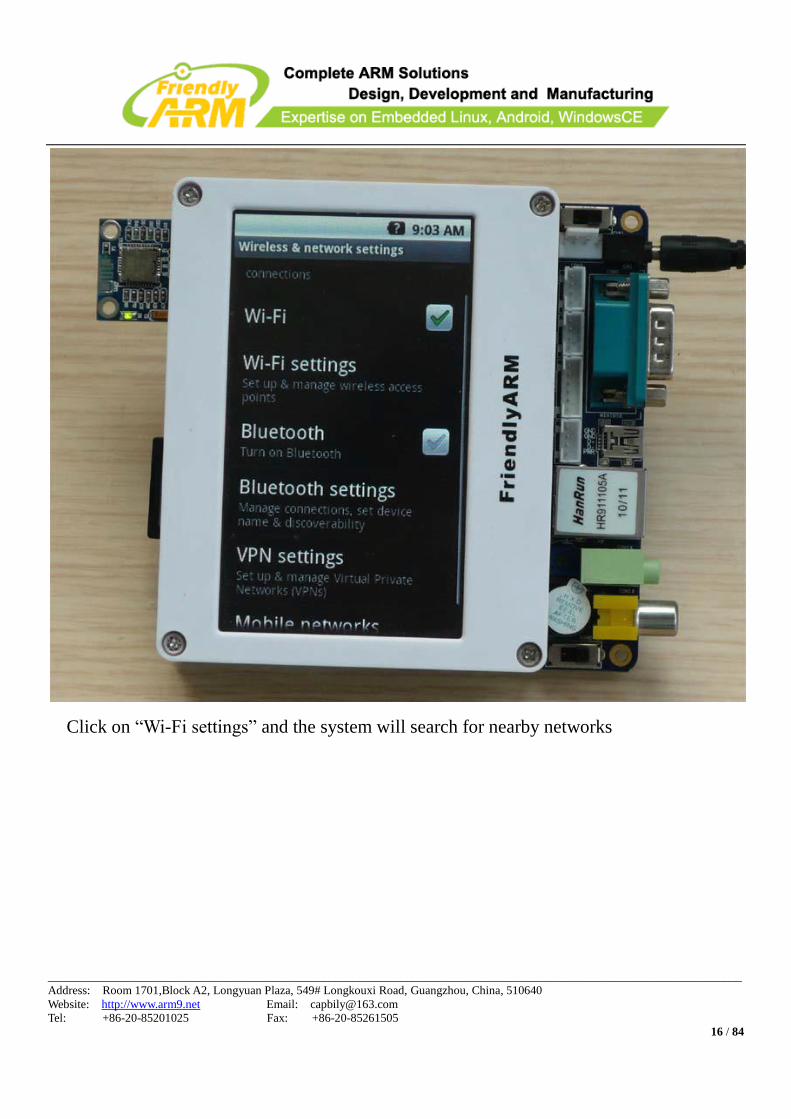
Click on “Wireless & network” -> “Wi-Fi” to start the SD WiFi function and you will see
that it is checked
____________________________________________________________________________________________________________________
Address: Room 1701,Block A2, Longyuan Plaza, 549# Longkouxi Road, Guangzhou, China, 510640
Website: http://www.arm9.net Email: [email protected]
Tel: +86-20-85201025 Fax: +86-20-85261505
16 / 84
Click on “Wi-Fi settings” and the system will search for nearby networks

____________________________________________________________________________________________________________________
Address: Room 1701,Block A2, Longyuan Plaza, 549# Longkouxi Road, Guangzhou, China, 510640
Website: http://www.arm9.net Email: [email protected]
Tel: +86-20-85201025 Fax: +86-20-85261505
17 / 84
Select your network and type required information to connect

____________________________________________________________________________________________________________________
Address: Room 1701,Block A2, Longyuan Plaza, 549# Longkouxi Road, Guangzhou, China, 510640
Website: http://www.arm9.net Email: [email protected]
Tel: +86-20-85201025 Fax: +86-20-85261505
18 / 84
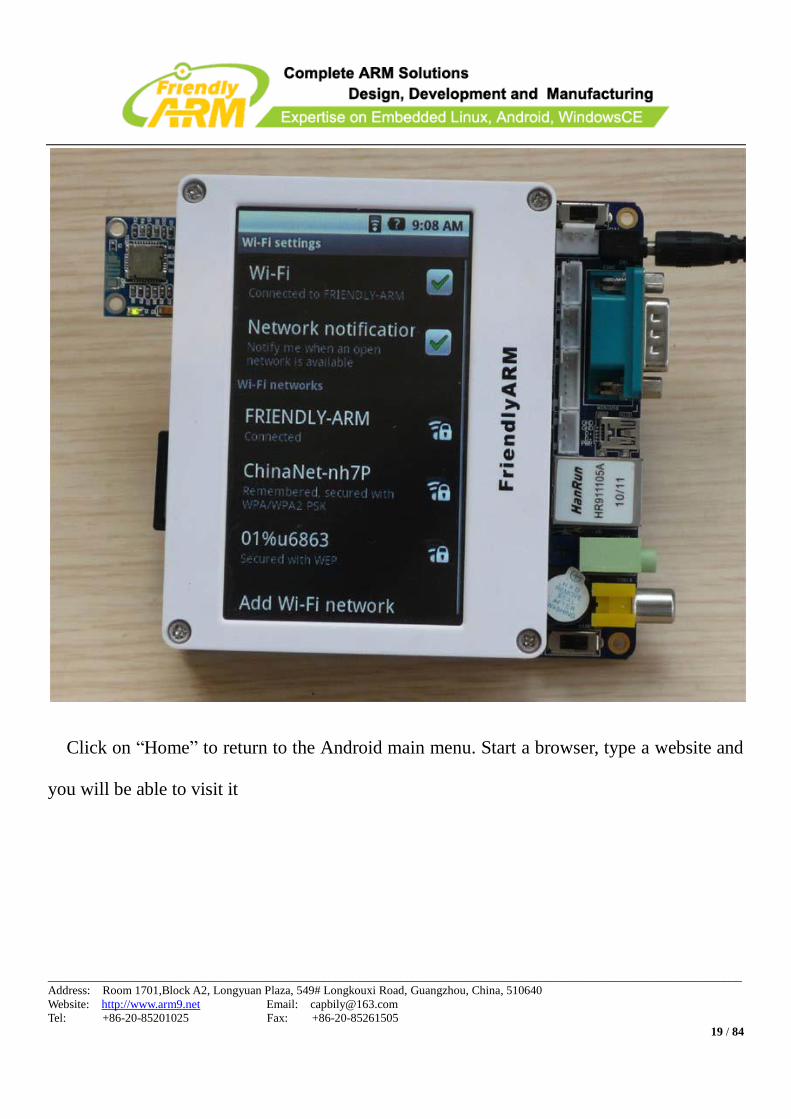
Connection is successful
____________________________________________________________________________________________________________________
Address: Room 1701,Block A2, Longyuan Plaza, 549# Longkouxi Road, Guangzhou, China, 510640
Website: http://www.arm9.net Email: [email protected]
Tel: +86-20-85201025 Fax: +86-20-85261505
19 / 84
Click on “Home” to return to the Android main menu. Start a browser, type a website and
you will be able to visit it

____________________________________________________________________________________________________________________
Address: Room 1701,Block A2, Longyuan Plaza, 549# Longkouxi Road, Guangzhou, China, 510640
Website: http://www.arm9.net Email: [email protected]
Tel: +86-20-85201025 Fax: +86-20-85261505
20 / 84
1.9 CMOS Camera
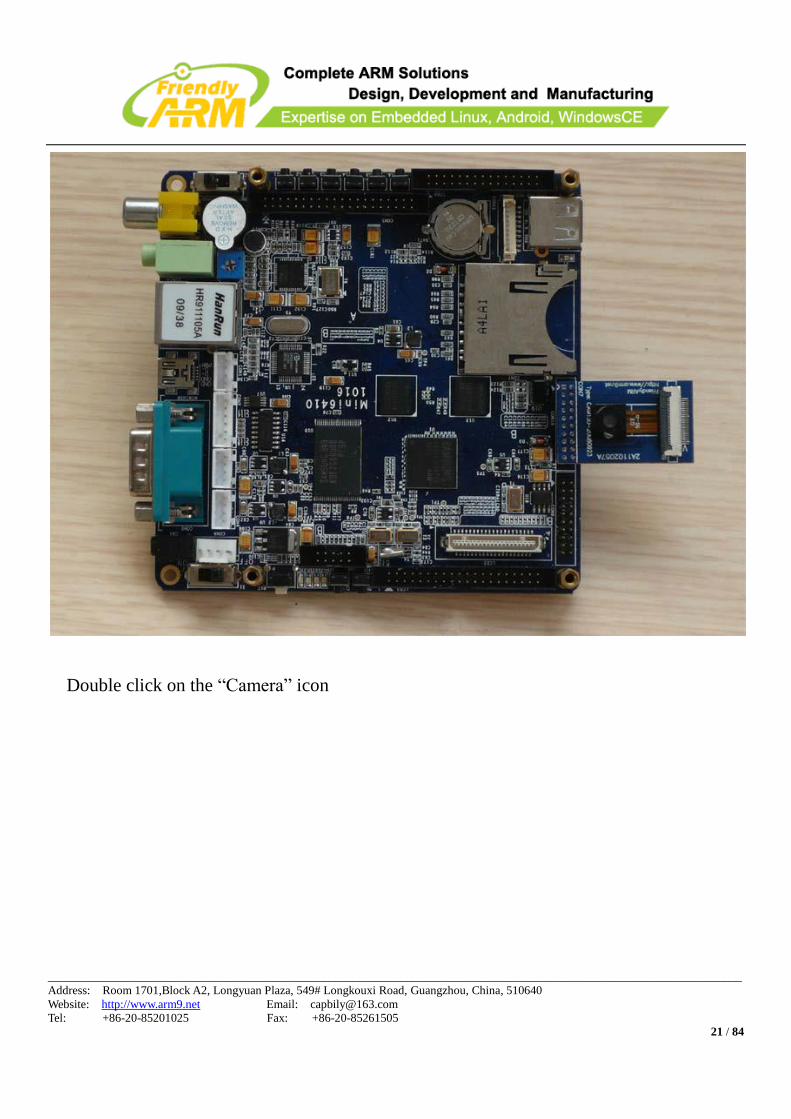
All the CMOS cameras supported in the Mini2440 are supported in the Mini6410 since
the two systems use the same interface. Before power on you need to hook up your CAM130
to your board (CON10 on the Mini6410 board)
____________________________________________________________________________________________________________________
Address: Room 1701,Block A2, Longyuan Plaza, 549# Longkouxi Road, Guangzhou, China, 510640
Website: http://www.arm9.net Email: [email protected]
Tel: +86-20-85201025 Fax: +86-20-85261505
21 / 84
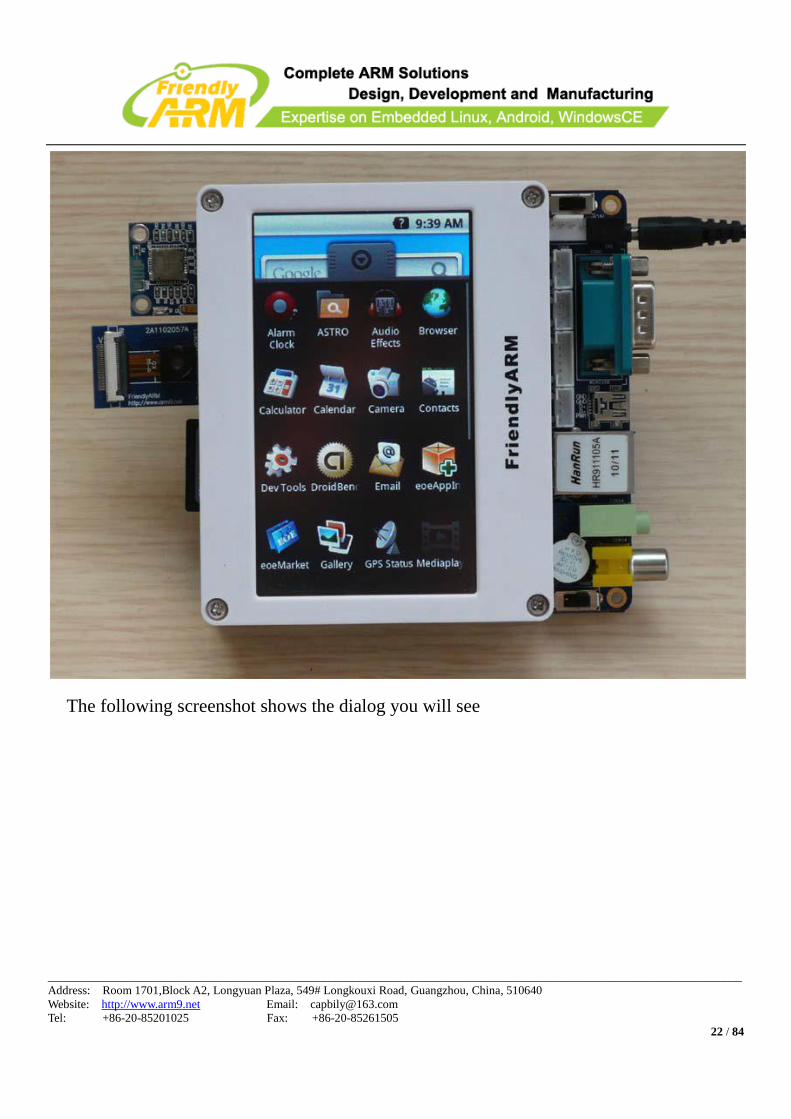
Double click on the “Camera” icon
____________________________________________________________________________________________________________________
Address: Room 1701,Block A2, Longyuan Plaza, 549# Longkouxi Road, Guangzhou, China, 510640
Website: http://www.arm9.net Email: [email protected]
Tel: +86-20-85201025 Fax: +86-20-85261505
22 / 84
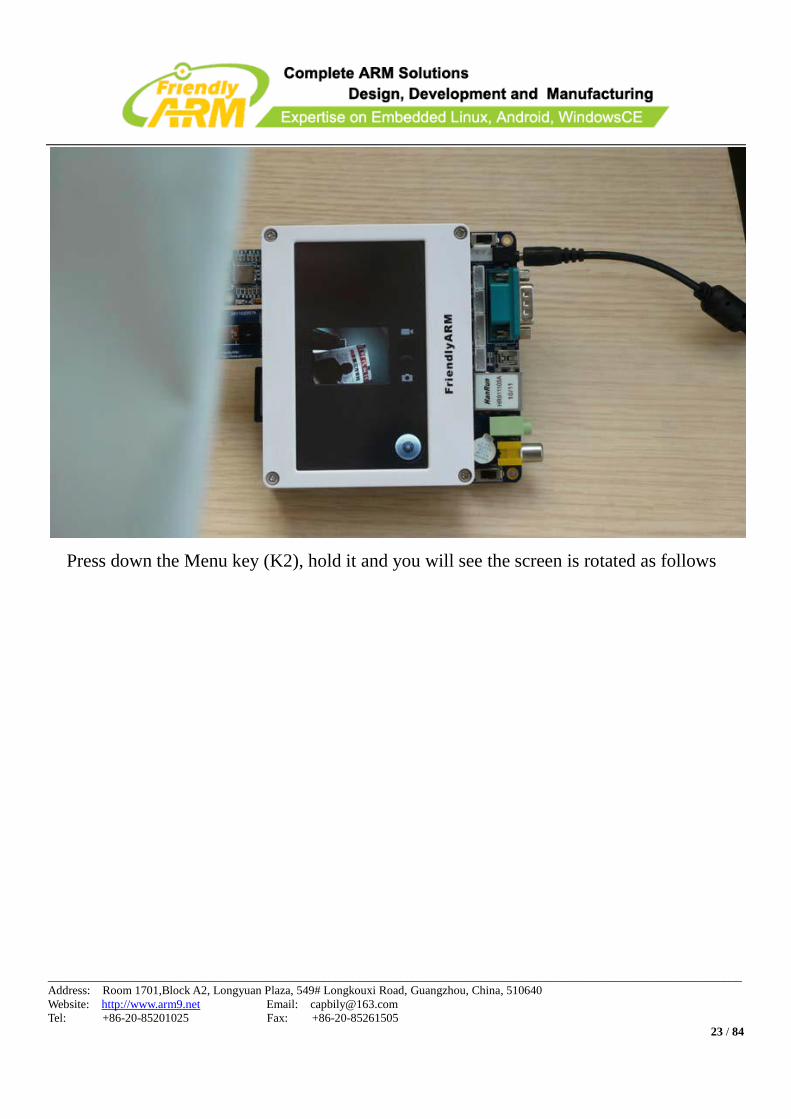
The following screenshot shows the dialog you will see
____________________________________________________________________________________________________________________
Address: Room 1701,Block A2, Longyuan Plaza, 549# Longkouxi Road, Guangzhou, China, 510640
Website: http://www.arm9.net Email: [email protected]
Tel: +86-20-85201025 Fax: +86-20-85261505
23 / 84
Press down the Menu key (K2), hold it and you will see the screen is rotated as follows

____________________________________________________________________________________________________________________
Address: Room 1701,Block A2, Longyuan Plaza, 549# Longkouxi Road, Guangzhou, China, 510640
Website: http://www.arm9.net Email: [email protected]
Tel: +86-20-85201025 Fax: +86-20-85261505
24 / 84
1.10 Configure Ethernet
Android has an ethernet configuration utility

____________________________________________________________________________________________________________________
Address: Room 1701,Block A2, Longyuan Plaza, 549# Longkouxi Road, Guangzhou, China, 510640
Website: http://www.arm9.net Email: [email protected]
Tel: +86-20-85201025 Fax: +86-20-85261505
25 / 84
Click on it you will see the following dialog
____________________________________________________________________________________________________________________
Address: Room 1701,Block A2, Longyuan Plaza, 549# Longkouxi Road, Guangzhou, China, 510640
Website: http://www.arm9.net Email: [email protected]
Tel: +86-20-85201025 Fax: +86-20-85261505
26 / 84
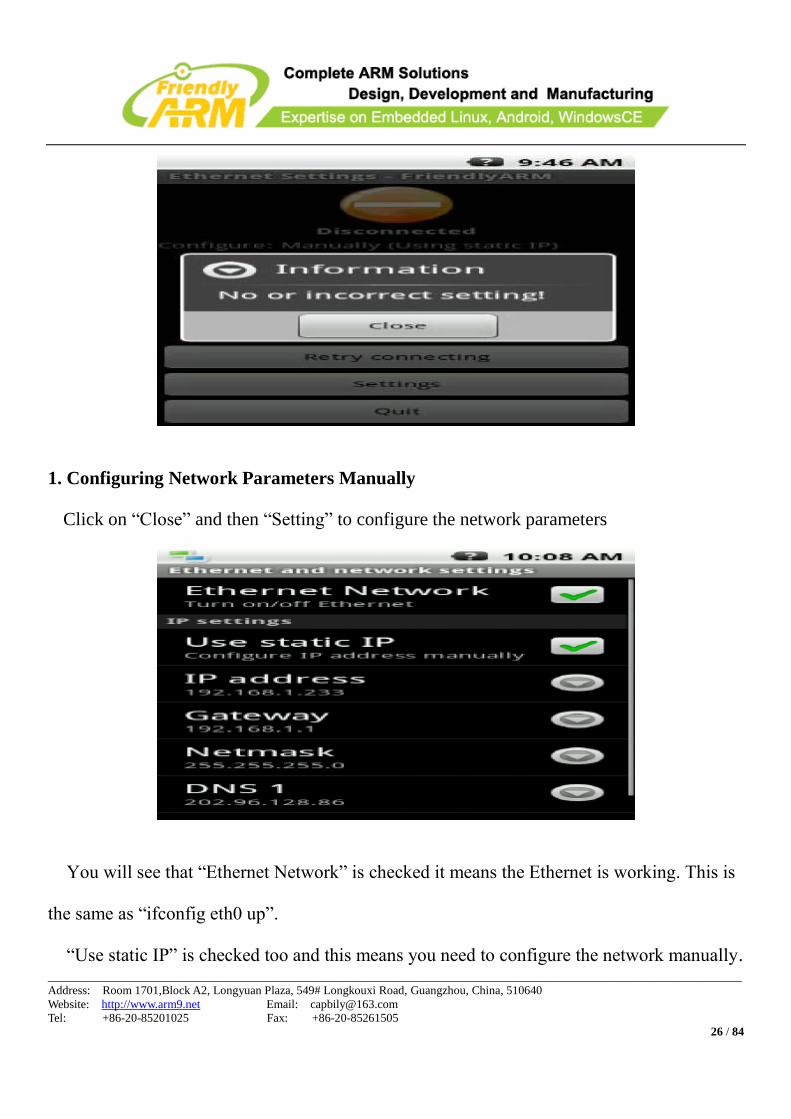
1. Configuring Network Parameters Manually
Click on “Close” and then “Setting” to configure the network parameters
You will see that “Ethernet Network” is checked it means the Ethernet is working. This is
the same as “ifconfig eth0 up”.
“Use static IP” is checked too and this means you need to configure the network manually.

____________________________________________________________________________________________________________________
Address: Room 1701,Block A2, Longyuan Plaza, 549# Longkouxi Road, Guangzhou, China, 510640
Website: http://www.arm9.net Email: [email protected]
Tel: +86-20-85201025 Fax: +86-20-85261505
27 / 84
Click on “IP address” and you will see the following dialog. Please type your network
information and click on “OK” to save
Please type other information as well such as Gateway, Netmask and DNS
After you are done please press K1 to return to the previous interface then you will see the
following dialog
Click on the icon you will see the current network information
____________________________________________________________________________________________________________________
Address: Room 1701,Block A2, Longyuan Plaza, 549# Longkouxi Road, Guangzhou, China, 510640
Website: http://www.arm9.net Email: [email protected]
Tel: +86-20-85201025 Fax: +86-20-85261505
28 / 84
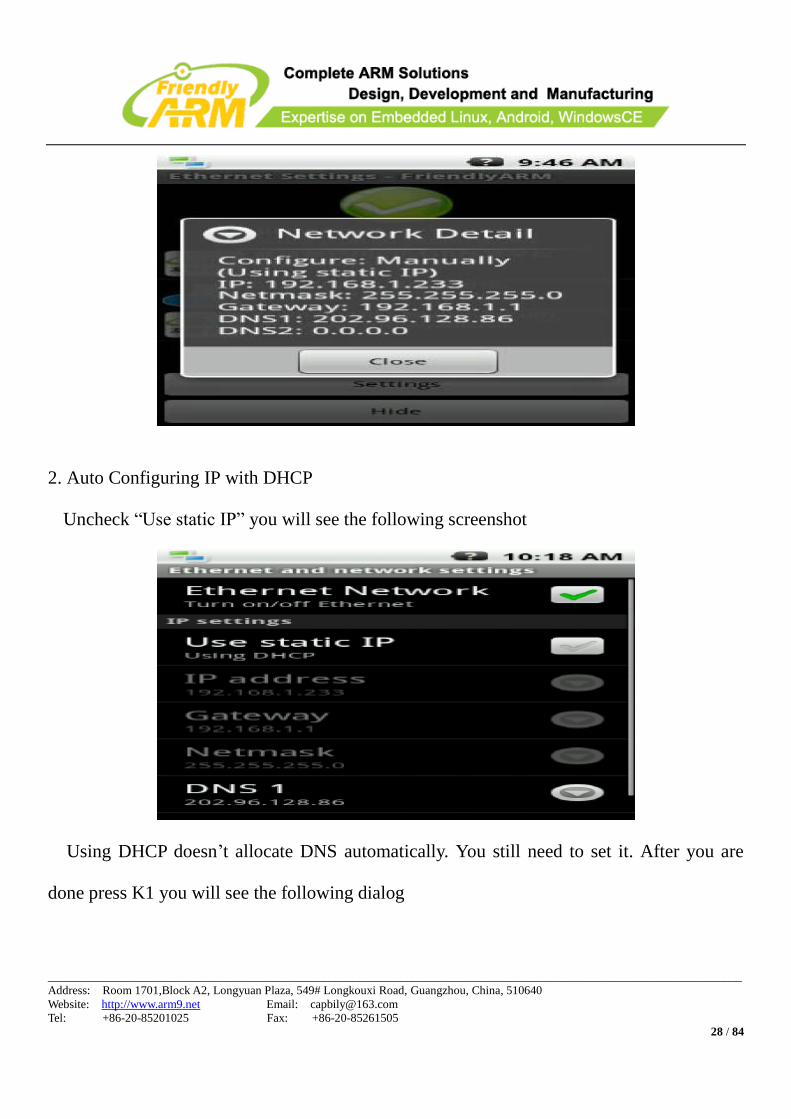
2. Auto Configuring IP with DHCP
Uncheck “Use static IP” you will see the following screenshot
Using DHCP doesn’t allocate DNS automatically. You still need to set it. After you are
done press K1 you will see the following dialog

____________________________________________________________________________________________________________________
Address: Room 1701,Block A2, Longyuan Plaza, 549# Longkouxi Road, Guangzhou, China, 510640
Website: http://www.arm9.net Email: [email protected]
Tel: +86-20-85201025 Fax: +86-20-85261505
29 / 84
If everything is OK you will see the following screenshot
Now you can surf the internet

____________________________________________________________________________________________________________________
Address: Room 1701,Block A2, Longyuan Plaza, 549# Longkouxi Road, Guangzhou, China, 510640
Website: http://www.arm9.net Email: [email protected]
Tel: +86-20-85201025 Fax: +86-20-85261505
30 / 84
1.11 3G Networking
We specially developed a 3G network utility for Android. It can automatically detect and
supportupto more than one hundred USB network cards for all these systems: WCDMA,
CDMA2000 and TD-SCDMA. We have a list of the USB 3G cards that are supported (listed
in <<User’s Guide to Mini6410 Linux>>).
Our following example was tested with HUAWEI E1750 for WCDMA
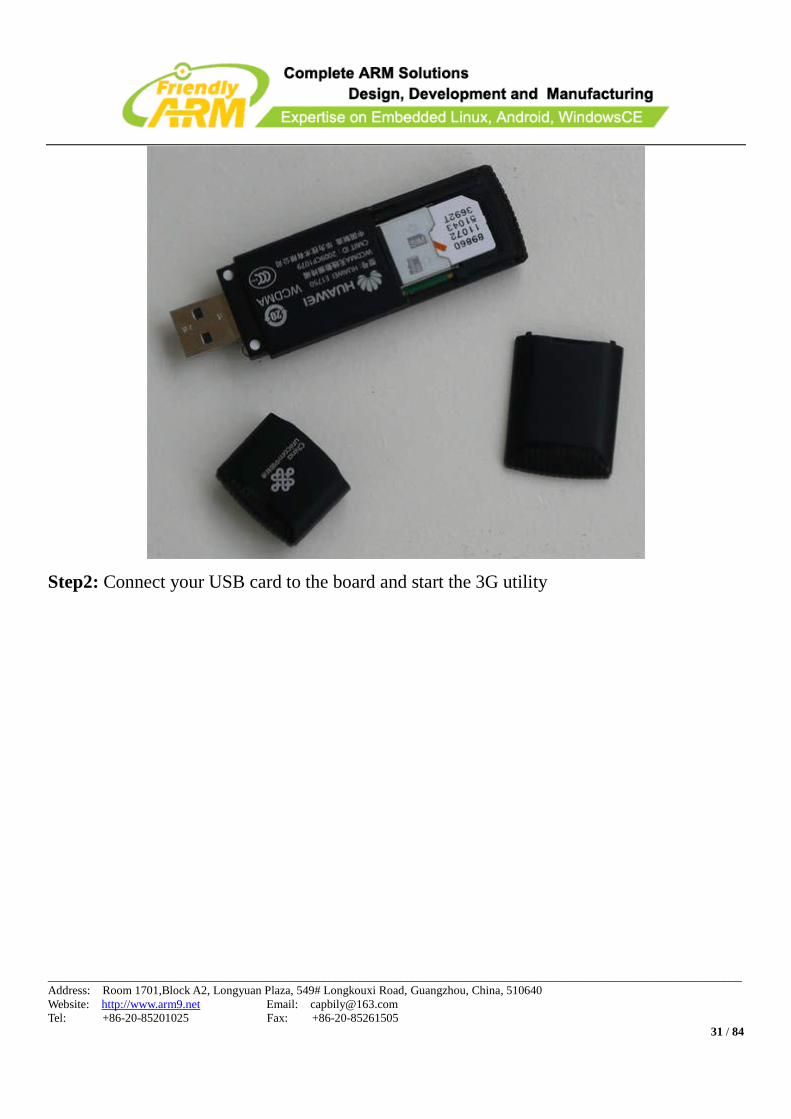
Step1: Insert a SIM card into your USB card
____________________________________________________________________________________________________________________
Address: Room 1701,Block A2, Longyuan Plaza, 549# Longkouxi Road, Guangzhou, China, 510640
Website: http://www.arm9.net Email: [email protected]
Tel: +86-20-85201025 Fax: +86-20-85261505
31 / 84
Step2: Connect your USB card to the board and start the 3G utility

____________________________________________________________________________________________________________________
Address: Room 1701,Block A2, Longyuan Plaza, 549# Longkouxi Road, Guangzhou, China, 510640
Website: http://www.arm9.net Email: [email protected]
Tel: +86-20-85201025 Fax: +86-20-85261505
32 / 84
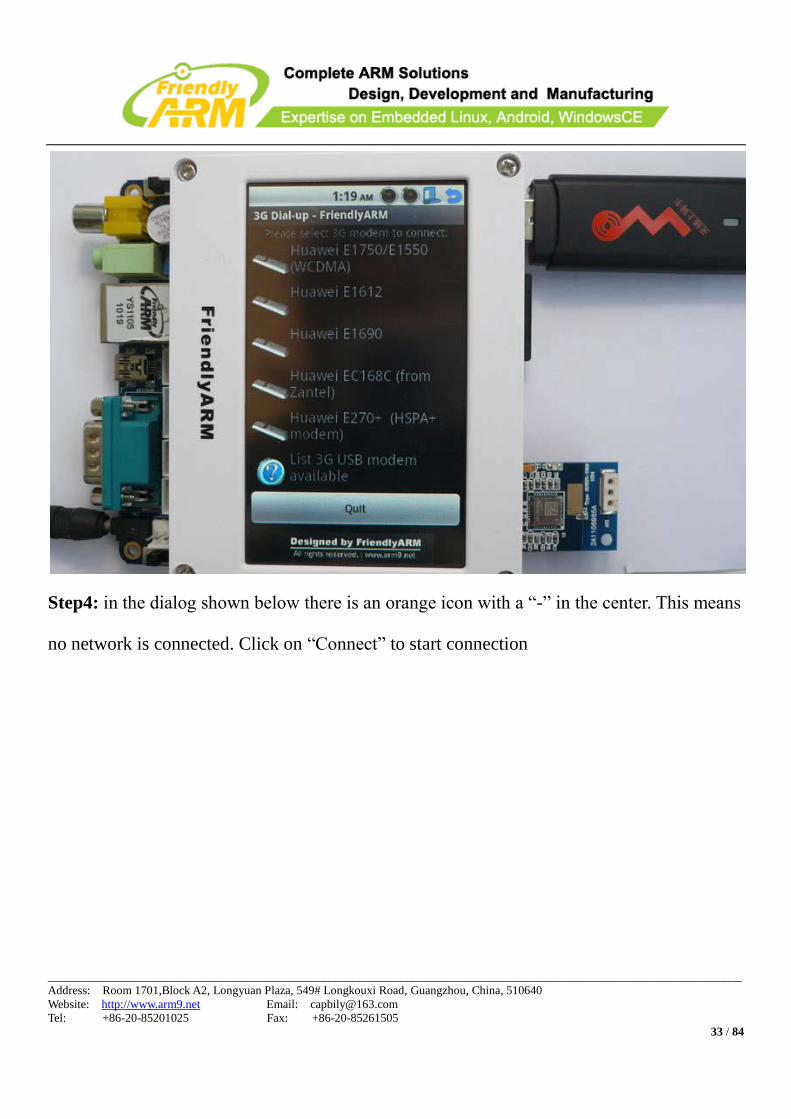
Step3: the 3G utility will detect the E1750 card. Click on its icon
____________________________________________________________________________________________________________________
Address: Room 1701,Block A2, Longyuan Plaza, 549# Longkouxi Road, Guangzhou, China, 510640
Website: http://www.arm9.net Email: [email protected]
Tel: +86-20-85201025 Fax: +86-20-85261505
33 / 84
Step4: in the dialog shown below there is an orange icon with a “-” in the center. This means
no network is connected. Click on “Connect” to start connection

____________________________________________________________________________________________________________________
Address: Room 1701,Block A2, Longyuan Plaza, 549# Longkouxi Road, Guangzhou, China, 510640
Website: http://www.arm9.net Email: [email protected]
Tel: +86-20-85201025 Fax: +86-20-85261505
34 / 84
Step5: the connection process may take a while

____________________________________________________________________________________________________________________
Address: Room 1701,Block A2, Longyuan Plaza, 549# Longkouxi Road, Guangzhou, China, 510640
Website: http://www.arm9.net Email: [email protected]
Tel: +86-20-85201025 Fax: +86-20-85261505
35 / 84
Step6: if the connection is a success the orange icon will turn green and shows “Connected”
and meanwhile FriendlyARM’s websites will be listed and a “3G” icon will show up in the
upper left of the screen.

____________________________________________________________________________________________________________________
Address: Room 1701,Block A2, Longyuan Plaza, 549# Longkouxi Road, Guangzhou, China, 510640
Website: http://www.arm9.net Email: [email protected]
Tel: +86-20-85201025 Fax: +86-20-85261505
36 / 84
Step7 Click on the green icon you will see the current network information

____________________________________________________________________________________________________________________
Address: Room 1701,Block A2, Longyuan Plaza, 549# Longkouxi Road, Guangzhou, China, 510640
Website: http://www.arm9.net Email: [email protected]
Tel: +86-20-85201025 Fax: +86-20-85261505
37 / 84
Step8 you can click on “Hide” to run it on background

____________________________________________________________________________________________________________________
Address: Room 1701,Block A2, Longyuan Plaza, 549# Longkouxi Road, Guangzhou, China, 510640
Website: http://www.arm9.net Email: [email protected]
Tel: +86-20-85201025 Fax: +86-20-85261505
38 / 84
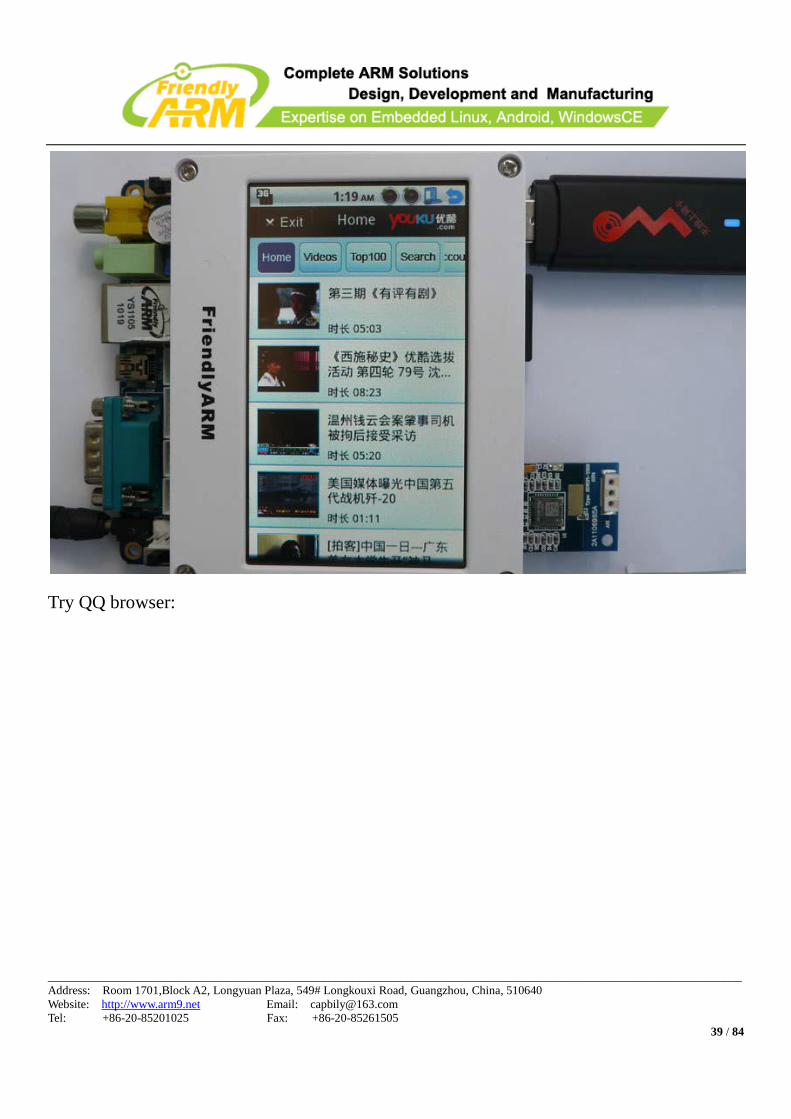
Step9 try youku.com
____________________________________________________________________________________________________________________
Address: Room 1701,Block A2, Longyuan Plaza, 549# Longkouxi Road, Guangzhou, China, 510640
Website: http://www.arm9.net Email: [email protected]
Tel: +86-20-85201025 Fax: +86-20-85261505
39 / 84
Try QQ browser:

____________________________________________________________________________________________________________________
Address: Room 1701,Block A2, Longyuan Plaza, 549# Longkouxi Road, Guangzhou, China, 510640
Website: http://www.arm9.net Email: [email protected]
Tel: +86-20-85201025 Fax: +86-20-85261505
40 / 84
Step10: to close the connection click on the “3G Network Status” icon to return to the main
menu andclick on “Disconnect”

____________________________________________________________________________________________________________________
Address: Room 1701,Block A2, Longyuan Plaza, 549# Longkouxi Road, Guangzhou, China, 510640
Website: http://www.arm9.net Email: [email protected]
Tel: +86-20-85201025 Fax: +86-20-85261505
41 / 84
1.12 USB Bluetooth
Android supports various USB bluetooth adapters. Please connect your USB Bluetooth
card to the USB host on the board.

____________________________________________________________________________________________________________________
Address: Room 1701,Block A2, Longyuan Plaza, 549# Longkouxi Road, Guangzhou, China, 510640
Website: http://www.arm9.net Email: [email protected]
Tel: +86-20-85201025 Fax: +86-20-85261505
42 / 84
Press K2 and click on “Settings” to enter the configuration menu

____________________________________________________________________________________________________________________
Address: Room 1701,Block A2, Longyuan Plaza, 549# Longkouxi Road, Guangzhou, China, 510640
Website: http://www.arm9.net Email: [email protected]
Tel: +86-20-85201025 Fax: +86-20-85261505
43 / 84

____________________________________________________________________________________________________________________
Address: Room 1701,Block A2, Longyuan Plaza, 549# Longkouxi Road, Guangzhou, China, 510640
Website: http://www.arm9.net Email: [email protected]
Tel: +86-20-85201025 Fax: +86-20-85261505
44 / 84
Click on “Wireless & networks” to enter the wireless network setting
Click on “Bluetooth settings” and check “Bluetooth” to start the Bluetooth service. It will
search for nearby bluetooth devices and list them.

____________________________________________________________________________________________________________________
Address: Room 1701,Block A2, Longyuan Plaza, 549# Longkouxi Road, Guangzhou, China, 510640
Website: http://www.arm9.net Email: [email protected]
Tel: +86-20-85201025 Fax: +86-20-85261505
45 / 84
1.12.1 Bluetooth Communication
Please get a cell phone which supports bluetooth and start the Bluetooth service. Boot
your board with Android, go to “Bluetooth settings”, click on “Scan for devices” and it will
find your cell phone (in our example it was “A760 BT”)

____________________________________________________________________________________________________________________
Address: Room 1701,Block A2, Longyuan Plaza, 549# Longkouxi Road, Guangzhou, China, 510640
Website: http://www.arm9.net Email: [email protected]
Tel: +86-20-85201025 Fax: +86-20-85261505
46 / 84
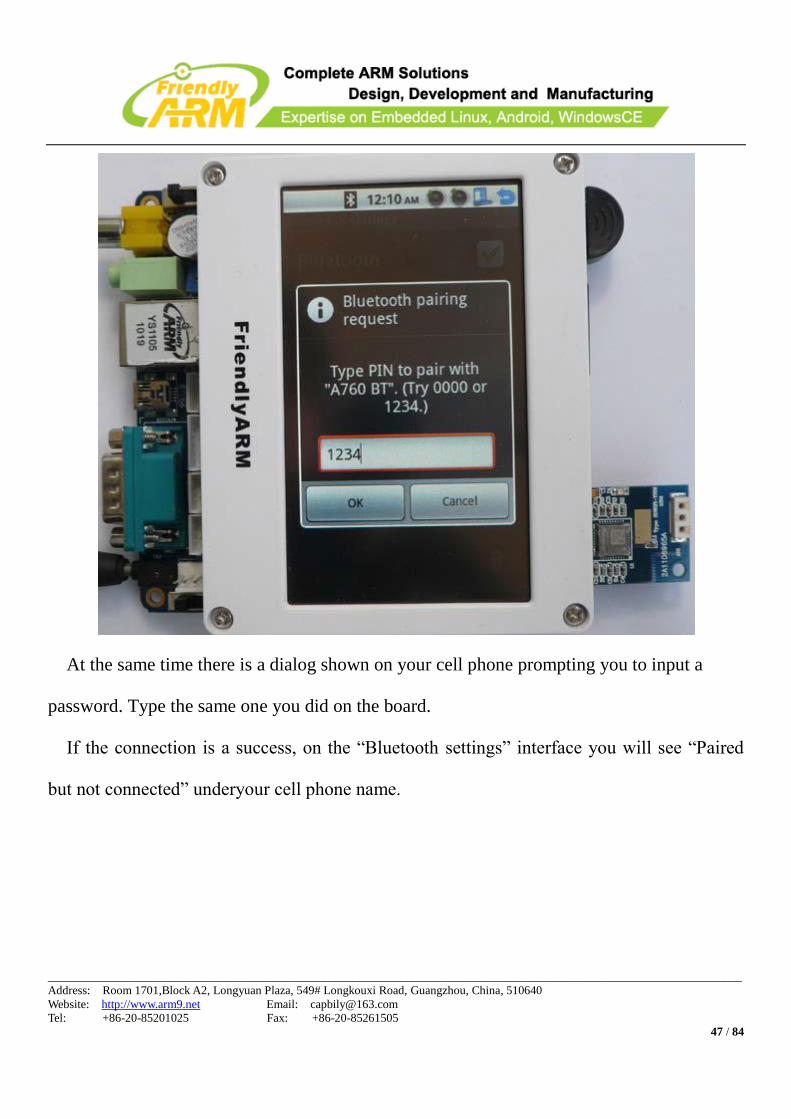
Click on the cell phone name, type the password and click on “OK”
____________________________________________________________________________________________________________________
Address: Room 1701,Block A2, Longyuan Plaza, 549# Longkouxi Road, Guangzhou, China, 510640
Website: http://www.arm9.net Email: [email protected]
Tel: +86-20-85201025 Fax: +86-20-85261505
47 / 84
At the same time there is a dialog shown on your cell phone prompting you to input a
password. Type the same one you did on the board.
If the connection is a success, on the “Bluetooth settings” interface you will see “Paired
but not connected” underyour cell phone name.

____________________________________________________________________________________________________________________
Address: Room 1701,Block A2, Longyuan Plaza, 549# Longkouxi Road, Guangzhou, China, 510640
Website: http://www.arm9.net Email: [email protected]
Tel: +86-20-85201025 Fax: +86-20-85261505
48 / 84
1.12.2 Transfer Files to Cell Phone
Please follow the steps described in the previous section to connect your board to a cell
phone. On your board that has loaded Android click on “Bluetooth File Transfer”

____________________________________________________________________________________________________________________
Address: Room 1701,Block A2, Longyuan Plaza, 549# Longkouxi Road, Guangzhou, China, 510640
Website: http://www.arm9.net Email: [email protected]
Tel: +86-20-85201025 Fax: +86-20-85261505
49 / 84
The Bluetooth File Transfer utility will be started.

____________________________________________________________________________________________________________________
Address: Room 1701,Block A2, Longyuan Plaza, 549# Longkouxi Road, Guangzhou, China, 510640
Website: http://www.arm9.net Email: [email protected]
Tel: +86-20-85201025 Fax: +86-20-85261505
50 / 84
This utility will list all the files in your SD card. Check the file you want to send to your
cell phone (we chose 1.png)

____________________________________________________________________________________________________________________
Address: Room 1701,Block A2, Longyuan Plaza, 549# Longkouxi Road, Guangzhou, China, 510640
Website: http://www.arm9.net Email: [email protected]
Tel: +86-20-85201025 Fax: +86-20-85261505
51 / 84
Press K2 and click on “More”.

____________________________________________________________________________________________________________________
Address: Room 1701,Block A2, Longyuan Plaza, 549# Longkouxi Road, Guangzhou, China, 510640
Website: http://www.arm9.net Email: [email protected]
Tel: +86-20-85201025 Fax: +86-20-85261505
52 / 84
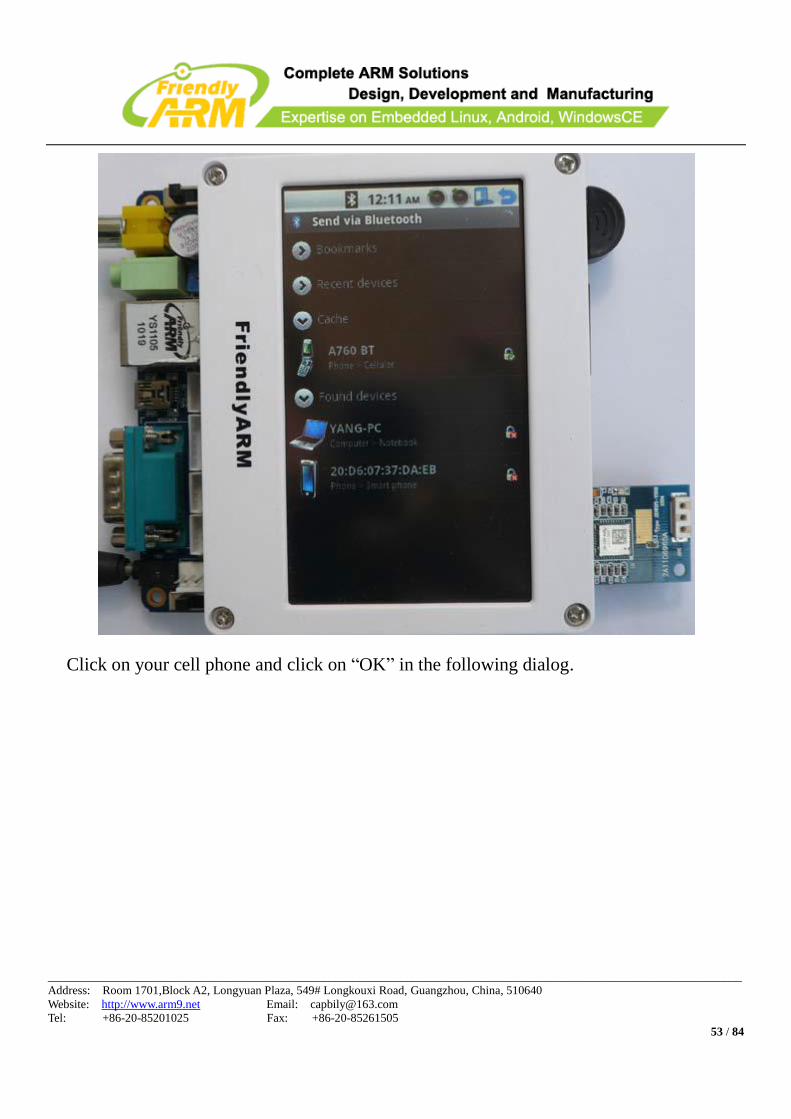
Click on “Send via Bluetooth (1 file)”, a dialog will pop up and prompt you to select a
target device. All Bluetooth devices will be listed including those connected or not connected.
The connected devices will be checked.
____________________________________________________________________________________________________________________
Address: Room 1701,Block A2, Longyuan Plaza, 549# Longkouxi Road, Guangzhou, China, 510640
Website: http://www.arm9.net Email: [email protected]
Tel: +86-20-85201025 Fax: +86-20-85261505
53 / 84
Click on your cell phone and click on “OK” in the following dialog.

____________________________________________________________________________________________________________________
Address: Room 1701,Block A2, Longyuan Plaza, 549# Longkouxi Road, Guangzhou, China, 510640
Website: http://www.arm9.net Email: [email protected]
Tel: +86-20-85201025 Fax: +86-20-85261505
54 / 84
Click on “OK” you will see file transferring.

____________________________________________________________________________________________________________________
Address: Room 1701,Block A2, Longyuan Plaza, 549# Longkouxi Road, Guangzhou, China, 510640
Website: http://www.arm9.net Email: [email protected]
Tel: +86-20-85201025 Fax: +86-20-85261505
55 / 84
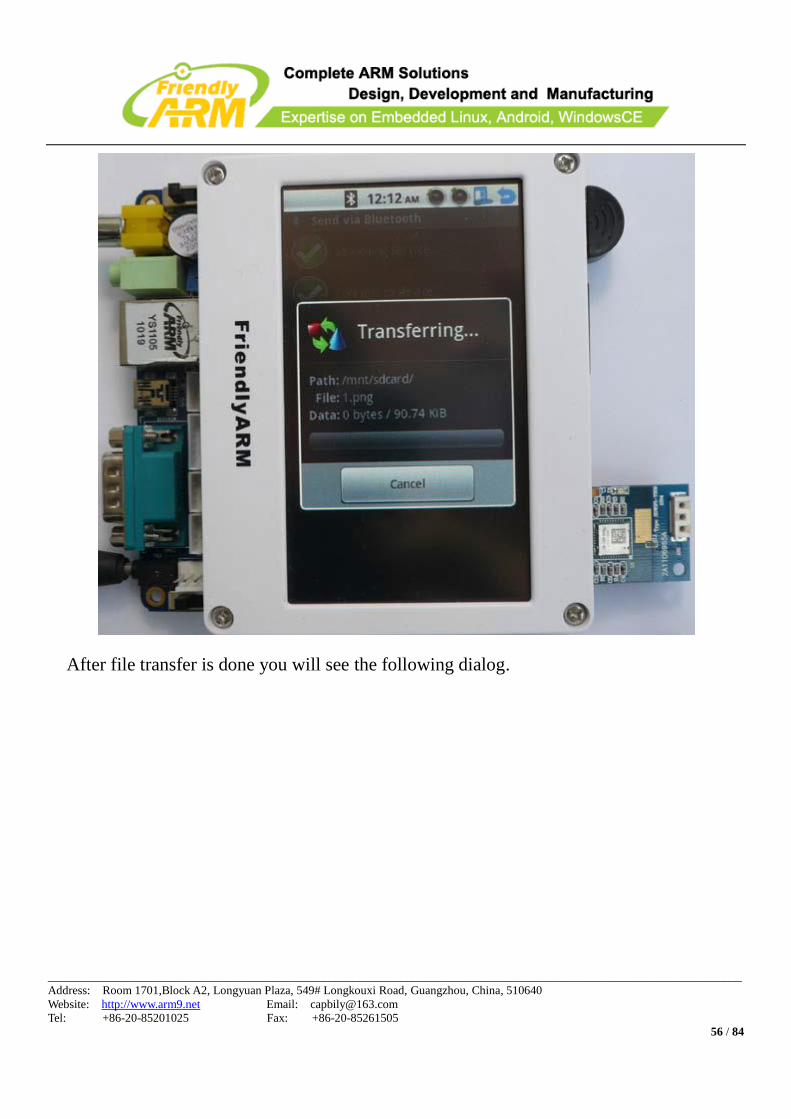
You cell phone will prompt you whether or not to accept a file sent from your Mini6410
board. Click on “Yes” to take it.
____________________________________________________________________________________________________________________
Address: Room 1701,Block A2, Longyuan Plaza, 549# Longkouxi Road, Guangzhou, China, 510640
Website: http://www.arm9.net Email: [email protected]
Tel: +86-20-85201025 Fax: +86-20-85261505
56 / 84
After file transfer is done you will see the following dialog.

____________________________________________________________________________________________________________________
Address: Room 1701,Block A2, Longyuan Plaza, 549# Longkouxi Road, Guangzhou, China, 510640
Website: http://www.arm9.net Email: [email protected]
Tel: +86-20-85201025 Fax: +86-20-85261505
57 / 84
1.12.3 Transfer Files to Mini6410
Please follow the steps described in the previous section to connect your board to a cell
phone. On your board that has loaded Android click on “Bluetooth File Transfer”.

____________________________________________________________________________________________________________________
Address: Room 1701,Block A2, Longyuan Plaza, 549# Longkouxi Road, Guangzhou, China, 510640
Website: http://www.arm9.net Email: [email protected]
Tel: +86-20-85201025 Fax: +86-20-85261505
58 / 84
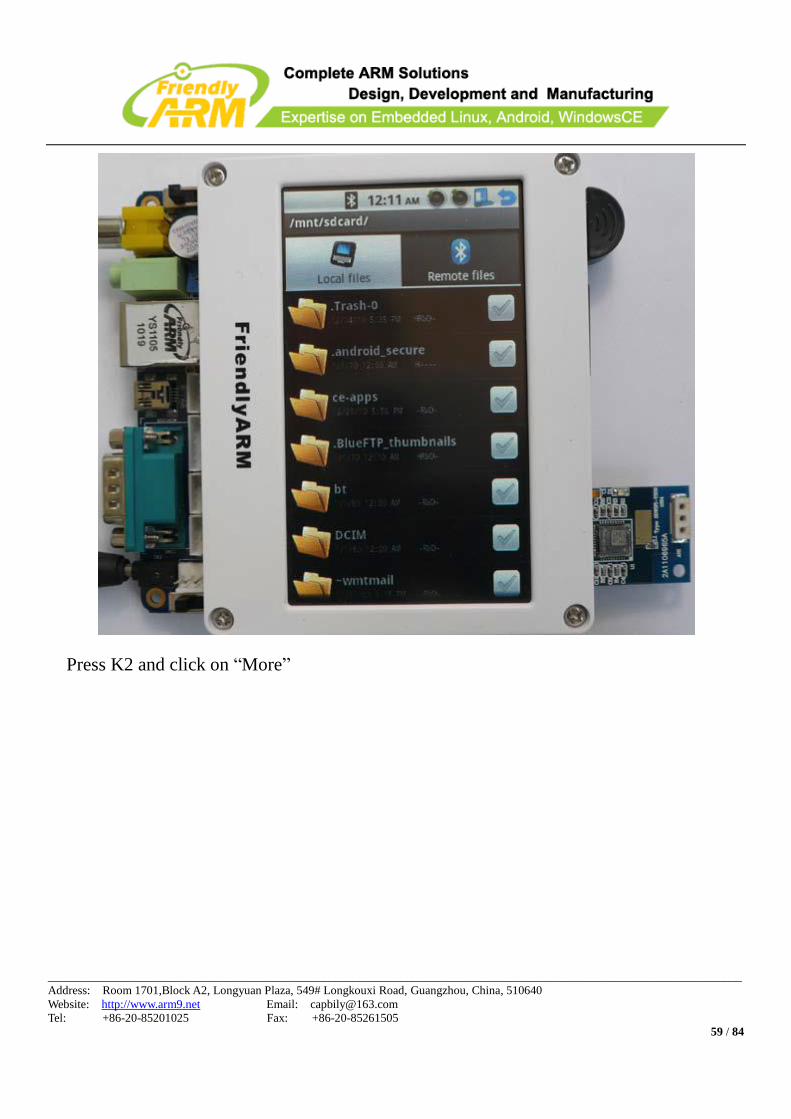
The Bluetooth File Transfer utility will be started.
____________________________________________________________________________________________________________________
Address: Room 1701,Block A2, Longyuan Plaza, 549# Longkouxi Road, Guangzhou, China, 510640
Website: http://www.arm9.net Email: [email protected]
Tel: +86-20-85201025 Fax: +86-20-85261505
59 / 84
Press K2 and click on “More”

____________________________________________________________________________________________________________________
Address: Room 1701,Block A2, Longyuan Plaza, 549# Longkouxi Road, Guangzhou, China, 510640
Website: http://www.arm9.net Email: [email protected]
Tel: +86-20-85201025 Fax: +86-20-85261505
60 / 84
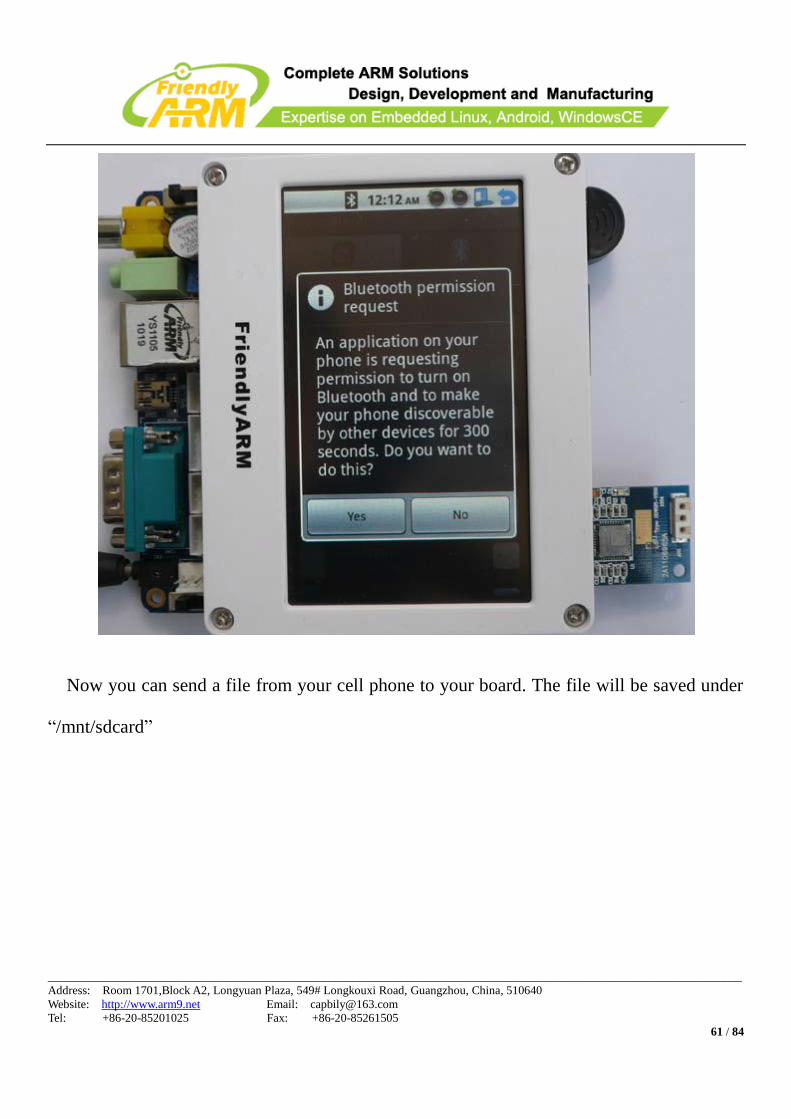
Click on “Discoverable” and click on “Yes” to continue
____________________________________________________________________________________________________________________
Address: Room 1701,Block A2, Longyuan Plaza, 549# Longkouxi Road, Guangzhou, China, 510640
Website: http://www.arm9.net Email: [email protected]
Tel: +86-20-85201025 Fax: +86-20-85261505
61 / 84
Now you can send a file from your cell phone to your board. The file will be saved under
“/mnt/sdcard”
____________________________________________________________________________________________________________________
Address: Room 1701,Block A2, Longyuan Plaza, 549# Longkouxi Road, Guangzhou, China, 510640
Website: http://www.arm9.net Email: [email protected]
Tel: +86-20-85201025 Fax: +86-20-85261505
62 / 84
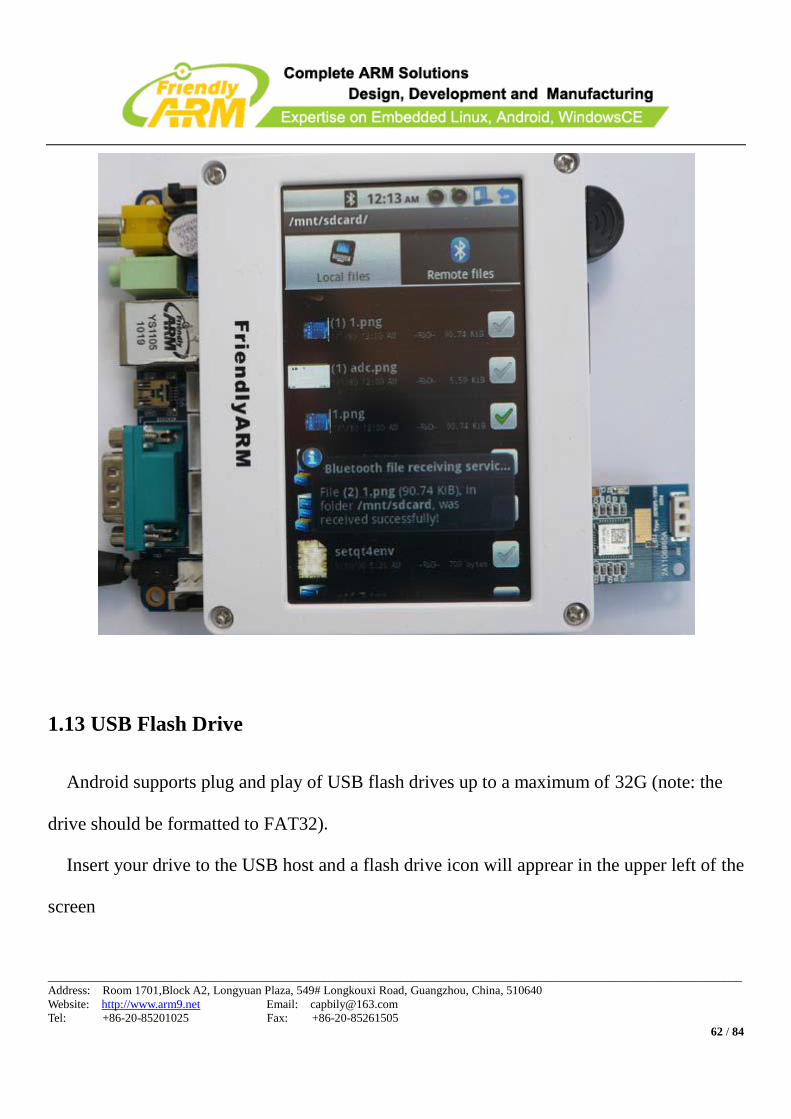
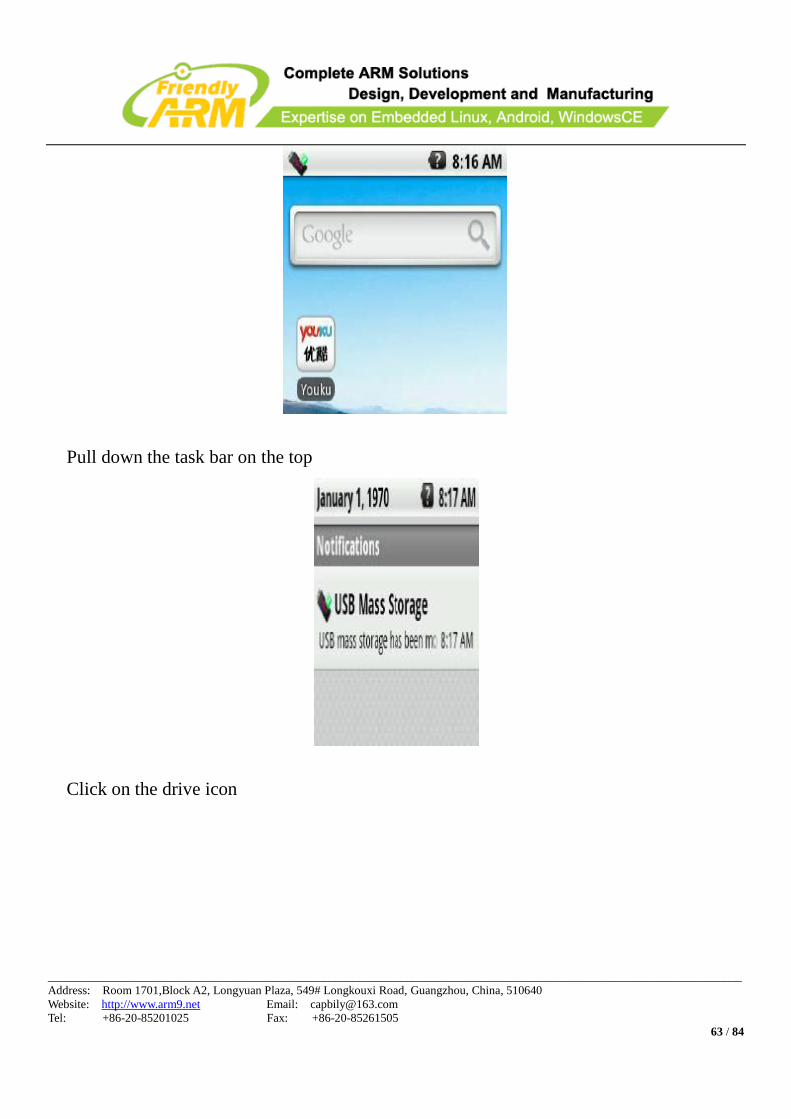
1.13 USB Flash Drive
Android supports plug and play of USB flash drives up to a maximum of 32G (note: the
drive should be formatted to FAT32).
Insert your drive to the USB host and a flash drive icon will apprear in the upper left of the
screen
____________________________________________________________________________________________________________________
Address: Room 1701,Block A2, Longyuan Plaza, 549# Longkouxi Road, Guangzhou, China, 510640
Website: http://www.arm9.net Email: [email protected]
Tel: +86-20-85201025 Fax: +86-20-85261505
63 / 84
Pull down the task bar on the top
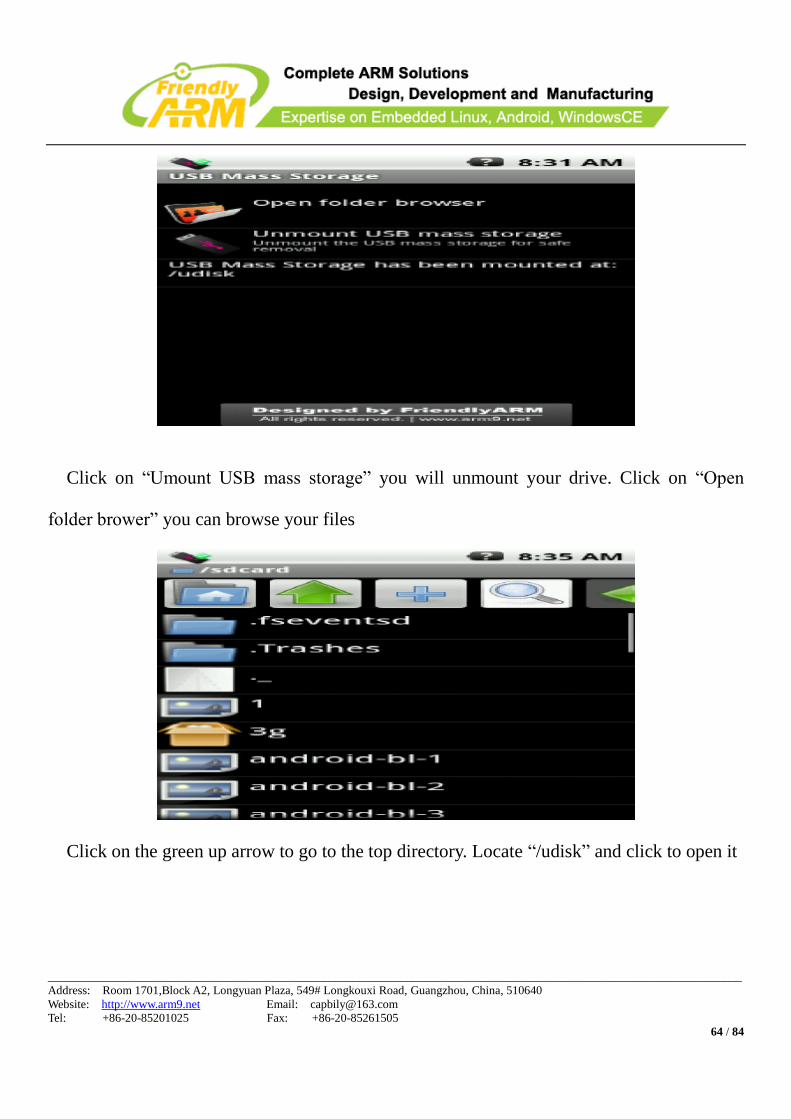
Click on the drive icon
____________________________________________________________________________________________________________________
Address: Room 1701,Block A2, Longyuan Plaza, 549# Longkouxi Road, Guangzhou, China, 510640
Website: http://www.arm9.net Email: [email protected]
Tel: +86-20-85201025 Fax: +86-20-85261505
64 / 84
Click on “Umount USB mass storage” you will unmount your drive. Click on “Open
folder brower” you can browse your files
Click on the green up arrow to go to the top directory. Locate “/udisk” and click to open it

____________________________________________________________________________________________________________________
Address: Room 1701,Block A2, Longyuan Plaza, 549# Longkouxi Road, Guangzhou, China, 510640
Website: http://www.arm9.net Email: [email protected]
Tel: +86-20-85201025 Fax: +86-20-85261505
65 / 84
1.14 Backlight Control
Maybe you have noticed that after the system boots the backlight will turn off gradually if
the touch screen doesn’t receive any touch. This is manipulated by the backlight control.
Click on “Sound & display”

____________________________________________________________________________________________________________________
Address: Room 1701,Block A2, Longyuan Plaza, 549# Longkouxi Road, Guangzhou, China, 510640
Website: http://www.arm9.net Email: [email protected]
Tel: +86-20-85201025 Fax: +86-20-85261505
66 / 84
Locate “Display settings”
Click on “Brightness” you can set its brightness
____________________________________________________________________________________________________________________
Address: Room 1701,Block A2, Longyuan Plaza, 549# Longkouxi Road, Guangzhou, China, 510640
Website: http://www.arm9.net Email: [email protected]
Tel: +86-20-85201025 Fax: +86-20-85261505
67 / 84
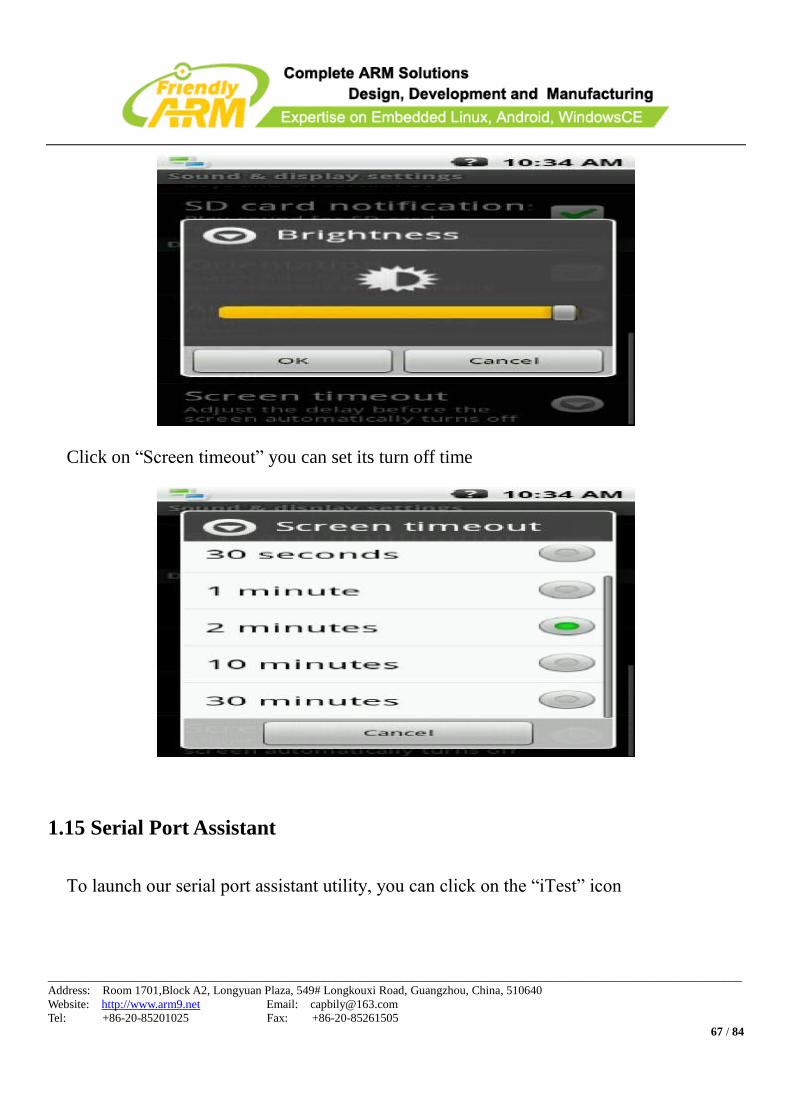
Click on “Screen timeout” you can set its turn off time
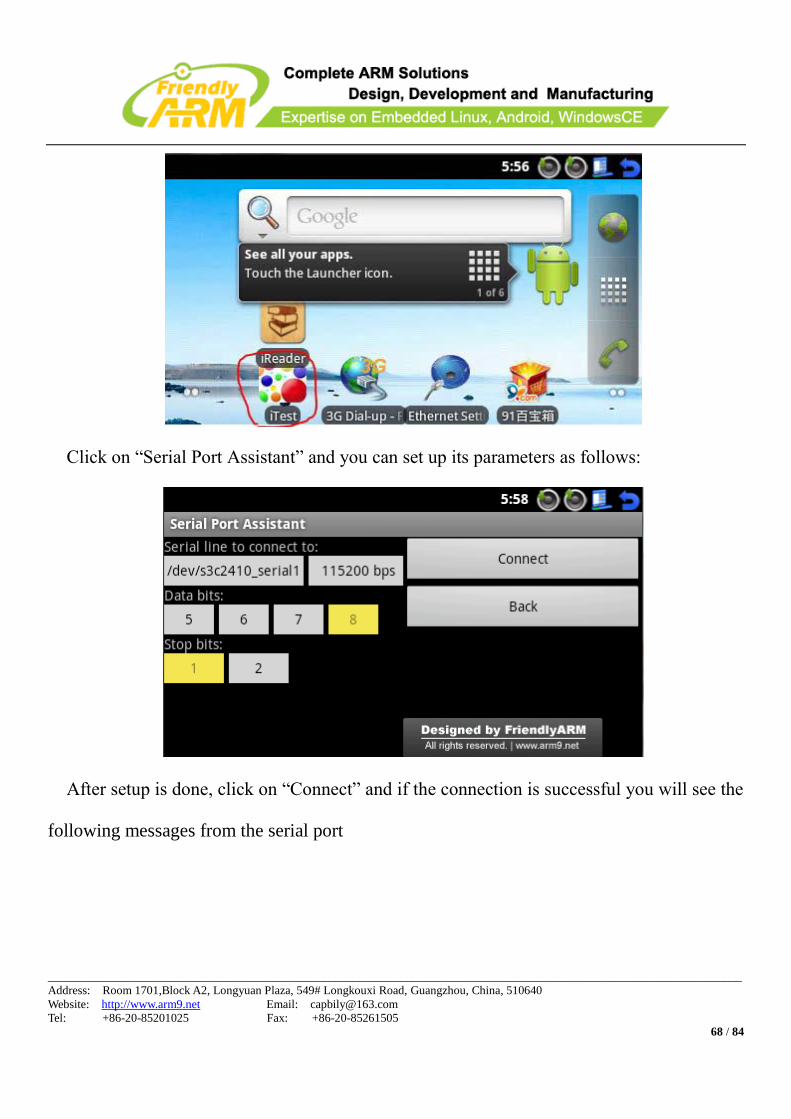
1.15 Serial Port Assistant
To launch our serial port assistant utility, you can click on the “iTest” icon
____________________________________________________________________________________________________________________
Address: Room 1701,Block A2, Longyuan Plaza, 549# Longkouxi Road, Guangzhou, China, 510640
Website: http://www.arm9.net Email: [email protected]
Tel: +86-20-85201025 Fax: +86-20-85261505
68 / 84
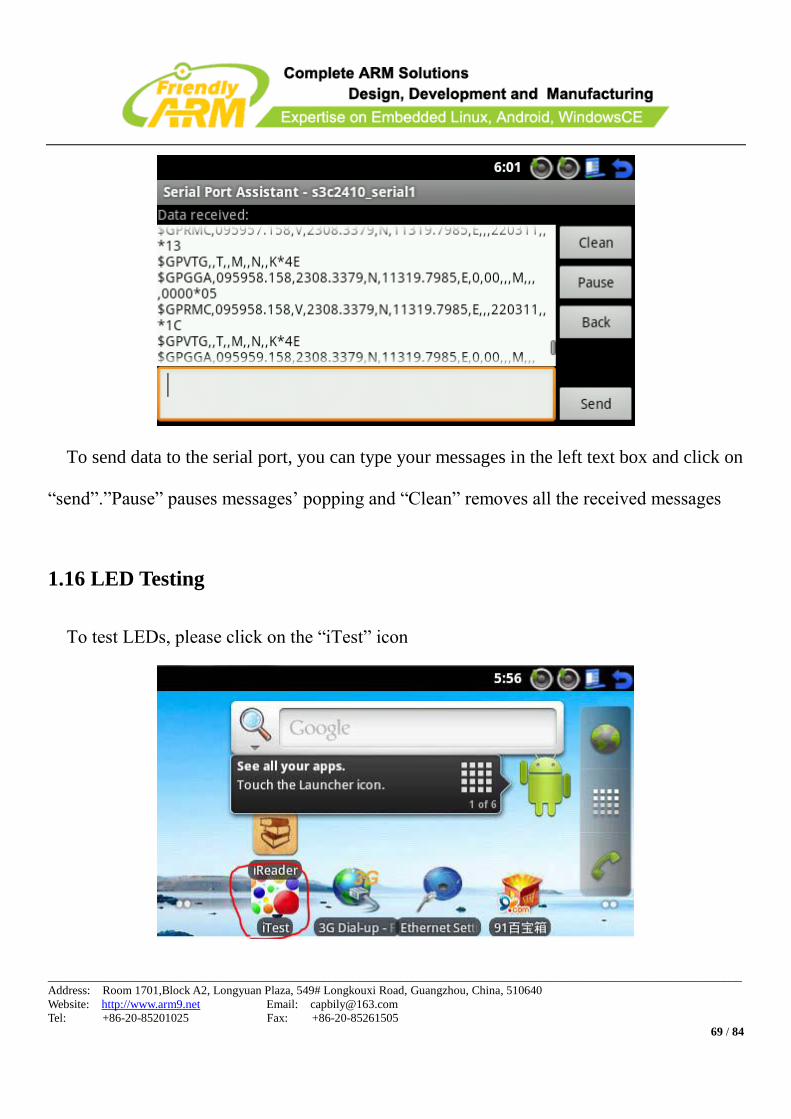
Click on “Serial Port Assistant” and you can set up its parameters as follows:
After setup is done, click on “Connect” and if the connection is successful you will see the
following messages from the serial port
____________________________________________________________________________________________________________________
Address: Room 1701,Block A2, Longyuan Plaza, 549# Longkouxi Road, Guangzhou, China, 510640
Website: http://www.arm9.net Email: [email protected]
Tel: +86-20-85201025 Fax: +86-20-85261505
69 / 84
To send data to the serial port, you can type your messages in the left text box and click on
“send”.”Pause” pauses messages’ popping and “Clean” removes all the received messages
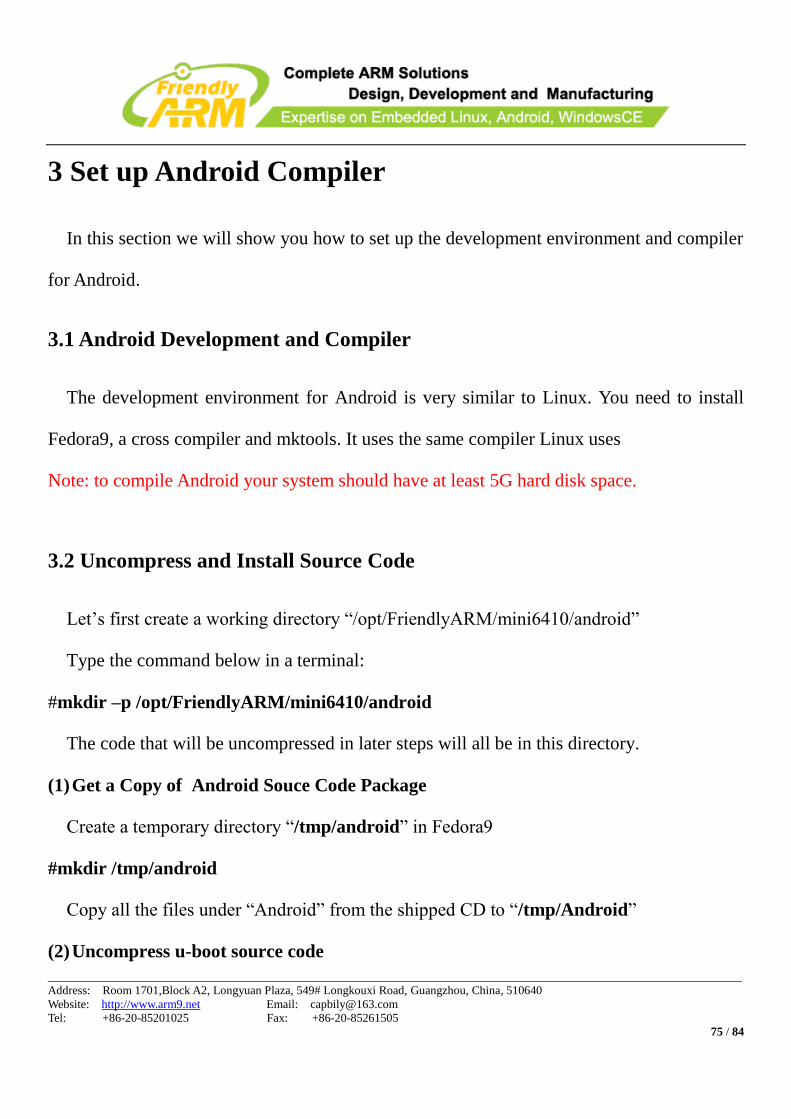
1.16 LED Testing
To test LEDs, please click on the “iTest” icon

____________________________________________________________________________________________________________________
Address: Room 1701,Block A2, Longyuan Plaza, 549# Longkouxi Road, Guangzhou, China, 510640
Website: http://www.arm9.net Email: [email protected]
Tel: +86-20-85201025 Fax: +86-20-85261505
70 / 84
Click on “LED Testing” and you will see the following window and be able to test LEDs
by clicking on those buttons
1.17 PWM Buzzer
To test PWM, please click on the iTest icon

____________________________________________________________________________________________________________________
Address: Room 1701,Block A2, Longyuan Plaza, 549# Longkouxi Road, Guangzhou, China, 510640
Website: http://www.arm9.net Email: [email protected]
Tel: +86-20-85201025 Fax: +86-20-85261505
71 / 84
Click on “PWM Testing” you will see the following window
On the dialog, you can type a frequency and “start” or adjust the frequency by clicking on
“+” and “-”.Tostopit you can click on “stop”.
1.18 ADC Testing
To test ADC, please click on the “iTest” icon

____________________________________________________________________________________________________________________
Address: Room 1701,Block A2, Longyuan Plaza, 549# Longkouxi Road, Guangzhou, China, 510640
Website: http://www.arm9.net Email: [email protected]
Tel: +86-20-85201025 Fax: +86-20-85261505
72 / 84
Click on “A/D Convert” you will see the following window
1.19 I2C-EEPROM
To test “I2C-EEPROM” please click on the “iTest” icon

____________________________________________________________________________________________________________________
Address: Room 1701,Block A2, Longyuan Plaza, 549# Longkouxi Road, Guangzhou, China, 510640
Website: http://www.arm9.net Email: [email protected]
Tel: +86-20-85201025 Fax: +86-20-85261505
73 / 84
Click on “IIC/EEPROM Testing” you will see the following window
Click on “Write Data below into EEPROM” to write your data on the left to “EEPROM”
and then clickon “Read EEPROM Data via IIC” to read it from EEPROM to the right area
____________________________________________________________________________________________________________________
Address: Room 1701,Block A2, Longyuan Plaza, 549# Longkouxi Road, Guangzhou, China, 510640
Website: http://www.arm9.net Email: [email protected]
Tel: +86-20-85201025 Fax: +86-20-85261505
74 / 84
2 Set up Android Development Environment
Please refer to the materials under “development documents\02 Android programming” in
the shipped CD
____________________________________________________________________________________________________________________
Address: Room 1701,Block A2, Longyuan Plaza, 549# Longkouxi Road, Guangzhou, China, 510640
Website: http://www.arm9.net Email: [email protected]
Tel: +86-20-85201025 Fax: +86-20-85261505
75 / 84
3 Set up Android Compiler
In this section we will show you how to set up the development environment and compiler
for Android.
3.1 Android Development and Compiler
The development environment for Android is very similar to Linux. You need to install
Fedora9, a cross compiler and mktools. It uses the same compiler Linux uses
Note: to compile Android your system should have at least 5G hard disk space.
3.2 Uncompress and Install Source Code
Let’s first create a working directory “/opt/FriendlyARM/mini6410/android”
Type the command below in a terminal:
#mkdir –p /opt/FriendlyARM/mini6410/android
The code that will be uncompressed in later steps will all be in this directory.
(1) Get a Copy of Android Souce Code Package
Create a temporary directory “/tmp/android” in Fedora9
#mkdir /tmp/android
Copy all the files under “Android” from the shipped CD to “/tmp/Android”
(2) Uncompress u-boot source code
____________________________________________________________________________________________________________________
Address: Room 1701,Block A2, Longyuan Plaza, 549# Longkouxi Road, Guangzhou, China, 510640
Website: http://www.arm9.net Email: [email protected]
Tel: +86-20-85201025 Fax: +86-20-85261505
76 / 84
Execute the following command under “/opt/FriendlyARM/mini6410/android”
#cd /opt/FriendlyARM/mini6410/android
#tar xvzf /tmp/android/u-boot-mini6410-20100730.tar.gz
This will create a “u-boot-mini6410” directory which contains a complete copy of source
code
Note: 20100730 is the date when we released it
(3) Uncompress Android Kernel
Execute the command below in “/opt/FriendlyARM/mini6410/android”
#cd /opt/FriendlyARM/mini6410/android
#tar xvzf /tmp/android/android-kernel-2.6.36-20110104.tar.gz
This will create a “linux-2.6.36-android” directory which contains a complete copy of
source code
Note: 20110104 is the date when we released it
(4) Uncompress Android System
Execute the command below in “/opt/FriendlyARM/mini6410/android”
#cd /opt/FriendlyARM/mini6410/android
#tar xvzf /tmp/android/android-2.3-fs-20110215.tar.gz
This will create a “Android-2.3” directory
Note: 20110215 is the date when we released it. This source code contains a copy of
Android-2.3 source code and compiling scripts.
____________________________________________________________________________________________________________________
Address: Room 1701,Block A2, Longyuan Plaza, 549# Longkouxi Road, Guangzhou, China, 510640
Website: http://www.arm9.net Email: [email protected]
Tel: +86-20-85201025 Fax: +86-20-85261505
77 / 84
(5) Uncompress Android
Execute the command below in “/opt/FriendlyARM/mini6410/android”
#cd /opt/FriendlyARM/mini6410/android
#tar xvzf /tmp/android/ rootfs_android-20110104.tar.gz
This will create a rootfs_android directory
Note: 20110104 is the date when we released it.

____________________________________________________________________________________________________________________
Address: Room 1701,Block A2, Longyuan Plaza, 549# Longkouxi Road, Guangzhou, China, 510640
Website: http://www.arm9.net Email: [email protected]
Tel: +86-20-85201025 Fax: +86-20-85261505
78 / 84
4 Configure and Compile U-Boot
Note: Android uses the same U-boot as Linux.
Here we take a 128M system as an example. Please follow the steps below:
Enter the U-boot source code directory and run the command below:
#cd /opt/FriendlyARM/mini6410/linux/u-boot-mini6410
#make mini6410_nand_config-ram128;make
This will compile a U-boot.bin which supports booting from the NAND flash. To differ it
from the one in the shipped CD we name it “u-boot_nand-ram128.bin”
To compile a U-boot for 256M systems please follow the steps below:
Enter the U-boot source code directory and run the command below:
#cd /opt/FriendlyARM/mini6410/linux/u-boot-mini6410
#make mini6410_nand_config-ram256;make
This will compile a U-boot.bin which supports booting from the NAND flash. To differ it
from the one in the shipped CD we name it “u-boot_nand-ram256.bin”

____________________________________________________________________________________________________________________
Address: Room 1701,Block A2, Longyuan Plaza, 549# Longkouxi Road, Guangzhou, China, 510640
Website: http://www.arm9.net Email: [email protected]
Tel: +86-20-85201025 Fax: +86-20-85261505
79 / 84
5 Configure and Compile Linux Kernel
Android’s Linux kernel is a little bit different from a standard one but its configuration
method is the same. If you are not familiar with configuring a Linux kernel we suggest you
use our default configuration file
To compile a kernel for an N43 LCD system please follow the steps below:
#cd /opt/FriendlyARM/mini6410/android/ linux-2.6.36-android
#cp config_android_n43 .config
#make
This will generate a zImage under “arch/arm/boot”. We name it azImage_n43.
To compile a kernel for an A70 LCD system please follow the steps below:
#cd /opt/FriendlyARM/mini6410/android/ linux-2.6.36-android
#cp config_android_a70 .config
#make
This will generate a zImage under “arch/arm/boot”. We name it azImage_n70
____________________________________________________________________________________________________________________
Address: Room 1701,Block A2, Longyuan Plaza, 549# Longkouxi Road, Guangzhou, China, 510640
Website: http://www.arm9.net Email: [email protected]
Tel: +86-20-85201025 Fax: +86-20-85261505
80 / 84
6 Create Android
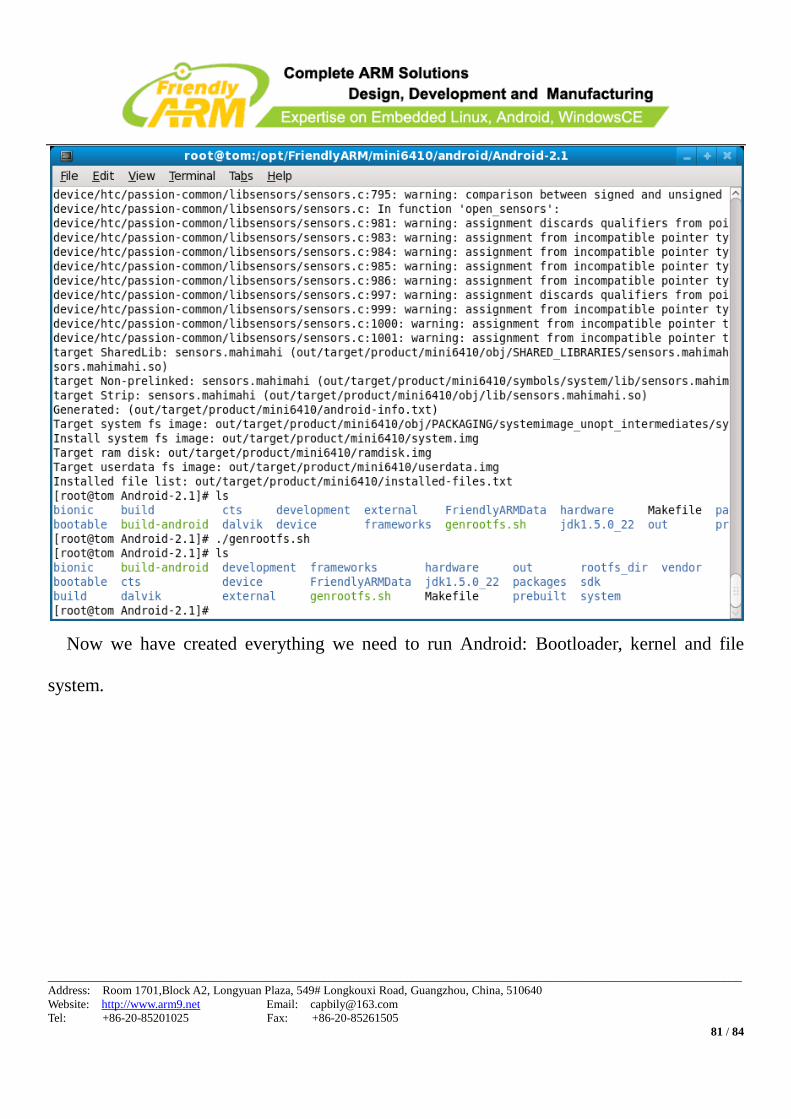
Compiling Android may not be an easy task for beginners. Therefore we have a complete
copy of the source code and two compiling scripts: build-android and genrootfs.sh.
Execute the command below:
#cd /opt/FriendlyARM/mini6410/android/Android-2.3
#./build-android
This will begin to compile Android-2.3. This process may take a while. We recommend
users to use a multi-core CPU and Linux instead of using a simulator.
After it is done, run the following script:
#./genrootfs.sh
This will create a target file system we need and a “rootfs_dir” directory. It is the same as
“rootfs_android”.
Note: you can compile one that supports the serial port control touch screen with the
“genrootfs-s.sh” script
____________________________________________________________________________________________________________________
Address: Room 1701,Block A2, Longyuan Plaza, 549# Longkouxi Road, Guangzhou, China, 510640
Website: http://www.arm9.net Email: [email protected]
Tel: +86-20-85201025 Fax: +86-20-85261505
81 / 84
Now we have created everything we need to run Android: Bootloader, kernel and file
system.
____________________________________________________________________________________________________________________
Address: Room 1701,Block A2, Longyuan Plaza, 549# Longkouxi Road, Guangzhou, China, 510640
Website: http://www.arm9.net Email: [email protected]
Tel: +86-20-85201025 Fax: +86-20-85261505
82 / 84
7 Create or Run File System
To run Android on your board you need to burn the above files into the NAND flash. The
bootloader and kernel are single file images and can be burned into the flash or the SD card.
The file system we just created is a directory and cannot be burned directly. Therefore we
need to make it a single file image with the mktools tools.
Note: you can make an image either via an Android compiled from the source code or the
one we offer in the shipped CD. The following steps are for the previous case:
7.1 Make YAFFS2 Image
With the mkyaffs2image-128M utility, you can make a yaffs2 image. The Android kernel
by default supports this file system:
#cd /opt/FriendlyARM/mini6410/android/Android-2.3
#mkyaffs2image-128M rootfs_dir rootfs_android.img
This will generate a rootfs_android.img file in the current directory.
Note: if you want to drive your serial port control touch screen you need a rootfs_android-s
image
Note: mkyaffs2image and mkyaffs2image-128M are only for SLC Nand Flash to make
yaffs2 iamges and don’t apply to MLC2 Nand Flash.
____________________________________________________________________________________________________________________
Address: Room 1701,Block A2, Longyuan Plaza, 549# Longkouxi Road, Guangzhou, China, 510640
Website: http://www.arm9.net Email: [email protected]
Tel: +86-20-85201025 Fax: +86-20-85261505
83 / 84
7.2 Make UBIFS Image
With the mkubimage-slc utility, you can make a UBIFS image. The Android kernel by
default supports this file system:
#cd /opt/FriendlyARM/mini6410/android/Android-2.3
#mkubimage-slc rootfs_dir rootfs_android.ubi
This will generate a rootfs_android.ubi file in the current directory.
Note: burning a UBIFS image is faster than burning a YAFFS2 image since a UBIFS image
has smaller size. If you want to drive your serial port control touch screen you need a
rootfs_android-s image
7.3 Make EXT3 Image
With the mkext3image utility, you can make an EXT3 image. You can copy it to the SD
card and run it directly. The Android kernel by default supports this file system. The default
FriendlyARM.ini supports this file system too:
#cd /opt/FriendlyARM/mini6410/android/Android-2.3
#mkext3image rootfs_dir rootfs_android.ext3
This will generate a rootfs_android.ext3 file. You can copy it to your SD card’s
“images/Android/” directory. Also you need to make sure to define
“Android-RootFs-RunImage =” to this filein the FriendlyARM.ini file.

____________________________________________________________________________________________________________________
Address: Room 1701,Block A2, Longyuan Plaza, 549# Longkouxi Road, Guangzhou, China, 510640
Website: http://www.arm9.net Email: [email protected]
Tel: +86-20-85201025 Fax: +86-20-85261505
84 / 84
Note: the size of an EXT3 file image usually is 30% bigger than that of other images. For a
file system that is less than 64M it will be treated as a 64M system. That is the minimum size
of an ext3 image is 64M x 1.3 = 83.2M。
Note: If you want to drive your serial port control touch screen you need a rootfs_android-s
image.