
USB Audio/Video Grabber User Manual · *This option, in combination with the Format option,...
24
MH-162579_UM-0418_REV-5.01 manhattanproducts.com USB Audio/Video Grabber User Manual Model 162579
Transcript of USB Audio/Video Grabber User Manual · *This option, in combination with the Format option,...

MH-162579_UM-0418_REV-5.01
manhattanproducts.com
USB Audio/Video Grabber User ManualModel 162579
2
CONTENTSIntroduction......................................................................................................3
Hardware Connections ................................................................................4Software Installation .....................................................................................5Starting the Program .....................................................................................5Navigation ....................................................................................................5
Capture ............................................................................................................6Start Capturing .............................................................................................6Step One — Connections .............................................................................7Step Two — Record Settings .........................................................................7Step Three — Optional Settings ....................................................................8Step Four — Preview......................................................................................8Step Five — Recording ..................................................................................8
Edit ....................................................................................................................8Start Editing ...................................................................................................9Step One — Preview Clips ............................................................................9Step Two — Split Clip ...................................................................................9Step Three — Arrange Clips ........................................................................10Step Four — Adding Effects (optional) ......................................................10Step Five — Merge & Save ..........................................................................11
Burn ................................................................................................................11Start Burning ...............................................................................................12Step One — Insert Disc ..............................................................................12Step Two — Settings ...................................................................................12Step Three — Add Clips .............................................................................13Step Four — Customize Menu (optional) ...................................................14Step Five — Burn ........................................................................................15
Uninstall honestech™ VHS to DVD™ 4.0 SE ..................................................16Appendix .......................................................................................................16
Video/Disc Format Options and Data Capacities ...................................16About Maximum Recording Time (MRT) ...................................................17About Project Files ......................................................................................17Converting PAL /NTSC (and other video standards) ................................17First Adjustment .........................................................................................17Second Adjustment ...................................................................................18
Troubleshooting .............................................................................................18Installation Problems .................................................................................18Access Denied error ..................................................................................19Product Key .................................................................................................19Invalid Product Key error ............................................................................19Disc Problems ............................................................................................19Video Problems ..........................................................................................19Choppy video .............................................................................................19Audio Problems ..........................................................................................20
Notes ..............................................................................................................21Additional Information ..................................................................................22
3
IntroductionThe Manhattan® Audio/Video Grabber converts your treasured home videos to contemporary formats that you can keep and share for a lifetime. It converts media from sources such as a camcorder, VCR or other media device that is equipped with S-video or RCA outputs.
Some of the great features this software supports are:• Capturing video from VCR, Digital Camcorder, PC camera, TV, or DVD players and
convert them into home DVDs• Enjoying advanced scene editing tools: trim out unwanted scenes, combine multiple
tapes, add transitions, titles and special effects• Including different screen effects and filters to creat professional-looking videos• Exporting the file to common device-friendly formats such as PSP or iPod formats• Using the recorded WMV files to create audio CDs, data CDs or data DVDs• Getting the most from this all-in-one solution: it includes everything you need to
easily transfer and convert your video into VCD, SVCD and DVD movies
Video input supported: capture device (VCR, Camcorder, TV, DVD Player)Video outputs supported: VCD, SVCD, DVD, Long DVD, WMV, MPEG-4 (PSP & iPod)
The Manhattan Audio/Video Grabber uses honestech™ VHS to DVD™ 4.0 SE to create professional videos from your home movies. It has three modes:1 Capture: Capture video from your device2 Edit: Cut unwanted scenes, combine clips, add transitions and special effects3 Burn: Burn your movie onto a DVD, VCD or SVCD disc or convert the video into MPEG-
4 or WMV format to watch it on your PSP, iPod or Windows-based PDA device.
Package Contents• Hi-Speed USB Audio/Video Grabber• RCA extension cable• Software and driver CD with user manual• Quick install guide
Minimum Recommended System Requirements• Windows XP/Vista/7/8/8.1/10 operating system • Hi-Speed USB-equipped computer with CD-ROM (for software installation)• Intel® Pentium® IV 2.4 GHz, Pentium D, Pentium M 1.3 GHz, Pentium Core™ Duo, or
AMD® Athlon® processor (Intel Pentium IV 3 GHz with hyperthreading or dual core 1.3 GHz for HD editing)

4
• 256 MB RAM (1 GB of RAM for HD editing)• 70 MB for program installation and 10 GB for DVD creation• Composite (RCA) cable• Audio cable (3.5 mm to composite)• Audio cable (3.5 mm to 3.5 mm)• DirectX 9.0 or higher• Windows Media Player 6.4 or higher• CD writer for VCD, SVCD• DVD writer for DVD
NOTE: Screen images presented in this user manual may have been modified to fit the format and can vary slightly depending on your operating system. The basic installation/operation steps are similar.
Hardware ConnectionsConnect your Manhattan Audio/Video Grabber’s USB plug to your com-puter. Then connect to the RCA cables to the appropriate ports on your media source — camcorder, TV or VCR, etc.• If the Found New Hardware Wizard welcome screen displays (below).
Click “Cancel.”
S-video In
Audio In (L)
Audio In (R)
Video In
5
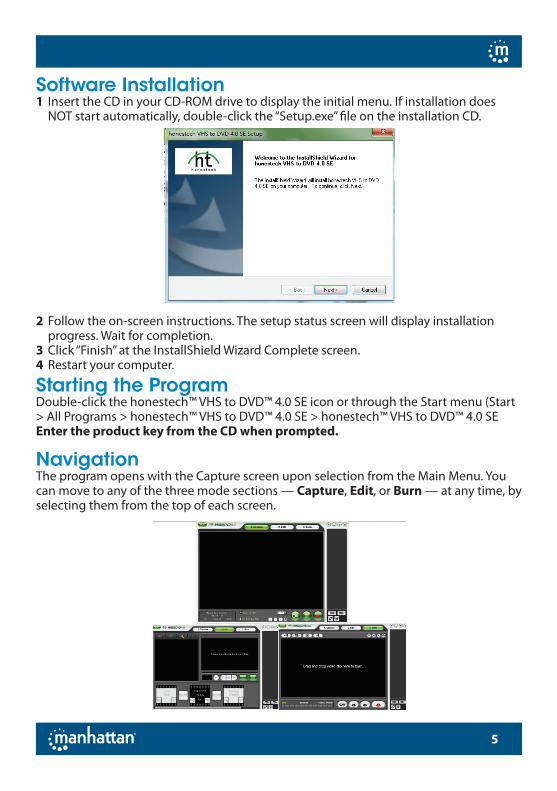
Software Installation1 Insert the CD in your CD-ROM drive to display the initial menu. If installation does
NOT start automatically, double-click the “Setup.exe” file on the installation CD.
2 Follow the on-screen instructions. The setup status screen will display installation progress. Wait for completion.
3 Click “Finish” at the InstallShield Wizard Complete screen. 4 Restart your computer.
Starting the ProgramDouble-click the honestech™ VHS to DVD™ 4.0 SE icon or through the Start menu (Start > All Programs > honestech™ VHS to DVD™ 4.0 SE > honestech™ VHS to DVD™ 4.0 SEEnter the product key from the CD when prompted.
NavigationThe program opens with the Capture screen upon selection from the Main Menu. You can move to any of the three mode sections — Capture, Edit, or Burn — at any time, by selecting them from the top of each screen.

6
CaptureThe Capture screen records video from any external video source such as a camcorder, VCR, etc. It provides several functions and task areas designed to make the recording process as easy as possible, which are described below.
• Screen Selection — 1. Capture 2. Edit 3. Burn• Preview Pane — used as a TV/monitor to see your video before and during
recording• Recording Status Display — displays the format selected for recording (DVD,
MPEG, WMV or LongDVD), recording time, file size of the recording megabytes, and the Maximum Recording Time
• Record and Burn — automatically burns your video to disc after the recording time has finished or the Stop button is clicked
• Video Perspective — provides 4:3 option for standard (non-HD) video and 16:9 for HDV/DV video
• Options — manage the recording format, video type, recording quality/time, output folder and device settings
• Clip Panel — all recorded, edited and imported video clips will appear here as thumbnail images
• Help Menu — access the User Guide, Product Registration information, Product Updates and Product Key information
Start CapturingThere are five steps to capturing: Step 1: ConnectionsStep 2: Record SettingsStep 3: Optional SettingsStep 4: PreviewStep 5: Recording Screen Selection Help Menu
Clip Panel
Remove clip from Clip Panel
Import Video to Clip Panel
Export clip options
Preview Pane
Recording Display Hours Minutes Seconds
Video Perspective

7
Step One — ConnectionsMake sure your video device is connected to the A/V Grabber. Then connect the A/V Grabber to your computer (refer diagram on page 3).
Step Two — Record SettingsAccess the Record Settings control panel using the Record Settings Button at the bottom of the Capture Screen.
• Video Device & Settings sets your video/cable connection (Composite or S-Video) and allows access to video controls for brightness, contrast, etc.
• Audio Device & Settings sets the input source and adjusts the recording volume.• Format & Settings sets the disc or video format you want the video to be recorded
in (see the Appendix for information regarding each format option); allows changes to video resolution if unstable or choppy video results. NOTE: Determine the type of disc to output your video files to before recording your video in the Capture screen or when merging and saving in the Edit screen.
• Quality adjusts the level of quality that your video will be recorded in. *This option, in combination with the Format option, determines how much video can be recorded to disc (does not apply to VCD or SVCD Formats).
• Result indicates the amount of video that can be burned to the type of disc or video format selected in the Format option; it changes based upon the settings for Format and Quality options.
• Video Recording Type specifies the video standard you want the video recorded in, NTSC (common video standard for North America) or PAL (commont video standard for Europe and British Commonwealths).
Tip: This option can also be used to convert a PAL videotape to the NTSC standard and vice versa. See the Appendix for information on converting video types.
• Output Folder specifies the location on your hard drive where all video recordings will be saved permanently. Click the Folder icon on the right to change the output
8
folder location. *Changing the Output Folder location is not recommended unless space is low on the current drive.* Save your settings and click the OK button when finished.
Step Three — Optional Settings• Set Recording Time enables Capture Mode to stop recording once the time entered
has elapsed. The timer will not start until the Record button is clicked. • Record and Burn automates the burn process; Advanced Mode burns the video to
disc when recording is complete. *Make sure to insert a blank disc into the disc drive before recording.*
• Video Perspective Select the option based on the type of video to be recorded. For standard video, select the 4:3 option. For HDV/DV video, select the 16:9 option.
Step Four — Preview• Press play on the device that has the video to be captured.• Video should appear in the Preview Pane; audio should play through
computer speakers.• Rewind or fast forward video to the desired point to record from.
Step Five — RecordingAny captured video appears in the Clip Panel as a thumbnail image.
• Recording Status Display lets you check recording status, verify recording format (DVD, SVCD, WMV etc.) and monitor file size. Maximum Recording Time (MRT) indicates available hours of recordable video on the hard drive. (See the Appendix for more MRT information.)
• Record records/captures video.• Stop ends or cancels the capture of your video. To remove video clips, select the
clip, then click the remove button at the bottom of the panel. • Save saves project when recording is finished. *Projects are saved as a VHS to DVD
project file. Repeat the process to record more tapes, if desired.
EditThe edit screen lets you split your video clips into smaller segments, arrange segments within the storyboard, add transitions, apply effects and overlay text. When you are finished, merge and save the changes you have made to create a new video clip. *Editing is optional. Select the Burn button to proceed without editing:
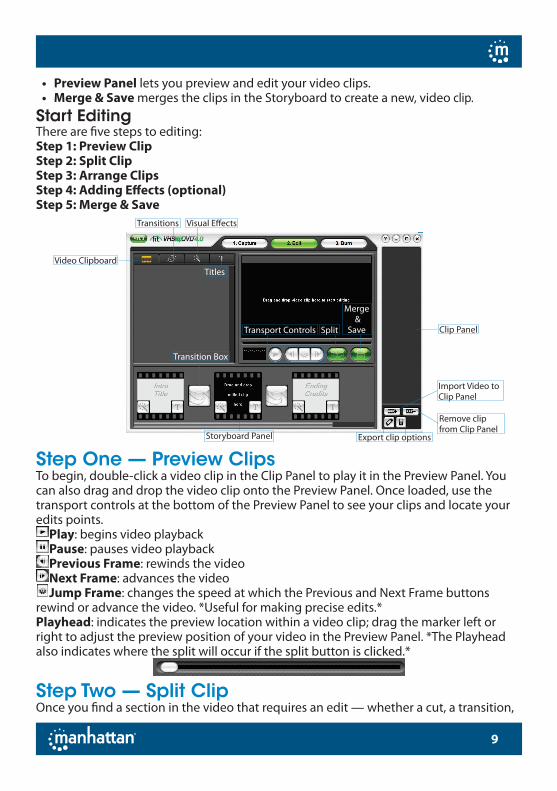
• Video Clipboard displays any video clips you have edited/split in the Preview Panel as thumbnails.
• Effects Tabs offers transitions, special effects, and title screens.• Storyboard Panel lets you drag and drop edited clips from the Clip Board here.
Organize, add transitions and text titles, apply special effects, and create intro and ending credits here.
• Clip Panel all recorded, edited, and imported video clips will appear here as thumbnail images.
9
• Preview Panel lets you preview and edit your video clips. • Merge & Save merges the clips in the Storyboard to create a new, video clip.
Start EditingThere are five steps to editing: Step 1: Preview Clip Step 2: Split Clip Step 3: Arrange Clips Step 4: Adding Effects (optional) Step 5: Merge & Save
Step One — Preview ClipsTo begin, double-click a video clip in the Clip Panel to play it in the Preview Panel. You can also drag and drop the video clip onto the Preview Panel. Once loaded, use the transport controls at the bottom of the Preview Panel to see your clips and locate your edits points.
Play: begins video playback Pause: pauses video playbackPrevious Frame: rewinds the videoNext Frame: advances the videoJump Frame: changes the speed at which the Previous and Next Frame buttons
rewind or advance the video. *Useful for making precise edits.*Playhead: indicates the preview location within a video clip; drag the marker left or right to adjust the preview position of your video in the Preview Panel. *The Playhead also indicates where the split will occur if the split button is clicked.*
Step Two — Split Clip Once you find a section in the video that requires an edit — whether a cut, a transition,
Video Clipboard
Transitions
Split
Merge &
Save
Transition Box
Storyboard Panel
Transport Controls
Visual Effects
Titles
Clip Panel
Remove clip from Clip Panel
Import Video to Clip Panel
Export clip options

10
or a special effect — split the clip to isolate the section. Splitting provides two clips that are automatically placed in the Video Clipboard. Repeat this procedure to further isolate sections of your video; rearrange clips as desired.
• Split splits your video clip at its current play position. The video divides into two segments that are placed in the Video Clipboard.
Tip: The Preview Panel lets you split clips at the Playhead or at the video frame appearing in the panel.
Step Three — Arrange ClipsAfter splitting your video into smaller segments, you can begin to arrange them in the Storyboard Panel. The Storyboard already contains three items that look like film frames.
The first and last items are provided to create custom Intro and Ending Titles for your video. *They can be removed by selecting the specific title frame and pressing Delete on your keyboard. The deleted item will remain in a grayed-out form.*
Add your first clip to the middle frame in the Storyboard. To move clips to the Storyboard, select a segment from the Video Clipboard and drag it to the Storyboard Panel at the bottom of the edit screen. If desired, add more clips around the middle clip (clips cannot be added before or after the Intro- and Ending-Title frames.).
You can also drag and drop clips within the Storyboard Panel. Dragging a clip to the right or left will change its sequence. A vertical red bar will appear to indicate where the clip will be placed in the timeline.
Tip: To preview your clip arrangement, select the clip you want to preview in the Storyboard Panel and click Play in the Preview Panel.
Step Four — Adding Effects (optional) The Edit screen includes a large selection of optional effects that can be used to visually enhance your video. To access the effects, select one of the three Effect tabs above the Video Clipboard: Transitions, Visual Effects, or Titles.
11
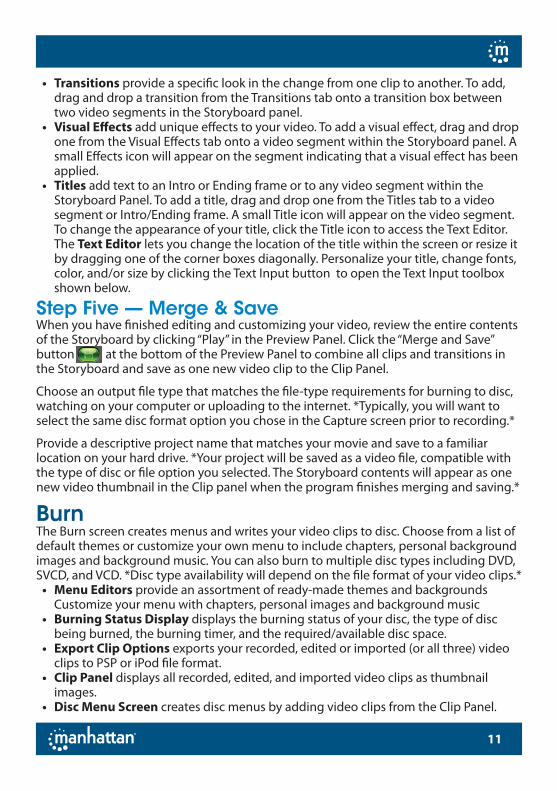
• Transitions provide a specific look in the change from one clip to another. To add, drag and drop a transition from the Transitions tab onto a transition box between two video segments in the Storyboard panel.
• Visual Effects add unique effects to your video. To add a visual effect, drag and drop one from the Visual Effects tab onto a video segment within the Storyboard panel. A small Effects icon will appear on the segment indicating that a visual effect has been applied.
• Titles add text to an Intro or Ending frame or to any video segment within the Storyboard Panel. To add a title, drag and drop one from the Titles tab to a video segment or Intro/Ending frame. A small Title icon will appear on the video segment. To change the appearance of your title, click the Title icon to access the Text Editor. The Text Editor lets you change the location of the title within the screen or resize it by dragging one of the corner boxes diagonally. Personalize your title, change fonts, color, and/or size by clicking the Text Input button to open the Text Input toolbox shown below.
Step Five — Merge & SaveWhen you have finished editing and customizing your video, review the entire contents of the Storyboard by clicking “Play” in the Preview Panel. Click the “Merge and Save” button at the bottom of the Preview Panel to combine all clips and transitions in the Storyboard and save as one new video clip to the Clip Panel.
Choose an output file type that matches the file-type requirements for burning to disc, watching on your computer or uploading to the internet. *Typically, you will want to select the same disc format option you chose in the Capture screen prior to recording.*
Provide a descriptive project name that matches your movie and save to a familiar location on your hard drive. *Your project will be saved as a video file, compatible with the type of disc or file option you selected. The Storyboard contents will appear as one new video thumbnail in the Clip panel when the program finishes merging and saving.*
BurnThe Burn screen creates menus and writes your video clips to disc. Choose from a list of default themes or customize your own menu to include chapters, personal background images and background music. You can also burn to multiple disc types including DVD, SVCD, and VCD. *Disc type availability will depend on the file format of your video clips.*
• Menu Editors provide an assortment of ready-made themes and backgrounds Customize your menu with chapters, personal images and background music
• Burning Status Display displays the burning status of your disc, the type of disc being burned, the burning timer, and the required/available disc space.
• Export Clip Options exports your recorded, edited or imported (or all three) video clips to PSP or iPod file format.
• Clip Panel displays all recorded, edited, and imported video clips as thumbnail images.
• Disc Menu Screen creates disc menus by adding video clips from the Clip Panel.

12
Start BurningThere are five steps to burning: Step 1: Insert Disc Step 2: Settings Step 3: Add Clips Step 4: Customize Menu (optional) Step 5: Burn
Step One — Insert Disc Before burning, insert that disc into your computer. If you are importing video clips into the program, see the About Video/Disc Format options in the Appendix for the best disc option based on the type of video file you will be importing.
Step Two — Settings Click Settings at the bottom of the Burn screen to access the disc and menu settings.
Chapters
BurnDiscInfo
BackgroundImages
Settings
Menu NavigationThemes BackgroundMusic
Erase DiscDisc Status
Disc Menu Screen Clip Panel
Remove clip from Clip Panel
Import Video to Clip Panel
Export clip options
13
• Select disc type lets you specify the type of disc format you want to record your video clips to. When selecting DVD, be sure to select the size of your DVD from the drop-down menu to the right.
Tip: Use the same option you selected for the format prior to recording in the Capture screen.
• Select region type specifies the video standard you want your disc burned in, NTSC or PAL. *You will want to choose the standard based on your geographical region. NTSC is the common video standard for North America. PAL is typically used in Europe and British Commonwealths.
Encoding Settings • Select encode type specifies your encoding settings. Unless you prefer to make
advanced encoding settings, Manhattan recommends choosing “Fit to Disc” or “Preset.” Otherwise, select “Custom” and adjust the remaining encoding selections based on your needs.
Menu Settings • Create Menu creates a main-disc menu made for your disc. The disc menu is made
from the different video clips you add to the disc, and it displays them as image thumbnails with a background image of your choice. The disc menu will appear when playing your disc, allowing you to play specific clips based on the selection of videos you added to the disc.
• Chapter Menu includes a chapter menu for your clips. The chapter menu will allow you to select from individual chapters made for each clip.
• Set duration of background music adjusts the length of playback for background music you add to the main disc menu. The music you select will play for the number of seconds you choose before looping again.
• Menu screen format provides options to change the aspect ratio for your menu: 4:3 (option for standard) and 16:9 (widescreen video). *Normally, you will want to select the same setting you chose for your video perspective prior to capturing in the Capture screen.*
Step Three — Add Clips Drag the video clips you want to burn from the Clip Panel and drop them in the Disc Menu Screen. A sample disc menu will appear after adding a clip, providing a preview to your disc menu. * Make sure the clips you add do not exceed the available disc space listed in the top right corner of the Burning Status Display. ** To remove a clip from the Disc Menu Screen, click on the clip to highlight it, then right click and select delete from the pop-up menu.
Tip: To turn off the disc menu, click the Settings button at the bottom of the Burn screen and uncheck the “Create Menu” option.
14
Step Four — Customize Menu (optional)Use the following features to create and customize menus for your discs. A disc menu functions as a visual table of contents, providing the option for selective viewing.
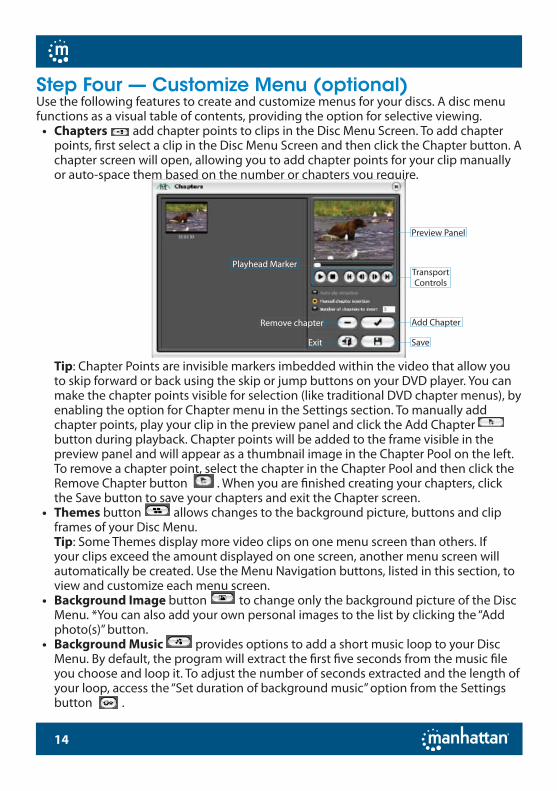
• Chapters add chapter points to clips in the Disc Menu Screen. To add chapter points, first select a clip in the Disc Menu Screen and then click the Chapter button. A chapter screen will open, allowing you to add chapter points for your clip manually or auto-space them based on the number or chapters you require.
Tip: Chapter Points are invisible markers imbedded within the video that allow you to skip forward or back using the skip or jump buttons on your DVD player. You can make the chapter points visible for selection (like traditional DVD chapter menus), by enabling the option for Chapter menu in the Settings section. To manually add chapter points, play your clip in the preview panel and click the Add Chapter button during playback. Chapter points will be added to the frame visible in the preview panel and will appear as a thumbnail image in the Chapter Pool on the left. To remove a chapter point, select the chapter in the Chapter Pool and then click the Remove Chapter button . When you are finished creating your chapters, click the Save button to save your chapters and exit the Chapter screen.
• Themes button allows changes to the background picture, buttons and clip frames of your Disc Menu. Tip: Some Themes display more video clips on one menu screen than others. If your clips exceed the amount displayed on one screen, another menu screen will automatically be created. Use the Menu Navigation buttons, listed in this section, to view and customize each menu screen.
• Background Image button to change only the background picture of the Disc Menu. *You can also add your own personal images to the list by clicking the “Add photo(s)” button.
• Background Music provides options to add a short music loop to your Disc Menu. By default, the program will extract the first five seconds from the music file you choose and loop it. To adjust the number of seconds extracted and the length of your loop, access the “Set duration of background music” option from the Settings button .
Add Chapter
TransportControls
Remove chapter
Playhead Marker
Preview Panel
SaveExit

15
• Menu Navigation buttons let you navigate through your Disc Menu screens and view the changes you have made.
Chapter Menu allows you to make changes to your Chapter Menu (only available when a Chapter Menu has been created)
Previous Menu Screen navigates to the previous menu screen. (Only available with multiple menu screens)
Next Menu Screen navigates to the next menu screen. (Only available with multiple menu screens)
Home Menu returns you to the main disc menu screen.
Step Five — Burn Before burning your video clips to disc, verify that the total, required size of your clip(s) does not exceed the total available size of your disc. To verify that your clip(s) do not exceed the disc size, check the Disc Status in the bottom left corner of the Burn Screen.
When you are ready to burn your video clip(s) to disc, click the Burn Disc button at the bottom of the Burn Screen.
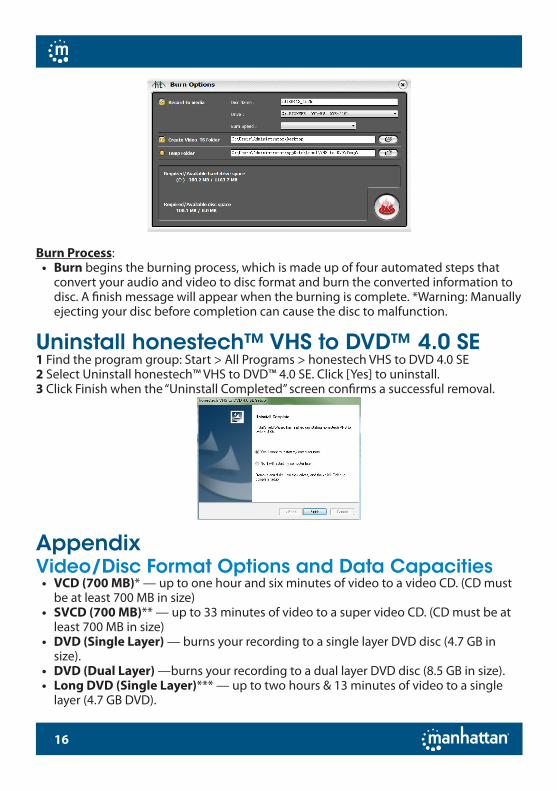
A Burn Options window will appear providing some additional disc burning choices before you begin the actual burning process. *Unless there is a specific need, the burn options can be left at their default settings, and you can start burning by clicking the red & white Burn button.
Burn Options • Disc Name lets you name your disc; the name will be visible when played on a
computer or from the display interface on supported DVD players.• Drive selects the disc drive that will burn your disc.• Burn Speed specifies the speed at which your disc drive will burn your disc.
Tip: Slower burn speeds will typically yield better disc results. If you encounter burning problems, try lowering the burn speed. Speeds can then be raised incrementally with each successful burn.
• Create Video_TS folder creates a Video_TS folder in the location specified. A Video_TS folder is the file structure or directory typically burned to DVD discs which also contains the DVD movie.
• Temp Folder lets you select a temporary folder used during the burning process. Advanced Mode uses the temporary folder to convert your video to disc format. Once burned to disc, the converted video is purged from the temporary folder.
16
Burn Process: • Burn begins the burning process, which is made up of four automated steps that
convert your audio and video to disc format and burn the converted information to disc. A finish message will appear when the burning is complete. *Warning: Manually ejecting your disc before completion can cause the disc to malfunction.
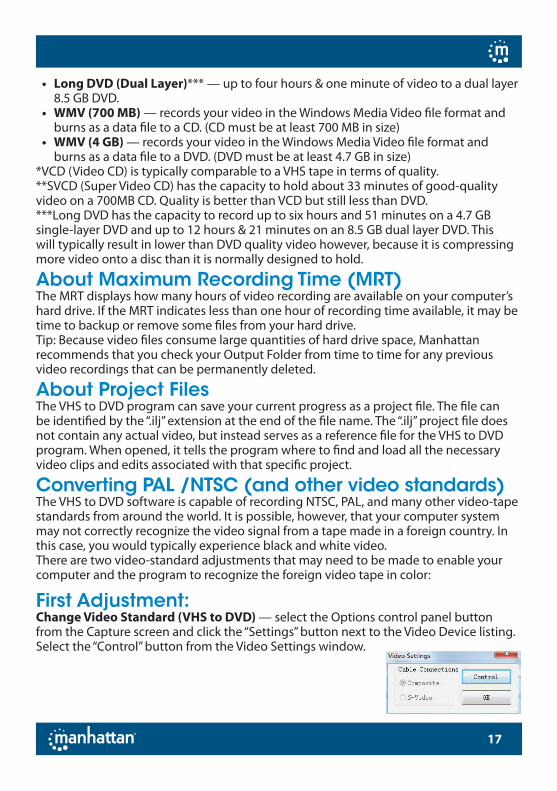
Uninstall honestech™ VHS to DVD™ 4.0 SE 1 Find the program group: Start > All Programs > honestech VHS to DVD 4.0 SE 2 Select Uninstall honestech™ VHS to DVD™ 4.0 SE. Click [Yes] to uninstall.3 Click Finish when the “Uninstall Completed” screen confirms a successful removal.
AppendixVideo/Disc Format Options and Data Capacities
• VCD (700 MB)* — up to one hour and six minutes of video to a video CD. (CD must be at least 700 MB in size)
• SVCD (700 MB)** — up to 33 minutes of video to a super video CD. (CD must be at least 700 MB in size)
• DVD (Single Layer) — burns your recording to a single layer DVD disc (4.7 GB in size).
• DVD (Dual Layer) —burns your recording to a dual layer DVD disc (8.5 GB in size). • Long DVD (Single Layer)*** — up to two hours & 13 minutes of video to a single
layer (4.7 GB DVD).
17
• Long DVD (Dual Layer)*** — up to four hours & one minute of video to a dual layer 8.5 GB DVD.
• WMV (700 MB) — records your video in the Windows Media Video file format and burns as a data file to a CD. (CD must be at least 700 MB in size)
• WMV (4 GB) — records your video in the Windows Media Video file format and burns as a data file to a DVD. (DVD must be at least 4.7 GB in size)
*VCD (Video CD) is typically comparable to a VHS tape in terms of quality. **SVCD (Super Video CD) has the capacity to hold about 33 minutes of good-quality video on a 700MB CD. Quality is better than VCD but still less than DVD. ***Long DVD has the capacity to record up to six hours and 51 minutes on a 4.7 GB single-layer DVD and up to 12 hours & 21 minutes on an 8.5 GB dual layer DVD. This will typically result in lower than DVD quality video however, because it is compressing more video onto a disc than it is normally designed to hold.
About Maximum Recording Time (MRT) The MRT displays how many hours of video recording are available on your computer’s hard drive. If the MRT indicates less than one hour of recording time available, it may be time to backup or remove some files from your hard drive. Tip: Because video files consume large quantities of hard drive space, Manhattan recommends that you check your Output Folder from time to time for any previous video recordings that can be permanently deleted.
About Project FilesThe VHS to DVD program can save your current progress as a project file. The file can be identified by the “.ilj” extension at the end of the file name. The “.ilj” project file does not contain any actual video, but instead serves as a reference file for the VHS to DVD program. When opened, it tells the program where to find and load all the necessary video clips and edits associated with that specific project.
Converting PAL /NTSC (and other video standards)The VHS to DVD software is capable of recording NTSC, PAL, and many other video-tape standards from around the world. It is possible, however, that your computer system may not correctly recognize the video signal from a tape made in a foreign country. In this case, you would typically experience black and white video. There are two video-standard adjustments that may need to be made to enable your computer and the program to recognize the foreign video tape in color:
First Adjustment: Change Video Standard (VHS to DVD) — select the Options control panel button from the Capture screen and click the “Settings” button next to the Video Device listing. Select the “Control” button from the Video Settings window.
18
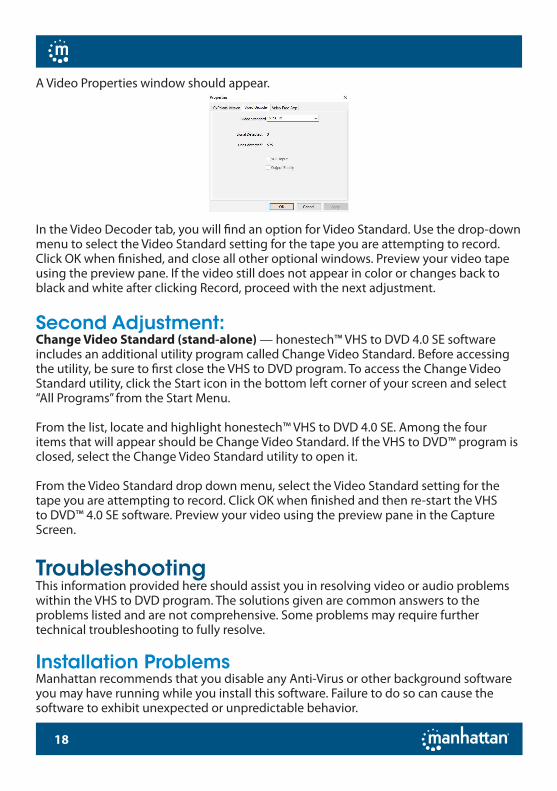
A Video Properties window should appear.
In the Video Decoder tab, you will find an option for Video Standard. Use the drop-down menu to select the Video Standard setting for the tape you are attempting to record. Click OK when finished, and close all other optional windows. Preview your video tape using the preview pane. If the video still does not appear in color or changes back to black and white after clicking Record, proceed with the next adjustment.
Second Adjustment: Change Video Standard (stand-alone) — honestech™ VHS to DVD 4.0 SE software includes an additional utility program called Change Video Standard. Before accessing the utility, be sure to first close the VHS to DVD program. To access the Change Video Standard utility, click the Start icon in the bottom left corner of your screen and select “All Programs” from the Start Menu.
From the list, locate and highlight honestech™ VHS to DVD 4.0 SE. Among the four items that will appear should be Change Video Standard. If the VHS to DVD™ program is closed, select the Change Video Standard utility to open it.
From the Video Standard drop down menu, select the Video Standard setting for the tape you are attempting to record. Click OK when finished and then re-start the VHS to DVD™ 4.0 SE software. Preview your video using the preview pane in the Capture Screen.
TroubleshootingThis information provided here should assist you in resolving video or audio problems within the VHS to DVD program. The solutions given are common answers to the problems listed and are not comprehensive. Some problems may require further technical troubleshooting to fully resolve.
Installation Problems Manhattan recommends that you disable any Anti-Virus or other background software you may have running while you install this software. Failure to do so can cause the software to exhibit unexpected or unpredictable behavior.

19
Access Denied error • Verify you are logged in as an Admin user for the computer.
Product Key• Check the back of the envelope or jewel case that the Install CD was packaged in.
Invalid Product Key error• Enter the key manually, five characters per box (avoid copying and pasting).
Disc Problems Media non-applicable error:
• For Advanced Mode: Verify you have inserted the correct type of blank media to match the format of your video clips (see the About Video/Disc Format Options section in the Appendix).
No DVD writer detected error: • Verify your optical disc drive will write to DVD -/+R discs. Many drives labeled DVD-
ROM will only read DVD discs but not write to them.
Video Problems No video
• Check your cable connections to make sure they are secure.• Verify that you have connected your cables to the ports labeled “Output” on your
video player. • Verify that you have only connected one type of video cable, the yellow RCA cable or
the black S-Video cable. • Verify that the output ports of your video player work by testing them with your television. • Check your video and audio device settings from the Record Settings control panel
(see Step Two of the Advanced Mode — Capture section). • Verify your video-cable-connections setting by clicking the “Settings” button next to
the Video Device listing (see Step Two of the Advanced Mode — Capture section). • Disconnect additional monitors.
Black & White video• Verify that your video tape was recorded in the same video-standard format for
your region. If it was not, see the Converting PAL/NTSC (and other video standards) section in the appendix.
Pink/Green video• Verify that you have plugged your capture device into a USB 2.0 port attached to
your computer. Avoid using external USB hubs.
Choppy video• Verify that your computer meets the program’s minimum system requirements.

20
• Avoid the following actions while recording and burning:• Locking the workstation.• Running other applications in full-screen mode or running CPU-intensive programs.
• Distorted lines at top or bottom of screen:• Clean VCR/camcorder tape heads. • Adjust VCR/camcorder video tracking. (These lines are not usually visible on a
regular television because a TV typically presents in overscan mode, which causes the edges of the video to be out of view)
Audio Problems No Audio
• Check your cable connections to make sure they are secure.• Verify that you have connected your cables to the ports labeled “Output” on your
video/audio player. *If there are no Output ports available, try using a Headphone output by way of a headphone-to-RCA (Composite) adapter cable.
• If using a Headphone output, adjust the volume for your audio player.• Verify that the audio output ports of your video player work by testing them with
your television.• Check your video and audio device settings from the Record Settings control panel
(see Step Two of the Advanced Mode—Capture section). Choppy audio:
• Verify your computer meets the program’s minimum system requirements.• Avoid the following actions while recording and burning:
• Locking the workstation.• Running other applications in full-screen mode or running CPU-intensive programs.

21
NOTES

WASTE ELECTRICAL & ELECTRONIC EQUIPMENTDISPOSAL OF ELECTRIC AND ELECTRONIC EQUIPMENT
(Applicable In The European Union And Other European Countries With Separate Collection Systems)ENGLISH: This symbol on the product or its packaging means that this product must not be treated as unsorted household waste. In accordance with EU Directive 2012/19/EU on Waste Electrical and Electronic Equipment (WEEE),
this electrical product must be disposed of in accordance with the user’s local regulations for electrical or electronic waste. Please dispose of this product by returning it to your local point of sale or recycling pickup point in your municipality.
DEUTSCH: Dieses auf dem Produkt oder der Verpackung angebrachte Symbol zeigt an, dass dieses Produkt nicht mit dem Hausmüll entsorgtwerden darf. In Übereinstimmung mit der Richtlinie 2012/19/EU des Europäischen Parlaments und des Rates über Elektro- und Elektronik-Altgeräte (WEEE) darf dieses Elektrogerät nicht im normalen Hausmüll oder dem Gelben Sack entsorgt werden. Wenn Sie dieses Produkt entsorgen möchten, bringen Sie es bitte zur Verkaufsstelle zurück oder zum Recycling-Sammelpunkt Ihrer Gemeinde.
ESPAÑOL: Este símbolo en el producto o su embalaje indica que el producto no debe tratarse como residuo doméstico. De conformidad con la Directiva 2012/19/EU de la UE sobre residuos de aparatos eléctricos y electrónicos (RAEE), este producto eléctrico no puede desecharse se con el resto de residuos no clasificados. Deshágase de este producto devolviéndolo a su punto de venta o a un punto de recolección municipal para su reciclaje.
FRANÇAIS: Ce symbole sur Ie produit ou son emballage signifie que ce produit ne doit pas être traité comme un déchet ménager. Conformément à la Directive 2012/19/EU sur les déchets d’équipements électriques et électroniques (DEEE), ce produit électrique ne doit en aucun cas être mis au rebut sous forme de déchet municipal non trié. Veuillez vous débarrasser de ce produit en Ie renvoyant à son point de vente ou au point de ramassage local dans votre municipalité, à des fins de recyclage.
ITALIANO: Questo simbolo sui prodotto o sulla relativa confezione indica che il prodotto non va trattato come un rifiuto domestico. In ottemperanza alla Direttiva UE 2012/19/EU sui rifiuti di apparecchiature elettriche ed elettroniche (RAEE), questa prodotto elettrico non deve essere smaltito come rifiuto municipale misto. Si prega di smaltire il prodotto riportandolo al punto vendita o al punto di raccolta municipale locale per un opportuno riciclaggio.
POLSKI: Jeśli na produkcie lub jego opakowaniu umieszczono ten symbol, wówczas w czasie utylizacji nie wolno wyrzucać tego produktu wraz z odpadami komunalnymi. Zgodnie z Dyrektywą Nr 2012/19/EU w sprawie zużytego sprzętu elektrycznego i elektronicznego (WEEE), niniejszego produktu elektrycznego nie wolno usuwać jako nie posortowanego odpadu komunalnego. Prosimy o usuniecie niniejszego produktu poprzez jego zwrot do punktu zakupu lub oddanie do miejscowego komunalnego punktu zbiórki odpadów przeznaczonych do recyklingu.
WARRANTY INFORMATIONENGLISH: For warranty information, go to manhattanproducts.com/t/warranty.
DEUTSCH: Garantieinformationen finden Sie unter manhattanproducts.com/t/warranty.
ESPAÑOL: Si desea obtener información sobre la garantía, visite manhattanproducts.com/t/warranty.
FRANÇAIS: Pour consulter les informations sur la garantie, visitez manhattanproducts.com/t/warranty.
POLSKI: Informacje dotyczące gwarancji znajdują się na stronie manhattanproducts.com/t/warranty.
ITALIANO: Per informazioni sulla garanzia, accedere a manhattanproducts.com/t/warranty.
EN MÉXICO: Póliza de Garantía Manhattan — Datos del importador y responsable ante el consumidor IC Intracom México, S.A.P.I. de C.V. • Av. Interceptor Poniente # 73, Col. Parque Industrial La Joya, Cuautitlán Izcalli, Estado de México, C.P. 54730, México. • Tel. (55)1500-4500La presente garantía cubre los siguientes productos contra cualquier defecto de fabricación en sus materiales y mano de obra.
A. Garantizamos los productos de limpieza, aire comprimido y consumibles, por 60 dias a partir de la fecha de entrega, o por el tiempo en que se agote totalmente su contenido por su propia función de uso, lo que suceda primero.
B. Garantizamos los productos con partes móviles por 3 años.C. Garantizamos los demás productos por 5 años (productos sin partes móviles), bajo las siguientes condiciones:
1. Todos los productos a que se refiere esta garantía, ampara su cambio físico, sin ningún cargo para el consumidor.2. El comercializador no tiene talleres de servicio, debido a que los productos que se garantizan no cuentan con
reparaciones, ni refacciones, ya que su garantía es de cambio físico.3. La garantía cubre exclusivamente aquellas partes, equipos o sub-ensambles que hayan sido instaladas de fábrica y
no incluye en ningún caso el equipo adicional o cualesquiera que hayan sido adicionados al mismo por el usuario o
22
Additional Information
distribuidor. Para hacer efectiva esta garantía bastará con presentar el producto al distribuidor en el domicilio donde fue adquirido o en el domicilio de IC Intracom México, S.A.P.I. de C.V., junto con los accesorios contenidos en su empaque, acompañado de su póliza debidamente llenada y sellada por la casa vendedora (indispensable el sello y fecha de compra) donde lo adquirió, o bien, la factura o ticket de compra original donde se mencione claramente el modelo, número de serie (cuando aplique) y fecha de adquisición. Esta garantía no es válida en los siguientes casos: Si el producto se hubiese utilizado en condiciones distintas a las normales; si el producto no ha sido operado conforme a los instructivos de uso; o si el producto ha sido alterado o tratado de ser reparado por el consumidor o terceras personas.
REGULATORY STATEMENTSFCC Class B
This equipment has been tested and found to comply with the limits for a Class B digital device, pursuant to Part 15 of Federal Communications Commission (FCC) Rules. These limits are designed to provide reasonable protection against harmful interference in a residential installation. This equipment generates, uses and can radiate radio frequency energy, and if not installed and used in accordance with the instructions may cause harmful interference to radio communications. However, there is no guarantee that interference will not occur in a particular installation. If this equipment does cause harmful interference to radio or television reception, which can be determined by turning the equipment off and on, the user is encouraged to try to correct the interference by one or more of the following measures: reorient or relocate the receiving antenna; increase the separation between the equipment and the receiver; connect the equipment to an outlet on a circuit different from the receiver; or consult the dealer or an experienced radio/TV technician for help.
CEENGLISH: This device complies with the requirements of CE RED 2014/53/EU, 2014/30/EU and/or 2014/35/EC. The Declaration of Conformity for is available at:
DEUTSCH: Dieses Gerät enspricht der CE RED 2014/53/EU, 2014/30/EU und / oder 2014/35/EC. Die Konformitätserklärung für dieses Produkt finden Sie unter:
ESPAÑOL: Este dispositivo cumple con los requerimientos de CE RED 2014/53/EU, 2014/30/EU y / o 2014/35/EC. La declaración de conformidad esta disponible en:
FRANÇAIS: Cet appareil satisfait aux exigences de CE RED 2014/53/EU, 2014/30/EU et / ou 2014/35/EC. La Déclaration de Conformité est disponible à:
POLSKI: Urządzenie spełnia wymagania CE RED 2014/53/EU, 2014/30/EU I / lub 2014/35/EC. Deklaracja zgodności dostępna jest na stronie internetowej producenta:
ITALIANO: Questo dispositivo è conforme alla CE RED 2014/53/EU, 2014/30/EU e / o 2014/35/EC. La dichiarazione di conformità è disponibile al:
manhattanproducts.com
North AmericaIC Intracom America550 Commerce Blvd.
Oldsmar, FL 34677 USA
Asia & AfricaIC Intracom Asia
4-F, No. 77, Sec. 1, Xintai 5th Rd.Xizhi Dist., New Taipei City 221, Taiwan
EuropeIC Intracom Europe
Löhbacher Str. 7, D-58553 Halver, Germany
All trademarks and trade names are the property of their respective owners.Alle Marken und Markennamen sind Eigentum Ihrer jeweiligen Inhaber.
Todas las marcas y nombres comerciales son propiedad de sus respectivos dueños.Toutes les marques et noms commerciaux sont la propriété de leurs propriétaires respectifs.
Wszystkie znaki towarowe i nazwy handlowe należą do ich właścicieli.Tutti i marchi registrati e le dominazioni commerciali sono di proprietà dei loro rispettivi proprietari.
2323

All trademarks and trade names are the property of their respective owners.© IC Intracom. All rights reserved. Manhattan is a trademark of IC Intracom, registered in the U.S. and other countries.
manhattanproducts.com