Upgrading to Centricity Practice Solution - Virtual...
74
Upgrading to Centricity ® Practice Solution Version 11 December 2012 GE Healthcare Centricity® Practice Solution DOC1189399
Transcript of Upgrading to Centricity Practice Solution - Virtual...
Upgrading toCentricity® Practice SolutionVersion 11December 2012
GE Healthcare
Centricity® Practice SolutionDOC1189399

Revision historyDate Description
December 2012DOC1189399
Updated for release 11.0
October 2011 DOC0838710 Rev 4
Clarified Update server procedure for sites already running SQL Server 2008 R2. Use either:
Updating Centricity Practice Solution 9.5 or later on page 15or
Updating/migrating earlier versions of Centricity Practice Solution on page 16Both procedures continue the update with the section Continuing the update on page 18.
July 2011DOC0838710 Rev 3
Updated for release 10.0
December 2010DOC0838710 Rev 2
Updated for release 9.5
Added:
• Added SQL Configuration for automatic startup and enabling TCP/IP.• Updated the procedure Configure SQL Server 2008 R2 to run the client on the server with
the new SQL Server Management process• Crystal reports upgrade• Updated the supported configurations• Removed 32-bit SQL Server tuning information• Added info for adding servers to local intranet zones• Time synchronization• Windows 7 or Vista camera set up
March 2010DOC0838710 Rev 4
Updated for release 9.0.3
Added an upgrade compatibility matrix on page 2.
Improved the pre and post DTS upgrade instructions.
Added pre and post MIK upgrade instructions.
Added location for GEMSDemo.txt and GEMSRole.txt files for the demo database.
September 2009DOC0838710 Rev 3
Updated for release 9.0.1
Added note to use a new staging area when upgrading from a pre-9.0 version.
June 2009DOC0838710 Rev 1
Original issue for version 9.0
Copyright © 2012 General Electric Company© 2011 General Electric Company. All Rights Reserved. GE Healthcare Integrated IT Solutions, 540 W. Northwest Highway, Barrington, IL 60010, USA
All information is subject to change without notice. This information is the confidential and proprietary information of General Electric Company.
Unauthorized duplication is strictly prohibited. Centricity
® and Logician
® are registered trademarks of General Electric Company.

UpgradingCentricity Practice Solution
Documentation conventions 2
Terminology 3
Getting Started 5
Prepare LinkLogic/Data Transfer Station for upgrade 10
SQL Server 2008 R2 12
Configure SQL Server for performance and up time 12
Configure SQL Server 2008 R2 to run the client on the server 14
Synchronize time 14
Update server 15
Install a web site 22
Upgrade a workstation client 34
Upgrade client on the Remote Desktop Services/Citrix server 38
Testing the Citrix client installation 39
Launch the Centricity Practice Solution client 40
Import clinical kits 46
Converting custom reports to newer Crystal Reports version 47
Install optional server software 49
About Data Transfer Station (DTS) 50
Install Data Transfer Station (DTS) 51
Running the DTS as a Service 54
Install Millbrook Integration Kit (MIK) 56
Configuring webcams for Windows 7 or Vista operating systems 61
Setting up user security 62
ServerSetup online help 62
Anti-virus software 62
Install biometric authentication on page 63
About the Demo (evaluation) Database 65
About ServerSetup product updates 68
Remove the client from a workstation 71
Upgrading Centricity Practice Solution
This guide contains instructions for an upgrade to Centricity Practice Solution.
Documentation conventions
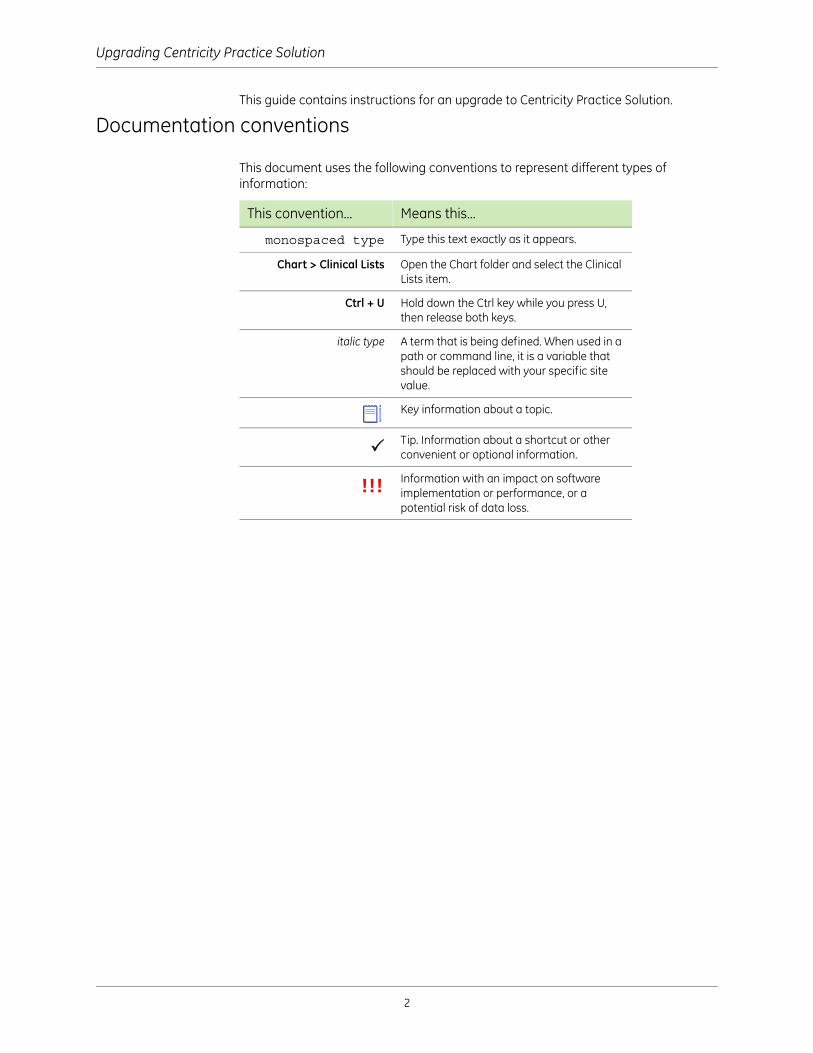
This document uses the following conventions to represent different types of information:
This convention... Means this...
monospaced type Type this text exactly as it appears.
Chart > Clinical Lists Open the Chart folder and select the Clinical Lists item.
Ctrl + U Hold down the Ctrl key while you press U, then release both keys.
italic type A term that is being defined. When used in a path or command line, it is a variable that should be replaced with your specific site value.
Key information about a topic.
Tip. Information about a shortcut or other convenient or optional information.
!!! Information with an impact on software implementation or performance, or a potential risk of data loss.
2
Terminology
Terminology
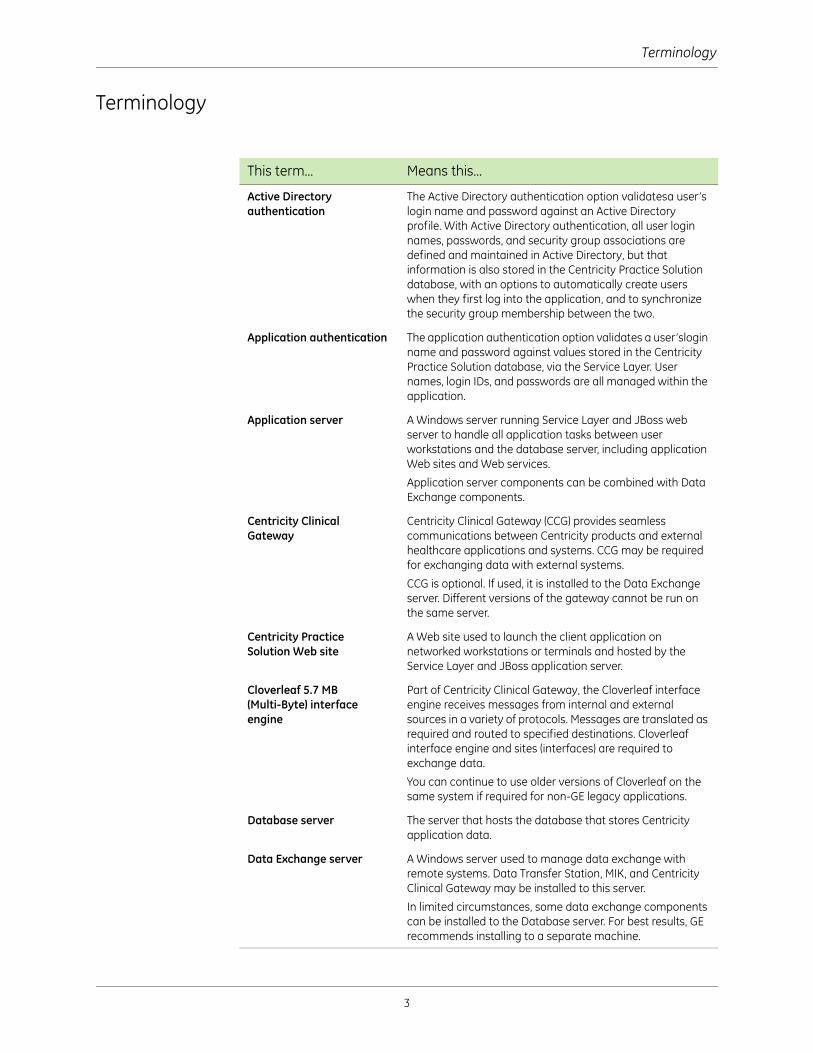
This term... Means this...
Active Directory authentication
The Active Directory authentication option validatesa user’s login name and password against an Active Directory profile. With Active Directory authentication, all user login names, passwords, and security group associations are defined and maintained in Active Directory, but that information is also stored in the Centricity Practice Solution database, with an options to automatically create users when they first log into the application, and to synchronize the security group membership between the two.
Application authentication The application authentication option validates a user’slogin name and password against values stored in the Centricity Practice Solution database, via the Service Layer. User names, login IDs, and passwords are all managed within the application.
Application server A Windows server running Service Layer and JBoss web server to handle all application tasks between user workstations and the database server, including application Web sites and Web services.
Application server components can be combined with Data Exchange components.
Centricity Clinical Gateway
Centricity Clinical Gateway (CCG) provides seamless communications between Centricity products and external healthcare applications and systems. CCG may be required for exchanging data with external systems.
CCG is optional. If used, it is installed to the Data Exchange server. Different versions of the gateway cannot be run on the same server.
Centricity Practice Solution Web site
A Web site used to launch the client application on networked workstations or terminals and hosted by the Service Layer and JBoss application server.
Cloverleaf 5.7 MB (Multi-Byte) interface engine
Part of Centricity Clinical Gateway, the Cloverleaf interface engine receives messages from internal and external sources in a variety of protocols. Messages are translated as required and routed to specified destinations. Cloverleaf interface engine and sites (interfaces) are required to exchange data.
You can continue to use older versions of Cloverleaf on the same system if required for non-GE legacy applications.
Database server The server that hosts the database that stores Centricity application data.
Data Exchange server A Windows server used to manage data exchange with remote systems. Data Transfer Station, MIK, and Centricity Clinical Gateway may be installed to this server.
In limited circumstances, some data exchange components can be installed to the Database server. For best results, GE recommends installing to a separate machine.
3

Upgrading Centricity Practice Solution
Data Transfer Station (DTS) Runs on a dedicated machine and automates clinical data transfers to and from external systems via LinkLogic and (optionally) Cloverleaf interface engine.
Multiple instances of DTS can be implemented. GE recommends locating each instance on a separate machine.
JBoss See Service Layer.
KnowledgeBase Clinical content that is updated quarterly. KnowledgeBase updates formulary names, ICD codes, allergy custom lists, medication references and interaction information, and problem references (CPT codes and keywords).
LinkLogic LinkLogic runs within the Centricity application and is used to exchange information with other health care information systems. LinkLogic imports demographics, documents, lab results, appointments, and references to external images into the Centricity database and exports application data for demographics, documents, observations, procedures, allergies, problems and clinical summaries.
MIK (Millbrook Integration Kit)
MIK is a service that automates business data transfers for Centricity PM. MIK is typically installed to the database server in a PM-only implementation. It is installed to the Data Exchange server in a joint EMR-PM implementation.
Service Layer The Service Layer handles all application tasks between user workstations and the Database Server. It is a service-oriented architecture (SOA) Java-based application server (JBoss) with Web services interface that supports:
• Legacy Clinical Web Services (Dosing Calculator, Growth Charts, Medication/Problem Web Lookup) and application Web sites
• Tighter integration with Centricity Business Systems (Flowcast) and a platform for future interoperability with other GE systems
• Enhanced integration with third-party software applications
Service Layer is installed to the Application server.
Staging area/staging location
The directory on the database server that contains the Centricity application and database files used in the installation process. The contents of the Centricity installation media is copied to this directory and remains there during and after installation. The database installation files can be copied to this directory as well. The staging directory should have at least 2 GB of free space.
This term... Means this...
4

Getting Started
Getting Started
Centricity Practice Solution users connect from their workstations via a Web interface to the database containing your patient records. An overview of the process is:
Install Centricity Practice Solution database on a Database server which users can access from workstations connected to your network. This is a remote install launched from the Application server.
Install the Application Web site (JBoss and the Service Layer) on a separate Application server that users log into to access the database.
If product updates or service packs are available, access them via the product Web site, then download and apply them to the server.
Download the latest Knowledge Base and release notes from the Centricity Practice Solution Services Web site at http://centricitypractice.gehealthcare.com.
Install and optionally update Centricity Practice Solution on workstations where users document patient visits and carry out practice management tasks.
Install and configure separately licensed interfaces to share data with labs, hospitals, transcription services, insurance companies, and other external information systems.
Review planning and implementation resources
The following planning and implementation resources are available on your Centricity Practice Solution media and on the Centricity Practice Services Web site.
Centricity Practice Solution Release Notes. Check these notes for release news. Includes a summary of new features, and any late breaking information.
System Planning and Requirements for Centricity Practice Solution. This guide contains detailed system planning information and maintenance procedures.
Configuring Environments for Centricity Practice Solution. This guide contains detailed hardware and software specifications.
Calculating hardware requirements for Centricity Practice Solution. Use this Microsoft® Excel spreadsheet to fine-tune your hardware requirements. This tool is available on the Centricity Practice Services Web site. If you have 25 or more users, you should plan to use this tool.
Installing Centricity Practice Solution. This guide contains instructions to install and set up Centricity Practice Solution for the first time.
Upgrading to Centricity Practice Solution. This guide contains instructions for upgrading an existing installation to Centricity Practice Solution.
Managing interfaces with Centricity Practice Solution. Includes resources to support import and export of clinical data and patient information to and from other systems, such as labs, transcription services, insurance companies, and other healthcare organizations.
Installing and Maintaining Centricity Clinical Gateway. Refer to this manual to install the Centricity Clinical Gateway and Cloverleaf. This is optional software shipped on a separate disc.
!!! Do not install the application Web site on a WTS/Citrix server.
5
Upgrading Centricity Practice Solution
Get technical support
For help with your upgrade:
Contact Sales: Send email to [email protected] to order your services for an upgrade.
After hours installation assistance is available at a higher billable rate. To avoid these additional fees, schedule your installation between 7:am and 5:30 PM Central Standard Time (CST) (Monday - Friday).
To contact Centricity Practice Services
Send an e-mail to [email protected].
Visit the Centricity Practice Solution Services Web site at http://centricitypractice.gehealthcare.comfor access to all documentation, optional plug-ins and other downloads, information about training and other services.
Before you upgrade
Before beginning the upgrade process:
1 Review your system requirements. Detailed specifications and planning information are available in Configuring Environments for Centricity Practice Solution available in Centricity Documentation library or on the Centricity Practice Solution site.
Review required software
Review recommended hardware for each of your servers and workstations
Review software/services prerequisites
Review optional software.
2 If you are a member of the MQIC consortium, notify the consortium prior to your upgrade to ensure success. Email [email protected] with your upgrade plans.
3 If you are installing into a virtual environment, perform the following:
a Shut down the virtual machine where you plan to install the software.
b Use your virtual machine manager/administration tool to allocate more memory to the virtual machine during the upgrade. Allow 8-16GB to improve the performance.
This setting can be changed back after the installation.
c Start the virtual machine.
If there is an existing jobs.txt file when the website is updated (Apply Available Updates) or re-installed (ServerSetup > Advanced > Web Installation), it is saved as jobs.save.txt . Use a text editor to view or copy the lines as needed. The existing jobs.txt file is not saved if the website is Uninstalled (ServerSetup > Advanced > Web Uninstallation).
!!! Do not use a new ServerSetup version to perform tasks on an older database version. Either perform the tasks with the older ServerSetup before starting, or wait until after the database is upgraded to the new version and use the new ServerSetup.
6
Getting Started
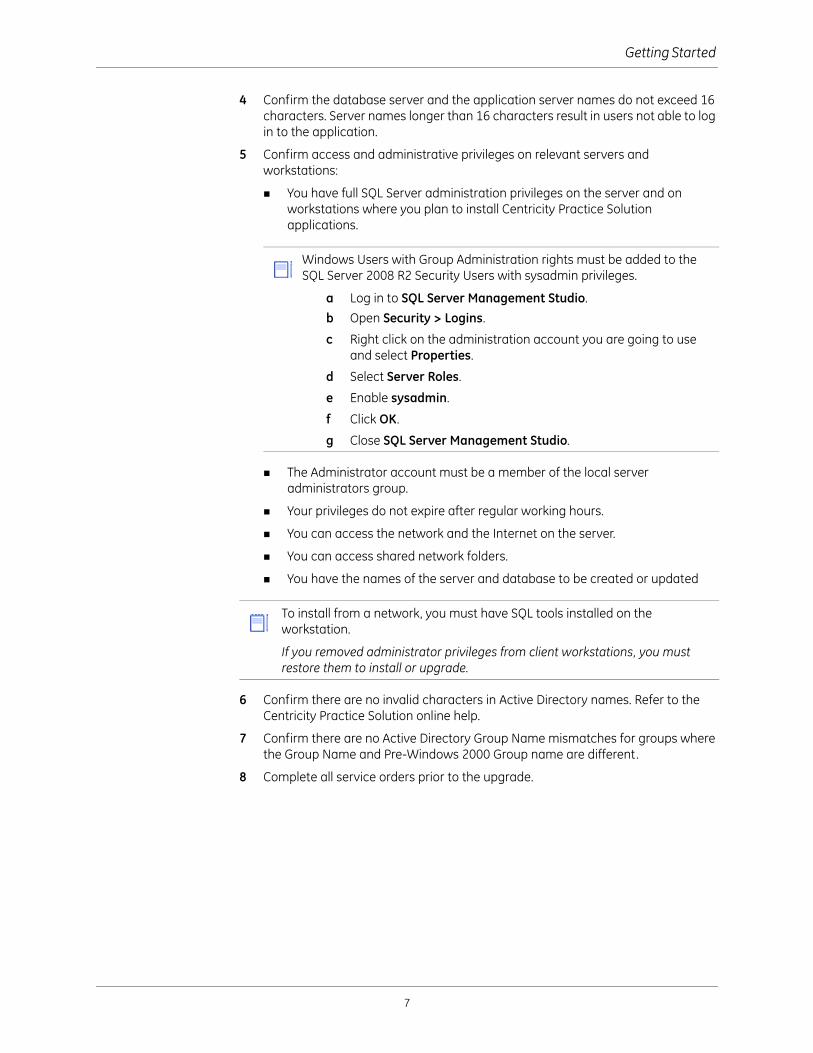
4 Confirm the database server and the application server names do not exceed 16 characters. Server names longer than 16 characters result in users not able to log in to the application.
5 Confirm access and administrative privileges on relevant servers and workstations:
You have full SQL Server administration privileges on the server and on workstations where you plan to install Centricity Practice Solution applications.
The Administrator account must be a member of the local server administrators group.
Your privileges do not expire after regular working hours.
You can access the network and the Internet on the server.
You can access shared network folders.
You have the names of the server and database to be created or updated
6 Confirm there are no invalid characters in Active Directory names. Refer to the Centricity Practice Solution online help.
7 Confirm there are no Active Directory Group Name mismatches for groups where the Group Name and Pre-Windows 2000 Group name are different.
8 Complete all service orders prior to the upgrade.
Windows Users with Group Administration rights must be added to the SQL Server 2008 R2 Security Users with sysadmin privileges.
a Log in to SQL Server Management Studio.
b Open Security > Logins.
c Right click on the administration account you are going to use and select Properties.
d Select Server Roles.
e Enable sysadmin.
f Click OK.
g Close SQL Server Management Studio.
To install from a network, you must have SQL tools installed on the workstation.
If you removed administrator privileges from client workstations, you must restore them to install or upgrade.
7
Upgrading Centricity Practice Solution
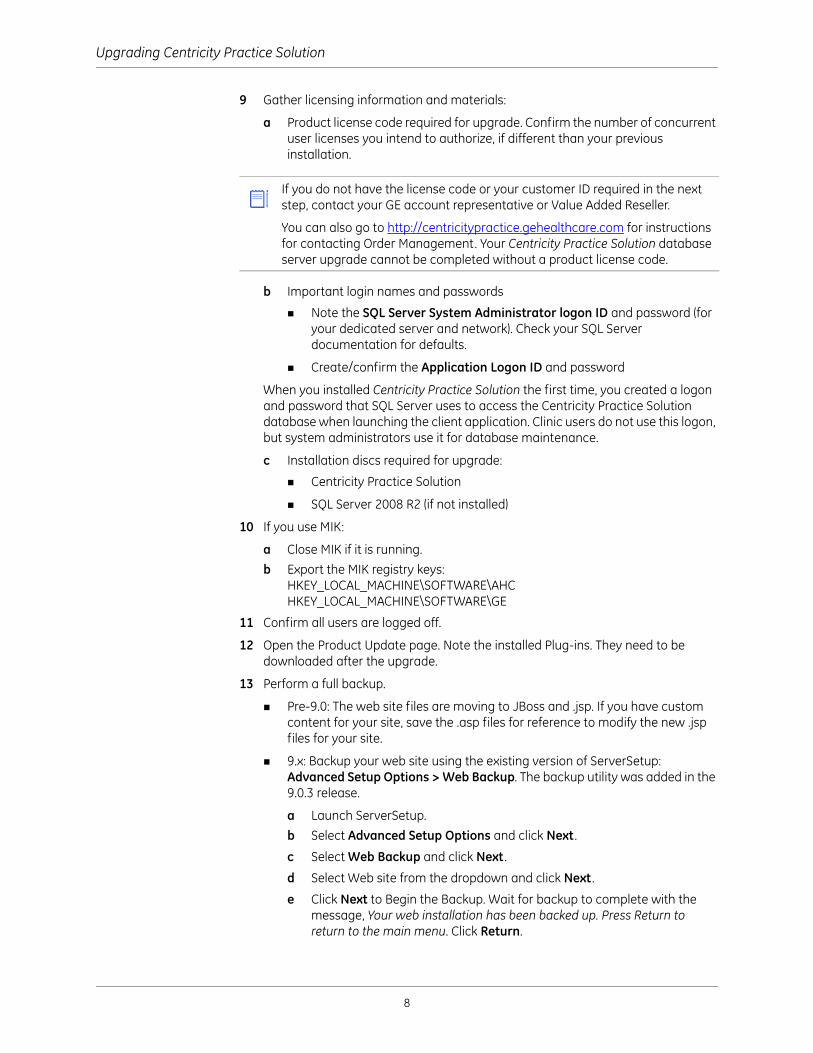
9 Gather licensing information and materials:
a Product license code required for upgrade. Confirm the number of concurrent user licenses you intend to authorize, if different than your previous installation.
b Important login names and passwords
Note the SQL Server System Administrator logon ID and password (for your dedicated server and network). Check your SQL Server documentation for defaults.
Create/confirm the Application Logon ID and password
When you installed Centricity Practice Solution the first time, you created a logon and password that SQL Server uses to access the Centricity Practice Solution database when launching the client application. Clinic users do not use this logon, but system administrators use it for database maintenance.
c Installation discs required for upgrade:
Centricity Practice Solution
SQL Server 2008 R2 (if not installed)
10 If you use MIK:
a Close MIK if it is running.
b Export the MIK registry keys:HKEY_LOCAL_MACHINE\SOFTWARE\AHCHKEY_LOCAL_MACHINE\SOFTWARE\GE
11 Confirm all users are logged off.
12 Open the Product Update page. Note the installed Plug-ins. They need to be downloaded after the upgrade.
13 Perform a full backup.
Pre-9.0: The web site files are moving to JBoss and .jsp. If you have custom content for your site, save the .asp files for reference to modify the new .jsp files for your site.
9.x: Backup your web site using the existing version of ServerSetup: Advanced Setup Options > Web Backup. The backup utility was added in the 9.0.3 release.
a Launch ServerSetup.
b Select Advanced Setup Options and click Next .
c Select Web Backup and click Next .
d Select Web site from the dropdown and click Next .
e Click Next to Begin the Backup. Wait for backup to complete with the message, Your web installation has been backed up. Press Return to return to the main menu. Click Return.
If you do not have the license code or your customer ID required in the next step, contact your GE account representative or Value Added Reseller.
You can also go to http://centricitypractice.gehealthcare.com for instructions for contacting Order Management. Your Centricity Practice Solution database server upgrade cannot be completed without a product license code.
8
Getting Started
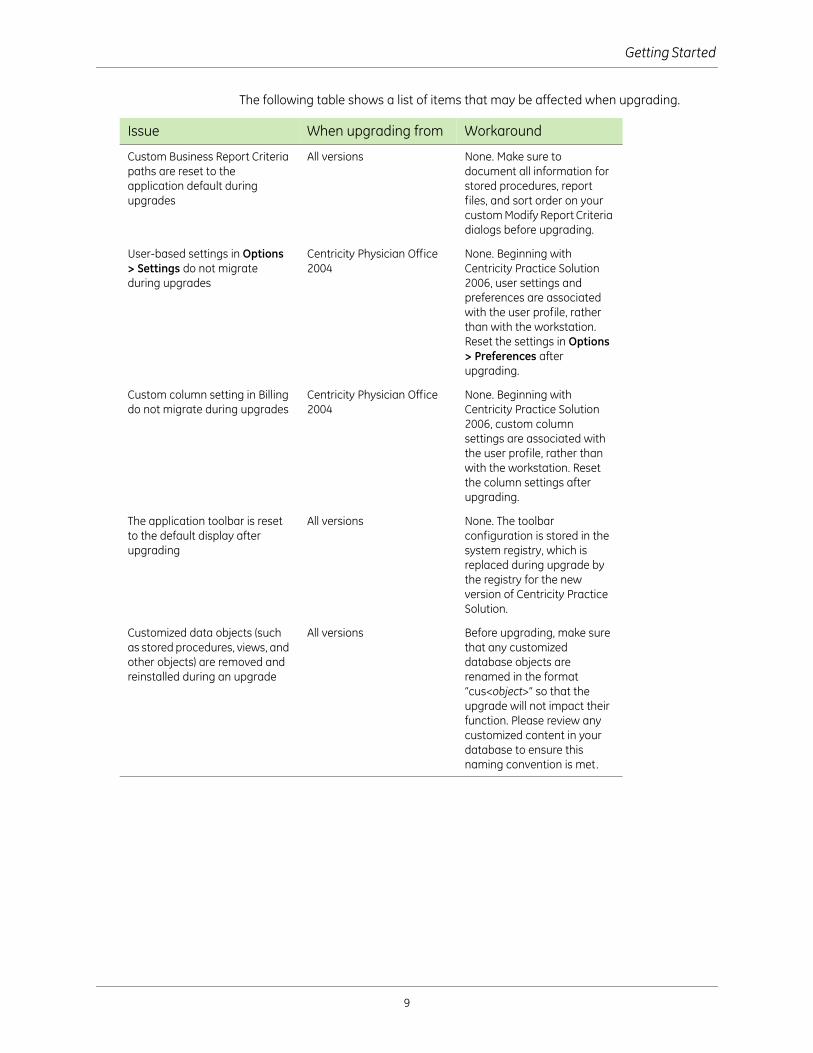
The following table shows a list of items that may be affected when upgrading.
Issue When upgrading from Workaround
Custom Business Report Criteria paths are reset to the application default during upgrades
All versions None. Make sure to document all information for stored procedures, report files, and sort order on your custom Modify Report Criteria dialogs before upgrading.
User-based settings in Options > Settings do not migrate during upgrades
Centricity Physician Office 2004
None. Beginning with Centricity Practice Solution 2006, user settings and preferences are associated with the user profile, rather than with the workstation. Reset the settings in Options > Preferences after upgrading.
Custom column setting in Billing do not migrate during upgrades
Centricity Physician Office 2004
None. Beginning with Centricity Practice Solution 2006, custom column settings are associated with the user profile, rather than with the workstation. Reset the column settings after upgrading.
The application toolbar is reset to the default display after upgrading
All versions None. The toolbar configuration is stored in the system registry, which is replaced during upgrade by the registry for the new version of Centricity Practice Solution.
Customized data objects (such as stored procedures, views, and other objects) are removed and reinstalled during an upgrade
All versions Before upgrading, make sure that any customized database objects are renamed in the format “cus<object>” so that the upgrade will not impact their function. Please review any customized content in your database to ensure this naming convention is met.
9
Upgrading Centricity Practice Solution
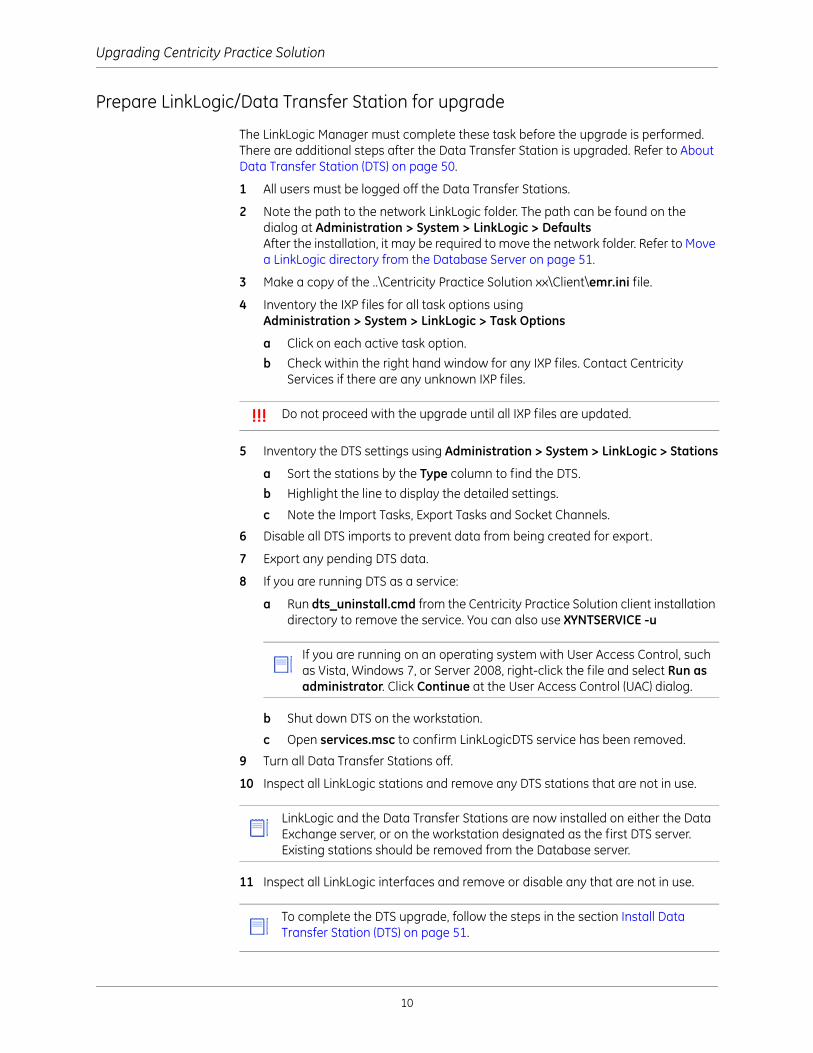
Prepare LinkLogic/Data Transfer Station for upgrade
The LinkLogic Manager must complete these task before the upgrade is performed. There are additional steps after the Data Transfer Station is upgraded. Refer to About Data Transfer Station (DTS) on page 50.
1 All users must be logged off the Data Transfer Stations.
2 Note the path to the network LinkLogic folder. The path can be found on the dialog at Administration > System > LinkLogic > DefaultsAfter the installation, it may be required to move the network folder. Refer to Move a LinkLogic directory from the Database Server on page 51.
3 Make a copy of the ..\Centricity Practice Solution xx\Client\emr.ini file.
4 Inventory the IXP files for all task options using Administration > System > LinkLogic > Task Options
a Click on each active task option.
b Check within the right hand window for any IXP files. Contact Centricity Services if there are any unknown IXP files.
5 Inventory the DTS settings using Administration > System > LinkLogic > Stations
a Sort the stations by the Type column to find the DTS.
b Highlight the line to display the detailed settings.
c Note the Import Tasks, Export Tasks and Socket Channels.
6 Disable all DTS imports to prevent data from being created for export.
7 Export any pending DTS data.
8 If you are running DTS as a service:
a Run dts_uninstall.cmd from the Centricity Practice Solution client installation directory to remove the service. You can also use XYNTSERVICE -u
b Shut down DTS on the workstation.
c Open services.msc to confirm LinkLogicDTS service has been removed.
9 Turn all Data Transfer Stations off.
10 Inspect all LinkLogic stations and remove any DTS stations that are not in use.
11 Inspect all LinkLogic interfaces and remove or disable any that are not in use.
!!! Do not proceed with the upgrade until all IXP files are updated.
If you are running on an operating system with User Access Control, such as Vista, Windows 7, or Server 2008, right-click the file and select Run as administrator. Click Continue at the User Access Control (UAC) dialog.
LinkLogic and the Data Transfer Stations are now installed on either the Data Exchange server, or on the workstation designated as the first DTS server. Existing stations should be removed from the Database server.
To complete the DTS upgrade, follow the steps in the section Install Data Transfer Station (DTS) on page 51.
10

Getting Started
Remove existing client and JBoss server
1 Uninstall the existing Centricity Practice Solution client from the database server if it was installed:
a Open Start > Control Panel > Programs > Uninstall a program
b Select CPS_xx_Client
c Click Change/Remove. Stay on this window to remove JBoss.
2 Uninstall all versions of JBoss from the server(s):
a Select Centricity Practice Solution - JBoss Application Server
b Click Uninstall and follow default prompts.
11
Upgrading Centricity Practice Solution
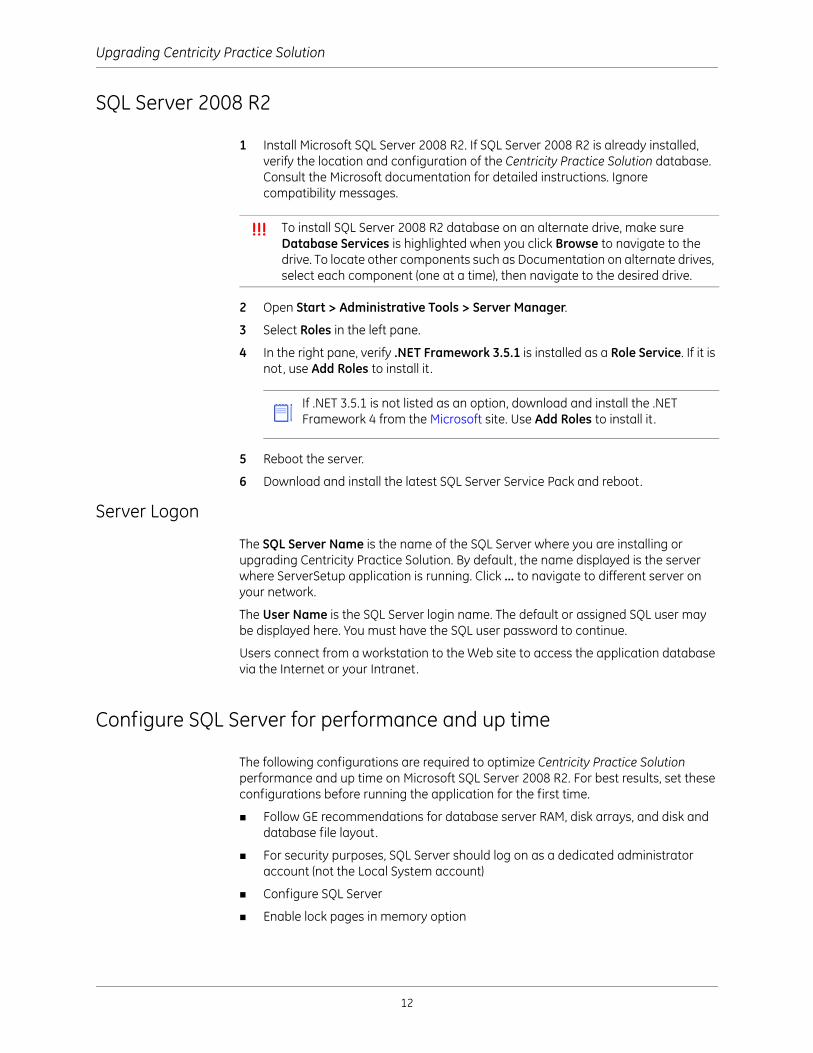
SQL Server 2008 R2
1 Install Microsoft SQL Server 2008 R2. If SQL Server 2008 R2 is already installed, verify the location and configuration of the Centricity Practice Solution database. Consult the Microsoft documentation for detailed instructions. Ignore compatibility messages.
2 Open Start > Administrative Tools > Server Manager.
3 Select Roles in the left pane.
4 In the right pane, verify .NET Framework 3.5.1 is installed as a Role Service. If it is not, use Add Roles to install it .
5 Reboot the server.
6 Download and install the latest SQL Server Service Pack and reboot.
Server Logon
The SQL Server Name is the name of the SQL Server where you are installing or upgrading Centricity Practice Solution. By default , the name displayed is the server where ServerSetup application is running. Click ... to navigate to different server on your network.
The User Name is the SQL Server login name. The default or assigned SQL user may be displayed here. You must have the SQL user password to continue.
Users connect from a workstation to the Web site to access the application database via the Internet or your Intranet.
Configure SQL Server for performance and up time
The following configurations are required to optimize Centricity Practice Solution performance and up time on Microsoft SQL Server 2008 R2. For best results, set these configurations before running the application for the first time.
Follow GE recommendations for database server RAM, disk arrays, and disk and database file layout.
For security purposes, SQL Server should log on as a dedicated administrator account (not the Local System account)
Configure SQL Server
Enable lock pages in memory option
!!! To install SQL Server 2008 R2 database on an alternate drive, make sure Database Services is highlighted when you click Browse to navigate to the drive. To locate other components such as Documentation on alternate drives, select each component (one at a time), then navigate to the desired drive.
If .NET 3.5.1 is not listed as an option, download and install the .NET Framework 4 from the Microsoft site. Use Add Roles to install it .
12
Configure SQL Server for performance and up time
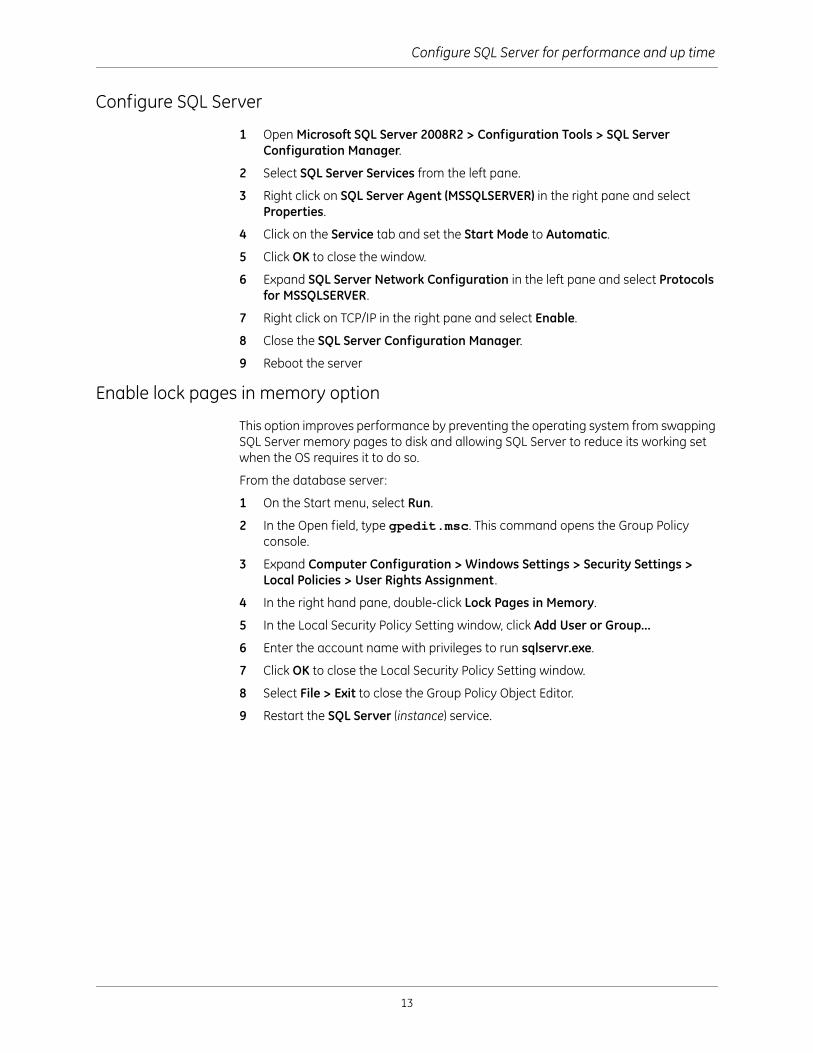
Configure SQL Server
1 Open Microsoft SQL Server 2008R2 > Configuration Tools > SQL Server Configuration Manager.
2 Select SQL Server Services from the left pane.
3 Right click on SQL Server Agent (MSSQLSERVER) in the right pane and select Properties.
4 Click on the Service tab and set the Start Mode to Automatic.
5 Click OK to close the window.
6 Expand SQL Server Network Configuration in the left pane and select Protocols for MSSQLSERVER.
7 Right click on TCP/IP in the right pane and select Enable.
8 Close the SQL Server Configuration Manager.
9 Reboot the server
Enable lock pages in memory option
This option improves performance by preventing the operating system from swapping SQL Server memory pages to disk and allowing SQL Server to reduce its working set when the OS requires it to do so.
From the database server:
1 On the Start menu, select Run.
2 In the Open field, type gpedit.msc. This command opens the Group Policy console.
3 Expand Computer Configuration > Windows Settings > Security Settings > Local Policies > User Rights Assignment .
4 In the right hand pane, double-click Lock Pages in Memory.
5 In the Local Security Policy Setting window, click Add User or Group...
6 Enter the account name with privileges to run sqlservr.exe.
7 Click OK to close the Local Security Policy Setting window.
8 Select File > Exit to close the Group Policy Object Editor.
9 Restart the SQL Server (instance) service.
13

Upgrading Centricity Practice Solution
Configure SQL Server 2008 R2 to run the client on the server
1 Open Microsoft SQL Server 2008R2 > SQL Server Management Studio.
2 Right click on the database instance and select Facets.
3 Select the Facet: Surface Area Configuration. Set each of the following features to True:
AdHocRemoteQueriesEnabled
ClrIntegrationEnabled
OleAutomationEnabled
RemoteDacEnabled
XPCmdShellEnabled
4 You can click Export Current State as Policy... to make these settings the policy for your enterprise.
5 Click OK to return to the main SQL Server Management Studio window.
6 Right click on the database instance and select Stop.
7 Once the service stops, click Start .
8 Click File > Exit to close the SQL Server Management Studio window.
Synchronize time
All servers and clients must be time synchronized with either Network Time Protocol (NTP) or Simple Network Time Protocol (SNTP). The best method for ensuring synchronization is to configure the domain controller and create a group policy for all clients.
1 Log on to the domain controller.
2 Open a command window and enter the following:
net time /setsntp <time_server>
Where <time_server> is the name or IP address of an accessible time server, for example: time.nist.gov
3 Create a group policy. Information is available on the Microsoft site:Windows Time Service Group Policy.
Disable Internet Protocol Version 6 (TCP/IPv6)
If your site does not use TCP/IPv6, disabling the component improves Centricity Practice Solution performance. For each server/workstation, including virtual machines:
1 Open the Local Area Connection Properties.
2 On the Networking tab for each adaptor, uncheck the option Internet Protocol Version 6 (TCP/IPv6).
Reboot if prompted.
14
Update server
Update server
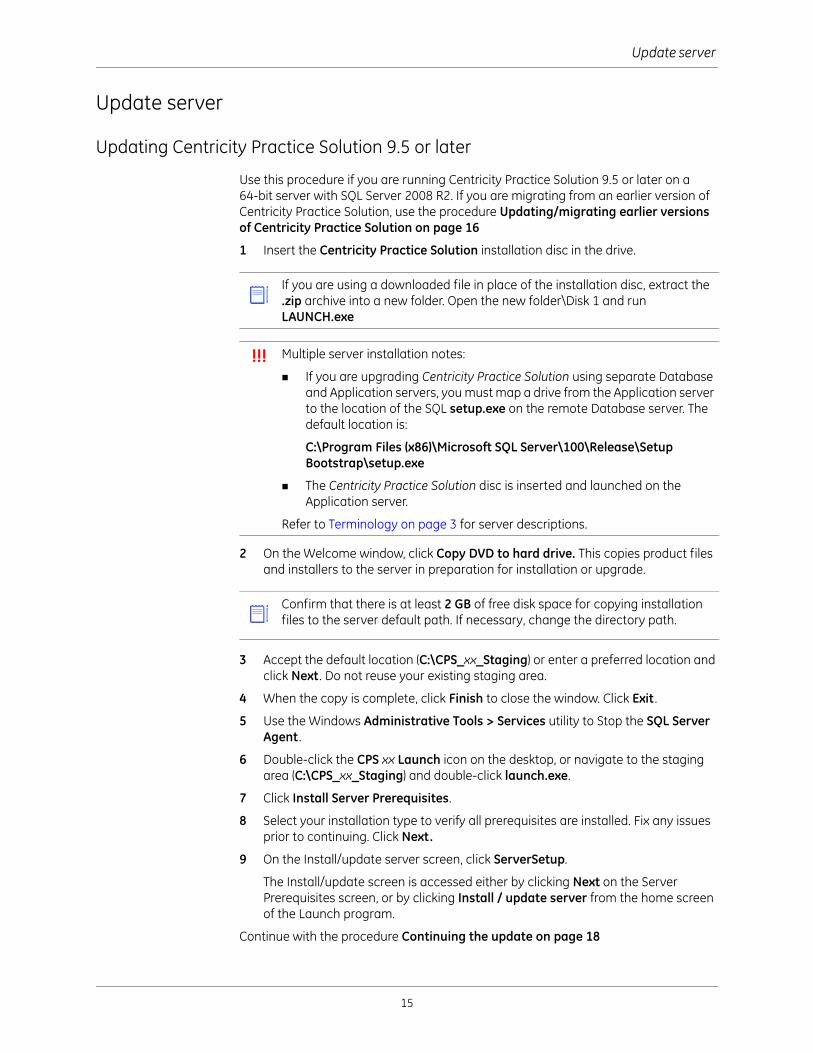
Updating Centricity Practice Solution 9.5 or later
Use this procedure if you are running Centricity Practice Solution 9.5 or later on a 64-bit server with SQL Server 2008 R2. If you are migrating from an earlier version of Centricity Practice Solution, use the procedure Updating/migrating earlier versions of Centricity Practice Solution on page 16
1 Insert the Centricity Practice Solution installation disc in the drive.
2 On the Welcome window, click Copy DVD to hard drive. This copies product files and installers to the server in preparation for installation or upgrade.
3 Accept the default location (C:\CPS_xx_Staging) or enter a preferred location and click Next . Do not reuse your existing staging area.
4 When the copy is complete, click Finish to close the window. Click Exit .
5 Use the Windows Administrative Tools > Services utility to Stop the SQL Server Agent .
6 Double-click the CPS xx Launch icon on the desktop, or navigate to the staging area (C:\CPS_xx_Staging) and double-click launch.exe.
7 Click Install Server Prerequisites.
8 Select your installation type to verify all prerequisites are installed. Fix any issues prior to continuing. Click Next.
9 On the Install/update server screen, click ServerSetup.
The Install/update screen is accessed either by clicking Next on the Server Prerequisites screen, or by clicking Install / update server from the home screen of the Launch program.
Continue with the procedure Continuing the update on page 18
If you are using a downloaded file in place of the installation disc, extract the .zip archive into a new folder. Open the new folder\Disk 1 and run LAUNCH.exe
!!! Multiple server installation notes:
If you are upgrading Centricity Practice Solution using separate Database and Application servers, you must map a drive from the Application server to the location of the SQL setup.exe on the remote Database server. The default location is:
C:\Program Files (x86)\Microsoft SQL Server\100\Release\Setup Bootstrap\setup.exe
The Centricity Practice Solution disc is inserted and launched on the Application server.
Refer to Terminology on page 3 for server descriptions.
Confirm that there is at least 2 GB of free disk space for copying installation files to the server default path. If necessary, change the directory path.
15

Upgrading Centricity Practice Solution
Updating/migrating earlier versions of Centricity Practice Solution
Use this procedure if you are running a version of Centricity Practice Solution 9.0.3 or earlier. This procedure includes processes that must be completed to update Centricity Practice Solution from SQL Server 2005 (source server) to SQL Server 2008 R2 (destination server).
On the source server: Complete the upgrade preparations in Before you upgrade on page 6 and Prepare LinkLogic/Data Transfer Station for upgrade on page 10.
1 On the destination server: Insert the Centricity Practice Solution installation disc in the drive.
2 On the Welcome window, click Copy DVD to hard drive. This copies product files and installers to the server in preparation for installation or upgrade.
3 Accept the default location (C:\CPS_xx_Staging) or enter a preferred location and then click Next . Do not reuse your existing staging area. The files are copied to the server.
4 When the copy is complete, click Finish to close the window.
5 Use the Windows Administrative Tools > Services utility to Stop the SQL Server Agent .
6 Double-click the CPS xx Launch icon on the desktop, or navigate to the staging area (C:\CPS_xx_Staging) and double-click launch.exe.
7 Click Install Server Prerequisites.
8 Select your installation type to verify all prerequisites are installed. Fix any issues prior to continuing. Click Next.
9 On the Install/update server screen, click ServerSetup.
If you are using a downloaded file in place of the installation disc, extract the .zip archive into a new folder. Open the new folder\Disk 1 and run LAUNCH.exe
!!! Multiple server installation notes:
If you are upgrading Centricity Practice Solution using separate Database and Application servers, you must map a drive from the Application server to the location of the SQL setup.exe on the remote Database server. The default location is:
C:\Program Files (x86)\Microsoft SQL Server\100\Release\Setup Bootstrap\setup.exe
The Centricity Practice Solution disc is inserted and launched on the Application server.
Refer to Terminology on page 3 for server descriptions.
Confirm that there is at least 2 GB of free disk space for copying installation files to the server default path. If necessary, change the directory path.
16

Update server
r
The Install/update screen is accessed either by clicking Next on the Server Prerequisites screen, or by clicking Install / update server from the home screen of the Launch program.
10 Set up a gigabit connection between the source and destination servers.
11 On the source server:
a Open the Microsoft SQL Server Management Studio. The default path is ..\Program Files (x86)\Microsoft SQL Server 2005\SQL server Management Studio.
b Log in with the Administrator account. The Administrator account must be a member of the local server administrators group.
c Expand Databases in the left pane.
d Right-click on your database name and select Tasks > Backup...
e On the Backup Databases dialog, drop any existing connections. Click OK.
f Close the Microsoft SQL Server Management Studio.
g Copy the database backup file (dbname.bak) to the destination server. The default location is:..\Program Files (x86)\Microsoft SQL Server\MSSQL.1\MSSQL\Data
12 On the destination server:
a Open the Microsoft SQL Server Management Studio. The default path is ..\Program Files (x86)\Microsoft SQL Server\100\Tools\Binn \VSShell\Common7\IDE\Ssms.exe
b Log in with the Administrator account. The Administrator account must be a member of the local server administrators group.
c Right-click on Databases in the left pane and select Restore Database...
d On the Restore Database dialog, select From device: and click ... to bring up a location browser. Click Add.
e Navigate to your database .bak file. Click OK.
f Verify everything is correct. Click OK to return to the Restore Database dialog.
g Check the box to select the database to restore.
h Enter the name for the database in To database.
i Click OK to begin the restore. When complete, the prompt should display The restore of database ‘db_name’ completed successfully.
j Expand Security in the left pane.
k Right-click on Logins and select New Login...
Create a temporary migration Login name.
Select SQL Server authentication and create a password.
Uncheck Enforce password policy.
Select your database as the Default database.
Click OK.
l Expand Databases > your_database_name > Security in the left pane.
!!! Leave this dialog open. You will return to this dialog at step 1 on page 18 aftemoving the database to the destination server.
17
Upgrading Centricity Practice Solution
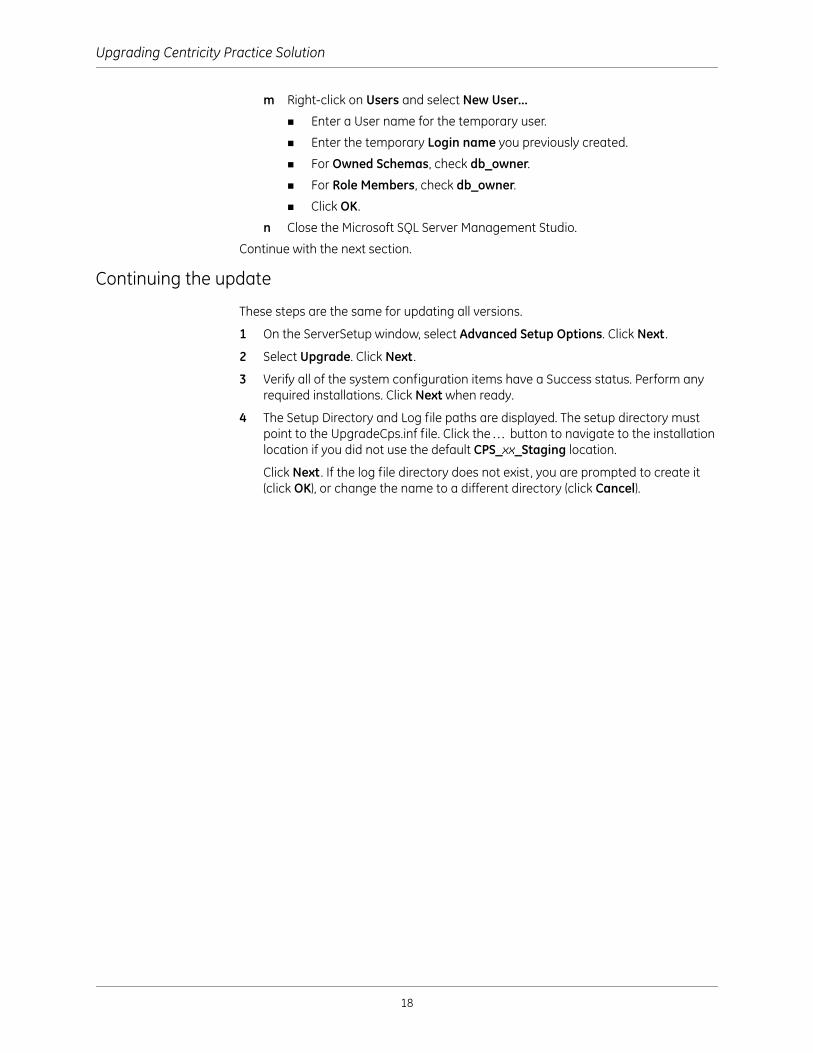
m Right-click on Users and select New User...
Enter a User name for the temporary user.
Enter the temporary Login name you previously created.
For Owned Schemas, check db_owner.
For Role Members, check db_owner.
Click OK.
n Close the Microsoft SQL Server Management Studio.
Continue with the next section.
Continuing the update
These steps are the same for updating all versions.
1 On the ServerSetup window, select Advanced Setup Options. Click Next .
2 Select Upgrade. Click Next .
3 Verify all of the system configuration items have a Success status. Perform any required installations. Click Next when ready.
4 The Setup Directory and Log file paths are displayed. The setup directory must point to the UpgradeCps.inf file. Click the button to navigate to the installation location if you did not use the default CPS_xx_Staging location.
Click Next . If the log file directory does not exist, you are prompted to create it (click OK), or change the name to a different directory (click Cancel).
18

Update server
5 On the Server Logon window, do the following:
Select or enter the name of the SQL Server where you want to install the database. The name should be in the form: server or server \instance if a named instance is used.
Leave the user name and password blank to use your current Windows administrator credentials.
Click Next .
6 If there are multiple databases, a dialog is displayed. Select the database from the list and click Next .
7 The upgrade version is displayed. Verify the versions are correct. Click Next .
ServerSetup displays a data validation screen. The screen shows whether any data errors were found in the database.
8 If there are no data errors, click Next .
If there are data errors,
a Click Report to view details about the error(s).
b After correcting the listed errors, click Re-Run Validations to make sure there are no additional data errors.
c Click Next when the data validation find no errors.
9 On the License Agreement window, select I accept the end user license agreement and have authority to do so, and click Next . This step performs the re-licensing. Wait for this process to complete.
!!! The database server host name and the application server name cannot exceed 16 characters. Server names longer than 16 characters result in users not able to log in to the application.
19

Upgrading Centricity Practice Solution
10 On the License Code window accept the presented information and click Next.
If you have purchased Crystal Reports integrated designer, you are prompted for the names of the workstation that utilize the Crystal Reports licenses. Click Modify to enter the workstation names. Click OK when finished.
11 On the Security window, select an authentication method (Application is the default). If you select Application, click Next .
If you select Active Directory,
a If needed, change the Active Directory domain controller to the desired domain in the Domain Controller field. The field defaults to the domain controller of the machine where ServerSetup is installed.
b In the Login Name field, enter the login ID of a user who is a member of the Domain Admins group in the selected Active Directory domain.
c Enter and re-enter the Active Directory password for the user in the Password and Confirm Password fields.
d Click Verify Account to determine if the entered credentials can be used to access Active Directory.
When clients request Active Directory user authentication or queries, the Service Layer will use the entered user credentials to access Active Directory. This account should be a permanent account, and should never be removed from the Domain Admins group in Active Directory.
If the credentials are accepted, a confirmation message appears at the bottom of the window in green text. If the credentials are denied, a message appears in red text, explaining the cause of the denial.
If you are upgrading from Centricity Physician Office 2004, the Security window will not automatically appear. Complete the remaining upgrade steps then go to “Selecting an authentication method when upgrading from Centricity Physician Office 2004”.
If the Domain Admin user account is inactivated, or if the user’s login name or password changes in Active Directory, you must update ServerSetup with the new credentials to prevent authentication and querying failures.
20
Update server
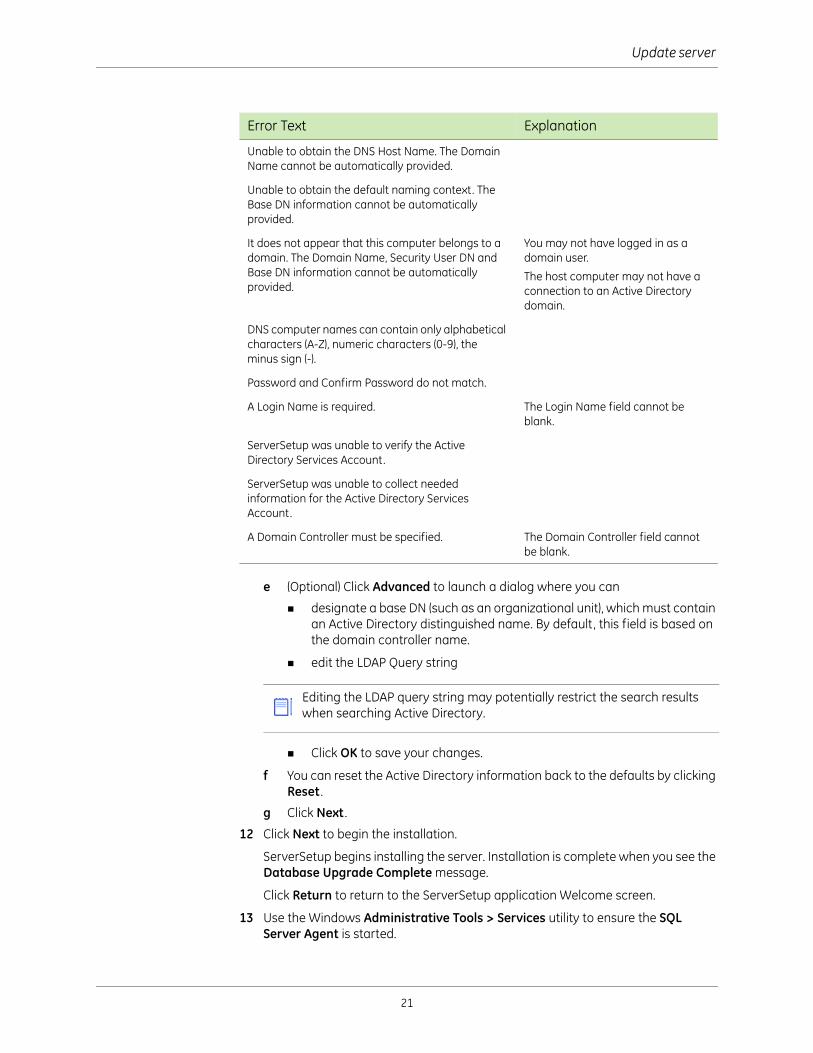
e (Optional) Click Advanced to launch a dialog where you can
designate a base DN (such as an organizational unit), which must contain an Active Directory distinguished name. By default, this field is based on the domain controller name.
edit the LDAP Query string
Click OK to save your changes.
f You can reset the Active Directory information back to the defaults by clicking Reset .
g Click Next .
12 Click Next to begin the installation.
ServerSetup begins installing the server. Installation is complete when you see the Database Upgrade Complete message.
Click Return to return to the ServerSetup application Welcome screen.
13 Use the Windows Administrative Tools > Services utility to ensure the SQL Server Agent is started.
Error Text Explanation
Unable to obtain the DNS Host Name. The Domain Name cannot be automatically provided.
Unable to obtain the default naming context. The Base DN information cannot be automatically provided.
It does not appear that this computer belongs to a domain. The Domain Name, Security User DN and Base DN information cannot be automatically provided.
You may not have logged in as a domain user.
The host computer may not have a connection to an Active Directory domain.
DNS computer names can contain only alphabetical characters (A-Z), numeric characters (0-9), the minus sign (-).
Password and Confirm Password do not match.
A Login Name is required. The Login Name field cannot be blank.
ServerSetup was unable to verify the Active Directory Services Account.
ServerSetup was unable to collect needed information for the Active Directory Services Account.
A Domain Controller must be specified. The Domain Controller field cannot be blank.
Editing the LDAP query string may potentially restrict the search results when searching Active Directory.
21

Upgrading Centricity Practice Solution
Install a web site
Use this process if you are upgrading Centricity Practice Solution or you are creating a new web site.
1 If ServerSetup is not open, double-click the ServerSetup icon on your Desktop or navigate to its location and open it.
2 On the ServerSetup window, select Advanced Setup Options and click Next .
3 Select Web Installation, then Next .
4 The prerequisites are checked on the server. If there are errors, correct them before you continue. If JBoss is not installed, an Install button appears and you are prompted to install it . Once the prerequisites are met, click Next .
5 Click Install to install JBoss. Click OK to confirm install. When the JBoss install launches, click Next to install JBoss.
6 Select the directory for JBoss and the Service Layer. Click Next to continue.
7 Enter the HTTP Port setting. For most sites the default port 9080 works correctly. Two ports are opened by the installer: 9080 and 9443 (9080+363). If you change the default 9080, the second port is then your selection +363. The ports are added to the Windows Firewall Domain Inbound Rule.
Click Next to continue.
JBoss is installed in the next step. Do not exit ServerSetup if JBoss is the only missing component. If you are missing other software prerequisites, click Exit and install the items noted on the screen, then restart the installation.
If the correct version of the Java Standard Edition Runtime Environment is not present, you are prompted to install it . Click Install to install the runtime environment.
HTTPS is required for web service access. All web service (service layer) calls now use HTTPS (SSL). This change requires the firewall settings on the JBoss server to be updated to open up port 9443 (or another https port if 9080 is not the default JBoss port). The firewall setting changes are performed as part of the installer.
22

Update server
8 When the Setup Complete window opens, click Finish.
Wait until the JBoss Requirement status changes to Success before clicking Next .
9 Change the paths if you did not use the defaults when you installed the application. The setup directory must point to the WebInstall.inf file. Next to continue.
10 Enter the Web information:
a Enter the name for the new web site.
b Select or enter the name of the SQL Server where the database is installed.
c Select or enter the database name.
d Enter your SQL user name and password.
e Click Next .
11 When prompted, click Next . The utility begins installing all web installation files. The Installation Complete window appears when the installation is complete.
Click Return to return to the main menu or Exit to close ServerSetup.
Additional web installations can be performed on separate servers using this same procedure.
If you are installing JBoss on a standalone server, you can increase the memory allocation. It is not recommended to increase it above 70% of your total available physical memory.
By default, it is set to 45% of your total available physical memory. For example, with 4 GB of memory, the default setting is Xmx1843m.
The basic procedure to change the allocated memory is:
a Edit the file: install_dir\jboss\jsw\wrapper.conf
b Locate the line:wrapper.java.additional.6=-Xmx1843m
c Increase the default setting. For example:wrapper.java.additional.6=-Xmx2856m
d Restart JBoss
Refer to the System Planning and Requirements for Centricity Practice Solution for more information on JBoss and the wrapper.conf file.
23

Upgrading Centricity Practice Solution
Selecting an authentication method when upgrading from Centricity Physician Office 2004
If you are upgrading to Centricity Practice Solution from Centricity Physician Office 2004, there are additional steps and considerations you must make in order to complete the upgrade.
1 Double-click the ServerSetup icon or navigate to its location on the server and open it.
2 Select Advanced Setup Options and click Next .
3 Select Utilities and click Next .
4 Verify the Setup Directory Path and Log File Path, and click Next .
5 Enter a SQL server name, a user name, and a password, and click Next .
6 If prompted, select your database and click Next .
7 Select an authentication method.
If you select Active Directory,
a If needed, change the Active Directory domain controller to the desired domain in the Domain Controller field. The field defaults to the domain controller of the machine where ServerSetup is installed.
b In the Login Name field, enter the login ID of a user who is a member of the Domain Admins group in the selected Active Directory domain.
c Enter and re-enter the Active Directory password for the user in the Password and Confirm Password fields.
d Click Verify Account to determine if the entered credentials can be used to access Active Directory.
When clients request Active Directory user authentication or queries, the Service Layer will use the entered user credentials to access Active Directory. This account should be a permanent account, and should never be removed from the Domain Admins group in Active Directory.
If the credentials are accepted, a confirmation message appears at the bottom of the window in green text. If the credentials are denied, a message appears in red text, explaining the cause of the denial.
When creating providers or resources Directory, do not use mixed-case or all uppercase letters for the login ID or password. If you use mixed- or uppercase letters, The application will not associate the Directory login information with the application login information. This will result providers and resources not having permissions to auto-sign imported documents.
If the Domain Admin user account is inactivated, or if the user’s login name or password changes in Active Directory, you must update ServerSetup with the new credentials to prevent authentication and querying failures.
24
Update server
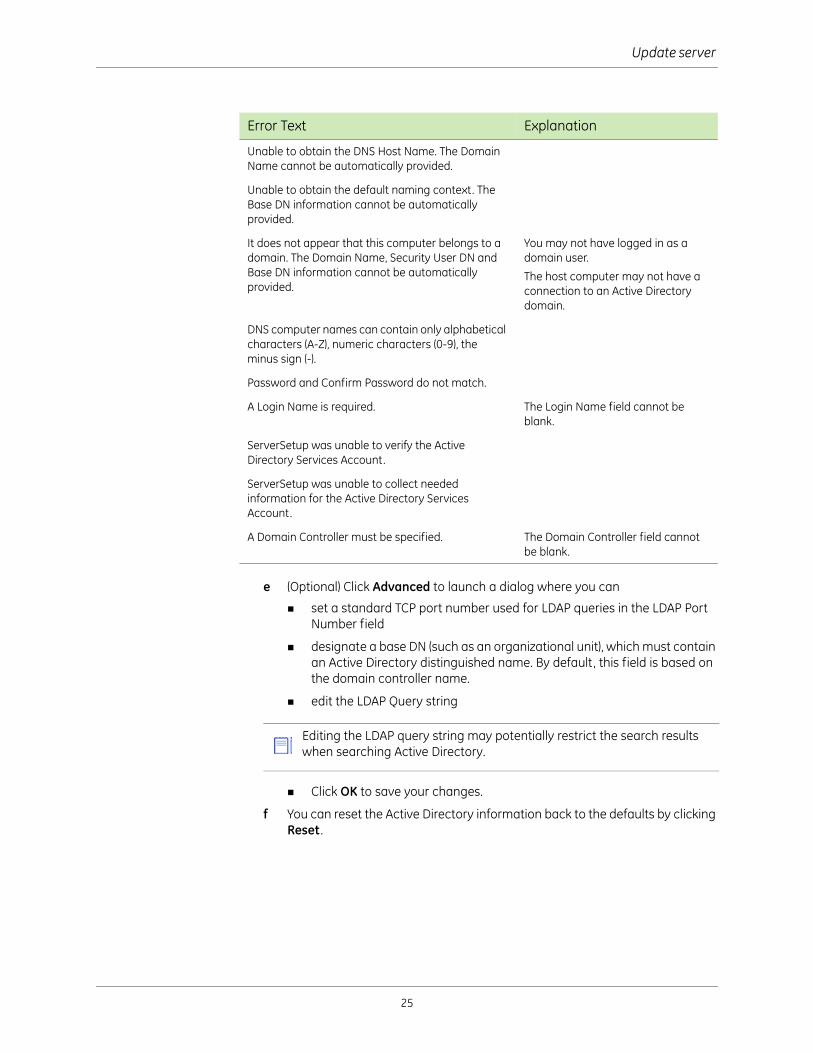
e (Optional) Click Advanced to launch a dialog where you can
set a standard TCP port number used for LDAP queries in the LDAP Port Number field
designate a base DN (such as an organizational unit), which must contain an Active Directory distinguished name. By default, this field is based on the domain controller name.
edit the LDAP Query string
Click OK to save your changes.
f You can reset the Active Directory information back to the defaults by clicking Reset .
Error Text Explanation
Unable to obtain the DNS Host Name. The Domain Name cannot be automatically provided.
Unable to obtain the default naming context. The Base DN information cannot be automatically provided.
It does not appear that this computer belongs to a domain. The Domain Name, Security User DN and Base DN information cannot be automatically provided.
You may not have logged in as a domain user.
The host computer may not have a connection to an Active Directory domain.
DNS computer names can contain only alphabetical characters (A-Z), numeric characters (0-9), the minus sign (-).
Password and Confirm Password do not match.
A Login Name is required. The Login Name field cannot be blank.
ServerSetup was unable to verify the Active Directory Services Account.
ServerSetup was unable to collect needed information for the Active Directory Services Account.
A Domain Controller must be specified. The Domain Controller field cannot be blank.
Editing the LDAP query string may potentially restrict the search results when searching Active Directory.
25
Upgrading Centricity Practice Solution
If you select Application, a dialog appears, asking if your site used Active Directory in Centricity Physician Office 2004. This selection will help determine whether the user and security group will be automatic or manual. Clicking Yes changes your authentication method to Active Directory, which allows automatic migrations occur comparing the user/group information in the database with the information in Active Directory to determine which database objects are users and which are security groups. Clicking No keeps your authentication method set to Application, which will require you to manually select users and groups in the migration tool.
a If your site used Active Directory in Centricity Physician Office 2004, click Yes and follow the Active Directory instructions in step 7.
b If your site used another authentication method, click No. A dialog appears, informing you that confirming Application authentication will require you to manually migrate your users and security groups using the migration tool.
8 Click Finish and OK to confirm the security settings update.
Migrate users and security groups from Centricity Physician Office 2004
Centricity Practice Solution 10 redefines the concept of users. Database schema changes require the user and security group information in Centricity Physician Office be migrated outside of the upgrade process. The migration is performed automatically or manually, depending on the chosen authentication method.
If you selected Active Directory, the migration will automatically migrate users and security groups when it matches the information in the CPS database with the information in the designated Active Directory domain. It will also rename any existing security group named EveryOne to Everyone_CPS to prevent security group synchronization issues.
If you selected and confirmed Application authentication, the migration tool will launch a wizard, allowing you to manually select which users and security groups you want to migrate.
You can run the migration tool repeatedly if there are users or security groups in the database that have not yet been migrated.
!!! Users who are created after the upgrade and migration do not automatically become members of the Everyone_CPS group. They must be added to the group when they are created.
Users without login IDs or last names in Active Directory are ignored by the automatic migration tool. You can make the necessary changes to those users in Active Directory and run the migration tool again to capture ignored users.
If this button is not enabled, it indicates that there are no users or security groups available for migration, or that your site is upgrading from a application version other than Centricity Physician Office 2004.
26

Update server
Performing an automatic migration
1 From the Utilities window, click Migrate Users and Security Groups.
Automatic migrations occur immediately when you click the Migrate Users and Security Groups window. A progress indicator at the bottom of the Utilities window tracks the completion progress of the migration. The indicator closes when the migration tool migrates the users and security groups. A summary report then appears. See “Migration summary report” on page 28.
2 Close the summary report. a dialog appears, asking you if you want to continue using Active Directory authentication or if you wan to switch to Application authentication.
If you click Active Directory, the dialog closes and the migration process is complete. Your authentication method will remain Active Directory.
If you click Application, your authentication method changes from Active Directory to Application, allowing the migrated users to authenticate against the database.
a Enter a password suffix (maximum of 8 alphanumeric characters) in the Password Suffix field.
Because Centricity Physician Office did not store user passwords in the database, the migration tool must reset all user passwords to ensure user authentication. To make the reset passwords unique for each user, the reset passwords are in the format <login ID><suffix>, where <login ID> is the login ID for each user, and <suffix> is a user-defined string of characters that are appended to each user’s login ID to form a default password (for example, if the user’s login ID is “hwinston” and the defined password suffix is “abcd”, the user’s default password becomes “hwinstonabcd”). When users log into the application for the first time using the default password, they will be immediately prompted to change their password.
b Click Finish to complete the migration process.
Performing a manual migration
In manual migrations, you can select specific security groups and/or specific users to migrate.
1 From the Utilities window, click Migrate Users and Security Groups. The User Security Group Migration wizard appears, displaying the Security Group selection window. A list of available users and security groups displays in the PM04 security groups and users panel.
2 Select one or more security groups and click >> to select them for migration. To remove items from the selection list, select one or more items in the Selected CPS security groups panel and click <<.
You must select at least one security group or user to initiate a migration.
The panel does not differentiate between security groups and users. Any items you select will become security groups after the migration.
27
Upgrading Centricity Practice Solution
3 Click Next . The User Selection window appears, with an identical list of available users and security groups in the PM04 security groups and users panel. Any items you selected in the Security Group Selection window will not be displayed.
4 Select one or more users and click >> to select them for migration. To remove items from the selection list , select one or more items in the Selected Users panel and click <<.
5 Enter a default password suffix (maximum of 8 alphanumeric characters) in the Default password suffix field.
Because Centricity Physician Office did not store user passwords in the database, the migration tool must reset all user passwords to ensure user authentication. To make the reset passwords unique for each user, the reset passwords are in the format <login ID><suffix>, where <login ID> is the login ID for each user, and <suffix> is a user-defined string of characters that are appended to each user’s login ID to form a default password (for example, if the user’s login ID is “hwinston” and the defined password suffix is “abcd”, the user’s default password becomes “hwinstonabcd”). When users log into the application for the first time using the default password, they will be immediately prompted to change their password.
6 Click Migrate to initiate the migration process. Click Cancel to close the migration tool without migrating users.
When the migration finishes, a summary report opens.
Migration summary report
After the migration finishes, a summary report opens in a standard Windows text editor (such as Notepad), displaying the results of the migration. The summary report lists
time and date of the migration
Active Directory information (automatic migrations)
the security groups and users that were successfully migrated
any security groups or users that could not be found in Active Directory
additional data that was migrated, such as security permissions
the password suffix (manual migrations)
You can print, save the report on your server for future reference, or close the summary report without saving. The migration tool also generates a separate log file containing the report security and security settings migrated for each security group and user. Both files are stored in the ServerSetup output folder on the server. The figure below shows a sample summary file for an automatic migration.
The panel does not differentiate between security groups and users. Any items you select will become users after the migration.
28

Update server
7 Double-click the CPS xx ServerSetup icon on the destination server desktop and select Advanced Setup Options. Click Next .
a Select Web Installation and click Next .
b Click Next on the system requirements dialog.
c Click ... to change setup and log file paths if needed. Click Next .
d Enter the Website and SQL Server information. For multi-server environments make sure the SQL Server Name is the name of the database server. Click ... to select the Database if different than the default CentricityPS. Login with the temporary login you created for the migration. Click Next .
e Click Next to begin the install.
f Click Return to go back to the menu.
29
Upgrading Centricity Practice Solution
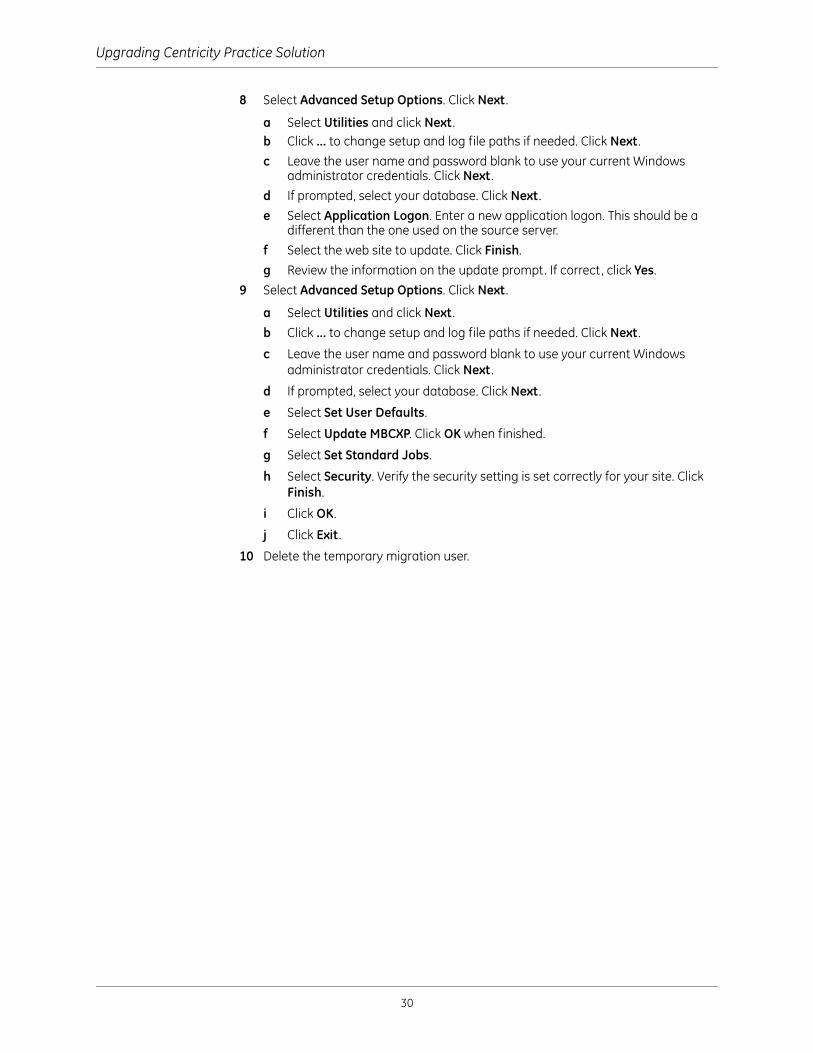
8 Select Advanced Setup Options. Click Next .
a Select Utilities and click Next . b Click ... to change setup and log file paths if needed. Click Next .
c Leave the user name and password blank to use your current Windows administrator credentials. Click Next .
d If prompted, select your database. Click Next .
e Select Application Logon. Enter a new application logon. This should be a different than the one used on the source server.
f Select the web site to update. Click Finish.
g Review the information on the update prompt. If correct, click Yes.
9 Select Advanced Setup Options. Click Next .
a Select Utilities and click Next .
b Click ... to change setup and log file paths if needed. Click Next .
c Leave the user name and password blank to use your current Windows administrator credentials. Click Next .
d If prompted, select your database. Click Next .
e Select Set User Defaults.
f Select Update MBCXP. Click OK when finished.
g Select Set Standard Jobs.
h Select Security. Verify the security setting is set correctly for your site. Click Finish.
i Click OK.
j Click Exit .
10 Delete the temporary migration user.
30
Update server
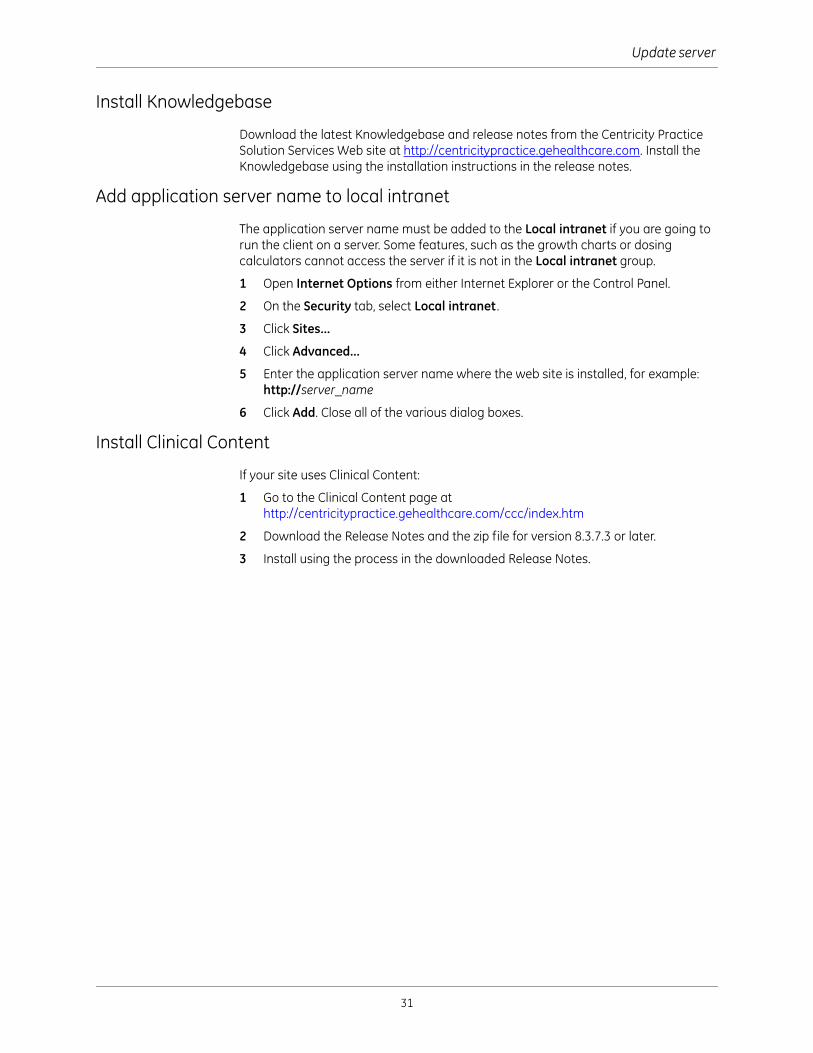
Install Knowledgebase
Download the latest Knowledgebase and release notes from the Centricity Practice Solution Services Web site at http://centricitypractice.gehealthcare.com. Install the Knowledgebase using the installation instructions in the release notes.
Add application server name to local intranet
The application server name must be added to the Local intranet if you are going to run the client on a server. Some features, such as the growth charts or dosing calculators cannot access the server if it is not in the Local intranet group.
1 Open Internet Options from either Internet Explorer or the Control Panel.
2 On the Security tab, select Local intranet .
3 Click Sites...
4 Click Advanced...
5 Enter the application server name where the web site is installed, for example:http://server_name
6 Click Add. Close all of the various dialog boxes.
Install Clinical Content
If your site uses Clinical Content:
1 Go to the Clinical Content page at http://centricitypractice.gehealthcare.com/ccc/index.htm
2 Download the Release Notes and the zip file for version 8.3.7.3 or later.
3 Install using the process in the downloaded Release Notes.
31

Upgrading Centricity Practice Solution
Copy custom content
Your custom content must be copied to the new location after the upgrade.
1 Create a \source directory under the new JBoss web structure, where database_name is your database name. The default is centricityps.
cd C:\Program Files(x86)\Centricity Practice Solution xx\JBoss Application Server\jboss\server\default\deploy\database_name.WAR
mkdir source
2 Use IIS to locate the \source directory for your existing web site(s).
3 Copy the CCC text files, Crystal reports, and the tsanames.ora file to your new \source directory.
Update custom collection letters
You customized collection letters must be modified after the upgrade or an error occurs due to a change in the Report Query field.
1 Open the standard collection letter from the new installation and your customized collection letter.
2 Copy the report query from the standard collection letter and copy it into your custom collection letter, replacing the old Report Query field.
3 Save the custom collection letter.
Do not move the service pack files, setup.exe files, or any .dll files to the new source directory.
32

Update server
Edit JOBS.TXT
Complete this section if you use jobs.txt for custom content. For more information about editing the jobs.txt , refer to Use jobs.txt in the guide System Planning and Requirements for Centricity Practice Solution.
Before you install the workstation clients, you must edit the JOBS.TXT file to remove all jobs (lines) that push application-specific files from a previous version of the Centricity product.
Do not remove custom lines that push 3rd-party files and custom clinical content and forms, including CCC forms.
If there is an existing jobs.txt file when the web site is updated (Apply Available Updates) or re-installed (ServerSetup > Advanced > Web Installation), it is saved as jobs.save.txt . Use a text editor to view or copy the lines as needed. The existing jobs.txt file is not saved if the website is Uninstalled ((ServerSetup > Advanced > Web Uninstallation).
!!! jobs.txt runs the first time users log in after the client is updated on the workstation. If you do not remove client-specific lines from jobs.txt older files may be pushed to the new client that render it inoperable.
33
Upgrading Centricity Practice Solution
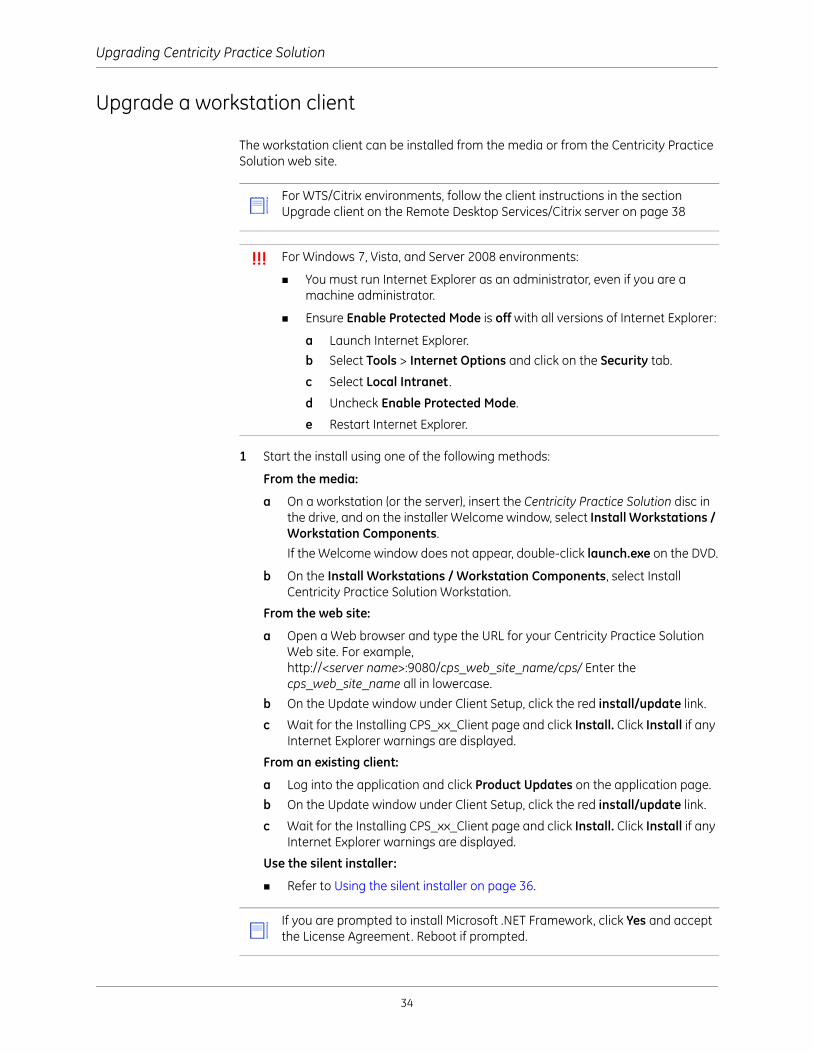
Upgrade a workstation client
The workstation client can be installed from the media or from the Centricity Practice Solution web site.
1 Start the install using one of the following methods:
From the media:
a On a workstation (or the server), insert the Centricity Practice Solution disc in the drive, and on the installer Welcome window, select Install Workstations / Workstation Components.
If the Welcome window does not appear, double-click launch.exe on the DVD.
b On the Install Workstations / Workstation Components, select Install Centricity Practice Solution Workstation.
From the web site:
a Open a Web browser and type the URL for your Centricity Practice Solution Web site. For example, http://<server name>:9080/cps_web_site_name/cps/ Enter the cps_web_site_name all in lowercase.
b On the Update window under Client Setup, click the red install/update link.
c Wait for the Installing CPS_xx_Client page and click Install. Click Install if any Internet Explorer warnings are displayed.
From an existing client:
a Log into the application and click Product Updates on the application page.
b On the Update window under Client Setup, click the red install/update link.
c Wait for the Installing CPS_xx_Client page and click Install. Click Install if any Internet Explorer warnings are displayed.
Use the silent installer:
Refer to Using the silent installer on page 36.
For WTS/Citrix environments, follow the client instructions in the section Upgrade client on the Remote Desktop Services/Citrix server on page 38
!!! For Windows 7, Vista, and Server 2008 environments:
You must run Internet Explorer as an administrator, even if you are a machine administrator.
Ensure Enable Protected Mode is off with all versions of Internet Explorer:
a Launch Internet Explorer.
b Select Tools > Internet Options and click on the Security tab.
c Select Local Intranet .
d Uncheck Enable Protected Mode.
e Restart Internet Explorer.
If you are prompted to install Microsoft .NET Framework, click Yes and accept the License Agreement. Reboot if prompted.
34

Upgrade a workstation client
This launches the client installer. Wait for the Welcome window.
2 On the client installer Welcome window, click Next .
3 On the Choose Destination Location window, accept the default installation directory or click Browse to install to a directory other than the default.
4 Click Next .
5 For Web site, enter the Web address you defined when you installed the Web site (for example, http://servername:9080/centricityps/cps where centricityps is the Web site name). The web site name must be entered in all in lowercase, exactly as shown.
6 Click Next .
7 Select one or more of the following options and click Next .
Select CPS xx Client to install the Centricity Practice Solution client application.
Select Data Transfer Station to automatically process HL7 data transfers between the EMR module and other healthcare information systems.
8 On the Start Copying Files window, click Next . The installation process copies the files to the workstation. If Data Transfer Station is selected, you are prompted whether this is the first CPS/DTS installation on the machine. Follow the prompts.
9 When installation is complete, click Finish. Click Exit or here if you upgraded with a browser. You can install/upgrade optional componets from the browser. Once complete, exit the browser if used.
10 Launch the client from the workstation. Launching the client from an account with administrator privileges ensures that the registration runs correctly. This step is not needed if the user accounts have administrative privileges.
For workstations running Windows 7 or Vista, the CPS shortcut must be enabled to be run as the administrator. There are three methods to set this up:
If the user has administrator rights, the shortcut and jobs.txt run correctly.
Users can right click on the CPS shortcut and click Run as Administrator from the menu.
The application can be set up to always run as administrator:
a Right click the shortcut icon and select Properties.
b Click the Advanced button to open Advanced Properties.
c Check the box Run as Administrator.
d Click OK to close the dialog boxes.
From now on, the application will always run as administrator if you use the shortcut to launch it. (You are prompted by UAC if you have it enabled).
The Welcome window can be hidden behind the Internet Explorer window. Move the Internet Explorer window, or check your Windows Taskbar and click the InstallShield task to change the window focus.
If you are prompted to install Microsoft .NET Framework, click Yes and accept the License Agreement. Reboot if prompted.
35

Upgrading Centricity Practice Solution
Using the silent installer
There is a silent installation utility available on the media. Here is the basic procedure.
On the server:
1 Copy the Disk1 folder from the installation media to the server.
2 Share the server folder Disk1. You can not use a UNC path to run the silent installer. It must be on a shared drive.
3 Edit the file Disk1\CPS_xx_Client\setup.iss, where xx is the version number. Set the szDir and szEdit1 variables, substituting your installation information for the <variables>.
szDir=<drive>:<install_path>\Centricity Practice Solution xx\ClientszEdit1=http:\\<server>:9080\<database_name>\cps
On each workstation:
1 Log in as administrator.
2 Open the mapped network drive from the server.
3 Double click silentinstall.bat , or right-click silentinstall.bat and use Run as administrator, depending on your operating system.
The silent install runs with only an installer icon visible in the system tray. When complete, a desktop shortcut is created using the URL specified by the szEdit1 variable in the setup.iss file.
Saving settings after an upgrade
Centricity Practice Solution copies the report settings (printers, offsets, and report files) that you saved with earlier product versions. The first time you run the product after it is installed, the system looks for the previous settings and copies them. This process occurs only once per client workstation.
The workstations must already be updated to .NET 4.0 prior to running the utility. Any pre-9.x clients must be manually removed. The utility only removes 9.x and higher clients.
You must install Centricity Practice Solution and run it once before uninstalling the earlier versions. If you do not, the settings you saved are deleted.
36

Install client on the Remote Desktop Services/Citrix server
Install client on the Remote Desktop Services/Citrix server
1 Log in as administrator at the Remote Desktop Services/Citrix server console.
2 Open a Command Prompt window.
3 Type the command:
change user /install
4 Launch Internet Explorer, and enter the URL for the Centricity Practice Solution Web site (for example, http://servername:9080/centricityps/cps/ where centricityps is the Web site name) and follow the instructions for installing the client. The Web site name must be entered in all lower case.
5 When the setup program prompts you to do so, accept the default terminal description or supply a different description for this terminal, then click Next .
Here are some sample terminal descriptions:
Clinic Manager–Bldg 2 Room 48, x5678, EastsideMed Asst. 2, x6179, WestsideLab 1, x5214, Rose Int. Med.Application Server for Centricity Practice Solution
6 In the Command Prompt window, type the command:
change user /execute
37

Upgrading Centricity Practice Solution
Upgrade client on the Remote Desktop Services/Citrix server
The upgrade from earlier versions of the Centricity Practice Solution client is automated once you upgrade the Centricity Practice Solution database server and Web site and launch the client.
1 Log in as administrator at the application server console.
2 Start Centricity Practice Solution. A message displays, stating that the database has been upgraded and asking if you want to upgrade. Click OK.
There are no windows to respond to during the upgrade.
3 When the upgrade completes, click Finish.
!!! For Windows 7 and Vista and environments,
You must use the 32-bit version of Internet Explorer to install the Centricity Practice Solution client on 64-bit Vista or 64-bit Windows 7.
Ensure Enable Protected Mode is off with all versions of Internet Explorer:
a Launch Internet Explorer.
b Select Tools > Internet Options and click on the Security tab.
c Select Local Intranet .
d Uncheck Enable Protected Mode.
e Restart Internet Explorer.
!!! Only the Administrator should upgrade client workstations from the server console. Before upgrading to Centricity Practice solution on the client, you must first complete the database server upgrade.
38

Upgrade client on the Remote Desktop Services/Citrix server
Testing the Citrix client installation
Test that the client is installed properly and can connect to the database.
1 Test the installation:
a Log in to the Remote Desktop Services/Citrix server as a regular user (not as admin).
b Log in to Centricity Practice Solution using RDP or ICA, the thin client protocol.
Select Start > Programs > Centricity Practice Solution xx > CPS xx Client
Log in using a valid user name on the same domain as the client and database.
2 Configure Remote Desktop Services users. When setting up users, configure how users connect to and disconnect from Remote Desktop Services sessions:
For On a Broken or Timed-Out Connection, choose the default Disconnect ,
This ensures that a broken or timed-out session will not be lost. Security may be maintained by limiting knowledge of the Citrix WinStation password, which is needed in order to reconnect. You may want to consider setting a time-out limit that eventually logs the user off.
For Reconnect Sessions Disconnected, choose From Previous WinStation Only.
This forces the next login of a specific WinstationName (User ID) to connect to the previously disconnected session.
For other attributes, use defaults or set time-outs as desired for security purposes. Consider setting an idle user time-out.
3 Identify each terminal with a unique ClientName variable name. Centricity Practice Solution uses the environment variable ClientName to identify individual terminals. The administrator sets the client name for each terminal using a terminal-specific setup mechanism within the terminal.
Centricity Practice Solution requires that each terminal have a unique name.
4 Optimize server memory. To optimize server memory usage do the following:
a Go to Start > Control Panel > Network and Internet > Network and Sharing Center.
b Double-click on Local Area Connection and click Properties.
c Select File and Printer Sharing for Microsoft Networks and click Properties.
d On the Server Optimization tab, select Maximize data throughput for network applications and click OK and then exit the Control Panel.
39

Upgrading Centricity Practice Solution
Launch the Centricity Practice Solution client
1 Select Start > Programs > Centricity Practice Solution xx > CPS xx Client
2 Log in using a valid user name on the same domain as the client and database, or using the superuser account. The default superuser password is superuser, and upon logging in for the first time, the application asks for a new password for this account. The default password minimum length is 5 characters.
The superuser account permissions are primarily restricted to the Administration permission node. The account has permanent Allow overrides for the Change System Settings permission and most Administration node permissions, with the following exceptions:
New Batch
Modify Batch
Delete Batch
Batch Closing
Batch Closing Override
Open Batch
Close Batch
Closing Date
Additionally, the superuser account cannot access the preference options and settings in
Administration | System > User and Resource Management > Users > Preferences > User Preference Groups
Administration | System > User and Resource Management > Users > Preferences > User Preference
Options menu item > Preferences.
If your site is using Application authentication, changing the minimum password length will also affect the superuser account if you change that account password at a later time.
The Superuser account will be locked out if the maximum number of failed login attempts is exceeded (the default is 3 attempts). You can unlock the account and reset the password back to the default on the Utilities window of ServerSetup.
40

Launch the Centricity Practice Solution client
3 Next step: If you are installing the Centricity Practice Solution client for the first time on a workstation, launch the application and immediately do the following:
Go to Administration > Users and Resource Management > Users > Security and set security settings for each anticipated user and security group of the product on the workstation. Failure to do this may prevent users from accessing components in upgraded versions, and prevents them from using the software for new installations.
If your organization is using Application authentication, refer to the Centricity Practice Solution online help for information on creating and managing users. For Active Directory authentication, users must first be created in Active Directory before they can access the application. Refer to Microsoft’s documentation for instructions on creating and managing Active Directory users.
If your organization is using Active Directory authentication and want the ability to automatically create new users and/or automatically synchronize security groups between Active Directory and the application, go to Administration > Users and Resource Management > Users > Security > Active Directory and select Auto Create Users and Auto Sync Groups. See the online help for more information about these features.
Associating new users to existing accounts
Your business may have providers who did not log in and use the application in previous versions, but wish to log into Centricity Practice Solution after upgrading. During the upgrade process, their existing provider accounts will be converted to billable providers, maintaining their billing information (such as schedule templates, fee schedules, and provider IDs), but without login capabilities. As a result. these new users will not be automatically associated with their existing provider information when their new login account is created. Each new user login must be connected to the existing billable provider via separate methods depending on whether your site is using Application or Active Directory authentication.
Refer to the Centricity Practice Solution online help for additional information on setting up users.
If you are using Active Directory authentication with the Automatically Sync Groups feature enabled, you must make sure that your Active Directory security groups are also recreated in the application database for successful synchronization. See the Centricity Practice Solution online help for more information on creating and automatically synchronizing security groups.
41
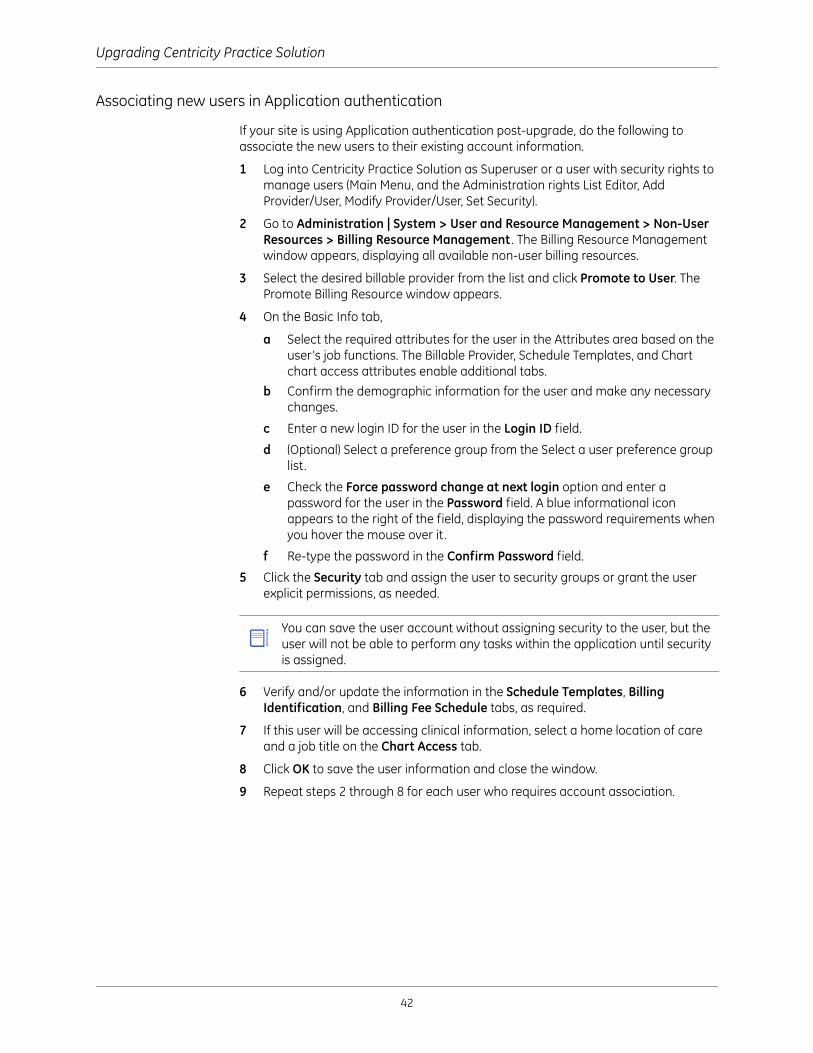
Upgrading Centricity Practice Solution
Associating new users in Application authentication
If your site is using Application authentication post-upgrade, do the following to associate the new users to their existing account information.
1 Log into Centricity Practice Solution as Superuser or a user with security rights to manage users (Main Menu, and the Administration rights List Editor, Add Provider/User, Modify Provider/User, Set Security).
2 Go to Administration | System > User and Resource Management > Non-User Resources > Billing Resource Management . The Billing Resource Management window appears, displaying all available non-user billing resources.
3 Select the desired billable provider from the list and click Promote to User. The Promote Billing Resource window appears.
4 On the Basic Info tab,
a Select the required attributes for the user in the Attributes area based on the user’s job functions. The Billable Provider, Schedule Templates, and Chart chart access attributes enable additional tabs.
b Confirm the demographic information for the user and make any necessary changes.
c Enter a new login ID for the user in the Login ID field.
d (Optional) Select a preference group from the Select a user preference group list.
e Check the Force password change at next login option and enter a password for the user in the Password field. A blue informational icon appears to the right of the field, displaying the password requirements when you hover the mouse over it .
f Re-type the password in the Confirm Password field.
5 Click the Security tab and assign the user to security groups or grant the user explicit permissions, as needed.
6 Verify and/or update the information in the Schedule Templates, Billing Identification, and Billing Fee Schedule tabs, as required.
7 If this user will be accessing clinical information, select a home location of care and a job title on the Chart Access tab.
8 Click OK to save the user information and close the window.
9 Repeat steps 2 through 8 for each user who requires account association.
You can save the user account without assigning security to the user, but the user will not be able to perform any tasks within the application until security is assigned.
42

Launch the Centricity Practice Solution client
Associating new users in Active Directory authentication
If your site is using Active Directory authentication post-upgrade, do the following to associate the new users to their existing account information.
1 In Active Directory:
a Create a user account and password for each new post-upgrade user.
b Add the users to the appropriate Active Directory security groups (if your business is using the Automatically Sync Groups feature).
2 Log into Centricity Practice Solution as Superuser or as a user with security rights to manage users (Main Menu, and the Administration rights List Editor, Add Provider/User, Modify Provider/User, Set Security).
3 Go to Administration | System > User and Resource Management > Non-User Resources > Billing Resource Management . The Billing Resource Management window appears, displaying all available non-user billing resources.
4 Select the desired billable provider from the list and click Promote to User. The Promote Billing Resource window appears.
5 On the Basic Info tab,
a Select the required attributes for the user in the Attributes area based on the user’s job functions. The Billable Provider, Schedule Templates, and chart access attributes enable additional tabs.
b Confirm the demographic information for the user and make any necessary changes.
c Enter the Active Directory login ID for the user in the Login ID field.
If you do not know the login ID, click the Search button beside the field to search Active Directory and select the correct user login ID.
d (Optional) Select a preference group from the Select a user preference group list.
6 Click the Security tab and assign the user to security groups or grant the user explicit permissions, as needed.
7 Verify and/or update the information in the Schedule Templates, Billing Identification, and Billing Fee Schedule tabs, as required.
8 If this user will be accessing clinical information, select a home location of care and a job title on the Chart Access tab.
9 Click OK to save the user information and close the window.
10 Repeat steps 2 through 9 for each user who requires account association.
You can save the user account without assigning security to the user, but the user will not be able to perform any tasks within the application until security is assigned.
If Automatically Synch Groups is enabled, security group assignment is unavailable.
If your site is not licensed to use the clinical functionality of the application, the Chart Access tab will not be available.
43

Upgrading Centricity Practice Solution
Associating existing users to existing accounts
In some instances, providers who logged in and used the application may also need to be re-associated with their billing and/or clinical information due to the user management changes in Centricity Practice Solution 10. In previous versions, administrators managed providers within the application, but users who logged into the application were managed externally within the Active Directory domain. As of Centricity Practice Solution 10, both providers and users are managed within the application, even if the users are being authenticated externally.
Additionally, a new user type called Basic User now defines any person who logs into the application as a user, rather than as a resource. Basic users have security permissions, can be scheduled, and may have access to patient charts, but are not billable (such a front desk person).
In previous versions, Active Directory authentication would allow users to be set up as resources and still log into the application due to the external Active Directory authentication. If the upgrade process detects resources without an associated login ID, it does not change these resources. These resources will not be able to log into the application post-upgrade, and will not be billable entities nor have clinical access.
If the upgrade process detects resources with login IDs (but without billing fee schedules), the process changes these resources to Basic Users.
If the upgrade process detects resources with billing fee schedules and login IDs, the process changes these resources to users with a ‘Doctor’ user type. Doctor user types can log in and are billable entities in the application. For example, a clinician such as a doctor or a nurse who is billable, schedulable, and has clinical access.
User TypeHas a login ID?
Schedulable? Billable? Clinical?
Doctora
a. The “Doctor” user type is a database designation given to any user with a login ID and who has the Billable Provider, Schedule Templates, and optionally the chart access attributes in the Edit User window.
Optional Optional Yes Optional
Referring doctor No No No No
Resourceb
b. The “Resource” user type is a database designation given to non-users that are schedulable, but that do not have login IDs and are not billable.
No Yes No No
Other provider Yes Optional Optional Optional
Basic user Yes Optional No Optional
44

Launch the Centricity Practice Solution client
With these changes, existing users who were previously managed outside of the application are now managed within the application. If these users were providers in the application, duplicate user accounts will be created as a result of the upgrade, with one account containing the pre-upgrade billing, scheduling, and clinical information, and another account containing the user login and security permissions information. For accurate record-keeping, auditing, and compliance, these accounts must be combined for each affected user by merging the non-user billing account with the user login account.
1 Log into the application as an administrator user.
2 Open Administration.
3 Select System > User and Resource Management > Non-User Resource > Billing Resource Management .
If there are records listed, open System-> User and Resource Management > Users > User Management.
If the user exists in User Management, skip to step 4.
If the user does not exist in User Management:
a Select appropriate line item in System > User and Resource Management > Non-User Resources > Billing Resource Management > Promote to User.
b Enter login name.
c Ensure the resource exists in System > User and Resource Management > Users > User Management .
d Highlight user, select Edit to verify the login, the resource is marked Billable Provider, and the Billing Identification information is populated appropriately. Continue with step 10.
4 | System > User and Resource Management > Users > User Management . The User Management window appears, displaying all available users.
5 Select the login account and click Edit .
6 Make sure that the Billable Provider attribute is enabled and click OK.
7 Click Merge.
8 In the Merge Provider window, search for and select the billing account provider from the Destination Provider field.
9 Click Merge to merge the accounts. The merged user account contains the login ID and security permissions with the existing billing information.
10 If this user requires clinical access,
a Select the user and click Edit .
b Enable the Chart Access attribute. The Chart Access tab appears.
c On the Chart Access tab, assign a home location of care and a job title to the user.
d Click OK to save the information.
Do not enable the Chart Access attribute on the login account prior to merging users.
45
Upgrading Centricity Practice Solution
Import clinical kits
Clinical kits contain related clinical content that can be imported into or exported from the application as a group. A kit can contain whatever content as you want, such as document templates, encounter types, form and text components, and letter templates.
For an upgrade, import the , upgrade.ckt and doctemps.ckt kits.
Refer to the application online help topic “Import clinical kits” for details. The basic procedure for importing a kit is:
1 Launch the application from the server where you installed the application and log in as an administrator.
2 Click Administration.
3 Go to System > Import Clinical Kits.
4 To import a kit, select Import Clinical Kit .
5 Browse to the kit location. This can be the network staging directory, a local or network drive, or the KnowledgeBank web site. Refer to the help topic for more information.
6 Select the kit file (with an extension of *.CKT) and select OK.
The Observation Term kit is required. Download and import the latest factory observation term kit from the support site: http://centricitypractice.gehealthcare.com/
46

Converting custom reports to newer Crystal Reports version
Converting custom reports to newer Crystal Reports version
All standard reports are in Crystal Reports, Professional XI R2. If you plan to use only the standard reports without modifying them, you don’t need to worry about converting your reports. The application includes all the Crystal Reports files you’ll need to run the standard reports.
Custom reports created in or converted to Crystal Reports v10.0 should open without any issues. However, if you have created custom reports with custom SQL in earlier versions, you must convert them to Crystal Reports Professional XI R2.
Clinical reports created in v8.5 should be converted to v10.0 before opening in v11.5.
For more information about Crystal Reports and help with migrating older reports, go to http://www.sap.com/solutions/sapbusinessobjects/index.epx.
Business reports
Crystal Reports Professional XI R2 is backward compatible with v10.0. Custom reports written in Crystal Reports v10.0 can be opened and modified in Crystal Reports Professional XI R2. However, you must create new reports using Crystal Professional XI R2.
Clinical reports
If you previously converted your custom clinical reports to Crystal Reports 10.0 in Centricity EMR 2005, you can open them in v11.5 Professional XI R2 when you upgrade to Centricity Practice Solution. If you have not converted your reports, use the following procedure to convert older reports to v10.0 before upgrading to Centricity Practice Solution.
!!! Do not open reports in versions higher than the recommended version. Once a report is opened in a later version it might not be compatible with the recommended version.
Before installing the application client, pre-install or upgrade to Crystal Reports on any workstation where you plan to create custom reports. If you install or upgrade Crystal Reports AFTER installing the application, some reports may fail.
!!! If you migrate from an earlier version of Centricity Electronic Medical Record on Oracle to an earlier version of Centricity Practice Solution in preparation for this upgrade, schema differences may break some custom reports.
See also “Migrating and upgrading custom reports” in Migrating to Centricity Practice Solution for schema changes that may impact your reports. This document is available for download at http://centricitypractice.gehealthcare.com, under CPS Integration.
47

Upgrading Centricity Practice Solution
Convert custom clinical reports to Crystal Reports v10.0
1 Open up your custom report in Crystal Reports 8.5 or higher.
2 Select Database | Show SQL Query and log in to the database.
3 Copy the SQL text to a text editor and reformat it for readability.
4 Close Crystal Reports 8.5.
5 Launch Crystal Reports 10.0 and open your custom report.
6 Select Database | Show SQL Query.
7 Log in to the database and click OK.
8 Select Database | Database Expert .
a Click the plus sign (+) on the current connection to open the sub-menu.b Double-click Add Command and paste the SQL text from step 3.
c Click OK to exit the Database Expert.
d Ignore the following warning:
More than one datasource or a stored procedure has been used in this report.
9 In the Refresh Report Data window, click Cancel.
10 Select Report | Formula Workshop and then open Formula Fields.
11 Replace the fields in the report one by one with the fields in the command, changing <Table>.Column to Command.Column in all the formulas.
12 Select Report/Record Sort Expert . Review the sorts and change the columns to use the new “Command” columns.
13 In the Select Expert , change the formulas to use the new “Command” columns.
14 If any groups use the old columns, change them to use the new “Command” columns.
15 In the Database/Database Expert, remove the tables one by one.
16 Refresh the report data, then open Database/Show SQL Query and press Reset . This will not change the query.
17 Replace any formulas you changed temporarily back in step 2.
18 Save the report.
!!! If an error message indicates an invalid ML... formula, temporarily change the formula in the report. You can change it back once the report is converted.
!!! Be careful with duplicate names to be sure you get the right ones.
!!! Schema changes in the integrated Centricity Practice Solution database may break some custom reports migrated from earlier versions of Centricity PM and EMR. See “Migrating and upgrading custom reports” in Migrating to Centricity Practice Solution for detailed information about schema changes that may impact your reports. The document is available at http://centricitypractice.gehealthcare.com, under CPS Integration.
48

Install optional server software
Install optional server software
You can install the following optional components:
Web installation on a separate server. Use the procedure Install a web site on page 22.
Data Transfer Station (DTS) automatically processes HL7 data transfers between Centricity Practice Solution and other information systems such as laboratories, hospitals, or transcription services. DTS can be installed on one of the servers or a dedicated workstation.
Millbrook Integration Kit (MIK) enables Centricity Practice Solution to share data with other information systems. MIK can be installed on one of the servers or a dedicated workstation.
Client workstation installs a CPS client on the application server for easy testing. If you are planning on running the Centricity Electronic Medical Record 9.x client on the same workstation as the Centricity Practice Solution 9.x client, you must install the EMR client on the workstation first.
49

Upgrading Centricity Practice Solution
About Data Transfer Station (DTS)
DTS runs as a client application on the workstation where it is installed.
DTS can run concurrently with the Centricity Practice Solution client application.
Multiple DTS can be configured to run on a single client workstation as separate instances. The DTS shortcut created during installation includes "instance=1" at the end of the target path (in Properties). For each additional DTS, you must manually copy the shortcut and increment the instance number (for example, instance=2).
Importing: DTS looks in the LinkLogic inbox for incoming data files (jobs) waiting to be processed, then sorts the jobs into task queues such as importing demographics data or lab reports. Next, DTS processes each queue. You control which tasks a DTS processes and how often it processes them.
Multiple Data Transfer Stations can import the same type of information. For example, Demographics.
Exporting: Automatically sending information from Centricity Practice Solution is simple: DTS puts the job in the LinkLogic outbox. The files are then transferred using one of the following methods:·
TCP/IP
Sockets
Another third-party transfer mechanism, such as an interface engine
DTS is either installed on a dedicated workstation (EMR only) or on a workstation with Millbrook Interface Kit (MIK). You can have more than one DTS set up to import or export specific types of data.
Multiple Data Transfer Stations cannot be assigned the same export task. Each LinkLogic export task can be assigned to only one DTS.
Refer to Managing interfaces with Centricity Practice Solution for detailed interface specifications and an overview of day-to-day LinkLogic/DTS management tasks.
Share the LinkLogic directory
LinkLogic is installed on either a Data Exchange server or on the primary DTS dedicated workstation. If you use a workstation, Windows 7, Vista, and XP only allow 10 concurrent connections. The LinkLogic directory is shared, to be available to clients and multiple DTS stations. Use a UNC path, not a mapped drive.
1 Navigate to \Program Files (x86)\Centricity Practice Solution xx\Client
2 Right click on the llogic directory. Select Sharing and Security.
3 Select Share this folder. Click OK.
Use the shared network folder for all of the DTS inboxes.
!!! You must be licensed for both CPS and LinkLogic to use Data Transfer Station. DTS is not supported in Windows Remote Desktop Services environments.
!!! If you have a previous version of the LinkLogic directory stored on the Database server, copy the \llogic\config folder and paste it in the new shared llogic directory.
50

Install optional server software
Move a LinkLogic directory from the Database Server
Beginning in version 9.0, the recommendation is to install the network LinkLogic directory on the DTS. This helps maximize performance by eliminating read/write activity across the network. Perform these steps to move the data from the Database server to the shared LinkLogic directory.
1 Ensure that the Data Transfer Station is not running and that no users who access LinkLogic are logged into the CPS application.
2 Stop or shut down external interface systems that read or write to the network LinkLogic folder.
3 Navigate to the network LinkLogic folder on your Database server.
a Delete or move any old files in your Save directory that you do not want to copy to the DTS.
b Right click on the llogic directory and select Copy.
4 Navigate to the shared network directory created in Share the LinkLogic directory on page 50.
a Delete or rename the existing llogic directory (example: llogicOld).
b Right click and select Paste.
5 Modify any external interface systems to point to the new shared LinkLogic directory, and re-start the systems as needed.
6 Log into the CPS application. Select Administration > System > LinkLogic > Defaults.
7 In Network location of LinkLogic folder, browse and select the new location of the llogic directory on your DTS.
8 Go to Administration > System > LinkLogic > Stations. For each Station, select Change and browse to select the new location of the llogic directory on your DTS.
Understanding DTS Inboxes
If more than one DTS imports the same type of information, they must have unique Inboxes. For example, if DTS-1 imports demographics and DTS-2 imports lab results, they can share the same Inbox. However, if DTS-1 and DTS-2 both import demographics, they must have unique Inbox locations. For example:
\\dts_server\llogic\data\in\DTS-1-Demographics\\dts_server\llogic\data\in\DTS-2-Demographics
For maximum performance, each DTS should have its own Inbox on the shared network llogic folder.
Install Data Transfer Station (DTS)
Confirm the workstation meets the hardware requirements for Data Transfer Station.
The LinkLogic directory on the Database server must be upgraded before it is moved. Complete the procedure Prepare LinkLogic/Data Transfer Station for upgrade on page 10.
51

Upgrading Centricity Practice Solution
After installation you must configure one or more stations on the client workstation to process data transfers. You cannot launch the DTS until all configuration is complete. Perform these steps while connected to the console of the DTS station.
1 Insert the Centricity Practice Solution installation disc in the workstation drive. On the Welcome window, select Install optional components and then click Install Data Transfer Station.
If the Welcome window does not appear, double-click launch.exe on the CD.
2 On the installer Welcome window, click Next .
3 On the Choose Destination Location window, accept the default installation directory or click Browse to install to a directory other than the default .
4 Click Next .
5 For Web site, enter the Web address you defined when you installed the Web site (for example, http://<server name>:9080/your_CPS_web_site_name
6 Click Next .
7 Confirm that both Client Workstation and Data Transfer Station are checked. The Centricity Practice Solution client is required to run Data Transfer Station.
8 Click Next .
9 If you are prompted to install Microsoft .NET 1.1 Framework, click Yes and accept the license agreement. Reboot when prompted. This component is required.
10 On the Start Copying Files window, click Next .
A DTS shortcut is added to the Start > Programs > Centricity Practice Solution xx menu. This launches the DTS application once a DTS has been created and configured in Administration.
11 When complete, remove the installation media.
12 Edit the CPS 9.x icon properties to have the DTS start up without a login prompt.
a Right click on the CPS 9.x icon and select Properties.
b Add -U after the web site address in the Target box. For example:"C:\Program Files (x86)\Centricity Practice Solution xx\Client\ml3dts.exe" "http://hcu-645lmh1:9080/demo/cps/" -U instance=1
c Click OK.
13 Update the Network llogic folder with the CPS 9.x files.
a Browse to the client folder on the DTS station. b Open the llogic\Config folder.
c Copy the Standard and Upgrade folders to the Network LLOGIC folder.
d Click Yes to All to overwrite any files.
14 Open the backup emr.ini file you created prior to the upgrade. Copy the <ComputerName>DTS # section from the backup file to the new CPS 9.x emr.ini.
Uninstall previous versions of the Centricity Practice Solution client software
52

Install optional server software
Set up a Data Transfer Station
1 Double click the desktop icon to launch Centricity Practice Solution. Log in as an Administrator.
2 Open Administration and select System > LinkLogic > Defaults.
3 Check Automatically Queue Jobs.
If you clear this option, DTS does not scan the inbox for new jobs.
4 Enter the frequency time and units in Queue Jobs Every for often DTS should scan the inbox.
GE recommends that you set up DTS to scan the inbox as often as your most frequent recurring task.
5 Enter the alert time and units for monitoring no activity in the DTS Monitor Threshold. Alerts are displayed on the Monitor tab on the DTS workstation.
6 If you are going to run DTS as a Windows service, check Disable all LinkLogic/DTS startup dialogs to permit the DTS to restart automatically without user intervention.
If the DTS cannot restart successfully, temporarily clear this option so you can see an error or warning that may be preventing restart.
7 From Administration, select System > LinkLogic > Stations.
8 In the Stations list , click New DTS... or select the an existing Data Transfer Station.
9 Below the Stations list , click Change. The Change Station window displays. Verify the network locations for the Inbox and LinkLogic folder are correct. Be sure and create all inboxes in the shared LinkLogic folder.
10 For Tasks, select the tasks that you want this DTS to process.
11 Click OK.
12 Disable all existing export interfaces.
13 Re-enable the export interfaces and check Base exports on changes made hereafter.
14 Double click the DTS icon. It should start without any errors.
You may see a screen confirming the IXP files that have been upgraded successfully, or IXP files that could not be upgraded.
a Make note of the files that could not be upgraded, and go to the Network llogic\Config\Local folder. These files can be renamed from xxx.IXP to xxx.OLD. The DTS should start normally after this change is made.
b From the Centricity Practice Solution client, open Administration and select System > LinkLogic > Task Options
c Search the configuration files related to each interface task. If the files are no longer in use, delete them. If they are needed, locate the corresponding file for CPS 9.x product.
15 Log into your DTS and verify messages import successfully.
53

Upgrading Centricity Practice Solution
Troubleshooting the DTS
Possible issues that may occur that could be related to DTS\LinkLogic configuration.
When opening up the DTS application or Chart component you receive a prompt to browse for the llogic folder. This indicates the share permissions on the llogic folder are not allowing users to connect to the share. Confirm that the llogic share is available from this workstation. Check the LinkLogic > Defaults in Administration to see where the Network llogic share is set.
When opening up the DTS application or Chart component you receive a message that the versions do not match and it asks you to browse for the llogic folder. This indicates that the Network llogic share has not been updated with the CPS 9.x Standard and Upgrade folders. There are version specific files contained within these folders.
When starting the DTS, you receive a message that this machine has not been configured as a DTS workstation. This indicates the emr.ini file does not contain the configuration information for the DTS. Copy the configuration into the file or rebuild the DTS within the CPS 9.xclient.
Running the DTS as a Service
You can configure Data Transfer Station to run as a Windows Service, allowing the LinkLogic Manager to start, stop, and check the status of the DTS from the Administrative Tools > Services control panel. If the DTS crashes, the new service restarts it automatically.
Install and start the LinkLogicDTS service
1 Navigate to the installation directory.
2 Double-click the dts_install.cmd file.
3 To start the service, from the Start menu, go to Administrative Tools > Computer Management > Services and Applications > Services.
4 Right-click on the LinkLogicDTS service and select Start . The LinkLogicDTS service starts the Data Transfer Station automatically when you reboot the machine.
Start the Microsoft Services Interaction Detection service
For operating systems such as Windows 7, Windows Vista, and Windows Server 2008, you must start the Microsoft Services Interaction Detection service in order to run DTS as a service. The LinkLogicDTS service must be started first.
GE does not recommend or support running multiple instances of DTS on a single workstation when running DTS as a service.
If you are running on an operating system with User Access Control, such as Vista, Windows 7, or Server 2008, right-click the file and select Run as administrator. Click Continue at the User Access Control (UAC) dialog.
When you have the DTS configured to start and run as a Windows service, never start the DTS manually from the command prompt.
54

Install optional server software
Configure the service to run under a user account
For processes created by the service to access a specific user's settings such as mapped network drives, you must configure the service to run under a user account. After starting the LinkLogicDTS Windows Service, perform the following steps:
1 Click Start > Administrative Tools > Services.
2 In the installed services list, double-click LinkLogicDTS.
3 In the Services Properties window, select the Log On tab.
4 Check Local System Account and Allow service to interact with Desktop.
5 Click OK.
Disable LinkLogic/DTS startup dialogs
To permit a fully automatic restart, you must disable all LinkLogic / DTS startup dialogs that force the launch of the Logon/Password dialog and require user intervention.
1 From the Centricity Practice Solution client, open Administration and select System > LinkLogic > Defaults.
2 Check Disable all LinkLogic / DTS Startup Dialogs.
The DTS will now restart automatically in the event of a crash.
Uninstall the LinkLogicDTS service
1 Stop the LinkLogicDTS service.
2 Navigate to the installation directory.
3 Double-click the dts_uninstall.cmd file.
The DTS will not restart if it encounters a “process hang.” If the DTS process is active but stops processing, you must stop it manually with Windows Task Manager, or use stop service in the Windows Services control panel.
If you are running on an operating system with User Access Control, such as Vista, Windows 7, or Server 2008, right-click the file and select Run as administrator. Click Continue at the User Access Control (UAC) dialog.
55
Upgrading Centricity Practice Solution
Install Millbrook Integration Kit (MIK)
Millbrook Integration Kit (MIK) is a service that shares patient and financial data used by the practice management module with external applications and plug-ins. MIK uses the MS-HUG ActiveX for Healthcare messaging system and uses HL7-compliant messages. For detailed interfaces specifications see Managing interfaces with Centricity Practice Solution available in the Centricity Document Library or on the Web site at http://centricitypractice.gehealthcare.com.
Installing, configuring, and licensing MIK should be performed by users with a thorough knowledge of interfaces, the operating system, and network connectivity.
To configure MIK to integrate with specific non-GE applications, see MIK Integration Tech Notes. Click a link for the system you want to integrate with to download Adobe PDF format instructions.
Before installing MIK to a workstation, confirm that it meets the hardware requirements for MIK. For an upgrade, make sure you exported the registry keys as described in step 10 on page 8. Uninstall MIK using Add/Remove programs before continuing with the next steps.
1 To install MIK, do one of the following:
Insert the Centricity Practice Solution installation disc in the workstation drive. On the Welcome window, select Install optional components and then click Install Millbrook Integration Kit (MIK). If the Welcome window does not appear, double-click launch.exe on the CD.
If you are installing MIK as part of the server installation, the Install optional components and then click Install Millbrook Integration Kit (MIK).
2 On the Welcome window, click Next .
3 Use Browse to select the drive and directory, or accept the default ..\Centricity Practice Solution xx\CPS_xx_MIK\ then click Next .
4 To start copying files, click Next .
5 When the installer displays Setup Complete, select Finish to exit setup.
6 Edit the exported MIK registry key file you created in step 10 on page 8. Change all of the AHC and GE paths to include WOW6432Node like the following example.
HKEY_LOCAL_MACHINE\SOFTWARE\WOW6432Node\AHCHKEY_LOCAL_MACHINE\SOFTWARE\WOW6432Node\GE
7 Save the exported MIK registry key file.
8 Double click on the exported MIK registry keys to reload them.
9 Reboot your system. You cannot configure MIK until you reboot the system.
MIK requires a separate license. For licensing information, please contact your Value Added Reseller or a GE Sales Representative.
!!! This site is password-protected. To obtain a login name and password, call Centricity Services at 888.436.8491, option 2.
56

Install optional server software
10 Confirm the MIK settings are correct. Common changes include:
If the MIK is being installed on a different server, confirm that the name of the AHC directory server has changed to the new name.
Confirm that the AHC Transport settings are correct by clicking on the "…" button. If the MIK was setup to read from TCP/IP ports, the beginning of message sequence string and end of message sequence string are not correctly populated. The default values for Beginning and End are blank.
Confirm that the SQL Server name and the Database name are correct.
57

Upgrading Centricity Practice Solution
About browser/mobile access installation
This feature is automatically installed and configured as part of the installation or upgrade process. This section provides an overview of that configuration. For complete information and security considerations, refer to “Security considerations for browser and mobile access” and “Maintaining JBoss/Service Layer” in the Systems Requirements Guide.
The browser and mobile access feature uses the existing service layer deployment and two new deployments that build on top of the service layer. It can be configured on one server to connect to multiple database instances. The user selects which database instance they access by referencing the URL for that instance.
The basic URL pattern is:http://servername:port/database_name/emrgwt/Emr.html
Where servername, port , and database_name are all specified during the installation process. In this example, servername is server1, port is 9080, and the database_name is cps1:
http://centricityserver:9080/cps1/emrgwt/Emr.html
Distribute this URL to all browser and mobile access users.
The filename Emr.html is case sensitive.
58
About browser/mobile access installation
Configuring browser/mobile access for users
Configuring user access and MQIC (if your site participates in the MQIC consortium) is performed within the application. Refer to the online help topics Assign access to patient charts and Enter application user security.
To configure users for browser/mobile access:
1 Go to Administration > System > User and Resource Management > Users > User Management . For each user:
2 Select user.
3 Click Edit...
4 On the Security tab, expand Web Services in the permission list.
5 Select Access Remote Access Client .
6 On the Chart Access tab, enter the MQIC User Name if used.
7 Click OK.
To configure MQIC:
1 In the main application, go to Administration > Charts > MQIC.
2 Click Enable MQIC.
3 Enter the Web Service URL.
Testing browser/mobile access
As part of the final installation or upgrade steps, test the web access:
1 Open a supported browser.
2 Enter the application URL as described in this section. The application login is displayed. You can not log in until browser/mobile access is enabled for the user.
3 Optional: Enable access for a test user. Login as the test user and view a patient chart.
59
Upgrading Centricity Practice Solution
Enabling attachment viewing
To properly display internal attachments, a third party package, LEAD command line utils, is required. This package is available from www.leadtools.com. For additional details, refer to http://www.leadtools.com/Utilities/Cmd-Line/File-Converter/
1 Install the LEAD command line utils on the same server as JBoss.
2 Copy the file c:\leadtools\lfc.exe to the directory c:\leadtools\bin
3 Update the system path to include c:\leadtools\bin
4 Restart the server.
5 Optional: Enable access for a test user. Login as the test user and view an internal attachment via browser /mobile access. Refer to Configuring browser/mobile access for users.
Displaying external attachments has the following conditions:
Content must be accessible by the JBoss server via the file system, or the network using http or https protocol.
Browser must be capable of displaying the content. For example, even simple files like .pdf require a plugin or software to display correctly.
Attachments like PDF, Microsoft Excel, or Microsoft Word documents are passed through the server to allow authenticated users to view content.
Complex web pages that reference external images may not display correctly since the secondary image content may not be accessible from the client in the customer configured network topology.
The browser may save the content to disk and could open the content in a new browser window. It is the responsibility of the user to avoid leaving windows open, or leaving attachment files on the client disk drive where they could be accessed by unauthorized personnel.
60

Configuring webcams for Windows 7 or Vista operating systems
Configuring webcams for Windows 7 or Vista operating systems
In Windows 7 and Vista operating systems, User Account Control (UAC) prevents Centricity Practice Solution from importing images via the Webcam button on the Acquire Photo window.
Workaround 1: Turn off User Account Control (UAC)
Turn off User Account Control (UAC) for each user who must use a webcam. Turning off UAC must be performed by an administrator.
1 Click Start > Control Panel > User Accounts > User Accounts.
2 Click Turn User Account Control on or off and then confirm your selection.
3 Click Continue.
4 On the Turn on User Account Control (UAC) window, uncheck Use User Account Control (UAC) to help protect your computer.
5 Click OK.
You must restart the computer for this change to take effect. Click Restart Now to immediately restart your computer, or Restart Later to continue working without restarting.
Workaround 2: Use the Camera button
For webcams that can also function as digital cameras, on the Acquire Photo window, select Camera instead of Webcam to capture images in Centricity Practice Solution.
See your camera’s documentation or manufacturer to determine whether your webcam will also function as a digital camera.
Workaround 3: Capture images outside the application
Capture images outside Centricity Practice Solution. Then, on the Acquire Photo window, select File or Clipboard to import the images into the application. S
!!! A Windows 7 or Vista-compatible webcam device is required for the following workarounds.
61
Upgrading Centricity Practice Solution
Setting up user security
Security rights determine whether you can access and take actions in Centricity Practice Solution components and sub-components. For example, you can access a visit, but your security settings may prevent you from modifying or deleting it .
A user with rights to the Administration module (usually the System Administrator) can set up user security. An Administrative user must have all security permissions to grant them to other users.
To access the help for the Administration module:
1 Start the application.
2 Select Administration
3 Select System > User and Resource Management > Users > Security and select Security by Group, Security by User, or Security by Permission.
4 Press F1
At a minimum, set up the following:
Users
Administrative Users
User Security
Chart Permissions
ServerSetup online help
Refer to the ServerSetup online help for information on the included utilities and advanced ServerSetup options.
Anti-virus software
GE recommends you use well-known commercial anti-virus software on all workstations. GE has tested compatibility with Symantec AntiVirus™ and Sophos anti-virus, anti-spam and client firewall.
Anti-virus software can impact the performance of your database software running on the server. Full virus scanning should not occur during peak system usage times.
To maintain reliable performance and help ensure protection of Protected Health Information, exclude directories that contain SQL Server database files.
Requirements for disabling anti-virus software during installation and upgrade are specified as part of the procedures in this guide, and in the System Planning and Requirements for Centricity Practice Solution guide.
If performance slows down, and the SQL Server is consuming most of the CPU utilization, reboot the server.
62
Install biometric authentication
Install biometric authentication
Biometric Authentication helps verify a user biometrically when faxing prescriptions to a pharmacy. To use Biometric Authentication, you must connect a finger reader device to your workstation. The supported reader is the digitalPersona Uare.U Fingerprint Reader. You need to complete the Biometric configuration and registration to use it . For more information on the device visit:
http://www.digitalpersona.com/products/dpFingRead.php
For configuration and usage information, refer to these topics in the online help:
Set up prescription requirements
Register fingerprint
Use biometric authentication
Logging events
There are multiple deployment methods for the biometric runtime environment:
Stand alone deployment. The runtime environment is installed on the same workstation that is running the Centricity application.
Remote desktop deployment. The runtime environment is installed on both the client and the dedicated server.
Citrix deployment. The runtime environment is installed on the Citrix server and all Citrix clients that access the fingerprint reader.
The installer is located in the Centricity staging directory Biometric folder. For example:
\CPS_90_Staging\Biometric\Setup.msi
!!! The digitalPersona runtime environment is custom built for GE. Do not download the standard version from the digitalPersona web site.
63
Upgrading Centricity Practice Solution
Stand alone deploymentThe runtime environment is installed on the same workstation that is running the Centricity application.
1 Copy the specified file from the staging area Biometric folder to the workstation:
digitalPersona: Setup.msi
2 Double click the install file to begin the installation.
3 Follow the prompts for the installation.
4 Restart the workstation when the installation is complete.
Remote desktop deploymentThe runtime environment is installed on both the client and the dedicated server.
1 Copy the Setup.msi file from the staging area Biometric folder to the workstation.
2 Double click the Setup.msi file to begin the installation.
3 Follow the prompts for the installation.
4 Restart the workstation when the installation is complete.
5 Repeat steps 1 through 3 on the server and restart the server.
Citrix deploymentThe runtime environment is installed on the Citrix server and all the Citrix clients that access the reader.
1 Copy the Setup.msi file from the staging area Biometric folder to the Citrix server hosting the Centricity client and to each workstation with Citrix clients that access the fingerprint reader.
2 Double click the Setup.msi file to begin the installation. The file must be installed on the Citrix server and on all Citrix clients that access fingerprint readers.
3 Follow the prompts for the installation.
4 Restart the workstation when the installation is complete.
5 Repeat steps 1 through 3 on the Citrix server and restart the Citrix server.
Registering DPICACnt.dll for each Citrix client1 Copy the DPICACnt.dll file from the staging area Biometric folder containing the
Citrix client. For example: Program Files\Citrix\ICA Client
2 Register the dll using the full path. For example:
regsvr32 C:\<Program Files\Citrix\ICA Client>\DPICACnt.dll
Only the digitalPersona reader runs under this configuration.
64
About the Demo (evaluation) Database
About the Demo (evaluation) Database
You can install the Demonstration version of the Centricity Practice Solution server with a demonstration database and Web site to evaluate or learn about and practice using Centricity Practice Solution features.
The Demo Database includes practice patients, users, security groups, and charts. Centricity Practice Solution is web-enabled, so users can access the application and Demo Database from a workstation via the Internet or your Intranet.
The Centricity Practice Solution application and Demo Database and Web site can be installed on a Windows Server. Refer to Configuring Environments for Centricity Practice Solution for minimum database engine and hardware requirements.
You can log into the Demo Database as a training user in a variety of job roles. For example, users hwinston and kstarr have a default password of asdf. These demo users are set up as a system managers. Additionally, you can log into the Demo Database using the superuser account (with the default password of superuser for the initial log in) to perform administrative functions such as setting security or creating users.
The application includes an option to manage Demo Database user logins using Application authentication. This option uses the training user information noted above for user authentication. Using this option helps you avoid mixing training user identities with real users in Active Directory.
Install a demo database and Web site
1 Insert the Centricity Practice Solution installation disc in the drive. If the Welcome window does not appear, double-click launch.exe on the disc.
2 On the Welcome window, click Copy CD to hard drive.
3 Accept the default location or enter a preferred location (default is C:\CPS_xx_staging\) and then click Next .
The installation files are copied to the server hard drive. When copy is complete, a Welcome window appears with new options.
4 To confirm installation of all required software, click Install Server Prerequisites to check your system.
5 Select Install single-user evaluation version. The installer checks requirements for you. Follow on-screen instructions to update your server or workstation with required software.
6 Click Back to return to the Welcome window, then click Install / update server.
7 Click ServerSetup.
8 On the ServerSetup window, select Demo, then Next .
65
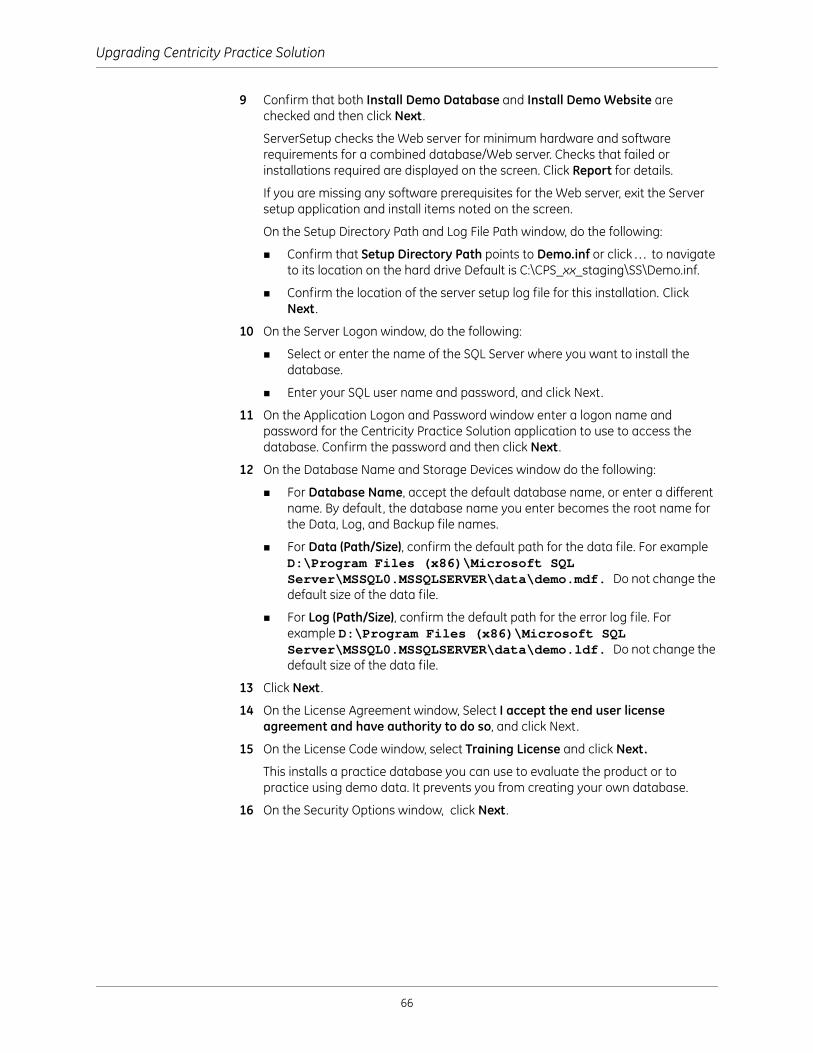
Upgrading Centricity Practice Solution
9 Confirm that both Install Demo Database and Install Demo Website are checked and then click Next .
ServerSetup checks the Web server for minimum hardware and software requirements for a combined database/Web server. Checks that failed or installations required are displayed on the screen. Click Report for details.
If you are missing any software prerequisites for the Web server, exit the Server setup application and install items noted on the screen.
On the Setup Directory Path and Log File Path window, do the following:
Confirm that Setup Directory Path points to Demo.inf or click to navigate to its location on the hard drive Default is C:\CPS_xx_staging\SS\Demo.inf.
Confirm the location of the server setup log file for this installation. Click Next .
10 On the Server Logon window, do the following:
Select or enter the name of the SQL Server where you want to install the database.
Enter your SQL user name and password, and click Next.
11 On the Application Logon and Password window enter a logon name and password for the Centricity Practice Solution application to use to access the database. Confirm the password and then click Next .
12 On the Database Name and Storage Devices window do the following:
For Database Name, accept the default database name, or enter a different name. By default, the database name you enter becomes the root name for the Data, Log, and Backup file names.
For Data (Path/Size), confirm the default path for the data file. For example D:\Program Files (x86)\Microsoft SQL Server\MSSQL0.MSSQLSERVER\data\demo.mdf. Do not change the default size of the data file.
For Log (Path/Size), confirm the default path for the error log file. For example D:\Program Files (x86)\Microsoft SQL Server\MSSQL0.MSSQLSERVER\data\demo.ldf. Do not change the default size of the data file.
13 Click Next .
14 On the License Agreement window, Select I accept the end user license agreement and have authority to do so, and click Next.
15 On the License Code window, select Training License and click Next.
This installs a practice database you can use to evaluate the product or to practice using demo data. It prevents you from creating your own database.
16 On the Security Options window, click Next .
66

About the Demo (evaluation) Database
17 In the Web site Information window, do the following:
For Virtual Directory, confirm the default or enter a different name. This name is used in the Centricity Practice Solution Web site’s address.
For Install Location, select or enter the file path where you want the program files to be installed. The default is:\Program Files (x86)\Centricity Practice Solution xx\demo
Click Next .
ServerSetup begins installing the server and Web site files. Installation is complete when you see the message Database Installation Complete.
18 Click Exit to complete the installation process, or Return to return to the ServerSetup window.
Renaming the Demo installation
It is useful to rename a Demo installation to easily differentiate it from a production installation if you are running both types at the same time.
1 Browse to the JBoss website folder on your Application Server. The default path is:\Program Files (x86)\Centricity Practice Solution xx\JBoss Application Server\jboss\server\default\deploy\WebsiteName.war
2 Make a backup of the config.xml file.
3 Open config.xml with a text editor.
4 Locate the Caption row and add TEST:
<Caption>TEST</Caption>
5 Save and exit. Make sure the file is saved with the .XML file extension.
6 Login to the application. Launch each component and note the blue title bar is prefaced with TEST. If this is not successful, delete the modified file and rename your backup file to be config.xml to restore the default.
Setting user permissions
In Windows XP, a standard user has read and write permission on the C:\ drive. This is not the default on Windows 7, Windows Vista and Windows Server operating systems. To ensure standard users can run the evaluation version, set the user permissions on the Centricity installation directory.
If the permissions are not set, and fatal error is displayed during file read and write operations when launching the client.
1 Login as administrator.
2 Give users full permission to the folder where the Centricity client is installed. The default directory location is under C:\Program Files.
This procedure modifies a file on your Application Server. The modification of this file should only involve a change to the row noted with no additional spaces or carriage returns added.
This procedure can be performed with the assistance of GE personnel.
67

Upgrading Centricity Practice Solution
About ServerSetup product updates
From ServerSetup you can download and apply available product updates and service packs.
Download Available Updates opens a secure web site containing all available update packages for server, Web site, and workstations. Select an update to download.
Apply Available Updates installs selected updates to the server, Web site, or workstation.
You can access this feature only after you have successfully downloaded the updates.
You can also accomplish product updates in the following ways:
From the product update web site. This is the easiest, most automated installation/update. Just login in to the application and click Product Updates on the CPS main page.
From the installation CD. When you need to install required or optional software for the application or add a single workstation or at remote sites where updates over the Internet might be too slow.
If your site uses a proxy server to access the internet, you must set up the proxy server for the JBoss application server from ServerSetup:
Advanced Setup Options > Web Proxy Server
Refer to the online help for details.
Depending on how your site is set up, you may have to set up the proxy for each workstation to be updated.
Selecting Download Available Updates in ServerSetup lets you access the Product Update website displaying updates available for the current version of your Web site.
68

About ServerSetup product updates
Download updates via ServerSetup
From ServerSetup, you can access a secure Web site to download available update packages for server, Web site, and workstations.
1 Double-click the ServerSetup icon on your Desktop or navigate to its location and open it.
2 Select Download Available Updates, and then click Next .
3 Select the Web site you want to check for updates, confirm the log file path, then click Next .
4 Select an update to begin downloading. The Downloading Update window displays the product version, download location, and progress.
5 If the download is unsuccessful (Download Failed), click OK. After this, click Cancel to return to the Available Updates window and do the following:
Select another download
Click Exit to leave the update Web site
Click Back to return to previous ServerSetup screen.
6 If the download is successful (Completed), click OK. Do the following:
Select another download
Click Finish if you are ready to apply downloaded updates.
Click Exit to leave ServerSetup. You can return to ServerSetup later to apply the download.
ServerSetup must be installed on the server where the Web site is installed.
!!! Clicking back removes any downloads you have selected.
69
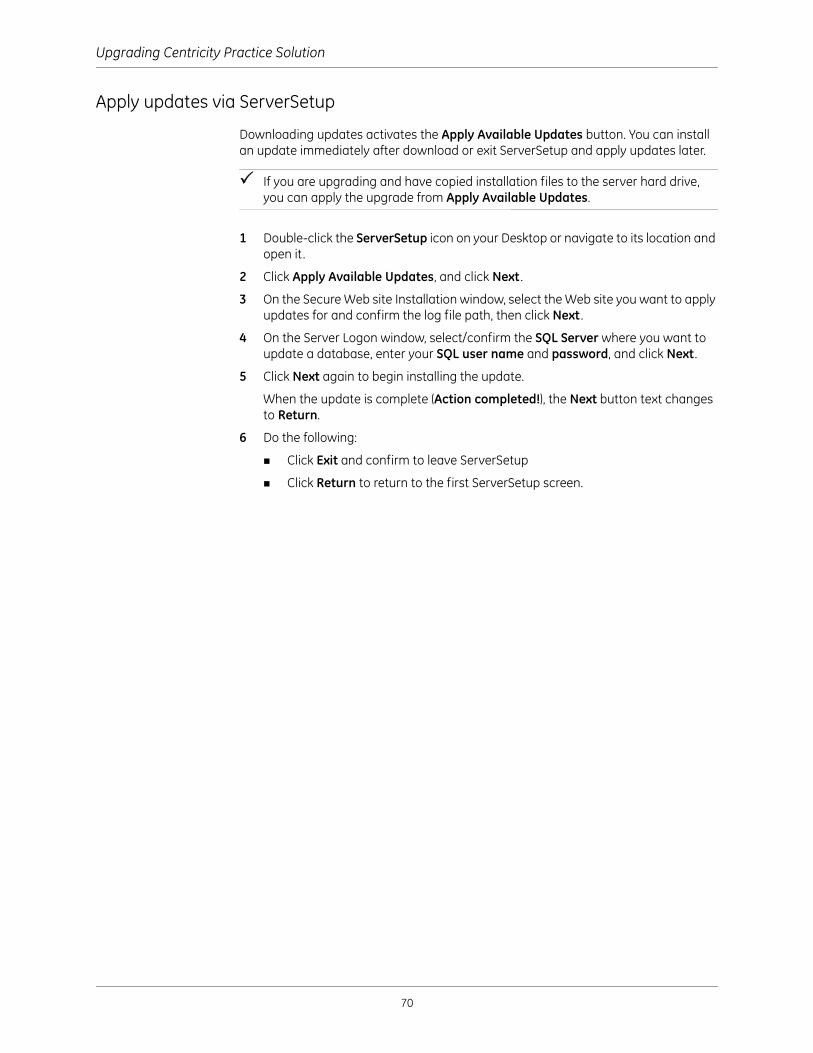
Upgrading Centricity Practice Solution
Apply updates via ServerSetup
Downloading updates activates the Apply Available Updates button. You can install an update immediately after download or exit ServerSetup and apply updates later.
If you are upgrading and have copied installation files to the server hard drive, you can apply the upgrade from Apply Available Updates.
1 Double-click the ServerSetup icon on your Desktop or navigate to its location and open it.
2 Click Apply Available Updates, and click Next .
3 On the Secure Web site Installation window, select the Web site you want to apply updates for and confirm the log file path, then click Next .
4 On the Server Logon window, select/confirm the SQL Server where you want to update a database, enter your SQL user name and password, and click Next .
5 Click Next again to begin installing the update.
When the update is complete (Action completed!), the Next button text changes to Return.
6 Do the following:
Click Exit and confirm to leave ServerSetup
Click Return to return to the first ServerSetup screen.
70

Remove the client from a workstation
Remove the client from a workstation
Use this procedure to remove the Centricity Practice Solution client:
1 If you store custom reports or other files, move or back up these files before you remove the application.
2 Exit all open programs.
3 Perform one of the following:
For workstations not running Windows 7 or Vista, select
Start > Programs > Centricity Practice Solution xx > CPS xx Setup
For workstations running Windows 7 or Vista, start the Windows Control Panel. For example:
Start > Control Panel > Programs > Uninstall a program
Select CPS_xx_Client
Click Change/Remove
Run the silent uninstaller. Refer to Using the silent uninstaller on page 72.
4 When you see the Welcome message, select Remove then click Next .
5 Confirm that you want to remove the application by clicking Yes.
Wait while the setup program removes the application.
6 When the process is complete, click Finish.
7 Locate the Centricity Practice Solution program folder and delete it . Default location is C:\Program Files (x86)\Centricity Practice Solution xx.
!!! Before deleting this folder, check for custom reports, saved versions of the database, and other files you want to save.
71
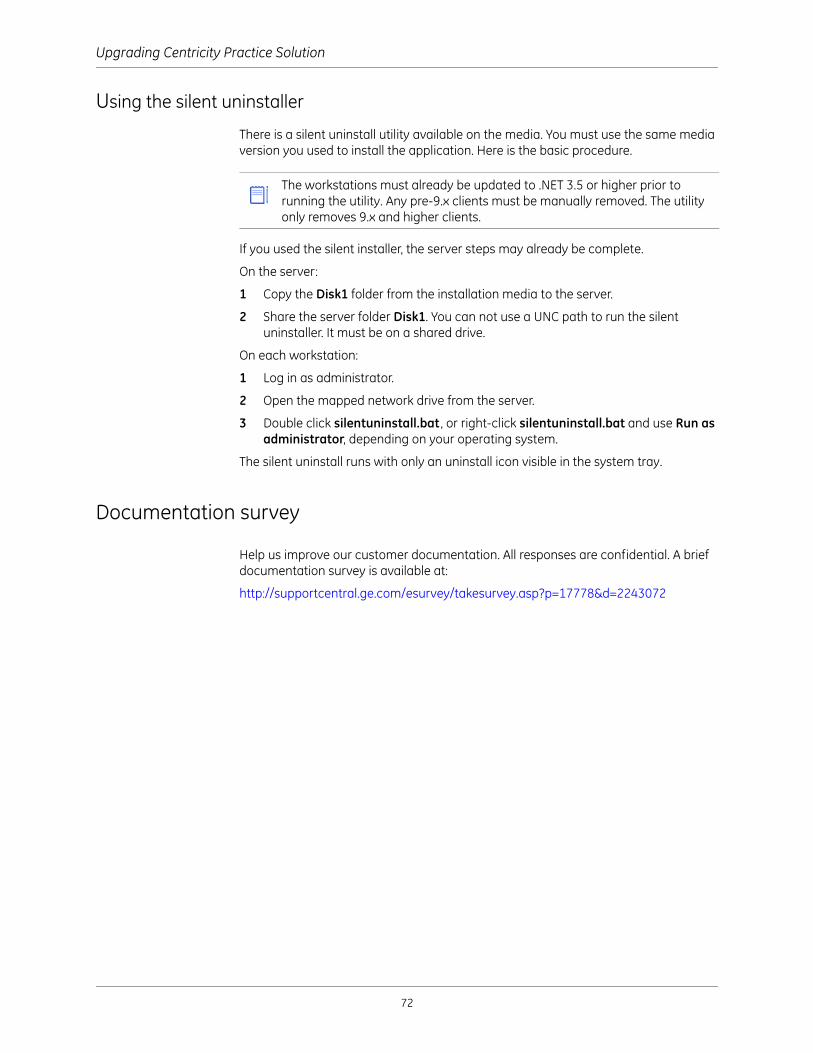
Upgrading Centricity Practice Solution
Using the silent uninstaller
There is a silent uninstall utility available on the media. You must use the same media version you used to install the application. Here is the basic procedure.
If you used the silent installer, the server steps may already be complete.
On the server:
1 Copy the Disk1 folder from the installation media to the server.
2 Share the server folder Disk1. You can not use a UNC path to run the silent uninstaller. It must be on a shared drive.
On each workstation:
1 Log in as administrator.
2 Open the mapped network drive from the server.
3 Double click silentuninstall.bat , or right-click silentuninstall.bat and use Run as administrator, depending on your operating system.
The silent uninstall runs with only an uninstall icon visible in the system tray.
Documentation survey
Help us improve our customer documentation. All responses are confidential. A brief documentation survey is available at:
http://supportcentral.ge.com/esurvey/takesurvey.asp?p=17778&d=2243072
The workstations must already be updated to .NET 3.5 or higher prior to running the utility. Any pre-9.x clients must be manually removed. The utility only removes 9.x and higher clients.
72