Upgrading Data Insight to 5.1
74
Veritas Data Insight Installation Guide 5.1 January 2017
Transcript of Upgrading Data Insight to 5.1

Veritas Data InsightInstallation Guide
5.1
January 2017

Veritas Data Insight Installation GuideDocumentation version: 5.1.1
Legal NoticeCopyright © 2016 Veritas Technologies LLC. All rights reserved.
Veritas and the Veritas Logo are trademarks or registered trademarks of Veritas TechnologiesLLC or its affiliates in the U.S. and other countries. Other names may be trademarks of theirrespective owners.
This product may contain third party software for which Veritas is required to provide attributionto the third party (“Third Party Programs”). Some of the Third Party Programs are availableunder open source or free software licenses. The License Agreement accompanying theSoftware does not alter any rights or obligations you may have under those open source orfree software licenses. Please see the Third Party Legal Notice Appendix to this Documentationor TPIP ReadMe File accompanying this product for more information on the Third PartyPrograms.
The product described in this document is distributed under licenses restricting its use, copying,distribution, and decompilation/reverse engineering. No part of this document may bereproduced in any form by anymeans without prior written authorization of Veritas TechnologiesLLC and its licensors, if any.
THE DOCUMENTATION IS PROVIDED "AS IS" AND ALL EXPRESS OR IMPLIEDCONDITIONS, REPRESENTATIONS AND WARRANTIES, INCLUDING ANY IMPLIEDWARRANTY OF MERCHANTABILITY, FITNESS FOR A PARTICULAR PURPOSE ORNON-INFRINGEMENT, ARE DISCLAIMED, EXCEPT TO THE EXTENT THAT SUCHDISCLAIMERS ARE HELD TO BE LEGALLY INVALID. VERITAS TECHNOLOGIES LLCSHALL NOT BE LIABLE FOR INCIDENTAL OR CONSEQUENTIAL DAMAGES INCONNECTION WITH THE FURNISHING, PERFORMANCE, OR USE OF THISDOCUMENTATION. THE INFORMATION CONTAINED IN THIS DOCUMENTATION ISSUBJECT TO CHANGE WITHOUT NOTICE.
The Licensed Software and Documentation are deemed to be commercial computer softwareas defined in FAR 12.212 and subject to restricted rights as defined in FAR Section 52.227-19"Commercial Computer Software - Restricted Rights" and DFARS 227.7202, et seq."Commercial Computer Software and Commercial Computer Software Documentation," asapplicable, and any successor regulations, whether delivered by Veritas as on premises orhosted services. Any use, modification, reproduction release, performance, display or disclosureof the Licensed Software and Documentation by the U.S. Government shall be solely inaccordance with the terms of this Agreement.

Veritas Technologies LLC500 E Middlefield RoadMountain View, CA 94043
http://www.veritas.com

Technical SupportTechnical Support maintains support centers globally. Technical Support’s primaryrole is to respond to specific queries about product features and functionality. TheTechnical Support group also creates content for our online Knowledge Base. TheTechnical Support group works collaboratively with the other functional areas withinthe company to answer your questions in a timely fashion.
Our support offerings include the following:
■ A range of support options that give you the flexibility to select the right amountof service for any size organization
■ Telephone and/or Web-based support that provides rapid response andup-to-the-minute information
■ Upgrade assurance that delivers software upgrades
■ Global support purchased on a regional business hours or 24 hours a day, 7days a week basis
■ Premium service offerings that include Account Management Services
For information about our support offerings, you can visit our website at the followingURL:
www.veritas.com/support
All support services will be delivered in accordance with your support agreementand the then-current enterprise technical support policy.
Contacting Technical SupportCustomers with a current support agreement may access Technical Supportinformation at the following URL:
www.veritas.com/support
Before contacting Technical Support, make sure you have satisfied the systemrequirements that are listed in your product documentation. Also, you should be atthe computer on which the problem occurred, in case it is necessary to replicatethe problem.
When you contact Technical Support, please have the following informationavailable:
■ Product release level
■ Hardware information
■ Available memory, disk space, and NIC information

■ Operating system
■ Version and patch level
■ Network topology
■ Router, gateway, and IP address information
■ Problem description:
■ Error messages and log files
■ Troubleshooting that was performed before contacting Technical Support
■ Recent software configuration changes and network changes
Licensing and registrationIf your product requires registration or a license key, access our technical supportWeb page at the following URL:
www.veritas.com/support
Customer serviceCustomer service information is available at the following URL:
www.veritas.com/support
Customer Service is available to assist with non-technical questions, such as thefollowing types of issues:
■ Questions regarding product licensing or serialization
■ Product registration updates, such as address or name changes
■ General product information (features, language availability, local dealers)
■ Latest information about product updates and upgrades
■ Information about upgrade assurance and support contracts
■ Advice about technical support options
■ Nontechnical presales questions
■ Issues that are related to CD-ROMs, DVDs, or manuals

Support agreement resourcesIf you want to contact us regarding an existing support agreement, please contactthe support agreement administration team for your region as follows:
[email protected] (except Japan)

Technical Support ............................................................................................ 4
Chapter 1 Understanding the Veritas Data Insightarchitecture .................................................................... 10
About Veritas Data Insight ............................................................. 10About the Management Server ........................................................ 13About the Collector worker node ...................................................... 13
About the Collector ................................................................. 14About the Scanner .................................................................. 14
About the Indexer worker node ........................................................ 15About the Self-Service Portal node ................................................... 15About Communication Service ........................................................ 16About the DataInsightWatchdog service ............................................ 16About the DataInsightWorkflow service ............................................ 17About Veritas Data Insight installation tiers ........................................ 17
About three-tier installation ....................................................... 17About two-tier installation ......................................................... 18About single-tier installation ...................................................... 18
Chapter 2 Preinstallation ..................................................................... 19
Preinstallation steps ...................................................................... 19Operating system requirements ....................................................... 20System requirements for Veritas Data Insight components .................... 21Supported file servers and platforms ................................................ 22Supported browsers ...................................................................... 24List of ports ................................................................................. 24Web server version ....................................................................... 26
Chapter 3 Installing Veritas Data Insight ........................................ 27About installing Veritas Data Insight ................................................. 27Performing a single-tier installation ................................................... 28Performing a two-tier installation ...................................................... 28Performing a three-tier installation .................................................... 29Installing the Management Server .................................................... 29
Contents
Installing the worker node .............................................................. 32Installing the Self-Service Portal ..................................................... 34Installing a Linux Indexer worker node .............................................. 35
Chapter 4 Upgrading Veritas Data Insight .................................... 40
Upgrading Data Insight to 5.1 .......................................................... 40Upgrading the product data using the Upgrade Data Wizard .................. 43Names and locations of cache files .................................................. 44Upgrading the Data Insight Web service for SharePoint ........................ 45
Chapter 5 Post-installation configuration ........................................ 46
Post-installation configuration ......................................................... 46Registering the worker node and the Portal node ................................ 46About post-installation security configuration for Management Server
........................................................................................... 48About SSL client/server certificates ............................................ 48Generating Management Console certificate ................................ 48
Configuring your corporate firewall ................................................... 54
Chapter 6 Installing Windows File Server agent .......................... 55About Windows File Server agent .................................................... 55Installing Windows File Server agent manually ................................... 56Configuring the Windows File Server using
ConfigureWindowsFileServer.exe .............................................. 57
Chapter 7 Getting started with Data Insight ................................... 60About the Data Insight Management Console ..................................... 60Logging in to the Data Insight Management Console ........................... 60Logging out of the Data Insight Management Console .......................... 61Displaying online help ................................................................... 61
Chapter 8 Uninstalling Veritas Data Insight ................................... 62Uninstalling Veritas Data Insight ..................................................... 62
Appendix A Installing Data Insight using response files ............... 64
About response files ..................................................................... 64Installing Data Insight using response files ......................................... 64Sample response files ................................................................... 65
8Contents

Index .................................................................................................................... 73
9Contents

Understanding the VeritasData Insight architecture
This chapter includes the following topics:
■ About Veritas Data Insight
■ About the Management Server
■ About the Collector worker node
■ About the Indexer worker node
■ About the Self-Service Portal node
■ About Communication Service
■ About the DataInsightWatchdog service
■ About the DataInsightWorkflow service
■ About Veritas Data Insight installation tiers
About Veritas Data InsightVeritas Data Insight is a solution for unstructured data governance. It monitors filesystem activity and helps answer questions such as who is using the data, whoowns the data and who has access to the data. Data Insight gives you full visibilityinto data access, which helps drive security remediation and compliance efforts.
Based on a distributed client-server architecture, a typical Data Insight deploymentconsists of the following:
■ Management ServerSee “About the Management Server” on page 13.
1Chapter

■ Collector worker nodesSee “About the Collector worker node” on page 13.
■ Indexer worker nodesSee “About the Indexer worker node” on page 15.
■ Self-Service Portal nodesSee “About the Self-Service Portal node” on page 15.
The way you deploy Veritas Data Insight depends on the size of your organization,the geographical distribution of your datacenters, and the number of storage devicesthat you want Data Insight to monitor.
See “About Veritas Data Insight installation tiers” on page 17.
Figure 1-1 illustrates the Data Insight architecture.
11Understanding the Veritas Data Insight architectureAbout Veritas Data Insight

Figure 1-1 Data Insight architecture
EMCFiler
NetAppFiler
SharePointFarm
WindowsFile Server
Collector
Collector
Collector
Collector
CEE
FPolicy
Web service
Indexer
Indexer
HTTPS
HTTPS
HTTPS
HTTPSHTTPS
HTTPS
HTTPS
HTTPS
Portalclients
Self-Service Portal
ManagementServer
DirectoryService
AD / LDAP / NIS / NIS+
Hitachi NAS
Unix Server(with VxFS)
Collector
Collector
RPC
HTTPS Indexer
HTTPS
HTTPS
HTTPS
HTTPS
12Understanding the Veritas Data Insight architectureAbout Veritas Data Insight

About the Management ServerThe Management Server is the main component of a Data Insight deployment andhosts the product's web interface. In the single tier deployment, you can alsoconfigure the Management Server to connect to multiple storage devices to extractaccess events and store the extracted data locally to answer queries. Yourdeployment can only have one Management Server. It also runs the actionframework that helps you to take remedial action on your data and enables you tosend archiving requests to Enterprise Vault.
The Data Insight Management Server performs the following functions:
■ Hosts the Web-based graphical user interface (GUI).
■ Scans directory services to obtain information about users in the organizationand correlates this information with the access events.
■ Ensures that the configuration data on the worker nodes is synchronized withthe Management Server's configuration data.
■ Authenticates the Data Insight users. It also runs the DataInsightWorkflow servicethat enables actions on your data.
Users interact with Data Insight primarily through the Data Insight managementconsole. In this interaction, the user connects to the Web server through a Webbrowser. By default, the Web server runs on HTTPS port 443.
About the Collector worker nodeThe Collector worker node is a host machine that scans file system and SharePointsite collection hierarchies in your environment and collects access events fromNetwork Attached Storage (NAS) devices. Data Insight uses this information toperform advanced reporting on the business owners of data and the access historyof data. By scanning for file metadata and security descriptors, it reports on theloopholes of permissions on files and folders. The details that are captured by theCollector node also help you find stale and orphan files in the scanned datarepositories.
You can have multiple Collector worker nodes attached to the Management Serverfor load balancing. You can configure each collector node to connect to a subsetof storage devices to extract file system metadata and extract access events fromthese devices. Each filer or Web application can have exactly one Collector nodeassociated with it.
Note: Veritas recommends that the Collector worker nodes share a fast networkwith the storage devices.
13Understanding the Veritas Data Insight architectureAbout the Management Server

A Collector worker node consists of the following components:
■ Collector
■ Scanner
About the CollectorThe Collector (Audit Pre-processor) is a Data Insight process that enables you tocollect and parse access events from various storage repositories. The Collectorexamines the access events available on these storage systems to parse the eventsthat report the read, write, create, delete, and rename activity on files or folders.The access events are processed in batches that consist of several thousand events.Each batch of events that are collected in a cycle is stored in a separate file withappropriate timestamp that indicates the ending time of the last entry in that batch.This data is pruned based on exclude rules or events that are not from the configuredshares or site collections, and is then segregated on a per-share basis. These filesare periodically shipped to the appropriate Indexer node.
Data Insight collects information about access events from various storagerepositories through exposed vendor APIs.
For detailed instructions on enabling audit service, see the Veritas Data InsightAdministrator's Guide.
About the ScannerThe Scanner is a Data Insight process that scans enterprise data repositories bymounting CIFS and NFS network shares or accessing SharePoint servers usingthe Data Insight Web Service. The Scanner captures the file or folder hierarchy ofa share or site collection and helps you collect in-depth information about files andfolders.
Note that the Scanner is a scheduled process. Schedule of the scan can becontrolled at the worker node level, filer/Web application level, or the share/sitecollection level. For detailed information on administration topics (including how toschedule scanning) see the Veritas Data Insight Administrator's Guide.
Depending on how the scans are scheduled, the Scanner stores the collected datain separate database files, with appropriate timestamp. For each subsequent scan,the Scanner only scans the files that are added or modified since the last full scan.These files are eventually uploaded to the Indexer node using the CommunicationService.
See “About the Indexer worker node” on page 15.
The Scanner captures information about the following attributes for each file ordirectory:
14Understanding the Veritas Data Insight architectureAbout the Collector worker node

■ The size of a file.
■ The access time.
■ The creation time.
■ The modification time.
■ The Security ID of the file owner (SID).
■ The Access Control Lists (ACLs)
The details the Scanner captures helps in the computation of metadata-based dataownership.
About the Indexer worker nodeThe access events and filesystem metadata that are collected from the storagerepositories are periodically uploaded to the Indexer node. You can choose to havemultiple indexers for load balancing purposes. Each storage repository can haveexactly one Indexer node associated with it. The indexer performs the followingfunctions:
■ Uses the data from the collector process and scanner to create index files.
■ Uses the index files to generate report output and service queries from theManagement Console.
About the Self-Service Portal nodeThe Self-Service portal provides an interface for custodians of data to take remedialactions on the data classified by Symantec Data Loss Prevention. It also letscustodians confirm ownership to folders that they own, and review entitlements tothose folders and classify sensitive files for retention based on their business value.Custodians take these actions based on workflows setup by the Data Insightadministrator guided by specific business requirements of the organization.
The Portal node is attached to the Management Server and runs theDataInsightWorkflow and DataInsightPortal services. The portal interface, which isseparate from the main Data Insight console, can be customized and branded asper customer's requirements.
The Self-Service Portal requires an Add-on license separate from Symantec DataLoss Prevention and Data Insight license. The Portal is available beginning DataInsight version 4.5. You can use the portal for remediating incidents pulled fromData Loss Prevention 12.5 or later.
15Understanding the Veritas Data Insight architectureAbout the Indexer worker node

For information about configuring and using the Self-Service Portal, see theSelf-Service Portal Quick Reference Guide.
About Communication ServiceEach node in a Data Insight deployment runs a process called CommunicationService. This service is responsible for all inter-node communication. CommunicationService uses Secure Sockets Layer (SSL) to secure communication between theData Insight nodes. The SSL keys are generated during installation.
By default, Communication Service connects through sever port 8383. This portmust be visible to bi-directional HTTPS traffic between all Data Insight nodes. Theservice is also responsible for scheduling various tasks on a Data Insight node,which include, scheduling file system scans and uploading files to the Indexer workernode.
About the DataInsightWatchdog serviceThe DataInsightWatchdog service monitors the disk usage on the Windows FileServer agent node and prevents it from running out of disk space by implementingsafeguards. When the disk usage crosses the configured threshold theDataInsightWatchdog service initiates the following safeguards:.
■ Ensures that the Communication service stops all activities that generate datathat can be reconstructed. For example, scanning.
■ Deletes all scan snapshot files, files in the scanner/err folder, and the volumeusage database files in the outbox folder. Deleting these files creates additionaldisk space so that event monitoring can continue.
■ If the threshold is crossed again, and there is no other data that can be deleted,the DataInsightWatchdog service stops the DataInsightWinnas service, whichin turn stops all event monitoring.
■ If the size of the <DATADIR>/data folder continues to grow, theDataInsightWatchdog service completely stops the Communication service.
The safeguard mode is reset once the disk space is available over the specifiedthreshold. The DataInsightWinnas service and the Communication service, ifstopped, is started, and scanning resumes normally.
When the Windows File Server agent is in the safeguard mode, its status appearsas Failed on the Data Insight servers listing page on the Management Console.
In addition to enforcing safeguards on the Windows File Server nodes, theDataInsightWatchdog service also runs on each Data Insight server. The service
16Understanding the Veritas Data Insight architectureAbout Communication Service

monitors the CPU, disk, and memory on each node. If CPU, disk, and memory areconsistently high for a server, the service sends out notifications to configured emailrecipients.
The node safeguard feature is enabled by default with specific default values. Youcan configure the thresholds for initiating the safeguard mode from the Settings >Global Settings > Scanning and Event Monitoring page of the ManagementConsole.
For more information about configuring the threshold values for initiating thesafeguard mode, see the Data Insight Administrator's Guide.
About the DataInsightWorkflow serviceDataInsightWorkflow service is responsible for execution of all actions initiated fromthe Management Console or the Portal server, such as remediation of Data LossPrevention (DLP) incidents, handling permission remediation, archiving data, andrunning custom action scripts to manage data. The service runs on the ManagementServer and the Portal nodes. By default, the DataInsightWorkflow service runs onport 8686.
The DataInsightWorkflow service is a multi-threaded execution framework whichexecutes actions in parallel.
About Veritas Data Insight installation tiersVeritas Data Insight supports three different installation types: three-tier, two-tier,and single tier. Your installation type depends on the total number of storage devicesthat you want Data Insight to scan and their geographical distribution. Single-tierinstallations are used for Proof of Concept (POC) deployments or smaller setups.
The type and scope of deployment should be determined with the help of Veritas.
About three-tier installationTo implement the three tier installation, you must install the Management server,the Collector worker node, and the Indexer worker node on separate computers.Depending on the size of your organization, you can choose to have multipleCollector and Indexer worker nodes. When your storage repositories spandatacenters that are geographically apart, you needmultiple Collector worker nodes.When you have a very large number of storage repositories, you need multipleIndexer worker nodes. However, it is recommended that the Management Serverand Indexer worker nodes must be co-located on the same network.
17Understanding the Veritas Data Insight architectureAbout the DataInsightWorkflow service

About two-tier installationTo implement the two-tier installation, you must install the Management Server andthe Collector worker nodes on separate computers. When your storage repositoriesspan datacenters that are geographically apart, you need multiple Collector workernodes. In this mode, the Management Server also functions as the Indexer.
About single-tier installationTo implement the single-tier installation, you must install only the ManagementServer. In this mode, the Management Server functions as the Collector as well asthe Indexer. Use single-tier installation only for POC deployments or smaller setups.
Note: You can start out with a single-tier deployment and gradually add workernodes to transition your system to a two-tier or a three-tier setup as the number ofsites and storage repositories increase.
18Understanding the Veritas Data Insight architectureAbout Veritas Data Insight installation tiers

PreinstallationThis chapter includes the following topics:
■ Preinstallation steps
■ Operating system requirements
■ System requirements for Veritas Data Insight components
■ Supported file servers and platforms
■ Supported browsers
■ List of ports
■ Web server version
Preinstallation stepsBefore you install the Veritas Data Insight servers, verify the following installationprerequisites:
■ Verify the server system requirements.See “System requirements for Veritas Data Insight components” on page 21.
■ Gather the required materials.
■ The Data Insight host has a minimum of 10 GB of available disk space.
■ The Management Server node can connect to the domain controller of eachdomain that needs to be scanned.
■ The Data Insight server that hosts the Collector worker node can connect to thefilers that it is supposed to monitor.
■ A bi-directional network connection on port 8383 exists between theManagementServer and the worker node(s), and between the worker node(s).
2Chapter

■ The firewall is configured to allow https/http access to the required ports. TheManagement Server should also be allowed access to http://sort.veritas.com,either directly or through a proxy, to get patch notifications.
■ The keystore file (commd.keystore) that enables secure communication betweenthe worker node and the Management Server is copied to the worker node fromthe Management Server.See “Registering the worker node and the Portal node” on page 46.
■ You have obtained the credentials required during software installation. Thesecredentials are required to log into the Data Insight Console after the installation.
Note:Additional credentials are required when you configure storage repositoriesand directory services, and for scanning of shares or site collections. For a listof these credentials, see the Veritas Data Insight Administrator's Guide.
■ Prepare for SMTP Alerting. When installing the Management Server, ensurethat you have the details of your SMTP server and authentication details, if any,available.
■ Prepare for Exclude Rules. Gather a list of paths to be excluded while scanning.For access events, gather a list of IP addresses, user accounts, or file extensionswhose access events should be ignored. For more details, see the Veritas DataInsight Administrator's Guide.
Operating system requirementsTable 2-1 provides an overview of Veritas Data Insight operating systemrequirements:
Table 2-1 Veritas Data Insight operating system requirements
NotesOperating system supported
Windows Server 2008 (64-bit ) Standard Editionand Enterprise Edition
Windows Server 2008 R2 (64-bit) Standard Editionand Enterprise Edition
Windows Server 2008
Windows Server 2012 (64-bit )
Windows Server 2012 R2 (64-bit )
Windows Server 2012
20PreinstallationOperating system requirements

Table 2-1 Veritas Data Insight operating system requirements (continued)
NotesOperating system supported
Version 6.0 update 3 or later
Version 7
Only 64 bit packages are supported.
Red Hat Enterprise Linux
64 bit on Windows 2008
64 bit on Windows 2012
Red Hat Enterprise Linux version 6 update 3 orlater
Red Hat Enterprise Linux version 7
Note: You must ensure that VMware Tools isinstalled on VMware virtual machines.
VMware
Note: 32-bit on Windows 2008 is supported only for backward compatibility withWindows File Server nodes installed with Data Insight versions 4.0 and 4.5.
System requirements for Veritas Data Insightcomponents
Table 2-2 lists the minimum system requirements for Veritas Data Insightcomponents.
Table 2-2 Minimum system requirements for Veritas Data Insightcomponents
System requirementsComponent
■ Windows Server 2008 or 2008 R2, 2012 or 2012 R2.The operating system must be 64 bit.
■ 8GB RAM■ 4 CPUs
Management Server
■ Windows Server 2008 or 2008 R2, 2012 or 2012 R2.The operating system must be 64 bit.Red Hat Enterprise Linux version 6.0 update 3 or higher,or version 7.0; 64 bit only.
■ 8GB RAM■ 4 CPUs
Indexer worker node
21PreinstallationSystem requirements for Veritas Data Insight components

Table 2-2 Minimum system requirements for Veritas Data Insightcomponents (continued)
System requirementsComponent
■ Windows Server 2008, or 2008 R2; 64 bitWindows Server 2012 or 2012 R2. The operating systemmust be 64 bit.
■ 4GB RAM■ 2 CPUs
Collector worker node
■ Windows Server 2008, 2008 R2, 2012, 2012 R2.The operating system must be 64 bit.
■ 8GB RAM■ 4 CPUs
Self-Service Portal node
■ Windows Server 2008 or 2008 R2. The operating system;64 bit Windows Server 2012 or 2012 R2.The operating system must be 64 bit.
■ 4GB RAM■ 2 CPUs
Note: 32-bit on Windows 2008 is supported only forbackward compatibility with Windows File Server nodesinstalled with Data Insight versions 4.0 and 4.5.
Windows File Server agentnode
Microsoft SharePoint 2007, SharePoint 2010, or SharePoint2013
SharePoint web service
Note: The type and scope of deployment should be determined with the help ofVeritas.
Supported file servers and platformsTable 2-3 lists the Network Attached Storage (NAS) devices and SharePointplatforms that Data Insight supports.
Table 2-3 Supported file servers and platforms
VersionDevice
Hitachi NAS 12.x.Hitachi NAS
Version 7.3.5 or higherNetApp ONTAP 7-Mode
22PreinstallationSupported file servers and platforms

Table 2-3 Supported file servers and platforms (continued)
VersionDevice
CIFS - ONTAP 8.2.x or higher
NFS - ONTAP 8.2.3 or higher and ONTAP 8.3.1 or higher
NetApp ONTAP Cluster-Mode
EMC Celerra version 5.6.45 or higher,EMC
EMC Isilon OneFS version 7.1.0.6 or higher
VNX version 7.1.71.1 or higher
Windows Server 2008, or 2008 R2, 32 bit and 64 bit
Windows Server 2012, or 2012 R2 64 bit
Note: 32-bit on Windows 2008 is supported only forbackward compatibility with Windows File Server nodesinstalled with Data Insight versions 4.0 and 4.5.
Windows File Server
6.0.1 or higher, configured in standalone or clusteredmodeusing Cluster Server (VCS)
Note: For VCS support, Clustered File System (CFS) isnot supported.
Veritas File System (VxFS)server
Microsoft SharePoint Server 2007
Microsoft SharePoint Server 2010
Microsoft SharePoint Server 2013
Microsoft SharePoint
-Box (Cloud-based contentmanangement platform)
Versions 12.0.1, 12.5, and 14.0Symantec Data Loss Prevention(DLP)
Versions 10.0.4, 11.0, 11.0.1, 12.0Enterprise Vault
Note the following:
■ Veritas strongly recommends that you upgrade your NetApp filer to the latestavailable firmware. Veritas recommends ONTAP 7.3.5 or higher.
■ For all supported versions of 7-mode NetApp filers, Data Insight supports CIFSprotocol over NTFS and NFS protocol v3. NFS v4 is not supported.For supported versions of Cluster-Mode NetApp filers, Data Insight supportsthe following volume/qtree styles:
■ NTFS and Mixed for CIFS protocol.
23PreinstallationSupported file servers and platforms

■ UNIX and Mixed for NFS protocol on 7-mode Netapp filers only.
■ NFS exports on the NetApp cluster.
■ For all supported versions of EMC Celerra/VNX and EMC Isilon, Data Insightsupports only CIFS protocol over NTFS. Data Insight supports Common EventEnabler (CEE), version 6.3.1 or higher. Data Insight still supports the olderversion of CEE and VEE, but Veritas recommends that you move to the latestEMC Common Event Enabler, which you can download from the EMC website
■ To use the Self-Service Portal to remediate DLP incidents, ensure that SymantecData Loss Prevention (DLP) version 12.5 or higher is installed. Data Insightuses the DLP Smart Response Rules to remediate incidents, which areintroduced in DLP version 12.5.
Supported browsersTable 2-4 provides an overview of the browser support for Veritas Data Insight
Table 2-4 Veritas Data Insight Supported browsers
VersionsBrowser
■ Version 10 and version 11.Internet Explorer
■ Version 39.0 or higherMozilla Firefox
■ Version 43.0.2357.124 or higherGoogle Chrome
Note: Veritas recommends that you install the latest available version of a browser.
List of portsThis section lists the default ports used by various Data Insight services, and devicesthat Data Insight communicates with.
See “Configuring your corporate firewall” on page 54.
24PreinstallationSupported browsers

Table 2-5 List of default ports
Default PortComponent
Management Console, HTTPS port 443
Communication service, HTTPS port 8383
DataInsightConfig service, port 8282
Workflow Service HTTPS, port 8686
Standard RPC ports 139 and 445
Management Server
Communication service, HTTPS port 8383
Standard RPC ports 139 and 445
DataInsightConfig service, port 8282
NetApp Cluster-Mode service, TCP port 8787(configurable)
Generic Collector service, HTTPS port 8585(configurable)
Collector worker node\ Indexer plus Collectorworker node
Communication service, HTTPS port 8383
DataInsightConfig service, port 8282
Indexer worker node
For Net App filers - HTTP port 80 (optional),standard RPC ports 139 and 445, and 2049(TCP,UDP) and 111 (TCP,UDP) for NFS
For NetApp Cluster-Mode, HTTP port 80
On EMC Control Station - HTTP port 80 andHTTPS port 443
On Windows File Servers managed withoutan agent - Standard RPC ports 139 and 445
For Veritas File System servers - HTTPS port5634, and 2049 (TCP,UDP) and 111(TCP,UDP) for NFS
File Server
Communication Service, HTTPS port 8383
DataInsightConfig service, port 8282
Standard RPC ports 139 and 445
Windows File Server agent node
25PreinstallationList of ports

Table 2-5 List of default ports (continued)
Default PortComponent
SharePoint Web Service is accessed overthe same port as the configured WebApplications. This port on the SharePointWebServers should be accessible from theCollector node.
SharePoint Web Service
Port 389 or 636 (for TLS)LDAP Directory Server
Ports 111 (TCP,UDP), 714 (TCP), 711 (UDP)NIS Server
Ports 111 (TCP,UDP), 714 (TCP), 711 (UDP)NIS+ Server in NIS compatibility mode
HTTPS port 443Symantec Data Loss Prevention (DLP)
HTTP port 80 or as configured by EnterpriseVault Server web service.
Enterprise Vault Server
Portal Service, HTTPS port 443
Workflow Service, HTTPS port 8686
DataInsightConfig, service port 8282
Communication service, HTTPS port 8383
Self-Service Portal server
Note: The default ports for Data Insight components are configurable at the timeof installation.
Web server versionVeritas Data Insight uses Apache Tomcat 7.0.62.
26PreinstallationWeb server version

Installing Veritas DataInsight
This chapter includes the following topics:
■ About installing Veritas Data Insight
■ Performing a single-tier installation
■ Performing a two-tier installation
■ Performing a three-tier installation
■ Installing the Management Server
■ Installing the worker node
■ Installing the Self-Service Portal
■ Installing a Linux Indexer worker node
About installing Veritas Data InsightYou can perform a three-tier, two-tier, or single-tier installation of Veritas DataInsight.
Note the following:
■ At the end of the installation process, Data Insight creates a fileinstall_summary.html in the DataInsight\log\install folder. This filerecords all the selections that are made on the installation wizard for a particularnode.
■ Data Insight records the upgrade history for the node in theinstall_history.log file in the DataInsight\log\install folder.
3Chapter

Both the files provide information that enable you to troubleshoot errors that mayoccur during the installation process.
Performing a single-tier installationThe computer on which you install Veritas Data Insight must contain only thesoftware that is required to run the product. Veritas does not support installingVeritas Data Insight on a computer with non-essential applications.
To perform a single-tier installation
1 Perform the preinstallation steps.
See “Preinstallation steps” on page 19.
2 Install the Management Server.
See “Installing the Management Server” on page 29.
Optionally install one or more Portal nodes.
See “Installing the Self-Service Portal ” on page 34.
3 Perform other post-installation configuration.
See “Post-installation configuration” on page 46.
Performing a two-tier installationTo perform a two-tier installation
1 Perform the preinstallation steps.
See “Preinstallation steps” on page 19.
2 Install the Management Server.
See “Installing the Management Server” on page 29.
Optionally install one or more Portal nodes.
See “Installing the Self-Service Portal ” on page 34.
3 Install one or more Collector worker nodes.
See “Installing the worker node ” on page 32.
4 Register the worker nodes with the Management Server.
See “Registering the worker node and the Portal node” on page 46.
5 Perform other post-installation configuration.
See “Post-installation configuration” on page 46.
28Installing Veritas Data InsightPerforming a single-tier installation

Note: Choose the two-tier installation mode when your filers are distributed acrossgeographically remote locations that are far away from the Management Server.Install at least one Collector for each remote location. For example, the main datacenter of your organization is in New York, with additional filers in Singapore andAustralia. In this case, the Management Server must be located in New York andthere must be at least one Collector each in Singapore and Australia.
Performing a three-tier installationTo perform a three-tier installation
1 Perform the preinstallation steps.
See “Preinstallation steps” on page 19.
2 Install the Management Server.
See “Installing the Management Server” on page 29.
Optionally install one or more Portal nodes.
See “Installing the Self-Service Portal ” on page 34.
3 Install one or more Collector worker nodes.
See “Installing the worker node ” on page 32.
4 Install one or more Indexer worker nodes.
See “Installing the worker node ” on page 32.
See “Installing a Linux Indexer worker node” on page 35.
5 Register the worker nodes with the Management Server.
See “Registering the worker node and the Portal node” on page 46.
6 Perform other post-installation configuration.
See “Post-installation configuration” on page 46.
Installing the Management ServerVeritas recommends that you disable any antivirus, pop-up blocker, and registryprotection software before you begin the Veritas Data Insight installation process.
Throughout the installation process, the setup wizard displays installation informationand options. Use the following options to navigate through the installation process:
29Installing Veritas Data InsightPerforming a three-tier installation

To install the Management Server
1 Log on (or remote logon) as Administrator to the computer that is intended forthe Management Server.
2 To launch the installer, double-clickVeritas_DataInsight_windows_5_1_0_N_x64.exe,
where,
■ N is the build number.If UAC is enabled, right-click on the installer and choose the Run asadministrator option for elevated administrative rights during the installation.
3 On theWelcome to the Veritas Data Insight Setup Wizard window, clickNext.
Veritas recommends that you let the installation process complete once youstart it. You can uninstall the software after the installation is complete.
4 In the License Agreement window, select I accept the agreement, and clickNext.
5 In the Select Destination Directory window, browse to the directory in whichyou want Data Insight to be installed. By default, the destination directory isC:\Program Files\DataInsight.
6 In the Configure Type of Install window, select Management Server.
Select a location with enough free space and high-performance disks. It isrecommended that you choose a location other than the system volume forthe data directory.
Click Next.
7 In the Configure Data Directory window, select the location where you wantto store the product data.
Click Next.
8 In the Management Server Properties window, enter the following details:
The Fully Qualified host name (FQHN) of the current host.
The remote worker nodes use this address tocommunicate with the Management Server
Management ServerAddress
The secure (HTTPS) Web server port on which you canaccess the Web interface of the Management Server.
Web Server port
The installer validates whether the appropriate ports are free to acceptconnections.
30Installing Veritas Data InsightInstalling the Management Server

9 Select the Add Domain <Name of domain> to the list of domains scannedby Data Insight checkbox, if you want the Management Server to automaticallystart scanning the Active Directory domain which the Management Server isa part of. If the Management Server is not part of any Active Directory domain,this option is disabled.
For information on customizing the Active Directory domains to be scanned,see the Veritas Data Insight Administrator's Guide.
Click Next.
10 In the Configure Networking window, enter the following information, andclick Next:
See “About Communication Service” on page 16.Communication ServicePort
Configuration service is a process that provides interfaceto configuration and other product data stored on the localsystem. This service port does not need to be accessibleoutside the host machine.
Configuration Service Port
11 In the Configure Product Administrator window, enter the followinginformation , and click Next:
■ Name of the user who can log in to Veritas Data Insight with ProductAdministrator privileges
■ Name of the domain to which the user belongs
Note: The product administrator must be a local user or must belong to thesame domain as the Management Server.
12 Review the options that you have selected in the installation wizard inInstallation Summary window.
13 To start the installation process, click Begin Install.
14 The Installing window appears and displays a progress bar.
31Installing Veritas Data InsightInstalling the Management Server

15 The Completing the Veritas Data Insight setup wizard window provides you anoption to start Data Insight Services.
Before you start services, Veritas recommends that you check for availablepatches at https://sort.veritas.com. If there is a patch available, install the patchfirst and then start the services.
The next screen provides you an option to launch the Management Server onexit. Select this option to launch the Console and complete setting up theManagement Server.
16 To exit setup, click Finish.
Note: Once you install the Management Server, log on to the Management Serverto configure the SMTP settings and other product users, as necessary.
Installing the worker nodeThroughout the installation process, the setup wizard displays installation informationand options. Use the following options to navigate through the installation process:
Installing the worker node
1 Log on (or remote logon) as Administrator to the computer that is intended forthe worker node.
2 Double-click Veritas_DataInsight_windows_5_1_0_N_x64.exe to launch theinstaller.
Where, N is the build number.
If UAC is enabled, right-click on the installer and choose the Run asadministrator option for elevated administrative rights during the installation.
3 The Welcome to the Veritas Data Insight Setup Wizard window appears.Click Next.
4 In the License Agreement window, select I accept the agreement, and clickNext.
5 In the Select Destination Directory window, browse to the directory in whichyou want Data Insight to be installed. By default, the destination directory isC:\Program Files\DataInsight.
Note: You cannot install the worker node on the same machine as theManagement Server.
32Installing Veritas Data InsightInstalling the worker node

6 Depending on your deployment scenario, in the Configure Type of Installwindow, select Indexer and Collector or Collector as the installation option.
7 Click Next.
8 In the Configure Data Directory window, browse to the location where youwant to store the product data.
Select a location with enough free space and high-performance disks. It isrecommended that you choose a location other than the system volume forthe data directory.
9 In theWorker Node Address window, enter the Fully Qualified Host Name(FQHN) of the server. This name must be resolvable from the ManagementServer and the other worker nodes.
10 In the Configure Networking window, enter the following information:
See “About Communication Service” on page 16.Communication Service Port
Configuration service is a process that providesinterface to configuration and other product data storedon the local system. This service port does not need tobe accessible outside the host machine.
Configuration Service Port
Note: The installer validates whether the appropriate ports are free to acceptconnections.
11 Review the options that you have selected in the installation wizard inInstallation Summary window.
12 To start the installation process, click Begin Install.
13 To register the worker node with the Management Server after you exit setup,select the Launch Worker Node Registration Wizard after exit checkbox.
See “Registering the worker node and the Portal node” on page 46.
14 To exit setup, click Finish.
33Installing Veritas Data InsightInstalling the worker node

Installing the Self-Service PortalInstalling the Self-Service Portal
1 Log on (or remote logon) as Administrator to the computer that is intended asthe Portal.
2 Double-click Veritas_DataInsight_windows_5_1_0_N_x64.exe to launch theinstaller.
where, N is the build number.
If UAC is enabled, right-click on the installer and choose the Run asadministrator option for elevated administrative rights during the installation.
3 TheWelcome to the Veritas Data Insight Setup Wizard window appears.Click Next.
4 In the License Agreement window, select I accept the agreement, and clickNext.
5 In the Select Destination Directory window, browse to the directory in whichyou want Data Insight to be installed. By default, the destination directory isC:\Program Files\DataInsight.
Note: You cannot install the portal node on the same computer as theManagement Server.
6 Depending on your deployment scenario, in the Configure Type of Installwindow, select Self-Service Portal as the installation option.
7 Click Next.
8 In the Configure Data Directory window, browse to the location where youwant to store the product data.
Select a location with enough free space and high-performance disks. It isrecommended that you choose a location other than the system volume forthe data directory.
9 In theWorker Node Address window, enter the Fully Qualified Host Name(FQHN) of the host. This host name must be resolvable from the ManagementServer and the other worker nodes.
34Installing Veritas Data InsightInstalling the Self-Service Portal

10 In the Configure Networking window, enter the following information:
See “About Communication Service” on page 16.Communication Service Port
Configuration service is a process that providesinterface to configuration and other product data thatis stored on the local system. This service port doesnot need to be accessible outside the host machine.
Configuration Service Port
11 In the Configure Self-Service Portal window, enter the port numbers for theSelf-Service Portal service and the Workflow service. By default the portnumbers are 443 for the Portal service and 8686 for the Workflow service.
Note: The installer validates whether the appropriate ports are free to acceptconnections.
12 Review the options that you have selected in the installation wizard inInstallation Summary window.
13 To start the installation process, click Begin Install.
14 To register the worker node with the Management Server after you exit setup,select the Launch Worker Node Registration Wizard after exit check box.
See “Registering the worker node and the Portal node” on page 46.
15 To exit setup, click Finish.
Emails for remediation tasks are sent to data owners from the Portal Server. Ensurethat you can connect to the configured SMTP server from the Portal server. Similarly,for incident remediation, the Portal node communicates with the DLP server. Ensurethat the portal node can connect to the DLP server.
Installing a Linux Indexer worker nodeYou can choose to install the Indexer on a server installed with Red Hat EnterpriseLinux 6.0 and above. The Linux indexer works exactly the sameway as theWindowsindexer.
Before you install the Indexer on the Linux server, ensure the following:
■ The compat-expat1 RPM resource package is installed on the server.
■ The firewall is configured to allow access to port 8383 between the ManagementServer, Indexer, and Collector.
35Installing Veritas Data InsightInstalling a Linux Indexer worker node
Installing the worker node
1 SSH to the Linux server where you want to install the worker node . You caninstall the package either as root or as non-root user. Ensure that you arelogged in as that user.
2 Run the following command to launch the installer package:
sh Veritas_DataInsight_linux_5_1_0_N_<RHELVER>_x64.sh, where N isthe build number, and RHELVER is RHEL6 or RHEL7 depending on the versionof your operating system.
3 The Welcome to the Veritas Data Insight Setup Wizard window appears.Click Next.
4 In the License Agreement window, select I accept the agreement, and clickNext.
5 In the Select Destination Directory window, browse to the directory in whichyou want the Indexer to be installed. By default, the destination directory is/opt/DataInsight.
When installing as non-root, ensure that the user has write privileges to theinstall location.
6 Click Next.
7 In the Configure Data Directory window, browse to the location where you wantto store the product data.
Select a location with enough free space and high-performance disks.
8 In the Worker Node address window, enter the Fully Qualified Host Name(FQHN) or IP address of the host. Ensure that the Management Server andthe other worker nodes are able to resolve this hostname.
9 In the Configure Networking window, enter the following information:
See “About Communication Service” on page 16.Communication Service Port
Configuration service is a process that providesinterface to configuration and other product data storedon the local system. This service port does not need tobe accessible outside the host machine.
Configuration Service Port
Note: The installer validates whether the appropriate ports are free to acceptconnections.
36Installing Veritas Data InsightInstalling a Linux Indexer worker node

10 To register the worker node with the Management Server after you exit setup,select the Launch Worker Node Registration Wizard after exit checkbox.
See “Registering the worker node and the Portal node” on page 46.
11 To exit setup, click Finish.
37Installing Veritas Data InsightInstalling a Linux Indexer worker node

12 Optionally, to use an alternate location for the log files, edit the following filesthat are located in the /opt/DataInsight/conf directory, to replace/opt/DataInsight/log with the new log location:
cli_logging.properties
dscli_logging.properties
commd_logging.properties
watchdog_logging.properties
webserver_logging.properties
Export the new log directory using the following command:
export MATRIX_LOG_DIR=/DataInsight/log
Add the export entry to .bash_profile file of the user to reflect the changewhen you restart the system.
Execute the following command to update the profile path:
source .bash_profile
Note: If you are installing Data Insight as non-root, but have, at an earlier time,installed and run the services as root, you must first delete the following files:
rm /tmp/i4jdaemon__DIdata_DataInsight_bin_DataInsightComm
rm /tmp/i4jdaemon__DIdata_DataInsight_bin_DataInsightWatchdog
rm /var/run/queryd.pid
38Installing Veritas Data InsightInstalling a Linux Indexer worker node

13 When installing as a non-root user, after you have registered this node withthe Management Server, add following entries to /etc/rc.local toautomatically start the services after you restart the system:
su – <name of non-root user>
# export MATRIX_LOG_DIR=/DataInsight/log (Optional)
/opt/DataInsight/bin/DataInsightConfig start
/opt/DataInsight/bin/DataInsightComm start
/opt/DataInsight/bin/DataInsightWatchdog start
logout
To stop services during shutdown, add the following entries to/etc/rc.local.shutdown:
/opt/DataInsight/bin/DataInsightWatchdog stop
/opt/DataInsight/bin/DataInsightComm stop
/opt/DataInsight/bin/DataInsightConfig stop
Note: The DataInsightConfig service does not start after registration if thequeryd.lock is present in the /tmp folder. The lock file is present if the installationis done using root, or when the machine is restarted. You must delete thequeryd.lock file before you restart the DataInsightConfig service.
39Installing Veritas Data InsightInstalling a Linux Indexer worker node

Upgrading Veritas DataInsight
This chapter includes the following topics:
■ Upgrading Data Insight to 5.1
■ Upgrading the product data using the Upgrade Data Wizard
■ Names and locations of cache files
■ Upgrading the Data Insight Web service for SharePoint
Upgrading Data Insight to 5.1You can upgrade an existing Data Insight Server with Veritas Data Insight versions4.5.x and 5.0 to 5.1. Data Insight does not support upgrading a version before 4.5directly to 5.1. If the server is installed with a version before 4.5, you must upgradeto version 4.5 or 5.0 before you can upgrade to 5.1.
All Data Insight worker nodes must be at the same level of major version as theManagement Server. Windows file server agents can be one level lower than theManagement Server version. Thus, Management Server 5.1 is compatible with the4.5 and 5.0 version of Windows File Server agents. This gives you enough time toplan the upgrade of your Windows File Server agents.
Before you begin the upgrade Data Insight to 5.1, note the following:
■ As a best-practice measure, Veritas recommends that you take a backup of theserver's data folder.
■ In case of a multi-node setup, the upgrade setup must be run first on theManagement Server, then on the Indexer nodes, followed by the Collector nodes.
4Chapter

You can upgrade the Windows File Server agent only after upgrading theCollector nodes.
■ If you have archived older index segments, ensure that you restore the archivedsegments before upgrading the server.
■ If you are upgrading the server using a Remote Desktop Connection (RDC),ensure that you do not set automatic log-off for the session.
■ During the upgrade the install directory is moved from C:\Program
Files\Symantec to C:\Program Files\DataInsight, and the entire contentof the old install directory is copied to the new location. After the upgrade iscomplete, the old install directory is deleted.If you have used the default installation directory for 4.5 and 5.0, ensure thatC:\Program Files\DataInsight has enough free space.
Ensure that you complete the following tasks after the upgrade:
■ Configure the primary attributes that are used to classify users for the purposeof generating advanced analytics data.
■ Configure the time period for computing advanced analytics.
■ Refresh the Data Insight Dashboard data.
■ Verify that the .Net Framework version 4.5 is installed on the following:
■ Collector nodes monitoring the Windows SharePoint servers and the EMCIsilon filers.
■ The Management Server serving an Enterprise Vault server.
For information about configuring settings for advanced analytics, see the VeritasData Insight Administrator's Guide.
To upgrade Data Insight to 5.1:
1 Log in as Administrator to the server that you want to upgrade.
2 Double-click Veritas_Data_Insight_windows_5_1_0_N_x64.exe to launch theinstaller.
3 When the setup prompts you to upgrade from current version to 5.1, click Yes.
4 In theWelcome to the Veritas Data Insight SetupWizardwindow, clickNext.
5 In the License Agreement window, select I accept the agreement, and clickNext.
6 You must upgrade the product data before you start Data Insight services. IntheCompleting the Veritas Data Insight 5.1 UpgradeWizard window, selectthe Launch the Upgrade Data Wizard check box.
7 Click Finish to exit the setup.
41Upgrading Veritas Data InsightUpgrading Data Insight to 5.1

To upgrade a Linux Indexer
1 In case of a Linux indexer, log in as the appropriate user (root or non-root)configured to run the product.
Note that if you had earlier installed the Linux Indexer as root and later switchedto using a non-root user, you must perform the following steps before you startthe Linux installer for upgrade. If you do not perform these steps, the installeryou launch with non-root credentials cannot detect the previous version of DataInsight on the server.
■ Log in to the machine as root user.
■ Copy the following file to a temporary location:~/.java/.userPrefs/com/install4j/installations/prefs.xml.
■ Log out and log back in as the non-root user.
■ Create the following directory:~/.java/.userPrefs/com/install4j/installations/
■ Change to the directory you have created.
■ Take a backup of prefs.xml.
■ Overwrite prefs.xml in this folder with the prefs.xml that was copied tothe temporary location.
2 To launch the Veritas Data Insight 5.1 installer, double-clickVeritas_DataInsight_linux_5_1_0_N_RHEL6_x64.exe, orVeritas_DataInsight_linux_5_1_0_N_RHEL7_x64.exe where,
N is the build number.
3 When the setup prompts you to upgrade from current version to 5.1, click Yes.
Note: On Linux, if the installer does not prompt you for upgrade because itdoes not detect the earlier version of Data Insight on the machine, ensure thatyou first follow the instructions in 1.
See “Upgrading the product data using the Upgrade Data Wizard” on page 43.
Note: You can also upgrade the Windows File Server agent and Collector nodesusing the Management Console. For more details, see the Veritas Data InsightAdministration Guide.
42Upgrading Veritas Data InsightUpgrading Data Insight to 5.1
Upgrading the product data using the UpgradeData Wizard
Before you upgrade data, Veritas recommends that you check for product updateson https://sort.veritas.com. If updates are available, you must apply the productupdate, and then proceed to upgrade the data.
To upgrade the product data using the Upgrade Data Wizard
1 Launch the Upgrade Data wizard.
2 On the Upgrade Product Data window, select the Make temporary backupof data before upgrading check box.
Veritas recommends that you take a backup of the product data before startingthe data upgrade. Taking a backup ensures that the original data can berestored from backup if the upgrade fails. Data Insight deletes the backup afterthe upgrade completes successfully.
3 Create the backup of the product data. To select a backup location, browse tothe location where you want the backup data to be stored.
Before you begin the upgrade, ensure that there is enough free space availablein the target location to take a backup. Data Insight requires that your systemmust have free space to accommodate your data directory and an additional5% of data size for the upgrade to succeed. If enough free space is notavailable, the upgrade wizard fails. If the upgrade fails, relaunch the upgradewizard by executing the command INSTALL_DIR\bin\UpgradeData.exe
(Windows) or /opt/DataInsight/bin/UpgradeData (Linux).
4 Select the following check boxes:
■ Automatically restore original data from backup if upgrade fails
■ Delete backup on successful upgrade
5 If an index is taking a long time to upgrade, or if the upgrade of an index failsfor some unknown reason, you can enter the number of such indexes in theSkip indexes field. Specify a comma-separated list of the indexes you wantto skip. The wizard skips the specified indexes and continues with the dataupgrade process.
6 Specify the number of index upgrade failures after which the installer must exitthe data upgrade process.
43Upgrading Veritas Data InsightUpgrading the product data using the Upgrade Data Wizard

7 You can upgrade up to 10 indexes in parallel. Select a number from theNumberof indexes to upgrade in parallel drop-down.
Just before an index is upgraded, a copy of that index is saved in the samefolder where the index resides. This requires additional disk space during theupgrade. Total additional disk space depends on the number of indexes beingupgraded in parallel. If you are short on disk space on data volume, you canselect the option to Skip index back up before upgrade. Selecting this optioncan also make the upgrade process faster. You should select this option onlyif you have a backup of your data directory so that indexes that fail to upgradecan be restored at a later time.
8 Click Upgrade Now to start the data upgrade process.
9 TheData Upgrade window appears and displays a progress bar while upgradingthe product data. The time taken in the upgrade process depends upon thesize of the data.
10 On successful completion of the data upgrade, click OK.
11 On theStart Data Insight Serviceswindow, selectStart Data Insight Servicesnow. Click Next.
12 Click Finish to exit the wizard.
Names and locations of cache filesData Insight generates cache files on the Indexer node at the time of installation orupgrade.
Data Insight creates the following persistent activity index files in each index folderfor a share:
■ activityidx.info
■ dir-activity.idx.<timestamp>
■ file-activity.idx.<timestamp>
The persistent cache files contain pre-calculated summary information about usersand their activity on the files and folders during the time period configured foradvanced analytics. The indexer process uses the information in these files toexpedite the process of servicing queries related to activity, reports, and SocialNetwork Graph.
Each index folder for a share may also contain the following temporary files:
44Upgrading Veritas Data InsightNames and locations of cache files

Table 4-1
DescriptionName
Uncompressed versions of thefile-activity.idx.<timestamp> anddir-activity.idx.<timestamp> files.
Since the activity index files are stored in acompressed form on disk, Data Insightcreates the uncompressed files when anyprocess attempts to read the activity index.The files remain on disk while the process isreading the files, and are deleted when theprocess finishes reading the activity index.
file-activity.idx.<timestamp>.<version>
dir-activity.idx.mmap.<timestamp>.<version>
Temporary file created when Data Insight rollsup the activity count for folders. The fileremains on the disk while the process isreading the files, and are deleted when theprocess finishes reading the activity index.
rolldir-activity.idx.<timestamp>.<version>
Temporary files created when Data Insightcalculates owners for files and folders. Thefiles remain on disk while the query or reportprocesses the share. Data Insight deletesthese files once the share is processed.
file-activity.idx.tmp.<timestamp>.<version>
file-activity.idx.attr.<timestamp>.<version>
dir-activity.idx.attr.<timestamp>.<version>
If the process that creates these temporary files stops unexpectedly, Data Insightdeletes these files during the next run of the IndexWriterJob or the ActivityIndexJobprocesses on the shares.
Upgrading the Data Insight Web service forSharePoint
Data Insight does not support an automatic upgrade of the Data Insight Web serviceon the SharePoint server. To upgrade to the latest version, uninstall the previousversion from the SharePoint server and install the latest version.
For detailed information on installing the Data Insight SharePoint Web service, seethe Veritas Data Insight Administrator's Guide.
45Upgrading Veritas Data InsightUpgrading the Data Insight Web service for SharePoint

Post-installationconfiguration
This chapter includes the following topics:
■ Post-installation configuration
■ Registering the worker node and the Portal node
■ About post-installation security configuration for Management Server
■ Configuring your corporate firewall
Post-installation configurationYou must complete the following configuration after you finish installing VeritasData Insight:
■ Register the worker node with the Management Server.See “Registering the worker node and the Portal node” on page 46.
■ Configure post-installation security settings.See “About post-installation security configuration for Management Server”on page 48.
■ Configure your corporate firewall.See “Configuring your corporate firewall” on page 54.
Registering the worker node and the Portal nodeYoumust register the worker node and the portal node with the Management Serverto enable communication between them.
5Chapter

You do not need to perform these steps if you have upgraded a worker node.
To register the worker and portal nodes with the Management Server
1 Do one of the following:
■ To launch the Worker Node Registration Wizard immediately aftercompleting theWorker Node installation wizard, select the LaunchWorkerNode Registration Wizard after exit checkbox.
■ To register the worker node at a later time, executeRegisterWorkerNode.exe located in the Data Insight installation bindirectory.
2 In the Register Worker Node with Management Server window, enter thefollowing information:
■ Fully Qualified Host Name (FQHN) of the Management Server host
■ Location of the Communication Service keystore fileThe keystore file, commd.keystore, enables secure communication betweenworker nodes and the Management Server. It is present in the keys
subfolder of the Management Server's data directory. You must manuallycopy the keystore file from the Management Server machine to a temporarylocation on the worker node. By default the data directory is located on theManagement Server at C:\DataInsight\data. It might be different for yoursetup. You can locate the data directory by reading the file C:\Program
Files\DataInsight\datadir.conf on the Management Server or byrunning the configdb -d command.
3 Click Register Now.
4 After the successful registration of the worker node, delete the commd.keystorefile from the temporary location.
5 On the Start Data Insight Services window, select Start Data Insight Servicesnow.
6 On the Completing the node registration screen, click Finish.
You must log in to the Data Insight Management Server to complete furtherconfiguration of the worker node.
47Post-installation configurationRegistering the worker node and the Portal node

About post-installation security configuration forManagement Server
Veritas Data Insight secures communications between all Data Insight servers. Thistask is accomplished by encrypting the transmitted data and requiring servers toauthenticate with each other.
The following sections describe the Veritas Data Insight security configuration andhow to change the default security configuration.
About SSL client/server certificatesVeritas Data Insight secures all data flowing between the Management Server andthe Worker nodes using the Secure Socket Layer/Transport Layer Security(SSL/TLS) protocol. The SSL/TLS protocol not only encrypts the data that istransmitted, Veritas Data Insight also uses it for mutual authentication betweenservers.
Data Insight implements authentication with the mandatory use of client andserver-side certificates or keys. Connections between the Data Insight servers usea single, self-signed certificate. The Management Server generates the certificateat install time and is unique to your deployment. It is present on the ManagementServer node in the keys folder under the data folder. The file is calledcommd.keystore. When you configure worker nodes, this file must be manuallycopied over to the new worker node before installation.
Generating Management Console certificateThe Management Server provides a web interface (administration console) forreporting and administration purposes. You access this interface with a web browser.The Management Server and browser communicate through an SSL connection.
To ensure confidentiality, all communication between the Management Server andthe browser is encrypted using a symmetric key. To initiate a connection, theManagement Server and browser negotiate the encryption algorithm (algorithm,key size, and encoding) and encryption key to use.
By default, connections between the Management Server and the browser use asingle, self-signed certificate. The Management Server generates the certificate atinstall time and is unique to your deployment. The certificate is present on theManagement Server node in a folder called keys under the data folder. The file iscalled webserver.keystore. While this certificate is secure, you get a warningmessage in the browser when accessing the web interface because it is a self-signedcertificate. To avoid getting this warning, Veritas recommends that you generate a
48Post-installation configurationAbout post-installation security configuration for Management Server

unique certificate for your organization’s installation. This new certificate replacesthe default certificate.
To generate a unique Management Console certificate
1 Collect the following information to generate a certificate request:
■ Common nameThe fully qualified DNS name of the Management Server. This name mustbe the actual name of the server that is accessible by all the clients.
■ Organization nameFor example, Veritas, Inc.
■ Organizational unit (optional)
■ CityFor example, San Francisco
■ StateFor example, CA
■ CountryFor example, US
■ ExpirationExpiration time in days (90)
2 Use keytool.exe to create the self-signed certificate (keystore file), which youneed to generate the Certificate Signing Request (CSR). keytool.exe is autility for managing keys and certificates. These items are used inself-authentication or data integrity and authentication services, using digitalsignatures. Certificates also enable users to cache the public keys of theircommunicating peers.
To create this file, go to the root directory of the Veritas Data Insight installationand perform the following steps in this order:
■ From a command window, go to the installdir\DataInsight\jre\bin
directory, where installdir is the directory into which you installed theManagement Server.
■ Run the following command with the information collected in 1:
keytool -genkey -alias tomcat -keyalg RSA -validity 730 -keysize 1024
-keypass changeit -keystore webserver.keystore -storepass changeit
-storetype JKS -dname cn=common_name,o=organization_name,
ou=organization_unit,l=city,s=state,c=US
49Post-installation configurationAbout post-installation security configuration for Management Server

The -storepass changeit command sets the password to changeit. Enterthis password if you are prompted for a password after running the command.This command creates the self-signed certificate (webserver.keystore) in the<installdir>\jre\bin directory.
Note: Veritas recommends that you set the password as changeit. If you wantto use a different password, perform the additional steps mentioned in 11 beforeyou start the DataInsightWeb service.
3 Generate the certificate signing request (CSR) file. The CSR file is the requestthat you submit to the Signature Authority to obtain a signed certificate.
From the <installdir>\jre\bin directory and run the following command:
keytool -certreq -alias tomcat -keyalg RSA -keystore webserver.keystore
-storetype JKS -storepass changeit -file "DataInsight.csr"
If you are prompted for a password, press Enter. This command creates a filecalled DataInsight.csr. You submit this file to the Signature Authority.
4 To generate a certificate you send the .CSR file to a Certified SignatureAuthority (your own or a third party, such as VeriSign).
To obtain a signed certificate from your internal Signature Authority, contactyour system administrator for instructions.
For the VeriSign Signature Authority, perform one of the following actions:
■ Current CustomersIf you are a current VeriSign customer, go to the following page and buyan additional certificate:http://www.symantec.com/ssl-certificates/?themeid=verisign-ssl-certificates&inid=vrsn_ss_IndexYou need your Common Name, Order Number, or serial number to beginthe transaction, as well as the CSR.
■ New customersIf you are not a current customer and want to purchase the signed certificatefrom VeriSign, go to the following page:http://www.VeriSign.com/products-services/security-services/ssl/buy-ssl-certificates/index.html.To purchase the signed certificate, you need the following information, inaddition to the CSR:
■ The length of time for the certificate (one year or two years).
■ The number of servers that host a single domain (up to five servers).
■ The server platform.
50Post-installation configurationAbout post-installation security configuration for Management Server

■ The organization, organizational unit, country, state, or locality (all spelledwithout abbreviations).
■ Payment information and a billing contact.
■ The common name. This name is the host name and domain name,such as www.company.com or company.com.
■ An email where VeriSign can reach you to validate the information.
■ Documentation to demonstrate that your organization is legitimate.
To obtain signed certificates from other Signature Authorities, go to their websites and follow the instructions to enroll and obtain a signed certificate. Thisprocess is similar to the VeriSign process. However, check with the organizationto identify any additional environment information that may be needed for thecertificate.
The certified Signature Authority sends you the signed certificate (this processmight take 3-5 days). Internal Signature Authorities must return the rootcertificate along with the signed certificate.
5 Place the signed certificate into the directory (<installdir>\jre\bin) withthe webserver.keystore file. To email the certificate, paste it into a textdocument exactly as it appears on the screen. Include the top line and bottomline (-----Begin Certificate----- and -----End Certificate-----). Make sure that noextra lines, spaces, trailing carriage returns, or characters have beeninadvertently added. Save this file in the same directory where thewebserver.keystore file is located. If the signed certificate is provided as anattachment to an email, copy this file into the same directory where thewebserver.keystore file is located.
6 Keep a copy of both the webserver.keystore file and the signed certificatefile in a separate, secure location.
51Post-installation configurationAbout post-installation security configuration for Management Server

7 Confirm the signed certificate is correct. Open a command prompt and run thefollowing command to view the certificate’s fingerprint(s)
keytool -printcert -file signed_certificate_filename
The following is an example output:
Owner: CN=ll, OU=ll, O=ll, L=ll, S=ll, C=ll
Issuer: CN=ll, OU=ll, O=ll, L=ll, S=ll, C=ll
Serial Number: 59092b34
Valid from: Thu Sep 25 18:01:13 PDT 1997 until: Wed Dec 24 17:01:13
PST 1997
Certificate Fingerprints:
MD5: 11:81:AD:92:C8:E5:0E:A2:01:2E:D4:7A:D7:5F:07:6F SHA1:
20:B6:17:FA:EF:E5:55:8A:D0:71:1F:E8:D6:9D:C0:37 37:13:0E:5E:FE
8 Call or email the person who sent the certificate and compare the fingerprint(s)you see with the fingerprint(s) they sent you. If the fingerprint(s) are not exactlyequivalent, the certificate may have been replaced in transit by an attacker’scertificate.
If you used an Internal Signing Authority, also view the fingerprint(s) of the rootcertificate using the same -printcert command.
keytool -printcert -file
name_of_root_certificate_provided_by_internal_signature_authority
Compare the displayed fingerprint with the well-known fingerprint (obtainedfrom a newspaper or the root CA’s web page). Contact the certificate’s issuerif you have questions.
When you execute the command, the -importcert command prints out thecertificate information and prompts you to verify it.
9 Return to the <installdir>jre\bin directory and update the localwebserver.keystore file with the signed certificate as follows:
■ Internal signature authorityUse the following command to update the webserver.keystore file withthe root certificate:
<installdir>\jre\bin\keytool.exe -importcert -file
root_certificate_filename -keystore webserver.keystore
52Post-installation configurationAbout post-installation security configuration for Management Server

-storepass changeit
Use the following command to update the webserver.keystore file with thesigned certificate:
<installdir>\jre\bin\keytool
-importcert -alias tomcat -keystore webserver.keystore -trustcacerts
-file signed_certificate_filename
■ VeriSign or third-party signature authorityUse the following command to update the local webserver .keystore filewith the signed certificate:
<installdir>\jre\bin\keytool
-importcert -alias tomcat -keystore webserver.keystore -trustcacerts
-file signed_certificate_filename
10 Copy the updated webserver.keystore file into the $datadir\keys directory.By default, $datadir is located at C:\DataInsight\data. Note that thisoperation overwrites an existing file of the same name in that location. Renamethe existing file if you want to keep it.
11 If you have used a password other than changeit in 2, perform the followingadditional steps:
■ Log into the Management Server with Administrator privileges.
■ Open a command prompt window, and change to the bin directory in theinstallation folder for Data Insight. By default, the bin directory is located atC:\Program Files\DataInsight\bin.
■ Execute the following command:configdb.exe -O -J matrix.webserver.keystore.password -j
<new_password>
12 Restart the Data Insight web service by performing the following steps in thespecified order:
■ net stop DataInsightWeb
■ net start DataInsightWeb
53Post-installation configurationAbout post-installation security configuration for Management Server

Configuring your corporate firewallThe instructions in this section assume that the Management Server and Workernodes are installed inside your corporate LAN behind a firewall. If this is the case,update your corporate firewall settings as follows:
■ Allow 2-way connections between the Management Server and the workernodes and between worker nodes. Configure your firewall to accept connectionson the port you entered for the Communication Service when installing theManagement Server and worker nodes. By default, the Communication Servicecommunicates over port 8383. You can configure the servers to use any otherport. Traffic on this port is HTTPS.You should also allow outgoing connection from the Management Server tohttps://sort.veritas.com. Data Insight downloads patch information from theSORT web site to notify you of product updates.
■ Allow Windows Remote Desktop Client connections (TCP port 3389). Thisfeature can be useful for setup purposes.
■ The web interface of the Management Server runs on port 443 (configurable atthe time of installation). Port 443 is also used for the Portal service on theSelf-Service Portal server. This port must be opened at the Management Serverto allow HTTPS communication between browsers and the Web server and theportal server.
■ The DataInsightWorkflow Service runs on HTTPS port 8686. This port must beopened on the Portal server to allow HTTPS communication between Portalserver and the Management Server.
54Post-installation configurationConfiguring your corporate firewall

Installing Windows FileServer agent
This chapter includes the following topics:
■ About Windows File Server agent
■ Installing Windows File Server agent manually
■ Configuring the Windows File Server using ConfigureWindowsFileServer.exe
About Windows File Server agentData Insight requires an agent to be installed on a Windows File Server machineif you want to monitor access events on the file server. Data Insight can automaticallyinstall the agent on the Windows File Server when adding the file server using theConsole.
For detailed information about automatically installing the agent on the WindowsFile Server, see the Veritas Data Insight Administrator's Guide.
Optionally, you can choose to install the agent manually on the file server.
6Chapter

To configure a Windows File Server manually
1 Install the Windows File Server agent on the file server machine.
See “Installing Windows File Server agent manually” on page 56.
2 Register the agent with the Management Server using theRegisterWorkerNode.exe utility. During registration, you can specify theaddress of the worker node that is intended to be the Collector node of this fileserver. Registration takes place through the Collector worker node. Registeringthe agent ensures that the file server can communicate with the Collectorworker node.
The procedure to registration of Windows File Server agent is the same asregistering a worker node.
See “Registering the worker node and the Portal node” on page 46.
3 Add the file server to the Management Server using theConfigureWindowsFileServer.exe utility.
See “Configuring the Windows File Server usingConfigureWindowsFileServer.exe” on page 57.
4 If the file server is clustered using MSCS, do the following:.
■ Install the agent on each node of the cluster.
■ Register each node with the Management Server using its physical hostaddress.
■ Run ConfigureWindowsFileServer.exe from each cluster node afterregistering the node.
Installing Windows File Server agent manuallyTo install the Windows File Server agent manually
1 Locate the agent installer binary from the agent bundle that ships with theproduct. The agent bundle is a compressed file that contains the agent installeralong with some installation templates. It is calledVeritas_DataInsight_windows_winnas_5_1_N_x64.zip.
2 Unzip it in a temporary location to get the installer binary.
3 Log on (or remote log on) as Administrator to the Windows file server, whereyou intend to install the agent.
4 Double-click the agent installer to launch it.
56Installing Windows File Server agentInstalling Windows File Server agent manually

5 TheWelcome to the Veritas Data Insight Setup Wizard window appears.Click Next.
6 In the License Agreement window, select I accept the agreement, and clickNext.
7 In the Select Destination Directory window, browse to the directory in whichyou want Data Insight to be installed. By default, the destination directory isC:\Program Files\DataInsight.
8 In the Configure Data Directory window, browse to the location where youwant to store the product data. Select a location with enough free space.
9 In the Configure Networking window, enter the following information:
■ Communication Service PortSee “About Communication Service” on page 16.
■ Configuration Service portConfiguration service is a process that provides interface to configurationand other product data that is stored on the local system. This service portdoes not need to be accessible outside the host machine.
Note: The installer validates whether the appropriate ports are free to acceptconnections.
10 To start the installation process, click Next.
11 To register the worker node with the Management Server after you exit setup,select the Launch Worker Node Registration Wizard after exit checkbox.
See “Registering the worker node and the Portal node” on page 46.
12 To exit setup, click Finish.
Configuring the Windows File Server usingConfigureWindowsFileServer.exe
Run the ConfigureWindowsFileServer.exe utility to configure the file server fromthe file server machine. You must run this utility after you have registered the agentnode with the Management Server to add the file server to the Management Serverconfiguration. Data Insight starts monitoring this file server after you have completedthis step.
57Installing Windows File Server agentConfiguring the Windows File Server using ConfigureWindowsFileServer.exe

To configure the Windows File Server from the file server machine
1 Double-click ConfigureWindowsFileServer.exe located in the bin folder ofthe installation.
The File Server Configuration Wizard appears.
2 Select This File Server is a part of MSCS cluster check box if this node is apart of an MSCS cluster. If you select this option, specify name of this clusterin the Cluster Name text box. You must enter the exact same name in this fieldwhen you run this utility on all nodes of this cluster.
3 Select the Collector worker node for this file server using the Collector Nodedrop-down. All communication with this file server happens through theassociated Collector node.
4 Select Automatically discover shares on this filer check box if you wantData Insight to automatically discover shares on this filer and add them to theconfiguration.
Note: If this filer is a Clustered file server, you need to log into the Consolelater and specify credentials of an Administrative user on this cluster beforediscovery can happen.
You can optionally specify shares that need to be ignored during discovery byspecifying matching patterns in the adjoining text box.
5 Select Scan new shares immediately check box to add newly added sharesto the scan queue immediately without waiting for the normal full scan schedule.However, scanning will still take place only during the times scanning ispermitted on the node.
6 Click Configure Now button to finish the configuration. The utility will contactthe Management Server through the selected Collector node and add the fileserver to the Management Server. If this is a clustered file server and the filerhas already been added through the first node, this step associates thisadditional cluster node with the existing filer configuration.
Alternately, you can choose to not run this utility post-registration, and configurethe Windows File Server agent from the Management Console.
To configure the Windows File Server agent from the Management console
1 Register the Windows File Server agent with the Management Server.
2 Log on to the Management Console.
58Installing Windows File Server agentConfiguring the Windows File Server using ConfigureWindowsFileServer.exe

3 From the Settings > Filers page, select Add New Filer and from thedrop-down, selectWindows File Server.
On theAddNewWindows File Server page, clear the Let Data Insight installthe agent automatically check box.
4 Select this node from the list view control to associate this node with the fileserver.
59Installing Windows File Server agentConfiguring the Windows File Server using ConfigureWindowsFileServer.exe

Getting started with DataInsight
This chapter includes the following topics:
■ About the Data Insight Management Console
■ Logging in to the Data Insight Management Console
■ Logging out of the Data Insight Management Console
■ Displaying online help
About the Data Insight Management ConsoleUsers interact with Data Insight primarily through the Data Insight ManagementConsole. The Data Insight Console is a graphical user interface that provides acentral point to view storage resources that Data Insight monitors, scheduleprocesses, and view reports, among other features. The Console is automaticallyinstalled with the Management Server. You access the Console through a Webbrowser that has a network connection to the Management Server. By default, theManagement Server runs on HTTPS port 443.
Logging in to the Data Insight ManagementConsole
To log on to the console from the Management Server or a worker node
1 Do one of the following:
■ Click the shortcut created on the Desktop during installation.
7Chapter

■ Click Start > Programs > Veritas > Veritas Data Insight > Data InsightConsole.
2 On the Login screen, enter the credentials of a user with privileges to log in tothe Management Server.
3 Enter the name of the domain to which the user belongs.
4 Click Submit.
The Management Console appears.
To log on to the console from a machine other than the Management Serveror the worker nodes
1 Open a Web browser and enter https://<ms_host>:<ms_port>. For example,https://datainsight.company.com:443.
2 On the Login screen, enter the credentials of a user with privileges to log in tothe Management Server.
3 Enter the name of the domain to which the user belongs.
4 Click Submit.
The Management Console appears.
Logging out of the Data Insight ManagementConsole
To log out
1 Click logout at the top right of the screen.
2 Click OK to go back to the login screen.
Displaying online helpTo access online help, click the Help button in the upper-right corner of any screenin the Management Console. Veritas Data Insight displays the help in a separatewindow. The online help shows the table of contents in the left pane andcontext-sensitive help in the right pane.
61Getting started with Data InsightLogging out of the Data Insight Management Console
Uninstalling Veritas DataInsight
This chapter includes the following topics:
■ Uninstalling Veritas Data Insight
Uninstalling Veritas Data InsightTo uninstall Data Insight
1 If you created shortcuts during the installation, select Start > All Programs >Veritas Data Insight > Veritas Data Insight Uninstaller.
If no shortcuts exist, open the Add or Remove Programs control from theWindows Control Panel, and select the Veritas Data Insight entry. Then clickChange/Remove.
Optionally, you can uninstall Veritas Data Insight using the uninstall.exe file.This file is located in the Data Insight installation folder (for example,C:\Program Files\DataInsight). On Linux, execute the script/opt/DataInsight/uninstall to launch the uninstall program.
2 In the Delete Data window, select the Delete all product data checkbox toremove all configuration as well as audit log data collected and stored by theproduct. Do not select this option, if you are attempting to repair the installationby uninstalling and reinstalling the software.
3 Click Next to uninstall.
The uninstaller removes all Veritas Data Insight components.
4 Click Finish to complete the uninstall process.
8Chapter

5 If you uninstall a worker node, log in to the Management Console, click theSettings tab.
6 Navigate to the Data Insight Servers page, select the worker node, and clickDelete.
63Uninstalling Veritas Data InsightUninstalling Veritas Data Insight

Installing Data Insightusing response files
This appendix includes the following topics:
■ About response files
■ Installing Data Insight using response files
■ Sample response files
About response filesThe installer or the product installation script generates a response file during anyinstallation, configuration, upgrade, or uninstall procedure. The response file containsthe configuration information that you entered during the procedure.
You can use the response file for future installation procedures. The response filepasses arguments to the script to automate the installation of that product. You canedit the file to automate installation and configuration of additional systems.
Installing Data Insight using response filesTypically, you can use the response file that the installer generates, after you installData Insight on a system in order to install Data Insight on other systems.
To install using response files
1 Make sure the systems where you want to install Data Insight meet theinstallation requirements.
2 Make sure the pre-installation tasks are completed.
AAppendix
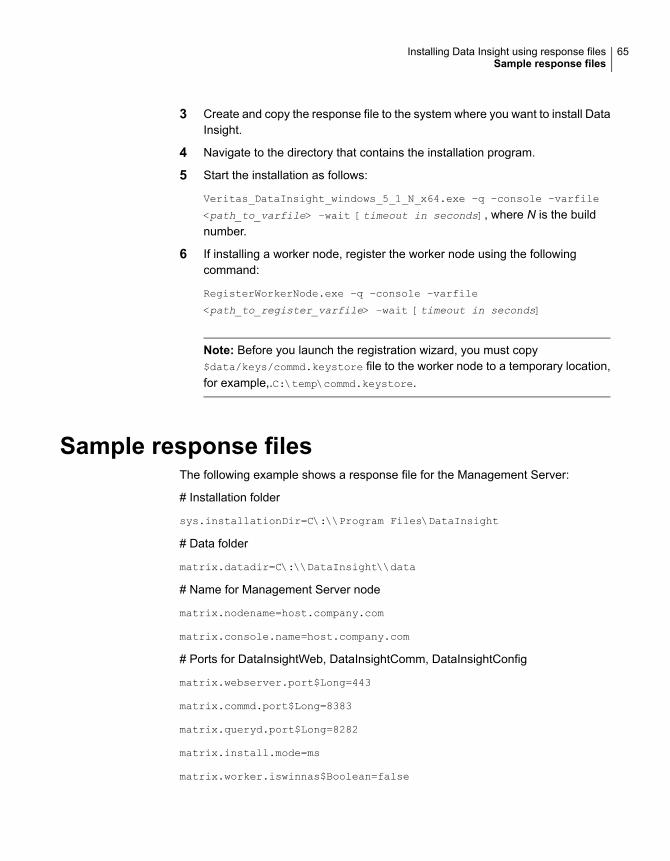
3 Create and copy the response file to the system where you want to install DataInsight.
4 Navigate to the directory that contains the installation program.
5 Start the installation as follows:
Veritas_DataInsight_windows_5_1_N_x64.exe –q –console –varfile
<path_to_varfile> –wait [timeout in seconds], where N is the buildnumber.
6 If installing a worker node, register the worker node using the followingcommand:
RegisterWorkerNode.exe –q –console –varfile
<path_to_register_varfile> –wait [timeout in seconds]
Note: Before you launch the registration wizard, you must copy$data/keys/commd.keystore file to the worker node to a temporary location,for example,.C:\temp\commd.keystore.
Sample response filesThe following example shows a response file for the Management Server:
# Installation folder
sys.installationDir=C\:\\Program Files\DataInsight
# Data folder
matrix.datadir=C\:\\DataInsight\\data
# Name for Management Server node
matrix.nodename=host.company.com
matrix.console.name=host.company.com
# Ports for DataInsightWeb, DataInsightComm, DataInsightConfig
matrix.webserver.port$Long=443
matrix.commd.port$Long=8383
matrix.queryd.port$Long=8282
matrix.install.mode=ms
matrix.worker.iswinnas$Boolean=false
65Installing Data Insight using response filesSample response files

# Username/Domain for initial administration
matrix.initial.admin.login=Administrator
matrix.initial.admin.domain=WISDOM
matrix.initial.admin.isgroup$Boolean=false
# If the Management Server is part of Active Directory domain, specify ifManagement Server domain should be scanned
matrix.scan.ad$Boolean=true
# Specify if anonymous usage collection should be enabled
matrix.enable.omniture$Boolean=true
# Specify whether services should be started after installation
matrix.ms.startServices$Boolean=true
sys.programGroupAllUsers$Boolean=true
createDesktopLinkAction$Boolean=true
createQuicklaunchIconAction$Boolean=true
sys.programGroupDisabled$Boolean=false
matrix.launch.console$Boolean=false
The following example shows a response file for installing a Collector node:
# Installation folder
sys.installationDir=C\:\\Program Files\DataInsight
# Data folder
matrix.datadir=C\:\\DataInsight\\data
#Address for Collector node
matrix.nodename=host.company.com
matrix.worker.name=host.company.com
# Ports for DataInsightComm, DataInsightConfig
matrix.commd.port$Long=8383
matrix.queryd.port$Long=8282
matrix.install.mode=worker
matrix.worker.isindexer$Boolean=true
createQuicklaunchIconAction$Boolean=true
66Installing Data Insight using response filesSample response files

sys.programGroupDisabled$Boolean=true
createDesktopLinkAction$Boolean=true
sys.programGroupAllUsers$Boolean=true
matrix.launch.register$Boolean=false
The following example shows a response file for launching the worker noderegistration wizard:
# Address of the Management Server
matrix.console.name=<IP address of the Management Server>
#Path to commd.keystore
matrix.ms.keystore=C\:\\DataInsight\\data\\commd.keystore
# Whether services should be started after registration
matrix.worker.startServices$Boolean=true
matrix.launch.console$Boolean=false
The following example shows a response file for installing a server with the Collectorand Indexer roles:
# Installation folder
sys.installationDir=C\:\\Program Files\DataInsight
# Data folder
matrix.datadir=C\:\\DataInsight\\data
#Address for Collector node
matrix.nodename=host.company.com matrix.worker.name=host.company.com
# Ports for DataInsightWeb, DataInsightComm, DataInsightConfig
matrix.commd.port$Long=8383
matrix.queryd.port$Long=8282 matrix.install.mode=worker
matrix.worker.isindexer$Boolean=false
createQuicklaunchIconAction$Boolean=true
sys.programGroupDisabled$Boolean=true
createDesktopLinkAction$Boolean=true
sys.programGroupAllUsers$Boolean=true
matrix.launch.register$Boolean=false
67Installing Data Insight using response filesSample response files

The following example shows a response file for launching the worker noderegistration wizard:
# Address of the Management Server
matrix.console.name=<IP address of the Management Server>
#Path to commd.keystore
matrix.ms.keystore=C\:\\DataInsight\\data\\commd.keystore
# Whether services should be started after registration
matrix.worker.startServices$Boolean=true
matrix.launch.console$Boolean=false
The following example shows a response file for installing a Windows File Servernode:
Run the following command:
Veritas_DataInsight_windows_winnas_5_1_N_x64.exe–q –console –varfile
<path to varfile> -wait <timeout>
# Installation folder
matrix.upgrade$Boolean=false
sys.installationDir=<INSTALLDIR>
#For example, C\:\\Program Files\DataInsight
matrix.install.mode=worker
matrix.worker.isindexer$Boolean=false
matrix.worker.iscollector$Boolean=true
# The value of the property iscollector can be true or false depending on whetherthe Windows File Server node is also assigned the role of the Collector node.
matrix.worker.iswinnas$Boolean=true
matrix.datadir=<DATADIR>
#For example, C\:\\DataInsight\\data
matrix.worker.name=<FILER_FQDN>
# worker.name property is the name of the Windows File Server.
matrix.commd.port$Long=8383
matrix.queryd.port$Long=8282
matrix.enable.drwatson$Boolean=true
68Installing Data Insight using response filesSample response files

matrix.launch.register$Boolean=false
matrix.launch.console$Boolean=false
#sys.programGroup.name=Veritas Data Insight
#sys.service.selected.114$Boolean=true
#sys.languageId=en
#sys.programGroup.linkDir=/usr/local/bin
#sys.service.startupType.1393=auto
#sys.programGroup.enabled$Boolean=true
#sys.service.selected.1393$Boolean=true
#sys.service.startupType.114=auto
#sys.programGroup.allUsers$Boolean=true
## Registration properties:
#matrix.register.node.during.install$Boolean=true
#matrix.register.node.varfile=<PATH TO VAR FILE>
# matrix.register.node.varfile can be the path of the varfile. For example,C\:\\Temp\\DataInsight\\winnas.varfile.
#matrix.console.name=<COLLECTOR FQDN>:<COMMD PORT>
(Default Communication Service port is 8383) For example,
DICollector1.win.local:8383
#matrix.ms.keystore=<PATH TO KEYSTORE>
# For example, C\:\\Temp\\DataInsight\\commd.keystore
#matrix.shortcuts$Boolean=false
#matrix.worker.startServices$Boolean=true
#matrix.launch.configure.winnas.filer$Boolean=false
#matrix.launch.console$Boolean=false
The following example shows a configuration file for configuring a Windows FileServer as a filer:
Navigate to <Data Insight Install directory>\bin folder and run the followingcommand:
Configcli register_filer <Name of configuration file>
For example: Configcli register_filer C:\\temp\\Registerfiler.conf
69Installing Data Insight using response filesSample response files

The configuration file contains the following properties:
filer.id=11
filer.name=FileServer1.SAMGWIN.local
filer.type=WINNAS
filer.scanNewSharesImmediately$Boolean=true
filer.monitorAllShares$Boolean=true
filer.excludeShares=*$
filer.winnas.clustered$Boolean=false
filer.winnas.with.agent=true
filer.indexer.name=Indexer1.SAMGWIN.local
filer.collector.name=Collector1.SAMGWIN.local
Where,
Filer.id is the ID of the Windows File Server.
filer.name is the FQDN of the Windows File Server.
filer.type will be WINNAS.
Filer.indexer.name is the FQDN of the Indexer.
The following example shows a response file for installing the Self-Service Portalnode:
sys.programGroupDisabled$Boolean=false
# Installation folder
sys.installationDir=C\:\\Program Files\DataInsight
sys.languageId=en
matrix.portal.port$Long=443
matrix.worker.iswinnas$Boolean=false
matrix.install.mode=worker
matrix.worker.winnas.plat=WLH
matrix.datadir=C\:\\DataInsight\\data
createQuicklaunchIconAction$Boolean=true
matrix.nodename=testnode.tulip.local
sys.programGroupName=Veritas Data Insight 5.1
70Installing Data Insight using response filesSample response files

matrix.launch.console$Boolean=false
matrix.launch.register$Boolean=true
matrix.worker.isportal$Boolean=true
matrix.commd.port$Long=8383
sys.programGroupAllUsers$Boolean=true
matrix.worker.name= testnode.tulip.local
createDesktopLinkAction$Boolean=true
matrix.workflowd.port$Long=8686
matrix.queryd.port$Long=8282
sys.adminRights$Boolean=true
The following example shows a response file for launching the worker noderegistration wizard to register the Collector, Indexer, Windows File Server, and thePotal nodes with the Management Console:
matrix.launch.console$Boolean=false
sys.languageId=en
sys.adminRights$Boolean=true
matrix.console.name=10.209.109.239
sys.installationDir=C\:\\Program Files\DataInsight
matrix.worker.startServices$Boolean=true
matrix.ms.keystore=C\:\\TempDir\\keys\\commd.keystore
Sample response file to upgrade a Collector nodematrix.upgrade$Boolean=true
# Indicates that upgrade has been requested
matrix.upgrade.data.during.install$Boolean=true
# Indicates that data be upgraded automatically during the upgrade
matrix.upgrade.backup$Boolean=false
#Indicates if data directory should first be backed up temporarily before the datais upgraded.
matrix.backup.dir$String=
#Indicates where data should be backed up. If empty or not defined, %tmp% willbe used
71Installing Data Insight using response filesSample response files

matrix.upgrade.backup.restore$Boolean=true
#Indicates if old data should be restored back in case upgrade fails. You must setmatrix.upgrade.backup to true for this to take effect.
matrix.upgrade.backup.delete$Boolean=true
#Indicates if backup copy can be deleted after upgrade is successful. You must setmatrix.upgrade.backup to true for this to take effect.
Sample response file to upgrade a Windows File ServerAgentmatrix.upgrade$Boolean=true
# Indicates that upgrade has been requested.
matrix.upgrade.data.during.install$Boolean=true
#Indicates that data be upgraded automatically during the upgrade.
matrix.upgrade.backup$Boolean=false
#Response file if any to be passed to UpgradeData.exe
whenmatrix.upgrade.data.during.install is set to true. This is optional andis generally not needed.
# The response file supports following variables:
#Format for UpgradeData.exe varfile
## Indicates if data directory should first be backed up temporarily before the datais upgraded.
matrix.backup.dir$String=
#Indicates where data should be backedup. If empty or not defined, %tmp% is used.
matrix.upgrade.backup.restore$Boolean=true
#Indicates if the old data should be restored in case upgrade fails. You must setmatrix.upgrade.backup to true for this to take effect.
matrix.upgrade.backup.delete$Boolean=true
#Indicates if backup copy can be deleted after the upgrade is successful. You needto set matrix.upgrade.backup to true for this to take effect.
72Installing Data Insight using response filesSample response files

CCollector process
about 14Collector worker node
Collector 14overview 13Scanner 14
Communication Service 16corporate firewall
configuring 54
DData Insight
installation 27installation tiers 17operating system requirements 20overview 10ports 24Supported browsers 24system requirements for components 21uninstalling 62
IIndexer worker node
overview 15installation
overview 27post-installation configuration 46
installation tiers 17single-tier installation 18three-tier installation 17two-tier installation 18
LLinux worker node
installing as root 35
MManagement Console
generating certificate 48
Management Console (continued)logging in 60logging out 61overview 60
Management Serverinstalling 29overview 13security configuration 48
Oonline help 61
Pportal
installing 34post-installation configuration 46
security configuration 48preinstallation steps 19
SScanner process
about 14Self-Service Portal
services 15single-tier installation
overview 18performing 28
SSL client/server certificates 48supported file servers 22system requirements 21
web server version 26
Tthree-tier installation
overview 17performing 29
two-tier installationoverview 18performing 28
Index

Uuninstalling 62
WWindows File Server
configuringsilently 58using configureWindowsFileServer.exe 57
Windows File Server agentinstallation overview 55installing
manual 56worker node
installing 32registering 46
74Index