Unity C# Tutorials - Catlike...
34
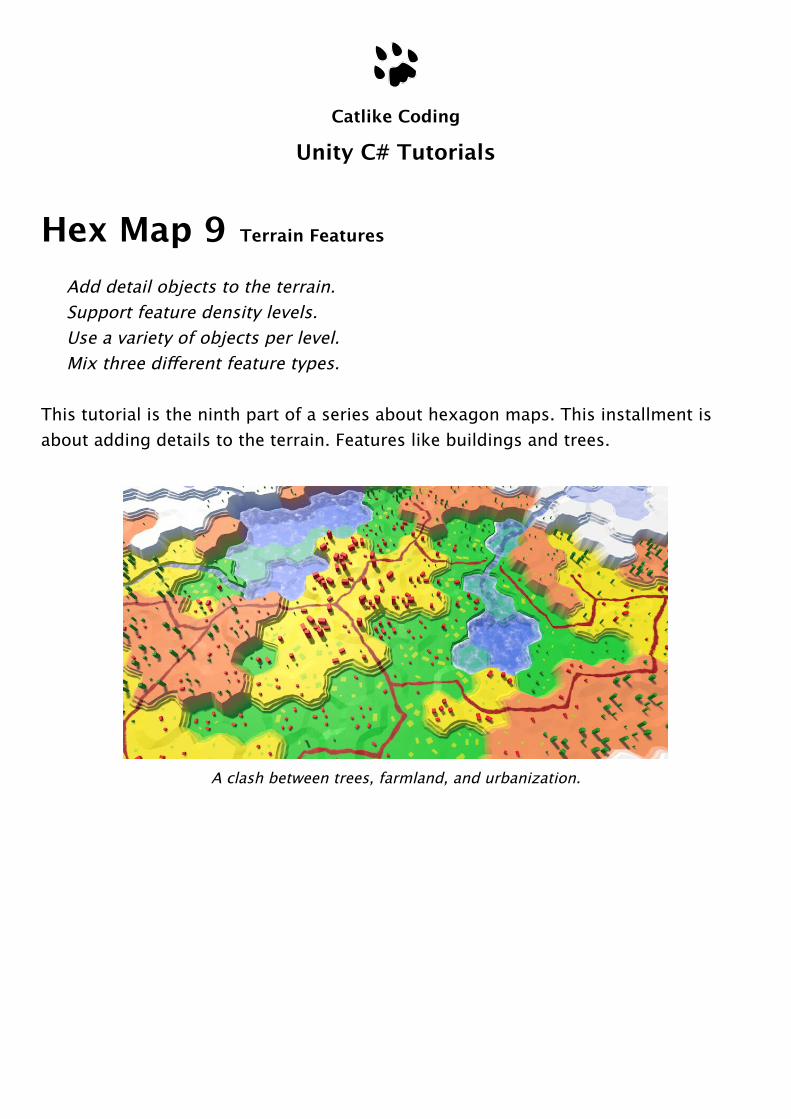
Catlike Coding Unity C# Tutorials Hex Map 9 Terrain Features Add detail objects to the terrain. Support feature density levels. Use a variety of objects per level. Mix three different feature types. This tutorial is the ninth part of a series about hexagon maps. This installment is about adding details to the terrain. Features like buildings and trees. A clash between trees, farmland, and urbanization.
Transcript of Unity C# Tutorials - Catlike...
Catlike Coding
Unity C# Tutorials
Hex Map 9 Terrain Features
Add detail objects to the terrain.Support feature density levels.Use a variety of objects per level.Mix three different feature types.
This tutorial is the ninth part of a series about hexagon maps. This installment isabout adding details to the terrain. Features like buildings and trees.
A clash between trees, farmland, and urbanization.

1 Adding Support for Features
While the shape of our terrain has variation, there isn't much going on. It is a lifelessplace. To make it come alive, we need to add things like trees and building. Thesefeatures are not part of the terrain mesh. They are separate objects. But that doesn'tstop us from adding them when triangulating the terrain.
HexGridChunk doesn't care about how a mesh works. It simply orders one of its HexMeshchildren to add a triangle, or a quad. Likewise, it can have a child that takes care offeature placement for it.
1.1 Feature Manager
Let's create a HexFeatureManager component that's responsible for the features of asingle chunk. Using the same design as HexMesh, we'll give it a Clear, an Apply, and anAddFeature method. As features have to be placed somewhere, the AddFeature methodgets a position parameter.
We begin with a stub implementation that doesn't actually do anything.
using UnityEngine;
public class HexFeatureManager : MonoBehaviour {
public void Clear () {}
public void Apply () {}
public void AddFeature (Vector3 position) {}}
We can now add a reference to such a component to HexGridChunk. Then we caninclude it in the triangulation process, just like all the HexMesh children.

public HexFeatureManager features;
public void Triangulate () { terrain.Clear(); rivers.Clear(); roads.Clear(); water.Clear(); waterShore.Clear(); estuaries.Clear(); features.Clear(); for (int i = 0; i < cells.Length; i++) { Triangulate(cells[i]); } terrain.Apply(); rivers.Apply(); roads.Apply(); water.Apply(); waterShore.Apply(); estuaries.Apply(); features.Apply(); }
Let's start by placing a single feature in the center of every cell.
void Triangulate (HexCell cell) { for (HexDirection d = HexDirection.NE; d <= HexDirection.NW; d++) { Triangulate(d, cell); } features.AddFeature(cell.Position); }
Now we need the actual feature manager. Add another child object to the Hex GridChunk prefab and give it a HexFeatureManager component. Then we can connect thechunk to it.
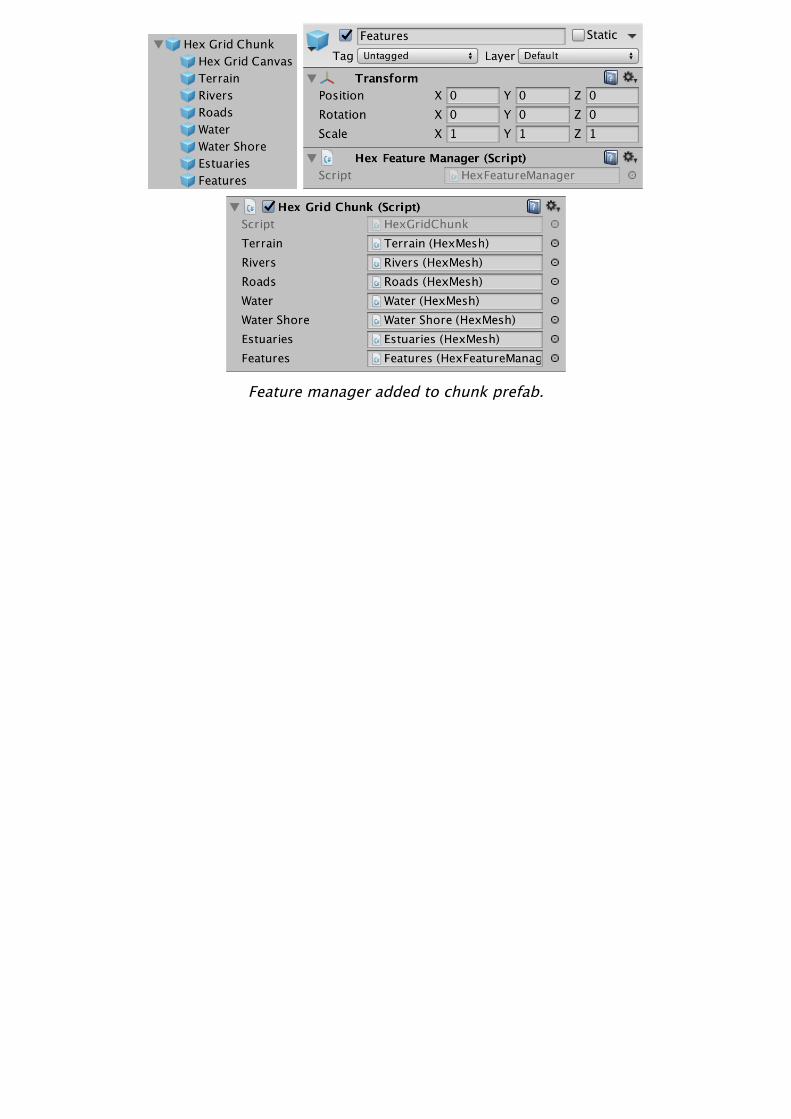
Feature manager added to chunk prefab.
1.2 Feature Prefab
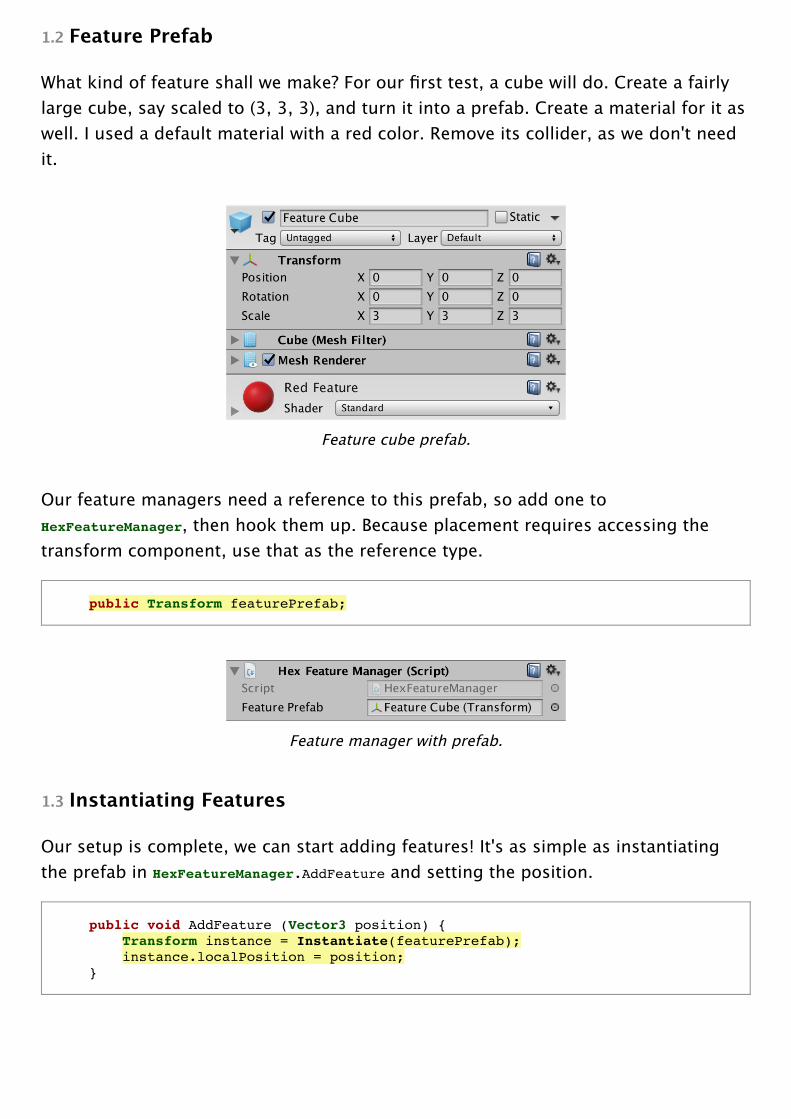
What kind of feature shall we make? For our first test, a cube will do. Create a fairlylarge cube, say scaled to (3, 3, 3), and turn it into a prefab. Create a material for it aswell. I used a default material with a red color. Remove its collider, as we don't needit.
Feature cube prefab.
Our feature managers need a reference to this prefab, so add one toHexFeatureManager, then hook them up. Because placement requires accessing thetransform component, use that as the reference type.
public Transform featurePrefab;
Feature manager with prefab.
1.3 Instantiating Features
Our setup is complete, we can start adding features! It's as simple as instantiatingthe prefab in HexFeatureManager.AddFeature and setting the position.
public void AddFeature (Vector3 position) { Transform instance = Instantiate(featurePrefab); instance.localPosition = position; }

Feature instances.
From now on, the terrain will be filled with cubes. At least, the top half of cubes.Because the local origin of Unity's cube mesh lies at the center of the cube, thebottom half is submerged below the terrain surface. To place the cubes on top of theterrain, we have to move them upwards by half their height.
public void AddFeature (Vector3 position) { Transform instance = Instantiate(featurePrefab); position.y += instance.localScale.y * 0.5f; instance.localPosition = position; }
Sitting on top of the terrain.
What if we're using a different mesh?
This approach is specifically for the default cube. If you're using a custom mesh, it is abetter idea to design them so their local origin sits at their bottom. Then you don't haveto adjust the position at all.
Of course our cells are perturbed, so we should perturb the position of our featuresas well. That does away with the perfect regularity of the grid.

instance.localPosition = HexMetrics.Perturb(position);
Perturbed features.
1.4 Destroying Features
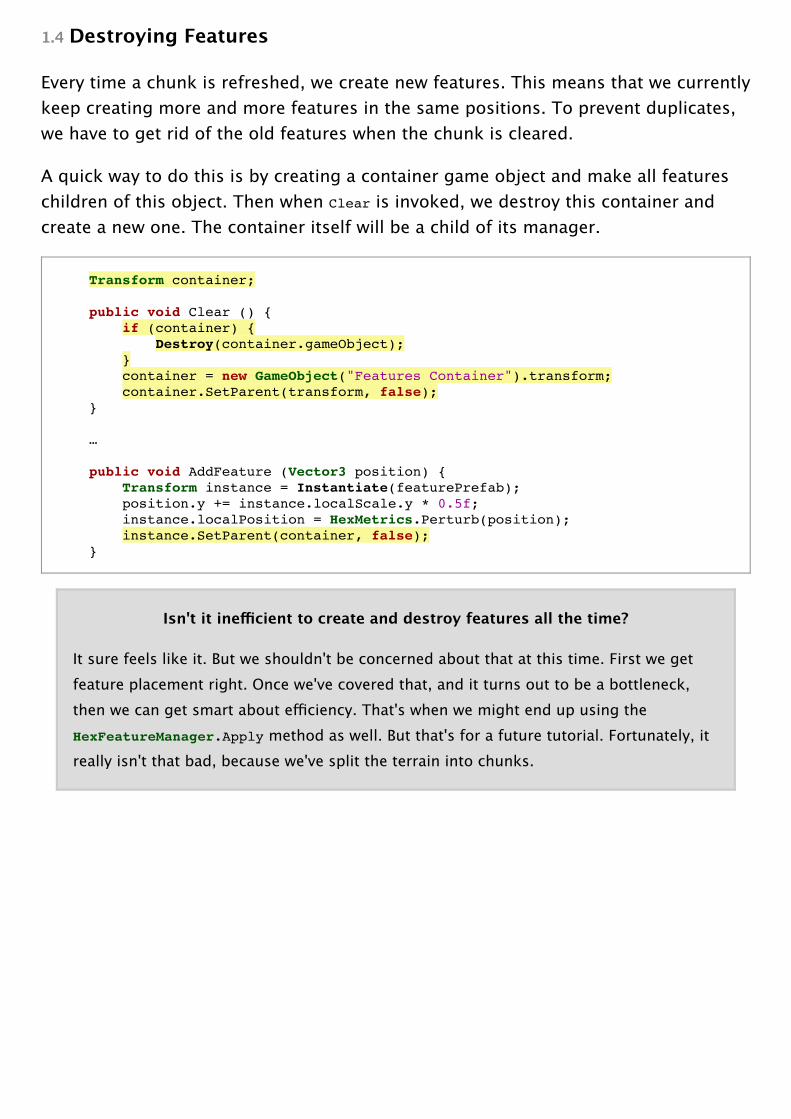
Every time a chunk is refreshed, we create new features. This means that we currentlykeep creating more and more features in the same positions. To prevent duplicates,we have to get rid of the old features when the chunk is cleared.
A quick way to do this is by creating a container game object and make all featureschildren of this object. Then when Clear is invoked, we destroy this container andcreate a new one. The container itself will be a child of its manager.
Transform container;
public void Clear () { if (container) { Destroy(container.gameObject); } container = new GameObject("Features Container").transform; container.SetParent(transform, false); } … public void AddFeature (Vector3 position) { Transform instance = Instantiate(featurePrefab); position.y += instance.localScale.y * 0.5f; instance.localPosition = HexMetrics.Perturb(position); instance.SetParent(container, false); }
Isn't it inefficient to create and destroy features all the time?
It sure feels like it. But we shouldn't be concerned about that at this time. First we getfeature placement right. Once we've covered that, and it turns out to be a bottleneck,then we can get smart about efficiency. That's when we might end up using theHexFeatureManager.Apply method as well. But that's for a future tutorial. Fortunately, itreally isn't that bad, because we've split the terrain into chunks.
2 Feature Placement
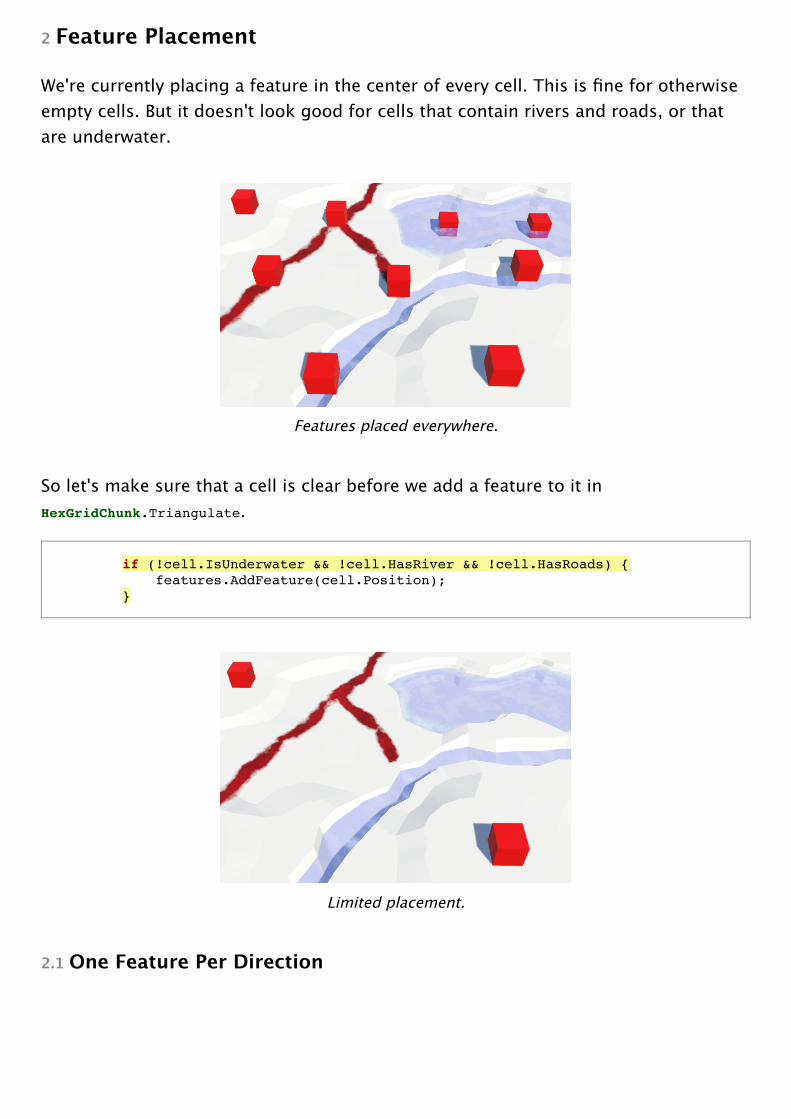
We're currently placing a feature in the center of every cell. This is fine for otherwiseempty cells. But it doesn't look good for cells that contain rivers and roads, or thatare underwater.
Features placed everywhere.
So let's make sure that a cell is clear before we add a feature to it inHexGridChunk.Triangulate.
if (!cell.IsUnderwater && !cell.HasRiver && !cell.HasRoads) { features.AddFeature(cell.Position); }
Limited placement.
2.1 One Feature Per Direction

Having only a single feature per cell isn't very much. There's plenty of room for more.Let's add an addition feature to the center of each of a cell's six triangles. So one perdirection.
We do this in the other Triangulate method, when we know that there isn't a river. Westill have to check whether we're underwater or whether there's a road. But in thiscase, we only care about roads going in the current direction.
void Triangulate (HexDirection direction, HexCell cell) { …
if (cell.HasRiver) { … } else { TriangulateWithoutRiver(direction, cell, center, e);
if (!cell.IsUnderwater && !cell.HasRoadThroughEdge(direction)) { features.AddFeature((center + e.v1 + e.v5) * (1f / 3f)); } }
… }
Many features, but not adjacent to rivers.
This produces a lot more features! They appear next to roads, but they still shy awayfrom rivers. To get features along rivers, we can also add them when insideTriangulateAdjacentToRiver. But once again only when not underwater, and not on topof a road.

void TriangulateAdjacentToRiver ( HexDirection direction, HexCell cell, Vector3 center, EdgeVertices e ) { …
if (!cell.IsUnderwater && !cell.HasRoadThroughEdge(direction)) { features.AddFeature((center + e.v1 + e.v5) * (1f / 3f)); } }
Also adjacent to rivers.
Can we render that many objects?
Many features would produce many draw calls, but Unity's dynamic batching helps usout here. As the features are small, their meshes should have few vertices. That allowsmany of them to be combined in a single batch. But if it turns out to be a bottleneck,we'll deal with it later. It is also possible to use instancing, which is comparable todynamic batching when using many small meshes.
3 Feature Variety
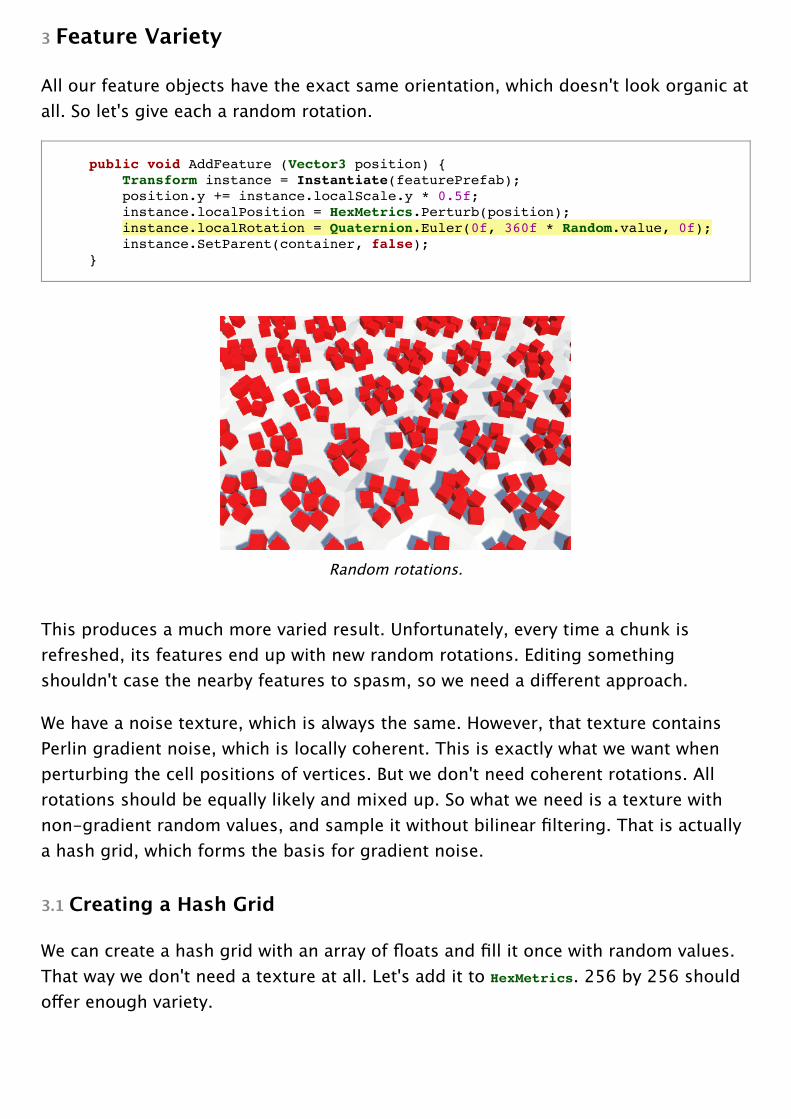
All our feature objects have the exact same orientation, which doesn't look organic atall. So let's give each a random rotation.
public void AddFeature (Vector3 position) { Transform instance = Instantiate(featurePrefab); position.y += instance.localScale.y * 0.5f; instance.localPosition = HexMetrics.Perturb(position); instance.localRotation = Quaternion.Euler(0f, 360f * Random.value, 0f); instance.SetParent(container, false); }
Random rotations.
This produces a much more varied result. Unfortunately, every time a chunk isrefreshed, its features end up with new random rotations. Editing somethingshouldn't case the nearby features to spasm, so we need a different approach.
We have a noise texture, which is always the same. However, that texture containsPerlin gradient noise, which is locally coherent. This is exactly what we want whenperturbing the cell positions of vertices. But we don't need coherent rotations. Allrotations should be equally likely and mixed up. So what we need is a texture withnon-gradient random values, and sample it without bilinear filtering. That is actuallya hash grid, which forms the basis for gradient noise.
3.1 Creating a Hash Grid
We can create a hash grid with an array of floats and fill it once with random values.That way we don't need a texture at all. Let's add it to HexMetrics. 256 by 256 shouldoffer enough variety.

public const int hashGridSize = 256;
static float[] hashGrid;
public static void InitializeHashGrid () { hashGrid = new float[hashGridSize * hashGridSize]; for (int i = 0; i < hashGrid.Length; i++) { hashGrid[i] = Random.value; } }
The random values are generated by a mathematical formula that always producesthe same results. Which sequence you get depends on a seed number, which defaultsto the current time value. That's why you get different results each play session.
To allow recreation of the exact same features, we have to add a seed parameter toour initialization method.
public static void InitializeHashGrid (int seed) { hashGrid = new float[hashGridSize * hashGridSize]; Random.InitState(seed); for (int i = 0; i < hashGrid.Length; i++) { hashGrid[i] = Random.value; } }
Now that we have initialized the random number stream, we'll always get the samesequence out of it. So all supposedly random events that would happen aftergenerating the map will always be the same as well. We can prevent this by savingthe state of the random number generator before initializing it. After we're done, weset it back to its old state.
Random.State currentState = Random.state; Random.InitState(seed); for (int i = 0; i < hashGrid.Length; i++) { hashGrid[i] = Random.value; } Random.state = currentState;
Initialization of the hash grid is done by HexGrid, at the same time that it assigns thenoise texture. So that's in HexGrid.Start and HexGrid.Awake. Make sure that we're notgenerating it more often than necessary.

public int seed;
void Awake () { HexMetrics.noiseSource = noiseSource; HexMetrics.InitializeHashGrid(seed);
… }
void OnEnable () { if (!HexMetrics.noiseSource) { HexMetrics.noiseSource = noiseSource; HexMetrics.InitializeHashGrid(seed); } }
The public seed allows us to choose a seed value for the map. Any value will do. Ipicked 1234.
Choosing a seed.
3.2 Using the Hash Grid
To make use of the hash grid, add a sampling method to HexMetrics. Like SampleNoise,it uses the XZ coordinates of a position to retrieve a value. The hash index is foundby clamping the coordinates to integer values, then taking the remainder of theinteger division by the grid size.
public static float SampleHashGrid (Vector3 position) { int x = (int)position.x % hashGridSize; int z = (int)position.z % hashGridSize; return hashGrid[x + z * hashGridSize]; }
What does % do?
This is the modulo operator. It computer the remainder of divisions, in our case integerdivisions. For example, the sequence −4, −3, −2, −1, 0, 1, 2, 3, 4 modulo 3 becomes−1, 0, −2, −1, 0, 1, 2, 0, 1.
This works for positive coordinates, but not for negative coordinates, as theremainder would be negative for those numbers. We can fix that by adding the gridsize to negative results.
int x = (int)position.x % hashGridSize; if (x < 0) { x += hashGridSize; } int z = (int)position.z % hashGridSize; if (z < 0) { z += hashGridSize; }
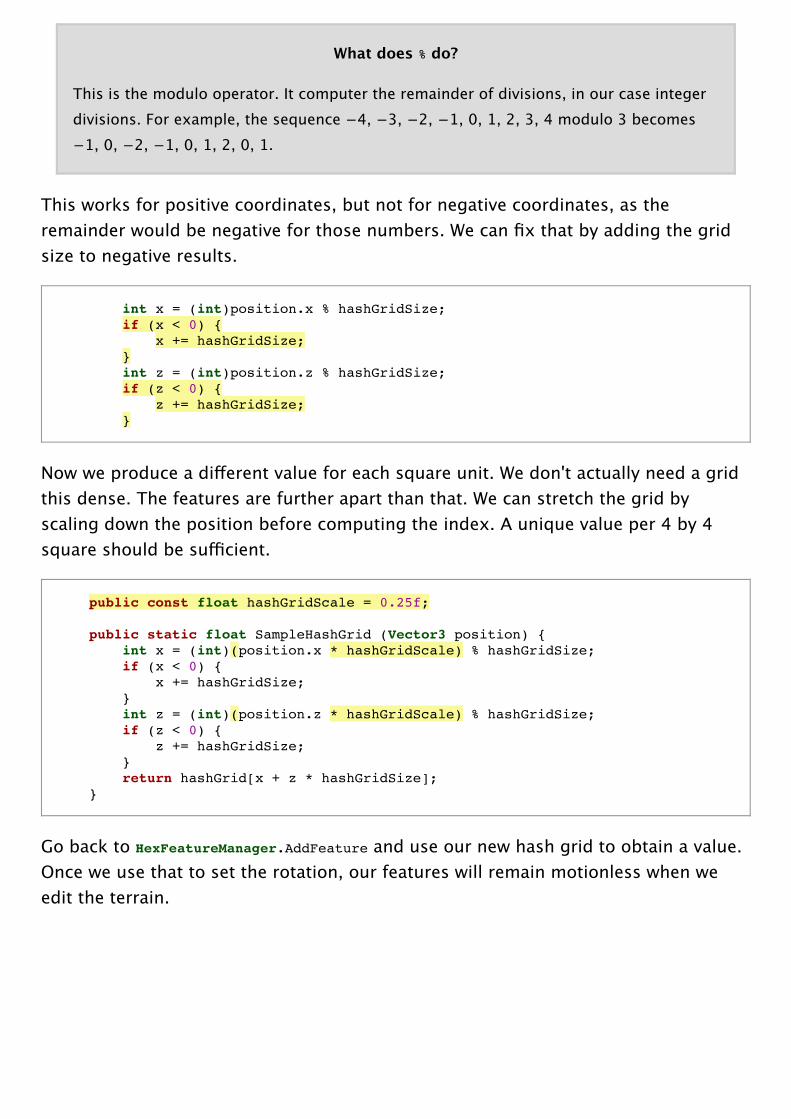
Now we produce a different value for each square unit. We don't actually need a gridthis dense. The features are further apart than that. We can stretch the grid byscaling down the position before computing the index. A unique value per 4 by 4square should be sufficient.
public const float hashGridScale = 0.25f;
public static float SampleHashGrid (Vector3 position) { int x = (int)(position.x * hashGridScale) % hashGridSize; if (x < 0) { x += hashGridSize; } int z = (int)(position.z * hashGridScale) % hashGridSize; if (z < 0) { z += hashGridSize; } return hashGrid[x + z * hashGridSize]; }
Go back to HexFeatureManager.AddFeature and use our new hash grid to obtain a value.Once we use that to set the rotation, our features will remain motionless when weedit the terrain.
public void AddFeature (Vector3 position) { float hash = HexMetrics.SampleHashGrid(position); Transform instance = Instantiate(featurePrefab); position.y += instance.localScale.y * 0.5f; instance.localPosition = HexMetrics.Perturb(position); instance.localRotation = Quaternion.Euler(0f, 360f * hash, 0f); instance.SetParent(container, false); }
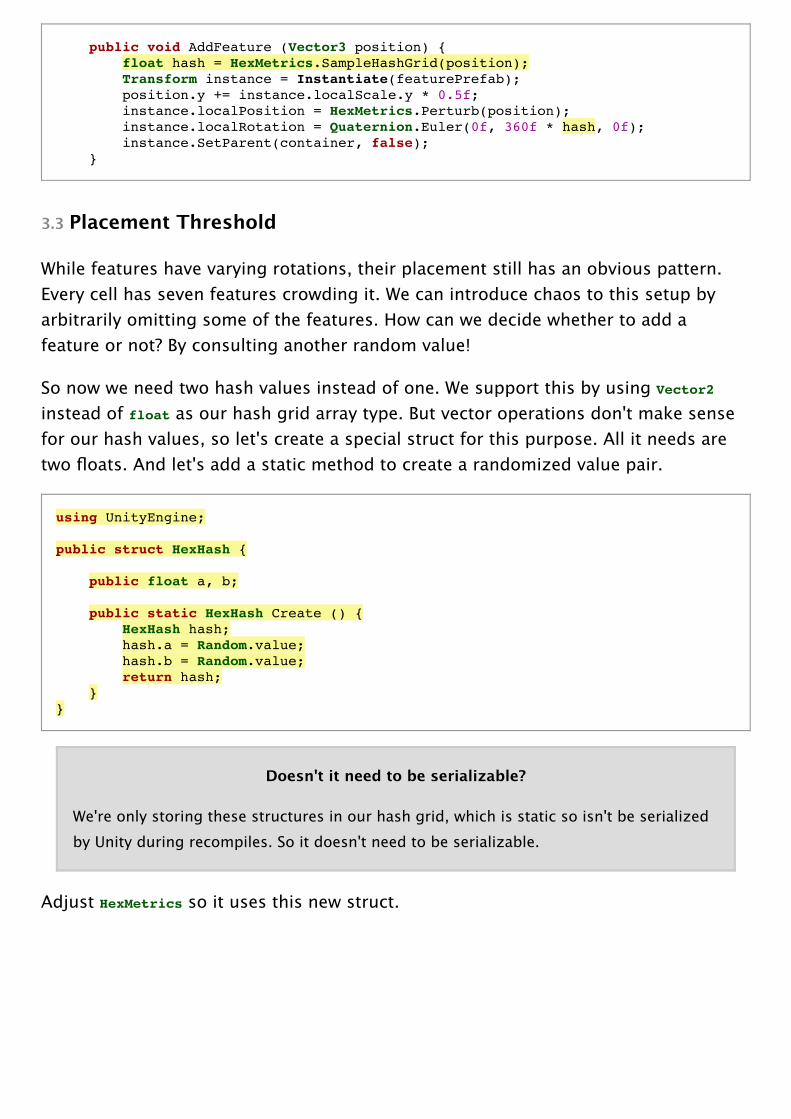
3.3 Placement Threshold
While features have varying rotations, their placement still has an obvious pattern.Every cell has seven features crowding it. We can introduce chaos to this setup byarbitrarily omitting some of the features. How can we decide whether to add afeature or not? By consulting another random value!
So now we need two hash values instead of one. We support this by using Vector2instead of float as our hash grid array type. But vector operations don't make sensefor our hash values, so let's create a special struct for this purpose. All it needs aretwo floats. And let's add a static method to create a randomized value pair.
using UnityEngine;
public struct HexHash {
public float a, b;
public static HexHash Create () { HexHash hash; hash.a = Random.value; hash.b = Random.value; return hash; }}
Doesn't it need to be serializable?
We're only storing these structures in our hash grid, which is static so isn't be serializedby Unity during recompiles. So it doesn't need to be serializable.
Adjust HexMetrics so it uses this new struct.

static HexHash[] hashGrid;
public static void InitializeHashGrid (int seed) { hashGrid = new HexHash[hashGridSize * hashGridSize]; Random.State currentState = Random.state; Random.InitState(seed); for (int i = 0; i < hashGrid.Length; i++) { hashGrid[i] = HexHash.Create(); } Random.state = currentState; }
public static HexHash SampleHashGrid (Vector3 position) { … }
Now HexFeatureManager.AddFeature has access to two hash values. Let's use the firstone to decide whether we actually add a feature, or skip it. If the value is 0.5 orlarger, we bail. This will eliminate about half of the features. We use the second valueto determine the rotation, as usual.
public void AddFeature (Vector3 position) { HexHash hash = HexMetrics.SampleHashGrid(position); if (hash.a >= 0.5f) { return; } Transform instance = Instantiate(featurePrefab); position.y += instance.localScale.y * 0.5f; instance.localPosition = HexMetrics.Perturb(position); instance.localRotation = Quaternion.Euler(0f, 360f * hash.b, 0f); instance.SetParent(container, false); }
Feature density reduced to 50%.
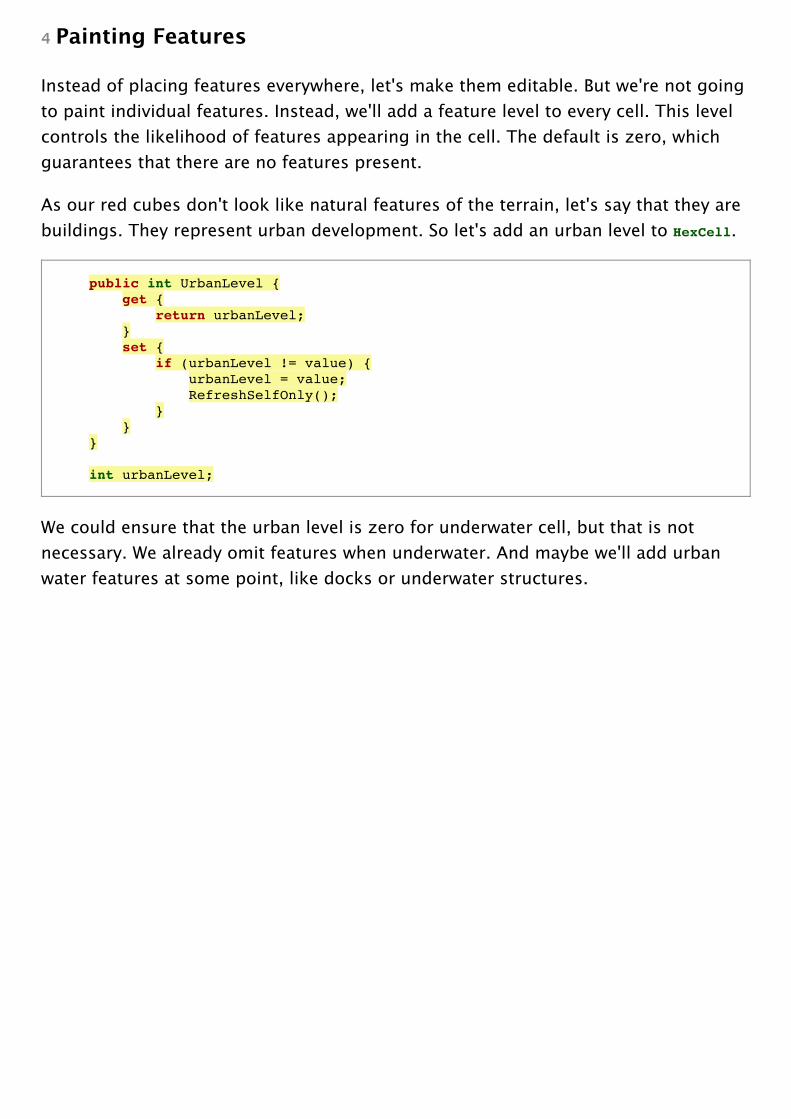
4 Painting Features
Instead of placing features everywhere, let's make them editable. But we're not goingto paint individual features. Instead, we'll add a feature level to every cell. This levelcontrols the likelihood of features appearing in the cell. The default is zero, whichguarantees that there are no features present.
As our red cubes don't look like natural features of the terrain, let's say that they arebuildings. They represent urban development. So let's add an urban level to HexCell.
public int UrbanLevel { get { return urbanLevel; } set { if (urbanLevel != value) { urbanLevel = value; RefreshSelfOnly(); } } }
int urbanLevel;
We could ensure that the urban level is zero for underwater cell, but that is notnecessary. We already omit features when underwater. And maybe we'll add urbanwater features at some point, like docks or underwater structures.

4.1 Density Slider
To edit the urban level, add support for another slider to HexMapEditor.
int activeUrbanLevel; … bool applyUrbanLevel; … public void SetApplyUrbanLevel (bool toggle) { applyUrbanLevel = toggle; } public void SetUrbanLevel (float level) { activeUrbanLevel = (int)level; }
void EditCell (HexCell cell) { if (cell) { … if (applyWaterLevel) { cell.WaterLevel = activeWaterLevel; } if (applyUrbanLevel) { cell.UrbanLevel = activeUrbanLevel; } if (riverMode == OptionalToggle.No) { cell.RemoveRiver(); } … } }
Add another slide to the UI and connect it to the appropriate methods. I put it in anew panel on the right side of the screen, to prevent overcrowding of the left panel.
How many levels do we need? Let's stick to four, representing zero, low, medium,and high density development.
Urban slider.

4.2 Adjusting the Threshold
Now that we have an urban level, we have to use that to determine whether we placefeatures or not. To do so, we have to add the urban level as an extra parameter toHexFeatureManager.AddFeature. Let's go one step further and just pass along the cellitself. That will be more convenient later.
A quick way to make use of the urban level is to multiply it by 0.25 and use that asthe new threshold to bail. That way, the probability of a feature appearing increasesby 25% per level.
public void AddFeature (HexCell cell, Vector3 position) { HexHash hash = HexMetrics.SampleHashGrid(position); if (hash.a >= cell.UrbanLevel * 0.25f) { return; } … }
To make this work, pass along the cells in HexGridChunk.
void Triangulate (HexCell cell) { … if (!cell.IsUnderwater && !cell.HasRiver && !cell.HasRoads) { features.AddFeature(cell, cell.Position); } }
void Triangulate (HexDirection direction, HexCell cell) { … if (!cell.IsUnderwater && !cell.HasRoadThroughEdge(direction)) { features.AddFeature(cell, (center + e.v1 + e.v5) * (1f / 3f)); } … } … void TriangulateAdjacentToRiver ( HexDirection direction, HexCell cell, Vector3 center, EdgeVertices e ) { …
if (!cell.IsUnderwater && !cell.HasRoadThroughEdge(direction)) { features.AddFeature(cell, (center + e.v1 + e.v5) * (1f / 3f)); } }

Painting urban density levels.
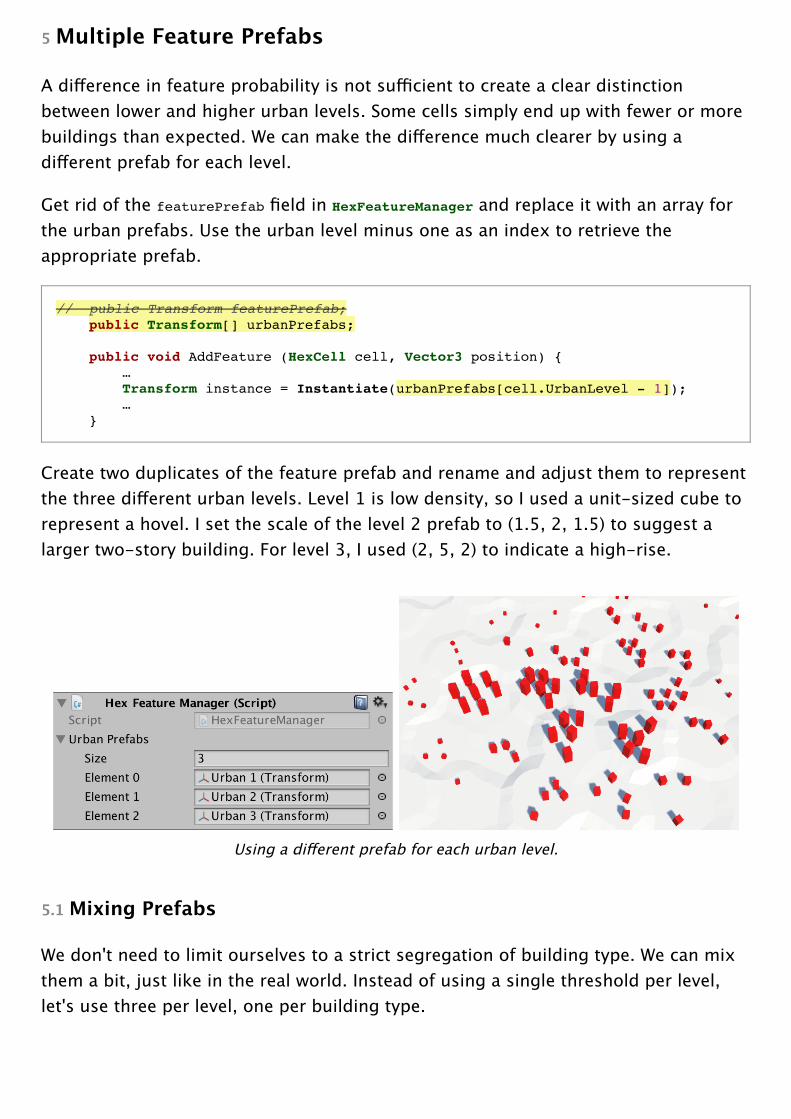
5 Multiple Feature Prefabs
A difference in feature probability is not sufficient to create a clear distinctionbetween lower and higher urban levels. Some cells simply end up with fewer or morebuildings than expected. We can make the difference much clearer by using adifferent prefab for each level.
Get rid of the featurePrefab field in HexFeatureManager and replace it with an array forthe urban prefabs. Use the urban level minus one as an index to retrieve theappropriate prefab.
// public Transform featurePrefab; public Transform[] urbanPrefabs; public void AddFeature (HexCell cell, Vector3 position) { … Transform instance = Instantiate(urbanPrefabs[cell.UrbanLevel - 1]); … }
Create two duplicates of the feature prefab and rename and adjust them to representthe three different urban levels. Level 1 is low density, so I used a unit-sized cube torepresent a hovel. I set the scale of the level 2 prefab to (1.5, 2, 1.5) to suggest alarger two-story building. For level 3, I used (2, 5, 2) to indicate a high-rise.
Using a different prefab for each urban level.
5.1 Mixing Prefabs
We don't need to limit ourselves to a strict segregation of building type. We can mixthem a bit, just like in the real world. Instead of using a single threshold per level,let's use three per level, one per building type.
For level 1, let's use a 40% chance for a hovel. The other building won't appear at all.This requires the threshold triplet (0.4, 0, 0).
For level 2, let's replace the hovels with larger buildings, and add a 20% chance foradditional hovels. Still no high-rises. That suggests the threshold triplet (0.2, 0.4, 0).
For level 3, let's upgrade the medium buildings to high-rises, replace the hovelsagain, and add another 20% change for more hovels. The thresholds for that wouldbe (0.2, 0.2, 0.4).
So the idea is that we upgrade existing building and add new ones in empty lots asthe urban level increases. To replace an existing building, we have to use the samehash value ranges. If hashes between 0 and 0.4 were hovels at level 1, the samerange should produce high-rises at level 3. Specifically, at level 3 high-rises shouldspawn for hash values in the 0–0.4 range, the two-story houses in the 0.4–0.6 range,and the hovels in the 0.6–0.8 range. If we check them from highest to lowest, we cando this with the threshold triplet (0.4, 0.6, 0.8). The level 2 thresholds then become(0, 0.4, 0.6), and the level 1 thresholds become (0, 0, 0.4).
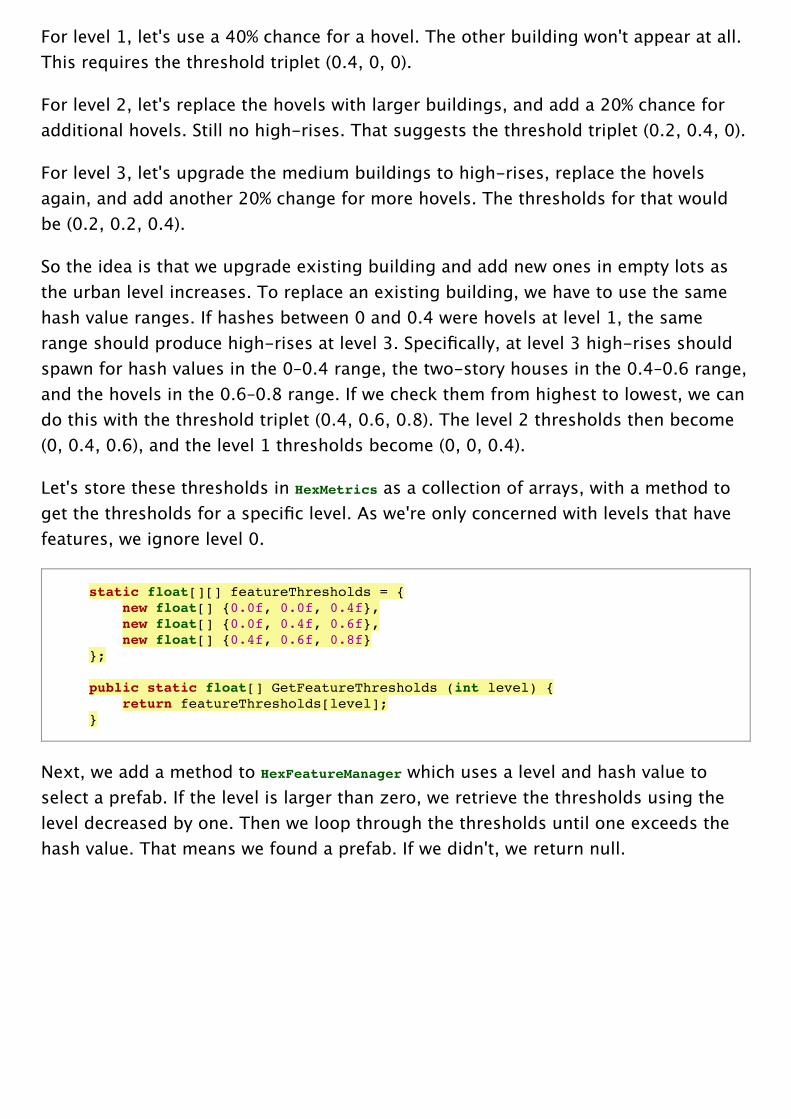
Let's store these thresholds in HexMetrics as a collection of arrays, with a method toget the thresholds for a specific level. As we're only concerned with levels that havefeatures, we ignore level 0.
static float[][] featureThresholds = { new float[] {0.0f, 0.0f, 0.4f}, new float[] {0.0f, 0.4f, 0.6f}, new float[] {0.4f, 0.6f, 0.8f} }; public static float[] GetFeatureThresholds (int level) { return featureThresholds[level]; }
Next, we add a method to HexFeatureManager which uses a level and hash value toselect a prefab. If the level is larger than zero, we retrieve the thresholds using thelevel decreased by one. Then we loop through the thresholds until one exceeds thehash value. That means we found a prefab. If we didn't, we return null.

Transform PickPrefab (int level, float hash) { if (level > 0) { float[] thresholds = HexMetrics.GetFeatureThresholds(level - 1); for (int i = 0; i < thresholds.Length; i++) { if (hash < thresholds[i]) { return urbanPrefabs[i]; } } } return null; }
This approach requires us to reorder the prefab references so they go from high tolow density.
Reversed prefabs.
Use this new method in AddFeature to pick a prefab. If we end up without one, bail.Otherwise, instantiate it and continue as before.
public void AddFeature (HexCell cell, Vector3 position) { HexHash hash = HexMetrics.SampleHashGrid(position);// if (hash.a >= cell.UrbanLevel * 0.25f) {// return;// }// Transform instance = Instantiate(urbanPrefabs[cell.UrbanLevel - 1]); Transform prefab = PickPrefab(cell.UrbanLevel, hash.a); if (!prefab) { return; } Transform instance = Instantiate(prefab); position.y += instance.localScale.y * 0.5f; instance.localPosition = HexMetrics.Perturb(position); instance.localRotation = Quaternion.Euler(0f, 360f * hash.b, 0f); instance.SetParent(container, false); }

Mixing prefabs.
5.2 Variation Per Level
By now we have a nice mix of buildings, but it are still just three distinct ones. Wecan increase the variety even more by associating a collection of prefabs to eachurban density level. Then we pick one of those at random. This requires a newrandom value, so add a third one to HexHash.
public float a, b, c;
public static HexHash Create () { HexHash hash; hash.a = Random.value; hash.b = Random.value; hash.c = Random.value; return hash; }
Turn HexFeatureManager.urbanPrefabs into an array of arrays, and add a choiceparameter to the PickPrefab method. Use it to index the nested array by multiplying itwith that array's length and casting to an integer.
public Transform[][] urbanPrefabs; …
Transform PickPrefab (int level, float hash, float choice) { if (level > 0) { float[] thresholds = HexMetrics.GetFeatureThresholds(level - 1); for (int i = 0; i < thresholds.Length; i++) { if (hash < thresholds[i]) { return urbanPrefabs[i][(int)(choice * urbanPrefabs[i].Length)]; } } } return null; }
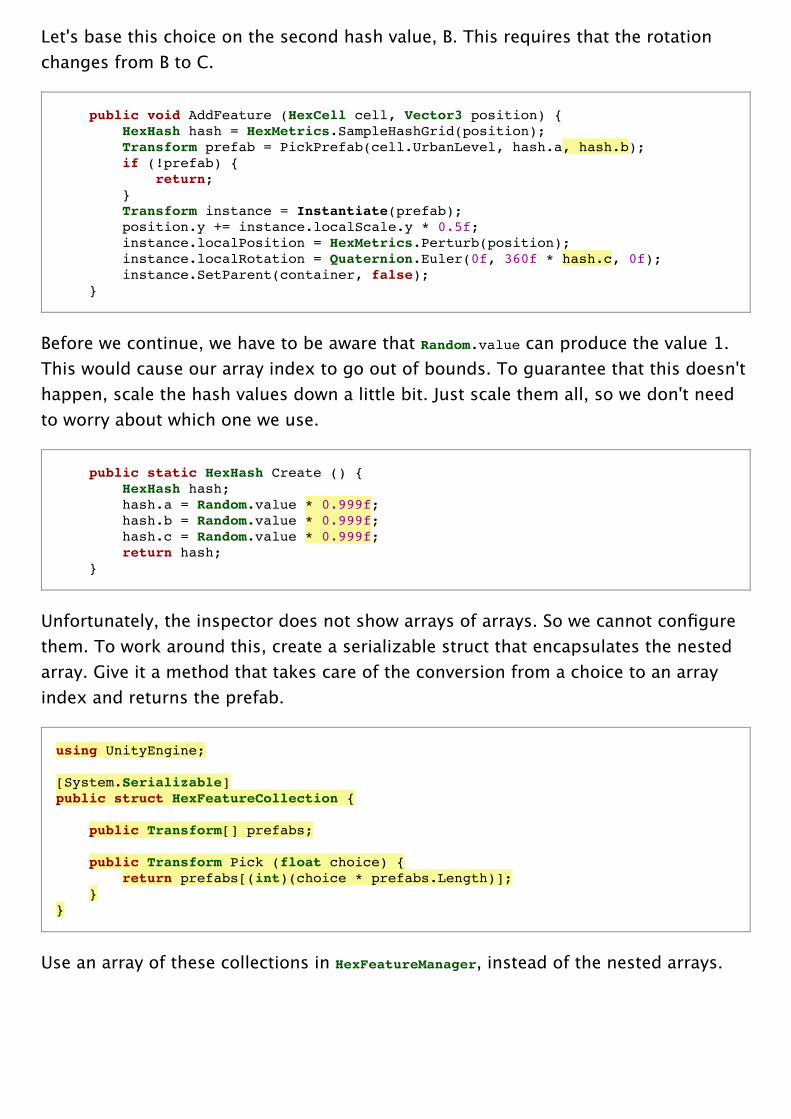
Let's base this choice on the second hash value, B. This requires that the rotationchanges from B to C.
public void AddFeature (HexCell cell, Vector3 position) { HexHash hash = HexMetrics.SampleHashGrid(position); Transform prefab = PickPrefab(cell.UrbanLevel, hash.a, hash.b); if (!prefab) { return; } Transform instance = Instantiate(prefab); position.y += instance.localScale.y * 0.5f; instance.localPosition = HexMetrics.Perturb(position); instance.localRotation = Quaternion.Euler(0f, 360f * hash.c, 0f); instance.SetParent(container, false); }
Before we continue, we have to be aware that Random.value can produce the value 1.This would cause our array index to go out of bounds. To guarantee that this doesn'thappen, scale the hash values down a little bit. Just scale them all, so we don't needto worry about which one we use.
public static HexHash Create () { HexHash hash; hash.a = Random.value * 0.999f; hash.b = Random.value * 0.999f; hash.c = Random.value * 0.999f; return hash; }
Unfortunately, the inspector does not show arrays of arrays. So we cannot configurethem. To work around this, create a serializable struct that encapsulates the nestedarray. Give it a method that takes care of the conversion from a choice to an arrayindex and returns the prefab.
using UnityEngine;
[System.Serializable]public struct HexFeatureCollection {
public Transform[] prefabs;
public Transform Pick (float choice) { return prefabs[(int)(choice * prefabs.Length)]; }}
Use an array of these collections in HexFeatureManager, instead of the nested arrays.

// public Transform[][] urbanPrefabs; public HexFeatureCollection[] urbanCollections;
…
Transform PickPrefab (int level, float hash, float choice) { if (level > 0) { float[] thresholds = HexMetrics.GetFeatureThresholds(level - 1); for (int i = 0; i < thresholds.Length; i++) { if (hash < thresholds[i]) { return urbanCollections[i].Pick(choice); } } } return null; }
You can now define multiple buildings per density level. As they're independent, youdon't need to use the same amount per level. I simply used two variants per level,adding a longer lower variant to each. I set their scales to (3.5, 3, 2), (2.75, 1.5, 1.5),and (1.75, 1, 1).
Two building types per density level.

6 Multiple Feature Types
With our current setup we can create decent urban settings. But terrain can containmore than just buildings. What about farms? What about plants? Let's add levels forthose to HexCell as well. They're not exclusive, they can mix.
public int FarmLevel { get { return farmLevel; } set { if (farmLevel != value) { farmLevel = value; RefreshSelfOnly(); } } }
public int PlantLevel { get { return plantLevel; } set { if (plantLevel != value) { plantLevel = value; RefreshSelfOnly(); } } }
int urbanLevel, farmLevel, plantLevel;
Of course this requires support for two addition slides in HexMapEditor.

int activeUrbanLevel, activeFarmLevel, activePlantLevel;
bool applyUrbanLevel, applyFarmLevel, applyPlantLevel;
…
public void SetApplyFarmLevel (bool toggle) { applyFarmLevel = toggle; }
public void SetFarmLevel (float level) { activeFarmLevel = (int)level; }
public void SetApplyPlantLevel (bool toggle) { applyPlantLevel = toggle; }
public void SetPlantLevel (float level) { activePlantLevel = (int)level; }
…
void EditCell (HexCell cell) { if (cell) { … if (applyUrbanLevel) { cell.UrbanLevel = activeUrbanLevel; } if (applyFarmLevel) { cell.FarmLevel = activeFarmLevel; } if (applyPlantLevel) { cell.PlantLevel = activePlantLevel; } … } }
Add them to the UI, as expected.
Three sliders.
And HexFeatureManager needs additional collections as well.

public HexFeatureCollection[] urbanCollections, farmCollections, plantCollections;
Three feature collections.
I gave both the farms and plants two prefabs per density level, just like the urbancollections. I used cubes for all of them. The farms got a light green material, whilethe plants got a dark green material.
I made the farm cubes 0.1 units high, to represent rectangular plots of farmland. Thehigh-density scales are (2.5, 0.1, 2.5) and (3.5, 0.1, 2). The medium lots are 1.75square and 2.5 by 1.25. Low density got 1 square and 1.5 by 0.75.
The plant prefabs represent tall trees and large shrubs. The high-density ones arebiggest, at (1.25, 4.5, 1.25) and (1.5, 3, 1.5). Medium scales are (0.75, 3, 0.75) and(1, 1.5, 1). The smallest plants have sizes (0.5, 1.5, 0.5) and (0.75, 1, 0.75).
6.1 Feature Selection
Each feature type should get its own hash value, so they have different spawnpatterns. This makes it possible to mix them. So add two additional values to HexHash.

public float a, b, c, d, e;
public static HexHash Create () { HexHash hash; hash.a = Random.value * 0.999f; hash.b = Random.value * 0.999f; hash.c = Random.value * 0.999f; hash.d = Random.value * 0.999f; hash.e = Random.value * 0.999f; return hash; }
HexFeatureManager.PickPrefab now has to work with different collections. Add aparameter to it to facilitate this. Also, change the hash used for the prefab variantchoice to D, and the one for the rotation to E.
Transform PickPrefab ( HexFeatureCollection[] collection, int level, float hash, float choice ) { if (level > 0) { float[] thresholds = HexMetrics.GetFeatureThresholds(level - 1); for (int i = 0; i < thresholds.Length; i++) { if (hash < thresholds[i]) { return collection[i].Pick(choice); } } } return null; }
public void AddFeature (HexCell cell, Vector3 position) { HexHash hash = HexMetrics.SampleHashGrid(position); Transform prefab = PickPrefab( urbanCollections, cell.UrbanLevel, hash.a, hash.d ); … instance.localRotation = Quaternion.Euler(0f, 360f * hash.e, 0f); instance.SetParent(container, false); }
Currently AddFeature picks an urban prefab. That's fine, but now we have moreoptions. So let's pick another prefab as well, from the farms. We'll use B as its hashvalue. The variant choice can just rely on D again.
Transform prefab = PickPrefab( urbanCollections, cell.UrbanLevel, hash.a, hash.d ); Transform otherPrefab = PickPrefab( farmCollections, cell.FarmLevel, hash.b, hash.d ); if (!prefab) { return; }

Which prefab do we end up instantiating? If one of them ends up as null, then thechoice is clear. But when both exist, we have to make a decision. Let's just use theone with the lowest hash value.
Transform otherPrefab = PickPrefab( farmCollections, cell.FarmLevel, hash.b, hash.d ); if (prefab) { if (otherPrefab && hash.b < hash.a) { prefab = otherPrefab; } } else if (otherPrefab) { prefab = otherPrefab; } else { return; }
A mix of urban and farm features.
Next, we do the same for plants, using the C hash value.

if (prefab) { if (otherPrefab && hash.b < hash.a) { prefab = otherPrefab; } } else if (otherPrefab) { prefab = otherPrefab; } otherPrefab = PickPrefab( plantCollections, cell.PlantLevel, hash.c, hash.d ); if (prefab) { if (otherPrefab && hash.c < hash.a) { prefab = otherPrefab; } } else if (otherPrefab) { prefab = otherPrefab; } else { return; }
However, we can't just copy the code like that. When we end up picking farm insteadof urban, we should compare the plant hash with the farm hash. Not with the urbanhash. So we have to keep track of which hash we decided to go with, and comparewith that one.
float usedHash = hash.a; if (prefab) { if (otherPrefab && hash.b < hash.a) { prefab = otherPrefab; usedHash = hash.b; } } else if (otherPrefab) { prefab = otherPrefab; usedHash = hash.b; } otherPrefab = PickPrefab( plantCollections, cell.PlantLevel, hash.c, hash.d ); if (prefab) { if (otherPrefab && hash.c < usedHash) { prefab = otherPrefab; } } else if (otherPrefab) { prefab = otherPrefab; } else { return; }
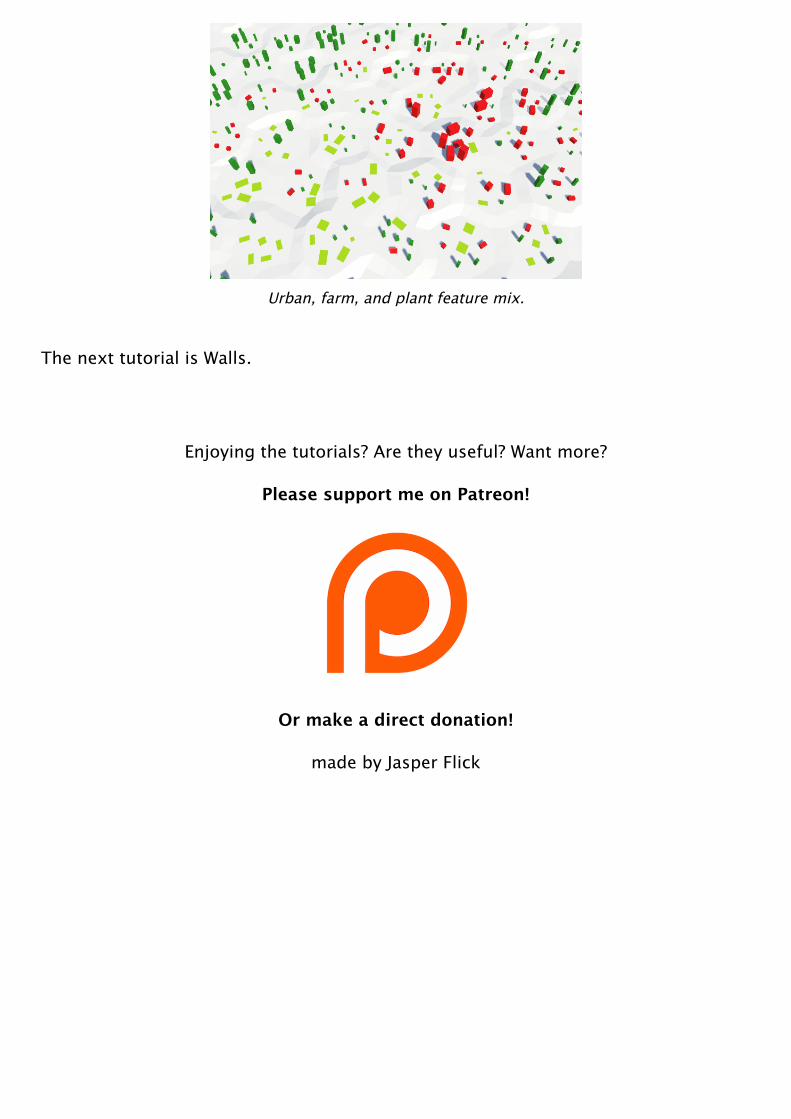
Urban, farm, and plant feature mix.
The next tutorial is Walls.
Enjoying the tutorials? Are they useful? Want more?
Please support me on Patreon!
Or make a direct donation!
made by Jasper Flick