
TyrolSport Mini Cooper S R55/R56/R57 Intercooler ... · TyrolSport Mini Cooper S R55/R56/R57...
51
TyrolSport Mini Cooper S R55/R56/R57 Intercooler Installation Guide Congratulations on your purchase of the TyrolSport FMIC for your Mini Cooper S. We have worked rigorously to develop a product which not only meets your highest expectations but also is functional and easy to install. This intercooler can be installed with the basic hand tools listed below by anyone who possesses basic mechanical skill. Parts List 1x TyrolSport Mini Cooper FMIC 3x M6x 1.00mm Rivet nut 3x M6 x 1.00mm stainless bolts 3x M6 x 1.00mm bolts 3x M8 x 1.25 nut Tools Needed 13mm socket/ratchet 10mm socket/ratchet 7mm Socket/ ratchet T25 torque socket T20 torque socket Small and medium flat head screw driver Plastic interior removal tool (optional) Stubby/short Philips screwdriver 23/64” drill bit/drill 4 mm hex key Dremel/ Cutting tool
Transcript of TyrolSport Mini Cooper S R55/R56/R57 Intercooler ... · TyrolSport Mini Cooper S R55/R56/R57...

TyrolSport Mini Cooper S R55/R56/R57 Intercooler Installation Guide
Congratulations on your purchase of the TyrolSport FMIC for your Mini Cooper S. We have worked
rigorously to develop a product which not only meets your highest expectations but also is functional
and easy to install. This intercooler can be installed with the basic hand tools listed below by anyone
who possesses basic mechanical skill.
Parts List
1x TyrolSport Mini Cooper FMIC
3x M6x 1.00mm Rivet nut
3x M6 x 1.00mm stainless bolts
3x M6 x 1.00mm bolts
3x M8 x 1.25 nut
Tools Needed
13mm socket/ratchet
10mm socket/ratchet
7mm Socket/ ratchet
T25 torque socket
T20 torque socket
Small and medium flat head screw driver
Plastic interior removal tool (optional)
Stubby/short Philips screwdriver
23/64” drill bit/drill
4 mm hex key
Dremel/ Cutting tool
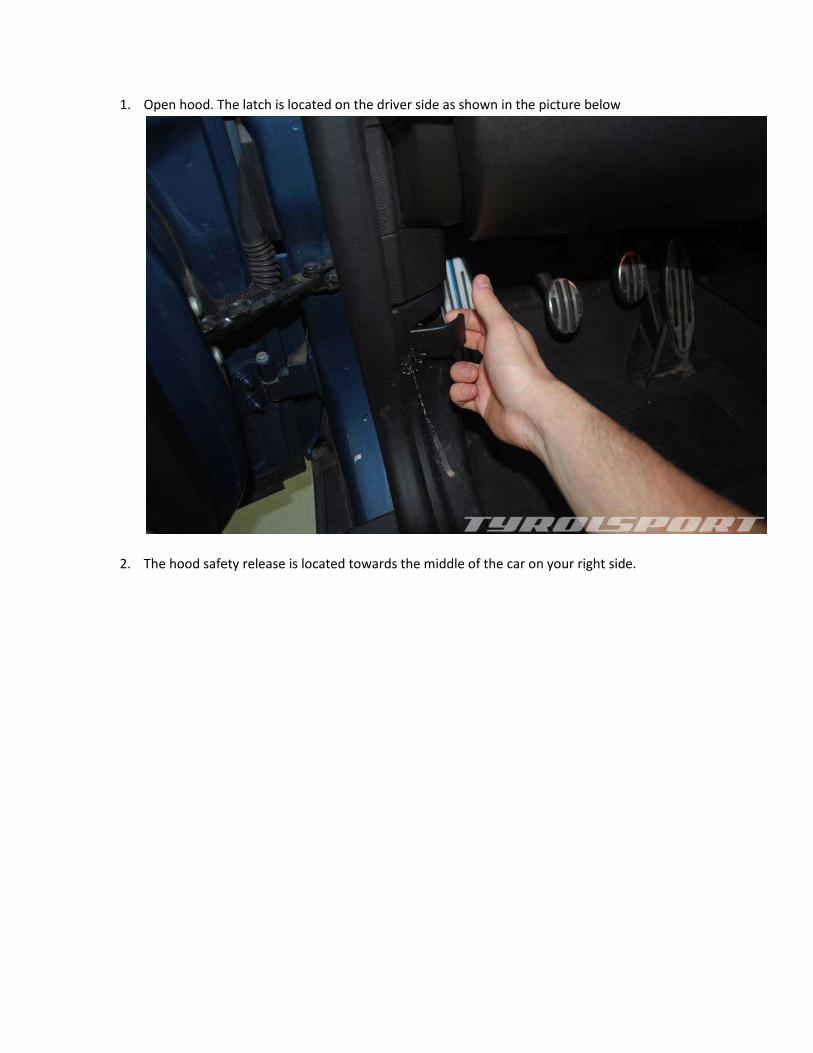
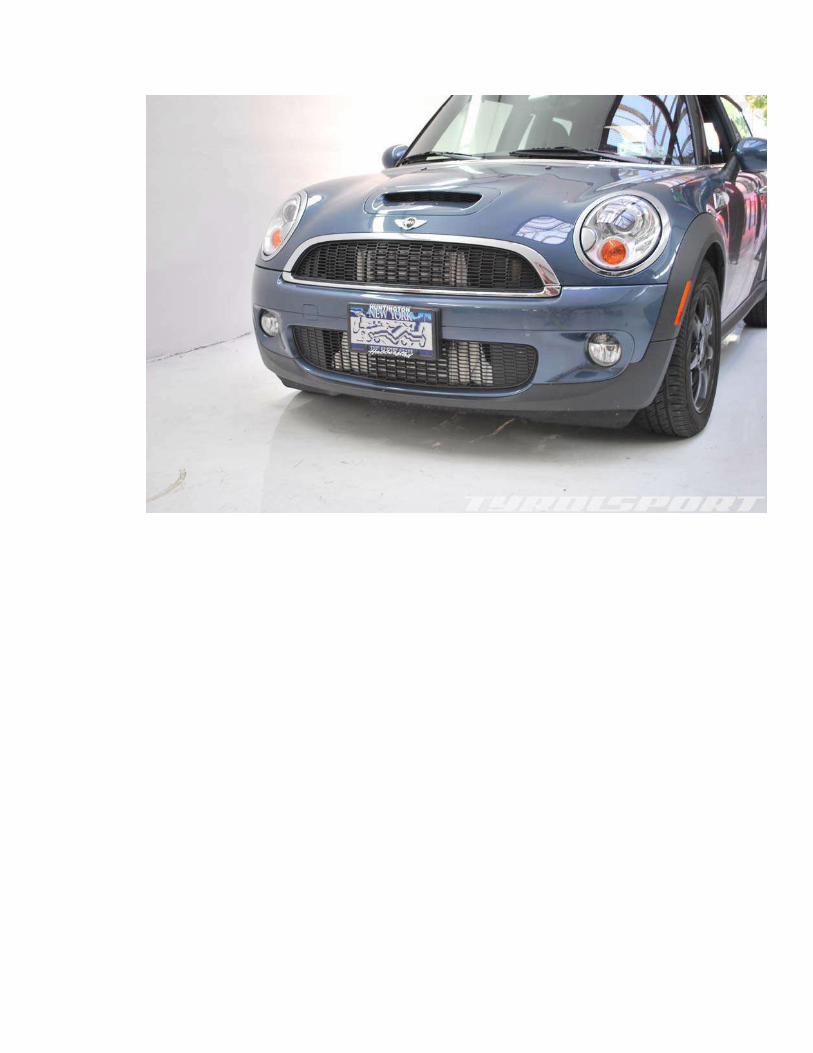
1. Open hood. The latch is located on the driver side as shown in the picture below
2. The hood safety release is located towards the middle of the car on your right side.
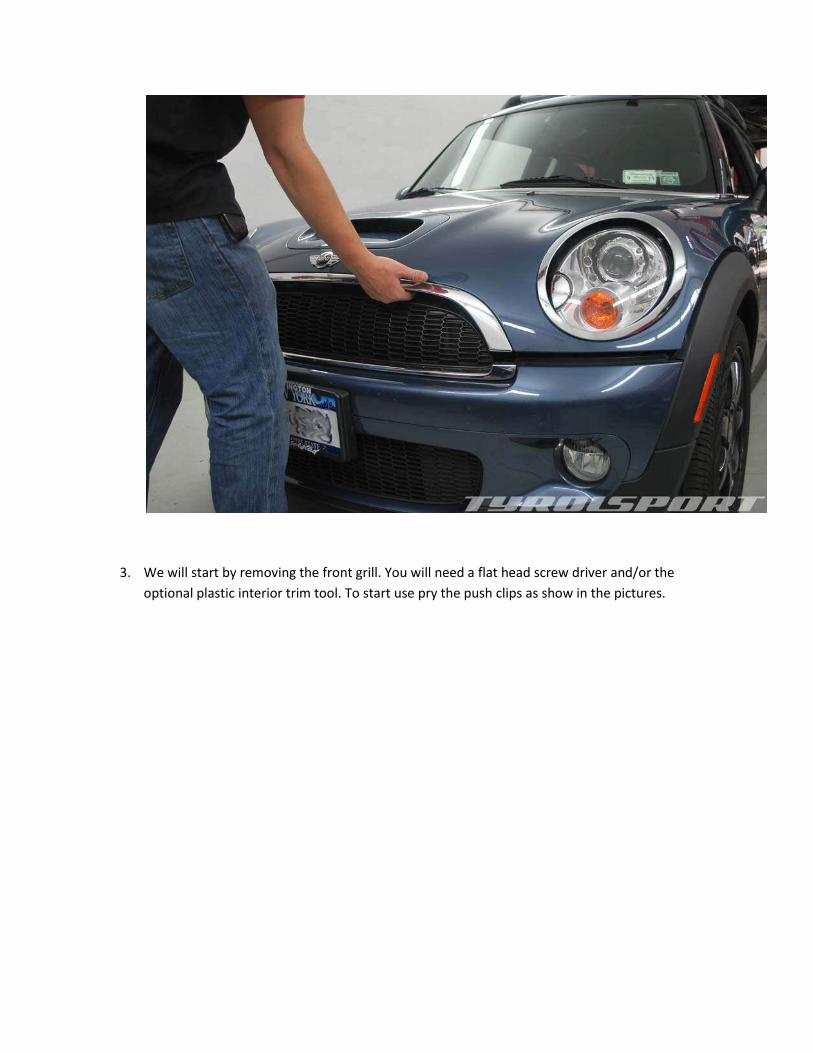
3. We will start by removing the front grill. You will need a flat head screw driver and/or the
optional plastic interior trim tool. To start use pry the push clips as show in the pictures.
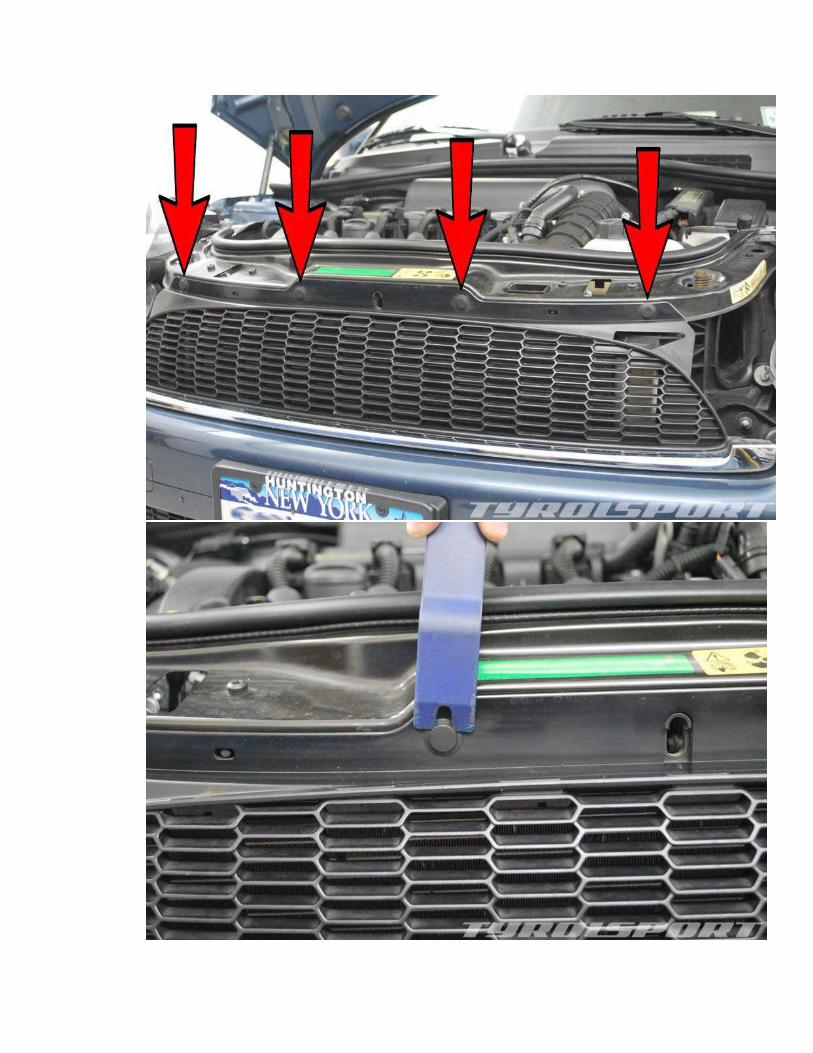
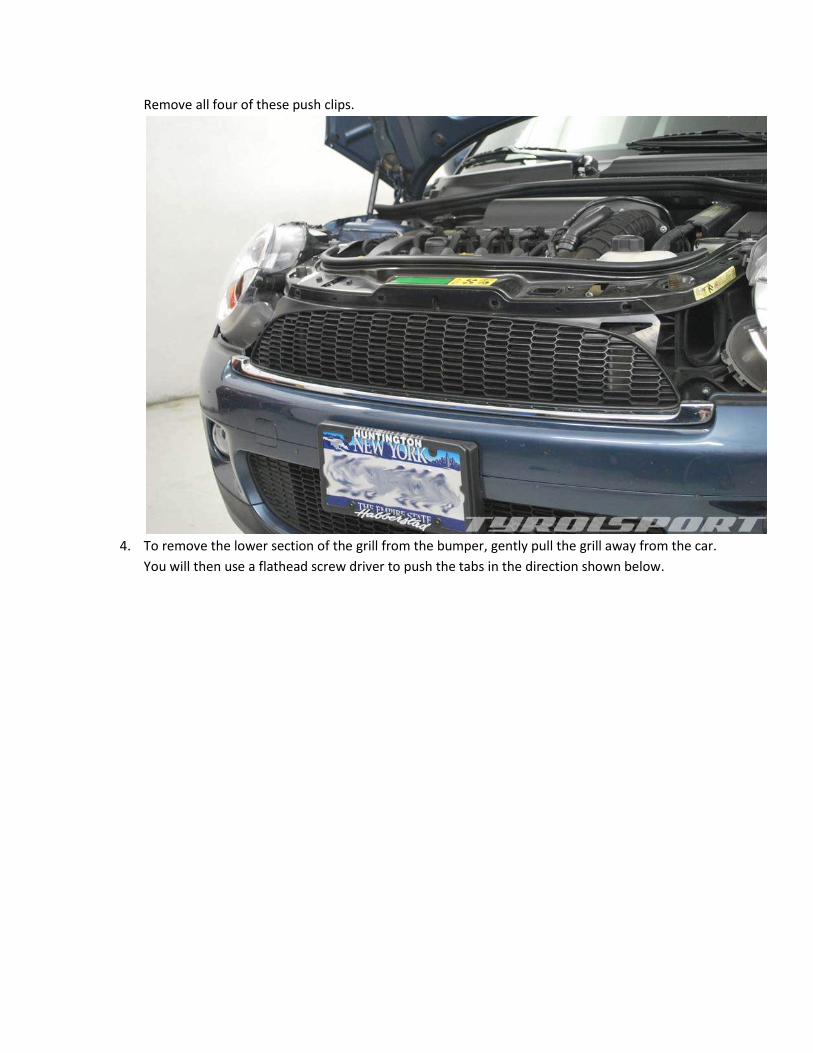
Remove all four of these push clips.
4. To remove the lower section of the grill from the bumper, gently pull the grill away from the car.
You will then use a flathead screw driver to push the tabs in the direction shown below.
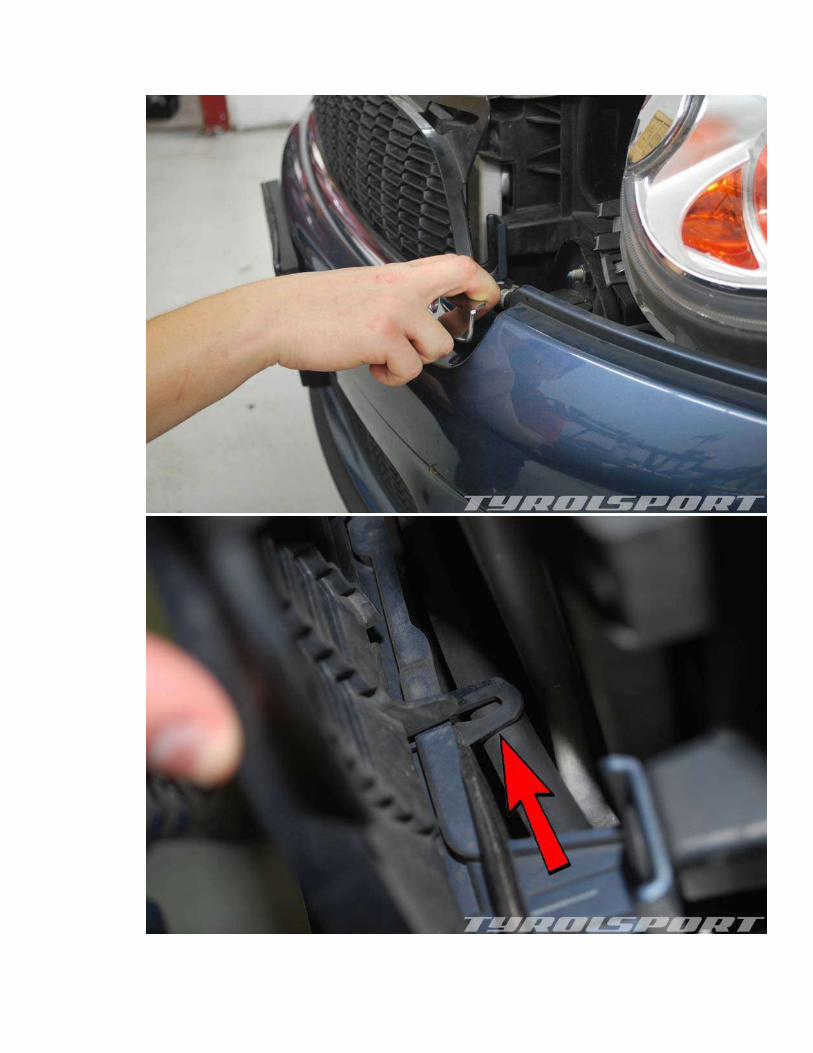
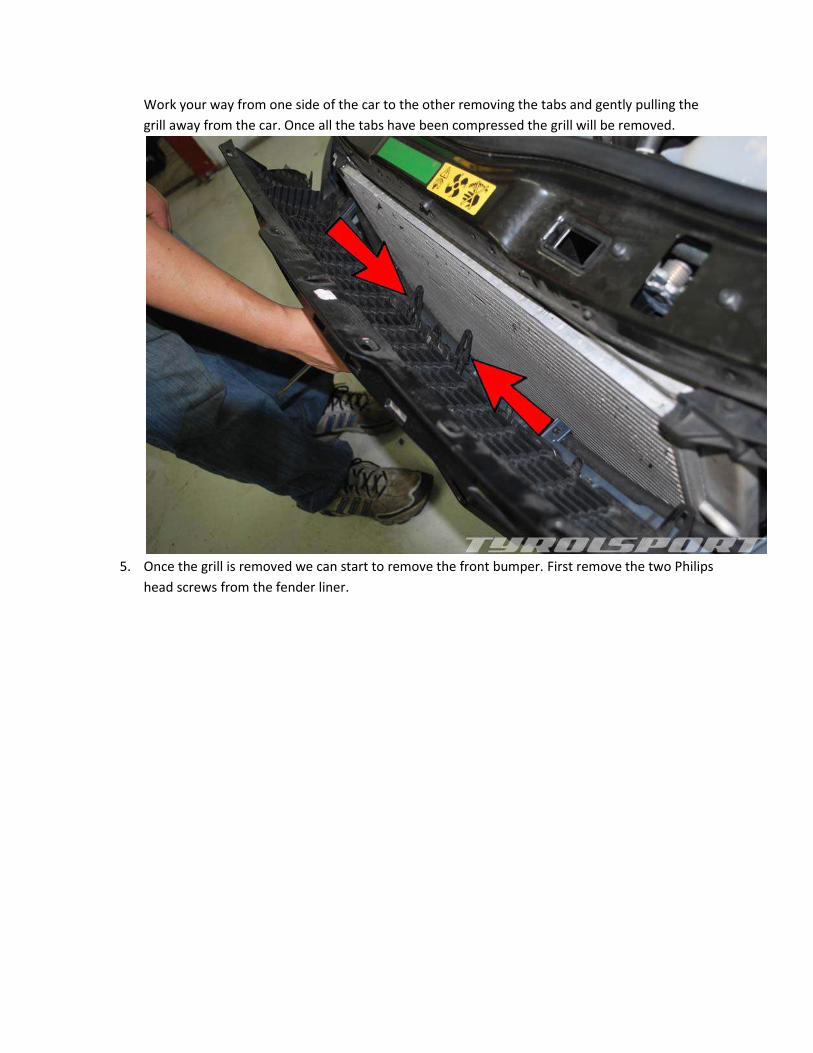
Work your way from one side of the car to the other removing the tabs and gently pulling the
grill away from the car. Once all the tabs have been compressed the grill will be removed.
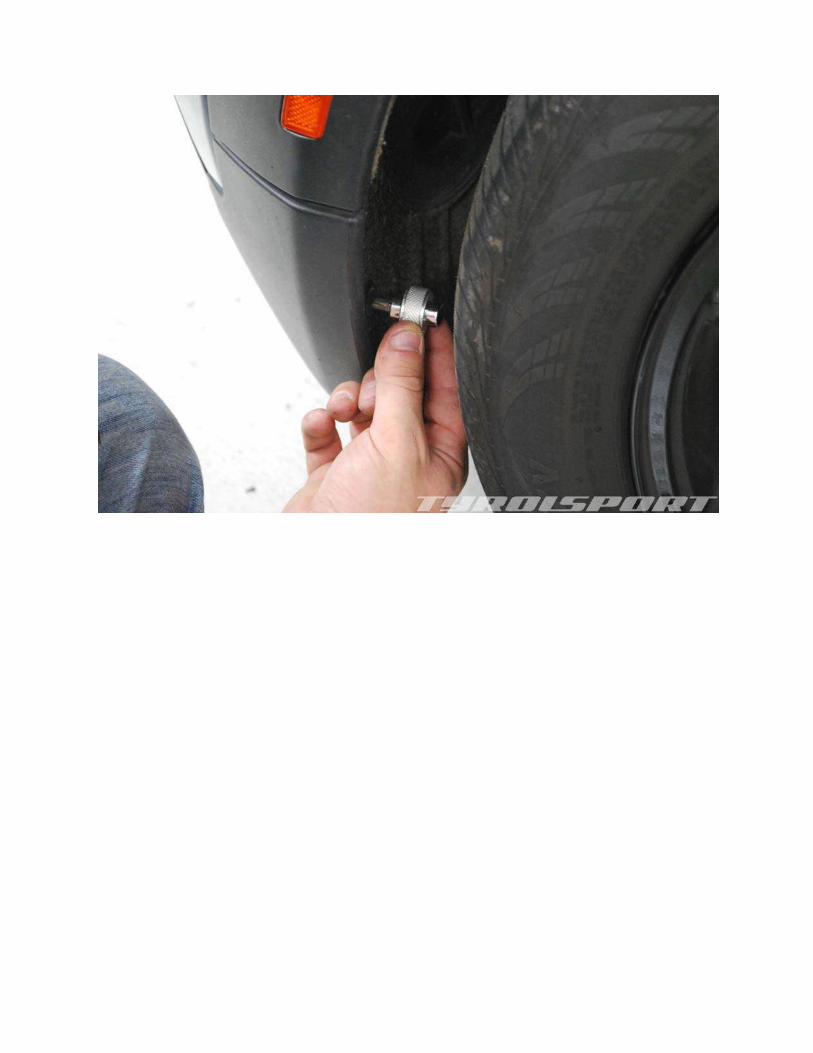
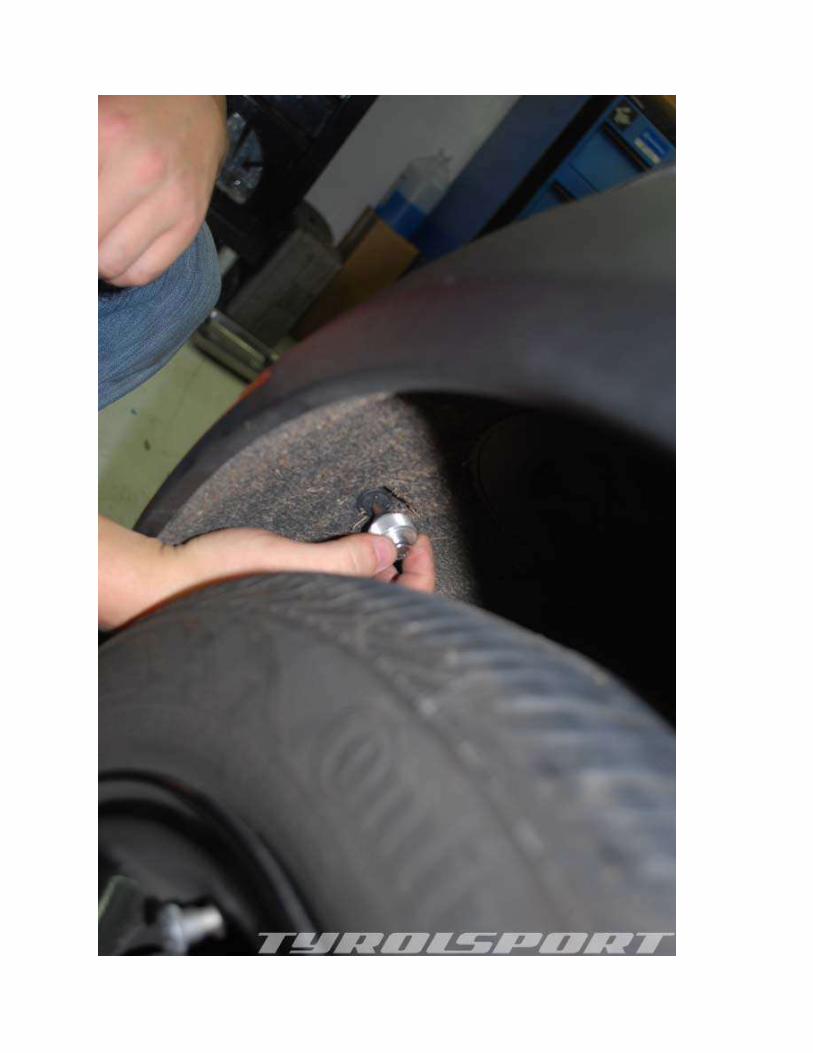
5. Once the grill is removed we can start to remove the front bumper. First remove the two Philips
head screws from the fender liner.

Once you have moved the fender liner you can now access the two push clips (on each side)
which hold the fender flair to the bumper. To remove these use the same procedure as the clips
in the front grill.
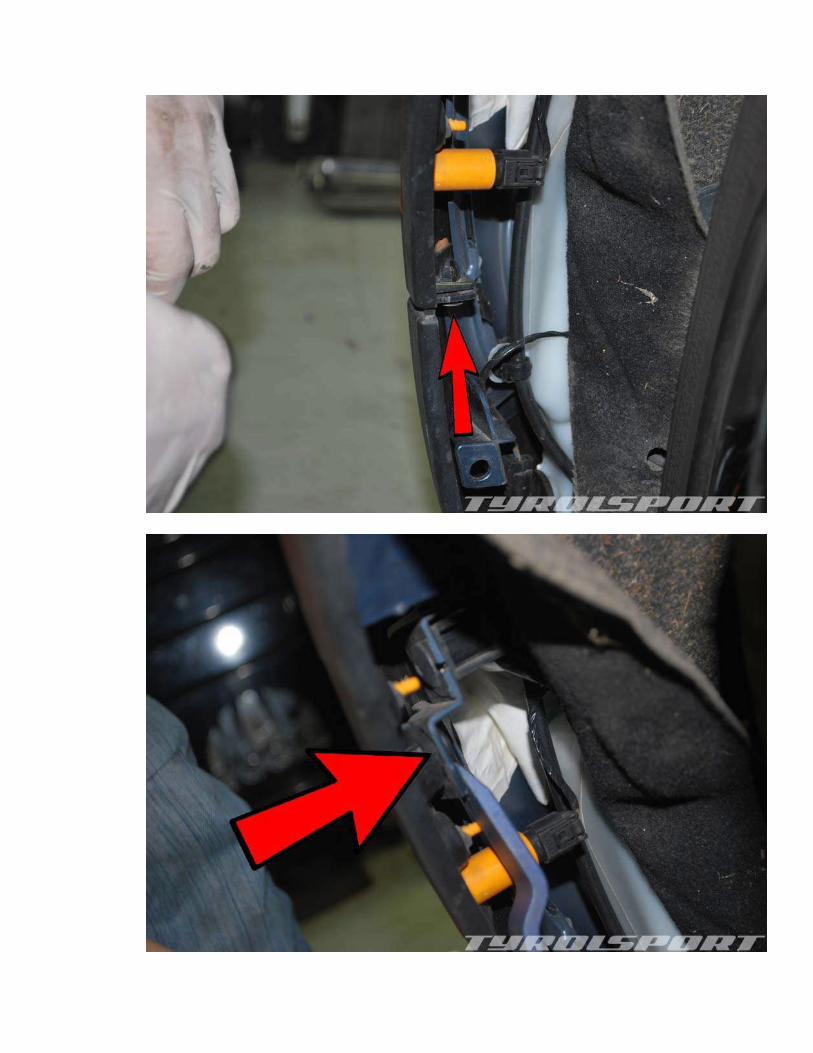

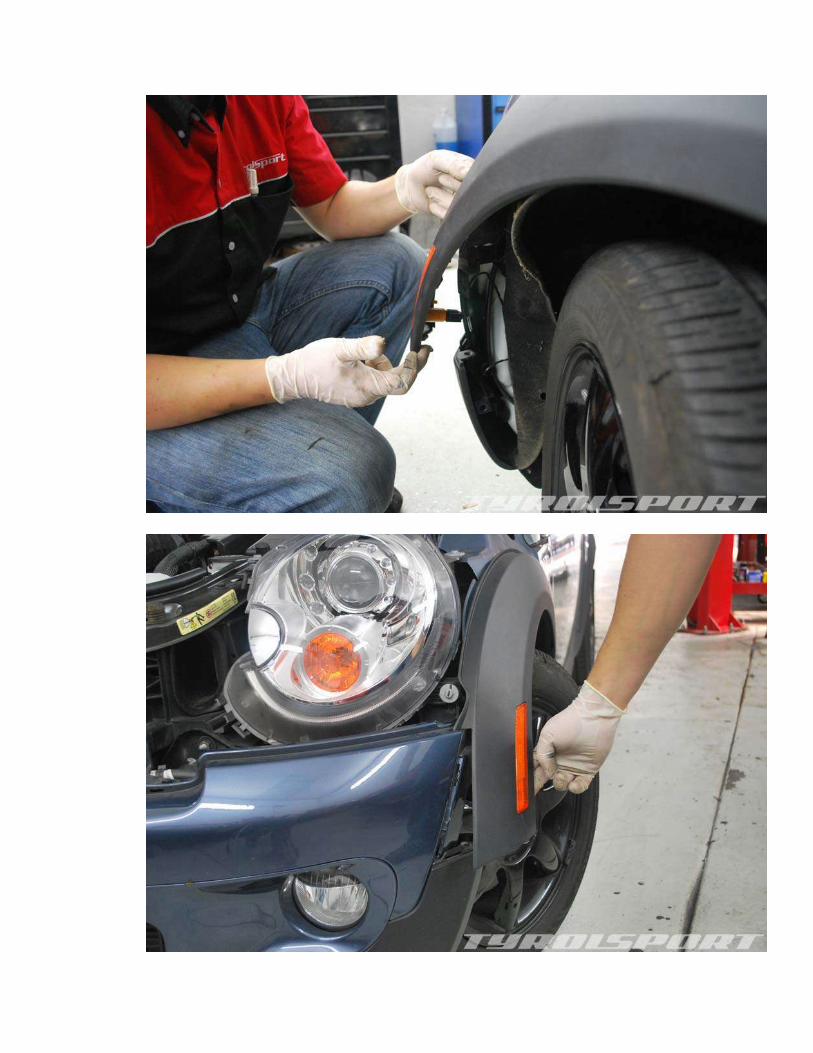
Once the push clips are removed you can pull the fender flair towards the front and away from
the car.
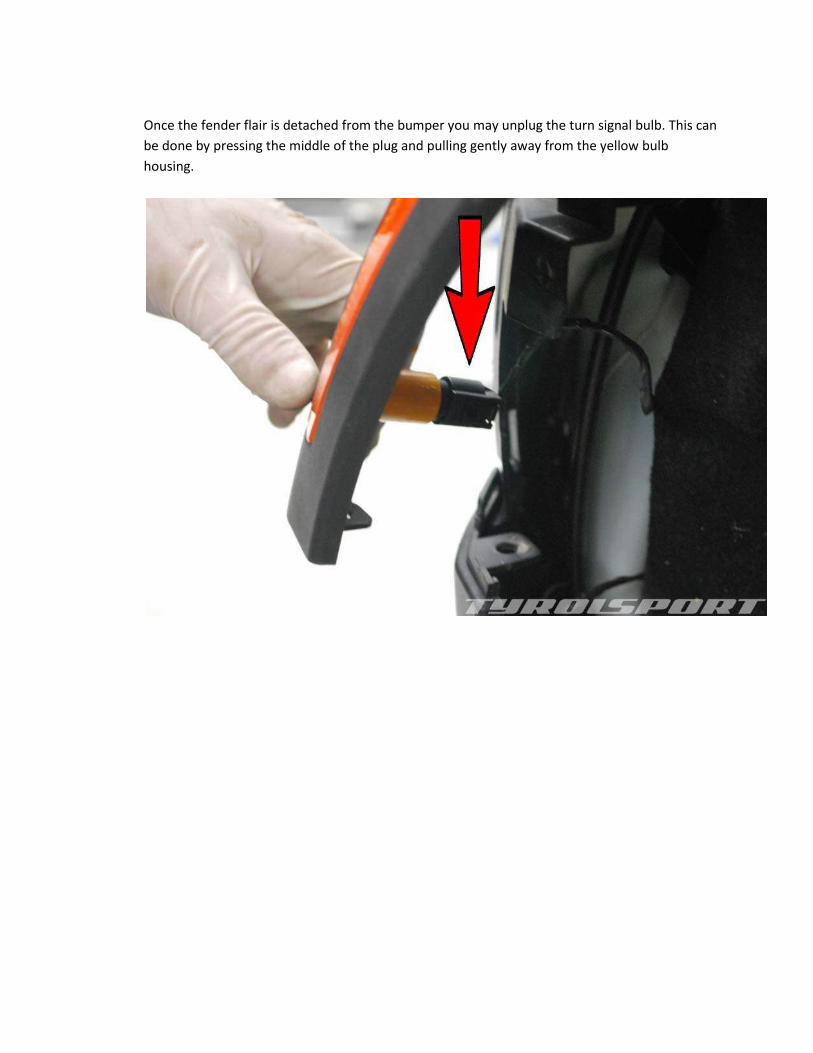
Once the fender flair is detached from the bumper you may unplug the turn signal bulb. This can
be done by pressing the middle of the plug and pulling gently away from the yellow bulb
housing.
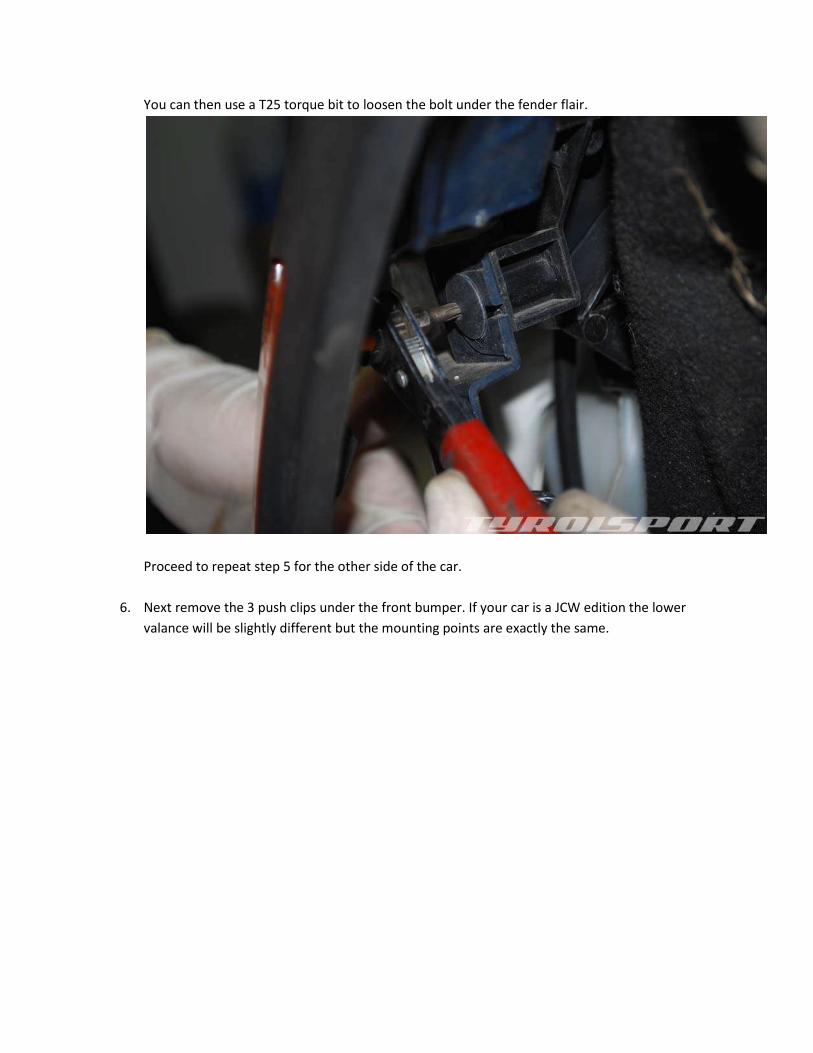
You can then use a T25 torque bit to loosen the bolt under the fender flair.
Proceed to repeat step 5 for the other side of the car.
6. Next remove the 3 push clips under the front bumper. If your car is a JCW edition the lower
valance will be slightly different but the mounting points are exactly the same.
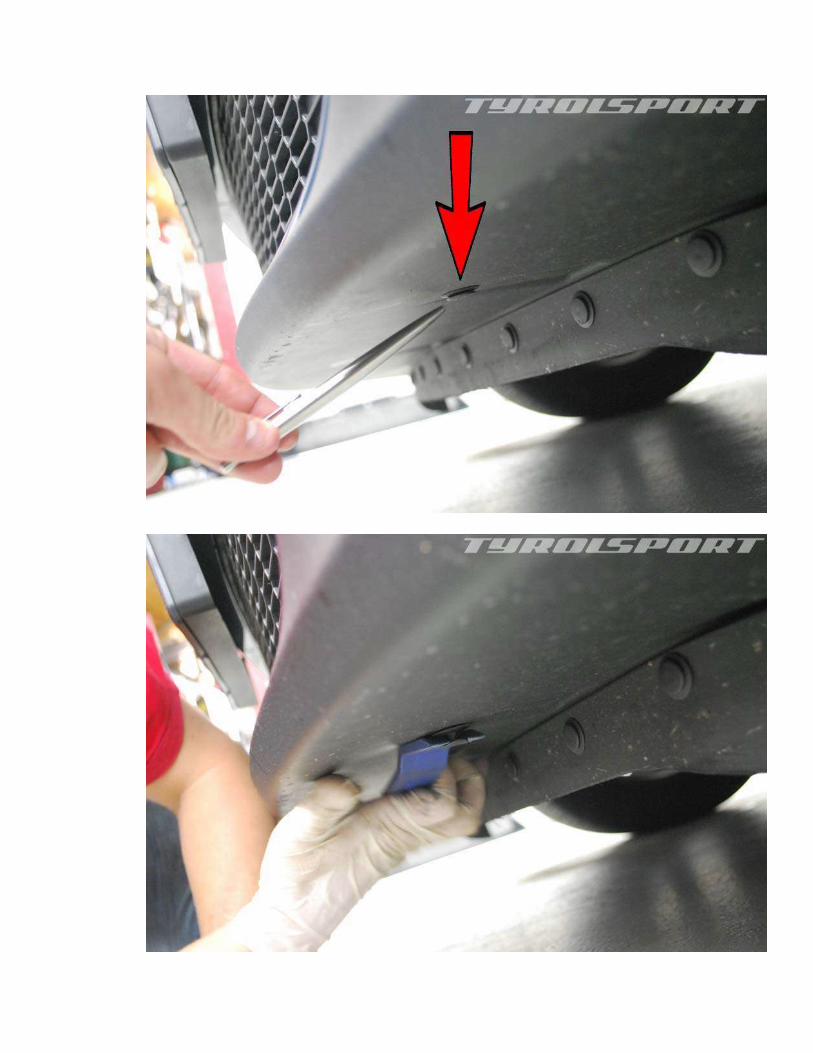
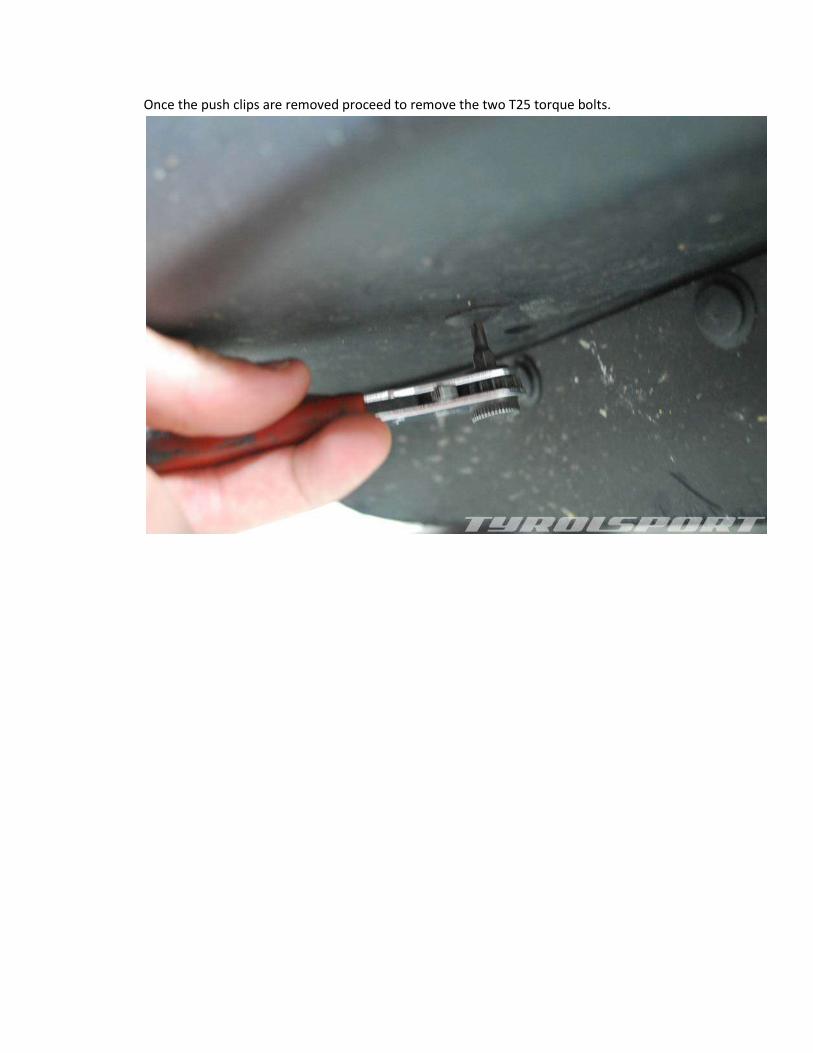
Once the push clips are removed proceed to remove the two T25 torque bolts.
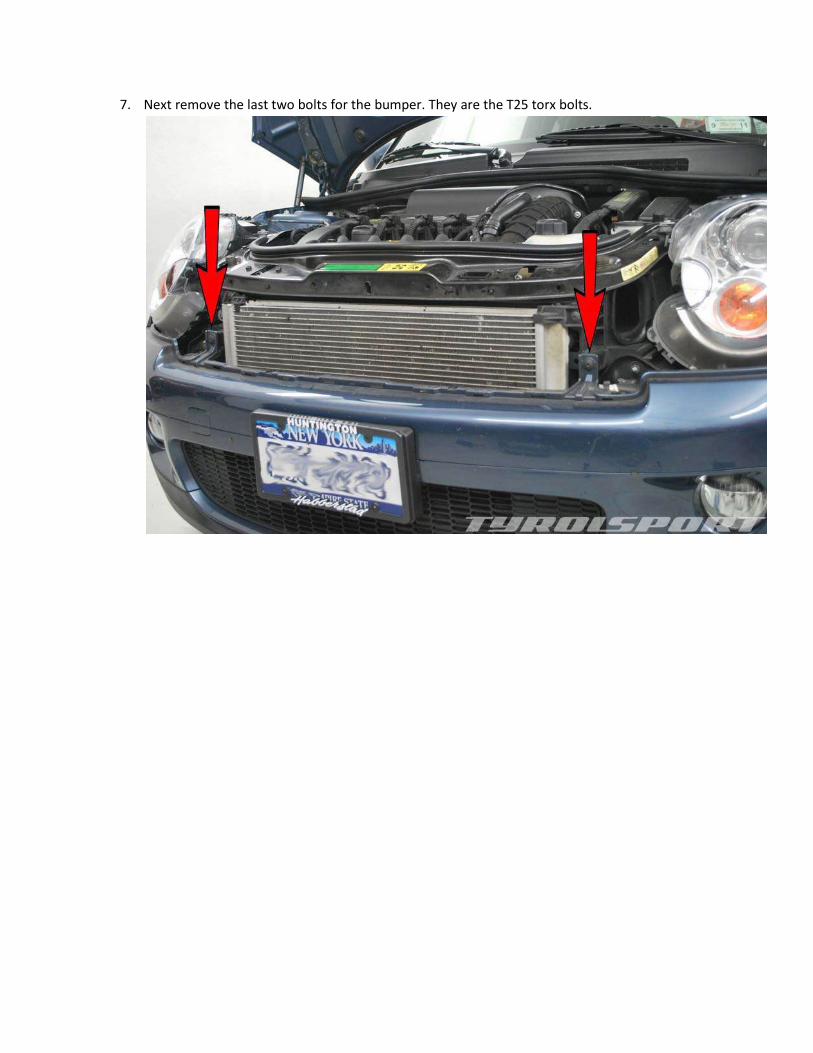
7. Next remove the last two bolts for the bumper. They are the T25 torx bolts.
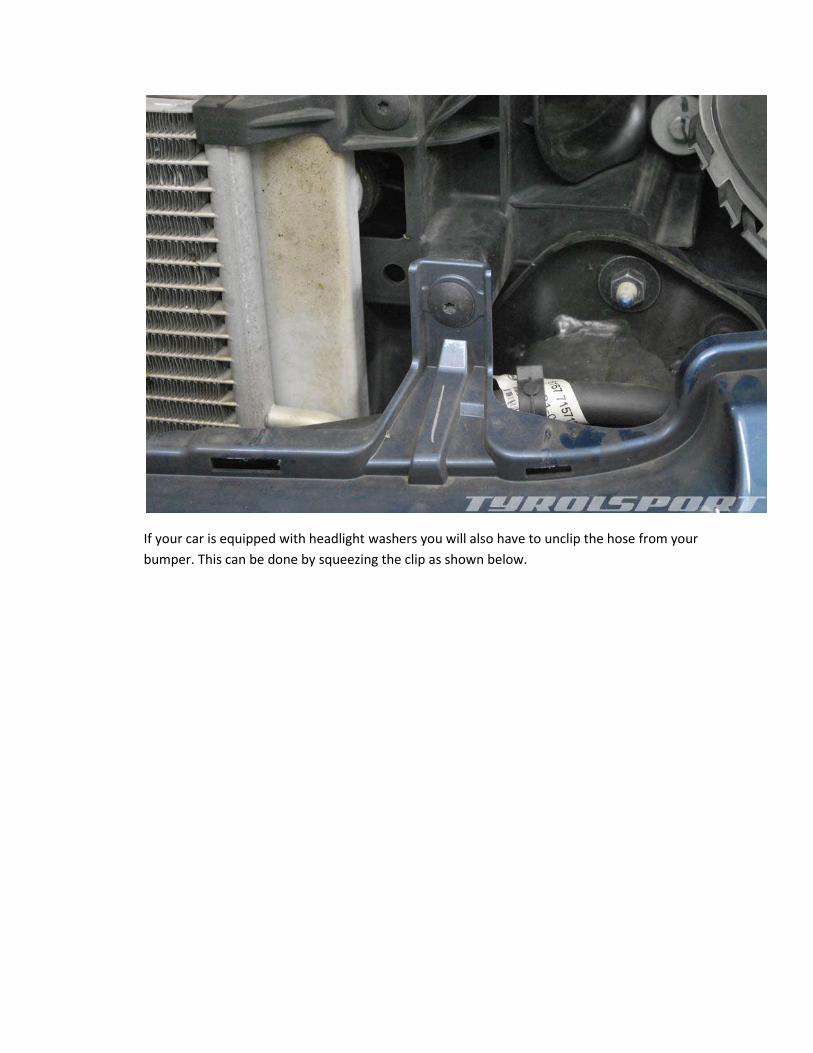
If your car is equipped with headlight washers you will also have to unclip the hose from your
bumper. This can be done by squeezing the clip as shown below.
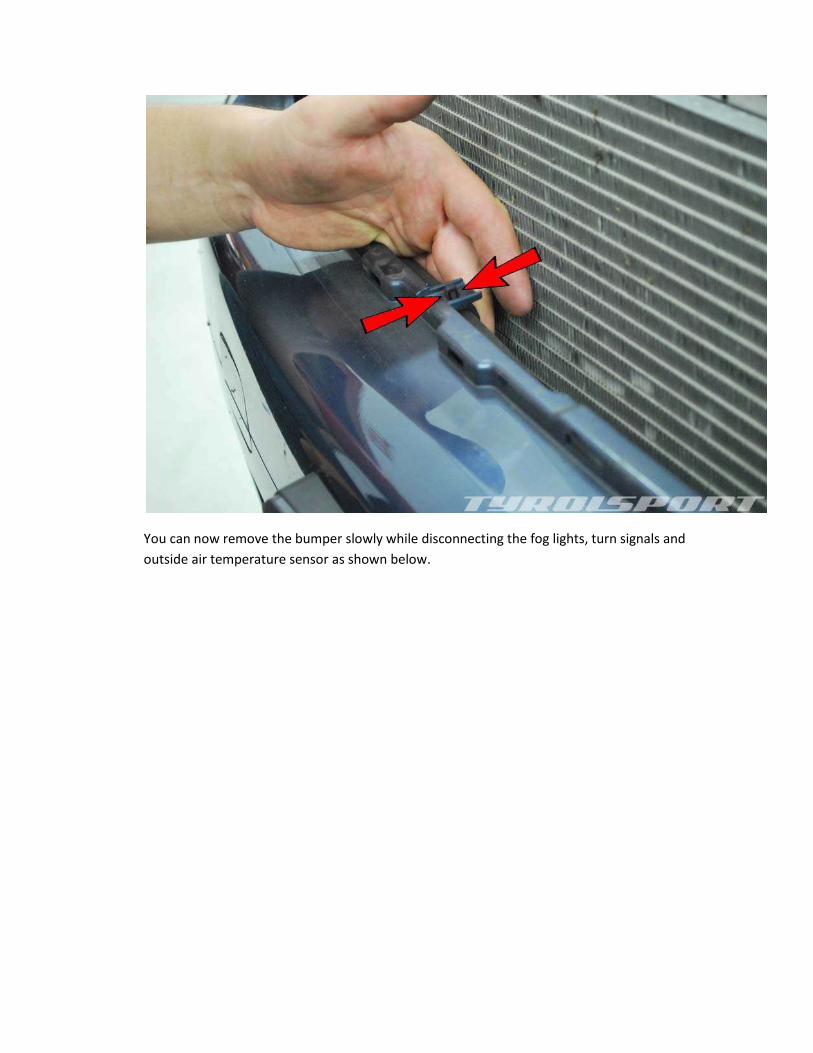
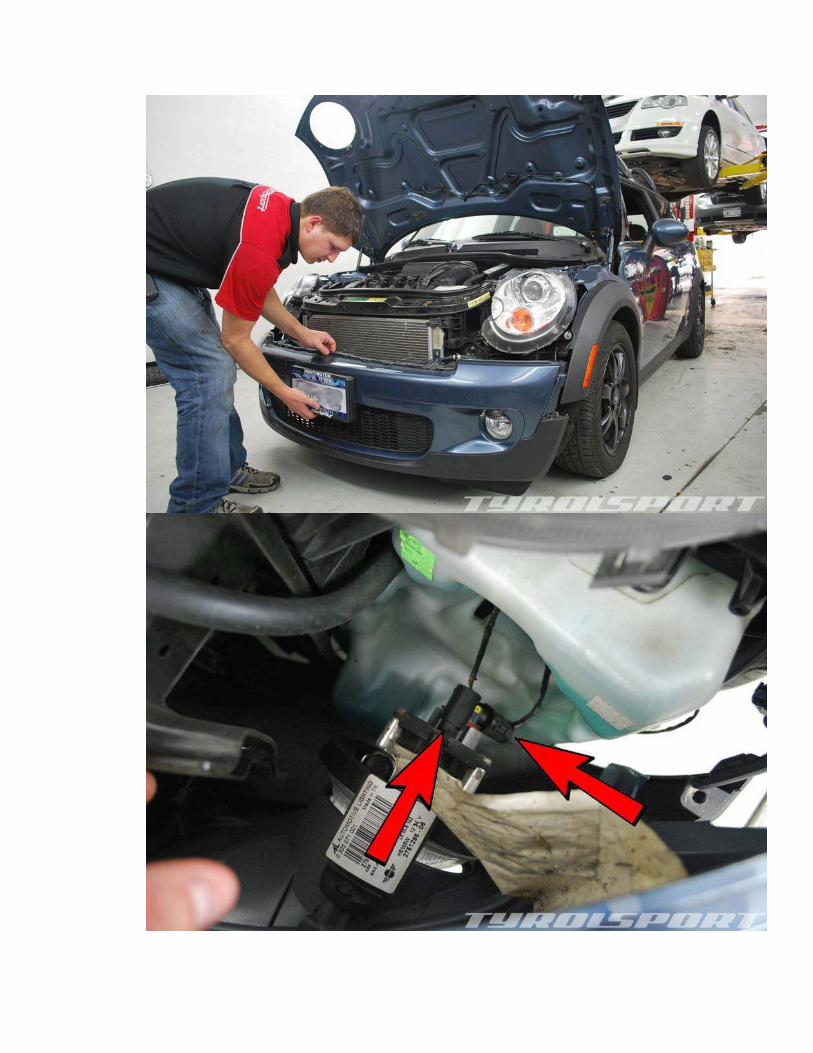
You can now remove the bumper slowly while disconnecting the fog lights, turn signals and
outside air temperature sensor as shown below.

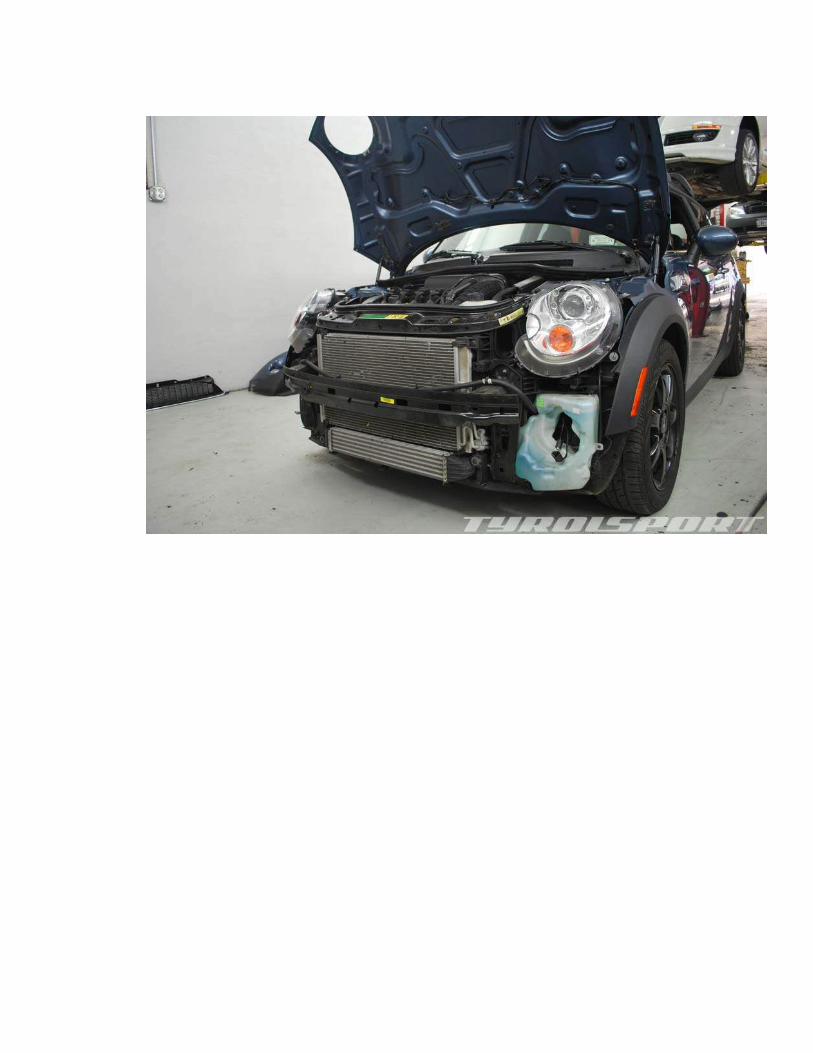
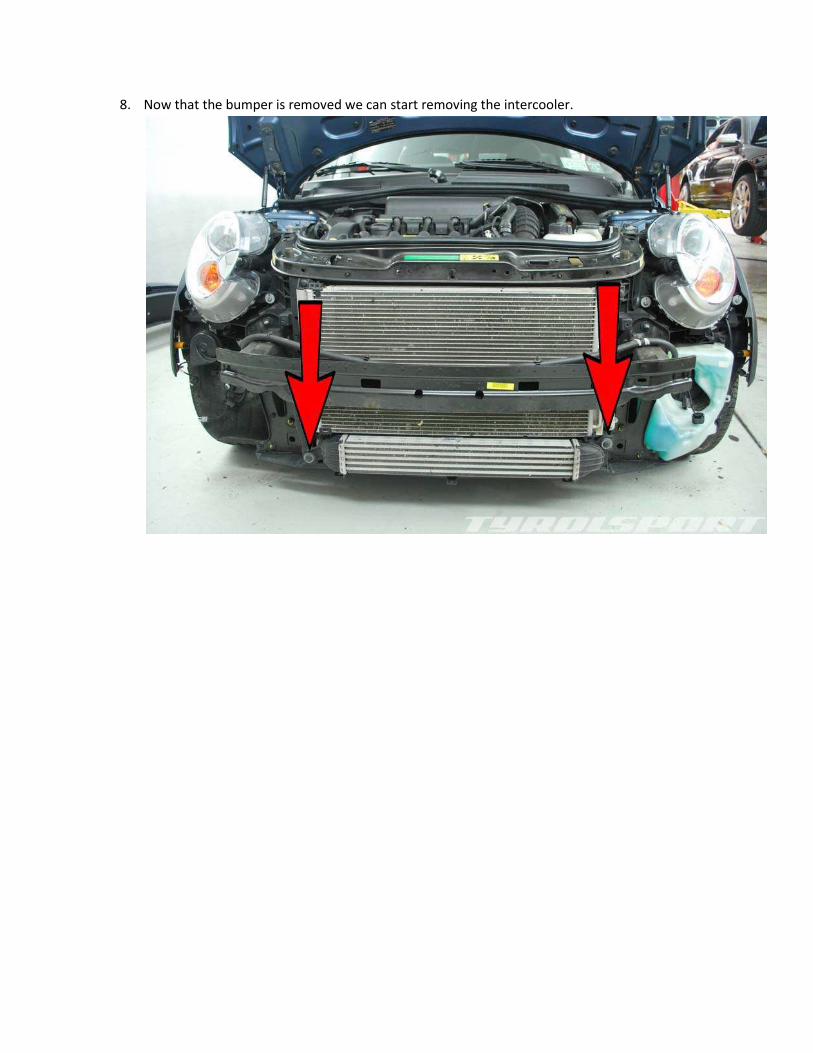
8. Now that the bumper is removed we can start removing the intercooler.
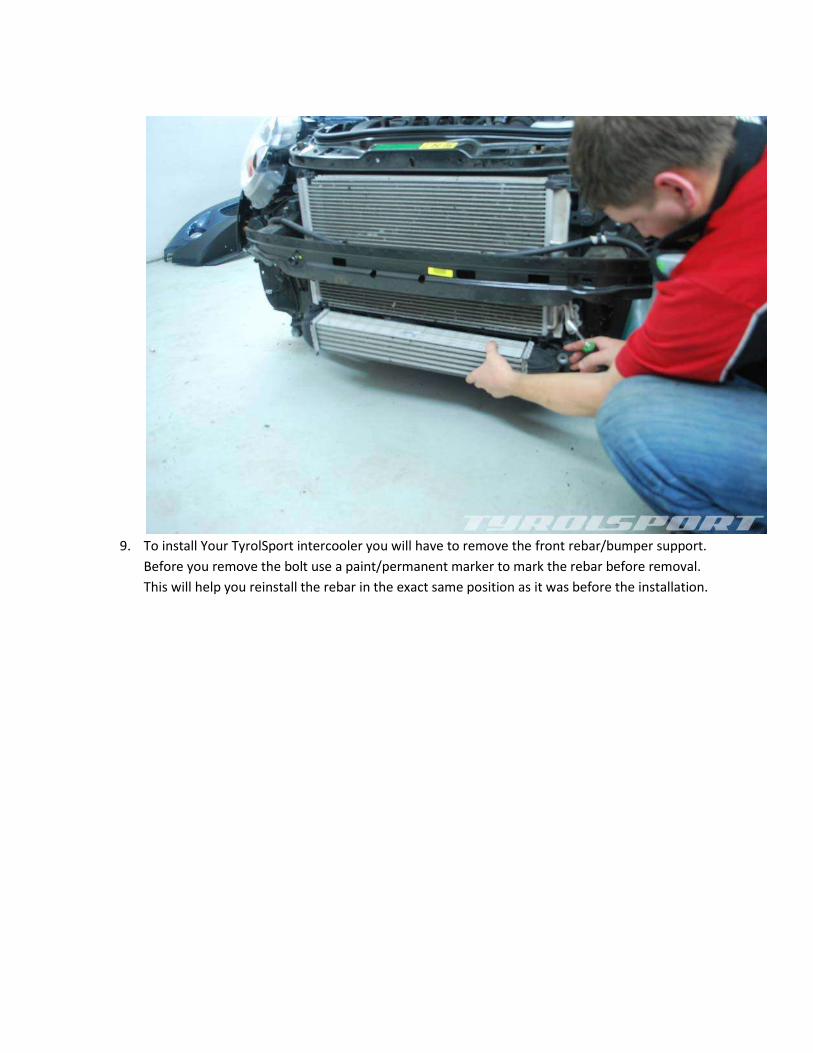
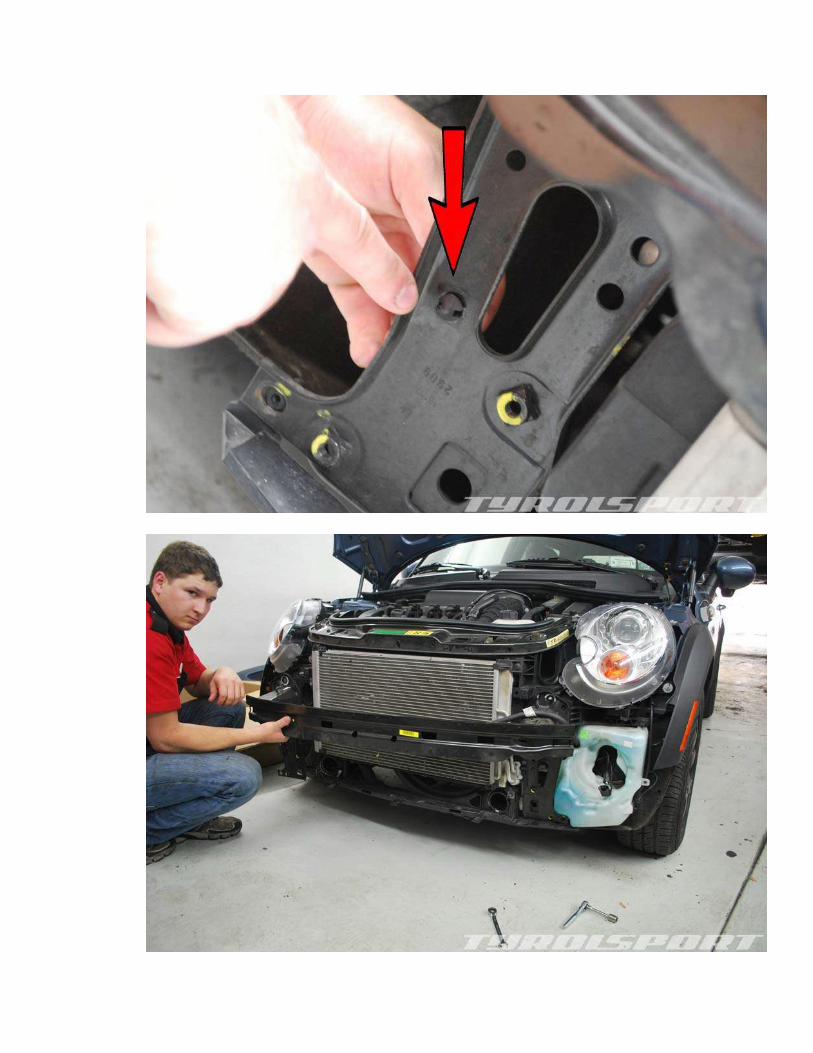
9. To install Your TyrolSport intercooler you will have to remove the front rebar/bumper support.
Before you remove the bolt use a paint/permanent marker to mark the rebar before removal.
This will help you reinstall the rebar in the exact same position as it was before the installation.
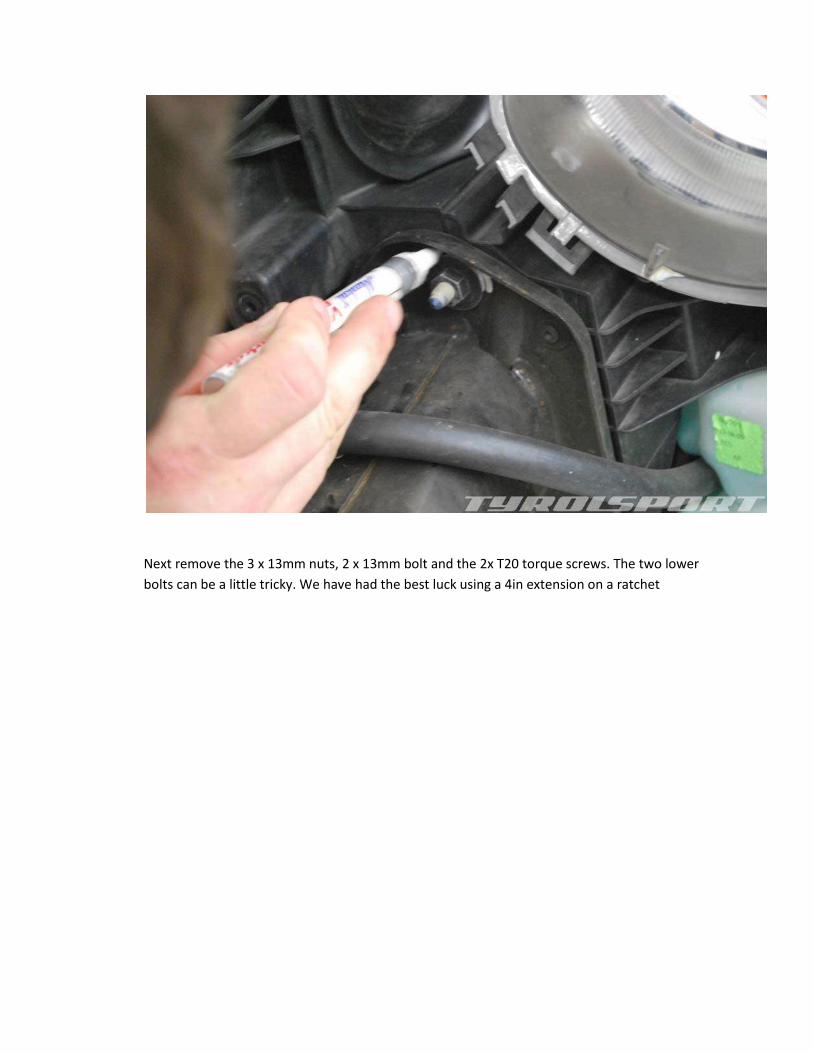
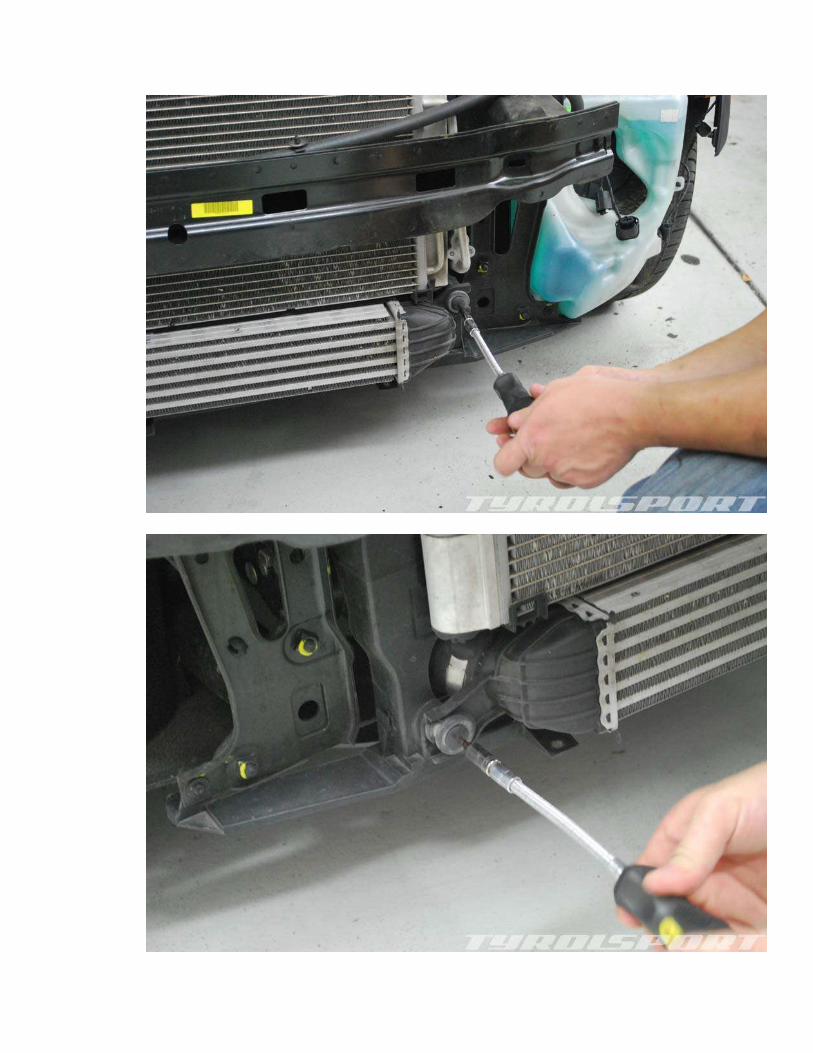
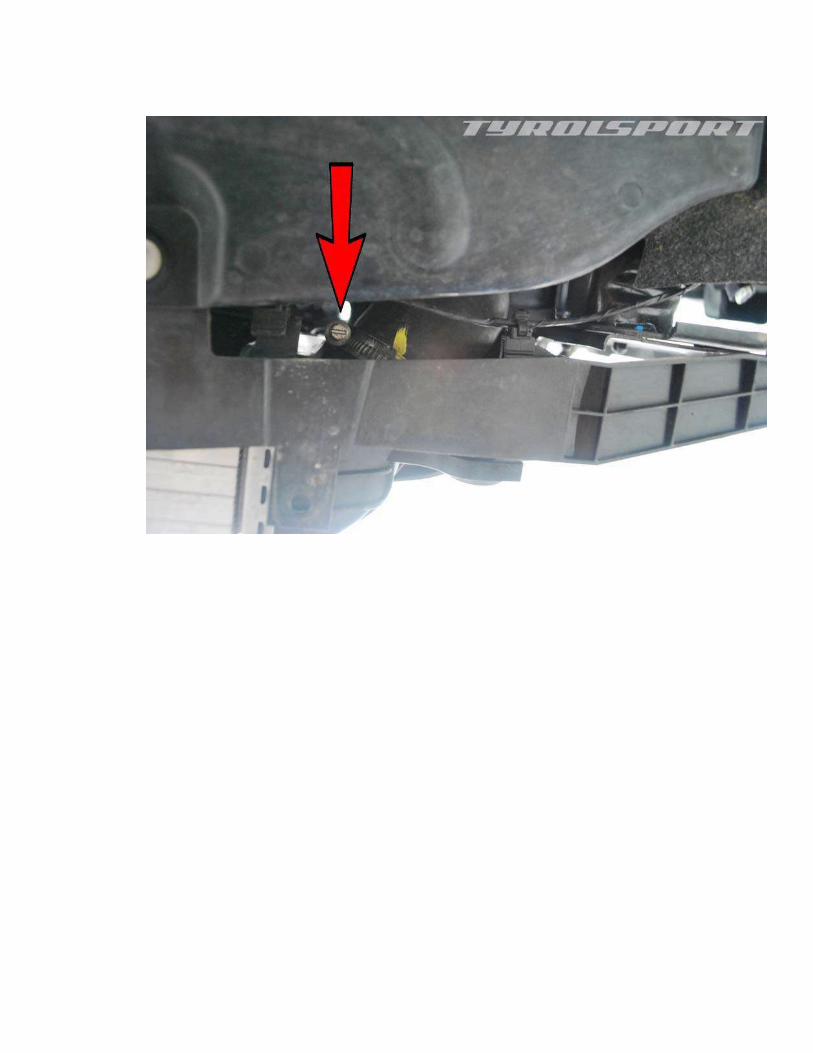
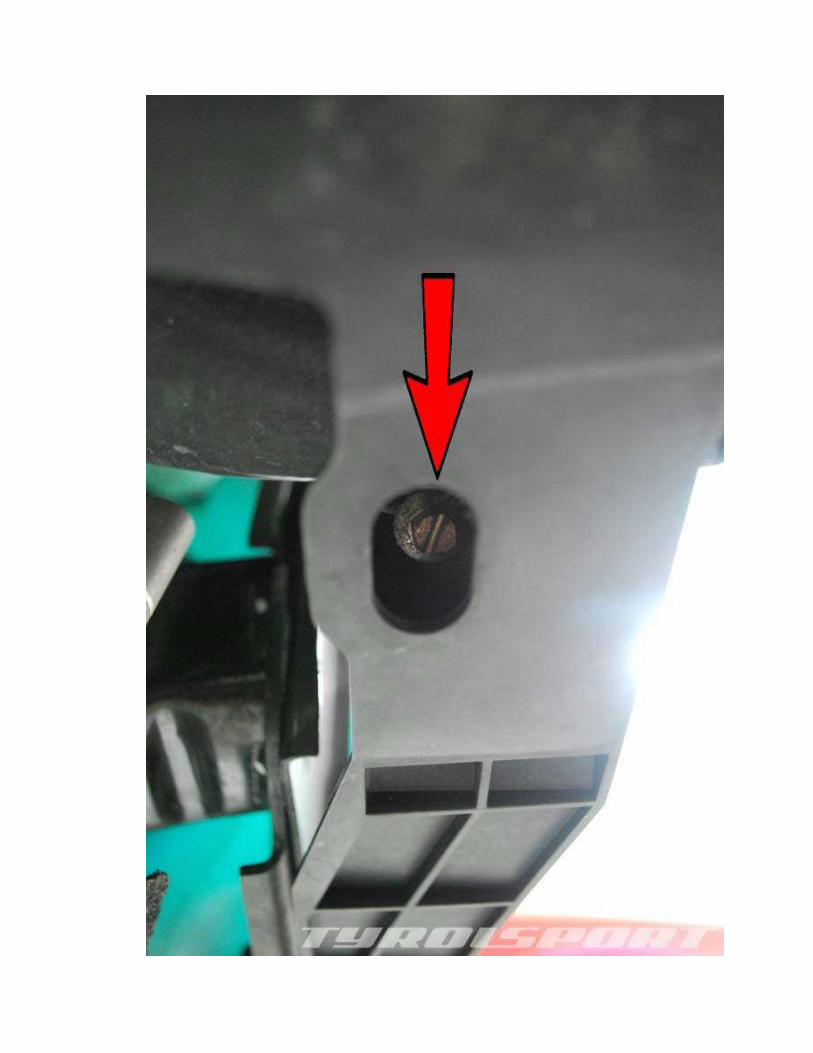
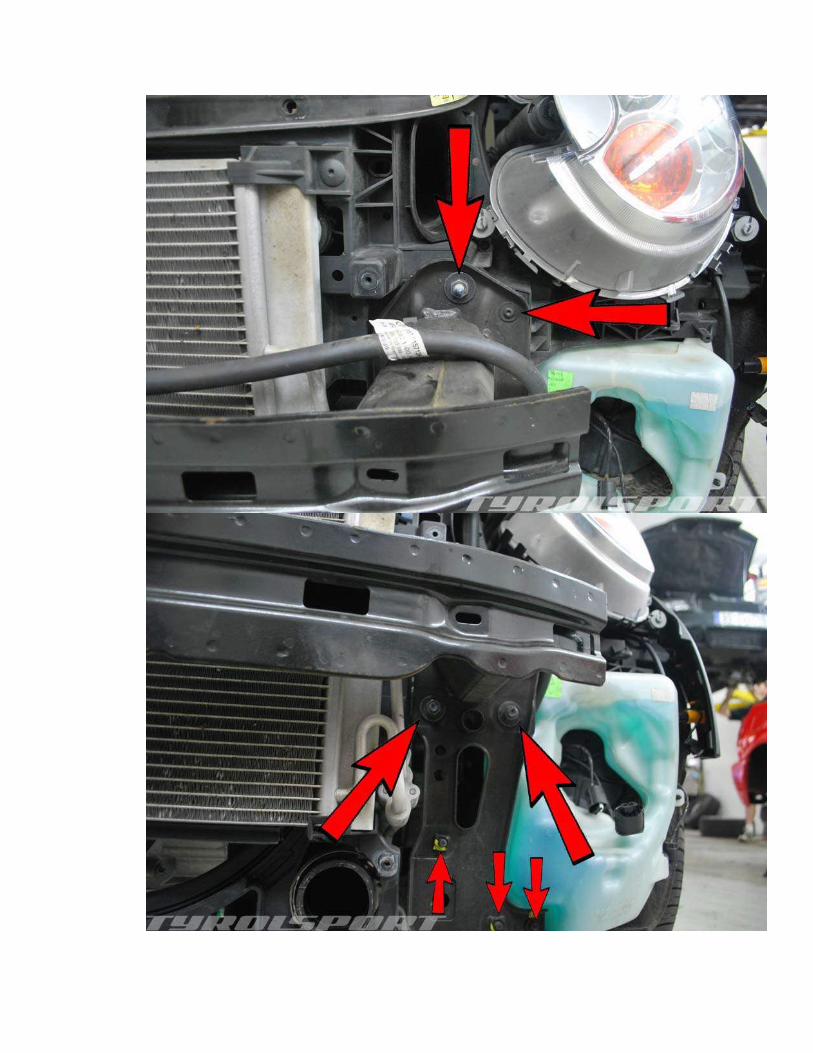
Next remove the 3 x 13mm nuts, 2 x 13mm bolt and the 2x T20 torque screws. The two lower
bolts can be a little tricky. We have had the best luck using a 4in extension on a ratchet
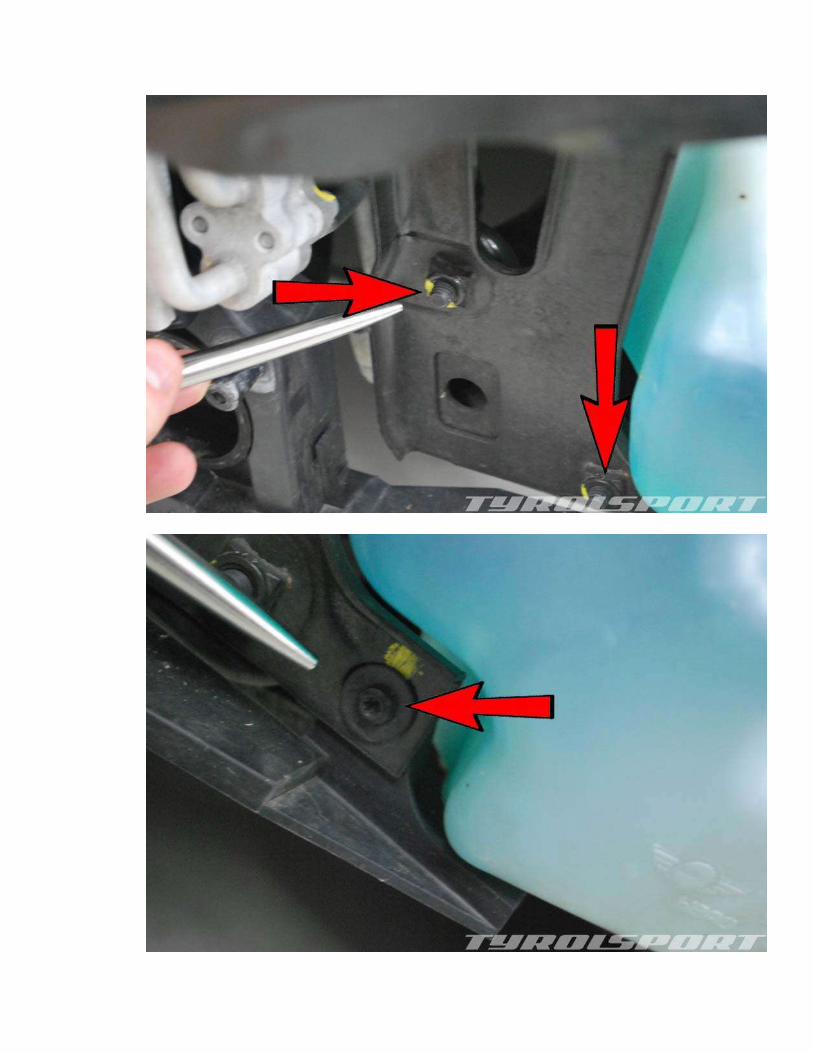

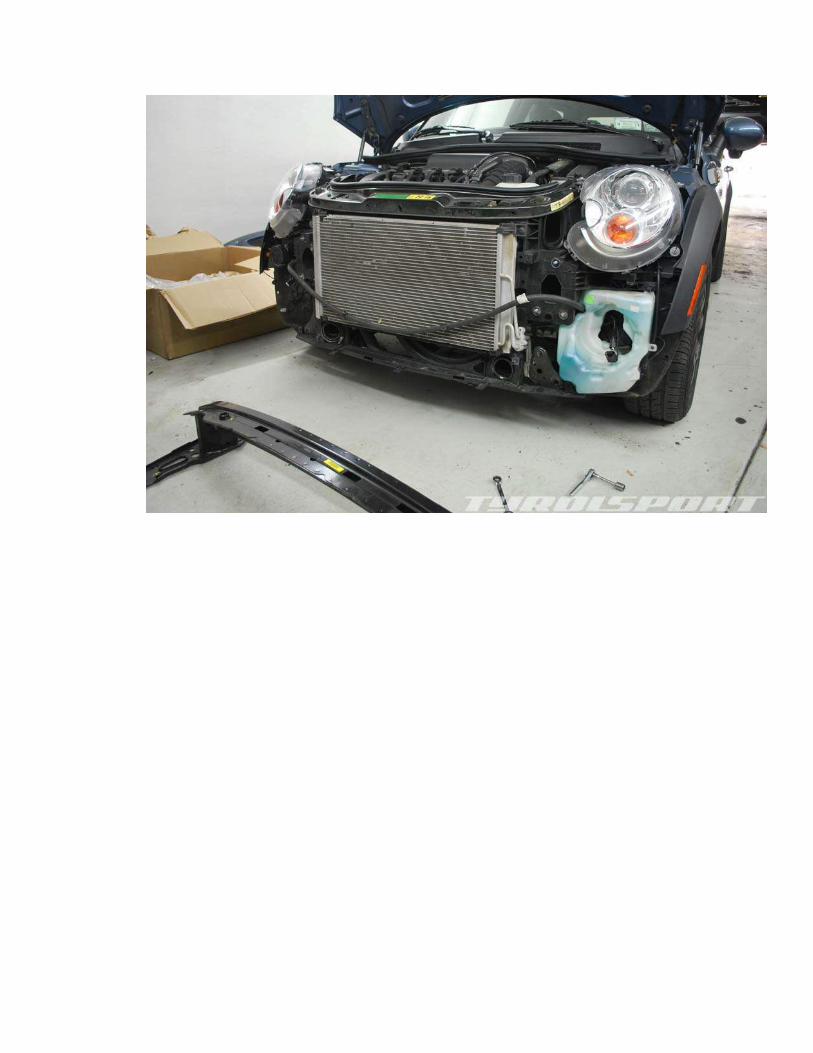
Repeat step 9 on the other side of your car. The only extra item is to remove this wire clip holder
on the passenger side of the rebar.
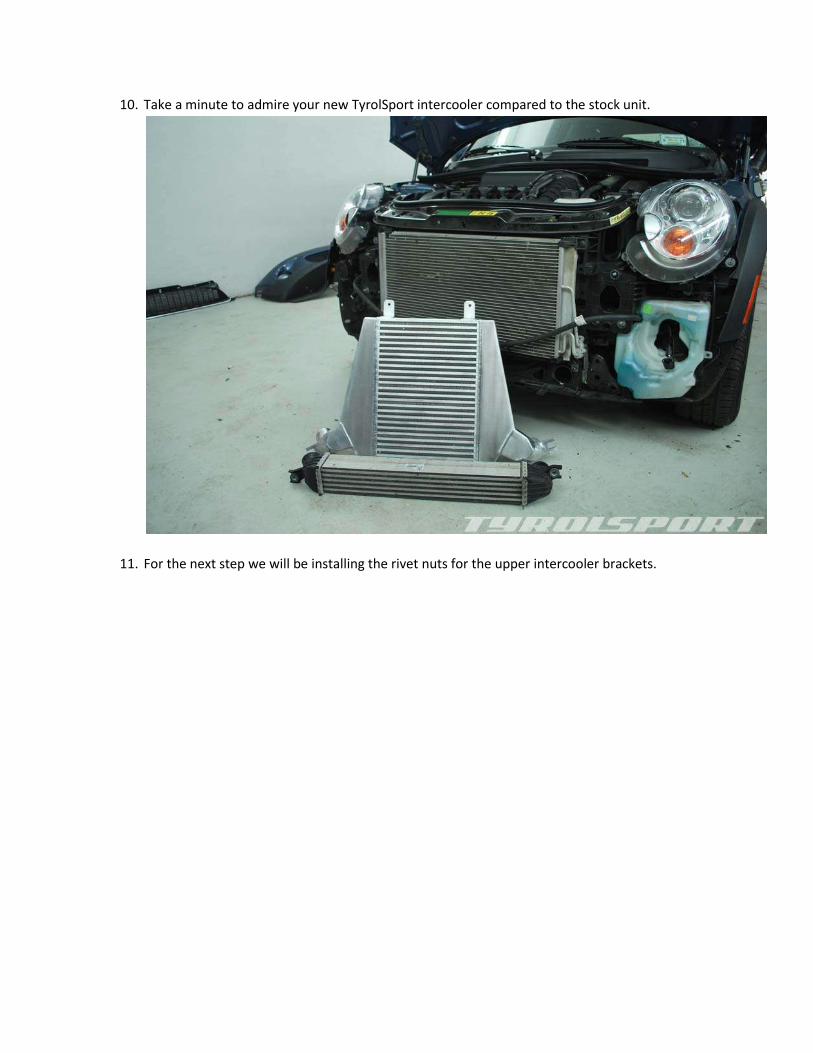
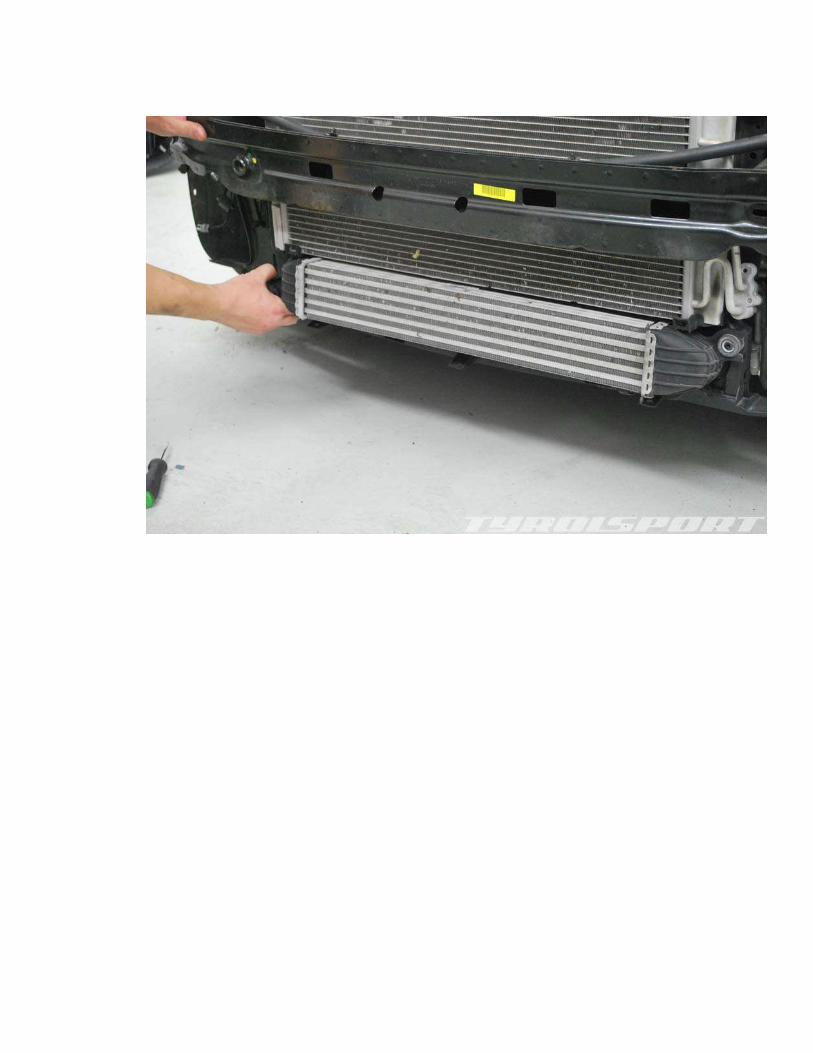
10. Take a minute to admire your new TyrolSport intercooler compared to the stock unit.
11. For the next step we will be installing the rivet nuts for the upper intercooler brackets.

To install the rivet nuts we will first need to drill an existing hole to a larger opening in the
radiator support. Please use a 23/64 drill bit.
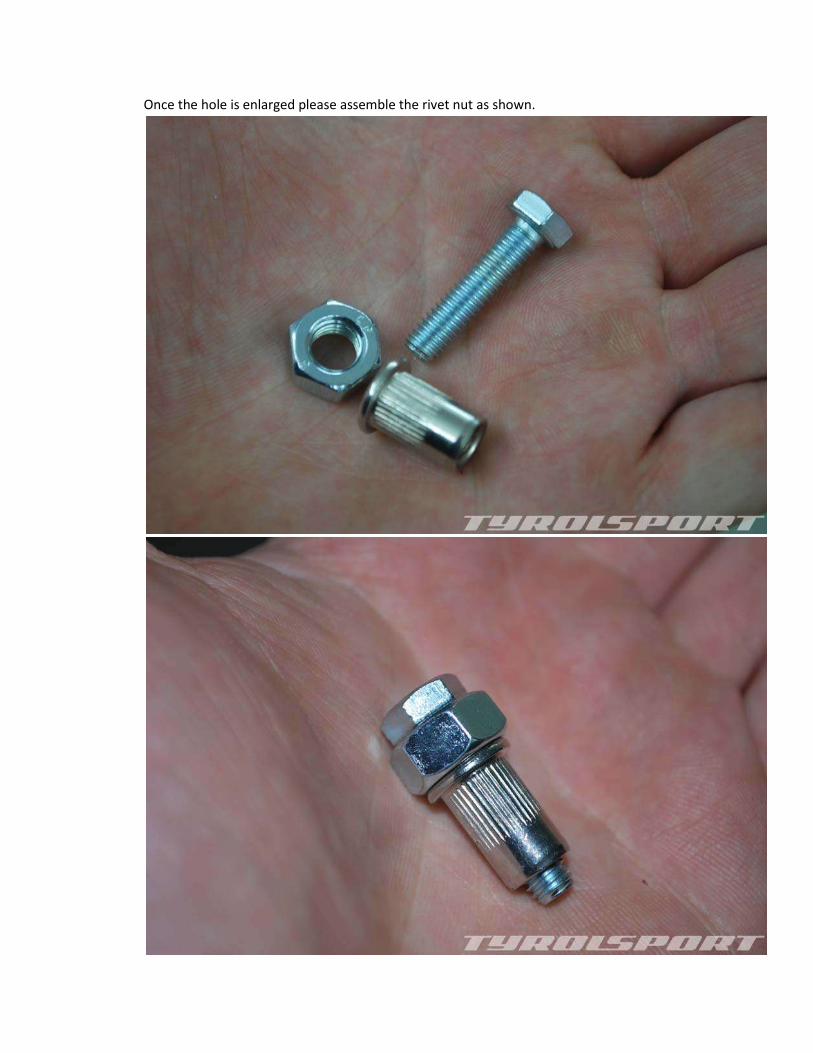
Once the hole is enlarged please assemble the rivet nut as shown.
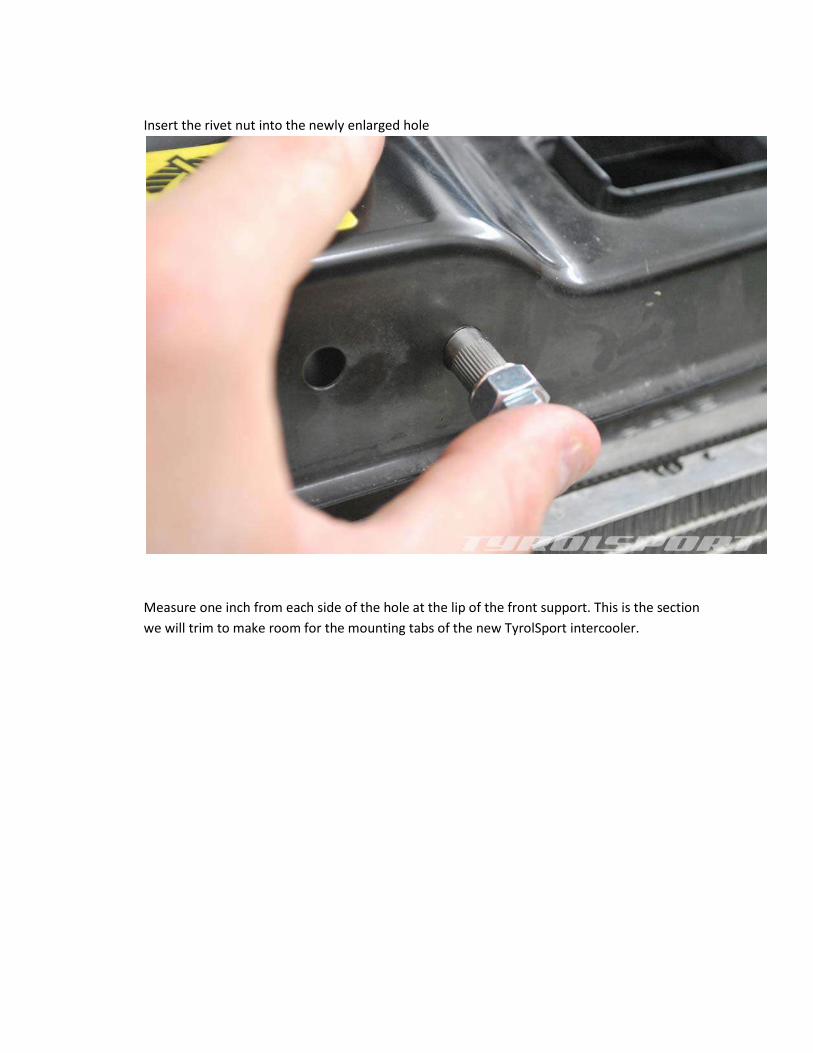
Insert the rivet nut into the newly enlarged hole
Measure one inch from each side of the hole at the lip of the front support. This is the section
we will trim to make room for the mounting tabs of the new TyrolSport intercooler.
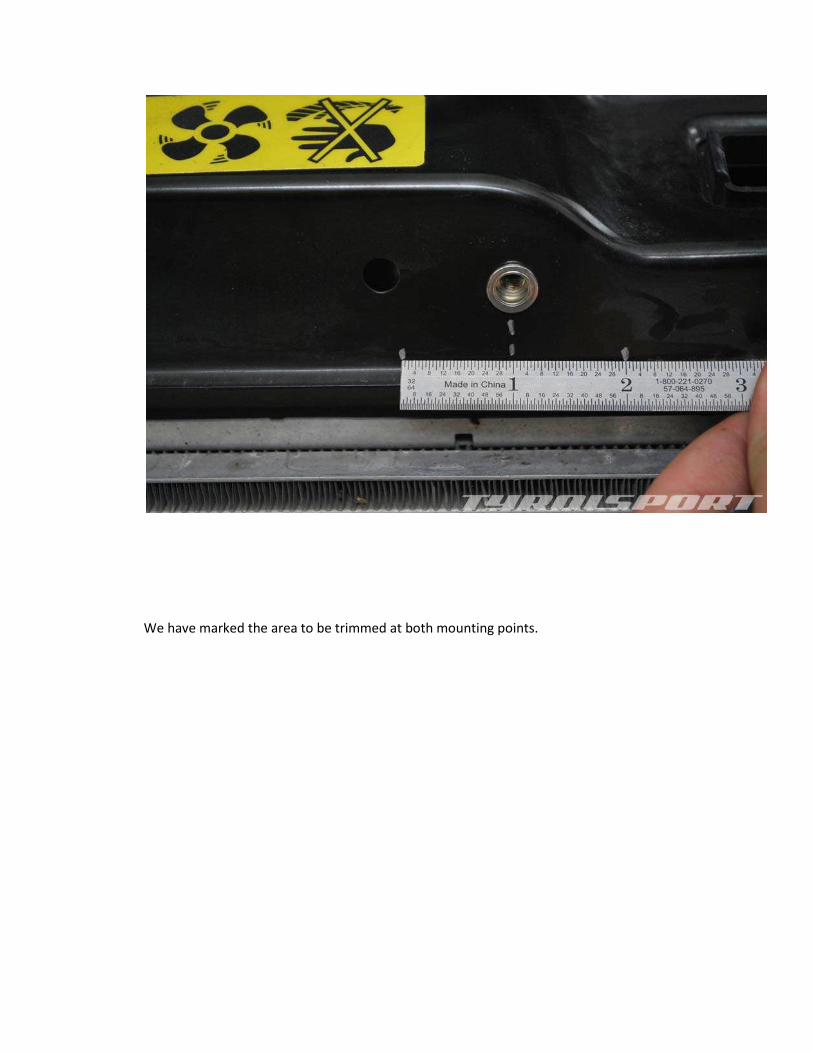
We have marked the area to be trimmed at both mounting points.
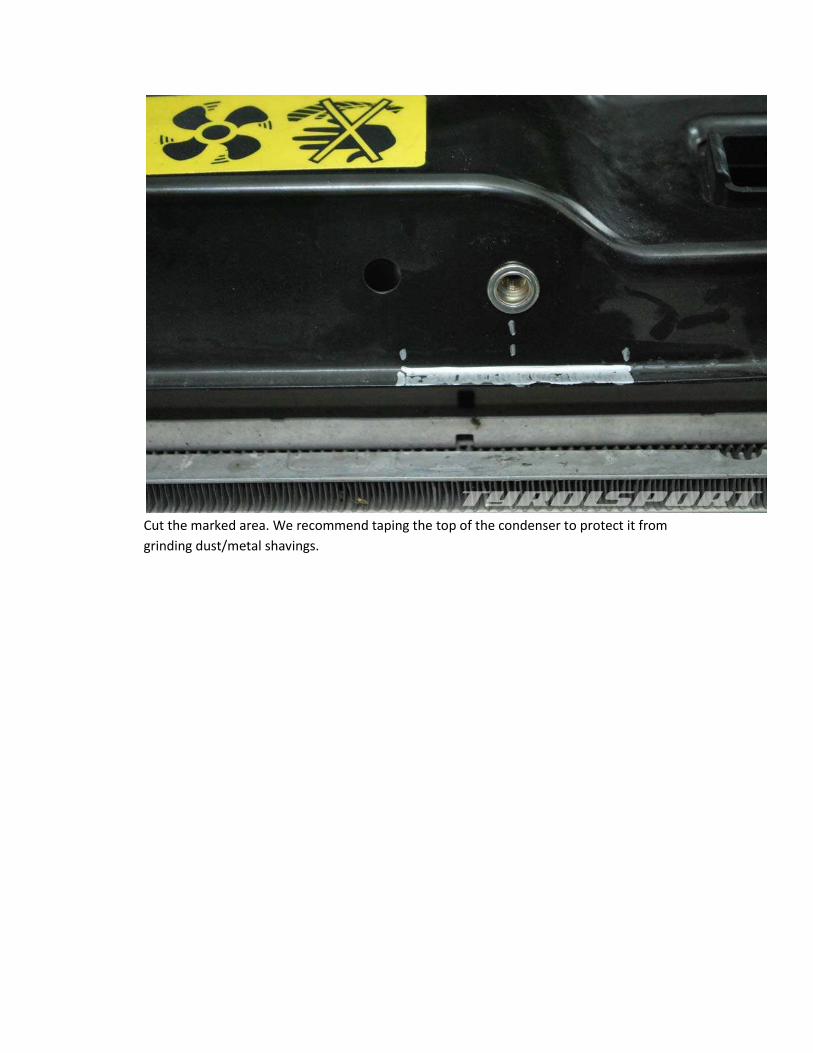
Cut the marked area. We recommend taping the top of the condenser to protect it from
grinding dust/metal shavings.
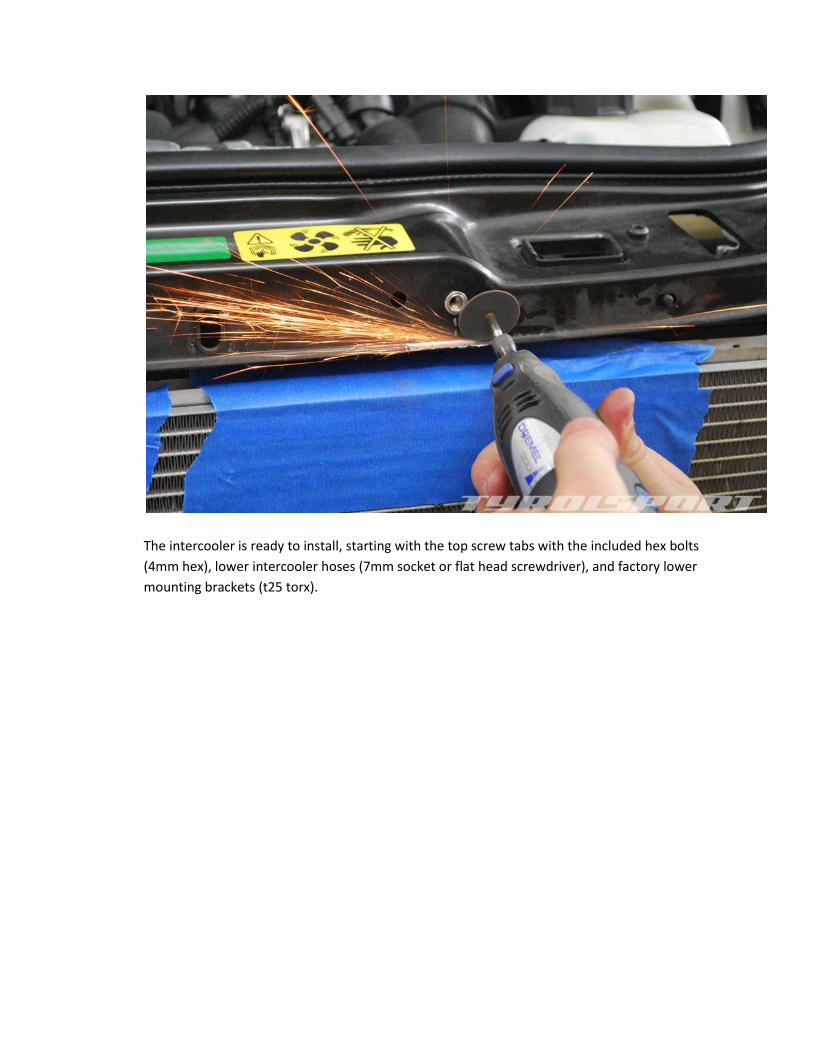
The intercooler is ready to install, starting with the top screw tabs with the included hex bolts
(4mm hex), lower intercooler hoses (7mm socket or flat head screwdriver), and factory lower
mounting brackets (t25 torx).
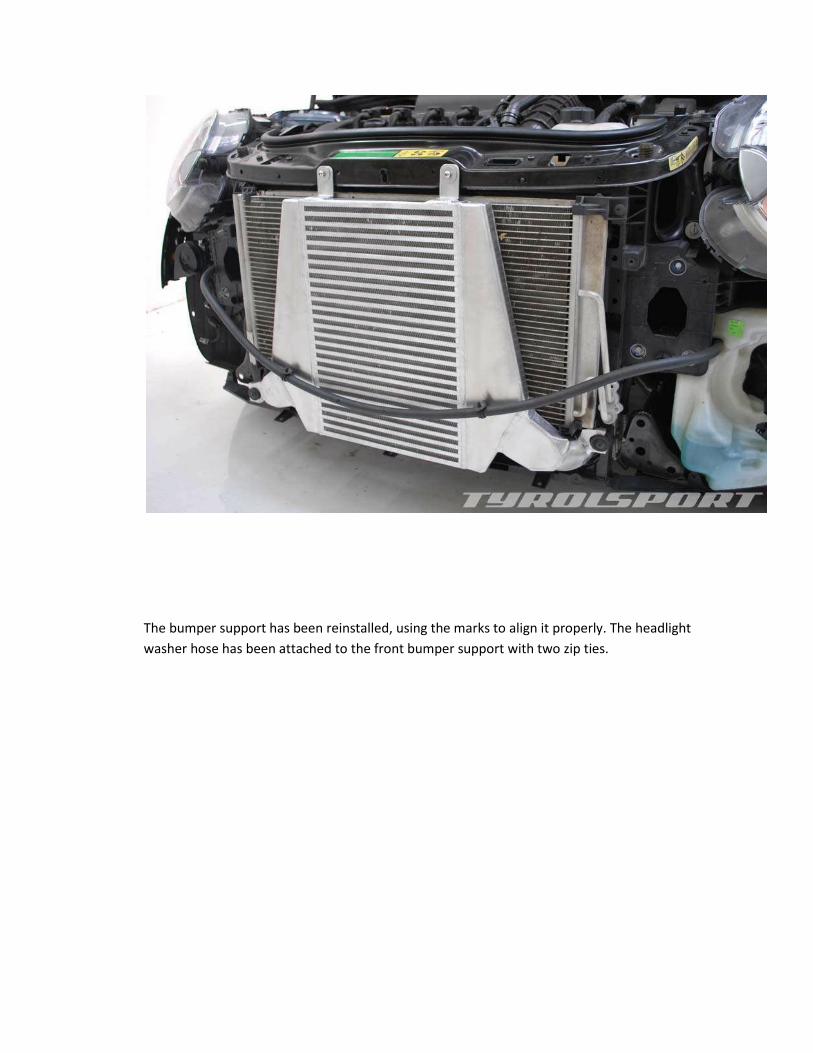
The bumper support has been reinstalled, using the marks to align it properly. The headlight
washer hose has been attached to the front bumper support with two zip ties.
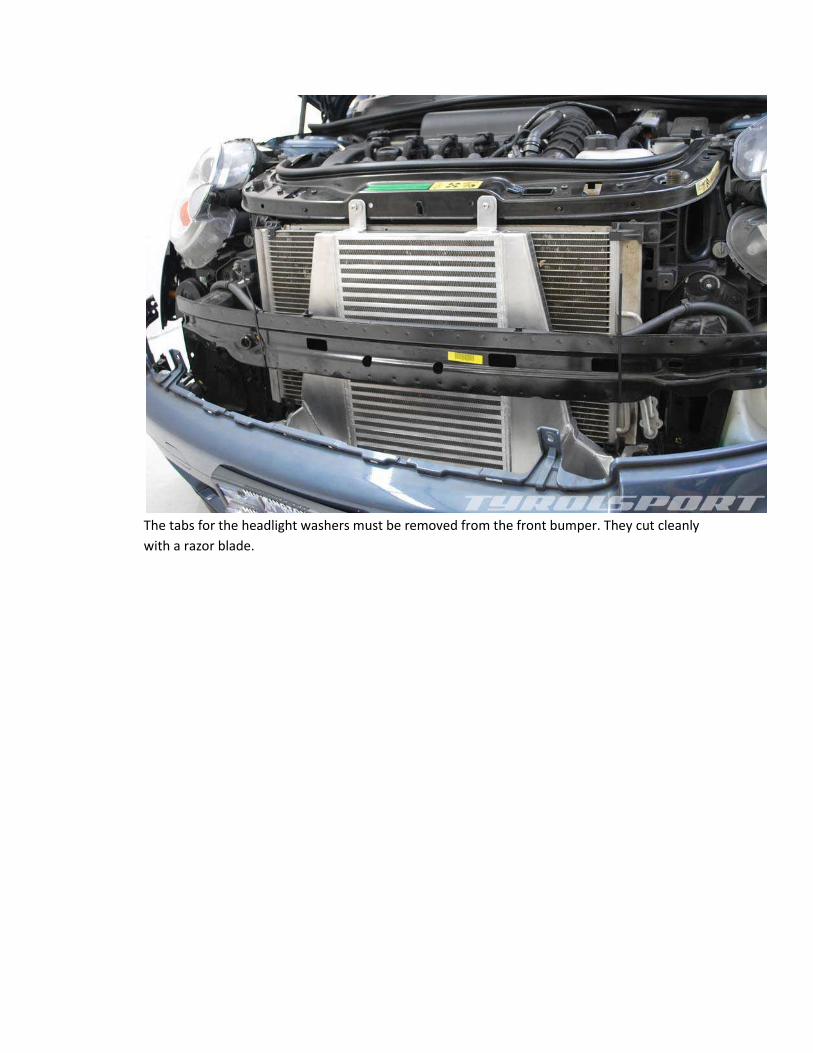
The tabs for the headlight washers must be removed from the front bumper. They cut cleanly
with a razor blade.
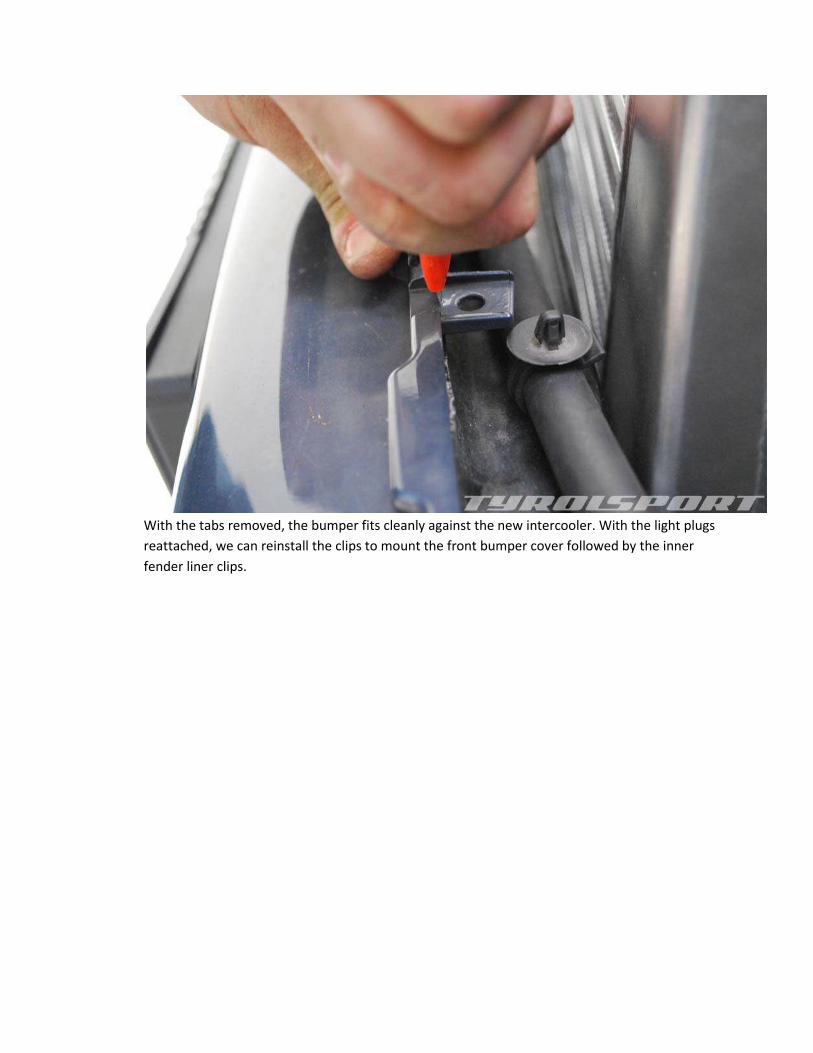
With the tabs removed, the bumper fits cleanly against the new intercooler. With the light plugs
reattached, we can reinstall the clips to mount the front bumper cover followed by the inner
fender liner clips.
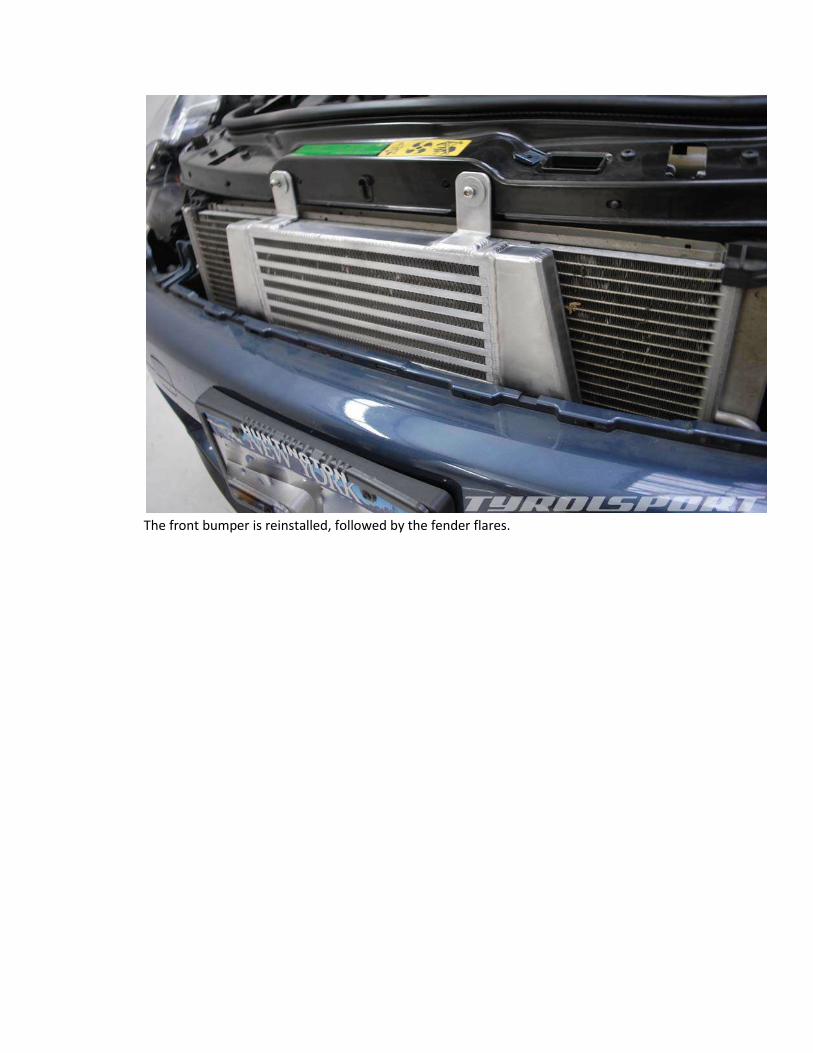
The front bumper is reinstalled, followed by the fender flares.
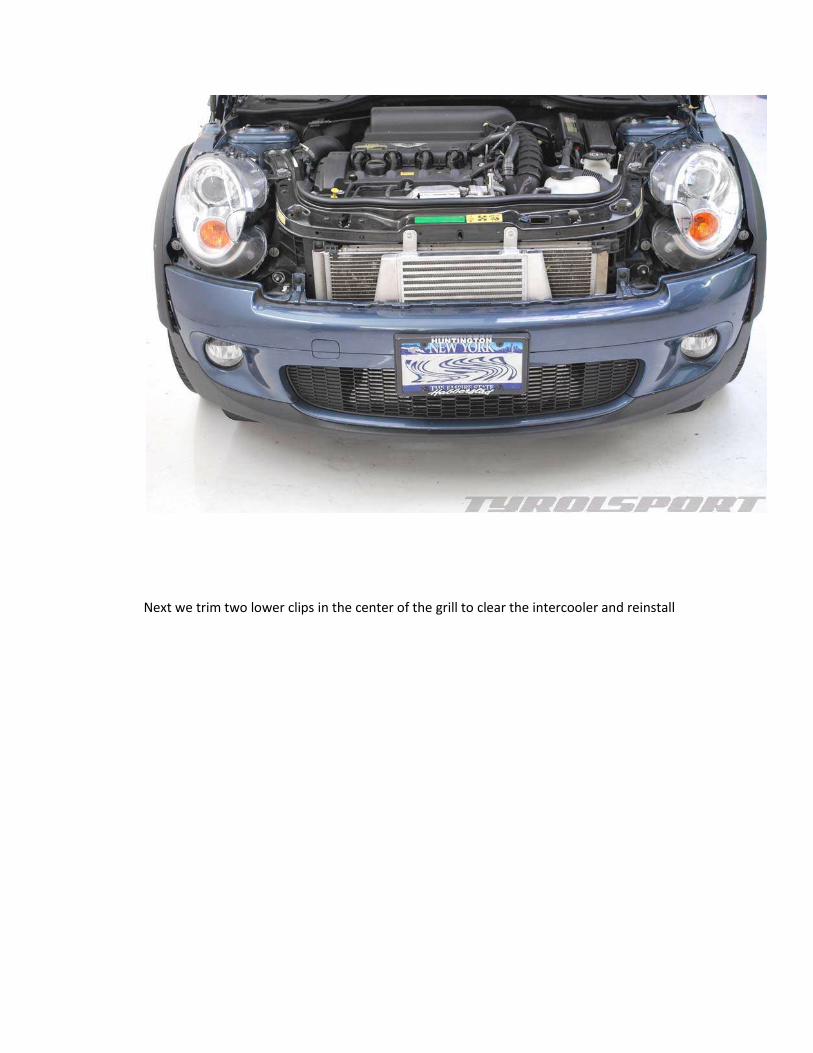
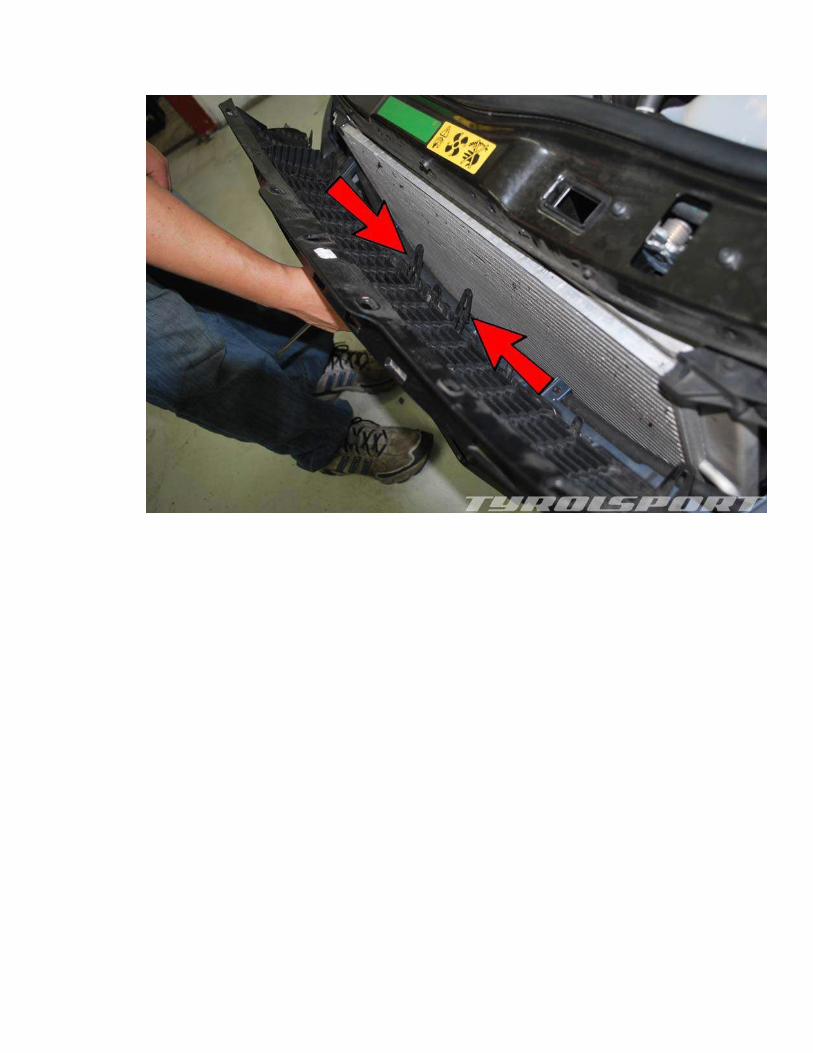
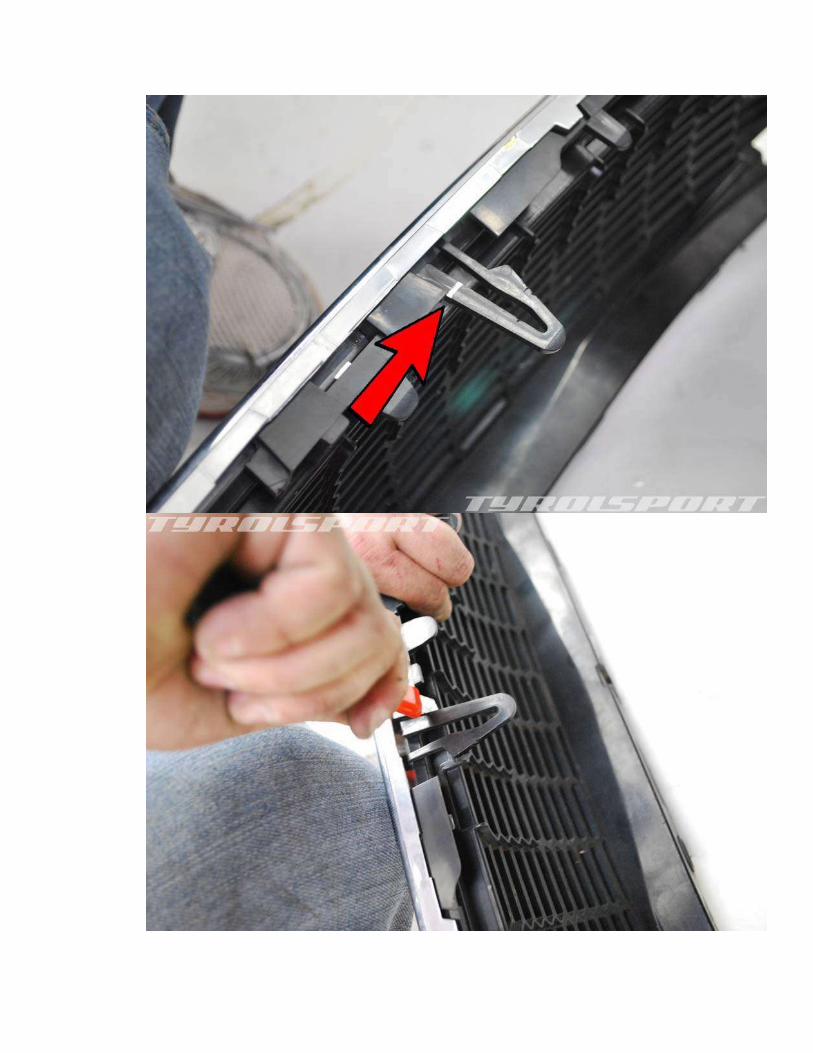
Next we trim two lower clips in the center of the grill to clear the intercooler and reinstall
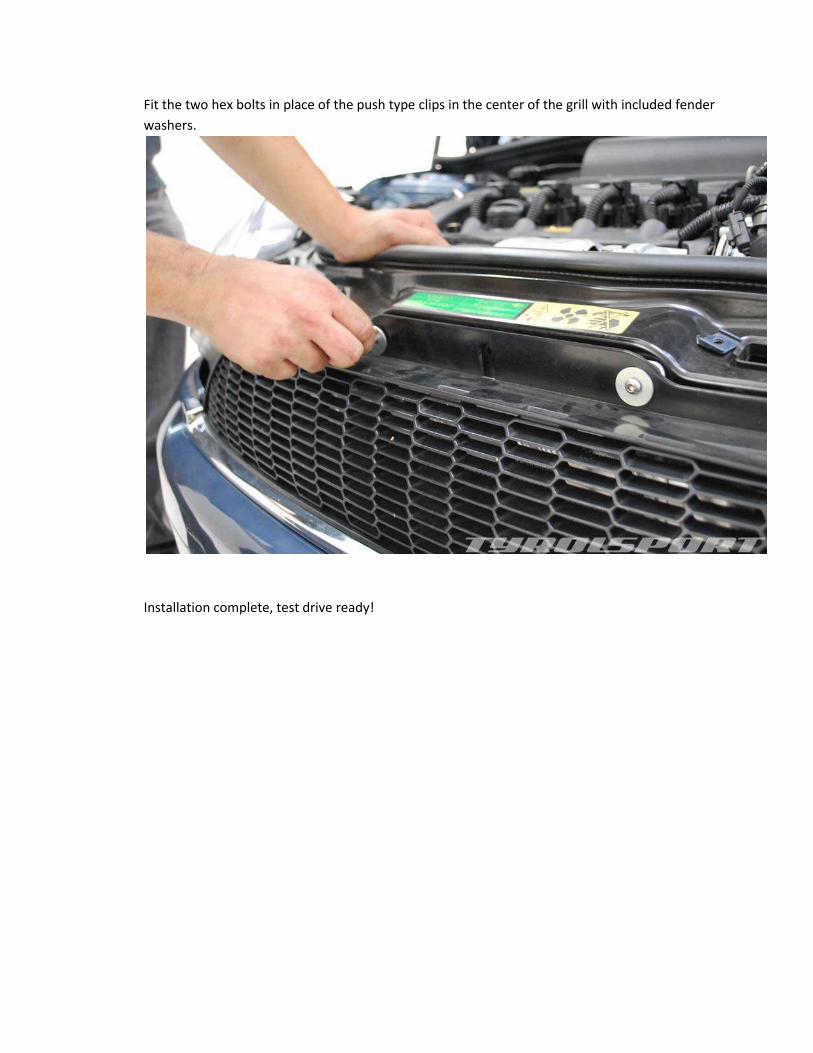
Fit the two hex bolts in place of the push type clips in the center of the grill with included fender
washers.
Installation complete, test drive ready!


![TITANIUM ADJUSTABLE CONTROL ARMS – … ADJUSTABLE CONTROL ARMS – NM.328855 [R55] MINI Cooper Clubman, Cooper S Clubman & JCW [R56] MINI Cooper Hardtop, Cooper S Hardtop & JCW [R57]](https://static.fdocuments.us/doc/165x107/5afdb9d37f8b9a434e8e0ffb/titanium-adjustable-control-arms-adjustable-control-arms-nm328855-r55.jpg)


