Tutorials on Macro
17
Excel VBA makes working with excel easier. We can automate the tasks in excel by writing what we call macros. I would start with the basics first, we will 1 st create a simple macro and before then turning the developers tab on Developer Tab To turn on the Developter tab, execute the following steps. 1. Right click anywhere on the ribbon, and then click Customize the Ribbon. 2. Under Customize the Ribbon, on the right side of the dialog box, select Main tabs and check the Developer check box.
-
Upload
anurag-deb -
Category
Education
-
view
97 -
download
6
Transcript of Tutorials on Macro

Excel VBA makes working with excel easier. We can automate the tasks in excel by writing what we call macros. I
would start with the basics first, we will 1st create a simple macro and before then turning the developers tab on
Developer TabTo turn on the Developter tab, execute the following steps.
1. Right click anywhere on the ribbon, and then click Customize the Ribbon.
2. Under Customize the Ribbon, on the right side of the dialog box, select Main tabs and check the Developer check
box.

3. Click OK.
4. Now Developer tab should be visible to you next to the View tab.
Let us make a simple command button that will place a value in the cell.
Command ButtonFor inserting a command button execute the following steps.
1. On the Developer tab, click Insert.

2. In the ActiveX Controls group, click Command Button.
3. Drag a command button anywhere on your worksheet.
Assign a MacroAssigning means the code we will write later, we will assign that macro to the command button, execute the following
steps.

1. Select the Design mode.
2. Right click on Command Button( Name : Command Button1)
3. Click View Code.
The Visual Basic Editor appears.
For convenience open up the project explorer (window with the names Sheet1, Sheet2 and Sheet3). If the Project
Explorer is not visible, click View->Project Explorer. To add any code, open code window for that sheet, say for sheet
1 click Sheet1 (Sheet1).
3. For now write the code shown below between Private Sub CommandButton1_Click() and End Sub.
5. Close the Visual Basic Editor.
6. After you deselect the Design mode click on the command button on the sheet Result:
Bravo you've just created a macro in Excel!
Note: You might have question on what is Range. These will be covered in the later posts. Or you can take a look at
the Range post.

Visual Basic EditorThere is another way to open visual basic (apart from right clicking the command button and clicking View Code).
To open the Visual Basic Editor, on the Developer tab, you have to just click the Visual Basic button shown below.
The Visual Basic Editor appears.
Did you find this information/Blog helpful? If so please share it.

MsgBox The MsgBox is a dialog box in Excel VBA which you can use as to build pop ups or alerts or many other purposes. Place a command button on your worksheet and add the following code lines in the subroutine():
1. Let us start with a simple message.
MsgBox "this is Anurag"
The output will be, when you click the command button on the sheet this:
2. A little more advanced message. First, enter a number into cell A1 say 12.
MsgBox "Entered value is " & Range("A1").Value
Result when you click the command button on the sheet:
Note: we use the & operator to concatenate (join) two strings. Although Range("A1").value is not a string, it works
here.
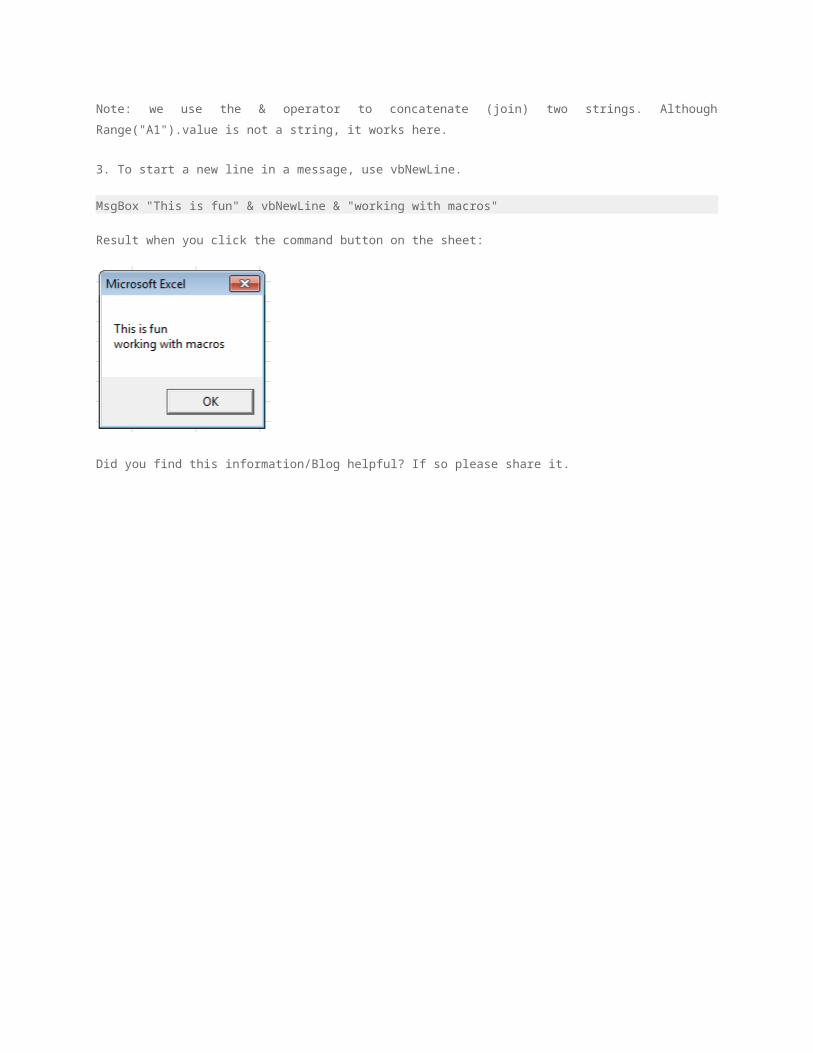
3. To start a new line in a message, use vbNewLine.
MsgBox "This is fun" & vbNewLine & "working with macros"
Result when you click the command button on the sheet:
Did you find this information/Blog helpful? If so please share it.

Object HierarchyAs they say an object can be a variable, function, or data structure. In the object-oriented programming paradigm,
"object" refers to a particular instance of a class where the object can be a combination of variables, functions, and
data structures.
An object can contain another object, and that object can contain another object, etc. In other words, Excel VBA
programming involves working with an object hierarchy. If you are confused this post will take you out of it. Just Keep
in mind what is object, that’s it.
The mother of all objects is Excel itself. We call it the Application object or what we can say is at the top level we
have Application object and the application object contains other objects. It will easier to understand the concept with
an example.
For Example, The excel file contain many excel sheets sheet1, sheet2 etc, now technically speaking the Workbook
object is the Excel file. The Workbook object contains other objects, such as the Worksheet object. (sheet1, sheet2).
And the Worksheet object contains other objects, such as the Range object.
In the “Create a Macro” tutorial we learned how to run code by clicking on a command button and there we used the
following code line:
Range("A1").Value = "Hello"
But what we meant was in layman language Excel->Sheet1->Range->value
Technically
Application.Workbooks("create-a-macro").Worksheets(1).Range("A1").Value = "Hello"
Where create-a-macro is the name of excel file
Worksheets(1) is the sheet1
Range(“A1”) is the 1st cell and the value in it was hello.
Note: the objects are connected with a dot but don’t worry, we don’t have to write every line of code that way. That is
because we know we placed out Command Button on the sheet1 in create-a-macro.xls, on the first worksheet.
But if you want to work on different worksheets you have to keep in mind the Worksheet object.
CollectionsYou may have noticed that Workbooks and Worksheets are both plural. That is because they are collections. The
Workbooks collection contains all the Workbook objects that are currently open. The Worksheets collection contains
all the Worksheet objects in a workbook.

You can refer to a member of the collection, for example, a single Worksheet object, in three ways.
1. Using the worksheet name.
Worksheets("Event Information").Range("A1").Value = "Hello"
2. Using the index number (1 is the first worksheet starting from the left).
Worksheets(1).Range("A1").Value = "Hello"
3. Using the CodeName.
Sheet1.Range("A1").Value = "Hello"
In the Project Explorer, the first name is the CodeName i.e. Sheet1. The second name is the worksheet name (Event
Information).
Note: the safest way to work with worksheets is with the CodeName as this remains the same even if you change the
worksheet name or the order of your worksheets. Click View, Properties Window to change the CodeName of a
worksheet. Or simply double click on the Sheet1 tab area as below.
But if want to reference a particular worksheet on a different workbook you cannot use the CodeName as every
workbook has different worksheets with same worksheet name i.e. sheet1, sheet2 etc.
Properties and MethodsNow let's take a look at some properties and methods of the Workbooks and Worksheets collection. Properties are
something which a collection has (they describe the collection), while methods do something (they perform an action
with an collection). Like Man has property say ‘having beard’ and methods can be ‘he can run’
Place a command button on your worksheet and add the code lines:

1. The Add method of the Workbooks collection creates a new workbook.
Workbooks.Add
And the Add method of the Worksheets collection creates a new worksheet.
2. The Count property of the Worksheets collection can be used to count the number of worksheets in a workbook.
MsgBox Worksheets.Count
Result when you click the command button on the sheet:
Note: the Count property of the Workbooks collection counts the number of active workbooks.
Did you find this information/Blog helpful? If so please share it.
RangeRange object is basically representation of a cell (or cells) on our worksheet. It’s very important object and we will use
it very much. After reading this post you will have clear idea of the properties and methods of the Range object. The
range object used at the very 1st beginning of the tutorial where we used Range.value, which I think was not cleared
there will be cleared after this. Properties are something which an object has (they describe the object),
while methods do something (they perform an action with an object).
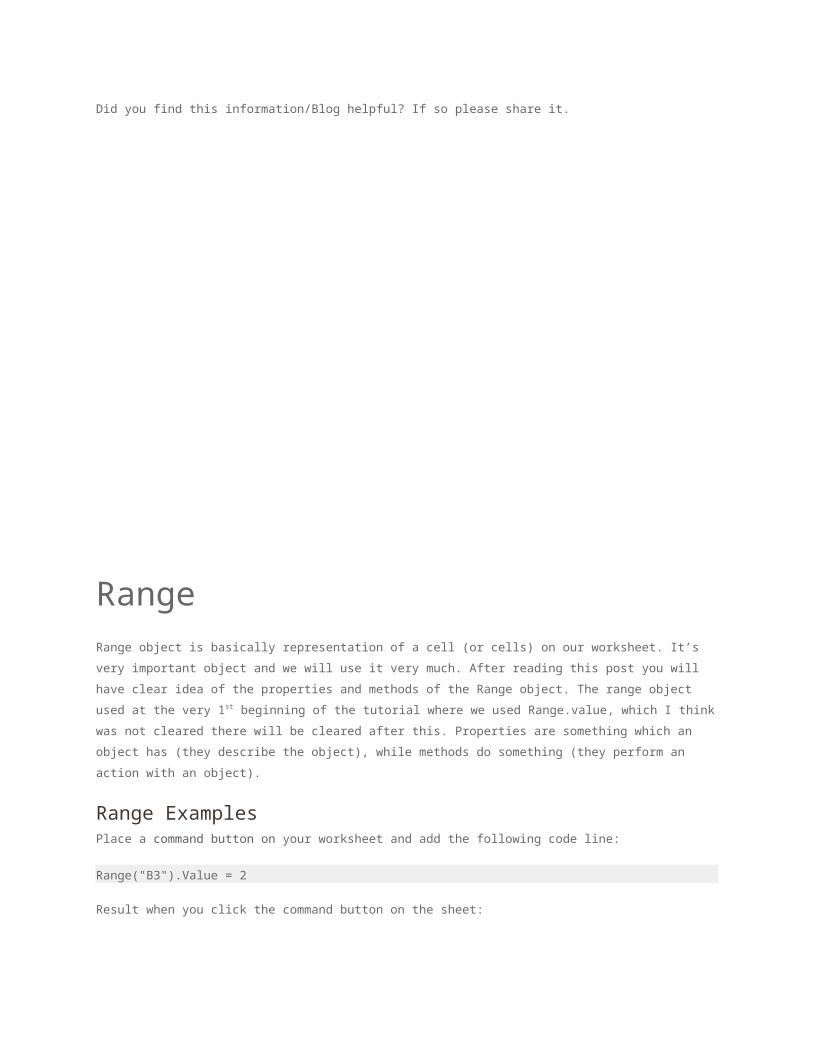
Range ExamplesPlace a command button on your worksheet and add the following code line:
Range("B3").Value = 2
Result when you click the command button on the sheet:
Code:
Range("A1:A4").Value = 5
Result:
Code:
Range("A1:A2,B3:C4").Value = 10
Result:

CellsInstead of Range, you can also use Cells. Using Cells is particularly useful when you want to loop through ranges.
Code:
Cells(3, 2).Value = 2
Result:
Explanation: Excel VBA enters the value 2 into the cell at the intersection of row 3 and column 2.
Code:
Range(Cells(1, 1), Cells(4, 1)) = 5
Result:
Declare a Range ObjectYou can declare a Range object by using the keywords Dim and Set.
Code:

Dim example As Range
Set example = Range("A1:C4")
example.Value = 8
Result:
SelectAn important method of the Range object is the Select method. The Select method simply selects a range.
Code:
Dim example As Range
Set example = Range("A1:C4")
example.Select
Result:
RowsThe Rows property gives access to a specific row of a range.
Code:
Dim example As Range
Set example = Range("A1:C4")
example.Rows(3).Select
Result:

Note: border for illustration only.
ColumnsThe Columns property gives access to a specific column of a range.
Code:
Dim example As Range
Set example = Range("A1:C4")
example.Columns(2).Select
Result:
Note: border for illustration only.
Copy/PasteThe Copy and Paste method are used to copy a range and to paste it somewhere else on the worksheet.
Code:
Range("A1:A2").Select
Selection.Copy
Range("C3").Select
ActiveSheet.Paste
Result:

Although this is allowed in Excel VBA, it is much better to use the code line below which does exactly the same.
Range("C3:C4").Value = Range("A1:A2").Value
ClearTo clear the content of an Excel range, you can use the ClearContents method.
Range("A1").ClearContents
or simply use:
Range("A1").Value = ""
Note: use the Clear method to clear the content and format of a range. Use the ClearFormats method to clear the
format only.
CountWith the Count property, you can count the number of cells, rows and columns of a range.
Note: border for illustration only.
Code:
Dim example As Range
Set example = Range("A1:C4")
MsgBox example.Count
Result:

Code:
Dim example As Range
Set example = Range("A1:C4")
MsgBox example.Rows.Count
Result:
Note: in a similar way, you can count the number of columns of a range.
Did you find this information helpful? Show your appreciation, vote for us.