TUTOR TRAINING WORKSHOP - frederickliteracy.org
121
Fall 2020 TUTOR TRAINING WORKSHOP Handouts
Transcript of TUTOR TRAINING WORKSHOP - frederickliteracy.org

Fall 2020
TUTOR TRAINING WORKSHOP Handouts

Fall 2020
Literacy Council Frederick County MD Tutor Training Workshop
Handouts Table of Contents
Being an Effective Cultural Guide ................................................................................... 1 Gestures ......................................................................................................................... 3 Directions and Script to Teach Dialog ............................................................................. 4 Teaching Conversation ................................................................................................... 5 Write a Dialog ................................................................................................................. 11 Information Grids ........................................................................................................... 15 Vocabulary Terminology ................................................................................................. 18 Teaching Vocabulary ...................................................................................................... 21 Directions and Scripts to Teach Vocabulary ................................................................... 23 Vocabulary Activities ...................................................................................................... 24 Principles of Teaching Pronunciation ............................................................................. 31 Pronunciation Terminology ............................................................................................ 33 Pronunciation Activities .................................................................................................. 38 Directions and Scripts to Teach Pronunciation ............................................................... 45 The Communicative Approach and Grammar ................................................................ 46 ESL Teaching Methods: Teaching Grammar Creatively .................................................. 47 Directions and Scripts to Teach Structure ...................................................................... 49 Directions and Scripts to Teach Vocabulary ................................................................... 50 Grammar Activities ......................................................................................................... 51 Alphabetics Terminology ................................................................................................ 56 Phonemic Awareness ..................................................................................................... 60 Teaching Phonics ............................................................................................................ 62 Alphabetics Practice Activities ........................................................................................ 64 Vocabulary Activities ...................................................................................................... 77 Fluency Activities ............................................................................................................ 81 Reading Comprehension ................................................................................................ 85 Prediction Chart .............................................................................................................. 89 Comprehension Activities ............................................................................................... 90 Teaching Writing ............................................................................................................ 93 The Language Experience Approach .............................................................................. 106 Goal Setting .................................................................................................................... 110 Lesson Planning Outline ................................................................................................. 112 Literacy Lesson Segments ............................................................................................... 113 Lesson Plan ..................................................................................................................... 115 The First Meetings .......................................................................................................... 117

Page 3-18 Handout: Being an Effective Cultural Guide
© 2018 ProLiteracy
Handout: Being an Effective Cultural Guide In the role of culture guide, you are helping students discover how American culture “works.” Together, you and your students will develop an awareness of each other’s cultures—both the similarities and the differences. Enjoy the process! The tips below may be useful as you think about culture and your role as tutor or teacher and guide.
Tips on Being an Effective Culture Guide
Recognize who you are as a culture guide (age, gender, life experience, personal likes and dislikes, etc.) You may be an American, but you also are someone with your own individual cultural roles and experiences. Never pose as the only “real” American. Your own view may be going out of style. By the same token, students do not represent all people from their culture. Each person is unique. Avoid stereotyping.
Learn as much about the student’s culture as you teach about your own. This helps the student by reinforcing his or her own cultural identity as valid, and it helps you discover points of contrast. An easy way to learn about culture is to ask questions of each other and discuss the answers. “What is a friend in your country?” “What’s the best way to find a job in your country?” “What do you like about the United States? What don’t you like?” In this way, teacher and student function as mutual cultural guides/informants.
Examine similarities as well as differences between the cultures. Similarities bind us together. Differences help us see the many ways we solve universal problems. Both are important. Note the various things your cultures have in common, and explore (respectfully) the ways in which they differ.
Explore cultural meanings found in words, phrases, and gestures. For example, in the United States, there is a difference between referring to someone as “fat” or as “heavyset.” The side-to-side headshake is not a universal way to say “no,” nor does the “OK” sign with the thumb to forefinger have the same meaning in every culture. Colors, too, carry meanings that can vary across cultures. White is not always for the bride, and black is not always for mourning.
1

Page 3-19 Handout: Being an Effective Cultural Guide
© 2018 ProLiteracy
Encourage students to practice guessing what is or is not appropriate in the new culture. Examples: When are gifts expected? What is the right time to arrive for a party? How does one decline an invitation? What do Americans mean when they say, “See you later” or “How’s it going?”
Train yourself and the student to be prepared for expressions that are not meant to be taken literally or that have culture-specific meanings. For instance, the expression “Let’s get together sometime” does not necessarily mean that the speaker is inviting the listener to a specific engagement. Such invitations are sometimes mere expressions of politeness on a par with the standard “How are you?”
Take time to explore the student’s perceptions and conclusions by following up with an observation of your own or a question. When a student describes a situation he or she encounters, you could ask, “What does that mean to you?” or “What did you see going on?” Discussing an event with cultural overtones from the student’s life helps bring clarity about cultural issues. Sometimes, you may find students making generalizations about American culture (or other cultures that they encounter). Try to refute misinformation in a nonthreatening way. For example, ask, “Why do you think so?” and give the student a chance to explain what is meant. Try offering insights and information that might broaden the student’s perspective on the matter, and then tactfully move on to a new topic.
Avoid being judgmental toward yourself or the student. As you build mutual trust, you and the student will realize it’s OK to make mistakes in your interpretations of each other’s cultural behaviors.
Realize that forming a new identity in a new cultural setting is a matter of personal choice. You can set objectives for what you want to teach about culture. But students must be the ones to decide which parts of the new culture to adapt or adopt. One’s cultural identity is a personal work of art.
Be aware that students often experience major adjustment problems. Be supportive, but do not undertake major therapy. Your role is simply to facilitate cultural adjustment as best you can.
2

Gestures
Hand gestures are important when working with an ESL student who doesn’t understand English command words such as listen, say and repeat. The signals must be definite and clear, yet gentle.
Hand gestures carry many unsuspected meanings because of different cultural interpretations. The descriptions that follow have been selected as ones which we feel are most neutral and inoffensive. There are others which may work for you. During the Tutor Workshop however, it will be helpful if everyone uses the same gestures.
LISTEN: Put one finger to your lips and the other hand behind your ear. (Option: Say “Listen”)
STOP: Hold one hand with your palm facing the student (off to the side of your face, so you don’t block your mouth while you talk.) The student does not repeat anything that you say with your hand in the Stop position.
BECKON: (a) From the STOP position, turn palm toward you. This signals to the student “This is where you begin to repeat.” As you model what he will say, slowly move your hand and arm downward toward the student. (b) At the end of the spoken pattern, pull your hand up by bending at the elbow to indicate for your student to speak. Do not move your fingers separately like waving backwards, as it’s very offensive in some cultures. (Option: Say “Repeat” or “Say”)
CONTRACTIONS: When teaching contractions, indicate two words by using two fingers in a “V” shape. Close them to indicate a contraction.
You’ll find it worthwhile to use all these hand gestures initially with a very beginning student. In time, the student will understand what to do. Then use gestures only when introducing a new drill or exercise.
I am I’m
3

Directions and Script to Teach Dialog (Reference: Laubach Way to English, Unit A)
• GESTURES to use: Stop. Listen. Beckon.• Read the whole dialog at least 2 times so the student can hear how the
complete dialog sounds.
• Do not use the words, ‘teacher or student’.
First Dialog:
Teacher: Hello. How are you?
Student: Fine thank you. How are you?
Teacher: Fine thanks. My name’s _________. (Point to yourself) What’s your name?
Student: My name’s ____________ (Use student’s name.)
• Say each line. After each line, Beckon. Have student repeat each line. Do thistwice. Do not switch roles at this time.
• Next, the tutor and student each take their own roles. At the student’s responseline, have the student listen and then repeat at your prompts.
• This script is not etched in stone, but it is important to be consistent in the wayyou present it.
If the student has difficulty understanding:
• Literally move beside the student to show this is his/her part.
• Use pictures or puppets or talking fingers like puppets.
• Model saying ‘hello’ while entering a door – whatever it takes.
• ‘Back up” and simplify as much as necessary – one or two words at a time until youhave the whole sentence: you, … are you, … how are you, … hello how are you. Ifyou need to shorten the sentence, model the last part first, adding words from back tofront.
Note: The Illustration books are no longer printed by the publisher. They are available on-line.
www.newreaderspress.com/laubach-way-to-english-teachersguide Scroll down the page and click on Free Resources and Correlations.
You will see links to LWE-Illustration Books for Level1, Level 2, Level 3.
9-2017
4

Page 7-9 Handout: Teaching Conversations
© 2018 ProLiteracy
Handout: Teaching Conversation Conversing spontaneously in real-life situations is the primary goal of most ESL students. Improving their conversation skills can help students meet every day needs, accomplish their goals, and integrate into their communities.
There are two types of conversation activities: structured conversation activities and free conversation activities. Structured conversations provide a safe entrance into conversation and can be helpful for addressing specific student needs. Free conversations between students are more representative of the types of spontaneous conversations they will have outside of class.
Dialogs Dialogs are the primary way tutors introduce structured conversations. Use dialogs to give students practice using English in situations similar to those they will encounter in daily life.
Principles Before learning how to teach dialogs, it is important to understand some underlying principles that will make the dialogs more effective.
1. Conversation involves two parts: listening and speaking. Students needpractice in both.
2. Introduce conversations orally before in written form. Introducingconversations orally before in writing:
x supports the development of listening skillsx avoids language interference where students unconsciously apply their first
language’s sounds and letters to Englishx helps students focus on visual clues and cuesx helps students gain confidence in speaking
Having said that, if students are highly visual learners or have a high education in their native language, it may be helpful to introduce the dialog in writing first or very quickly after introducing it orally.
3. Establish a context for the dialog. It is not enough to develop dialogs based onstudent context. You must also provide context while students are learning the dialog.Use props, pictures, and other tools to do this. This will foster students’ understanding.
5

Page 7-10 Handout: Teaching Conversations
© 2018 ProLiteracy
4. Students need to hear conversations in a normal tone and speed.While it may be necessary to speak slowly and distinctly when introducing a dialog, it iscritical to return to a natural speed and tone as you continue the lesson. Students whobecome accustomed to unnaturally slow and distinct speech will find it difficult toconverse or to understand normal speech outside of class. Students need to hearEnglish as they will hear it outside of class.
5. Repetition, repetition, repetition. Students need to hear, say, and practice thedialog numerous times to gain the confidence needed to use it outside of class.
6. Dialogs need to be followed with role play. Transitioning from dialogs to roleplays help students move from a structured conversation to a more spontaneousconversation, preparing them to use their new conversation skills with success outside ofthe classroom.
Preparation 8. Work with students to identify a setting or situation in which they need to be able to use
English (e.g., a post office).9. Identify one activity that commonly takes place in that setting (buying stamps). Do not try
to focus on every possible interaction that could take place there.10. Decide who the two people in the dialogue will be (postal clerk and customer).11. Decide how long the dialogue will be. Three complete exchanges are about right for
beginners. At this level, dialogues should be simple and brief.12. Write the dialogue. Depending on the students’ level, you can work with them to create a
dialogue. To save time (or if you think they would not have the vocabulary to help createthe dialogue), you can write it in advance. Here is an example of a post office dialogue:
Postal clerk: Next! Customer: I would like ten stamps, please. Postal clerk: What kind? Customer: Forever stamps. Postal clerk: That’ll be $4.90. Customer: Thank you.
13. Decide what props or pictures you will need for teaching the dialogue (e.g., pictures ofthe inside and outside of a post office, forever stamps, several one dollar bills, and thechange you will need). Props and pictures are especially important to help beginningstudents envision the setting for the dialogue. With more advanced students, you canestablish the setting verbally.
6

Page 7-11 Handout: Teaching Conversations
© 2018 ProLiteracy
Pre-Teach 14. Pre-teach any new vocabulary words the students will need to know (next, stamps,
forever).15. Pre-teach any new grammatical structures students will need to know (I would like . . .).
Teach the Dialog to One Student 16. Recite the whole dialogue (both parts) two to three times. As you say each part, move
back and forth physically between the two imaginary positions of the speakers in thedialogue. This visual cue will help students differentiate between the two roles. Also usewhatever props are necessary to indicate the nature of the conversation between thetwo speakers.
17. Next, recite the dialog line-by-line, inviting students to say the dialog (both parts) withyou.
18. Take the first role; have the student take the second role.19. Reverse roles with the student.
Involve Other Students 20. If you are in a small-group or classroom setting, call on another student to do the same
dialogue with you. Repeat steps 11-12, using two students in the dialogue.21. Call on two students to practice the dialogue with each other.22. Pair students up to practice the dialog with each other
Role Plays After students are comfortable with a dialog, role plays give students an opportunity to use newly learned words and expressions in more natural conversation in a nonthreatening environment. This increases students’ confidence in their ability to use English to meet their needs in the outside world.
1. After teaching a basic dialog related to a specific situation, explain that you’ll practice thedialogue in a setting a little more like real life. Pass out any props needed for the roleplay. Stand up while you do the role play with a student.
2. Take the role of the first speaker. Say the same line you practiced in the dialogue. Thenbeckon the student to give the next line.
3. Modify your second line of the dialogue slightly to see how the student will respond.Example from the post office dialog:
Postal clerk: Next! Customer: I’d like ten stamps, please. Postal clerk: Forever stamps? Customer: Yes. Postal clerk: Did you say ten? Customer: Yes, please. Postal clerk: That’s $4.90 Customer: Thank you.
7

Page 7-12 Handout: Teaching Conversations © 2018 ProLiteracy
4. Practice again, modifying the dialogue even more. 5. If the students seem comfortable with role plays, practice again, but have them modify
what they say. Encourage them to be creative.
Question Strips Question strips are a great way to initiate conversations between students on a variety of topics. It is appropriate for students at all language levels, and is especially useful if the students in your group are at different language levels.
Steps 6. Make a list of several questions, and put them on strips of paper. Write one question per
strip. Examples: a. When was the last time you went to a movie? b. Have you ever met a famous person? Who? c. What is your favorite food? Why?
7. Distribute one question strip to each student. 8. Tell students to walk around and find partners. Have the partners ask each other the
questions they have on their strips. Students should not show their written questions to their partners. That would defeat the purpose of the activity.
9. After they have answered each other’s questions, tell them to trade questions, find new partners, and repeat the process.
10. Continue the activity until students have partnered with each person in the group or until interest starts to diminish.
Suggestions x Select topics that interest the students. This encourages them to respond more fully. x Avoid questions on topics that students might consider private or inappropriate for
discussion because of their cultural backgrounds. Similarly, avoid questions that are viewed by Americans as private or inappropriate for public discussion.
x Try to phrase the questions using grammatical structures and vocabulary that are familiar to most of the students.
x Use questions that are likely to give the questioner new information. In natural conversation, people don’t ask questions if they already know the answers. For example, questions such as “Where do you live?” or “Do you have any brothers or sisters?” create real communication only if the questioner does not already have that information.
x Remember that the way you phrase a question can either encourage or limit discussion. With a low-level group, questions that call for one-word or very short answers might be enough. Example: “Do you like ice cream?”
x If you have a multilevel class, encourage the more proficient students to help the lower-level ESL students by reading their questions for them.
x To simulate a real-life interaction, encourage students to follow up on answers by adding their own comments (“Oh, really? That’s my favorite food, too.”) or by asking questions to get additional information (“What was the name of the movie? How did you like it?”).
8

Page 7-13 Handout: Teaching Conversations
© 2018 ProLiteracy
Such discussion helps students focus on what’s being discussed rather than on how it is being said.
x With a more advanced group, encourage discussion or extended answers by includingone or more follow-up questions on the strip. Example: “What was [famous person]like?”
20 Questions This is a fun game to play with students to promote conversation. One student picks an object in the room or a well-known person or place. The other students must guess what it is.
Steps 1. Pick one student to be “it.” This person mentally picks an object in the room, or a well-
known person or place. Keep in mind that students may be from different countries andmay have been in the U.S. for different amounts of time. The person or place should beknown internationally.
2. The person who is “it” tells the other students if it is an object in the room or a person orplace.
3. The remaining students take turns asking questions that can be answered by yes or no,trying to identify the object, person, or place.
4. The students collectively can ask a total of 20 questions. If they are unable to guesscorrectly, the person who is “it” wins the game.
5. If one of the students thinks they know what the object, person, or place is, they canguess. If they get it right, then that student becomes it.
Show and Tell This is similar to what children do in grade school. Pick a consistent day of the week or month as show and tell day. Invite students to bring something in that is meaningful to them. They will show it to the class and talk about it, telling what the object is and why it is meaningful. Invite other students to ask questions.
Two Truths/One Lie Another game that encourages conversation among students.
Steps 1. One student comes to the front of the class. That student says three statements about
themselves. Two of the statements are true and one of them is a lie. The tutor writes thestatements on the board.
2. The remaining students take turns asking questions about each statement, trying tofigure out which one is the lie. When they think they have figured it out, they guess.
3. You may want to limit the number of questions students can ask if you want everyone togive two truths and one lie.
9

Page 7-14 Handout: Teaching Conversations © 2018 ProLiteracy
Newspaper Article Sharing This activity encourages conversation while helping students keep up with current events.
Steps 1. Give each student a collection of newspaper articles written at a low level or you can use
a newspaper like News for You (https://www.newreaderspress.com/news-for-you-online) which is specifically written for literacy and ESL students.
2. Ask each student to choose an article to read. Ask them to read the article and make notes about it.
3. Pair students with someone who read a different article. Ask the pairs to use their notes to share their article with each other.
4. You can pair students up multiple times. This allows students to read one article, but learn from 3 or 4.
10

Page 7-18 Handout: Write a Dialog
© 2018 ProLiteracy
Handout: Write a Dialog
Directions 1. Write a brief dialog that might occur at a pizza restaurant. Here are some ideas for your
dialog, but it can be any dialog you want.x A dialog between the hostess and customers to seat your party.x A dialog between customers and wait staff to order pizza and drinks.x A dialog between phone order staff and customer for pizza deliveryx A dialog between wait staff and cooks about the pizza order
2. After you write your dialog, use the Information Grid provided to expand your dialog.Include headings for the different columns and brainstorm additional vocabulary wordsor phrases.
3. Write a new dialog using the expansion ideas from your information grid.
11

Page 7-19 Handout: Write a Dialog
© 2018 ProLiteracy
First Dialog Person Conversation
___________ ______________________________________________________________
______________________________________________________________
______________________________________________________________
___________ ______________________________________________________________
______________________________________________________________
______________________________________________________________
___________ ______________________________________________________________
______________________________________________________________
______________________________________________________________
___________ ______________________________________________________________
______________________________________________________________
______________________________________________________________
___________ ______________________________________________________________
______________________________________________________________
______________________________________________________________
___________ ______________________________________________________________
______________________________________________________________
______________________________________________________________
12

Page 7-20 Handout: Write a Dialog
© 2018 ProLiteracy
Info
rmat
ion
Gri
d
13

Page 7-21 Handout: Write a Dialog
© 2018 ProLiteracy
Expanded Dialog Person Conversation
___________ ______________________________________________________________
______________________________________________________________
______________________________________________________________
___________ ______________________________________________________________
______________________________________________________________
______________________________________________________________
___________ ______________________________________________________________
______________________________________________________________
______________________________________________________________
___________ ______________________________________________________________
______________________________________________________________
______________________________________________________________
___________ ______________________________________________________________
______________________________________________________________
______________________________________________________________
___________ ______________________________________________________________
______________________________________________________________
______________________________________________________________
14

Page 7-15 Handout: Information Grids
© 2018 ProLiteracy
Handout: Information Grids An information grid is a table that students use to collect and organize information around a particular topic. Information grid activities use all aspects of language: listening, speaking, reading, and writing, making them a useful tool for ESL instruction.
Steps for Using an Information Grid with Low Level ESL Students
1. To use information grids with beginning ESL students, first select a topic for the grid.Personal information works well for these ESL students.
2. Determine what column headings you want to use. Create an information grid on achalkboard so everyone can see it. In the far left column, write a number for eachstudent in the group. If you have a large class, limit the number of students on the grid tofive or six. The topic for this information grid is “things people ask each other when theyfirst meet.”
3. Choose a student. Write the student’s name on the first line as you repeat the namealoud, slowly and clearly.
4. Ask the student questions to find out what information you should put in the remainingcolumns. Write the student’s responses in the grid, and then read aloud what you havewritten.
5. Repeat this process with a few other students.6. Once the grid has been completed, you can ask any number of questions that require
the students to read and understand the information in the grid. Ask simple questionslike these:
x Who is from Mexico?x How long has Mieko been in the United States?x Who has the most children?
7. Each time you ask a question, be sure to allow plenty of time before you call on astudent to answer it. This provides students with enough time to locate the informationand think about how to answer the question.
15

Page 7-16 Handout: Information Grids © 2018 ProLiteracy
Steps for Using an Information Grid with Higher Level ESL Students
1. You can use information grids with higher-level ESL students and make the activity more interactive.
2. Before students begin, review the kinds of questions students will need to ask to complete their grids.
3. Give each student a copy of the information grid on a piece of paper. Have students complete their grids by circulating around the room and interviewing each other.
4. By making the activity interactive, you require students to integrate various language skills such as asking questions, providing information, asking for clarification, taking notes, and reporting.
Variations of Information Grids 1. You can use information grids as a pre-reading activity to help students see what they
already know about a topic. For example, if students are reading about different occupations you can use an information grid that asks students information about their jobs: where they work, what they do there, are they hourly or salaried, are there safety issues, is there overtime, etc.
2. You can also use information grids to practice grammar and vocabulary. Let’s say you wanted to use an information grid to practice grammar and vocabulary around ordering food at a restaurant. You would put a part of the language structure at the top of each column – “I would like a …., pizza with…., and a …. to drink.” In each column you then put the vocabulary that fits that part of the sentence: small, medium, large; mushrooms, pepperoni, sausage; coke, beer, etc.
16

Page 7-17 Handout: Information Grids
© 2018 ProLiteracy
Info
rmat
ion
Gri
d
Do
you
have
chi
ldre
n?
Whe
re d
o yo
u w
ork?
W
here
are
you
from
? W
hat i
s yo
ur n
ame?
17

Page 8-10 Handout: Vocabulary Terminology © 2018 ProLiteracy
Handout: Vocabulary Terminology Types of Vocabulary
Listening Vocabulary These are the words we hear and understand. This is the first type of vocabulary we develop as children. Adults recognize and understand close to 50,000 words.
Speaking Vocabulary These are the words we use to convey information and ideas when we speak. Speaking vocabulary is typically a lot smaller than listening vocabulary—studies estimate 5,000–10,000 words.
Reading Vocabulary These are the words we recognize and understand when we see them in print. People typically develop reading vocabulary by reading a wide variety of content. However, to read a wide variety of content, readers need a broad reading vocabulary. Much vocabulary instruction focuses on helping students develop a broad reading vocabulary.
Writing Vocabulary These are the words we use to convey information and ideas in print. Typically, writing vocabulary is the smallest type and is heavily influenced by the number of words we can spell correctly.
18

Page 8-11 Handout: Vocabulary Terminology
© 2018 ProLiteracy
Tiers of Vocabulary Vocabulary words can be divided into three tiers.
Tier 1 Basic Tier 1 words are typically nouns, verbs, familiar adjectives, and common sight words. They will already be part of a student’s oral vocabulary. These words are often found in low-level instructional materials. We use them to teach alphabetics and word study skills specifically because they are already part of oral vocabulary. Examples include shoe, paper, sad, run, and blue.
Tier 2 Higher-level Tier 2 words are found in more sophisticated texts across a variety of content and genres. They typically have multiple or nuanced meanings and are used to provide description and detail. These words are much less likely to be part of a student’s current vocabulary. For intermediate and advanced students, focus vocabulary instruction on Tier 2 words. Building students’ understanding of Tier 2 words gives them the expanded vocabulary they will need to read higher-level, more sophisticated texts with confidence. That larger vocabulary will also help them express themselves better when writing and speaking. Examples include exertion, unanimous, rickety, benevolent, and masterpiece.
Tier 3 Specialized Tier 3 words are related to specific topics such as health, finance, technology, or occupations. People typically learn these words when the need arises, and they usually do not become part of a person’s everyday vocabulary. Vocabulary instruction for Tier 3 words occurs when the words are encountered in reading, and focuses on word meaning to improve comprehension. Examples include pedometer, creditor, prosecution, isotope, and crepe.
19

Page 8-12 Handout: Vocabulary Terminology
© 2018 ProLiteracy
Principles
Pre-teach words before reading. Analyze a reading passage before students read it. Identify Tier 2 and Tier 3 words they may not know and teach these words before they read. Teaching unfamiliar words before reading improves comprehension.
Ensure multiple exposures. Choose words to teach that students are likely to see again. Try to ensure multiple exposures. Reinforce vocabulary by including practice activities where students use new words in writing. The more often a student sees and uses a new word, the more likely that word is to be incorporated in the student’s vocabulary.
Focus on breadth and depth. Vocabulary instruction should focus on two things: breadth and depth. By breadth we mean expanding students’ vocabularies by exposing them to new words and encouraging them to use these new words in speech and print. By depth, we mean understanding specific meanings, nuanced differences between similar words, word choice for audience and formality, and meaning in specific contexts.
Teach word-learning strategies. Teach students word-learning strategies that will help them understand the meanings of words. Often a student’s first exposure to new a new word will take place while reading outside of class. Teaching students how common prefixes and suffixes affect the meanings of words, how to use context clues, and how to use a dictionary ensures that students have the proper tools to learn new words on their own.
20

Page 6-12 Handout: Teaching Vocabulary
© 2018 ProLiteracy
Handout: Teaching Vocabulary The first step in preparing students to communicate in English is helping them acquire a basic vocabulary of useful words and phrases. It can take as many as 20 or more exposures to a new word in written or oral form for a language learner to truly understand that word. Keep in mind the following guidelines when you are teaching vocabulary:
Teach only a few new words at a time. Aim for no more than 8 to 10 new words per lesson.
Choose one way of saying something and stick with it. For example, if you teach the expression “Turn off the light,” don’t give other versions of the same expression (“Switch off the light,” “Turn out the light,” or “Put out the light”).
Contextualize vocabulary. There are several ways to do this:
x Use pictures that show the word in context. For example, it’s easier to define theword “deer” by showing a student pictures of deer in the woods than it is to tell them it’sa four legged animal that eats grass and has antlers.
x Use realia. Bring in the actual objects you are teaching. For example, bring in an apple,orange, pear, and banana if you are teaching fruits.
x Teach words in groupings. For example, if you were trying to help a student developthe vocabulary needed to talk to the doctor, you would teach body parts together as onelesson, and teach ailment words (such as cut, ache, or burn) in the next lesson.
x Teach words contextualized in common phrases. If you were teaching vocabularywords to help a student order food, you wouldn’t just teach individual words like large,small, drink, pizza, pepperoni, or sausage. You would teach the phrase “I would like asmall pepperoni pizza and a small drink,” then let the student practice using differentvocabulary words in the phrase.
x Use themed pictures to group vocabulary wordsand phrases. Show students a picture like this one andask them what they see. Write the words on the board,then put the words in phrases and sentences. Forexample, students might use the vocabulary woman,books, and buy. You can put those words together inas the sentence “The woman is buying books.”
x Act it out. If you are teaching verbs like sit, stand,walk, or jump, act them out.
Use several examples of the vocabulary word for clarity. That way, there is no danger that students will misunderstand what the word means. For example, to teach the word yellow, show students three different things that are yellow: a pencil, a lemon, and a picture of a taxi. If you use only one, students might mistakenly think that you are teaching the word pencil or write.
21

Page 6-13 Handout: Teaching Vocabulary © 2018 ProLiteracy
Teach vocabulary in a consistent fashion. Aim for a routine each time you introduce a new group of words. For example, you might routinely follow these steps:
x Say each word or phrase and have students watch and listen. x Say the word or phrase again and invite students to repeat it. x Check for comprehension by asking direct questions. “What is this?” x Have students practice using the word or phrase with each other.
Use repetition. To learn new words permanently, students need to hear and use them over and over again. Your teaching routine should include recycling new words in later lessons. Here’s an example: You are helping a student prepare for a job interview, and you are teaching related vocabulary words such as application, manager, interview, and thank-you note. You present the vocabulary, practice it in a comprehension exercise, and have the student use the vocabulary in sentences. In the next class, you can review the words through a game, a dictation, or a job interview role play.
Link vocabulary to practical application. For most ESL students, learning English is a means to an end. Students want to learn English so they can meet basic needs (buy groceries), access resources in their community (make a doctor’s appointment), and interact with others (introduce yourself to coworkers). Choose words and phrases that help students accomplish these goals. Design practice activities that prepare students to use words and phrases outside of class.
Ask students to create personal dictionaries. Give each student a notebook. At the top of each page, have students write one letter of the alphabet. As students learn important words or phrases, they can write them in the notebook along with definitions, translations, pictures, or other information that will help them use the words.
Encourage students to record words and phrases using their phones. Recordings can help students with pronunciation as well as remembering new vocabulary.
Notes:
22

Directions and Scripts to Teach Vocabulary (Reference: Laubach Way to English, Unit A)
Procedure to teach classroom objects: 1. Teacher gestures Stop, Listen, picks up object and models sentence several times.2. Teacher models sentence and gestures (beckons) for student to Repeat.3. Teacher holds up object and asks “What’s this?”
Practice: Teach Classroom Objects Teacher: (Stop. Listen.) This is a book. This is a book. This is a book.Teacher: This is a book. (Beckon) Student: This is a book. Teacher: This is a book. (Beckon) Student: This is a book. Teacher: (Hold up book and beckon.) Student: This is a book.Teacher: (Hold up book.) What’s this? (This is a book.) Student: This is a book.
Repeat these steps for other words: pen, pencil, table, desk, chair
Procedure for substitution drill with vocal cues: 1. Teacher gestures Stop, Listen. Model sentence twice.2. Teacher gestures to Repeat the sentence.3. Teacher says the object, and the sentence (pencil, This is a pencil.)4. Teacher gestures for student to Repeat just the sentence. Shake your head if student
repeats the name of the object (the cue). You may need to prompt the student.
Practice: Substitution Drill with Vocal Cues Teacher: (Stop. Listen.) This is a pen. Teacher: This is a pen. (Beckon) Student: This is a pen. Teacher: pencil. This is a pencil. (Beckon) Student: This is a pencil. Teacher: chair. This is a chair. (Beckon) Student: This is a chair. Teacher: table. (Beckon) Student: This is a table.
Continue with other objects: desk, chair, student, teacher, book.
Procedure for substitution drill with visual cues: 1. Teacher holds up or indicates the object.2. Gesture to Listen and Repeat (This is a pen.)3. Hold up the object and beckon for student to respond.
Practice: Substitution Drill with Visual Cues Teacher: (Listen) (Hold up pen) This is a pen. Teacher: This is a pen. (Beckon) Student: This is a pen. Teacher: Hold up pen and beckon Student: This is a pen. (If student can’t produce the sentence, say it and have him repeat.) Teacher: Hold up book and beckon Student: This is a book.
Continue to indicate other objects as visual cues: table, chair, pencil, desk, student, teacher.
23

Page 6-14 Handout: Vocabulary Activities
© 2018 ProLiteracy
Handout: Vocabulary Activities I’m a Banana. What are You? This vocabulary activity combines listening, speaking, and reading skills; and can be used to:
x learn and practice the correct language structures for asking questions and exchanginginformation
x review recently taught vocabularyx practice categorizationx divide students in a large classroom into smaller groupsx break up “seat-time” by getting students moving around the room and talking to each
otherSteps
1. Decide how many categories of objects you want and what the categories will be.Examples: fruits, cooking utensils, vegetables, clothing. (If you are using the activity as afun way to divide the students into a specific number of small groups, use that number ofcategories.)
2. Make a list of items for each category. The total number of items needs to equal thenumber of students in the group. (Each category should have approximately the samenumber of items.) Example (for a group of 16 students):Fruits: banana, apple, pear, orangeCooking utensils: frying pan, spatula, eggbeater, measuring cupVegetables: carrot, cabbage, onion, potatoClothing: shoe, jacket, shirt, hat
3. Give each student an index card on which you have written the name of one of theseitems. (Do not write the category names on these cards.)
4. Ask students to get up and walk around the room. As they approach other students, theyshould say, “I’m a [item listed on their card]. What are you?” The objective is to find allthe other students who belong in the same category as they do.
5. When the students have found the others in their category, ask them to sit together andwrite a list of all the items they can think of in that category. Give them three or fourminutes for this part of the activity.
6. When the time is up, ask a member of each group to tell what category the groupmembers belong to and to read aloud the items they wrote on their list.
Suggestion Give students extra time to continue their conversations if they seem interested in what they are discussing. As long as students are speaking English, this sort of “free” conversation should be encouraged.
24

Page 6-15 Handout: Vocabulary Activities
© 2018 ProLiteracy
Total Physical Response Total Physical Response (TPR) is a teaching technique for beginning ESL students that enables them to learn new vocabulary by listening to and carrying out spoken commands. Students are less likely to feel pressure because In TPR activities, students are not required to speak. The tutor models the commands and continually repeats and reviews them until the students can carry out the commands with no difficulty.
With beginning students, first teach basic commands that call for simple body movements and no props: stand up, sit down, walk, and turn around. This gives them a welcome feeling of accomplishment and helps them become comfortable with TPR right away. Students can go on to more advanced TPR activities in which they interact with props and people in the learning environment. Examples of commands to use at this stage are touch the, point to, pick up, put down, and give me.
Steps 1. Select five to seven new commands (and any related vocabulary) to teach.2. Before the teaching session, make a list of all the commands in the order you plan to
teach them. (The list will serve as a record of what you have taught and will help youplan review activities for later lessons.)
3. Gather any equipment, props, or pictures you will need to set the context or illustrate themeaning of the commands. For example, if you are teaching stand up, sit down, pick itup, and put it down, you would list those commands and make sure you have a chairand a couple of pencils or books to use for demonstration. If you will be teachingcommands that involve objects, bring to the lesson two examples of each object. Thiswill allow you to model the command using one object and to have the student use theother object to carry out the command at the same time.
4. If you are working with a group, select two or three students for the demonstration.Teaching more than one student at the same time takes the pressure off any individualstudent. The other students in the class will also be learning as they watch. When youfinish the demonstration, you can invite others to carry out the commands they saw youteach.)
5. Teach the commands.a. Model the action as you give the first command. Speak slowly and clearly. As
you do this, try using gestures and facial expressions to help studentsunderstand what you want them to do.
b. Perform the action with the student several times, and give the command eachtime.
c. Give the command without performing the action yourself. Encourage the studentto indicate comprehension by performing the action.
d. If the student has difficulty carrying out the command, model the action again asyou say it. Always be ready to help out if necessary.
e. Repeat steps a–d for each command you plan to teach. Before introducing eachnew command, review the commands you have already taught. Review them inthe same order that you taught them.
25

Page 6-16 Handout: Vocabulary Activities © 2018 ProLiteracy
f. Finally, review all the commands in random order. g. If you are working with a small group, have selected students practice giving the
commands. Suggestions
x Go slowly. If you go too fast, students are likely to become confused and tense and make mistakes. They will learn best if they are relaxed and feel comfortable with the activity. TPR should always be light and fun.
x Provide whatever support the students need to be successful. If students are not successful in carrying out a command, you have gone too fast, included too much material, or asked them to do something you did not adequately teach and model.
x Use TPR lessons to practice real-life activities. Examples: baking a cake, addressing an envelope, getting dressed to go out in winter, washing one’s hands, setting the table, or routines for waking up and going to work or to class.
x You will find a variety of resources that describe more TPR techniques online. One such resource is Total Physical Response (TPR): A Curriculum for Adults by Margaret Silver, Barbara Adelman, and Elisabeth Price of the English Language and Literacy Center. You can find this resource on ProLiteracy Education Network.
Substitution Drills Substitution drills use a consistent language structure to teach students new vocabulary. Substitution drills require students to respond orally. For low-level students, substitution drills are an effective way to teach nouns and adjectives. At higher levels, a variation substitution drills can be used to expand dialogs and role-plays.
Steps 1. Choose several objects you want to teach. In the beginning, you may want to teach
classroom words: book, pen, paper, eraser, chalkboard. 2. Introduce the first object by showing the object and using a simple sentence. “This is a
book.” Say the sentence 2-3 times, then invite students to say it with you. 3. Ask the questions “What is this?” Respond “This is a book.” Ask the student “What is
this?” Answer with the student “This is a book.” Repeat until the student can answer without your help.
4. Introduce the next item using steps 2-3. “This is a pen.” “What is this?” “This is a pen.” Note: always use correct grammar, such as a vs. an, even if you don’t teach the rule.
5. Review each item (book and pen) with the student asking “What is this?” 6. Continue to use the consistent language structure to introduce new items. Review all
vocabulary words before introducing a new word. Suggestions
x Introduce adjectives by using variations of the same object. For example, once students know the word comb, you can use a blue comb, a black comb, a red comb, and a yellow comb to introduce colors. Remember to use a simple and familiar sentence structure, substituting only one word: “This is a blue comb.” “This is a black comb.”
x After students have learned the vocabulary words orally, they can practice recognizing them in print. Write each word on the board. Hold up the object, state “This is a _____”
26

Page 6-17 Handout: Vocabulary Activities
© 2018 ProLiteracy
and point to the word on the board. To review, ask students “What is this?” and have them write the word on a piece of paper, choose from an index card, or come to the board and point to the word then say it.
Concentration This is a fun way for students to review print vocabulary.
Steps 1. Group students into pairs. For one-to-one tutoring sessions, the student and the tutor
play against one another.2. Make sets of matching cards by writing a vocabulary word on one card, and putting a
picture or the definition of the word on a second card. Make at least four sets of cards.3. Place the cards face down on a table, in a grid, in random order.4. Have students take turns turning over two cards at a time to see if they can match the
word with its definition or picture.5. If the words do not match, the student turns the cards face down again, in the same
place, and it is the other student’s turn. If the cards do match, the student keeps themand it is the other student’s turn.
6. The student who matches the most card sets is the winner.Word Bingo This is a fun way for students to review vocabulary words
Steps 1. Design bingo cards by drawing a 5x5 table on a piece of paper. Each card will have 24
words on it. You should draw from a larger group of words, 30-40.2. Write the word free in the middle square. Write a review word in each of the remaining
24 squares. Make sure to switch the position of words as well as which words are on acard. You should not have two identical cards.
3. Write each word on an index card. You will use the index cards to call Bingo. Shuffle thecards.
4. Give each student a bingo card and counters (M&Ms or some other small candy makegood counters).
5. Draw the first index card and read the word. Students should find the word on their cardand cover it with a marker.
6. The winner is the first person to get five in a row: horizontally, vertically, or diagonally.That person should yell Bingo!
Suggestions x For lower level students, instead of reading the bingo word you can show a picture.x For higher level students, you can read the definition and students can match the word.
27
Page 6-18 Handout: Vocabulary Activities © 2018 ProLiteracy
Other activities x Word search puzzles x Crossword puzzles x Dictation x Hangman
Teaching Homonyms and Homographs Homonyms are words that sound the same, may or may not be spelled the same, and have different meanings. Examples include fair (country fair)/fair (reasonable) and pear (fruit)/pair (couple). Homographs are words that are spelled the same, may or may not sound the same, and have different meanings. Examples include lie (untruth)/lie (lie down) and tear (crying)/tear (rip). These words can give new English language learners problems:
x When teaching beginning level students, we often limit their vocabulary. Words that are spelled the same but have different meanings (like lie and lie) can give students trouble if they only know one meaning of the word and that meaning doesn’t fit what they’re reading. They will have trouble with comprehension.
x Words that sound the same but are spelled differently (like pear and pair) can give students trouble because we often focus on oral vocabulary before print vocabulary. Students may know the difference when speaking, but not recognize or produce the words correctly in print.
Teach When They Come Up Typically we want to limit the amount of information a student learns in any given lesson, giving them manageable amounts that they can practice and master. This means that we typically don’t teach homonyms and homographs until they come up, in a lesson, a story, or something the student encountered outside of class.
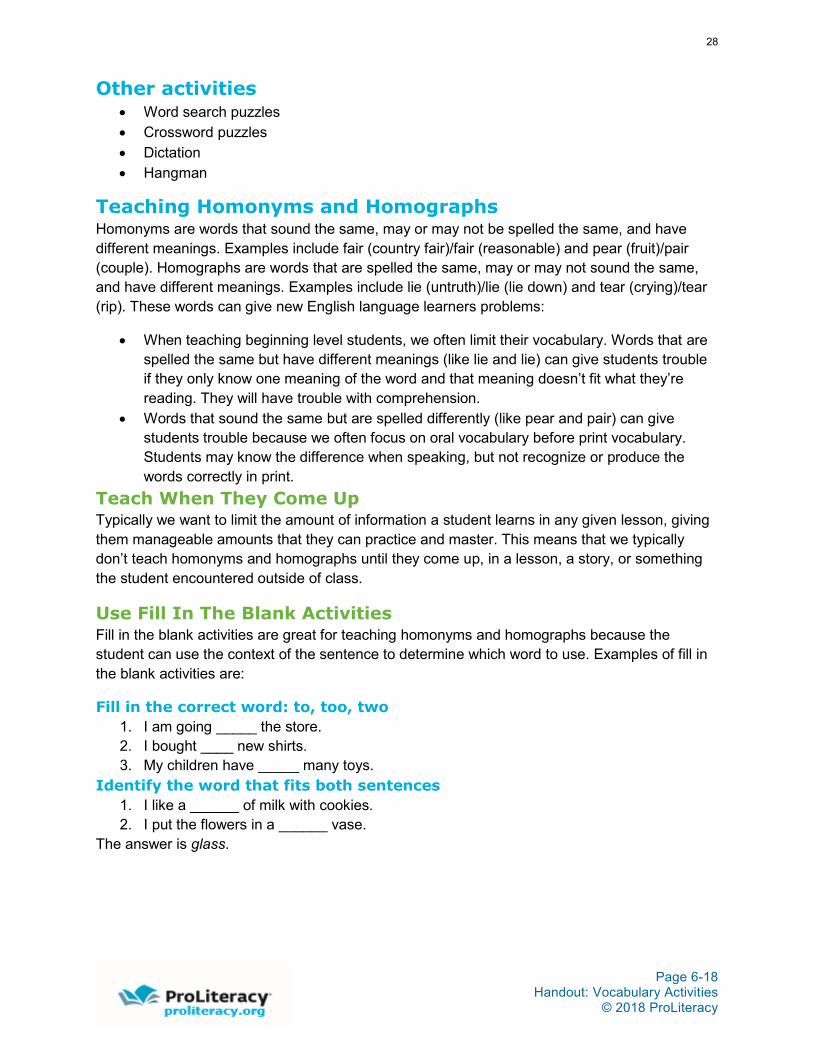
Use Fill In The Blank Activities Fill in the blank activities are great for teaching homonyms and homographs because the student can use the context of the sentence to determine which word to use. Examples of fill in the blank activities are:
Fill in the correct word: to, too, two 1. I am going _____ the store. 2. I bought ____ new shirts. 3. My children have _____ many toys.
Identify the word that fits both sentences 1. I like a ______ of milk with cookies. 2. I put the flowers in a ______ vase.
The answer is glass.
28

Page 6-19 Handout: Vocabulary Activities
© 2018 ProLiteracy
Oral fill in the blank. Write the words pair and pear on an index card. Read the sentences below. Ask students to show you the correct word.
1. I bought a _____ of tickets for the soccer game.2. We planted a ______ tree in our front yard.
Idioms The difficulty with idioms is that although students might already know the meanings of the individual words in the idiom, this will not help them decipher the meaning of the idiom as a whole. Idioms can be two- or three-word verbs, such as:
x call off (cancel)x get across (convey an idea)x think up (invent)x read up on (get information about)x cut down on (lessen)
Idioms can also be expressions, such as:
x in the long runx push over the edgex through thick and thin
The key to teaching an idiom is to put it in context. When introducing an idiom, use it in a sentence, repeating the sentence and substituting words that mean the same thing.
Example: He’s broke. He has no money. He’s broke.
Writing a Conversation to Teach Idioms We often use and encounter idioms in conversations, so writing a conversation that includes idioms can help students understand when and how to use them, along with their meanings.
1. Select the idioms you want to teach, and explain them. The idioms you choose mightcome from a reading passage you are planning to use. Aim for no more than eightidioms at a time. Introduce the idiom as mentioned above.
2. Have the students practice using the idioms in sentences.3. After you have practiced the idioms a few times and feel confident the students
understand them, work with the students to write a conversation between two peoplethat incorporates the idioms.
29
Page 6-20 Handout: Vocabulary Activities
© 2018 ProLiteracy
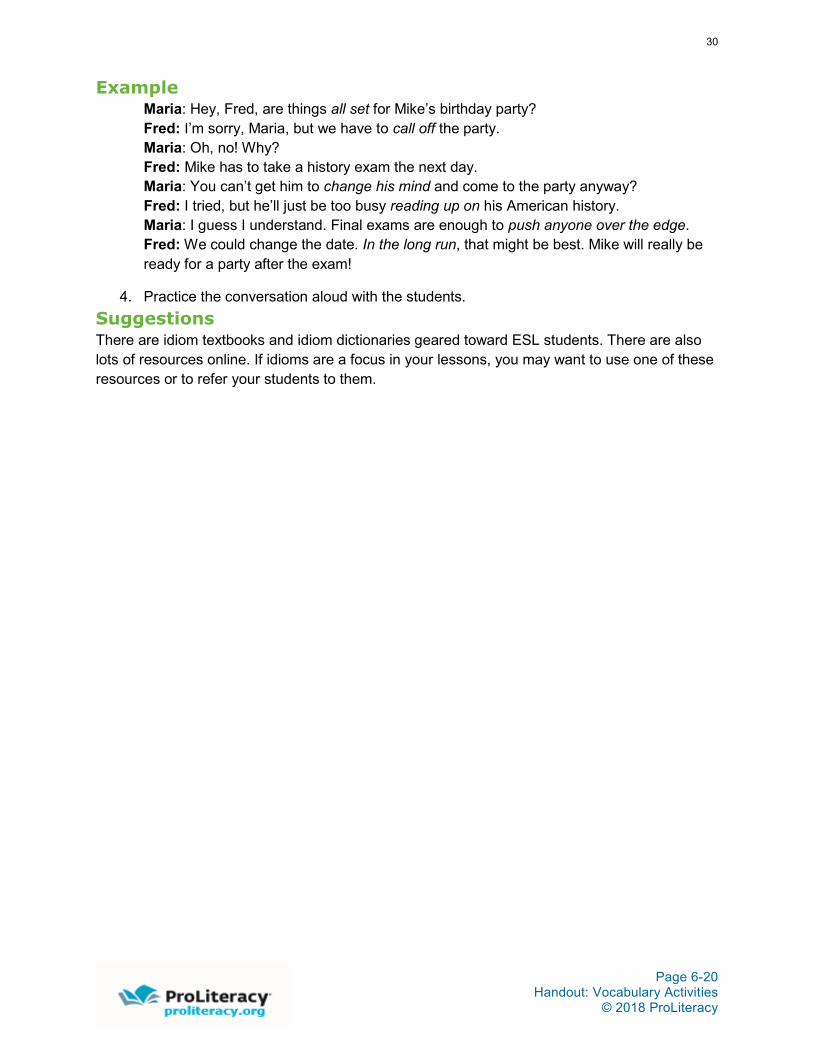
Example Maria: Hey, Fred, are things all set for Mike’s birthday party? Fred: I’m sorry, Maria, but we have to call off the party. Maria: Oh, no! Why? Fred: Mike has to take a history exam the next day. Maria: You can’t get him to change his mind and come to the party anyway? Fred: I tried, but he’ll just be too busy reading up on his American history. Maria: I guess I understand. Final exams are enough to push anyone over the edge. Fred: We could change the date. In the long run, that might be best. Mike will really be ready for a party after the exam!
4. Practice the conversation aloud with the students.Suggestions There are idiom textbooks and idiom dictionaries geared toward ESL students. There are also lots of resources online. If idioms are a focus in your lessons, you may want to use one of these resources or to refer your students to them.
30

Page 8-11 Handout: Principles of Teaching Pronunciation
© 2018 ProLiteracy
Handout: Principles of Teaching Pronunciation Students with extensive English vocabulary and a good grasp of English grammar may still have difficulty speaking understandable English if their pronunciation is not good. To be understood, a student needs to pronounce individual English sounds correctly and use appropriate English patterns of stress, rhythm, and intonation.
Here are three principles for teaching pronunciation:
1. A student’s native language influences how he or shehears and speaks English. Students are used to speaking their native languages with sounds that are different from those they must use to speak English. Speaking English requires different tongue and lip placement and different mouth movements than students are accustomed to. Remember, ESL students have been producing sounds from other languages throughout their lives. Acquiring the new sounds of English might take considerable time.
There are three major reasons why students have problems with individual sounds:
1. The sound is new to the student. For example, a French speaker learningEnglish is apt to have difficulty with a word like thank because French has no /th/ sound.A French speaker tends to say sank or tank instead.
2. The sound exists in the student’s native language but comes in aplace that is new to him or her. For example, an English speaker learningVietnamese is apt to have difficulty with words like Nganh and Nguyen. Although Englishhas the /ng/ sound, that sound does not appear at the beginning of words. A Cambodianlearning English will tend to drop final /s/ sounds because the Khmer language does nothave an /s/ sound at the end of words. The English words bus and peace might becomebuh and pea.
3. The sound doesn’t exist in the student’s native language but issimilar to one that does. For example, a Spanish speaker learning English is aptto have difficulty distinguishing between the vowel sounds in the words bit and beet. TheSpanish sound system has the /ē/ sound but not the /i/ sound, so Spanish speakers tendto say both of these words with the /ē/ sound.
As soon as you’ve been assigned a student, research the student’s native language to understand what pronunciation problems he or she may bring:
x Compare their alphabet (if they have one) with the English alphabet.x Compare the sounds of their native language with the sounds of English.
31

Page 8-12 Handout: Principles of Teaching Pronunciation © 2018 ProLiteracy
2. Students don’t just “pick up” good pronunciation. It takes a lot of work. Many adult students would like to speak accent-free English, but that is difficult. Students do not just pick up good pronunciation. The older a student is, the longer they have been speaking their native language and the more influence it has over learning a new language. Their mouths have been trained to use the sounds of their first language, not English. They need direct instruction in the sounds, rhythm, and intonation of English, and then need many opportunities to practice. Tutors will need to think critically about how they make sounds; model sounds accurately; and describe how they make sounds to students.
3. Encourage, reassure, and practice to build confidence. Many ESL students feel frustrated about their pronunciation. It is one of the most visible indicators that they are not native English speakers. Students may not want to engage with native English speakers because they are not confident in their ability to speak and be understood. Here are four tips that can go a long way toward building a student’s confidence.
8. When students feel frustrated by their pronunciation, give encouragement and praise. Remind participants that encouragement and praise are most effective when they are specific.
9. If you can’t understand a student, say so, but assure the student that you will solve the problem together. When students are struggling, it helps to remind them that you are there to assist them, and that you will help them until they can speak the way they want.
10. Sounds aren’t learned until they become automatic, so practice new sounds often. Practice, especially practice that leads to improvement, builds confidence.
11. Remind students that the goal is communication, not perfection.
32

Page 8-13 Handout: Pronunciation Terminology
© 2018 ProLiteracy
Handout: Pronunciation Terminology Phoneme The smallest individual sound in an oral language.
Grapheme The letter or letters that represent a sound when it is written.
Phonics The relationship between the sounds of oral language and written symbols, and how those symbols are used to create recognizable words in print. Another way to say this: phonics is the relationship between phonemes and graphemes. Understanding this relationship allows good readers to accurately decode unfamiliar words.
Phonological Awareness The ability to identify and manipulate different components of oral language. Phonological awareness includes:
x phonemic awareness;x recognizing individual words in a sentence;x identifying syllables within a word;x recognizing rhyming words;x identifying onsets (the initial consonant) and rimes (the vowel and whatever else follows)
in syllables.
Vowels Vowels in English are a, e, i, o, and u. They are made by using the vocal cords and without blocking the airflow with your lips, tongue, or teeth. Vowels are continuants. Each syllable has a vowel.
Consonant Consonants in English are all the letters that are not vowels. Their sounds are made by partially blocking the airflow with lips, tongue, teeth, or a combination. They can be stopped or continuants. They can be voiced, unvoiced, or nasal.
33

Page 8-14 Handout: Pronunciation Terminology © 2018 ProLiteracy
Consonant Blend In a consonant blend, two or more consonants blend together but each letter sound can still be heard. Examples include bl, br, cl, cr, dr, fr, tr, fl, gl, gr, pl, pr, sl, sm, sp and st. Blends can occur at the beginning of words, like blue or crook. They can also occur at the end of words, like last or rasp.
Consonant Digraphs In a consonant digraph, two consonants join together to create a new sound. Examples include ch, ph, sh, th, wh, and ck. Digraphs can occur at the beginning of words, like chew or shook. They can also occur at the end of words, like bath or truck.
Consonant Trigraphs In a consonant trigraph, three consonants join together to create a new sound. Examples include sch, shr, sph, squ, thr, and tch. Trigraphs can occur at the beginning of words, like schedule or sphere. They can also occur at the end of words, like batch.
Continuant/Stop If you can continue the sound as long as you want, it’s a continuant. If the sound just stops, it’s a stop. Some of the consonant sounds, such as /s/, /m/, and /l/, are continuants, as are all the vowel sounds. The consonant sounds /b/, /p/, and /t/ are examples of stops.
Voiced/Unvoiced If you use your vocal cords when you make the sound, it’s voiced. All the vowel sounds are voiced. If you don’t use your vocal cords, the sound is unvoiced. Some consonant sounds, such as /z/, are voiced. Others, such as /s/, are unvoiced.
Nasal If the sound comes from your nose, it’s a nasal sound. The sounds /m/, /n/, and /ng/ are nasal sounds.
Front/Back Vowels can be described by the place in the mouth where the tongue “humps” up. An example of a “front vowel” sound is /e/, as in feel. For this sound, the hump is at the front of the mouth. An example of a “back vowel” sound is /oo/ as in tool. For this sound, the hump is at the back of the mouth.
34

Page 8-15 Handout: Pronunciation Terminology
© 2018 ProLiteracy
Tense/Lax Vowels can be described by the degree of tenseness or laxness of the muscles of the mouth. For example, the /e/ sound in the word cheap makes the mouth feel more tense than the /i/ sound in the word chip, although the position of the mouth is almost the same for each of these sounds. Thus, the sound /e/ (tense) and /i/ (lax) form a tense/lax pair.
Rounded/Unrounded Vowels can also be described by the degree of rounding of the lips during production of the sound. All front vowels are made with lips unrounded (e.g., /e/, /i/, /a/). All back vowels are made with rounded lips (e.g., /oo/, /o/).
Stress Without being conscious of it, native speakers naturally stress some syllables in a word and some words in a phrase or sentence. Stressed syllables or words are usually louder, more clearly enunciated, and longer. Unstressed syllables or words are generally reduced, shorter, and weaker.
x am bi tiousx de vel op ment
In sentences, changing the stress on individual words can alter the emphasis of meaning.
x Roberto is sitting on the chair. (not the sofa or on the floor)x Roberto is sitting on the chair (not Luis or Maria)
Rhythm Rhythm is the timing of a language. It’s how the language divides itself into equal, regularly repeating patterns. English is a stress-timed language, meaning the timing is based on the words we choose to stress in a sentence, and the time between stressed words is approximately the same. In English, we stress content words (nouns, verbs, adjectives, adverbs—words that are important to meaning) and do not stress function words (articles, prepositions, conjunctions, pronouns—the words that join the content words together). Consider the following sentences
x Dogs eat bones.x The dogs eat bones.x The dogs will eat bones.x The dogs will eat some bones.x The dogs are eating some bones.x The dogs will have eaten the bones.
These sentences vary in length. However, each of them has three content words, or stress points. If you read them aloud, it takes approximately the same amount of time to say each of
35

Page 8-16 Handout: Pronunciation Terminology © 2018 ProLiteracy
them. That is because we alter the amount of time to say each combination of functional words so that the stressed words come at equal intervals.
Some languages have a syllable-timed rhythm instead of a stress rhythm. This means there is a regular time interval between syllables regardless of whether they are stressed or not. Languages like French, Spanish, and Hindi are syllable timed.
Intonation Intonation is the way the voice rises and falls in speech. English has three basic intonation patterns:
x Falling Intonation: where the voice falls on the final stressed syllable of a phrase or group of words. This is common in statements or wh- questions.
o What do you want for dinner? o I think I’ll have the chicken.
x Rising Intonation: where the voice rises at the end of a sentence. This is common in yes/no questions.
o Would you like a drink? o Is that the new designer?
x Falling-Rising Intonation: where the voice falls off and then rises at the end. This common when we are making a statement and we want to indicate that we’re not sure of what we’re saying, or there’s more to come.
o I don’t support either candidate at the moment.
We also use the falling-rising intonation when we are asking a question, such as asking for information or requesting someone to do something.
o Can I have your address?
The same sentence, said with different intonations, can mean very different things. We use a rising intonation to express emotions like happiness, excitement, fright, and annoyance. We use a falling intonation to express boredom, sarcasm, and disinterest. The sentence “I’m so excited to see you” could be an expression of excitement or sarcasm, depending on the intonation.
36

Page 8-17 Handout: Pronunciation Terminology
© 2018 ProLiteracy
Connected Speech One problem that ESL students have with understanding spoken English and speaking English fluently is the difference between what oral language sounds like and the words they see in print. This is because native English speakers combine words, drop beginning or ending sounds, or change the sounds of words altogether when they speak. Consider the following examples:
x an apple Æ anapplex Is he busy? Æ Izi busy?x Fish and chips Æ fishenchipsx He asked Æ Heyaskedx Do it Æ Dewitx Don’t you Æ Donjux Would you Æ Wudchux Should have told me Æ shoulda tolmex most common Æ moscommonx Have you seen Æ Hafew seen
37

Page 8-18 Handout: Pronunciation Activities © 2018 ProLiteracy
Handout: Pronunciation Activities Here are several activities you can use with students to teach different aspects of pronunciation.
Teaching Sounds
Steps 1. Explain and model: The tutor introduces the sound by naming and modeling it. The
tutor describes how to form the sound. The tutor models the sound again, providing examples of words where the sound occurs. Students watch and listen.
2. Practice listening: The tutor says some words that contain the sound and some that do not contain the sound. Students practice listening for the sound and identifying words that contain it. Sounds not found in their native languages will be unfamiliar to students, so they will need lots of practice listening to and identifying them.
3. Practice speaking: Students practice repeating the individual sounds after the tutor. Next students practice saying words with the sound after the tutor. If you are working with a group, students can practice with each other.
4. Apply: Students practice using words that contain the new sound in dialogs and conversations. Homework assignments lead students to use words with the sounds outside of class.
Suggestions x This same basic process can be used with other aspects of pronunciation: stress,
rhythm, intonation, linking, pausing, etc. The tutor explains and models the concept. Next the tutor provides examples and non-examples. Students listen and try to identify the examples. Students then try to reproduce the aspect of pronunciation by repeating after the tutor and then using it in their own in dialogs and conversations.
38

Page 8-19 Handout: Pronunciation Activities
© 2018 ProLiteracy
Minimal Pairs The “minimal pairs” teaching technique is commonly used to help ESL students hear the difference between two sounds and then correctly produce each of the sounds. A minimal pair consists of two words that differ only in one sound. For example, the words hat and bat, rake and rate, or hit and heat.
Steps 1. Identify two sounds you want to work on, for example, /p/ and /b/.2. Create a list of words that contrast these two sounds. Make sure that the two sounds
you are focusing on are the only differences between the two words. For example, pilland bill would be a minimal pair. You can search online for minimal pair lists ideal forESL teaching. Here is an example of a minimal pair list for /p/ and /b/.
x pill/billx pail/bailx pair/bearx pie/buy
3. Create flashcards for the two sounds you have chosen, writing each letter on one indexcard.
4. Ask the student to listen to the difference between the two sounds as you say first oneand then the other (first the /p/ sound and then the /b/ sound).
5. Ask the student to listen to the difference again. This time, as you pronounce the /p/sound, raise the p flashcard. As you pronounce the /b/ sound, raise the b flashcard.
6. Read the first pair of words on the list (pill/bill). After you read each word, ask the studentto point to one of the flashcards to indicate which sound the word begins with. If astudent has difficulty, demonstrate by saying each word again and raising theappropriate flashcard.
7. Repeat the process with the first few pairs on the list.8. When a student understands what to do, begin alternating between reading the /p/ word
first or the /b/ word first.9. Go back through the list, and have the student repeat the words in pairs after you.10. Put the words into a meaningful context so the student has an opportunity to practice
saying the two sounds in sentences. For example:x Where is the pill? I have to take the pill now.x Where is the bill? I have to pay the bill now.
Repeat the first question, letting the student give the appropriate response. A correct response means the student can hear the difference and respond correctly.
11. Finally, reverse the roles. Let the student ask the questions and you respond. If you givethe correct response, they will know they are pronouncing the sounds correctly.
39

Page 8-20 Handout: Pronunciation Activities © 2018 ProLiteracy
The Sound Phone The Sound Phone is a fun activity that students can use to practice sounds and words that give them difficulty.
Steps 1. Choose ten words that model one or two sounds the student is having difficulty with.
These do not have to be minimal pairs. 2. Using the Sound Phone Number Pad template, write each word under a number and
give it to the student. Below is an example highlighting the different pronunciations of oo.
1 book
2 food
3 look
4 moon
5 cook
6 roof
7 good
8 room
9 foot
0 too
3. Begin by asking the student to provide his or her phone number by saying the word under each digit (not the number).
4. Present additional phone numbers and have the student say them back to you using the Sound Phone Number Pad you created. For example, if the student has created a list of community resources with phone numbers, have the student say those phone numbers using the sound phone.
5. Give the student the number pad to take home. Have the student use the number pad with any phone numbers he or she encounters outside of class, for example:
x Phone numbers provided in commercials x Phone numbers that appear on caller ID x Phone numbers of friends or family members x Phone numbers for work
40

Page 8-21 Handout: Pronunciation Activities
© 2018 ProLiteracy
Sound Phone Number Pad 1 2 3 1 2 3
4 5 6 4 5 6
7 8 9 7 8 9
0 0
1 2 3 1 2 3
4 5 6 4 5 6
7 8 9 7 8 9
0 0
41

Page 8-22 Handout: Pronunciation Activities © 2018 ProLiteracy
Stress Patterns Use activities like the ones below to teach stress patterns to students.
Syllable and Stress Practice for Words Write the number of syllables after the word. Underline the stressed portion of the word. The first one is done for you.
1. receive __2__
2. pronunciation _____
3. meeting _____
4. because _____
5. cat _____
6. syllable _____
7. umbrella _____
8. diver _____
9. correct _____
10. important _____
Stress Practice for Words Write the word under the matching stress pattern. The first one is done for you.
O o o O o o O o o O o o o o o O o copy
copy
delegation
insist
determination
arithmetic
because
standard
environment
pronunciation
contribution
pattern
divide
42

Page 8-23 Handout: Pronunciation Activities
© 2018 ProLiteracy
Stress Practice for Phrases Write the phrase under the matching stress pattern. The first one is done for you.
O o o O o o O o o O o o o o o O o What’s for dinner?
What’s for dinner?
I’m lost.
What’s wrong with you?
What do you notice?
Come here.
Help me.
I like your accent.
because I said so
in the morning
at night
Call me.
I told you so.
I don’t want to
matching pattern
the breakfast bar
He’s gone.
Pencil Tracking Pencil tracking effectively helps ESL students improve fluency and rhythm. It’s also a great multisensory activity.
Steps: 1. Write a few sentences that the student will use for fluency practice.2. Place dots in the text, grouping words together into phrases that represent the rhythm of
English. Bold the stressed content words.3. Explain the activity to students and model it for them by reading the sentence, swinging
your pencil from dot to dot as your read.4. Ask the students to read aloud and swing their pencils from dot to dot. Provide feedback.5. Repeat the activity until the student is able to read the sentence or sentences with
proper rhythm.
You can create pencil-tracking activities for students, or they can create them for each other. Below is an example of a pencil tracking activity:
Example Keisha heard ● that a large snowstorm ● was predicted. ● She decided ● to go to the grocery store ● to buy milk, ● eggs, ● bread, ● and peanut butter. ● She bought a few extra items ● just in case the storm ● was really bad. ● She got home ● just ● in ● time.
43

Page 8-24 Handout: Pronunciation Activities © 2018 ProLiteracy
Connected Speech Dialog Once students are comfortable with a dialog, you can rewrite and practice it using connected speech. This will give students authentic practice in pronunciation and listening. Below is an example of a dialog written in connected speech:
Postal clerk: Next! Customer: I’d like ten stamps, please. Postal clerk: Foreverstamps? Customer: Yes. Postal clerk: Didju say ten? Customer: Yes, please. Postal clerk: That’s $4.90 Customer: Thank you.
44

Directions and Scripts to Teach Pronunciation (Reference: Laubach Way to English Units B, C, D)
Teach “same” and “different”: Prepare two index cards by writing “same” on one and “different” on the other. Show student two identical items while saying “same” and pointing to that card. Show student two very unlike items while saying “different” and pointing to that card.
Practice: Vowel Sounds: /ē/ and /i/, /ā/ and /a/ Teacher: Listen to /ē/ /ē/ /ē/ Student: /ē/ /ē/ /ē/ Teacher: /ē/ /ē/ /ē/, beat, beat, beat Student: /ē/ /ē/ /ē/, beat, beat, beat Teacher: Listen to /i/ /i/ /i/ Student: /i/ /i/ /i/ Teacher: /i/ /i/ /i/, bit, bit, bit Student: /i/ /i/ /i/, bit, bit, bit Continue procedure with other words such as bat/bet, mate/mat, boot/book, coat/cat, buy/boy.
Then model pairs of words to see if student can distinguish between them. Teacher: beat, beat (Say/point to “same”), beat, boot (Say/point to “different”) Continue with other pairs, varying the pattern of same and different pairs so student doesn’t just guess without listening.
Practice: Plural Endings /s/ and /z/
Teacher: model plural form of noun, unvoiced ending “Listen to /s/. Books.” Prolong the /s/. Teacher: say each word twice books, books Student: books, booksContinue with students, clocks, desks
Teacher: model plural form of nouns, voiced ending “Listen to /z/. Pens.” Prolong the /z/. Teacher: say each word twice pens, pensStudent: pens, pensContinue with pencil, table, chair, boy, girls, window, door
Teacher: give the singular form of nouns already taught above, ending in either a voiced or unvoiced sound (/s/ or /z/) and ask student for the plural.Teacher: table Student: tables
Practice: Minimal Pairs /a/ and /e/
A minimal pair consists of two words, with different meanings, that sound exactly alike except for the two sounds being contrasted. The student learns to discriminate between the two sounds. Prepare index cards with the sounds being contrasted, such as /a/ and /e/.
Teacher: Listen to /a/. bad, add, man, pan, and, sand - say each several times. Student repeats.Teacher: Listen to /e/. bed, Ed, men, pen, end, send – say each several times. Student repeats.
Teacher: Tell the student that and, sand and man are the /a/ sound. End, send and men are the /e/ sound. Student points to the correct index card.
Practice by saying one of a pair and have the student say the other:Teacher: and Student: end Teacher: man Student: menTeacher: Ed Student: add Teacher: send Student: sand
45

Page 9-7 Handout: The Communicative Approach and Grammar
© 2018 ProLiteracy
Handout: The Communicative Approach and Grammar The Communicative Approach contextualizes language learning in the way that people use language – to communicate. This is different from both a grammar or rules based approach and a translation approach to learning language. The communicative approach has six elements:
1. Learning takes place through real communication.2. Language learning is contextualized in the real-life experiences of students.3. The focus of language learning is on usage, not how language works.4. There is lots of interaction among learners and between learners and the tutor.5. Trial and error are part of the learning process.6. The tutor serves as a facilitator of learning.
How do these elements affect how you would teach grammar?
46

Page 9-8 Handout: ESL Teaching Methods: Teaching Grammar Creatively
© 2018 ProLiteracy
ESL Teaching Methods: Teaching Grammar Creatively Stephanie Long, Reach to Teach: Teaching Adventures Abroad Blog, April 13, 2015, https://www.reachtoteachrecruiting.com/blog/ESL-teaching-methods-grammar
Grammar probably ranked pretty high on your list of least favorite subjects as a student. As a teacher, it can seem just as boring. When it comes to teaching ESL, though, you’re going to be spending a lot of time getting very familiar with the minute points of grammar, and then figuring out how to communicate those to your students.
Does that mean the grammar portions of your lessons always have to be a drag? Nope. It’s a huge part of your lessons, and you can definitely find ways to make it fun and interesting for you and your students. Teaching grammar creatively isn’t nearly as tricky as you might think!
Teach Grammar in Context One of the most important things to do if you are looking for more interesting ways to teach grammar is to teach it in context.
For example, let’s say you are introducing conditional sentences to your students. You could start your lesson by writing a big title on the board: “Conditional Sentences”, followed by an example: “If I don’t study for a test, I get a bad grade,” followed by a lengthy explanation: “This type of conditional sentence means that every time the first thing happens, the second thing happens, too. So, every time I don’t study for a test…” Are you falling asleep yet?
On the other hand, you can start your lesson by tossing out some sentences for the students to finish: “If Jerry falls asleep in class, he…” “If I don’t study for a test, I…” “If I eat too much, I feel…” You might need to coax the answers out of them at first, but usually there will be one or two students who will catch on right away, even if they’ve never heard that particular sentence structure. The other students, after hearing a few answers, will get the gist pretty quickly, too. Let some zany answers come up, and have fun with it.
Once they’ve seen the grammar in context, take a few moments to clarify and point out the structure and usage. Make sure everyone understands, knows what it’s called, and can identify and give examples of this particular sentence structure. Return to the game or activity briefly after the lesson, too. It will take on a new meaning and drive the grammar point home now that they have a solid understanding.
When students see grammar in context first – through a game, a story, an activity, or just frequently hearing it used – it lets their brains work a little bit to intuit the meaning before you formally explain it. That’s how we naturally learn a language: by being exposed to it and picking up on the meaning. It’s more engaging, it develops an understanding that’s grounded in context, and it also develops their critical thinking and comprehension skills.
47

Page 9-9 Handout: ESL Teaching Methods: Teaching Grammar Creatively © 2018 ProLiteracy
Don’t Over-Explain Even though it’s useful to have a quick lesson where you explain the formal name of the grammar pattern and go over its structure and usage, don’t over explain. The less you can possibly talk about grammar and the more you can actually use and practice that grammar, the better.
Often, your students’ textbooks will have explanations of new grammar points. If it’s a very complex or advanced point, reading through that explanation and answering any questions can be helpful. But, for the most part, grammar explanations are very, very confusing, and trying too hard to explain a grammar point is just going to confuse you and the students. A few concrete examples are almost always better.
Incorporate Grammar into Other Activities Grammar is something that runs through just about every aspect of language. Even the simplest sentences have grammar. Your curriculum may require you to teach stand-alone grammar lessons, and it’s important to introduce various grammar points and topics so that the students have a richer understanding of the mechanisms of language. But don’t let that be the only time you think about grammar in the classroom.
Games and activities are the perfect time to revisit and emphasize grammar points with very little effort on your part and a lot of fun for the students. For example, mad libs are a perfect way to revisit the difference between nouns, verbs, adverbs, and adjectives, without feeling like a dry review.
Stories are amazing teaching tools, too. After reading a story, challenge students to identify examples of grammar points that you have recently taught, or to pick out sentence structure and patterns that are used frequently throughout the story.
The most important thing to remember when you are coming up with ways to teach grammar creatively is that grammar doesn’t have to be dry and boring. If you teach it in context and incorporate grammar into stories, games, and other fun activities, your students will pick up on grammar usage and structure relatively painlessly – and they will probably even have a lot of fun doing it.
48

Directions and Scripts to Teach Structure (Reference: Laubach Way to English Unit A)
Basic Steps: 1. Model – student listens2. Model – student repeats3. Gesture for student to respond - student learns to respond with correct answers to drills
Practice: I’m, You’re
Teacher: Point to student, model several times I’m a student, I’m a student
Teacher: Model and gesture to repeat I’m a student Student: I’m a student
Teacher: Gesture for student to speak (prompt if needed) Student: I’m a student
Repeat the above steps, pointing to yourself, for I’m a teacher.
Practice: Contractions of be with I, you, it First, help student understand contractions by using V shape with fingers and bringing them together, two hands apart and then together, or words written on cards.
Teacher: Model full form and contraction using Say “Listen to I am ____, I’m ____” the student’s name.
Teacher: Model and have student repeat I am _____________ Student: I am _____________ Teacher: I’m ______________ Student: I’m ______________
Teacher: I am _____ I’m_____ Student: I am _____ I’m _____
Repeat above steps for you are/you’re using your name, and it is/it’s using an object.
Practice: Substitution Drill with Vocal Cues
Point to student and use student’s name for I’m, and use your name for you’re.
Teacher Student I’m ___________ I’m ___________ You’re ________ You’re ________ I I’m ___________ You You’re ________ It’s a book It’s a book Book It’s a book
49
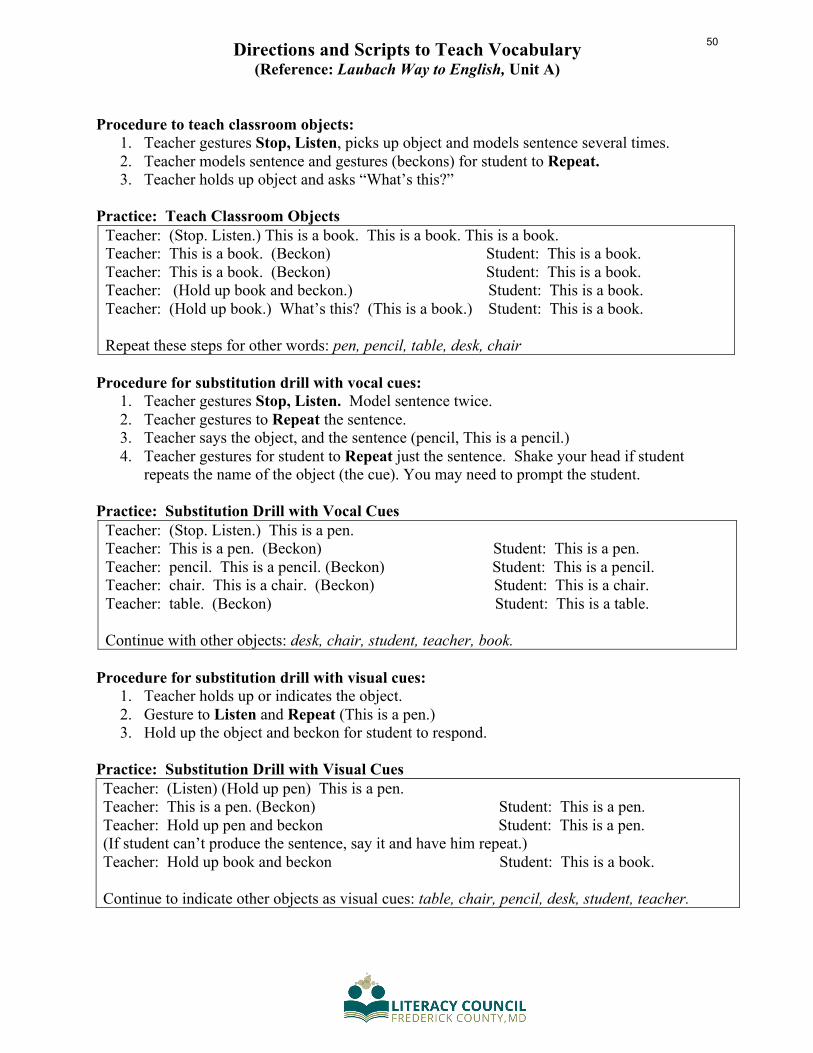
Directions and Scripts to Teach Vocabulary (Reference: Laubach Way to English, Unit A)
Procedure to teach classroom objects: 1. Teacher gestures Stop, Listen, picks up object and models sentence several times.2. Teacher models sentence and gestures (beckons) for student to Repeat.3. Teacher holds up object and asks “What’s this?”
Practice: Teach Classroom Objects Teacher: (Stop. Listen.) This is a book. This is a book. This is a book.Teacher: This is a book. (Beckon) Student: This is a book. Teacher: This is a book. (Beckon) Student: This is a book. Teacher: (Hold up book and beckon.) Student: This is a book.Teacher: (Hold up book.) What’s this? (This is a book.) Student: This is a book.
Repeat these steps for other words: pen, pencil, table, desk, chair
Procedure for substitution drill with vocal cues: 1. Teacher gestures Stop, Listen. Model sentence twice.2. Teacher gestures to Repeat the sentence.3. Teacher says the object, and the sentence (pencil, This is a pencil.)4. Teacher gestures for student to Repeat just the sentence. Shake your head if student
repeats the name of the object (the cue). You may need to prompt the student.
Practice: Substitution Drill with Vocal Cues Teacher: (Stop. Listen.) This is a pen. Teacher: This is a pen. (Beckon) Student: This is a pen. Teacher: pencil. This is a pencil. (Beckon) Student: This is a pencil. Teacher: chair. This is a chair. (Beckon) Student: This is a chair. Teacher: table. (Beckon) Student: This is a table.
Continue with other objects: desk, chair, student, teacher, book.
Procedure for substitution drill with visual cues: 1. Teacher holds up or indicates the object.2. Gesture to Listen and Repeat (This is a pen.)3. Hold up the object and beckon for student to respond.
Practice: Substitution Drill with Visual Cues Teacher: (Listen) (Hold up pen) This is a pen. Teacher: This is a pen. (Beckon) Student: This is a pen. Teacher: Hold up pen and beckon Student: This is a pen. (If student can’t produce the sentence, say it and have him repeat.) Teacher: Hold up book and beckon Student: This is a book.
Continue to indicate other objects as visual cues: table, chair, pencil, desk, student, teacher.
50

Page 9-10 Handout: Grammar Activities
© 2018 ProLiteracy
Handout: Grammar Activities Total Physical Response for Grammar Total Physical Response (TPR) is a teaching technique for beginning ESL students that enables them to learn new vocabulary and grammar structures by listening to and carrying out spoken commands. Students are less likely to feel pressure because in TPR activities they are not required to speak.
When using TPR to teach grammar, choose grammar concepts that can be easily demonstrated, such as prepositions of place: in, on, under, beside.
Steps 1. Select the grammar concept and five to seven phrases to teach.2. Before the teaching session, make a list of all the phrases in the order you plan to teach
them. (The list will serve as a record of what you have taught and will help you planreview activities for later lessons.)
3. Gather any equipment, props, or pictures you will need to set the context or illustrate themeaning of the commands. For example, if you are teaching prepositions of place, youwill need several objects that can be placed in, on, under, and beside each other. Apencil, a book, and a cup would make good props. It is good to select items for whichstudents already know the English vocabulary. Then they can focus on the grammarstructure being taught.
4. Teach the grammar.a. Model the grammar phrase as you say it. Speak slowly and clearly. For example,
place the pencil on the book as you say, “The pencil is on the book.” Model 2-3times.
b. Use the grammar phrase as a command to the students. Perform the action withthem several times, and give the command each time. For example, you wouldsay to students, “Please put your pencil on the book.”
c. Give the command without performing the action yourself. Encourage thestudents to indicate comprehension by performing the action.
d. If a student has difficulty carrying out the command, model the action again asyou say it. Always be ready to help out if necessary.
e. Repeat steps a–d for each grammar phrase you plan to teach. Before introducingeach new command, review the commands you have already taught. Reviewthem in the same order that you taught them.
f. Finally, review all the commands in random order.g. If you are working with a small group, have selected students practice giving the
commands.
51

Page 9-11 Handout: Grammar Activities © 2018 ProLiteracy
Suggestions for Topics
52

Page 9-12 Handout: Grammar Activities
© 2018 ProLiteracy
Information Grids An information grid is a table that students use to collect and organize information around a particular topic. Information grid activities use all aspects of language: listening, speaking, reading, and writing. This makes them useful tools for ESL instruction. You can teach grammar with a grid by having students report information from their grids back to the class using different grammar structures. Here’s an example:
Steps 1. Select a topic for the grid and a grammar structure the information will allow you to
teach. For example, you might have students collect information about what time they doeveryday things and use the reporting to teach noun/verb agreement.
2. Create an information grid on a chalkboard so everyone can see it. Write the headingsalong the top. In the far left column, write a number for each student in the group. If youhave a large class, limit the number of students on the grid to five or six.
3. Enter your information in the grid on the first line. This will allow you to model thegrammar structure.
4. Choose a student. Write the student’s name on the second line as you repeat the namealoud. Ask the student questions to find out what information you should put in thecolumns. Write the student’s responses in the grid, and then read aloud what you havewritten.
5. Repeat this process with a few other students.6. Once the grid has been completed, model reporting information about yourself and other
students using the correct grammar structure. For example, here is an information gridfor the activity described above:
What time do you…? Name go to bed? get up? eat breakfast? leave for work? Mr. Evans 11:30 p.m. 7:00 a.m. 7:15 a.m. 8:00 a.m. Maria 10:00 p.m. 6:30 a.m. 7:00 a.m. 7:30 a.m. Wong 11:00 p.m. 6:00 a.m. 6:10 a.m. 7:00 a.m. Ivan 9:00 a.m. 4:00 p.m. 8:30 a.m. 10:30 p.m. Frieda 9:30 p.m. 6:00 a.m. no breakfast 6:30 a.m.
7. Begin by reporting your own information, stressing the verb: “I go to bed at 11:30 p.m. Iget up at 7:00 a.m.”
8. Then report on someone else: “Maria goes to bed at 10:00 p.m. She gets up at 6:30a.m.”
9. Do this 2-3 more times, first modeling your own information and then modeling reportingon someone else.
10. Next, ask one of the students a question. “Maria, what time do you eat breakfast?”Maria’s response should be “I eat breakfast at 7:00 a.m.” (only correct the noun/verbagreement if she has trouble). Now, ask Maria a question about someone else. “Maria,what time does Wong get up?” Maria’s response should be “Wong gets up at 6:00 a.m.”
53
Page 9-13 Handout: Grammar Activities © 2018 ProLiteracy
Grammar Chants Grammar chants are short, rhythmic, jazzy chants designed to help students remember specific grammar rules, structures, or principles.
Steps 1. Select the grammar target. What grammar point will the students practice? 2. Write a short chant that teaches this grammar point. You don’t need to teach everything.
A few good examples are enough for the chant. 3. Practice saying the chant alone. Pay attention to the rhythm. The chant should have a
strong rhythm, but not too fast or too slow. 4. Hand out copies of the chant to students. 5. Read the chant to the students. 6. Have the students read the chant with you. 7. Perform the chant so that students can hear and follow the rhythm. 8. Have students join you in the chant.
Suggestions x Some chants may be done in call and response style. For example, you say a sentence
and the student’s response is to change the noun to a pronoun, or form a contraction, or change the tense of the verb.
Chants from Workshop
54

Page 9-14 Handout: Grammar Activities
© 2018 ProLiteracy
Grammar Board Game: Tell about Something Use pieces of paper, M&Ms, or something else for markers. Roll a die and move forward. Follow the instructions in the box. Use gerunds in your response. For example, if you land on you always avoid doing, you might say “I always avoid washing the dishes.” Ask each other questions. Use the statements as an opportunity to practice conversations.
55

Page 6-16 Handout: Alphabetics Terminology © 2018 ProLiteracy
Handout: Alphabetics Terminology Phoneme The smallest individual sound in an oral language.
Phonemic Awareness The ability to hear and manipulate the individual sounds in oral language. When students are reading at the lowest levels and are having difficulty decoding words, it is often because they have problems with phonemic awareness. Phonemic awareness doesn’t develop naturally – it has to be taught. When we learn English as children, we learn it orally and focus on the complete word. Students will need explicit instruction and practice in discerning and manipulating individual sounds in words.
Grapheme The letter or letters that represent a sound when it is written.
Phonics The relationship between the sounds of oral language and written symbols, and how those symbols are used to create recognizable words in print. In other words, phonics is the relationship between phonemes and graphemes. Understanding this relationship allows good readers to accurately decode unfamiliar words.
56

Page 6-17 Handout: Alphabetics Terminology
© 2018 ProLiteracy
Phonological Awareness The ability to identify and manipulate different components of oral language. Phonemic awareness is a subset of phonological awareness. Phonological awareness includes
x phonemic awareness;x recognizing individual words in a sentence;x identifying syllables within a word;x recognizing rhyming words;x Identifying onsets (initial consonants) and rimes (the vowel and whatever else follows an
onset) in syllables.
Decoding Using skills and strategies to identify words in print. In other words, converting the printed code into oral language.
Voiced The vocal cords vibrate when the sound is made, as in the sound /v/.
Unvoiced The vocal cords do not vibrate when the sound is made, as in the sound /f/.
57

Page 6-18 Handout: Alphabetics Terminology © 2018 ProLiteracy
Continuant The sound can be continued as long as you have breath. All vowels and some consonants, such as /v/ and /f/, are continuants.
Stopped The sound cannot be continued. Some consonant sounds are stopped, such as /d/.
Nasal The sound comes through the nose. There are three nasal sounds: /m/, /n/, and /ng/ as in ring. If you make these sounds and then pinch your nose, the sound will stop.
Consonant Blend Two or more consonants blend together but each letter sound can still be heard. Examples include /bl/, /br/, /cl/, /cr/, /dr/, /fr/, /tr/, /fl/, /gl/, /gr/, /pl/, /pr/, /sl/, /sm/, /sp/, and /st/. Blends can occur at the beginning of words, like blue or crook. They can also occur at the end of words, like last or rasp.
Consonant Digraphs Two consonants join together to create a new sound. Examples include /ch/, /ph/, /sh/, /th/, /wh/, and /ck/. Digraphs can occur at the beginning of words, like chew or shook. They can also occur at the end of words, like bath or truck.
58

Page 6-19 Handout: Alphabetics Terminology
© 2018 ProLiteracy
Consonant Trigraphs When three consonants join together to create a new sound. Examples include /sch/, /shr/, /sph/, /squ/, /thr/, and /tch/. Trigraphs can occur at the beginning of words, like schedule or sphere. They can also occur at the end of words, like batch.
59
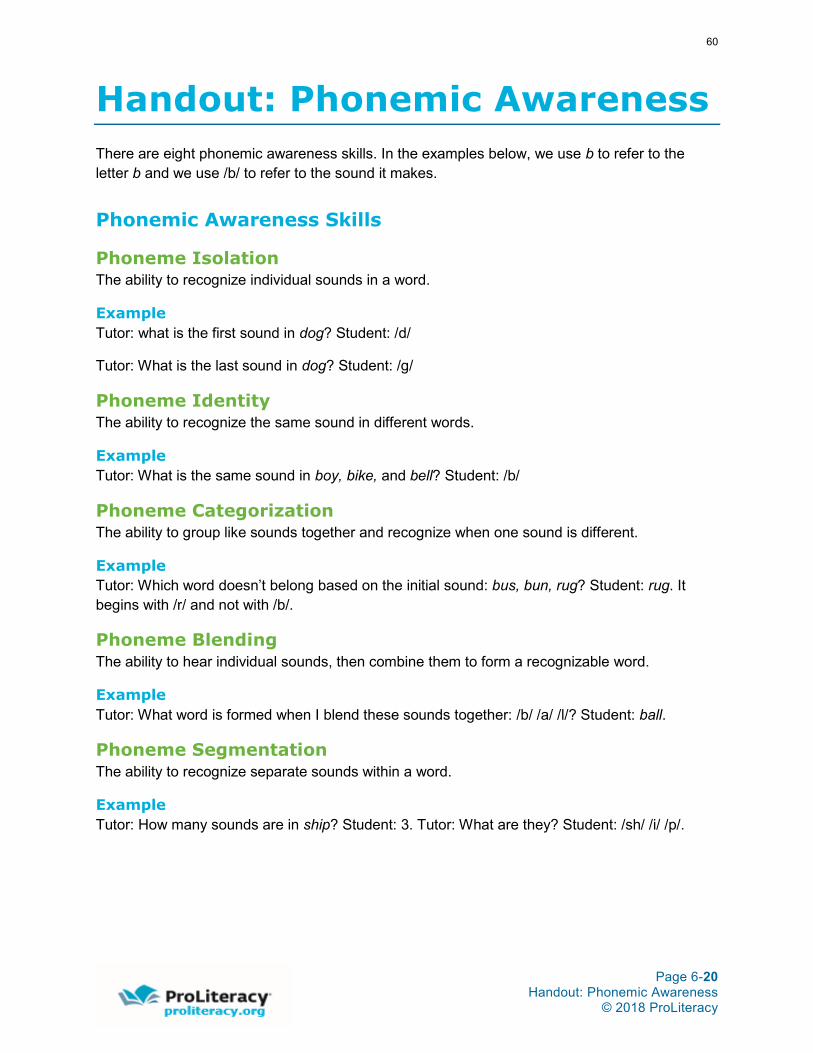
Page 6-20 Handout: Phonemic Awareness
© 2018 ProLiteracy
Handout: Phonemic Awareness There are eight phonemic awareness skills. In the examples below, we use b to refer to the letter b and we use /b/ to refer to the sound it makes.
Phonemic Awareness Skills
Phoneme Isolation The ability to recognize individual sounds in a word.
Example Tutor: what is the first sound in dog? Student: /d/
Tutor: What is the last sound in dog? Student: /g/
Phoneme Identity The ability to recognize the same sound in different words.
Example Tutor: What is the same sound in boy, bike, and bell? Student: /b/
Phoneme Categorization The ability to group like sounds together and recognize when one sound is different.
Example Tutor: Which word doesn’t belong based on the initial sound: bus, bun, rug? Student: rug. It begins with /r/ and not with /b/.
Phoneme Blending The ability to hear individual sounds, then combine them to form a recognizable word.
Example Tutor: What word is formed when I blend these sounds together: /b/ /a/ /l/? Student: ball.
Phoneme Segmentation The ability to recognize separate sounds within a word.
Example Tutor: How many sounds are in ship? Student: 3. Tutor: What are they? Student: /sh/ /i/ /p/.
60
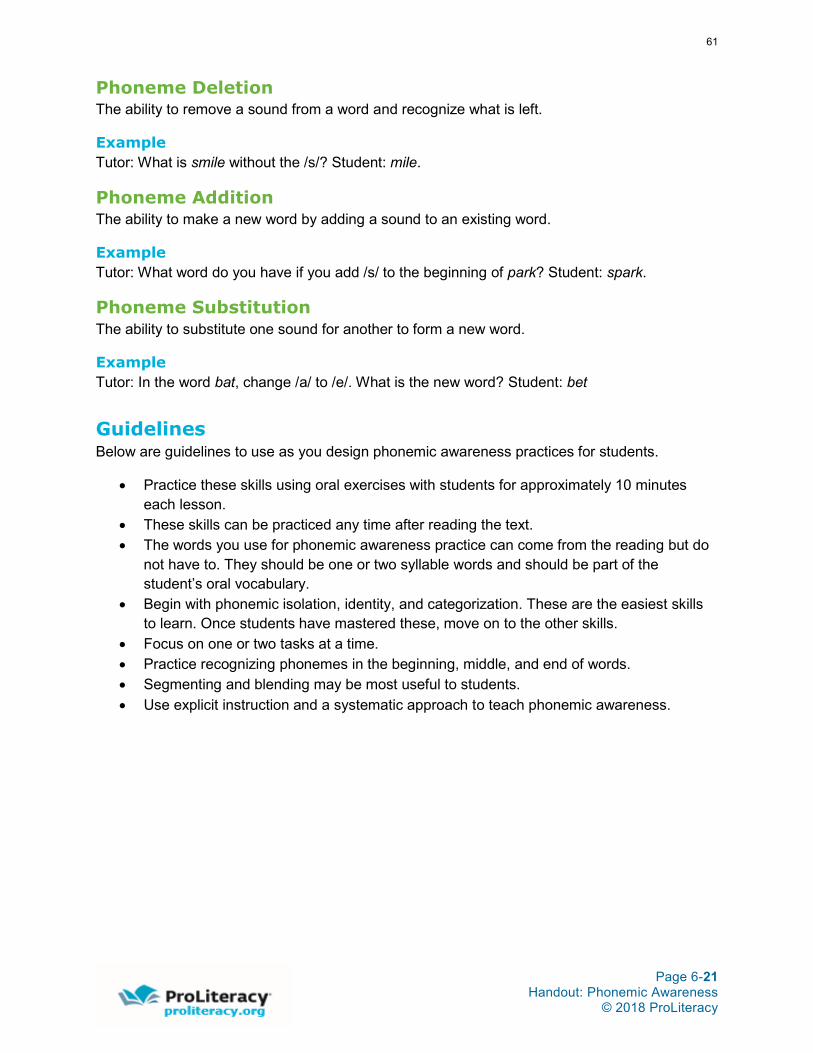
Page 6-21 Handout: Phonemic Awareness
© 2018 ProLiteracy
Phoneme Deletion The ability to remove a sound from a word and recognize what is left.
Example Tutor: What is smile without the /s/? Student: mile.
Phoneme Addition The ability to make a new word by adding a sound to an existing word.
Example Tutor: What word do you have if you add /s/ to the beginning of park? Student: spark.
Phoneme Substitution The ability to substitute one sound for another to form a new word.
Example Tutor: In the word bat, change /a/ to /e/. What is the new word? Student: bet
Guidelines Below are guidelines to use as you design phonemic awareness practices for students.
x Practice these skills using oral exercises with students for approximately 10 minuteseach lesson.
x These skills can be practiced any time after reading the text.x The words you use for phonemic awareness practice can come from the reading but do
not have to. They should be one or two syllable words and should be part of thestudent’s oral vocabulary.
x Begin with phonemic isolation, identity, and categorization. These are the easiest skillsto learn. Once students have mastered these, move on to the other skills.
x Focus on one or two tasks at a time.x Practice recognizing phonemes in the beginning, middle, and end of words.x Segmenting and blending may be most useful to students.x Use explicit instruction and a systematic approach to teach phonemic awareness.
61

Page 6-22 Handout: Teaching Phonics © 2018 ProLiteracy
Handout: Teaching Phonics Phonics instruction helps students make the connection between the sounds of English and the letters that represent the sounds. This skill is necessary for students to be able to decode the words on a page. Below are the basic steps for teaching a phonics element or principle.
Steps for Teaching Phonics 1. Identify the letter for the phonics lesson and write the small letter. Begin by teaching
students to recognize the small letter because the majority of letters they see will be in lower case. Students repeat the name of the letter.
2. Selects words from the lesson that begin with the letter and sound. The number of words you pick should be enough to provide students with several examples but not overwhelm them. Start with 3–5 words, then adjust accordingly. Explain that these words begin with the sound the letter makes and model the sound. Say the words and have students listen for the sound. Write the words on the board and read them again.
3. Ask students to read the words. Do this 2–3 times. Always ask students to “read” words, not “say” words to reinforce the fact that they are reading.
4. Ask students to pick a key word. Explain that they will use that word to model and produce the sound of the letter. Ask students to model the sound of the letter.
5. Ask students for examples of other words that begin with this sound. Write these words on the board. Ask students to read these words.
6. Give students examples of words that end with the sound and letter. Write these words on the board and read them. Ask students to read the words. Ask students for examples of other words that end in the sound. Write these on the board and ask students to read them.
7. Give students examples of words that have the sound and letter in the middle. Write these words on the board and read them. Ask students to read the words. Ask students for examples of other words that have the sound in the middle of the word. Write these on the board and ask students to read them.
8. Review the name, sound, and key word for the phonics element. 9. Students write the letter, key word, and other words they want to learn. 10. Write and explain the capital letter.
62

Page 6-23 Handout: Teaching Phonics
© 2018 ProLiteracy
Suggestions x Keywords to use as examples of phonics elements and principles can come from
anywhere: a published story, a picture, student generated materials, real worldmaterials, and a student’s own vocabulary.
x When teaching consonants, be sure not to confuse individual sounds with blends (/br//tr/) and digraphs (/sh/ /th/).
x When teaching vowel sounds, you may find it necessary to focus more on recognizingthe letter and sound in the middle of the word. Use short, single syllable words asexamples.
x Another approach you may see is to teach multiple phonics elements per lesson, but tofocus on learning one example for each element (this is the approach in Laubach Way toReading). Either method is appropriate. The one used above helps students recognizemore words in print more quickly, while teaching multiple phonics elements helpsstudents recognize more phonics elements in print more quickly.
Sequence of Phonics Instruction In phonics instruction, there is a customary sequence for introducing different elements and principles. It begins with the easier elements and progresses to more difficult elements and principles. Of course, you can adjust this sequence to accommodate students’ specific needs or questions.
x Single consonant soundsx Short vowelsx Long vowelsx Consonant blends and digraphsx Other common vowel teamsx Additional phonics elements and principles
Adapted from Tutor 8: A Collaborative, Learner-Centered Approach to Literacy Instruction for Teens and Adults and Teaching Adults: A Literacy Resource Handbook
63

Page 6-25 Handout: Alphabetics Practice Activities © 2018 ProLiteracy
Handout: Alphabetics Practice Activities Phonics
Word Toss This is a good activity for discerning beginning and ending sounds. It is played like the name game and can be played with individuals or in teams.
Steps 1. Sit in a circle if individuals are playing. If playing in teams, line each team up (after a
team member gives an answer, they will go to the back of the line) 2. Determine who will go first. 3. The first person (or team) says a word, such as bird 4. The second person or team must say a word that begins with the same sound as the
end sound in bird. For example, dog 5. The next person or team must now say a word that begins with the same sound as the
end sound in dog. For example, garden. 6. The teacher writes the words used on the board. Words may not be used twice. 7. When a person or a team is unable to come up with a word, they are eliminated and the
game continues until one person or team is left.
Phonics Bingo This is a great way to review lots of phonics elements. There are lots of variations to the game, as you will see below.
Steps 1. Select the phonics sounds you want to work on. 2. On a piece of paper, draw a grid of five rows and five columns (like a bingo card). 3. Write a phonics sound in each of the spaces (you can use some more than once). Make
the middle space a “Free” space. 4. Do the same on cards for the remaining students. You can use the same phonics
sounds, just put them in different places. 5. Select words from the lessons that represent the sounds. Write these words on pieces of
paper, underline the phonics sound, and put them face down in a pile. 6. Draw a word from the pile. Read it aloud and then give the sound the word represents. 7. Each student should cover the matching sound on his or her bingo card. 8. The person who first covers five sounds in a row wins.
Variations 1. You don’t have to use the beginning sound of the word. You can have students listen for
the end sound of the word and cover the letter or letters on their bingo cards.
64

Page 6-26 Handout: Alphabetics Practice Activities
© 2018 ProLiteracy
2. Some sounds can be spelled many different ways. You can have multiple ways ofspelling the sound on the bingo card. Instead of reading a word and giving the sound,just give the sound and have students cover all of the ways to spell that sound. Forexample, if the sound was /k/, students might cover c, k, ck, or ch.
Word Find This is a great way to use real world materials to reinforce phonics study.
Steps 1. Pick an article from a newspaper or other piece of realia that students are interested in.2. Read the article to the students.3. Give students a sound, such as /b/. Ask students to find all of the words in the article (or
paragraph, if the article is long) that have the sound in the beginning, middle, or end ofthe word.
4. Ask students to write the words they found, grouping them by where the target soundoccurs.
Same or Different This activity helps students distinguish between sounds.
Steps 1. Select two initial consonant sounds to practice. Write the letter for each sound along with
a keyword. If students have created study flash cards, you can have students use thosecards.
2. Review each sound and letter.3. Say two words that begin with the same sound. Ask students if the words begin with the
same sound or different sounds. Ask students what letter each word begins with.4. Say two words that begin with the other sound. Ask students if the words begin with the
same sound or different sounds. Ask students what letter each word begins with.5. Say two words, each beginning with one of the sounds. Ask students if the words begin
with the same sound or different sounds. Ask students what letter each word beginswith.
6. Repeat the process with other words with the same or different beginning sounds untilyou are sure students can distinguish the sounds.
Sound Boxes Sound boxes, also known as Elkonin boxes, are used to help students break words into individual sounds. They are good for spelling practice.
Steps 1. This activity requires some computer skills – the ability to insert clipart or pictures into a
document and the ability to make boxes.2. Identify the words you want students to practice.3. Find an image that represents the word. Insert the image into a document.4. Underneath the image create a series of boxes, one box for each sound (not letter).
65

Page 6-27 Handout: Alphabetics Practice Activities © 2018 ProLiteracy
5. Explain to students that they are to identify the word, identify the individual sounds in the word, then spell the word in the boxes provided. Each box represents one sound.
Examples
���
���
���
����
66
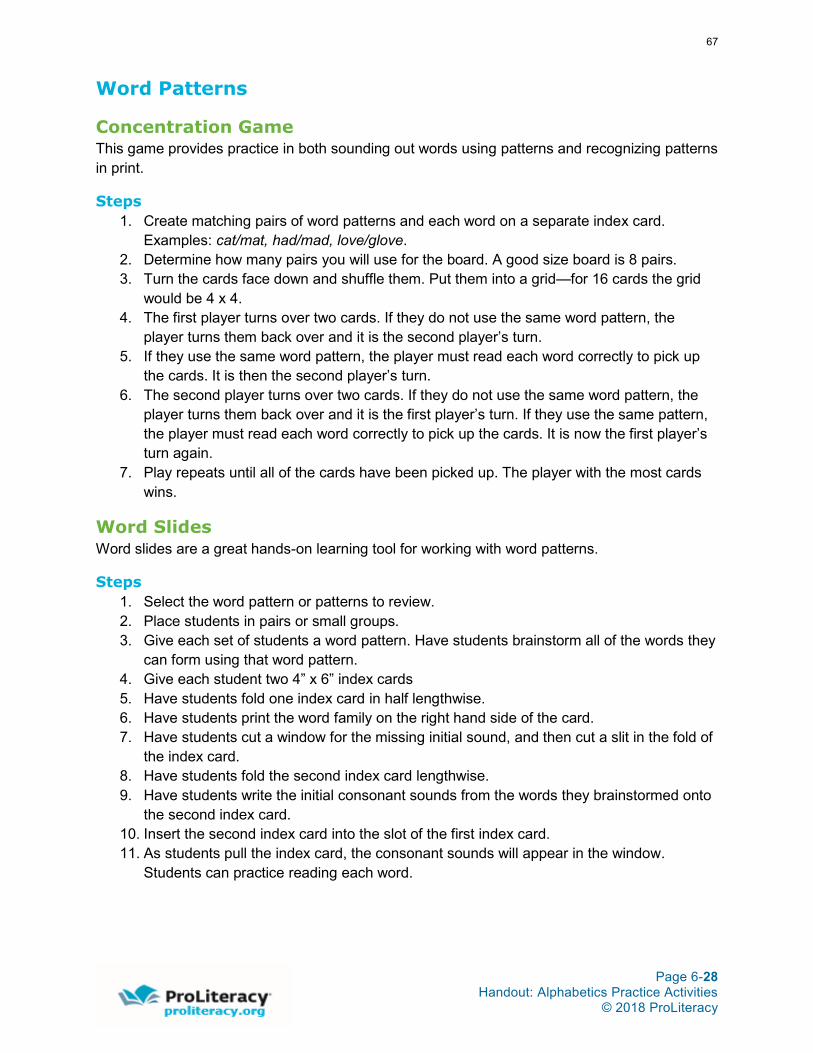
Page 6-28 Handout: Alphabetics Practice Activities
© 2018 ProLiteracy
Word Patterns
Concentration Game This game provides practice in both sounding out words using patterns and recognizing patterns in print.
Steps 1. Create matching pairs of word patterns and each word on a separate index card.
Examples: cat/mat, had/mad, love/glove.2. Determine how many pairs you will use for the board. A good size board is 8 pairs.3. Turn the cards face down and shuffle them. Put them into a grid—for 16 cards the grid
would be 4 x 4.4. The first player turns over two cards. If they do not use the same word pattern, the
player turns them back over and it is the second player’s turn.5. If they use the same word pattern, the player must read each word correctly to pick up
the cards. It is then the second player’s turn.6. The second player turns over two cards. If they do not use the same word pattern, the
player turns them back over and it is the first player’s turn. If they use the same pattern,the player must read each word correctly to pick up the cards. It is now the first player’sturn again.
7. Play repeats until all of the cards have been picked up. The player with the most cardswins.
Word Slides Word slides are a great hands-on learning tool for working with word patterns.
Steps 1. Select the word pattern or patterns to review.2. Place students in pairs or small groups.3. Give each set of students a word pattern. Have students brainstorm all of the words they
can form using that word pattern.4. Give each student two 4” x 6” index cards5. Have students fold one index card in half lengthwise.6. Have students print the word family on the right hand side of the card.7. Have students cut a window for the missing initial sound, and then cut a slit in the fold of
the index card.8. Have students fold the second index card lengthwise.9. Have students write the initial consonant sounds from the words they brainstormed onto
the second index card.10. Insert the second index card into the slot of the first index card.11. As students pull the index card, the consonant sounds will appear in the window.
Students can practice reading each word.
67

Page 6-29 Handout: Alphabetics Practice Activities © 2018 ProLiteracy
Variations 1. Instead of cutting a window at the beginning of the word, you can cut a window in the
middle of the word. Write the vowels on the pull strip and practice substituting them to create words.
2. Write one word pattern on the front of the strip and another on the back of the strip.
Example
Word Parts
Teaching Syllables Use this process for teaching students to divide words into syllables and apply three rules to help with pronunciation.
Steps 1. Select a group of words to practice. These words can come from the reading or can be
part of students’ known vocabulary. 2. Explain to students that a syllable is a word or word part that has only one vowel sound. 3. Give examples: bat (1), paper (2), little (2), employment (3), example (3) 4. Read the first word. Ask students how many vowel sounds they hear. Ask students to
identify the vowel sounds. Continue with the remaining words. 5. If students have difficulty with step 4, continue to practice that skill. When students can
accurately identify vowel sounds, move on to step 6. 6. Explain that students can use three rules about syllables to help them decode and
pronounce new words. Explain that we will learn the rules and then see how they apply to the words in the list.
68

Page 6-30 Handout: Alphabetics Practice Activities
© 2018 ProLiteracy
7. Write each rule at the top of an index card. Leave room at the bottom for students towrite examples.
Rule 1: The two-consonant rule If there are two consonants between the vowel sounds, divide the word between the consonants. Do not divide blends or digraphs.
1. Ask students to write the following words below the rule: into, lesson, traffic, fender,bashful, emblem.
2. Ask students to put a dot under each vowel.3. Ask students to put an x under any final e’s.4. Ask students to underline digraphs and consonant blends.5. Ask students to divide the words according to rule 1.6. Ask students to pronounce each word according to rule 1.
Rule 2: The one-consonant rule If the word has only one consonant sound between two vowel sounds, divide the word before the consonant. If the vowel is at the end of a syllable, it will usually have a long sound. The letter y in the middle or at the end of the word acts as a vowel.
1. Ask students to write the following words below the rule: bacon, female, syphon, lady.2. Ask students to put a dot under each vowel.3. Ask students to put an x under any final e’s.4. Ask students to underline digraphs and consonant blends.5. Ask students to divide the words according to rule 2.6. Ask students to pronounce each word according to rule 2.
Rule 3: The one-consonant oops rule Sometimes the one consonant rule doesn’t work. If the word doesn’t sound like a word you recognize, divide the word after the consonant. The vowel will have a short sound.
1. Ask students to write the following words below the rule: lemon, visit, second, travel.2. Ask students to put a dot under each vowel.3. Ask students to put an x under any final e’s.4. Ask students to underline digraphs and consonant blends.5. Ask students to divide the words according to rule 2.6. Ask students to pronounce each word according to rule 2.7. Ask students if the way they pronounced the words sounded like words they recognized.8. Ask students to write the words again under the rule, putting dots under each vowel, x’s
under final e’s, and underlining digraphs and consonant blends.9. Now ask students to divide the words according to rule 3.
in/to les/son traf/fic fen/der bash/ful em/blem •n/t• l•s/s•n tr•f/f•c f•n/d•r b•__/f•l •m/__•m
ba/con fe/male sy/phon la/dy b•/c•n f•/m•lx s•/__•n l•/d•
69

Page 6-31 Handout: Alphabetics Practice Activities © 2018 ProLiteracy
10. Ask students to pronounce the words according to rule 3. Do students recognize the words now?
8. Now give students the first word from your list. 9. Ask students to put a dot under each vowel. 10. Ask students to put an x under any final e’s. 11. Ask students to underline digraphs and consonant blends. 12. Ask students which rule applies to the word. 13. Ask students to divide the word according to the rules. 14. Ask students to pronounce the word according to the rules. 15. Give students another word.
Word Maps Word maps can help students identify prefixes, suffixes, and word roots to decode words; to recognize words with similar roots; and to use prefixes and suffixes to build new words.
Steps 1. Begin with a word students have discovered in their reading. It may have been new to
them or they may have had trouble decoding it. We’ll use the word predict as an example.
2. Explain that the word is actually made up of a word root, -dict, and a prefix pre-. Write the root dict in the middle of a piece of paper. Write the word predict to the side and draw a line connecting predict to the root dict.
3. Ask students if they can think of any words that might be made by adding prefixes and suffixes to the word predict. If students have difficulty identifying words, give them an example like prediction, predictable, or unpredictable. As students come up with words, write them off of the word predict (if they are related to predict). If students generate words related to the root dict, but different from predict, write them to a different side of dict and connect them to the root.
4. After you write the words related to predict, point out the common word root and prefix in each one. Explain that looking for elements you already know in longer words can help students decode words.
5. Returning to the word root, ask students if they can think of any other words that contain that root. If students have trouble thinking of words, give them a list of prefixes and suffixes. Encourage them to try adding prefixes and suffixes until they come up with words they recognize. When they think of another word, follow steps 3 and 4 with these words as well.
6. Continue to do steps 3–5 until you have developed a word map. Review each word, asking students to identify the prefix, suffix, and root for each word, then read it.
lem/on vis/it sec/ond trav/el l•m/•n v•s/•t s•c/•__ __•v/•l
70

Page 6-32 Handout: Alphabetics Practice Activities
© 2018 ProLiteracy
Variation 1. For vocabulary instruction, give students a list of common prefixes and suffixes and their
meanings after you have created the word map.2. Give students the meaning of the word root. In the example above, dict means to tell.3. Point out that the prefix pre- means before, so predict means to tell before. Ask students
what predict actually means. Answers should be similar to “to tell what you think willhappen before it happens.” Ask students if “to tell before” makes sense based on theirdefinition.
4. Continue with other forms of the word, using prefixes and suffixes to show how theseword parts can help students understand a word’s meaning.
5. If students don’t know what a word means, have them make a guess based on themeaning of the root and prefixes and suffixes. Use a simple dictionary to look up themeaning and compare the actual definition to their guess.
Sight Words
Sight Word Flashcard Practice Flashcards are one of the best and easiest ways to practice recognizing words by sight. It’s also useful that many other literacy practice activities involve writing words on flashcards, so they are often readily available for practice.
Steps 1. Choose six to ten words the student wants to learn. They may already exist on
flashcards. If not, have the student write each word on an index card.2. Shuffle the stack of index cards. Flip the top one over and ask the student to read it. If
the student reads it correctly, put it to the right.3. If the student misses the word, put it to the left. If a student has trouble, read the word
aloud and ask him or her to use it in a sentence. Put the card to the left4. Once a student has gone through the stack once, pick up the cards on the left that the
student missed. Shuffle these cards and review them again following the sameprocedures. Continue this until the student reads all of the words correctly.
5. Shuffle the entire deck and review all the words again. Continue until the student is ableto read the entire deck, or until you sense that the student is becoming frustrated.
Variations 1. Once the student is able to read the entire stack correctly, focus on reading the word
quickly and accurately. Using a stopwatch, begin timing as you flip over the first card.Work your way through the deck. Record the time and any misses. Repeat the process2–3 more times, recording the time and number of misses. Discuss any improvement thedata shows.
71

Page 6-33 Handout: Alphabetics Practice Activities © 2018 ProLiteracy
Context Clues
Create a Cloze Activity Cloze activities are a great way to practice using context clues to decode words.
Steps 1. Select a passage from a lesson. 2. Leave the first sentence intact, and then delete words in the subsequent sentences.
Select words for which there are context clues. Example There were four eggs in the bird’s ______, not There were _____ eggs in the bird’s nest.
3. Provide a word list. Review the words with the students. 4. Ask students to fill in the missing words. Students may work individually, in pairs, or in
small groups. 5. For beginning students, you can
x provide a choice of two words for each blank; x provide the first letter of the word in the blank space; x provide the exact number of spaces for the deleted word.
Strategic Decoding
Teaching Students to Decode Strategically In strategic decoding, students combine decoding skills with a consistent problem solving process to help them decode difficult words. The steps below describe the process and explain how you can introduce it to students.
Steps 1. As a student reads a passage, listen for places where he or she struggles to decode a
word. If the student is unable to decode the word, encourage him or her to say “blank” and keep reading. You will return to that part of the passage later.
2. After the student has finished reading the passage, return to the sentence with the difficult word. (Depending on the sentence, you may want to start with the previous sentence to provide context.)
3. Ask the student to read the sentence(s) again, saying blank for the difficult word. Ask, “Based on the meaning of the sentence, is there a word you think makes sense here?” Depending on the student’s response, ask if there are visual clues (initial letter, shape of word) that confirm the guess.
4. If the student is unable to think of a word that makes sense in context, isolate the word. Encourage the student to try to sound it out using phonics, word patterns, and word parts skills. Does the student recognize the word? Does the word make sense in the sentence? Reread the sentence to find out.
5. It the student is unable to use decoding skills to identify a word that makes sense, suggest using different vowel sounds. This may be a word that does not follow a common phonics pattern. Does the student recognize the word? Does the word make sense in the sentence? Reread the sentence to find out.
72

Page 6-34 Handout: Alphabetics Practice Activities
© 2018 ProLiteracy
6. Encourage the student to think of a word that makes sense in the sentence and read thesentence using that word.
7. Read the word the student was unable to decode and demonstrate which decoding skillscould have been used to decode it. If the word is new to the student, explain what itmeans.
8. Ask the student to reflect back on the process they just used. Point out that the studenta. used context and visual clues to decode the word;b. tried to sound out the word;c. tried different vowel sounds;d. thought of a word that made sense and used that word.
9. Explain that any time the student encounters a word they are unable to decode whilereading, they can use this process to try to figure out the word.
73
Page 8-10 Handout: Vocabulary Terminology © 2018 ProLiteracy
Handout: Vocabulary Terminology Types of Vocabulary
Listening Vocabulary These are the words we hear and understand. This is the first type of vocabulary we develop as children. Adults recognize and understand close to 50,000 words.
Speaking Vocabulary These are the words we use to convey information and ideas when we speak. Speaking vocabulary is typically a lot smaller than listening vocabulary²studies estimate 5,000±10,000 words.
Reading Vocabulary These are the words we recognize and understand when we see them in print. People typically develop reading vocabulary by reading a wide variety of content. However, to read a wide variety of content, readers need a broad reading vocabulary. Much vocabulary instruction focuses on helping students develop a broad reading vocabulary.
Writing Vocabulary These are the words we use to convey information and ideas in print. Typically, writing vocabulary is the smallest type and is heavily influenced by the number of words we can spell correctly.

Page 8-11 Handout: Vocabulary Terminology © 2018 ProLiteracy
Tiers of Vocabulary Vocabulary words can be divided into three tiers.
Tier 1 Basic Tier 1 words are typically nouns, verbs, familiar adjectives, and common sight words. They will already be part of a student’s oral vocabulary. These words are often found in low-level instructional materials. We use them to teach alphabetics and word study skills specifically because they are already part of oral vocabulary. Examples include shoe, paper, sad, run, and blue.
Tier 2 Higher-level Tier 2 words are found in more sophisticated texts across a variety of content and genres. They typically have multiple or nuanced meanings and are used to provide description and detail. These words are much less likely to be part of a student’s current vocabulary. For intermediate and advanced students, focus vocabulary instruction on Tier 2 words. Building students’ understanding of Tier 2 words gives them the expanded vocabulary they will need to read higher-level, more sophisticated texts with confidence. That larger vocabulary will also help them express themselves better when writing and speaking. Examples include exertion, unanimous, rickety, benevolent, and masterpiece.
Tier 3 Specialized Tier 3 words are related to specific topics such as health, finance, technology, or occupations. People typically learn these words when the need arises, and they usually do not become part of a person’s everyday vocabulary. Vocabulary instruction for Tier 3 words occurs when the words are encountered in reading, and focuses on word meaning to improve comprehension. Examples include pedometer, creditor, prosecution, isotope, and crepe.

Page 8-12 Handout: Vocabulary Terminology © 2018 ProLiteracy
Principles
Pre-teach words before reading. Analyze a reading passage before students read it. Identify Tier 2 and Tier 3 words they may not know and teach these words before they read. Teaching unfamiliar words before reading improves comprehension.
Ensure multiple exposures. Choose words to teach that students are likely to see again. Try to ensure multiple exposures. Reinforce vocabulary by including practice activities where students use new words in writing. The more often a student sees and uses a new word, the more likely that word is to be incorporated in the student’s vocabulary.
Focus on breadth and depth. Vocabulary instruction should focus on two things: breadth and depth. By breadth we mean expanding students’ vocabularies by exposing them to new words and encouraging them to use these new words in speech and print. By depth, we mean understanding specific meanings, nuanced differences between similar words, word choice for audience and formality, and meaning in specific contexts.
Teach word-learning strategies. Teach students word-learning strategies that will help them understand the meanings of words. Often a student’s first exposure to new a new word will take place while reading outside of class. Teaching students how common prefixes and suffixes affect the meanings of words, how to use context clues, and how to use a dictionary ensures that students have the proper tools to learn new words on their own.

Page 8-17 Handout: Vocabulary Activities
© 2018 ProLiteracy
Handout: Vocabulary Activities Below are several activities you can use with students to develop their vocabulary knowledge.
Teaching New Words This is one model for using direct instruction to teach students new words. You can use this process to pre-teach words before students read.
Steps 1. Write the word and read the word.2. Ask students to divide the word into syllables, or you can do it if the students have
trouble. Ask students to read each syllable and write it down as they read it. Look forcorrect spelling.
3. Ask students if they know what the word means.4. Give a definition of the word. Give examples (if appropriate). Use the word in a
sentence.5. Ask students to put the definition in their own words. Ask them to provide their own
examples.6. Ask students to use the word in a sentence that draws from their experience. Ask
students to write the word and the sentence.
Word Charts Word charts are an expansion of traditional flash cards. They are good for introducing students to new words.
Steps 1. Give students blank 4”x 6” index cards, one index card for each new word they will learn.2. Ask students to write the new word on the front of the card.3. Ask students to turn the card over and draw a line from the top to the bottom of the card,
about 2/3 of the way over. Ask students to then draw a line dividing the larger portion inhalf horizontally.
4. In the first space, have students write a definition of the word in their own words. Theycan also include examples and synonyms.
5. In the second space, ask students to think of antonyms or opposites of the new word.Not all words have natural antonyms, so students will have to think creatively about themeaning of the word.
6. In the remaining space, ask students to think of the word in relation to their ownexperience. Maybe a student has heard the word used in another setting or maybe astudent has a life experience that is an example of the word. Whatever the association,ask students to write a sentence (or two) about that experience using the new word.
77

Page 8-18 Handout: Vocabulary Activities © 2018 ProLiteracy
Using New Words in Writing One of the best ways to reinforce new vocabulary words is to have students use them to discuss what they just read. Here are some ideas of how to do that.
Steps 1. After reading a story and checking for comprehension, review the vocabulary words you
pre-taught. Say a word and ask the student to tell you what it means. Go back in the story and reread one or more sentences with the word. Ask the student to explain how the new word helps them understand that sentence. For example, a sentence from a story might be “Listen up,” the fire chief said tersely to his firefighters. “We don’t know what is burning in the house or where.” Ask the student, “What does it mean when it says ‘the fire chief said tersely’? Why do you think the fire chief was being terse?”
2. Have students each write a paragraph related to the story they just read (a summary, what happens next, or what a main character is thinking). Have them use 3–4 of the new vocabulary words in their paragraphs.
Vocabulary Game The vocabulary game is an engaging way to review vocabulary words from multiple lessons. It’s a team game and players can get help from their teammates, so students at different levels can play and have fun.
Steps 1. Create a list of vocabulary words from selections students have read in class. 2. Divide students into two teams. 3. A student from the first team comes up to the board. He or she draws a piece of paper
from envelope one. Envelope one contains four different tasks: pronounce the word, spell the word, define the word, and create a sentence with the word.
4. The student then draws a vocabulary word from envelope two. (Note that a student who draws “spell the word” from envelope one must hand the vocabulary word to you without looking at it. Otherwise, they keep the vocabulary word).
5. If the student can do the task without help from his or her team, the team gets 2 points. If the team helps, they get one point.
6. If the team does not know the answer, the other team can try to steal by answering correctly and getting 1 point. If a team tries to steal and misses the question, they lose a point.
78

Page 8-19 Handout: Vocabulary Activities
© 2018 ProLiteracy
Word Builder This activity helps students develop skill at identifying word meanings based on what they know about the meanings of word roots, prefixes, and suffixes. This activity assumes you have gone over the meanings of common prefixes and suffixes with students. If not, do that before using this activity.
Steps 1. Write common prefixes and suffixes that the student knows on index cards with a
marker. Write one prefix or suffix per card. Use one color for prefixes and a differentcolor for suffixes. Write the meaning of each prefix or suffix on the back of the card.
2. Have the student make up a word and give it a meaning. For example, the student mightmake up the word bloop and say that it means “to ball up on the floor and roll around.”
3. Write the word on an index card and write the meaning of the word on the back of thecard.
4. Put the card on the table in front of the student. Using your prefix and suffix index cards,add one prefix or suffix to the word. Have the student read the new word.
5. Ask the student what they think the new word would mean, based on the meaning of theprefix or suffix. (if the student can’t remember what the prefix or suffix means, turn thecard over and let them read it). For example, a blooper would be someone who balls upon the floor and rolls around. A biblooper might be someone who rolls around on thefloor twice and then stops. Bloopible might refer to something that can be balled up androlled on a surface.
6. Continue to add prefixes, suffixes or both to the made up word.
Variations x For a classroom, you can divide students into teams. Have each team create a word root
and meaning, and then a list of made up words using prefixes and suffixes. Have eachteam write down what the new words mean. Have the first team read their words to thesecond team and have the second team guess the meanings. Then switch roles. Youcan keep score if you want.
x Once you have a collection of made up word roots, you can make made-up compoundwords. Again, have students guess the meanings of the compound words.
79

Page 8-20 Handout: Vocabulary Activities © 2018 ProLiteracy
Word Matrix The word matrix is a way to help students think about the differences between words that have similar meanings. A word matrix use two axes:
x The horizontal axis measures connotation—how positive or negative a word is—with positive connotations to the right and negative connotations to the left. (Depending on the collection of words, this axis might also be labeled strong or weak).
x The vertical axis measures formality, with more formal words at the top and less formal words at the bottom.
Steps 1. Brainstorm a group of words that have similar meanings. For example, you might
brainstorm the words cheap, inexpensive, discounted, economical, low-cost, bargain, reduced, on sale, modest, affordable, budget, and low-end.
2. Write each word on an index card. 3. On four index cards, write the words negative, positive, formal, informal. 4. Create a horizontal axis on the desk using the two index cards positive and negative. 5. Working individually, in pairs, or in small groups, have students place the words along
the axis according to their connotation. For example, students might place low-end to the left of the axis, close to the negative index card, and economical to the right of the axis, close to the positive card.
6. Once students have finished, ask them to explain their reasoning. 7. You can follow the same process using the formal/informal cards and creating a vertical
axis. If you want students to evaluate words on both connotation and formality, it is best to have them focus on one axis first, and then add the other axis.
80

Page 7-13 Handout: Fluency Activities
© 2018 ProLiteracy
Handout: Fluency Activities Below are several activities you can use with students to improve their reading fluency.
Echo Reading Echo reading provides support to students because they hear fluent reading modeled before attempting to do it themselves.
Steps 1. Select something to read that is short and at the student’s instructional reading level.
Read the first sentence aloud, modeling proper pace and phrasing.2. Ask the student to read the same sentence aloud after you.3. Continue this pattern through to the end of the passage.4. When you’ve finished the passage, go back to the beginning and follow the same pattern
again. As the student improves, expand the amount of text you read before the student“echos” you. For instance, increase to two sentences and then to a paragraph.
Variations x For higher-level students, you can begin by reading a few sentences or even a
paragraph before asking the students to read.x To adapt this activity to a classroom environment, you might read through the passage
once with the entire class echoing in unison, then go back through the passage usingthe same technique and calling on individual students to read. Remember to read thesentence aloud before each student reads to model proper pace and phrasing.
Modeled Reading Modeled reading provides the student an opportunity to hear reading done with good expression and good phrasing. It also provides a change of pace in instruction and allows students to practice listening skills.
Steps 1. Choose fiction materials that are of interest to students. Since students are not reading
aloud, the text may be a reading level above the students’ instructional reading level.2. Provide students with a copy of the passage.3. Ask the students to relax and listen to the reading as they follow along in the text.4. Read aloud and model expressive and fluent reading for the students.5. The reading need only be about 5 minutes in length.
Variations x The model does not have to be the teacher. It can be a recording or another student.
81

Page 7-14 Handout: Fluency Activities © 2018 ProLiteracy
Dyad/Choral Reading Dyad reading involves a teacher and one student; choral reading is a teacher and a group of students. For both activities, the students and you read the same passage aloud together. Both provide an opportunity for students to read fluently and independently, knowing that support is available from the teacher or other classmates if needed.
Steps 1. Begin by selecting something to read that is short and at an independent reading level
for the students. As in echo reading, your role is to model proper pace, phrasing, and emphasis.
2. If the students are reading comfortably, you will simply stop and allow them to continue on their own.
3. If students encounter a word they do not know, provide it quickly so the pace is not disrupted.
4. If students start to struggle with the selection, begin reading again to provide a model. 5. At the end of the selection, ask one or two factual comprehension questions. 6. Repeat the process until students are able to read the passage aloud independently,
with proper pace and phrasing. 7. Ask comprehension questions about the passage each time the students read to
emphasize that as they reread a passage with better fluency, their comprehension improves as well.
Variations x This is a good activity for students to practice at home with a recording of the passage.
Duet Reading/Neurological Impress Duet reading or neurological impress helps students improve fluency by developing “automaticity” in reading—the ability and confidence to recognize words automatically rather than spending a lot of time and energy decoding, which can hinder fluency.
Steps 1. Select an article to read that is at the high end of the students’ instructional level. 2. Explain to the students that you are going to read the article out loud and you want the
students to read aloud with you. Explain that the article was selected because it will be difficult for them and that you expect that there will be places where the students will not be able to keep up. This is OK. Explain also that students will not be asked questions about what they are reading. This is not a comprehension activity and comprehension will not be tested.
82

Page 7-15 Handout: Fluency Activities
© 2018 ProLiteracy
Say It Like You Mean It This activity helps students understand how changing the emphasis on words in a sentence can change the meaning.
Steps 1. Write a sentence down, or have a student select one from the reading passage. Here is
an example:
I never said you hit my car.
2. Ask the student to read the sentence aloud, emphasizing the first word of the sentence.Ask the student what the sentence means. In the example, I never said you hit my car,the author or the person speaking might be saying they were not the person who saidyou hit my car, implying that someone else might have said it.
3. Continue to ask a student to read the sentence aloud, emphasizing the second word ofthe sentence, then the third word, etc. After each time, ask the student what they thinkthe sentence means. Here is what students might say for the example above:
I never said you hit my car. – The speaker is denying the statement completely.
I never said you hit my car. – The speaker is contesting that they “said” you hit my car. Implying they may have conveyed such a statement in other ways.
I never said you hit my car. – The speaker confirms making the statement, but it was about someone else.
I never said you hit my car. – The speaker is implying the person did something else to their car.
I never said you hit my car. – The speaker is saying the person hit someone else’s car.
I never said you hit my car. – The speaker is saying the person hit something that belonged to the speaker, but it wasn’t the car.
83

Page 7-16 Handout: Fluency Activities © 2018 ProLiteracy
Roll It! This activity helps students understand how different emotions can be conveyed with the same sentence.
Steps 1. Select six sentences from the reading or generate six sentences of your own. Number
the sentences 1–6. 2. Roll the die. This tells you which sentence you will read. 3. Roll the die again. This tells you how you will read the sentence. Use the chart below:
Excited
Sad
Angry
Shocked
Irritated
Tired
4. Take turns with the student reading sentences with different emotions.
84

Page 9-28 Handout: Reading Comprehension
© 2018 ProLiteracy
Handout: Reading Comprehension The goal of reading is to understand what you have read. To do that, you need to accurately decode the words on the page, recognize what they mean, combine them into meaningful phrases, and read with expression. You also need to interpret what the author intended to say, make inferences, integrate information with your own knowledge and evaluate it, and apply what you’ve read to other contexts.
Many literacy students may not be aware they have a comprehension problem. Others may realize they don’t understand what they are reading, but are unaware of the many comprehension strategies and skills that good readers use to help them gain meaning from text. Tutors must provide explicit instruction in comprehension strategies and skills to help students improve their comprehension.
Comprehension Strategies Good readers have at their disposal broad-based comprehension strategies they can apply to a variety of reading topics and genres to help them understand what they are reading. They use these strategies before they read, while they are reading, and after they read. These strategies include:
x Setting a purpose for reading. Good readers use this strategy when readingnonfiction to learn something; like reading the newspaper or website to find out whathappened at the school board meeting, or reading an instruction manual to learn how toprogram the timer on your coffee pot so you can wake up to freshly brewed coffee.Having a clear purpose for reading helps the reader determine what other readingstrategies they might use.
x Using background knowledge and prior experiences. Good readers usewhat they know to help them relate to and understand what they’re reading. Thisstrategy can be used for fiction or nonfiction. It generally requires the reader to havesome idea of what the text is about before they read. Often the reader will askthemselves questions to help them draw out their knowledge and experiences.
x Making predictions. Good readers predict what they expect to find in an article orwhat a character might do next. This strategy and the next one, asking questions andlooking for answers, are strategies a reader uses to help them focus – to look for specificpieces of information or to read and pay close attention to details. Good readers makepredictions before they read and while they are reading. Good readers might combinethis strategy with marking text, highlighting information, and taking notes.
x Asking questions. As they read, good readers ask themselves questions and thenlooking for the answers in the text. This helps a reader look for specific pieces ofinformation and identify details. Good readers also ask themselves questions after theyread a portion of the text to help them monitor their comprehension. If they are unable toanswer their questions it might mean they need to reread the portion of the text.
85

Page 9-29 Handout: Reading Comprehension © 2018 ProLiteracy
x Marking text. Good readers often mark text, such as highlighting important points, and take notes.
x Summarizing. Summarizing after reading is a good way to check comprehension. However, good readers also break the text up in smaller chunks and periodically summarize as they read. This is an important comprehension monitoring strategy.
x Rereading things that don’t make sense. Sometimes readers ask themselves questions they can’t answer, or are unable to summarize what they just read. Good readers understand this to mean they didn’t really understand what they just read. When this happens, they will reread the text, often applying new strategies while they read to improve their comprehension.
x Reorganizing information. When they have finished reading, good readers will often reorganize information from the text into a new format, making it easier for them to understand and apply to other contexts. This often involves the use of a graphic organizer – creating a chart of information, drawing a diagram, or summarizing and numbering the steps in a process.
Comprehension Skills Good readers also use specific comprehension skills that help them recognize how information is being presented and then make decisions about that information. These include:
x Recognizing cause and effect. Cause and effect is an organizational pattern commonly found in news articles, history books, biographies, and fiction. Consider a newspaper article about the school board. A reader might learn from the article that some of the attendees were upset. Understanding the relationship of cause and effect can help the reader identify why the attendees were upset, which might be more important information.
x Recognizing main idea and details. This is a foundational comprehension skill for being able to summarize. Good readers need to be able to identify the main idea and make decisions about which details are important and which are not to be able to summarize what they’ve read, internalize it, and use it. Because it is such a foundational skill to reading comprehension, students are often asked to read texts and identify the main idea and details on academic tests like the GED.
x Discerning fact from opinion. Good readers use this skill to help them evaluate information. It is becoming more important as the distinctions between news and commentary; articles, sponsored articles, and ads; and science and sponsored science are blurred.
x Classifying information. Grouping or classifying information is an important comprehension strategy for remembering information.
x Comparing and contrasting. Comparing and contrasting information is a specific way of classifying how items are alike and different. It is an especially useful comprehension tool when evaluating two things.
86

Page 9-30 Handout: Reading Comprehension
© 2018 ProLiteracy
x Sequencing events. Sequencing is a comprehension skill that good readers oftenuse as they go about their everyday lives. They might use this skill to follow a recipe orfollow a procedure at work. Sometimes the sequences are easy to identify, such as inthe examples above. A more difficult example would be when a reader follows asequence of events in a fictional story where the time might change from present to amemory of the past. In these cases, readers rely on keywords to help them identify theproper sequence. This is also where comprehension monitoring is important – a readermust be able to recognize when the sequence doesn’t make sense.
x Drawing inferences and reaching conclusions. Readers automatically drawconclusions as they read if they are concentrating on meaning. The text supplies theinformation, but the reader has to determine how the information can be used. Makinginferences is more difficult because the information isn’t clearly stated in the text. Thereader must use clues and draw upon their own knowledge and experiences to inferwhat the author means. This is why teaching students to use their own knowledge andexperiences is important.
x Understanding how plot, character, and setting contribute to a story.When reading fiction, good readers use their understanding of the genre, plot structures,characters, and setting to help them understand and enjoy the story.
Different Levels of Comprehension
Literal Comprehension Literal comprehension is the ability to understand and remember what the text says. It does not involve the reader’s feelings or opinions, or require the reader to be able to apply information from the text to other contexts. You can check a student’s literal comprehension by asking factual questions about the text such as “what time did Bob wake up?” or “What does the emergency switch do?” You can also check for literal understanding by asking the student to summarize the story or identify the main idea and details of an article. These types of activities check the student’s understanding of the entire text, but still at a literal level.
Literal Comprehension provides the foundation for more in-depth comprehension of a passage. Without literal understanding, it is difficult to make inferences or think critically about a text. Literal comprehension is the focus of comprehension for beginning readers. When working with intermediate and advanced students, you will check for literal comprehension and then build on their literal understanding to develop their inferential and critical thinking comprehension skills.
Inferential Comprehension Inferential comprehension is the ability to combine what the text says with the reader’s own knowledge and experiences to draw conclusions about the text. “How” and “Why” questions are good to use to check inferential comprehension. Examples might include “What do you think Mr. Jones thought when Bob showed up late for work?” or “Why do you think the article suggests making a list before going to the grocery?” Inferential comprehension is an area of focus for intermediate and advanced students.
87

Page 9-31 Handout: Reading Comprehension © 2018 ProLiteracy
Critical Thinking Comprehension Critical thinking comprehension is the ability to understood the information or story well enough to use it in other contexts. This requires the reader to:
x take the knowledge they learned from the article or story and apply it to a different situation
x think more deeply about the characters, exploring their moods and the motivations behind their actions
x develop an opinion or stance based on information from a range of sources, including this text, and then applying it to another text or context
x compare and contrast elements in the text and make judgements based on that information
Examples of questions that require the reader to think critically about the text might include “How do you think the story would be different if this was a job that Bob liked?” or “You said you liked this planning process as a way to help you organize your work. How might you use a similar process with your kids to help them organize their work at home?” Critical thinking comprehension is an area of focus for intermediate and advanced students.
88

Page 9-27 Handout: Prediction Chart
© 2018 ProLiteracy
Handout: Prediction Chart My Prediction Correct? Incorrect? What really
happened? No evidence or not addressed?
89

Page 9-21 Handout: Comprehension Activities © 2018 ProLiteracy
Handout: Comprehension Activities Think-Aloud Technique The Think-Aloud technique is a great way to help adult students improve their reading comprehension skills. In the Think-Aloud technique, you read a passage aloud to the students. As you read, you periodically think out loud as you apply different reading comprehension strategies. This helps students see the “invisible” strategies good readers use when they read. Below are the steps for the Think-Aloud technique.
Steps 1. Review the reading and select the reading strategies you will use.
While there may be many strategies you would actually use, you should try to limit the number you focus on to two or three. Explain the strategies and why they are useful so that students can more easily identify them when they hear or see them used.
2. Set the purpose for reading and be clear about it with students. This is the first thing a good reader does, but many students don’t do this, especially if they’ve been assigned a reading. Setting the purpose will also help students connect specific strategies with specific purposes for reading.
3. Read the article and model the strategies you identified. Model the strategies by stopping during the reading and thinking aloud. It’s important to rehearse when you’ll use the strategies and what you’ll say, rather than demonstrating this “on the fly.” This will help you focus on the specific strategies and present them clearly. It is OK, even preferred, to demonstrate the thinking process as not perfect. For example, you may make predictions that are wrong. Just explain why you’ve made the error, how you recognized the error, and your correction. While you’re doing the Think-Aloud technique, have students follow along in the text and mark where you use different comprehension strategies.
4. Identify the strategies and discuss how they were used. Have students identify where you used each strategy and why that particular strategy was useful. Ask students if they can think of other things they’ve read where that strategy would be useful. Ask them to think of other strategies that you might have used.
5. Have students use the Think-Aloud technique to apply the same strategies. You can do this many ways. You can have each student read a portion of a passage and think aloud to the entire class. You can have students work in pairs and think aloud to each other, while you go around the room and listen.
90
Page 9-22 Handout: Comprehension Activities
© 2018 ProLiteracy
Mind Map A mind map is a graphic organizer that can be used to help students comprehend what they read. It is sometimes called clustering, a brainstorming web, an idea map, or a concept map.
Steps 1. Have students read a story or an article. Briefly discuss with them what they just read to
get them thinking about it.2. Have a student draw a circle in the middle of a piece of paper. Have the student write a
word or a couple of words to represent the main idea of the story.3. Ask students what else occurred in the story. Use questions about the people involved,
location, cause and effect, and so forth. For each detail, have a student write key wordsin a circle and connect that circle to the diagram where it logically belongs.
4. Have students look back over the map and the story to see if they missed any details. Ifso, add them to the map.
5. Ask a student to use the mind map to tell you what the story was about. Students shouldbe able to summarize the story or tell you the main idea and details of an article withoutreferring back to the story or article.
6. It’s a good idea to model the process of creating a mind map with students before askingthem to create a mind map on their own.
7. Beginning literacy or ESL students may have difficulty with the writing. Discuss the storywith them and use what they say to create a mind map on the chalkboard. Then ask thestudents to copy what you have written and use that mind map to retell the story.
Creating Independent Readers This activity encourages students to use a before-during-after questioning strategy outside of class to improve their comprehension while reading independently.
Steps 1. Give students three index cards. Label one card “Before I Read,” another card “While I
Read,” and the third card “After I Read.”2. Write the following questions on the Before I Read card:
x What is this going to be about?x What do I already know about the topic?x What’s my purpose for reading this?
3. Write the following questions on the While I Read card:x What do I think the next part is going to be about?x Was I right or wrong?x What else do I want to know about this topic?
91

Page 9-23 Handout: Comprehension Activities © 2018 ProLiteracy
5. Write the following questions on the After I Read card: x What did the article tell me? x What did I have to figure out? x What else do I want to know about this topic?
6. Practice using the cards with students in class with you or with each other. When students become comfortable with asking themselves these questions, encourage students to use the cards outside of class when reading.
92

Page 11-13 Handout: Teaching Writing
© 2018 ProLiteracy
Handout: Teaching Writing
Writing in Daily Life List the types of writing you have done this week.
Teaching Letter Formation Here are some teaching strategies you can use when teaching handwriting.
1. Keep a handwriting chart available and visible to students when they areworking on any writing activity, and make sure each student has a copy for home.Preferably, the chart will show the direction of the pencil as the letters are formed. Youcan find many examples of these charts by searching for “handwriting charts” online.
2. Progress from large motor to small motor skills. Students who haven’tdone a lot of writing may not have the fine motor skills needed to write legibly in a smallspace while holding a small pencil. Begin by having students use their arms and handsto write the letters in the air. Next, have them write the letters on the top of a desk usingtheir fingers. Or put salt into a rimmed tray and have them draw the letters in the salt.From there, have students use pencils to write the letters on unlined paper. Finally, havethem trace the outline of the letters on lined paper, and then write them independently.
3. Focus on printing. Print closely resembles the text students see in books andonline.
4. Start with the letters the student needs or wants to learn. Written lettersdo not need to be taught in alphabetical order. Letter formation is better taught in thecontext of what the student needs to learn to write or by grouping letters that are formedwith similar motions.
5. Copy. After a student can form letters, have the student copy words and sentences.The student can copy vocabulary words, sentences from the story, or a story that he orshe dictated and you wrote down. Copying activities should be short and should berelated to student needs or learning goals.
93

Page 11-14 Handout: Teaching Writing © 2018 ProLiteracy
Copying When students can write their letters comfortably, you can encourage them to copy words and sentences. This will help them learn the proper spacing to use between letters and words, when to use capital letters, and where to place punctuation marks. Asking students to copy all or part of their own Language Experience stories is an excellent way to start.
Copy Words Have students copy words that they need to use often or that they have difficulty spelling.
___________________________________________________________________________ ................................................................................................................................................... ___________________________________________________________________________ ___________________________________________________________________________ ................................................................................................................................................... ___________________________________________________________________________
Copy Similar Words It can be difficult for students to notice small differences in words in a second language. Have students practice copying words with one different letter (minimal pairs).
pet bet pet bet pet bet _____________________________________________________
lip lid lip lid lip lid ________________________________________________________
mate mat mate mat mate mat __________________________________________________
Copy Sentences Copying phrases or sentences helps students with the spacing of letters and words as well as spelling, grammar, and punctuation. Sentences can be written on worksheets or copied from the board. Have students copy a sentence multiple times.
Copy the sentence below three times. I like apples and bananas.
___________________________________________________________________________
___________________________________________________________________________
___________________________________________________________________________
daughter sick
94

Page 11-15 Handout: Teaching Writing
© 2018 ProLiteracy
Complete and Rewrite Sentences Have students complete a fill-in-the-blank sentence, then rewrite the entire sentence.
Write Rewrite
My name is _____________________ . _______________________________________ .
I am from _______________________ . _______________________________________ .
Practice Punctuation Have students begin by identifying punctuation. When they are comfortable identifying punctuation and can describe where to look for it, have them move on to the more challenging task of adding punctuation.
Identify Capitals Circle all of the words that use capital letters.
Every morning in the Hernandez family mom and dad drink coffee with cream and sugar, and
Rachel and Robbie drink hot chocolate. The family eats sweet Mexican bread, eggs, and fruit.
They love to eat sweet food! Do you like sweet food? The family eats Doritos, sandwiches, and
apples for lunch on Mondays and Tuesdays. They like to eat Italian food on Wednesdays and
Chinese food on Fridays.
Identify Punctuation Circle each period in red. Circle each question mark in blue.
Every morning in the Hernandez family mom and dad drink coffee with cream and sugar, and
Rachel and Robbie drink hot chocolate. The family eats sweet Mexican bread, eggs, and fruit.
They love to eat sweet food! Do you like sweet food? The family eats Doritos, sandwiches, and
apples for lunch on Mondays and Tuesdays. They like to eat Italian food on Wednesdays and
Chinese food on Fridays.
95

Page 11-16 Handout: Teaching Writing © 2018 ProLiteracy
Add Punctuation Add a punctuation mark, period or question mark, to the end of each sentence.
The Cruz family eats muffins donuts and other sweet bread for breakfast They like to drink
orange juice They eat fried chicken sandwiches apples and French fries for lunch The dad likes
to drink an energy drink and the mom likes to drink iced coffee The kids drink juice water or
soda They love soda For dinner they eat pizza with extra cheese and meat They drink soda
again They eat ice cream or cake after dinner.
Supporting Transitioning Writers As ESL students become more comfortable copying sentences and start to produce phrases and sentences on their own, they often begin to worry about making grammatical mistakes, misspelling words, or writing something that no one will understand. They may come to view writing as an agonizing act of creating something for the teacher or tutor to correct. As a result, they become overly concerned with the technical aspect of writing and lose sight of the fact that writing is a tool for communicating ideas. The activities below provide the support students need so they can focus on small aspects of writing composition or grammar and not become overwhelmed with either.
Sentence Frames Sentence frames or sentence starters provide part of the sentence and the student completes the rest. They are different from fill-in-the-blanks in that the student has more control and can be more creative in how he or she completes the frame.
Examples Here are some examples of single sentence starters.
On the weekend, I like to ________________________________________________ .
My favorite food is _____________ because ________________________________ .
When I ____________________ I like to ___________________________________ .
You can also use sentence frames to help a student write paragraphs.
My favorite city is _________________________. I like this city because
___________________________________________________________________.
One of my favorite things to do in this city is ________________________________
___________________________________________________________________.
96

Page 11-17 Handout: Teaching Writing
© 2018 ProLiteracy
Questions Another way to foster the transition to more independent writing is to have students respond to questions. You can teach students to incorporate the words and phrases into their responses.
Examples Question Student Response
Where do you work? I work at the hotel.
What do you do at work? At work, I clean the rooms.
When do you go to work? I go to work at night.
If this is initially too difficult for students, you can provide sentence frames as part of the student response.
Question Student Response
Where do you work? I work at _________________.
What do you do at work? At work, I _________________.
When do you go to work? I go to work ________________.
Writing with Photos If students have difficulty coming up with things to write, or you have difficulty coming up with topics, you can combine the supports above with pictures to spark the writing.
Writing with Photos and Sentence Frames 1. Select a picture or photograph. The picture should depict vocabulary that students know.
For example, if students have recently learned color names or names of clothing items,the picture might feature various people in a city wearing different types of colorfulclothing.
2. Create sentence frames that will encourage students to write about the picture. Put thesentence frames along with the picture on a handout, or write the sentence frames onthe board if you want students to practice writing whole sentences.
3. Tell students that this is a writing activity. Explain that you will start to say sentencesabout the picture and they will complete the sentences. You can make the sentenceframes as easy or as difficult as you feel is appropriate.
4. Ask students to share their stories when they are finished.
97

Page 11-18 Handout: Teaching Writing © 2018 ProLiteracy
This is _____________________________________________________________________ .
The woman looks ____________________________________________________________ .
The dog looks _______________________________________________________________ .
They are going to ____________________________________________________________ .
When they get there, they will ___________________________________________________ .
Writing with Photos and Questions with Groups 1. Divide students into groups of 3-5. Collect different magazine or newspaper pictures that
depict just one person. Each person in the group will need a different picture. Note: the pictures should be of one person, not a group of people.
2. Give each student a picture with a blank sheet of paper stapled to the back of it. 3. Ask the students to look at their pictures and imagine who the person is and what the
person’s background and life are like. 4. Write the first set of questions on a chalkboard where each member of the group can
see them. Read the questions aloud. x What is his/her name? x How old is he/she? x What does he/she do?
98

Page 11-19 Handout: Teaching Writing
© 2018 ProLiteracy
5. Ask the students to turn their pictures over and write the answers to these questions(using complete sentences) on the attached piece of paper. Tell them not to worry aboutcorrect spelling or grammar. Encourage them to be as imaginative as possible.
6. When they have finished writing, have them pass the picture to the person on the right.7. Ask each student to look at the new picture, turn it over, and read the sentences written
by the previous student.8. Write the following set of questions on the chalkboard. Read them aloud.
x Where does he/she live?x Who does he/she live with?
9. Ask the students to write answers to these questions on the sheet of paper on the photothey are now holding.
10. When they finish writing, ask them to pass the picture to the person on their right.11. Continue to do this for the following questions.
x What does he/she like to do?x What doesn’t he/she like to do?x What did he/she do yesterday? Why?x What is he/she going to do tomorrow? Why?
12. When the students have answered all the questions, ask each person to pass the pictureto the right one more time. At this point, ask students to read the story about the photo tothe other students.
Using Models and Templates Another way to support emerging ESL writers is to provide them with a model they can imitate in content and style or a template that provides the basic structure for what they want to write and for which the student provides the details. This technique is especially useful for practical everyday writing, but can also be used for creative writing.
Steps 1. Read. Select 2-3 models of the type of writing the student will do. For example, find 2-3
examples of absentee notes for children in school. Have the student read each noteindependently or with your help.
2. Discuss. Discuss the content of the model: What content was similar across models?How did the models differ? Make a list of content areas found in each model. Forexample, an absentee note might contain the date, the teacher’s name, the student’sname, the day the student was absent and the reason for being absent. Some notesmight include a request to send homework while others may not.
3. Decide. After discussing the differences, have the student decide which content he orshe thinks is important to include.
4. Identify words and phrases. If there were specific words or phrases that wereused that the student liked, have the student identify those and write them down.
5. Brainstorm. For each content area, have the student brainstorm his or her owninformation. An information grid is useful for this step. In our absentee note example, thestudent would brainstorm the names of his or her children, the names of the teachers,the days and months, and reasons for being absent.
99

Page 11-20 Handout: Teaching Writing © 2018 ProLiteracy
6. Create a template. Use the model that most closely resembles what the student wants to write as a starting point. Create a draft template by copying the model, removing the content areas and replacing them with blanks (as if you were creating a sentence frame). Next ask the student what he or she would like to add to the template. Recopy to create the final draft of the template.
7. Use. If a student has an immediate need for the template, have the student use the template to write what he or she needs to write, replacing the content placeholders with their information. If the student doesn’t have an immediate need, practice using the template by giving the student different scenarios and having him or her write an appropriate note based on the scenario.
Suggestions Models and templates may be useful for items like these:
x Permission notes x Party invitations x Craigslist ads for items or services x Information flyers x Lost pet notices
High-Beginning/Low Intermediate Writers As students become more confident and competent writers, you can gradually take the supports away. For example, you might replace an activity like the photo and sentence frames with a guided writing activity like the one below:
My Favorite Person
Prewriting Think about a person you know and really like. Draw the person here.
100

Page 11-21 Handout: Teaching Writing
© 2018 ProLiteracy
How do you know this person?
What words would you use to describe this person?
Give an example of when this person did something special.
Write about this person. Write a paragraph about this person. First, tell how you know this person. Next, describe this person. Last, give an example of something special this person did.
Rewrite Reread your paragraph. Work with your tutor or another student to improve one thing about your paragraph. Rewrite your paragraph below.
101

Page 11-22 Handout: Teaching Writing © 2018 ProLiteracy
The Writing Process Having a consistent process to use when writing helps students become more confident writers. It provides them with a structure to follow when they are unsure of where to start. It relieves the pressure of being perfect because it allows time to go back and fix mistakes. It provides enough structure for them to write independently. And ultimately, it results in a final product they can be proud of. Follow the process below when writing with students.
Prewriting This is the first step in the writing process. Here, students decide what to write about and brainstorm their ideas. This is probably the most important step in the writing process, but it is also often the step that teachers and students pay the least attention to. The more time spent in the prewriting step, the easier the remaining steps will be. Ideas may come from conversation between you and the student, a practical need, or thoughts generated from reading. If a student wants to do practical writing—such as writing a resume and cover letter or birthday invitations—you might start by analyzing examples of that type of writing. Mind mapping is a good way to capture and organize the ideas generated in this step.
First Draft The first draft is a student’s first attempt to give structure to his or her ideas. For the first draft, the focus is on the message rather than on punctuation, spelling, grammar, or handwriting. It is not even necessary for the first draft to contain complete sentences. A student who has difficulty with a word or phrase can guess, draw a symbol, or ask for help.
Revise This is where the student works to clarify and expand the content. When revising, the student should focus on the overall organization of information, adding and removing information, description and detail, and word choice. You can help by asking the student to read his or her first draft and then asking questions about it. Read the piece aloud yourself, and ask the student to listen critically.
Edit This is where the student makes improvements in the mechanics—spelling, punctuation, and grammar. The amount of editing will depend on the student’s level and the purpose of the piece. For beginning writers, focus on editing to correct one or two reoccurring problems rather than trying to make the piece perfect. For example, you might have a student edit a piece specifically for noun/verb agreement, proper use of apostrophes, and the spelling of words that have double letters because you know these mechanics give that student the most trouble. Create a customized editing checklist for the student to follow that includes what he or she is looking for as well as common mistakes and ways to fix them.
Final Draft This is where the student publishes what they have written. Publishing means creating a clean copy of a piece and then using it or sharing it with others. Publishing might mean sending off a resume and cover letter to a potential employer, or putting envelopes with birthday party
102

Page 11-23 Handout: Teaching Writing
© 2018 ProLiteracy
invitations in a daughter’s backpack to deliver to her friends at school. Publishing is very important because it represents the end of the writing process. Students may go through the revise and edit cycle several times. Without publishing, revising and editing can become an endless loop. If a student has written something he or she is especially proud of, consider ways of publishing the writing to enhance that pride. This might involve submitting the writing to be published in the literacy program’s newsletter or on their website, or taking a collection of the student’s writings to a printer and having them bound and published. This can go a long way toward changing a student’s attitude about writing from negative to positive.
Mind Mapping Mind mapping is a great tool to use during the prewriting step of the writing process. Mind mapping allows writers to quickly capture thoughts and connect those ideas in ways that make sense to them. Students can then use their mind maps as starting points for creating first drafts.
Steps 1. Write a word or topic in the center of the page and circle it.2. Ask the student what comes to mind when thinking about the topic.3. Write what the student says. Group related ideas using circles or lines to show
connections.4. Talk about the finished map and make additions or revisions.5. Ask the student to choose which parts of the map to include in the writing.6. For beginning students, do all the mind map writing, and read the results back to the
student. More advanced students may be able to create their own maps.7. To help a student get comfortable with maps, you might want to make a map of a
reading selection.8. As an intermediate step, you can ask a student to brainstorm thoughts about a topic and
dictate them to you. You write them in a list. Go over the list with the student and askwhich ideas belong together. Write these ideas in clusters, and use them to prepare amap.
The Unnamed Food This activity is good for helping students improve their use of description and detail in writing. Use a mind map or other graphic organizer to help students brainstorm during the prewriting step.
Steps 1. Ask students to think of a food. Explain that they shouldn’t tell anyone what their food is.
Ask them to write the name of the food in the center of a piece of paper and draw acircle around it.
2. Ask students to write the word “ingredients” off to one side, draw a circle around it, andconnect it back to the circle with the name of their food. Now ask students to think of theingredients in their food and write them around the circle.
3. Follow Step 2 with the following topics:
103
Page 11-24 Handout: Teaching Writing © 2018 ProLiteracy
a. How the food is prepared b. How the food looks, smells, feels, sounds, and tastes c. Why the student enjoys this food.
4. Now ask each student to take a fresh sheet of paper and write a paragraph describing his or her food without naming it. When students have finished, have them give their paragraphs to their partners. The partners try to guess the foods correctly. The goal is to describe the food well enough for a partner to identify it.
Variations This activity can be done with holidays, modes of transportation, clothing, sports, places to eat or visit, or any other common student experience.
Dialog Journals Dialog journals give students the opportunity to use and appreciate writing as a form of communication and to consistently practice writing.
Steps 1. Give each student in class a notebook to use as a dialog journal. 2. In the class session, ask each student to write something for you to read in his or her
notebook. Tell them that they can choose the topic. For example, students can explain something to you, ask you a question, tell a joke, tell you what they did last weekend, or describe a fond memory.
3. Tell students not to worry whether their grammar or spelling is correct or whether any wording sounds funny. The important thing is writing something that they want to write and want to share with you. By not having to focus on correctness, students will appreciate writing as a way to communicate their ideas to someone else and not just as another exercise that they have to do. This may encourage them to use writing to meet their daily communication needs outside of class. Plus, as you work on correcting and improving their writing with other exercises in class, you will likely see those new skills also applied to their journal writing.
4. Explain that you will not correct or change anything they write and that the writing will be confidential. No one except you will see it. You can review the writing as soon as they finish. Tell your students that this is the first of many written exchanges you will have in the form of a dialogue journal. Tell students that the next time they write in their journals, they will do it at home.
5. Give students time to do the writing. If a student is having difficulty getting started, talk with him or her and ask questions. For example, you could suggest that the student write about what he or she did the previous weekend.
6. When you’ve read a journal entry, put the current date below the student’s entry and write your response. If the student asked questions, try to answer them. If not, make comments triggered by what the student wrote. By responding to what students write, you will help them understand that their ideas are worthwhile and meaningful. You will also help them gain a better sense of how to write for a specific audience—you!
104

Page 11-25 Handout: Teaching Writing
© 2018 ProLiteracy
7. Although you will not make any corrections to a student’s entry, model correct English inwhat you choose to write yourself.
8. Since your goal is to keep the dialogue going, consider ending each of your entries witha question. This can make it easier for a student to get started on a new entry. Butexplain to your students that they don’t have to limit themselves to answering yourquestions. They can also choose to write about an entirely different topic.
9. Continue this process through subsequent weeks, except have students take theirjournals home and write in them there. (Alternately, all of the writing could take place viaemail or in a word processing program, and students could email you their entries.)Students will write during class only in the session in which you first introduce dialoguejournals. You might want to require one entry from each student each week. You’llprobably find that students are initially reluctant to do much writing: They will still betrying to figure out what the assignment “really” is. Eventually, a true dialogue willdevelop.
105

Page 11-6 Handout: The Language Experience Approach © 2018 ProLiteracy
Handout: The Language Experience Approach The Language Experience Approach (LEA) involves using a story dictated by a student and written by the tutor to teach different components of reading and writing. Using both the learners’ own experiences and language as the basis for instructional material is an effective way of collaborating with learners from the very first lesson. This approach gives immediate success and is an icebreaker in a new teaching situation. It also gives you insights into the learners’ worlds that can be of great help in selecting materials for a series of lessons.
The Language Experience Approach emphasizes the connections between oral language and written language. This technique allows even beginning readers to create sophisticated oral compositions which are then put into print. Language Experience works well with any level student and in individual and group settings. Eventually it can be the basis for students writing their own stories.
Steps 1. Converse with students to identify an experience or topic. Begin the
language experience approach by inviting the student or students to talk. The conversation will help you narrow the topic for the language experience story, and will help the student generate ideas. Topics for the conversation might include asking the student what they did over the weekend, what they enjoy doing for fun, or where they went for vacation. You might also use a prompt to spark conversation, like reading a short article from the newspaper or using a picture.
2. Focus the conversation and ask the student to tell you a story. Once you’ve discussed the topic with the student, narrow the topic and have the student tell you a story about it. If you’re working with a group of students, you might rotate from student to student, with each student giving you one or two statements about the topic.
3. Print exactly what the student says. Use correct spelling and punctuation, but do not change any words. It is very important to maintain the integrity of the student’s voice. Leave blank lines between each printed line. You will give the student a chance to make edits later in the process. For beginning readers, a story of 3-5 sentences is long enough. For more advanced students, a longer story is better. Ask the student or students to give the story a title.
4. Read and verify the story. Read the story back to the student and ask if the story says what they wanted it to say. Ask they student if there are any changes they would like to make to the story. Reread the story as many times as needed for this process.
5. Read the story to the student. Read the story to the student, tracking the words with your finger, while the student watches and listens.
106

Page 11-7 Handout: The Language Experience Approach
© 2018 ProLiteracy
6. Ask the student to read the story. After you have read the story, ask thestudent to read the story. For beginning students, you will combine steps five and six.You will read a sentence tracking the words, and then ask the student to read thatsentence back to you. You will repeat the process until the student can read the entirestory independently. Higher-level students may be able to read the story on their ownafter listening to you read it first. When working with a group of students, have thestudents read the story together and then give each student a chance to read parts or allof it on their own.
7. Identify reading and writing skills. Now that you have a story, you will use thestory to identify reading and writing skills for the student to work on. Based on thestudent’s needs, here are some of the things you might do:
x Alphabetics and word study. Review the story and identify words thatreflect specific phonemic awareness and phonics skills the student needs topractice, such as selecting words that have a short /i/ and a short /e/ and practicedistinguishing between the two sounds. You might select a word that uses acommon word pattern and have the student use it to form new words. You mightselect a group of words that use prefixes and suffixes and have the studentpractice identifying the prefix, suffix, and root word for each one.
x Vocabulary. Since the vocabulary in the language experience story are thestudent’s own words, he or she has some idea of what the words mean.However, people often don’t have a complete understanding of the words theyuse regularly. Review the story and identify tier 2 vocabulary words. Ask thestudent what he or she thinks each word means, then read the completedefinition. Discuss how the word might be used in other contexts and create aword chart. Identify vocabulary words that lend themselves to helping the studentdevelop word building skills – identifying the meaning of a word throughunderstanding the meaning of the root word and any prefixes and suffixes.
x Fluency: You will have already worked on fluency as you read the story to thestudent and the student read it back to you. If there were phrases or portions ofthe story that gave the student problems when reading, use an activity such asphrase reading or pencil tracking to practice those phrases.
x Comprehension: You may not be able to work on applying the broadcomprehension strategies since the student already understands what he or shewas trying to say. However, you can use the story to develop specificcomprehension skills like how cause and effect, main idea and detail, orsequencing function within the story. You can compare these structures to similarexamples in other stories the student may have read.
x Writing: There will likely be grammatical errors in the story. You can use thoseto teach grammar lessons. After the grammar lesson, give the student anotheropportunity to revise the story.
8. Student copy the final story. Finally, ask the student to copy the story.
107

Page 11-8 Handout: The Language Experience Approach © 2018 ProLiteracy
Generating Story Ideas Use the questions and other ideas below to start conversations that will lead to the creation of a language experience story.
x What is your favorite hobby? Describe it. x If you could have three wishes, what would they be? x What type of work do you do? What do you like and dislike about your work? x What is the strangest thing that ever happened to you? x Tell me a story about someone in your family. x If you had as much time and money as you needed, how would you spend your
vacation? x What is something you do well? How would you tell someone else how to do it? x What was the best choice you made in the last five years? x What do you most like to do on your day off? x Do you have a favorite song? Can you tell me the words? x Tell me about your favorite television show. x What would you say to the president if you met him or her? x Think about someone you know. Describe what he or she looks like. x Tell me about a tradition your family has. x Have you ever had an experience like ______? Tell me about it. (after reading a story) x Read an article from a newspaper, magazine, or website to the student. Ask the student
to tell you about the article in his or her own words. x Read a submission to a personal advice column or blog. Ask the student how he or she
would respond. x Use a short video clip related to the student’s interest to start a conversation. x Bring in an interesting picture and ask the student to describe it, or how he or she feels
about it. x Choose a photo depicting an odd situation. Ask the student to describe what they think
happened just before the photo was taken and just after it was taken. x Ask the student to bring in a photo and tell you what the photo represents. x Create a shared experience such as going on a field trip to a local museum. Afterward,
ask the student or students to share their thoughts about the experience and what it mean to them.
108

Page 11-9 Handout: The Language Experience Approach
© 2018 ProLiteracy
Benefits of the Language Experience Approach There are many benefits to using the Language Experience Approach with students:
x Empowers students to see their own words in print. When students see astory about a personal experience, written in their own words, it is both empowering andmotivating.
x Emphasizes the connection between oral and written language. Asstudents tell you the story, you write the story down on paper. This immediately helpsstudent make the connection between their oral vocabulary and the same words in print.
x Gives insight into the student’s vocabulary and language structure.The language experience story gives you an opportunity to understand the size andscope of the student’s vocabulary, their understanding of composition and grammar, andtheir experiences that you may draw upon in later lessons.
x Allows beginning students to produce sophisticated work. Even thougha student may be reading at a first or second grade level, they have been speaking andtelling stories all their life. Students can tell complex and detailed stories using high-levelvocabulary words.
x Works well for individuals or groups. It is a process that is easily adapted toindividual learning or group learning.
x Works well with new students. This approach provides a new student with animmediate opportunity to experience success in reading and writing. It also gives you anopportunity to establish rapport with a new student before delving into publishedinstructional materials.
109
Page 5-24 Handout: Goal Setting © 2018 ProLiteracy
Handout: Goal Setting Effective goal setting with students is the foundation of successful instruction. When students set their own reading goals and then are able to monitor and see progress toward those goals, they are more likely to persist in adult education programs. In addition, goal setting and monitoring provides valuable information to help tutors make instructional decisions about materials, methodology, and focus of instruction. Below are some tools and strategies you can use to help students set and monitor their goals.
Setting Long-Term Goals Initially, an adult student may enter a program with very vague or general long-term goals; specific short-term reading goals and no long-term goals; or maybe without any goals at all –just the sense that he wants to read better. In long-term goal setting, the objective is to get students to think about the “why” more than the “what.” For example, a student may want to get his GED (the what). In setting the long-term reading goal, you want to help the student identify why he wants his GED: to move up in his job, to continue his education, to be a role model for his children. This discussion helps the student clearly define a big picture for what he wants to accomplish. Once the student can describe the big picture, begin to talk about how reading fits into this big picture. In the example above, you could begin by asking the student what kinds of things he reads at work now and what kinds of things he would need to read if he got a promotion. You can talk about what kinds of things he thinks he would need to be able to read to pass the GED and how those might be similar to or different from the things he would read at work. These then become the student’s long-term reading goals.
Setting Short-Term Goals Once the student has established some long-term reading goals, it is important to break these down into short-term reading goals that can be clearly identified, articulated, accomplished in a short period, and measured. To do this:
x Have the student discuss the reading strengths and skills he already has and can build on to accomplish his goals
x Discuss with the student what gives him trouble when he reads and help him identify the areas that he needs or wants to develop
x Identify the skills, knowledge, and abilities that are needed for the student’s long term goal.
x Identify with the student the short-term reading goals that will be the focus of instruction.
110

Page 5-25 Handout: Goal Setting
© 2018 ProLiteracy
Once you and the student have identified the short-term reading goals, be sure there is a clear link back to the long-term reading goals. In the example above, the student might identify the need to identify details in work documents, follow a sequence of steps, and skim for important information. These are also skills that the student will need to pass the GED. Discuss with the students what the two of you will do in and out of class to accomplish the goals, and how the student will know the goal has been met.
Monitoring Goals Once you’ve worked with the student to set long-term and short-term reading goals, it is important to monitor the goals on a regular basis. Monitoring involves reviewing the long-term reading goal to see that it is still relevant to the student’s life, and then reviewing the short- term reading goals related to it. During this review, you and the student want to identify the goals that have been accomplished and what progress he has made on the other goals. If the student has not made progress on a goal, discuss the reasons why and make adjustments in the strategies you both are using to achieve the goal. Setting and monitoring long-term and short-term reading goals helps the student see progress, avoid frustration, and remain motivated to continue his education.
111

Lesson Planning Outline
ESL Basic Literacy
Topic / Learning Objectives Topic / Learning Objectives What the student will know or be able to do What the student will know or be able to do at the end of the lesson at the end of the lesson
Materials and Resources Needed Materials and Resources Needed Book; picture dictionary; flash cards; Book; flash cards; authentic texts from authentic texts from student’s life; props, etc. student’s life; paper and pencil
Activities (How you will teach) Activities (How you will teach) Warm Up Warm Up
Vocabulary Before Reading – phonics; decoding; sight words; Conversation new vocabulary; comprehension strategy Pronunciation During Reading – use comprehensions strategy Grammar and interact with text Reading After Reading – check comprehension; practice Writing vocabulary; write; read for fluency
(Percentage of time varies according to student needs)
Assessment and Evaluation Assessment and Evaluation How will you know they understood? How will you know they understood? How will you know they can use new skills? How will you know they can use new skills? Did this help meet student objectives? Did this help meet student objectives?
Wrap Up Wrap Up Summarize lesson; answer questions; Summarize lesson; answer questions; assign homework assign homework
Backup Plans Backup Plans Review and reinforcement plans; life skill Review and reinforcement plans and activities lesson ideas
112

Page 4-11 Handout: Literacy Lesson Segments
© 2018 ProLiteracy
Handout: Literacy Lesson Segments Advanced Literacy Lesson
Notes:
113
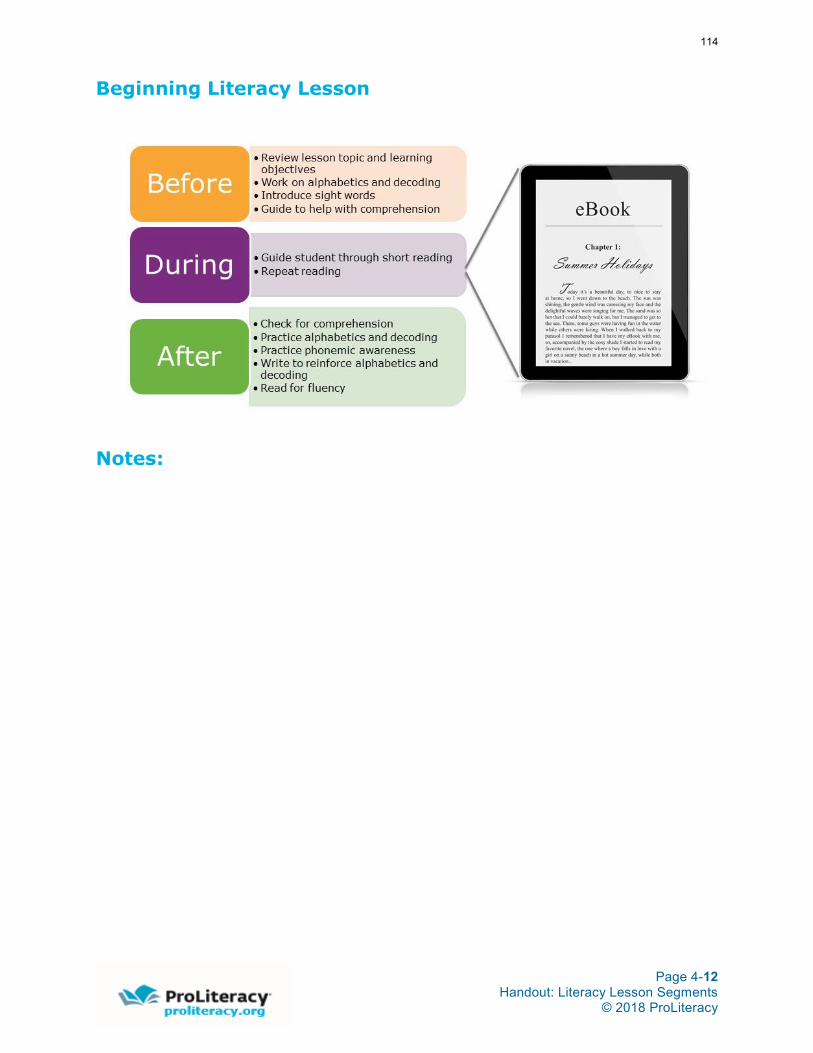
Page 4-12 Handout: Literacy Lesson Segments
© 2018 ProLiteracy
Beginning Literacy Lesson
Notes:
114

Page 4-9 Handout: Lesson Plan
© 2018 ProLiteracy
Handout: Lesson Plan What does the student want to know?
Lesson Topic
Lesson Objectives
How will I teach? For each lesson segment include the content, the teaching activities you will use, and any materials you will need.
Before reading (What the student needs to improve comprehension)
115

Page 4-10 Handout: Lesson Plan © 2018 ProLiteracy
During reading (what the student will do to improve comprehension)
After reading (how will we check comprehension and practice other reading and writing skills)
How will we measure? Review each segment of your lesson plan and identify how you and the student will know they understood what they read and can use the reading skills they’ve learned.
116

Page 12-8 Handout: The First Meetings
© 2018 ProLiteracy
Handout: The First Meetings Use these checklists to make sure you are on track for your initial meeting with a student.
Initial Phone Call � When you reach the student, introduce yourself, explaining that you are a tutor with the
literacy program. x If you do not reach the student, leave your name and number. Do not indicate
that you are from the literacy program unless you know that it is OK to do so.� Confirm that now is a good time to talk � Reinforce that you are excited about working with the student � Schedule the first meeting
x Establish date and timex Establish locationx Provide any special instructions such as where to parkx Describe a specific meeting placex Describe how the student will recognize you
� Exchange contact information x Confirm the best way to contact the studentx Provide your contact informationx Ask student to contact you if he or she will be unable to make it. Explain that you
will do the same.� Ask student if it’s OK to text or call the day of the meeting to confirm
The First Meeting
Prior to the First Meeting � Scout the meeting place and identify 2-3 good places where you can study. This will
allow you some options if one or two of them are taken on the day of the meeting. � If the literacy program has provided you information about the student, review it before
the meeting. You should be familiar with the student’s learning history, initial assessment, and reading goals so you can use these as a starting point for the first meeting.
� Select some reading materials from your literacy program that you can use for the first meeting. Try to select a variety of reading materials at different levels close to the student’s reading level. Examples might include a newspaper like News for You from New Readers Press (https://www.newreaderspress.com/news-for-you-online), low-level pleasure reading materials (https://www.newreaderspress.com/pleasure-reading), children’s books (if you know the student has kids and this is a goal for them), examples of published instructional materials, and some real-world materials like pamphlets or job ads (again, if you know this is a goal of the student’s).
� Create a “tutoring bag” that includes instructional materials plus notebook paper or spiral notebook, pencils, markers, and index cards.
117

Page 12-9 Handout: The First Meetings © 2018 ProLiteracy
At the Meeting � Arrive at the meeting place at least 15 minutes ahead of the scheduled time. Find a quiet
place where you and the student can talk and study. � Introduce yourself and greet the student by name so he or she knows they have
connected with the correct person. “Are you _____? I’m ______.” � Make “small talk” with the student as you walk back to the study area. This will help put
the student at ease. � Use your first meeting to begin to get to know the student. The literacy council may have
already given you information about the student’s life experiences, goals, and literacy levels. You can use this information to start conversations with the student. Be aware that information related to the student’s goals may have changed. Sometimes students are not clear about their education goals when they first come in. Use your first few meetings with the student to clarify the student’s goals. Share information about your own goals and why you want to tutor.
� Explain how tutoring will work. Talk about how often you’ll meet, the partnership between student and tutor in instruction, and how you will measure progress. Reinforce themes of partnership and the student’s role in decision-making. This is an overview level conversation, not a detail level conversation.
� Exchange contact information and establish ground rules for contacting each other. For example, you might exchange cell phone numbers and establish that you will text the student the day of your lesson to confirm he or she is still able to meet.
� Use this conversation to build trust and rapport with the student.
Assessment and The Lesson You should plan to use the first few lessons with a student to assess the student’s literacy skills (if the literacy program has not already assessed the student) or to expand on the intake assessment (if the literacy program has already assessed the student). Do this through simple instructional activities and observation. Here are some ideas for the first few lessons:
� Read. Provide a selection of reading material for the student to choose from. Alternate reading to the student and having the student read (so you can observe the student’s reading ability). If the student struggles with a word, provide it immediately so the student doesn’t become frustrated. Do this for 5-10 minutes. After reading, pick 2-3 words for the student to study, either decoding skills for low-level students or vocabulary for higher-level students.
� Language Experience. Language experience is a great instructional activity to do for the first lesson. Explain the process. Provide topic ideas for the student to pick from. Discuss the topic and write the student’s story. Go back to the story and pick 2-3 words for the student to study, either decoding skills for low-level students or vocabulary for higher-level students.
� Writing. Provide topic ideas and introduce the student to the writing process. Guide the student through brainstorming using a mind map. You extend the writing activity over the first few lessons, using each lesson to create a first draft, then revise and edit the draft. Focus on 1-2 edits and provide instruction.
118

Page 12-10 Handout: The First Meetings © 2018 ProLiteracy
� Assessment. If the program did not perform an initial assessment, plan to administer one during the second or third meeting. This will allow you some time to observe the student’s reading and writing and allow you to put the assessment results in context. You can use an assessment provided by your literacy program, a placement test associated with the set of published materials you are considering using, or one of these standardized tests:
x The Tests of Adult Basic Education (TABE, http://tabetest.com/) x The BEST Literacy and BEST Plus test (http://www.cal.org/aea/) x The Comprehensive Adult Student Assessment Systems (CASAS,
https://www.casas.org/product-overviews/assessments)
Most importantly, you want to plan instructional activities that guarantee student success. After the first few meetings, the student should feel like they are learning new things and that they will be successful in this endeavor.
119