Tulips Candle Mat - busybeeweb.combusybeeweb.com/ecoughlindesigns/tulipscandlemat.pdfo ½ yard Moody...
12
Transcript of Tulips Candle Mat - busybeeweb.combusybeeweb.com/ecoughlindesigns/tulipscandlemat.pdfo ½ yard Moody...
Tulips Candle Mat Page 1
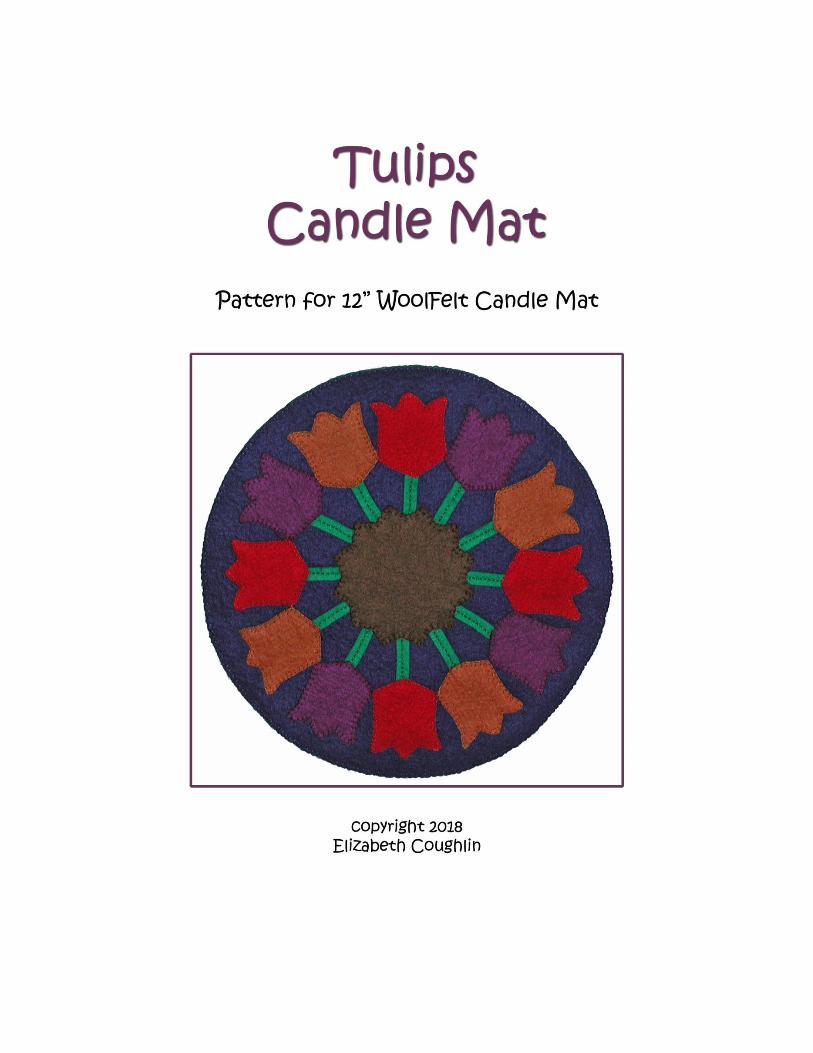
Tulips Candle Mat WoolFelt Home Décor Project - Finished size is approximately 12" round Copyright 2018 Elizabeth Coughlin For personal use only, do not sell items made using these designs. Purchase of pattern does not constitute transfer of copyright or license for commercial usage. All Rights Reserved. Elizabeth Coughlin Designs Blog My Etsy Store My Craftsy Store
Material Sources:
WoolFelt - National Nonwovens P.O. Box 150 Easthampton MA 01027 1-800-333-3469 http://www.woolfelt.com/ (wholesale) http://www.commonwealthfelt.com/ (online retail).
Embroidery Floss - The DMC Corporation 10 Basin Drive, Suite 130, Kearny, NJ 07032 (973) 589-0606 http://www.dmc-usa.com
Tulips Candle Mat Page 2
Materials:
National Nonwovens WoolFelt In Harmony Collection: (WoolFelt requirements allow for
shrinkage from preparing the felt. Preparation instructions to follow.):
o ½ yard Moody Blues for front and back of candle mat, (or fat quarter Moody
Blues and fat quarter of another color for back of candle mat.)
o 8” x 8” piece Purple Rain for tulips
o 8” x 8” piece Rockin Red for tulips
o 8” x 8” piece Gold Ensemble for tulips
o 8” x 8” piece Muddy Waters for center medallion
o 8” x 8” piece Celtic Dance for stems
DMC Six-Strand Embroidery Floss (use three strands at a time):
o 158 for Moody Blues WoolFelt
o 550 for Purple Rain WoolFelt
o 347 for Rockin Red WoolFelt
o 420 for Gold Ensemble WoolFelt
o 938 for Muddy Waters WoolFelt
o 909 for Celtic Dance WoolFelt
Large-eyed chenille needle, straight pins, scissors, freezer paper, pen or pencil, glue stick,
and iron.
Tulips Candle Mat Page 3
Instructions:
Prepare WoolFelt: Soak WoolFelt in a basin of very warm water. WoolFelt will bleed, so
soak colors separately. Gently squeeze as much water out as you can. Dry WoolFelt in a
dryer until slightly damp. Dry similar colors together as they may rub off on each other.
Flatten felt and let air-dry the rest of the way. You may use a warm iron to flatten felt more
after dry, if too wrinkly.
Print all pattern pieces at 100%.
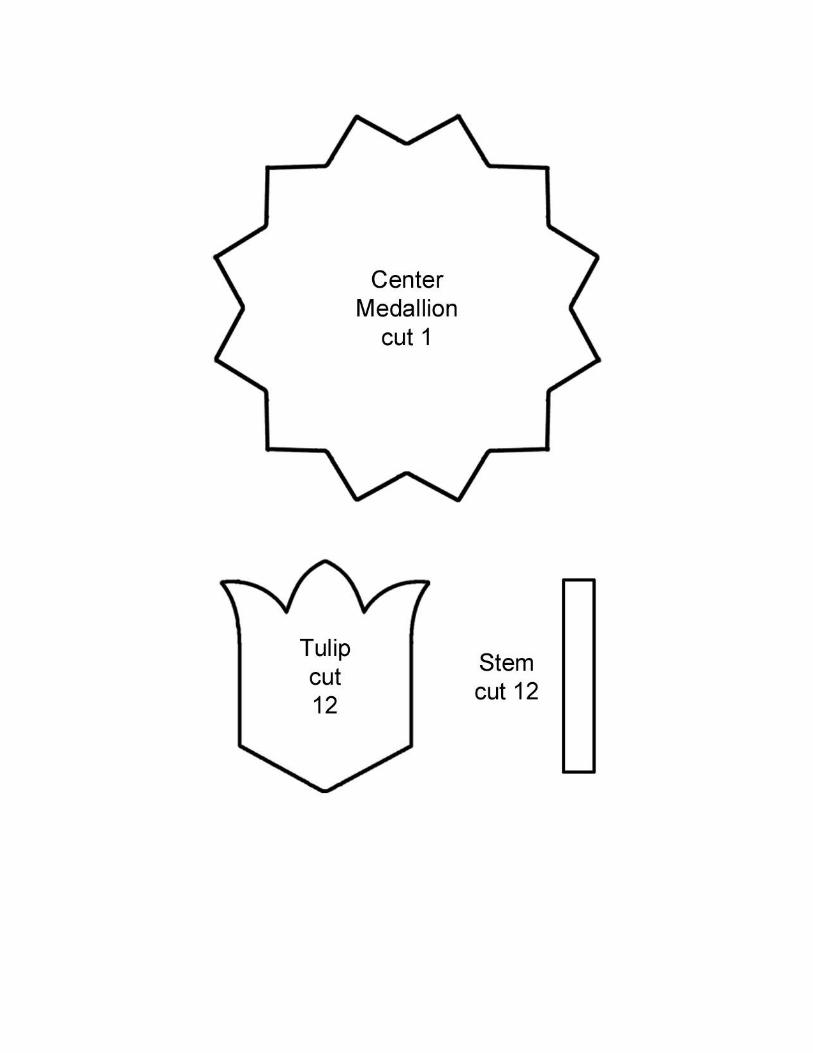
Trace all pattern pieces onto freezer paper and cut out:
o Trace the ¼ circle four times, joining on dotted lines to create a 12” circle. Cut
out.
o Cut twelve tulips.
o Cut one center medallion.
o Cut twelve stems.
To use the freezer paper templates, place them shiny side down on the WoolFelt. Set the
iron to the wool setting with no steam; the iron must be dry. Iron the freezer paper onto the
WoolFelt, pressing down for a few seconds until the freezer paper sticks.
Cut the pattern pieces out in the following quantities:
o Cut one 12” circle from the Moody Blues WoolFelt. Reserve remaining Moody
Blues WoolFelt for later.
o Cut one center medallion from the Muddy Waters WoolFelt.
o Cut twelve stems from the Celtic Dance WoolFelt.
o Cut four tulips from each of the following WoolFelt colors: Purple Rain, Rockin
Red, and Gold Ensemble.
Use the glue stick to adhere smaller applique pieces before stitching, if desired.
Tulips Candle Mat Page 4
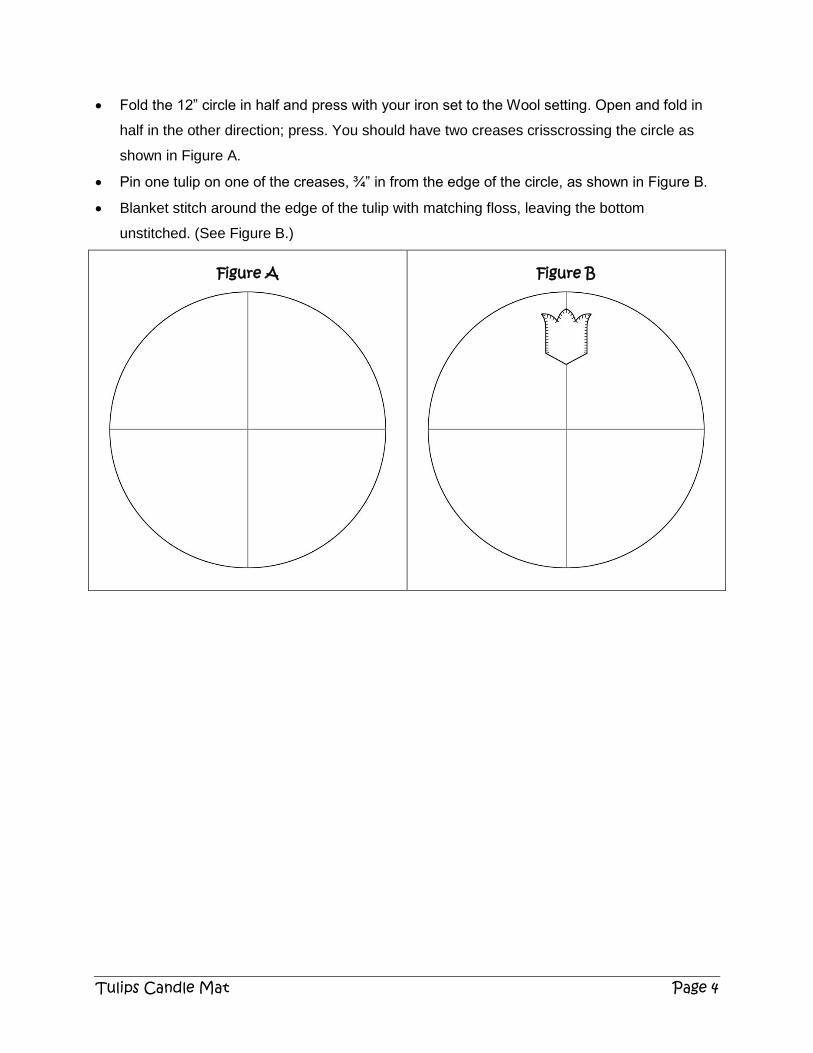
Fold the 12” circle in half and press with your iron set to the Wool setting. Open and fold in
half in the other direction; press. You should have two creases crisscrossing the circle as
shown in Figure A.
Pin one tulip on one of the creases, ¾” in from the edge of the circle, as shown in Figure B.
Blanket stitch around the edge of the tulip with matching floss, leaving the bottom
unstitched. (See Figure B.)
Figure A
Figure B

Tulips Candle Mat Page 5
Repeat with the other three tulips of the same color, pinning and stitching on the other
creases, ¾” in from the edge of the circle. (See Figure C.)
Fill in between the first set of tulips with those of the remaining two colors. Blanket stitch
around each one with the appropriate color floss, leaving the bottoms unstitched. (See
Figure D.)
Figure C
Figure D
Tulips Candle Mat Page 6
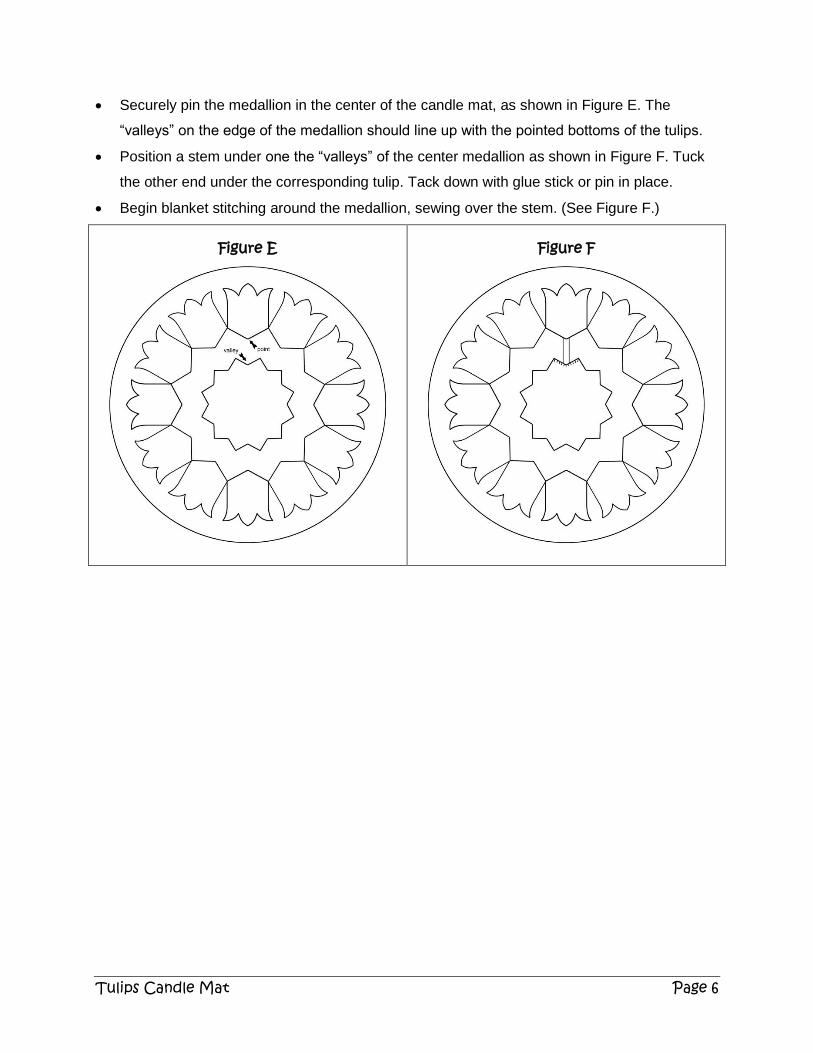
Securely pin the medallion in the center of the candle mat, as shown in Figure E. The
“valleys” on the edge of the medallion should line up with the pointed bottoms of the tulips.
Position a stem under one the “valleys” of the center medallion as shown in Figure F. Tuck
the other end under the corresponding tulip. Tack down with glue stick or pin in place.
Begin blanket stitching around the medallion, sewing over the stem. (See Figure F.)
Figure E
Figure F
Tulips Candle Mat Page 7
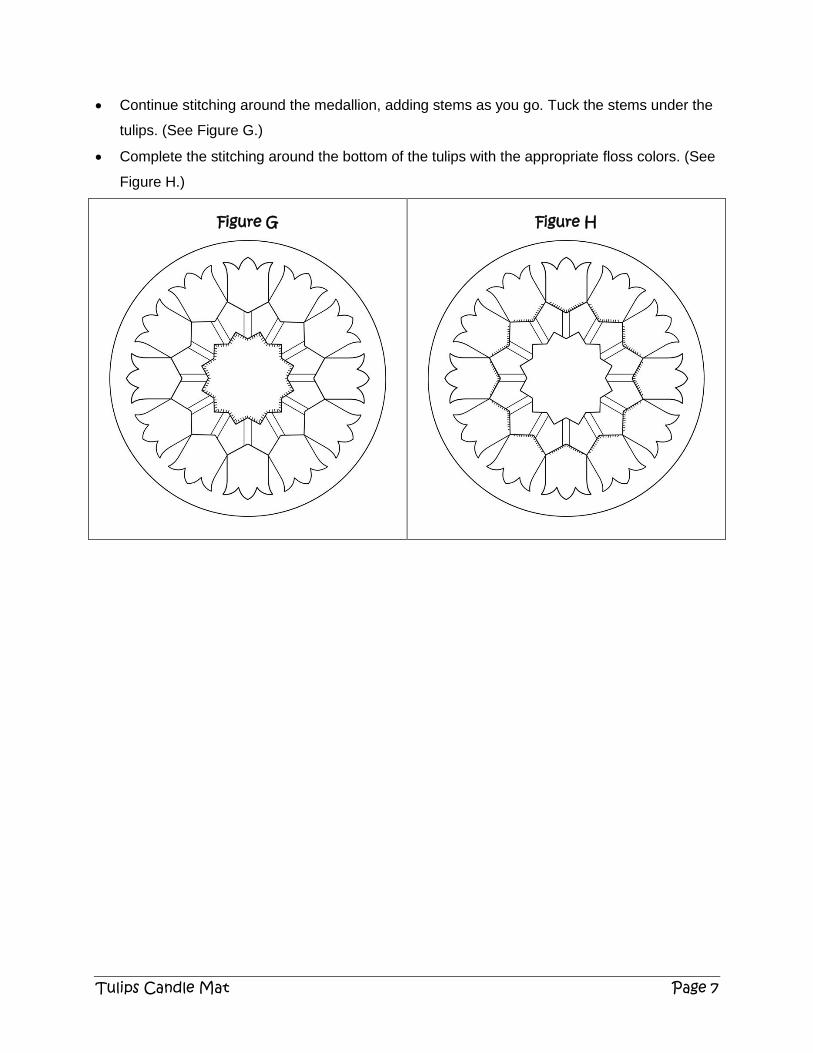
Continue stitching around the medallion, adding stems as you go. Tuck the stems under the
tulips. (See Figure G.)
Complete the stitching around the bottom of the tulips with the appropriate floss colors. (See
Figure H.)
Figure G
Figure H
Tulips Candle Mat Page 8
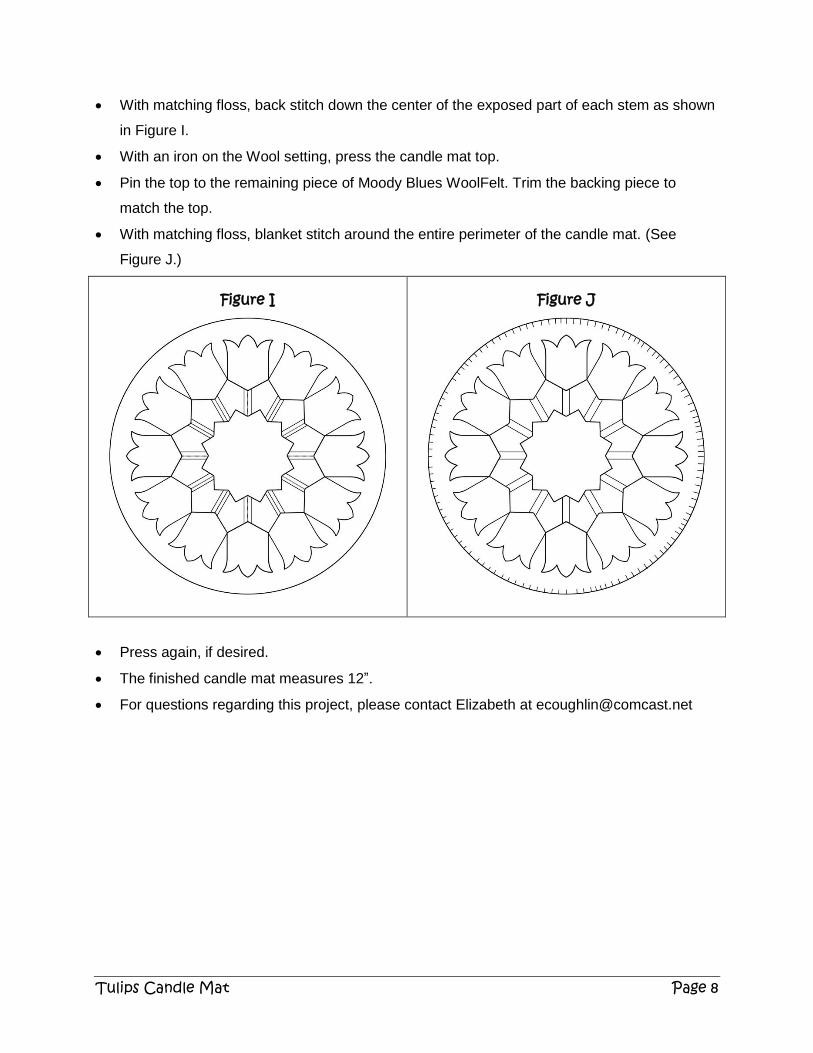
With matching floss, back stitch down the center of the exposed part of each stem as shown
in Figure I.
With an iron on the Wool setting, press the candle mat top.
Pin the top to the remaining piece of Moody Blues WoolFelt. Trim the backing piece to
match the top.
With matching floss, blanket stitch around the entire perimeter of the candle mat. (See
Figure J.)
Figure I
Figure J
Press again, if desired.
The finished candle mat measures 12”.
For questions regarding this project, please contact Elizabeth at [email protected]
Tulips Candle Mat Page 9
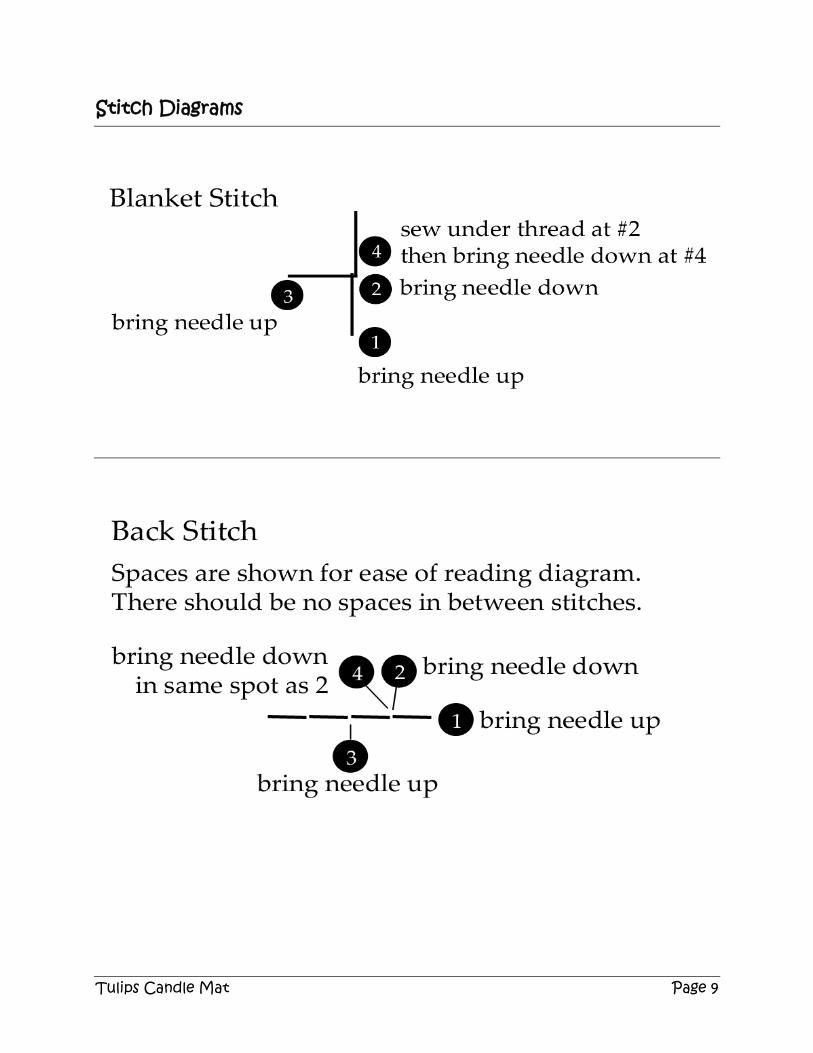
Stitch Diagrams
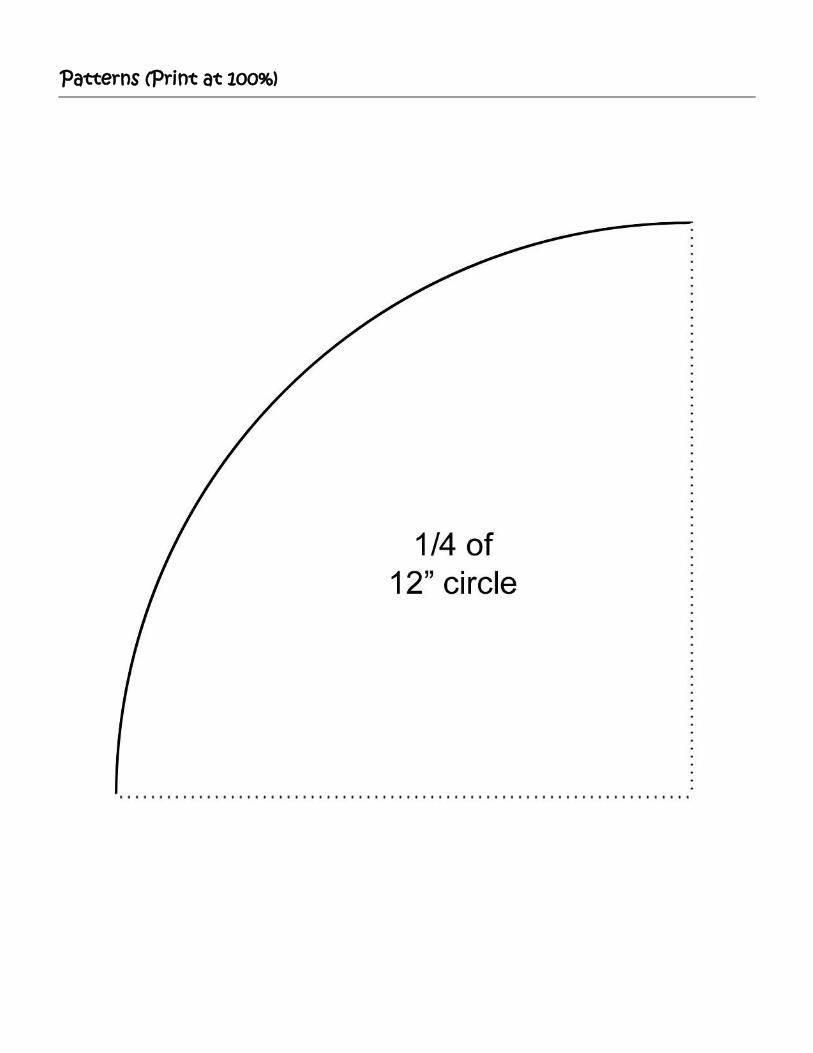
Patterns (Print at 100%)