Troop Guide Handbook - Boy Scout Trailboyscouttrail.com/docs/2016troopguide.pdf · Troop Guide...
40
Find more Scouting Resources at www.BoyScoutTrail.com Troop Guide Handbook for Training New Scouts
Transcript of Troop Guide Handbook - Boy Scout Trailboyscouttrail.com/docs/2016troopguide.pdf · Troop Guide...

Find more Scouting Resources at www.BoyScoutTrail.com
Troop Guide Handbook
for
Training New Scouts
First Class Advancement Page 2
Find more Scouting Resources at www.BoyScoutTrail.com
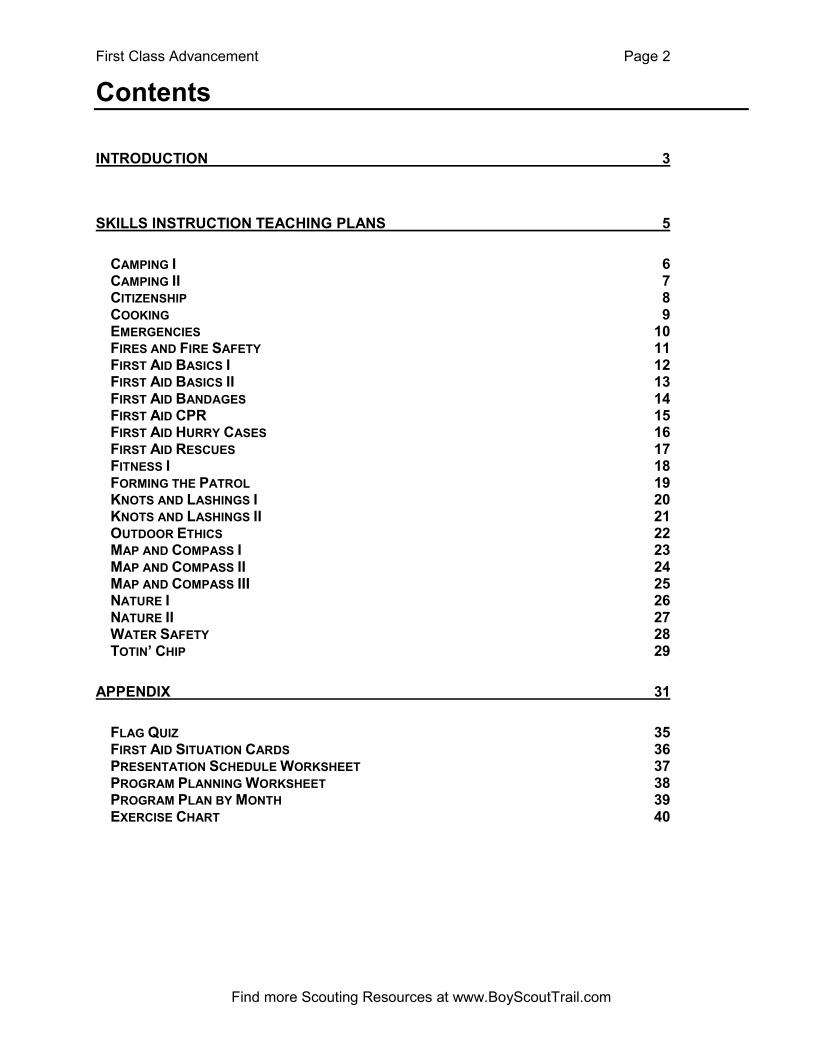
Contents
INTRODUCTION 3
SKILLS INSTRUCTION TEACHING PLANS 5
CAMPING I 6 CAMPING II 7 CITIZENSHIP 8 COOKING 9 EMERGENCIES 10 FIRES AND FIRE SAFETY 11 FIRST AID BASICS I 12 FIRST AID BASICS II 13 FIRST AID BANDAGES 14 FIRST AID CPR 15 FIRST AID HURRY CASES 16 FIRST AID RESCUES 17 FITNESS I 18 FORMING THE PATROL 19 KNOTS AND LASHINGS I 20 KNOTS AND LASHINGS II 21 OUTDOOR ETHICS 22 MAP AND COMPASS I 23 MAP AND COMPASS II 24 MAP AND COMPASS III 25 NATURE I 26 NATURE II 27 WATER SAFETY 28 TOTIN’ CHIP 29
APPENDIX 31
FLAG QUIZ 35 FIRST AID SITUATION CARDS 36 PRESENTATION SCHEDULE WORKSHEET 37 PROGRAM PLANNING WORKSHEET 38 PROGRAM PLAN BY MONTH 39 EXERCISE CHART 40
First Class Advancement Page 3
Find more Scouting Resources at www.BoyScoutTrail.com
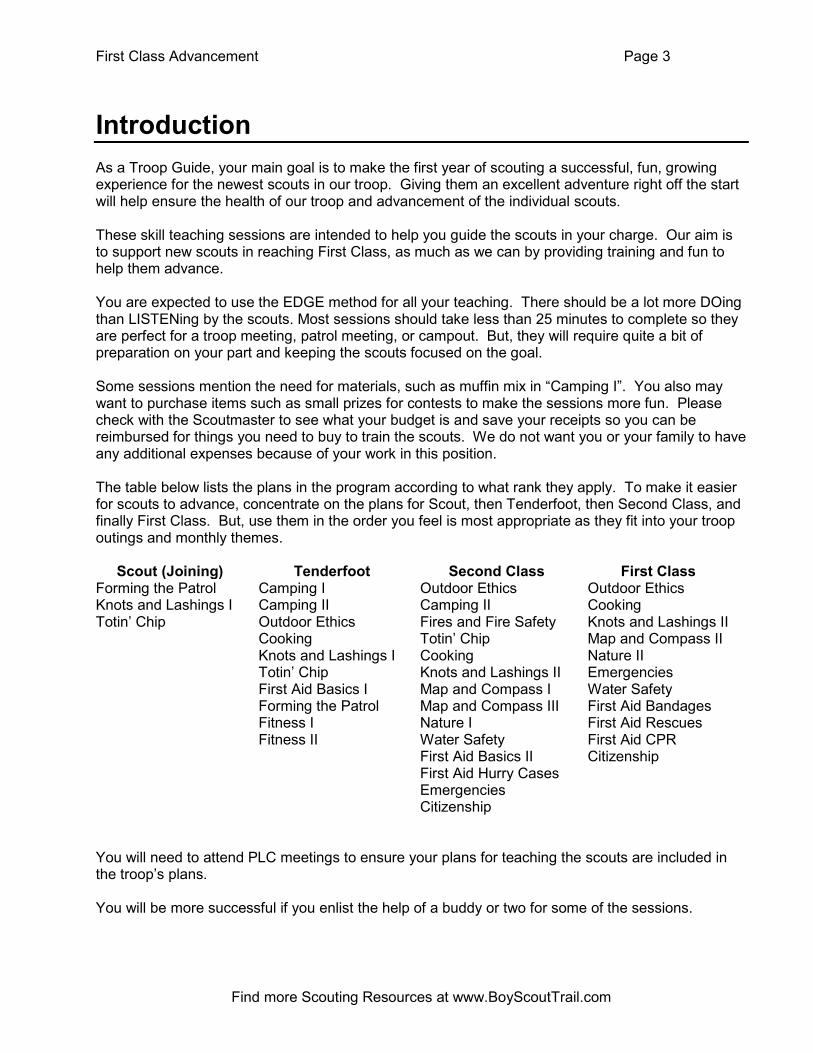
Introduction
As a Troop Guide, your main goal is to make the first year of scouting a successful, fun, growing experience for the newest scouts in our troop. Giving them an excellent adventure right off the start will help ensure the health of our troop and advancement of the individual scouts. These skill teaching sessions are intended to help you guide the scouts in your charge. Our aim is to support new scouts in reaching First Class, as much as we can by providing training and fun to help them advance. You are expected to use the EDGE method for all your teaching. There should be a lot more DOing than LISTENing by the scouts. Most sessions should take less than 25 minutes to complete so they are perfect for a troop meeting, patrol meeting, or campout. But, they will require quite a bit of preparation on your part and keeping the scouts focused on the goal. Some sessions mention the need for materials, such as muffin mix in “Camping I”. You also may want to purchase items such as small prizes for contests to make the sessions more fun. Please check with the Scoutmaster to see what your budget is and save your receipts so you can be reimbursed for things you need to buy to train the scouts. We do not want you or your family to have any additional expenses because of your work in this position. The table below lists the plans in the program according to what rank they apply. To make it easier for scouts to advance, concentrate on the plans for Scout, then Tenderfoot, then Second Class, and finally First Class. But, use them in the order you feel is most appropriate as they fit into your troop outings and monthly themes.
Scout (Joining) Tenderfoot Second Class First Class Forming the Patrol Knots and Lashings I Totin’ Chip
Camping I Camping II Outdoor Ethics Cooking Knots and Lashings I Totin’ Chip First Aid Basics I Forming the Patrol Fitness I Fitness II
Outdoor Ethics Camping II Fires and Fire Safety Totin’ Chip Cooking Knots and Lashings II Map and Compass I Map and Compass III Nature I Water Safety First Aid Basics II First Aid Hurry Cases Emergencies Citizenship
Outdoor Ethics Cooking Knots and Lashings II Map and Compass II Nature II Emergencies Water Safety First Aid Bandages First Aid Rescues First Aid CPR Citizenship
You will need to attend PLC meetings to ensure your plans for teaching the scouts are included in the troop’s plans. You will be more successful if you enlist the help of a buddy or two for some of the sessions.

First Class Advancement Page 4
Find more Scouting Resources at www.BoyScoutTrail.com
Sample First Year Program This is a sample way to order the sessions to offer them all in a year. A scout participating in all troop and patrol activities can advance quickly. Location Requirement
Goals Presentation/Description
J1, J2, J3, T5a Forming the Patrol T1a, T5b-c Camping I
April Outing J5, T3d, S2b S2a,c,d
Totin’ Chip Fires and Fire Safety
T6a-b Fitness I J4a-b, T3a-c, T8 Knots and Lashings I T1b, S1c Camping II
May Outing T2a-c, S2e, F2a-e T1c, S1b, F1b, F9c
Cooking Outdoor Ethics
T4a-d First Aid Basics I S3a—c, F4b Map and Compass I
June Outing S3d S4, F5a
Map and Compass III Nature I & II
Court of Honor – Scout done S5a-d, F6a-e Water Safety T6c Fitness II
July Summer Camp
Swimming and boating requirements
S6a,S6c First Aid Basics II August Outing S4, F5a
S6d-e, F5b-d, F7d-f Emergencies S6b First Aid Hurry Cases
Sept Outing Court of Honor – Tenderfoot done F4a Map and Compass II S2f-g, F3a-d Knots and Lashings II
Oct Outing S8a-b, S9a-b, F9a-b,
F10 Citizenship
F7a First Aid Bandages Nov Outing
F7b First Aid Rescues F7c First Aid CPR
Dec Outing Court of Honor – Second Class done
Jan Outing Feb Outing Mar Outing
Court of Honor – First Class done
First Class Advancement Page 5
Find more Scouting Resources at www.BoyScoutTrail.com
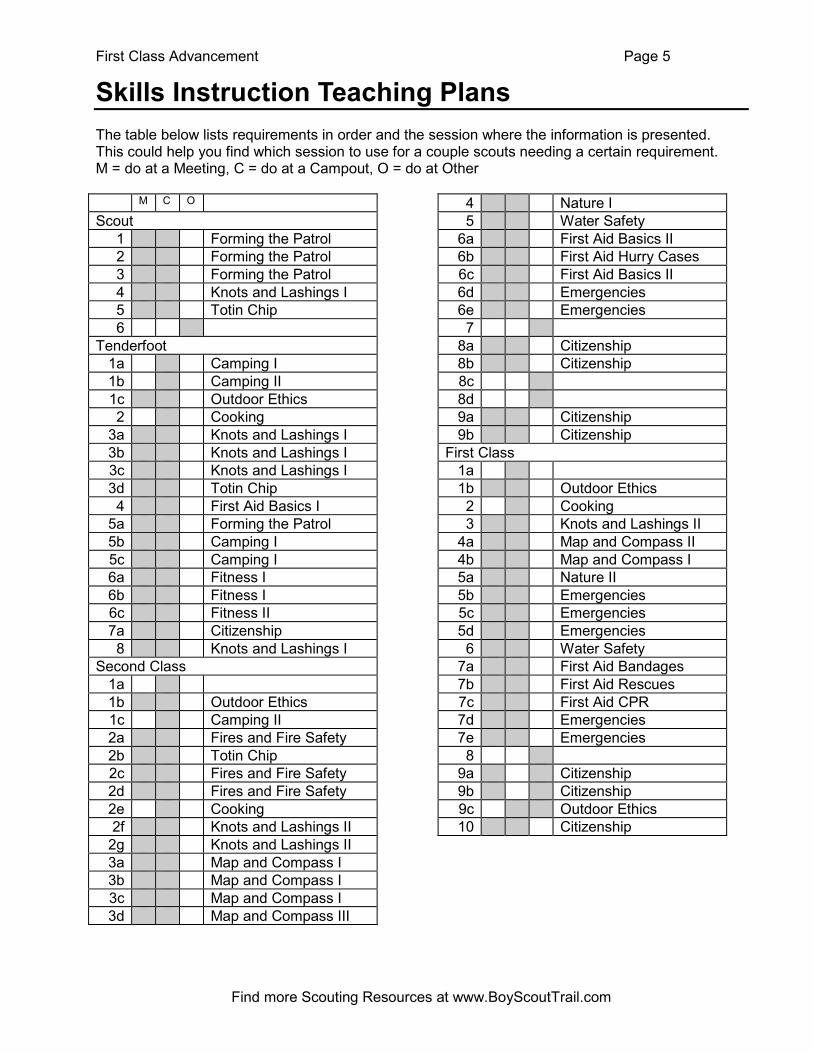
Skills Instruction Teaching Plans
The table below lists requirements in order and the session where the information is presented. This could help you find which session to use for a couple scouts needing a certain requirement. M = do at a Meeting, C = do at a Campout, O = do at Other
M C O
Scout
1 Forming the Patrol
2 Forming the Patrol
3 Forming the Patrol
4 Knots and Lashings I
5 Totin Chip
6
Tenderfoot
1a Camping I
1b Camping II
1c Outdoor Ethics
2 Cooking
3a Knots and Lashings I
3b Knots and Lashings I
3c Knots and Lashings I
3d Totin Chip
4 First Aid Basics I
5a Forming the Patrol
5b Camping I
5c Camping I
6a Fitness I
6b Fitness I
6c Fitness II
7a Citizenship
8 Knots and Lashings I
Second Class
1a
1b Outdoor Ethics
1c Camping II
2a Fires and Fire Safety
2b Totin Chip
2c Fires and Fire Safety
2d Fires and Fire Safety
2e Cooking
2f Knots and Lashings II
2g Knots and Lashings II
3a Map and Compass I
3b Map and Compass I
3c Map and Compass I
3d Map and Compass III
4 Nature I
5 Water Safety
6a First Aid Basics II
6b First Aid Hurry Cases
6c First Aid Basics II
6d Emergencies
6e Emergencies
7
8a Citizenship
8b Citizenship
8c
8d
9a Citizenship
9b Citizenship
First Class
1a
1b Outdoor Ethics
2 Cooking
3 Knots and Lashings II
4a Map and Compass II
4b Map and Compass I
5a Nature II
5b Emergencies
5c Emergencies
5d Emergencies
6 Water Safety
7a First Aid Bandages
7b First Aid Rescues
7c First Aid CPR
7d Emergencies
7e Emergencies
8
9a Citizenship
9b Citizenship
9c Outdoor Ethics
10 Citizenship
First Class Program Page 6
Find more Scouting Resources at www.BoyScoutTrail.com
Camping I
Learning Objectives Each scout should be able to: (pages 237-255, 257-287)
• Complete requirements T1a, T5b, T5c
• Know what to bring and what not to bring on a campout, and how to pack
• Know what equipment is necessary for sleeping comfortably in the outdoors
• Know what to do if lost
• Know safe hiking rules
Materials Required • Paper and pencil for each scout
• Sleeping bag and pad
• Pack and plastic pack cover
• Overnight clothes for the season
• Usual equipment for an overnight
Discovery Before the presentation, arrange the overnight gear on a table or the floor. Allow scouts to examine the gear. Ask scouts how many times they have been camping before and what type of camping it was.
Teaching-Learning I. Explain: Help scouts understand why having the correct equipment is important for safety,
comfort, and fun. What happens if it rains and you don’t have a raincoat? What happens if you have to use the bathroom at night and don’t have a flashlight? Ask other leading questions. Tell Scouts that proper clothing is important. Ask them what they might bring.
II. Demonstrate: A. Ask scouts to name and tell the purpose of equipment items you brought. B. Show scouts the clothing that you have brought and explain its advantages. C. Show scouts how to pack the pack properly, distributing heavy items correctly.
III. Guide: A. Have each scout write down every item they remember that was packed into the pack, in
one minute. Then, dump everything out and see who remembered the most. B. Have scouts repack the pack properly, discussing it together.
IV. Demonstrate putting the pack cover on the pack. Ask them when the cover would be used – while hiking in rain, but more importantly at night. Tell them that by keeping their pack outside the tent and covered, they will be much more comfortable sleeping at night.
V. Enable: Show scouts where in their handbooks they can find clothing and equipment to bring with them on this month’s outing. Tell them that if they come prepared and early, they will be able to complete requirement T1a.
VI. Discussion of Hiking Rules: Cover each of the following by asking questions:
A. LNT – cut switchbacks, stay on trail, hike single file, space between scouts, bikers horses and pets
B. Off-trail hiking – don’t do it until older. Use durable surfaces like snow, rock, sand, dirt. C. Road hiking – only when necessary, light-colored clothes, single file, left side, flashlight D. If lost – STOP – Stay calm, Think, Observe, Plan

First Class Program Page 7
Find more Scouting Resources at www.BoyScoutTrail.com
Camping II
Learning Objectives Each scout should be able to: (pages 264-266, 274-281)
• Complete requirements T1b, S1c
• Understand the importance of a sleeping pad and proper sleeping bag
• Know how and where to set up a campsite and tent
Materials Required • 2 tents with poles, stakes, ground cloth
• 2 hammers
• Sleeping bag
• Sleeping pad
Discovery Since setting up a tent takes awhile, have their tents in bags ready to go.
Teaching-Learning I. Explain: Move outside. Choose a location for a campsite and explain why you chose that spot:
A. Level, but with good drainage. B. Free of lumps, stumps, etc. C. Safe from dead limbs D. Size
E. Water and Firewood F. Privacy and Permission G. Low environmental impact –leafs and duff rather
than green grass. Use established campsites. II. Demonstrate: Lay ground cloth and pitch the tent. Ask scouts if they have ever stayed out in a
tent before. Ask the scouts if they have ever set a tent like this up before. Put the sleeping pad and bag in the tent. Review that leaving packs covered outside will make the tent more comfortable.
III. Take the tent down and show the scouts how it goes into the bag. Make sure you pack it well because the scouts will use what you do as a guide to what is expected of them.
IV. Guide: Give a tent to each ½ of the group. Guide them in choosing a spot to camp and setting up their tent. Help them pack their tents away.
V. Enable: Show scouts the sections in the Boy Scout Handbook that relate to this session. Tell them that if they know this material, they will be able to complete requirements T1b and S1C at this month’s outing.
First Class Program Page 8
Find more Scouting Resources at www.BoyScoutTrail.com
Citizenship
Learning Objectives Each scout should be able to: (pages 49-71, 395-409)
• Complete requirements T7a, S8b, S9a, S9b and be ready for S8a, F9a, F9b, F10
• Properly display, raise, lower and fold the American Flag
• Explain three R’s of personal safety
• Describe bullying
• Visit community leader
• Investigate environmental issue
Materials Required • flag pole and American flag
Discovery Ask how many of them know how to properly display the flag and how many have participated in a flag ceremony before. If you’re doing this on a campout, have some experienced scouts lash a flagpole for you beforehand.
Teaching-Learning I. Ask questions about flag etiquette. Use the “Flag Quiz” in the appendix as an example and add
your own. II. Use EDGE to teach scouts how to fold the American flag. III. Go to the flag pole and use EDGE to teach scouts how to properly raise and lower the Flag.
A. Cover Hoisting, Flying, Lowering, Half-Staff. IV. Review the Three R’s on page 400. V. Review bullying on page 405. VI. Recite the Scout Law. Explain that each scout will need to have an example of four different
points that he has demonstrated in his life to complete each rank. He should start looking for examples now and remembering them.
VII. Explain that Helpful, Friendly, and Kind mean that we should care for others and help out. Our daily “Good Turn” helps us keep that in mind. For each rank, scouts need to perform service.
VIII. Explain that each scout completes F9a and F9b on his own. IX. Explain that inviting a friend to join him in Scouts for requirement F10 is a way to be friendly and
loyal. He must do it on his own and discuss it with the scoutmaster.
Application: Scouts should participate in a formal flag ceremony to complete S8a.
First Class Program Page 9
Find more Scouting Resources at www.BoyScoutTrail.com
Cooking
Learning Objectives Each scout should be able to: (pages 289-325)
• Prepare for requirements T2, S2e, and F2
• Plan a menu for the season
• Cook a simple meal
Materials Required • Bread or muffin mixes of different flavors. Approximately one per participant.
• A heat source, pan of water, and Zip Lock sandwich bags.
Discovery Give each scout a sandwich bag and the ingredients for his muffin mix. Have each one put the ingredients into the bag. Get as much air out of the bag as you can and then seal it. Next, the scout should mix up the ingredients by ‘swishing’ the bag. When the muffins are mixed, put them in boiling water to cook them. They should be ready by the end of a meeting if you do this as an early pre-opening activity. This would also be a fun camp out activity.
Teaching-Learning I. Use pages 292-295 to discuss importance of good, healthy food. II. Discuss how to plan a meal, using questions on page 291, and information on 311-325. III. Actually plan the menu for their next campout, using myPlate, serving sizes, and budget. IV. Use pages 304-310 to discuss cooking safety, sanitation, and teamwork. Explain hand
washing, 3-pot dishwashing, disposal of dirty water and waste, and following Leave No Trace. V. Explain duty rosters, their importance, and what duties there are. Create a duty roster for the
next campout.
Application: Scouts should cook meals on their own at the campouts after this presentation. They will complete T2 and S2e on campouts. The ultimate application will be in the completion of F2.
First Class Program Page 10
Find more Scouting Resources at www.BoyScoutTrail.com
Emergencies
Learning Objectives Each scout should be able to: (pages 111-115, 148-155, 212-218, 240)
• Complete requirement S6d, S6e, F5b-d, F7d-f
Materials Required * Paper and pencil for each scout * Water treatments – filter, UV light, chemicals, boiling
Discovery
◦ Display several ways to treat water. Ask scouts if they know how each one works. Ask when water should be treated.
Teaching-Learning I. Scouts will probably say water needs to be treated when camping. Discuss each method of
treating water. Tell them that treating water may also be needed at home if there is an emergency. Ask what kinds emergency this might include.
II. Use pages 153-155 to discuss home utility hazards and preparation by having an emergency kit and emergency plan for F7d and F7f. Tell scouts they need to work with a parent to make an emergency plan for F7e
III. Use pages 111-115, and 151, to discuss the emergency action steps for S6d. IV. Use page 152 to discuss vehicle accident specifics for S6e. V. Emergencies in the outdoors may be caused by unexpected severe weather. Use pages 212-
218 to discuss the need for being aware of weather forecasts, how to get forecasts, how to interpret natural weather signs, and describe severe weather hazards for F5b-d.
Application: Check the Clouds Divide scouts into buddy teams. Have each team go outside and predict what the weather will be like tomorrow based on the clouds of page 215 and weather signs on 217. Then, have someone check the NOAA or local news weather forecast.

First Class Program Page 11
Find more Scouting Resources at www.BoyScoutTrail.com
Fires and Fire Safety
Learning Objectives Each scout should be able to: (pages 387-393)
* Complete requirement S2a, S2c, S2d. * Understand the Outdoor Code and Leave No Trace as it relates to fire safety. * Light and be safe with wood fires and lightweight stoves.
Materials Required * Firem’n Chit Cards cards for each participant. * Fire starters, fire aids, tinder, kindling, wood, and water. * Backpacking stoves, fuel, funnel, matches
Discovery
◦ Display several different types of fire starters – flint/steel, sparker, bow drill, matches, lighter. Have scouts arrange them from easiest to most difficult.
◦ Display several fire starting aids – dryer lint, wax/sawdust, candle, Pringles, …
◦ Have piles of tinder, kindling, and wood. Ask if scouts know the difference between them.
Teaching-Learning I. Describe the Minimize Campfire Impact principle – use campfires only in existing fire rings. II. Fire Safety: (have a discussion, letting scouts answer your questions as much as possible)
A. Three things are needed to have fire: Fuel, Oxygen, Heat - remove one and fire goes out. B. Where can I build a fire? In existing fire ring, away from burnables (grass, brush, limbs) C. What precautions are taken before lighting a fire? water, wind, fire bans, permits D. What guidelines while fire is burning? Monitor it, no horseplay, keep it small E. How is a fire extinguished? Burn to ash. Sprinkle water and stir. Repeat until cold F. How is site cleaned up? Scoop out cold ash and scatter far from campsite
III. Fires: (use EDGE to teach scouts to lay and light fires) A. Explain fires are for cooking, heat, and entertainment. We make our own fires. B. Demonstrate laying a TeePee. Emphasize air space, tinder, kindling, lighting spot, wind
direction, having extra wood ready. Demonstrate match lighting and starting the fire. C. Guide scouts in laying their fires. Make them tall and thin instead of flat and wide, and
emphasize air space. Give each scout 5 matches to practice lighting, but not light their fire. D. Enable – have scouts take their fire lays apart. From scratch, have each build a fire and then
light it. IV. Lightweight stoves
A. Demonstrate proper storage, filling, priming, lighting, extinguishing of the stoves. B. Have teams of 3 take turns lighting and extinguishing stoves, with close supervision!
V. After the presentation, sign and hand out Firem’n Chit cards to each participant. Tell them they must live up to their responsibility to keep fires safe.
Application: Fire Building Contest Divide scouts into buddy teams. Have each team build a fire as quickly as they can. Have the scouts light the fires with as few matches as possible to emphasize good fire lay rather than speed.

First Class Program Page 12
Find more Scouting Resources at www.BoyScoutTrail.com
First Aid Basics I
Learning Objectives Each scout should be able to: (pages 105-155)
* Complete requirements T4 * Assemble a personal first aid kit to take on hikes. * Treat for first aid (simple cuts, minor burns, nosebleed, bites and stings, choking).
Materials Required * First aid practice kit, troop first aid kit, personal first aid kit, fake wounds * CPR faceguard and gloves kits. * Bandages suitable for simple cuts, burns, etc.
Discovery Display the personal first aid kit and troop first aid kit. Ask scouts who will provide first aid when we are out camping and someone gets hurt? (we need to be able to help each other)
Teaching-Learning I. What is in a first aid kit?
A. Briefly go through the items in your troop first aid kit and their uses. (page 109) B. Show the contents of the small personal kit. (page 108)
II. Use EDGE to teach scouts how to administer simple First Aid (pg 125-132) They must demonstrate the skill, not just tell how they would do it. Use fake wounds or red marker, water, bandaids, moleskin, … as required. You already Explained the need to know first aid. Demonstrate a problem on a scout. Then, Guide scout buddies to do the problem on each other and show you their results. Then, do the next problem. If they performed the first aid adequately, they are Enabled otherwise have them practice more.A. Cuts and scratches (p125) B. Blisters (p125) C. Minor burns (p136) D. Bites or Stings of insects
and ticks (p131)
E. Venomous snakes (p129) F. Nosebleed (p126) G. Frostbite & Sunburn (p137, 140) H. Choking (p120)
III. Use EDGE to teach scouts how to care for choking victim. (pg 120) (Show positioning, but do NOT actually do abdominal thrusts or backblows) Demonstrate on one scout, then have buddy pairs act it out and show you their positions. A. Encourage continued coughing since some air is getting in. B. If coughing stops, do abdominal thrusts and backblows. (do NOT actually do these!) C. If victim goes unconscious, lower him to the floor and switch to CPR if needed.
IV. Poisonous Plants: (pg 127) Tell how to identify poisonous plants. Discuss treatment - wash skin, wash clothes, relieve itching with lotion.
Application: Scouts make their own first aid kit. Ask the scoutmaster if the troop has items to make personal kits. Scouts should identify a poison ivy plant in the wild.

First Class Program Page 13
Find more Scouting Resources at www.BoyScoutTrail.com
First Aid Basics II
Learning Objectives Each scout should be able to: (pages 105-155)
* Prepare for requirement S6a * This module may need to be broken into two sessions
Materials Required * Practice first aid kits and wounds * Q-tips
* Tweezers * Water bottle
* Blanket * Bandages
Discovery Share stories of getting hurt. See who has had the worst injury.
Teaching-Learning Use EDGE to teach scouts how to administer First Aid for 10 problems. For each problem, Explain the symptoms to look for, steps to treat it, and how to prevent it. Scouts must demonstrate the skill, not just tell how they would do it. Use fake wounds or red marker, water, bandaids, gauze pads, … as required. Demonstrate a problem on a scout. Then, Guide buddy pairs to do the problem on each other and show you their results. Repeat for each problem. Tell scouts there will be scenarios at future troop meetings. Each scenario they complete correctly will get one of the required items checked off. (Remember to have PLC plan time for scenarios!) I. Object in eye (pg 133) II. Bite of warm-blooded animal (pg 128) III. Puncture wound – infection is a high risk (pg 134-135) IV. Serious burns (pg 137) V. Heat exhaustion (pg 139) VI. Shock (pg 123-124) VII. Heatstroke (pg 139-140) VIII. Dehydration (pg 137-138) IX. Hypothermia (pg 141) X. Hyperventilation (pg 135-136)

First Class Program Page 14
Find more Scouting Resources at www.BoyScoutTrail.com
First Aid Bandages
Learning Objectives Each scout should be able to: (pages 142-148)
* Complete requirement F7a * Construct and use the bandages for the head, upper arm, sprained ankle and collarbone.
Materials Required * Practice first aid kits * Splinting materials * Roller bandages * SAM splints
Discovery Ask if anyone has broken a bone, sprained a joint, worn a cast.
Teaching-Learning I. Use EDGE to teach scouts how to apply bandages. Explain what splints are.(pg 145)
Demonstrate each bandage. Guide scouts in applying bandages to their buddy. A. Sprained ankle (pg 142) B. Head (pg 143) C. Upper arm (pg 147) D. Collar Bone (pg 147)
II. Tell scouts that they will use these skills later this month to complete their requirement. (At the PLC, request a First Aid event at the outing or scenarios at a troop meeting.)
Application: Bandage Relay Divide the patrol into two teams. Provide patrols with a list of bandages. At the signal (“Go”) one member of each team will run forward and apply the first bandage to the ‘victim.' It must be certified correct. Then the next member does the second one and so on. The first team finished wins.

First Class Program Page 15
Find more Scouting Resources at www.BoyScoutTrail.com
First Aid CPR
Learning Objectives Each scout should be able to: (pg 111-119)
* Complete requirement F7c. * Describe the five signs of a heart attack. * Explain the steps in CPR.
Discovery Ask what the leading cause of death is: Heart Disease Ask who will probably have a heart attack, adult or scout? An adult
Teaching-Learning I. Discuss the 8 steps of the First Aid method and use those steps always. (pg 111-115) II. Ask what the Five common Signs of a Heart Attack are: (pg 119) III. Use EDGE to teach scouts the basic steps of CPR as part of the First Aid Method. Either use
CPR manikins or a large pillow for the body. (pg 117) A. Check that the scene is safe for you to help B. Check that the victim is unresponsive – (shake and shout) C. Tell a specific person to call for help and get an AED D. Open Airway – head tilt, chin lift E. Check for breathing – cheek by face, looking down body for 10 seconds F. If no breathing, give 30 chest compressions G. Using a mouth shield, give 2 breaths H. Repeat F and G until help arrives, it becomes unsafe, or you are physically exhausted.
Application: Have the scoutmaster or other CPR-certified person available for discussion. Recommend every scout get certified in CPR so they really know it. (Note, however, that scouts do not have to be certified to complete requirement F7c.)

First Class Program Page 16
Find more Scouting Resources at www.BoyScoutTrail.com
First Aid Hurry Cases
Learning Objectives Each scout should be able to: (pages 111-124)
* Complete requirement S6b. * Treat for the hurry cases of stopped breathing, stroke, serious bleeding, and ingested
poisoning.
Materials Required * Practice first aid kits * Roller bandages * Gauze pads
Discovery Ask scouts to take their pulse on their neck. See how many can find it. Help those that cannot. Then, try other spots – wrist, inside thigh, ankle.
Teaching-Learning I. Discuss the 8 steps of the First Aid method and use those steps always. (pg 111-115) II. Use EDGE to teach how to handle Stopped Breathing: (pg 116-118)
It is either airway obstruction or cardiac problem, so review CPR steps. III. Use EDGE to teach how to handle Stroke: (pg 124) IV. Use EDGE to teach how to handle Serious Bleeding: (pg 119-120) V. Discuss what to do for Ingested Poisoning: (pg 121-122)
Application: Tell scouts that they will use these skills later this month to complete their requirement. (At the PLC, request a First Aid event at the outing or scenarios at a troop meeting.)
First Class Program Page 17
Find more Scouting Resources at www.BoyScoutTrail.com
First Aid Rescues
Learning Objectives Each scout should be able to: (pages 148-150)
* Complete requirement F7b. * Demonstrate the carries used to transport a victim.
Materials Required * Old large jacket to wear for clothes drag * Ropes, poles, and blankets for stretcher
Discovery Have all scouts line up for a race. Tell them that their right ankle can take no pressure. If their right foot touches the floor, they are out of the race. See who can run the race fastest.
Teaching-Learning I. Use EDGE to teach how to move a person out of a smoke filled room. (pg 148-150) Buddy
pairs practice. A. Blanket Drag B. Clothes Drag C. Ankle Drag
II. Use EDGE to teach how to transport a person with a sprained ankle. (pg 149-150) Buddy pairs practice. A. Walking Assist B. Pack-strap Carry – only a person smaller than you C. Two-Handed Carry D. Four Handed Seat Carry
Application: Carry Relay Divide the patrol into two teams. Set up a start line and another approximately 25 yards away as a turning line. Have scouts practice one carry going down and one coming back. The first team to complete all four carries wins.
First Class Program Page 18
Find more Scouting Resources at www.BoyScoutTrail.com
Fitness I
Learning Objectives Each scout should be able to: (pages 75-102)
* Complete requirement T6a and T6b.
Materials Required * Exercise chart for each scout (appendix) * A stopwatch
* A Sit-and-Reach box * A location for doing fitness tests in T6a.
Teaching-Learning I. Have each scout do the 4 tests and record results. Do the first three individually and then have
everyone do the 1-mile run/walk together. II. Have each scout write his plan to improve in each test.
Application: Have scouts record their best in the tests listed on page 77. Record these for your records as well. Part of this requirement is to practice for 30 days. Scouts should bring back their completed chart to show they practiced before the 30-day check.
Fitness II To be completed at least 30 days after the completion of Fitness I
Learning Objectives Each scout should be able to:
* Complete requirement T6c * Prepare for requirements S7a, S7b, F8a, F8b
Materials Required * Completed exercise chart for each scout * A stop watch
* A Sit-and-Reach box * A location for doing fitness tests in T6c.
Application: Have scouts record their best in the tests listed. Record these for your records as well. If they show they have practiced and have shown improvement, they have completed T6c. After completing T6c, have scouts make plans to remain physically active and track activity for at least four weeks for S7 and four weeks for F8.

First Class Program Page 19
Find more Scouting Resources at www.BoyScoutTrail.com
Forming the Patrol
Learning Objectives Each scout should be able to: (pages 8-29, 413-422)
* Complete requirements J1, J2, J3, T5a * Review the Scout Oath, Law, Motto and Slogan. * Know the Scout sign, salute, and handshake. * Understand ‘scout spirit’. * State their patrol name, give the yell, and describe their patrol flag. * Describe how scouts provide leadership, steps to advancement, ranks, merit badge
process, and patrol method. * Describe why we use the buddy system.
Materials Required * A large beach ball
Discovery Have an older patrol present their flag at the opening of the meeting. Make sure they tell about the symbolism of the flag and the embellishments that have been put on it.
Teaching-Learning I. Recite with the Scouts the Scout Oath, Scout Law, Motto, and Slogan. Use the sign, salute,
and handshake appropriately (pg 11-19). Do these every time you meet. II. Recite the Outdoor Code (pg 223) III. Describe the First Class badge (pg 20). IV. Discuss the buddy system (pg 29). Ask them why they think that the buddy system is important. V. Play Moon Ball
A. Arrange the patrol in a circle. B. The object of the game is for the patrol to keep the ball aloft as long as possible. C. The patrol should compete against its own record.
I. What is a Patrol? (pg 24-25) Discuss how each patrol has its own leader, its own gear, its own responsibilities. A patrol is a group of scouts that can do anything – they don’t need a troop. A troop is just a bunch of patrols.
II. What is Scout Spirit? (pg 15) Discuss how scouts can make their patrol the best. Make sure every other scout feels welcome in the patrol!
III. Patrol Method, Name, Yell, Flag (pg 25-26). Help scouts decide on a patrol patch and name, yell, and flag design.
IV. Scout Leadership (pg 420-422) V. Advancement & merit badge process (pg 413-418)
Application: Patrol Meeting The patrol will probably not create a flag design in a single meeting. Designs should be voted on and then one chosen. Time should be reserved at the next two patrol meetings for designing and then creating the flag.
First Class Program Page 20
Find more Scouting Resources at www.BoyScoutTrail.com
Knots and Lashings I
Learning Objectives Each scout should be able to: (pages 360-367)
* Complete requirements J4a, J4b, T3a, T3b, T3c, and T8. * Whip and fuse the ends of a rope. * Tie and use square knot, two half hitches, and taut line hitch. * Teach someone how to tie the square knot using EDGE.
Materials Required * Have at least one experienced scout, or adult, available as a judge to watch EDGE. * Frayed ropes that need to be whipped and fused. * String for whipping and a candle and matches for fusing. * One rope for each participant for knot tying. * Short poles or dowels for tying hitches.
Discovery Show scouts a rope that is badly frayed. Ask them how useful this rope is compared to a good piece.
Teaching-Learning Use EDGE to teach scouts to whip a rope. (pg 361) Explain: We need to have equipment in good shape for safety and usability. Whipping or fusing rope makes a rope more useful and safe. Demonstrate: Whip the rope while the scouts watch. Guide: Step the scouts through whipping the rope, helping where needed. Enable: Watch as each scout whips his own rope. Explain to the scouts that you just used EDGE and that is how all training is done in Boy Scouts. Explain what the acronym stands for – Explain, Demonstrate, Guide, Enable. I. Repeat EDGE with Fusing ropes. (pg 361) II. Repeat EDGE with tying a square knot. (pg 365) III. Have scouts split into buddy pairs. Have one scout use EDGE to teach the square knot to the
other scout. Monitor that they are using EDGE correctly. Then, reverse roles. IV. Teach the Two Half Hitches and its use. V. Teach the Taut Line Hitch and its use.
Application: Knot Relay Divide the patrol up into two teams. At the signal, one member of each team will run to the judge and tie a Taut Line Hitch and Two Half Hitches. That patrol member then steps behind the judge and sits down. The first team with all members sitting behind their judge wins.
First Class Program Page 21
Find more Scouting Resources at www.BoyScoutTrail.com
Knots and Lashings II
Learning Objectives Each scout should be able to: (pages 360-378)
* Complete requirements S2f, S2g, F3. * Tie the sheet bend, bowline, timber hitch, and clove hitch. * Use these knots in demonstrating the square, shear, and diagonal lashings. * Use these lashings to create a camp gadget.
Materials Required * 2 short 1.5 to 2 inch diameter dowels or sticks for each participant and one for the
instructor * 1 15-foot rope for each participant and one for the instructor * 4 5-foot poles * 2 7-foot poles
Discovery Before the meeting, build an H trestle (pg 375) for the scouts to inspect with the 5-foot and 7-foot poles. Let them notice how sturdy the structure is. Let the scouts take the structure apart.
Teaching-Learning I. Use EDGE to teach the sheet bend, bowline, timber hitch, and clove hitch. (pg 367-370) II. Explain when lashings are used. (pg 371-372) III. Use EDGE to teach square, sheer, and diagonal lashings. (pg 373-376)
Application: This module may take extra time to master all seven knots and lashings. You may want to practice these skills more during the skills time of the next meeting. If so, scouts can make an X trestle or some other pioneering projects. Have scouts make a camp gadget on this month’s outing to complete requirement F3d.
First Class Program Page 22
Find more Scouting Resources at www.BoyScoutTrail.com
Outdoor Ethics
Learning Objectives Each scout should be able to: (pages 222-235)
* Complete requirements T1c, S1b, F1b, F9c
Materials Required * Leave No Trace cards * Outdoor Code cards
Discovery Ask: What are some reasons people like to go camping?
Teaching-Learning I. Review the Outdoor Code and what it means (pg 223). Hand out Outdoor Code cards to each
participant that doesn’t have one yet. Ask how the scouts practiced the Outdoor Code on their last campout.
II. Discuss the seven Leave No Trace principles (pg 225-232) and how our camping practices support them: (pg 244-257)A. Plan Ahead and Prepare B. Travel and Camp on Durable Surfaces C. Minimize Campfire Impact D. Dispose of Waste Properly
E. Leave What You Find F. Respect Wildlife G. Be Courteous to Others
III. Discuss Tread Lightly! (pg 233-234) IV. Review requirement F9c and explain to the scouts that they need to individually note their trash,
make a plan to reduce waste, and actually use that plan and note the results.
Application: Remind scouts that they are expected to follow outdoor ethics guidelines on all campouts and hikes. They will complete S1a when they’ve gone on five outings and F1a when they’ve gone on ten.
First Class Program Page 23
Find more Scouting Resources at www.BoyScoutTrail.com
Map and Compass I
Learning Objectives Each scout should be able to: (pages 328-357)
* Complete requirements S3a, S3b, S3c, F4b * Use a compass and understand how a compass and map work together. * Use a GPS.
Materials Required * topographic maps * A GPS
* 1 compass and map for every buddy pair
Discovery Have everyone close his eyes. Ask everyone to turn so they are facing North. Have everyone open his eyes and see if there is any consensus. Ask how we could find out who is correct.
Teaching-Learning I. Compass
A. Use EDGE to teach how to use a compass: (pg 338-339) 1. To follow a bearing:
a) Turn bezel so the degree bearing is at the base of the Direction of Travel arrow. b) Turn with the compass until north end of the Needle is inside the Orienting Arrow.
2. To find which direction you are heading, or direction to a landmark: a) Point Direction of Travel arrow at landmark. b) Turn the bezel until the north end of the Needle is inside the Orienting Arrow. c) Read degrees at the base of the Direction of Travel arrow.
II. Map (pg 332-338) A. Give each buddy pair a map and ask questions about the symbols:
1. What do different colored areas on the map mean? (forest, clear, water, …) 2. What symbols represent man-made structures? 3. What symbols represent trails, roads, railroads? 4. What other lines are on the map? (boundaries, rivers, contour lines, lat/lon, …) 5. What are the contour lines for? Explain how they are used. (pg 336) 6. What other interesting symbols are on the map? 7. Which direction is North on the map?
III. Orienting the map: Use EDGE to teach how to orient the map. (pg 343) IV. Demonstrate a GPS. (pg 345-349)
Use EDGE to teach how to use a GPS to show your location and direction to travel to reach a waypoint.
V. Discuss what hazards and injuries might be encountered when hiking.
Application: Arrange time for a 5-mile hike (about 2.5 hours), using a map and compass, around the city or on an upcoming campout. See the scoutmaster for topo maps of local parks.
First Class Program Page 24
Find more Scouting Resources at www.BoyScoutTrail.com
Map and Compass II Note: This will take about 90 minutes, including the orienteering course.
Learning Objectives Each scout should be able to: (pages 328-331, 350-351)
* Complete requirement F4a * Measure the height and width of objects using several different methods. * Complete an orienteering course.
Materials Required * Compass and map * Orienteering map
Discovery Meet at local park or location where you’ve prepared an orienteering course. Ask scouts to estimate the height of a tree, cliff, or flag pole and the width of a tennis court, river, or other space.
Teaching-Learning I. Use EDGE to teach measuring heights, and measure a few structures or trees: (pg 330)
A. Pencil Method B. Tree Felling Method
II. Use EDGE to teach these methods of measuring widths: (pg 331) A. Stick Method B. Compass Method
III. Explain what orienteering is and how orienteering races work. Use the orienteering map to demonstrate how to plot routes from waypoint to waypoint. Have the scouts complete an orienteering course that has been prepared on a campout or local park.
Application: Orienteering Course Ask the Scoutmaster for an orienteering course map and waypoints and have scouts complete that course. This can not be part of the 5 mile hike for S3b, but can be a separate mile done before or after that 5 mile hike.
First Class Program Page 25
Find more Scouting Resources at www.BoyScoutTrail.com
Map and Compass III Try to do this session on a campout where scouts can actually practice the skills. Do the discovery experience on Friday night, the directions during the day throughout Saturday, and the final Directions during night Saturday night.
Learning Objectives Each scout should be able to: (pages 354-357)
* Complete requirement S3d * Tell directions during the day and night in several ways without a compass.
Materials Required * Compass (to give the right answer) * Sticks and materials for various methods * Constellation finder
Discovery Have scouts tell you which way is North. How do they know--what method are they using? Use the compass to confirm their findings.
Teaching-Learning I. Use EDGE to teach finding directions during the day with the shadow stick method, watch
method, and equal-length shadow method. (pg 356) The time for the equal-length method can be shortened to 20 minutes. Mark the tip of the shadow with a pebble or twig every 5 minutes. The row of pebbles will run west to east.
II. Use EDGE to teach finding directions at night. (pg 354) A. North Star method – Cassiopeia is the “W” on the opposite side of the North Star from the
Big Dipper and its center points towards the North Star. B. Constellation Method. There are many constellations in the sky. These move in a
predictable way throughout the various seasons. If you know the constellation, you can tell directions from where they are in the sky, given the season and time. This is easily demonstrated using a wheel type Star Gazer or Constellation Finder.
C. Methods used during day with the sun’s shadow will also work at night with a bright moon! D. See http://CompassDude.com/no-compass.php for more information.
Application: Each scout chooses a daytime and nighttime method of finding direction and demonstrates them to someone else, after the teaching is complete.

First Class Program Page 26
Find more Scouting Resources at www.BoyScoutTrail.com
Nature I
Learning Objectives Each scout should be able to: (pages 199-212)
* Complete requirement S4. * Appreciate and respect the animals that live in their communities.
Materials Required * Examples of plaster casts of animal prints * Books on animal identification
* Piece of fur, feather, bone
Discovery An excellent discovery would be to have an animal brought to the meeting by a qualified professional. Show the fur, feather, and bone. Ask what can be determined about the animal that left them.
Teaching-Learning I. What are some types of animals? What are some characteristics of each one?
A. Mammals (have fur, warm blooded) B. Birds (have feathers, sometimes fly) C. Reptiles (Scaly skin, cold blooded, hibernate) D. Amphibians (Moist skin, ‘dual life’) E. Fish (Have gills, live in water)
II. Identifying Animals A. Show the pages (200-210) in the Handbook that can be used in identifying animals. B. Show other books that can be used.
III. Observing Animals A. Seeing the animal B. Hearing the animal’s vocalization C. Evidence of animals – tracks, scat, fur, feathers
Application: Have scouts collect evidence of at least 10 different kinds of wild animals, be able to identify the animal, and bring the evidence to a future meeting. This can include plaster casts, fur, feathers, shells, photographs they took (not from a magazine), etc. Or, you could go on a hike with the patrol and collect the evidence.

First Class Program Page 27
Find more Scouting Resources at www.BoyScoutTrail.com
Nature II
Learning Objectives Each scout should be able to: (pg 188-199)
* Complete requirement F5a * Use resources to identify plants.
Materials Required * Plant identification books * 10 to 15 different types of leaves (1 of each per buddy pair and a set for the presenter) * Example leaf casts and leaf prints
Discovery Allow scouts to look at the leaves and try to identify them.
Teaching-Learning I. Demonstrate how to identify a leaf by using a Plant Key, either in a book or an app. (pg 196)
A. Types of Trees Deciduous (Broad Leafed) or Coniferous (Evergreen or Cone Bearing)
B. Types of leaves: Simple, Compound, Simple Palmate, Compound Palmate
C. Using one sample leaf, determine with the group its characteristics – deciduous, coniferous, simple, lobed, compound, smoothness, size, etc.
II. Discuss other ways to identify plants Flower, fruit, bark, smell
Application: Plant Hike Take a hike with the scouts through a wooded area where they can identify different trees, shrubs, and other plants. They should each track the ones they identify in their handbook until they have at least 10 listed. Some native plants that are fairly easy to identify: maple, white oak, red oak, paper birch, red pine, ponderosa pine, eastern white pine, eastern red cedar, eastern white cedar, buckthorn, elm, quaking aspen, poplar, cottonwood, weeping willow, ironwood, basswood, sumac, poison ivy, milkweed, goldenrod
First Class Program Page 28
Find more Scouting Resources at www.BoyScoutTrail.com
Water Safety
Learning Objectives Each scout should be able to: (pages 158-181)
* Complete requirements S5a, S5d, F6b, F6c, F6d * Prepare for requirements S5b, S5c, F6a, F6e
Teaching-Learning I. Discuss the Safe Swim Defense precautions. (pg 158-161) II. Discuss the Safety Afloat precautions. (pg 172-173) III. Discuss parts of watercraft and proper positioning (pg 174-176) IV. Review the BSA Swimmer Test requirements. (pg 168) V. Discuss Water Rescue methods. (pg 177-181) VI. Discuss why swimming rescues should be avoided. (pg 181)
Application: If you do this session before summer camp, most scouts will complete the requirements at camp. Otherwise, arrange a time at a local pool for scouts to demonstrate the required skills. Follow the Safe Swim Defense precautions, including supervision, lifeguards, and lookouts.
First Class Program Page 29
Find more Scouting Resources at www.BoyScoutTrail.com
Totin’ Chip Note: It is best to do this session on a campout where scouts can actually practice the skills. If you have three instructors, one each running knife, ax, and saw stations, then scouts can rotate through stations.
Learning Objectives Each scout should be able to: (pg 378-386)
* Complete requirements J5, T3d, S2b * Properly use and care for the scout knife, ax, and saw. * Prepare tinder, kindling, fuel for a fire * Earn the Totin’ Chip Card
Materials Required * Totin’ Chip Cards * Ax, knife, and saw * File * Knife sharpening kit
* rope for ax yard * Limbs about 3 inches in
diameter and 3 feet long * Chopping Log
* Ax Sharpening Demo log * 2 pair of gloves * Rags (to wipe up oil)
Discovery Start by asking the scouts the following questions.
◦ How many of you have used a knife, ax, or saw before? ◦ How important do you think it is to be safe with these tools? ◦ What do you think can happen if you’re not safe?
Teaching-Learning Note: You may wish to do I, II, and III as three separate EDGE presentations separated by a game or activity. This can be especially helpful with younger scouts. Or, have 3 stations set up and divide the scouts into groups that rotate between the stations – you will need two other scouts to help you. I. The Scout Saw
A. Care and Sharpening 1. The best way to ‘sharpen’ a blade is to buy a new one.
B. Usage: 1. Keep blade sheathed except when in use. 2. Cut off an end of a log, not the center, so the saw does not bind. 3. Use long, smooth strokes 4. Keep blade out of dirt 5. Undercut branches first when clearing trails.
C. Carrying and Passing: 1. Sheath the blade. 2. Carry with blade down and away, and handle facing forward. 3. Pass from right to left hand, not across body. 4. Make sure the other person has the tool (i.e. says ‘thank you’).
II. The Scout Ax A. Sharpening
1. Use a file with a knuckle guard and wear gloves.

First Class Program Page 30
Find more Scouting Resources at www.BoyScoutTrail.com
2. Use a log and stakes as shown in the Boy Scout Handbook on page 386. 3. Place the file on the edge of the blade and push it into the bit. Use pressure so you
can feel the file cutting metal. Use firm, even strokes and sharpen each side evenly. B. Handling and Use
1. The ax should be sharp and the head on tight. 2. Always wear sturdy shoes to protect your feet. 3. Clear the area in which you're working. 4. Carry an ax correctly. 5. Hand the ax in the proper way (Boy Scout Handbook page 385). 6. Know how to properly: Buck a log, Switch hit, Use a chopping block, and split wood.
III. The Scout Knife:
A. Care and Sharpening 1. Cleaning:
a) Open all the blades. b) Twirl a small piece of cloth or paper towel onto the end of a toothpick. c) Moisten it with oil and wipe out the inside. d) Be sure to clean the joint at the base of each blade. e) Swab out extra oil with a clean cloth.
2. Sharpening: a) Put a few drops of honing oil on the whetstone. b) Hold the back against the stone at about a 23 degree angle. c) Push the blade along the stone as if you were slicing a thin piece off the stone. d) Work the blade back and forth. Make sure that the number of times for each side
is the same to evenly sharpen the blade. B. Handling and Use: Follow these Dos and Don’ts.
1. Do: a) Keep blades closed except when in use. b) Cut away from yourself. c) Close blades before handing the knife to someone else. d) Make sure that no one is within an arm's length away when using the knife.
2. Don’t: a) Carry a knife with the blade open. b) Pound on the knife handle with another tool. c) Throw the knife. d) Pry with the point of the knife blade. e) Put the knife in a fire - can ruin the temper and weaken the knife.
3. Handing your knife to another person. a) Close the blade. b) Hand the knife. c) Make sure the other person has the tool (i.e. says ‘thank you’).
Application: Scouts should receive the Totin’ Chip card as recognition for their accomplishments and a reminder of the responsibility of using wood tools. To complete S2b, a scout should saw a 6-inch length of 3-inch diameter limb with a saw, split it with the hand ax, and make tinder and tinder with the knife. They could then use this wood for the S2c requirement.

Find more Scouting Resources at www.BoyScoutTrail.com
Appendix
This section contains the forms and worksheets you will need to implement the program.
Find more Scouting Resources at www.BoyScoutTrail.com
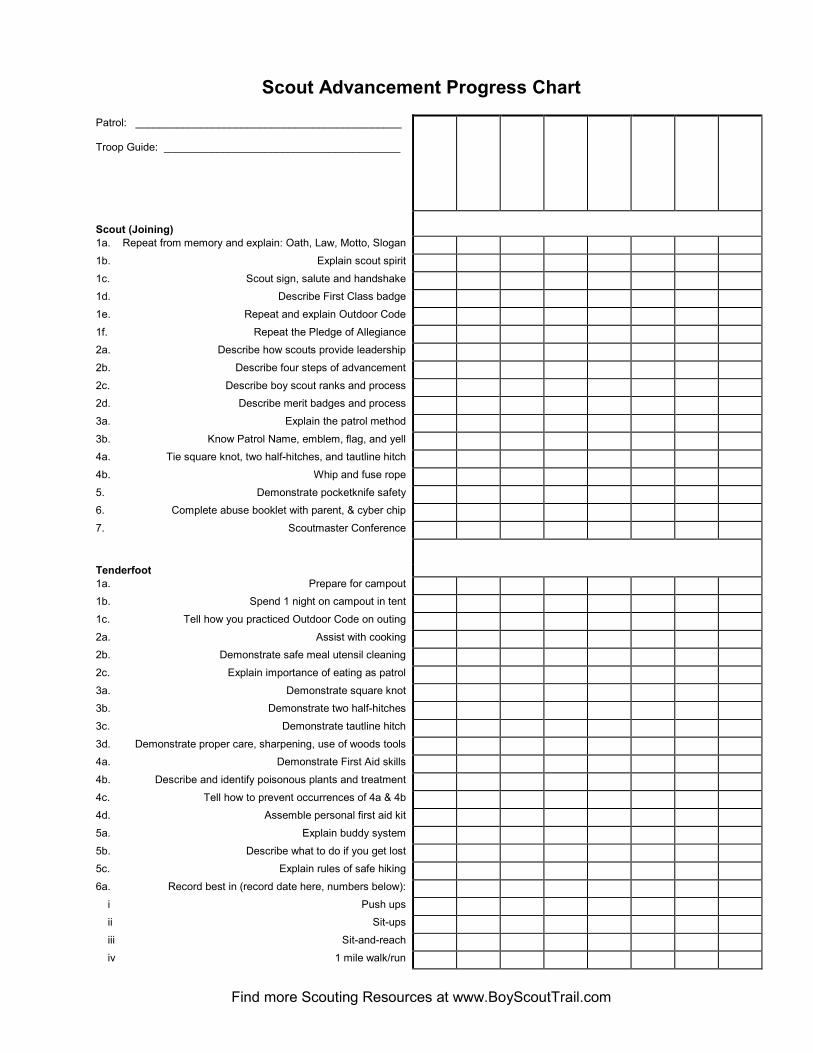
Scout Advancement Progress Chart Patrol: _____________________________________________ Troop Guide: ________________________________________
Scout (Joining)
1a. Repeat from memory and explain: Oath, Law, Motto, Slogan 1b. Explain scout spirit 1c. Scout sign, salute and handshake 1d. Describe First Class badge 1e. Repeat and explain Outdoor Code 1f. Repeat the Pledge of Allegiance 2a. Describe how scouts provide leadership 2b. Describe four steps of advancement 2c. Describe boy scout ranks and process 2d. Describe merit badges and process 3a. Explain the patrol method 3b. Know Patrol Name, emblem, flag, and yell 4a. Tie square knot, two half-hitches, and tautline hitch 4b. Whip and fuse rope 5. Demonstrate pocketknife safety 6. Complete abuse booklet with parent, & cyber chip 7. Scoutmaster Conference
Tenderfoot
1a. Prepare for campout 1b. Spend 1 night on campout in tent 1c. Tell how you practiced Outdoor Code on outing 2a. Assist with cooking 2b. Demonstrate safe meal utensil cleaning 2c. Explain importance of eating as patrol 3a. Demonstrate square knot 3b. Demonstrate two half-hitches 3c. Demonstrate tautline hitch 3d. Demonstrate proper care, sharpening, use of woods tools 4a. Demonstrate First Aid skills 4b. Describe and identify poisonous plants and treatment 4c. Tell how to prevent occurrences of 4a & 4b 4d. Assemble personal first aid kit 5a. Explain buddy system 5b. Describe what to do if you get lost 5c. Explain rules of safe hiking 6a. Record best in (record date here, numbers below): i Push ups ii Sit-ups iii Sit-and-reach iv 1 mile walk/run
Find more Scouting Resources at www.BoyScoutTrail.com
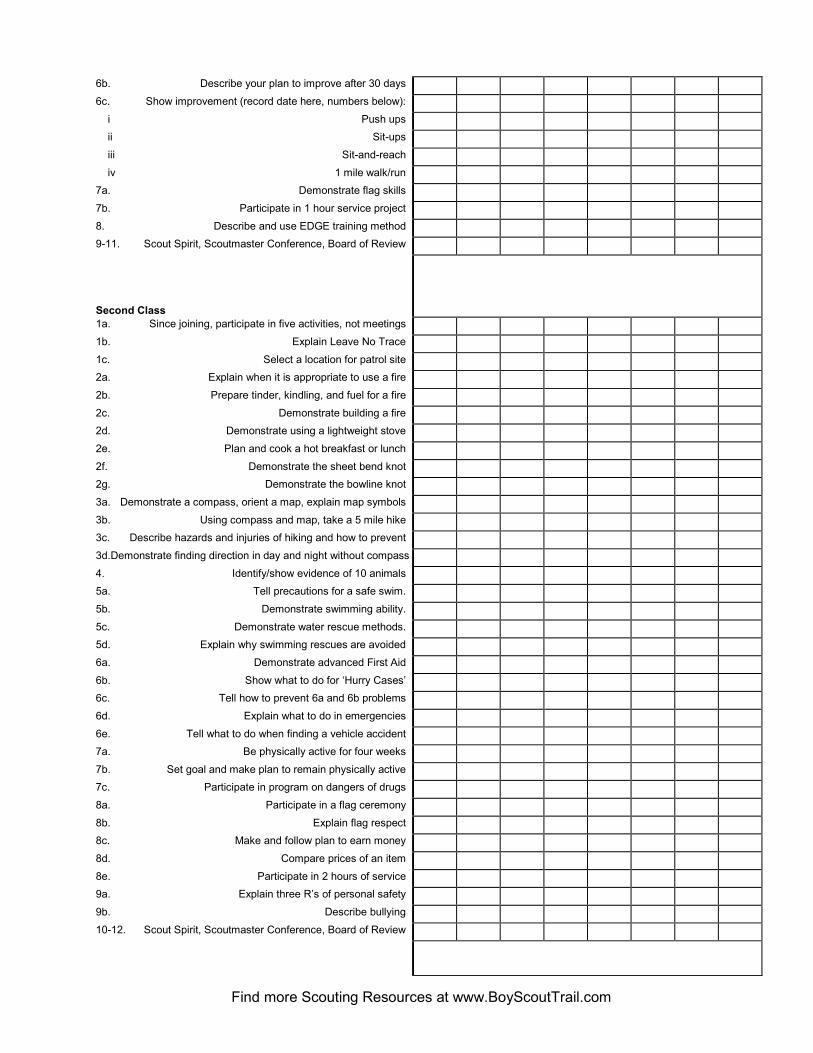
6b. Describe your plan to improve after 30 days 6c. Show improvement (record date here, numbers below): i Push ups ii Sit-ups iii Sit-and-reach iv 1 mile walk/run 7a. Demonstrate flag skills 7b. Participate in 1 hour service project 8. Describe and use EDGE training method 9-11. Scout Spirit, Scoutmaster Conference, Board of Review Second Class
1a. Since joining, participate in five activities, not meetings 1b. Explain Leave No Trace 1c. Select a location for patrol site 2a. Explain when it is appropriate to use a fire 2b. Prepare tinder, kindling, and fuel for a fire 2c. Demonstrate building a fire 2d. Demonstrate using a lightweight stove 2e. Plan and cook a hot breakfast or lunch 2f. Demonstrate the sheet bend knot 2g. Demonstrate the bowline knot 3a. Demonstrate a compass, orient a map, explain map symbols 3b. Using compass and map, take a 5 mile hike 3c. Describe hazards and injuries of hiking and how to prevent 3d.Demonstrate finding direction in day and night without compass 4. Identify/show evidence of 10 animals 5a. Tell precautions for a safe swim. 5b. Demonstrate swimming ability. 5c. Demonstrate water rescue methods. 5d. Explain why swimming rescues are avoided 6a. Demonstrate advanced First Aid 6b. Show what to do for ‘Hurry Cases’ 6c. Tell how to prevent 6a and 6b problems 6d. Explain what to do in emergencies 6e. Tell what to do when finding a vehicle accident 7a. Be physically active for four weeks 7b. Set goal and make plan to remain physically active 7c. Participate in program on dangers of drugs 8a. Participate in a flag ceremony 8b. Explain flag respect 8c. Make and follow plan to earn money 8d. Compare prices of an item 8e. Participate in 2 hours of service 9a. Explain three R’s of personal safety 9b. Describe bullying 10-12. Scout Spirit, Scoutmaster Conference, Board of Review

Find more Scouting Resources at www.BoyScoutTrail.com
First Class
1a. Participated in 10 activities since joining 1b. Explain Tread Lightly! 2a. Plan patrol menu for breakfast, lunch, dinner. 2b. Make food list 2c. Show gear needed to prepare meals 2d. Demonstrate food and garbage handling procedures 2e. Serve as cook 3a. Discuss use of lashings 3b. Demonstrate tying timber hitch and clove hitch 3c. Demonstrate square, sheer, and diagonal lashings 3d. Make a camp gadget using lashings 4a. Complete orienteering course with measurements 4b. Demonstrate how to use a GPS 5a. Identify/show evidence of 10 native plants 5b. Identify 2 ways to get weather forecast 5c. Describe 3 natural indicators of hazardous weather 5d. Describe and discuss extreme weather conditions 6a. Pass BSA swimmer test 6b. Tell precautions for safe trip afloat 6c. Identify parts of a boat, canoe, or kayak and oar or paddle 6d. Describe proper body positioning in watercraft 6e. With helper and victim, show line rescue 7a. Bandages for head, upper arm, collar bone, sprained ankle 7b. Transport a victim 7c. Tell five signs of heart attack and explain CPR 7d. Describe potential utility hazards 7e. Develop home emergency action plan 7f. Explain how to obtain potable water in an emergency 8a. Be physically active for four weeks 8b. Set goal and make plan to remain physically active 9a. Visit and discuss citizenship with community leader 9b. Investigate an environmental issue 9c. Note garbage produced and reduce it 9d. Participate in 3 hours of service 10. Tell a boy about Boy Scouts 11-13. Scout Spirit, Scoutmaster Conference, Board of Review

Find more Scouting Resources at www.BoyScoutTrail.com
Flag Quiz True False
_____ ____ Hanging the flag upside down indicates mourning or sadness. It is often done
when a president or noted figure dies
_____ ____ The flag is placed on the speaker’s right if it is on the stage.
_____ ____ The flag of one country is never flown below another in times of peace.
_____ ____ When hanging the flag on the wall, the blue portion is always on the bottom on the right.
_____ ____ The US flag is always on the highest pole.
Find more Scouting Resources at www.BoyScoutTrail.com
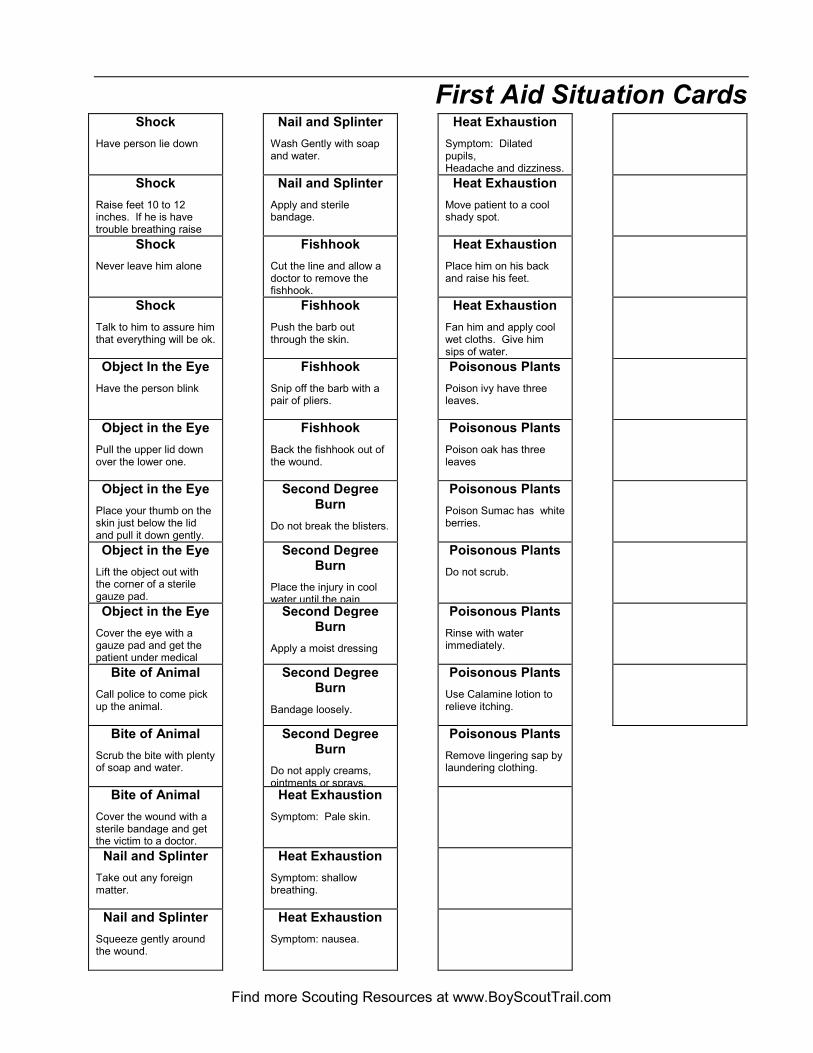
First Aid Situation Cards Shock
Have person lie down
Shock
Raise feet 10 to 12 inches. If he is have trouble breathing raise
Shock
Never leave him alone
Shock
Talk to him to assure him that everything will be ok.
Object In the Eye
Have the person blink
Object in the Eye
Pull the upper lid down over the lower one.
Object in the Eye
Place your thumb on the skin just below the lid and pull it down gently.
Object in the Eye
Lift the object out with the corner of a sterile gauze pad.
Object in the Eye
Cover the eye with a gauze pad and get the patient under medical
Bite of Animal
Call police to come pick up the animal.
Bite of Animal
Scrub the bite with plenty of soap and water.
Bite of Animal
Cover the wound with a sterile bandage and get the victim to a doctor.
Nail and Splinter
Take out any foreign matter.
Nail and Splinter
Squeeze gently around the wound.
Nail and Splinter
Wash Gently with soap and water.
Nail and Splinter
Apply and sterile bandage.
Fishhook
Cut the line and allow a doctor to remove the fishhook.
Fishhook
Push the barb out through the skin.
Fishhook
Snip off the barb with a pair of pliers.
Fishhook
Back the fishhook out of the wound.
Second Degree Burn
Do not break the blisters.
Second Degree Burn
Place the injury in cool water until the pain
Second Degree Burn
Apply a moist dressing
Second Degree Burn
Bandage loosely.
Second Degree Burn
Do not apply creams, ointments or sprays.
Heat Exhaustion
Symptom: Pale skin.
Heat Exhaustion
Symptom: shallow breathing.
Heat Exhaustion
Symptom: nausea.
Heat Exhaustion
Symptom: Dilated pupils, Headache and dizziness.
Heat Exhaustion
Move patient to a cool shady spot.
Heat Exhaustion
Place him on his back and raise his feet.
Heat Exhaustion
Fan him and apply cool wet cloths. Give him sips of water.
Poisonous Plants
Poison ivy have three leaves.
Poisonous Plants
Poison oak has three leaves
Poisonous Plants
Poison Sumac has white berries.
Poisonous Plants
Do not scrub.
Poisonous Plants
Rinse with water immediately.
Poisonous Plants
Use Calamine lotion to relieve itching.
Poisonous Plants
Remove lingering sap by laundering clothing.

Find more Scouting Resources at www.BoyScoutTrail.com
Presentation Schedule Worksheet Fill in the name, location, and date of each presentation in the program in the spaces below.
Session Date Location Person Responsible
Camping I
Camping II
Citizenship
Cooking
Emergencies
Fires and Fire Safety
First Aid Basics I
First Aid Basics II
First Aid Bandages
First Aid CPR
First Aid Hurry Cases
First Aid Rescues
Fitness I
Fitness II
Forming the Patrol
Knots and Lashings I
Knots and Lashings II
Outdoor Ethics
Map and Compass I
Map and Compass II
Map and Compass III
Nature I
Nature II
Water Safety
Firem’n Chit
Totin’ Chip
Tech Chip

Find more Scouting Resources at www.BoyScoutTrail.com
Program Planning Worksheet Enter the date you plan to complete the Requirements listed below. For those requirements which do not have a corresponding lesson plan, enter the date you anticipate the requirement will be completed. M = do at a Meeting, C = do at a Campout, O = do at Other M C O Date To Do
Scout
1 Forming the Patrol
2 Forming the Patrol
3 Forming the Patrol
4 Knots and Lashings I
5 Totin Chip
6
Tenderfoot
1a Camping I
1b Camping II
1c Outdoor Ethics
2 Cooking
3a Knots and Lashings I
3b Knots and Lashings I
3c Knots and Lashings I
3d Totin Chip
4 First Aid Basics I
5a Forming the Patrol
5b Camping I
5c Camping I
6a Fitness I
6b Fitness I
6c Fitness II
7a Citizenship
8 Knots and Lashings I
Second Class
1a
1b Outdoor Ethics
1c Camping II
2a Fires and Fire Safety
2b Totin Chip
2c Fires and Fire Safety
2d Fires and Fire Safety
2e Cooking
2f Knots and Lashings II
2g Knots and Lashings II
3a Map and Compass I
3b Map and Compass I
M C O Date To Do
3c Map and Compass I
3d Map and Compass III
4 Nature I
5 Water Safety
6a First Aid Basics II
6b First Aid Hurry Cases
6c First Aid Basics II
6d Emergencies
6e Emergencies
7
8a Citizenship
8b Citizenship
8c
8d
9a Citizenship
9b Citizenship
First Class
1a
1b Outdoor Ethics
2 Cooking
3 Knots and Lashings II
4a Map and Compass II
4b Map and Compass I
5a Nature II
5b Emergencies
5c Emergencies
5d Emergencies
6 Water Safety
7a First Aid Bandages
7b First Aid Rescues
7c First Aid CPR
7d Emergencies
7e Emergencies
8
9a Citizenship
9b Citizenship
9c Outdoor Ethics
10 Citizenship
Find more Scouting Resources at www.BoyScoutTrail.com
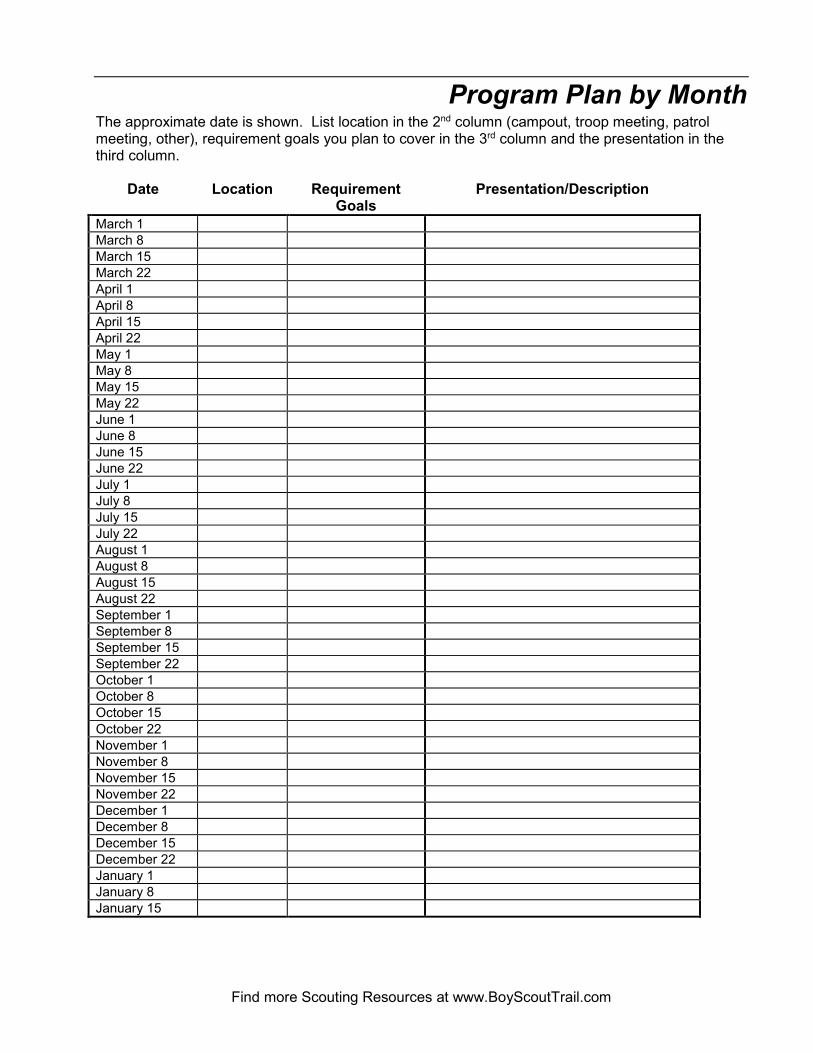
Program Plan by Month The approximate date is shown. List location in the 2nd column (campout, troop meeting, patrol meeting, other), requirement goals you plan to cover in the 3rd column and the presentation in the third column.
Date Location Requirement Goals
Presentation/Description
March 1
March 8
March 15
March 22
April 1
April 8
April 15
April 22
May 1
May 8
May 15
May 22
June 1
June 8
June 15
June 22
July 1
July 8
July 15
July 22
August 1
August 8
August 15
August 22
September 1
September 8
September 15
September 22
October 1
October 8
October 15
October 22
November 1
November 8
November 15
November 22
December 1
December 8
December 15
December 22
January 1
January 8
January 15
Find more Scouting Resources at www.BoyScoutTrail.com
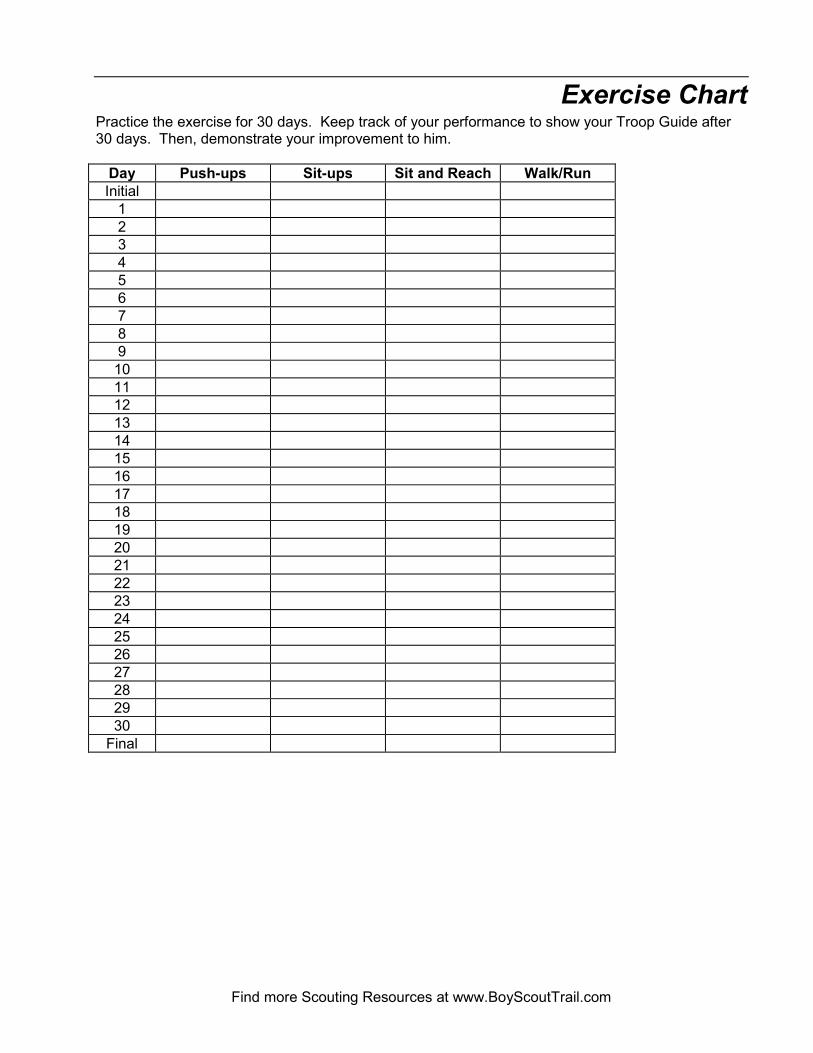
Exercise Chart Practice the exercise for 30 days. Keep track of your performance to show your Troop Guide after 30 days. Then, demonstrate your improvement to him.
Day Push-ups Sit-ups Sit and Reach Walk/Run
Initial
1
2
3
4
5
6
7
8
9
10
11
12
13
14
15
16
17
18
19
20
21
22
23
24
25
26
27
28
29
30
Final