Travel and Expense User Guide - in.gov · Budget Check an Expense Report & Travel Authorization ......
249
Travel and Expense User Guide Created on Tuesday, July 02, 2013
Transcript of Travel and Expense User Guide - in.gov · Budget Check an Expense Report & Travel Authorization ......
Travel and Expense User Guide Created on Tuesday, July 02, 2013
COPYRIGHT & TRADEMARKS Copyright © 2003, 2007, Oracle. All rights reserved. Powered by OnDemand Software. Distributed by Oracle under license from Global Knowledge Software LLC. © 1998-2007. All rights reserved. The information contained in this document is subject to change without notice. If you find any problems in the documentation, please report them to us in writing. This document is not warranted to be error-free. Except as may be expressly permitted in your license agreement for these Programs, no part of these Programs may be reproduced or transmitted in any form or by any means, electronic or mechanical, for any purpose. If this documentation is delivered to the United States Government or anyone using the documentation on behalf of the United States Government, the following notice is applicable: U.S. GOVERNMENT RIGHTS The U.S. Government’s rights to use, modify, reproduce, release, perform, display, or disclose these training materials are restricted by the terms of the applicable Oracle license agreement and/or the applicable U.S. Government contract. Oracle, JD Edwards, PeopleSoft, and Siebel are registered trademarks of Oracle Corporation and/or its affiliates. Other names may be trademarks of their respective owners.

ENCOMPASS Training Guide Travel and Expense User Guide
Page iii
Table of Contents Introduction ...................................................................................................................... ivManager Process - ER & TA ........................................................................................... 1
Budget Check an Expense Report & Travel Authorization ......................................................... 1Approve/Send Back an Expense Report .................................................................................... 15
Expense Report ............................................................................................................... 25Setting up User Preferences ....................................................................................................... 25Delegating Entry Authority ....................................................................................................... 49Create an Expense Report from a Blank Form .......................................................................... 55Create an Expense Report from a Travel Authorization ........................................................... 91Modifying an Expense Report ................................................................................................. 102Print an Expense Report .......................................................................................................... 109Copy an Expense report ........................................................................................................... 128Review Expense Report ........................................................................................................... 137Delete an Expense Report ........................................................................................................ 146
Travel Authorization .................................................................................................... 155Create a Travel Authorization from a Blank Form .................................................................. 155Modify a Travel Authorization ................................................................................................ 212Print a Travel Authorization .................................................................................................... 216Copy A Travel Authorization .................................................................................................. 227View A Travel Authorization .................................................................................................. 232Cancel an Approved Travel Authorization .............................................................................. 236Delete a Travel Authorization ................................................................................................. 240
ENCOMPASS Training Guide Travel and Expense User Guide
Page iv
Introduction This module contains information regarding the State of Indiana's Travel and Expense Travel Authorization and Expense Report entry and policies. The Travel and Expense User Guide is divided into three lessons: 1) Travel Authorization (Form G10) 2) Expense Report (Travel Voucher) 3) Miscellaneous Procedures

ENCOMPASS Training Guide Travel and Expense User Guide
Page 1
Manager Process - ER & TA
Budget Check an Expense Report & Travel Authorization
Procedure
Step Action 1. From the main menu, click the Manager Self-Service link.

ENCOMPASS Training Guide Travel and Expense User Guide
Page 2
Step Action 2. Click the Travel and Expense Center - M link.
ENCOMPASS Training Guide Travel and Expense User Guide
Page 3
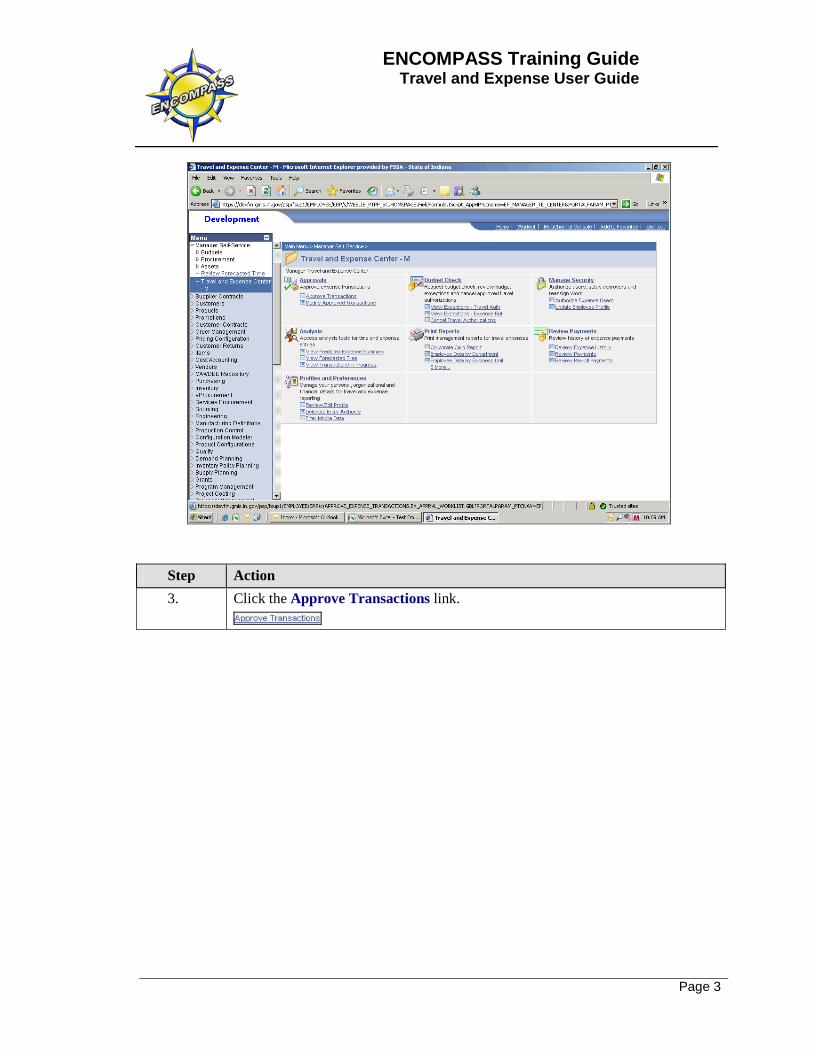
Step Action 3. Click the Approve Transactions link.
ENCOMPASS Training Guide Travel and Expense User Guide
Page 4
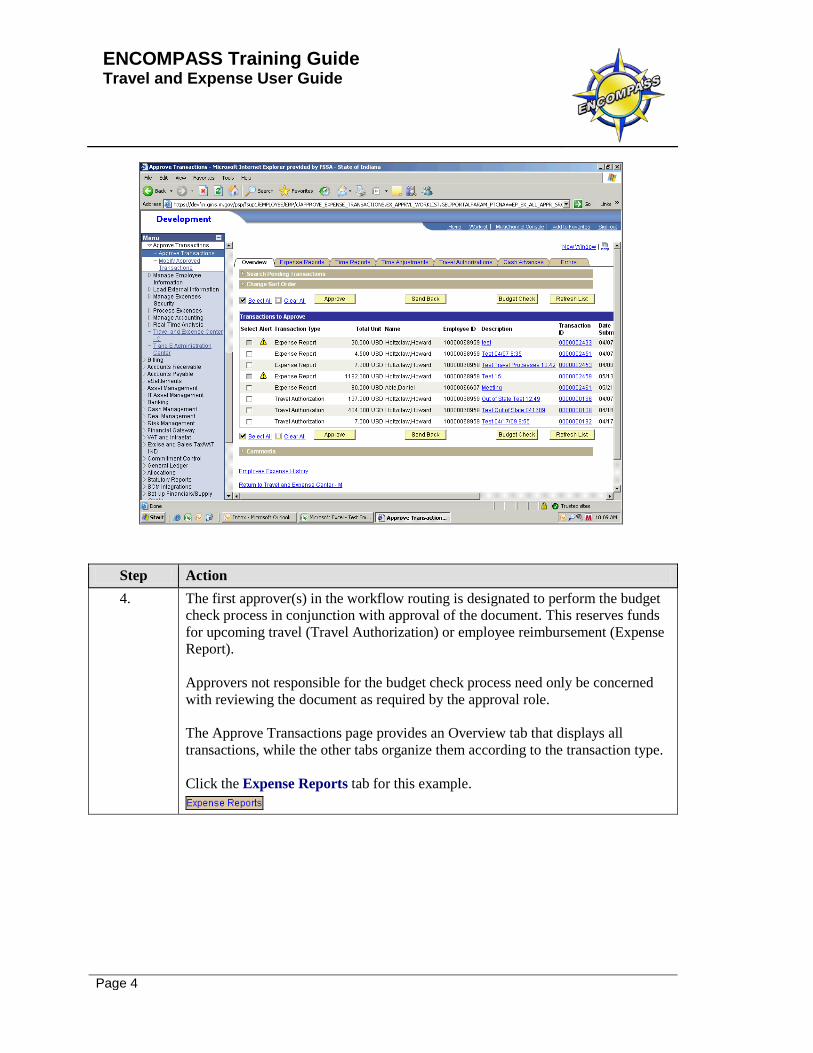
Step Action 4. The first approver(s) in the workflow routing is designated to perform the budget
check process in conjunction with approval of the document. This reserves funds for upcoming travel (Travel Authorization) or employee reimbursement (Expense Report). Approvers not responsible for the budget check process need only be concerned with reviewing the document as required by the approval role. The Approve Transactions page provides an Overview tab that displays all transactions, while the other tabs organize them according to the transaction type. Click the Expense Reports tab for this example.
ENCOMPASS Training Guide Travel and Expense User Guide
Page 5
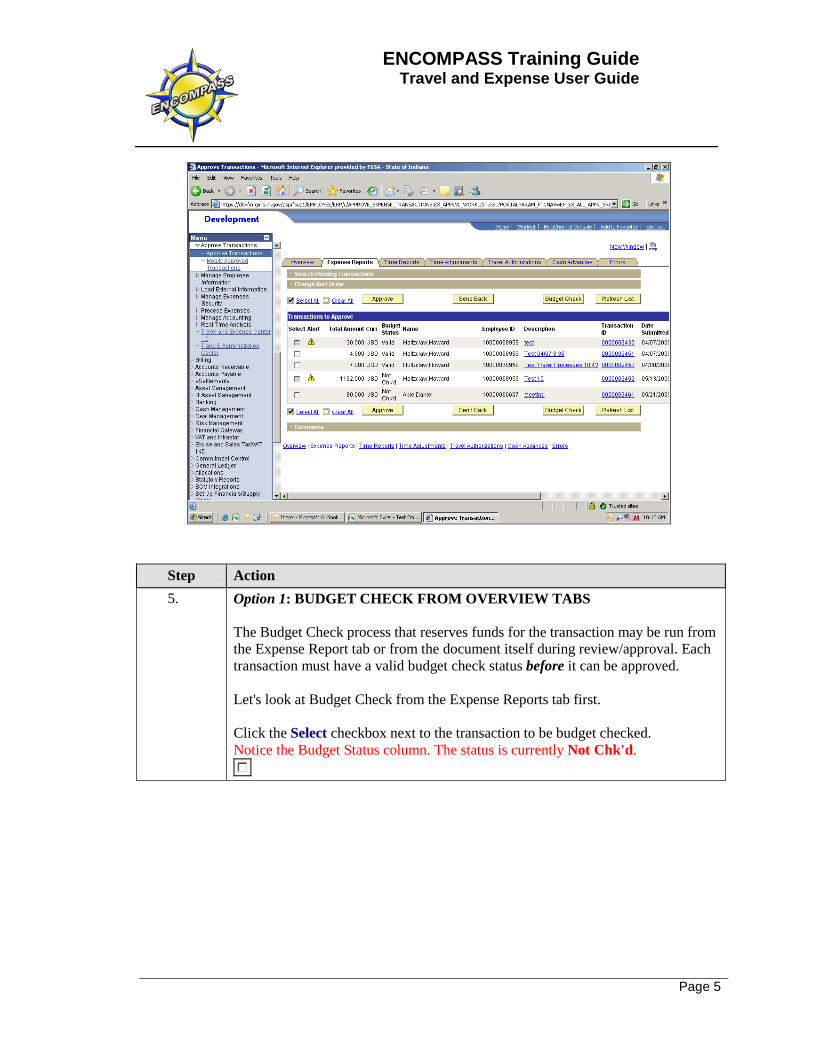
Step Action 5. Option 1: BUDGET CHECK FROM OVERVIEW TABS
The Budget Check process that reserves funds for the transaction may be run from the Expense Report tab or from the document itself during review/approval. Each transaction must have a valid budget check status before it can be approved. Let's look at Budget Check from the Expense Reports tab first. Click the Select checkbox next to the transaction to be budget checked. Notice the Budget Status column. The status is currently Not Chk'd.
ENCOMPASS Training Guide Travel and Expense User Guide
Page 6
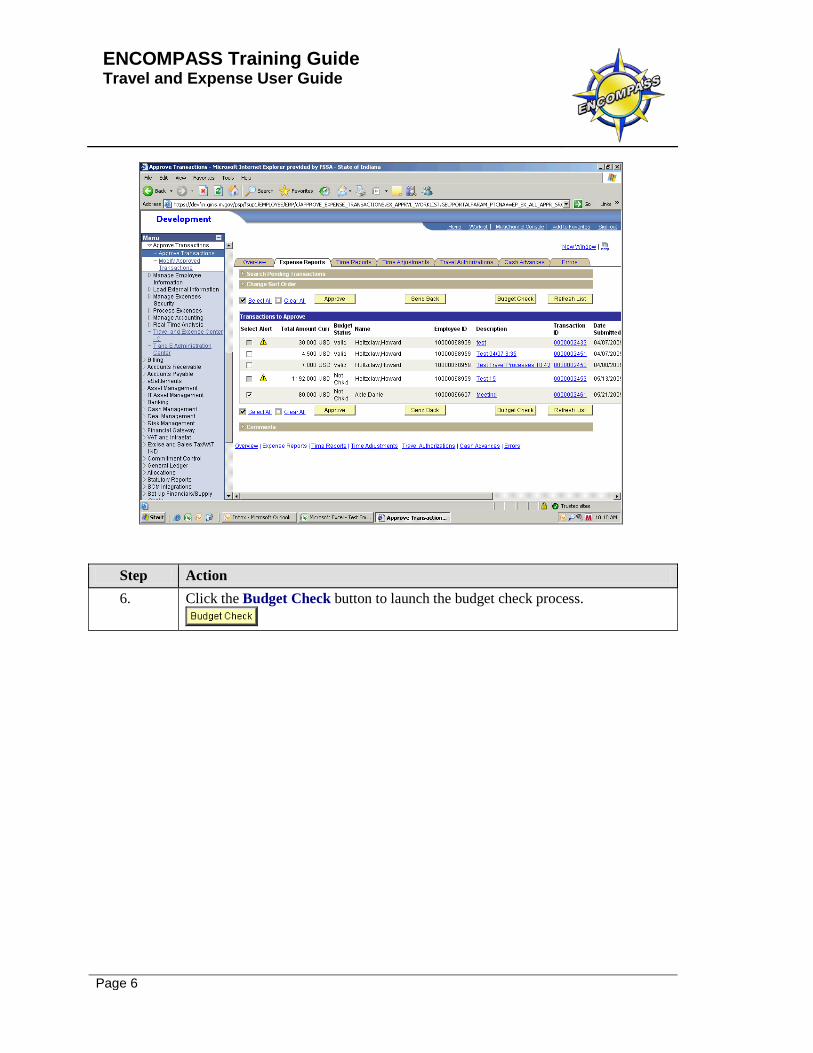
Step Action 6. Click the Budget Check button to launch the budget check process.

ENCOMPASS Training Guide Travel and Expense User Guide
Page 7
Step Action 7. The Expense Report will disappear from the list on the Expense Reports tab until
budget checking is complete. Be patient as this may take several minutes. After the process has been launched, click the Refresh List button every 30 seconds or so. When the process is complete, the Expense Report will reappear on the list. If the process is successful, the Budget Status column will indicate Valid.

ENCOMPASS Training Guide Travel and Expense User Guide
Page 8
Step Action 8. Option 2: BUDGET CHECK FROM THE DOCUMENT
The second method for running budget check is most recommended because it allows the approver to review the document and complete the budget check in the same procedure. Approvers not responsible for the budget check follow the same path, but exclude the budget checking procedures. Open the document to be budget checked and approved by clicking the appropriate link in the Description or Transaction ID column.

ENCOMPASS Training Guide Travel and Expense User Guide
Page 9
Step Action 9. The link opens a summary view of the Expense Report.
Each of the Expense Types listed beneath Expense Line Items is a link that will display more detail about the expense, including the accounting/chartfield information. To run Budget Check, scroll to the bottom of the Expense Report.
ENCOMPASS Training Guide Travel and Expense User Guide
Page 10
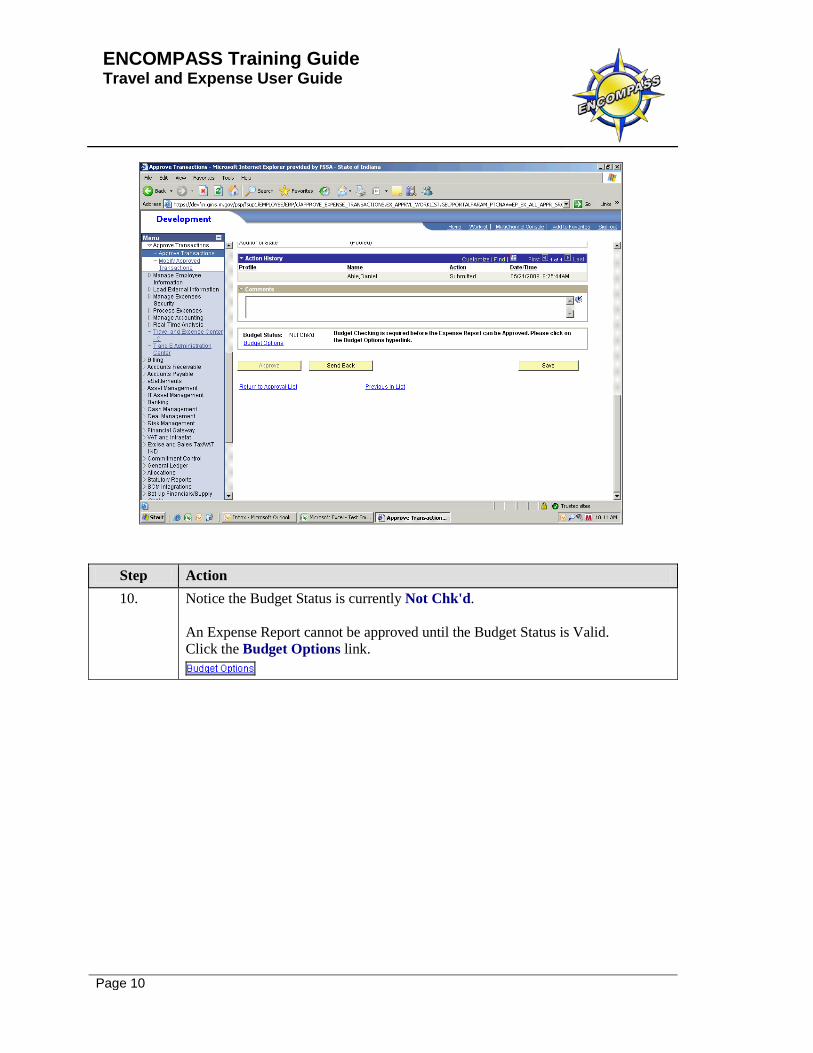
Step Action 10. Notice the Budget Status is currently Not Chk'd.
An Expense Report cannot be approved until the Budget Status is Valid. Click the Budget Options link.
ENCOMPASS Training Guide Travel and Expense User Guide
Page 11
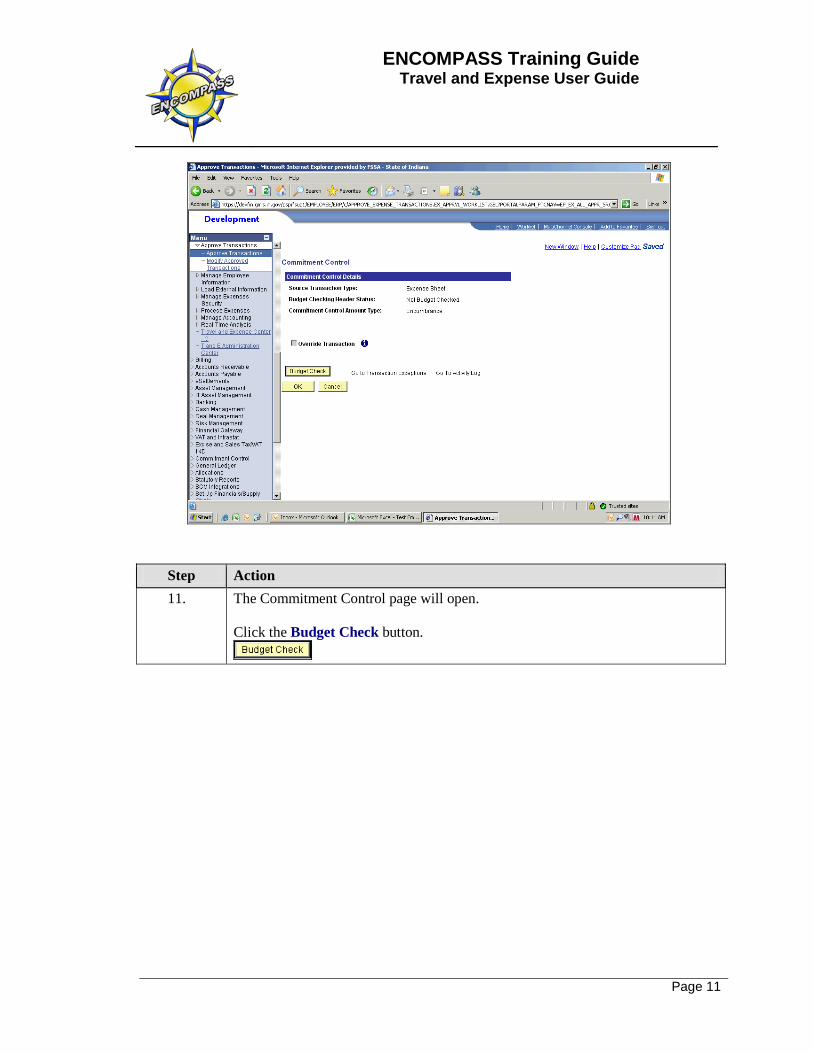
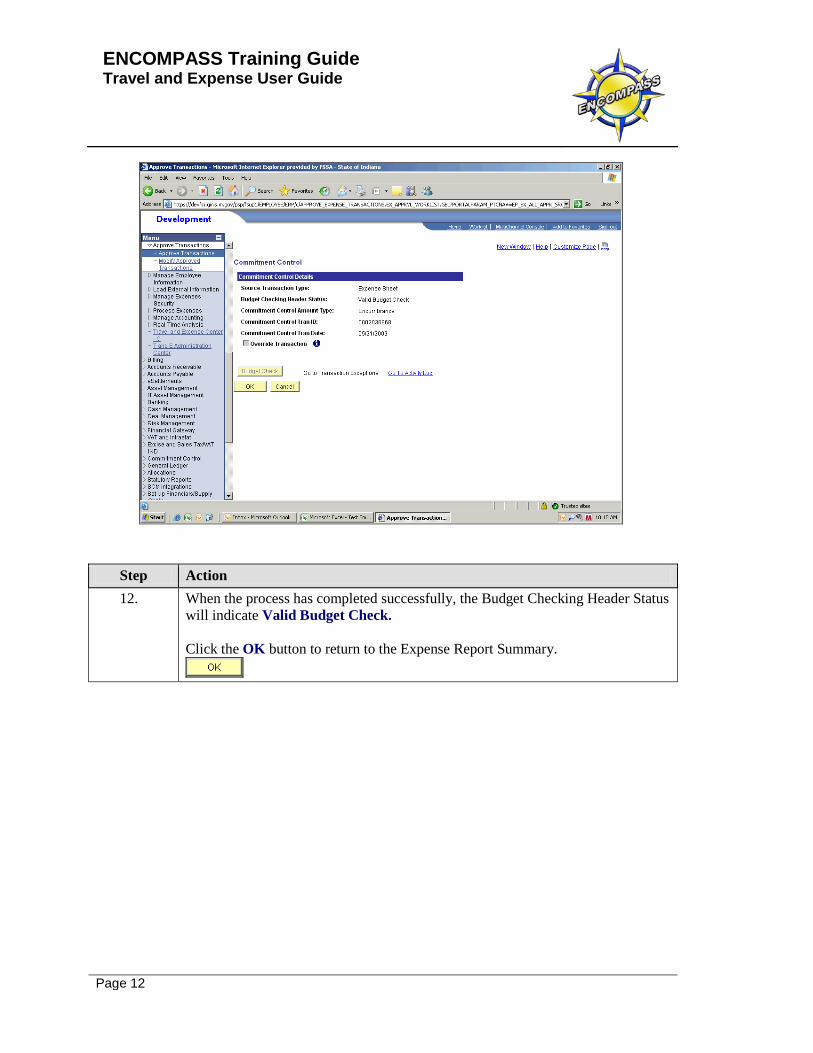
Step Action 11. The Commitment Control page will open.
Click the Budget Check button.
ENCOMPASS Training Guide Travel and Expense User Guide
Page 12
Step Action 12. When the process has completed successfully, the Budget Checking Header Status
will indicate Valid Budget Check. Click the OK button to return to the Expense Report Summary.
ENCOMPASS Training Guide Travel and Expense User Guide
Page 13
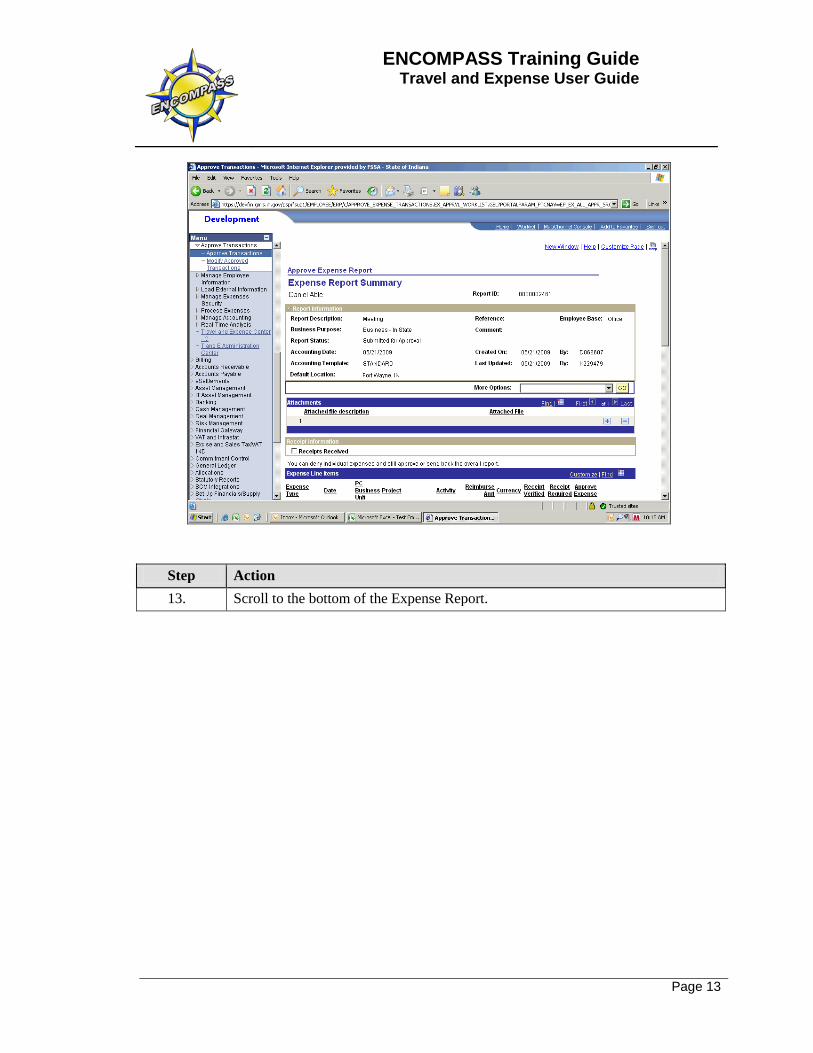
Step Action 13. Scroll to the bottom of the Expense Report.

ENCOMPASS Training Guide Travel and Expense User Guide
Page 14
Step Action 14. The Budget Status on the Expense Report Is now Valid.
Once review of the expenses is complete, the options are Approve or Send Back. Any revisions required must be done by the employee and the transaction resubmitted. If Send Back is selected, an explanation describing the problem and/or what changes are necessary must be entered in the Comments field. Click the Approve or Send Back button. If approved, the document will route to the next designated approver(s).
15. End of Procedure.

ENCOMPASS Training Guide Travel and Expense User Guide
Page 15
Approve/Send Back an Expense Report
Procedure
Step Action 1. From the main menu, click the Manager Self-Service link.
ENCOMPASS Training Guide Travel and Expense User Guide
Page 16
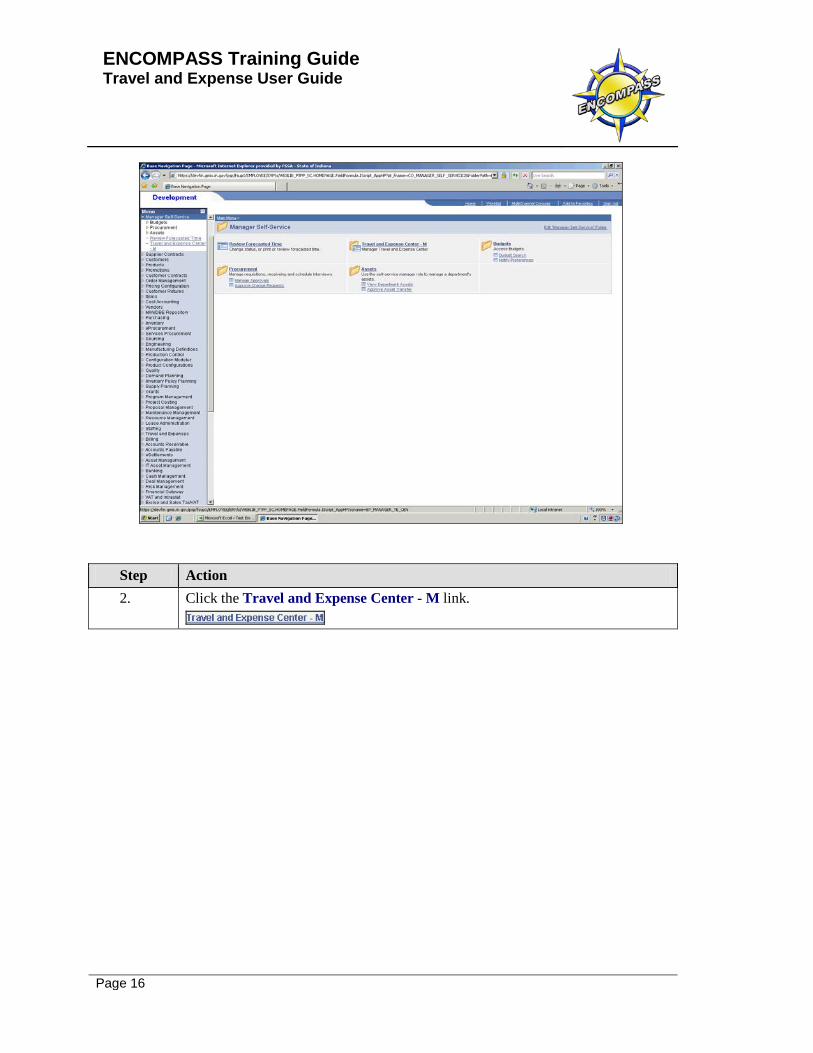
Step Action 2. Click the Travel and Expense Center - M link.

ENCOMPASS Training Guide Travel and Expense User Guide
Page 17
Step Action 3. Click the Approvals link.
ENCOMPASS Training Guide Travel and Expense User Guide
Page 18
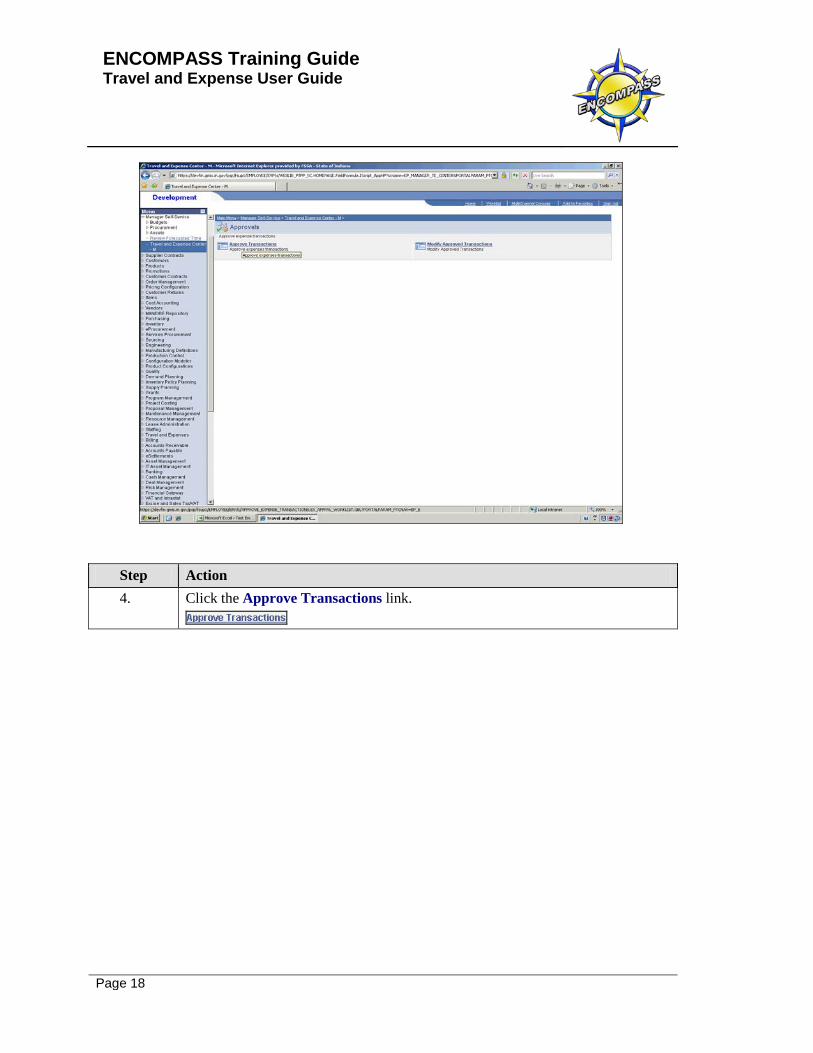
Step Action 4. Click the Approve Transactions link.

ENCOMPASS Training Guide Travel and Expense User Guide
Page 19
Step Action 5. The Approve Transactions page provides an overview tab that displays all pending
transactions, while the other tabs organize them according to the transaction type. Approval of the Travel Authorization and/or the Expense Report is performed using the same process. For this example, click the Expense Reports tab.

ENCOMPASS Training Guide Travel and Expense User Guide
Page 20
Step Action 6. Locate the appropriate transaction in the list of Expense Reports.
Click the Description or Transaction ID link to open a summary of the Expense Report and access the details of each expense line item.
ENCOMPASS Training Guide Travel and Expense User Guide
Page 21
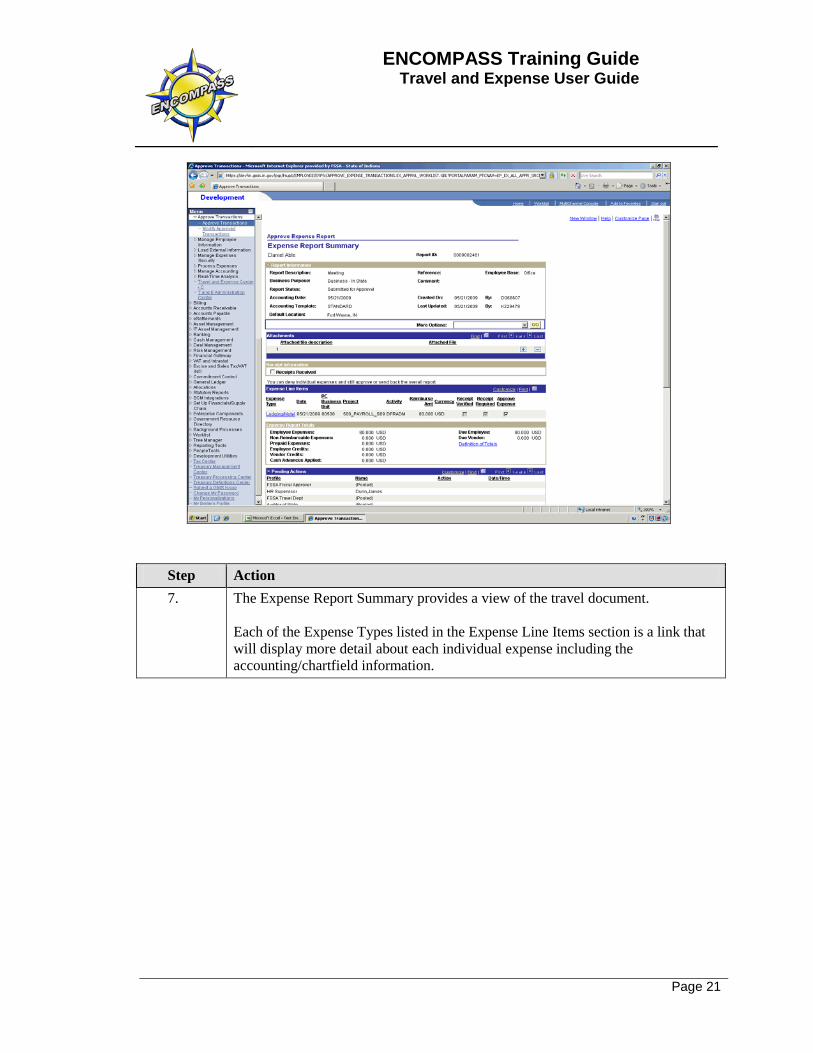
Step Action 7. The Expense Report Summary provides a view of the travel document.
Each of the Expense Types listed in the Expense Line Items section is a link that will display more detail about each individual expense including the accounting/chartfield information.
ENCOMPASS Training Guide Travel and Expense User Guide
Page 22
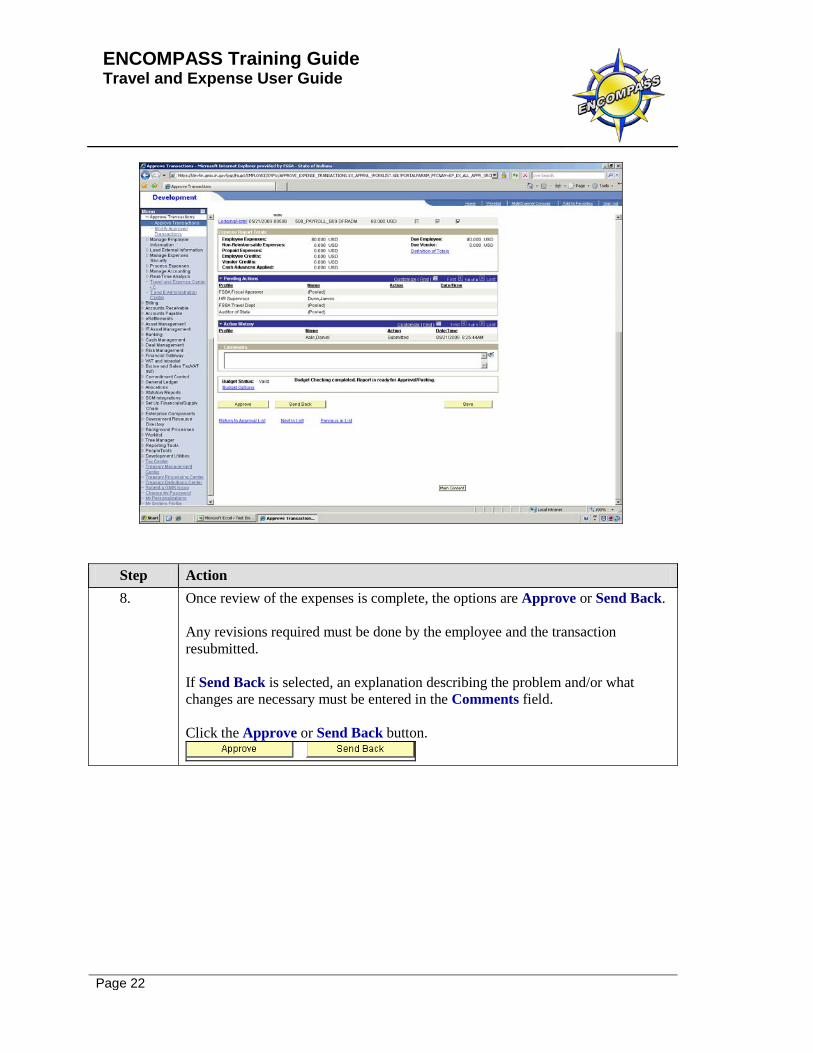
Step Action 8. Once review of the expenses is complete, the options are Approve or Send Back.
Any revisions required must be done by the employee and the transaction resubmitted. If Send Back is selected, an explanation describing the problem and/or what changes are necessary must be entered in the Comments field. Click the Approve or Send Back button.
ENCOMPASS Training Guide Travel and Expense User Guide
Page 23
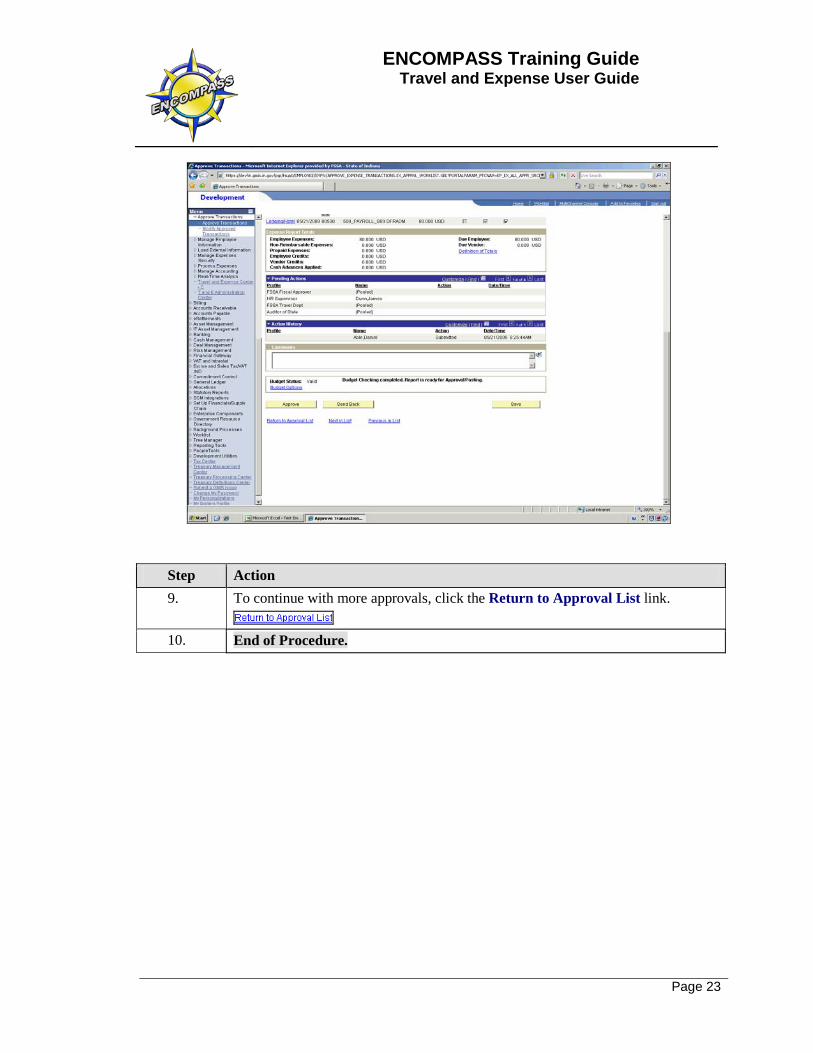
Step Action 9. To continue with more approvals, click the Return to Approval List link.
10. End of Procedure.

ENCOMPASS Training Guide Travel and Expense User Guide
Page 25
Expense Report
Setting up User Preferences
Procedure
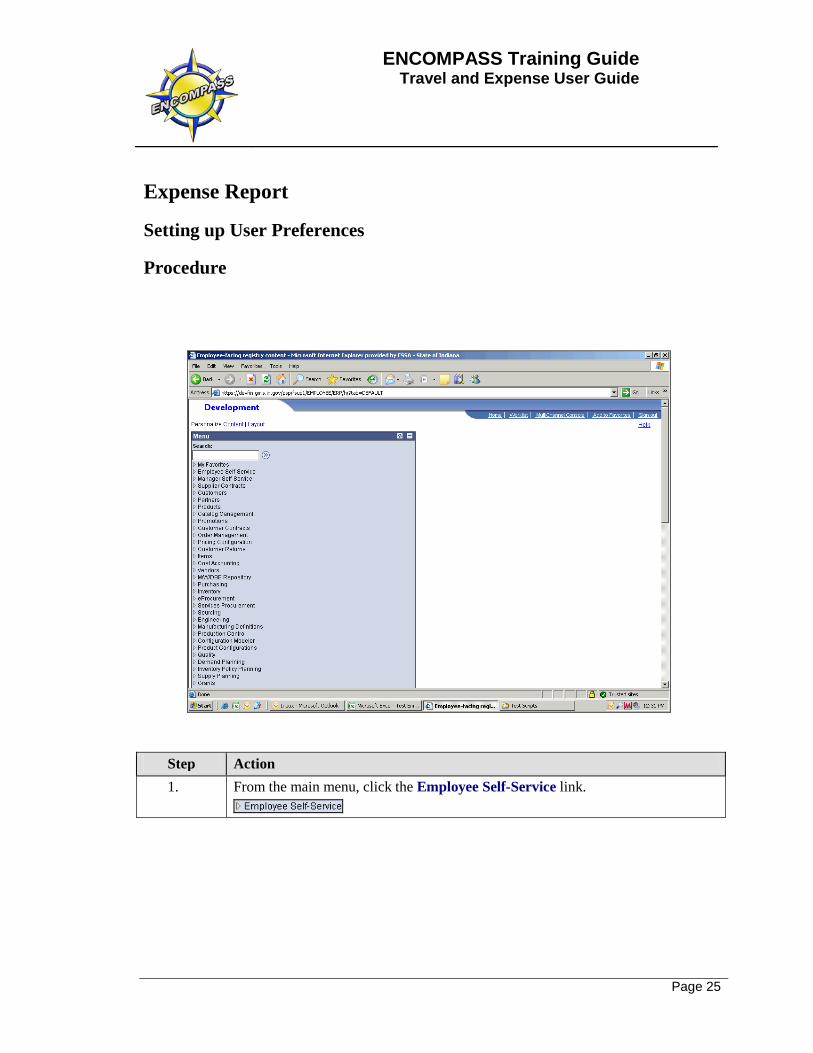
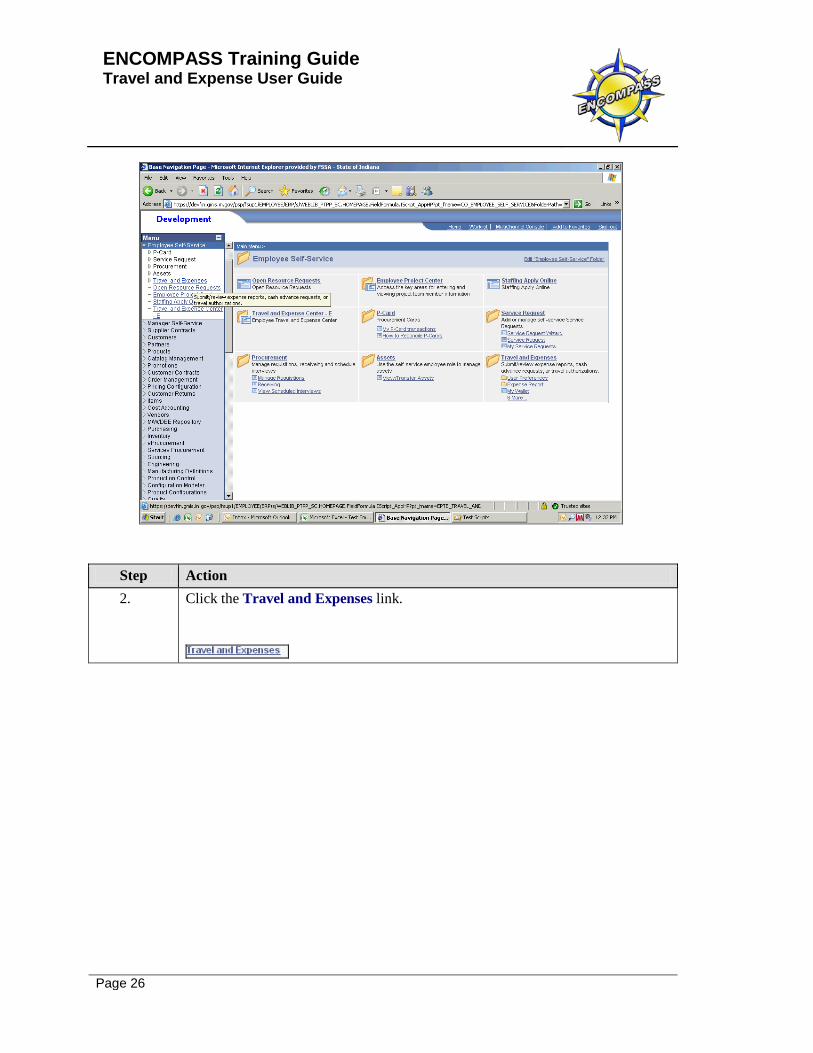
Step Action 1. From the main menu, click the Employee Self-Service link.
ENCOMPASS Training Guide Travel and Expense User Guide
Page 26
Step Action 2. Click the Travel and Expenses link.

ENCOMPASS Training Guide Travel and Expense User Guide
Page 27
Step Action 3. Click the Review/Edit Profile link.

ENCOMPASS Training Guide Travel and Expense User Guide
Page 28
Step Action 4. The Employee Profile page will open.
Entering information specific to each individual traveler will save time and data entry efforts by populating portions of the Expense Report by default. It may be changed if necessary when the Expense Report is created. Click the User Defaults tab.
ENCOMPASS Training Guide Travel and Expense User Guide
Page 29
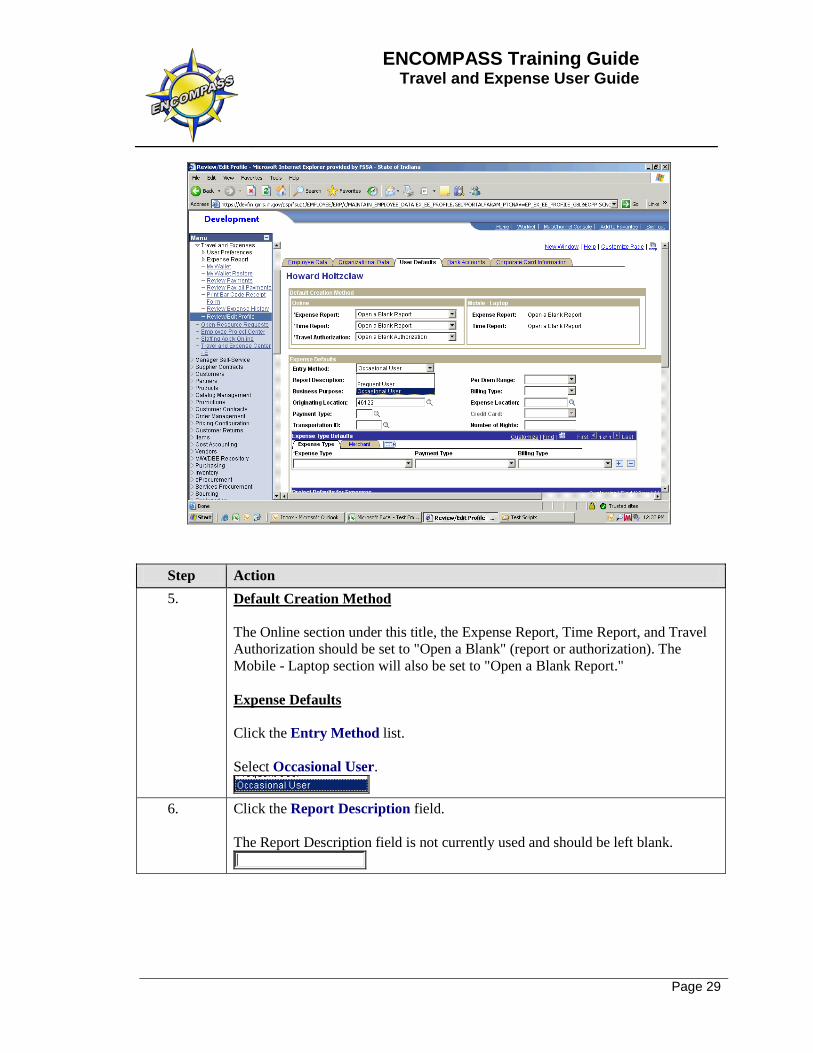
Step Action 5.
Default Creation Method
The Online section under this title, the Expense Report, Time Report, and Travel Authorization should be set to "Open a Blank" (report or authorization). The Mobile - Laptop section will also be set to "Open a Blank Report."
Expense Defaults
Click the Entry Method list. Select Occasional User.
6. Click the Report Description field.
The Report Description field is not currently used and should be left blank.

ENCOMPASS Training Guide Travel and Expense User Guide
Page 30
Step Action 7. Click the Business Purpose list.
Select Business - In State
ENCOMPASS Training Guide Travel and Expense User Guide
Page 31
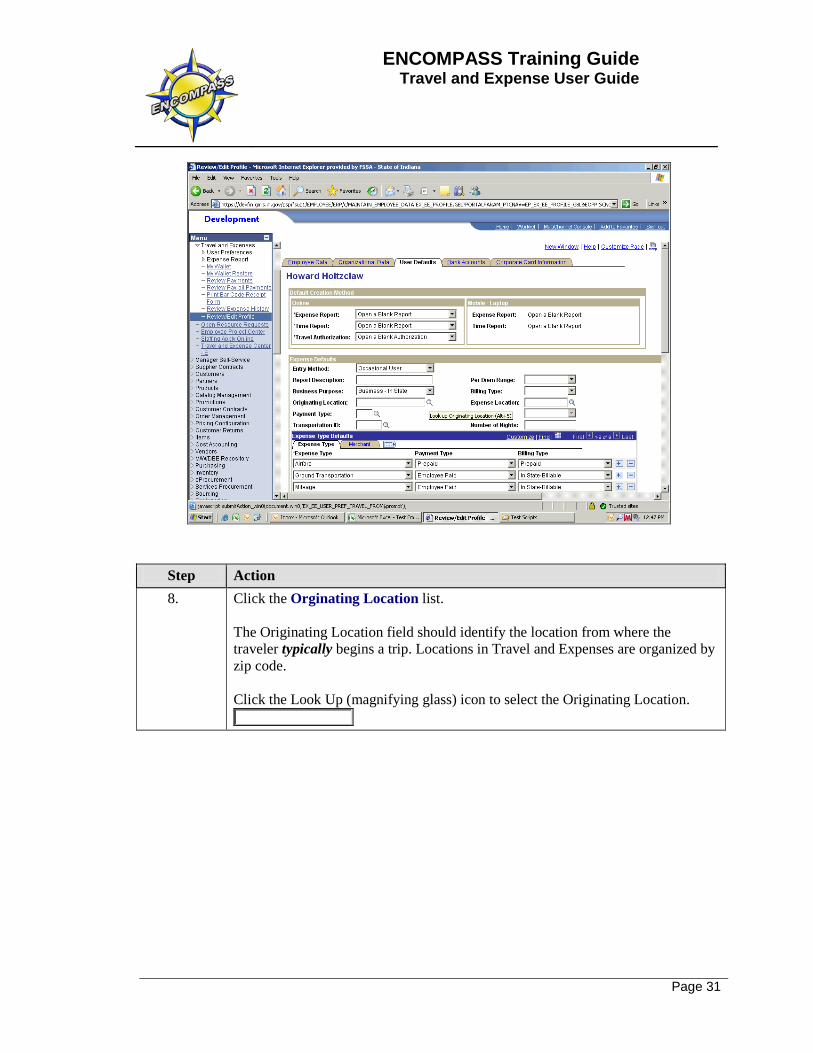
Step Action 8. Click the Orginating Location list.
The Originating Location field should identify the location from where the traveler typically begins a trip. Locations in Travel and Expenses are organized by zip code. Click the Look Up (magnifying glass) icon to select the Originating Location.
ENCOMPASS Training Guide Travel and Expense User Guide
Page 32
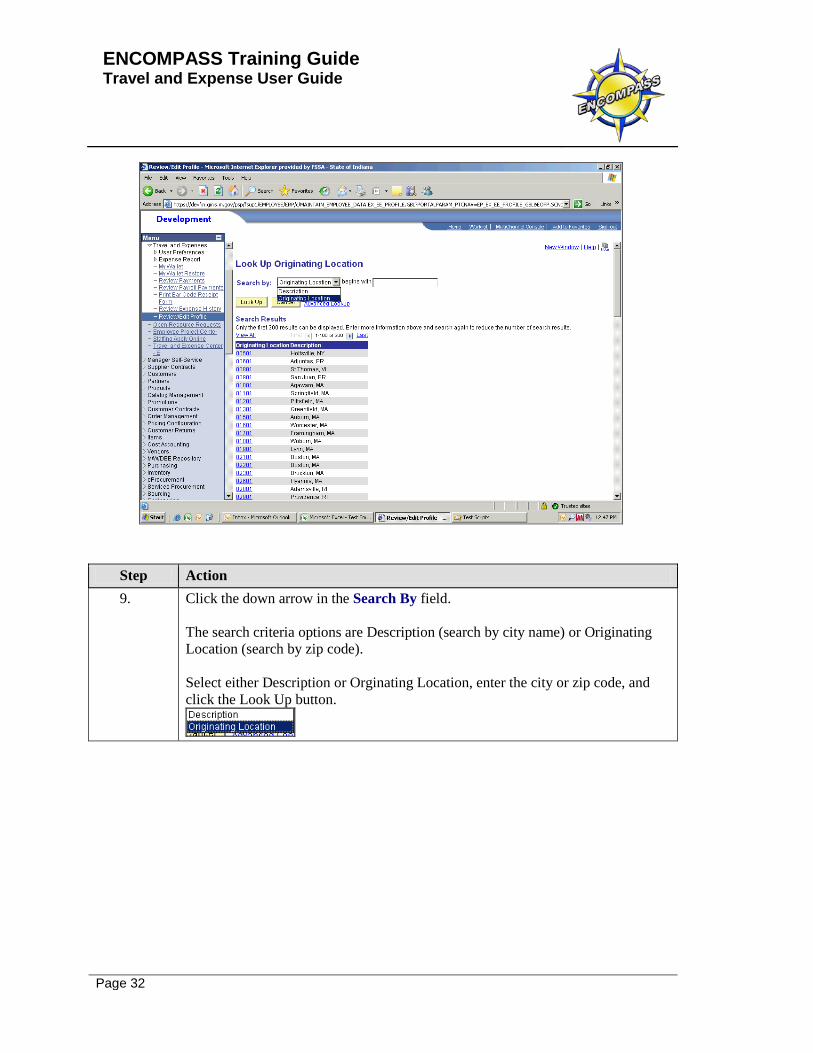
Step Action 9. Click the down arrow in the Search By field.
The search criteria options are Description (search by city name) or Originating Location (search by zip code). Select either Description or Orginating Location, enter the city or zip code, and click the Look Up button.
ENCOMPASS Training Guide Travel and Expense User Guide
Page 33
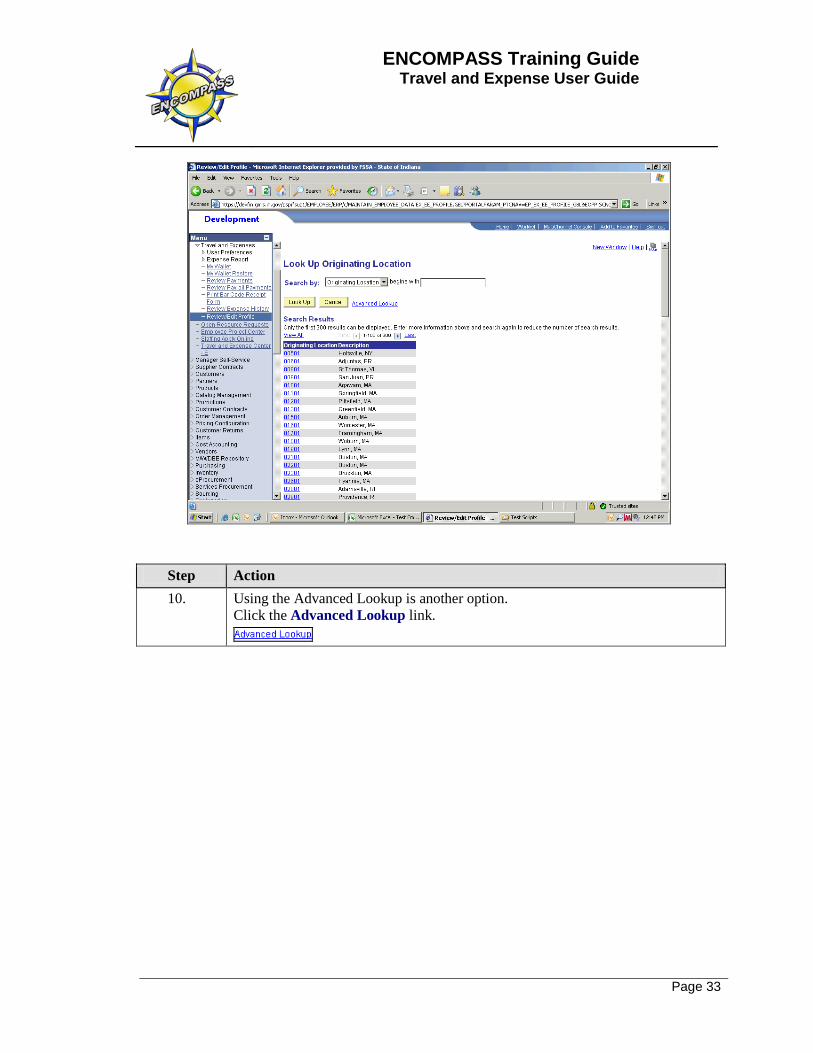
Step Action 10. Using the Advanced Lookup is another option.
Click the Advanced Lookup link.
ENCOMPASS Training Guide Travel and Expense User Guide
Page 34
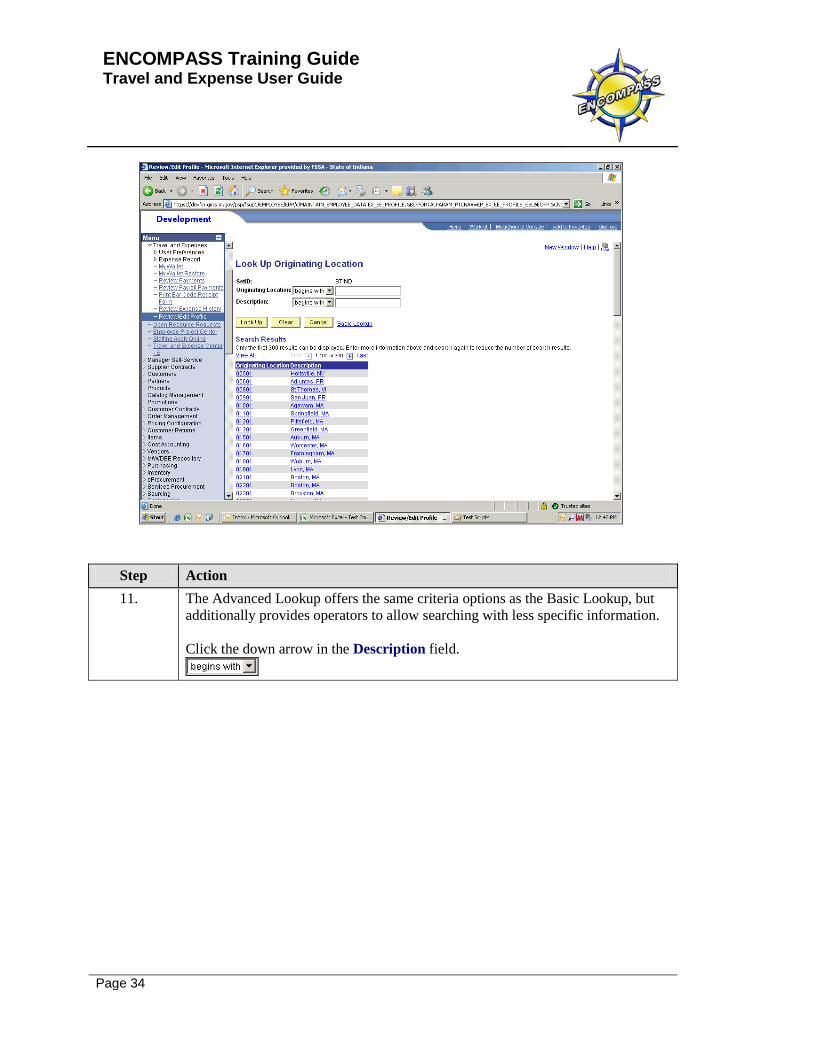
Step Action 11. The Advanced Lookup offers the same criteria options as the Basic Lookup, but
additionally provides operators to allow searching with less specific information. Click the down arrow in the Description field.

ENCOMPASS Training Guide Travel and Expense User Guide
Page 35
Step Action 12. Select Contains as the operator for the Description search option.
Enter the city name in the Description field. For demonstration, enter Danville.
ENCOMPASS Training Guide Travel and Expense User Guide
Page 36
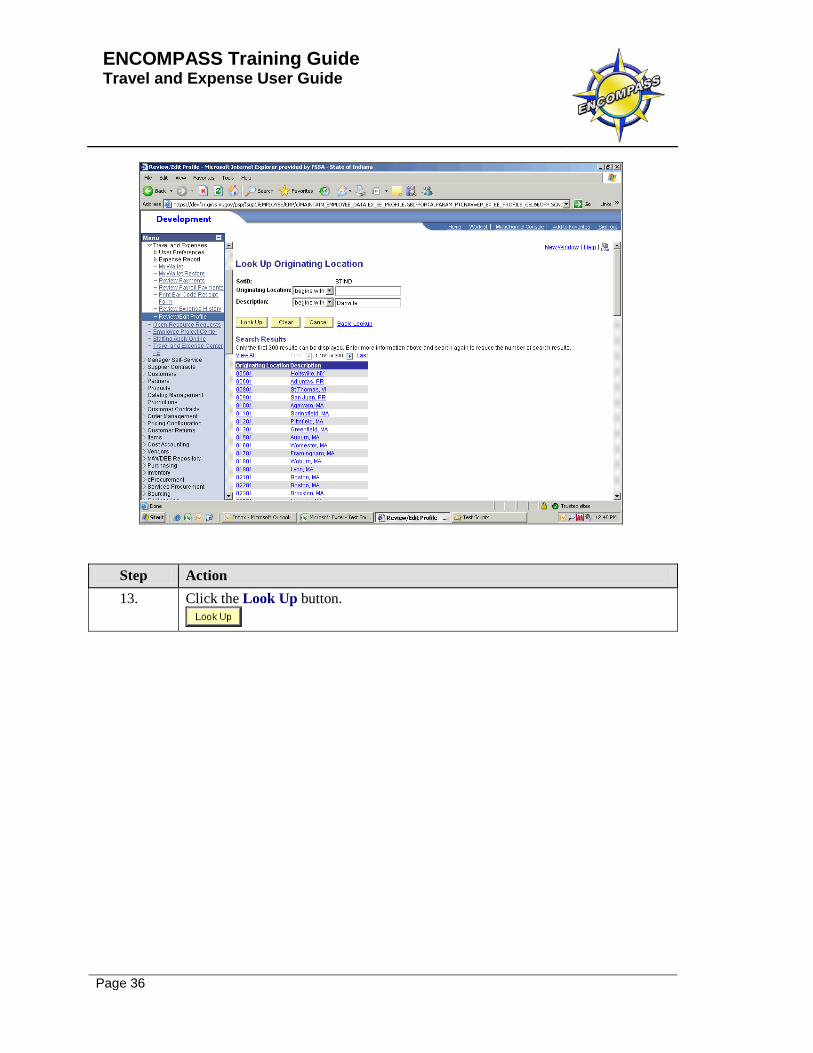
Step Action 13. Click the Look Up button.
ENCOMPASS Training Guide Travel and Expense User Guide
Page 37
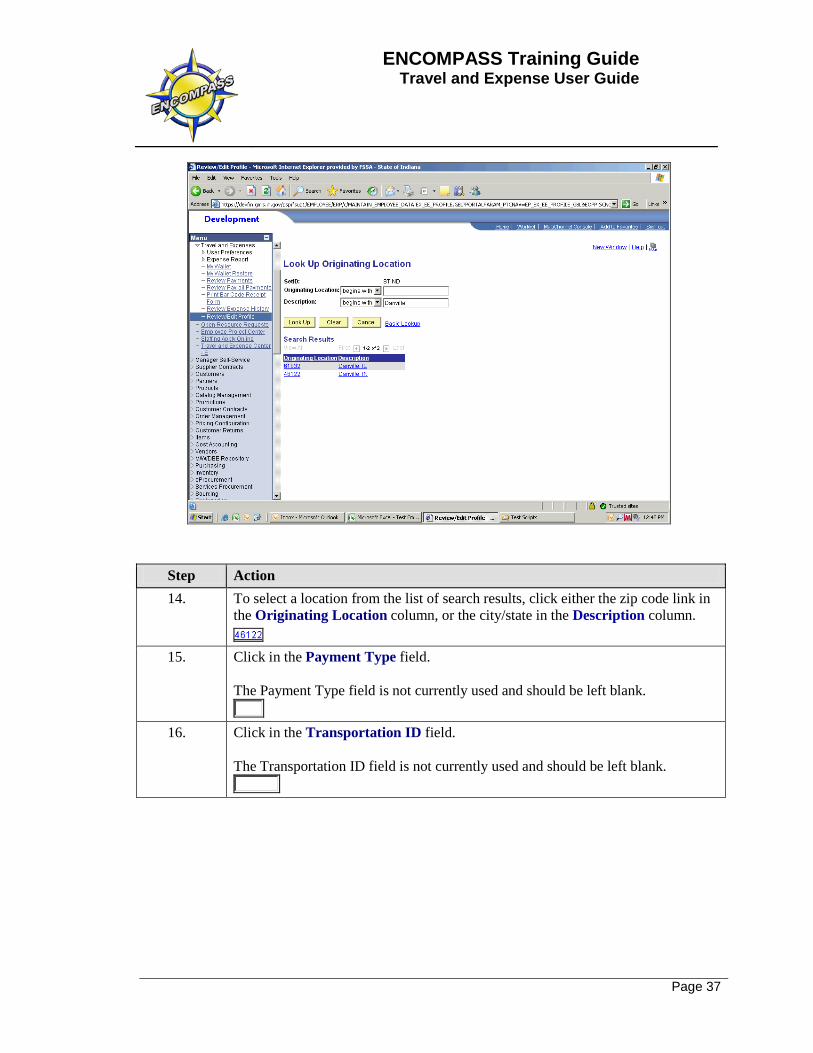
Step Action 14. To select a location from the list of search results, click either the zip code link in
the Originating Location column, or the city/state in the Description column.
15. Click in the Payment Type field. The Payment Type field is not currently used and should be left blank.
16. Click in the Transportation ID field.
The Transportation ID field is not currently used and should be left blank.
ENCOMPASS Training Guide Travel and Expense User Guide
Page 38
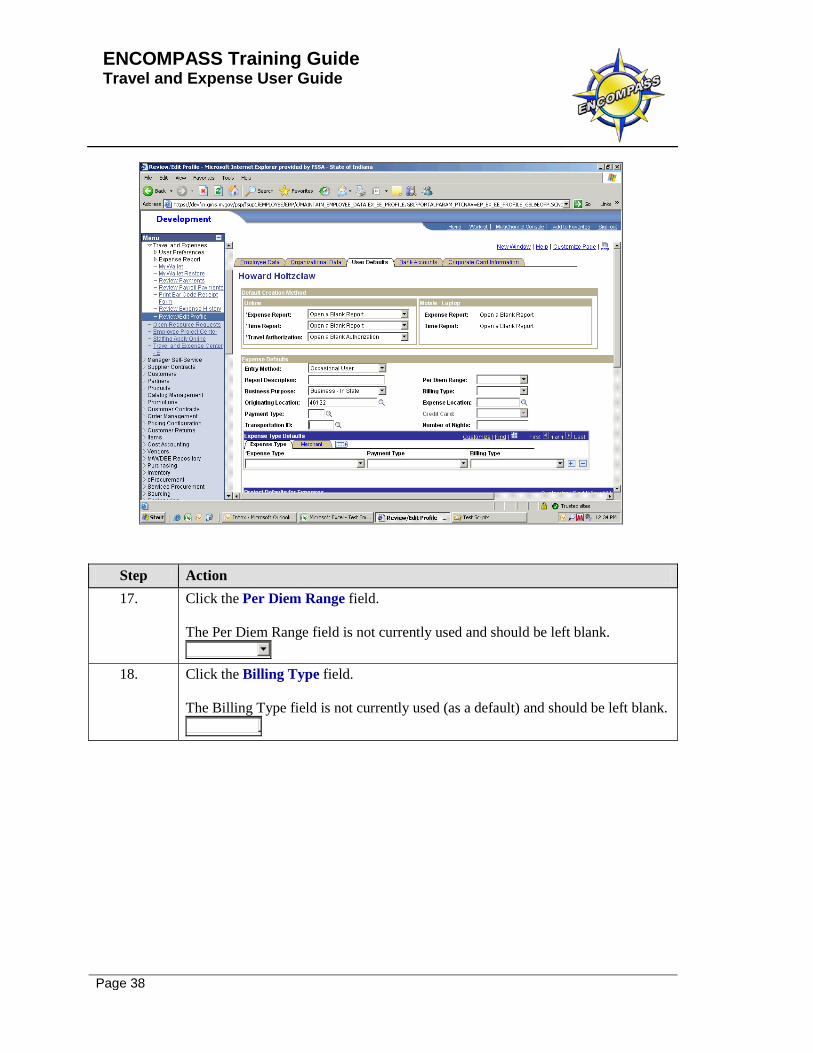
Step Action 17. Click the Per Diem Range field.
The Per Diem Range field is not currently used and should be left blank.
18. Click the Billing Type field.
The Billing Type field is not currently used (as a default) and should be left blank.

ENCOMPASS Training Guide Travel and Expense User Guide
Page 39
Step Action 19. The Expense Location field is optional and may be left blank, or used to identify
a default destination. Use of this default would only be helpful if consistently traveling to the same place. If using this option, click the Look Up (magnifying glass) icon to search for the location needed. Click in the Expense Location field.
20. The Number of Nights field is not currently used and should be left blank.
Click in the Number of Nights field.
ENCOMPASS Training Guide Travel and Expense User Guide
Page 40
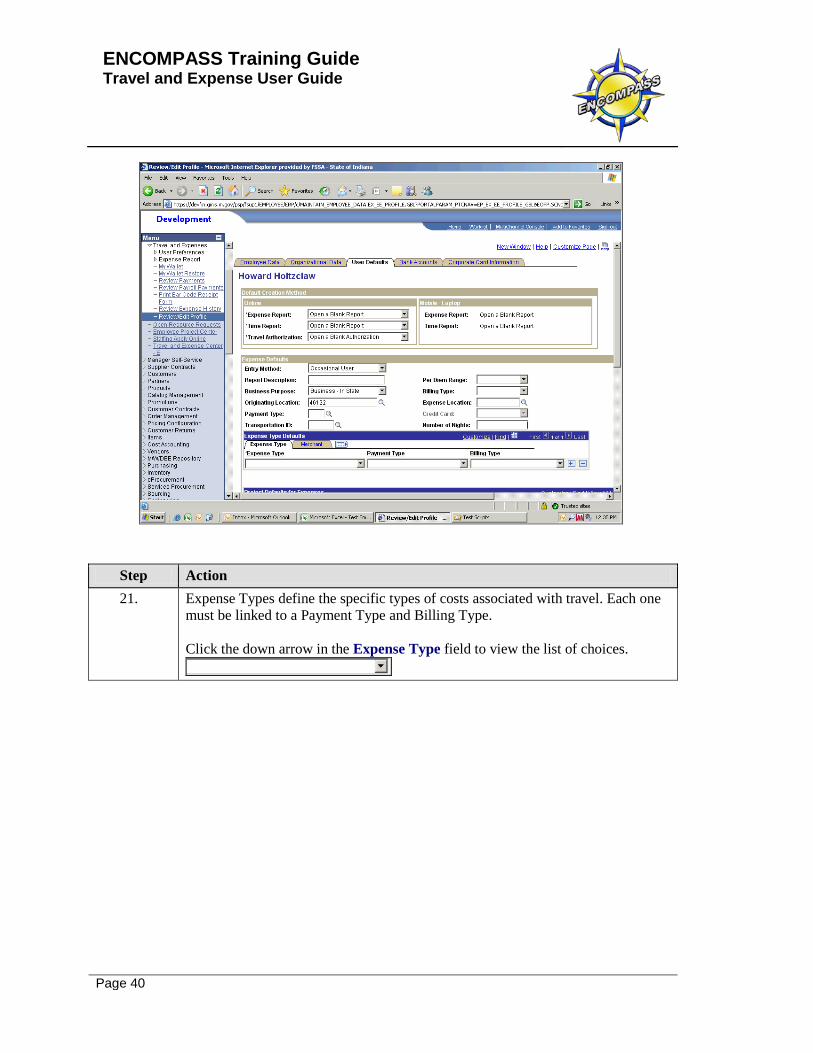
Step Action 21. Expense Types define the specific types of costs associated with travel. Each one
must be linked to a Payment Type and Billing Type. Click the down arrow in the Expense Type field to view the list of choices.

ENCOMPASS Training Guide Travel and Expense User Guide
Page 41
Step Action 22. Click the Expense Type list.
Select Airfare.
ENCOMPASS Training Guide Travel and Expense User Guide
Page 42
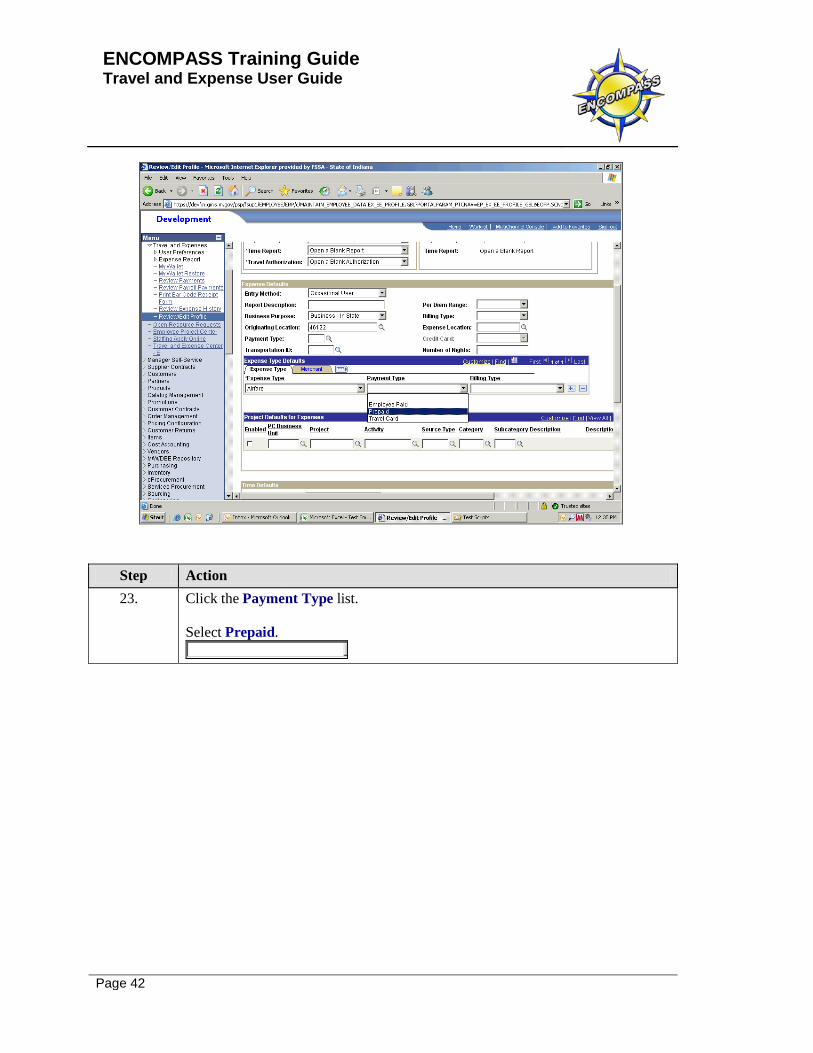
Step Action 23. Click the Payment Type list.
Select Prepaid.

ENCOMPASS Training Guide Travel and Expense User Guide
Page 43
Step Action 24. Click the Billing Type list.
Select Prepaid.

ENCOMPASS Training Guide Travel and Expense User Guide
Page 44
Step Action 25. Click the Add a Row ("+") to add additional rows.
ENCOMPASS Training Guide Travel and Expense User Guide
Page 45
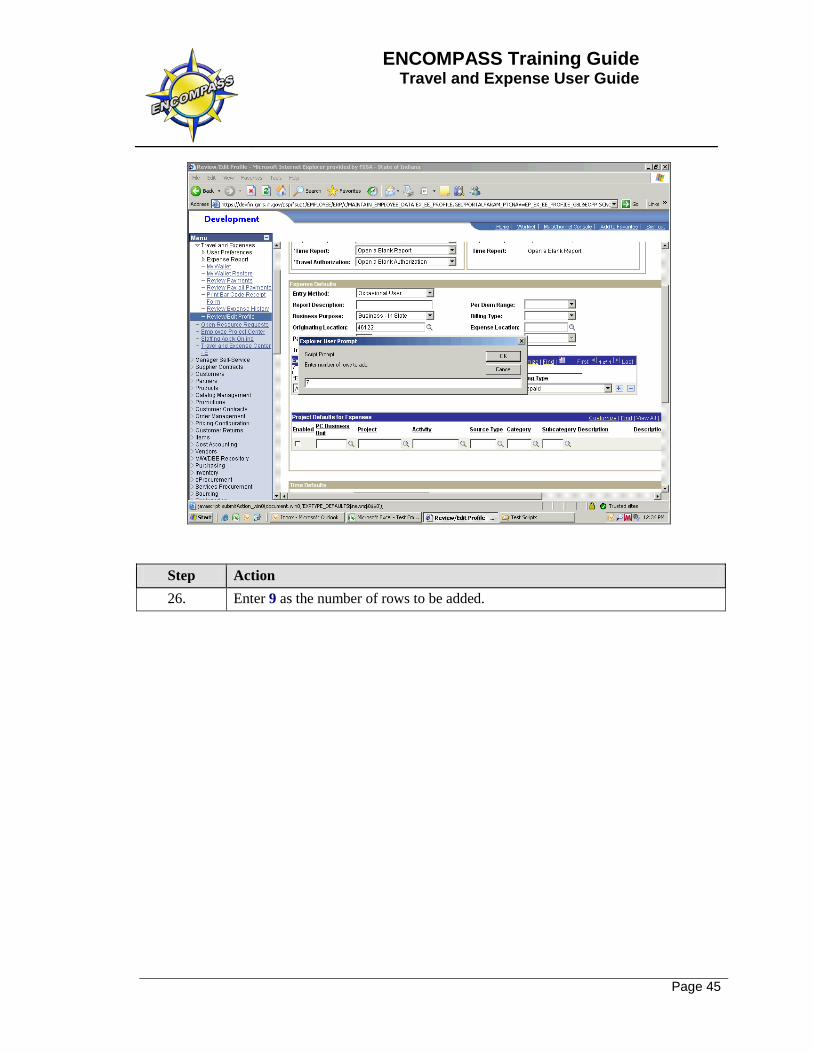
Step Action 26. Enter 9 as the number of rows to be added.

ENCOMPASS Training Guide Travel and Expense User Guide
Page 46
Step Action 27. Complete the Expense Type Defaults by selecting the 9 remaining Expense Types,
associated Payment Types and Billling Types.

ENCOMPASS Training Guide Travel and Expense User Guide
Page 47
Step Action 28. Click the Enabled checkbox option.
***IMPORTANT*** The Project Defaults for Expenses section should only be enabled/completed if your agency uses Projects information in the chartfield string for travel reimbursements. If not, these fields should be left blank.
29. Enter the Business Unit into the PC Business Unit field.
For demonstration, enter 00500 or your business unit.
30. Click in the Project field. The Project field should be left blank unless only one project is ever used, or there's one project used the majority of the time.
31. Click in the Activity field.
If a Project was entered, select the Activity.
ENCOMPASS Training Guide Travel and Expense User Guide
Page 48
Step Action 32. Click in the Source Type field.
If a Source Type is applicable with the Project, select it. If not, leave the field blank.
33. Click in the Category field.
If a Category is applicable with the Project, select it. If not, leave the field blank.
34. Click in the Subcategory field.
If a Subcategory is applicable with the Project, select it. If not, leave the field blank.
35. Scroll to the right to view the rest of the page (if necessary). 36. Enter 100 into the Percentage field.
37. ***OPTIONAL***
If necessary, multiple lines may be added using the Add a Row button to define more than one distribution. The total of all Percentages entered, though, must equal 100%. Click the Add multiple new rows at row 1 (Alt+7) button to add more Project Default lines. Repeat the previous steps to enter the Project information.
ENCOMPASS Training Guide Travel and Expense User Guide
Page 49
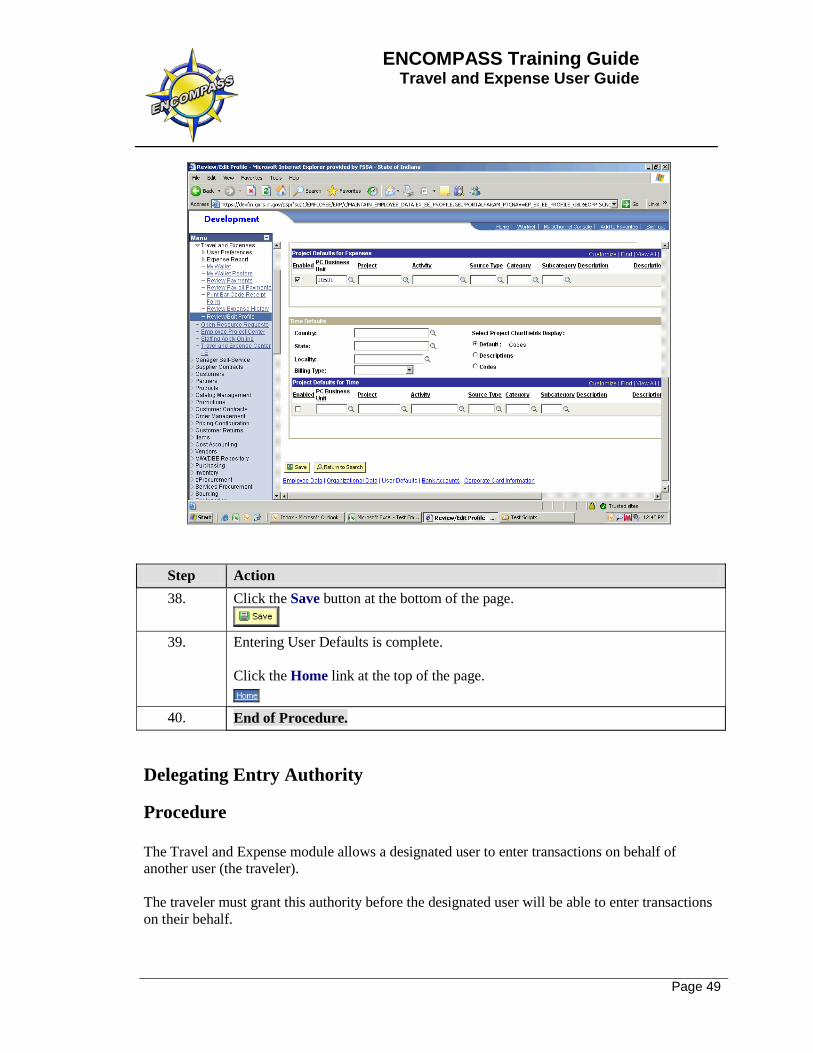
Step Action 38. Click the Save button at the bottom of the page.
39. Entering User Defaults is complete.
Click the Home link at the top of the page.
40. End of Procedure.
Delegating Entry Authority
Procedure The Travel and Expense module allows a designated user to enter transactions on behalf of another user (the traveler). The traveler must grant this authority before the designated user will be able to enter transactions on their behalf.

ENCOMPASS Training Guide Travel and Expense User Guide
Page 50
Step Action 1. To begin, click the Employee Self-Service link.
ENCOMPASS Training Guide Travel and Expense User Guide
Page 51
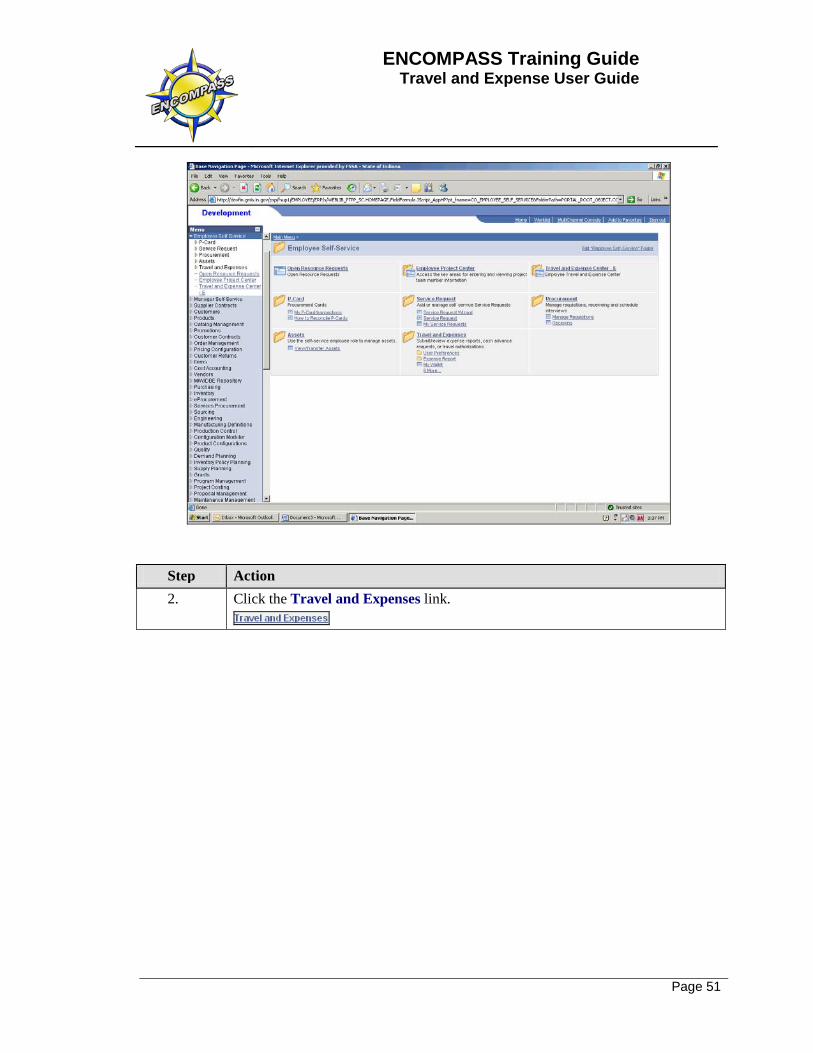
Step Action 2. Click the Travel and Expenses link.

ENCOMPASS Training Guide Travel and Expense User Guide
Page 52
Step Action 3. Click the User Preferences link.
ENCOMPASS Training Guide Travel and Expense User Guide
Page 53
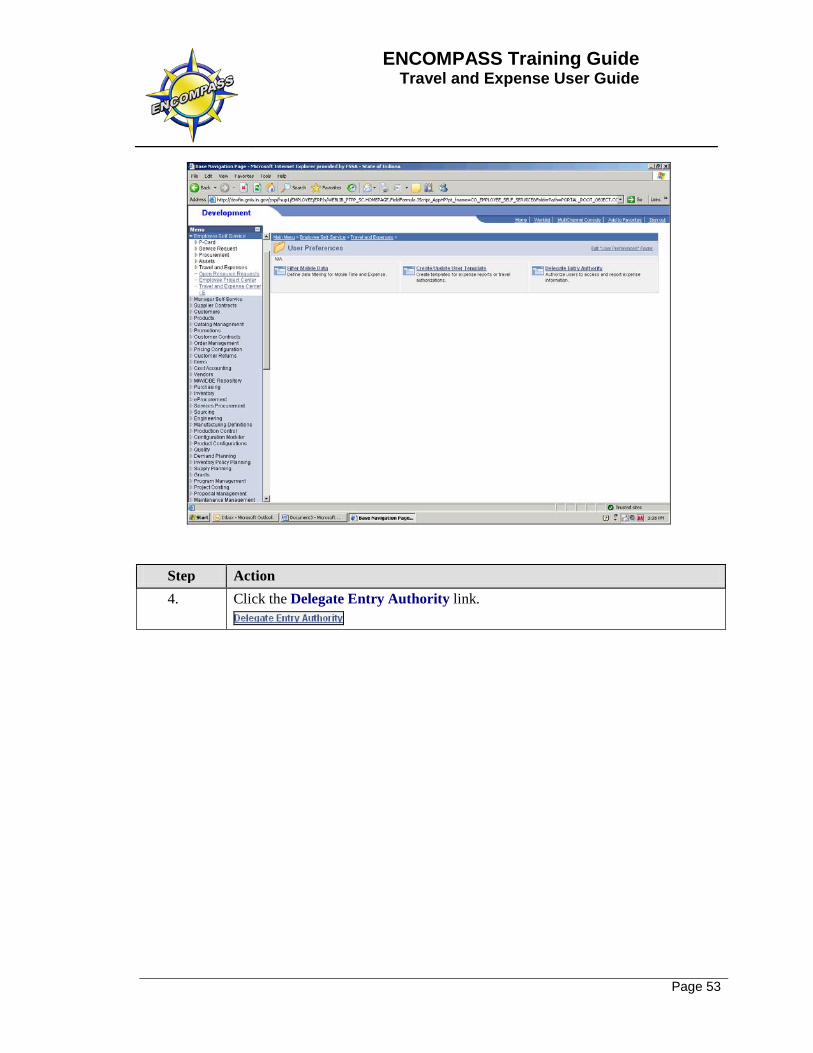
Step Action 4. Click the Delegate Entry Authority link.

ENCOMPASS Training Guide Travel and Expense User Guide
Page 54
Step Action 5. Add or delete authorized users by using the [+] Add and [-] Delete buttons. The
PeopleSoft user ID of the person to be authorized must be entered in the Authorzied User ID field/column. Click the Save button when additions or revisions are complete.
6. Delegate Entry Authority is complete.
Click the Home link to return to the home/main menu.
7. Congratulations! You have learned how to successfully add/delete authorized
users to your account. End of Procedure.
ENCOMPASS Training Guide Travel and Expense User Guide
Page 55
Create an Expense Report from a Blank Form
Procedure
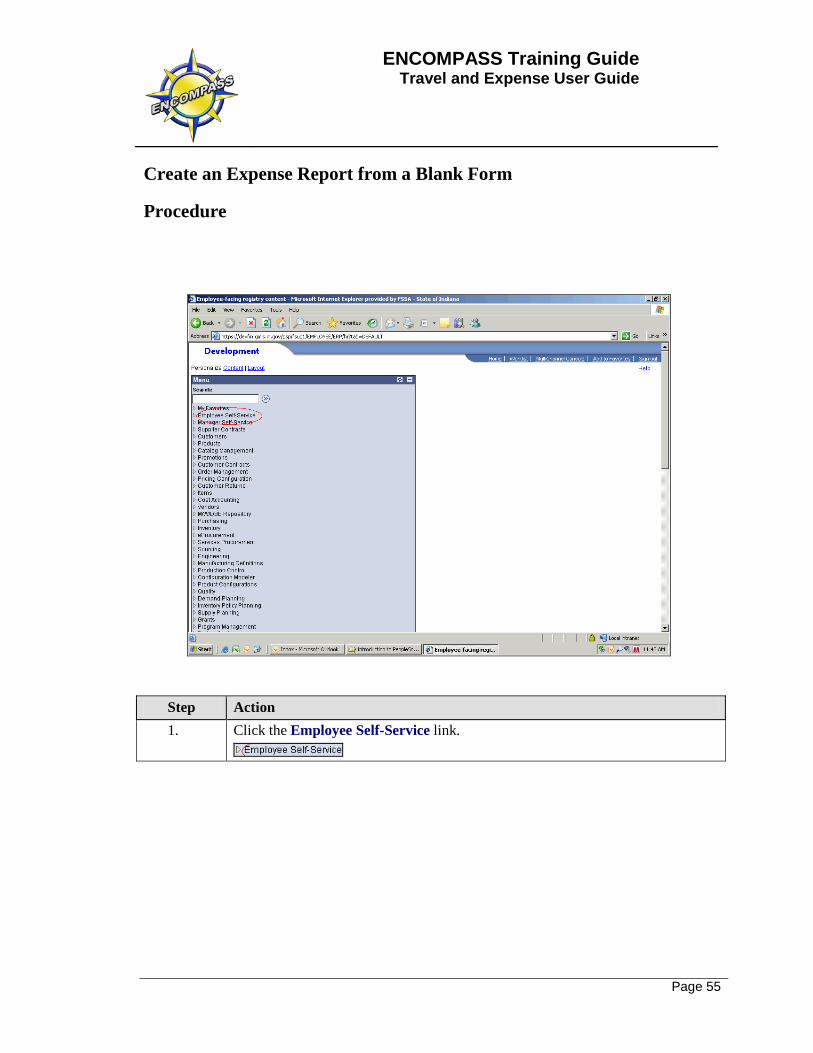
Step Action 1. Click the Employee Self-Service link.
ENCOMPASS Training Guide Travel and Expense User Guide
Page 56
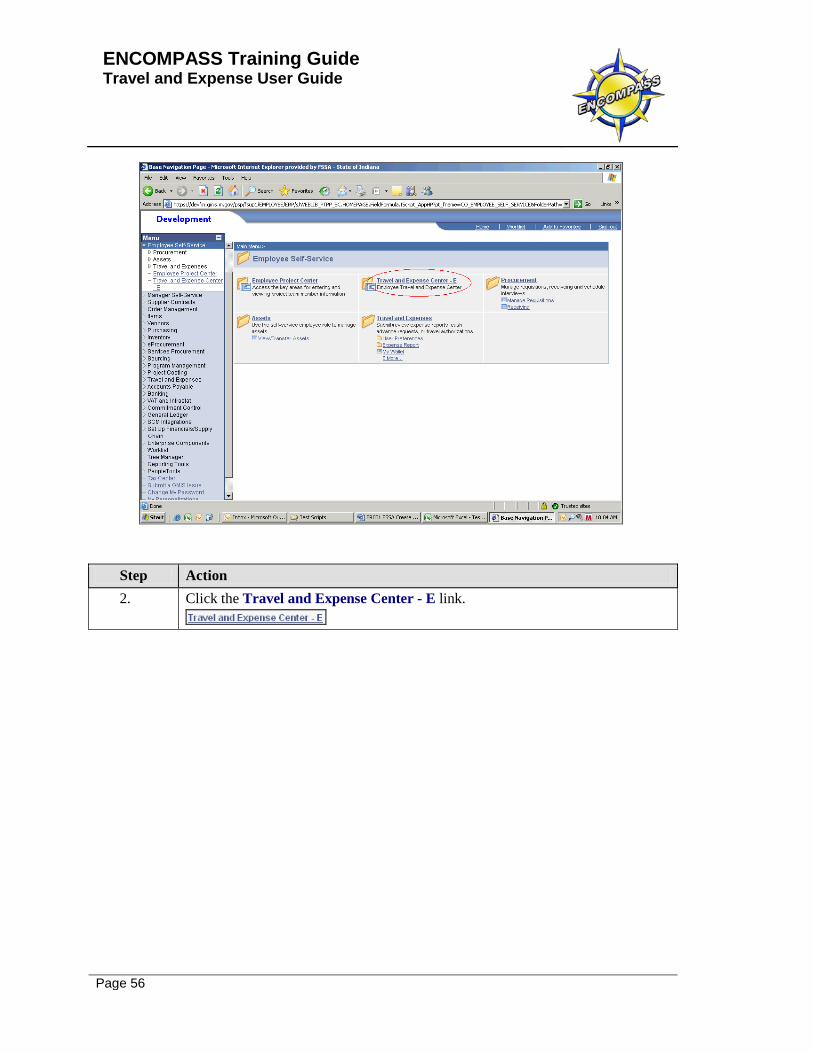
Step Action 2. Click the Travel and Expense Center - E link.
ENCOMPASS Training Guide Travel and Expense User Guide
Page 57
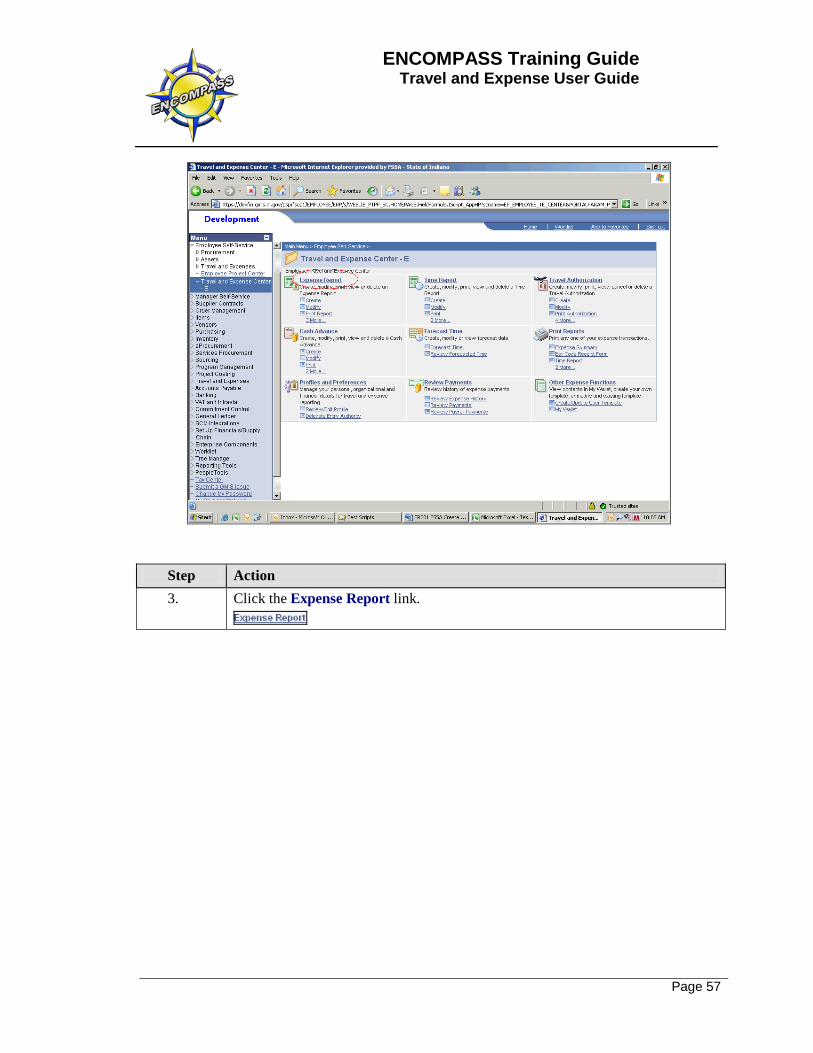
Step Action 3. Click the Expense Report link.

ENCOMPASS Training Guide Travel and Expense User Guide
Page 58
Step Action 4. Click the Create link.

ENCOMPASS Training Guide Travel and Expense User Guide
Page 59
Step Action 5. IMPORTANT INFORMATION
When following the instruction outlined in this demonstration, be mindful that this presentation was designed to assist in learning the software application. Although some business process instruction is provided, not all State travel rules, policies, and regulations are addressed. Questions regarding specific information to be included, per diem rates and how they're applied, or other specific State travel requirements should be directed to the agency travel department/travel administrators. Let's Get Started! The Quick Start field will default to A Blank Report. This is the most common method used to create an Expense Report, but other options are available. Click the Quick Start list.
ENCOMPASS Training Guide Travel and Expense User Guide
Page 60
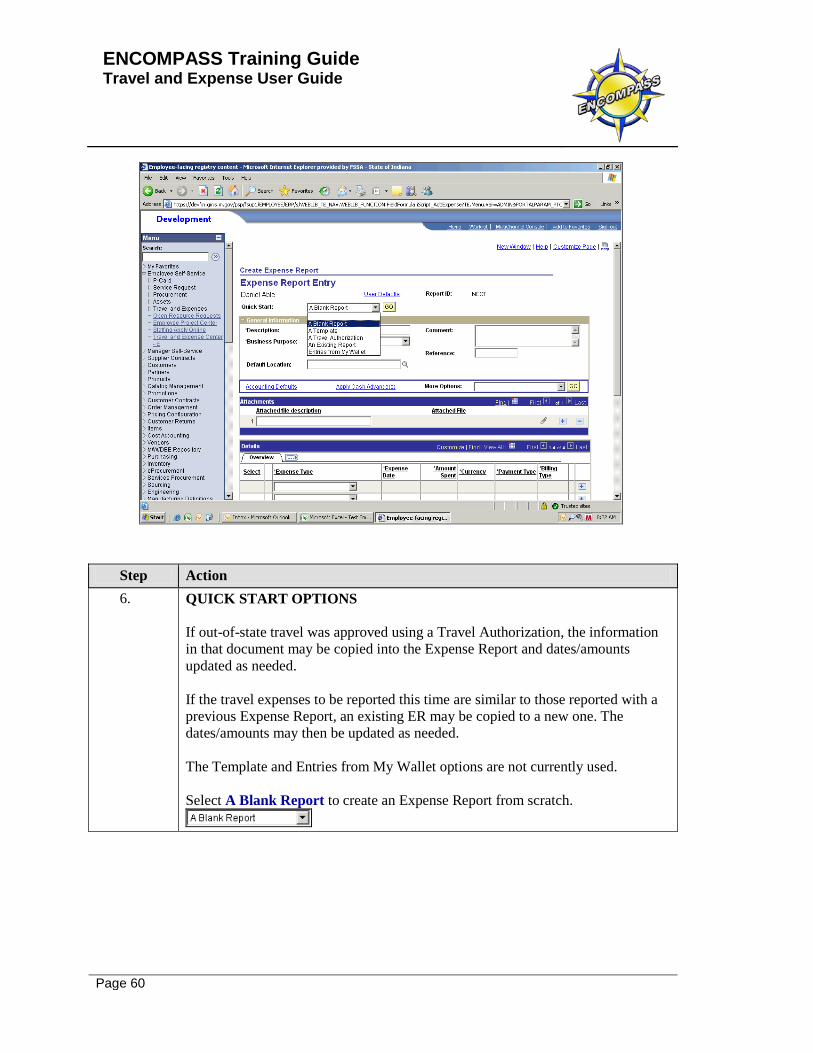
Step Action 6. QUICK START OPTIONS
If out-of-state travel was approved using a Travel Authorization, the information in that document may be copied into the Expense Report and dates/amounts updated as needed. If the travel expenses to be reported this time are similar to those reported with a previous Expense Report, an existing ER may be copied to a new one. The dates/amounts may then be updated as needed. The Template and Entries from My Wallet options are not currently used. Select A Blank Report to create an Expense Report from scratch.
ENCOMPASS Training Guide Travel and Expense User Guide
Page 61
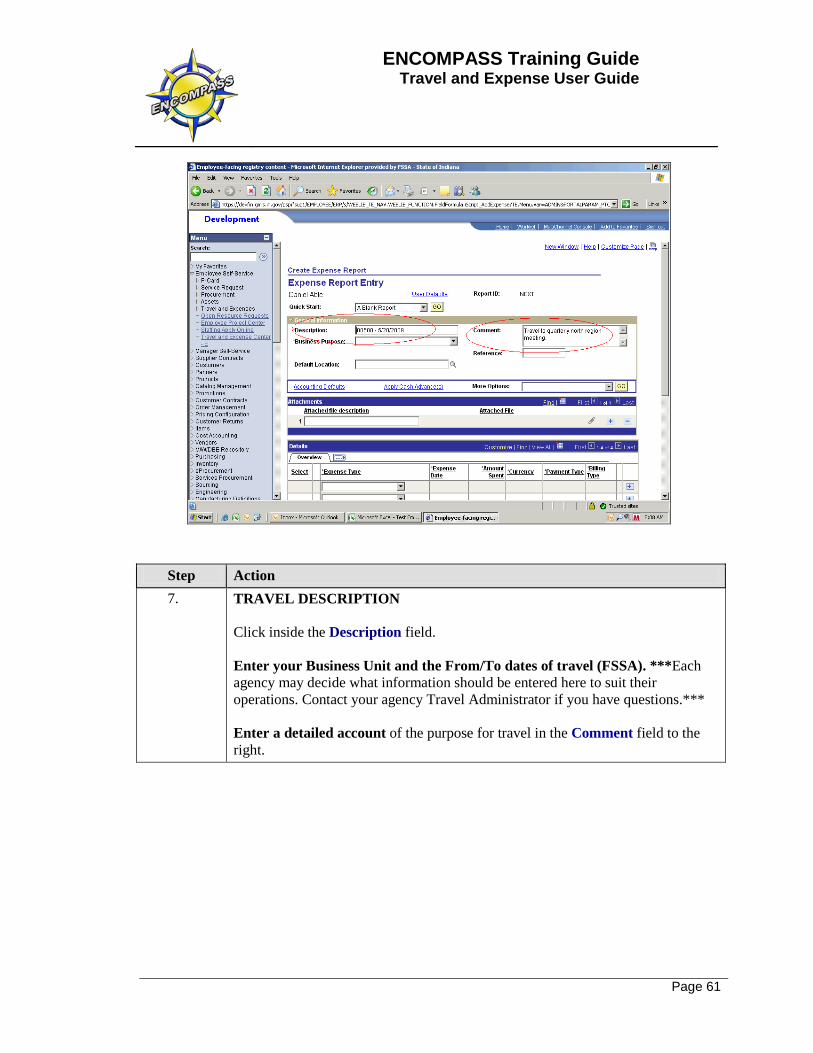
Step Action 7. TRAVEL DESCRIPTION
Click inside the Description field. Enter your Business Unit and the From/To dates of travel (FSSA). ***Each agency may decide what information should be entered here to suit their operations. Contact your agency Travel Administrator if you have questions.*** Enter a detailed account of the purpose for travel in the Comment field to the right.

ENCOMPASS Training Guide Travel and Expense User Guide
Page 62
Step Action 8. BUSINESS PURPOSE
The Business Purpose simply identifies the travel as "in state," or "out-of-state." If user defaults have been previously set, this field should default to Business - In State, as this is most common. Click the Business Purpose list and select the appropriate option.
ENCOMPASS Training Guide Travel and Expense User Guide
Page 63
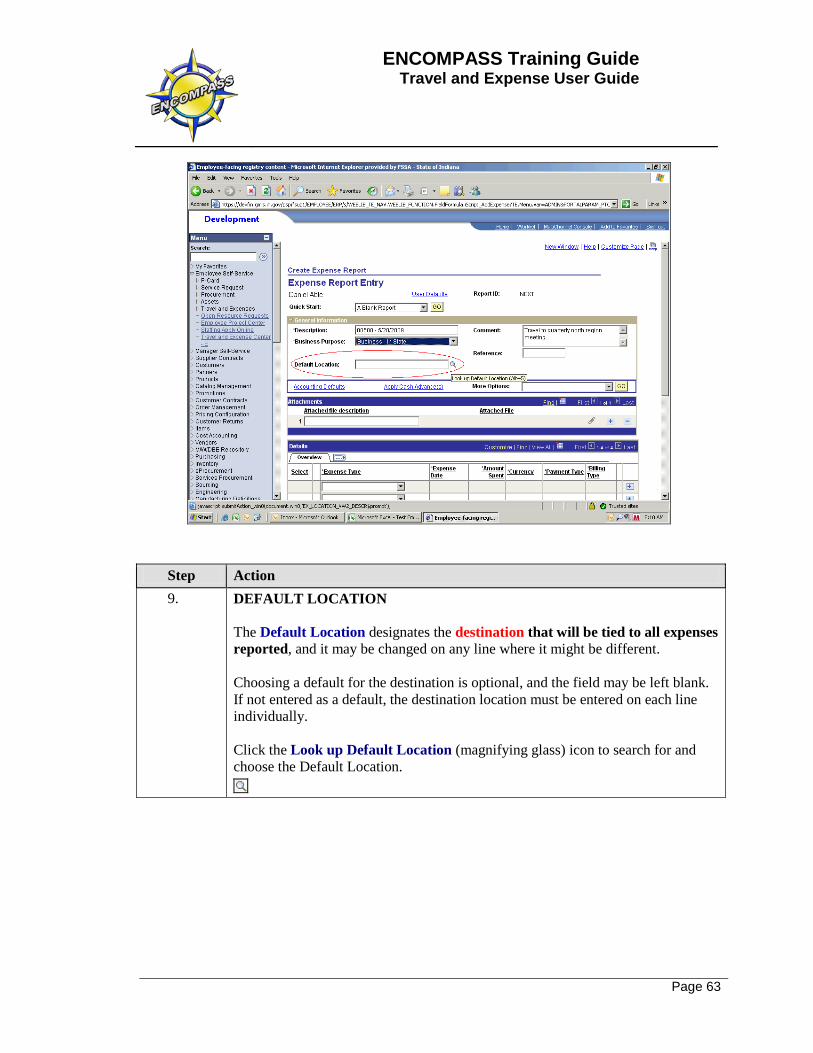
Step Action 9. DEFAULT LOCATION
The Default Location designates the destination that will be tied to all expenses reported, and it may be changed on any line where it might be different. Choosing a default for the destination is optional, and the field may be left blank. If not entered as a default, the destination location must be entered on each line individually. Click the Look up Default Location (magnifying glass) icon to search for and choose the Default Location.

ENCOMPASS Training Guide Travel and Expense User Guide
Page 64
Step Action 10. Click the down arrow next to the Search by list.
ENCOMPASS Training Guide Travel and Expense User Guide
Page 65
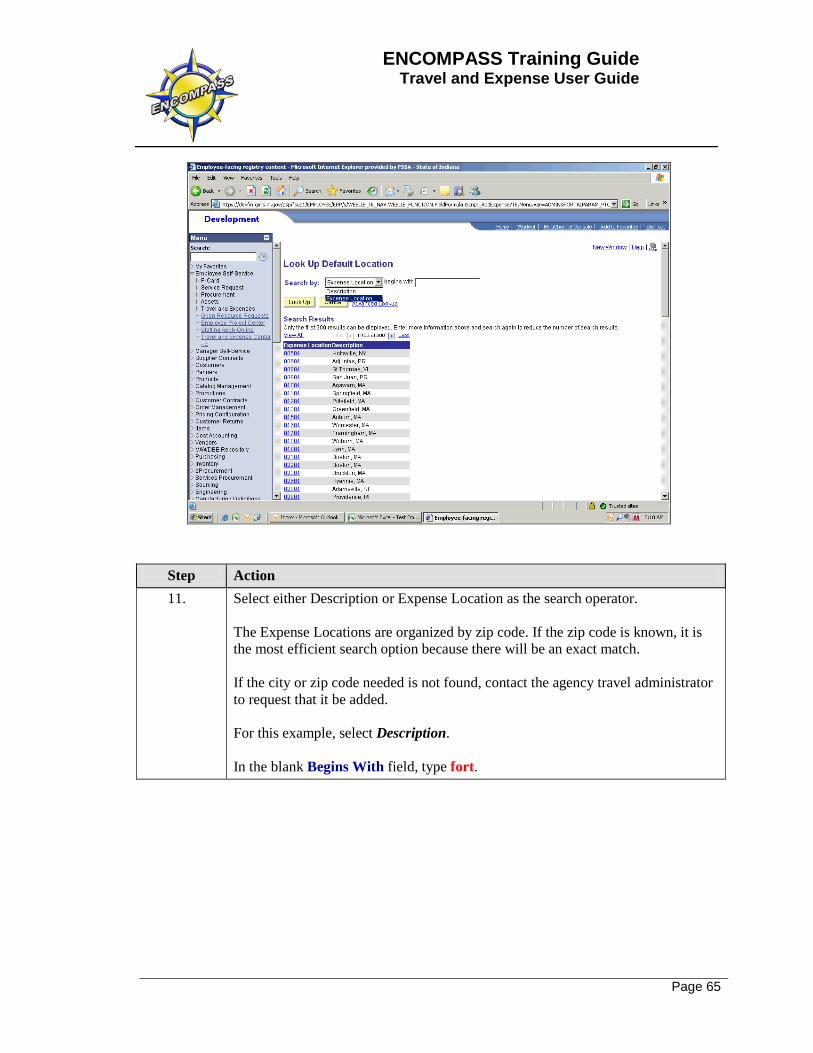
Step Action 11. Select either Description or Expense Location as the search operator.
The Expense Locations are organized by zip code. If the zip code is known, it is the most efficient search option because there will be an exact match. If the city or zip code needed is not found, contact the agency travel administrator to request that it be added. For this example, select Description. In the blank Begins With field, type fort.
ENCOMPASS Training Guide Travel and Expense User Guide
Page 66
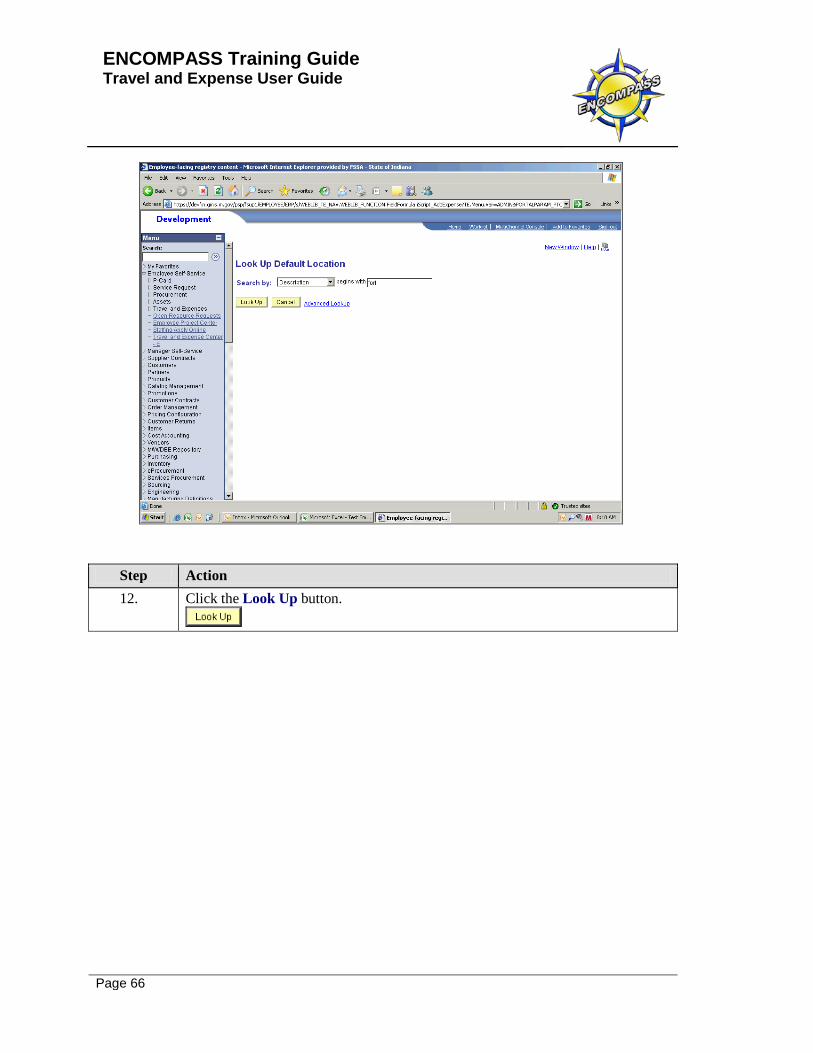
Step Action 12. Click the Look Up button.
ENCOMPASS Training Guide Travel and Expense User Guide
Page 67
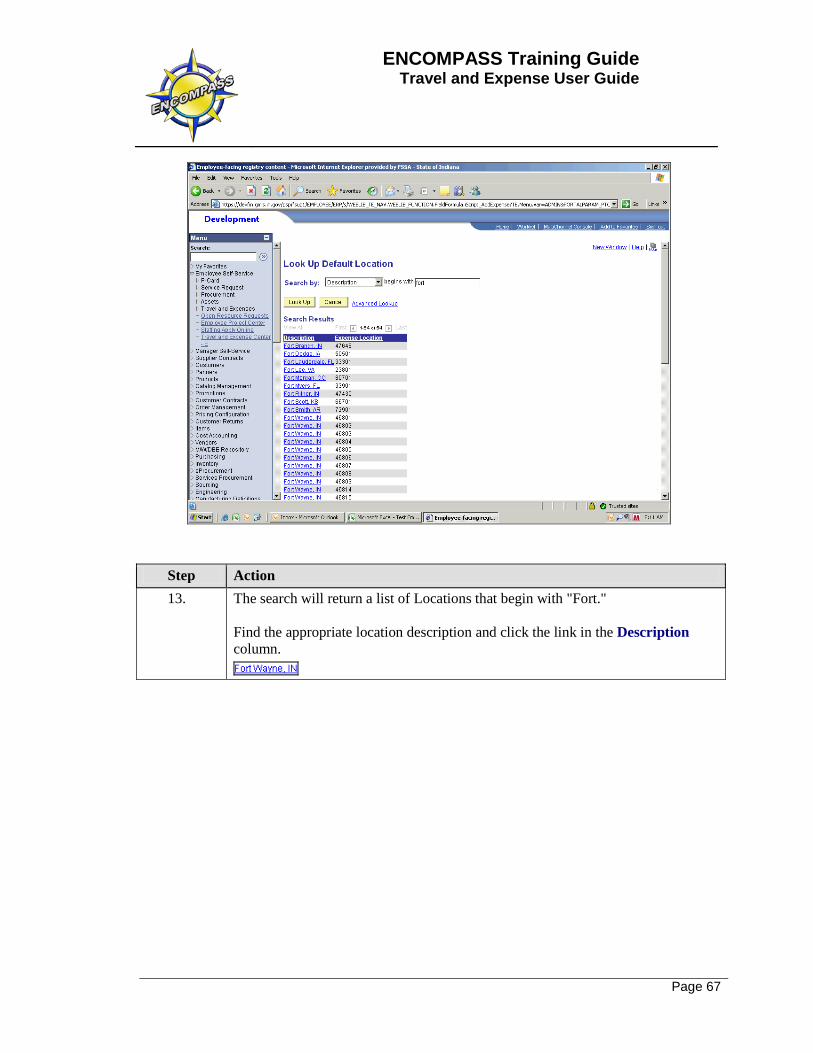
Step Action 13. The search will return a list of Locations that begin with "Fort."
Find the appropriate location description and click the link in the Description column.
ENCOMPASS Training Guide Travel and Expense User Guide
Page 68
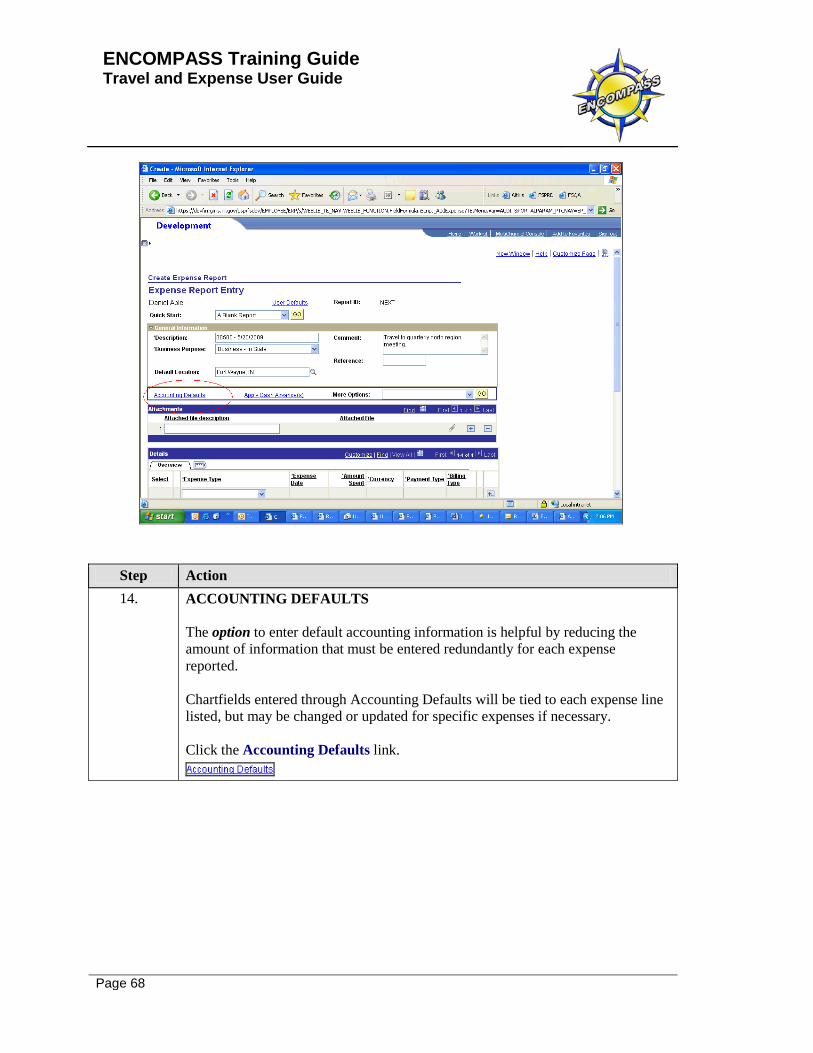
Step Action 14. ACCOUNTING DEFAULTS
The option to enter default accounting information is helpful by reducing the amount of information that must be entered redundantly for each expense reported. Chartfields entered through Accounting Defaults will be tied to each expense line listed, but may be changed or updated for specific expenses if necessary. Click the Accounting Defaults link.

ENCOMPASS Training Guide Travel and Expense User Guide
Page 69
Step Action 15. Accounting information entered on the Accounting Defaults page will be applied
to each Expense Report line. The Chartfields required vary by agency. The correct accounting information should be provided by the division controller, accounting department, or manager/supervisor depending on the agency structure. The Account (not shown on this page) will default based on the type of expense. Enter the appropriate accounting information and click the OK button to return to the Expense Report.

ENCOMPASS Training Guide Travel and Expense User Guide
Page 70
Step Action 16. ATTACHMENTS AND DOCUMENTATION
Receipts and other required expenses documentation may be scanned and attached to the Expense Report electronically. Click the Paper Clip icon to browse your file directories, locate the documents, and upload them as attachments. Enter a description of the information contained in the attached file. Click the "+" to add rows as needed for additional attachments.

ENCOMPASS Training Guide Travel and Expense User Guide
Page 71
Step Action 17. ENTER TRAVEL EXPENSES
To begin listing travel expenses for reimbursement (or to document those that have been pre-paid), click the down arrow on the Expense Type field and select an expense description. All expenses for a travel event including those that were paid for in advance or by a vendor should be listed on the Expense Report. Using the Payment Type and Billing Type of Prepaid for these types of expenses, Travel and Expenses will calculate the amount to be reimbursed to the traveler only. For this example, select Lodging/Hotel.
ENCOMPASS Training Guide Travel and Expense User Guide
Page 72
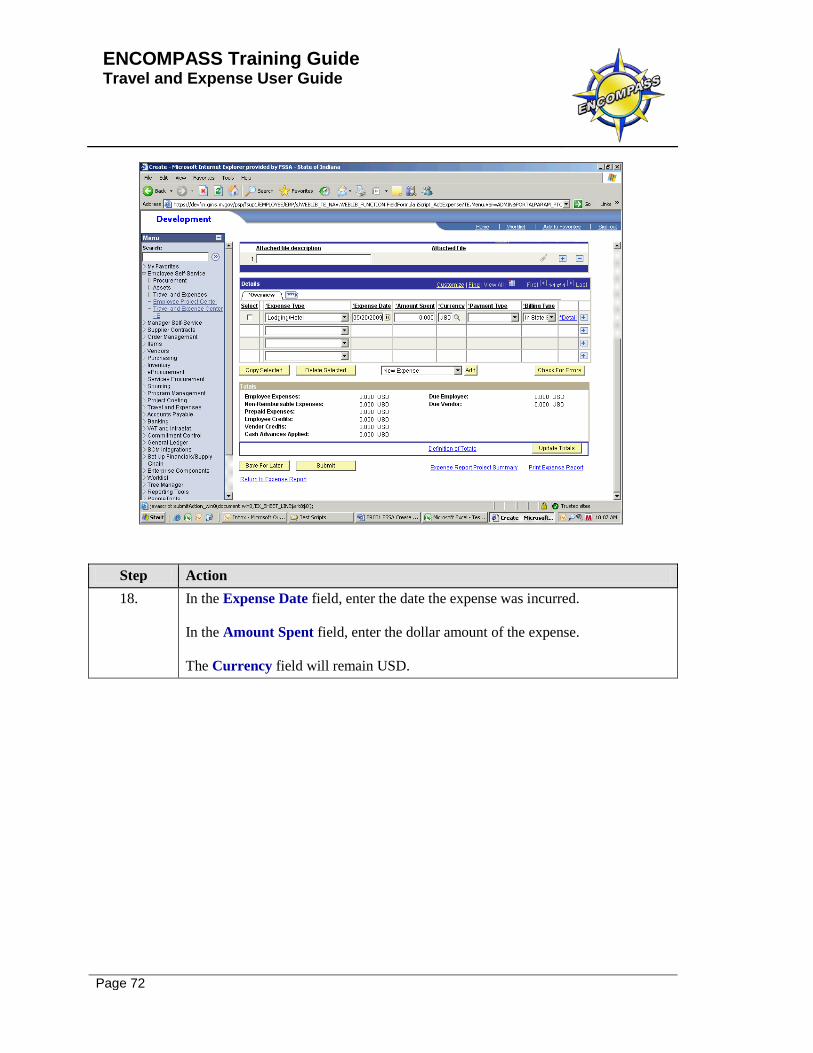
Step Action 18. In the Expense Date field, enter the date the expense was incurred.
In the Amount Spent field, enter the dollar amount of the expense. The Currency field will remain USD.

ENCOMPASS Training Guide Travel and Expense User Guide
Page 73
Step Action 19. PAYMENT TYPE
Employee Paid should be used for an expense paid by the employee to be reimbursed. Prepaid should be used for an expense which the agency/division has paid in advance, or will be billed for directly. Travel Card should be used for an expense charged to a State-issued travel credit card. Click the Payment Type field down arrow and make a selection from the list.
ENCOMPASS Training Guide Travel and Expense User Guide
Page 74
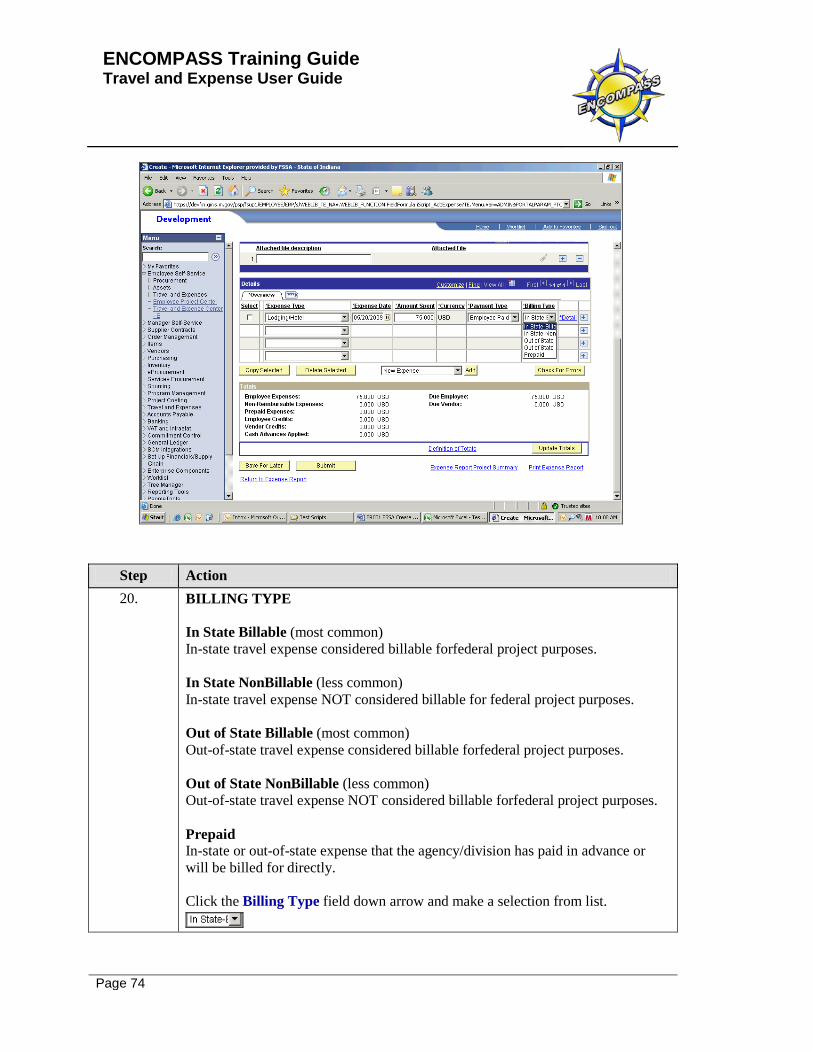
Step Action 20. BILLING TYPE
In State Billable (most common) In-state travel expense considered billable forfederal project purposes. In State NonBillable (less common) In-state travel expense NOT considered billable for federal project purposes. Out of State Billable (most common) Out-of-state travel expense considered billable forfederal project purposes. Out of State NonBillable (less common) Out-of-state travel expense NOT considered billable forfederal project purposes. Prepaid In-state or out-of-state expense that the agency/division has paid in advance or will be billed for directly. Click the Billing Type field down arrow and make a selection from list.

ENCOMPASS Training Guide Travel and Expense User Guide
Page 75
Step Action 21. EXPENSE DETAIL
Click the Detail link. The Expense Detail page will open where all required information related to this expense line must be entered.
ENCOMPASS Training Guide Travel and Expense User Guide
Page 76
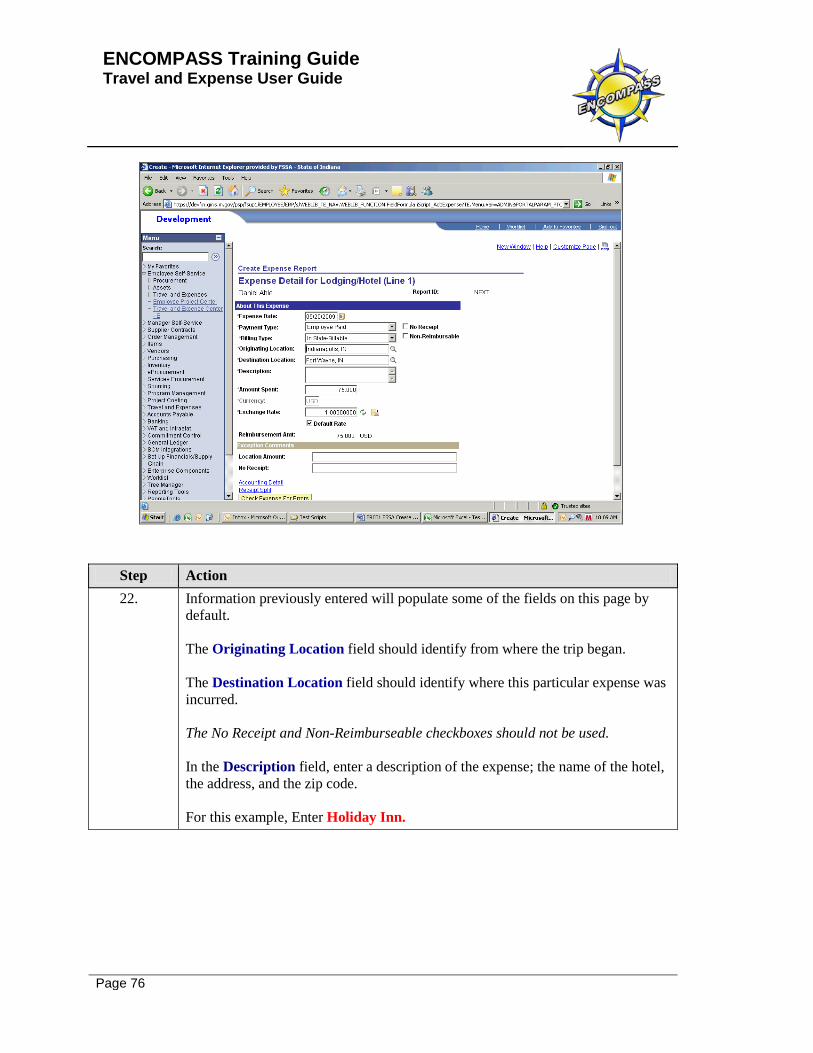
Step Action 22. Information previously entered will populate some of the fields on this page by
default. The Originating Location field should identify from where the trip began. The Destination Location field should identify where this particular expense was incurred. The No Receipt and Non-Reimburseable checkboxes should not be used. In the Description field, enter a description of the expense; the name of the hotel, the address, and the zip code. For this example, Enter Holiday Inn.
ENCOMPASS Training Guide Travel and Expense User Guide
Page 77
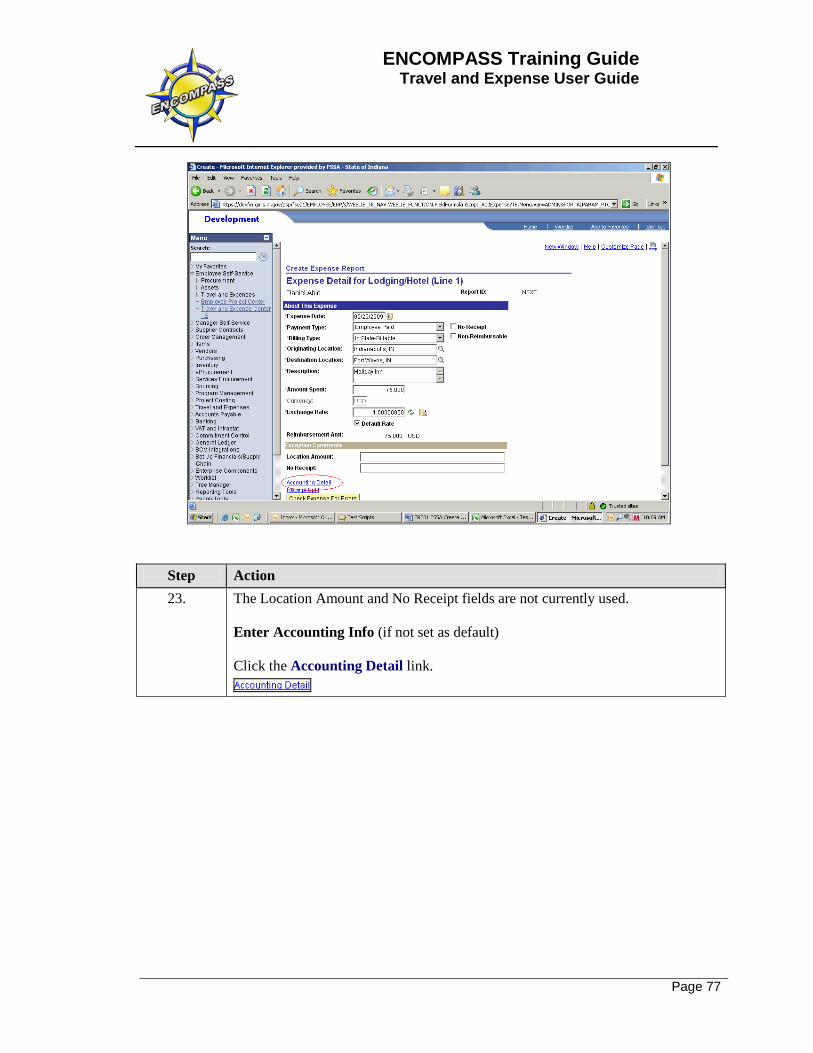
Step Action 23. The Location Amount and No Receipt fields are not currently used.
Enter Accounting Info (if not set as default) Click the Accounting Detail link.

ENCOMPASS Training Guide Travel and Expense User Guide
Page 78
Step Action 24. ACCOUNTING DETAIL
If Accounting Defaults have been set-up, the required chartfield information will populate by default. It may be entered manually or changed if necessary. The correct accounting information should be provided by the division controller, accounting department, or manager/supervisor depending on the agency structure.

ENCOMPASS Training Guide Travel and Expense User Guide
Page 79
Step Action 25. Click the OK button when the required accounting information has been
entered/verified.
ENCOMPASS Training Guide Travel and Expense User Guide
Page 80
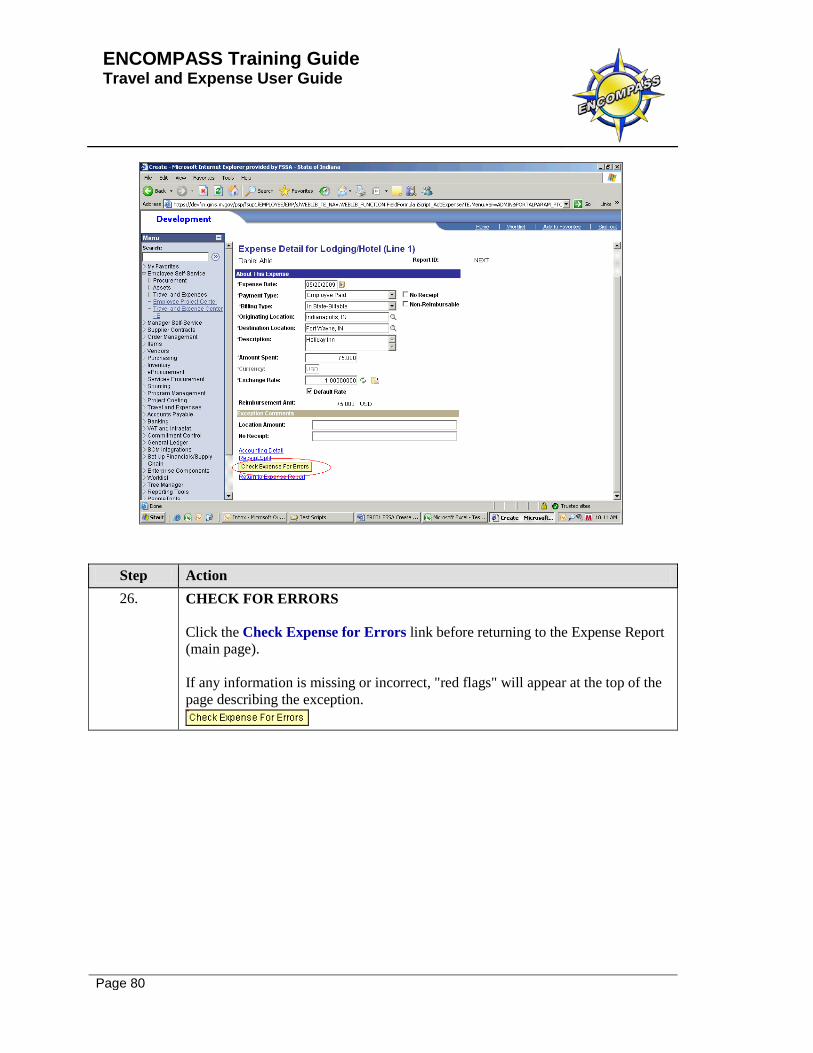
Step Action 26. CHECK FOR ERRORS
Click the Check Expense for Errors link before returning to the Expense Report (main page). If any information is missing or incorrect, "red flags" will appear at the top of the page describing the exception.
ENCOMPASS Training Guide Travel and Expense User Guide
Page 81
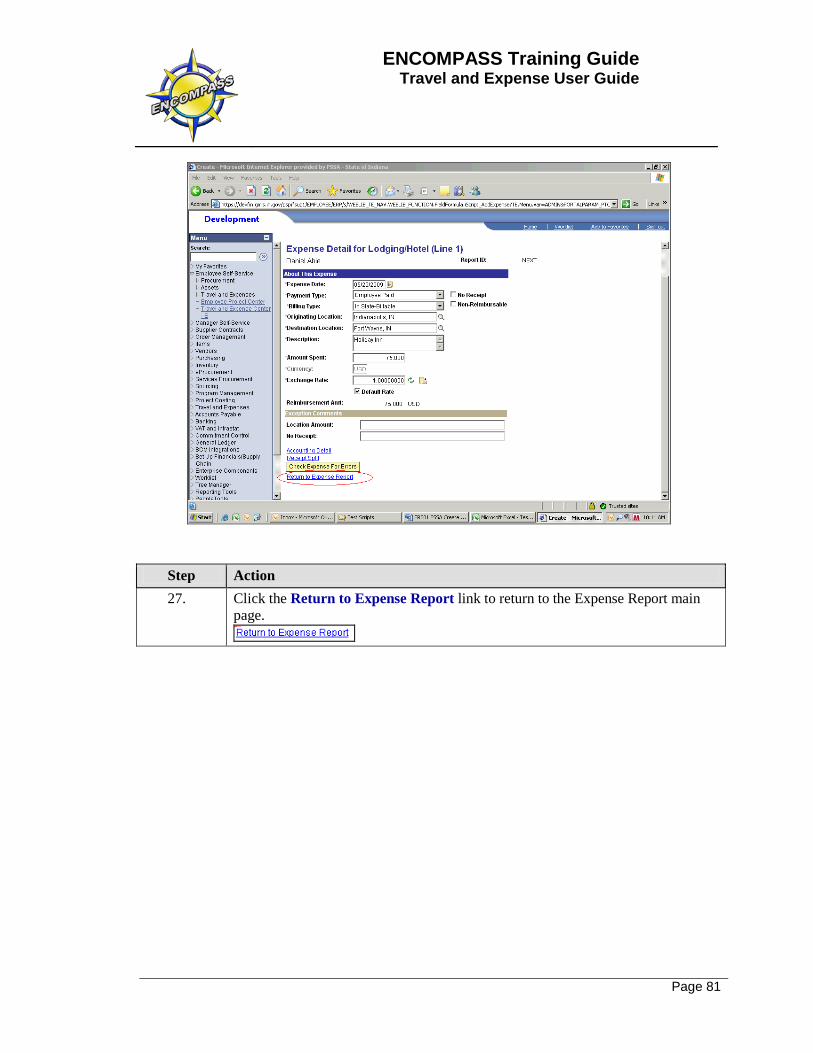
Step Action 27. Click the Return to Expense Report link to return to the Expense Report main
page.
ENCOMPASS Training Guide Travel and Expense User Guide
Page 82
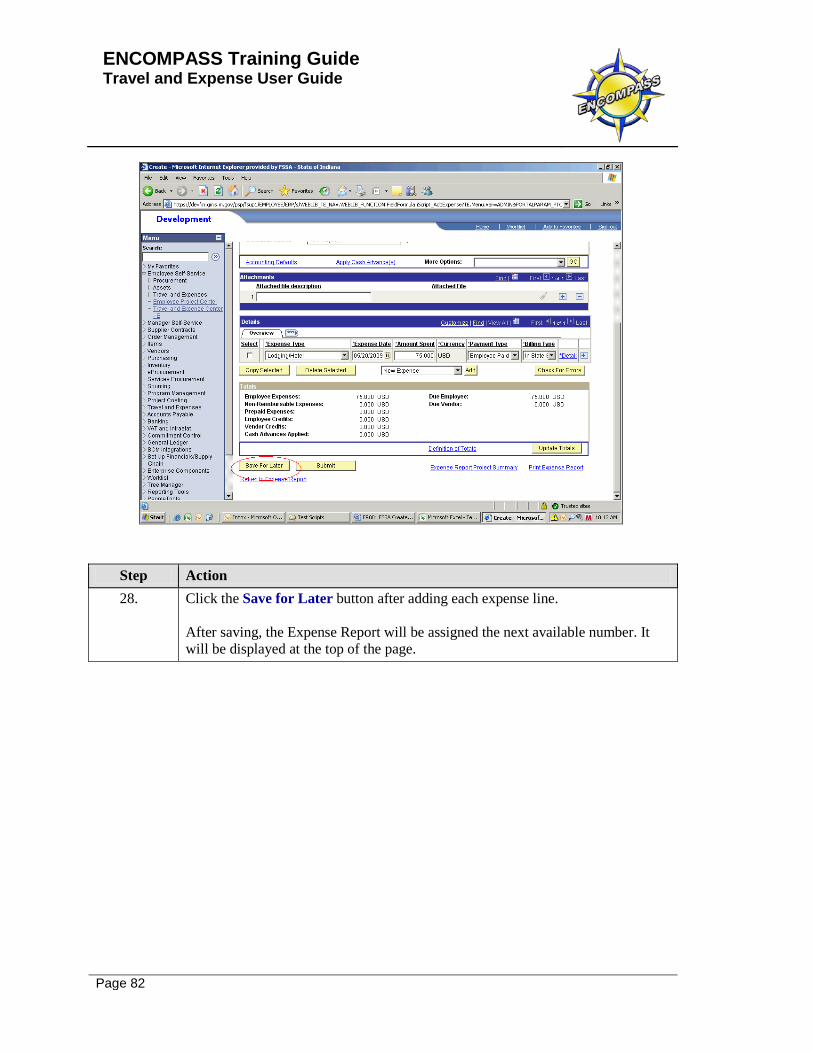
Step Action 28. Click the Save for Later button after adding each expense line.
After saving, the Expense Report will be assigned the next available number. It will be displayed at the top of the page.
ENCOMPASS Training Guide Travel and Expense User Guide
Page 83
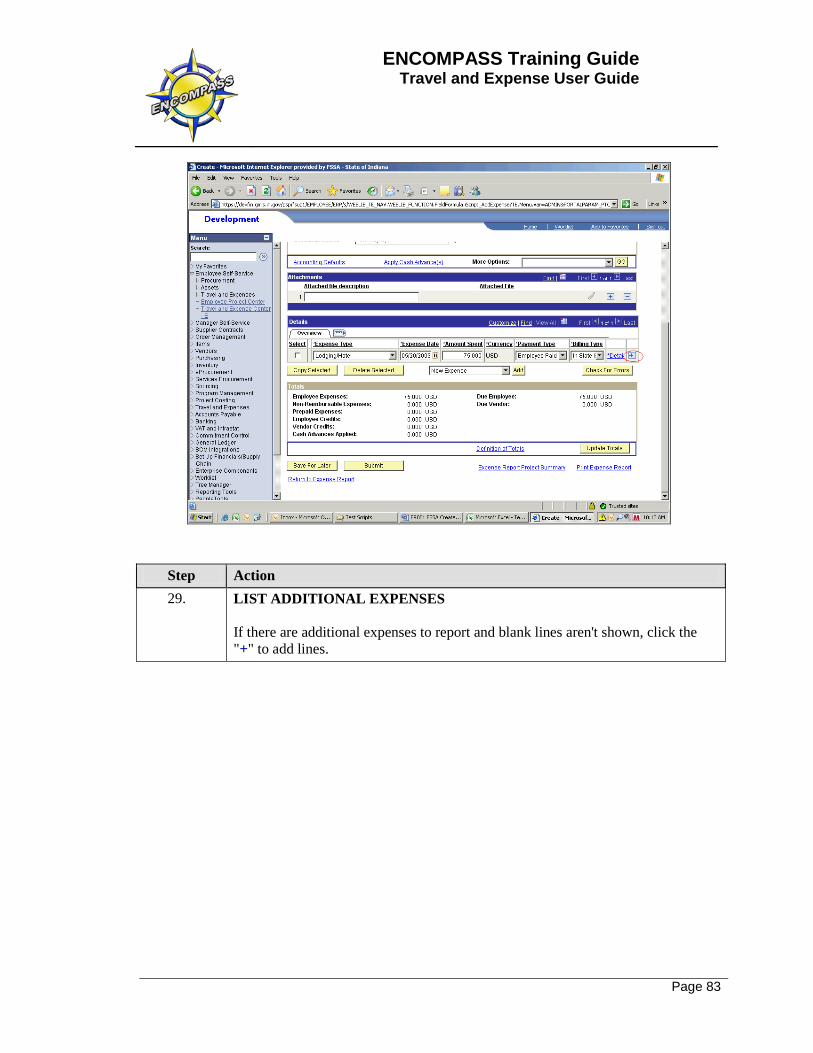
Step Action 29. LIST ADDITIONAL EXPENSES
If there are additional expenses to report and blank lines aren't shown, click the "+" to add lines.

ENCOMPASS Training Guide Travel and Expense User Guide
Page 84
Step Action 30. EXPENSE TYPE - MILEAGE
When adding mileage expenses, notice that the Amount Spent field is inactive on the main page and a dollar amount cannot be entered. Travel and Expenses will automatically calculate the amount due based on the miles traveled according the State's current mileage allowance. To enter the number of miles being claimed for mileage expense lines, click the Detail link at the end of the row to go to the Expense Detail page (after entering the Payment Type and Billing Type).

ENCOMPASS Training Guide Travel and Expense User Guide
Page 85
Step Action 31. Enter the number of miles claimed in the Miles field.
When the page refrehses, the dollar amount due will be calculated based on the current allowance and displayed as the Reimbursement Amount on this page and in the Amount field on the main page. Be sure to also complete the other required fields for this expense (Originating/Destination Location, Description, Accounting Detail, etc.) as necessary. Click the Return to Expense Report page to return to the main page.
ENCOMPASS Training Guide Travel and Expense User Guide
Page 86
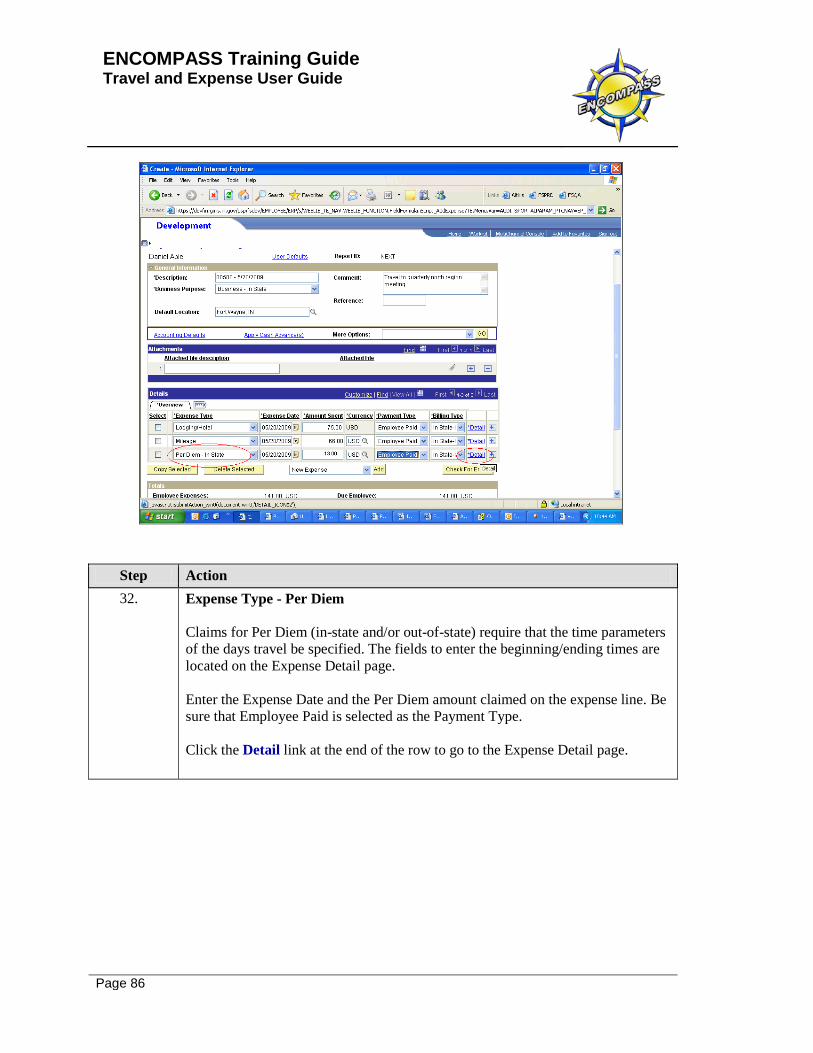
Step Action 32. Expense Type - Per Diem
Claims for Per Diem (in-state and/or out-of-state) require that the time parameters of the days travel be specified. The fields to enter the beginning/ending times are located on the Expense Detail page. Enter the Expense Date and the Per Diem amount claimed on the expense line. Be sure that Employee Paid is selected as the Payment Type. Click the Detail link at the end of the row to go to the Expense Detail page.

ENCOMPASS Training Guide Travel and Expense User Guide
Page 87
Step Action 33. The Start Time and End Time fields should document the travel time frame
eligible for per diem reimbursement. Questions about per diem allowances and requirements should be directed to the agency travel administrator. Per Diem amounts are not currently calculated automatically and must be entered manually. Do not use the Refresh Per Diem Amounts button or Per Diem Deductions link below. Be sure to also complete the other required fields for this expense (Originating/Destination Location, Description, Accounting Detail, etc.) as necessary. Click the Return to Expense Report page to return to the main page.
ENCOMPASS Training Guide Travel and Expense User Guide
Page 88
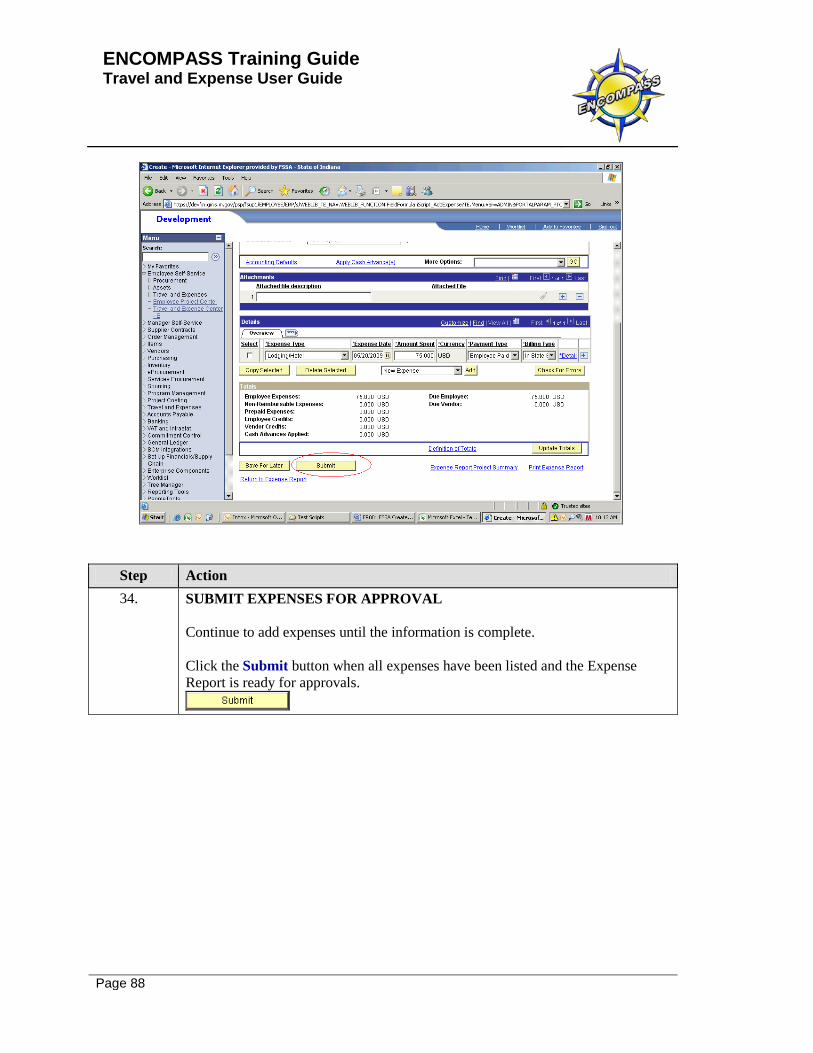
Step Action 34. SUBMIT EXPENSES FOR APPROVAL
Continue to add expenses until the information is complete. Click the Submit button when all expenses have been listed and the Expense Report is ready for approvals.
ENCOMPASS Training Guide Travel and Expense User Guide
Page 89
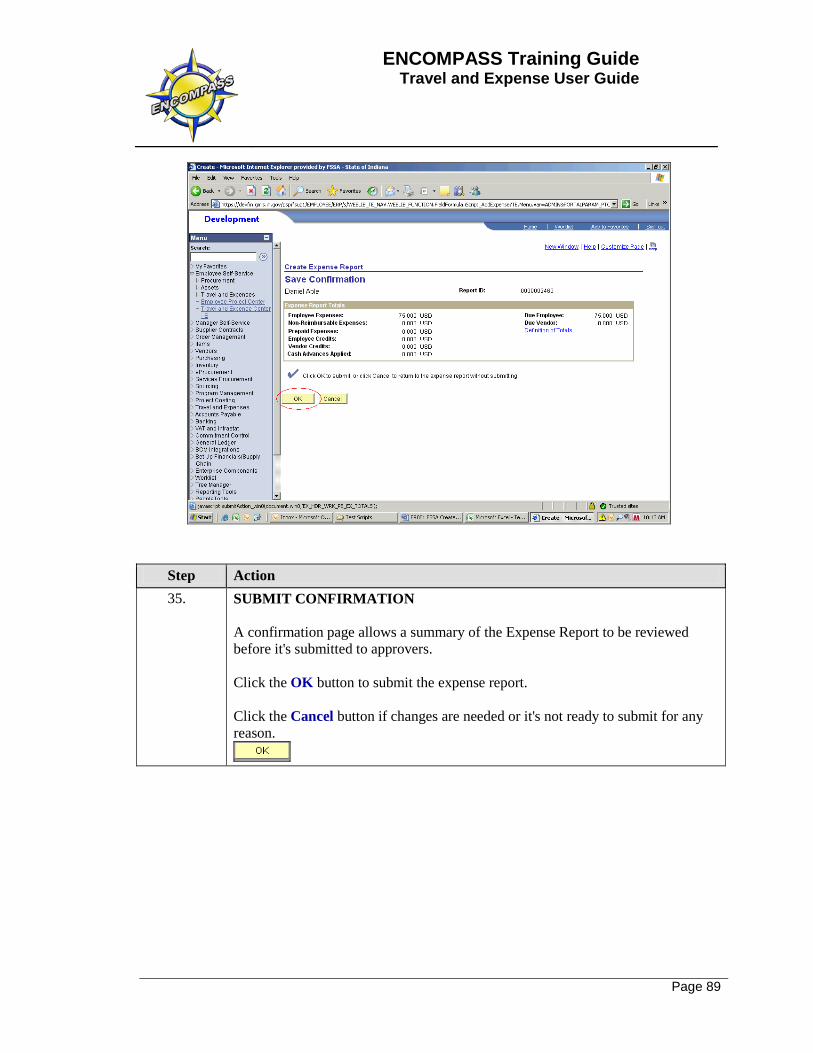
Step Action 35. SUBMIT CONFIRMATION
A confirmation page allows a summary of the Expense Report to be reviewed before it's submitted to approvers. Click the OK button to submit the expense report. Click the Cancel button if changes are needed or it's not ready to submit for any reason.
ENCOMPASS Training Guide Travel and Expense User Guide
Page 90
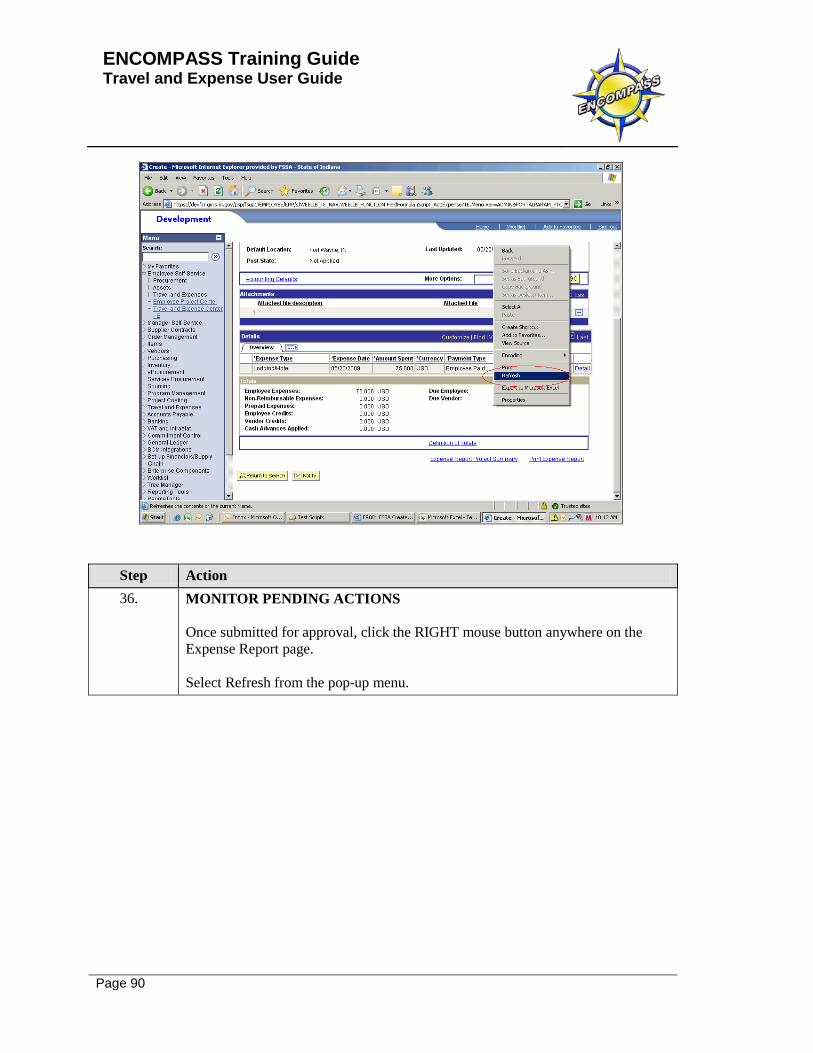
Step Action 36. MONITOR PENDING ACTIONS
Once submitted for approval, click the RIGHT mouse button anywhere on the Expense Report page. Select Refresh from the pop-up menu.

ENCOMPASS Training Guide Travel and Expense User Guide
Page 91
Step Action 37. After the page is refreshed, the Pending Actions (approval routing) for the
Expense Report will be displayed. It may take up to several minutes for the workflow routing to be visible after submission. If the Pending Actions are not displayed immediately, be patient and click the right mouse button/select refresh again. To monitor the Expense Report through the required approvals, navigate to Employee Self Service>Travel and Expenses Center>Expense Report>View from the main menu. The Pending Actions sections will update as approvals are made.
38. End of Procedure.
Create an Expense Report from a Travel Authorization
Procedure
ENCOMPASS Training Guide Travel and Expense User Guide
Page 92
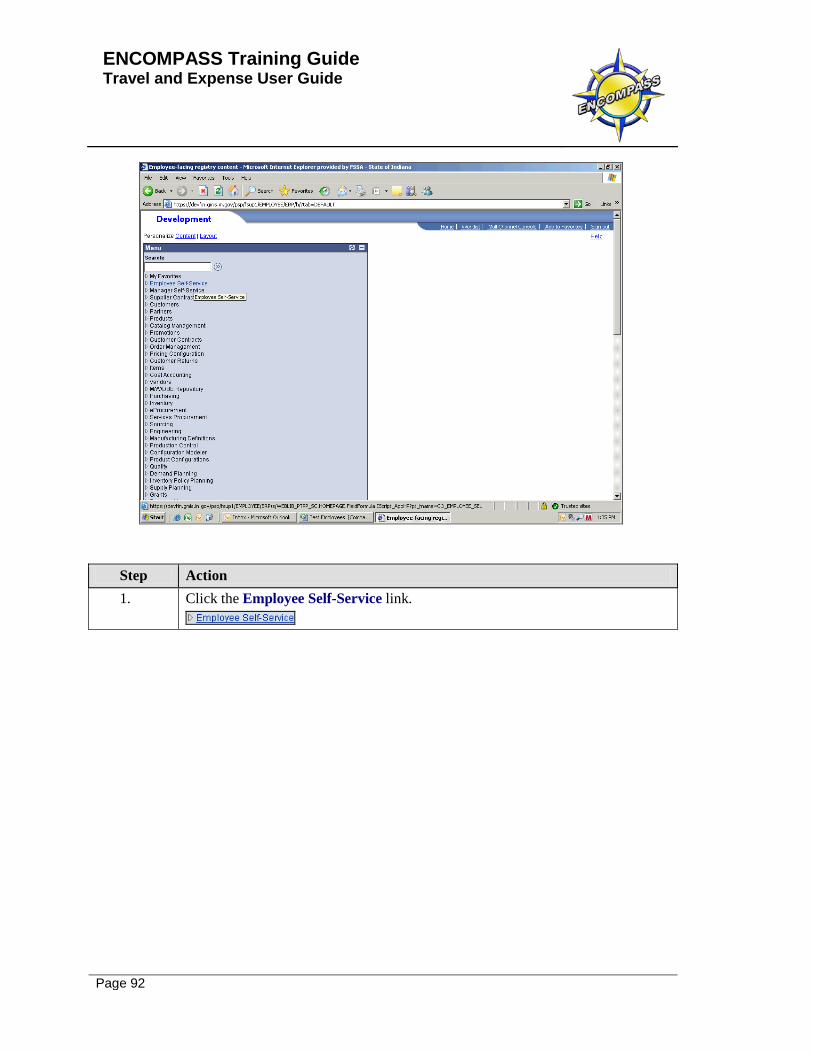
Step Action 1. Click the Employee Self-Service link.
ENCOMPASS Training Guide Travel and Expense User Guide
Page 93
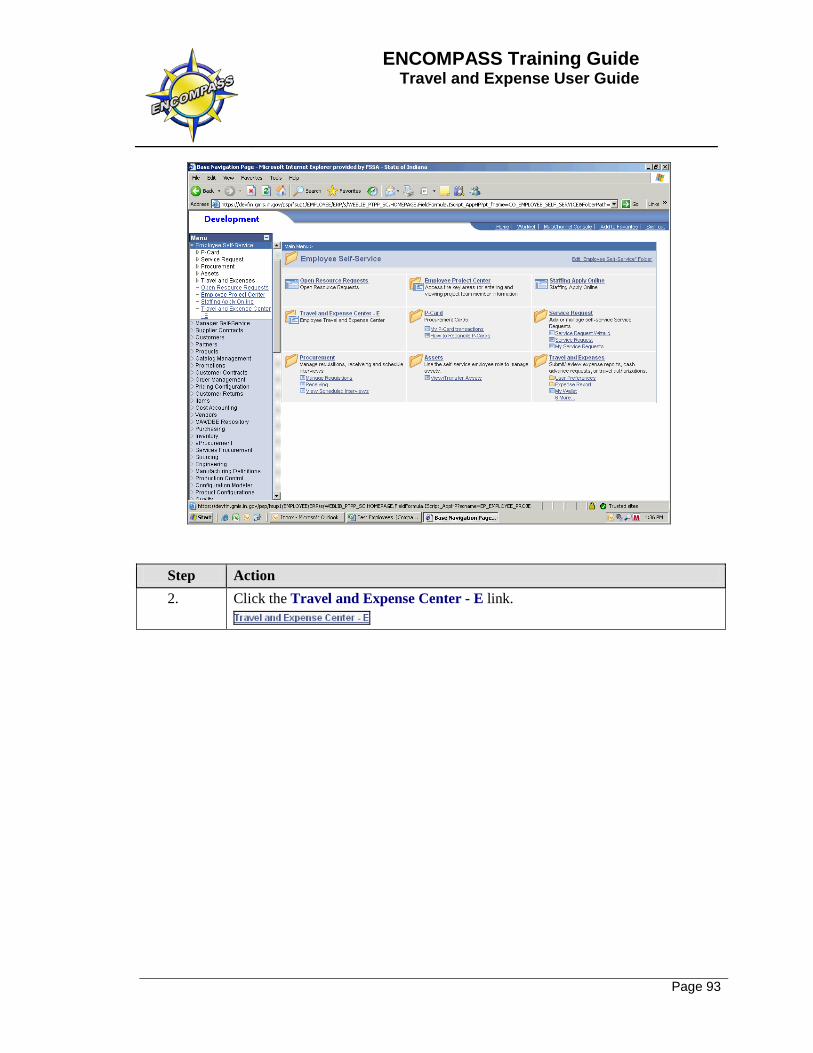
Step Action 2. Click the Travel and Expense Center - E link.
ENCOMPASS Training Guide Travel and Expense User Guide
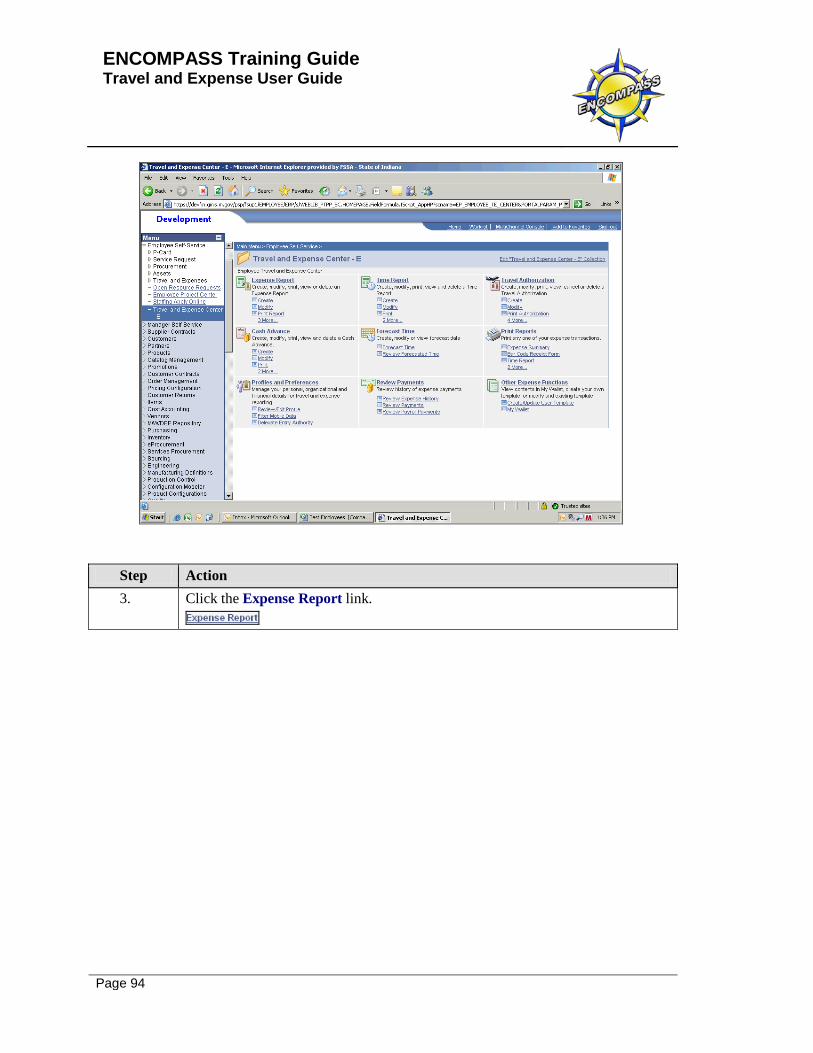
Page 94
Step Action 3. Click the Expense Report link.

ENCOMPASS Training Guide Travel and Expense User Guide
Page 95
Step Action 4. Click the Create link.
ENCOMPASS Training Guide Travel and Expense User Guide
Page 96
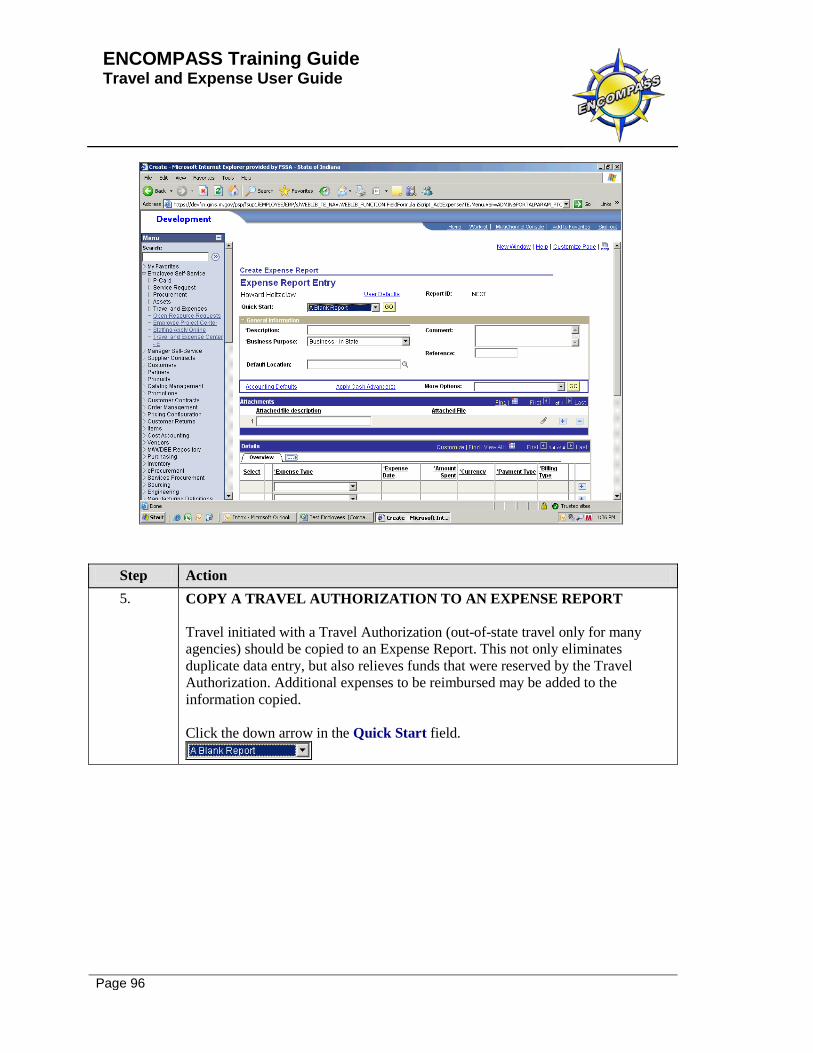
Step Action 5. COPY A TRAVEL AUTHORIZATION TO AN EXPENSE REPORT
Travel initiated with a Travel Authorization (out-of-state travel only for many agencies) should be copied to an Expense Report. This not only eliminates duplicate data entry, but also relieves funds that were reserved by the Travel Authorization. Additional expenses to be reimbursed may be added to the information copied. Click the down arrow in the Quick Start field.
ENCOMPASS Training Guide Travel and Expense User Guide
Page 97
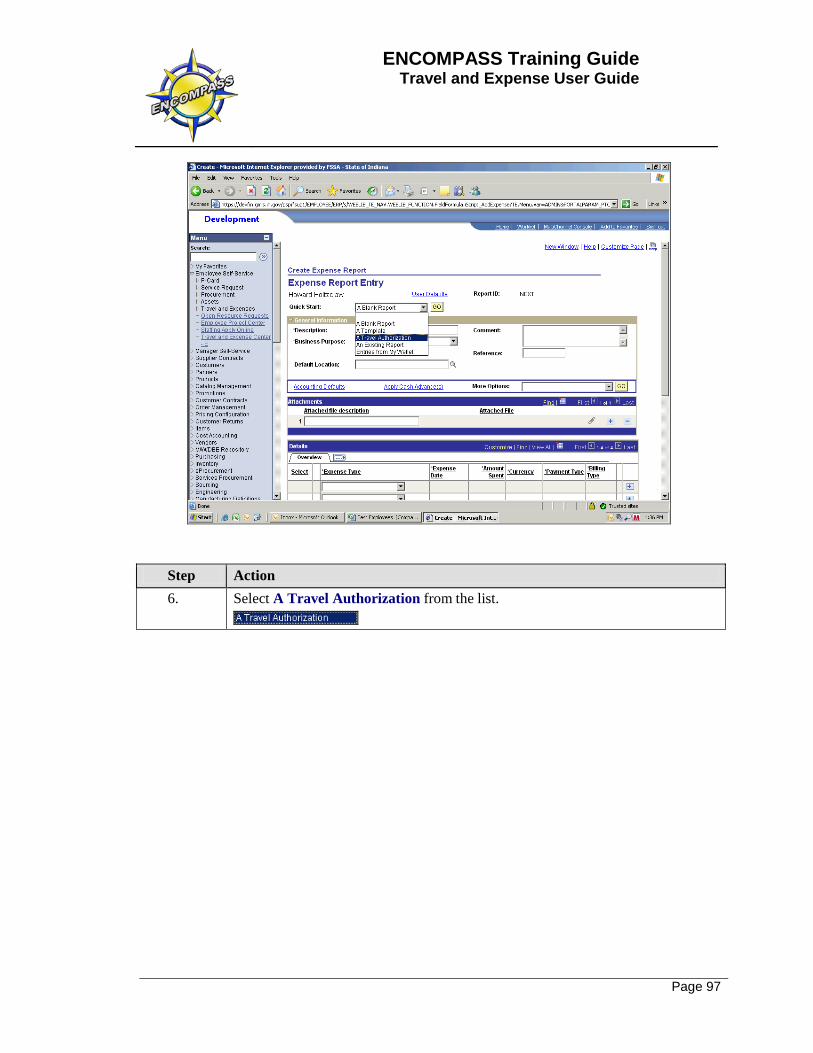
Step Action 6. Select A Travel Authorization from the list.
ENCOMPASS Training Guide Travel and Expense User Guide
Page 98
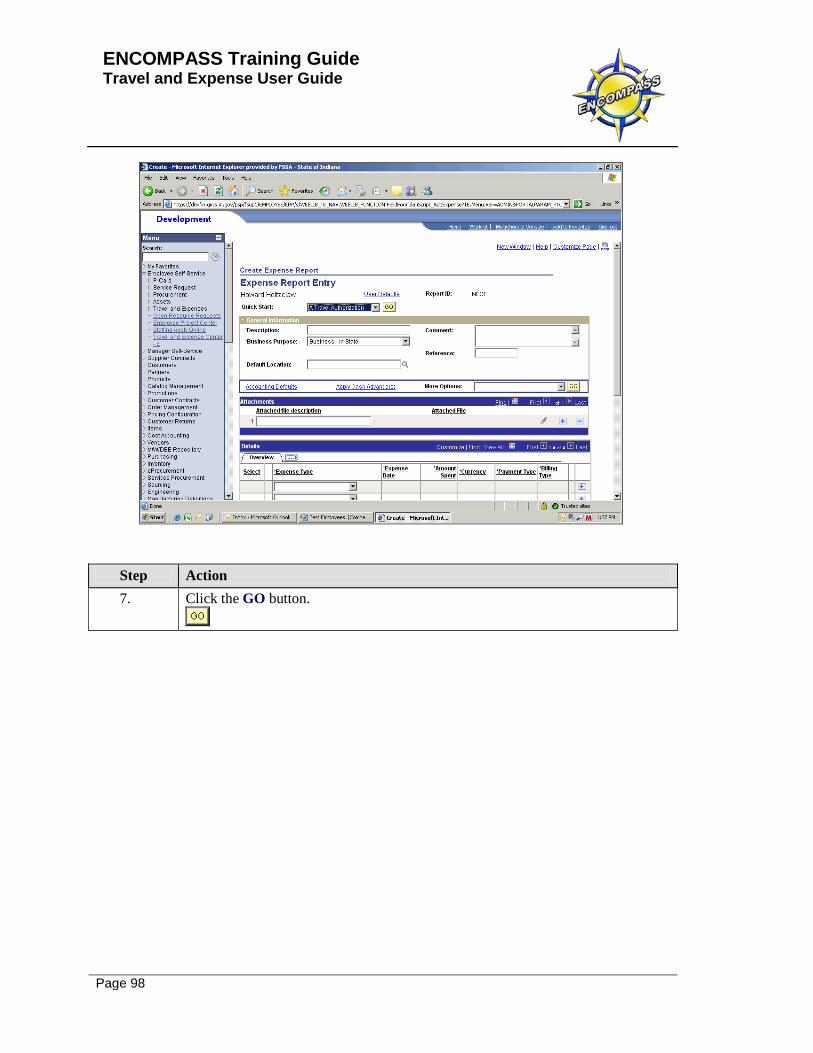
Step Action 7. Click the GO button.
ENCOMPASS Training Guide Travel and Expense User Guide
Page 99
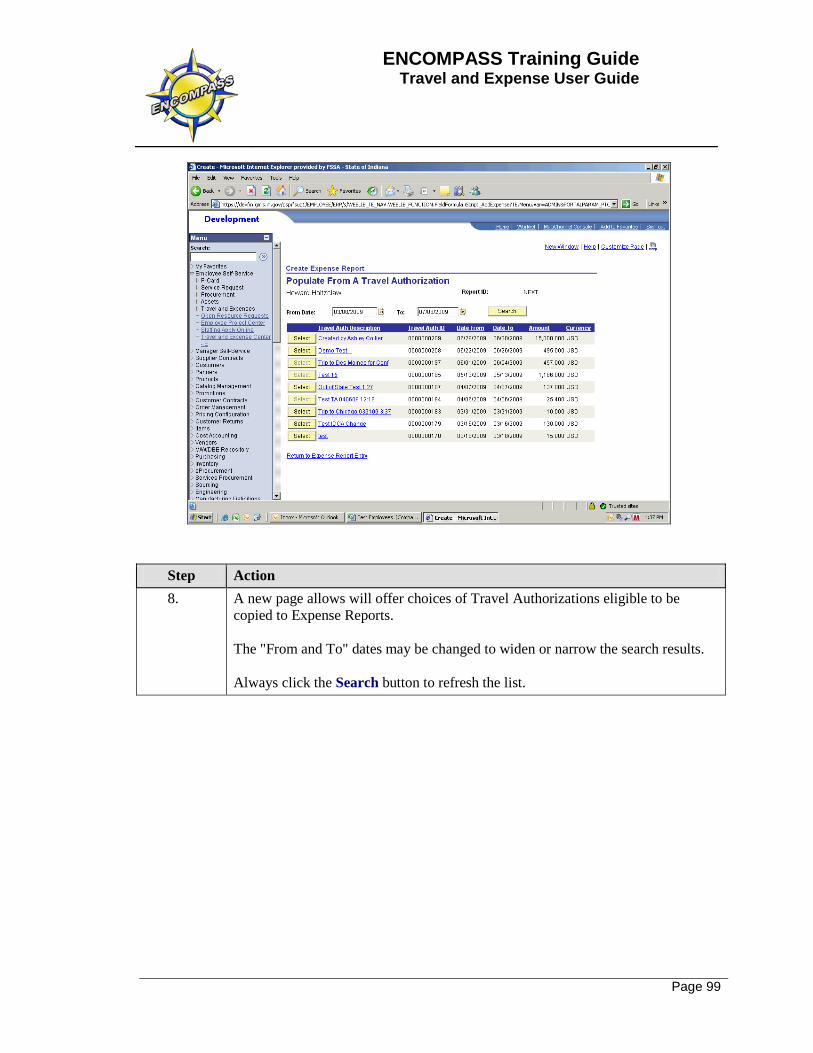
Step Action 8. A new page allows will offer choices of Travel Authorizations eligible to be
copied to Expense Reports. The "From and To" dates may be changed to widen or narrow the search results. Always click the Search button to refresh the list.
ENCOMPASS Training Guide Travel and Expense User Guide
Page 100
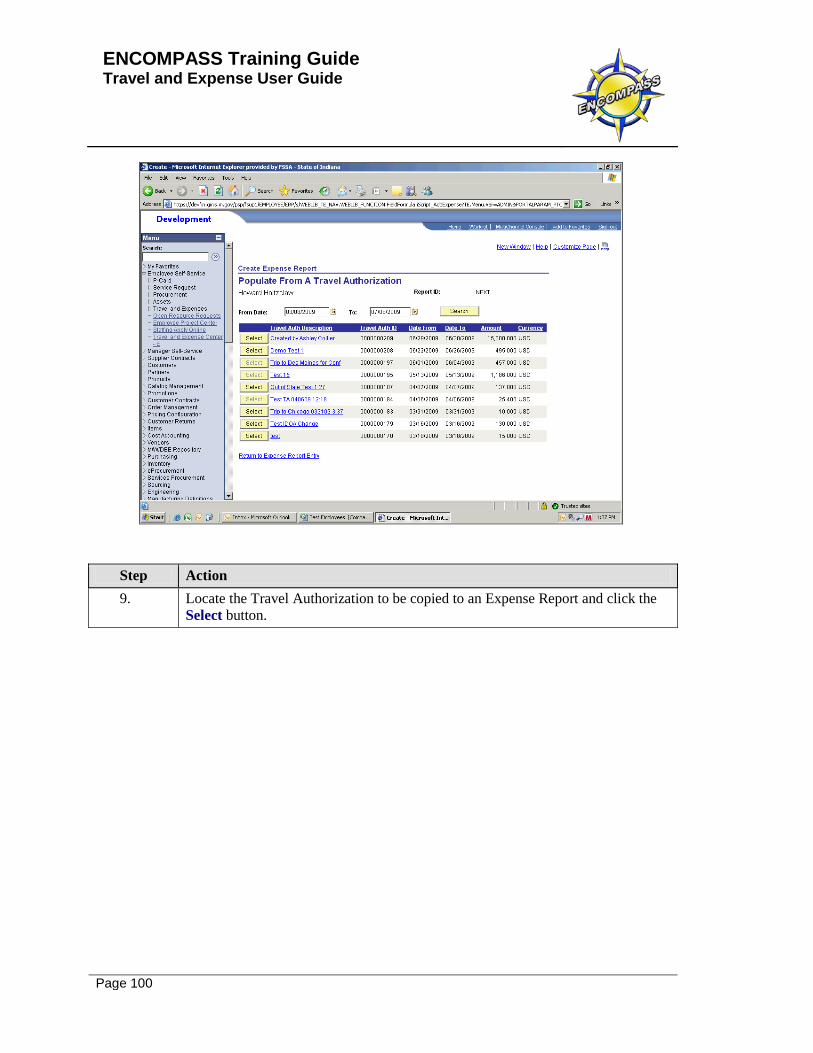
Step Action 9. Locate the Travel Authorization to be copied to an Expense Report and click the
Select button.
ENCOMPASS Training Guide Travel and Expense User Guide
Page 101
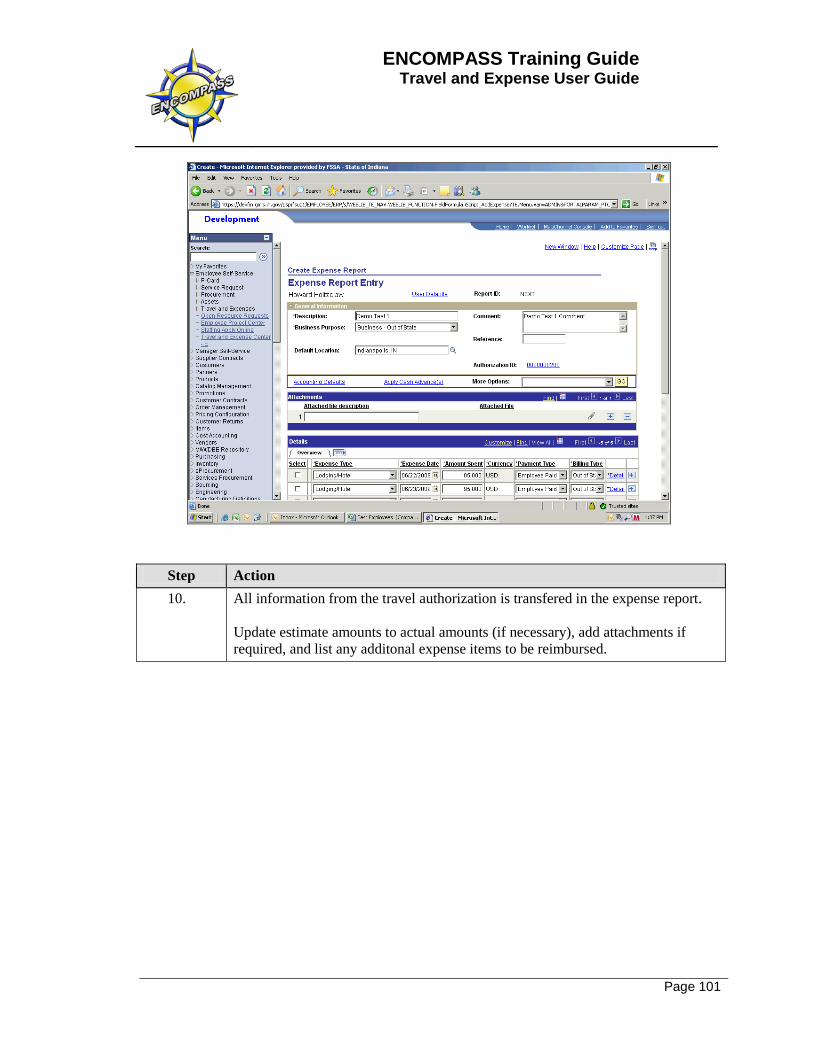
Step Action 10. All information from the travel authorization is transfered in the expense report.
Update estimate amounts to actual amounts (if necessary), add attachments if required, and list any additonal expense items to be reimbursed.
ENCOMPASS Training Guide Travel and Expense User Guide
Page 102
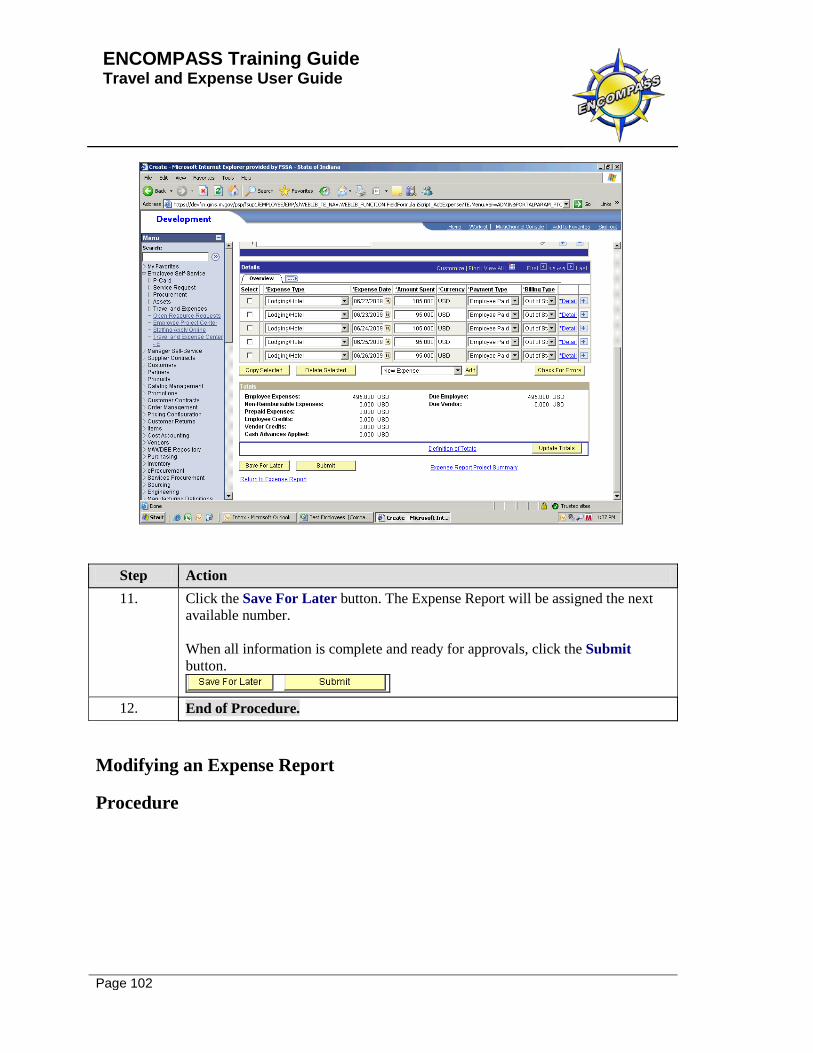
Step Action 11. Click the Save For Later button. The Expense Report will be assigned the next
available number. When all information is complete and ready for approvals, click the Submit button.
12. End of Procedure.
Modifying an Expense Report
Procedure

ENCOMPASS Training Guide Travel and Expense User Guide
Page 103
Step Action 1. Click the Employee Self-Service link.
ENCOMPASS Training Guide Travel and Expense User Guide
Page 104
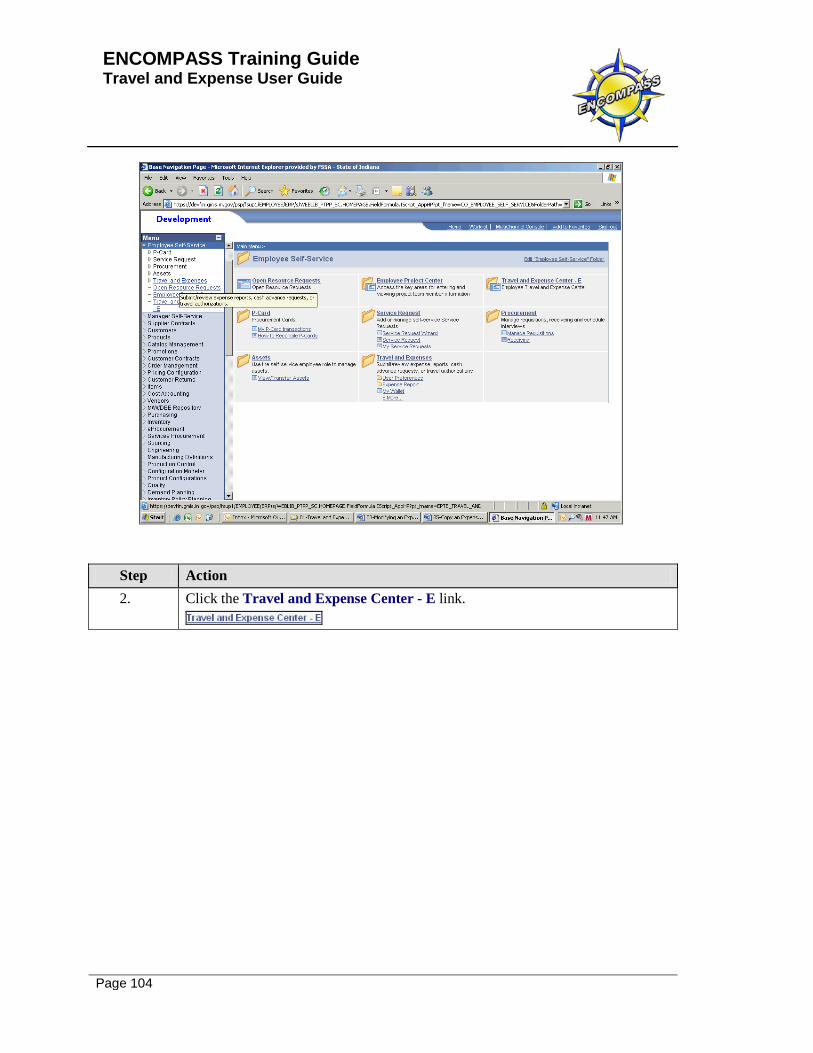
Step Action 2. Click the Travel and Expense Center - E link.
ENCOMPASS Training Guide Travel and Expense User Guide
Page 105
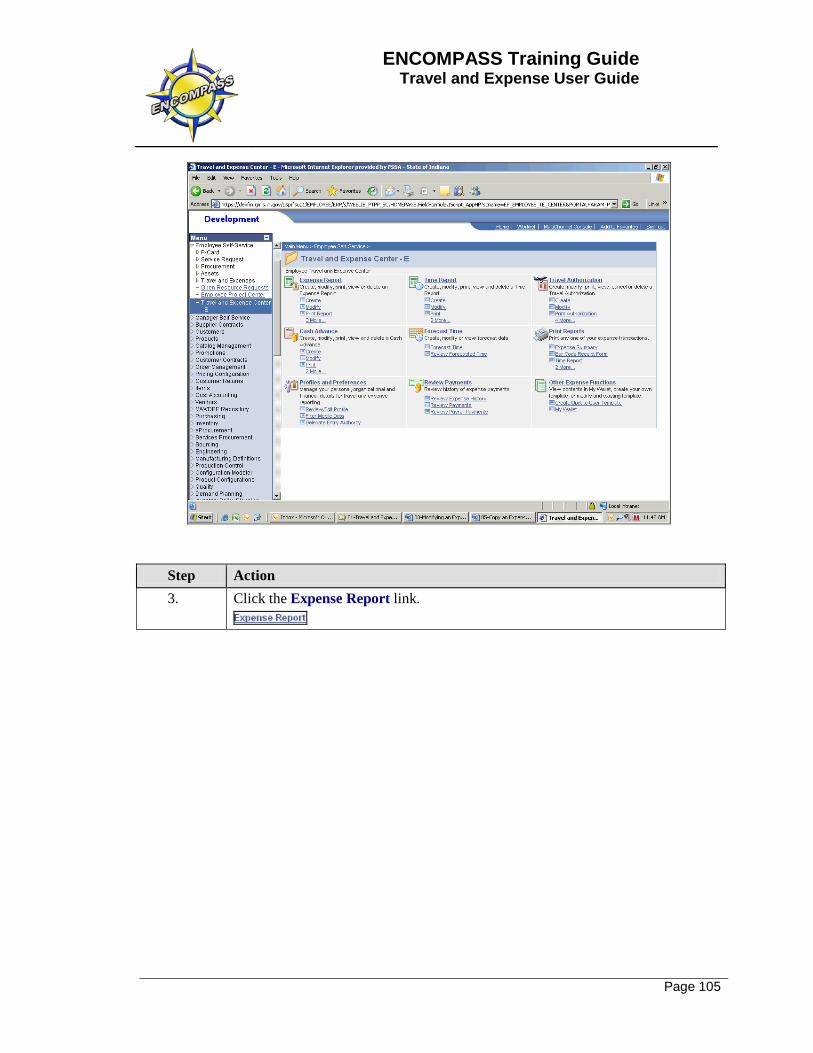
Step Action 3. Click the Expense Report link.
ENCOMPASS Training Guide Travel and Expense User Guide
Page 106
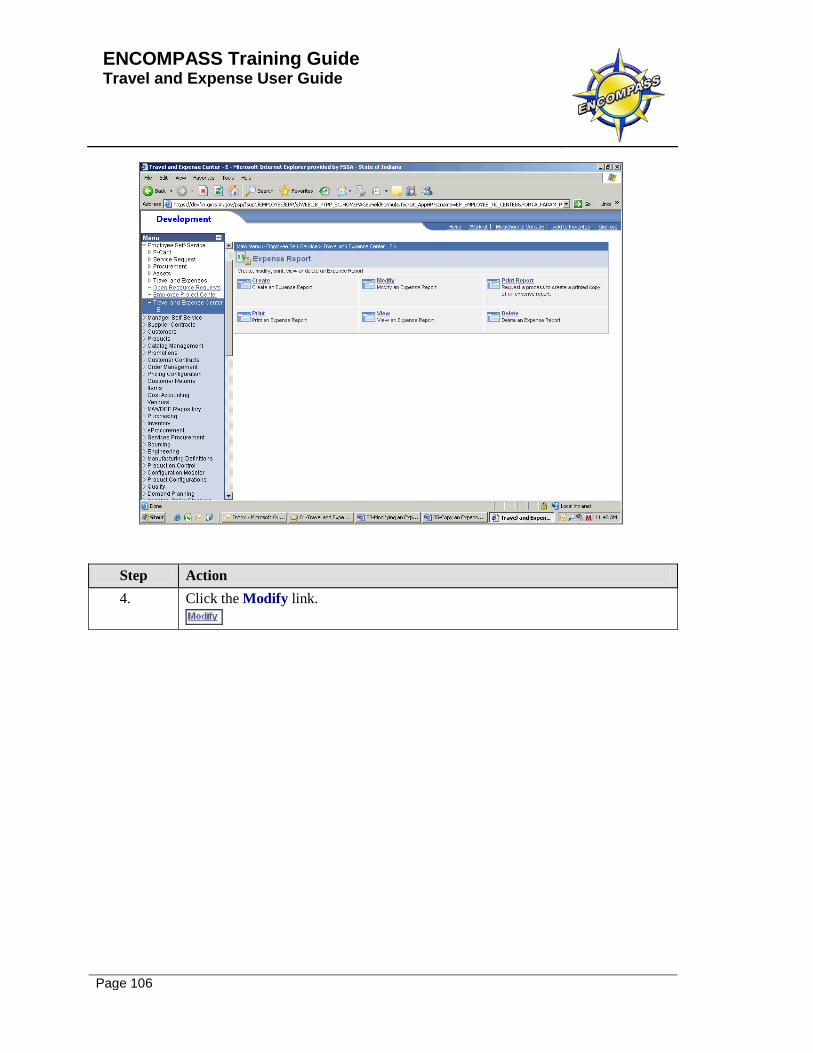
Step Action 4. Click the Modify link.
ENCOMPASS Training Guide Travel and Expense User Guide
Page 107
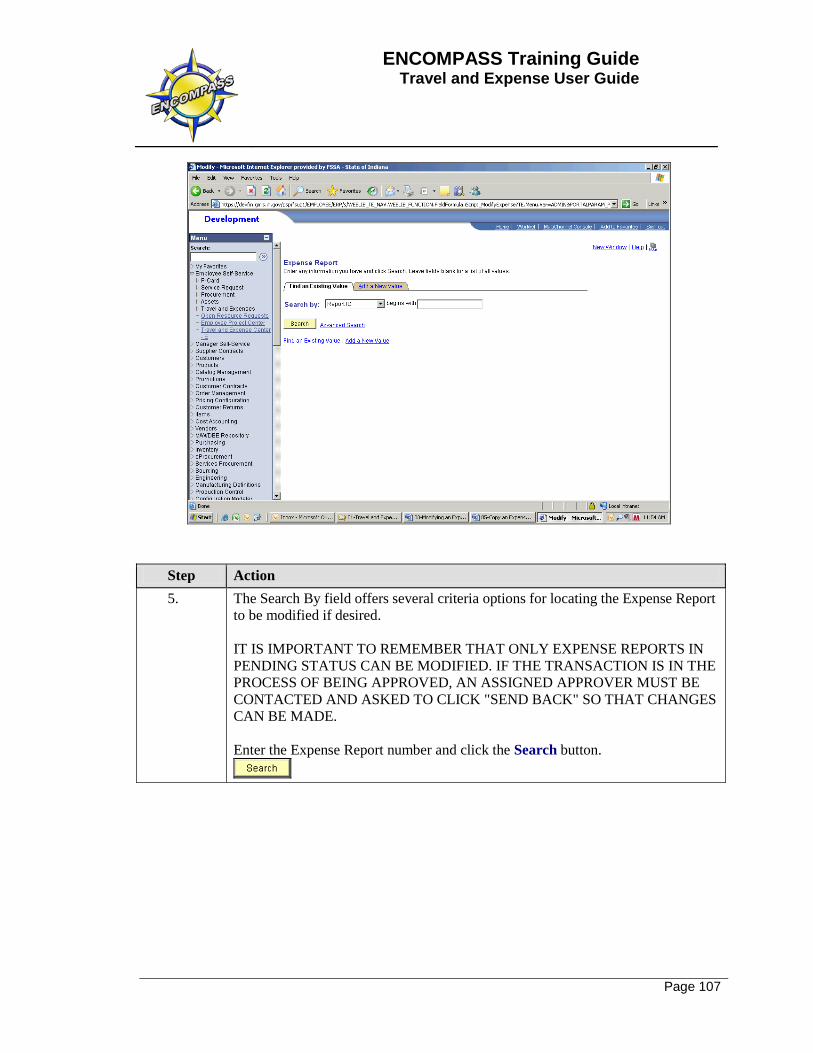
Step Action 5. The Search By field offers several criteria options for locating the Expense Report
to be modified if desired. IT IS IMPORTANT TO REMEMBER THAT ONLY EXPENSE REPORTS IN PENDING STATUS CAN BE MODIFIED. IF THE TRANSACTION IS IN THE PROCESS OF BEING APPROVED, AN ASSIGNED APPROVER MUST BE CONTACTED AND ASKED TO CLICK "SEND BACK" SO THAT CHANGES CAN BE MADE. Enter the Expense Report number and click the Search button.
ENCOMPASS Training Guide Travel and Expense User Guide
Page 108
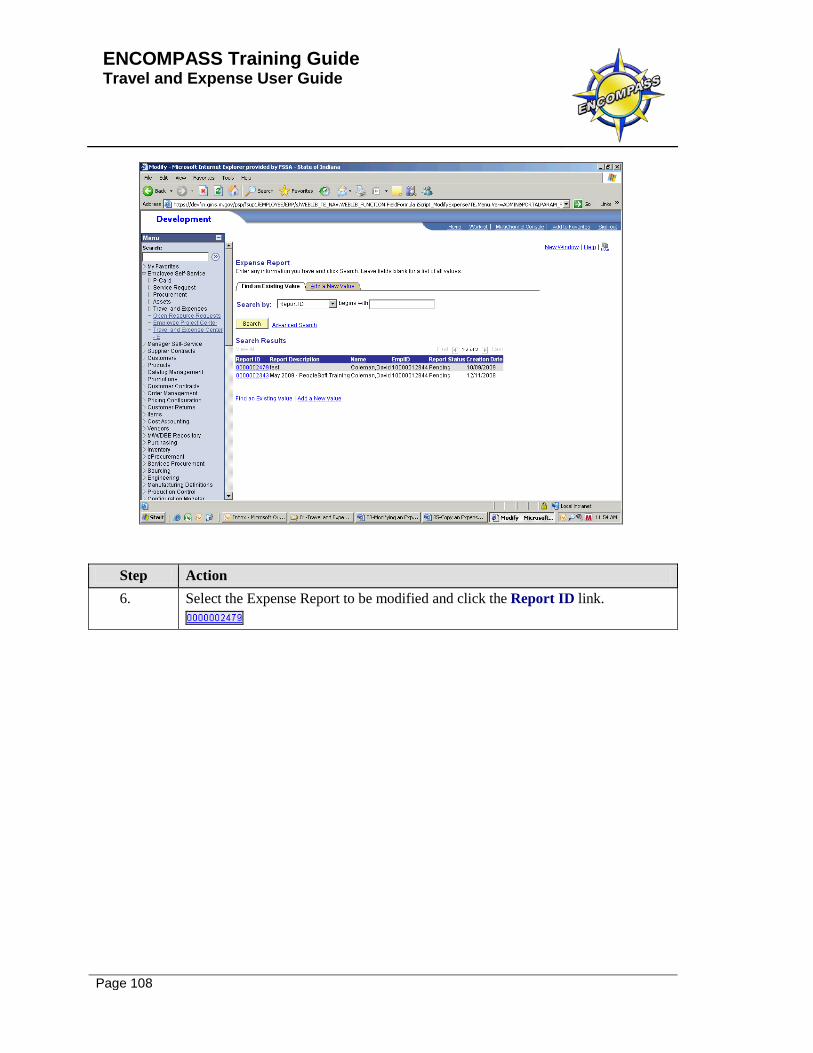
Step Action 6. Select the Expense Report to be modified and click the Report ID link.

ENCOMPASS Training Guide Travel and Expense User Guide
Page 109
Step Action 7. Make the necessary changes to the Expense Report and click the Save For Later
button. When complete and ready for approvals, click the Submit button.
8. Click the Home link to return to the home/main menu. 9. End of Procedure.
Print an Expense Report
Procedure
ENCOMPASS Training Guide Travel and Expense User Guide
Page 110
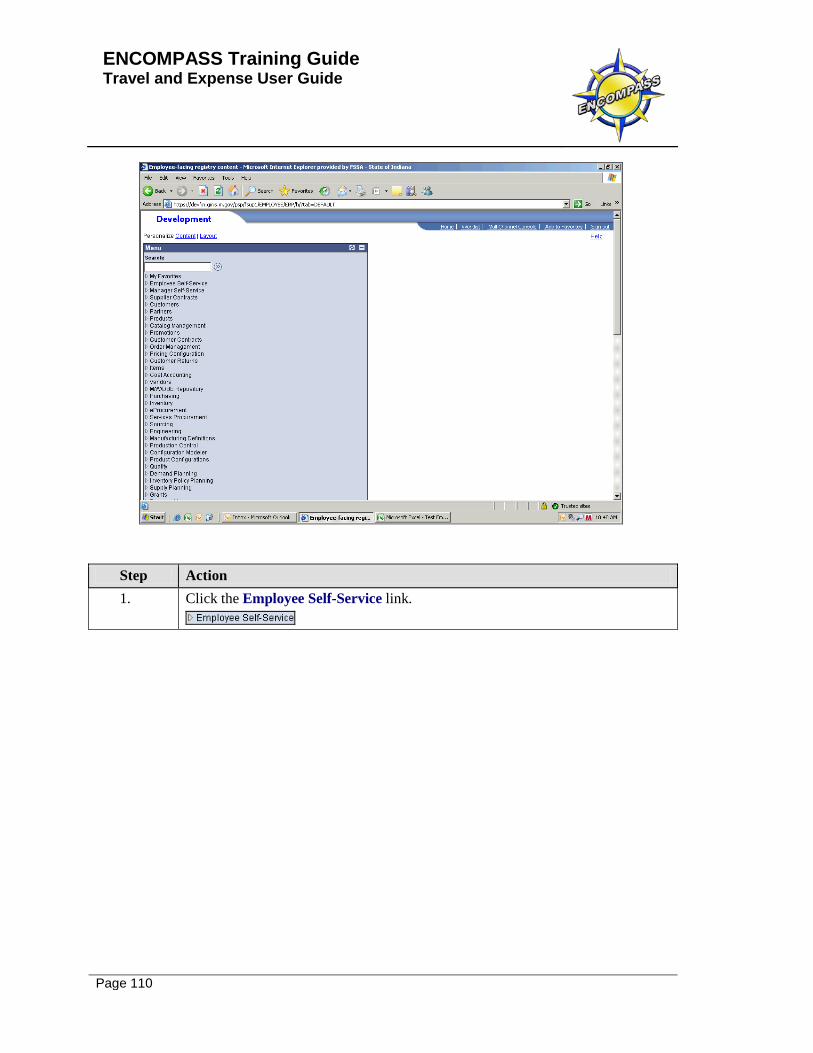
Step Action 1. Click the Employee Self-Service link.

ENCOMPASS Training Guide Travel and Expense User Guide
Page 111
Step Action 2. Click the Travel and Expense Center - E link.
3. Click the Expense Report link.
4. Click the Print link.
ENCOMPASS Training Guide Travel and Expense User Guide
Page 112
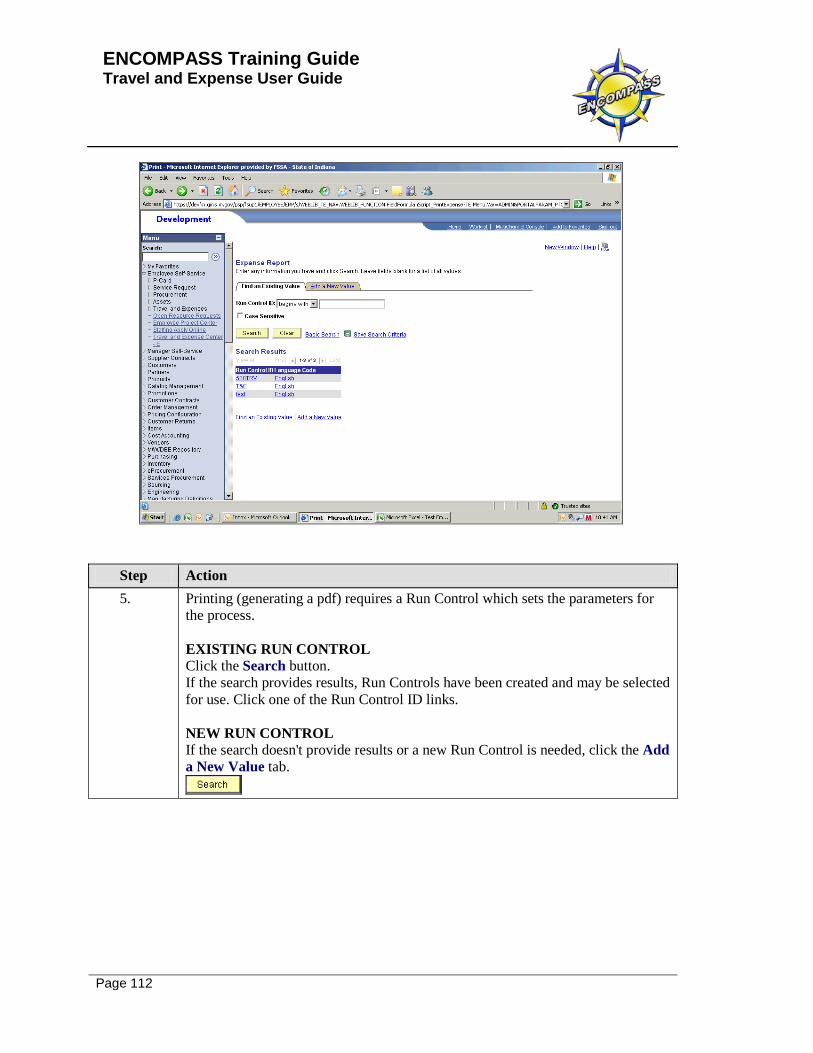
Step Action 5. Printing (generating a pdf) requires a Run Control which sets the parameters for
the process. EXISTING RUN CONTROL Click the Search button. If the search provides results, Run Controls have been created and may be selected for use. Click one of the Run Control ID links. NEW RUN CONTROL If the search doesn't provide results or a new Run Control is needed, click the Add a New Value tab.
ENCOMPASS Training Guide Travel and Expense User Guide
Page 113
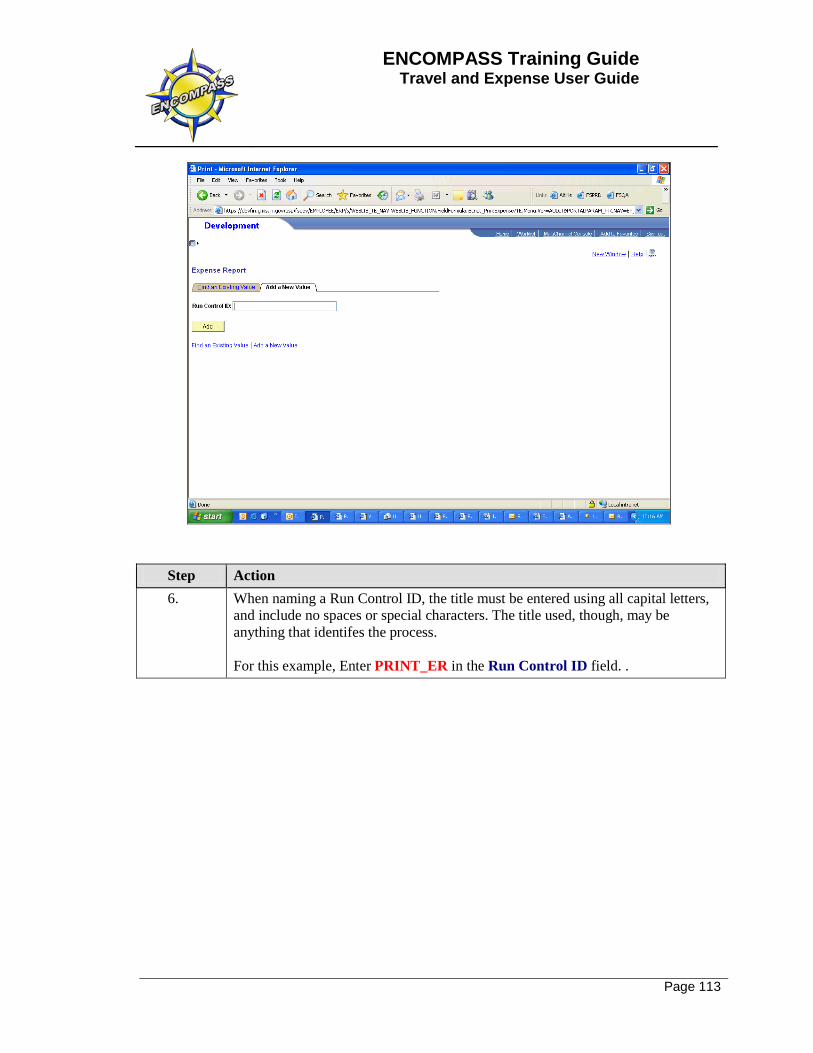
Step Action 6. When naming a Run Control ID, the title must be entered using all capital letters,
and include no spaces or special characters. The title used, though, may be anything that identifes the process. For this example, Enter PRINT_ER in the Run Control ID field. .
ENCOMPASS Training Guide Travel and Expense User Guide
Page 114
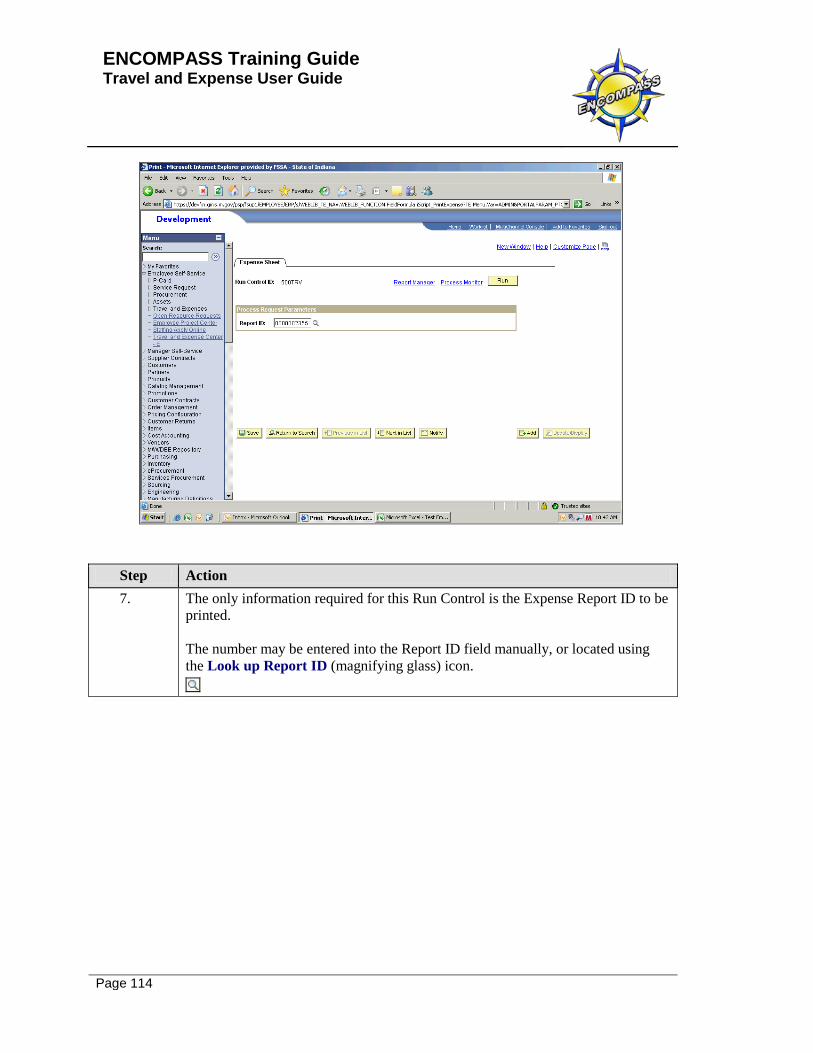
Step Action 7. The only information required for this Run Control is the Expense Report ID to be
printed. The number may be entered into the Report ID field manually, or located using the Look up Report ID (magnifying glass) icon.
ENCOMPASS Training Guide Travel and Expense User Guide
Page 115
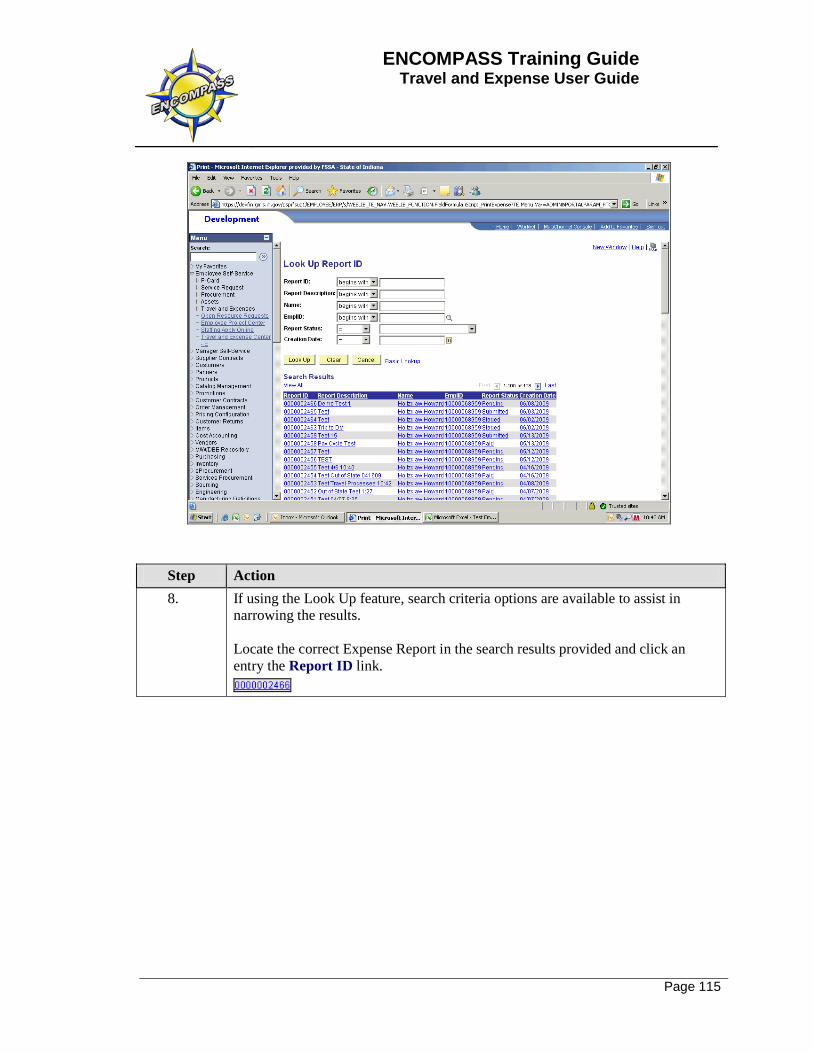
Step Action 8. If using the Look Up feature, search criteria options are available to assist in
narrowing the results. Locate the correct Expense Report in the search results provided and click an entry the Report ID link.
ENCOMPASS Training Guide Travel and Expense User Guide
Page 116
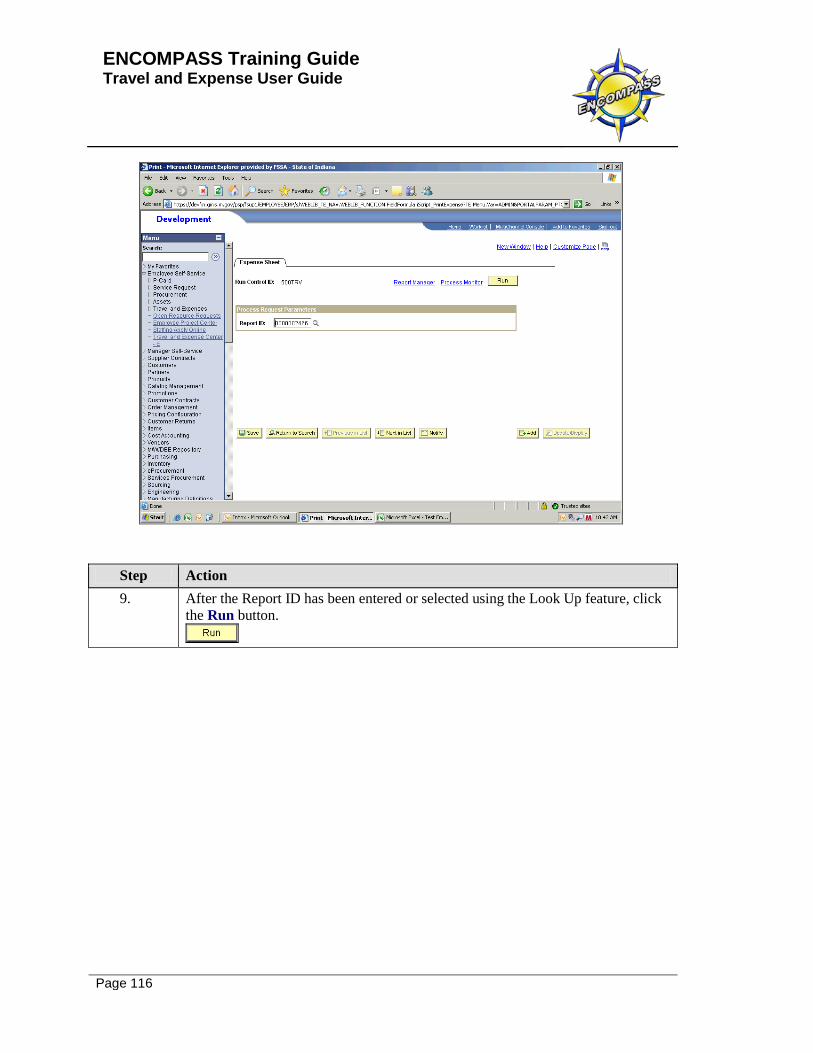
Step Action 9. After the Report ID has been entered or selected using the Look Up feature, click
the Run button.

ENCOMPASS Training Guide Travel and Expense User Guide
Page 117
Step Action 10. The Process Scheduler Request page will open.
The information above the Process List section (dark blue band) should not be changed. It is IMPORTANT to select TRAVEL VOUCHER from the Process List using the checkbox.DO NOT select the Expense Sheet option.

ENCOMPASS Training Guide Travel and Expense User Guide
Page 118
Step Action 11. Click the OK button.

ENCOMPASS Training Guide Travel and Expense User Guide
Page 119
Step Action 12. When the process is launched, it will be assigned a Process Instance number.
To follow the progress of the process, click the Process Monitor link.
ENCOMPASS Training Guide Travel and Expense User Guide
Page 120
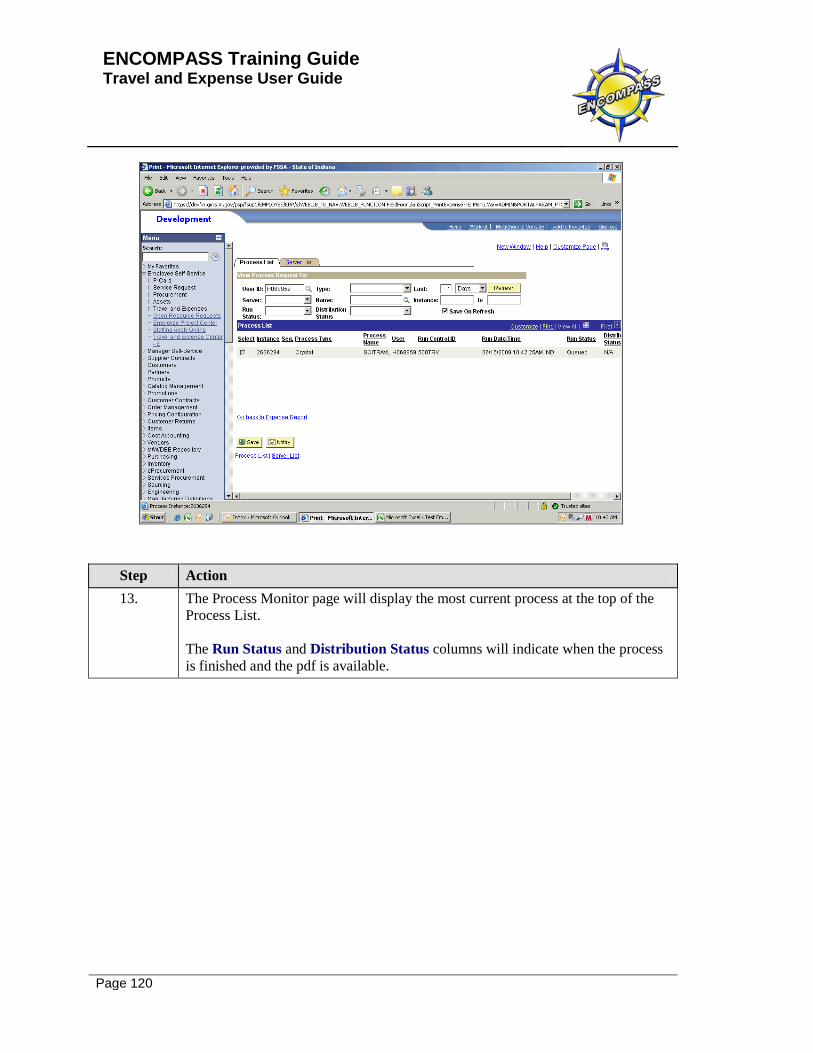
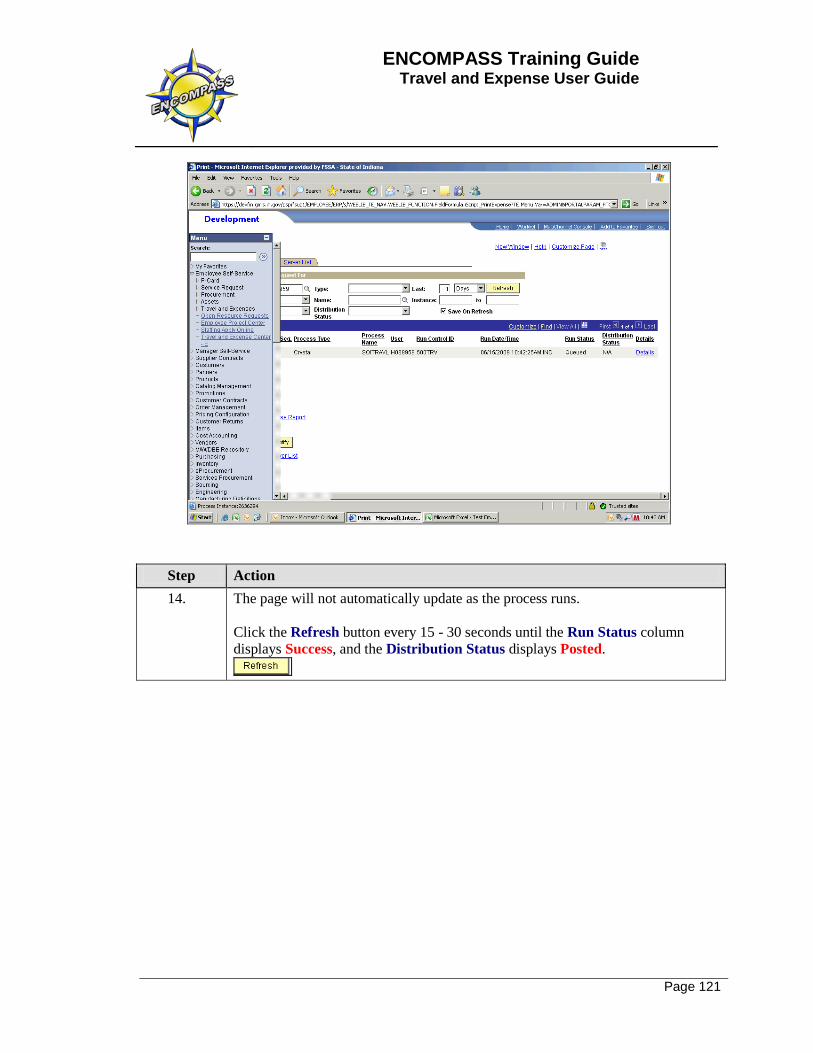
Step Action 13. The Process Monitor page will display the most current process at the top of the
Process List. The Run Status and Distribution Status columns will indicate when the process is finished and the pdf is available.
ENCOMPASS Training Guide Travel and Expense User Guide
Page 121
Step Action 14. The page will not automatically update as the process runs.
Click the Refresh button every 15 - 30 seconds until the Run Status column displays Success, and the Distribution Status displays Posted.
ENCOMPASS Training Guide Travel and Expense User Guide
Page 122
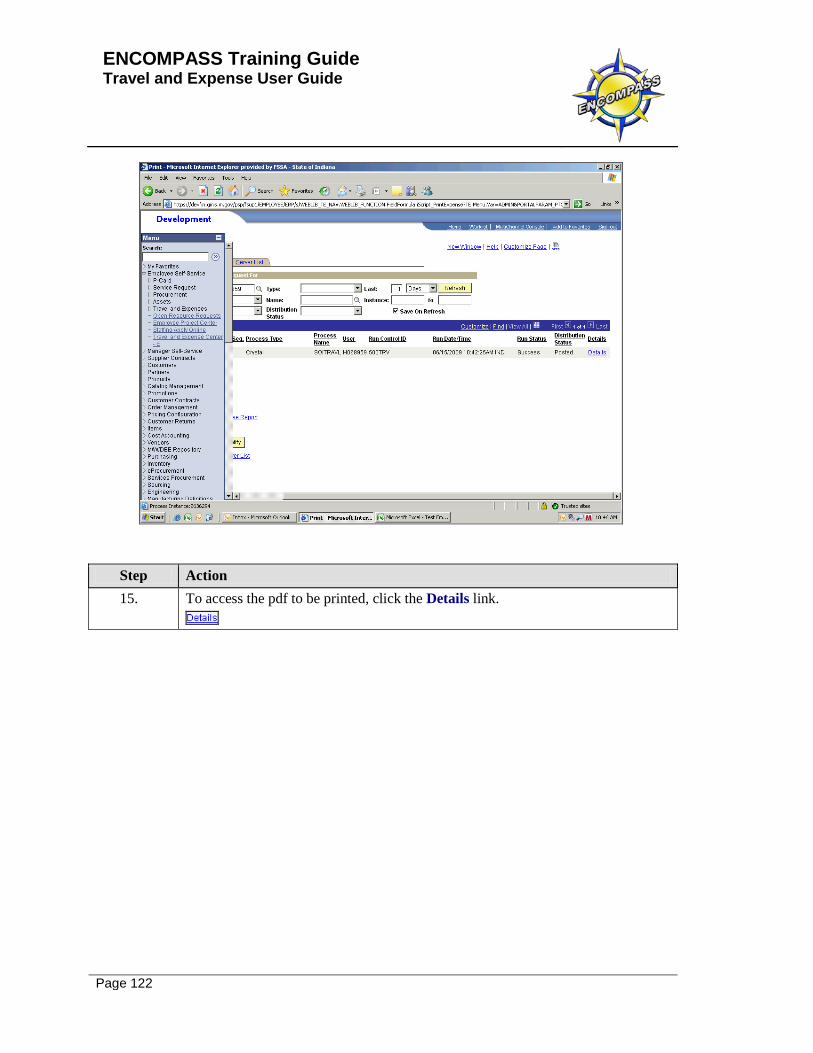
Step Action 15. To access the pdf to be printed, click the Details link.
ENCOMPASS Training Guide Travel and Expense User Guide
Page 123
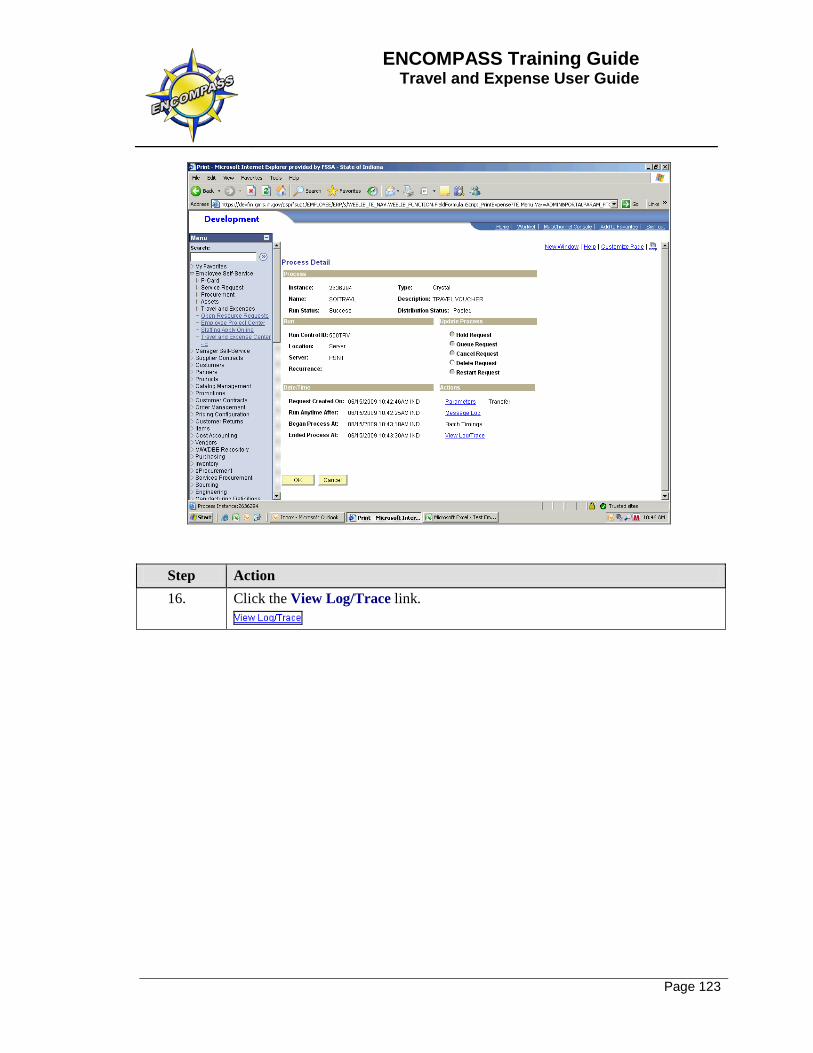
Step Action 16. Click the View Log/Trace link.

ENCOMPASS Training Guide Travel and Expense User Guide
Page 124
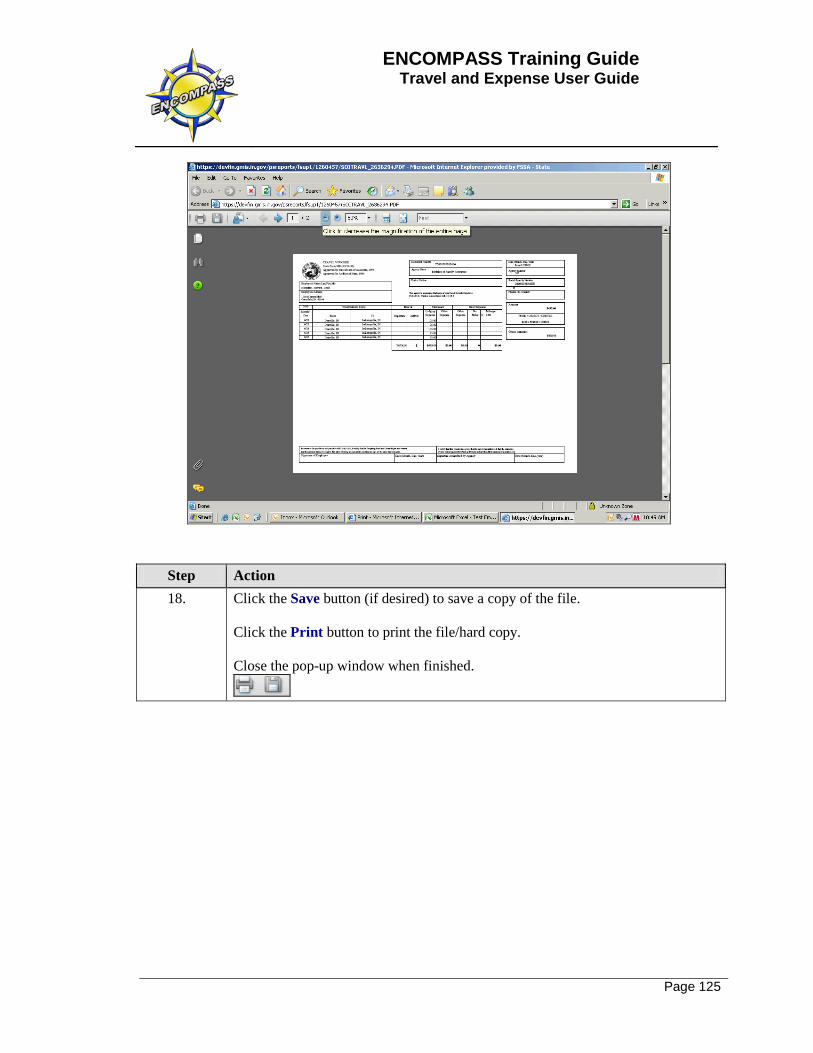
Step Action 17. Click the PDF link.
A new window will pop up displaying the Expense Report in pdf format.
ENCOMPASS Training Guide Travel and Expense User Guide
Page 125
Step Action 18. Click the Save button (if desired) to save a copy of the file.
Click the Print button to print the file/hard copy. Close the pop-up window when finished.
ENCOMPASS Training Guide Travel and Expense User Guide
Page 126
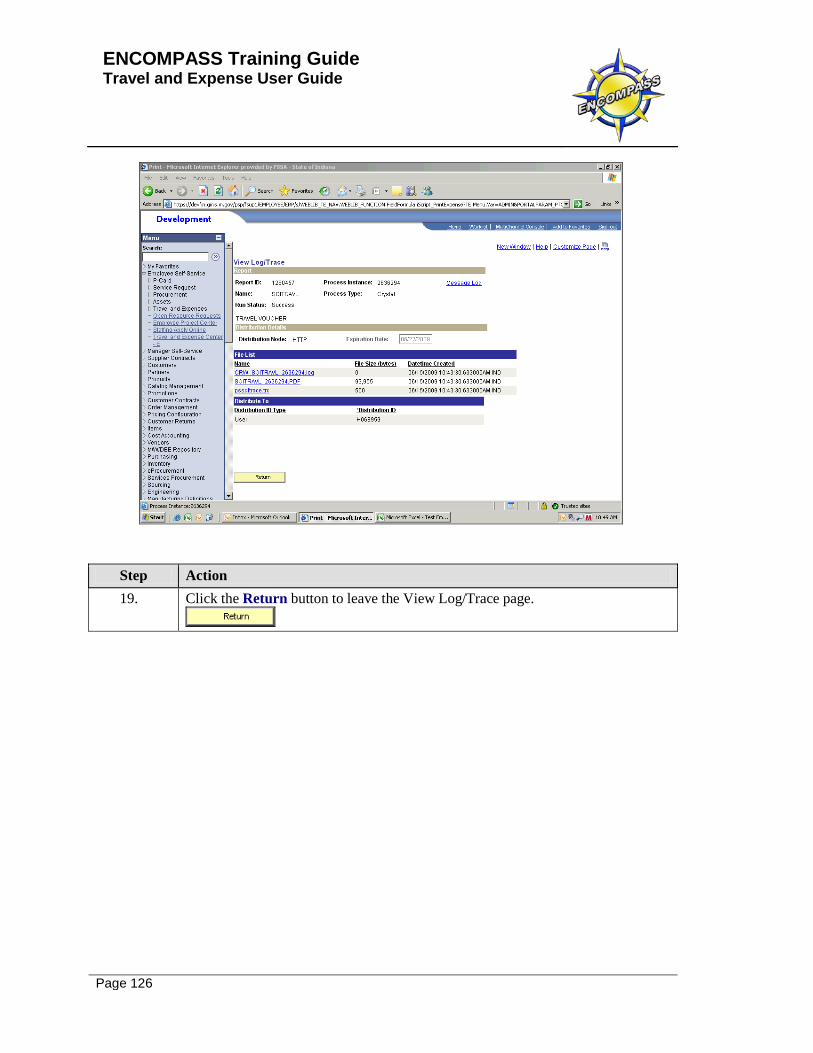
Step Action 19. Click the Return button to leave the View Log/Trace page.
ENCOMPASS Training Guide Travel and Expense User Guide
Page 127
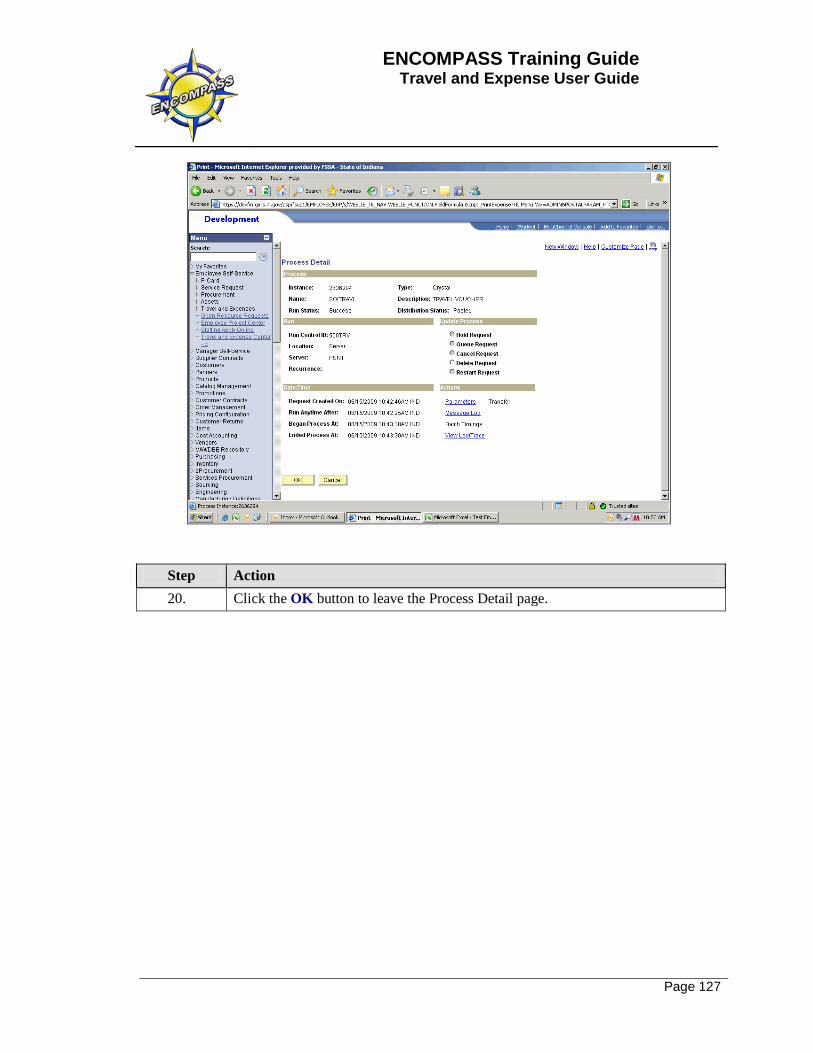
Step Action 20. Click the OK button to leave the Process Detail page.
ENCOMPASS Training Guide Travel and Expense User Guide
Page 128
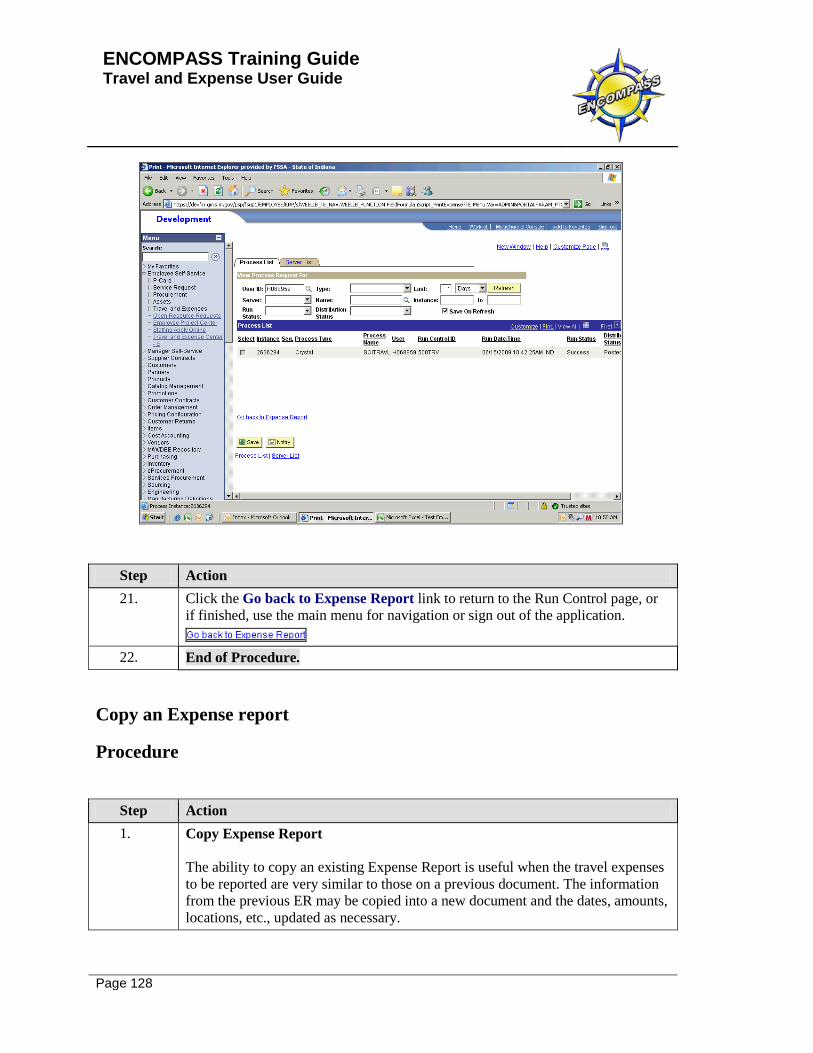
Step Action 21. Click the Go back to Expense Report link to return to the Run Control page, or
if finished, use the main menu for navigation or sign out of the application.
22. End of Procedure.
Copy an Expense report
Procedure
Step Action 1. Copy Expense Report
The ability to copy an existing Expense Report is useful when the travel expenses to be reported are very similar to those on a previous document. The information from the previous ER may be copied into a new document and the dates, amounts, locations, etc., updated as necessary.

ENCOMPASS Training Guide Travel and Expense User Guide
Page 129
Step Action 2. Click the Employee Self-Service link.
ENCOMPASS Training Guide Travel and Expense User Guide
Page 130
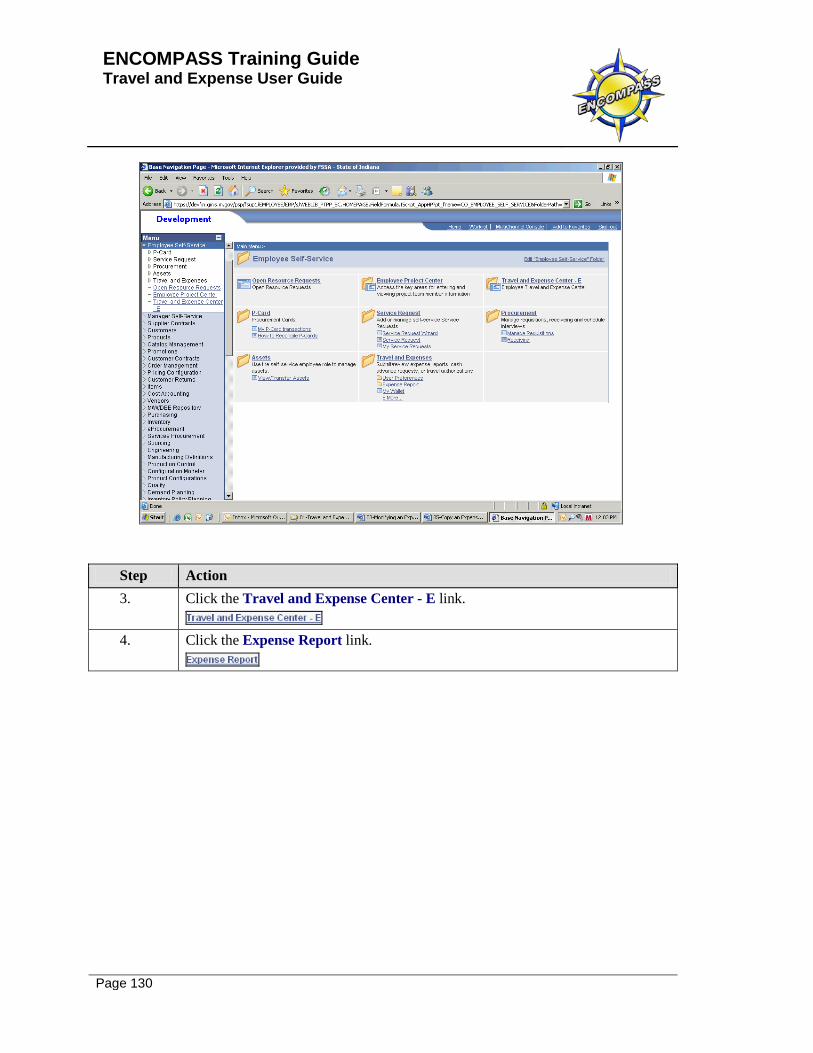
Step Action 3. Click the Travel and Expense Center - E link.
4. Click the Expense Report link.

ENCOMPASS Training Guide Travel and Expense User Guide
Page 131
Step Action 5. Click the Create link.
ENCOMPASS Training Guide Travel and Expense User Guide
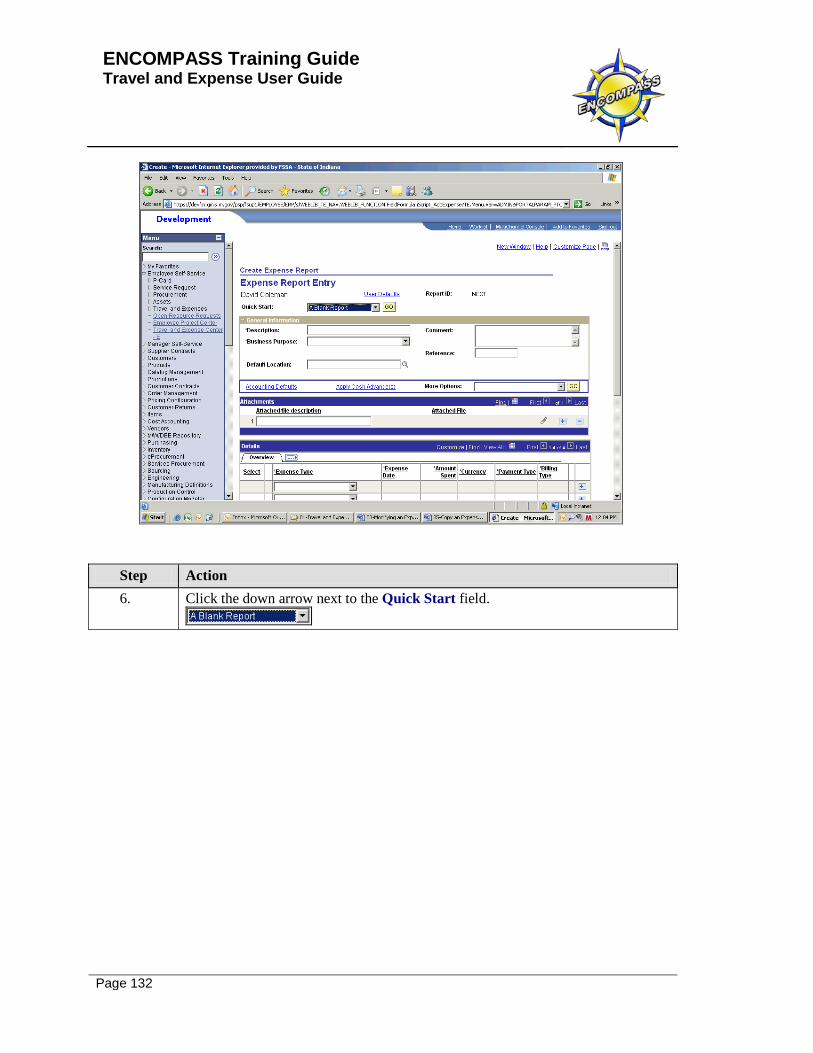
Page 132
Step Action 6. Click the down arrow next to the Quick Start field.

ENCOMPASS Training Guide Travel and Expense User Guide
Page 133
Step Action 7. Select An Existing Report from the drop down list.

ENCOMPASS Training Guide Travel and Expense User Guide
Page 134
Step Action 8. Click the GO button.
ENCOMPASS Training Guide Travel and Expense User Guide
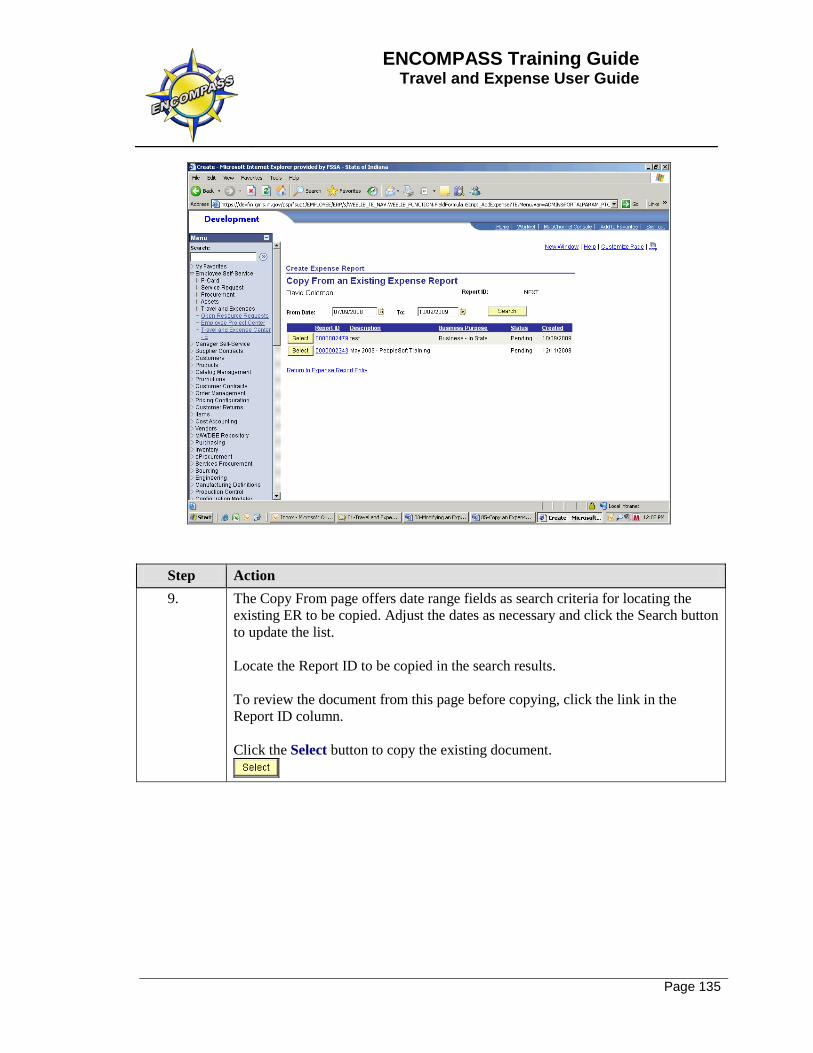
Page 135
Step Action 9. The Copy From page offers date range fields as search criteria for locating the
existing ER to be copied. Adjust the dates as necessary and click the Search button to update the list. Locate the Report ID to be copied in the search results. To review the document from this page before copying, click the link in the Report ID column. Click the Select button to copy the existing document.

ENCOMPASS Training Guide Travel and Expense User Guide
Page 136
Step Action 10. The Expense Report selected will be copied into a new document.
Revise the description and update all other fields as necessary. Also, be sure to update/revise the Detail section for each expense line.
ENCOMPASS Training Guide Travel and Expense User Guide
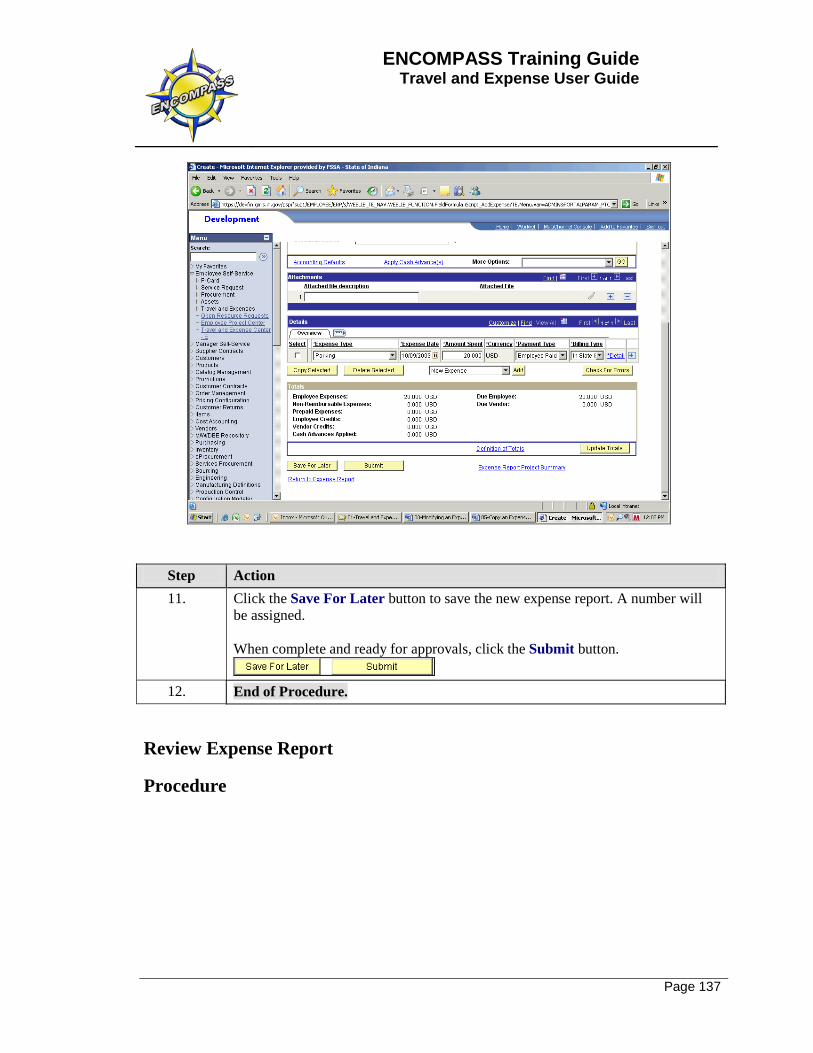
Page 137
Step Action 11. Click the Save For Later button to save the new expense report. A number will
be assigned. When complete and ready for approvals, click the Submit button.
12. End of Procedure.
Review Expense Report
Procedure

ENCOMPASS Training Guide Travel and Expense User Guide
Page 138
Step Action 1. Click the Employee Self-Service link.
ENCOMPASS Training Guide Travel and Expense User Guide
Page 139
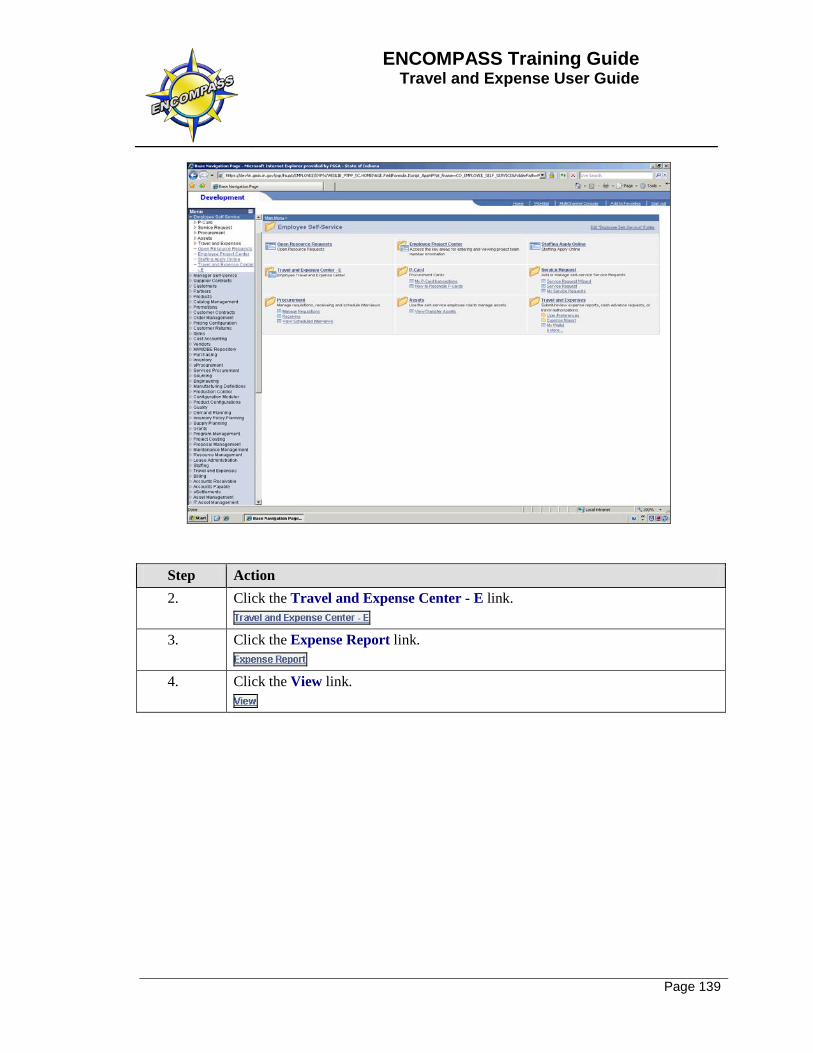
Step Action 2. Click the Travel and Expense Center - E link.
3. Click the Expense Report link.
4. Click the View link.
ENCOMPASS Training Guide Travel and Expense User Guide
Page 140
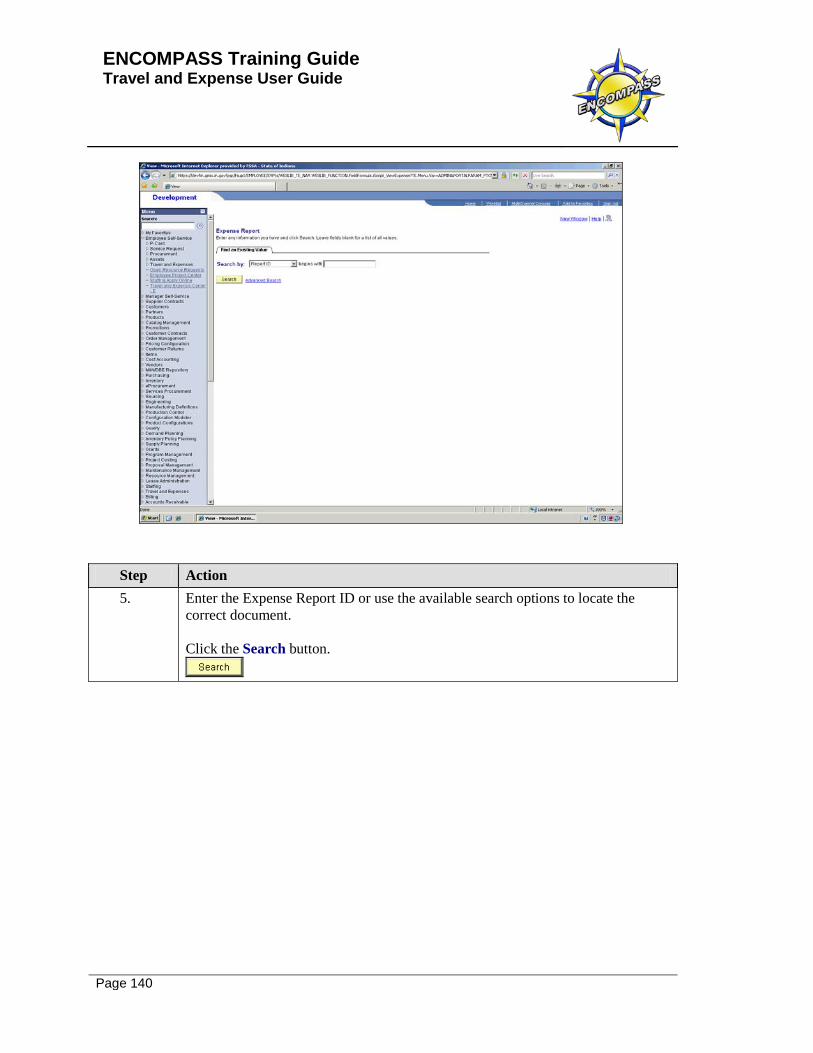
Step Action 5. Enter the Expense Report ID or use the available search options to locate the
correct document. Click the Search button.

ENCOMPASS Training Guide Travel and Expense User Guide
Page 141
Step Action 6. If the search options used provided a list of results, select the correct document
and click an entry in the Report ID column.
ENCOMPASS Training Guide Travel and Expense User Guide
Page 142
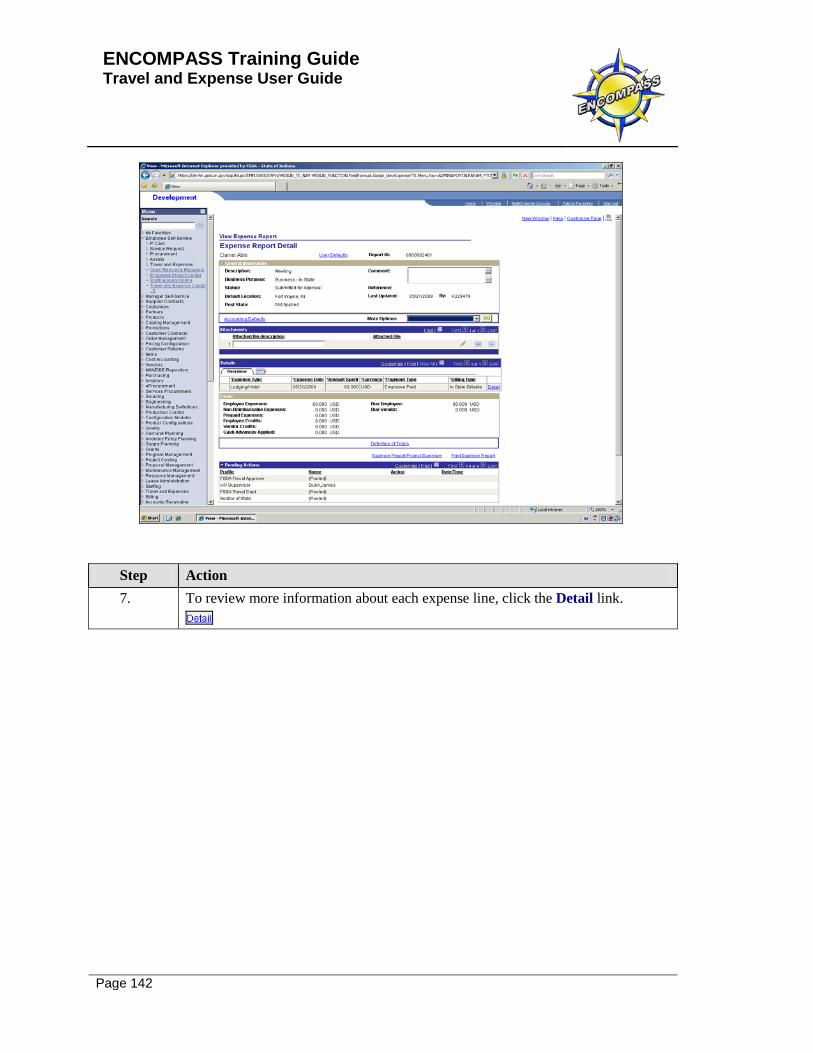
Step Action 7. To review more information about each expense line, click the Detail link.
ENCOMPASS Training Guide Travel and Expense User Guide
Page 143
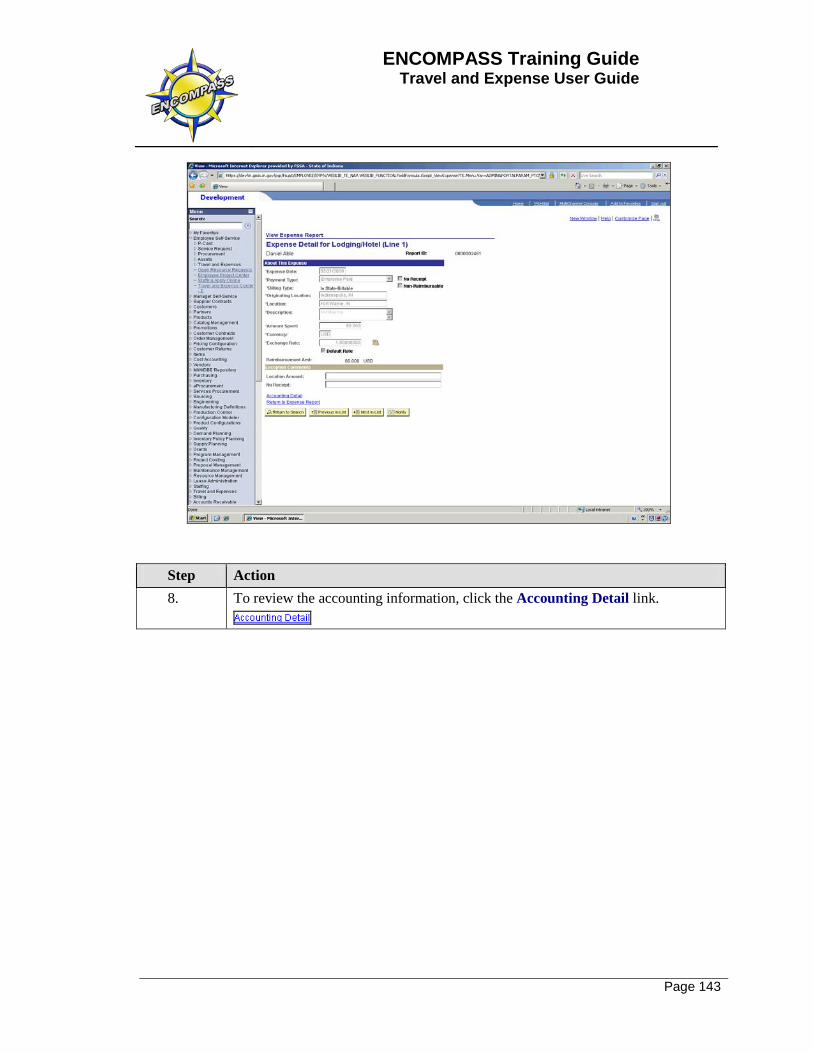
Step Action 8. To review the accounting information, click the Accounting Detail link.
ENCOMPASS Training Guide Travel and Expense User Guide
Page 144
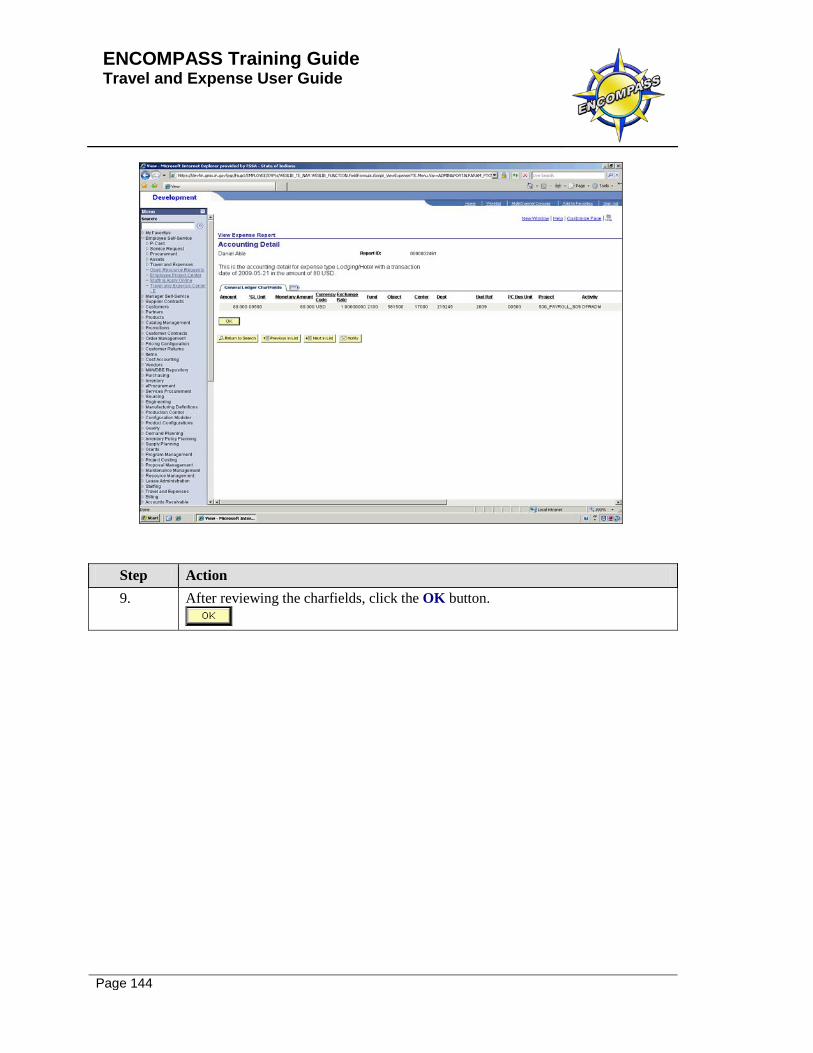
Step Action 9. After reviewing the charfields, click the OK button.
ENCOMPASS Training Guide Travel and Expense User Guide
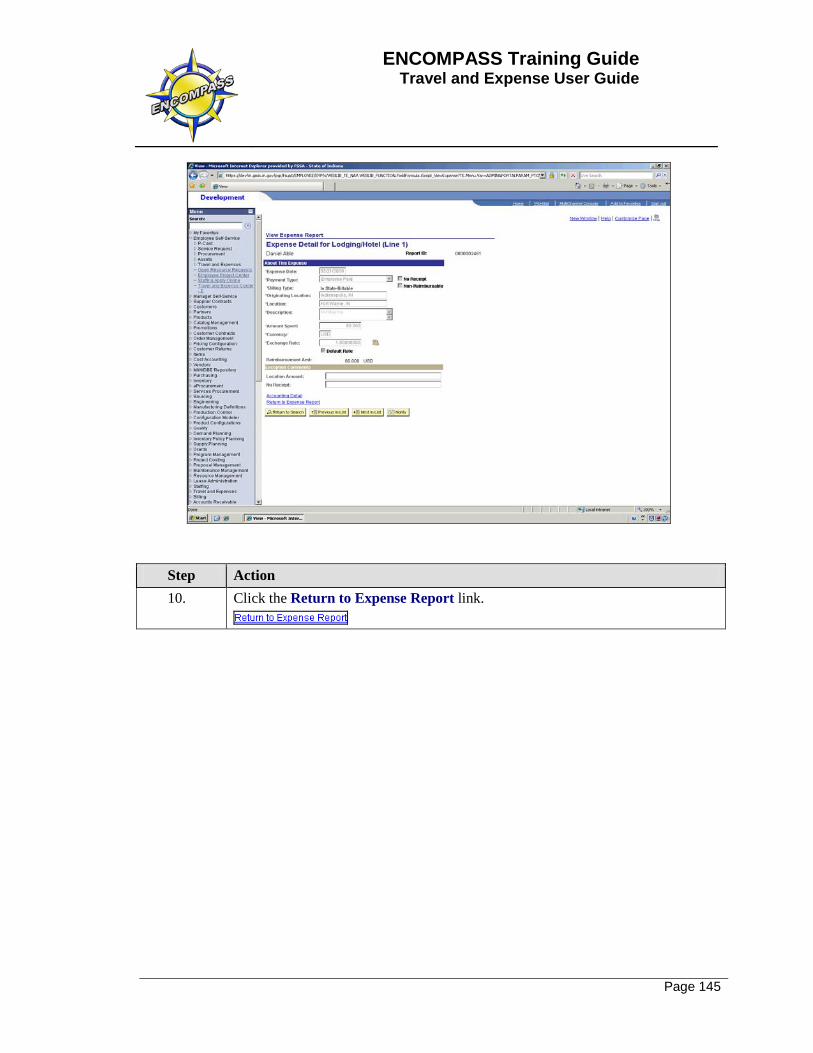
Page 145
Step Action 10. Click the Return to Expense Report link.
ENCOMPASS Training Guide Travel and Expense User Guide
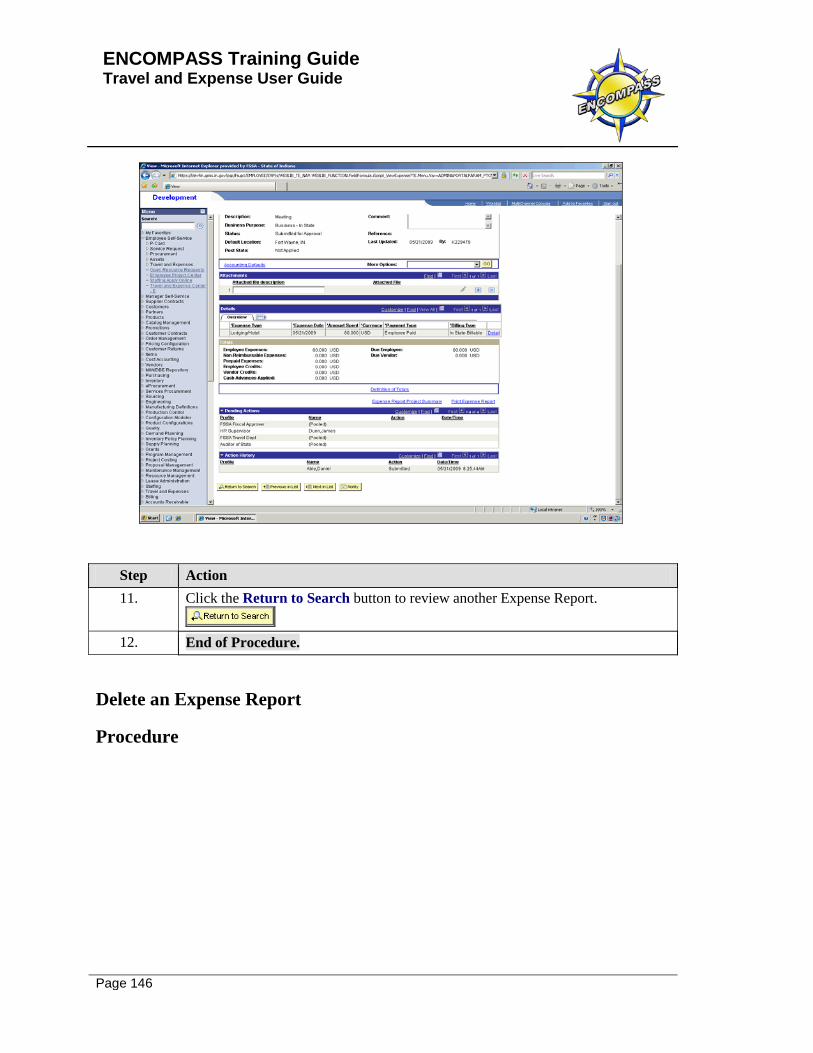
Page 146
Step Action 11. Click the Return to Search button to review another Expense Report.
12. End of Procedure.
Delete an Expense Report
Procedure

ENCOMPASS Training Guide Travel and Expense User Guide
Page 147
Step Action 1. Click the Employee Self-Service link.

ENCOMPASS Training Guide Travel and Expense User Guide
Page 148
Step Action 2. Click the Travel and Expense Center - E link.
3. Click the Expense Report link.
4. Click the Delete link.

ENCOMPASS Training Guide Travel and Expense User Guide
Page 149
Step Action 5. Select the Expense Report(s) to delete from the list of those that are eligible.
ENCOMPASS Training Guide Travel and Expense User Guide
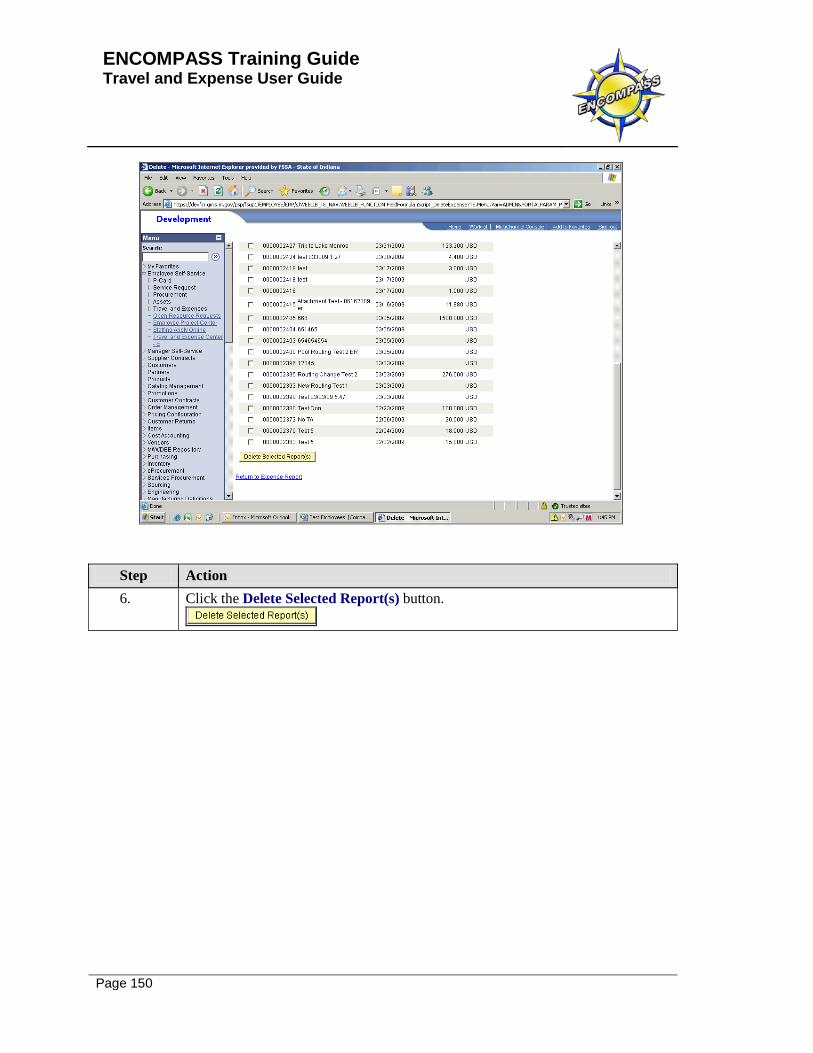
Page 150
Step Action 6. Click the Delete Selected Report(s) button.
ENCOMPASS Training Guide Travel and Expense User Guide
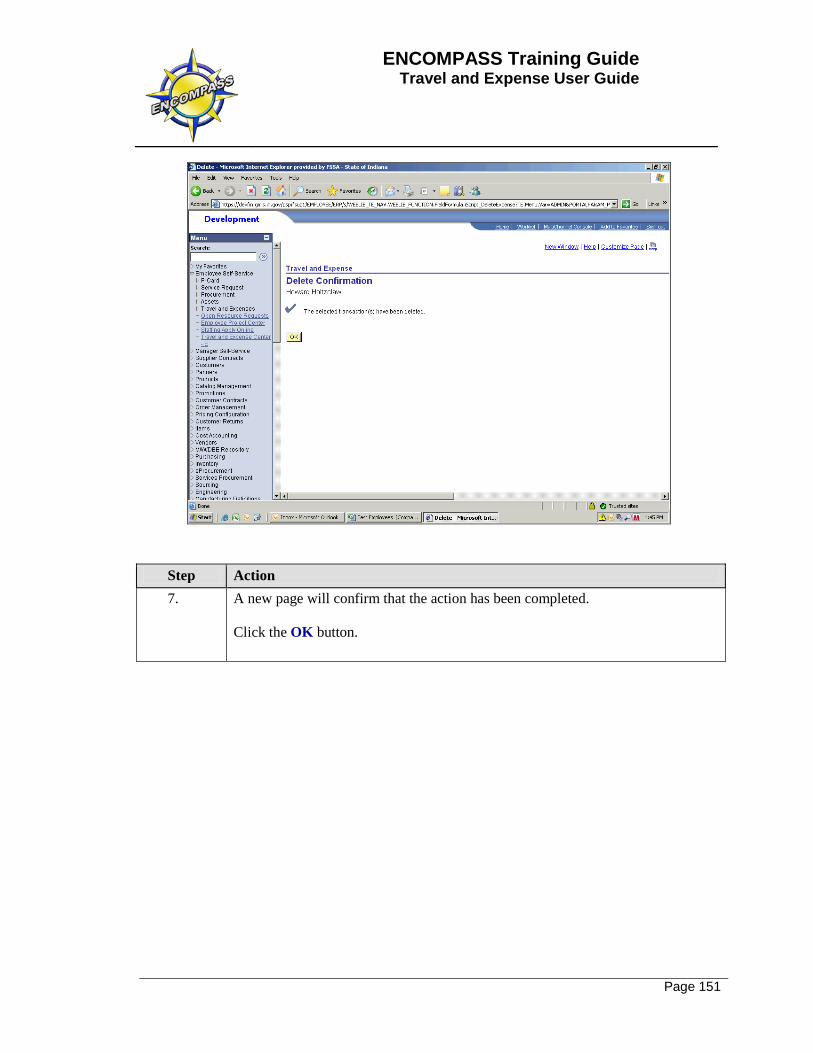
Page 151
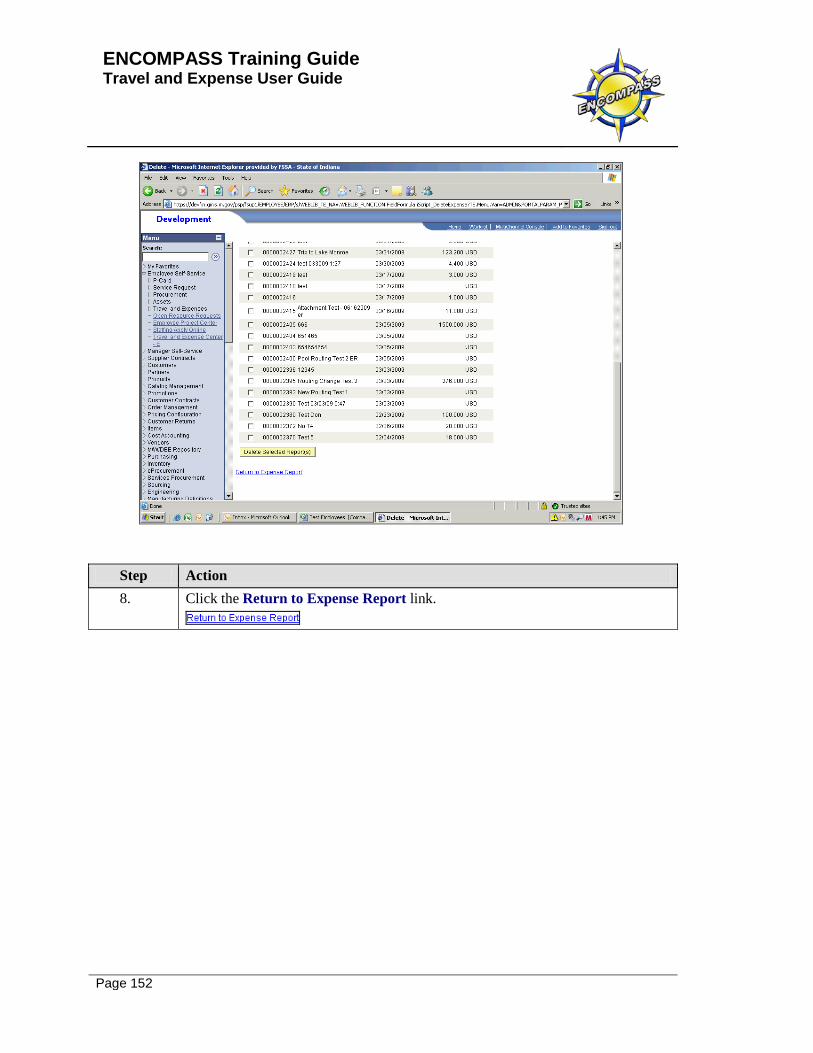
Step Action 7. A new page will confirm that the action has been completed.
Click the OK button.
ENCOMPASS Training Guide Travel and Expense User Guide
Page 152
Step Action 8. Click the Return to Expense Report link.
ENCOMPASS Training Guide Travel and Expense User Guide
Page 153
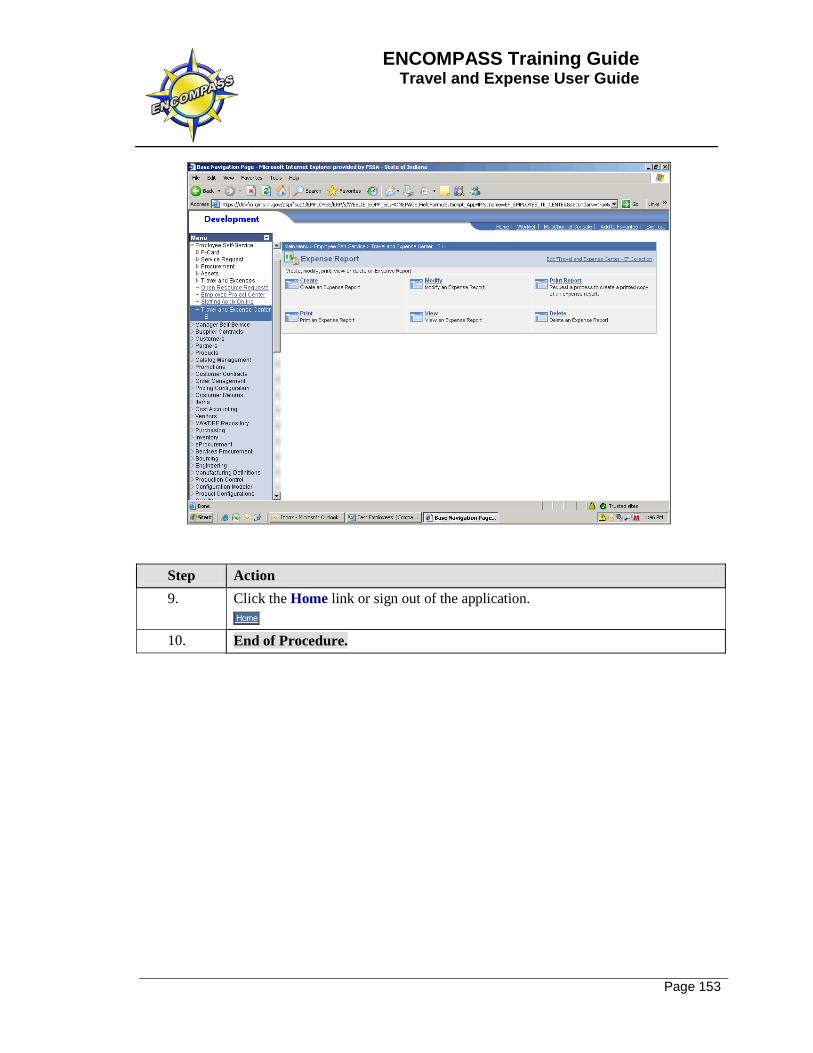
Step Action 9. Click the Home link or sign out of the application.
10. End of Procedure.


ENCOMPASS Training Guide Travel and Expense User Guide
Page 155
Travel Authorization
Create a Travel Authorization from a Blank Form
Procedure
Step Action 1. Click the Employee Self-Service link.

ENCOMPASS Training Guide Travel and Expense User Guide
Page 156
Step Action 2. Click the Travel and Expense Center - E link.

ENCOMPASS Training Guide Travel and Expense User Guide
Page 157
Step Action 3. Click the Travel Authorization link.

ENCOMPASS Training Guide Travel and Expense User Guide
Page 158
Step Action 4. Click the Create link.
ENCOMPASS Training Guide Travel and Expense User Guide
Page 159
ENCOMPASS Training Guide Travel and Expense User Guide
Page 160
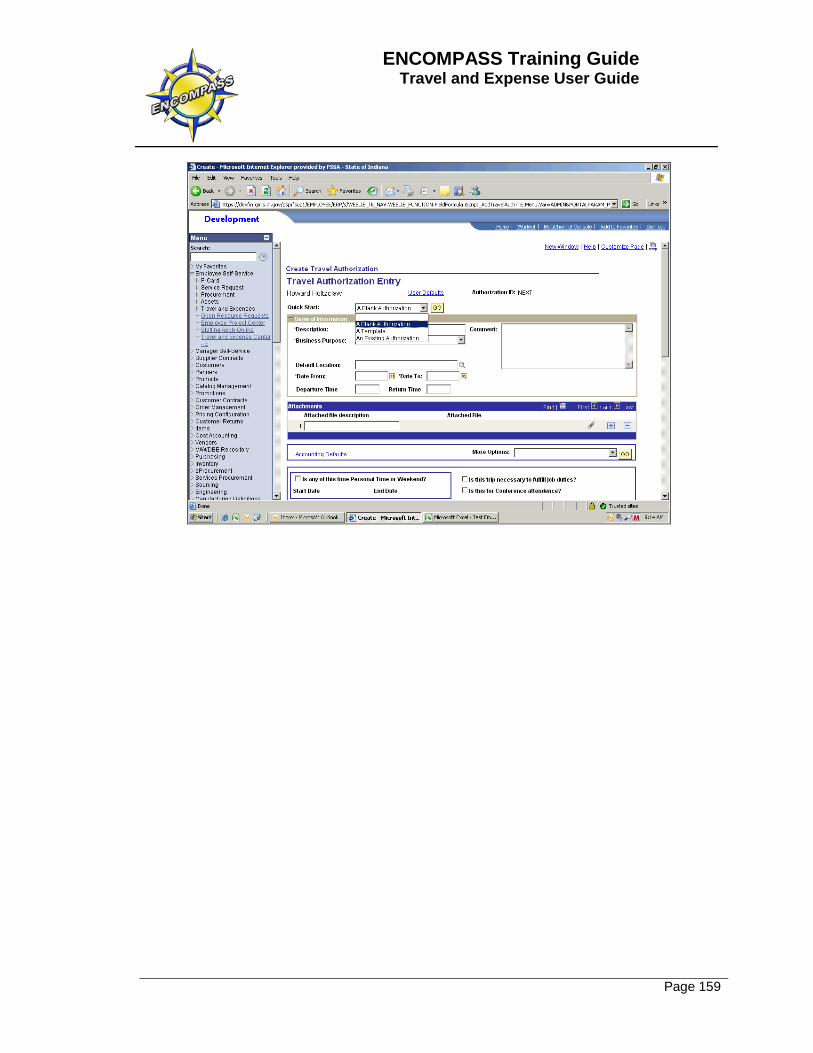
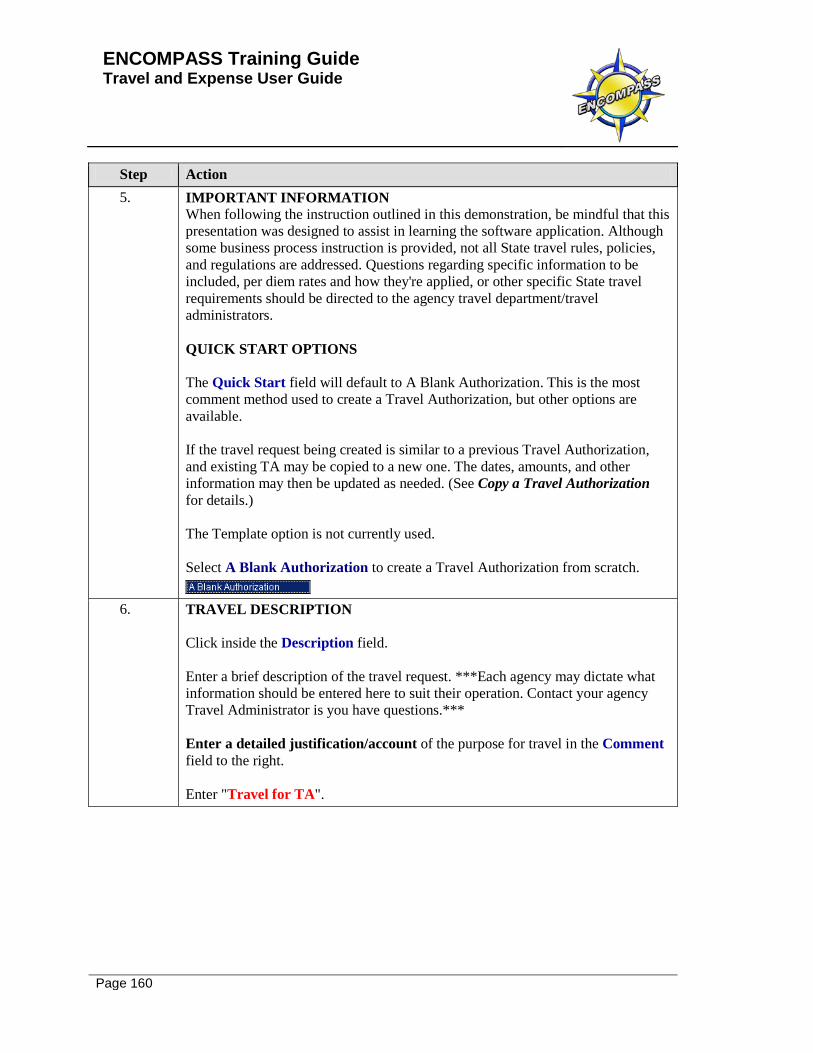
Step Action 5. IMPORTANT INFORMATION
When following the instruction outlined in this demonstration, be mindful that this presentation was designed to assist in learning the software application. Although some business process instruction is provided, not all State travel rules, policies, and regulations are addressed. Questions regarding specific information to be included, per diem rates and how they're applied, or other specific State travel requirements should be directed to the agency travel department/travel administrators. QUICK START OPTIONS The Quick Start field will default to A Blank Authorization. This is the most comment method used to create a Travel Authorization, but other options are available. If the travel request being created is similar to a previous Travel Authorization, and existing TA may be copied to a new one. The dates, amounts, and other information may then be updated as needed. (See Copy a Travel Authorization for details.) The Template option is not currently used. Select A Blank Authorization to create a Travel Authorization from scratch.
6. TRAVEL DESCRIPTION
Click inside the Description field. Enter a brief description of the travel request. ***Each agency may dictate what information should be entered here to suit their operation. Contact your agency Travel Administrator is you have questions.*** Enter a detailed justification/account of the purpose for travel in the Comment field to the right. Enter "Travel for TA".

ENCOMPASS Training Guide Travel and Expense User Guide
Page 161
Step Action 7. BUSINESS PURPOSE
The Business Purpose simply identifies the travel as "in state" or "out-of-state." It is important to make the correct selection so that the Travel Authorization routes for approval correctly. Click the down arrow next to the Business Purpose field and select Business - Out of State
8. DEFAULT LOCATION
The Default Location designates the destination that will be tied to all expenses reported, and it may be changed on any line where it might be different. Choosing a default for the destination is optional, and the field may be left blank. If not entered as a default, the destination location must be entered on each line individually. Click the Look up Default Location (Alt+5) button (magnifying glass) to search for and choose the Default Location.
ENCOMPASS Training Guide Travel and Expense User Guide
Page 162
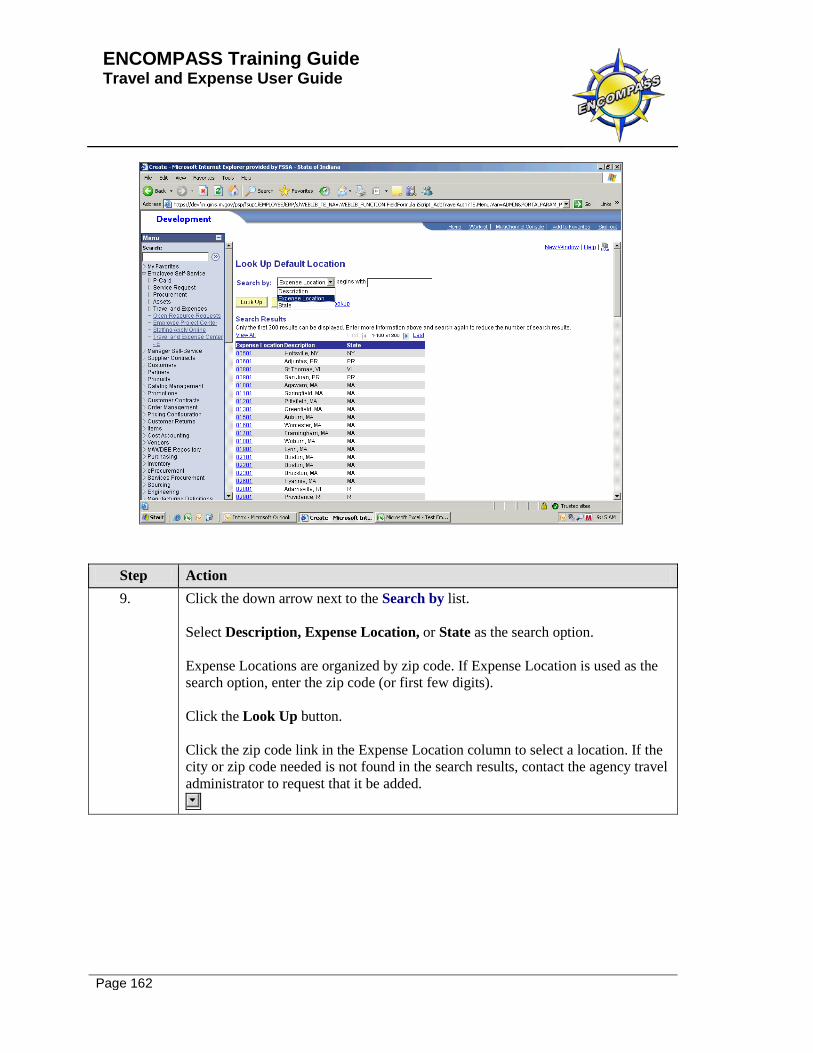
Step Action 9. Click the down arrow next to the Search by list.
Select Description, Expense Location, or State as the search option. Expense Locations are organized by zip code. If Expense Location is used as the search option, enter the zip code (or first few digits). Click the Look Up button. Click the zip code link in the Expense Location column to select a location. If the city or zip code needed is not found in the search results, contact the agency travel administrator to request that it be added.
ENCOMPASS Training Guide Travel and Expense User Guide
Page 163
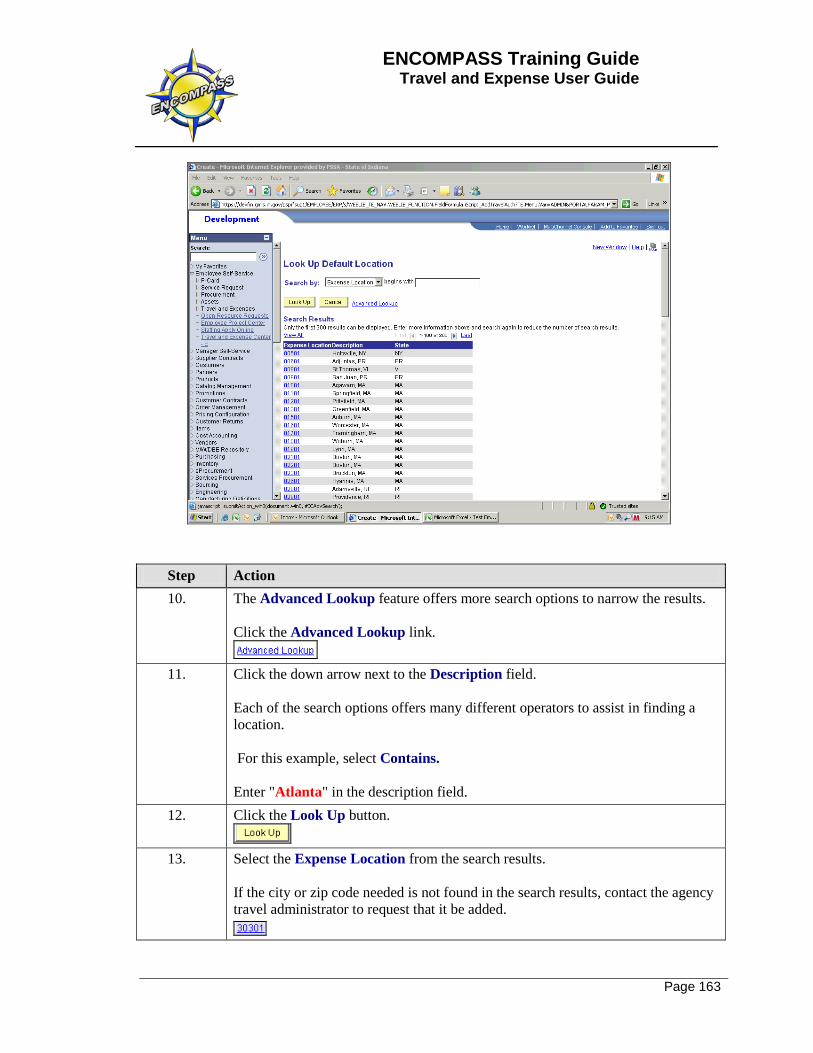
Step Action 10. The Advanced Lookup feature offers more search options to narrow the results.
Click the Advanced Lookup link.
11. Click the down arrow next to the Description field.
Each of the search options offers many different operators to assist in finding a location. For this example, select Contains. Enter "Atlanta" in the description field.
12. Click the Look Up button.
13. Select the Expense Location from the search results. If the city or zip code needed is not found in the search results, contact the agency travel administrator to request that it be added.
ENCOMPASS Training Guide Travel and Expense User Guide
Page 164
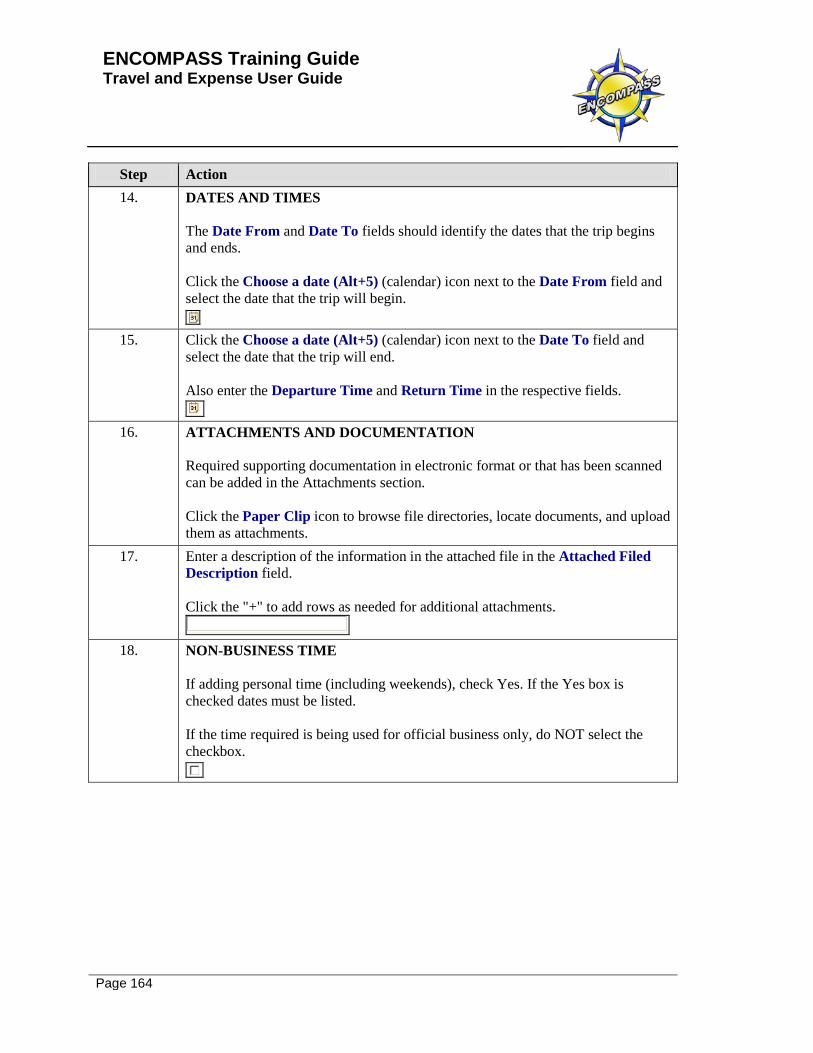
Step Action 14. DATES AND TIMES
The Date From and Date To fields should identify the dates that the trip begins and ends. Click the Choose a date (Alt+5) (calendar) icon next to the Date From field and select the date that the trip will begin.
15. Click the Choose a date (Alt+5) (calendar) icon next to the Date To field and
select the date that the trip will end. Also enter the Departure Time and Return Time in the respective fields.
16. ATTACHMENTS AND DOCUMENTATION
Required supporting documentation in electronic format or that has been scanned can be added in the Attachments section. Click the Paper Clip icon to browse file directories, locate documents, and upload them as attachments.
17. Enter a description of the information in the attached file in the Attached Filed Description field. Click the "+" to add rows as needed for additional attachments.
18. NON-BUSINESS TIME
If adding personal time (including weekends), check Yes. If the Yes box is checked dates must be listed. If the time required is being used for official business only, do NOT select the checkbox.

ENCOMPASS Training Guide Travel and Expense User Guide
Page 165
Step Action 19. TRAVEL PURPOSE
Is this trip necessary to fulfill job duties? Check this box if the travel requested is essential to performance of job duties. Is this for Conference attendence? If supporting documentation indicates travel involves a conference, this box must be checked.
20. START DATES AND TIMES
Enter the exact date/time of departure. Example: If a flight departs at 10:00a.m., at least 1.5 hours prior to departure time is needed for check-in. 8:30a.m. should be entered as the Meeting Start Time. (i.e. 7/21/09 - 8:30a.m.) OR... The exact time or estimated time the travelers attendance is required in any meeting, conference, or other official business. Example: If a conference starts 7/20/09 at 8:00a.m. but the part of the traveler's attendance isn't required until 7/21/09 at noon, 7/21/09 should be entered as the Meeting Start Date, and 12:00p.m. as the Meeting Start Time.
21. END DATES AND TIMES Enter the exact date and time the traveler is to return to their originating location. Specify the exact time the traveler's required attendance in any meeting, conference, or other official business ends.
22. TRANSPORTATION INFORMATION
All modes of transportation to be utilized are to be checked and the estimated costs included on the Travel Authorization. Estimated airfare can be obtained online or through the contracted travel agency and should be listed in as expense lines in the Detail section below.

ENCOMPASS Training Guide Travel and Expense User Guide
Page 166
Step Action 23. ACCOUNT INFORMATION
Fund Account Name: Actual name of account; example: a grant name or other. Fund Account Number: Actual Account Number; example: 0000/000000 Percentage breakdowns are required! Check the box or boxes that apply and enter the percentage breakdown . If Other Source is marked, enter the name of other source in the line below.
24. HOTEL INFORMATION Enter the name and location (city) of the hotel. The estimated per day rate must include the tax rate.

ENCOMPASS Training Guide Travel and Expense User Guide
Page 167
Step Action 25. CONTACT INFORMATION
Contact Name Enter the name of the agency travel contact. Contact Phone Enter the agency travel contact’s phone number.

ENCOMPASS Training Guide Travel and Expense User Guide
Page 168
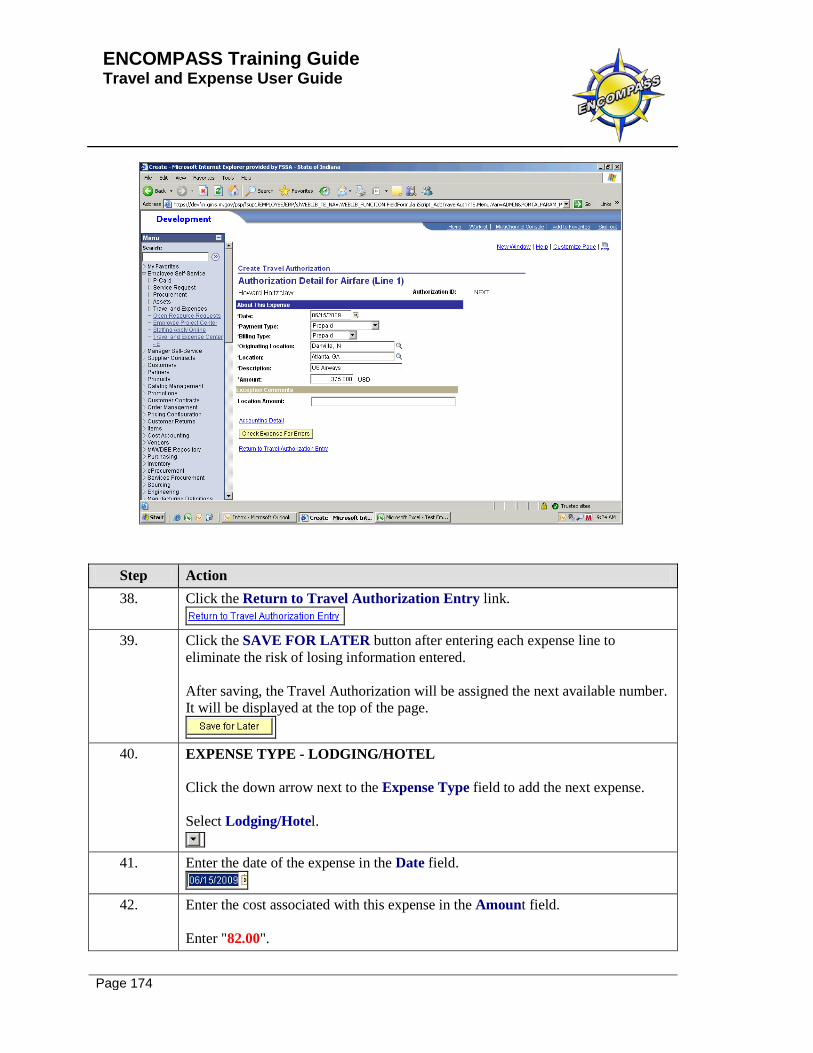
Step Action 26. EXPENSE TYPE - AIRFARE
Click the down arrow next to the Expense Type field. All expenses (exact or estimated) for a travel event should be listed on the Travel Authorization, including those to be paid for in advance or by a vendor. Select the Expense to be listed. Select Airfare.
Step Action 27. Enter the date of the expense in the Date field.
Enter "06/15/2009".
ENCOMPASS Training Guide Travel and Expense User Guide
Page 169
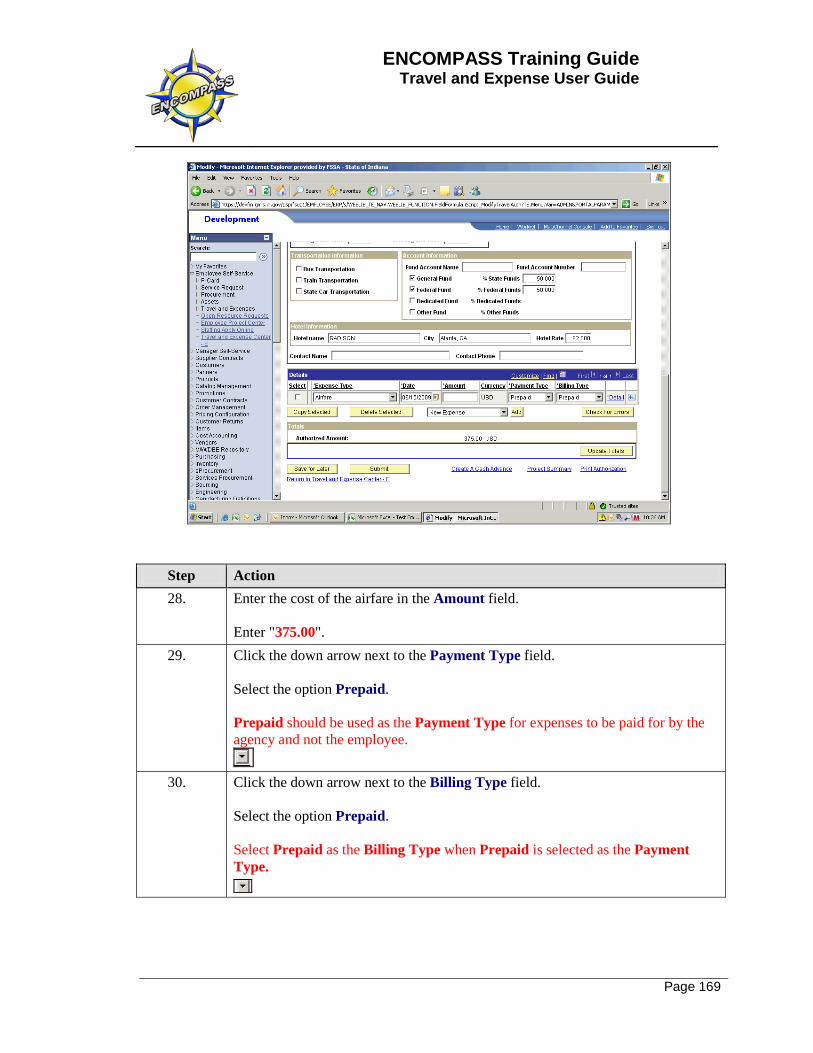
Step Action 28. Enter the cost of the airfare in the Amount field.
Enter "375.00".
29. Click the down arrow next to the Payment Type field. Select the option Prepaid. Prepaid should be used as the Payment Type for expenses to be paid for by the agency and not the employee.
30. Click the down arrow next to the Billing Type field.
Select the option Prepaid. Select Prepaid as the Billing Type when Prepaid is selected as the Payment Type.
ENCOMPASS Training Guide Travel and Expense User Guide
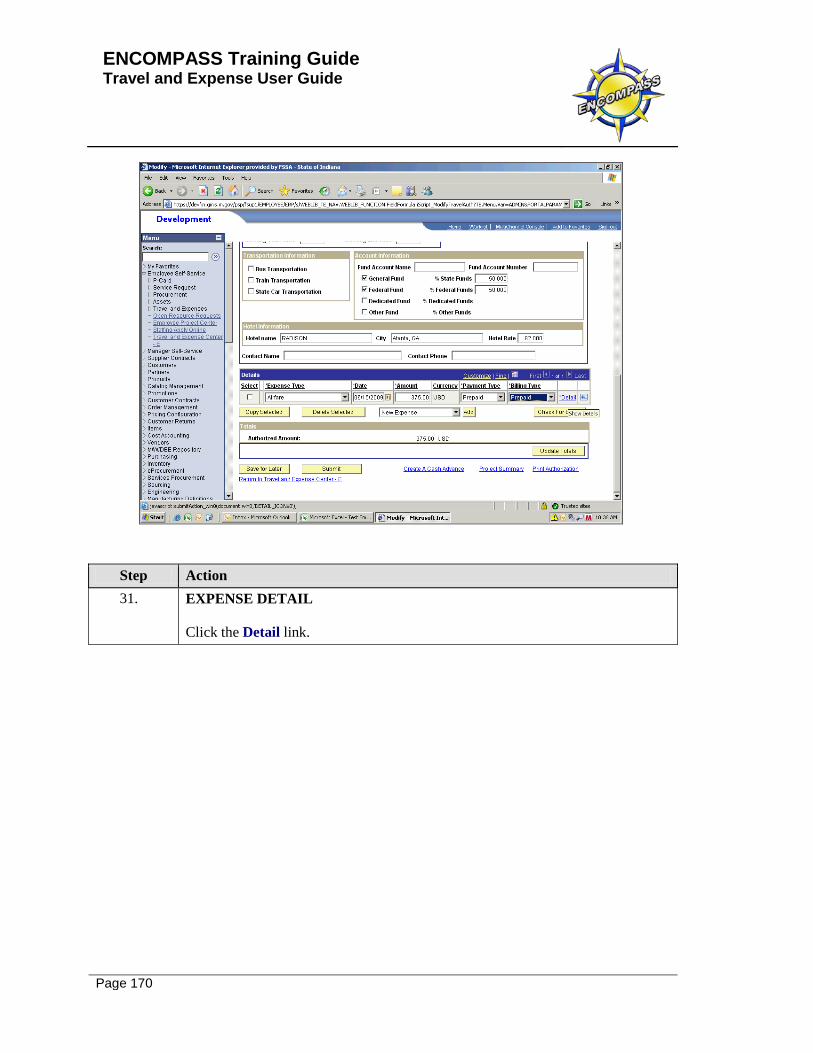
Page 170
Step Action 31. EXPENSE DETAIL
Click the Detail link.
ENCOMPASS Training Guide Travel and Expense User Guide
Page 171
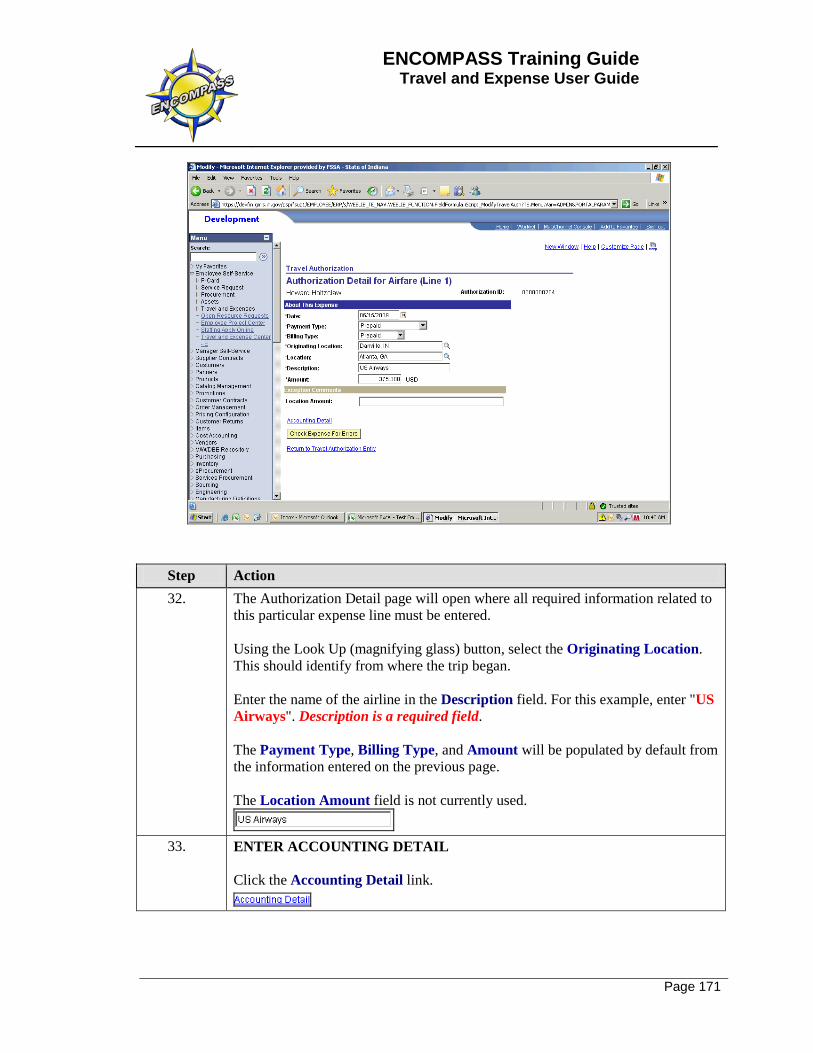
Step Action 32. The Authorization Detail page will open where all required information related to
this particular expense line must be entered. Using the Look Up (magnifying glass) button, select the Originating Location. This should identify from where the trip began. Enter the name of the airline in the Description field. For this example, enter "US Airways". Description is a required field. The Payment Type, Billing Type, and Amount will be populated by default from the information entered on the previous page. The Location Amount field is not currently used.
33. ENTER ACCOUNTING DETAIL
Click the Accounting Detail link.
ENCOMPASS Training Guide Travel and Expense User Guide
Page 172
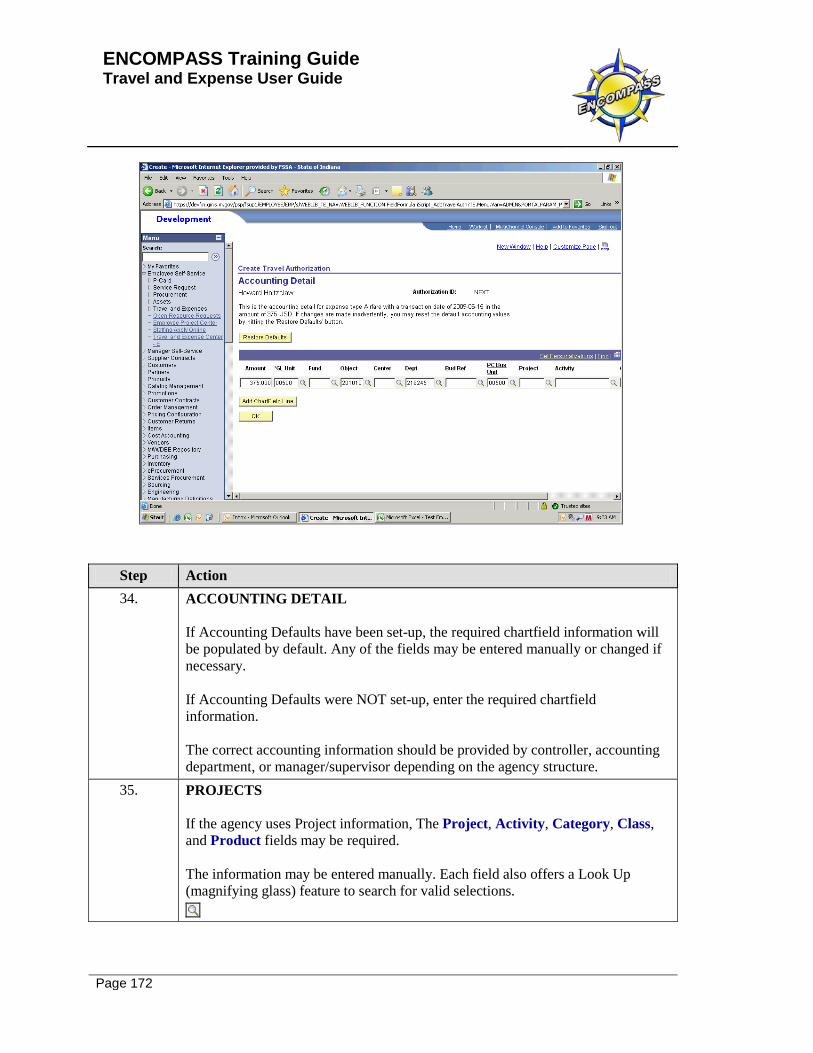
Step Action 34. ACCOUNTING DETAIL
If Accounting Defaults have been set-up, the required chartfield information will be populated by default. Any of the fields may be entered manually or changed if necessary. If Accounting Defaults were NOT set-up, enter the required chartfield information. The correct accounting information should be provided by controller, accounting department, or manager/supervisor depending on the agency structure.
35. PROJECTS If the agency uses Project information, The Project, Activity, Category, Class, and Product fields may be required. The information may be entered manually. Each field also offers a Look Up (magnifying glass) feature to search for valid selections.
ENCOMPASS Training Guide Travel and Expense User Guide
Page 173
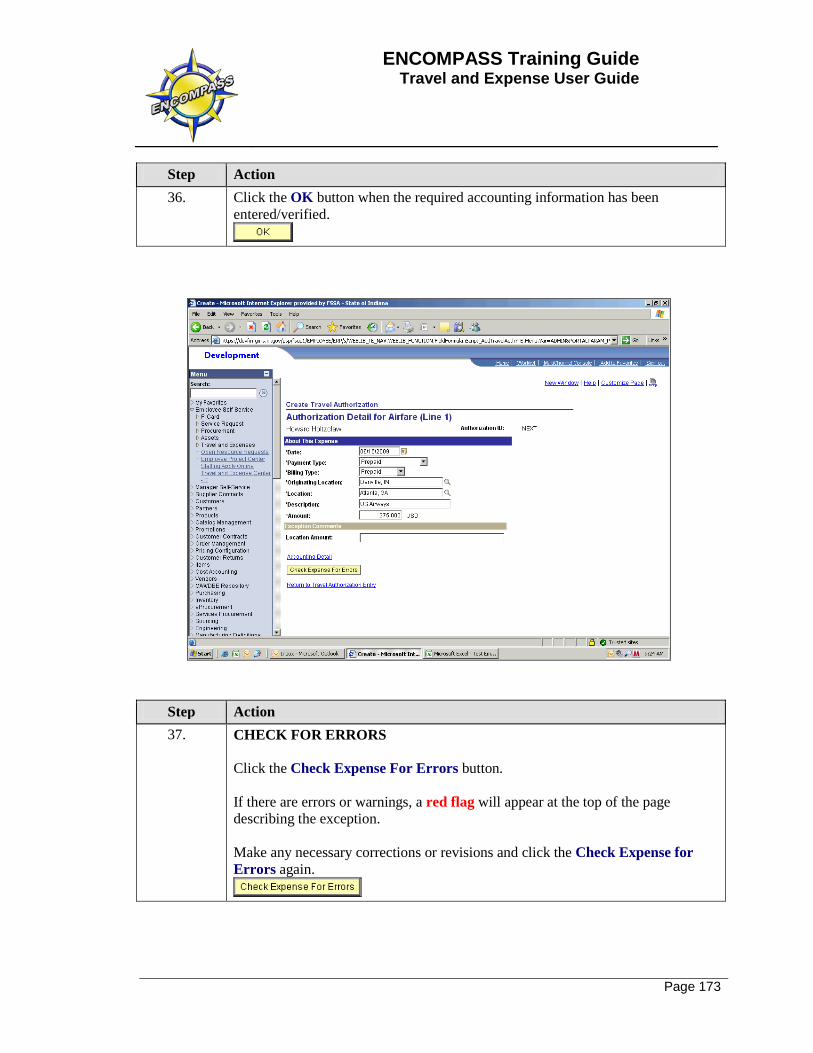
Step Action 36. Click the OK button when the required accounting information has been
entered/verified.
Step Action 37. CHECK FOR ERRORS
Click the Check Expense For Errors button. If there are errors or warnings, a red flag will appear at the top of the page describing the exception. Make any necessary corrections or revisions and click the Check Expense for Errors again.
ENCOMPASS Training Guide Travel and Expense User Guide
Page 174
Step Action 38. Click the Return to Travel Authorization Entry link.
39. Click the SAVE FOR LATER button after entering each expense line to
eliminate the risk of losing information entered. After saving, the Travel Authorization will be assigned the next available number. It will be displayed at the top of the page.
40. EXPENSE TYPE - LODGING/HOTEL
Click the down arrow next to the Expense Type field to add the next expense. Select Lodging/Hotel.
41. Enter the date of the expense in the Date field.
42. Enter the cost associated with this expense in the Amount field.
Enter "82.00".

ENCOMPASS Training Guide Travel and Expense User Guide
Page 175
Step Action 43. Click the down arrow next to the Payment Type field.
If the traveler is paying for this expense, select Employee Paid. If User Defaults have been set-up, the default settings will be displayed. *FSSA users must never select the Travel Card option.
44. Click the down arrow next to the Billing Type field.
Select Out of State-Billable. Billing Type Prepaid may not be used with Payment Type Employee Paid. *FSSA users should never select In State-NonBillable or Out of State-NonBillable.
45. EXPENSE DETAIL
Click the Detail link.
ENCOMPASS Training Guide Travel and Expense User Guide
Page 176
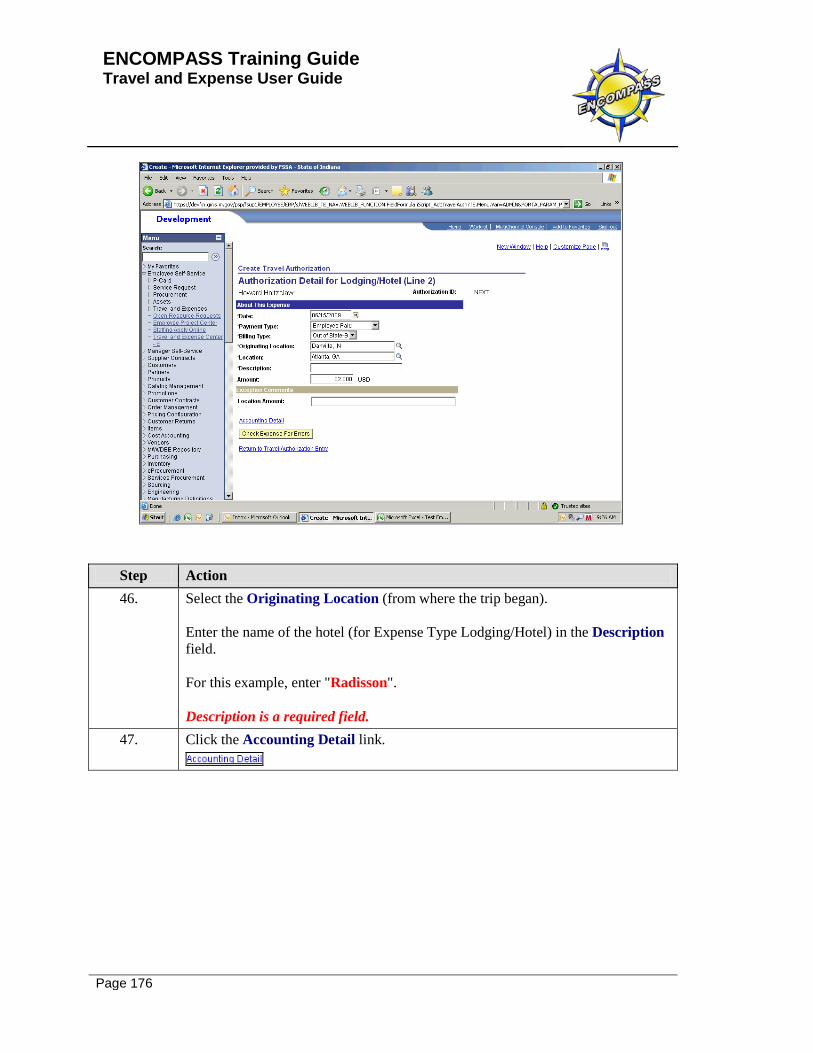
Step Action 46. Select the Originating Location (from where the trip began).
Enter the name of the hotel (for Expense Type Lodging/Hotel) in the Description field. For this example, enter "Radisson". Description is a required field.
47. Click the Accounting Detail link.

ENCOMPASS Training Guide Travel and Expense User Guide
Page 177
Step Action 48. ACCOUNTING DETAIL
Enter/verify the accounting information for this expense item. Remember that each field offers the Look Up (magnifying glass) feature to search for valid entries.
49. Click the OK button when the required accounting information has been entered/verified.

ENCOMPASS Training Guide Travel and Expense User Guide
Page 178
Step Action 50. CHECK FOR ERRORS
Click the Check Expense For Errors button. If there are errors or warnings, a red flag will appear at the top of the page describing the exception. Make any necessary corrections or revisions and click the Check Expense for Errors again.

ENCOMPASS Training Guide Travel and Expense User Guide
Page 179
Step Action 51. Click the Return to Travel Authorization Entry. 52. Click the Save For Later button.
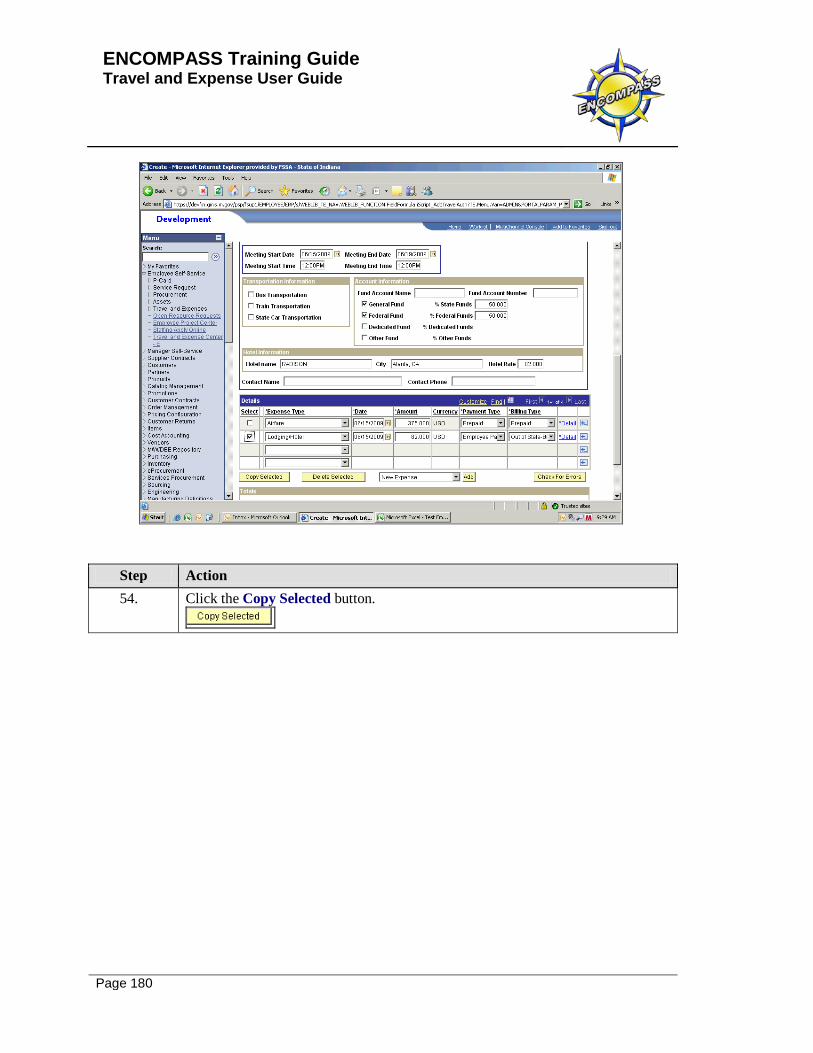
53. COPY AN EXPENSE LINE
Expense lines that are similar and will be listed multiple times may be copied to save data entry requirements. Click the Select checkbox next to the expense to be copied.
ENCOMPASS Training Guide Travel and Expense User Guide
Page 180
Step Action 54. Click the Copy Selected button.
ENCOMPASS Training Guide Travel and Expense User Guide
Page 181
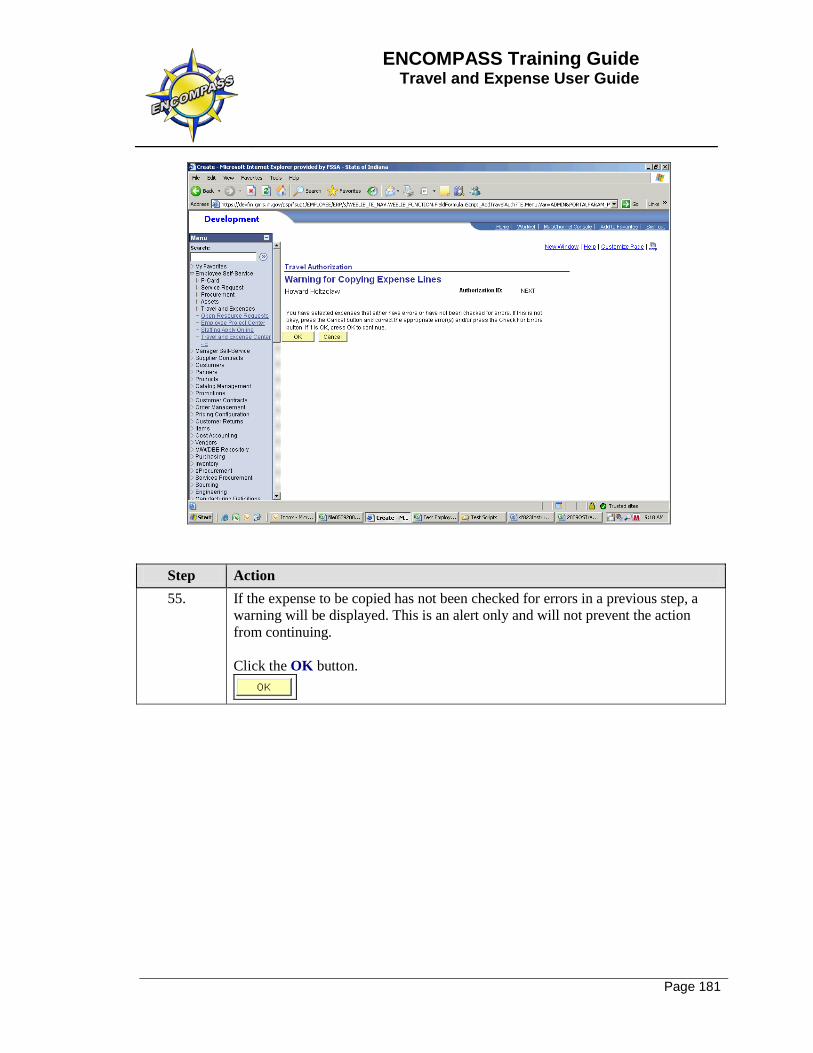
Step Action 55. If the expense to be copied has not been checked for errors in a previous step, a
warning will be displayed. This is an alert only and will not prevent the action from continuing. Click the OK button.
ENCOMPASS Training Guide Travel and Expense User Guide
Page 182
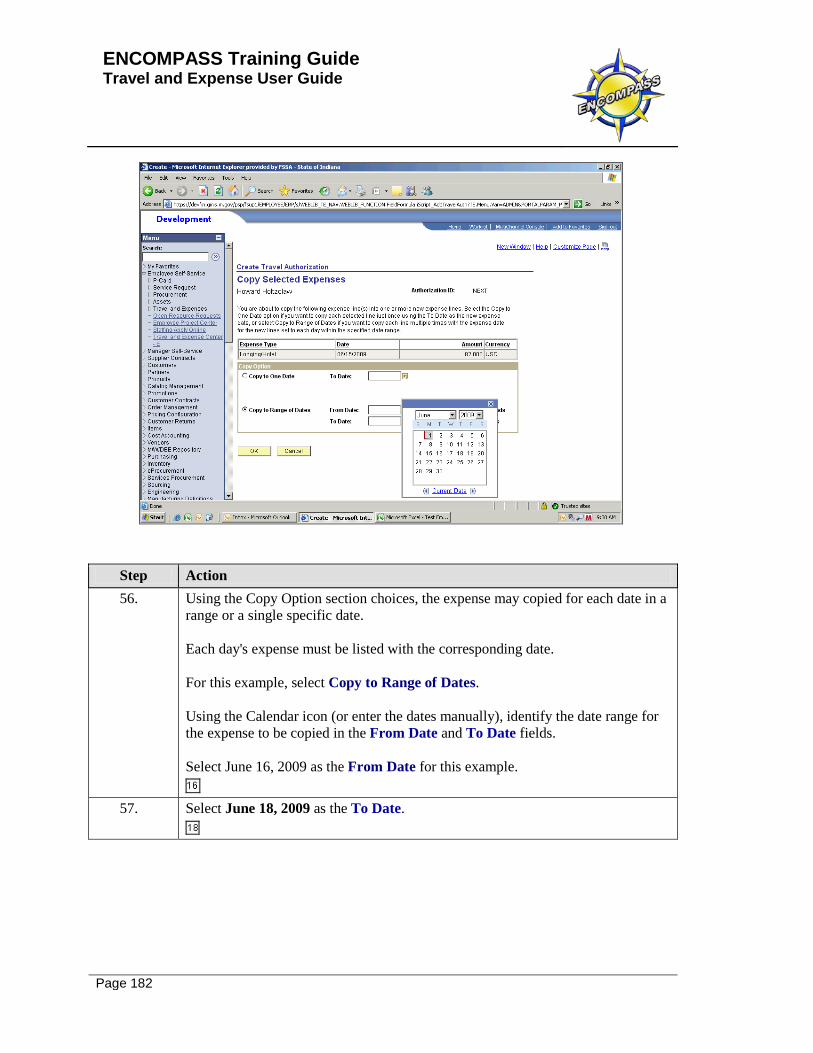
Step Action 56. Using the Copy Option section choices, the expense may copied for each date in a
range or a single specific date. Each day's expense must be listed with the corresponding date. For this example, select Copy to Range of Dates. Using the Calendar icon (or enter the dates manually), identify the date range for the expense to be copied in the From Date and To Date fields. Select June 16, 2009 as the From Date for this example.
57. Select June 18, 2009 as the To Date.

ENCOMPASS Training Guide Travel and Expense User Guide
Page 183
Step Action 58. The Include Weekends and/or Include Holidays checkboxes allow these types of
days to be included in the date range specified if applicable for this trip. Do not check them if they don't apply.
59. Click the OK button.
Step Action 60. The expense selected will be copied to the Travel Authorization for the dates
specified. The information may be updated if necessary.
61. Click the Save for Later button.
ENCOMPASS Training Guide Travel and Expense User Guide
Page 184
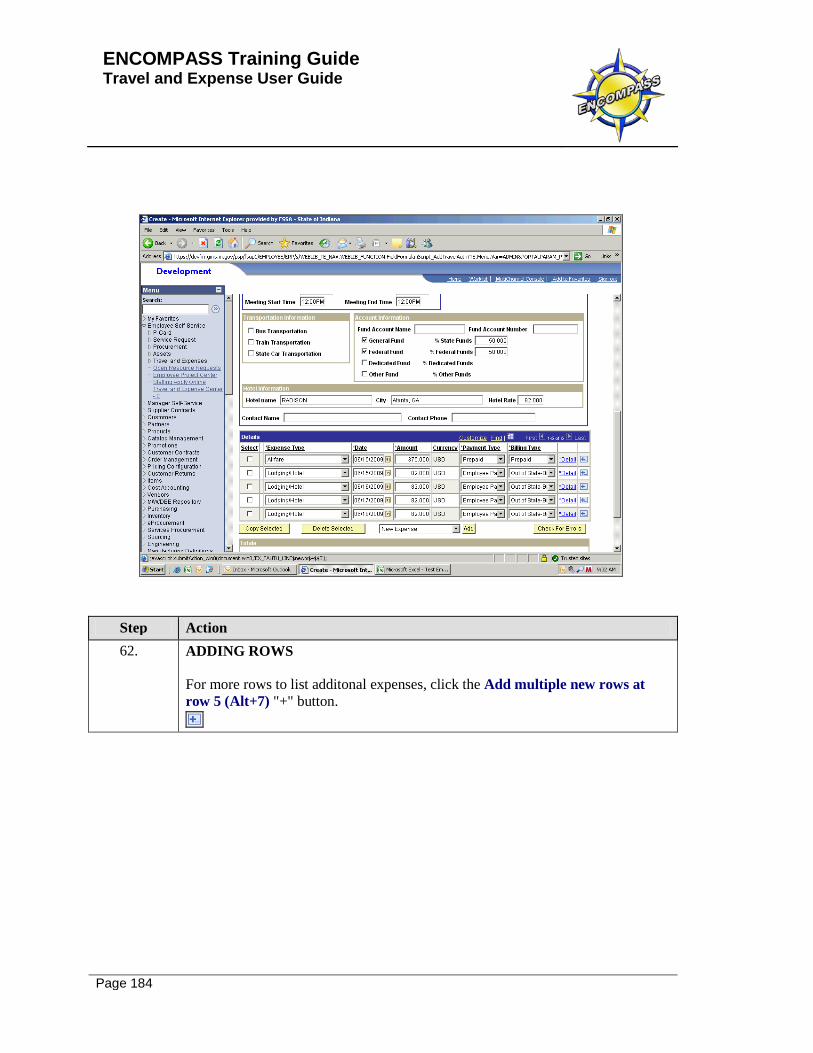
Step Action 62. ADDING ROWS
For more rows to list additonal expenses, click the Add multiple new rows at row 5 (Alt+7) "+" button.
ENCOMPASS Training Guide Travel and Expense User Guide
Page 185
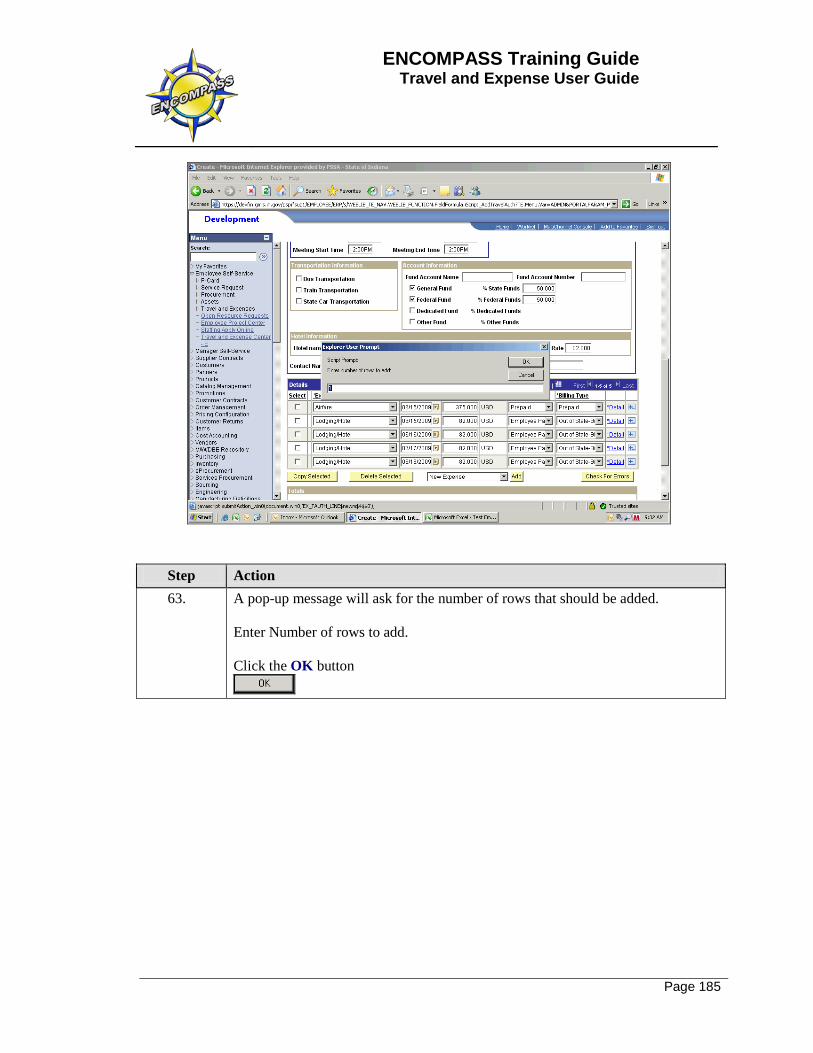
Step Action 63. A pop-up message will ask for the number of rows that should be added.
Enter Number of rows to add. Click the OK button

ENCOMPASS Training Guide Travel and Expense User Guide
Page 186
Step Action 64. EXPENSE TYPE - PER DIEM
Click the down arrow next to the Expense Type field and select Per Diem-Out of State.

ENCOMPASS Training Guide Travel and Expense User Guide
Page 187
Step Action 65. Enter the date of the expense in the Date field.
For this example, enter "06/15/2009"
66. Enter the Per Diem dollar amount in the Amount field. The daily amount allowed is $32.00 multiplied by the total number of days the traveler is eligible for reimbursement (based on the State's travel policies) minus any meals provided. Amounts for portions of a day are calculated differently. Questions about per diem allowances should be directed to the travel administrator/travel department.

ENCOMPASS Training Guide Travel and Expense User Guide
Page 188
Step Action 67. Click the down arrow next to the Payment Type field and select Employee Paid.
ENCOMPASS Training Guide Travel and Expense User Guide
Page 189
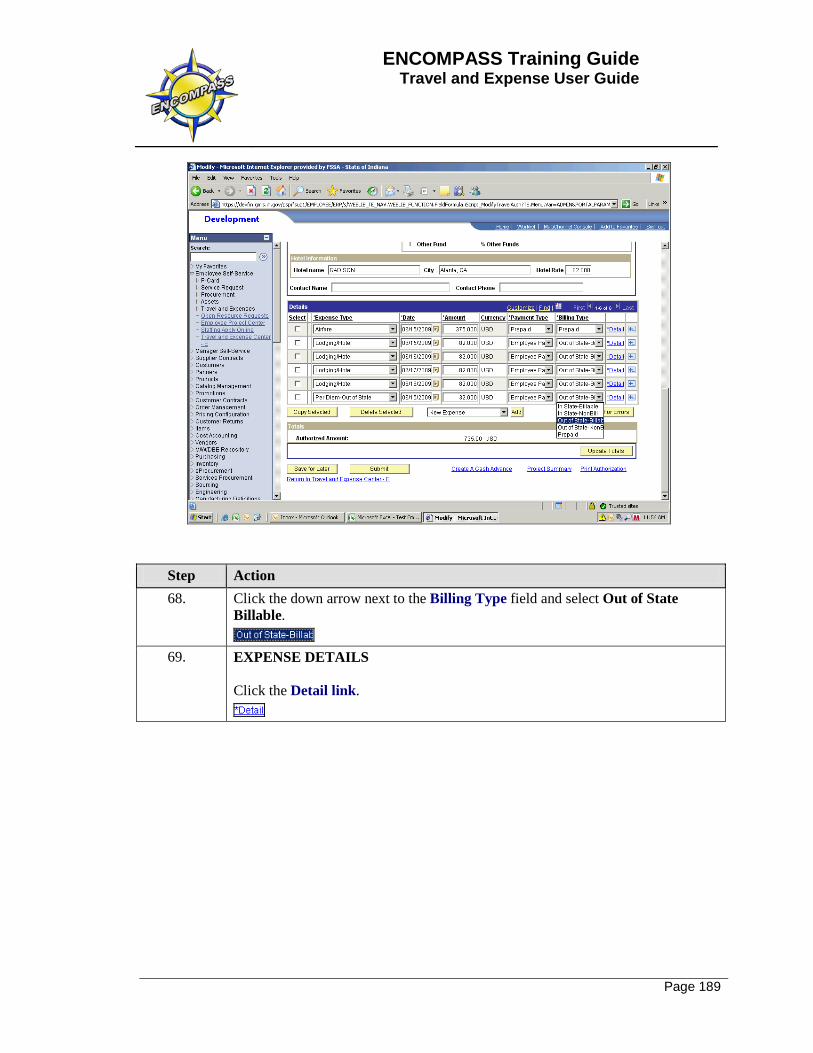
Step Action 68. Click the down arrow next to the Billing Type field and select Out of State
Billable.
69. EXPENSE DETAILS Click the Detail link.
ENCOMPASS Training Guide Travel and Expense User Guide
Page 190
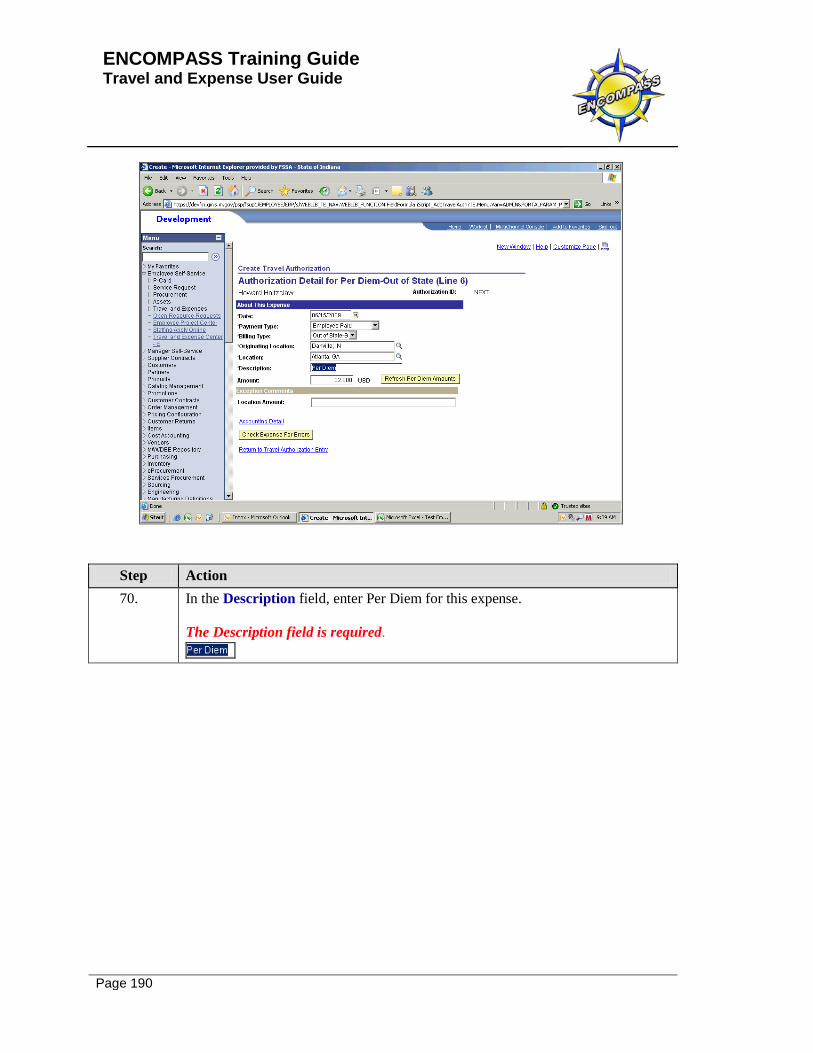
Step Action 70. In the Description field, enter Per Diem for this expense.
The Description field is required.
ENCOMPASS Training Guide Travel and Expense User Guide
Page 191
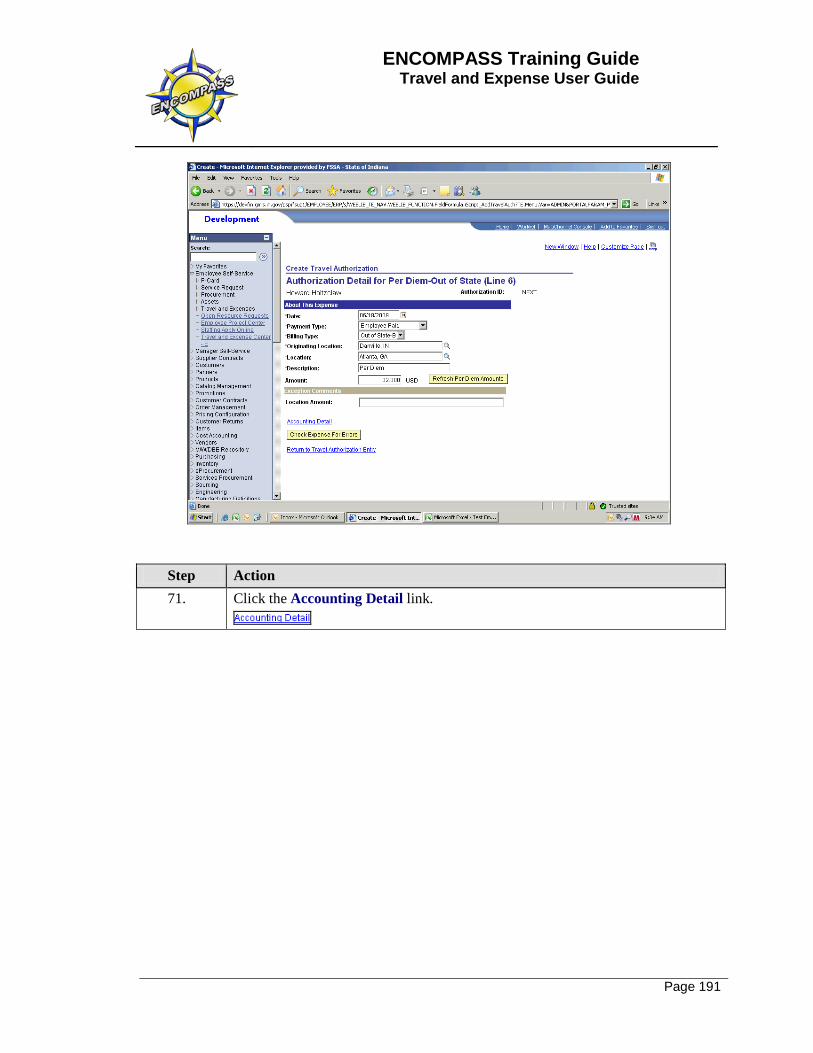
Step Action 71. Click the Accounting Detail link.
ENCOMPASS Training Guide Travel and Expense User Guide
Page 192
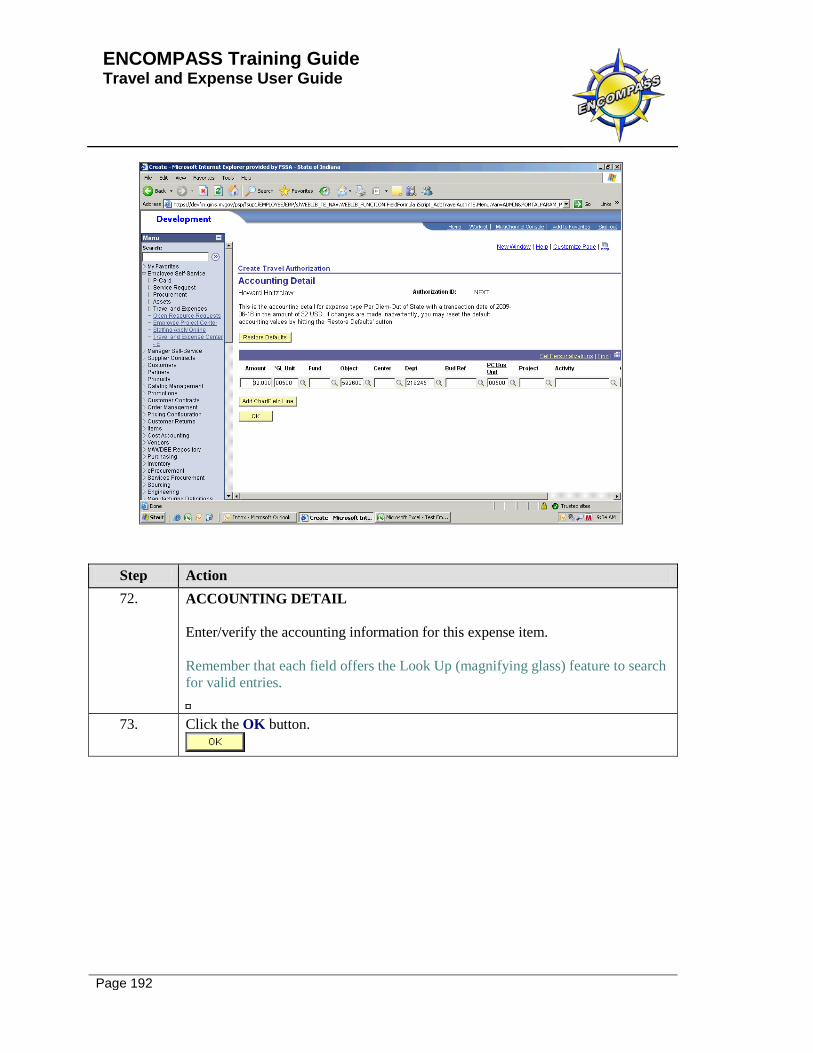
Step Action 72. ACCOUNTING DETAIL
Enter/verify the accounting information for this expense item. Remember that each field offers the Look Up (magnifying glass) feature to search for valid entries.
73. Click the OK button.

ENCOMPASS Training Guide Travel and Expense User Guide
Page 193
Step Action 74. CHECK FOR ERRORS
Click the Check Expense For Errors button. If there are errors or warnings, a red flag will appear at the top of the page describing the exception. Make any necessary corrections or revisions and click the Check Expense for Errors again.
75. Click the Return to Travel Authorization Entry link.
ENCOMPASS Training Guide Travel and Expense User Guide
Page 194
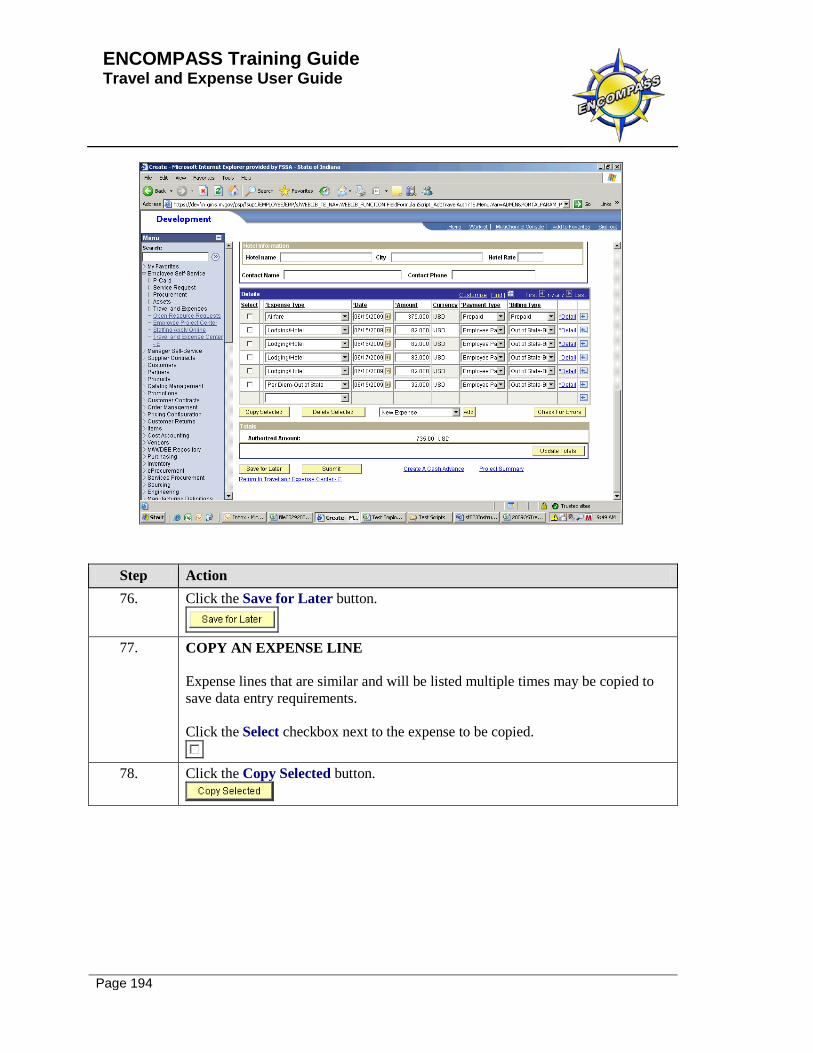
Step Action 76. Click the Save for Later button.
77. COPY AN EXPENSE LINE
Expense lines that are similar and will be listed multiple times may be copied to save data entry requirements. Click the Select checkbox next to the expense to be copied.
78. Click the Copy Selected button.
ENCOMPASS Training Guide Travel and Expense User Guide
Page 195
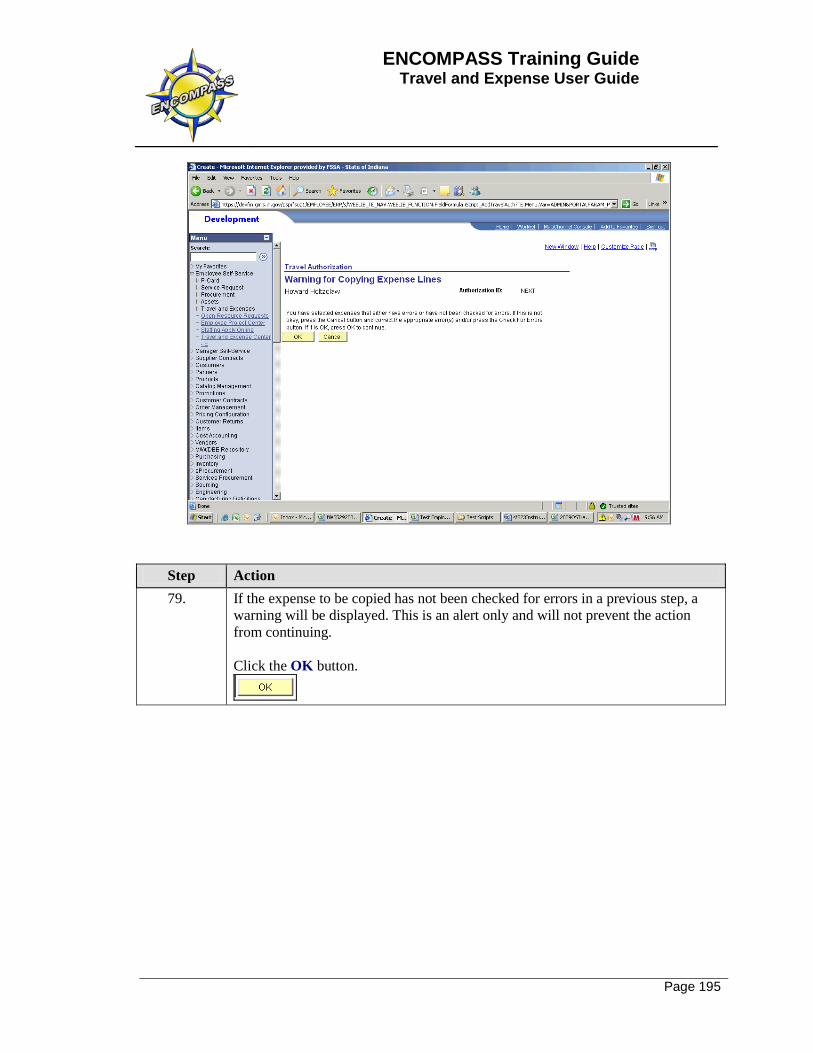
Step Action 79. If the expense to be copied has not been checked for errors in a previous step, a
warning will be displayed. This is an alert only and will not prevent the action from continuing. Click the OK button.

ENCOMPASS Training Guide Travel and Expense User Guide
Page 196
Step Action 80. Using the Copy Option section choices, the expense may copied for each date in a
range or a single specific date. Each day's expense must be listed with the corresponding date. For this example, select Copy to Range of Dates.
81. Using the Calendar icon (or enter the dates manually), identify the date range for
the expense to be copied in the From Date and To Date fields. For this example, select June 16, 2009 as the From Date and June 19, 2009 as the To Date.

ENCOMPASS Training Guide Travel and Expense User Guide
Page 197
Step Action 82. The Include Weekends and/or Include Holidays checkboxes allow these types of
days to be included in the date range specified if applicable for this trip. Do not check them if they don't apply. Click the OK button.

ENCOMPASS Training Guide Travel and Expense User Guide
Page 198
Step Action 83. The expense selected will be copied to the Travel Authorization for the dates
specified. The information may be updated if necessary.
84. Click the Save for Later button.
85. ADDING ROWS
For more rows to list additonal expenses, click the Add multiple new rows at row 5 (Alt+7) "+" button.
86. A pop-up message will ask for the number of rows that should be added.
Enter Number of rows to add. Click the OK button For this example, enter "2".
ENCOMPASS Training Guide Travel and Expense User Guide
Page 199
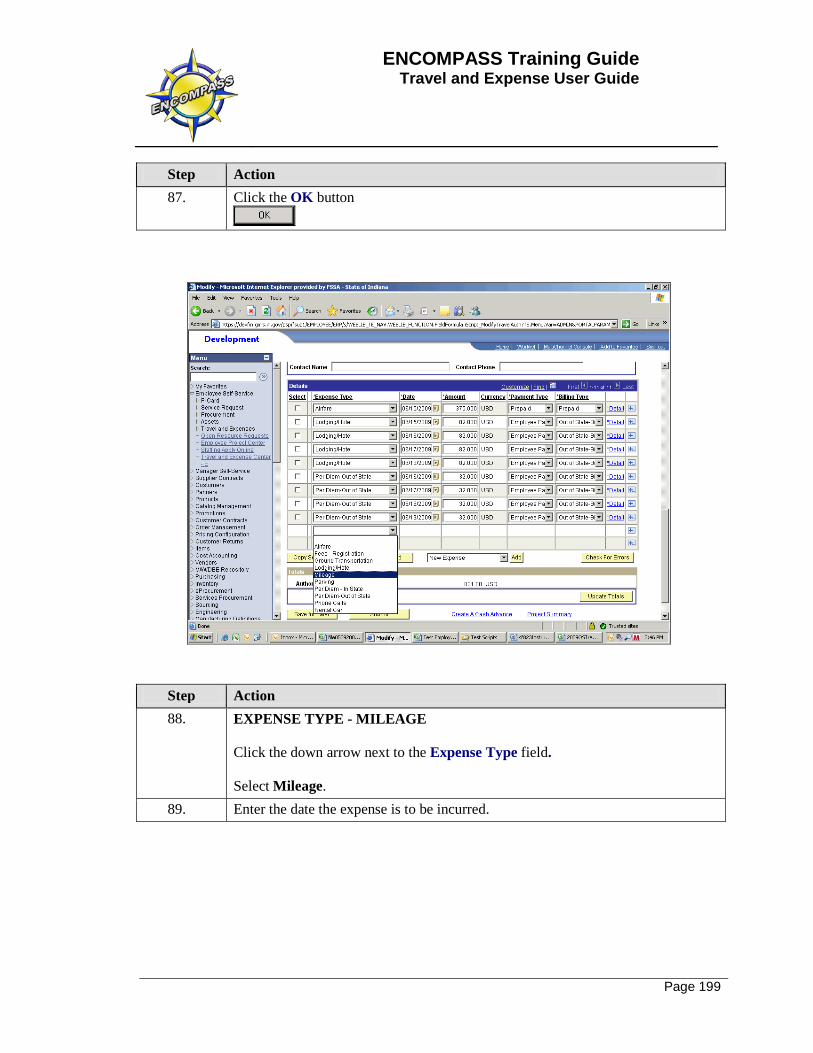
Step Action 87. Click the OK button
Step Action 88. EXPENSE TYPE - MILEAGE
Click the down arrow next to the Expense Type field. Select Mileage.
89. Enter the date the expense is to be incurred.

ENCOMPASS Training Guide Travel and Expense User Guide
Page 200
Step Action 90. Notice that the Amount field is inactive (grayed out).
When the number of miles is entered on the Expense Details page, the dollar amount will be calculated based on the State's current mileage allowance.
91. Click the down arrow next to the Payment Type field.
Select Employee Paid.
92. Click the down arrow next to the Billing Type field. Select Out of State-Billable.

ENCOMPASS Training Guide Travel and Expense User Guide
Page 201
Step Action 93. Click the Detail link.
94. In the Miles field, enter the estimated number of miles to be driven.
For this example, enter "147".
ENCOMPASS Training Guide Travel and Expense User Guide
Page 202
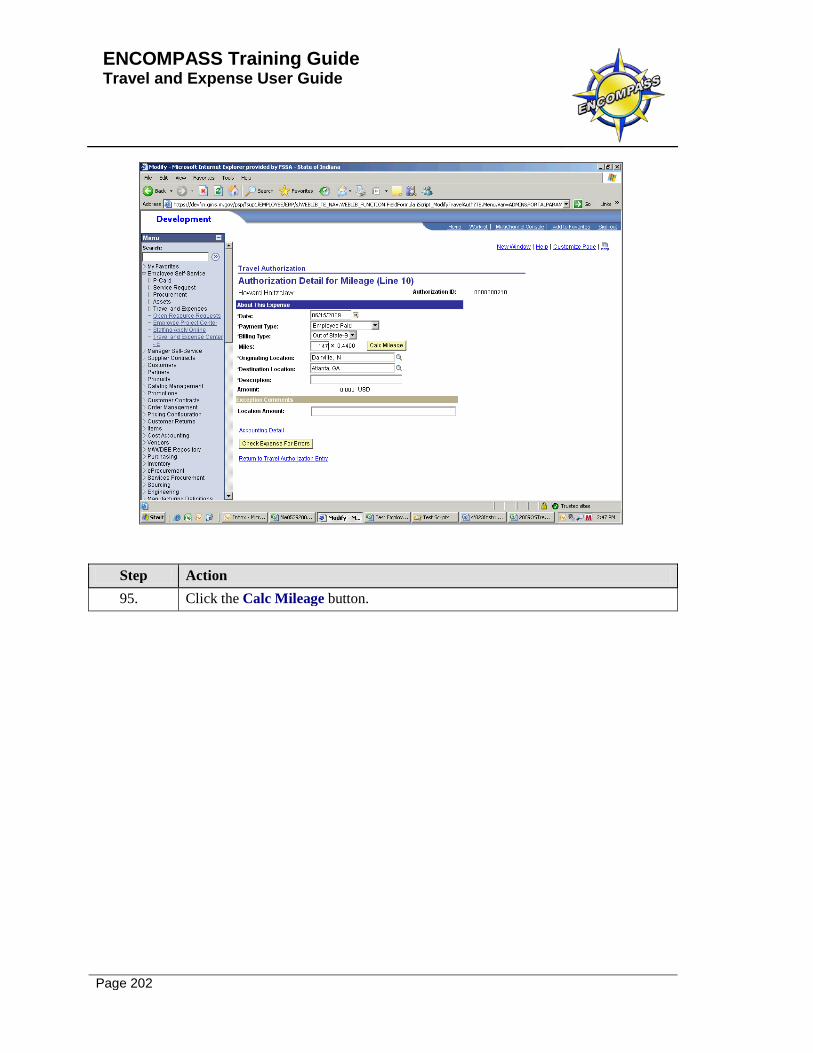
Step Action 95. Click the Calc Mileage button.
ENCOMPASS Training Guide Travel and Expense User Guide
Page 203
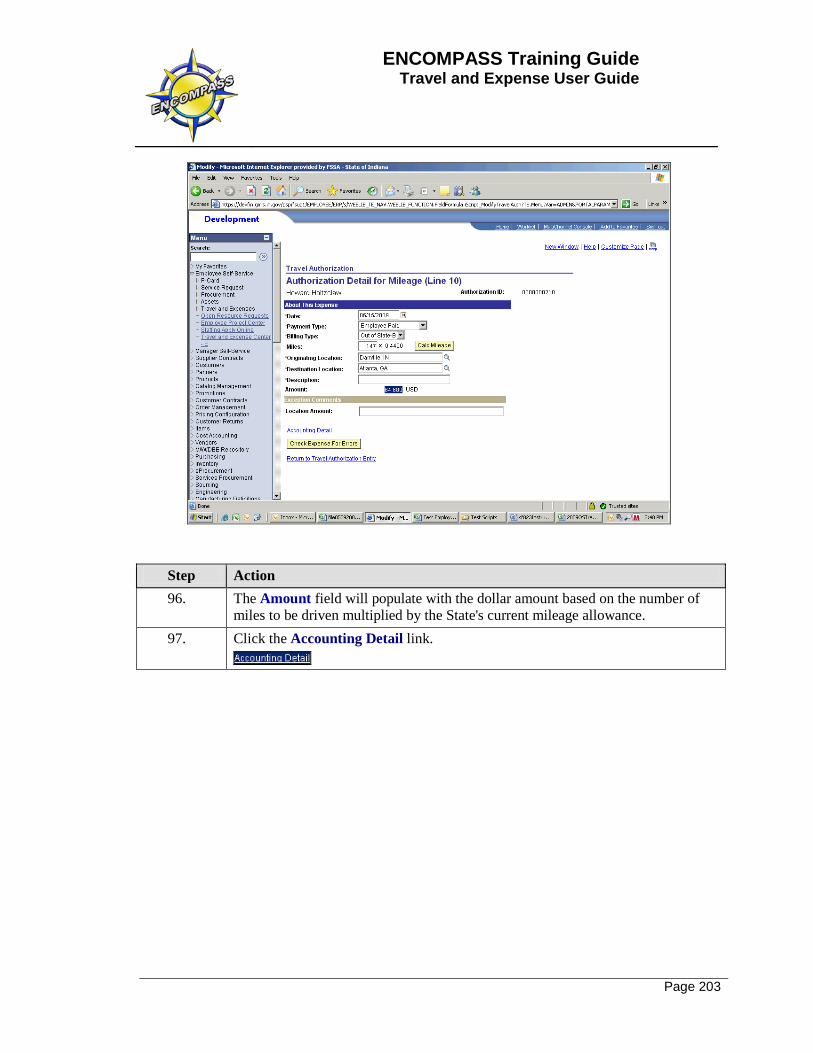
Step Action 96. The Amount field will populate with the dollar amount based on the number of
miles to be driven multiplied by the State's current mileage allowance. 97. Click the Accounting Detail link.
ENCOMPASS Training Guide Travel and Expense User Guide
Page 204
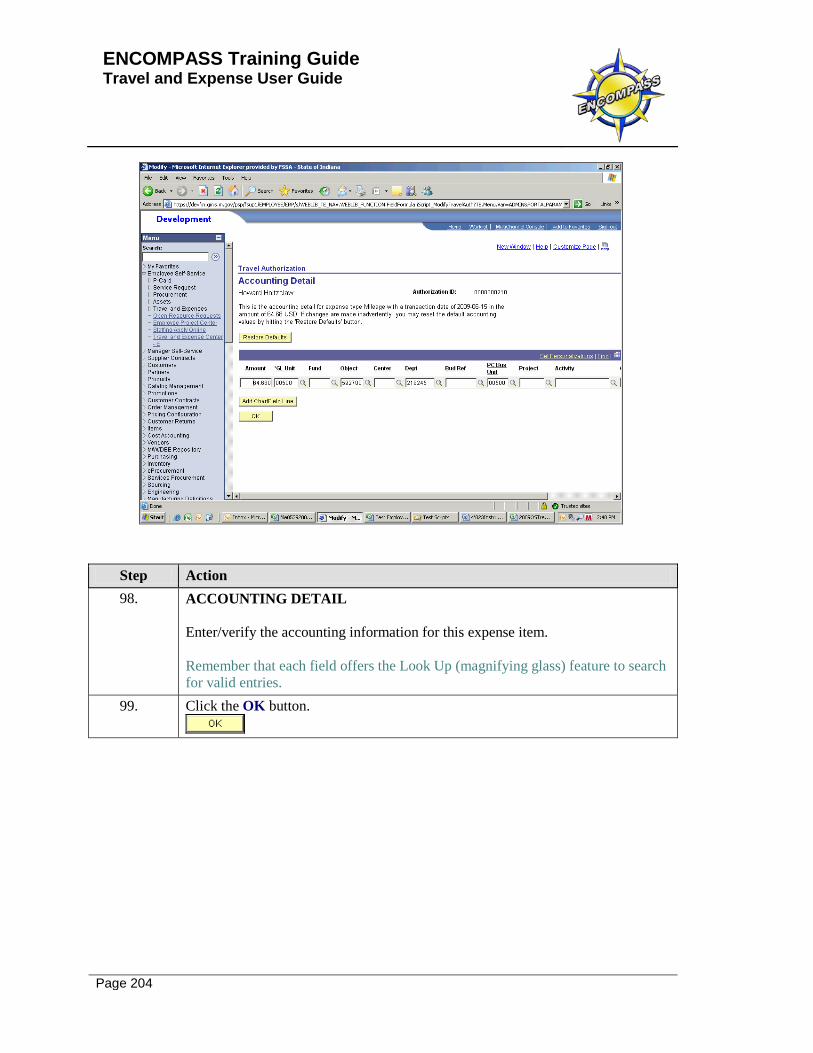
Step Action 98. ACCOUNTING DETAIL
Enter/verify the accounting information for this expense item. Remember that each field offers the Look Up (magnifying glass) feature to search for valid entries.
99. Click the OK button.
ENCOMPASS Training Guide Travel and Expense User Guide
Page 205
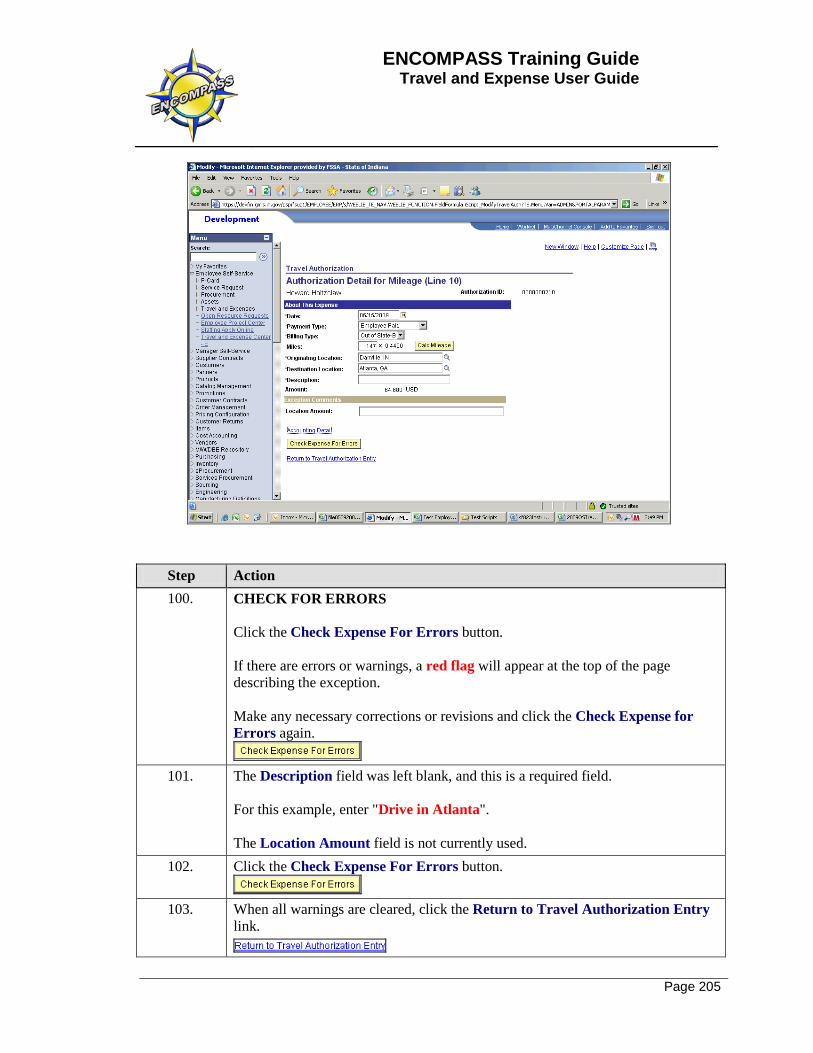
Step Action 100. CHECK FOR ERRORS
Click the Check Expense For Errors button. If there are errors or warnings, a red flag will appear at the top of the page describing the exception. Make any necessary corrections or revisions and click the Check Expense for Errors again.
101. The Description field was left blank, and this is a required field.
For this example, enter "Drive in Atlanta". The Location Amount field is not currently used.
102. Click the Check Expense For Errors button.
103. When all warnings are cleared, click the Return to Travel Authorization Entry link.
ENCOMPASS Training Guide Travel and Expense User Guide
Page 206
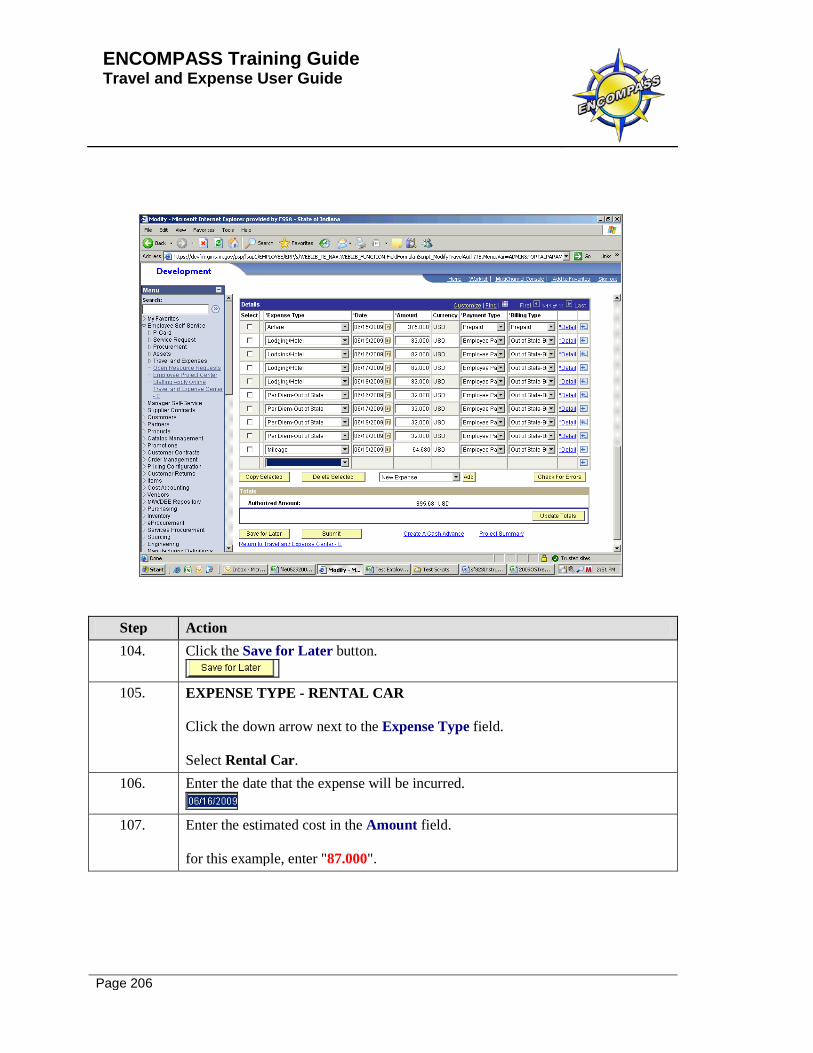
Step Action 104. Click the Save for Later button.
105. EXPENSE TYPE - RENTAL CAR
Click the down arrow next to the Expense Type field. Select Rental Car.
106. Enter the date that the expense will be incurred.
107. Enter the estimated cost in the Amount field. for this example, enter "87.000".
ENCOMPASS Training Guide Travel and Expense User Guide
Page 207
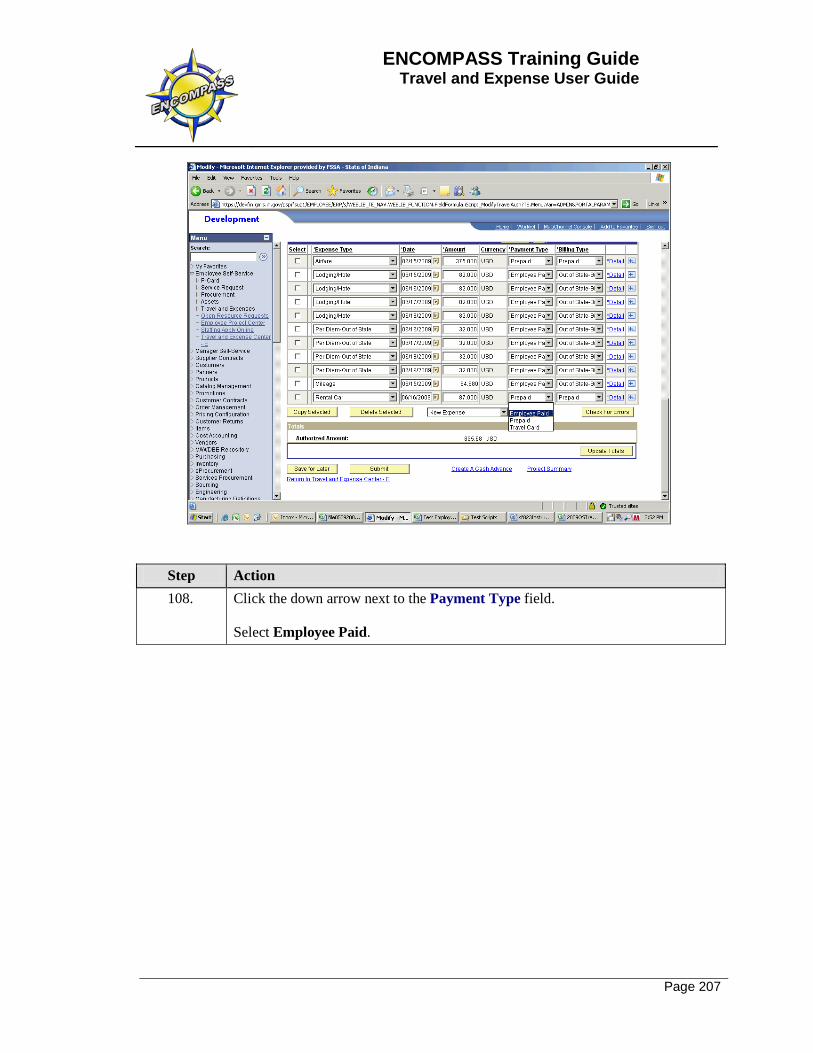
Step Action 108. Click the down arrow next to the Payment Type field.
Select Employee Paid.
ENCOMPASS Training Guide Travel and Expense User Guide
Page 208
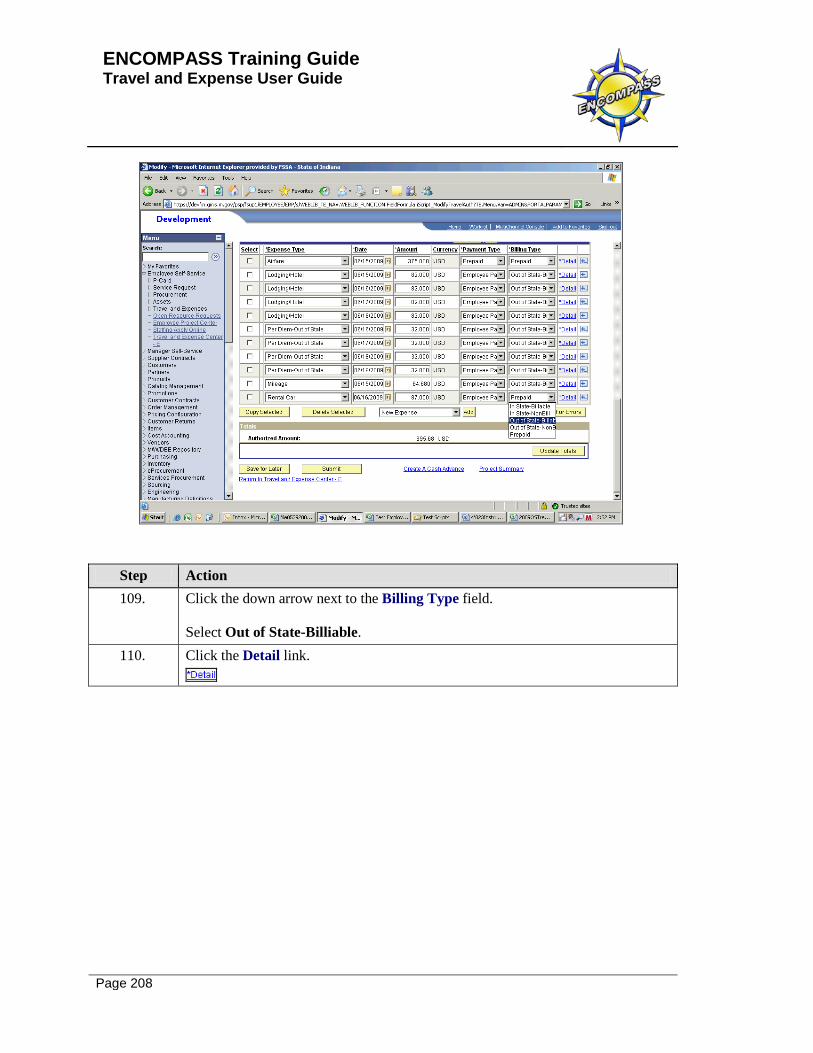
Step Action 109. Click the down arrow next to the Billing Type field.
Select Out of State-Billiable.
110. Click the Detail link.
ENCOMPASS Training Guide Travel and Expense User Guide
Page 209
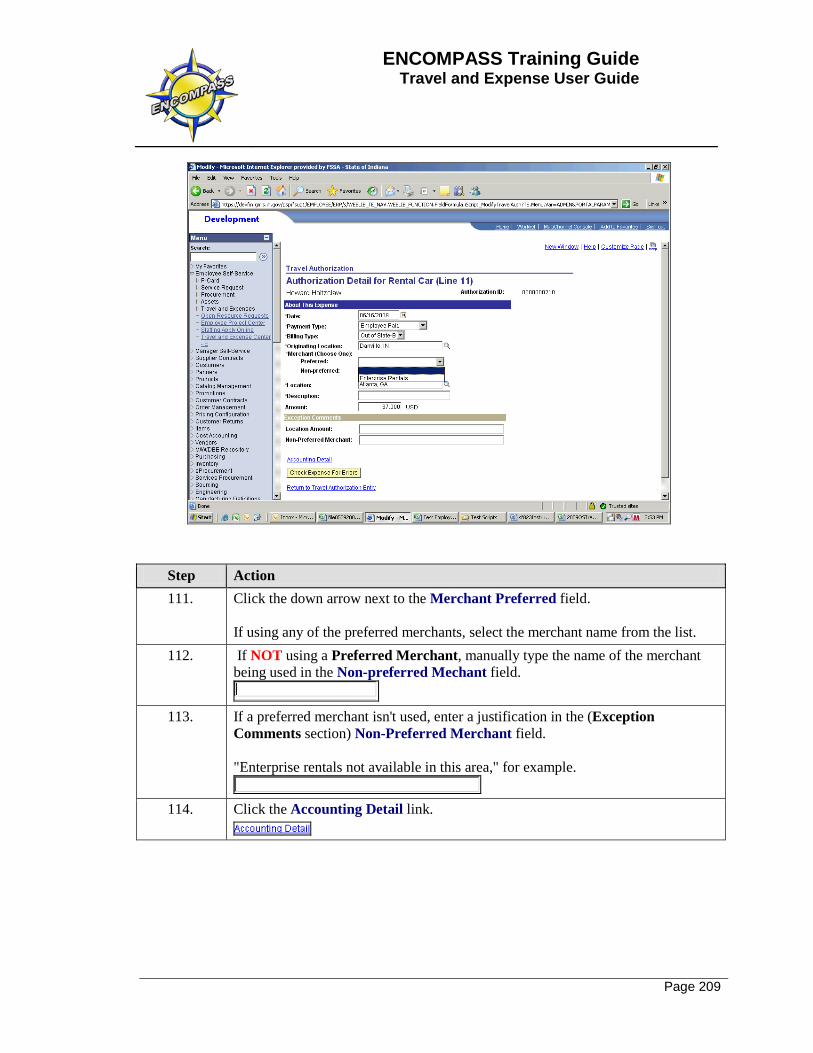
Step Action 111. Click the down arrow next to the Merchant Preferred field.
If using any of the preferred merchants, select the merchant name from the list.
112. If NOT using a Preferred Merchant, manually type the name of the merchant being used in the Non-preferred Mechant field.
113. If a preferred merchant isn't used, enter a justification in the (Exception
Comments section) Non-Preferred Merchant field. "Enterprise rentals not available in this area," for example.
114. Click the Accounting Detail link.

ENCOMPASS Training Guide Travel and Expense User Guide
Page 210
Step Action 115. ACCOUNTING DETAIL
Enter/verify the accounting information for this expense item. Remember that each field offers the Look Up (magnifying glass) feature to search for valid entries.
Step Action 116. Click the OK button.

ENCOMPASS Training Guide Travel and Expense User Guide
Page 211
Step Action 117. Click the Check Expense for Errors button. 118. The Description field was left blank, and this is a required field.
Click in the Description field and enter a description for this expense. For this example, enter "Go from conference to hotel."
119. Click the Check Expense for Errors button again to make sure all warnings have
been cleared.

ENCOMPASS Training Guide Travel and Expense User Guide
Page 212
Step Action 120. Click the Return to Travel Authorization Entry link when all warnings have
been cleared. 121. Click the Save for Later button.
When the Travel Authorization is complete, click the Submit button to route the document for approval.
122. End of Procedure.
Modify a Travel Authorization
Procedure

ENCOMPASS Training Guide Travel and Expense User Guide
Page 213
Step Action 1. Click the Employee Self-Service link.

ENCOMPASS Training Guide Travel and Expense User Guide
Page 214
Step Action 2. Click the Travel and Expense Center - E link.
3. Click the Travel Authorization link.
4. Click the Modify link.

ENCOMPASS Training Guide Travel and Expense User Guide
Page 215
Step Action 5. Click the Search by list.
6. Click the Advanced Search link.
You can search for a TA by any of thes data elements. OR 7. Click the Advanced Search link.
8. You can use the Advanced search with more details to find the TA you are
looking for.
9. Release the mouse button. For most of your searches, the basic search will be enough. Select Authorization ID.
10. Click the Search button 11. Click an entry in the Authorization ID column.
Make a selection from the search results of TA's.
ENCOMPASS Training Guide Travel and Expense User Guide
Page 216
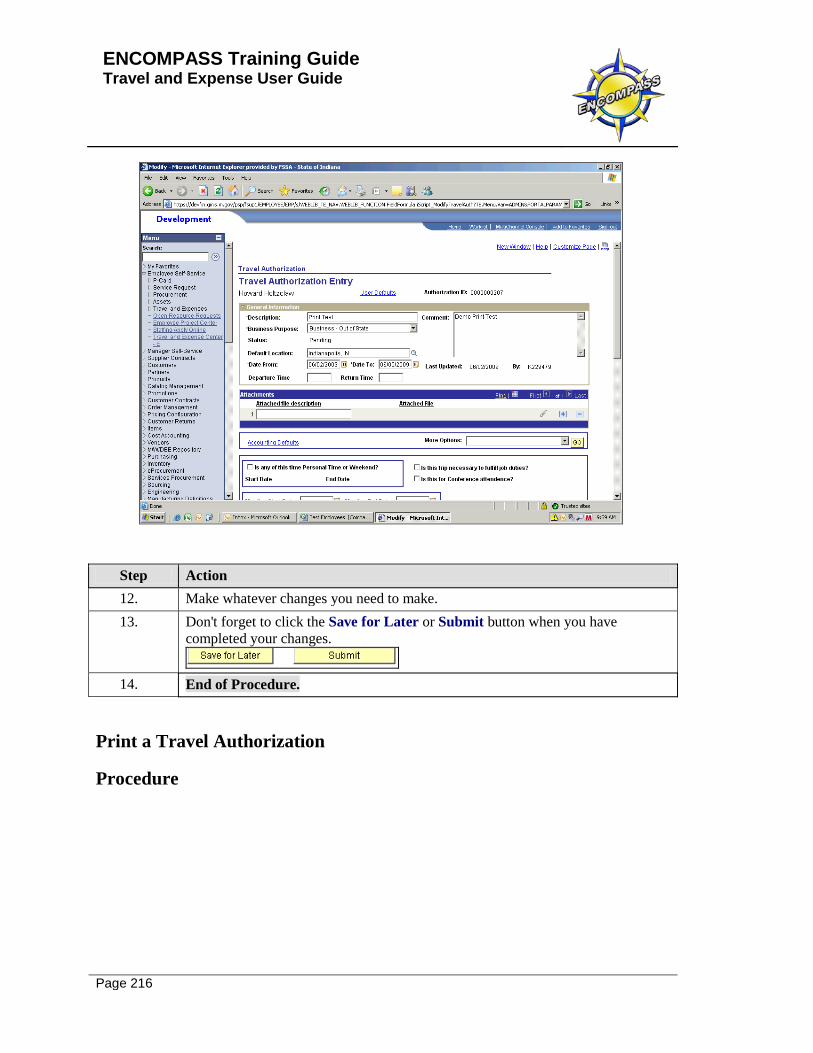
Step Action 12. Make whatever changes you need to make. 13. Don't forget to click the Save for Later or Submit button when you have
completed your changes.
14. End of Procedure.
Print a Travel Authorization
Procedure

ENCOMPASS Training Guide Travel and Expense User Guide
Page 217
Step Action 1. Click the Employee Self-Service link.
ENCOMPASS Training Guide Travel and Expense User Guide
Page 218
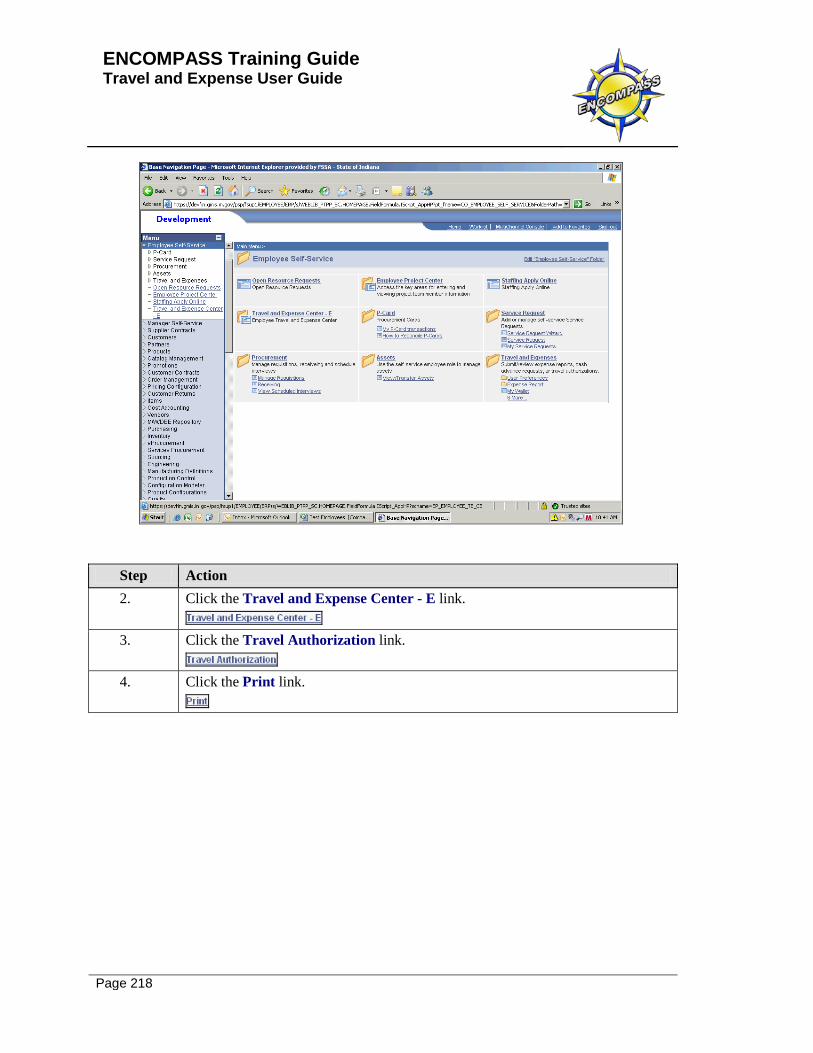
Step Action 2. Click the Travel and Expense Center - E link.
3. Click the Travel Authorization link.
4. Click the Print link.
ENCOMPASS Training Guide Travel and Expense User Guide
Page 219
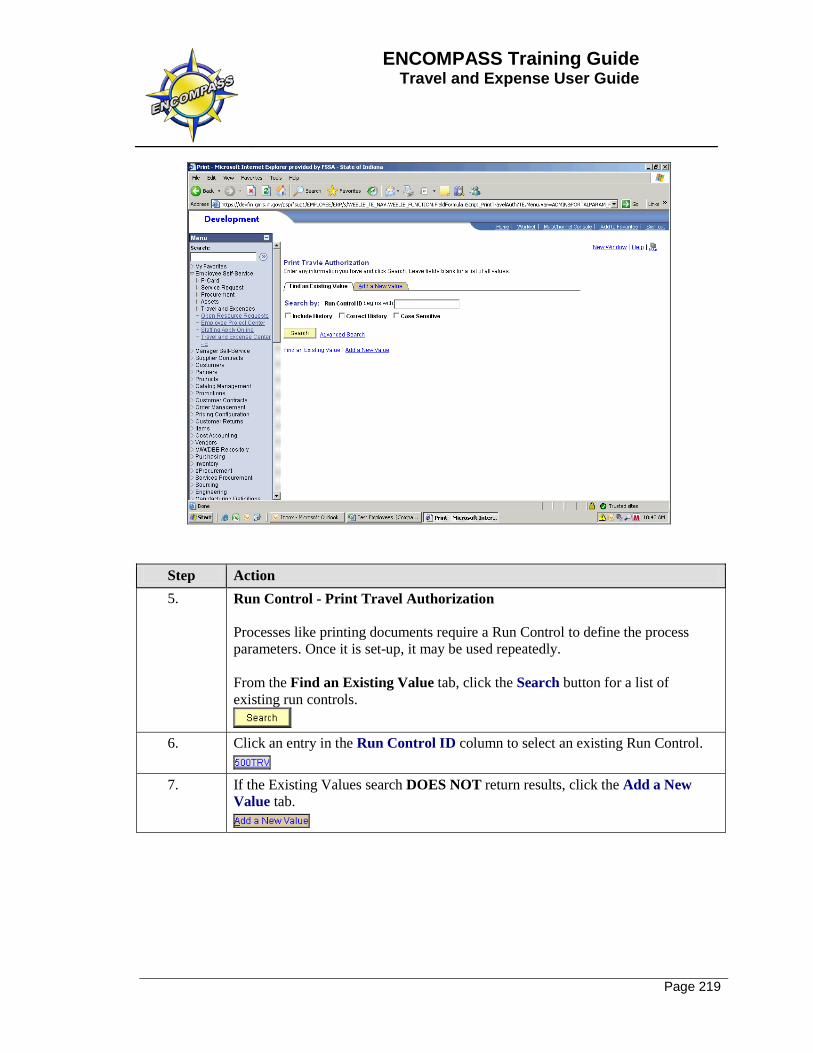
Step Action 5. Run Control - Print Travel Authorization
Processes like printing documents require a Run Control to define the process parameters. Once it is set-up, it may be used repeatedly. From the Find an Existing Value tab, click the Search button for a list of existing run controls.
6. Click an entry in the Run Control ID column to select an existing Run Control.
7. If the Existing Values search DOES NOT return results, click the Add a New
Value tab.

ENCOMPASS Training Guide Travel and Expense User Guide
Page 220
Step Action 8. Enter a title for the process in the Run Control ID field.
The name used is at the user's discretion. Most choose something that identifies the particular process. PRINT_TA, for example. When entering the Run Control name, spaces or special characters will not be accepted. Enter "NEW".
Step Action 9. When the Run Control ID has been entered, click the Add button. 10. In the Process Request Parameters, enter the Travel Authorization number in the
Travel Authorization ID field. The Look Up icon (magnifying glass) may be used to search for Travel Authorization ID if needed.

ENCOMPASS Training Guide Travel and Expense User Guide
Page 221
Step Action 11. Using the Look Up
Click the down arrow next to the Search By field (currently displaying Authorization ID.) Select the desired search operator.
12. Using the Look Up
To narrow the search results further and/or define other parameters, click the Advanced Lookup link.
13. Using the Look Up
Using the available search fields, enter information to define the desired results. Click the Lookup button.
14. Using the Look Up From the search results returned, click an entry in the Authorization ID column to select a document.
15. When the Travel Authorization ID has been entered (or selected), click the Run
button.
ENCOMPASS Training Guide Travel and Expense User Guide
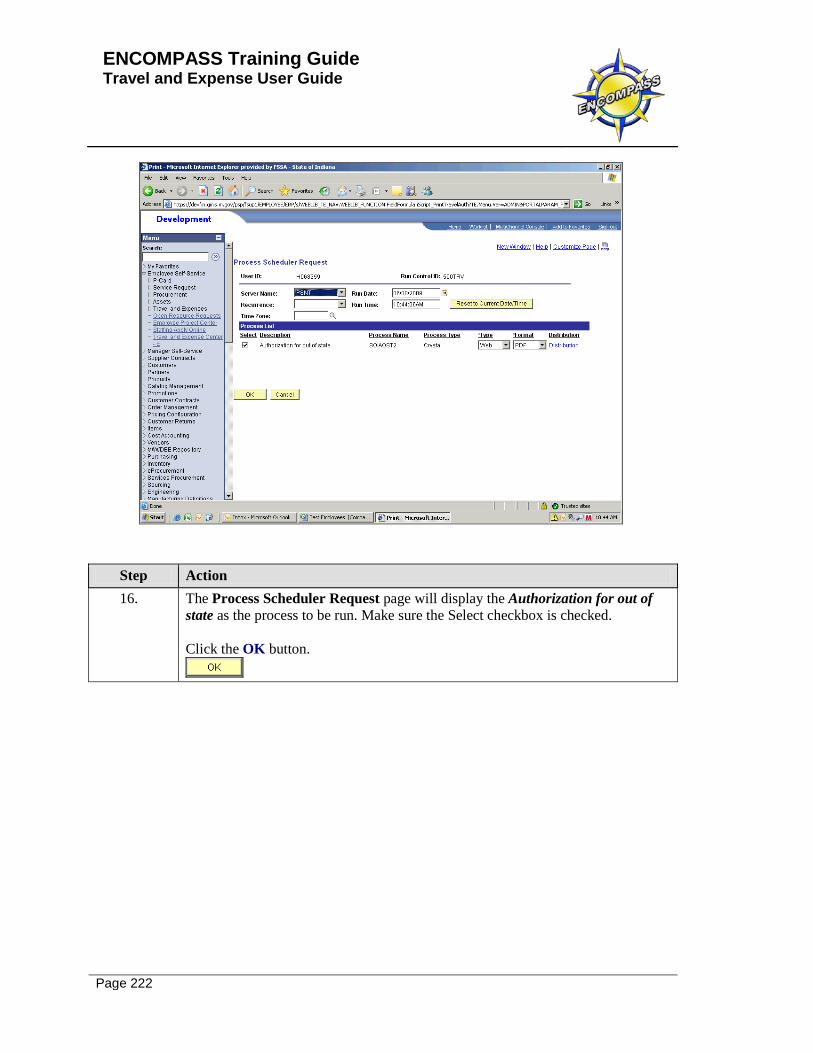
Page 222
Step Action 16. The Process Scheduler Request page will display the Authorization for out of
state as the process to be run. Make sure the Select checkbox is checked. Click the OK button.

ENCOMPASS Training Guide Travel and Expense User Guide
Page 223
Step Action 17. When the process is launched, the Run Control page will return and an assigned
Process Instance will be displayed in the top right corner. To monitor the progress, click on the Process Monitor link.
18. The page will not automatically update as the process runs. Click the Refresh button every 15 - 30 seconds until the Run Status column displays Success, and the Distribution Status displays Posted.
19. Once the Run Status changes to Success and the Distribution Status changes to
Posted, click the Details link.

ENCOMPASS Training Guide Travel and Expense User Guide
Page 224
Step Action 20. Click the View Log/Trace link.

ENCOMPASS Training Guide Travel and Expense User Guide
Page 225
Step Action 21. Click the link under the File List section that ends in .PDF.
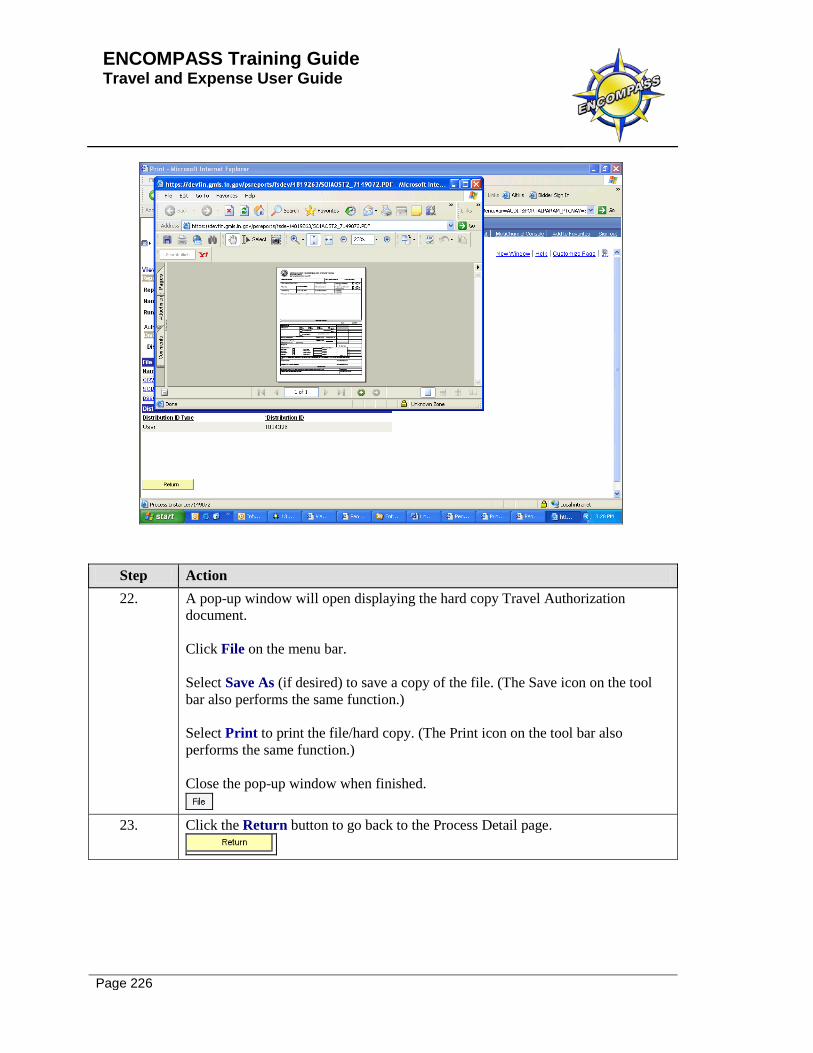
ENCOMPASS Training Guide Travel and Expense User Guide
Page 226
Step Action 22. A pop-up window will open displaying the hard copy Travel Authorization
document. Click File on the menu bar. Select Save As (if desired) to save a copy of the file. (The Save icon on the tool bar also performs the same function.) Select Print to print the file/hard copy. (The Print icon on the tool bar also performs the same function.) Close the pop-up window when finished.
23. Click the Return button to go back to the Process Detail page.
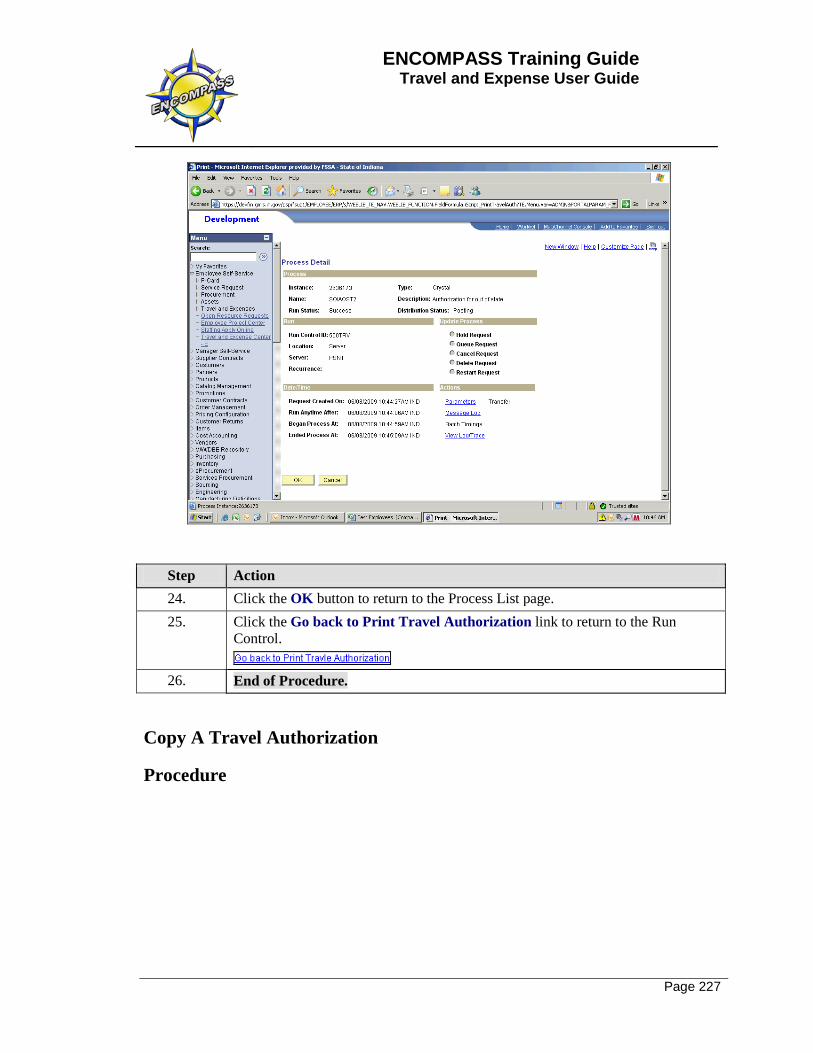
ENCOMPASS Training Guide Travel and Expense User Guide
Page 227
Step Action 24. Click the OK button to return to the Process List page. 25. Click the Go back to Print Travel Authorization link to return to the Run
Control.
26. End of Procedure.
Copy A Travel Authorization
Procedure

ENCOMPASS Training Guide Travel and Expense User Guide
Page 228
Step Action 1. Click the Employee Self-Service link.
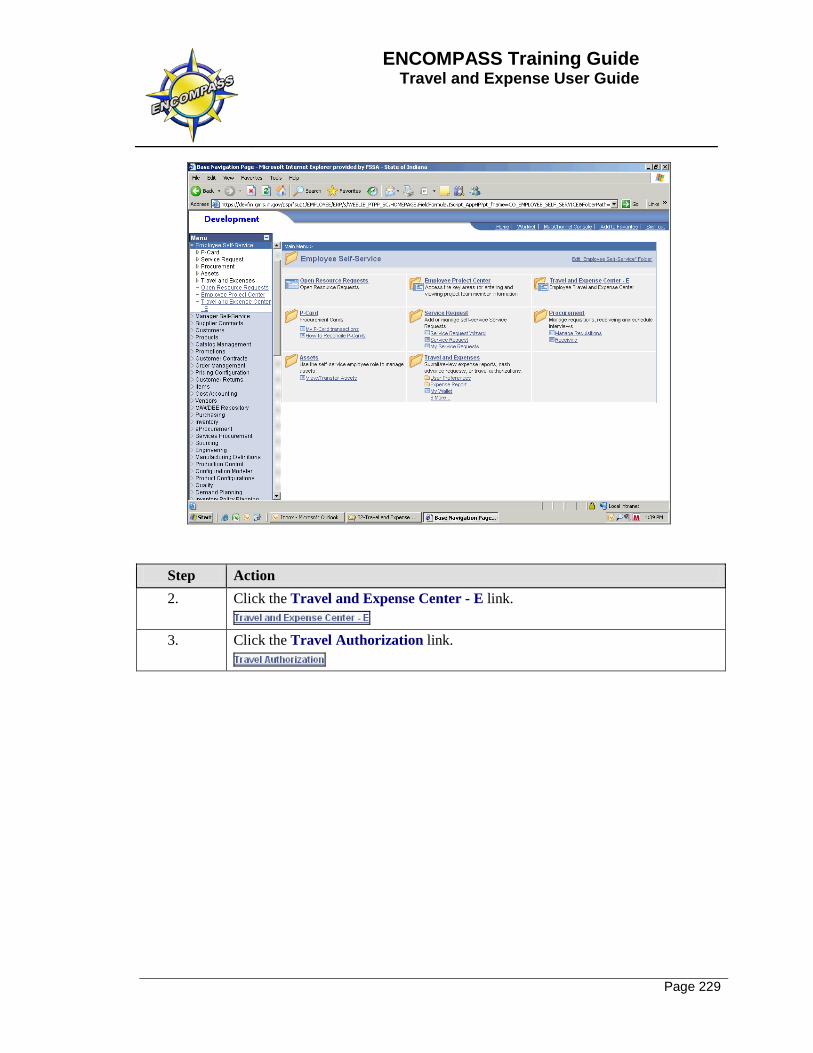
ENCOMPASS Training Guide Travel and Expense User Guide
Page 229
Step Action 2. Click the Travel and Expense Center - E link.
3. Click the Travel Authorization link.
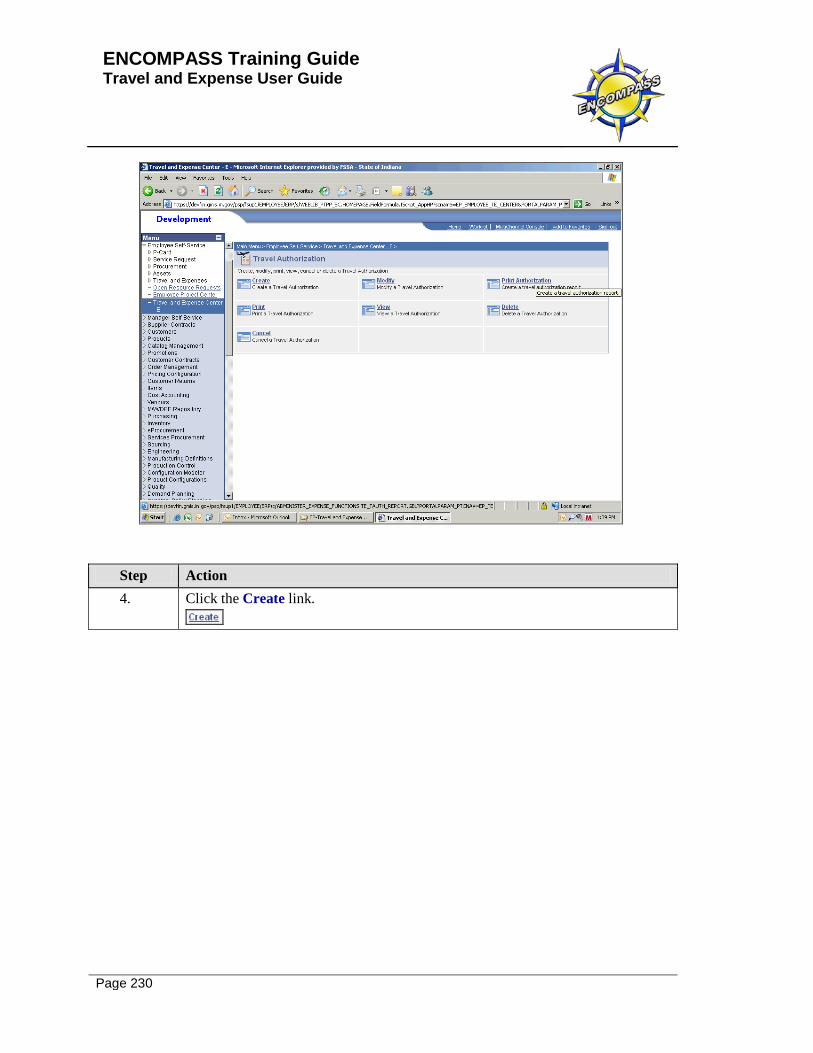
ENCOMPASS Training Guide Travel and Expense User Guide
Page 230
Step Action 4. Click the Create link.

ENCOMPASS Training Guide Travel and Expense User Guide
Page 231
Step Action 5. A new Travel Authorization may be created from a previously entered document.
If the travel request is similar to one processed in the past, this option can save time and data entry. When using this feature, be sure to update the copied information as needed. Click the down arrow next to the Quick Start field and select An Existing Authorization.
6. Click the GO button.
7. Using the "From and To" date fields, enter a date range to use as search criteria for
locating the Travel Authorization to be copied. Click the Search button.
ENCOMPASS Training Guide Travel and Expense User Guide
Page 232
Step Action 8. Locate the Travel Authorization to copy in the search results.
To review an existing Travel Authorization from this page before copying, click the link in the Description column. To copy the Travel Authorization, click the Select button.
9. The Travel Authorization selected will be copied to a new document.
Be sure to update the description, date fields, expenses, location, etc, to reflect the information for the new request. Click in the Comment field.
10. End of Procedure.
View A Travel Authorization
Procedure
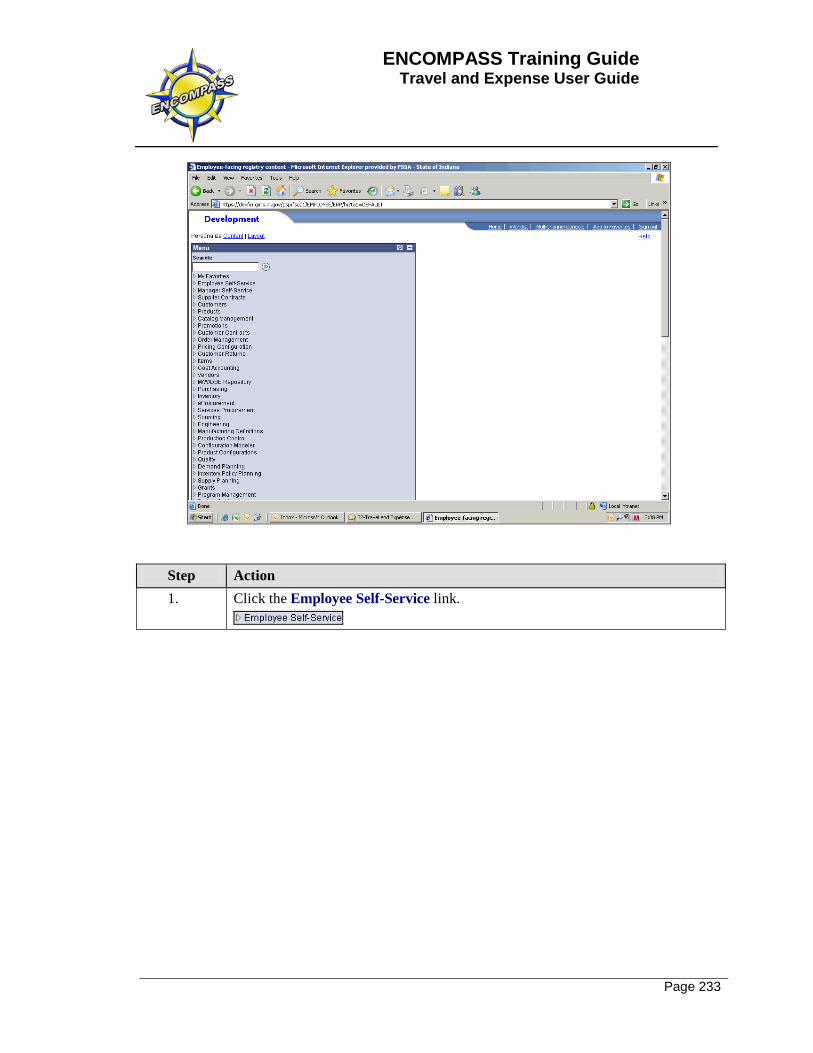
ENCOMPASS Training Guide Travel and Expense User Guide
Page 233
Step Action 1. Click the Employee Self-Service link.
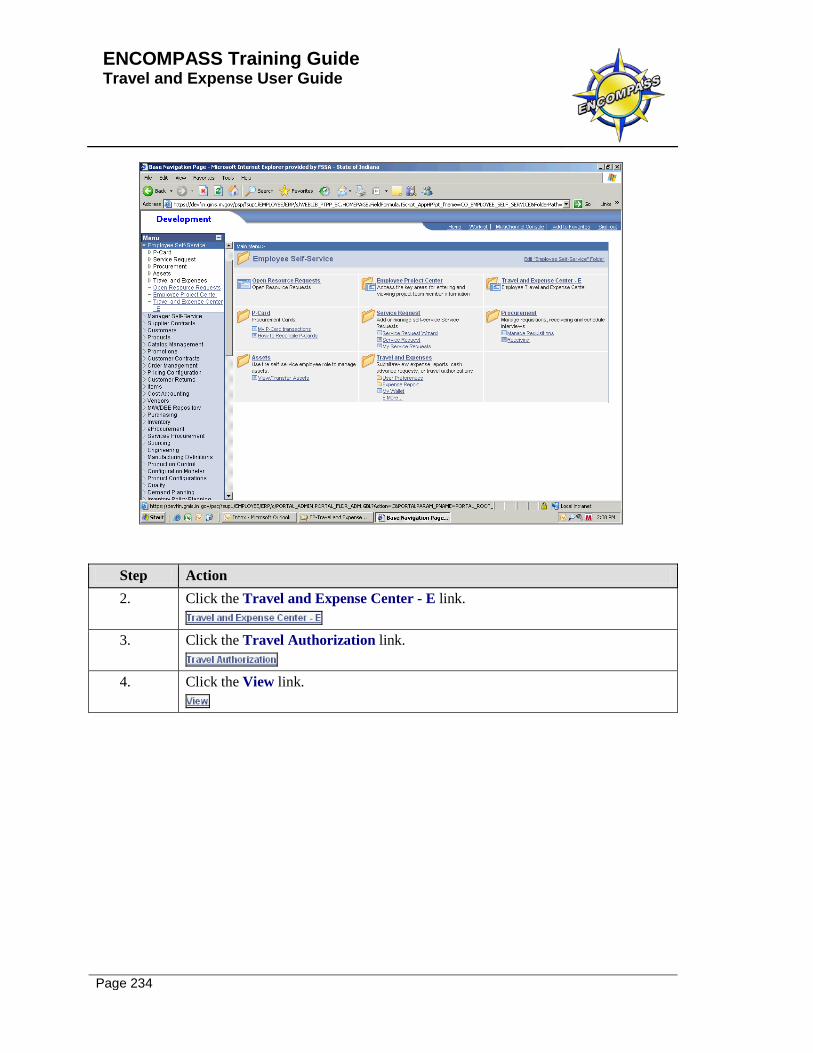
ENCOMPASS Training Guide Travel and Expense User Guide
Page 234
Step Action 2. Click the Travel and Expense Center - E link.
3. Click the Travel Authorization link.
4. Click the View link.
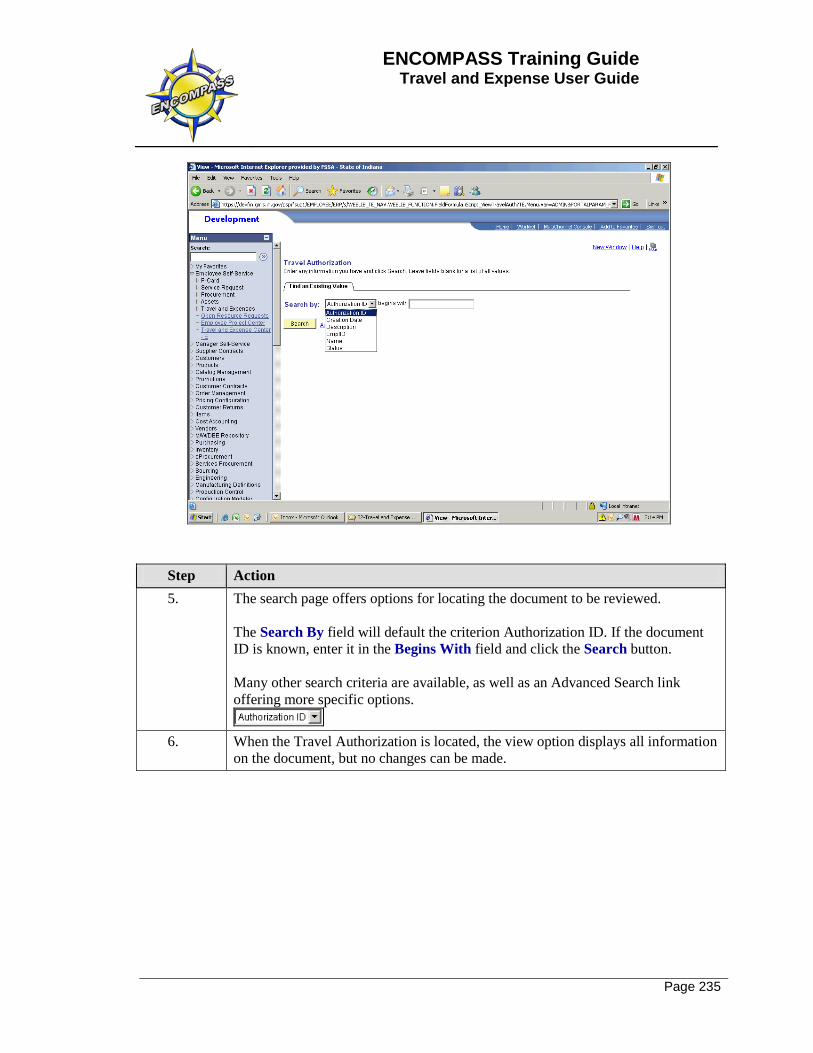
ENCOMPASS Training Guide Travel and Expense User Guide
Page 235
Step Action 5. The search page offers options for locating the document to be reviewed.
The Search By field will default the criterion Authorization ID. If the document ID is known, enter it in the Begins With field and click the Search button. Many other search criteria are available, as well as an Advanced Search link offering more specific options.
6. When the Travel Authorization is located, the view option displays all information
on the document, but no changes can be made.
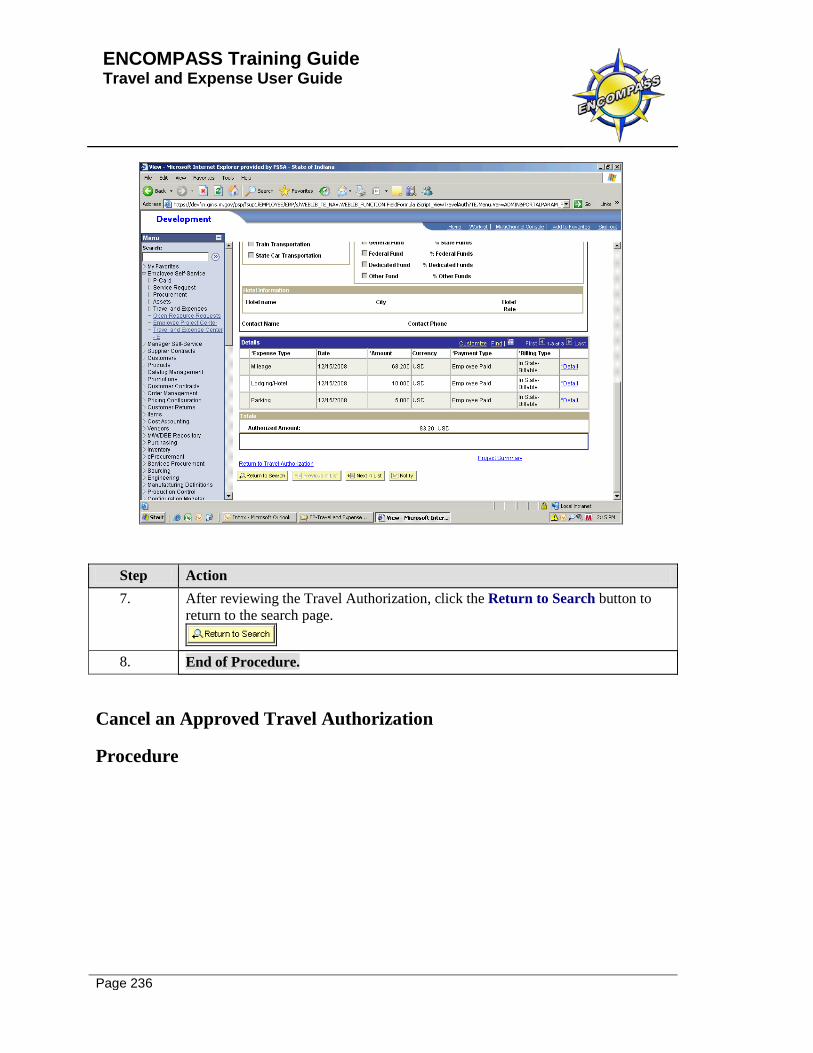
ENCOMPASS Training Guide Travel and Expense User Guide
Page 236
Step Action 7. After reviewing the Travel Authorization, click the Return to Search button to
return to the search page.
8. End of Procedure.
Cancel an Approved Travel Authorization
Procedure

ENCOMPASS Training Guide Travel and Expense User Guide
Page 237
Step Action 1. Click the Employee Self-Service link.
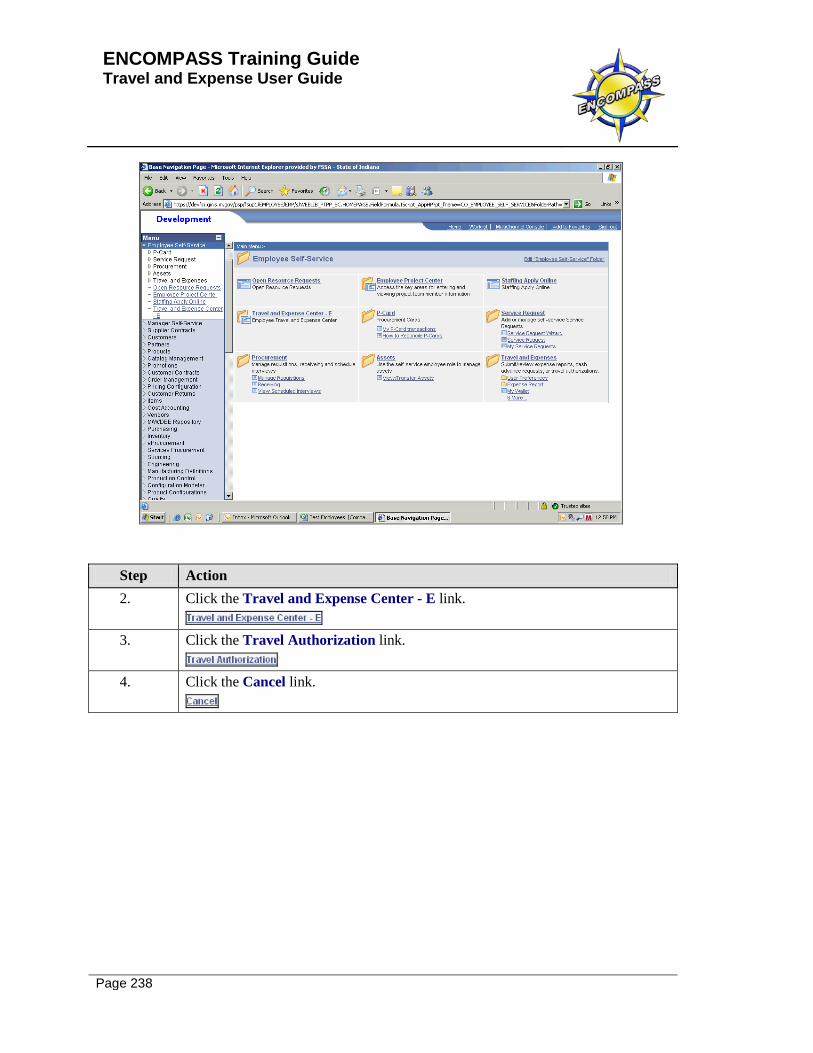
ENCOMPASS Training Guide Travel and Expense User Guide
Page 238
Step Action 2. Click the Travel and Expense Center - E link.
3. Click the Travel Authorization link.
4. Click the Cancel link.
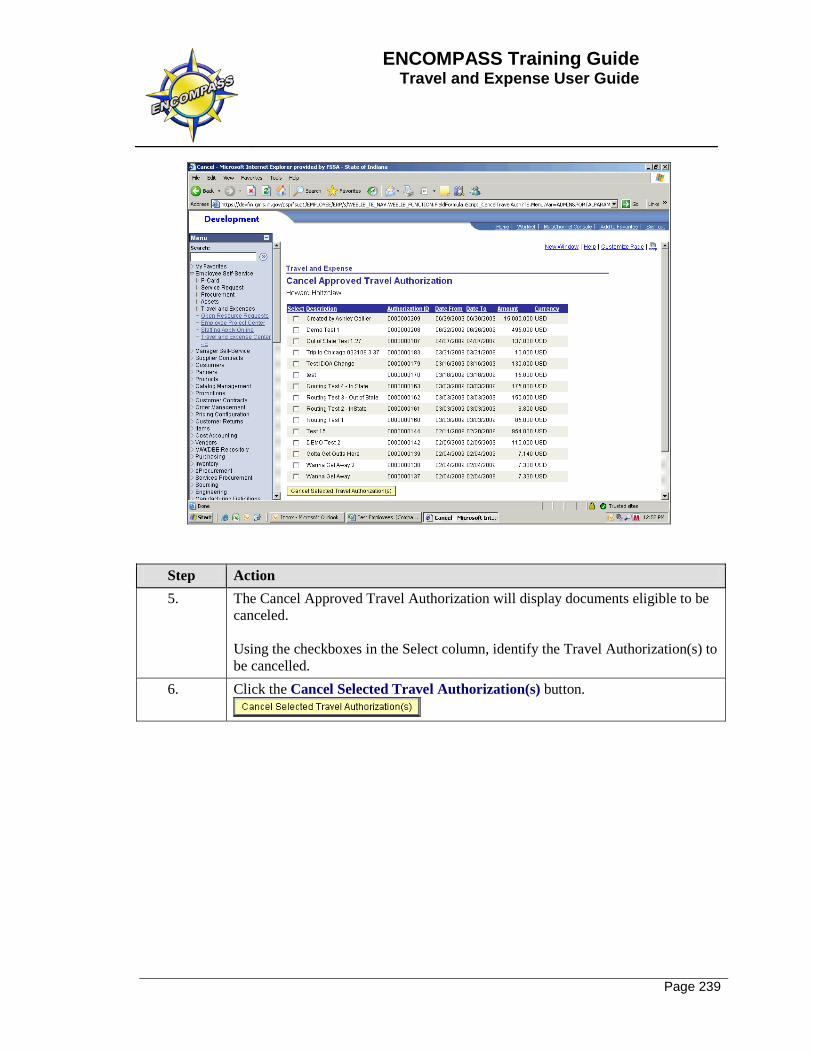
ENCOMPASS Training Guide Travel and Expense User Guide
Page 239
Step Action 5. The Cancel Approved Travel Authorization will display documents eligible to be
canceled. Using the checkboxes in the Select column, identify the Travel Authorization(s) to be cancelled.
6. Click the Cancel Selected Travel Authorization(s) button.

ENCOMPASS Training Guide Travel and Expense User Guide
Page 240
Step Action 7. Click the Return to Travel Authorization link.
8. End of Procedure.
Delete a Travel Authorization
Procedure
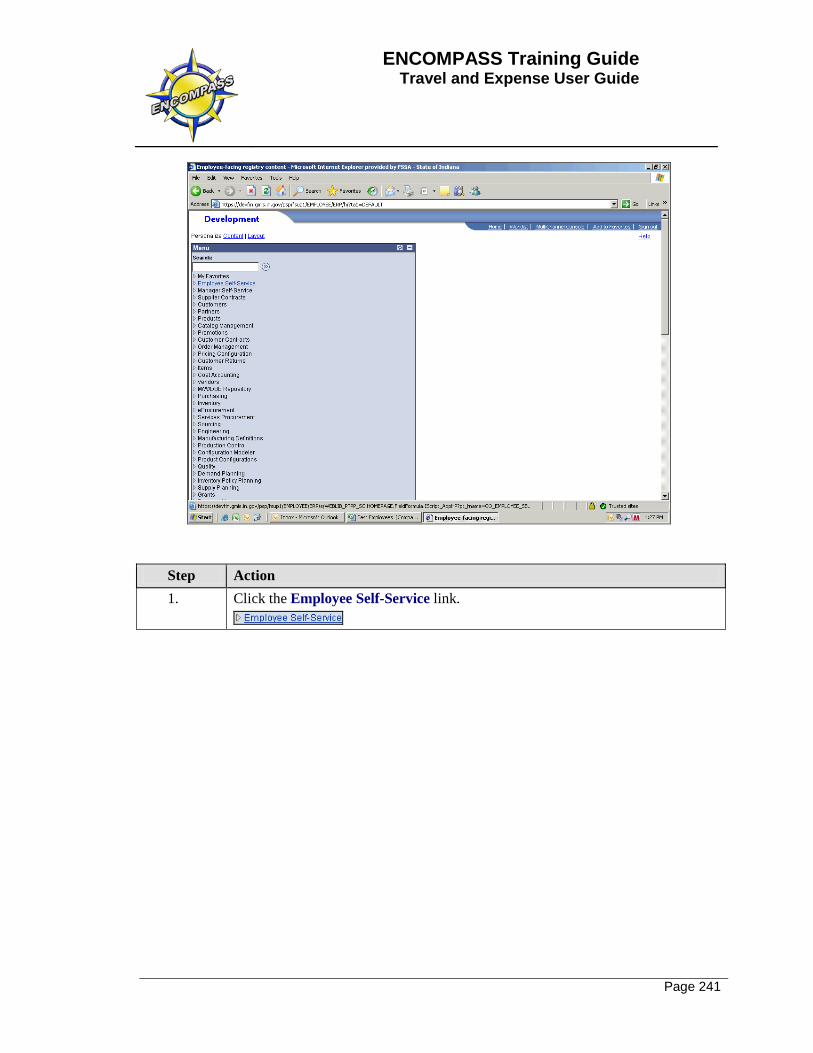
ENCOMPASS Training Guide Travel and Expense User Guide
Page 241
Step Action 1. Click the Employee Self-Service link.

ENCOMPASS Training Guide Travel and Expense User Guide
Page 242
Step Action 2. Click the Travel and Expense Center - E link.
3. Click the Travel Authorization link.
4. Click the Delete link.
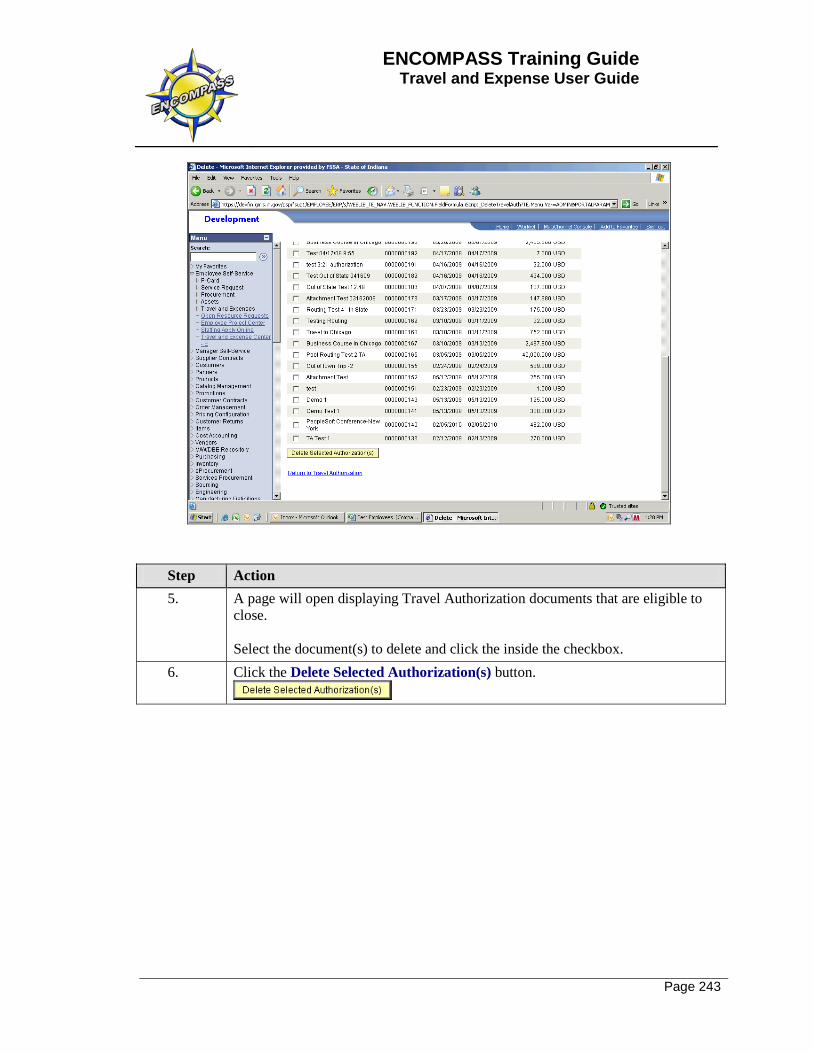
ENCOMPASS Training Guide Travel and Expense User Guide
Page 243
Step Action 5. A page will open displaying Travel Authorization documents that are eligible to
close. Select the document(s) to delete and click the inside the checkbox.
6. Click the Delete Selected Authorization(s) button.
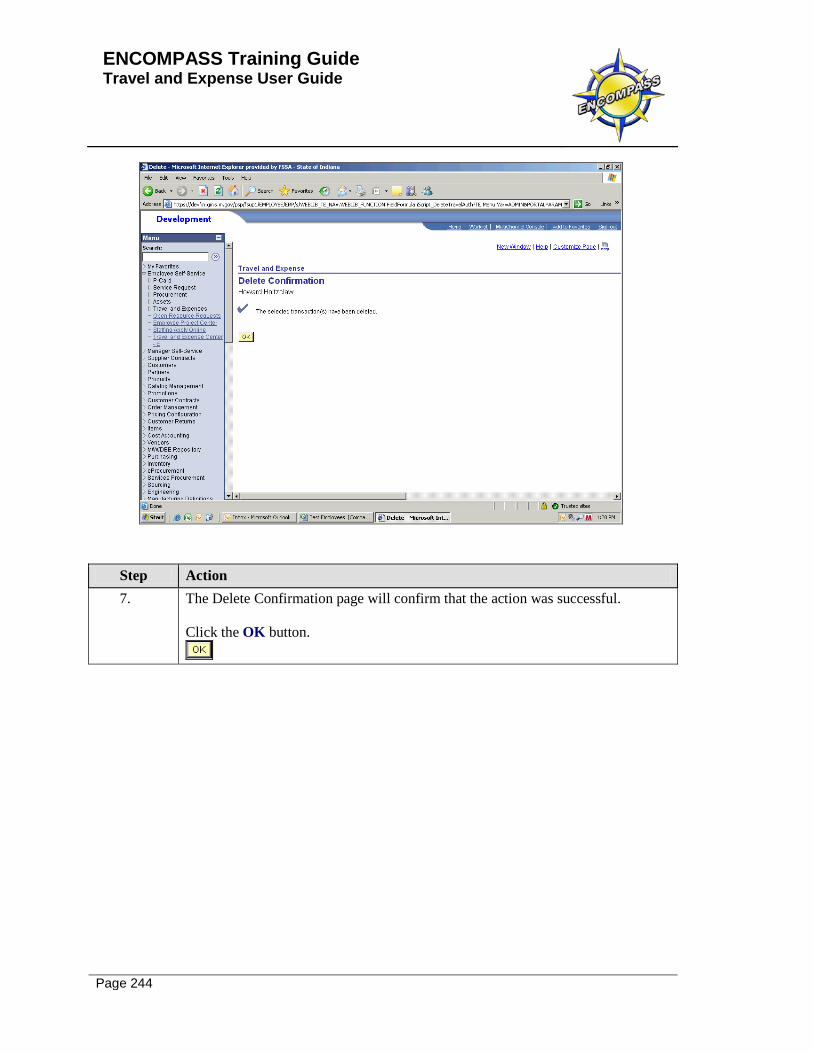
ENCOMPASS Training Guide Travel and Expense User Guide
Page 244
Step Action 7. The Delete Confirmation page will confirm that the action was successful.
Click the OK button.

ENCOMPASS Training Guide Travel and Expense User Guide
Page 245
Step Action 8. Click the Return to Travel Authorization link.
9. End of Procedure.