TRADE OF PLASTERING - eCollegelocal.ecollege.ie/Content/APPRENTICE/liu/Plastering/module...
12
TRADE OF PLASTERING PHASE 2 Module 1 SLABBING, RENDERING, FLOATING AND SKIMMING UNIT: 11 Floating Walls with Floating Coat
Transcript of TRADE OF PLASTERING - eCollegelocal.ecollege.ie/Content/APPRENTICE/liu/Plastering/module...
TRADE OF PLASTERING
PHASE 2
Module 1
SLABBING, RENDERING, FLOATING AND SKIMMING
UNIT: 11
Floating Walls with Floating Coat
Module 1– Unit 11 Floating Walls with Floating Coat
Plastering Phase 2 Revision 2.0 January 2014
Produced by
In cooperation with subject matter expert:
Terry Egan
Some images & text courtesy of Gypsum Industries Ltd.
© SOLAS
Module 1– Unit 11 Floating Walls with Floating Coat
Plastering Phase 2 Revision 2.0 January 2014
Table of Contents Introduction .................................................................................................................. 1
Unit Objective .............................................................................................................. 1
1.0 Outline the Use of Various Lightweight Plasters ...................................... 1
1.1 Lightweight Plasters - Range, Composition, Function .......................... 1
2.0 Interpret and Draw Basic Geometric Shapes ............................................. 6
2.1 Construction of Circles, Triangles, Quadrilaterals ................................ 6
3.0 Calculate Costs of In-situ Work ................................................................... 6
3.0 Calculate Costs of In-situ Work ................................................................... 7
3.1 Calculation of Cost of Materials and Labour .......................................... 7
Module 1– Unit 11 Floating Walls with Floating Coat
Plastering Phase 2 1 Revision 2.0 January 2014
Introduction
Welcome to this section of your course which is designed to introduce you the learner, to lightweight plasters, geometric shapes and calculations.
Unit Objective
By the end of this unit each apprentice will be able to:
Outline the use of various lightweight plasters Interpret and draw basic geometric shapes Calculate costs of in-situ work
1.0 Outline the Use of Various Lightweight Plasters
Key Learning Point
Lightweight plasters - range, composition, function
1.1 Lightweight Plasters - Range, Composition, Function There are several types of gypsum plaster. Each type is intended for a certain specific purpose. They are divided into undercoat plasters and finishing coat plasters. Gypsum plaster is manufactured from gypsum rock. In pure form it contains 20.9% water by weight, chemically combined as water of crystallisation. In manufacture, the gypsum in lump or powder form is heated in rotating kilns to drive off three quarters of this combined water.
The heating process is called 'calcining' and the resulting product is calcined gypsum. In this powdered form, it is also known as 'Plaster of Paris', so named because of its early production in Paris which is built on vast beds of gypsum.
The British Standard Specification (1191) for Gypsum Building plasters covers four classes:
a) Plaster of Paris.
b) Retarded Hemihydrate Gypsum Plaster.
c) Anhydrous Gypsum Plaster.
d) Keenes Plaster of Parian.
Module 1– Unit 11 Floating Walls with Floating Coat
Plastering Phase 2 2 Revision 2.0 January 2014
Lightweight Plasters
Lightweight plasters are pre-mixed plasters with a lightweight expanded mineral aggregate and gypsum plaster as the binding agent. All grades, Floating coat, Metal Lathing, Bonding Coat, and Finish require only the addition of water (the catalyst) to make them ready for application. There is a grade available to suit practically every background to which plaster is normally applied.
Floating coat for use on Brick Walls, Block Walls, No-Fines Concrete, Concrete Bricks.
Bonding Coat for use on Pre-Cast and In-Situ Concrete, Gypsum Baseboard and Gypsum Lath, Stone Masonry
Finish for use on all grades of lightweight backing coats.
Advantages of Lightweight Plasters
Only 1/3 the weight of sanded plaster. Three times the Thermal Insulation of sanded plaster. Resistance to cracking. Adhesion to smooth concrete. Plastering on glazed or oil painted surfaces. Can be used in conditions of frost when work with sanded plasters
would be stopped completely. High Fire Resistance.
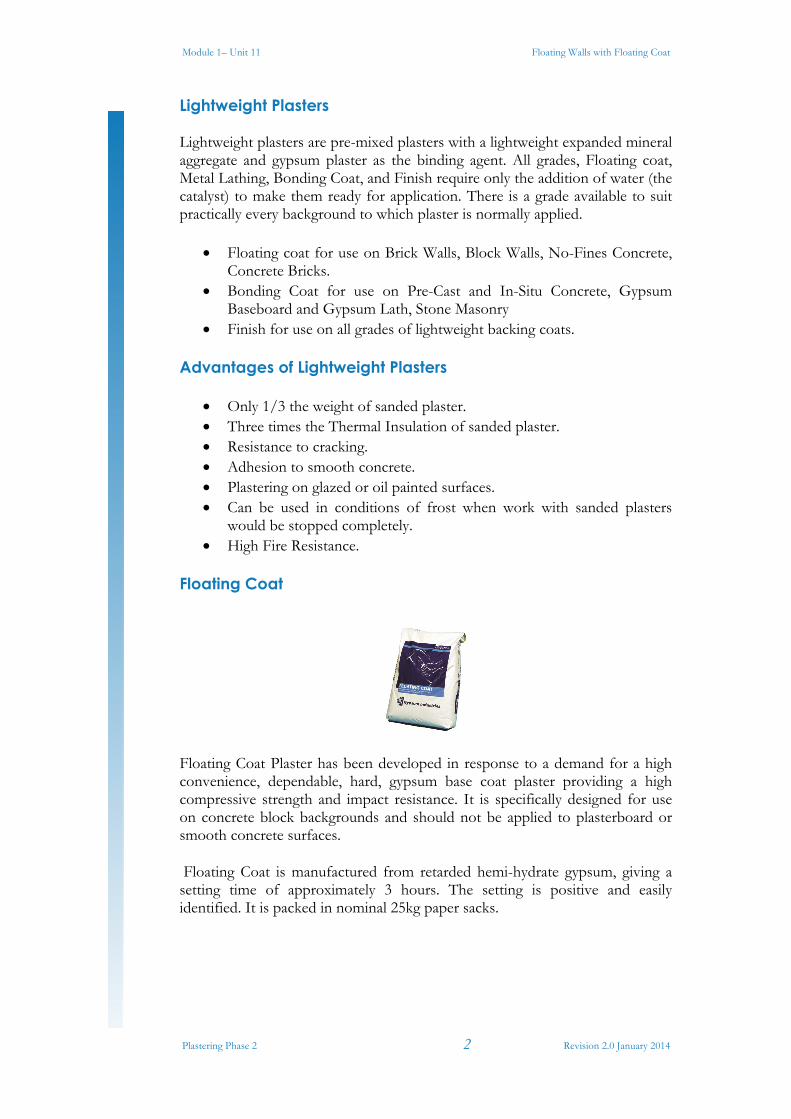
Floating Coat
Floating Coat Plaster has been developed in response to a demand for a high convenience, dependable, hard, gypsum base coat plaster providing a high compressive strength and impact resistance. It is specifically designed for use on concrete block backgrounds and should not be applied to plasterboard or smooth concrete surfaces.
Floating Coat is manufactured from retarded hemi-hydrate gypsum, giving a setting time of approximately 3 hours. The setting is positive and easily identified. It is packed in nominal 25kg paper sacks.
Module 1– Unit 11 Floating Walls with Floating Coat
Plastering Phase 2 3 Revision 2.0 January 2014
Floating Coat Plaster should be applied to a normal thickness of 9mm and the approximate coverage at this thickness is 130 square metres per tonne depending on the straightness of the concrete blockwork.
Floating Coat Plaster is premixed with aggregate and only clean water need be added to prepare it for use. No mechanical mixers or admixtures should be used. Mix to a normal plastering consistency. Cleanliness is essential and set plaster left in a receptacle from a previous mixing will shorten the setting time and this can reduce the strength of the plaster when set. Mixing trays and buckets must be washed thoroughly after each mix.
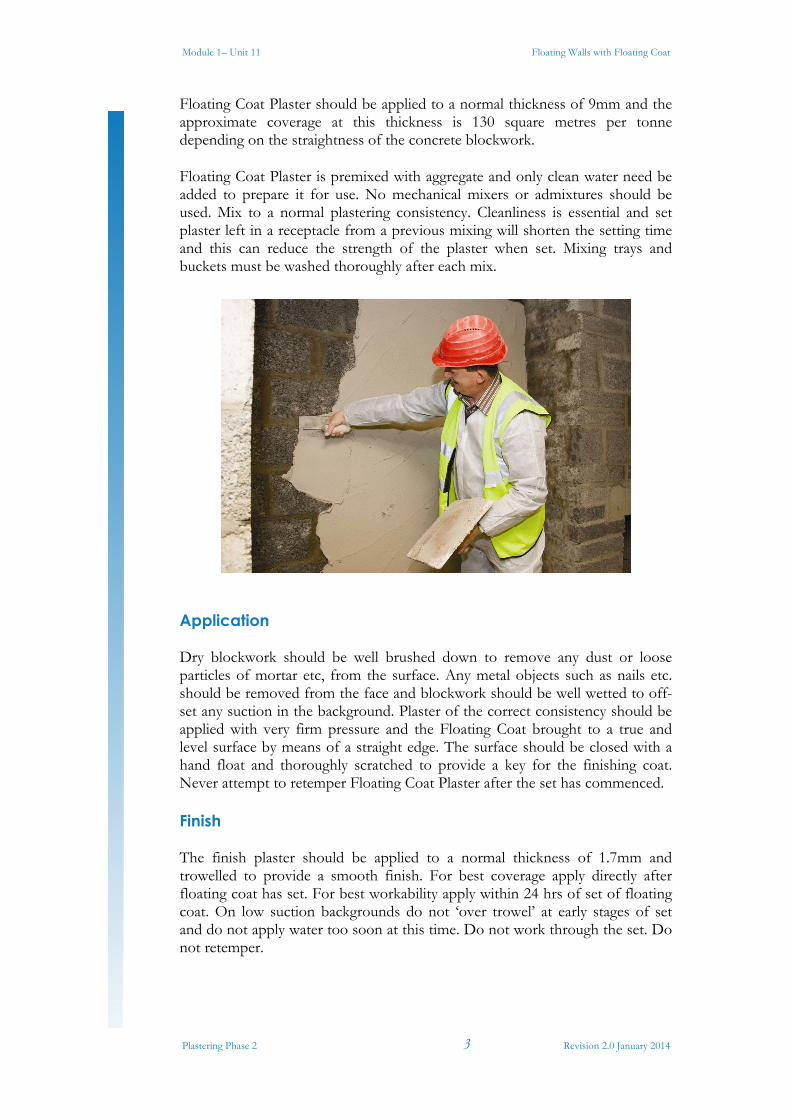
Application
Dry blockwork should be well brushed down to remove any dust or loose particles of mortar etc, from the surface. Any metal objects such as nails etc. should be removed from the face and blockwork should be well wetted to off-set any suction in the background. Plaster of the correct consistency should be applied with very firm pressure and the Floating Coat brought to a true and level surface by means of a straight edge. The surface should be closed with a hand float and thoroughly scratched to provide a key for the finishing coat. Never attempt to retemper Floating Coat Plaster after the set has commenced.
Finish
The finish plaster should be applied to a normal thickness of 1.7mm and trowelled to provide a smooth finish. For best coverage apply directly after floating coat has set. For best workability apply within 24 hrs of set of floating coat. On low suction backgrounds do not ‘over trowel’ at early stages of set and do not apply water too soon at this time. Do not work through the set. Do not retemper.
Module 1– Unit 11 Floating Walls with Floating Coat
Plastering Phase 2 4 Revision 2.0 January 2014
Mixing
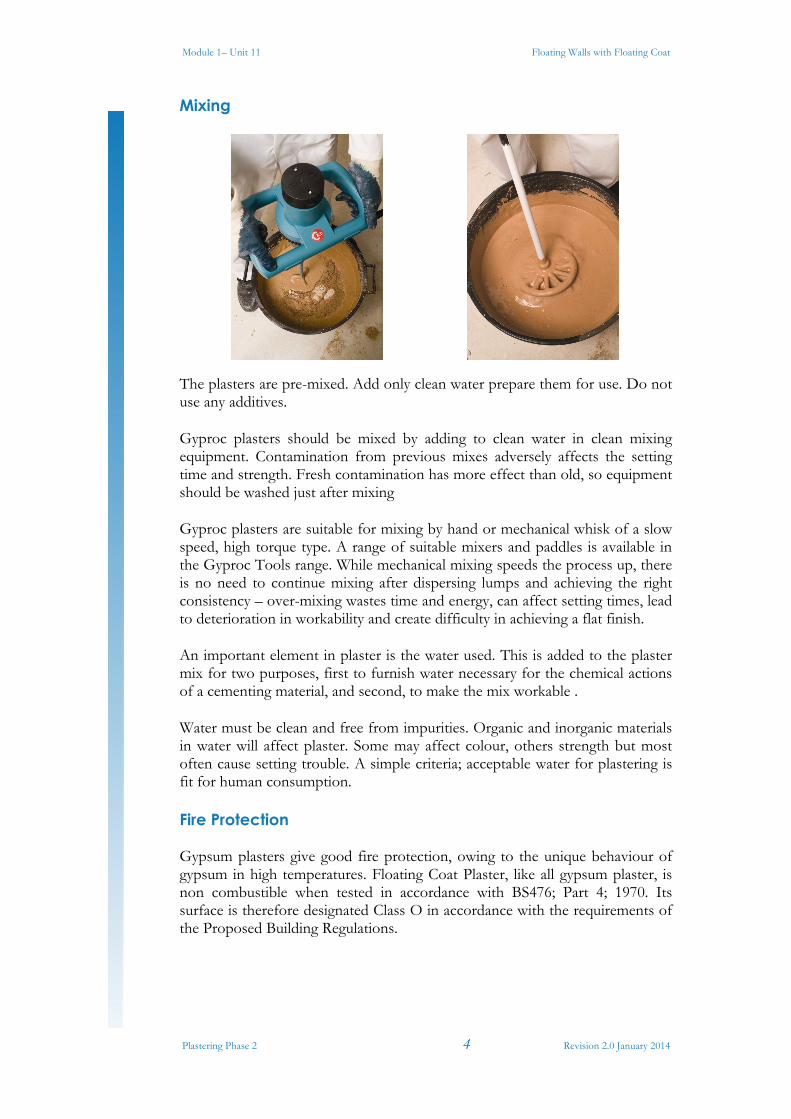
The plasters are pre-mixed. Add only clean water prepare them for use. Do not use any additives.
Gyproc plasters should be mixed by adding to clean water in clean mixing equipment. Contamination from previous mixes adversely affects the setting time and strength. Fresh contamination has more effect than old, so equipment should be washed just after mixing
Gyproc plasters are suitable for mixing by hand or mechanical whisk of a slow speed, high torque type. A range of suitable mixers and paddles is available in the Gyproc Tools range. While mechanical mixing speeds the process up, there is no need to continue mixing after dispersing lumps and achieving the right consistency – over-mixing wastes time and energy, can affect setting times, lead to deterioration in workability and create difficulty in achieving a flat finish.
An important element in plaster is the water used. This is added to the plaster mix for two purposes, first to furnish water necessary for the chemical actions of a cementing material, and second, to make the mix workable .
Water must be clean and free from impurities. Organic and inorganic materials in water will affect plaster. Some may affect colour, others strength but most often cause setting trouble. A simple criteria; acceptable water for plastering is fit for human consumption.
Fire Protection
Gypsum plasters give good fire protection, owing to the unique behaviour of gypsum in high temperatures. Floating Coat Plaster, like all gypsum plaster, is non combustible when tested in accordance with BS476; Part 4; 1970. Its surface is therefore designated Class O in accordance with the requirements of the Proposed Building Regulations.
Module 1– Unit 11 Floating Walls with Floating Coat
Plastering Phase 2 5 Revision 2.0 January 2014
Effect of Temperature
Plastering on frozen backgrounds must be avoided. The plaster is not suitable for use in situations where the temperature exceeds 43°C.
Storage
Store lightweight plasters in a completely dry stores, preferably on wooden pallets, never directly onto concrete surfaces. Bad and over extended storage will accelerate the set and weaken the strength of all gypsum products
Setting Times
Floating Coat Approx. 3 hours. Bonding Coat Approx. 1½ hours. Skim Coat Approx. 1½ hours
Lightweight Aggregates
Lightweight aggregates are important in plastering as they weigh roughly 1/10 as much as the sand they replace, with the addition of better insulating and sound absorbing qualities. The main quality is lightness. There are three main lightweight aggregates: Pumice, Vermiculite and Perlite.
Pumice
The oldest of these materials was used by the Romans. It is a material formed by Volcanoes. It could be called formed lava or volcanic glass froth as it is filled with minute cavities formed when it exploded from the volcano and its water turned to steam, blowing holes or bubbles all through it. It can be used in its natural form by crushing and grading in order to lighten it still more however it can be exploded again by application of great heat but even at this it still remains heavier than the other lightweights, which tends to curtail its use.
Perlite
Another material formed by volcanic eruption. The ore is glassy with many rounded granules resembling pearls (hence the name perlite). Perlite consists of silica and alumina compositions which contain between 4% to 6% water, weighs between 7 to 12 lbs per cubic foot compared to 100 lbs for sand. Perlite ore is heated rapidly to more than 2000°F which forces out its water content in steam causing the Perlite to become sponge-like (This is termed 'Intumescing'). This expanded Perlite is literally a mass of air cells. Chemically similar to pumice but different in physical characteristics it has excellent insulating properties, fire resistance and low water absorption. Perlite plaster has approx. 3 times the insulating effectiveness of sand.
Module 1– Unit 11 Floating Walls with Floating Coat
Plastering Phase 2 6 Revision 2.0 January 2014
Vermiculite
This consists of Silica, Magnesium and Aluminium Oxides chiefly, and contains from 5% to 9% combined water, by weight. The ore looks like Mica and is made up of very thin layers about one million to an inch. There is a tiny amount of moisture between each layer. When the ore is heated to about 2000°F this moisture changes to steam with explosive force causing the layers to move apart (this is termed exfoliation).
2.0 Interpret and Draw Basic Geometric Shapes
Key Learning Point
Construction of basic geometric shapes: circles, triangles, quadrilaterals
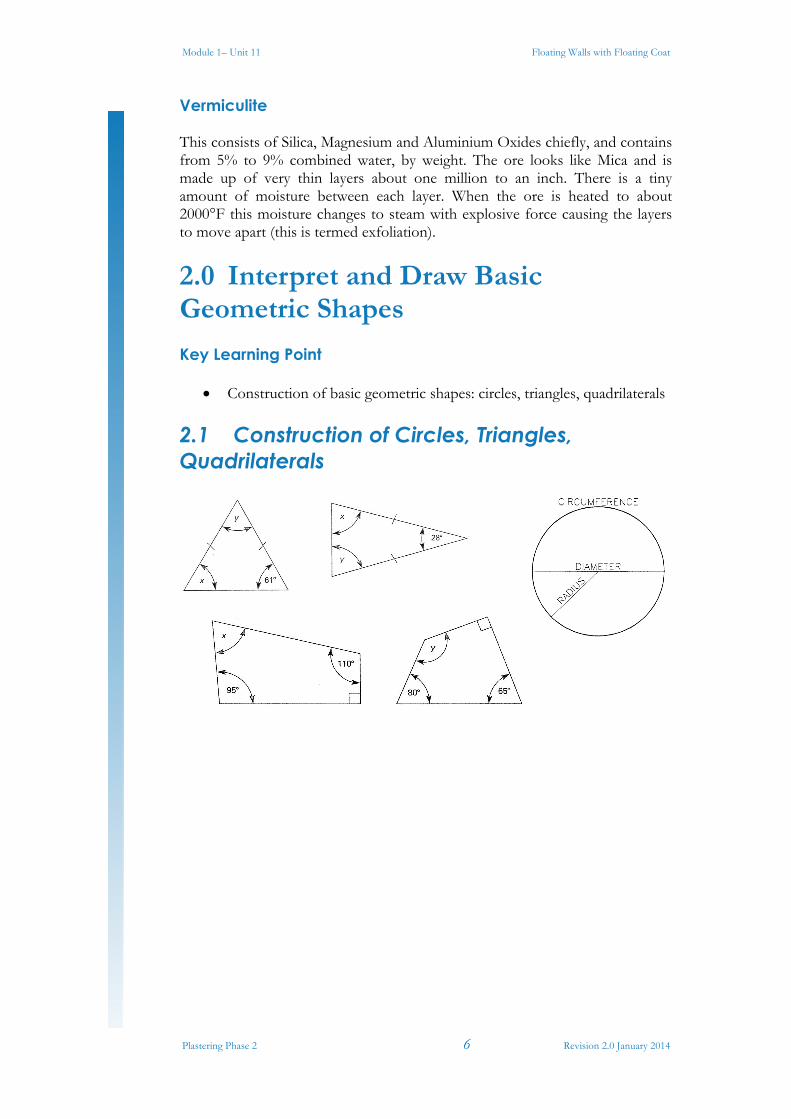
2.1 Construction of Circles, Triangles, Quadrilaterals
Module 1– Unit 11 Floating Walls with Floating Coat
Plastering Phase 2 7 Revision 2.0 January 2014
3.0 Calculate Costs of In-situ Work
Key Learning Points
Calculation of cost of materials and labour in terms of kg’s per square metre
3.1 Calculation of Cost of Materials and Labour Calculations are in frequent use by all building trades whether on site or in the workshop; some problems become very involved and complicated, others only entail the addition, subtraction or division of measurements.
To illustrate the type of calculation, being used by traders within the industry, some typical examples are shown and problems set which can be worked out.
A firm of wall tillers has been asked to submit a price for supplying and fixing tiles in twenty-six kitchens on a new housing estate. The tiles to be used cost €8 a square meter. The firm charges €6 a square meter of wall area to fix the tiles. An allowance of 10% is made on the total number of tiles required for cutting and wastage. Combined grout and adhesive costs €12 for a 15 kg tub which will cover approximately 16 square meters of wall area. The wall areas to be tiled are 3m x 2m, 2.2 m x 2.4 m and 1.7 m x 1.6 m
Answer
Total area to be tiled of one kitchen:
1st wall 3 m x 2m = 6 m 2
2nd wall 2.2 m x 2.4 m = 5.28 m 2
3rd wall 1.7 m x 1.6 m = +2.72 m 2
Total =14 m 2
Total area to be tiled of 26 kitchens:
14 m 2 x 26 = 364 m 2
Charge for fixing tiles:
364 m2 at €6 a square meter
364 x €6 = €2,184

Module 1– Unit 11 Floating Walls with Floating Coat
Plastering Phase 2 8 Revision 2.0 January 2014
Total and cost of tiles required:
364 m 2 + 10%
= 364 m 2 x 0.1 = 36.4 m 2
= 364 m 2 + 36.4 m2 = 400.4 m 2
= 400.4 x €8 = €3,203.20
Adhesive and grout:
364 m2÷16 = 22.75 tubs
The tiler will have to price 23 tubs of adhesive:
23 tubs at €12 a tub
= 23 x €12 = €276.00
Totals
Cost of fixing tiles €2,184.00
Cost of tiles €3,203.20
Grout and adhesive €276.00
Price to be submitted €5,663.20
Calculate
1. A wall measuring 10m long and 3m high is to have a float finish. Allowing the wall having a plinth 500mm and 50kg of plaster will cover 5m². How many Kg’s of plaster will be required?
2. Calculate the cost of plastering, a room 4.5m wide, 3.5m long and 2.4m high @ 4.75 per metre
27-33 Upper Baggot Street Dublin 4