TOUCH SCREEN V UNIT ELECTION PROCEDURESTouch Screen Voting Unit General Information General...
33
TOUCH SCREEN VOTING UNIT ELECTION PROCEDURES STATE OF ALASKA DIVISION OF ELECTIONS B17 (REV 2/6/2017)
Transcript of TOUCH SCREEN V UNIT ELECTION PROCEDURESTouch Screen Voting Unit General Information General...
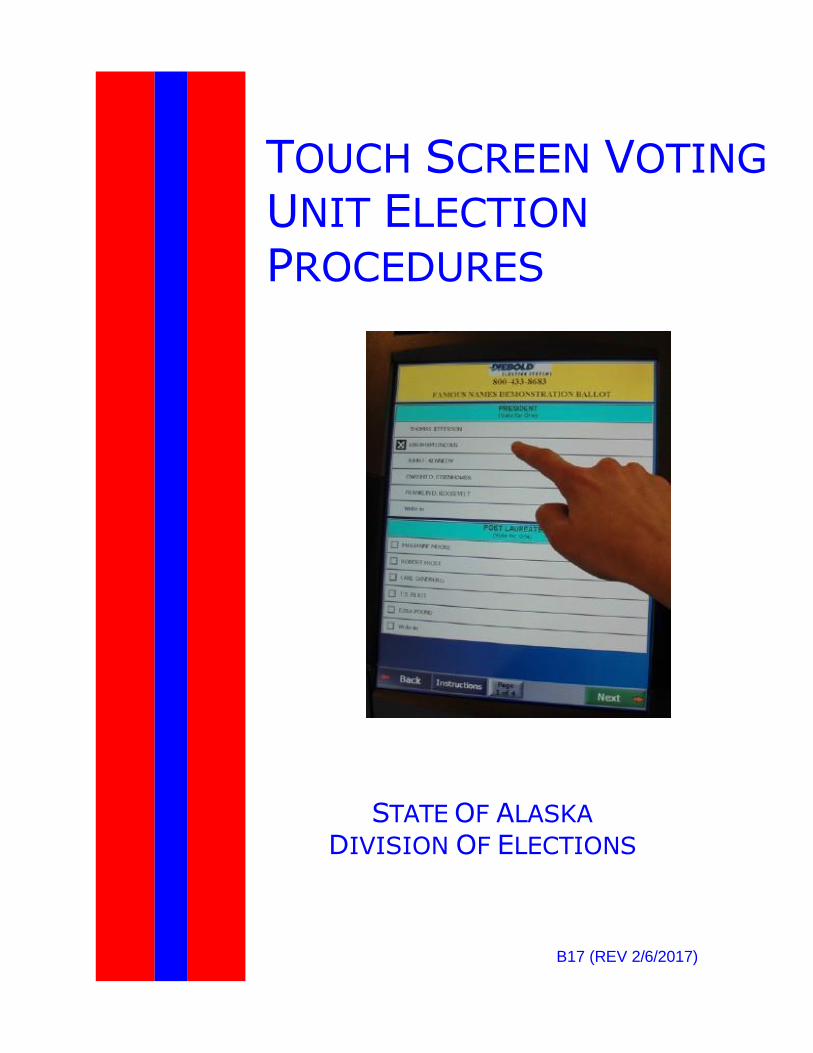
TOUCH SCREEN VOTING
UNIT ELECTION
PROCEDURES
STATE OF ALASKA
DIVISION OF ELECTIONS
B17 (REV 2/6/2017)
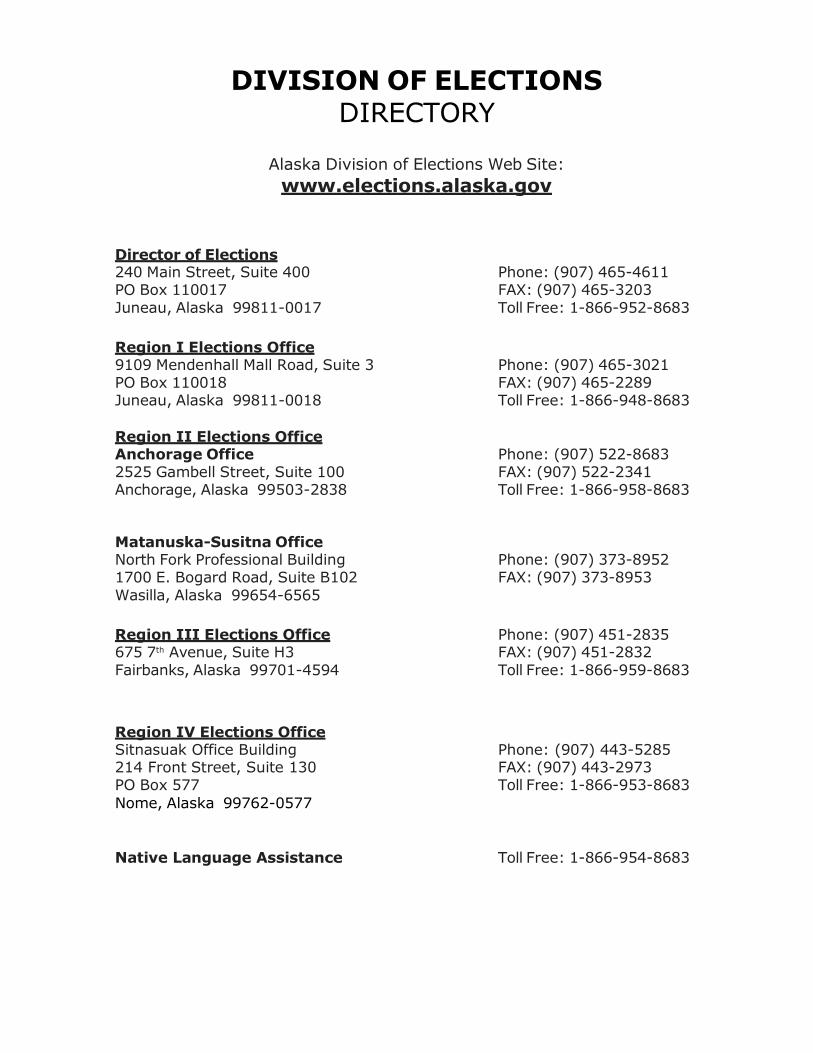
DIVISION OF ELECTIONS DIRECTORY
Alaska Division of Elections Web Site:
www.elections.alaska.gov
Director of Elections 240 Main Street, Suite 400 Phone: (907) 465-4611 PO Box 110017 FAX: (907) 465-3203
Juneau, Alaska 99811-0017 Toll Free: 1-866-952-8683
Region I Elections Office 9109 Mendenhall Mall Road, Suite 3 Phone: (907) 465-3021 PO Box 110018 FAX: (907) 465-2289 Juneau, Alaska 99811-0018 Toll Free: 1-866-948-8683
Region II Elections Office Anchorage Office Phone: (907) 522-8683 2525 Gambell Street, Suite 100 FAX: (907) 522-2341 Anchorage, Alaska 99503-2838 Toll Free: 1-866-958-8683
Matanuska-Susitna Office North Fork Professional Building Phone: (907) 373-8952 1700 E. Bogard Road, Suite B102 FAX: (907) 373-8953
Wasilla, Alaska 99654-6565
Region III Elections Office Phone: (907) 451-2835 675 7th Avenue, Suite H3 FAX: (907) 451-2832
Fairbanks, Alaska 99701-4594 Toll Free: 1-866-959-8683
Region IV Elections Office Sitnasuak Office Building Phone: (907) 443-5285 214 Front Street, Suite 130 FAX: (907) 443-2973 PO Box 577 Toll Free: 1-866-953-8683
Nome, Alaska 99762-0577
Native Language Assistance Toll Free: 1-866-954-8683
Table of Contents
Touch Screen Voting General Information .................................................................. 4
Touch Screen Voting Unit Components
and Accessories ......................................................................................................... 5
Voter Access Card Information ................................................................................... 8
Creating Voter Access Cards Using Encoder .............................................................. 9
Creating Voter Access Cards Using Touch Screen Unit ...............................................11
Touch Screen Voting Instructions -
Visual Ballot ............................................................................................................... 12
Touch Screen Voting Instructions -
Audio Only and Audio/Visual Ballot ............................................................................ 16
End Voting on the Touch Screen
Voting Unit ......................................................................................................................18
Replacing the Paper Roll ........................................................................................... 19
Appendix
Troubleshooting ........................................................................................................ 25
Frequently Asked Questions ...................................................................................... 30
Storing the Touch Screen Voting Unit ........................................................................ 32
4
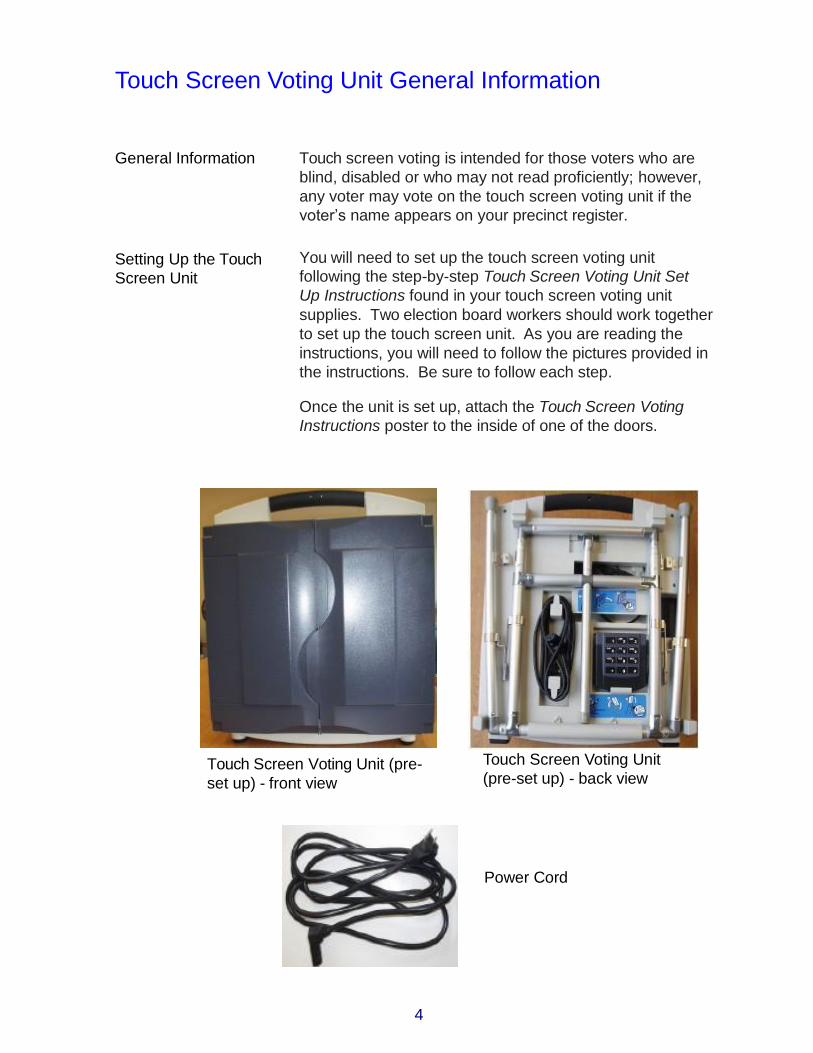
Touch Screen Voting Unit General Information General Information Touch screen voting is intended for those voters who are
blind, disabled or who may not read proficiently; however,
any voter may vote on the touch screen voting unit if the
voter’s name appears on your precinct register.
Setting Up the Touch
Screen Unit
You will need to set up the touch screen voting unit
following the step-by-step Touch Screen Voting Unit Set
Up Instructions found in your touch screen voting unit
supplies. Two election board workers should work together
to set up the touch screen unit. As you are reading the
instructions, you will need to follow the pictures provided in
the instructions. Be sure to follow each step.
Once the unit is set up, attach the Touch Screen Voting
Instructions poster to the inside of one of the doors.
Touch Screen Voting Unit (pre-
set up) - front view
Touch Screen Voting Unit
(pre-set up) - back view
Power Cord
5
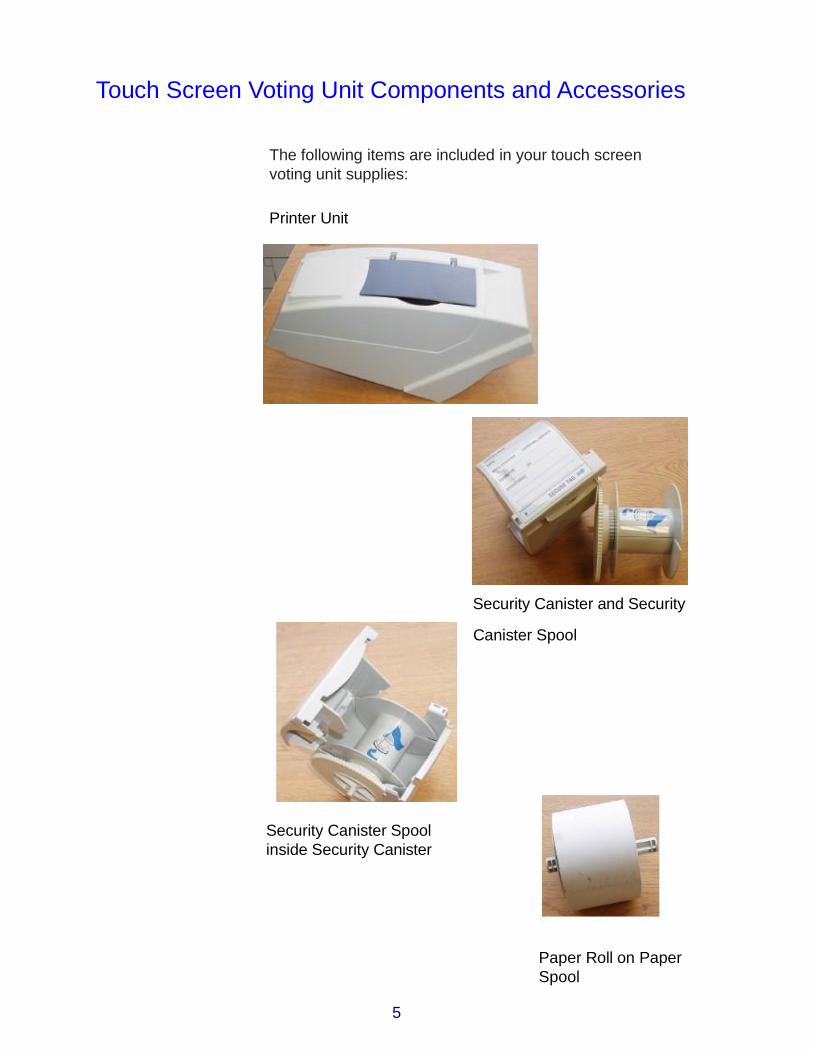
Touch Screen Voting Unit Components and Accessories
The following items are included in your touch screen
voting unit supplies:
Printer Unit
Security Canister and Security
Canister Spool
Security Canister Spool
inside Security Canister
Paper Roll on Paper
Spool
6
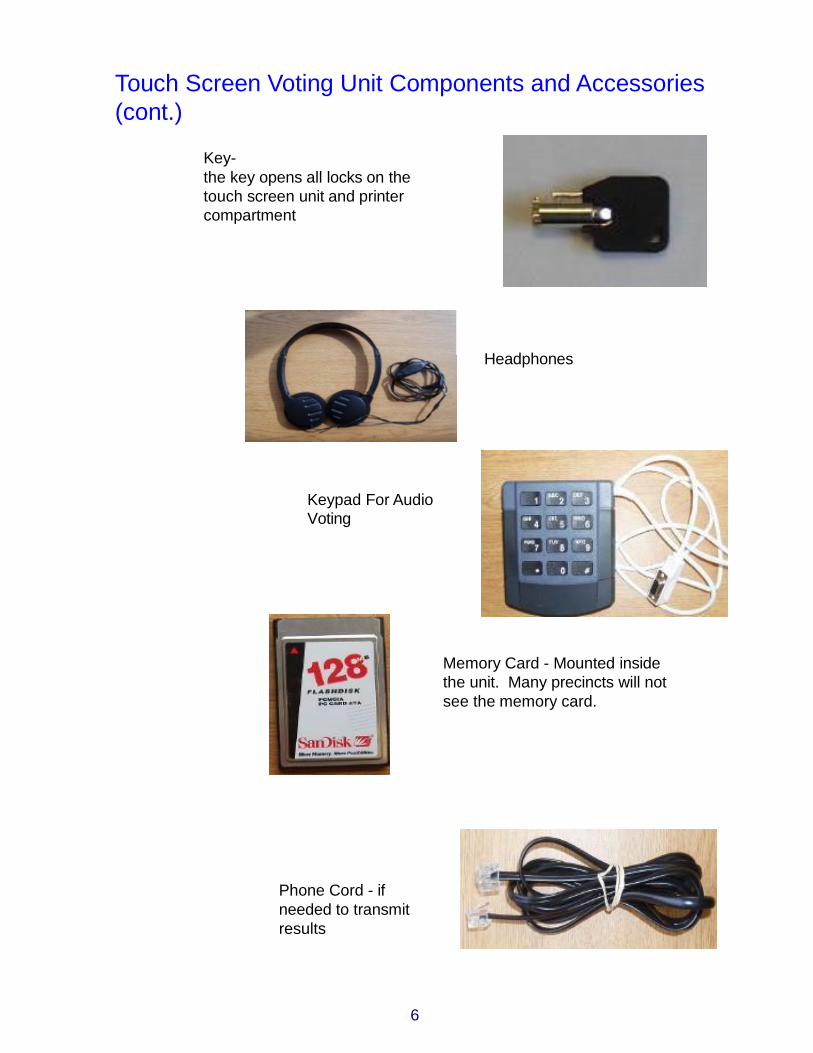
Touch Screen Voting Unit Components and Accessories
(cont.)
Key-
the key opens all locks on the
touch screen unit and printer
compartment
Headphones
Keypad For Audio
Voting
Memory Card - Mounted inside
the unit. Many precincts will not
see the memory card.
Phone Cord - if
needed to transmit
results
7
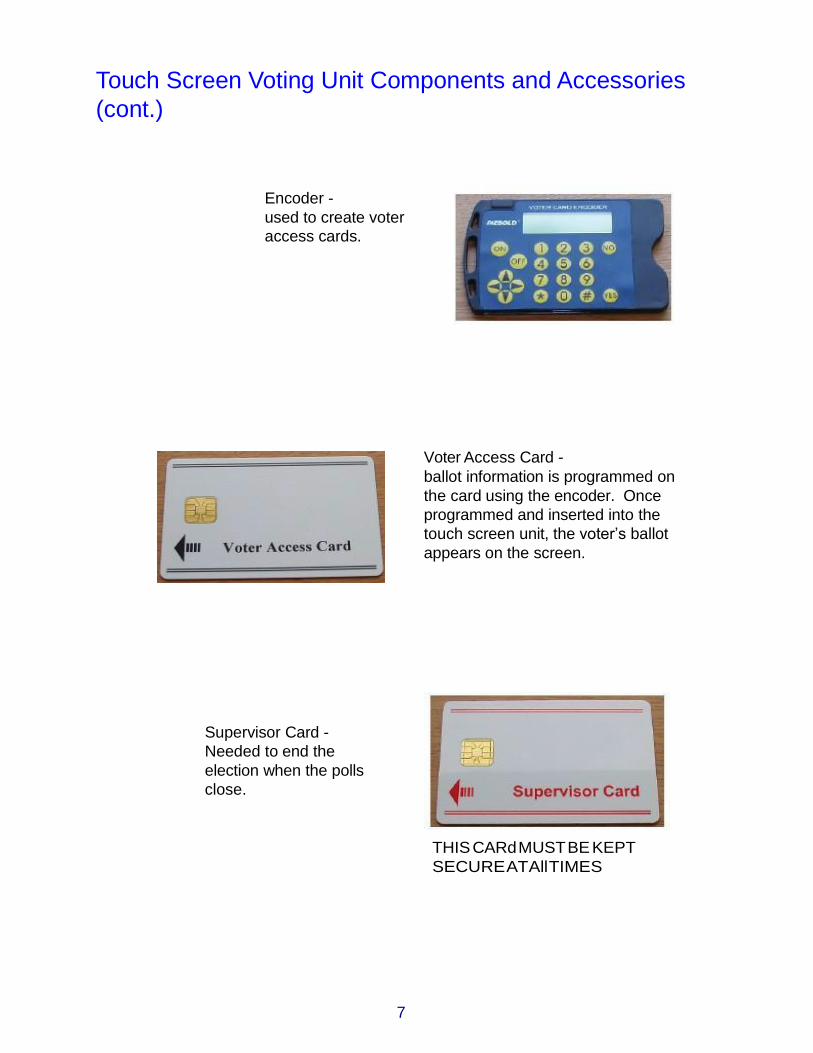
Touch Screen Voting Unit Components and Accessories
(cont.)
Encoder -
used to create voter
access cards.
Voter Access Card -
ballot information is programmed on
the card using the encoder. Once
programmed and inserted into the
touch screen unit, the voter’s ballot
appears on the screen.
Supervisor Card -
Needed to end the
election when the polls
close.
THIS CARd MUST BE KEPT
SECURE AT All TIMES
8
Voter Access Card Information
General Information Each voter who uses the touch screen unit will need a
voter access card encoded with the proper ballot. The
voter access card can be encoded to include appropriate
ballot options (visual, audio/visual or audio only).
Voter access cards can be encoded using either the
encoder or the touch screen voting unit itself. The touch
screen unit should only be used to encode voter access
cards if the encoders become unusable.
Once it is encoded, a voter access card contains only
information to tell the touch screen voting unit which ballot
to display – no voter information or voting information is
transferred to or kept on the voter access card. After a
voter has finished voting, there is no information retained
on the card, and it must be re-encoded for another voter to
use it to vote.
Touch Screen Ballot
Options
August Primary
Election
Before encoding a voter access card, you will need to
determine the type of touch screen ballot the voter would
like to vote.
Visual – for those voters who may not have a visual
impairment. The ballot will appear on the screen.
Audio/Visual – for voters with limited vision. The voter
may view the ballot on the screen while listening to the
ballot on the headset.
Audio Only – for voters who are blind or with limited
vision, or who do not read proficiently. The ballot does
not appear on the screen. Using the headset, the voter
will listen to a ballot recording and use the keypad to
make selections.
When encoding the voter access cards for the Primary
Election, you will select the number on the encoder that
corresponds to the ballot type the voter would like to
vote (Combined, Republican or Ballot Measures Only).
Remember, the party affiliation listed on the precinct
register will determine which ballot type the voter is eligible
to vote.
9
Creating Voter Access Cards Using the Encoder
August Primary
Election
1. Turn on encoder – Press the ON button.
2. Insert the voter access card into plastic slot in back of
encoder. The printed side of the voter access card will be
facing towards you.
3. Press the following number for the Primary ballot choice:
1 = A-d-l Candidate Ballot
6 = Republican Candidate Ballot
7 = Measures Only Ballot
4. The prompt Create? will appear. At prompt, you will create
ballot style for voter as follows:
• REGUlAR VISUAl BAllOT Just press the YES button.
• AUdIO/VISUAl BAllOT Press the star ( * ) button until you see VMCreate?,
then, press YES.
• AUdIO ONlY BAllOT Press the star ( * ) button until you see VHCreate?,
then press YES.
• MAGNIFIEd BAllOT Press the star ( * ) button until you see MCreate?,
then press YES.
Attention
When you first insert the voter access card, if the prompt
reads Clear?, press the YES button, remove the card and
re-insert the card and start again at number two above.

10
Creating Voter Access Cards Using the Encoder - (cont.)
General Election 1. Turn on encoder – Press the ON button.
2. Insert the voter access card into plastic slot in back of
encoder. The printed side of the voter access card will
be facing towards you.
3. The prompt Create? will appear. At prompt, you will
create ballot style for voter as follows:
• REGUlAR VISUAl BAllOT Just press the YES button.
• AUdIO/VISUAl BAllOT Press the star ( * ) button until you see VMCreate?,
then, press YES.
• AUdIO ONlY BAllOT Press the star ( * ) button until you see VHCreate?,
then press YES.
• MAGNIFIEd BAllOT Press the star ( * ) button until you see MCreate?,
then press YES.
Attention
When you first insert the voter access card, if the prompt
reads Clear?, press the YES button, remove the card
and re-insert the card and start again at number two
above.
11
Creating Voter Access Cards Using the Touch Screen
Unit
If both of your encoders are not functioning, you can create
voter access cards using the touch screen unit. To create
voter access cards using the touch screen unit:
1. Insert your red Supervisor Card. At the password screen,
enter the Supervisor password.
2. Touch “Create Voter Cards”.
3. If there is more than one precinct using the same touch
screen, the precinct names will appear in the Precinct
column on the left of the screen. Touch the precinct you
want the card created for.
4. Primary Election Only - Choose the Primary Election
ballot type by touching the ballot type in the Party column
on right of the screen. (The ballot type will be highlighted
once you touch it.)
5. If necessary, select the appropriate Voter Card Options
listed at the bottom of the screen. To select an option,
touch the option and a check mark will appear in the box
next to the option. If you select Audio Ballot, the Hidden
Ballot box will automatically check. If you want an audio/
visual ballot, touch Hidden Ballot to de-select the option
to hide the ballot on the screen.
6. Insert a voter access card and touch “Create” at the
lower left side. Once the card is encoded, it will eject.
7. Touch “Close”.
8. Touch “Resume Voting” to return to the voting screen.
12
Touch Screen Voting Instructions -
Visual Ballot
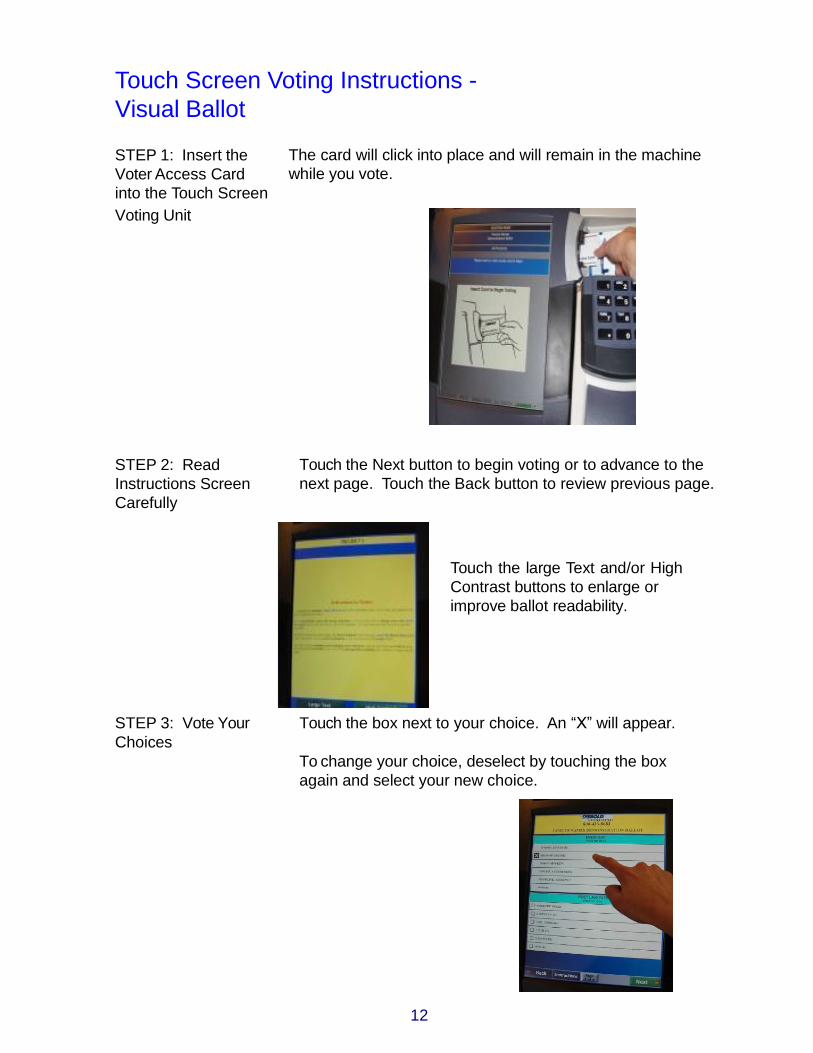
STEP 1: Insert the
Voter Access Card
into the Touch Screen
Voting Unit
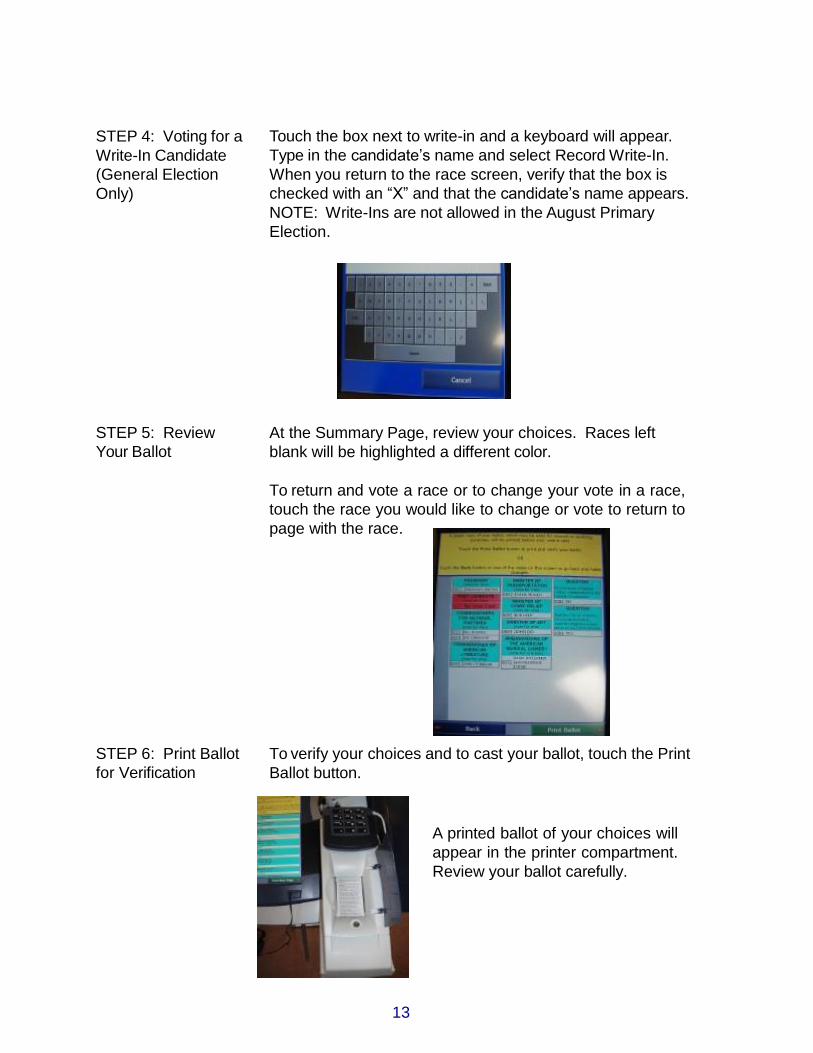
STEP 2: Read
Instructions Screen
Carefully
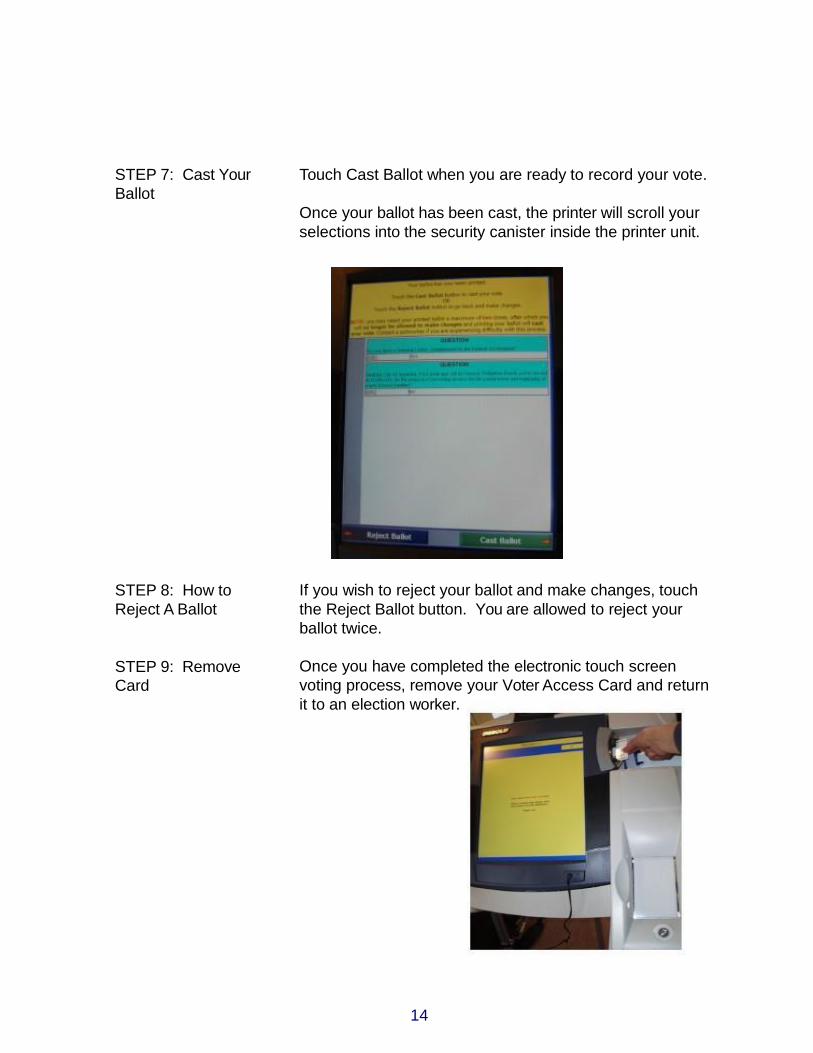
STEP 3: Vote Your
Choices
The card will click into place and will remain in the machine
while you vote.
Touch the Next button to begin voting or to advance to the
next page. Touch the Back button to review previous page.
Touch the large Text and/or High
Contrast buttons to enlarge or
improve ballot readability.
Touch the box next to your choice. An “X” will appear.
To change your choice, deselect by touching the box
again and select your new choice.
13
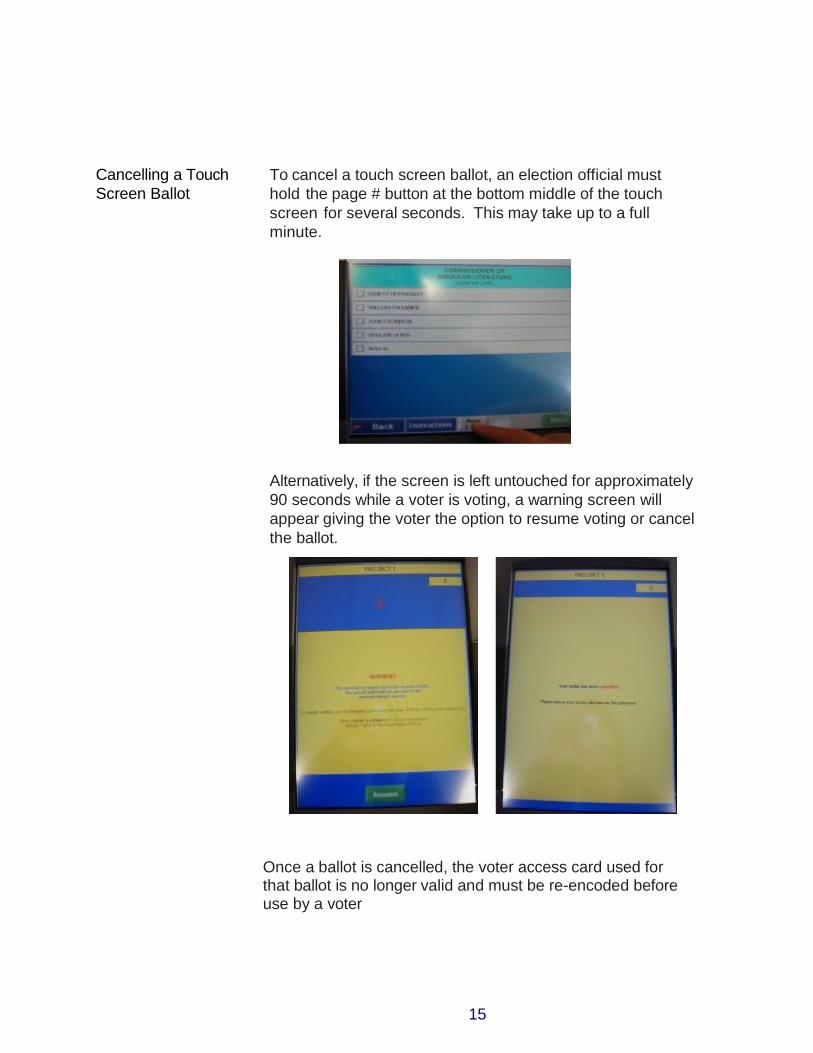
STEP 4: Voting for a
Write-In Candidate
(General Election
Only)
STEP 5: Review
Your Ballot
STEP 6: Print Ballot
for Verification
Touch the box next to write-in and a keyboard will appear.
Type in the candidate’s name and select Record Write-In.
When you return to the race screen, verify that the box is
checked with an “X” and that the candidate’s name appears.
NOTE: Write-Ins are not allowed in the August Primary
Election.
At the Summary Page, review your choices. Races left
blank will be highlighted a different color.
To return and vote a race or to change your vote in a race,
touch the race you would like to change or vote to return to
page with the race.
To verify your choices and to cast your ballot, touch the Print
Ballot button.
A printed ballot of your choices will
appear in the printer compartment.
Review your ballot carefully.
14
STEP 7: Cast Your
Ballot
STEP 8: How to
Reject A Ballot
Touch Cast Ballot when you are ready to record your vote.
Once your ballot has been cast, the printer will scroll your
selections into the security canister inside the printer unit.
If you wish to reject your ballot and make changes, touch
the Reject Ballot button. You are allowed to reject your
ballot twice.
STEP 9: Remove
Card
Once you have completed the electronic touch screen
voting process, remove your Voter Access Card and return
it to an election worker.
Cancelling a Touch
Screen Ballot
To cancel a touch screen ballot, an election official must
hold the page # button at the bottom middle of the touch
screen for several seconds. This may take up to a full
minute.
Alternatively, if the screen is left untouched for approximately
90 seconds while a voter is voting, a warning screen will
appear giving the voter the option to resume voting or cancel
the ballot.
Once a ballot is cancelled, the voter access card used for that ballot is no longer valid and must be re-encoded before use by a voter
15
16
Touch Screen Voting Instructions -
Audio Only and Audio/Visual Ballot
Instructions for Poll
Workers
Be sure to have a chair on hand near the touch screen
voting unit, but not blocking it. Voting an audio ballot takes
longer than voting a visual ballot and it may be helpful for
non-sighted or disabled voters to remain seated while
voting.
1. determine if the voter wants an audio only or audio/
visual ballot and encode a voter access card with the appropriate ballot options.
2. Place clean disposable headphone covers on the
headset and attach the headset to the jack on the front
of the touch screen tablet. (When the voter is done with
voting, the headphone covers are discarded.)
3. For visually impaired voters, orient the voter to the
touch screen unit (including the doors, legs and printer
unit), headphones, keypad, and voter access card. let
the voter know the headset has disposable covers
for sanitary purposes. Give the voter time to become
familiar with the touch screen.
4. Place the keypad in the voter’s hand. Inform the voter
that the number 5 on the keypad has a raised “dimple”
for them to use to orient their hand to the keypad.
Ensure that the voter understands the placement of the
keys
5. Inform the voter of the following audio commands:
0 = returns the voter to instructions at any time
3 = increases volume
1 = decreases volume
* = decreases the speed of the person talking (slower)
# = increases the speed of the person talking (faster)
6 = advances to the next candidate or choice or if on the
last candidate of a race, advances to the next race
5 = used to vote for a candidate or choice or to deselect
a candidate or choice already voted
4 = returns to previous candidate or choice, or if on the
first candidate or choice of a race, returns to the
previous race
8 = advances to the next race

17
6. Inform the voter:
If they have any questions or need assistance during
voting, to raise their hand and an election worker will
come assist them.
At the end of the ballot, the ballot choices will be read
back to them for verification. A paper ballot will print
and will scroll up into the printer canister so the next
voter does not see their choices. When they are
done voting, the voter access card will eject.
7. let the voter know that once they are ready to begin
voting, you will insert the voter access card and they
should immediately begin hearing the instructions.
Ensure that the voter has the headphones in place before
inserting the voter access card. If they don’t hear
the instructions immediately after the voter access card is
inserted, have them press the 3 key to increase volume
(the 3 key may need to be pressed repeatedly to raise
the volume sufficiently).
Encourage the voter to listen to the instructions at
the normal speed. Once the voter is familiar with the
instructions and the touch screen voting unit, they may
find that they wish to increase the speed of the audio.
As the voter is voting, remain alert to any signal that the
voter may have a question, require assistance, or has
finished voting and is ready to turn in his or her voter
access card.
8. When the voter has finished voting, ensure that the voter
access card is removed from the unit. If necessary,
guide the voter away from the unit. Return the chair, if
it was used, to its position out of the way of the touch
screen voting unit.
18
End Voting on the Touch Screen Voting Unit General Information At 8:00pm, after all voters have voted, you will end voting on
the touch screen voting unit. To end voting, you will need
the Touch Screen Voting Unit Closing Instructions and the
red Supervisor Card. Follow the instructions step-by-step
and look at the pictures provided in the instructions while
reading.
It is important that you end voting on the touch screen
voting unit even if you did not have any voters using the
touch screen. In addition, if you are an optical scan precinct
transmitting results electronically, you need to transmit your
touch screen voting results even if you had no voters using
the touch screen.
Touch Screen
Memory Card
As indicated in the closing instructions, you will need to
remove the memory card from the touch screen voting unit
and seal it in the Memory Card Envelope for return to the
division of Elections. Remove the memory card even if you
did not have any voters using the touch screen voting unit.
Touch Screen
Ballots
The printed copy of the touch screen ballot is the official
ballot that will be used in the event of any recounts. The
closing instructions provide information about unwinding
the ballots from the security canister. It is very important
that you handle these ballots carefully, and that you seal the
ballots in the Voted Touch Screen Ballot envelope for return
to the division of Elections.
19
Replacing the Paper Roll
The touch screen voting unit paper roll should last through
Election day. If, however, more voters than anticipated use
the unit, the paper roll may need to be changed.
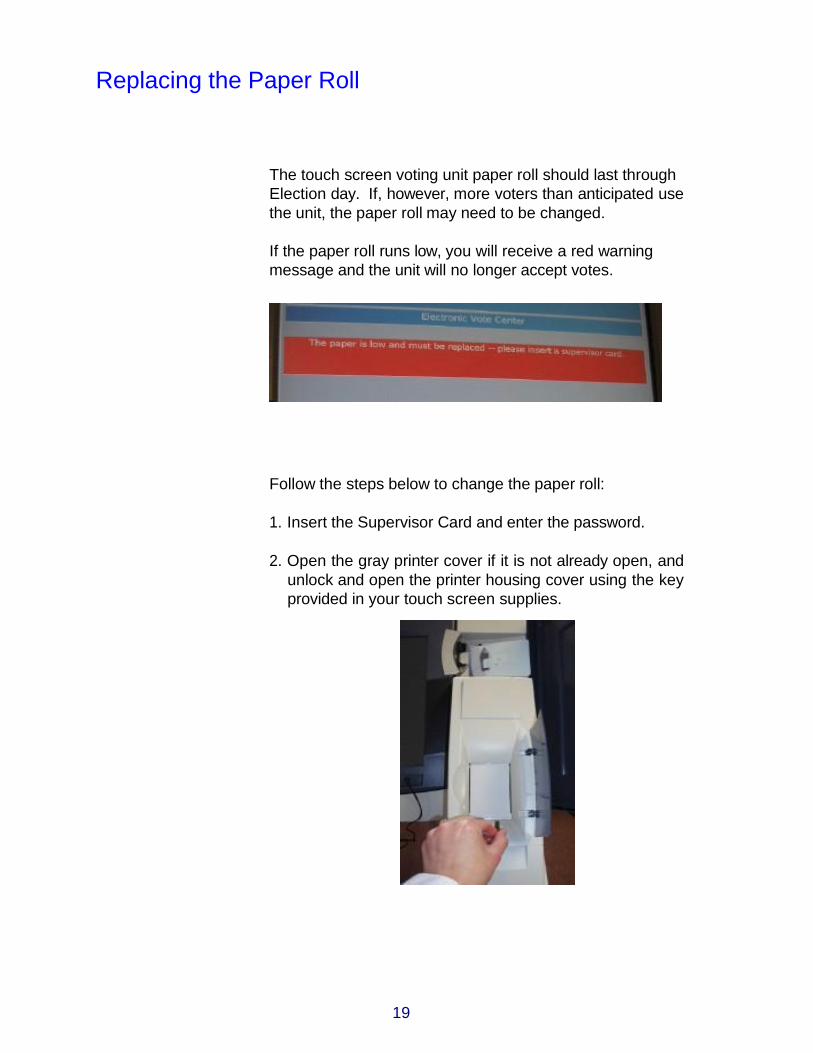
If the paper roll runs low, you will receive a red warning
message and the unit will no longer accept votes.
Follow the steps below to change the paper roll:
1. Insert the Supervisor Card and enter the password.
2. Open the gray printer cover if it is not already open, and
unlock and open the printer housing cover using the key
provided in your touch screen supplies.
20
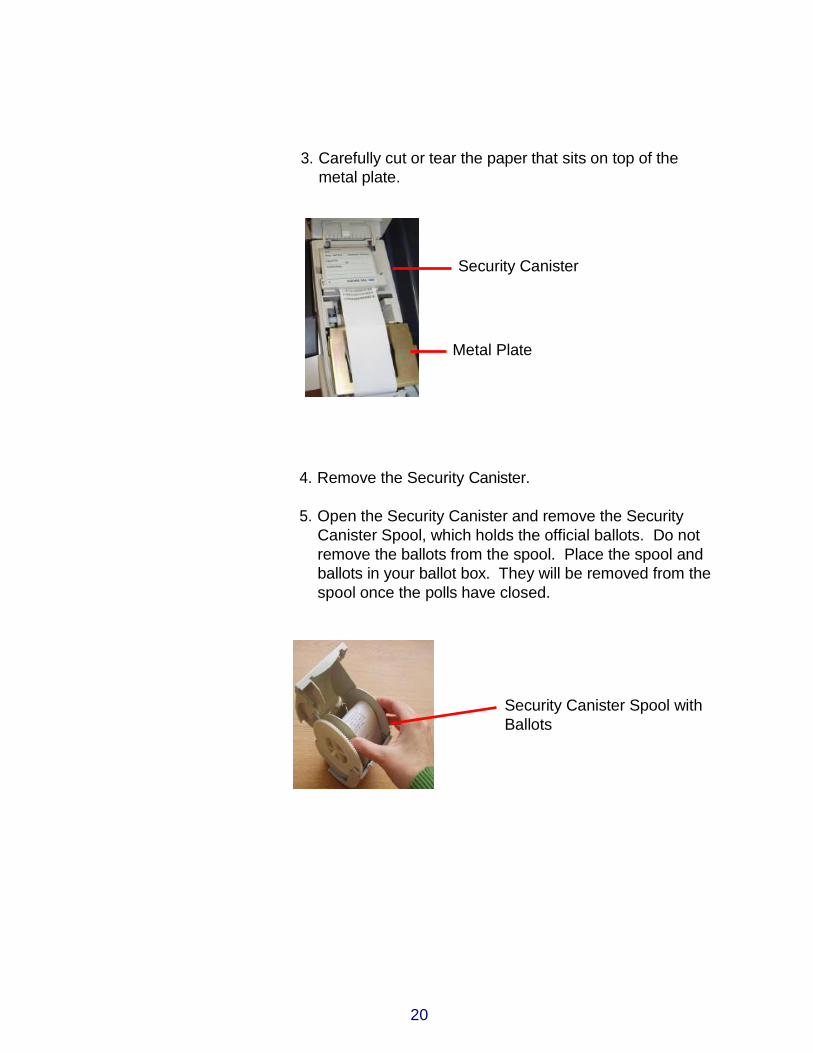
3. Carefully cut or tear the paper that sits on top of the
metal plate.
Security Canister
Metal Plate
4. Remove the Security Canister.
5. Open the Security Canister and remove the Security
Canister Spool, which holds the official ballots. Do not
remove the ballots from the spool. Place the spool and
ballots in your ballot box. They will be removed from the
spool once the polls have closed.
Security Canister Spool with
Ballots
21
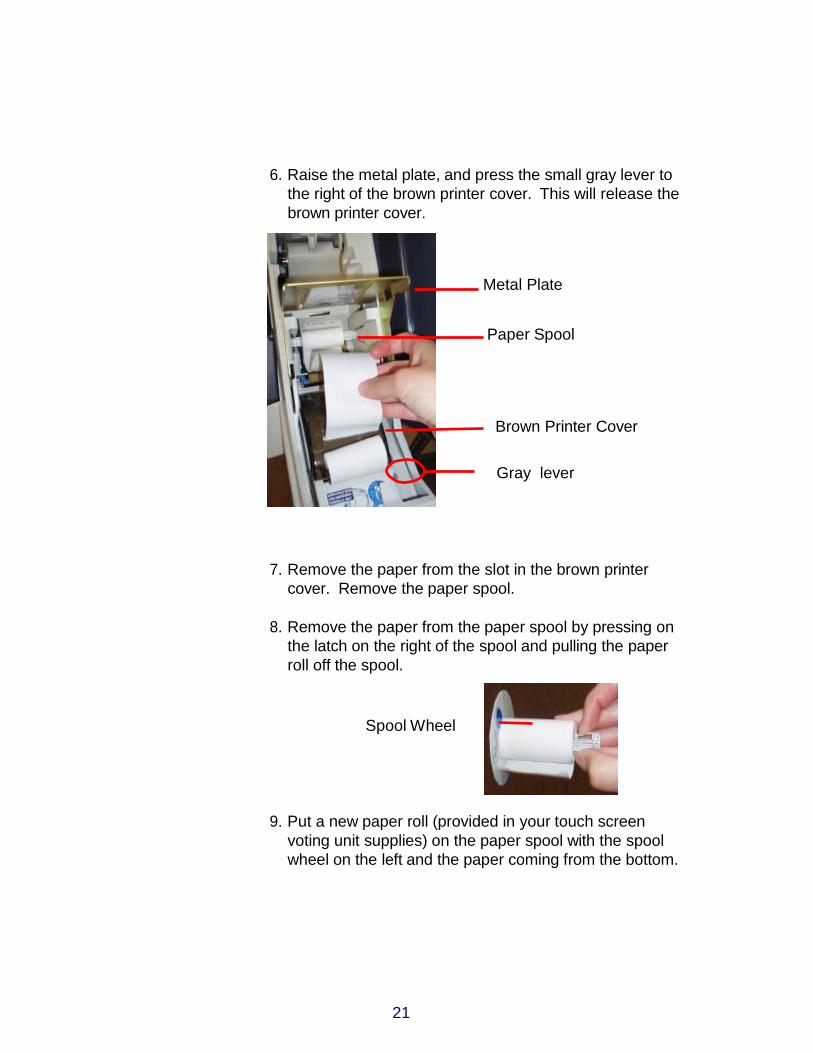
6. Raise the metal plate, and press the small gray lever to
the right of the brown printer cover. This will release the
brown printer cover.
Metal Plate
Paper Spool
Brown Printer Cover
Gray lever
7. Remove the paper from the slot in the brown printer
cover. Remove the paper spool.
8. Remove the paper from the paper spool by pressing on
the latch on the right of the spool and pulling the paper
roll off the spool.
Spool Wheel
9. Put a new paper roll (provided in your touch screen
voting unit supplies) on the paper spool with the spool
wheel on the left and the paper coming from the bottom.

22
10. Insert the paper spool with the new paper roll into the
printer, with the paper coming from the bottom.
11. Pass the end of the paper roll through the slot in the
brown printer cover and unwind enough paper to
almost reach the floor.
Brown Printer Cover
12. Close the brown printer cover and make sure that it
clicks closed. lower the metal plate.
13. Return the Security Canister to the printer housing and
leave it open.
Security Canister
Metal Plate
23
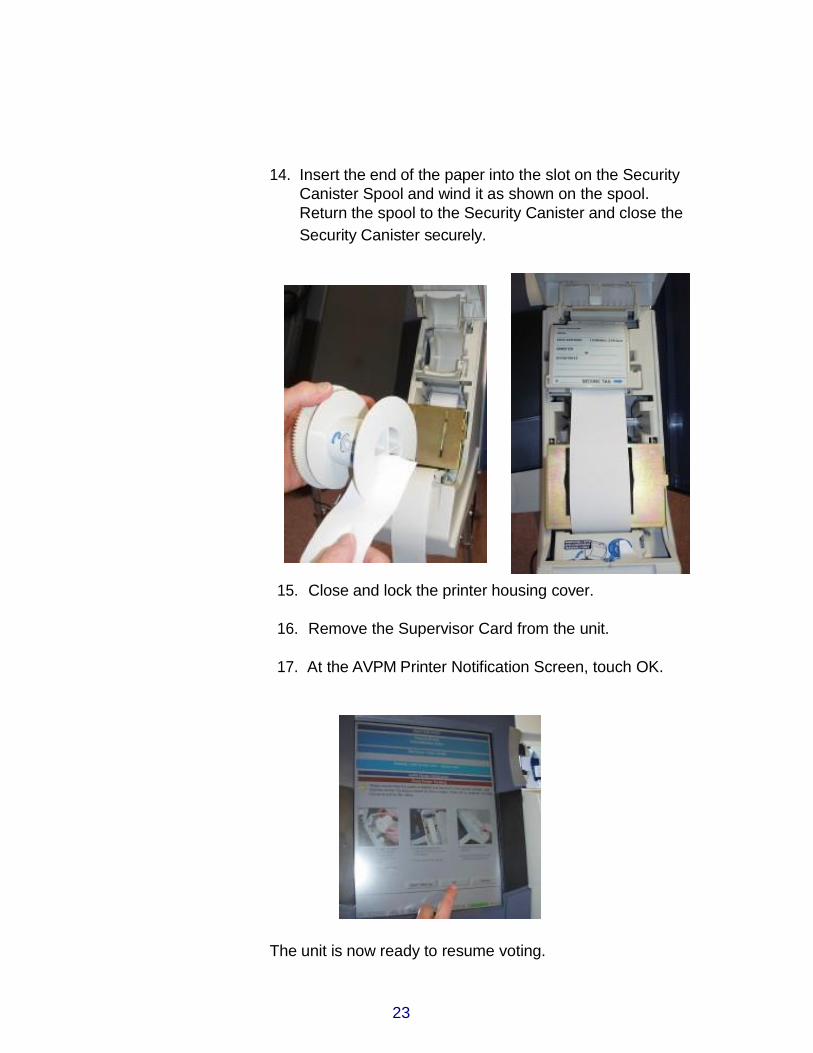
14. Insert the end of the paper into the slot on the Security
Canister Spool and wind it as shown on the spool.
Return the spool to the Security Canister and close the
Security Canister securely.
15. Close and lock the printer housing cover.
16. Remove the Supervisor Card from the unit.
17. At the AVPM Printer Notification Screen, touch OK.
The unit is now ready to resume voting.
24
Appendix
Troubleshooting
Frequently Asked Questions
Storage the Touch Screen Voting Unit
25
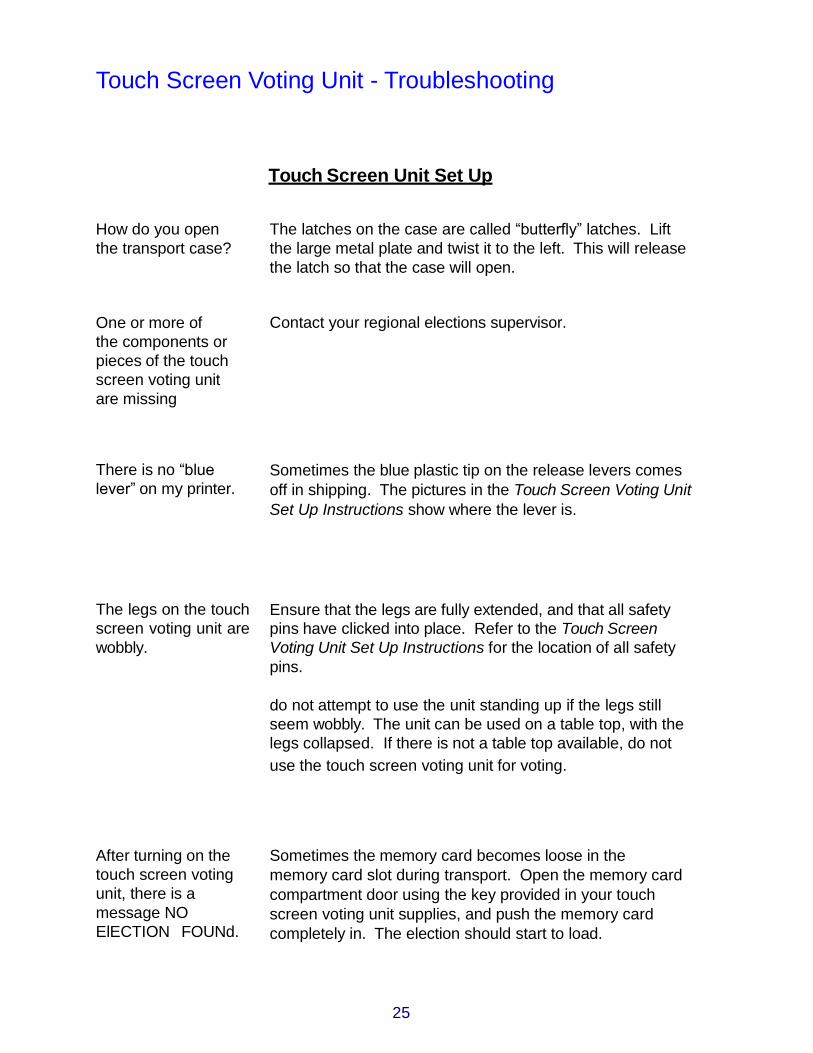
Touch Screen Voting Unit - Troubleshooting
Touch Screen Unit Set Up
How do you open
the transport case?
The latches on the case are called “butterfly” latches. Lift
the large metal plate and twist it to the left. This will release
the latch so that the case will open.
One or more of
the components or
pieces of the touch
screen voting unit
are missing
There is no “blue
lever” on my printer.
The legs on the touch
screen voting unit are
wobbly.
After turning on the
touch screen voting
unit, there is a
message NO
ElECTION FOUNd.
Contact your regional elections supervisor.
Sometimes the blue plastic tip on the release levers comes
off in shipping. The pictures in the Touch Screen Voting Unit
Set Up Instructions show where the lever is.
Ensure that the legs are fully extended, and that all safety
pins have clicked into place. Refer to the Touch Screen
Voting Unit Set Up Instructions for the location of all safety
pins.
do not attempt to use the unit standing up if the legs still
seem wobbly. The unit can be used on a table top, with the
legs collapsed. If there is not a table top available, do not
use the touch screen voting unit for voting.
Sometimes the memory card becomes loose in the
memory card slot during transport. Open the memory card
compartment door using the key provided in your touch
screen voting unit supplies, and push the memory card
completely in. The election should start to load.
26
Troubleshooting
Printer or Paper Issues
The unit says that the
printer is not attached,
but it is.
There is a broken or
missing piece on the
printer, and it will not
install correctly.
The printer will not
print.
The security canister is
winding, but the paper
is not being taken up.
The security canister
will not stop winding.
Unlock the printer cover and carefully follow the Touch
Screen Voting Unit Set Up Instructions to ensure that the
printer is installed correctly. If the problem persists, do
not use the unit for voting. Contact your regional elections
supervisor.
Contact your regional elections supervisor. It may be
possible to replace the printer unit.
If the printer cannot be repaired or replaced, do not use the
touch screen voting unit for voting. disassemble the unit
and return it to its transport case.
Verify the brown printer cover below the metal plate is
completely closed. The brown printer cover will click when
it is closed correctly.
There are a larger black wheel and a smaller black wheel
behind the printer’s security canister. If the larger wheel
does not engage with the smaller wheel, the canister spool
wheel will not stop turning. Turn off the touch screen voting
unit. Remove the security canister and carefully move the
larger black wheel to the right so that it becomes engaged
with the smaller black wheel.
Verify the tab on the lower left side of the security canister
is securely closed.
27
Troubleshooting
The paper is
jammed.
The unit says that
the paper is low.
Unlock the printer cover and carefully follow the Touch
Screen Voting Unit Set Up Instructions to ensure that the
paper is placed correctly in the printer, and that the printer
is correctly installed. If the problem persists, do not use the
unit for voting. Contact your regional elections supervisor.
Unlock and open the printer cover, and raise the metal plate.
Check to make sure that the paper roll is seated securely,
and that there is plenty of paper on the roll. lower the metal
plate and close and lock the printer cover. If the notification
does not disappear, or there is only a small amount of paper
left on the roll, change the paper roll.
To change the paper roll, refer to the Replacing the Paper
Roll section of this handbook.
If the problem persists, do not use the unit for voting.
Contact your regional elections supervisor.
Frozen Screen
When you touch the
screen, nothing
happens.
Using the key provided in your touch screen voting unit
supplies, unlock and open the memory card compartment
door. Press the red button inside the memory card
compartment to turn off the unit. Turn the unit back on. If
the screen remains frozen, do not use the unit for voting.
Contact your regional elections supervisor.
28
Troubleshooting
Encoder/Voter Access Cards
The encoder does not
turn on.
When I insert a voter
access card into the
encoder, it reads
“Clear?”.
A voter’s voter
access card brings
up the wrong ballot
type.
If both encoders are not functioning, contact your regional
elections supervisor to have another encoder brought to
you. Until the encoder arrives, or if you are in a remote
area, you will need to create voter cards using the touch
screen voting unit.
See the Creating Voter Access Cards section of this
handbook for step-by-step instructions on creating voter
access cards using the touch screen voting unit.
The “Clear?” prompt means that the card has already been
encoded and has not yet been used to vote. To
ensure that it is encoded with the proper ballot information,
press YES to clear the card, and re-encode it with the
desired ballot information.
See the Creating Voter Access Cards section of this
handbook for step-by-step instructions on creating voter
access cards.
Turn on the encoder and insert the voter access card, with
the printed side facing forward. At the “Clear?” prompt,
press YES. Re-encode the card with the correct ballot
information.
See the Creating Voter Access Cards section of this
handbook for step-by-step instructions on encoding voter
access cards.
29
Troubleshooting
Audio Voting
The voter cannot hear
anything through the
headphones.
The keypad does
not respond.
Ensure that the headphones are correctly plugged in to the
headphone jack.
To raise the volume, press 3 on the audio keypad repeatedly
until the desired volume is reached, or use the volume wheel
on the headphones to raise the volume.
Ensure that the voter has been given an audio-enabled voter
access card. See the Creating Voter Access Cards section
of this handbook for step-by-step instructions on creating
voter access cards for audio voting.
If the audio still does not work, contact your regional
elections supervisor.
Ensure that the keypad connector is correctly inserted
behind the touch screen voting unit tablet by pressing the
black button on top of the tablet and pulling it forward. See
the Touch Screen Voting Unit Set Up Instructions (Step 7)
for detailed instructions.
Transmitting Results (Optical Scan Precincts Only)
The touch screen
voting unit gives an
error message while
trying to upload
ballots, or will not
connect.
Contact your regional elections supervisor for instructions.

30
Touch Screen Voting
Frequently Asked Questions
General Questions
Can any voter use the
touch screen voting
units, or are they
reserved for disabled
voters?
Why is the State
implementing touch
screen voting units?
do the touch screen
voting units offer
languages besides
English?
do the touch screen
voting units have a
paper trail?
The touch screen voting units will be available for any
voter who wishes to vote on them. However, those with
disabilities will have priority in using them.
The Help America Vote Act (HAVA) of 2002 requires that
in each polling place there be a voting unit accessible to
visually impaired and disabled voters.
HB 320, which passed the State legislature in 2002,
directed the division of Elections to provide balloting
equipment to allow voters with visual impairments and
disabilities the opportunity to vote a private, independent
and verifiable ballot. More specifically, HB 459, which
passed in 2004, required the voting units to be capable
of providing a paper record that can be reviewed and
corrected by the voter at the time the vote is cast and
used for a recount of the votes cast at an election in which
electronically generated ballots were used.
The touch screen voting units in some precincts will offer
the ballot in Filipino (Tagalog) and Alaska Native languages.
Yes. Each touch screen voting unit is equipped with a
printer to produce a paper ballot. The voter will have the
ability to review the paper ballot print-out to determine its
accuracy prior to the ballot being cast on the touch screen
machine. For visually impaired voters, the paper ballot will
be read to the voter via a headset to determine the accuracy
of the paper ballot before the ballot is cast.
31
Frequently Asked Questions
Voter Access Card
What information is
stored on the voter
access card?
A voter access card contains only information to tell the
touch screen voting unit which ballot to display – no voter
information or voting information is transferred to or kept
on the voter access card. After a voter has finished voting,
there is no information retained on the card, and it must be
re-encoded for another voter to use it to vote.
Visually Impaired and Disabled Voters
How will visually
impaired and
disabled voters cast
an independent
ballot?
May voters ask
another person to
assist them with the
touch screen voting
unit?
The touch screen voting units can accommodate many
different disabilities. Along with offering large print, high-
contract and audio-only ballots, the touch screen can also
be used with “pointer sticks” by those with limited use of
their hands. The touch screen can be used by a voter in a
wheelchair, or who needs to remain seated while voting.
Yes. An election worker, friend, family member, bystander,
campaign worker or anyone else who is not the voter’s
employer may assist a voter who needs assistance.
Transmitting Results
How are results
transmitted on
Election day?
Results are transmitted via modem in precincts that use
optical scan voting units. In hand count precincts, results
are called in to the local regional elections office.
32
Storing the Touch Screen Voting Unit
After the polls are closed, follow the Touch Screen Voting
Unit Closing Instructions and return the unit and its
components and accessories to their transport cases.
You may have signed an agreement to store the touch
screen voting unit between the Primary and General
Elections which states that you shall:
1. Provide heated storage of the touch screen voting
unit and printer in a secure, locked location;
2. Charge touch screen voting unit battery, and
conduct election readiness check on the touch
screen voting unit and printer for use in the General
Election as directed by the regional supervisor;
3. deliver touch screen voting unit and printer to
polling place for the General Election;
4. deliver the touch screen voting unit and printer to
the US Postal Service for return shipment as stated
in the agreement or as directed by the regional
supervisor.
If you have not signed such an agreement, return the touch
screen voting unit and equipment to your regional elections
supervisor as directed.

33