TopSURV: Collecting field data using the Auto Topo … · button to begin collecting Auto Topo...
27
TopSURV: Collecting field data using the Auto TopSURV: Collecting field data using the Auto Topo function Topo function Oscar R. Cantu’ March 2010
Transcript of TopSURV: Collecting field data using the Auto Topo … · button to begin collecting Auto Topo...

TopSURV: Collecting field data using the Auto TopSURV: Collecting field data using the Auto Topo functionTopo function
Oscar R. Cantu’March 2010

March 2010
• At anytime during today’s webinar, if you have any questions, please type them within the Questions section of your webinar software.
• All questions and answers will be posted as a PDF along with all webinar supporting files on the Topcon University website.
Have a Question?Have a Question?TopSURV - Auto Topo Function

March 2010
• For access to previously offered webinars and supporting documentation, please go to:
http://www.topconuniversity.com/
Topcon University WebsiteTopcon University WebsiteTopSURV - Auto Topo Function
March 2010
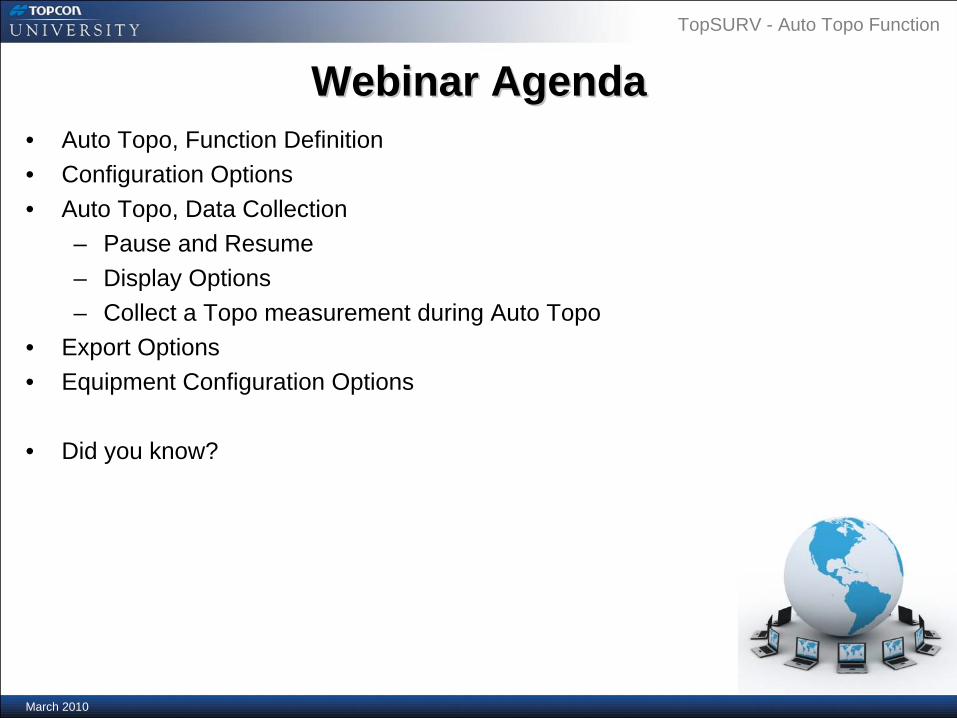
Webinar AgendaWebinar Agenda• Auto Topo, Function Definition• Configuration Options• Auto Topo, Data Collection
– Pause and Resume– Display Options– Collect a Topo measurement during Auto Topo
• Export Options• Equipment Configuration Options
• Did you know?
TopSURV - Auto Topo Function

March 2010
TopSURV - Auto Topo Function
• TopSURV's Auto Topo function sets the following parameters for real time kinematic surveys:
– Method: defines the method for measuring the interval between the received epochs; by time, by horizontal distance, or by slope distance.
– Interval: sets the value of this interval
Function DefinitionFunction Definition
Initial Auto Topo point
By Dist
ance Auto Topo
measurement
March 2010
TopSURV - Auto Topo Function
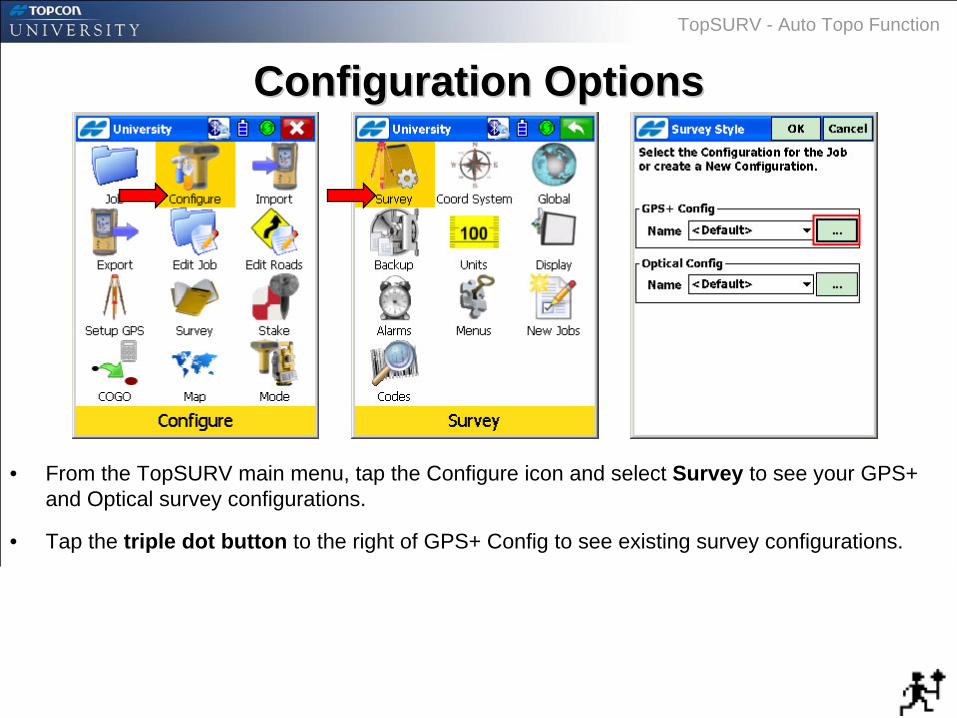
• From the TopSURV main menu, tap the Configure icon and select Survey to see your GPS+ and Optical survey configurations.
• Tap the triple dot button to the right of GPS+ Config to see existing survey configurations.
Configuration OptionsConfiguration Options

March 2010
TopSURV - Auto Topo Function
• Continue past equipment setup options until you get to the Survey Parameters screen (shown above).
• Here you have the option to filter the receiver’s real time positional quality. For this example, we have declared that we will accept Fixed solutions only.
• To trigger a sequential Auto Topo measurement, you can use the methods of:– By Time (each specified period)– By Horizontal Distance (plane measurement)– By Slope Distance (also take into account elevation change)
Configuration OptionsConfiguration Options

March 2010
Auto Topo Data CollectionAuto Topo Data CollectionTopSURV - Auto Topo Function
• Tap the Survey icon and select Auto Topo to begin collecting data.
• Notice that by default, the point number is automatically assigned to be 5000. The purpose of this is to assist with point management in the existing job.
• Typically, when someone collects data using the Auto Topo method, a lot of points will be recorded quickly.
• Therefore, the intent is to jump in to a completely different point number range for these uniquely collected points. Of course, you could always customize.

March 2010
Auto Topo Data CollectionAuto Topo Data CollectionTopSURV - Auto Topo Function
• To take advantage of TopSURV’s code driven line work functionality, select from the job’s existing Code Library.
• In this example, the code of CL – Centerline was chosen. Since this is a Line Type code, the String Identifier field automatically appears.
• Consecutive points that share the same Code and String Identifier will be “strung together” and automatically associated to their proper layer, color, and line type. Efficiency.
String Identifier

March 2010
TopSURV - Auto Topo Function
• Just to remind us, tap the Settings button to see the Survey Parameters that we declared previously.
• Here you have the option to “change your mind” as to how you want to collect Auto Topo points. Once done, you can tap the Defaults button to return to your global settings.
• When ready tap the Start button to begin collecting Auto Topo points every 25 feet, starting with point number 5000, with the Code of CL – Centerline, and a String Identifier of 1. Easy.
Auto Topo Data CollectionAuto Topo Data Collection
March 2010
TopSURV - Auto Topo Function
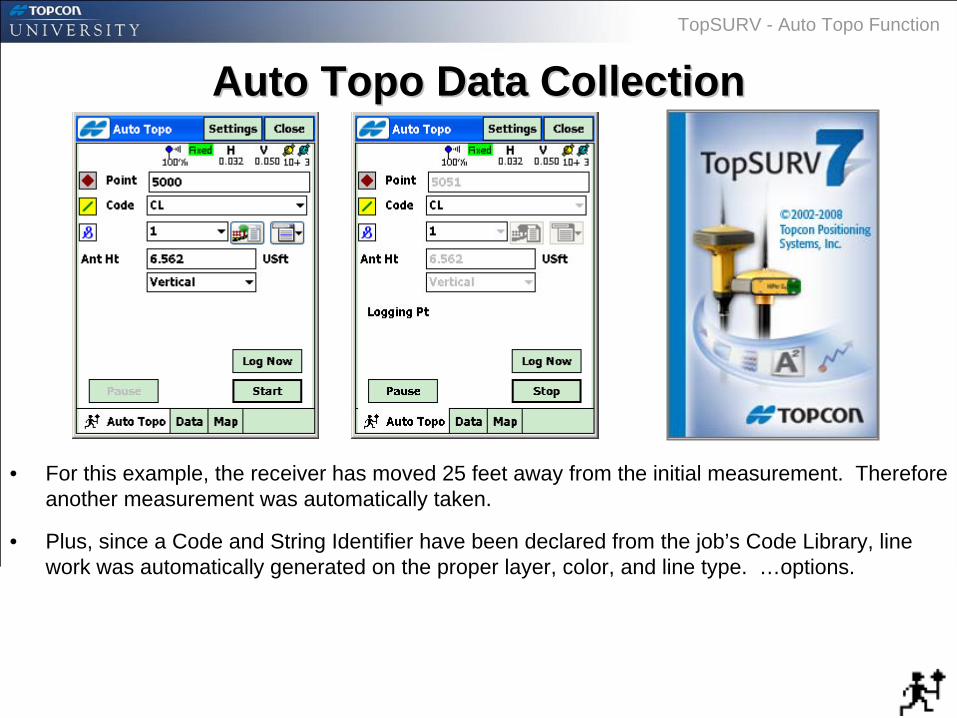
• For this example, the receiver has moved 25 feet away from the initial measurement. Therefore another measurement was automatically taken.
• Plus, since a Code and String Identifier have been declared from the job’s Code Library, line work was automatically generated on the proper layer, color, and line type. …options.
Auto Topo Data CollectionAuto Topo Data Collection

March 2010
TopSURV - Auto Topo Function
• TopSURV is automatically generating line work based off of the Code and String Identifier.
• Looks like this…
Auto Topo Data CollectionAuto Topo Data Collection
Initial Auto Topo point
By Dist
ance
Code = CL
String Identifier = 1
Code = CL
String Identifier = 1
Line work

March 2010
TopSURV - Auto Topo Function
• While collecting Auto Topo points, things begin to happen rather <err> automatically! However, at anytime you have the option of tapping the Pause button.
• Once Auto Topo collection is paused, you have two options. You can either Resume on the course that you were last on, or you can tap the Log Now button.
• While this collection is paused, tapping the Log Now button will allow you to take a single Auto Topo point where you are standing.
• For example, you specified that you wanted to take a shot every 25 feet. With the Pause / Log Now feature, you can collect an Auto Topo measurement manually. …more options.
Pause and ResumePause and Resume
While the collection of Auto Topo points are being
Paused, the Log Now will take one more single Auto
Topo point.
March 2010
TopSURV - Auto Topo Function
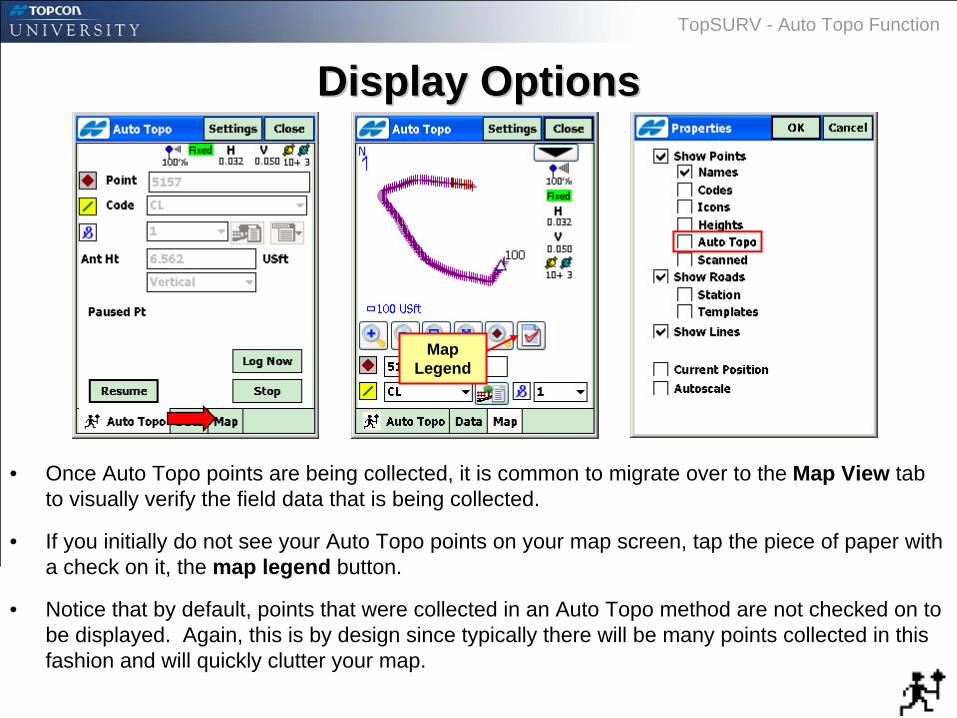
• Once Auto Topo points are being collected, it is common to migrate over to the Map View tab to visually verify the field data that is being collected.
• If you initially do not see your Auto Topo points on your map screen, tap the piece of paper with a check on it, the map legend button.
• Notice that by default, points that were collected in an Auto Topo method are not checked on to be displayed. Again, this is by design since typically there will be many points collected in this fashion and will quickly clutter your map.
Display OptionsDisplay Options
Map Legend
March 2010
TopSURV - Auto Topo Function
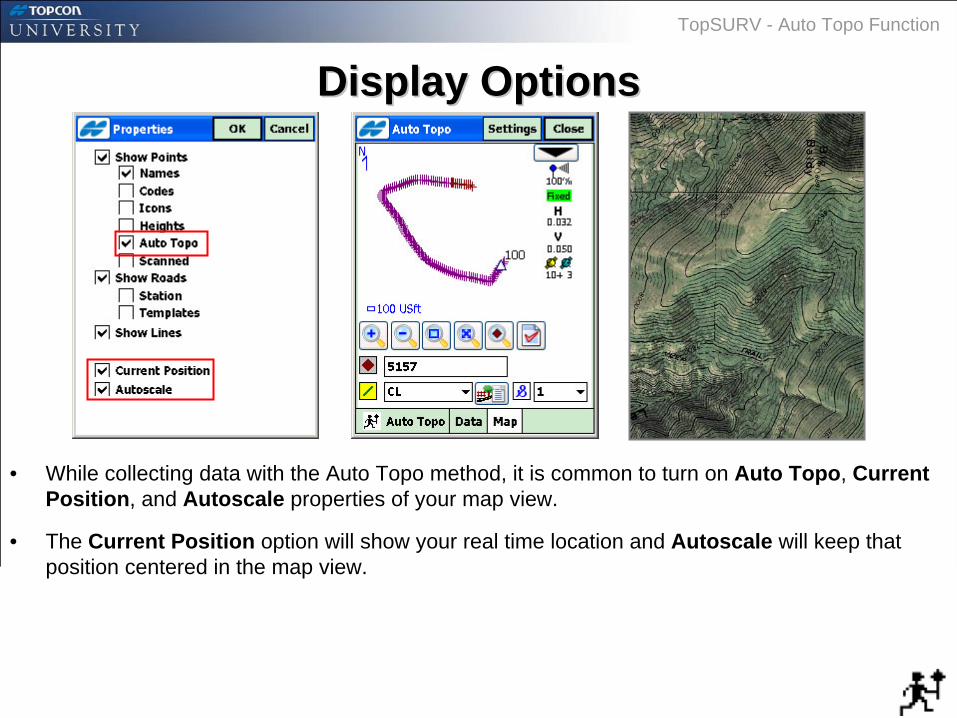
• While collecting data with the Auto Topo method, it is common to turn on Auto Topo, Current Position, and Autoscale properties of your map view.
• The Current Position option will show your real time location and Autoscale will keep that position centered in the map view.
Display OptionsDisplay Options
March 2010
TopSURV - Auto Topo Function
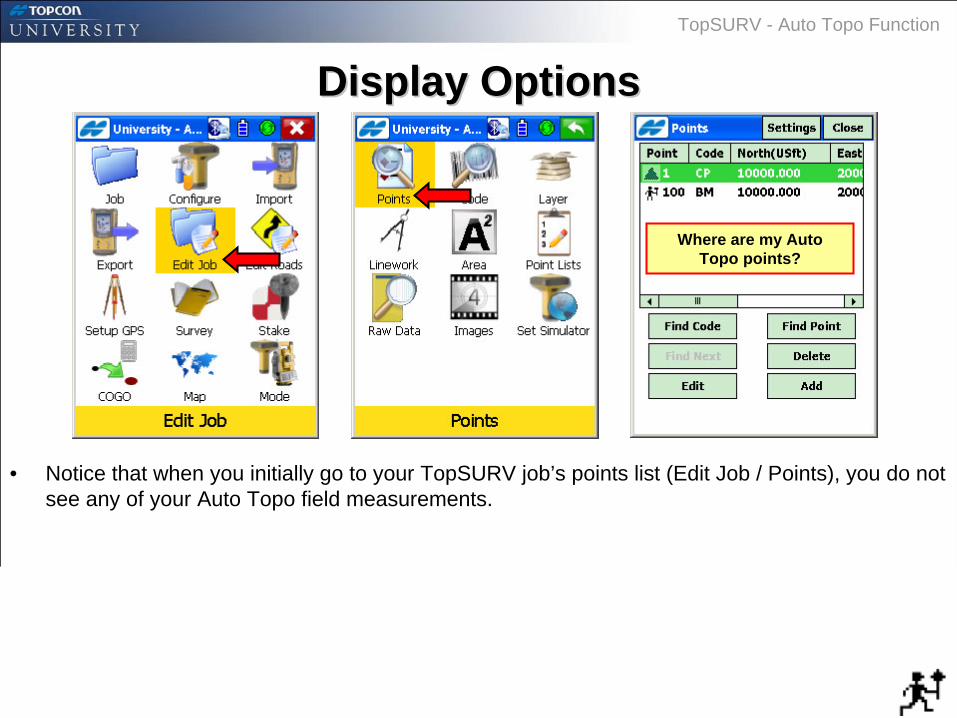
• Notice that when you initially go to your TopSURV job’s points list (Edit Job / Points), you do not see any of your Auto Topo field measurements.
Display OptionsDisplay Options
Where are my Auto Topo points?

March 2010
TopSURV - Auto Topo Function
• Tap the Context Menu (Topcon logo at upper left corner) and select the Show AutoTopo Points display option.
• Recall that it is typical to collect many points quickly using the Auto Topo method. Therefore, TopSURV will not display them in your job’s point list initially.
• From the Context Menu, you can toggle them on / off as needed.
Display OptionsDisplay Options
Oh. There are my Auto Topo points!

March 2010
TopSURV - Auto Topo Function
Questions?Questions?
March 2010
TopSURV - Auto Topo Function
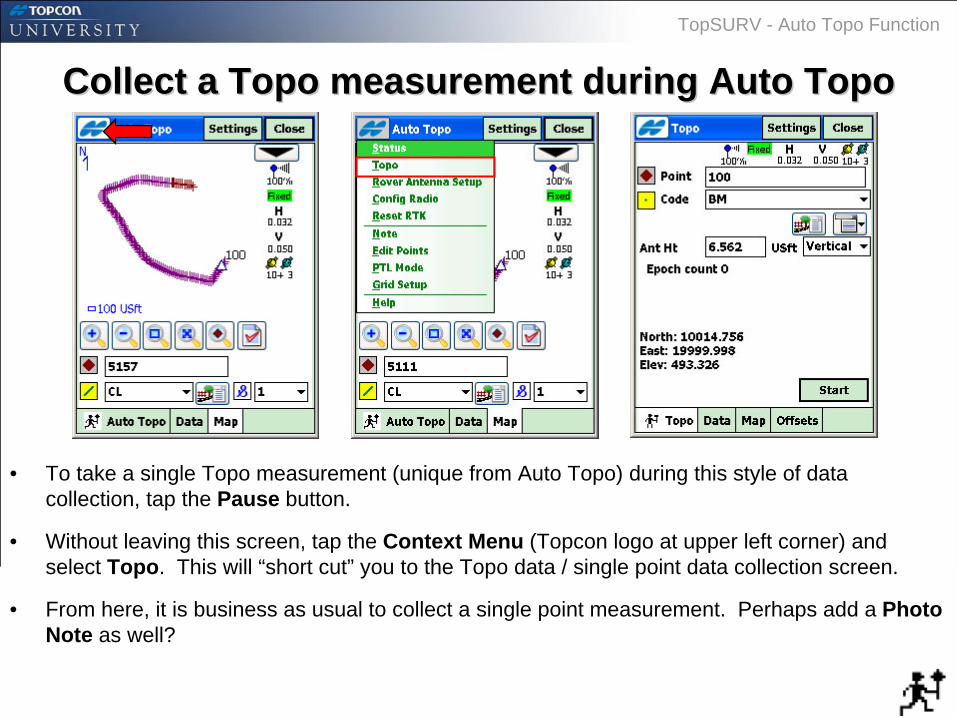
• To take a single Topo measurement (unique from Auto Topo) during this style of data collection, tap the Pause button.
• Without leaving this screen, tap the Context Menu (Topcon logo at upper left corner) and select Topo. This will “short cut” you to the Topo data / single point data collection screen.
• From here, it is business as usual to collect a single point measurement. Perhaps add a Photo Note as well?
Collect a Topo measurement during Auto TopoCollect a Topo measurement during Auto Topo
March 2010
TopSURV - Auto Topo Function
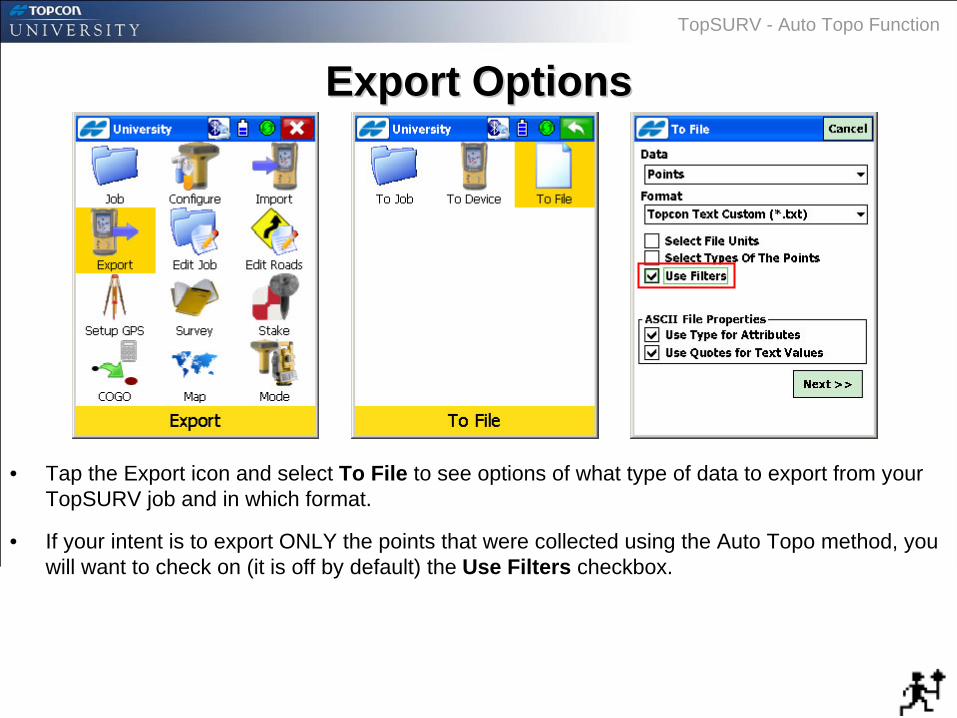
• Tap the Export icon and select To File to see options of what type of data to export from your TopSURV job and in which format.
• If your intent is to export ONLY the points that were collected using the Auto Topo method, you will want to check on (it is off by default) the Use Filters checkbox.
Export OptionsExport Options

March 2010
TopSURV - Auto Topo Function
• There are many ways to do the same thing here. A common way is to simply check on the Filter by Range option and declare that you want to select only the point number range of your Auto Topo points.
• For this this example, Auto Topo points were numbered starting with 4000 and increased from there.
• Lastly, you have the opportunity to save the resulting text file to either the (most common) IEFiles directory or an external SD memory card.
Export OptionsExport Options
March 2010
TopSURV - Auto Topo Function
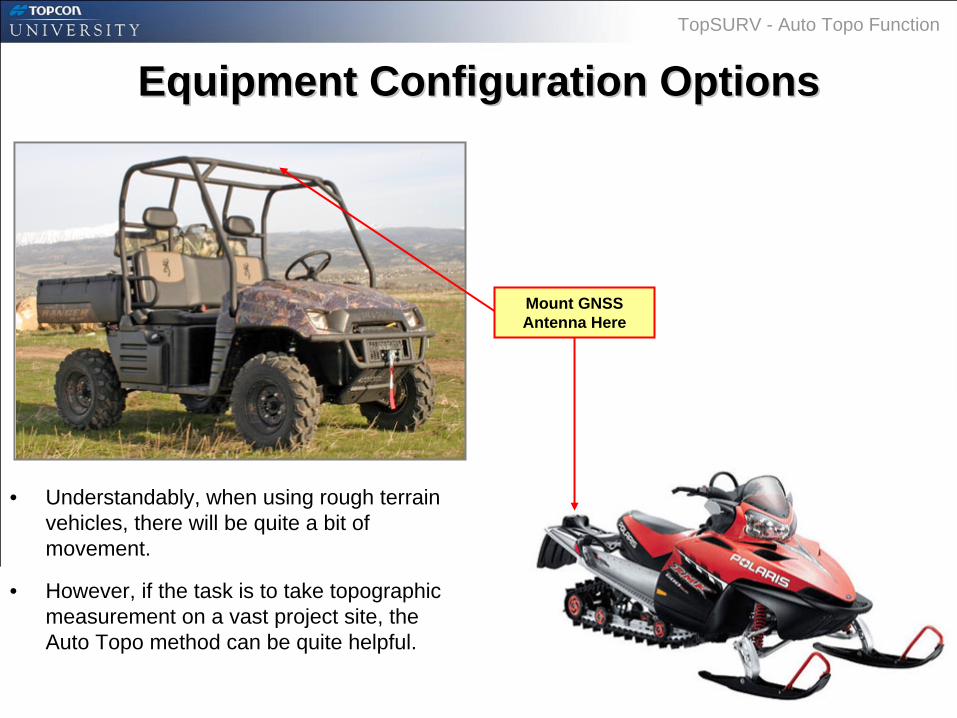
• Understandably, when using rough terrain vehicles, there will be quite a bit of movement.
• However, if the task is to take topographic measurement on a vast project site, the Auto Topo method can be quite helpful.
Equipment Configuration OptionsEquipment Configuration Options
Mount GNSS Antenna Here

March 2010
TopSURV - Auto Topo Function
• When collecting Auto Topo data with a vehicle mount or perhaps a magnetic mount on the roof, the receiver’s antenna height will have to be accounted for.
• It is common to simply take a measurement from the receiver’s Antenna Reference Point (ARP) straight down to the natural ground.
• As a result in TopSURV, you will declare an antenna measurement method of Vertical (instead of Slant) and enter in your measure up.
Equipment Configuration OptionsEquipment Configuration Options
Antenna Reference Point
(ARP)
Vertical Antenna Height
Measurement
March 2010
TopSURV - Auto Topo Function
Equipment Configuration OptionsEquipment Configuration Options
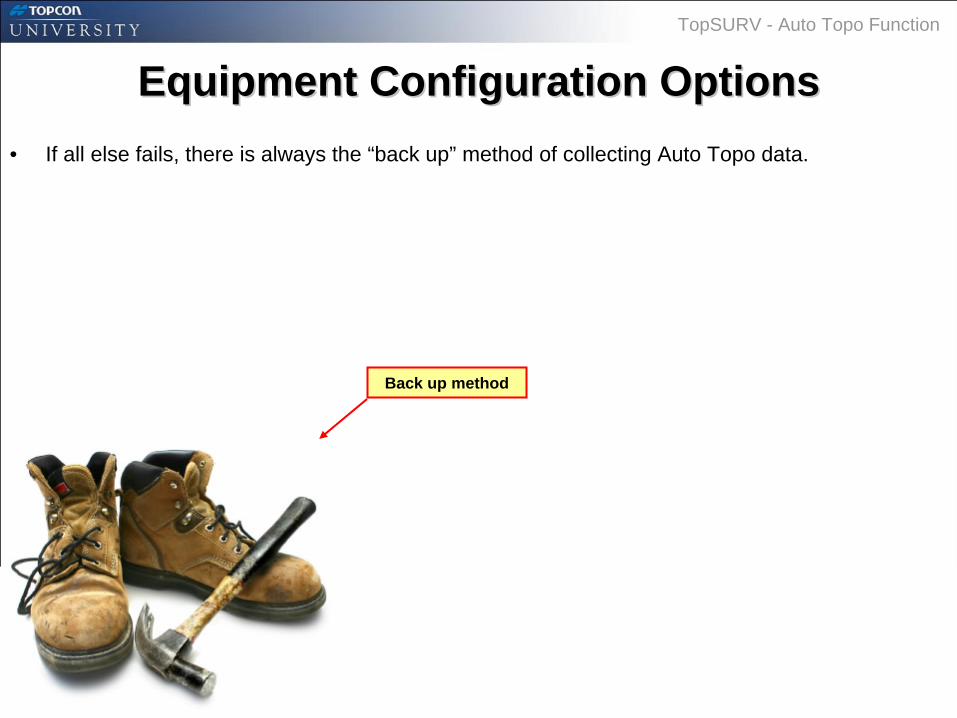
Back up method
• If all else fails, there is always the “back up” method of collecting Auto Topo data.

March 2010
TopSURV - Auto Topo Function
Questions?Questions?

March 2010
TopSURV - Auto Topo Function
• While you are actively using the Topcon GRS-1 receiver, if you ever need to access the Windows Mobile start button, just press and hold the Escape button for three seconds.
• While in the middle of collecting data in TopSURV, you could perhaps launch Google Maps to see surround street names, check your local weather forecast using Internet Explorer, etc.
Topcon GRSTopcon GRS--1 1 –– Windows Start ButtonWindows Start Button
At anytime, press and hold for three seconds

TopSURV: Collecting field data using the Auto TopSURV: Collecting field data using the Auto Topo functionTopo function
March 2010