TOOLS NEEDED HARDWARE - Victory 4x4
7
TOOLS NEEDED HARDWARE TACOMA BLITZ FRONT BUMPER INSTALLATION INSTRUCTIONS • Body Saw • 10mm Socket • 14mm Socket • 5/16” Drill Bit • 3/16” Allen • 1/2-13 x 1” Head Head Bolt qty. 2 • 1/2-13 Flange Nut qty. 2 • 5/16-18 x 3/4” Button Head qty. 2 • 5/16-18 Flange Nut qty. 4 • 5/16-18 x 1” Hex Head qty. 2 Please read the instructions below carefully before attempting to install.
Transcript of TOOLS NEEDED HARDWARE - Victory 4x4

TOOLS NEEDED HARDWARE
TACOMA BLITZ FRONT BUMPER INSTALLATION INSTRUCTIONS
• Body Saw
• 10mm Socket
• 14mm Socket
• 5/16” Drill Bit
• 3/16” Allen
• 1/2-13 x 1” Head Head Bolt qty. 2
• 1/2-13 Flange Nut qty. 2
• 5/16-18 x 3/4” Button Head qty. 2
• 5/16-18 Flange Nut qty. 4
• 5/16-18 x 1” Hex Head qty. 2
Please read the instructions below carefully before attempting to install.
Assemble your Blitz bumper. If you are installing a winch, light bar, or
filler-panel, install them now before we install the bumper on the Tacoma.
To install the filler-panel use two 5/16” nuts, bolts, and washers from the
hardware kit.
Remove the eleven 10mm bolts along the valance, then use a pry tool to
pop the front plastic panel off. Once you remove the panel, you can cut the
very small lower valance off. (This will be hidden by the plastic panel if you
ever need to go back to stock)
1.
2.

After you remove the valance, remove the splash guard. 3.
Next we will remove the crash bar. There is a plastic cover over the crash
bar that we will remove by pressing on the clips. Use a 14mm socket to
move the 6 nuts holding the crash bar in place. Remove outer trim screws
from the bottom of the plastic valance and remove crash bar assembly. You
may need to drill out the rivets holding the reinforcement brackets to the
crash bar to remove it.
4.
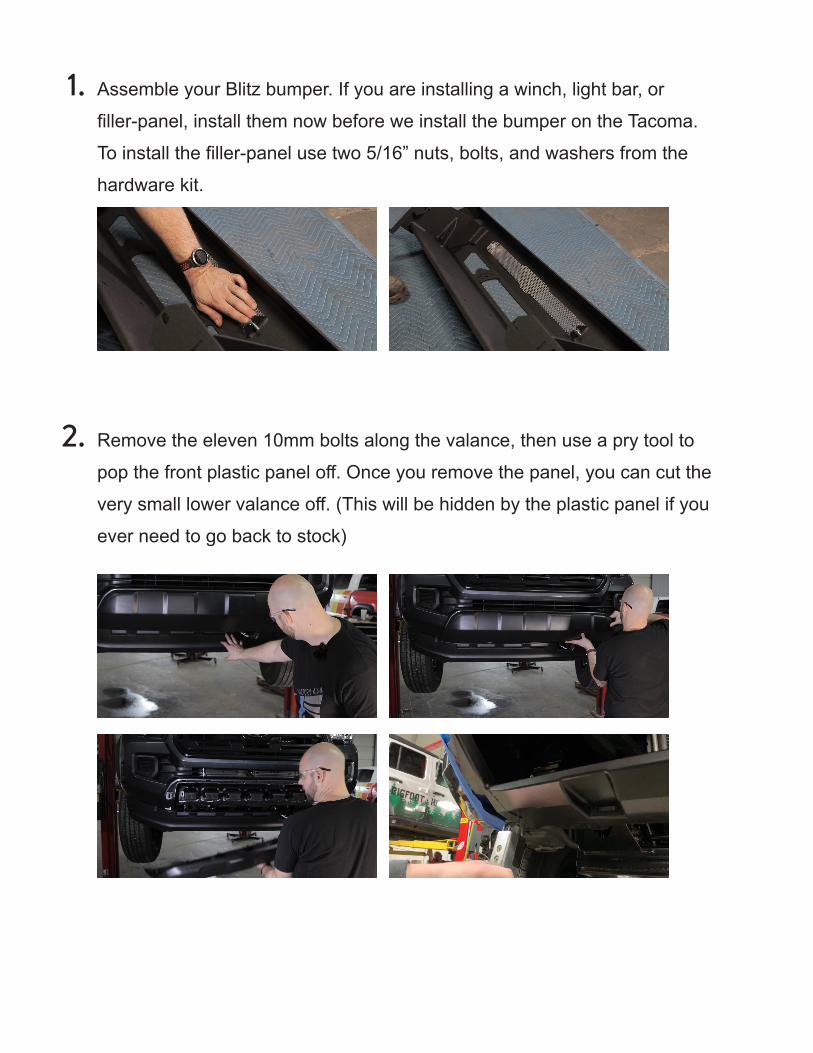
Remove the aluminium stand off blocks from the crash bar with a 14mm
socket.
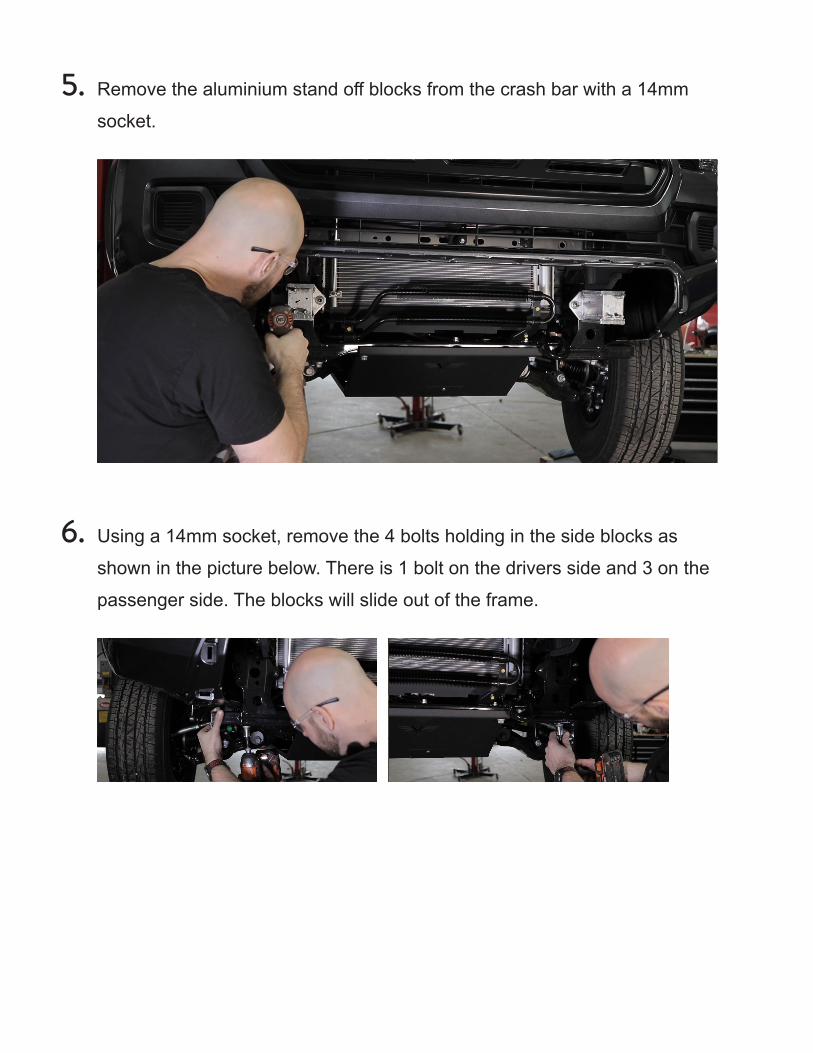
Using a 14mm socket, remove the 4 bolts holding in the side blocks as
shown in the picture below. There is 1 bolt on the drivers side and 3 on the
passenger side. The blocks will slide out of the frame.
5.
6.
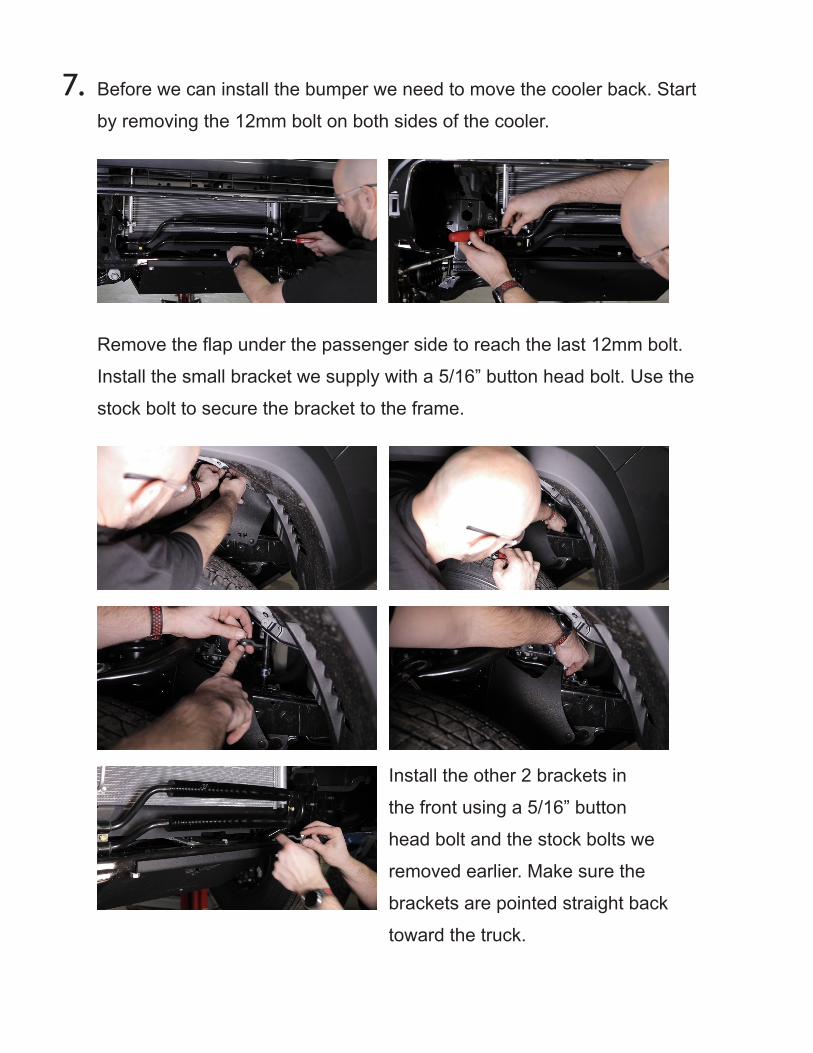
Before we can install the bumper we need to move the cooler back. Start
by removing the 12mm bolt on both sides of the cooler.
Remove the flap under the passenger side to reach the last 12mm bolt.
Install the small bracket we supply with a 5/16” button head bolt. Use the
stock bolt to secure the bracket to the frame.
Install the other 2 brackets in
the front using a 5/16” button
head bolt and the stock bolts we
removed earlier. Make sure the
brackets are pointed straight back
toward the truck.
7.

Install the blitz bumper. Have a friend help you lift the Blitz bumper onto the
pre-existing bolts. Loosely install 1-2 per side using the factory nuts to hold
the bumper in place and then reach underneath the bumper to secure the
rest of the nuts.
Using a 3/4” socket, install a 1/2” bolt that we provide on the bottom
bracket of the bumper. Secure this bolt with a washer and flange nut.
Use a 14mm socket and tighten the rest of the nuts holding the bumper in
place.
8.
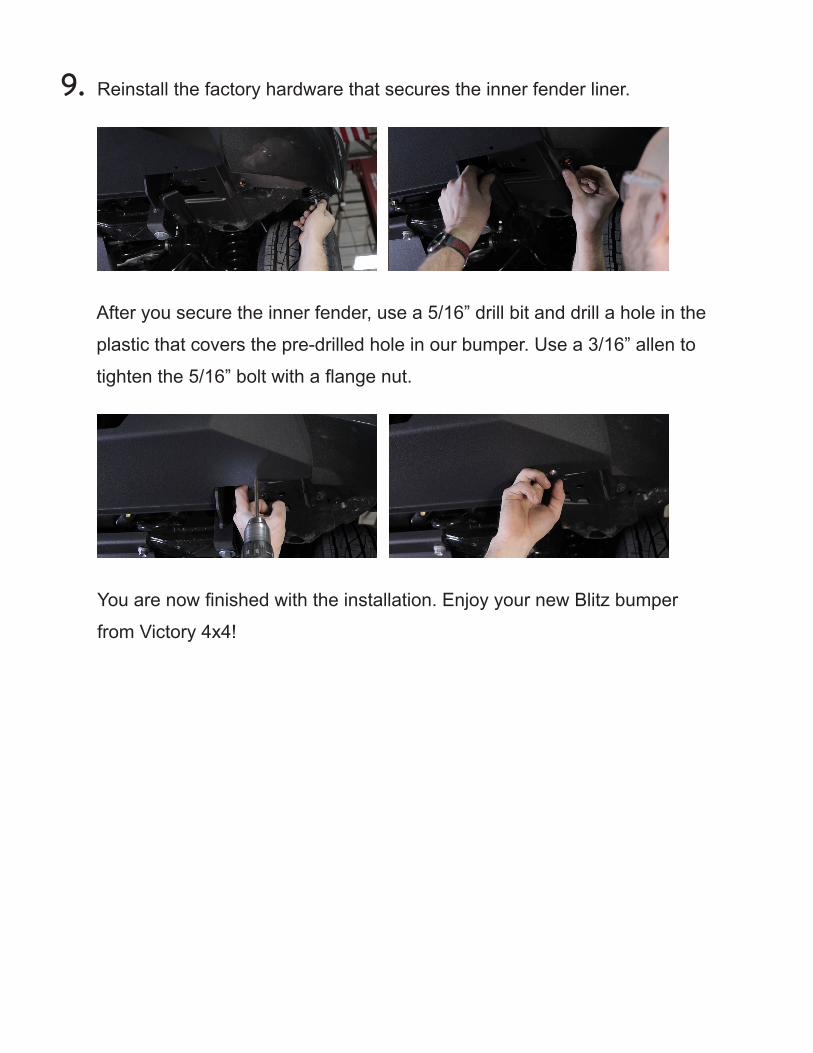
Reinstall the factory hardware that secures the inner fender liner.
After you secure the inner fender, use a 5/16” drill bit and drill a hole in the
plastic that covers the pre-drilled hole in our bumper. Use a 3/16” allen to
tighten the 5/16” bolt with a flange nut.
You are now finished with the installation. Enjoy your new Blitz bumper
from Victory 4x4!
9.


![KIT CINGHIE DISTRIBUZIONE/TIMING BELT KIT…db2.japko.it/japandb/cataloghiKop/K307.pdf · kit cinghie distribuzione/timing belt kit[kct] kjt001 gonow troy 1.9 td 4x4 gonow victory](https://static.fdocuments.us/doc/165x107/5b9481c009d3f252738cdbc2/kit-cinghie-distribuzionetiming-belt-kit-cinghie-distribuzionetiming-belt.jpg)