This product can be set up using DWL-7200AP D-Link...
12
This product can be set up using This product can be set up using This product can be set up using This product can be set up using This product can be set up using an an an an any curr y curr y curr y curr y curren en en en ent W t W t W t W t Web br eb br eb br eb br eb browser owser owser owser owser, i.e , i.e , i.e , i.e , i.e., ., ., ., ., Internet Explorer 6 or Netscape Internet Explorer 6 or Netscape Internet Explorer 6 or Netscape Internet Explorer 6 or Netscape Internet Explorer 6 or Netscape Navi avi avi avi avigator 6.2.3 or later gator 6.2.3 or later gator 6.2.3 or later gator 6.2.3 or later gator 6.2.3 or later. ©2004 D-Link Systems, Inc. All rights reserved. Trademarks or registered trademarks are the property of their respective holders. Software and specifications subject to change without notice. DWL-7200AP. 09102004 Before You Begin Check Your Package Contents DWL-7200AP AirPremier ™ AG Wireless Access Point If any of the above items are missing, please contact your reseller. The default IP address for the DWL-7200AP is 192.168.0.50 with a subnet mask of 255.255.255.0. For the purpose of configuring the DWL-7200AP you will need to assign your computer a static IP address within the same range as the DWL-7200AP’s IP address. See the Manual on the CD-ROM if you need assistance in assigning a static IP address for your network adapter. DWL-7200AP D-Link AirPremier TM AG Tri-mode Dualband Wireless Access Point CD-ROM with Manual Ethernet (CAT5e UTP/Straight-Through) Cable Using a power adapter with a different voltage rating will damage and void the warranty of this product. Power Adapter PoE Base Unit Power Cord
Transcript of This product can be set up using DWL-7200AP D-Link...
This product can be set up usingThis product can be set up usingThis product can be set up usingThis product can be set up usingThis product can be set up usingananananany curry curry curry curry currenenenenent Wt Wt Wt Wt Web breb breb breb breb browserowserowserowserowser, i.e, i.e, i.e, i.e, i.e.,.,.,.,.,Internet Explorer 6 or NetscapeInternet Explorer 6 or NetscapeInternet Explorer 6 or NetscapeInternet Explorer 6 or NetscapeInternet Explorer 6 or NetscapeNNNNNaviaviaviaviavigator 6.2.3 or latergator 6.2.3 or latergator 6.2.3 or latergator 6.2.3 or latergator 6.2.3 or later.....
©2004 D-Link Systems, Inc. All rights reserved. Trademarks or registered trademarks are the property of their respective holders.Software and specifications subject to change without notice. DWL-7200AP. 09102004
Before You Begin
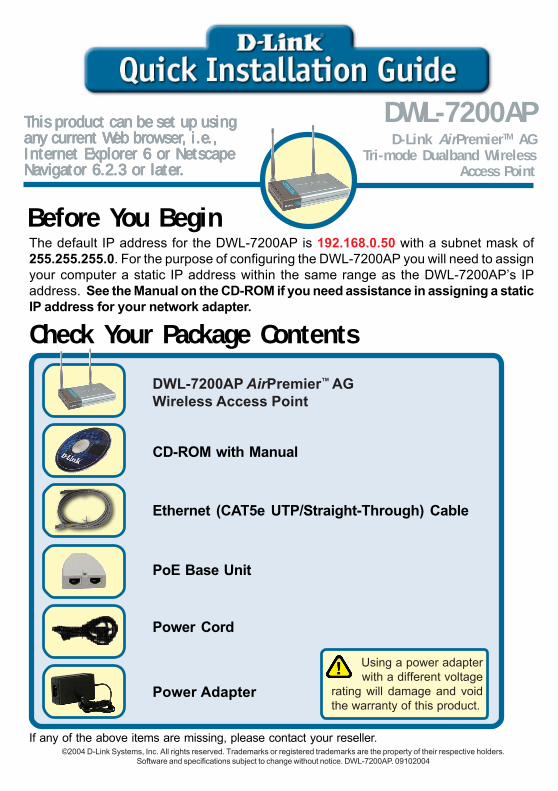
Check Your Package Contents
DWL-7200AP AirPremier™ AGWireless Access Point
If any of the above items are missing, please contact your reseller.
The default IP address for the DWL-7200AP is 192.168.0.50 with a subnet mask of255.255.255.0. For the purpose of configuring the DWL-7200AP you will need to assignyour computer a static IP address within the same range as the DWL-7200AP’s IPaddress. See the Manual on the CD-ROM if you need assistance in assigning a staticIP address for your network adapter.
DWL-7200APD-Link AirPremierTM AG
Tri-mode Dualband WirelessAccess Point
CD-ROM with Manual
Ethernet (CAT5e UTP/Straight-Through) Cable
Using a power adapter with a different voltagerating will damage and voidthe warranty of this product.
Power Adapter
PoE Base Unit
Power Cord

2
Hardware Overview
Front Panel
Power LED: Indicatesthe unit is powered on.
Link/Act LEDs: Indicates a 10Mor 100M Link to the LAN port.Activity is indicated when blinking.
WLAN LEDs: A solid lightindicates that the wirelesssegment is ready. This LEDblinks during wireless datatransmission.

3
Power ConnectorThe power adapterconnects here.
Reset ButtonPressing this button restoresthe access point to its originalfactory default settings.
LAN PortConnects to a PC, switch,router, or PoE base unitusing an Ethernet cable.
2.4GHz AntennaUsed to wirelessly connectto 802.11b/g devices.
Rear Panel
Hardware Overview (continued)
5GHz AntennaUsed to wirelessly connectto 802.11a devices.

4
There are two methods of powering the DWL-7200AP. The power adapter can plug directlyinto the unit or plug into the PoE (Power over Ethernet) base unit. To connect powerdirectly to the DWL-7200AP, please follow the steps on this page. To use the PoE baseunit, please follow the steps on the next page.
Connecting Power Directly to the DWL-7200APA. Connect the power adapter to the receptor on the back panel of the DWL-7200AP.
Connect the power cord to the power adapter. Plug the other end of the powercord into a wall outlet or power strip. The Power LED will turn ON to indicateproper operation.
B. Insert an Ethernet cable into the LAN port on the back panel of the DWL-7200APand an available Ethernet port on the network adapter in the computer you willuse to configure the DWL-7200AP. The Link LED for the LAN Port will illuminateto indicate a proper connection.
C. Computers with 802.11a/b/g wireless adapters can connect to the DWL-7200AP.The DWL-AG660 AirPremierTM AG Wireless Cardbus Adapter and the DWL-AG530AirPremierTM AG Wireless PCI Adapter will connect with the DWL-7200AP, out ofthe box, using the default settings.
Connecting The DWL-7200AP ToYour Network

5
Connecting The DWL-7200AP ToYour Network (continued)
Connecting PoE (Power over Ethernet) to the DWL-7200AP• Step 1: Connect one end of an Ethernet cable (included with your package) to the
LAN port on the DWL-7200AP and the other end of the Ethernet cable to the portlabeled P+DATA OUT on the PoE base unit.
• Step 2: Connect another Ethernet cable from the DATA IN port on the PoE base unitto your router/switch or to a PC.
• Step 3: Attach the power adapter to the connector labeled POWER IN on the PoEbase unit. Attach the power cord to the power adapter and into an electrical outlet.

6
Connecting The DWL-7200AP ToYour Network (continued)
When you have completed the steps in this Quick Installation Guide, your connectednetwork should look similar to this:

7
The logon pop-up screen will appear.
Type admin for the Username and leave the Passwordfield blank.
Click OK
Using The Setup Wizard
Open your Web browserand type http://192.168.0.50into the URL address box.Then press the Enter orReturn key.

8
Using The Setup Wizard (continued)
Once you have logged in, theHome screen will appear.
Click Run Wizard
Click Next

9
Click Next
Set PasswordYou have the option toestablish a password.
Click Next
Click Next
Set Wireless LAN 802.11aConnectionThe default wireless settings are:SSID = defaultChannel = 52You can change these settings tomatch an existing wireless network.
WEP Encryption for 802.11aThe DWL-7200AP is capable of64-bit, 128-bit, and 152-bitencryption. Keys may be enteredin HEX (0-9, A-F) or ASCII format.Select the key type and size youwish to use and enter the key inthe field provided. By default,WEP is Disabled.
Using The Setup Wizard (continued)

10
Click Next
Click Next
Click Restart
Set Wireless LAN 802.11gConnectionThe default wireless settings are:SSID = defaultChannel = 6You can change these settingsto match an existing wirelessnetwork.
WEP Encryption for 802.11gThe DWL-7200AP is capable of64-bit, 128-bit, and 152-bitencryption. Keys may be enteredin HEX (0-9, A-F) or ASCII format.Select the key type and size youwish to use and enter the key inthe field provided. By default,WEP is Disabled.
Using The Setup Wizard (continued)

11
You will be returned to the Home tab.
Click to Exit
For additional settings or information, refer to the Advanced, Tools, or Status tabs onthe web-management interface; or to the manual located on the CD-ROM.
For managing several DWL-7200AP’s, please utilize the D-LinkAirPremierTM AG Access Point Manager. For the latest version of thefirmware or AP manager, please go to http://support.dlink.com
Your Setup is Complete!
Using The Setup Wizard (continued)

TTTTTechniechniechniechniechnical Supportcal Supportcal Supportcal Supportcal SupportYou can find software updates and user documentation on the D-Link website.
D-Link provides free technical support for customers within the United States andwithin Canada for the duration of the warranty period on this product.
U.S. and Canadian customers can contact D-Link technical support through ourwebsite, or by phone.
Tech Support for customers within the United States:D-Link Technical Support over the Telephone:(877) 453-5465Monday to Friday, 6:00am to 6:00pm PST
D-Link Technical Support over the Internet:http://support.dlink.comemail:[email protected]
Tech Support for customers within Canada:D-Link Technical Support over the Telephone:(800) 361-5265Monday to Friday, 7:30am to 12:00am EST
D-Link Technical Support over the Internet:http://support.dlink.caemail:[email protected]