The Sherwood Neighbourhood Centre Introduces: Western ... fileThe Sherwood Neighbourhood Centre...
13
The Sherwood Neighbourhood Centre Introduces: Western Suburbs Clayworkers Newsletter November 2015 A word from our president Hi All, Well - October is the time for smiles for those who entered the EKKA pottery competition. Talking to Gai MacDonald at the raku firing the other day, she was amazed at how lucrative her participation had been. Although the prizes are not large, they do add up and she had also sold all the pieces she entered. At the moment there are still a limited number of entries in the Pottery section but if we can increase the number of entries it may be possible to increase the prize-money also with the assistance of WSC. When I was president of Sculptors Queensland, I asked SQ to give greater support to the EKKA competition and it proved to be very good for both SQ and the EKKA. This would be good promotionally for WSC. The studio has been a hive of activity in October with lots of members availing themselves of the facilities. The studio is now being used most Tuesday afternoons as well as Wednesday mornings. Unfortunately the GOLD classes facilitated by the Brisbane City Council and SNC had to be held on Tuesdays in October and this resulted in rather a crowded studio with my GOLD class attracting nine participants for sculptural ceramics. WSC run the GOLD classes on behalf of SNC. Two classes have been approved for the first half of next year. If you would like to facilitate these let Karen from SNC know. Sue and Liz have altered the firing schedule so that as many pots as possible can be put through the kilns prior to the Pop-up shop, which is rapidly approaching. Last Sunday (18th) was the final raku firing for the year. Only a small number participated but results were good. One question I would like to put to the Raku gods is “Why do we nearly always see the most spectacular results on the shards of pieces that have cracked or broken in the process?” Derek got some of the most subtle and beautiful colourings on a pot that came out in four pieces. However, it is colours like these that lead us back to try raku over and over again. A reminder that the AGM takes place in December and it is time to wave off Judy and Derek as they complete their stints on the committee. The positions are not onerous. The president is essentially the liaison person between SNC and the group, but also provides some sort of direction for the club. Anthony got the group out and about with interesting visits to galleries and workshops, while I pushed the group towards exhibiting their work in the BVAC pop-up shop and our Celebration exhibition. The secretary needs to take the minutes of the meeting and keep track of correspondence – either email or “real” letters that come to the office of SNC. The secretary is also responsible for email forwarding of newsletters from other pottery groups and bringing email issues to the president’s attention. I am hopeful that David will remain as treasurer to provide guidance for the newbies. Other positions are for FFs (Firing Fairies or Combustion Gnomes. Ed) and Newsletter Editor and I’m hoping these will also stay as is. Sue and Liz are doing a wonderful job as FFs, and Angie Archibald has proved to be wonderful at sourcing information for the newsletter before David puts it all together. Ceramicists around Brisbane recognise our newsletter as the best in Brisbane. Think how you can help the club continue to provide services for our members by taking on a position. Judy. contacts President Judy Hamilton Secretary Derek Johnston Western Suburbs Clayworkers 38 Thallon Street Sherwood 4075 Newsletter Angie Archibald [email protected] Newsletter Production [email protected] Email [email protected]
Transcript of The Sherwood Neighbourhood Centre Introduces: Western ... fileThe Sherwood Neighbourhood Centre...
The Sherwood Neighbourhood Centre Introduces:
Western Suburbs Clayworkers Newsletter November 2015
A word from our presidentHi All,Well - October is the time for smiles for those who entered the EKKA pottery competition. Talking to Gai MacDonald at the raku firing the other day, she was amazed at how lucrative her participation had been. Although the prizes are not large, they do add up and she had also sold all the pieces she entered. At the moment there are still a limited number of entries in the Pottery section but if we can increase the number of entries it may be possible to increase the prize-money also with the assistance of WSC. When I was president of Sculptors Queensland, I asked SQ to give greater support to the EKKA competition and it proved to be very good for both SQ and the EKKA. This would be good promotionally for WSC.
The studio has been a hive of activity in October with lots of members availing themselves of the facilities. The studio is now being used most Tuesday afternoons as well as Wednesday mornings. Unfortunately the GOLD classes facilitated by the Brisbane City Council and SNC had to be held on Tuesdays in October and this resulted in rather a crowded studio with my GOLD class attracting nine participants for sculptural ceramics. WSC run the GOLD classes on behalf of SNC. Two classes have been approved for the first half of next year. If you would like to facilitate these let Karen from SNC know.
Sue and Liz have altered the firing schedule so that as many pots as possible can be put through the kilns prior to the Pop-up shop, which is rapidly approaching.
Last Sunday (18th) was the final raku firing for the year. Only a small number participated but results were good. One question I would like to put to the Raku gods is “Why do we nearly always see the most spectacular results on the shards of pieces
that have cracked or broken in the process?” Derek got some of the most subtle and beautiful colourings on a pot that came out in four pieces. However, it is colours like these that lead us back to try raku over and over again.
A reminder that the AGM takes place in December and it is time to wave off Judy and Derek as they complete their stints on the committee. The positions are not onerous. The president is essentially the liaison person between SNC and the group, but also provides some sort of direction for the club. Anthony got the group out and about with interesting visits to galleries and workshops, while I pushed the group towards exhibiting their work in the BVAC pop-up shop and our Celebration exhibition.
The secretary needs to take the minutes of the meeting and keep track of correspondence – either email or “real” letters that come to the office of SNC. The secretary is also responsible for email forwarding of newsletters from other pottery groups and bringing email issues to the president’s attention. I am hopeful that David will remain as treasurer to provide guidance for the newbies. Other positions are for FFs (Firing Fairies or Combustion Gnomes. Ed) and Newsletter Editor and I’m hoping these will also stay as is. Sue and Liz are doing a wonderful job as FFs, and Angie Archibald has proved to be wonderful at sourcing information for the newsletter before David puts it all together. Ceramicists around Brisbane recognise our newsletter as the best in Brisbane.
Think how you can help the club continue to provide services for our members by taking on a position.
Judy.
contactsPresident Judy Hamilton Secretary Derek Johnston
Western Suburbs Clayworkers 38 Thallon Street Sherwood 4075 Newsletter Angie Archibald [email protected]
Newsletter Production [email protected] Email [email protected]
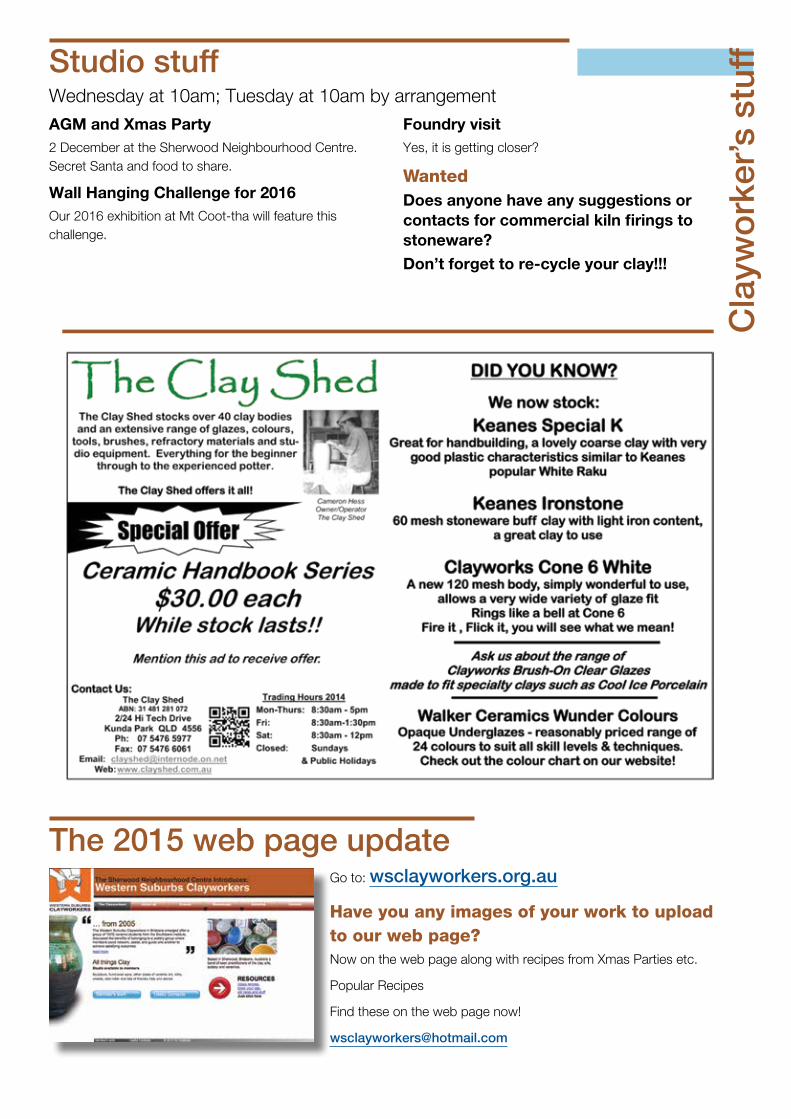
Go to: wsclayworkers.org.au
Have you any images of your work to upload to our web page?Now on the web page along with recipes from Xmas Parties etc.
Popular Recipes
Find these on the web page now!
The 2015 web page update
Cla
ywo
rker
’s s
tuffStudio stuff
Wednesday at 10am; Tuesday at 10am by arrangement
AGM and Xmas Party2 December at the Sherwood Neighbourhood Centre. Secret Santa and food to share.
Wall Hanging Challenge for 2016Our 2016 exhibition at Mt Coot-tha will feature this challenge.
Foundry visitYes, it is getting closer?
WantedDoes anyone have any suggestions or contacts for commercial kiln firings to stoneware?Don’t forget to re-cycle your clay!!!
Sho
w +
Tel
l +
inte
rest
ing
thi
ngs
The Wall hanging workshopThe workshop on 11 November drew quite a bit of interest.
We had samples from Judy, Michelle A and David. Rachael had put together a slide show of wall hangings from her Pinterest account to show on her laptop.
Anthony found this link on the day from Ceramics Daily.
http://ceramicartsdaily.org/ceramic-art-and-artists/ceramic-sculpture/clay-on-the-wall-an-introduction-to-hanging-ceramic-wall-pieces/
David found that he had the book “Wall Pieces” in his home library referenced in the Ceramics Daily link. He will have it in the studio next week!
Don't forget this is a challenge for our 2016 Exhibition in July next year!
David's Urban Fossil
Judy's 3 chooks - the modern answer to the flying ducks!
Michelle's Torso
Wall Pieces - the book
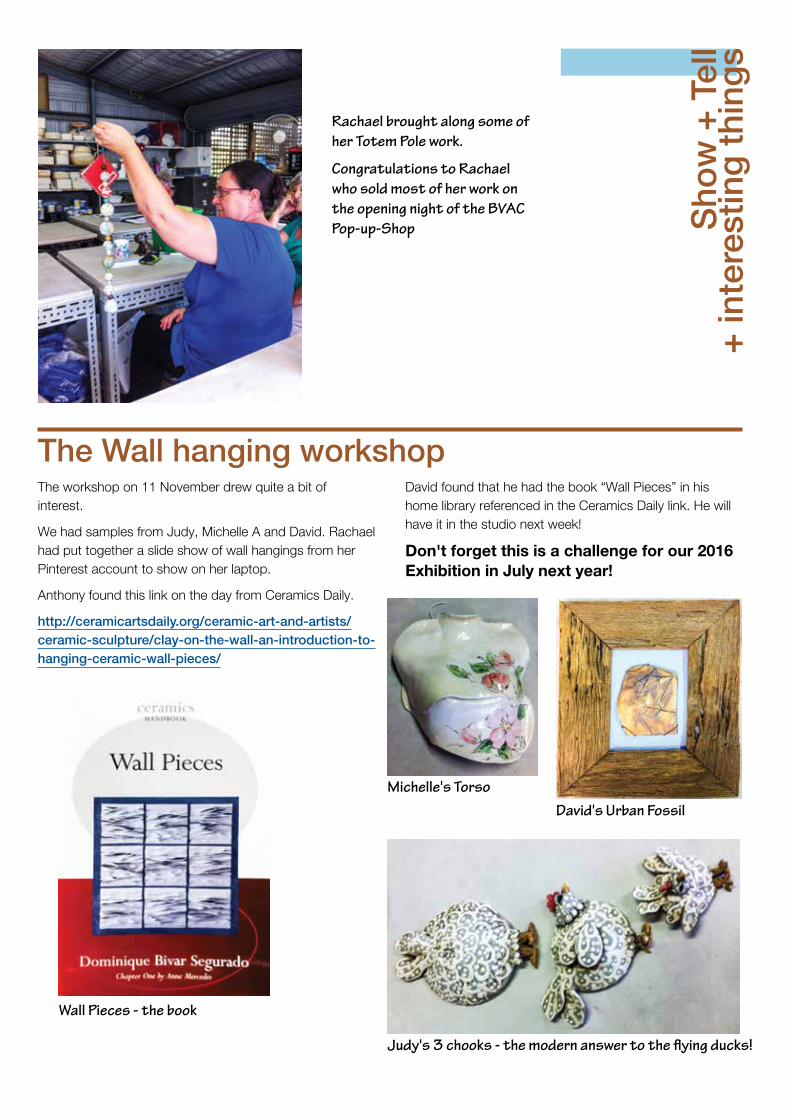
Rachael brought along some of her Totem Pole work.
Congratulations to Rachael who sold most of her work on the opening night of the BVAC Pop-up-Shop
http://ceramicartsdaily.org/ceramic-art-and-artists/ceramic-sculpture/clay-on-the-wall-an-introducti
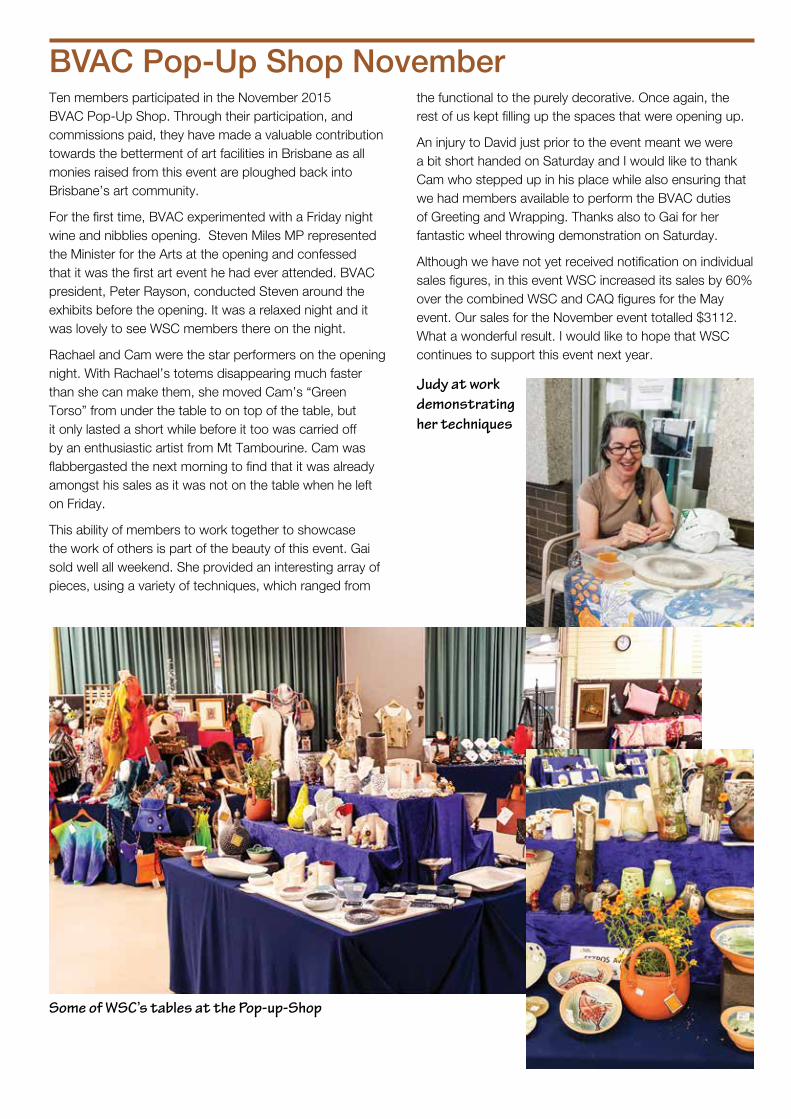
BVAC Pop-Up Shop NovemberTen members participated in the November 2015 BVAC Pop-Up Shop. Through their participation, and commissions paid, they have made a valuable contribution towards the betterment of art facilities in Brisbane as all monies raised from this event are ploughed back into Brisbane’s art community.
For the first time, BVAC experimented with a Friday night wine and nibblies opening. Steven Miles MP represented the Minister for the Arts at the opening and confessed that it was the first art event he had ever attended. BVAC president, Peter Rayson, conducted Steven around the exhibits before the opening. It was a relaxed night and it was lovely to see WSC members there on the night.
Rachael and Cam were the star performers on the opening night. With Rachael’s totems disappearing much faster than she can make them, she moved Cam’s “Green Torso” from under the table to on top of the table, but it only lasted a short while before it too was carried off by an enthusiastic artist from Mt Tambourine. Cam was flabbergasted the next morning to find that it was already amongst his sales as it was not on the table when he left on Friday.
This ability of members to work together to showcase the work of others is part of the beauty of this event. Gai sold well all weekend. She provided an interesting array of pieces, using a variety of techniques, which ranged from
the functional to the purely decorative. Once again, the rest of us kept filling up the spaces that were opening up.
An injury to David just prior to the event meant we were a bit short handed on Saturday and I would like to thank Cam who stepped up in his place while also ensuring that we had members available to perform the BVAC duties of Greeting and Wrapping. Thanks also to Gai for her fantastic wheel throwing demonstration on Saturday.
Although we have not yet received notification on individual sales figures, in this event WSC increased its sales by 60% over the combined WSC and CAQ figures for the May event. Our sales for the November event totalled $3112. What a wonderful result. I would like to hope that WSC continues to support this event next year.
Judy at work demonstrating her techniques
Some of WSC’s tables at the Pop-up-Shop
ROBERT LINIGEN http://www.robertlinigen.com/ceramics-repairs.php
Ceramic repairsIn my own work, I try to leave the marks made during the making as a tangible record of process. To disguise or fi ll cracks isn’t really in keeping with my practice, but as a teacher working with students making ceramic
sculpture, I’ve had a lot of experience in repairing broken and cracked ceramic pieces. You may fi nd some of these methods useful in your work.
Cracks in unfi red clayRemember that clay shrinks as it dries.SO DON”T ADD PLAIN WATER or SOFT CLAY to the crack!Water will swell the clay and make you think you have fi xed it. When it dries out and shrinks, the crack will be worse.If your work has cracked, show your teacher, and discuss your options for fi xing it.
Try to work out why the piece cracked.Have you added softer clay to fi rm clay and the softer clay has dried and shrunk more? Was the join compressed enough? Is it very thick?Here’s a link to an article “Clay, Why It Acts the Way It Does by FH Norton that gives the clearest explanation I’ve seen to explain cracking and warping in clay.
Fixing a Crack in Dry ClayMethod 1 Rub in dry clay.If a crack is in a dry piece , and is very small and there a no obvious stresses pulled the crack apart, then the simplest type of repair is to just rub some dry powdered clay into the crack before the bisque fi ring. It won’t join the clay, but a fl uid glaze after the bisque fi re may fi ll it in so it doesn’t show.
Method 2 Sugar ClayTo fi ll a wide crack in a nearly dry to dry piece.Take a small amount of clay that has dried out until it crumbles. Add an equal volume of caster sugar, and mix together with your fi ngers. The sugar will soften and plasticise the clay. Scrape out the crack to solid clay. Wet the edges of the wet with a little vinegar. Work the sugar clay into the crack. The fi ne caster sugar adds plasticity, rather than water. The sugar clay mix will have much lower shrinkage than wet clay.
Method 3 Vinegar.When you have managed to snap off a small part of your work and have a clean break, try vinegar. Paint a little vinegar on the join and work the break together. The idea is that the vinegar fl oculates the edges of the break, making the clay soften without absorbing much water.
Method 4 Paper ClayFor big cracks in a nearly dry to dry piece. Better than sugar clay if the piece still has some wetness and is going to remain unglazed. Put some some toilet paper in a jar, cover with hot water and blend with a stab blender until smooth. Pour off the excess water. Mix some bone dry clay into a paste in another jar with the stab blender. Mix 2/3 clay paste and 1/3 paper together. You may need to dry the mix out a little on plaster. Scrap out the crack, wet the edges with vinegar, and fi ll with the paper clay mix. A thick plastic mix is good for cracks, a thinner mix is good for joining.
Method 5 Patch-A-TatchNot my favourite method to reattach a broken piece of clay, but others swear by it. Wet the edges. Paint on Patch-A-Tatch and press together. I think it is a mix of ground fi red clay and sodium silicate and probably some gum. It works as an airset glue and then a fl ux, to fuse the edges in the fi ring. Students often fail to push the edges together and the join will fail early in the fi ring when the gum burns out. Much better if the attached piece can have some support during fi ring, rather than relying just on the strength of the join. Fires off white, and can show through a transparent glaze.
Adhesives for CeramicsSometimes you have to attach a found object to fi red ceramic. Sometimes things are dropped and broken. Sometimes they dry too fast and crack. Sometimes they were just too thick or badly made. Try to understand how and why something broke, so you can learn from this. Keep all the pieces and show your teacher. Sometimes it’s quicker and better to make another piece, but sometimes you may be able to make a good repair using hardware adhesives and fi llers. But they aren’t easy to use well, and sometimes you can make a small imperfection into a much bigger and uglier problem. Obviously, once you have used an adhesive or fi ller, you can’t reglaze and refi re the piece. So you may need to match the existing clay and glaze surface or cover with a paint. Ceramic conservators, who repair ceramics for museums, are often concerned with having repairs reversible, so the piece can be repaired again in the future as materials improve. This is not a concern here. Most of these hardware chain materials will be diffi cult or impossible to remove. The Nepean library has a copy of “Repairing Pottery and Porcelain” by Lesley Acton and Paul McAuley that describes more sophisticated materials and techniques, if you are interested in ceramics conservation. A porous unglazed or dry matt glazed piece is MUCH easier to repair. Of course, these surfaces shouldn’t be used for any functional ceramics that might be used with food. This guide is general. Whenever you use these fi llers, adhesives and paints read and follow the instructions on the pack. Ask your teacher for advice on your piece before you begin a repair. Avoid skin contact and avoid breathing the vapor of these products. At Nepean we use all these adhesives, fi llers and paints in a ventilated spray booth and handle with disposable gloves.Epoxy like Araldite Crystal Clear or 5 Minute Araldite are very strong 2 part adhesive that will stick to vitreous and porous ceramics and just about any other found material (except a couple of types of plastics). It will fi ll small gaps and be very strong.The Araldite Crystal Clear claims to dry and stay clear. 5 Minute Araldite will certainly go brown after a few years of exposure to light. You can also add dry powdered materials, like a little Titanium Dioxide or calcined clay, up about a third by volume, (available from the Glaze Lab) to make an opaque white epoxy. Don’t add too much, or it won’t stick. This can be useful for very small gaps in joining unglazed but fi red porcelain, if you can match the colour well.
Nathaniel Mickhaiel added a liitle zinc oxide to Araldite to make a good repair on this piece made from Southern Ice Porcelain fi red to cone 10 in Oxidation.These types of Araldite will set up in 5 minutes, so mix equal amounts for 2 1/2 minutes by your timer, and then place a small amount in the centre on the join. If you only mix for a few seconds and then apply, it will tend to seep out of the join. You don’t want the Araldite to show on the surface of the ceramic. Even if it doesn’t eventually turn brown, and even if you intend to paint over the piece, the different texture and porosity will most likely show.I have read, but have never tested, that if you heat the piece up to 150oC the Araldite will soften and the join can be repositioned. When it cools it will regain strength. Easier to plan and get it right the fi rst time.Selleys recommend acetone or nail polish remover containing acetone to remove Araldite before it sets. I use disposable gloves and try to avoid any skin contact.Superglue (cyanoacrylate) is made for that meet exactly, so it will glue something like porcelain with a neat break very well. It will also stick your skin to a glazed piece or to the tube very well, but it won’t stick the sort of slightly porous clay that we use at WSI Nepean for sculpture well at all. It won’t fi ll gaps and dries pretty much instantly, so a misaligned piece can’t be repositioned. Acetone will remove it from your skin. I think the Emergency Department at Nepean Hospital probably has acetone, but let’s not fi nd out.Selleys All Clear is a co polymer sealant marketed for sealing things like windows and shower screens. I have used it for gluing porcelain together in installations. It dries with a fl exible joint which can be useful for something very fragile, with gaps between the joins.Liquid Nails Construction Adhesive like or tile adhesive can be useful for gluing tile to backing board for hanging. Some adhesives are not fl exible. A large board of tiles moved to hang for exhibition will be likely to fl ex at least a little, and your tiles can pop off or crack if the adhesive doesn’t have some fl exibility.
Clay repairs
Museum Gel or Earthquake Gel is like a clear BluTac material, marketed for securing work to a shelf in earthquake zones. Handy for stopping a piece with a narrow base falling over if bumped, or to discourage someone picking up your work. The join is easily parted by twisting and you can peel it off by hand.PVA, White wood glue, Bondcrete thinned with parts of water can be sprayed onto a sculpture with a powdery surface. At an 8:1 ratio (8 water to 1 part water by volume), you won’t see a shiny fi nish, but it will help seal and protect the surface. I also use on home made ceramic crayons so they won’t smudge off before fi ring. I also have used it to spray onto raw Majolica pieces to bind the powdery surface before or after painting.You add a small amount of PVA to glazes and pigments as a quick binder/suspender if you are going to use the glaze immediately. It seems to curdle if you leave it for more than a few days.
Combining clay and other materials
Ceramics has great compressive strength, but poor tensile strength. Sometimes it is easier to make a sculpture in separate parts and attach them after fi ring, than to use small clay joins that might break trying to support heavy parts. Sometimes a small area of contact needs a metal spike like a bolt, nail or rod, to attach two parts of a sculpture together. It’s MUCH better to have the spike with you when you are working the clay and make the hole a little oversize, allowing for clay shrinkage, and then glue one or both ends in with Araldite after the fi nal fi ring. If one ends slots in neatly without glue, the sculpture is easily dismantled and moved more easily. Drilling into fi red clay is possible but needs a masonry bit, and is pretty likely to break your piece or chip around the hole.For product information and MSDS on these adhesives and fi llers. Check out http://www.selleys.com.au/and ALWAYS discuss your repair with your teacher before you start and ALWAYS read and FOLLOW the instructions.
Fillers
OK, so the parts of your broken sculpture are reattached, but there are gaps, chips or a crack still showing.Ordinary tile grout can be used to fi ll gaps around tile or in sculptures. The grout can be coloured with stains or pigments to suit your work. Grout is water based, and is an easy and safe way to fi ll small gaps in broken work. It can be stained or painted over but obviously won’t be very strong, is better for small gaps and can’t be fi red. Excess can usually be removed without too much trouble. If you need something stronger or need to fi ll a large area, you can try:Knead It Multipurpose is a 2-part epoxy ribbon, that looks and works like permanent chewing gum. It will stick to ceramics and most found materials
to fi ll a gap but does not glue pieces together. Example Nathaniel Mickhael soccer playerKnead the 2 parts together with your gloved fi ngers until even and you have just a couple of minutes to fi ll a gap. It sets hard to a grey color in 10 minutes. After 60 minutes you can drill or sand it. Working a piece of broken soft fi rebrick into the surface while it’s still setting can give a surface texture that better matches the sandy clay we use at Nepean. You can even model it to replace a lost or broken part of your sculpture. You can paint over it, but it’s too quick setting to mix in stain.Car body fi llers like Plasti-Bond are 2 part fi llers. Get the part A fi ller and add the Part B hardener in a 50:1 ratio. You add pigment or crushed fi red clay to the part A before the hardener to get a good colour and texture match to dry ceramic surfaces. Some brands set grey and others are pink without added colour.Working time is 20 minutes, and it sets hard in an hour. You can texture it like Knead It . It will fi ll big gaps, but it is not a glue to stick broken pieces together. Glue with Araldite fi rst, and then when that’s set, fi ll with Knead-It or Plasti-Bond. Plasti-Bond smells terrible, so at Nepean, we use it in the ventilated spray booth. Plasti_Bond and Knead-It are both very strong, and quick setting, which is an advantage if you only have one lesson to repair your work. It’s pretty inexpensive and available at any any hardware shop and even most garages.I prefer to use Apoxie Sculpt It is a bit more expensive two part putty, available locally from Artsup or by shopping online. It has a working time of about 3 hours, which is great if you need to work on something complex, or even sculpt a whole new addition to a piece, but it means that you might not be able to fi ll and paint your piece in a single lesson. The manufacturers, Aves recommend mixing the putty with a gloved hand, then say it is safe to work with bare hands. You can add a little paint to colour it, and wash your hands with soap and water after using it. There is no solvent to remove it once it sets. It doesn’t smell too badly, and much easier to work with than Knead It or Plasti Bond.With this portrait by Helen Jenner, a section of the cheek blew out during the fi ring. The pieces were assembled and glued with 5 minute Araldite, then Apoxie Sculpt was used to fi ll in the gaps. When this has cured a painted fi nish will be usedSelley’s Mortar Mix Is a fi ller for matching to cement mortar. It comes in various colours. Robyn Lewis built child sized fi gures in a terracotta mix (1/2 Feeneys Red Raku and 1/2 Keanes terracotta) once fi red to 1120oC. The thumb on one piece was accidentally broken off. The thumb was glued with 5 minute Araldite and Selley’s Mortar Works terracotta colour with a little extra yellow and white acrylic paint for colour was used to fi ll the missing fragments. Robyn did a great job and the repair is pretty hard to spot.
PAINT and ROOM TEMPERATURE GLAZESYou’ve got your piece stuck together and you fi lled all the gaps. Your piece can’t be fi red again because all the glue will burn out. If you haven’t matched the fi ller colour and texture to the rest of the piece or if it’s only bisque fi red, you may have to consider what some ceramicists call ‘Room Temperature Glazes” and what sculptors call paint.Artist’s acrylic paints, like Jo Sonjas or Chromacryl, will dry with a plastic sheen that I think looks terrible on ceramics. Avoid this type of acrylic at all times.Gouache or opaque watercolour is better, in that it dries to a matt fi nish that better matches the dry glazes and underglaze colours used at WSI Nepean. It is water based and dries quickly.Artist’s Oil paints are my preferred choice to match underglaze colours. Thin the paint down with turps and build the colour with layers. Don’t use gesso or primer.Rust ,Verdigris and Liquid Copper paints can give a great surface for sculpture. 2 coats of the metal-based paint and then another coat with an oxidizing patina. The fi rst coats look black and the rust / verdigris /aged copper develops over 2 or 3 hours. These types of paints are available from Langridges, Porter’s Paints and Haynes. http://langridgecolours.com/ The Porters range are more expensive, but seem to give a stronger colour.Porter’s Paints have a range of translucent lime paints and specialty paints that could look good on ceramics, on there own or used thinly over fi red ceramic fi nishes to modify or tone down a ceramic surface.http://porterspaints.com/.There are a whole bunch of fake fi nishes like Sandstone Paint and metallic paint available from craft stores and hardware shops that could look OK on the right piece or on a base made from customwood off cuts. With a lot of
practice you can even do fairly convincing fake marble or bronze effects. Hammertone spray paint gives a convincing metal hammertone look.Sculpture Patinas can be just clear shoe polish mixed with powdered paint or pigment to the colour you like, rubbed in, and buffed off with a cloth.For Fake Bronze paint , you can paint all over with thin burnt umber oil paint, then highlight on textures with a little veridian green oil paint and/or bronze gold Rub and Buff.Rub and Buff paint comes in small tubes in various shades of gold and pewter, and is greasy, like makeup, but dries hard. A little on your thumb rubbed on the high points of a sculpture can give a subtle highlight for impact. Great for when you’ve applied a glaze too thick to break over texture or underfi red a little. Like makeup, a little can be great, too much is a very bad look.Just like glazes, some of these fi nishes will suit your work and some won’t. Some may express your ideas in just the way you hoped and dreamed, and some may look terrible on your piece. Some require more skill and practice to apply well. Some are more toxic and require special care in their use. Read the instructions and MSDS, discuss your options with your teachers, have a look at any samples and TEST on a scrap tile before committing to your fi nal work.Like making work, assembling and repairing well is a skill that you can learn and develop with testing and practice.Is it cheating? Ceramic materials have a unique quality and durability. You should learn to use them skillfully and creatively. But your sculptural intent can be realized using other materials too. Sometimes they can be the best option, or at least the best remaining option. You should include all the materials used in your catalogue description.
What’s On in & Around Brissy:FireWorks Gallery52a Doggett Street, Newstead 4006. (07) 3216-1250. [email protected] www.fireworksgallery.com.au Tues-Fri 10.00 to 6.00, Sat 10.00 to 4.00. To Nov 28 Flight by Yvonne Mills-Stanley, and Assembly Lines by Alick Sweet.
Jan Murphy Gallery486 Brunswick Street, Fortitude Valley 4006. (07) 3254-1855. [email protected] www.janmurphygallery.com.au Director: Jan Murphy. Tues-Sat 10.00 to 5.00 or by appt. Nov 3 to 28 Paper Armada by Alex Seton
Museum of BrisbaneLevel 3, Brisbane City Hall (Adelaide and Ann streets) King George Square, Brisbane 4000. (07) 3339-0800. [email protected] museumofbrisbane.com.au Free entry. Daily 10.00 to 5.00. To April 3, 2016 Cloud Land a photographic exhibition like no other by Robyn Stacey. To Jan 31, 2016 The Last Street in Highgate Hill by Stephen Nothling.
Queensland Art Gallery (QAG) | Gallery of Modern Art (GOMA)Stanley Place, Cultural Precinct, South Bank Brisbane 4101. (07) 3840-7303 Fax 3844-8865. www.qagoma.qld.gov.au Free entry, unless otherwise stated. Daily 10.00 to 5.00.
QAG:Nov 7 to Jan 31, 2016 Lure of the Sun: Charles Blackman in Queensland.
QAGOMA:Nov 21 to April 10, 2016 The 8th Asia Pacific Triennial of Contemporary Art, and APT8 Kids. Showing at Australian Cinémathéque: Pop Islam, and Filipino Indie.
QUT Art Museum2 George Street, QUT Gardens Point Campus (next to the City Botanic Gardens), Brisbane 4000. (07) 3138-5370. [email protected] www.artmuseum.qut.edu.au Free entry. Tues-Fri 10.00 to 5.00, Sat-Sun 12.00 to 4.00. Visit website for programs and events. To Nov 8, 1969: The Black Box of Conceptual Art is a reconstruction of the first Conceptual art exhibition in Australia sent by Ian Burn, Roger Cutforth and Mel Ramsden in 1969 from New York to Pinacotheca Gallery, Melbourne. Also, TEXT brings together a diverse selection of works from the QUT Art Collection that use text in creative, clever, and compelling ways. Nov 19 to Feb 28, 2016 Nineteen Sixty-Five: Dadang Christanto brings together a powerful and poignant collection of work, offering a moving memorial to victims of mass violence.
Redland Art GalleryCapalabaCapalaba Place, Noeleen Street, Capalaba 4157. (07) 3829-8899. [email protected] artgallery.redland.qld.gov.au Free admission. Mon-Wed, Fri 8.30 to 5.00, Thurs 8.30 to 7.30, Sat 9.00 to 4.00. To Nov 7 Dreamscape by Matt Rees. Nov 14 to Jan 23, 2016 In Focus 2015.
Redland Art GalleryClevelandCnr Middle and Bloomfield streets, Cleveland 4163. (07) 3829-8899. [email protected] artgallery.redland.qld.gov.au Free admission. Mon-Fri 9.00 to 4.00, Sun 9.00 to 2.00. To Nov 22 East Coast Encounter: Re-imagining 1770 – a multi-arts initiative involving Australian indigenous and non-Indigenous artists, writers and songwriters to re-imagine the encounter by Lt James Cook and his crew with Aboriginal people in 1770.
Fes
tival
s, E
xhib
itio
ns
and
Aw
ard
s
Gold Coast City GalleryThe Arts Centre Gold Coast, 135 Bundall Road, Surfers Paradise 4217. (07) 5588-4000. [email protected] www.theartscentregc.com.au/gallery Mon-Fri 10.00 to 5.00, Sat-Sun and public hols 11.00 to 5.00. To Dec 6 Flesh: The Gold Coast in the 1960s, 70s & 80s by Graham Burstow. Oct 31 to Nov 29 Ebb & Flow by Steve Tyerman. Nov 7 to 29 Espial – Queensland College of Art Digital Media Graduates.
Stanthorpe Regional Art Gallery (SRAG)Cnr Lock and Marsh streets, Stanthorpe 4380. (07) 4681-1874. [email protected] www.srag.org.au Free entry. Tues-Fri 10.00 to 4.00, Sat-Sun 10.00 to 1.00. Oct 29 to Dec 13 Treasures Past – local photographer Sandra McEwan presents her first exhibition at the SRAG with a dynamic series of images of Stanthorpe. In response to the photographs, Helen Turrisi has created an array of sculptures. By fusing the mediums of photography and sculpture, the works bring faces to a life from an era past.
Also, The Joy of Clay annual display of works from our home-grown potters and sculptors, the Stanthorpe Pottery Club.
Toowoomba Regional Art Gallery531 Ruthven Street, Toowoomba 4350. (07) 4688-6652 Fax 4688-6895. [email protected] www.tr.qld.gov.au/trag Free admission. Tues-Sat 10.00 to 4.00, Sun 1.00 to 4.00, closed Mondays and public hols. To Dec 23 Jimmy Pike’s Artlines: You call it desert, we used to live there. Jimmy Pike’s Artlines.. is a selection of vibrant felt-tip pen drawings by Walmajarri artist Jimmy Pike, that bring the artist’s country in the Great Sandy Desert of Western Australia into glorious relief through renderings of spirit beings, flowers, stars and earthscapes. Jimmy Pike Artlines: You call it desert, we used to live there is proudly presented by the Berndt Museum, The University of Western Australia. This project has been assisted by the Australian Government through the Australia Council for the Arts, its art funding and advisory body. The national tour of this exhibition is managed by ART ON THE MOVE.
Fes
tival
s, E
xhib
itio
ns
and
Aw
ard
s
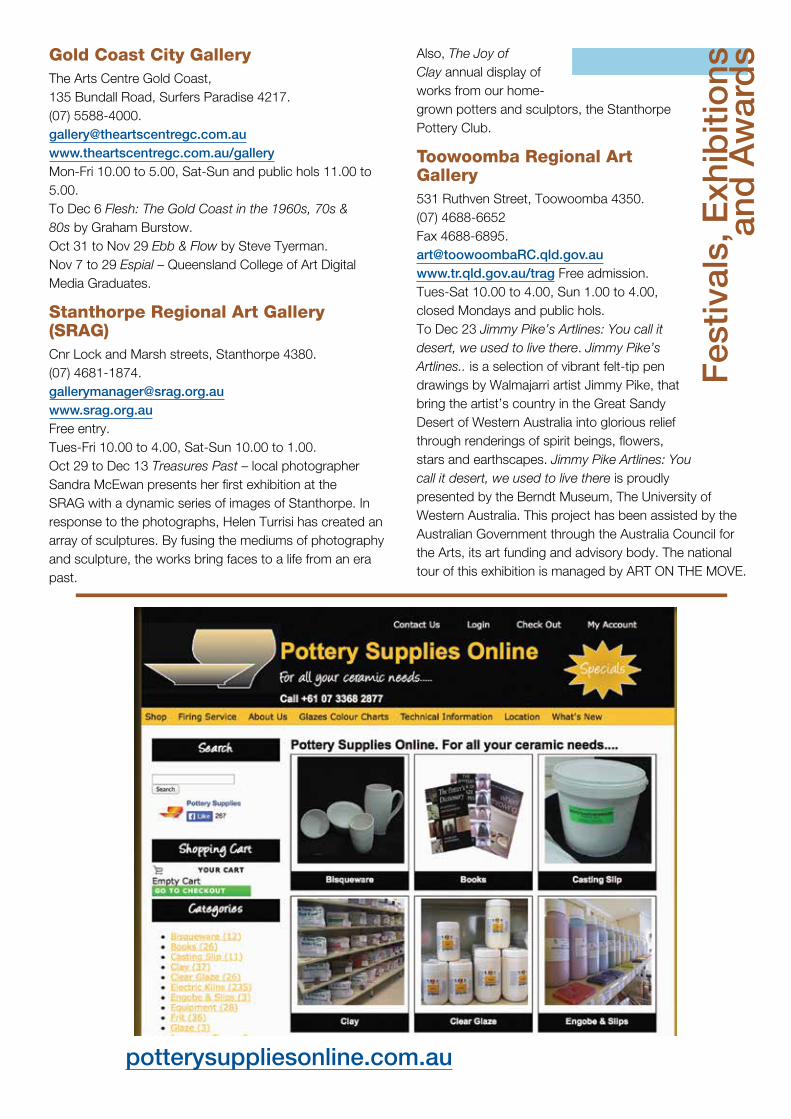
potterysuppliesonline.com.au
Noosa Regional GalleryLevel 1, 9 Pelican Street (PO Box 141), Riverside, Tewantin 4565. (07) 5329-6145. [email protected] www.noosaregionalgallery.com Director: Nina Shadforth.
Wed-Sun 10.00 to 4.00. To Dec 6 Opened and Closed by Ken Munsie. Also, Pas de Deux, and Notions of an Ordinary Yarn by Anne Harris.
Call for Entries:69 Smith Street Gallery69 Smith Street, Fitzroy 3065. (03) 9028-7503. [email protected] Now accepting proposals from contemporary artists and curators for the 2016 exhibition program. Seven spaces, no commission.
2016 Taiwan Residency OpportunityCall for Proposals from artists for a 2016 residency at the Kuandu Museum of Fine Art in Taiwan. Applications are
due Fri Nov 20. Visit website for details.
Toorak Village Sculpture Exhibition0438-542-713. Accepting submissions of medium sized interior sculptures and larger exterior installations. Entries closing Mon Feb 1, 2016. Exhibition May 1 to June 12, 2016. Visit website for entry form and details.
Awards:Alice Prize 2016(08) 8953-7090. [email protected] National art award $25,000 acquisitive. Any medium, any genre. Entries close Fri Jan 15, 2016. Visit website for details and entry. * Please note the closing date for entries was published incorrectly in the October Issue. The correct closing date for the Alice Prize 2016 is Fri Jan 15, 2016. Apologies from the Alice Springs Art Foundation.
Australian Artists’ GrantProvides professional visual and media arts, craft and design practitioners with assistance towards the cost of public representation. Entries closing Sat 14 Nov. Visit website to apply.
Contemporary Art Awards 2015Winners Prize $3000. Entries closing Fri Nov 27. Apply online, visit website for details.
Sawmillers Sculpture ExhibitionElsa Atkins (02) 9955-5540. $20,000 prize non-acquisitive. Submissions for medium-sized exterior sculptures and installations.
Entries closing Mon May 30, 2016. Exhibition Sept 2016. Visit website for details.
Sculpture At Scenic World 2016 ExhibitionOpen call for submissions. Entries closing Mon Nov 23. Exhibition April 8 to May 8, 2016. Visit website for details and entry form.
Stanthorpe Art Festival 2016Call for Entries. Entries closing March 21, 2016. Visit website for details and entry form, or contact Dee Booth 0438-260-843.
The Tom Bass Prize for Figurative SculptureNational Award for artists aged 16 years and over. $15,000 in prize money. Further information and entry via website. Entries closing Fri Jan 22, 2016.
Walker Street Gallery & Arts Centre(03) 9706-8441. [email protected] Inviting Australian female artists to submit artwork for the She exhibition Mar 3 to 31, 2016 – celebrating creative women. Entries closing Mon Feb 1, 2016. Contact the gallery or visit the website for entry form.
Fes
tival
s, E
xhib
itio
ns
and
Aw
ard
s
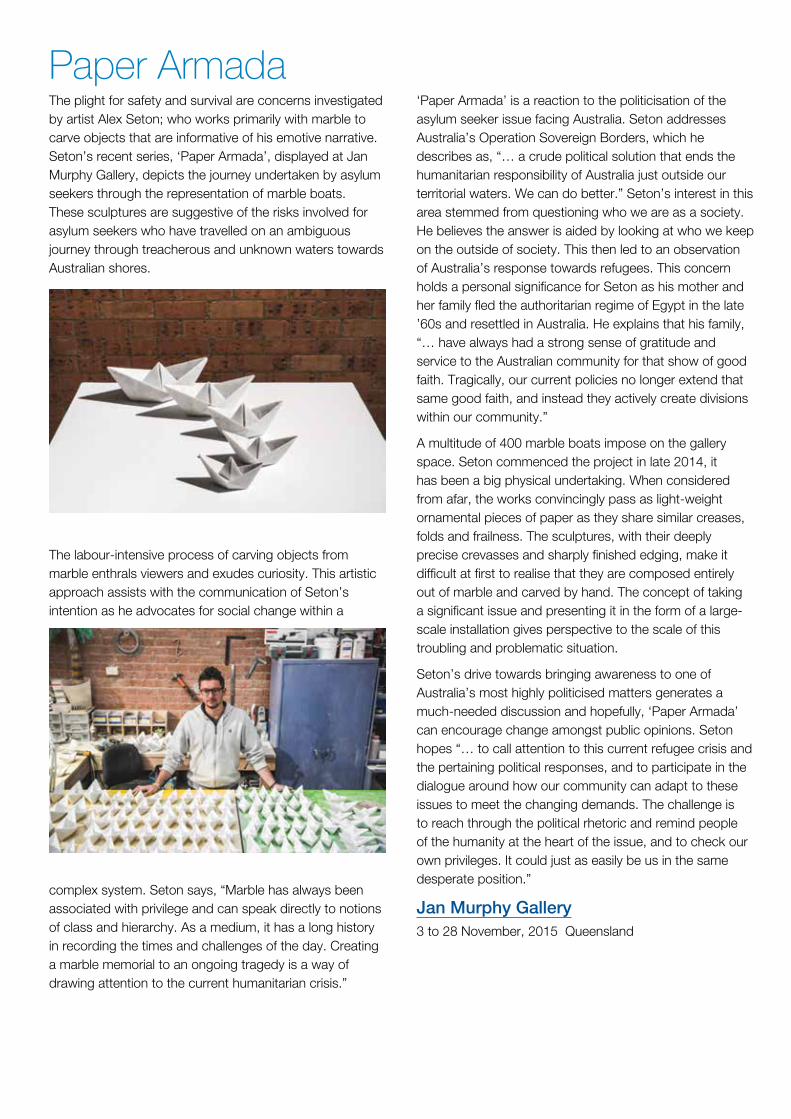
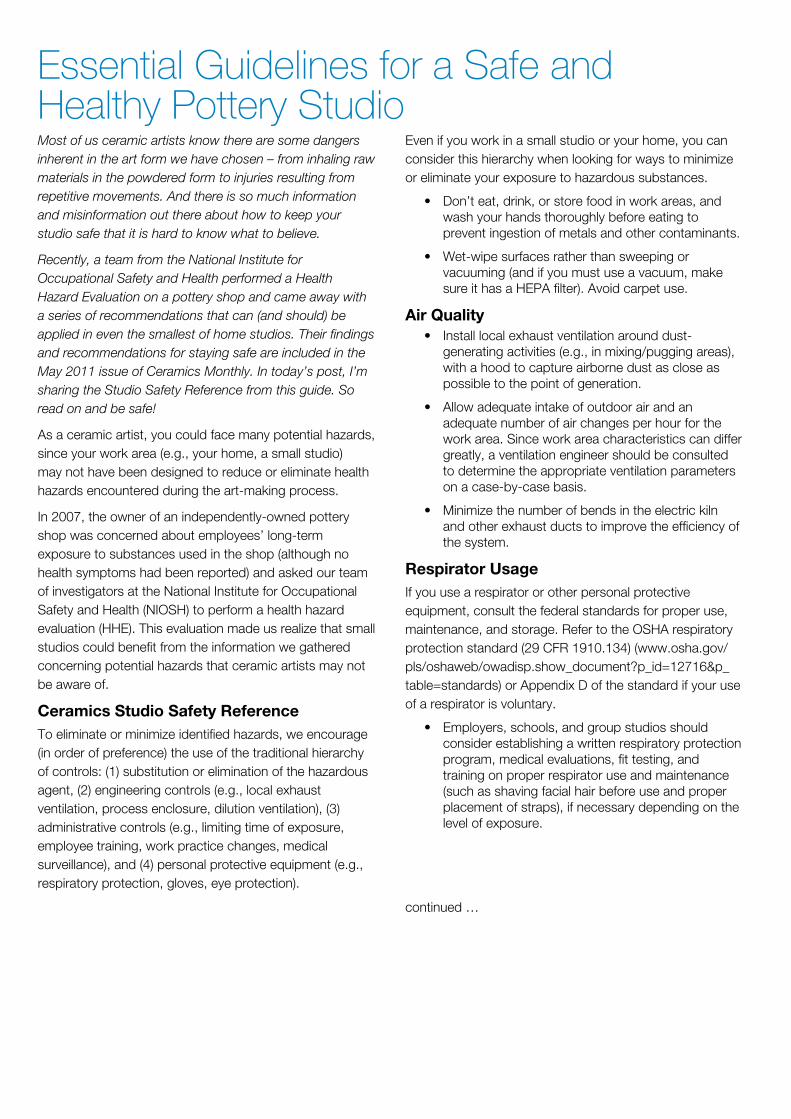
Paper ArmadaThe plight for safety and survival are concerns investigated by artist Alex Seton; who works primarily with marble to carve objects that are informative of his emotive narrative. Seton’s recent series, ‘Paper Armada’, displayed at Jan Murphy Gallery, depicts the journey undertaken by asylum seekers through the representation of marble boats. These sculptures are suggestive of the risks involved for asylum seekers who have travelled on an ambiguous journey through treacherous and unknown waters towards Australian shores.
The labour-intensive process of carving objects from marble enthrals viewers and exudes curiosity. This artistic approach assists with the communication of Seton’s intention as he advocates for social change within a
complex system. Seton says, “Marble has always been associated with privilege and can speak directly to notions of class and hierarchy. As a medium, it has a long history in recording the times and challenges of the day. Creating a marble memorial to an ongoing tragedy is a way of drawing attention to the current humanitarian crisis.”
‘Paper Armada’ is a reaction to the politicisation of the asylum seeker issue facing Australia. Seton addresses Australia’s Operation Sovereign Borders, which he describes as, “… a crude political solution that ends the humanitarian responsibility of Australia just outside our territorial waters. We can do better.” Seton’s interest in this area stemmed from questioning who we are as a society. He believes the answer is aided by looking at who we keep on the outside of society. This then led to an observation of Australia’s response towards refugees. This concern holds a personal significance for Seton as his mother and her family fled the authoritarian regime of Egypt in the late ’60s and resettled in Australia. He explains that his family, “… have always had a strong sense of gratitude and service to the Australian community for that show of good faith. Tragically, our current policies no longer extend that same good faith, and instead they actively create divisions within our community.”
A multitude of 400 marble boats impose on the gallery space. Seton commenced the project in late 2014, it has been a big physical undertaking. When considered from afar, the works convincingly pass as light-weight ornamental pieces of paper as they share similar creases, folds and frailness. The sculptures, with their deeply precise crevasses and sharply finished edging, make it difficult at first to realise that they are composed entirely out of marble and carved by hand. The concept of taking a significant issue and presenting it in the form of a large-scale installation gives perspective to the scale of this troubling and problematic situation.
Seton’s drive towards bringing awareness to one of Australia’s most highly politicised matters generates a much-needed discussion and hopefully, ‘Paper Armada’ can encourage change amongst public opinions. Seton hopes “… to call attention to this current refugee crisis and the pertaining political responses, and to participate in the dialogue around how our community can adapt to these issues to meet the changing demands. The challenge is to reach through the political rhetoric and remind people of the humanity at the heart of the issue, and to check our own privileges. It could just as easily be us in the same desperate position.”
Jan Murphy Gallery3 to 28 November, 2015 Queensland
Essential Guidelines for a Safe and Healthy Pottery StudioMost of us ceramic artists know there are some dangers inherent in the art form we have chosen – from inhaling raw materials in the powdered form to injuries resulting from repetitive movements. And there is so much information and misinformation out there about how to keep your studio safe that it is hard to know what to believe.
Recently, a team from the National Institute for Occupational Safety and Health performed a Health Hazard Evaluation on a pottery shop and came away with a series of recommendations that can (and should) be applied in even the smallest of home studios. Their findings and recommendations for staying safe are included in the May 2011 issue of Ceramics Monthly. In today’s post, I’m sharing the Studio Safety Reference from this guide. So read on and be safe!
As a ceramic artist, you could face many potential hazards, since your work area (e.g., your home, a small studio) may not have been designed to reduce or eliminate health hazards encountered during the art-making process.
In 2007, the owner of an independently-owned pottery shop was concerned about employees’ long-term exposure to substances used in the shop (although no health symptoms had been reported) and asked our team of investigators at the National Institute for Occupational Safety and Health (NIOSH) to perform a health hazard evaluation (HHE). This evaluation made us realize that small studios could benefit from the information we gathered concerning potential hazards that ceramic artists may not be aware of.
Ceramics Studio Safety ReferenceTo eliminate or minimize identified hazards, we encourage (in order of preference) the use of the traditional hierarchy of controls: (1) substitution or elimination of the hazardous agent, (2) engineering controls (e.g., local exhaust ventilation, process enclosure, dilution ventilation), (3) administrative controls (e.g., limiting time of exposure, employee training, work practice changes, medical surveillance), and (4) personal protective equipment (e.g., respiratory protection, gloves, eye protection).
Even if you work in a small studio or your home, you can consider this hierarchy when looking for ways to minimize or eliminate your exposure to hazardous substances.
• Don’t eat, drink, or store food in work areas, and wash your hands thoroughly before eating to prevent ingestion of metals and other contaminants.
• Wet-wipe surfaces rather than sweeping or vacuuming (and if you must use a vacuum, make sure it has a HEPA filter). Avoid carpet use.
Air Quality• Install local exhaust ventilation around dust-
generating activities (e.g., in mixing/pugging areas), with a hood to capture airborne dust as close as possible to the point of generation.
• Allow adequate intake of outdoor air and an adequate number of air changes per hour for the work area. Since work area characteristics can differ greatly, a ventilation engineer should be consulted to determine the appropriate ventilation parameters on a case-by-case basis.
• Minimize the number of bends in the electric kiln and other exhaust ducts to improve the efficiency of the system.
Respirator UsageIf you use a respirator or other personal protective equipment, consult the federal standards for proper use, maintenance, and storage. Refer to the OSHA respiratory protection standard (29 CFR 1910.134) (www.osha.gov/pls/oshaweb/owadisp.show_document?p_id=12716&p_table=standards) or Appendix D of the standard if your use of a respirator is voluntary.
• Employers, schools, and group studios should consider establishing a written respiratory protection program, medical evaluations, fit testing, and training on proper respirator use and maintenance (such as shaving facial hair before use and proper placement of straps), if necessary depending on the level of exposure.
continued …

Ergonomics• Incorporate a minimum height range of 27.6
inches and a maximum height of 56.2 inches for workstations/worktables, palletized pieces, shelving units, and items on carts to eliminate overhead reaching and bending.
• Store frequently used materials at waist height rather than at floor level. Use extra pallets to raise the height of cart surfaces to the recommended ranges.
• Use scissor lift tables to reduce bending and overhead reaching, and pallet carousels and collapsible carousel stands to allow access to loads from various angles.
• Eliminate lifting and carrying items weighing more than 50 pounds, and always use carts to transport heavy materials long distances.
• Provide a faucet hose extension to eliminate lifting buckets into and out of the sink.
• Provide a range of heights for pottery wheels and stools, and personalize the two heights for each user to eliminate back pain and discomfort. Use stools with lumbar support and tilt adjustment. Provide adjustable leg stools for level or tilted seats.
• Do not perform repetitive activities (wedging, throwing, and trimming) in long sessions.
Requesting an HHE for your StudioEmployees, employers, or union representatives can ask our comprehensive team of experts to investigate their health and safety concerns by requesting an HHE. Our team contacts the requestor and discusses the problems and how to solve them. This may result in sending the requestor information, referring them to a more appropriate agency, or making a site visit (which may include environmental sampling and medical testing). If we make a site visit, the end result is a report of our investigations that includes recommendations that are specific to the problems found, as well as general guidance for following good occupational health practices. These HHE reports are available online (see below).
Resources and Links• NIOSH HHE reports: www.cdc.gov/niosh/hhe/
• Read the complete HHE for the case study mentioned in this article (PDF format):
• www.cdc.gov/niosh/hhe/reports/pdfs/2007-0127-3068.pdf
• NIOSH Pocket Guide to Chemical Hazards. Includes recommended exposure limits (RELs), permissible exposure limits (PELs) and other information on chemical effects: www.cdc.gov/niosh/npg/default.html
• American Conference of Governmental Industrial Hygienists (ACGIH) 2009 threshold limit values (TLVs®) and biological exposure index (BEIs®) for chemical substances and physical agents: www.acgih.org
• OSHA Permissible Exposure Limits (PELs): www.osha.gov/SLTC/pel/
• OSHA Small Entity Compliance Guide for the Revised Respiratory Protection Standard [OSHA 1998]: www.osha.gov/Publications/secgrev-current.pdf
• (Mandatory) Information for Employees Using Respirators when not Required Under Standard- 1910.134 Appendix D: www.osha.gov/pls/oshaweb/owadisp.show_document?p_id=12716&p_table=standards
• Canadian Centre for Occupational Health and Safety [1998]. Materials flow. In manual materials handling. www.ccohs.ca/oshanswers/ergonomics/mmh/materials_flow.html
WantedDoes anyone have any suggestions or contacts for commercial kiln firings to stoneware?
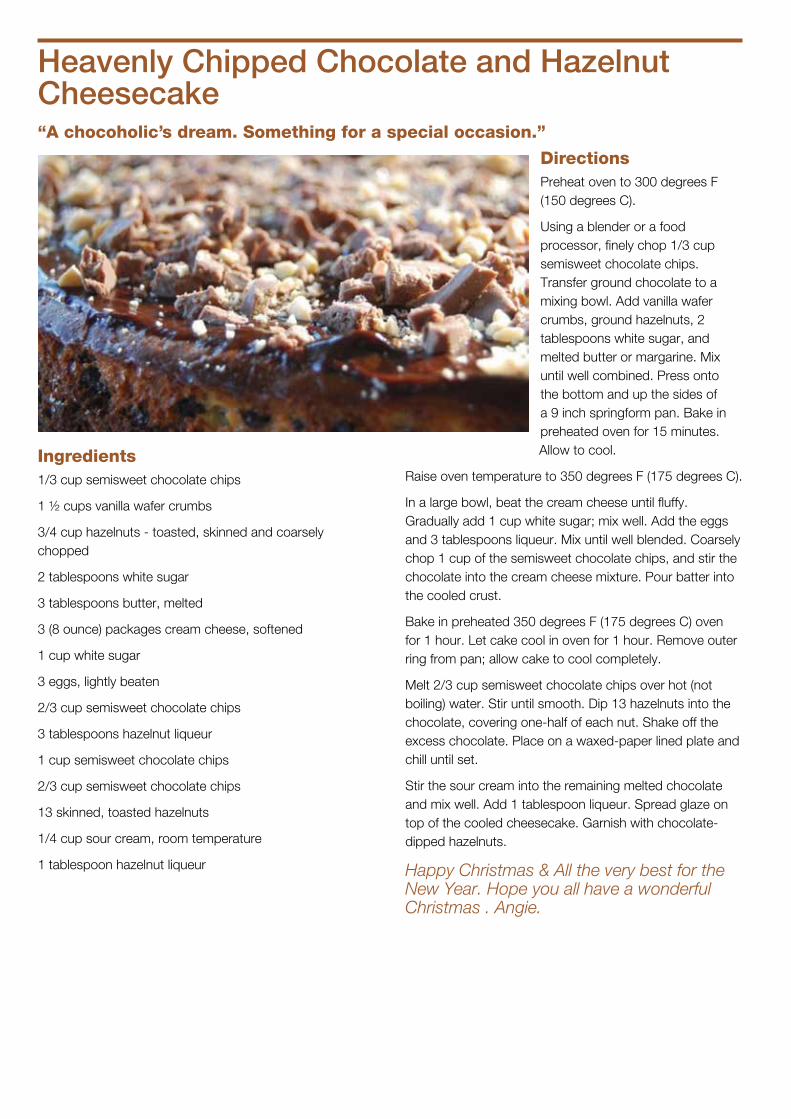
Heavenly Chipped Chocolate and Hazelnut Cheesecake“A chocoholic’s dream. Something for a special occasion.”
Ingredients1/3 cup semisweet chocolate chips
1 ½ cups vanilla wafer crumbs
3/4 cup hazelnuts - toasted, skinned and coarsely chopped
2 tablespoons white sugar
3 tablespoons butter, melted
3 (8 ounce) packages cream cheese, softened
1 cup white sugar
3 eggs, lightly beaten
2/3 cup semisweet chocolate chips
3 tablespoons hazelnut liqueur
1 cup semisweet chocolate chips
2/3 cup semisweet chocolate chips
13 skinned, toasted hazelnuts
1/4 cup sour cream, room temperature
1 tablespoon hazelnut liqueur
DirectionsPreheat oven to 300 degrees F (150 degrees C).
Using a blender or a food processor, finely chop 1/3 cup semisweet chocolate chips. Transfer ground chocolate to a mixing bowl. Add vanilla wafer crumbs, ground hazelnuts, 2 tablespoons white sugar, and melted butter or margarine. Mix until well combined. Press onto the bottom and up the sides of a 9 inch springform pan. Bake in preheated oven for 15 minutes. Allow to cool.
Raise oven temperature to 350 degrees F (175 degrees C).
In a large bowl, beat the cream cheese until fluffy. Gradually add 1 cup white sugar; mix well. Add the eggs and 3 tablespoons liqueur. Mix until well blended. Coarsely chop 1 cup of the semisweet chocolate chips, and stir the chocolate into the cream cheese mixture. Pour batter into the cooled crust.
Bake in preheated 350 degrees F (175 degrees C) oven for 1 hour. Let cake cool in oven for 1 hour. Remove outer ring from pan; allow cake to cool completely.
Melt 2/3 cup semisweet chocolate chips over hot (not boiling) water. Stir until smooth. Dip 13 hazelnuts into the chocolate, covering one-half of each nut. Shake off the excess chocolate. Place on a waxed-paper lined plate and chill until set.
Stir the sour cream into the remaining melted chocolate and mix well. Add 1 tablespoon liqueur. Spread glaze on top of the cooled cheesecake. Garnish with chocolate-dipped hazelnuts.
Happy Christmas & All the very best for the New Year. Hope you all have a wonderful Christmas . Angie.