
The Python GTK+ 3 Tutorial Release 3.4 Sebastian Pölsterl
131
The Python GTK+ 3 Tutorial Release 3.4 Sebastian Pölsterl September 29, 2016
Transcript of The Python GTK+ 3 Tutorial Release 3.4 Sebastian Pölsterl
The Python GTK+ 3 TutorialRelease 3.4
Sebastian Pölsterl
September 29, 2016

Deprecated
1 Installation 31.1 Dependencies . . . . . . . . . . . . . . . . . . . . . . . . . . . . . . . . . . . . . . . . . . . . . . . 31.2 Prebuilt Packages . . . . . . . . . . . . . . . . . . . . . . . . . . . . . . . . . . . . . . . . . . . . . 31.3 Installing From Source . . . . . . . . . . . . . . . . . . . . . . . . . . . . . . . . . . . . . . . . . . 3
2 Getting Started 52.1 Simple Example . . . . . . . . . . . . . . . . . . . . . . . . . . . . . . . . . . . . . . . . . . . . . 52.2 Extended Example . . . . . . . . . . . . . . . . . . . . . . . . . . . . . . . . . . . . . . . . . . . . 6
3 Basics 93.1 Main loop and Signals . . . . . . . . . . . . . . . . . . . . . . . . . . . . . . . . . . . . . . . . . . 93.2 Properties . . . . . . . . . . . . . . . . . . . . . . . . . . . . . . . . . . . . . . . . . . . . . . . . . 10
4 How to Deal With Strings 114.1 Definitions . . . . . . . . . . . . . . . . . . . . . . . . . . . . . . . . . . . . . . . . . . . . . . . . 114.2 Python 2 . . . . . . . . . . . . . . . . . . . . . . . . . . . . . . . . . . . . . . . . . . . . . . . . . 114.3 Python 3 . . . . . . . . . . . . . . . . . . . . . . . . . . . . . . . . . . . . . . . . . . . . . . . . . 134.4 References . . . . . . . . . . . . . . . . . . . . . . . . . . . . . . . . . . . . . . . . . . . . . . . . 13
5 Layout Containers 155.1 Boxes . . . . . . . . . . . . . . . . . . . . . . . . . . . . . . . . . . . . . . . . . . . . . . . . . . . 155.2 Grid . . . . . . . . . . . . . . . . . . . . . . . . . . . . . . . . . . . . . . . . . . . . . . . . . . . . 165.3 ListBox . . . . . . . . . . . . . . . . . . . . . . . . . . . . . . . . . . . . . . . . . . . . . . . . . . 175.4 Stack and StackSwitcher . . . . . . . . . . . . . . . . . . . . . . . . . . . . . . . . . . . . . . . . . 205.5 HeaderBar . . . . . . . . . . . . . . . . . . . . . . . . . . . . . . . . . . . . . . . . . . . . . . . . 215.6 FlowBox . . . . . . . . . . . . . . . . . . . . . . . . . . . . . . . . . . . . . . . . . . . . . . . . . 225.7 Notebook . . . . . . . . . . . . . . . . . . . . . . . . . . . . . . . . . . . . . . . . . . . . . . . . . 25
6 Label 276.1 Example . . . . . . . . . . . . . . . . . . . . . . . . . . . . . . . . . . . . . . . . . . . . . . . . . 28
7 Entry 317.1 Example . . . . . . . . . . . . . . . . . . . . . . . . . . . . . . . . . . . . . . . . . . . . . . . . . 31
8 Button Widgets 358.1 Button . . . . . . . . . . . . . . . . . . . . . . . . . . . . . . . . . . . . . . . . . . . . . . . . . . 358.2 ToggleButton . . . . . . . . . . . . . . . . . . . . . . . . . . . . . . . . . . . . . . . . . . . . . . . 368.3 CheckButton . . . . . . . . . . . . . . . . . . . . . . . . . . . . . . . . . . . . . . . . . . . . . . . 378.4 RadioButton . . . . . . . . . . . . . . . . . . . . . . . . . . . . . . . . . . . . . . . . . . . . . . . 37
i
8.5 LinkButton . . . . . . . . . . . . . . . . . . . . . . . . . . . . . . . . . . . . . . . . . . . . . . . . 388.6 SpinButton . . . . . . . . . . . . . . . . . . . . . . . . . . . . . . . . . . . . . . . . . . . . . . . . 398.7 Switch . . . . . . . . . . . . . . . . . . . . . . . . . . . . . . . . . . . . . . . . . . . . . . . . . . 41
9 ProgressBar 439.1 Example . . . . . . . . . . . . . . . . . . . . . . . . . . . . . . . . . . . . . . . . . . . . . . . . . 43
10 Spinner 4710.1 Example . . . . . . . . . . . . . . . . . . . . . . . . . . . . . . . . . . . . . . . . . . . . . . . . . 47
11 Tree and List Widgets 4911.1 The Model . . . . . . . . . . . . . . . . . . . . . . . . . . . . . . . . . . . . . . . . . . . . . . . . 4911.2 The View . . . . . . . . . . . . . . . . . . . . . . . . . . . . . . . . . . . . . . . . . . . . . . . . . 5111.3 The Selection . . . . . . . . . . . . . . . . . . . . . . . . . . . . . . . . . . . . . . . . . . . . . . . 5111.4 Sorting . . . . . . . . . . . . . . . . . . . . . . . . . . . . . . . . . . . . . . . . . . . . . . . . . . 5211.5 Filtering . . . . . . . . . . . . . . . . . . . . . . . . . . . . . . . . . . . . . . . . . . . . . . . . . 53
12 CellRenderers 5712.1 CellRendererText . . . . . . . . . . . . . . . . . . . . . . . . . . . . . . . . . . . . . . . . . . . . . 5712.2 CellRendererToggle . . . . . . . . . . . . . . . . . . . . . . . . . . . . . . . . . . . . . . . . . . . 5912.3 CellRendererPixbuf . . . . . . . . . . . . . . . . . . . . . . . . . . . . . . . . . . . . . . . . . . . 6012.4 CellRendererCombo . . . . . . . . . . . . . . . . . . . . . . . . . . . . . . . . . . . . . . . . . . . 6212.5 CellRendererProgress . . . . . . . . . . . . . . . . . . . . . . . . . . . . . . . . . . . . . . . . . . 6312.6 CellRendererSpin . . . . . . . . . . . . . . . . . . . . . . . . . . . . . . . . . . . . . . . . . . . . 65
13 ComboBox 6913.1 Example . . . . . . . . . . . . . . . . . . . . . . . . . . . . . . . . . . . . . . . . . . . . . . . . . 69
14 IconView 7314.1 Example . . . . . . . . . . . . . . . . . . . . . . . . . . . . . . . . . . . . . . . . . . . . . . . . . 74
15 Multiline Text Editor 7715.1 The View . . . . . . . . . . . . . . . . . . . . . . . . . . . . . . . . . . . . . . . . . . . . . . . . . 7715.2 The Model . . . . . . . . . . . . . . . . . . . . . . . . . . . . . . . . . . . . . . . . . . . . . . . . 7715.3 Tags . . . . . . . . . . . . . . . . . . . . . . . . . . . . . . . . . . . . . . . . . . . . . . . . . . . . 7815.4 Example . . . . . . . . . . . . . . . . . . . . . . . . . . . . . . . . . . . . . . . . . . . . . . . . . 79
16 Dialogs 8516.1 Custom Dialogs . . . . . . . . . . . . . . . . . . . . . . . . . . . . . . . . . . . . . . . . . . . . . 8516.2 MessageDialog . . . . . . . . . . . . . . . . . . . . . . . . . . . . . . . . . . . . . . . . . . . . . . 8716.3 FileChooserDialog . . . . . . . . . . . . . . . . . . . . . . . . . . . . . . . . . . . . . . . . . . . . 89
17 Clipboard 9317.1 Example . . . . . . . . . . . . . . . . . . . . . . . . . . . . . . . . . . . . . . . . . . . . . . . . . 93
18 Drag and Drop 9518.1 Target Entries . . . . . . . . . . . . . . . . . . . . . . . . . . . . . . . . . . . . . . . . . . . . . . . 9518.2 Drag Source Signals . . . . . . . . . . . . . . . . . . . . . . . . . . . . . . . . . . . . . . . . . . . 9618.3 Drag Destination Signals . . . . . . . . . . . . . . . . . . . . . . . . . . . . . . . . . . . . . . . . . 9618.4 Example . . . . . . . . . . . . . . . . . . . . . . . . . . . . . . . . . . . . . . . . . . . . . . . . . 96
19 Glade and Gtk.Builder 9919.1 Creating and loading the .glade file . . . . . . . . . . . . . . . . . . . . . . . . . . . . . . . . . . . 9919.2 Accessing widgets . . . . . . . . . . . . . . . . . . . . . . . . . . . . . . . . . . . . . . . . . . . . 10019.3 Connecting Signals . . . . . . . . . . . . . . . . . . . . . . . . . . . . . . . . . . . . . . . . . . . . 10019.4 Example . . . . . . . . . . . . . . . . . . . . . . . . . . . . . . . . . . . . . . . . . . . . . . . . . 101
ii
20 Objects 10320.1 Inherit from GObject.GObject . . . . . . . . . . . . . . . . . . . . . . . . . . . . . . . . . . . . . . 10320.2 Signals . . . . . . . . . . . . . . . . . . . . . . . . . . . . . . . . . . . . . . . . . . . . . . . . . . 10320.3 Properties . . . . . . . . . . . . . . . . . . . . . . . . . . . . . . . . . . . . . . . . . . . . . . . . . 10420.4 API . . . . . . . . . . . . . . . . . . . . . . . . . . . . . . . . . . . . . . . . . . . . . . . . . . . . 107
21 Application 10921.1 Actions . . . . . . . . . . . . . . . . . . . . . . . . . . . . . . . . . . . . . . . . . . . . . . . . . . 10921.2 Menus . . . . . . . . . . . . . . . . . . . . . . . . . . . . . . . . . . . . . . . . . . . . . . . . . . 10921.3 Command Line . . . . . . . . . . . . . . . . . . . . . . . . . . . . . . . . . . . . . . . . . . . . . . 10921.4 Example . . . . . . . . . . . . . . . . . . . . . . . . . . . . . . . . . . . . . . . . . . . . . . . . . 11021.5 See Also . . . . . . . . . . . . . . . . . . . . . . . . . . . . . . . . . . . . . . . . . . . . . . . . . 113
22 Menus 11522.1 Actions . . . . . . . . . . . . . . . . . . . . . . . . . . . . . . . . . . . . . . . . . . . . . . . . . . 11522.2 UI Manager . . . . . . . . . . . . . . . . . . . . . . . . . . . . . . . . . . . . . . . . . . . . . . . . 11622.3 Example . . . . . . . . . . . . . . . . . . . . . . . . . . . . . . . . . . . . . . . . . . . . . . . . . 116
23 Table 12123.1 Example . . . . . . . . . . . . . . . . . . . . . . . . . . . . . . . . . . . . . . . . . . . . . . . . . 121
24 Indices and tables 123
iii

iv
The Python GTK+ 3 Tutorial, Release 3.4
Release 3.4
Date September 29, 2016
Copyright GNU Free Documentation License 1.3 with no Invariant Sections, no Front-Cover Texts, andno Back-Cover Texts
This tutorial gives an introduction to writing GTK+ 3 applications in Python.
Prior to working through this tutorial, it is recommended that you have a reasonable grasp of the Python programminglanguage. GUI programming introduces new problems compared to interacting with the standard output (console /terminal). It is necessary for you to know how to create and run Python files, understand basic interpreter errors, andwork with strings, integers, floats and Boolean values. For the more advanced widgets in this tutorial, good knowledgeof lists and tuples will be needed.
Although this tutorial describes the most important classes and methods within GTK+ 3, it is not supposed to serve asan API reference. Please refer to the GTK+ 3 Reference Manual for a detailed description of the API.
Contents:
Deprecated 1
The Python GTK+ 3 Tutorial, Release 3.4
2 Deprecated
CHAPTER 1
Installation
The first step before we start with actual coding consists of setting up PyGObject and its dependencies. PyGObject is aPython module that enables developers to access GObject-based libraries such as GTK+ within Python. It exclusivelysupports GTK+ version 3 or later. If you want to use GTK+ 2 in your application, use PyGTK, instead.
1.1 Dependencies
• GTK+3
• Python 2 (2.6 or later) or Python 3 (3.1 or later)
• gobject-introspection
1.2 Prebuilt Packages
Recent versions of PyGObject and its dependencies are packaged by nearly all major Linux distributions. So, if youuse Linux, you can probably get started by installing the package from the official repository for your distribution.
1.3 Installing From Source
The easiest way to install PyGObject from source is using JHBuild. It is designed to easily build source packages anddiscover what dependencies need to be build and in what order. To setup JHBuild, please follow the JHBuild manual.
Once you have installed JHBuild successfully, download the latest configuration from 1. Copy files with the suffix.modules to JHBuild’s module directory and the file sample-tarball.jhbuildrc to ~/.jhbuildrc.
If you have not done it before, verify that your build environment is setup correctly by running:
$ jhbuild sanitycheck
It will print any applications and libraries that are currently missing on your system but required for building. Youshould install those using your distribution’s package repository. A list of package names for different distributions ismaintained on the GNOME wiki. Run the command above again to ensure the required tools are present.
Executing the following command will build PyGObject and all its dependencies:
1 http://download.gnome.org/teams/releng/
3
The Python GTK+ 3 Tutorial, Release 3.4
$ jhbuild build pygobject
Finally, you might want to install GTK+ from source as well:
$ jhbuild build gtk+
To start a shell with the same environment as used by JHBuild, run:
$ jhbuild shell
4 Chapter 1. Installation
CHAPTER 2
Getting Started
2.1 Simple Example
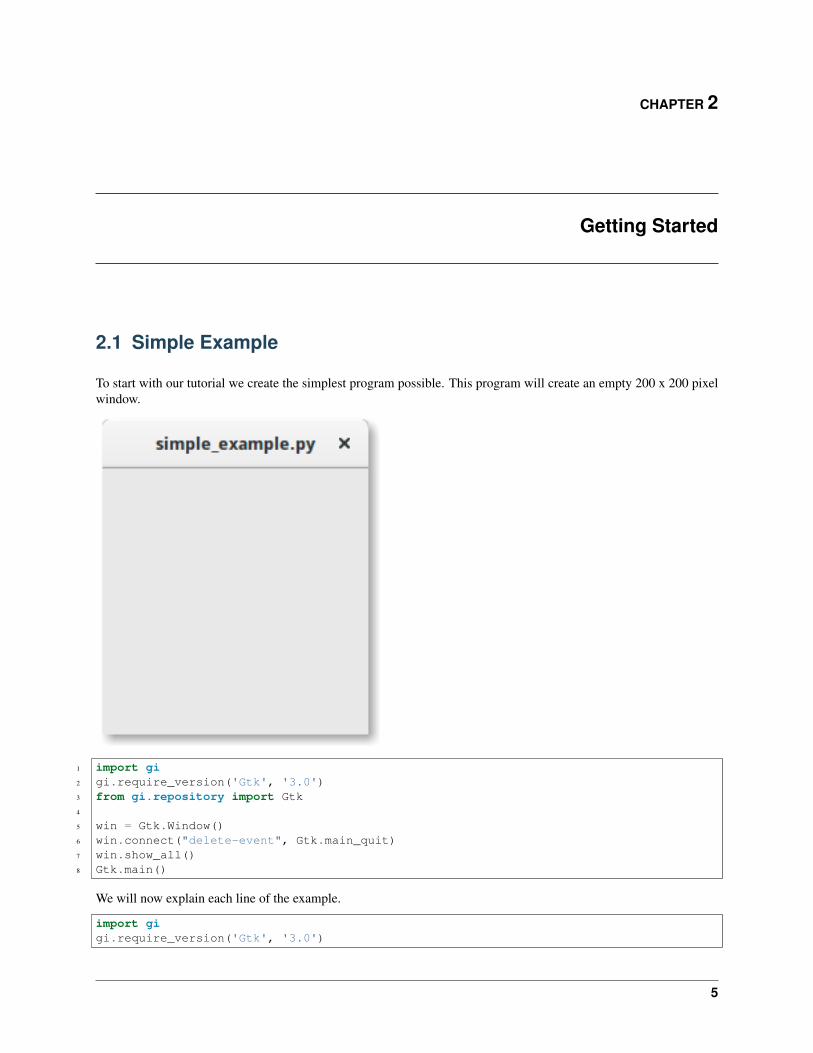
To start with our tutorial we create the simplest program possible. This program will create an empty 200 x 200 pixelwindow.
1 import gi2 gi.require_version('Gtk', '3.0')3 from gi.repository import Gtk4
5 win = Gtk.Window()6 win.connect("delete-event", Gtk.main_quit)7 win.show_all()8 Gtk.main()
We will now explain each line of the example.
import gigi.require_version('Gtk', '3.0')
5
The Python GTK+ 3 Tutorial, Release 3.4
from gi.repository import Gtk
In the beginning, we have to import the Gtk module to be able to access GTK+’s classes and functions. Since auser’s system can have multiple versions of GTK+ installed at the same, we want to make sure that we when weimport Gtk that it referrs to GTK+ 3 and not any other version of the library, which is the purpose of statementgi.require_version(’Gtk’, ’3.0’).
The next line creates an empty window.
win = Gtk.Window()
Followed by connecting to the window’s delete event to ensure that the application is terminated if we click on the xto close the window.
win.connect("delete-event", Gtk.main_quit)
In the next step we display the window.
win.show_all()
Finally, we start the GTK+ processing loop which we quit when the window is closed (see line 5).
Gtk.main()
To run the program, open a terminal, change to the directory of the file, and enter:
python simple_example.py
2.2 Extended Example
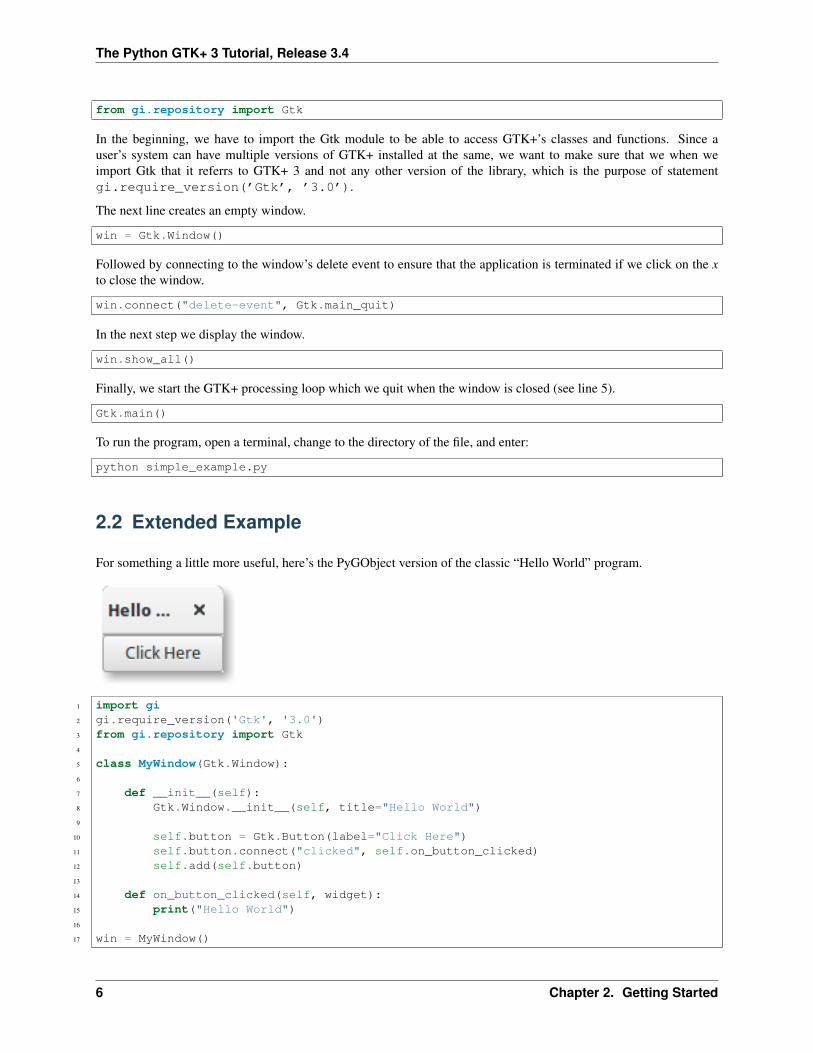
For something a little more useful, here’s the PyGObject version of the classic “Hello World” program.
1 import gi2 gi.require_version('Gtk', '3.0')3 from gi.repository import Gtk4
5 class MyWindow(Gtk.Window):6
7 def __init__(self):8 Gtk.Window.__init__(self, title="Hello World")9
10 self.button = Gtk.Button(label="Click Here")11 self.button.connect("clicked", self.on_button_clicked)12 self.add(self.button)13
14 def on_button_clicked(self, widget):15 print("Hello World")16
17 win = MyWindow()
6 Chapter 2. Getting Started
The Python GTK+ 3 Tutorial, Release 3.4
18 win.connect("delete-event", Gtk.main_quit)19 win.show_all()20 Gtk.main()
This example differs from the simple example as we sub-class Gtk.Window to define our own MyWindow class.
class MyWindow(Gtk.Window):
In the class’s constructor we have to call the constructor of the super class. In addition, we tell it to set the value of theproperty title to Hello World.
Gtk.Window.__init__(self, title="Hello World")
The next three lines are used to create a button widget, connect to its clicked signal and add it as child to the top-levelwindow.
self.button = Gtk.Button(label="Click Here")self.button.connect("clicked", self.on_button_clicked)self.add(self.button)
Accordingly, the method on_button_clicked() will be called if you click on the button.
def on_button_clicked(self, widget):print("Hello World")
The last block, outside of the class, is very similar to the simple example above, but instead of creating an instance ofthe generic Gtk.Window class, we create an instance of MyWindow.
2.2. Extended Example 7

The Python GTK+ 3 Tutorial, Release 3.4
8 Chapter 2. Getting Started
CHAPTER 3
Basics
This section will introduce some of the most important aspects of GTK+.
3.1 Main loop and Signals
Like most GUI toolkits, GTK+ uses an event-driven programming model. When the user is doing nothing, GTK+ sitsin the main loop and waits for input. If the user performs some action - say, a mouse click - then the main loop “wakesup” and delivers an event to GTK+.
When widgets receive an event, they frequently emit one or more signals. Signals notify your program that “somethinginteresting happened” by invoking functions you’ve connected to the signal. Such functions are commonly known ascallbacks. When your callbacks are invoked, you would typically take some action - for example, when an Openbutton is clicked you might display a file chooser dialog. After a callback finishes, GTK+ will return to the main loopand await more user input.
A generic example is:
handler_id = widget.connect("event", callback, data)
Firstly, widget is an instance of a widget we created earlier. Next, the event we are interested in. Each widget has itsown particular events which can occur. For instance, if you have a button you usually want to connect to the “clicked”event. This means that when the button is clicked, the signal is issued. Thirdly, the callback argument is the name ofthe callback function. It contains the code which runs when signals of the specified type are issued. Finally, the dataargument includes any data which should be passed when the signal is issued. However, this argument is completelyoptional and can be left out if not required.
The function returns a number that identifies this particular signal-callback pair. It is required to disconnect from asignal such that the callback function will not be called during any future or currently ongoing emissions of the signalit has been connected to.
widget.disconnect(handler_id)
If you have lost the “handler_id” for some reason (for example the handlers were installed usingGtk.Builder.connect_signals()), you can still disconnect a specific callback using the functiondisconnect_by_func():
widget.disconnect_by_func(callback)
Almost all applications will connect to the “delete-event” signal of the top-level window. It is emitted if a user requeststhat a toplevel window is closed. The default handler for this signal destroys the window, but does not terminate theapplication. Connecting the “delete-event” signal to the function Gtk.main_quit() will result in the desiredbehaviour.
9
The Python GTK+ 3 Tutorial, Release 3.4
window.connect("delete-event", Gtk.main_quit)
Calling Gtk.main_quit() makes the main loop inside of Gtk.main() return.
3.2 Properties
Properties describe the configuration and state of widgets. As for signals, each widget has its own particular set ofproperties. For example, a button has the property “label” which contains the text of the label widget inside the button.You can specify the name and value of any number of properties as keyword arguments when creating an instance ofa widget. To create a label aligned to the right with the text “Hello World” and an angle of 25 degrees, use:
label = Gtk.Label(label="Hello World", angle=25, halign=Gtk.Align.END)
which is equivalent to
label = Gtk.Label()label.set_label("Hello World")label.set_angle(25)label.set_halign(Gtk.Align.END)
Instead of using getters and setters you can also get and set the gobject properties through the “props”property such as widget.props.prop_name = value. This is equivelent to the more verbosewidget.get_property("prop-name") and widget.set_property("prop-name", value).
To see which properties are available for a widget in the running version of GTK you can “dir” the “props” property:
widget = Gtk.Box()print(dir(widget.props))
This will print in the console the list of properties a Gtk.Box has.
10 Chapter 3. Basics
CHAPTER 4
How to Deal With Strings
This section explains how strings are represented in Python 2.x, Python 3.x and GTK+ and discusses common errorsthat arise when working with strings.
4.1 Definitions
Conceptionally, a string is a list of characters such as ‘A’, ‘B’, ‘C’ or ‘É’. Characters are abstract representations andtheir meaning depends on the language and context they are used in. The Unicode standard describes how charactersare represented by code points. For example the characters above are represented with the code points U+0041,U+0042, U+0043, and U+00C9, respectively. Basically, code points are numbers in the range from 0 to 0x10FFFF.
As mentioned earlier, the representation of a string as a list of code points is abstract. In order to convert this abstractrepresentation into a sequence of bytes the Unicode string must be encoded. The simplest form of encoding is ASCIIand is performed as follows:
1. If the code point is < 128, each byte is the same as the value of the code point.
2. If the code point is 128 or greater, the Unicode string can’t be represented in this encoding. (Python raises aUnicodeEncodeError exception in this case.)
Although ASCII encoding is simple to apply it can only encode for 128 different characters which is hardly enough.One of the most commonly used encodings that addresses this problem is UTF-8 (it can handle any Unicode codepoint). UTF stands for “Unicode Transformation Format”, and the ‘8’ means that 8-bit numbers are used in theencoding.
4.2 Python 2
4.2.1 Python 2.x’s Unicode Support
Python 2 comes with two different kinds of objects that can be used to represent strings, str and unicode. Instancesof the latter are used to express Unicode strings, whereas instances of the str type are byte representations (theencoded string). Under the hood, Python represents Unicode strings as either 16- or 32-bit integers, depending on howthe Python interpreter was compiled. Unicode strings can be converted to 8-bit strings with unicode.encode():
>>> unicode_string = u"Fu\u00dfb\u00e4lle">>> print unicode_stringFußbälle>>> type(unicode_string)<type 'unicode'>
11
The Python GTK+ 3 Tutorial, Release 3.4
>>> unicode_string.encode("utf-8")'Fu\xc3\x9fb\xc3\xa4lle'
Python’s 8-bit strings have a str.decode() method that interprets the string using the given encoding:
>>> utf8_string = unicode_string.encode("utf-8")>>> type(utf8_string)<type 'str'>>>> u2 = utf8_string.decode("utf-8")>>> unicode_string == u2True
Unfortunately, Python 2.x allows you to mix unicode and str if the 8-bit string happened to contain only 7-bit(ASCII) bytes, but would get UnicodeDecodeError if it contained non-ASCII values:
>>> utf8_string = " sind rund">>> unicode_string + utf8_stringu'Fu\xdfb\xe4lle sind rund'>>> utf8_string = " k\xc3\xb6nnten rund sein">>> print utf8_stringkönnten rund sein
>>> unicode_string + utf8_stringTraceback (most recent call last):
File "<stdin>", line 1, in <module>UnicodeDecodeError: 'ascii' codec can't decode byte 0xc3 in position 2:ordinal not in range(128)
4.2.2 Unicode in GTK+
GTK+ uses UTF-8 encoded strings for all text. This means that if you call a method that returns a string you willalways obtain an instance of the str type. The same applies to methods that expect one or more strings as parameter,they must be UTF-8 encoded. However, for convenience PyGObject will automatically convert any unicode instanceto str if supplied as argument:
>>> from gi.repository import Gtk>>> label = Gtk.Label()>>> unicode_string = u"Fu\u00dfb\u00e4lle">>> label.set_text(unicode_string)>>> txt = label.get_text()>>> type(txt), txt(<type 'str'>, 'Fu\xc3\x9fb\xc3\xa4lle')>>> txt == unicode_string__main__:1: UnicodeWarning: Unicode equal comparison failed to convertboth arguments to Unicode - interpreting them as being unequalFalse
Note the warning at the end. Although we called Gtk.Label.set_text()with a unicode instance as argument,Gtk.Label.get_text() will always return a str instance. Accordingly, txt and unicode_string are notequal.
This is especially important if you want to internationalize your program using gettext. You have to make sure thatgettext will return UTF-8 encoded 8-bit strings for all languages. In general it is recommended to not use unicodeobjects in GTK+ applications at all and only use UTF-8 encoded str objects since GTK+ does not fully integratewith unicode objects. Otherwise, you would have to decode the return values to Unicode strings each time you calla GTK+ method:
12 Chapter 4. How to Deal With Strings
The Python GTK+ 3 Tutorial, Release 3.4
>>> txt = label.get_text().decode("utf-8")>>> txt == unicode_stringTrue
4.3 Python 3
4.3.1 Python 3.x’s Unicode support
Since Python 3.0, all strings are stored as Unicode in an instance of the str type. Encoded strings on the other handare represented as binary data in the form of instances of the bytes type. Conceptionally, str refers to text, whereasbytes refers to data. Use str.encode() to go from str to bytes, and bytes.decode() to go from bytesto str.
In addition, it is no longer possible to mix Unicode strings with encoded strings, because it will result in aTypeError:
>>> text = "Fu\u00dfb\u00e4lle">>> data = b" sind rund">>> text + dataTraceback (most recent call last):
File "<stdin>", line 1, in <module>TypeError: Can't convert 'bytes' object to str implicitly>>> text + data.decode("utf-8")'Fußbälle sind rund'>>> text.encode("utf-8") + datab'Fu\xc3\x9fb\xc3\xa4lle sind rund'
4.3.2 Unicode in GTK+
As a consequence, things are much cleaner and consistent with Python 3.x, because PyGObject will automaticallyencode/decode to/from UTF-8 if you pass a string to a method or a method returns a string. Strings, or text, willalways be represented as instances of str only:
>>> from gi.repository import Gtk>>> label = Gtk.Label()>>> text = "Fu\u00dfb\u00e4lle">>> label.set_text(text)>>> txt = label.get_text()>>> type(txt), txt(<class 'str'>, 'Fußbälle')>>> txt == textTrue
4.4 References
What’s new in Python 3.0 describes the new concepts that clearly distinguish between text and data.
The Unicode HOWTO discusses Python 2.x’s support for Unicode, and explains various problems that people com-monly encounter when trying to work with Unicode.
The Unicode HOWTO for Python 3.x discusses Unicode support in Python 3.x.
4.3. Python 3 13

The Python GTK+ 3 Tutorial, Release 3.4
UTF-8 encoding table and Unicode characters contains a list of Unicode code points and their respective UTF-8encoding.
14 Chapter 4. How to Deal With Strings
CHAPTER 5
Layout Containers
While many GUI toolkits require you to precisely place widgets in a window, using absolute positioning, GTK+ usesa different approach. Rather than specifying the position and size of each widget in the window, you can arrange yourwidgets in rows, columns, and/or tables. The size of your window can be determined automatically, based on the sizesof the widgets it contains. And the sizes of the widgets are, in turn, determined by the amount of text they contain, orthe minimum and maximum sizes that you specify, and/or how you have requested that the available space should beshared between sets of widgets. You can perfect your layout by specifying padding distance and centering values foreach of your widgets. GTK+ then uses all this information to resize and reposition everything sensibly and smoothlywhen the user manipulates the window.
GTK+ arranges widgets hierarchically, using containers. They are invisible to the end user and are inserted into a win-dow, or placed within each other to layout components. There are two flavours of containers: single-child containers,which are all descendants of Gtk.Bin, and multiple-child containers, which are descendants of Gtk.Container.The most commonly used are vertical or horizontal boxes (Gtk.Box) and grids (Gtk.Grid).
5.1 Boxes
Boxes are invisible containers into which we can pack our widgets. When packing widgets into a horizontal box, theobjects are inserted horizontally from left to right or right to left depending on whether Gtk.Box.pack_start()or Gtk.Box.pack_end() is used. In a vertical box, widgets are packed from top to bottom or vice versa. You mayuse any combination of boxes inside or beside other boxes to create the desired effect.
5.1.1 Example
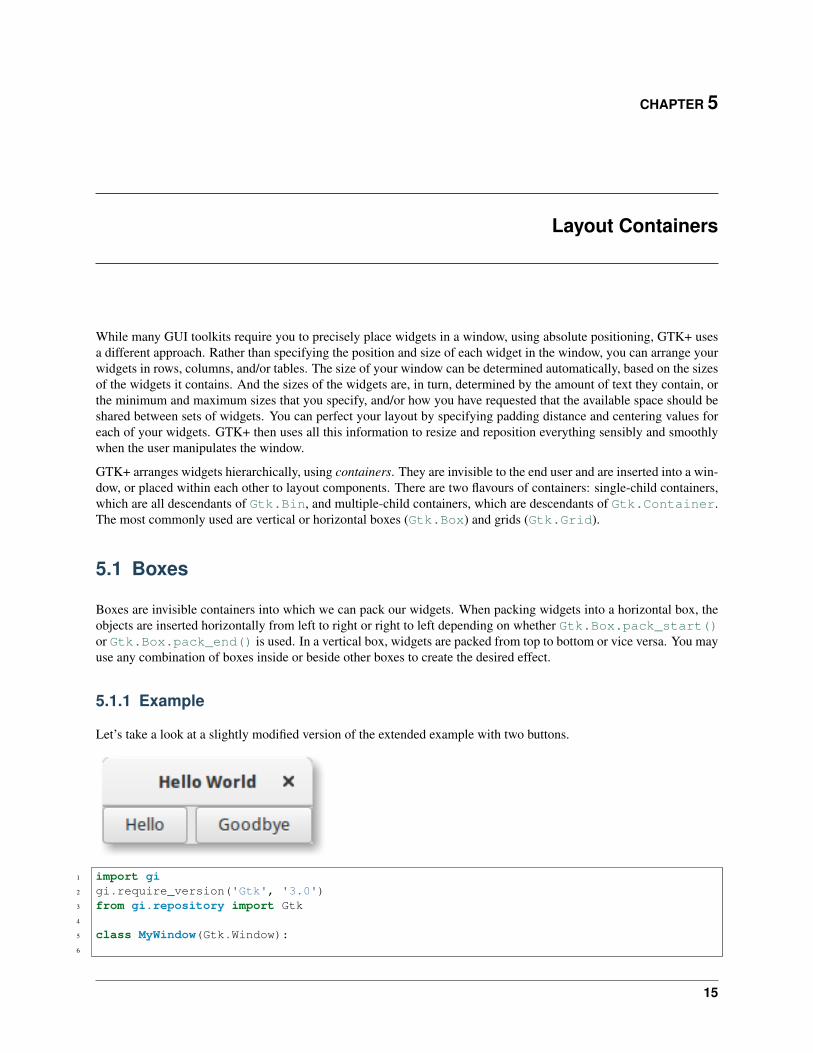
Let’s take a look at a slightly modified version of the extended example with two buttons.
1 import gi2 gi.require_version('Gtk', '3.0')3 from gi.repository import Gtk4
5 class MyWindow(Gtk.Window):6
15
The Python GTK+ 3 Tutorial, Release 3.4
7 def __init__(self):8 Gtk.Window.__init__(self, title="Hello World")9
10 self.box = Gtk.Box(spacing=6)11 self.add(self.box)12
13 self.button1 = Gtk.Button(label="Hello")14 self.button1.connect("clicked", self.on_button1_clicked)15 self.box.pack_start(self.button1, True, True, 0)16
17 self.button2 = Gtk.Button(label="Goodbye")18 self.button2.connect("clicked", self.on_button2_clicked)19 self.box.pack_start(self.button2, True, True, 0)20
21 def on_button1_clicked(self, widget):22 print("Hello")23
24 def on_button2_clicked(self, widget):25 print("Goodbye")26
27 win = MyWindow()28 win.connect("delete-event", Gtk.main_quit)29 win.show_all()30 Gtk.main()
First, we create a horizontally orientated box container where 6 pixels are placed between children. This box becomesthe child of the top-level window.
self.box = Gtk.Box(spacing=6)self.add(self.box)
Subsequently, we add two different buttons to the box container.
self.button1 = Gtk.Button(label="Hello")self.button1.connect("clicked", self.on_button1_clicked)self.box.pack_start(self.button1, True, True, 0)
self.button2 = Gtk.Button(label="Goodbye")self.button2.connect("clicked", self.on_button2_clicked)self.box.pack_start(self.button2, True, True, 0)
While with Gtk.Box.pack_start() widgets are positioned from left to right, Gtk.Box.pack_end() posi-tions them from right to left.
5.2 Grid
Gtk.Grid is a container which arranges its child widgets in rows and columns, but you do not need to specify thedimensions in the constructor. Children are added using Gtk.Grid.attach(). They can span multiple rows orcolumns. It is also possible to add a child next to an existing child, using Gtk.Grid.attach_next_to().
Gtk.Grid can be used like a Gtk.Box by just using Gtk.Grid.add(), which will place children next to eachother in the direction determined by the “orientation” property (defaults to Gtk.Orientation.HORIZONTAL).
16 Chapter 5. Layout Containers
The Python GTK+ 3 Tutorial, Release 3.4
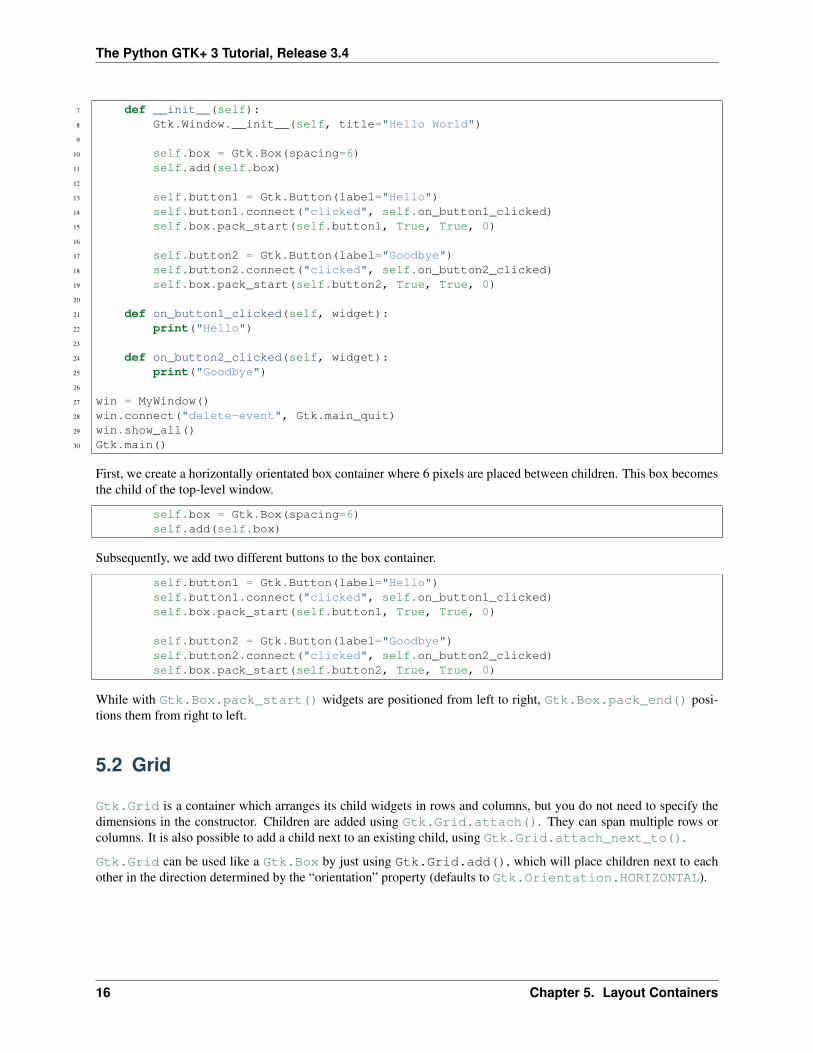
5.2.1 Example
1 import gi2 gi.require_version('Gtk', '3.0')3 from gi.repository import Gtk4
5 class GridWindow(Gtk.Window):6
7 def __init__(self):8 Gtk.Window.__init__(self, title="Grid Example")9
10 grid = Gtk.Grid()11 self.add(grid)12
13 button1 = Gtk.Button(label="Button 1")14 button2 = Gtk.Button(label="Button 2")15 button3 = Gtk.Button(label="Button 3")16 button4 = Gtk.Button(label="Button 4")17 button5 = Gtk.Button(label="Button 5")18 button6 = Gtk.Button(label="Button 6")19
20 grid.add(button1)21 grid.attach(button2, 1, 0, 2, 1)22 grid.attach_next_to(button3, button1, Gtk.PositionType.BOTTOM, 1, 2)23 grid.attach_next_to(button4, button3, Gtk.PositionType.RIGHT, 2, 1)24 grid.attach(button5, 1, 2, 1, 1)25 grid.attach_next_to(button6, button5, Gtk.PositionType.RIGHT, 1, 1)26
27 win = GridWindow()28 win.connect("delete-event", Gtk.main_quit)29 win.show_all()30 Gtk.main()
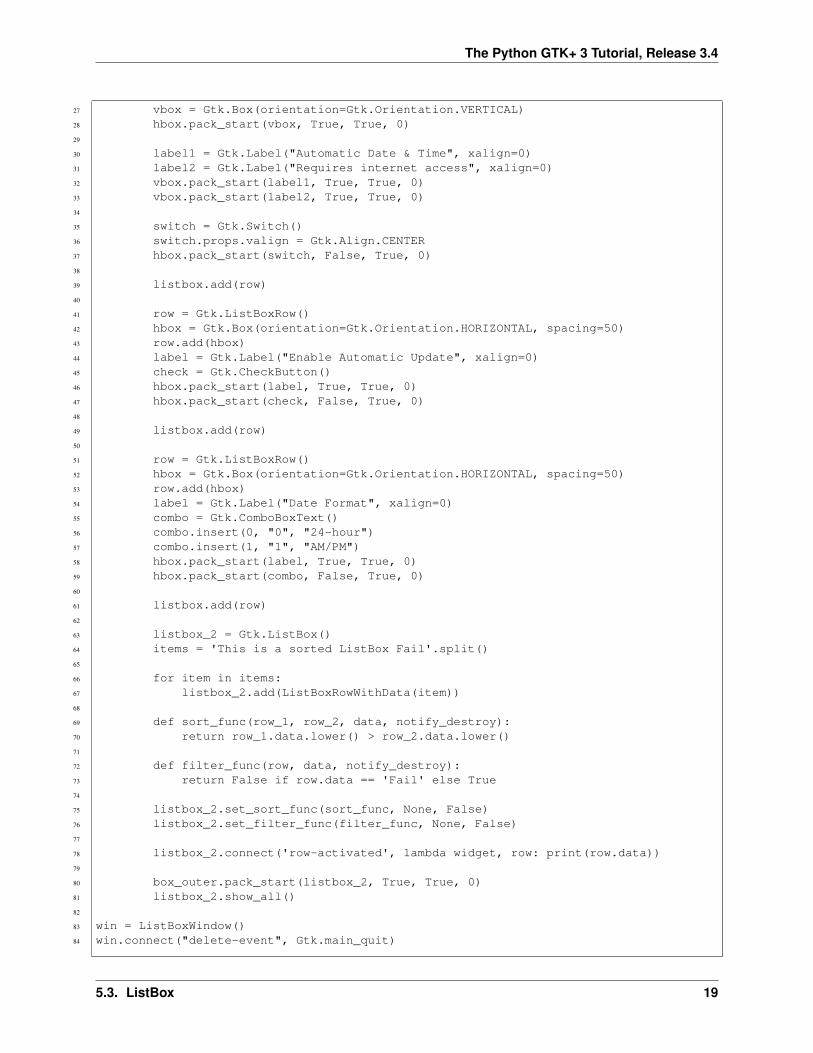
5.3 ListBox
A Gtk.ListBox is a vertical container that contains Gtk.ListBoxRow children. These rows can by dynamicallysorted and filtered, and headers can be added dynamically depending on the row content. It also allows keyboard andmouse navigation and selection like a typical list.
Using Gtk.ListBox is often an alternative to Gtk.TreeView, especially when the list contents has a more com-plicated layout than what is allowed by a Gtk.CellRenderer, or when the contents is interactive (i.e. has a buttonin it).
5.3. ListBox 17
The Python GTK+ 3 Tutorial, Release 3.4
Although a Gtk.ListBox must have only Gtk.ListBoxRow children you can add any kind of widget to it viaGtk.Container.add(), and a Gtk.ListBoxRow widget will automatically be inserted between the list andthe widget.
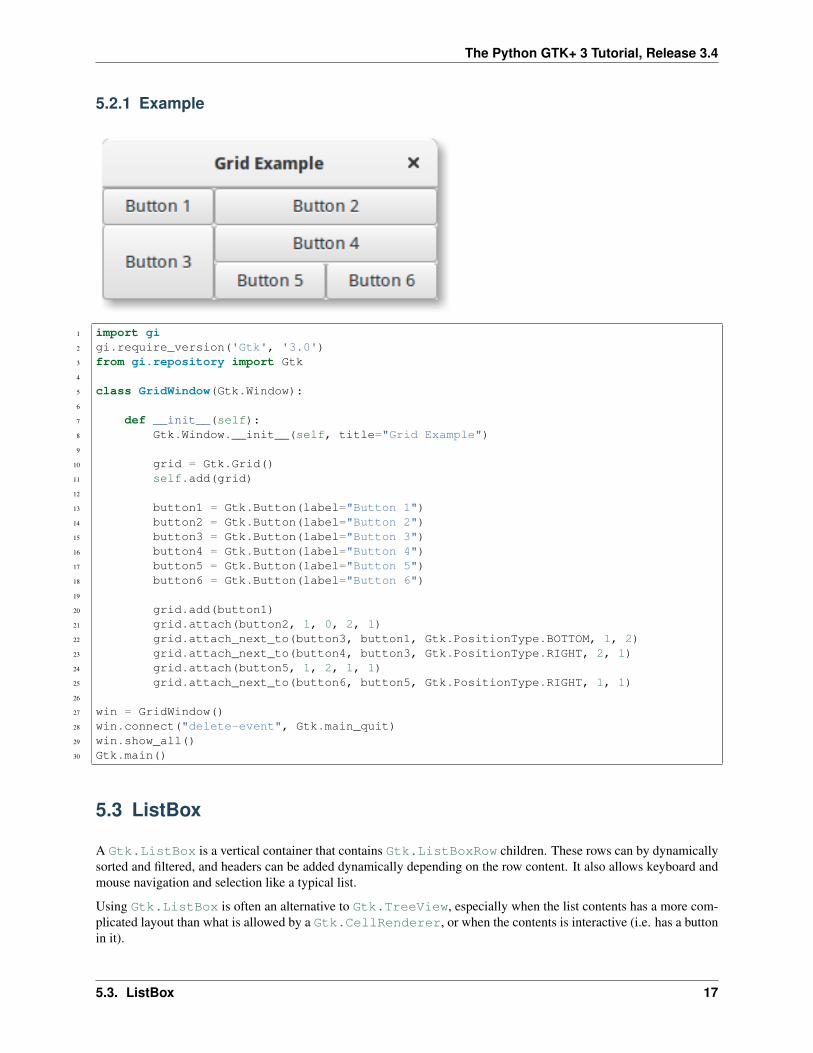
5.3.1 Example
1 import gi2 gi.require_version('Gtk', '3.0')3 from gi.repository import Gtk4
5 class ListBoxRowWithData(Gtk.ListBoxRow):6 def __init__(self, data):7 super(Gtk.ListBoxRow, self).__init__()8 self.data = data9 self.add(Gtk.Label(data))
10
11 class ListBoxWindow(Gtk.Window):12
13 def __init__(self):14 Gtk.Window.__init__(self, title="ListBox Demo")15 self.set_border_width(10)16
17 box_outer = Gtk.Box(orientation=Gtk.Orientation.VERTICAL, spacing=6)18 self.add(box_outer)19
20 listbox = Gtk.ListBox()21 listbox.set_selection_mode(Gtk.SelectionMode.NONE)22 box_outer.pack_start(listbox, True, True, 0)23
24 row = Gtk.ListBoxRow()25 hbox = Gtk.Box(orientation=Gtk.Orientation.HORIZONTAL, spacing=50)26 row.add(hbox)
18 Chapter 5. Layout Containers
The Python GTK+ 3 Tutorial, Release 3.4
27 vbox = Gtk.Box(orientation=Gtk.Orientation.VERTICAL)28 hbox.pack_start(vbox, True, True, 0)29
30 label1 = Gtk.Label("Automatic Date & Time", xalign=0)31 label2 = Gtk.Label("Requires internet access", xalign=0)32 vbox.pack_start(label1, True, True, 0)33 vbox.pack_start(label2, True, True, 0)34
35 switch = Gtk.Switch()36 switch.props.valign = Gtk.Align.CENTER37 hbox.pack_start(switch, False, True, 0)38
39 listbox.add(row)40
41 row = Gtk.ListBoxRow()42 hbox = Gtk.Box(orientation=Gtk.Orientation.HORIZONTAL, spacing=50)43 row.add(hbox)44 label = Gtk.Label("Enable Automatic Update", xalign=0)45 check = Gtk.CheckButton()46 hbox.pack_start(label, True, True, 0)47 hbox.pack_start(check, False, True, 0)48
49 listbox.add(row)50
51 row = Gtk.ListBoxRow()52 hbox = Gtk.Box(orientation=Gtk.Orientation.HORIZONTAL, spacing=50)53 row.add(hbox)54 label = Gtk.Label("Date Format", xalign=0)55 combo = Gtk.ComboBoxText()56 combo.insert(0, "0", "24-hour")57 combo.insert(1, "1", "AM/PM")58 hbox.pack_start(label, True, True, 0)59 hbox.pack_start(combo, False, True, 0)60
61 listbox.add(row)62
63 listbox_2 = Gtk.ListBox()64 items = 'This is a sorted ListBox Fail'.split()65
66 for item in items:67 listbox_2.add(ListBoxRowWithData(item))68
69 def sort_func(row_1, row_2, data, notify_destroy):70 return row_1.data.lower() > row_2.data.lower()71
72 def filter_func(row, data, notify_destroy):73 return False if row.data == 'Fail' else True74
75 listbox_2.set_sort_func(sort_func, None, False)76 listbox_2.set_filter_func(filter_func, None, False)77
78 listbox_2.connect('row-activated', lambda widget, row: print(row.data))79
80 box_outer.pack_start(listbox_2, True, True, 0)81 listbox_2.show_all()82
83 win = ListBoxWindow()84 win.connect("delete-event", Gtk.main_quit)
5.3. ListBox 19
The Python GTK+ 3 Tutorial, Release 3.4
85 win.show_all()86 Gtk.main()
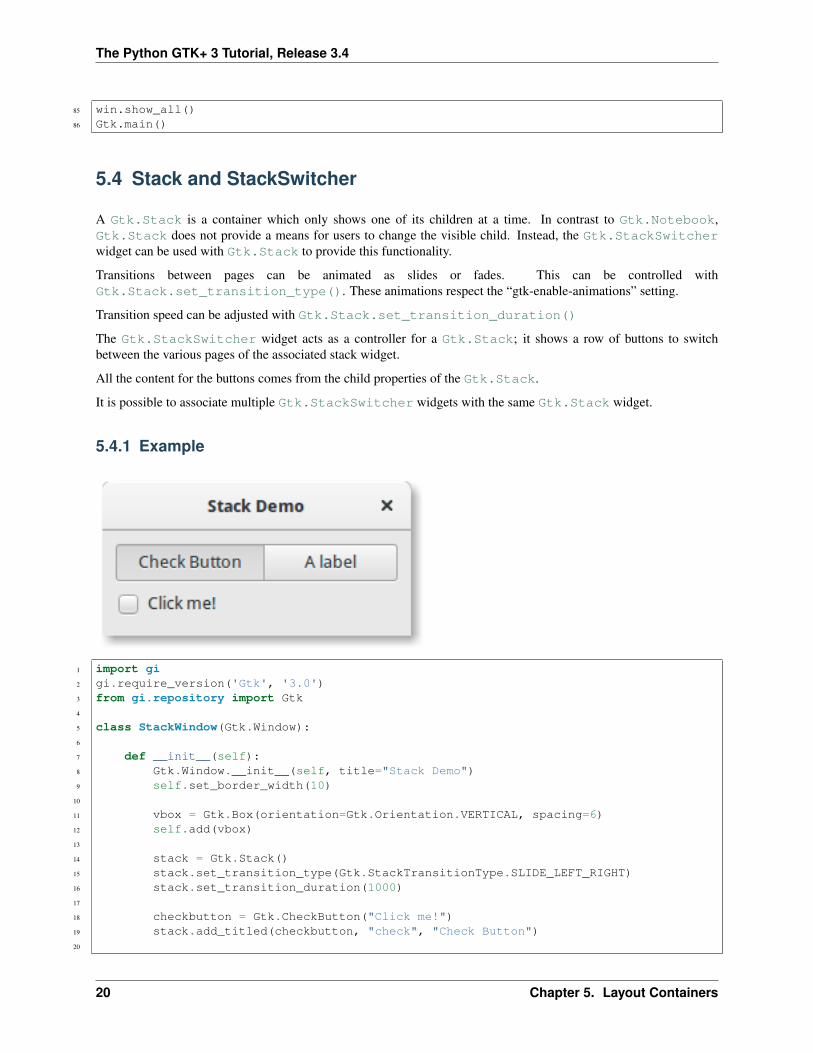
5.4 Stack and StackSwitcher
A Gtk.Stack is a container which only shows one of its children at a time. In contrast to Gtk.Notebook,Gtk.Stack does not provide a means for users to change the visible child. Instead, the Gtk.StackSwitcherwidget can be used with Gtk.Stack to provide this functionality.
Transitions between pages can be animated as slides or fades. This can be controlled withGtk.Stack.set_transition_type(). These animations respect the “gtk-enable-animations” setting.
Transition speed can be adjusted with Gtk.Stack.set_transition_duration()
The Gtk.StackSwitcher widget acts as a controller for a Gtk.Stack; it shows a row of buttons to switchbetween the various pages of the associated stack widget.
All the content for the buttons comes from the child properties of the Gtk.Stack.
It is possible to associate multiple Gtk.StackSwitcher widgets with the same Gtk.Stack widget.
5.4.1 Example
1 import gi2 gi.require_version('Gtk', '3.0')3 from gi.repository import Gtk4
5 class StackWindow(Gtk.Window):6
7 def __init__(self):8 Gtk.Window.__init__(self, title="Stack Demo")9 self.set_border_width(10)
10
11 vbox = Gtk.Box(orientation=Gtk.Orientation.VERTICAL, spacing=6)12 self.add(vbox)13
14 stack = Gtk.Stack()15 stack.set_transition_type(Gtk.StackTransitionType.SLIDE_LEFT_RIGHT)16 stack.set_transition_duration(1000)17
18 checkbutton = Gtk.CheckButton("Click me!")19 stack.add_titled(checkbutton, "check", "Check Button")20
20 Chapter 5. Layout Containers
The Python GTK+ 3 Tutorial, Release 3.4
21 label = Gtk.Label()22 label.set_markup("<big>A fancy label</big>")23 stack.add_titled(label, "label", "A label")24
25 stack_switcher = Gtk.StackSwitcher()26 stack_switcher.set_stack(stack)27 vbox.pack_start(stack_switcher, True, True, 0)28 vbox.pack_start(stack, True, True, 0)29
30 win = StackWindow()31 win.connect("delete-event", Gtk.main_quit)32 win.show_all()33 Gtk.main()
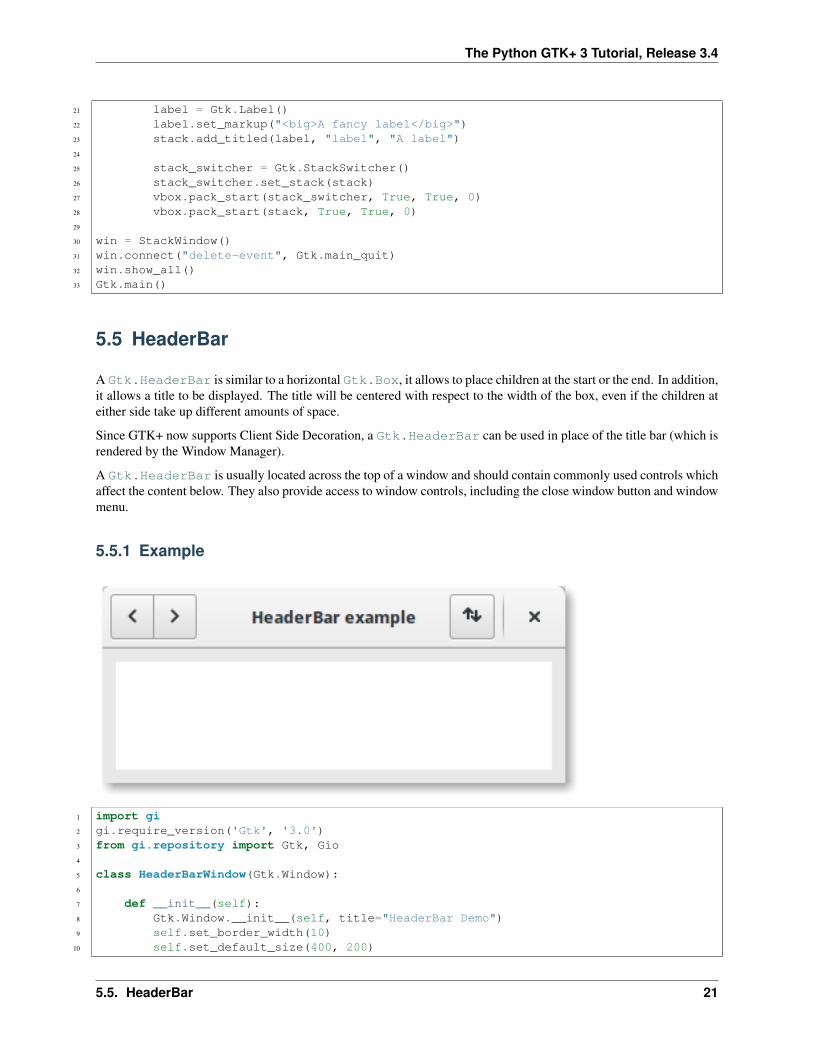
5.5 HeaderBar
A Gtk.HeaderBar is similar to a horizontal Gtk.Box, it allows to place children at the start or the end. In addition,it allows a title to be displayed. The title will be centered with respect to the width of the box, even if the children ateither side take up different amounts of space.
Since GTK+ now supports Client Side Decoration, a Gtk.HeaderBar can be used in place of the title bar (which isrendered by the Window Manager).
A Gtk.HeaderBar is usually located across the top of a window and should contain commonly used controls whichaffect the content below. They also provide access to window controls, including the close window button and windowmenu.
5.5.1 Example
1 import gi2 gi.require_version('Gtk', '3.0')3 from gi.repository import Gtk, Gio4
5 class HeaderBarWindow(Gtk.Window):6
7 def __init__(self):8 Gtk.Window.__init__(self, title="HeaderBar Demo")9 self.set_border_width(10)
10 self.set_default_size(400, 200)
5.5. HeaderBar 21
The Python GTK+ 3 Tutorial, Release 3.4
11
12 hb = Gtk.HeaderBar()13 hb.set_show_close_button(True)14 hb.props.title = "HeaderBar example"15 self.set_titlebar(hb)16
17 button = Gtk.Button()18 icon = Gio.ThemedIcon(name="mail-send-receive-symbolic")19 image = Gtk.Image.new_from_gicon(icon, Gtk.IconSize.BUTTON)20 button.add(image)21 hb.pack_end(button)22
23 box = Gtk.Box(orientation=Gtk.Orientation.HORIZONTAL)24 Gtk.StyleContext.add_class(box.get_style_context(), "linked")25
26 button = Gtk.Button()27 button.add(Gtk.Arrow(Gtk.ArrowType.LEFT, Gtk.ShadowType.NONE))28 box.add(button)29
30 button = Gtk.Button()31 button.add(Gtk.Arrow(Gtk.ArrowType.RIGHT, Gtk.ShadowType.NONE))32 box.add(button)33
34 hb.pack_start(box)35
36 self.add(Gtk.TextView())37
38 win = HeaderBarWindow()39 win.connect("delete-event", Gtk.main_quit)40 win.show_all()41 Gtk.main()42
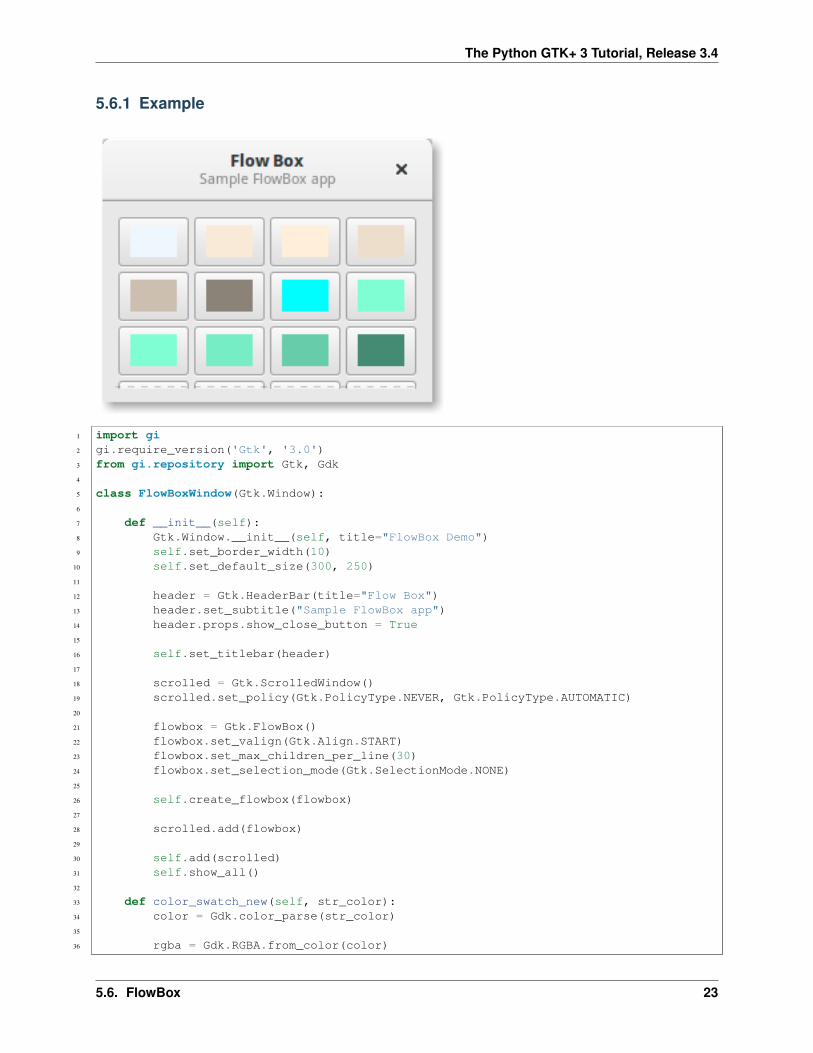
5.6 FlowBox
A Gtk.FlowBox is a container that positions child widgets in sequence according to its orientation.
For instance, with the horizontal orientation, the widgets will be arranged from left to right, starting a new row underthe previous row when necessary. Reducing the width in this case will require more rows, so a larger height will berequested.
Likewise, with the vertical orientation, the widgets will be arranged from top to bottom, starting a new column to theright when necessary. Reducing the height will require more columns, so a larger width will be requested.
The children of a Gtk.FlowBox can be dynamically sorted and filtered.
Although a Gtk.FlowBox must have only Gtk.FlowBoxChild children, you can add any kind of widget to itvia Gtk.Container.add(), and a Gtk.FlowBoxChild widget will automatically be inserted between the boxand the widget.
22 Chapter 5. Layout Containers
The Python GTK+ 3 Tutorial, Release 3.4
5.6.1 Example
1 import gi2 gi.require_version('Gtk', '3.0')3 from gi.repository import Gtk, Gdk4
5 class FlowBoxWindow(Gtk.Window):6
7 def __init__(self):8 Gtk.Window.__init__(self, title="FlowBox Demo")9 self.set_border_width(10)
10 self.set_default_size(300, 250)11
12 header = Gtk.HeaderBar(title="Flow Box")13 header.set_subtitle("Sample FlowBox app")14 header.props.show_close_button = True15
16 self.set_titlebar(header)17
18 scrolled = Gtk.ScrolledWindow()19 scrolled.set_policy(Gtk.PolicyType.NEVER, Gtk.PolicyType.AUTOMATIC)20
21 flowbox = Gtk.FlowBox()22 flowbox.set_valign(Gtk.Align.START)23 flowbox.set_max_children_per_line(30)24 flowbox.set_selection_mode(Gtk.SelectionMode.NONE)25
26 self.create_flowbox(flowbox)27
28 scrolled.add(flowbox)29
30 self.add(scrolled)31 self.show_all()32
33 def color_swatch_new(self, str_color):34 color = Gdk.color_parse(str_color)35
36 rgba = Gdk.RGBA.from_color(color)
5.6. FlowBox 23
The Python GTK+ 3 Tutorial, Release 3.4
37 button = Gtk.Button()38
39 area = Gtk.DrawingArea()40 area.set_size_request(24, 24)41 area.override_background_color(0, rgba)42
43 button.add(area)44
45 return button46
47 def create_flowbox(self, flowbox):48 colors = [49 'AliceBlue',50 'AntiqueWhite',51 'AntiqueWhite1',52 'AntiqueWhite2',53 'AntiqueWhite3',54 'AntiqueWhite4',55 'aqua',56 'aquamarine',57 'aquamarine1',58 'aquamarine2',59 'aquamarine3',60 'aquamarine4',61 'azure',62 'azure1',63 'azure2',64 'azure3',65 'azure4',66 'beige',67 'bisque',68 'bisque1',69 'bisque2',70 'bisque3',71 'bisque4',72 'black',73 'BlanchedAlmond',74 'blue',75 'blue1',76 'blue2',77 'blue3',78 'blue4',79 'BlueViolet',80 'brown',81 'brown1',82 'brown2',83 'brown3',84 'brown4',85 'burlywood',86 'burlywood1',87 'burlywood2',88 'burlywood3',89 'burlywood4',90 'CadetBlue',91 'CadetBlue1',92 'CadetBlue2',93 'CadetBlue3',94 'CadetBlue4',
24 Chapter 5. Layout Containers
The Python GTK+ 3 Tutorial, Release 3.4
95 'chartreuse',96 'chartreuse1',97 'chartreuse2',98 'chartreuse3',99 'chartreuse4',
100 'chocolate',101 'chocolate1',102 'chocolate2',103 'chocolate3',104 'chocolate4',105 'coral',106 'coral1',107 'coral2',108 'coral3',109 'coral4'110 ]111
112 for color in colors:113 button = self.color_swatch_new(color)114 flowbox.add(button)115
116
117 win = FlowBoxWindow()118 win.connect("delete-event", Gtk.main_quit)119 win.show_all()120 Gtk.main()
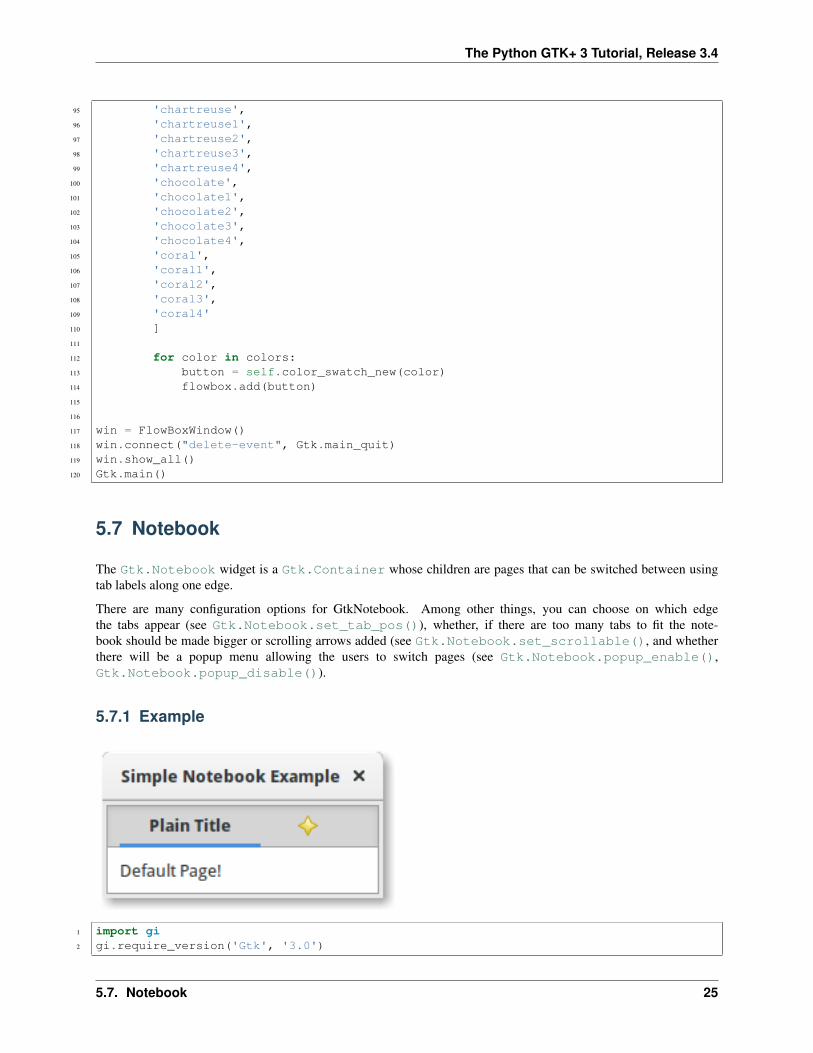
5.7 Notebook
The Gtk.Notebook widget is a Gtk.Container whose children are pages that can be switched between usingtab labels along one edge.
There are many configuration options for GtkNotebook. Among other things, you can choose on which edgethe tabs appear (see Gtk.Notebook.set_tab_pos()), whether, if there are too many tabs to fit the note-book should be made bigger or scrolling arrows added (see Gtk.Notebook.set_scrollable(), and whetherthere will be a popup menu allowing the users to switch pages (see Gtk.Notebook.popup_enable(),Gtk.Notebook.popup_disable()).
5.7.1 Example
1 import gi2 gi.require_version('Gtk', '3.0')
5.7. Notebook 25
The Python GTK+ 3 Tutorial, Release 3.4
3 from gi.repository import Gtk4
5 class MyWindow(Gtk.Window):6
7 def __init__(self):8 Gtk.Window.__init__(self, title="Simple Notebook Example")9 self.set_border_width(3)
10
11 self.notebook = Gtk.Notebook()12 self.add(self.notebook)13
14 self.page1 = Gtk.Box()15 self.page1.set_border_width(10)16 self.page1.add(Gtk.Label('Default Page!'))17 self.notebook.append_page(self.page1, Gtk.Label('Plain Title'))18
19 self.page2 = Gtk.Box()20 self.page2.set_border_width(10)21 self.page2.add(Gtk.Label('A page with an image for a Title.'))22 self.notebook.append_page(23 self.page2,24 Gtk.Image.new_from_icon_name(25 "help-about",26 Gtk.IconSize.MENU27 )28 )29
30 win = MyWindow()31 win.connect("delete-event", Gtk.main_quit)32 win.show_all()33 Gtk.main()
26 Chapter 5. Layout Containers
CHAPTER 6
Label
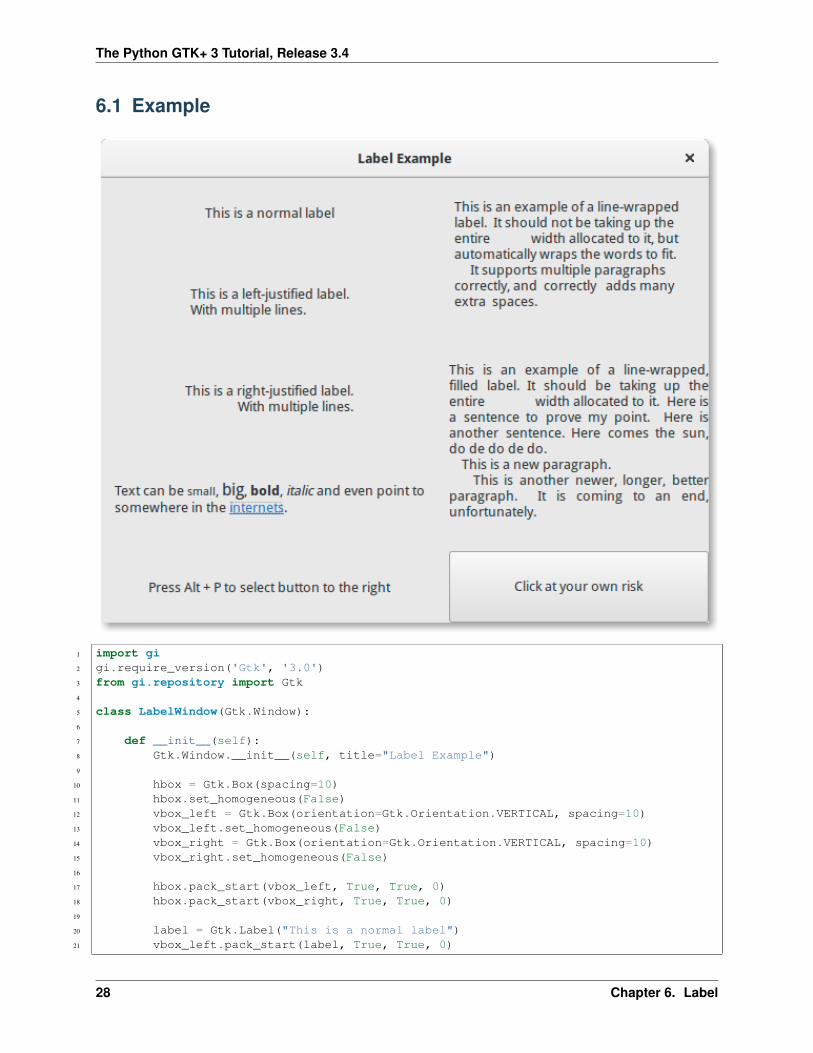
Labels are the main method of placing non-editable text in windows, for instance to place a title next to aGtk.Entry widget. You can specify the text in the constructor, or later with the Gtk.Label.set_text()or Gtk.Label.set_markup() methods.
The width of the label will be adjusted automatically. You can produce multi-line labels by putting line breaks (“\n”)in the label string.
Labels can be made selectable with Gtk.Label.set_selectable(). Selectable labels allow the user to copythe label contents to the clipboard. Only labels that contain useful-to-copy information — such as error messages —should be made selectable.
The label text can be justified using the Gtk.Label.set_justify() method. The widget is also capable ofword-wrapping, which can be activated with Gtk.Label.set_line_wrap().
Gtk.Label support some simple formatting, for instance allowing you to make some text bold, colored, or larger.You can do this by providing a string to Gtk.Label.set_markup(), using the Pango Markup syntax 1. Forinstance, <b>bold text</b> and <s>strikethrough text</s>. In addition, Gtk.Label supportsclickable hyperlinks. The markup for links is borrowed from HTML, using the a with href and title attributes. GTK+renders links similar to the way they appear in web browsers, with colored, underlined text. The title attribute isdisplayed as a tooltip on the link.
label.set_markup("Go to <a href=\"http://www.gtk.org\" ""title=\"Our website\">GTK+ website</a> for more")
Labels may contain mnemonics. Mnemonics are underlined characters in the label, used for keyboard navigation.Mnemonics are created by providing a string with an underscore before the mnemonic character, such as “_File”,to the functions Gtk.Label.new_with_mnemonic() or Gtk.Label.set_text_with_mnemonic().Mnemonics automatically activate any activatable widget the label is inside, such as a Gtk.Button; ifthe label is not inside the mnemonic’s target widget, you have to tell the label about the target usingGtk.Label.set_mnemonic_widget().
1 Pango Markup Syntax, http://developer.gnome.org/pango/stable/PangoMarkupFormat.html
27
The Python GTK+ 3 Tutorial, Release 3.4
6.1 Example
1 import gi2 gi.require_version('Gtk', '3.0')3 from gi.repository import Gtk4
5 class LabelWindow(Gtk.Window):6
7 def __init__(self):8 Gtk.Window.__init__(self, title="Label Example")9
10 hbox = Gtk.Box(spacing=10)11 hbox.set_homogeneous(False)12 vbox_left = Gtk.Box(orientation=Gtk.Orientation.VERTICAL, spacing=10)13 vbox_left.set_homogeneous(False)14 vbox_right = Gtk.Box(orientation=Gtk.Orientation.VERTICAL, spacing=10)15 vbox_right.set_homogeneous(False)16
17 hbox.pack_start(vbox_left, True, True, 0)18 hbox.pack_start(vbox_right, True, True, 0)19
20 label = Gtk.Label("This is a normal label")21 vbox_left.pack_start(label, True, True, 0)
28 Chapter 6. Label
The Python GTK+ 3 Tutorial, Release 3.4
22
23 label = Gtk.Label()24 label.set_text("This is a left-justified label.\nWith multiple lines.")25 label.set_justify(Gtk.Justification.LEFT)26 vbox_left.pack_start(label, True, True, 0)27
28 label = Gtk.Label(29 "This is a right-justified label.\nWith multiple lines.")30 label.set_justify(Gtk.Justification.RIGHT)31 vbox_left.pack_start(label, True, True, 0)32
33 label = Gtk.Label("This is an example of a line-wrapped label. It "34 "should not be taking up the entire "35 "width allocated to it, but automatically "36 "wraps the words to fit.\n"37 " It supports multiple paragraphs correctly, "38 "and correctly adds "39 "many extra spaces. ")40 label.set_line_wrap(True)41 vbox_right.pack_start(label, True, True, 0)42
43 label = Gtk.Label("This is an example of a line-wrapped, filled label. "44 "It should be taking "45 "up the entire width allocated to it. "46 "Here is a sentence to prove "47 "my point. Here is another sentence. "48 "Here comes the sun, do de do de do.\n"49 " This is a new paragraph.\n"50 " This is another newer, longer, better "51 "paragraph. It is coming to an end, "52 "unfortunately.")53 label.set_line_wrap(True)54 label.set_justify(Gtk.Justification.FILL)55 vbox_right.pack_start(label, True, True, 0)56
57 label = Gtk.Label()58 label.set_markup("Text can be <small>small</small>, <big>big</big>, "59 "<b>bold</b>, <i>italic</i> and even point to "60 "somewhere in the <a href=\"http://www.gtk.org\" "61 "title=\"Click to find out more\">internets</a>.")62 label.set_line_wrap(True)63 vbox_left.pack_start(label, True, True, 0)64
65 label = Gtk.Label.new_with_mnemonic(66 "_Press Alt + P to select button to the right")67 vbox_left.pack_start(label, True, True, 0)68 label.set_selectable(True)69
70 button = Gtk.Button(label="Click at your own risk")71 label.set_mnemonic_widget(button)72 vbox_right.pack_start(button, True, True, 0)73
74 self.add(hbox)75
76 window = LabelWindow()77 window.connect("delete-event", Gtk.main_quit)78 window.show_all()79 Gtk.main()
6.1. Example 29
The Python GTK+ 3 Tutorial, Release 3.4
30 Chapter 6. Label
CHAPTER 7
Entry
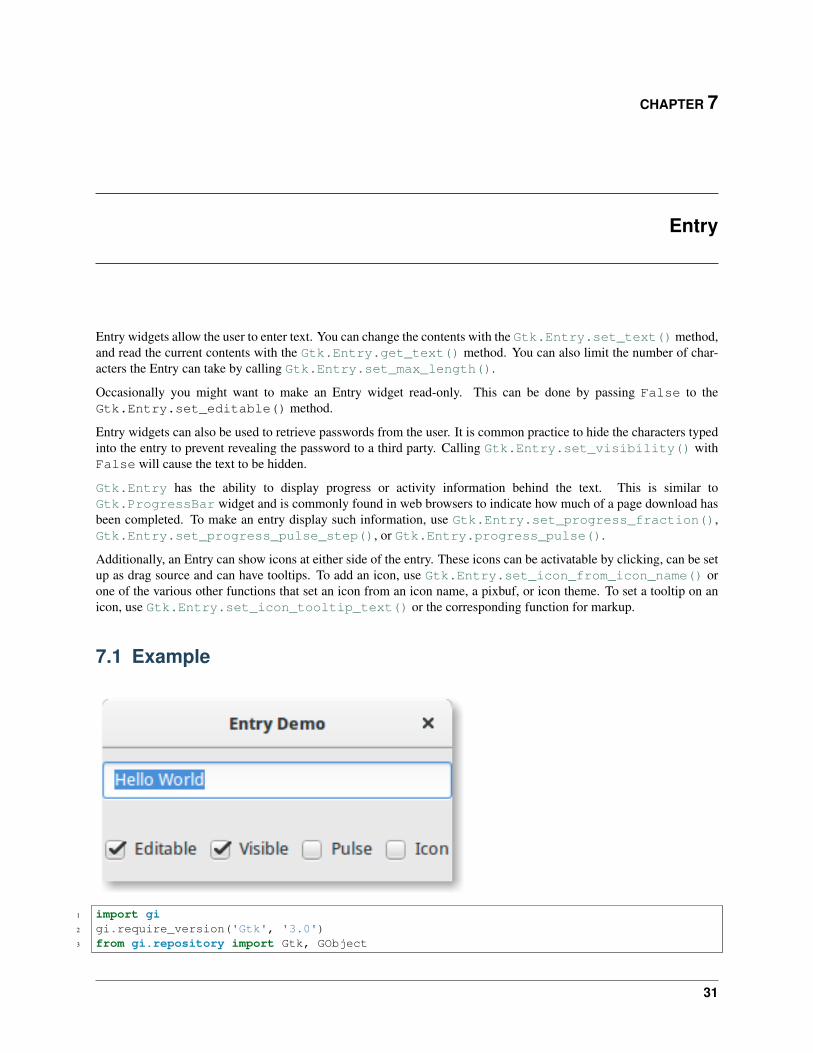
Entry widgets allow the user to enter text. You can change the contents with the Gtk.Entry.set_text()method,and read the current contents with the Gtk.Entry.get_text() method. You can also limit the number of char-acters the Entry can take by calling Gtk.Entry.set_max_length().
Occasionally you might want to make an Entry widget read-only. This can be done by passing False to theGtk.Entry.set_editable() method.
Entry widgets can also be used to retrieve passwords from the user. It is common practice to hide the characters typedinto the entry to prevent revealing the password to a third party. Calling Gtk.Entry.set_visibility() withFalse will cause the text to be hidden.
Gtk.Entry has the ability to display progress or activity information behind the text. This is similar toGtk.ProgressBar widget and is commonly found in web browsers to indicate how much of a page download hasbeen completed. To make an entry display such information, use Gtk.Entry.set_progress_fraction(),Gtk.Entry.set_progress_pulse_step(), or Gtk.Entry.progress_pulse().
Additionally, an Entry can show icons at either side of the entry. These icons can be activatable by clicking, can be setup as drag source and can have tooltips. To add an icon, use Gtk.Entry.set_icon_from_icon_name() orone of the various other functions that set an icon from an icon name, a pixbuf, or icon theme. To set a tooltip on anicon, use Gtk.Entry.set_icon_tooltip_text() or the corresponding function for markup.
7.1 Example
1 import gi2 gi.require_version('Gtk', '3.0')3 from gi.repository import Gtk, GObject
31
The Python GTK+ 3 Tutorial, Release 3.4
4
5 class EntryWindow(Gtk.Window):6
7 def __init__(self):8 Gtk.Window.__init__(self, title="Entry Demo")9 self.set_size_request(200, 100)
10
11 self.timeout_id = None12
13 vbox = Gtk.Box(orientation=Gtk.Orientation.VERTICAL, spacing=6)14 self.add(vbox)15
16 self.entry = Gtk.Entry()17 self.entry.set_text("Hello World")18 vbox.pack_start(self.entry, True, True, 0)19
20 hbox = Gtk.Box(spacing=6)21 vbox.pack_start(hbox, True, True, 0)22
23 self.check_editable = Gtk.CheckButton("Editable")24 self.check_editable.connect("toggled", self.on_editable_toggled)25 self.check_editable.set_active(True)26 hbox.pack_start(self.check_editable, True, True, 0)27
28 self.check_visible = Gtk.CheckButton("Visible")29 self.check_visible.connect("toggled", self.on_visible_toggled)30 self.check_visible.set_active(True)31 hbox.pack_start(self.check_visible, True, True, 0)32
33 self.pulse = Gtk.CheckButton("Pulse")34 self.pulse.connect("toggled", self.on_pulse_toggled)35 self.pulse.set_active(False)36 hbox.pack_start(self.pulse, True, True, 0)37
38 self.icon = Gtk.CheckButton("Icon")39 self.icon.connect("toggled", self.on_icon_toggled)40 self.icon.set_active(False)41 hbox.pack_start(self.icon, True, True, 0)42
43 def on_editable_toggled(self, button):44 value = button.get_active()45 self.entry.set_editable(value)46
47 def on_visible_toggled(self, button):48 value = button.get_active()49 self.entry.set_visibility(value)50
51 def on_pulse_toggled(self, button):52 if button.get_active():53 self.entry.set_progress_pulse_step(0.2)54 # Call self.do_pulse every 100 ms55 self.timeout_id = GObject.timeout_add(100, self.do_pulse, None)56 else:57 # Don't call self.do_pulse anymore58 GObject.source_remove(self.timeout_id)59 self.timeout_id = None60 self.entry.set_progress_pulse_step(0)61
32 Chapter 7. Entry
The Python GTK+ 3 Tutorial, Release 3.4
62 def do_pulse(self, user_data):63 self.entry.progress_pulse()64 return True65
66 def on_icon_toggled(self, button):67 if button.get_active():68 icon_name = "system-search-symbolic"69 else:70 icon_name = None71 self.entry.set_icon_from_icon_name(Gtk.EntryIconPosition.PRIMARY,72 icon_name)73
74 win = EntryWindow()75 win.connect("delete-event", Gtk.main_quit)76 win.show_all()77 Gtk.main()
7.1. Example 33

The Python GTK+ 3 Tutorial, Release 3.4
34 Chapter 7. Entry
CHAPTER 8
Button Widgets
8.1 Button
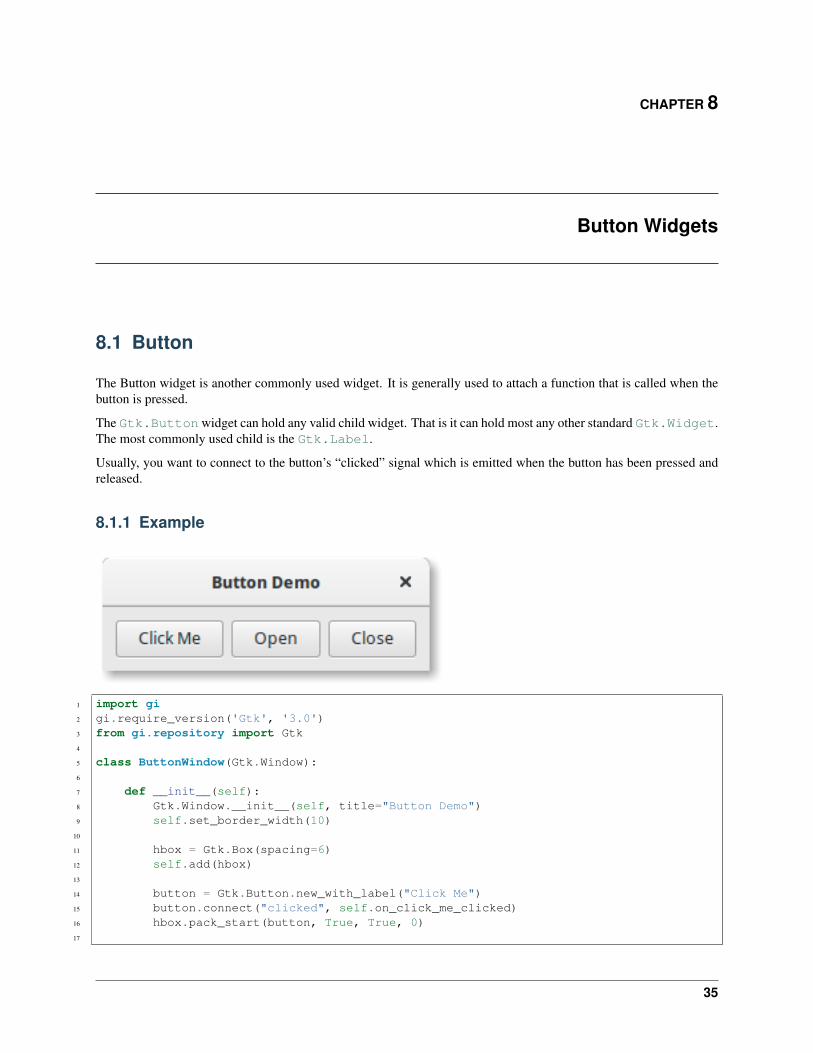
The Button widget is another commonly used widget. It is generally used to attach a function that is called when thebutton is pressed.
The Gtk.Buttonwidget can hold any valid child widget. That is it can hold most any other standard Gtk.Widget.The most commonly used child is the Gtk.Label.
Usually, you want to connect to the button’s “clicked” signal which is emitted when the button has been pressed andreleased.
8.1.1 Example
1 import gi2 gi.require_version('Gtk', '3.0')3 from gi.repository import Gtk4
5 class ButtonWindow(Gtk.Window):6
7 def __init__(self):8 Gtk.Window.__init__(self, title="Button Demo")9 self.set_border_width(10)
10
11 hbox = Gtk.Box(spacing=6)12 self.add(hbox)13
14 button = Gtk.Button.new_with_label("Click Me")15 button.connect("clicked", self.on_click_me_clicked)16 hbox.pack_start(button, True, True, 0)17
35
The Python GTK+ 3 Tutorial, Release 3.4
18 button = Gtk.Button.new_with_mnemonic("_Open")19 button.connect("clicked", self.on_open_clicked)20 hbox.pack_start(button, True, True, 0)21
22 button = Gtk.Button.new_with_mnemonic("_Close")23 button.connect("clicked", self.on_close_clicked)24 hbox.pack_start(button, True, True, 0)25
26 def on_click_me_clicked(self, button):27 print("\"Click me\" button was clicked")28
29 def on_open_clicked(self, button):30 print("\"Open\" button was clicked")31
32 def on_close_clicked(self, button):33 print("Closing application")34 Gtk.main_quit()35
36 win = ButtonWindow()37 win.connect("delete-event", Gtk.main_quit)38 win.show_all()39 Gtk.main()
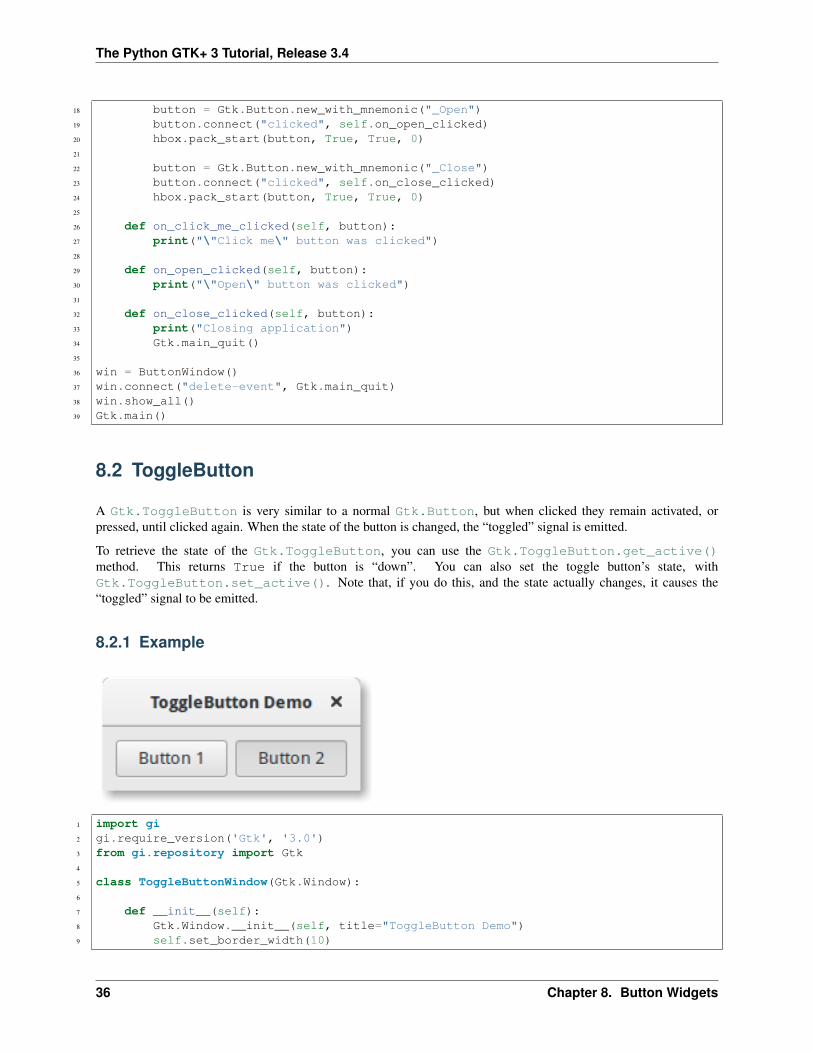
8.2 ToggleButton
A Gtk.ToggleButton is very similar to a normal Gtk.Button, but when clicked they remain activated, orpressed, until clicked again. When the state of the button is changed, the “toggled” signal is emitted.
To retrieve the state of the Gtk.ToggleButton, you can use the Gtk.ToggleButton.get_active()method. This returns True if the button is “down”. You can also set the toggle button’s state, withGtk.ToggleButton.set_active(). Note that, if you do this, and the state actually changes, it causes the“toggled” signal to be emitted.
8.2.1 Example
1 import gi2 gi.require_version('Gtk', '3.0')3 from gi.repository import Gtk4
5 class ToggleButtonWindow(Gtk.Window):6
7 def __init__(self):8 Gtk.Window.__init__(self, title="ToggleButton Demo")9 self.set_border_width(10)
36 Chapter 8. Button Widgets
The Python GTK+ 3 Tutorial, Release 3.4
10
11 hbox = Gtk.Box(spacing=6)12 self.add(hbox)13
14 button = Gtk.ToggleButton("Button 1")15 button.connect("toggled", self.on_button_toggled, "1")16 hbox.pack_start(button, True, True, 0)17
18 button = Gtk.ToggleButton("B_utton 2", use_underline=True)19 button.set_active(True)20 button.connect("toggled", self.on_button_toggled, "2")21 hbox.pack_start(button, True, True, 0)22
23 def on_button_toggled(self, button, name):24 if button.get_active():25 state = "on"26 else:27 state = "off"28 print("Button", name, "was turned", state)29
30 win = ToggleButtonWindow()31 win.connect("delete-event", Gtk.main_quit)32 win.show_all()33 Gtk.main()
8.3 CheckButton
Gtk.CheckButton inherits from Gtk.ToggleButton. The only real difference between the two isGtk.CheckButton‘s appearance. A Gtk.CheckButton places a discrete Gtk.ToggleButton nextto a widget, (usually a Gtk.Label). The “toggled” signal, Gtk.ToggleButton.set_active() andGtk.ToggleButton.get_active() are inherited.
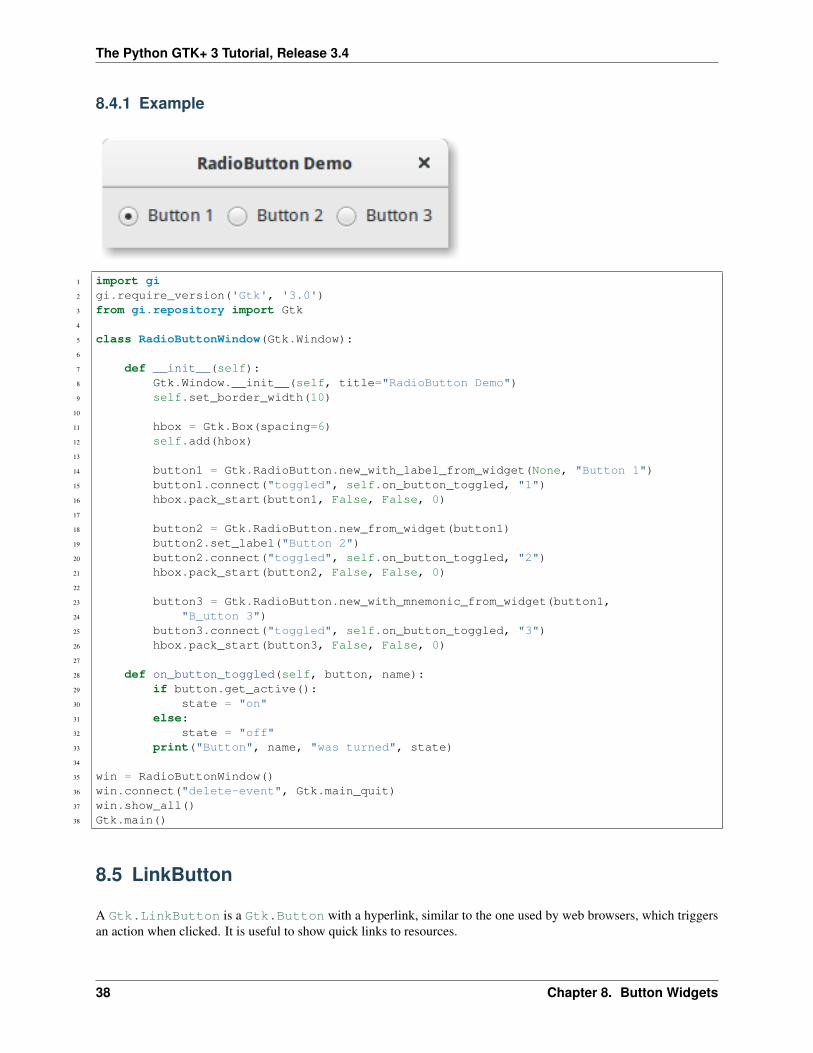
8.4 RadioButton
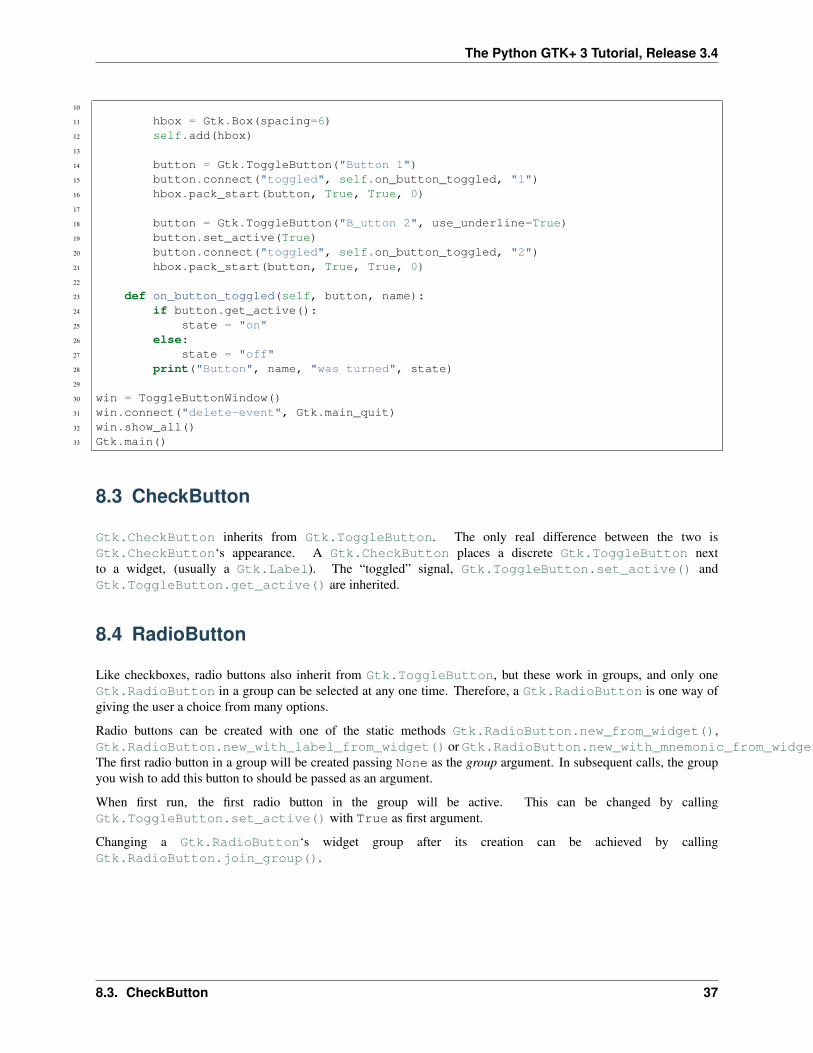
Like checkboxes, radio buttons also inherit from Gtk.ToggleButton, but these work in groups, and only oneGtk.RadioButton in a group can be selected at any one time. Therefore, a Gtk.RadioButton is one way ofgiving the user a choice from many options.
Radio buttons can be created with one of the static methods Gtk.RadioButton.new_from_widget(),Gtk.RadioButton.new_with_label_from_widget() or Gtk.RadioButton.new_with_mnemonic_from_widget().The first radio button in a group will be created passing None as the group argument. In subsequent calls, the groupyou wish to add this button to should be passed as an argument.
When first run, the first radio button in the group will be active. This can be changed by callingGtk.ToggleButton.set_active() with True as first argument.
Changing a Gtk.RadioButton‘s widget group after its creation can be achieved by callingGtk.RadioButton.join_group().
8.3. CheckButton 37
The Python GTK+ 3 Tutorial, Release 3.4
8.4.1 Example
1 import gi2 gi.require_version('Gtk', '3.0')3 from gi.repository import Gtk4
5 class RadioButtonWindow(Gtk.Window):6
7 def __init__(self):8 Gtk.Window.__init__(self, title="RadioButton Demo")9 self.set_border_width(10)
10
11 hbox = Gtk.Box(spacing=6)12 self.add(hbox)13
14 button1 = Gtk.RadioButton.new_with_label_from_widget(None, "Button 1")15 button1.connect("toggled", self.on_button_toggled, "1")16 hbox.pack_start(button1, False, False, 0)17
18 button2 = Gtk.RadioButton.new_from_widget(button1)19 button2.set_label("Button 2")20 button2.connect("toggled", self.on_button_toggled, "2")21 hbox.pack_start(button2, False, False, 0)22
23 button3 = Gtk.RadioButton.new_with_mnemonic_from_widget(button1,24 "B_utton 3")25 button3.connect("toggled", self.on_button_toggled, "3")26 hbox.pack_start(button3, False, False, 0)27
28 def on_button_toggled(self, button, name):29 if button.get_active():30 state = "on"31 else:32 state = "off"33 print("Button", name, "was turned", state)34
35 win = RadioButtonWindow()36 win.connect("delete-event", Gtk.main_quit)37 win.show_all()38 Gtk.main()
8.5 LinkButton
A Gtk.LinkButton is a Gtk.Button with a hyperlink, similar to the one used by web browsers, which triggersan action when clicked. It is useful to show quick links to resources.
38 Chapter 8. Button Widgets

The Python GTK+ 3 Tutorial, Release 3.4
The URI bound to a Gtk.LinkButton can be set specifically using Gtk.LinkButton.set_uri(), and re-trieved using Gtk.LinkButton.get_uri().
8.5.1 Example
1 import gi2 gi.require_version('Gtk', '3.0')3 from gi.repository import Gtk4
5 class LinkButtonWindow(Gtk.Window):6
7 def __init__(self):8 Gtk.Window.__init__(self, title="LinkButton Demo")9 self.set_border_width(10)
10
11 button = Gtk.LinkButton("http://www.gtk.org", "Visit GTK+ Homepage")12 self.add(button)13
14 win = LinkButtonWindow()15 win.connect("delete-event", Gtk.main_quit)16 win.show_all()17 Gtk.main()
8.6 SpinButton
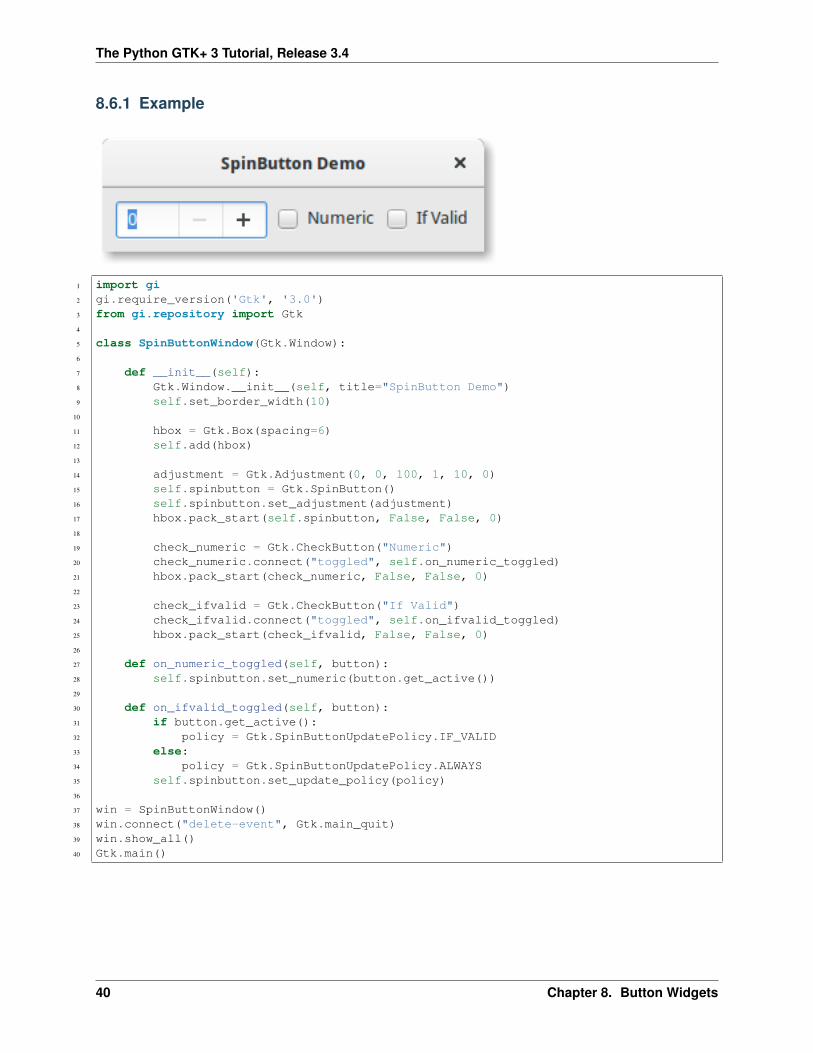
A Gtk.SpinButton is an ideal way to allow the user to set the value of some attribute. Rather than having todirectly type a number into a Gtk.Entry, Gtk.SpinButton allows the user to click on one of two arrows toincrement or decrement the displayed value. A value can still be typed in, with the bonus that it can be checked toensure it is in a given range. The main properties of a Gtk.SpinButton are set through Gtk.Adjustment.
To change the value that Gtk.SpinButton is showing, use Gtk.SpinButton.set_value(). The valueentered can either be an integer or float, depending on your requirements, use Gtk.SpinButton.get_value()or Gtk.SpinButton.get_value_as_int(), respectively.
When you allow the displaying of float values in the spin button, you may wish to adjust the number of decimal spacesdisplayed by calling Gtk.SpinButton.set_digits().
By default, Gtk.SpinButton accepts textual data. If you wish to limit this to numerical values only, callGtk.SpinButton.set_numeric() with True as argument.
We can also adjust the update policy of Gtk.SpinButton. There are two options here; by default the spin buttonupdates the value even if the data entered is invalid. Alternatively, we can set the policy to only update when the valueentered is valid by calling Gtk.SpinButton.set_update_policy().
8.6. SpinButton 39
The Python GTK+ 3 Tutorial, Release 3.4
8.6.1 Example
1 import gi2 gi.require_version('Gtk', '3.0')3 from gi.repository import Gtk4
5 class SpinButtonWindow(Gtk.Window):6
7 def __init__(self):8 Gtk.Window.__init__(self, title="SpinButton Demo")9 self.set_border_width(10)
10
11 hbox = Gtk.Box(spacing=6)12 self.add(hbox)13
14 adjustment = Gtk.Adjustment(0, 0, 100, 1, 10, 0)15 self.spinbutton = Gtk.SpinButton()16 self.spinbutton.set_adjustment(adjustment)17 hbox.pack_start(self.spinbutton, False, False, 0)18
19 check_numeric = Gtk.CheckButton("Numeric")20 check_numeric.connect("toggled", self.on_numeric_toggled)21 hbox.pack_start(check_numeric, False, False, 0)22
23 check_ifvalid = Gtk.CheckButton("If Valid")24 check_ifvalid.connect("toggled", self.on_ifvalid_toggled)25 hbox.pack_start(check_ifvalid, False, False, 0)26
27 def on_numeric_toggled(self, button):28 self.spinbutton.set_numeric(button.get_active())29
30 def on_ifvalid_toggled(self, button):31 if button.get_active():32 policy = Gtk.SpinButtonUpdatePolicy.IF_VALID33 else:34 policy = Gtk.SpinButtonUpdatePolicy.ALWAYS35 self.spinbutton.set_update_policy(policy)36
37 win = SpinButtonWindow()38 win.connect("delete-event", Gtk.main_quit)39 win.show_all()40 Gtk.main()
40 Chapter 8. Button Widgets
The Python GTK+ 3 Tutorial, Release 3.4
8.7 Switch
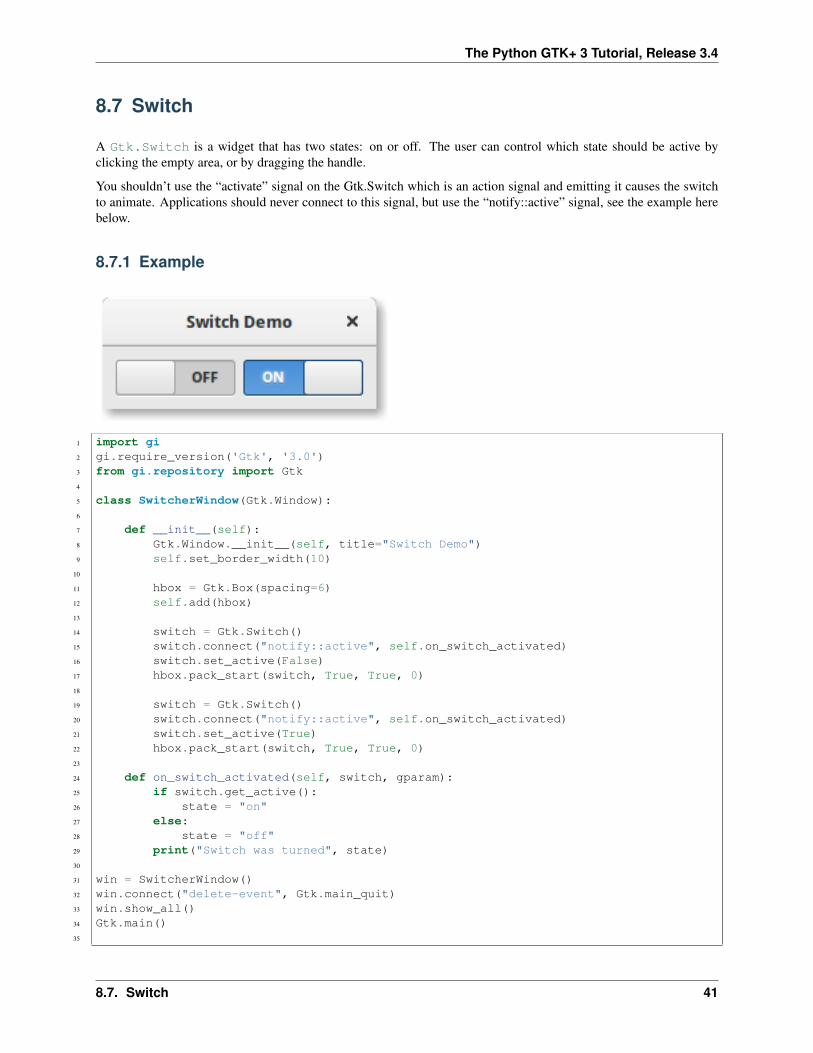
A Gtk.Switch is a widget that has two states: on or off. The user can control which state should be active byclicking the empty area, or by dragging the handle.
You shouldn’t use the “activate” signal on the Gtk.Switch which is an action signal and emitting it causes the switchto animate. Applications should never connect to this signal, but use the “notify::active” signal, see the example herebelow.
8.7.1 Example
1 import gi2 gi.require_version('Gtk', '3.0')3 from gi.repository import Gtk4
5 class SwitcherWindow(Gtk.Window):6
7 def __init__(self):8 Gtk.Window.__init__(self, title="Switch Demo")9 self.set_border_width(10)
10
11 hbox = Gtk.Box(spacing=6)12 self.add(hbox)13
14 switch = Gtk.Switch()15 switch.connect("notify::active", self.on_switch_activated)16 switch.set_active(False)17 hbox.pack_start(switch, True, True, 0)18
19 switch = Gtk.Switch()20 switch.connect("notify::active", self.on_switch_activated)21 switch.set_active(True)22 hbox.pack_start(switch, True, True, 0)23
24 def on_switch_activated(self, switch, gparam):25 if switch.get_active():26 state = "on"27 else:28 state = "off"29 print("Switch was turned", state)30
31 win = SwitcherWindow()32 win.connect("delete-event", Gtk.main_quit)33 win.show_all()34 Gtk.main()35
8.7. Switch 41
The Python GTK+ 3 Tutorial, Release 3.4
42 Chapter 8. Button Widgets
CHAPTER 9
ProgressBar
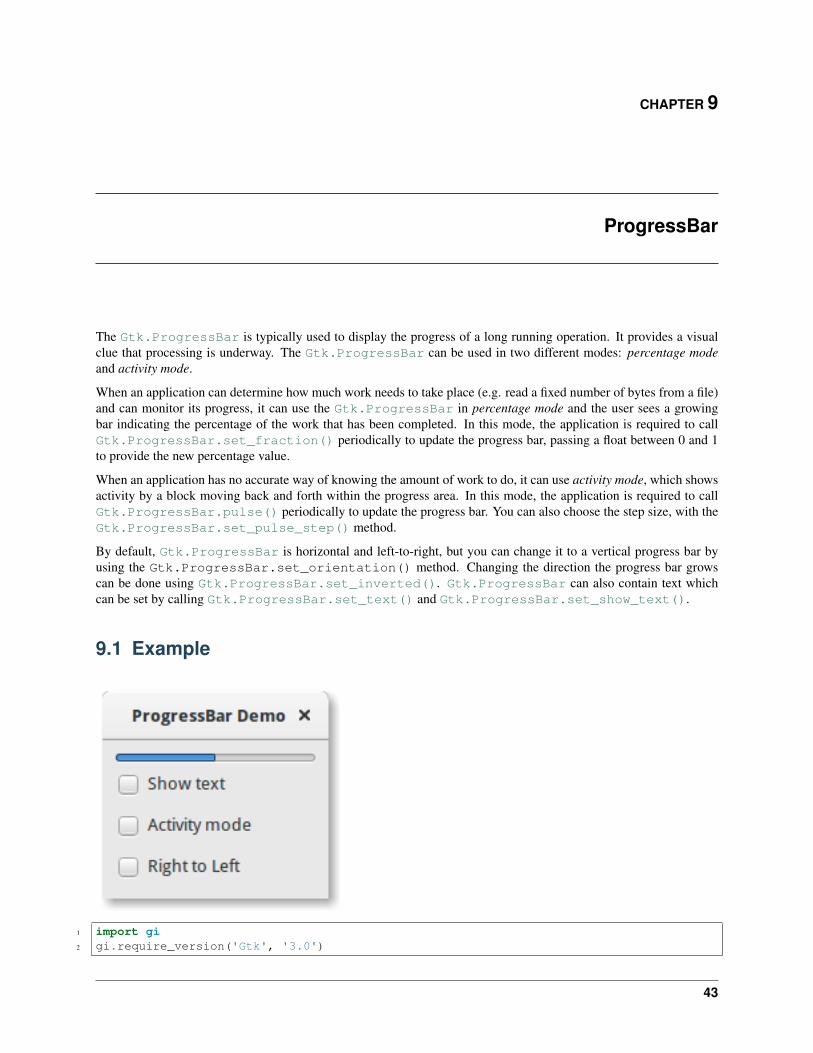
The Gtk.ProgressBar is typically used to display the progress of a long running operation. It provides a visualclue that processing is underway. The Gtk.ProgressBar can be used in two different modes: percentage modeand activity mode.
When an application can determine how much work needs to take place (e.g. read a fixed number of bytes from a file)and can monitor its progress, it can use the Gtk.ProgressBar in percentage mode and the user sees a growingbar indicating the percentage of the work that has been completed. In this mode, the application is required to callGtk.ProgressBar.set_fraction() periodically to update the progress bar, passing a float between 0 and 1to provide the new percentage value.
When an application has no accurate way of knowing the amount of work to do, it can use activity mode, which showsactivity by a block moving back and forth within the progress area. In this mode, the application is required to callGtk.ProgressBar.pulse() periodically to update the progress bar. You can also choose the step size, with theGtk.ProgressBar.set_pulse_step() method.
By default, Gtk.ProgressBar is horizontal and left-to-right, but you can change it to a vertical progress bar byusing the Gtk.ProgressBar.set_orientation() method. Changing the direction the progress bar growscan be done using Gtk.ProgressBar.set_inverted(). Gtk.ProgressBar can also contain text whichcan be set by calling Gtk.ProgressBar.set_text() and Gtk.ProgressBar.set_show_text().
9.1 Example
1 import gi2 gi.require_version('Gtk', '3.0')
43
The Python GTK+ 3 Tutorial, Release 3.4
3 from gi.repository import Gtk, GObject4
5 class ProgressBarWindow(Gtk.Window):6
7 def __init__(self):8 Gtk.Window.__init__(self, title="ProgressBar Demo")9 self.set_border_width(10)
10
11 vbox = Gtk.Box(orientation=Gtk.Orientation.VERTICAL, spacing=6)12 self.add(vbox)13
14 self.progressbar = Gtk.ProgressBar()15 vbox.pack_start(self.progressbar, True, True, 0)16
17 button = Gtk.CheckButton("Show text")18 button.connect("toggled", self.on_show_text_toggled)19 vbox.pack_start(button, True, True, 0)20
21 button = Gtk.CheckButton("Activity mode")22 button.connect("toggled", self.on_activity_mode_toggled)23 vbox.pack_start(button, True, True, 0)24
25 button = Gtk.CheckButton("Right to Left")26 button.connect("toggled", self.on_right_to_left_toggled)27 vbox.pack_start(button, True, True, 0)28
29 self.timeout_id = GObject.timeout_add(50, self.on_timeout, None)30 self.activity_mode = False31
32 def on_show_text_toggled(self, button):33 show_text = button.get_active()34 if show_text:35 text = "some text"36 else:37 text = None38 self.progressbar.set_text(text)39 self.progressbar.set_show_text(show_text)40
41 def on_activity_mode_toggled(self, button):42 self.activity_mode = button.get_active()43 if self.activity_mode:44 self.progressbar.pulse()45 else:46 self.progressbar.set_fraction(0.0)47
48 def on_right_to_left_toggled(self, button):49 value = button.get_active()50 self.progressbar.set_inverted(value)51
52 def on_timeout(self, user_data):53 """54 Update value on the progress bar55 """56 if self.activity_mode:57 self.progressbar.pulse()58 else:59 new_value = self.progressbar.get_fraction() + 0.0160
44 Chapter 9. ProgressBar
The Python GTK+ 3 Tutorial, Release 3.4
61 if new_value > 1:62 new_value = 063
64 self.progressbar.set_fraction(new_value)65
66 # As this is a timeout function, return True so that it67 # continues to get called68 return True69
70 win = ProgressBarWindow()71 win.connect("delete-event", Gtk.main_quit)72 win.show_all()73 Gtk.main()
9.1. Example 45
The Python GTK+ 3 Tutorial, Release 3.4
46 Chapter 9. ProgressBar
CHAPTER 10
Spinner
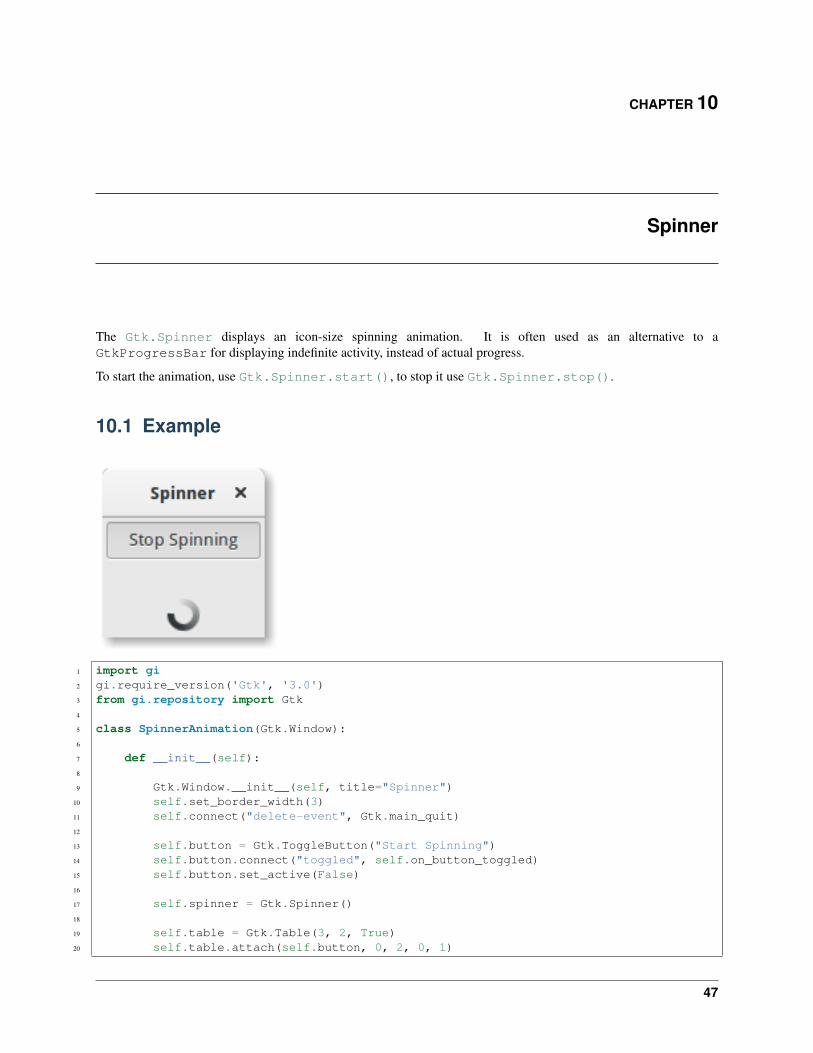
The Gtk.Spinner displays an icon-size spinning animation. It is often used as an alternative to aGtkProgressBar for displaying indefinite activity, instead of actual progress.
To start the animation, use Gtk.Spinner.start(), to stop it use Gtk.Spinner.stop().
10.1 Example
1 import gi2 gi.require_version('Gtk', '3.0')3 from gi.repository import Gtk4
5 class SpinnerAnimation(Gtk.Window):6
7 def __init__(self):8
9 Gtk.Window.__init__(self, title="Spinner")10 self.set_border_width(3)11 self.connect("delete-event", Gtk.main_quit)12
13 self.button = Gtk.ToggleButton("Start Spinning")14 self.button.connect("toggled", self.on_button_toggled)15 self.button.set_active(False)16
17 self.spinner = Gtk.Spinner()18
19 self.table = Gtk.Table(3, 2, True)20 self.table.attach(self.button, 0, 2, 0, 1)
47
The Python GTK+ 3 Tutorial, Release 3.4
21 self.table.attach(self.spinner, 0, 2, 2, 3)22
23 self.add(self.table)24 self.show_all()25
26 def on_button_toggled(self, button):27
28 if button.get_active():29 self.spinner.start()30 self.button.set_label("Stop Spinning")31
32 else:33 self.spinner.stop()34 self.button.set_label("Start Spinning")35
36
37 myspinner = SpinnerAnimation()38
39 Gtk.main()40
48 Chapter 10. Spinner
CHAPTER 11
Tree and List Widgets
A Gtk.TreeView and its associated widgets are an extremely powerful way of displaying data. They are used inconjunction with a Gtk.ListStore or Gtk.TreeStore and provide a way of displaying and manipulating datain many ways, including:
• Automatically updates when data added, removed or edited
• Drag and drop support
• Sorting of data
• Support embedding widgets such as check boxes, progress bars, etc.
• Reorderable and resizable columns
• Filtering of data
With the power and flexibility of a Gtk.TreeView comes complexity. It is often difficult for beginner developers tobe able to utilize it correctly due to the number of methods which are required.
11.1 The Model
Each Gtk.TreeView has an associated Gtk.TreeModel, which contains the data displayed by the TreeView.Each Gtk.TreeModel can be used by more than one Gtk.TreeView. For instance, this allows the same under-lying data to be displayed and edited in 2 different ways at the same time. Or the 2 Views might display differentcolumns from the same Model data, in the same way that 2 SQL queries (or “views”) might show different fields fromthe same database table.
Although you can theoretically implement your own Model, you will normally use either the Gtk.ListStore orGtk.TreeStore model classes. Gtk.ListStore contains simple rows of data, and each row has no children,whereas Gtk.TreeStore contains rows of data, and each row may have child rows.
When constructing a model you have to specify the data types for each column the model holds.
store = Gtk.ListStore(str, str, float)
This creates a list store with three columns, two string columns, and a float column.
Adding data to the model is done using Gtk.ListStore.append() or Gtk.TreeStore.append(), depend-ing upon which sort of model was created.
treeiter = store.append(["The Art of Computer Programming","Donald E. Knuth", 25.46])
49
The Python GTK+ 3 Tutorial, Release 3.4
Both methods return a Gtk.TreeIter instance, which points to the location of the newly inserted row. You canretrieve a Gtk.TreeIter by calling Gtk.TreeModel.get_iter().
Once data has been inserted, you can retrieve or modify data using the tree iter and column index.
print(store[treeiter][2]) # Prints value of third columnstore[treeiter][2] = 42.15
As with Python’s built-in list object you can use len() to get the number of rows and use slices to retrieve or setvalues.
# Print number of rowsprint(len(store))# Print all but first columnprint(store[treeiter][1:])# Print last columnprint(store[treeiter][-1])# Set first two columnsstore[treeiter][:2] = ["Donald Ervin Knuth", 41.99]
Iterating over all rows of a tree model is very simple as well.
for row in store:# Print values of all columnsprint(row[:])
Keep in mind, that if you use Gtk.TreeStore, the above code will only iterate over the rows of the top level, butnot the children of the nodes. To iterate over all rows and its children, use the print_tree_store function.
def print_tree_store(store):rootiter = store.get_iter_first()print_rows(store, rootiter, "")
def print_rows(store, treeiter, indent):while treeiter != None:
print(indent + str(store[treeiter][:]))if store.iter_has_child(treeiter):
childiter = store.iter_children(treeiter)print_rows(store, childiter, indent + "\t")
treeiter = store.iter_next(treeiter)
Apart from accessing values stored in a Gtk.TreeModel with the list-like method mentioned above, it is alsopossible to either use Gtk.TreeIter or Gtk.TreePath instances. Both reference a particular row in a treemodel. One can convert a path to an iterator by calling Gtk.TreeModel.get_iter(). As Gtk.ListStorecontains only one level, i.e. nodes do not have any child nodes, a path is essentially the index of the row you want toaccess.
# Get path pointing to 6th row in list storepath = Gtk.TreePath(5)treeiter = liststore.get_iter(path)# Get value at 2nd columnvalue = liststore.get_value(treeiter, 1)
In the case of Gtk.TreeStore, a path is a list of indexes or a string. The string form is a list of numbers separatedby a colon. Each number refers to the offset at that level. Thus, the path “0” refers to the root node and the path “2:4”refers to the fifth child of the third node.
# Get path pointing to 5th child of 3rd row in tree storepath = Gtk.TreePath([2, 4])treeiter = treestore.get_iter(path)
50 Chapter 11. Tree and List Widgets
The Python GTK+ 3 Tutorial, Release 3.4
# Get value at 2nd columnvalue = treestore.get_value(treeiter, 1)
Instances of Gtk.TreePath can be accessed like lists, i.e. len(treepath) returns the depth of the itemtreepath is pointing to, and treepath[i] returns the child’s index on the i-th level.
11.2 The View
While there are several different models to choose from, there is only one view widget to deal with. It works witheither the list or the tree store. Setting up a Gtk.TreeView is not a difficult matter. It needs a Gtk.TreeModelto know where to retrieve its data from, either by passing it to the Gtk.TreeView constructor, or by callingGtk.TreeView.set_model().
tree = Gtk.TreeView(store)
Once the Gtk.TreeView widget has a model, it will need to know how to display the model. It does this withcolumns and cell renderers.
Cell renderers are used to draw the data in the tree model in a way. There are a number of cell ren-derers that come with GTK+, for instance Gtk.CellRendererText, Gtk.CellRendererPixbuf andGtk.CellRendererToggle. In addition, it is relatively easy to write a custom renderer yourself.
A Gtk.TreeViewColumn is the object that Gtk.TreeView uses to organize the vertical columns in the tree view.It needs to know the name of the column to label for the user, what type of cell renderer to use, and which piece ofdata to retrieve from the model for a given row.
renderer = Gtk.CellRendererText()column = Gtk.TreeViewColumn("Title", renderer, text=0)tree.append_column(column)
To render more than one model column in a view column, you need to create a Gtk.TreeViewColumn instanceand use Gtk.TreeViewColumn.pack_start() to add the model columns to it.
column = Gtk.TreeViewColumn("Title and Author")
title = Gtk.CellRendererText()author = Gtk.CellRendererText()
column.pack_start(title, True)column.pack_start(author, True)
column.add_attribute(title, "text", 0)column.add_attribute(author, "text", 1)
tree.append_column(column)
11.3 The Selection
Most applications will need to not only deal with displaying data, but also receiving input events from users. To dothis, simply get a reference to a selection object and connect to the “changed” signal.
select = tree.get_selection()select.connect("changed", on_tree_selection_changed)
Then to retrieve data for the row selected:
11.2. The View 51
The Python GTK+ 3 Tutorial, Release 3.4
def on_tree_selection_changed(selection):model, treeiter = selection.get_selected()if treeiter != None:
print("You selected", model[treeiter][0])
You can control what selections are allowed by calling Gtk.TreeSelection.set_mode().Gtk.TreeSelection.get_selected() does not work if the selection mode is set toGtk.SelectionMode.MULTIPLE, use Gtk.TreeSelection.get_selected_rows() instead.
11.4 Sorting
Sorting is an important feature for tree views and is supported by the standard tree models (Gtk.TreeStore andGtk.ListStore), which implement the Gtk.TreeSortable interface.
11.4.1 Sorting by clicking on columns
A column of a Gtk.TreeView can easily made sortable with a call toGtk.TreeViewColumn.set_sort_column_id(). Afterwards the column can be sorted by clickingon its header.
First we need a simple Gtk.TreeView and a Gtk.ListStore as a model.
model = Gtk.ListStore(str)model.append(["Benjamin"])model.append(["Charles"])model.append(["alfred"])model.append(["Alfred"])model.append(["David"])model.append(["charles"])model.append(["david"])model.append(["benjamin"])
treeView = Gtk.TreeView(model)
cellRenderer = Gtk.CellRendererText()column = Gtk.TreeViewColumn("Title", renderer, text=0)
The next step is to enable sorting. Note that the column_id (0 in the example) refers to the column of the model andnot to the TreeView’s column.
column.set_sort_column_id(0)
11.4.2 Setting a custom sort function
It is also possible to set a custom comparison function in order to change the sorting behaviour. As an example wewill create a comparison function that sorts case-sensitive. In the example above the sorted list looked like:
alfredAlfredbenjaminBenjamincharlesCharles
52 Chapter 11. Tree and List Widgets
The Python GTK+ 3 Tutorial, Release 3.4
davidDavid
The case-sensitive sorted list will look like:
AlfredBenjaminCharlesDavidalfredbenjamincharlesdavid
First of all a comparison function is needed. This function gets two rows and has to return a negative integer if the firstone should come before the second one, zero if they are equal and a positive integer if the second one should comebefore the second one.
def compare(model, row1, row2, user_data):sort_column, _ = model.get_sort_column_id()value1 = model.get_value(row1, sort_column)value2 = model.get_value(row2, sort_column)if value1 < value2:
return -1elif value1 == value2:
return 0else:
return 1
Then the sort function has to be set by Gtk.TreeSortable.set_sort_func().
model.set_sort_func(0, compare, None)
11.5 Filtering
Unlike sorting, filtering is not handled by the two models we previously saw, but by the Gtk.TreeModelFilterclass. This class, like Gtk.TreeStore and Gtk.ListStore, is a Gtk.TreeModel. It acts as a layer betweenthe “real” model (a Gtk.TreeStore or a Gtk.ListStore), hiding some elements to the view. In practice, itsupplies the Gtk.TreeView with a subset of the underlying model. Instances of Gtk.TreeModelFilter canbe stacked one onto another, to use multiple filters on the same model (in the same way you’d use “AND” clauses in aSQL request). They can also be chained with Gtk.TreeModelSort instances.
You can create a new instance of a Gtk.TreeModelFilter and give it a model to filter, but the easiest way is tospawn it directly from the filtered model, using the Gtk.TreeModel.filter_new() method.
filter = model.filter_new()
In the same way the sorting function works, the Gtk.TreeModelFilter needs a “visibility” function, which,given a row from the underlying model, will return a boolean indicating if this row should be filtered out or not. It’sset by Gtk.TreeSortable.set_visible_func():
filter.set_visible_func(filter_func, data=None)
Let’s look at a full example which uses the whole Gtk.ListStore - Gtk.TreeModelFilter -Gtk.TreeModelFilter - Gtk.TreeView stack.
11.5. Filtering 53
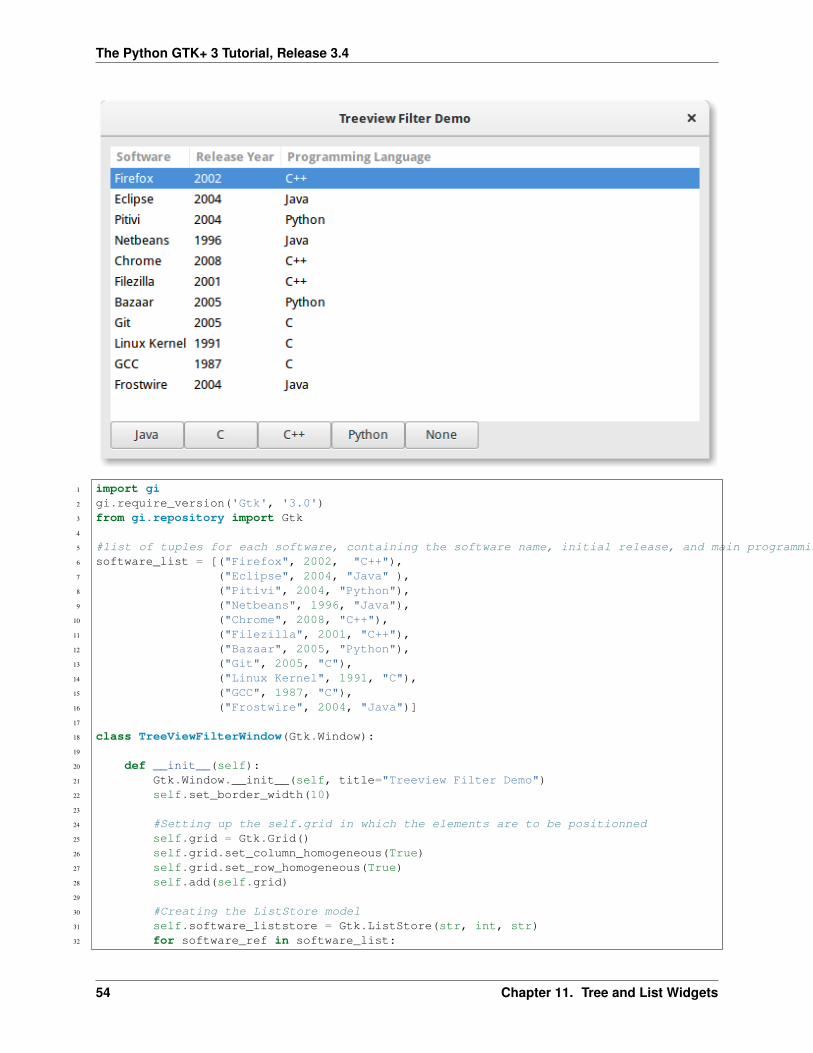
The Python GTK+ 3 Tutorial, Release 3.4
1 import gi2 gi.require_version('Gtk', '3.0')3 from gi.repository import Gtk4
5 #list of tuples for each software, containing the software name, initial release, and main programming languages used6 software_list = [("Firefox", 2002, "C++"),7 ("Eclipse", 2004, "Java" ),8 ("Pitivi", 2004, "Python"),9 ("Netbeans", 1996, "Java"),
10 ("Chrome", 2008, "C++"),11 ("Filezilla", 2001, "C++"),12 ("Bazaar", 2005, "Python"),13 ("Git", 2005, "C"),14 ("Linux Kernel", 1991, "C"),15 ("GCC", 1987, "C"),16 ("Frostwire", 2004, "Java")]17
18 class TreeViewFilterWindow(Gtk.Window):19
20 def __init__(self):21 Gtk.Window.__init__(self, title="Treeview Filter Demo")22 self.set_border_width(10)23
24 #Setting up the self.grid in which the elements are to be positionned25 self.grid = Gtk.Grid()26 self.grid.set_column_homogeneous(True)27 self.grid.set_row_homogeneous(True)28 self.add(self.grid)29
30 #Creating the ListStore model31 self.software_liststore = Gtk.ListStore(str, int, str)32 for software_ref in software_list:
54 Chapter 11. Tree and List Widgets
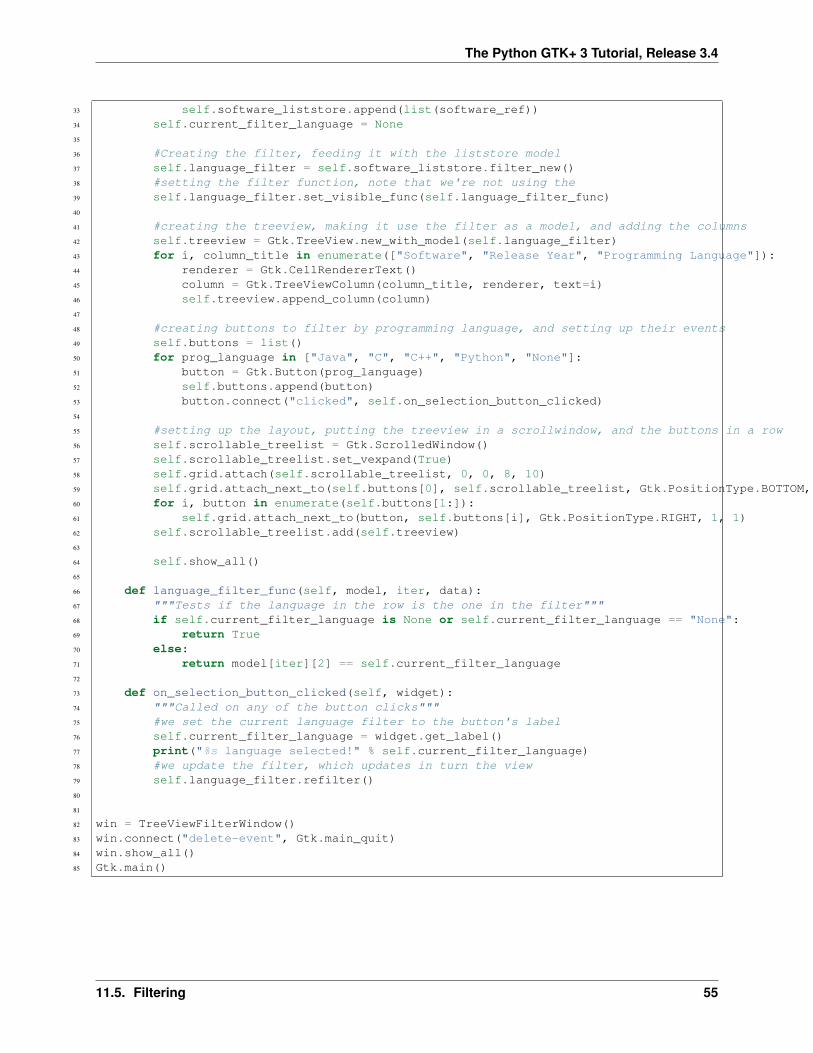
The Python GTK+ 3 Tutorial, Release 3.4
33 self.software_liststore.append(list(software_ref))34 self.current_filter_language = None35
36 #Creating the filter, feeding it with the liststore model37 self.language_filter = self.software_liststore.filter_new()38 #setting the filter function, note that we're not using the39 self.language_filter.set_visible_func(self.language_filter_func)40
41 #creating the treeview, making it use the filter as a model, and adding the columns42 self.treeview = Gtk.TreeView.new_with_model(self.language_filter)43 for i, column_title in enumerate(["Software", "Release Year", "Programming Language"]):44 renderer = Gtk.CellRendererText()45 column = Gtk.TreeViewColumn(column_title, renderer, text=i)46 self.treeview.append_column(column)47
48 #creating buttons to filter by programming language, and setting up their events49 self.buttons = list()50 for prog_language in ["Java", "C", "C++", "Python", "None"]:51 button = Gtk.Button(prog_language)52 self.buttons.append(button)53 button.connect("clicked", self.on_selection_button_clicked)54
55 #setting up the layout, putting the treeview in a scrollwindow, and the buttons in a row56 self.scrollable_treelist = Gtk.ScrolledWindow()57 self.scrollable_treelist.set_vexpand(True)58 self.grid.attach(self.scrollable_treelist, 0, 0, 8, 10)59 self.grid.attach_next_to(self.buttons[0], self.scrollable_treelist, Gtk.PositionType.BOTTOM, 1, 1)60 for i, button in enumerate(self.buttons[1:]):61 self.grid.attach_next_to(button, self.buttons[i], Gtk.PositionType.RIGHT, 1, 1)62 self.scrollable_treelist.add(self.treeview)63
64 self.show_all()65
66 def language_filter_func(self, model, iter, data):67 """Tests if the language in the row is the one in the filter"""68 if self.current_filter_language is None or self.current_filter_language == "None":69 return True70 else:71 return model[iter][2] == self.current_filter_language72
73 def on_selection_button_clicked(self, widget):74 """Called on any of the button clicks"""75 #we set the current language filter to the button's label76 self.current_filter_language = widget.get_label()77 print("%s language selected!" % self.current_filter_language)78 #we update the filter, which updates in turn the view79 self.language_filter.refilter()80
81
82 win = TreeViewFilterWindow()83 win.connect("delete-event", Gtk.main_quit)84 win.show_all()85 Gtk.main()
11.5. Filtering 55
The Python GTK+ 3 Tutorial, Release 3.4
56 Chapter 11. Tree and List Widgets
CHAPTER 12
CellRenderers
Gtk.CellRenderer widgets are used to display information within widgets such as the Gtk.TreeView orGtk.ComboBox. They work closely with the associated widgets and are very powerful, with lots of configura-tion options for displaying a large amount of data in different ways. There are seven Gtk.CellRenderer widgetswhich can be used for different purposes:
• Gtk.CellRendererText
• Gtk.CellRendererToggle
• Gtk.CellRendererPixbuf
• Gtk.CellRendererCombo
• Gtk.CellRendererProgress
• Gtk.CellRendererSpinner
• Gtk.CellRendererSpin
• Gtk.CellRendererAccel
12.1 CellRendererText
A Gtk.CellRendererText renders a given text in its cell, using the font, color and style information providedby its properties. The text will be ellipsized if it is too long and the “ellipsize” property allows it.
By default, text in Gtk.CellRendererText widgets is not editable. This can be changed by setting the value ofthe “editable” property to True:
cell.set_property("editable", True)
You can then connect to the “edited” signal and update your Gtk.TreeModel accordingly.
57
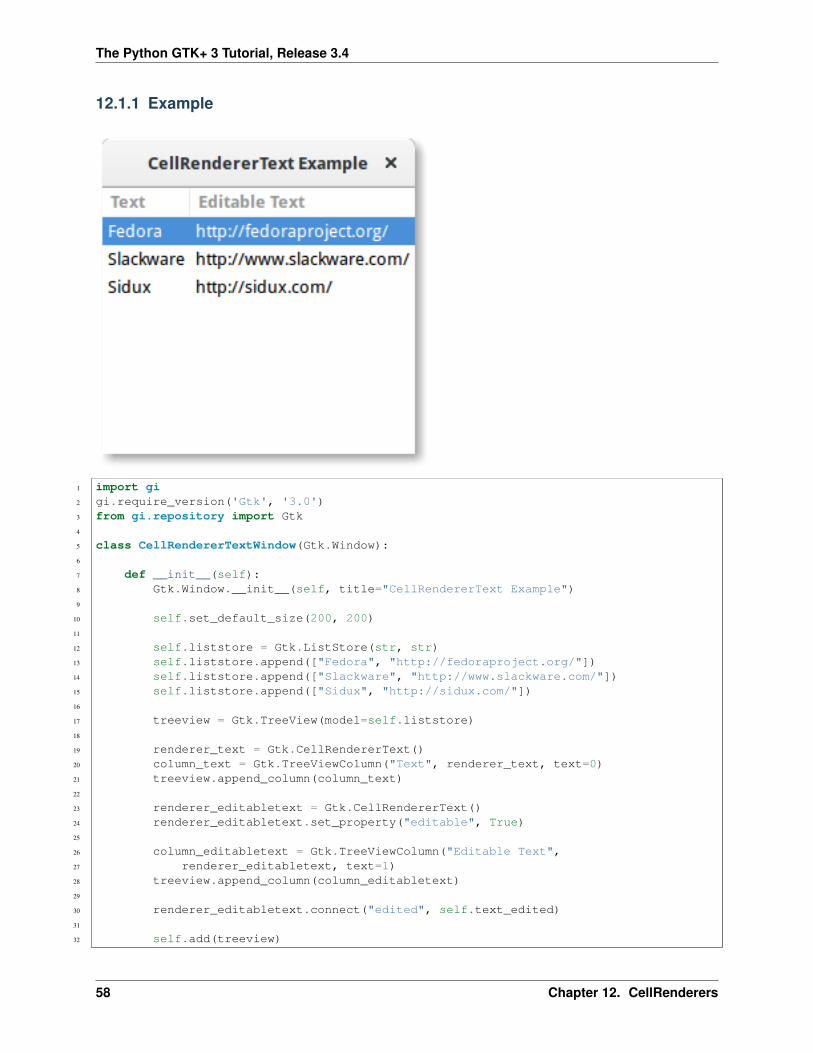
The Python GTK+ 3 Tutorial, Release 3.4
12.1.1 Example
1 import gi2 gi.require_version('Gtk', '3.0')3 from gi.repository import Gtk4
5 class CellRendererTextWindow(Gtk.Window):6
7 def __init__(self):8 Gtk.Window.__init__(self, title="CellRendererText Example")9
10 self.set_default_size(200, 200)11
12 self.liststore = Gtk.ListStore(str, str)13 self.liststore.append(["Fedora", "http://fedoraproject.org/"])14 self.liststore.append(["Slackware", "http://www.slackware.com/"])15 self.liststore.append(["Sidux", "http://sidux.com/"])16
17 treeview = Gtk.TreeView(model=self.liststore)18
19 renderer_text = Gtk.CellRendererText()20 column_text = Gtk.TreeViewColumn("Text", renderer_text, text=0)21 treeview.append_column(column_text)22
23 renderer_editabletext = Gtk.CellRendererText()24 renderer_editabletext.set_property("editable", True)25
26 column_editabletext = Gtk.TreeViewColumn("Editable Text",27 renderer_editabletext, text=1)28 treeview.append_column(column_editabletext)29
30 renderer_editabletext.connect("edited", self.text_edited)31
32 self.add(treeview)
58 Chapter 12. CellRenderers
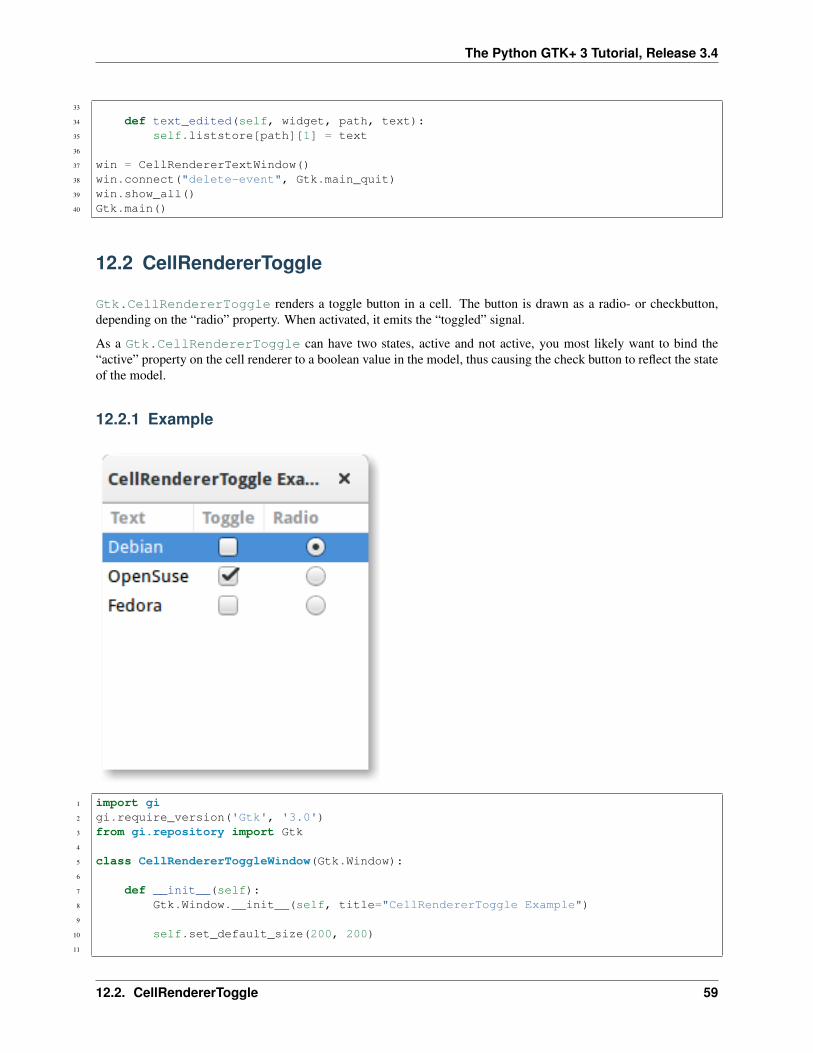
The Python GTK+ 3 Tutorial, Release 3.4
33
34 def text_edited(self, widget, path, text):35 self.liststore[path][1] = text36
37 win = CellRendererTextWindow()38 win.connect("delete-event", Gtk.main_quit)39 win.show_all()40 Gtk.main()
12.2 CellRendererToggle
Gtk.CellRendererToggle renders a toggle button in a cell. The button is drawn as a radio- or checkbutton,depending on the “radio” property. When activated, it emits the “toggled” signal.
As a Gtk.CellRendererToggle can have two states, active and not active, you most likely want to bind the“active” property on the cell renderer to a boolean value in the model, thus causing the check button to reflect the stateof the model.
12.2.1 Example
1 import gi2 gi.require_version('Gtk', '3.0')3 from gi.repository import Gtk4
5 class CellRendererToggleWindow(Gtk.Window):6
7 def __init__(self):8 Gtk.Window.__init__(self, title="CellRendererToggle Example")9
10 self.set_default_size(200, 200)11
12.2. CellRendererToggle 59
The Python GTK+ 3 Tutorial, Release 3.4
12 self.liststore = Gtk.ListStore(str, bool, bool)13 self.liststore.append(["Debian", False, True])14 self.liststore.append(["OpenSuse", True, False])15 self.liststore.append(["Fedora", False, False])16
17 treeview = Gtk.TreeView(model=self.liststore)18
19 renderer_text = Gtk.CellRendererText()20 column_text = Gtk.TreeViewColumn("Text", renderer_text, text=0)21 treeview.append_column(column_text)22
23 renderer_toggle = Gtk.CellRendererToggle()24 renderer_toggle.connect("toggled", self.on_cell_toggled)25
26 column_toggle = Gtk.TreeViewColumn("Toggle", renderer_toggle, active=1)27 treeview.append_column(column_toggle)28
29 renderer_radio = Gtk.CellRendererToggle()30 renderer_radio.set_radio(True)31 renderer_radio.connect("toggled", self.on_cell_radio_toggled)32
33 column_radio = Gtk.TreeViewColumn("Radio", renderer_radio, active=2)34 treeview.append_column(column_radio)35
36 self.add(treeview)37
38 def on_cell_toggled(self, widget, path):39 self.liststore[path][1] = not self.liststore[path][1]40
41 def on_cell_radio_toggled(self, widget, path):42 selected_path = Gtk.TreePath(path)43 for row in self.liststore:44 row[2] = (row.path == selected_path)45
46 win = CellRendererToggleWindow()47 win.connect("delete-event", Gtk.main_quit)48 win.show_all()49 Gtk.main()
12.3 CellRendererPixbuf
A Gtk.CellRendererPixbuf can be used to render an image in a cell. It allows to render either a givenGdk.Pixbuf (set via the “pixbuf” property) or a named icon (set via the “icon-name” property).
60 Chapter 12. CellRenderers
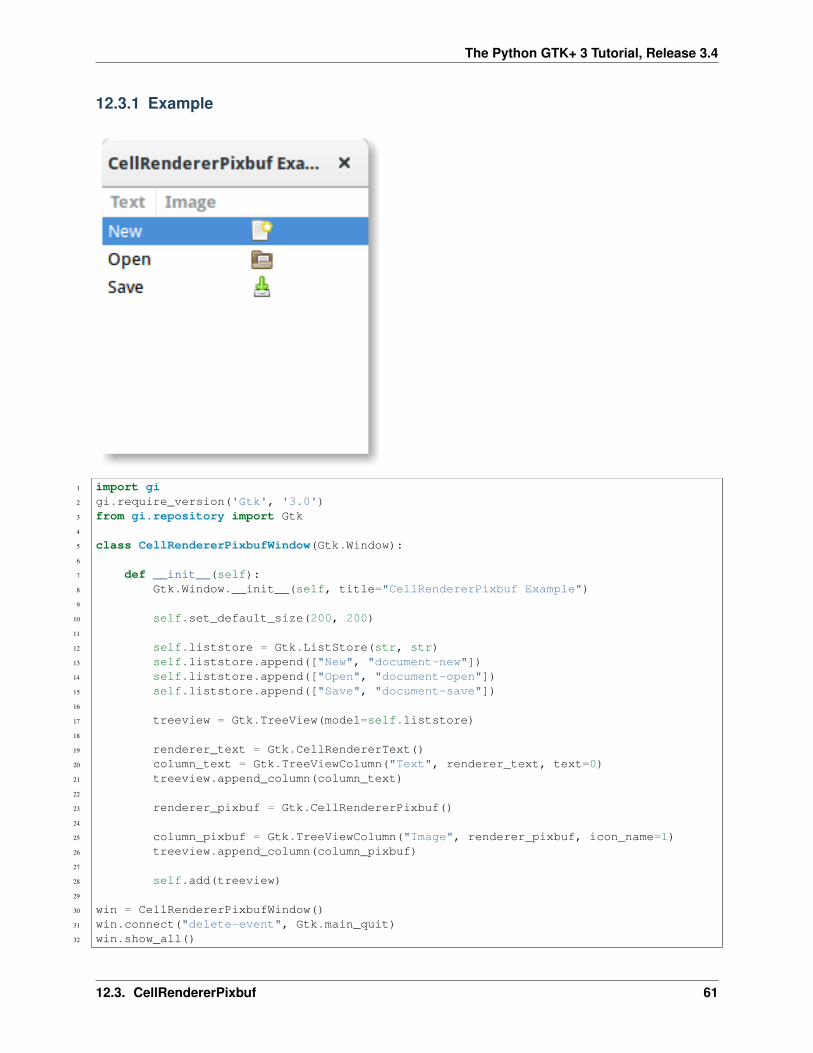
The Python GTK+ 3 Tutorial, Release 3.4
12.3.1 Example
1 import gi2 gi.require_version('Gtk', '3.0')3 from gi.repository import Gtk4
5 class CellRendererPixbufWindow(Gtk.Window):6
7 def __init__(self):8 Gtk.Window.__init__(self, title="CellRendererPixbuf Example")9
10 self.set_default_size(200, 200)11
12 self.liststore = Gtk.ListStore(str, str)13 self.liststore.append(["New", "document-new"])14 self.liststore.append(["Open", "document-open"])15 self.liststore.append(["Save", "document-save"])16
17 treeview = Gtk.TreeView(model=self.liststore)18
19 renderer_text = Gtk.CellRendererText()20 column_text = Gtk.TreeViewColumn("Text", renderer_text, text=0)21 treeview.append_column(column_text)22
23 renderer_pixbuf = Gtk.CellRendererPixbuf()24
25 column_pixbuf = Gtk.TreeViewColumn("Image", renderer_pixbuf, icon_name=1)26 treeview.append_column(column_pixbuf)27
28 self.add(treeview)29
30 win = CellRendererPixbufWindow()31 win.connect("delete-event", Gtk.main_quit)32 win.show_all()
12.3. CellRendererPixbuf 61
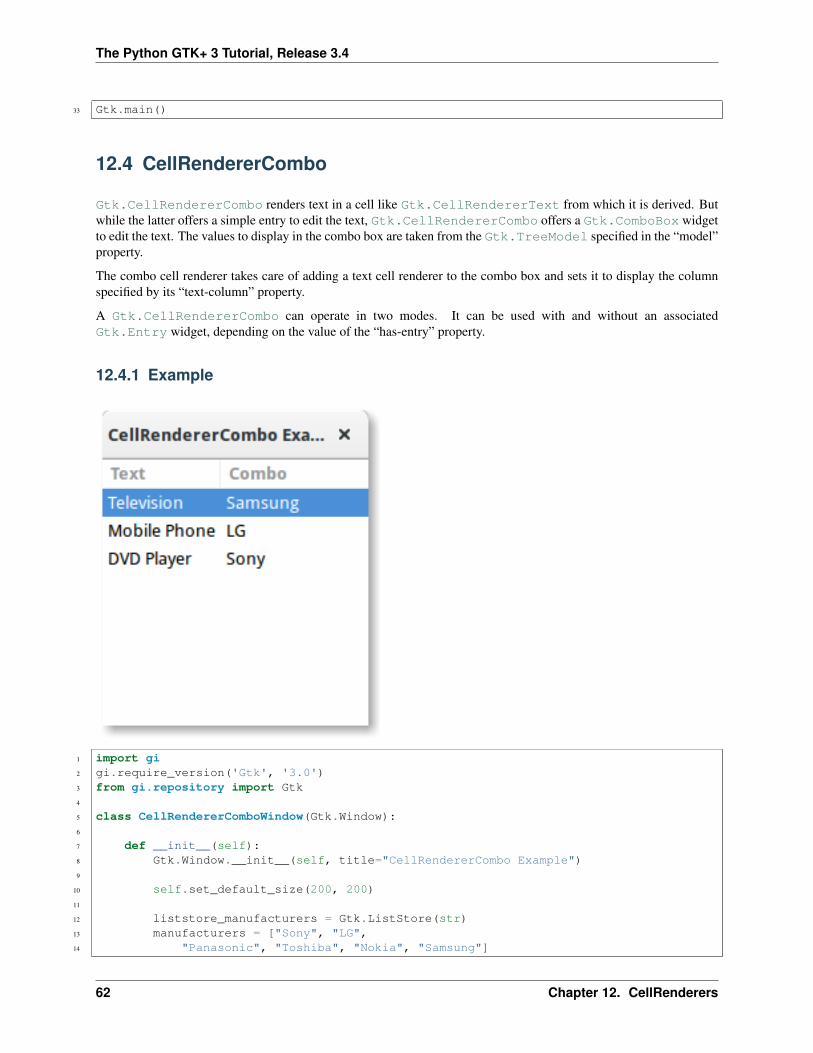
The Python GTK+ 3 Tutorial, Release 3.4
33 Gtk.main()
12.4 CellRendererCombo
Gtk.CellRendererCombo renders text in a cell like Gtk.CellRendererText from which it is derived. Butwhile the latter offers a simple entry to edit the text, Gtk.CellRendererCombo offers a Gtk.ComboBox widgetto edit the text. The values to display in the combo box are taken from the Gtk.TreeModel specified in the “model”property.
The combo cell renderer takes care of adding a text cell renderer to the combo box and sets it to display the columnspecified by its “text-column” property.
A Gtk.CellRendererCombo can operate in two modes. It can be used with and without an associatedGtk.Entry widget, depending on the value of the “has-entry” property.
12.4.1 Example
1 import gi2 gi.require_version('Gtk', '3.0')3 from gi.repository import Gtk4
5 class CellRendererComboWindow(Gtk.Window):6
7 def __init__(self):8 Gtk.Window.__init__(self, title="CellRendererCombo Example")9
10 self.set_default_size(200, 200)11
12 liststore_manufacturers = Gtk.ListStore(str)13 manufacturers = ["Sony", "LG",14 "Panasonic", "Toshiba", "Nokia", "Samsung"]
62 Chapter 12. CellRenderers
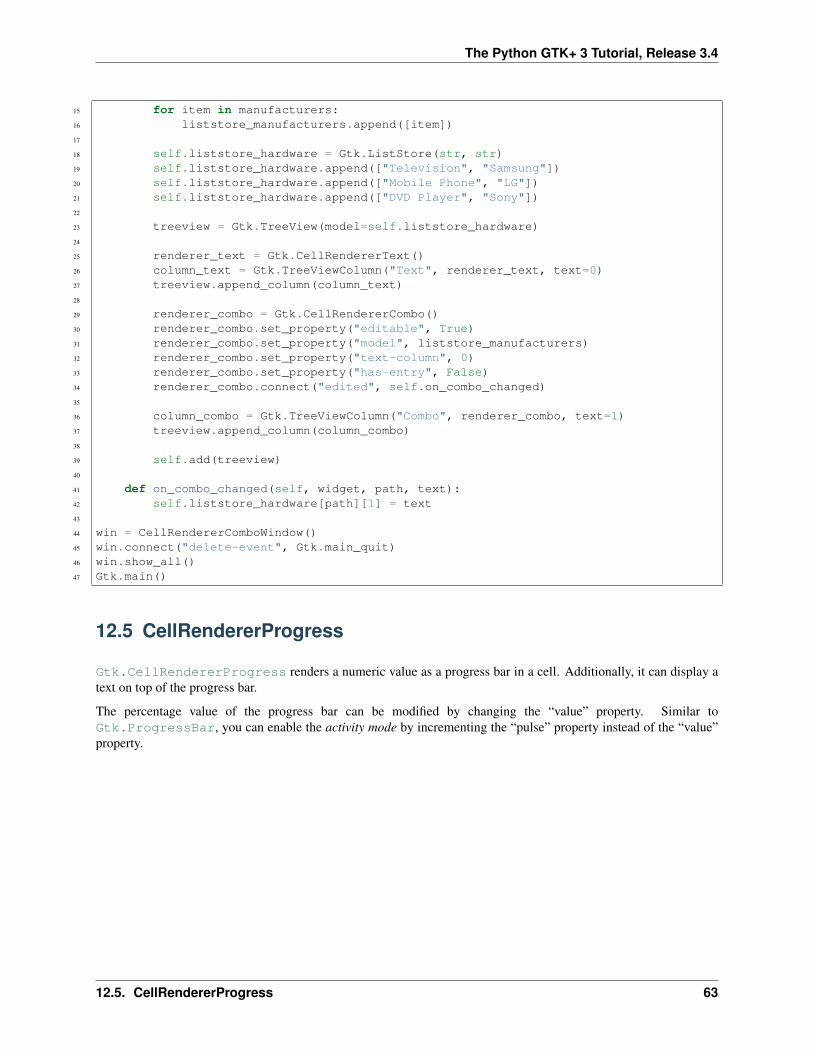
The Python GTK+ 3 Tutorial, Release 3.4
15 for item in manufacturers:16 liststore_manufacturers.append([item])17
18 self.liststore_hardware = Gtk.ListStore(str, str)19 self.liststore_hardware.append(["Television", "Samsung"])20 self.liststore_hardware.append(["Mobile Phone", "LG"])21 self.liststore_hardware.append(["DVD Player", "Sony"])22
23 treeview = Gtk.TreeView(model=self.liststore_hardware)24
25 renderer_text = Gtk.CellRendererText()26 column_text = Gtk.TreeViewColumn("Text", renderer_text, text=0)27 treeview.append_column(column_text)28
29 renderer_combo = Gtk.CellRendererCombo()30 renderer_combo.set_property("editable", True)31 renderer_combo.set_property("model", liststore_manufacturers)32 renderer_combo.set_property("text-column", 0)33 renderer_combo.set_property("has-entry", False)34 renderer_combo.connect("edited", self.on_combo_changed)35
36 column_combo = Gtk.TreeViewColumn("Combo", renderer_combo, text=1)37 treeview.append_column(column_combo)38
39 self.add(treeview)40
41 def on_combo_changed(self, widget, path, text):42 self.liststore_hardware[path][1] = text43
44 win = CellRendererComboWindow()45 win.connect("delete-event", Gtk.main_quit)46 win.show_all()47 Gtk.main()
12.5 CellRendererProgress
Gtk.CellRendererProgress renders a numeric value as a progress bar in a cell. Additionally, it can display atext on top of the progress bar.
The percentage value of the progress bar can be modified by changing the “value” property. Similar toGtk.ProgressBar, you can enable the activity mode by incrementing the “pulse” property instead of the “value”property.
12.5. CellRendererProgress 63
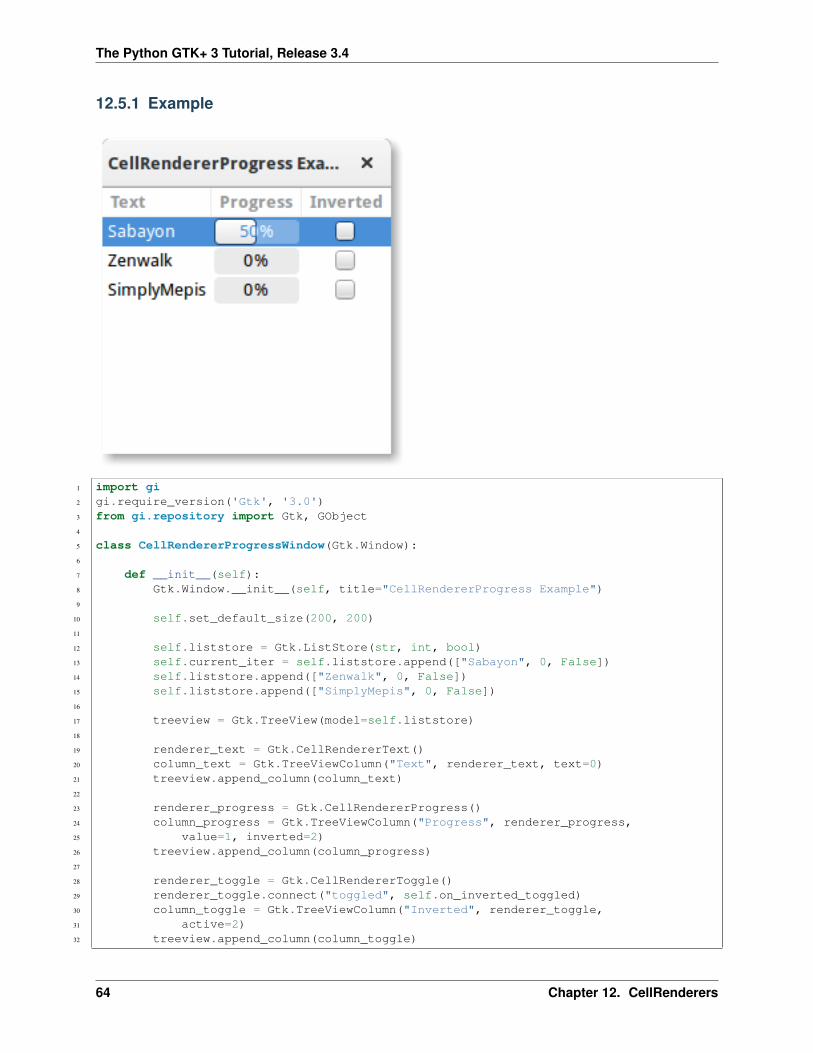
The Python GTK+ 3 Tutorial, Release 3.4
12.5.1 Example
1 import gi2 gi.require_version('Gtk', '3.0')3 from gi.repository import Gtk, GObject4
5 class CellRendererProgressWindow(Gtk.Window):6
7 def __init__(self):8 Gtk.Window.__init__(self, title="CellRendererProgress Example")9
10 self.set_default_size(200, 200)11
12 self.liststore = Gtk.ListStore(str, int, bool)13 self.current_iter = self.liststore.append(["Sabayon", 0, False])14 self.liststore.append(["Zenwalk", 0, False])15 self.liststore.append(["SimplyMepis", 0, False])16
17 treeview = Gtk.TreeView(model=self.liststore)18
19 renderer_text = Gtk.CellRendererText()20 column_text = Gtk.TreeViewColumn("Text", renderer_text, text=0)21 treeview.append_column(column_text)22
23 renderer_progress = Gtk.CellRendererProgress()24 column_progress = Gtk.TreeViewColumn("Progress", renderer_progress,25 value=1, inverted=2)26 treeview.append_column(column_progress)27
28 renderer_toggle = Gtk.CellRendererToggle()29 renderer_toggle.connect("toggled", self.on_inverted_toggled)30 column_toggle = Gtk.TreeViewColumn("Inverted", renderer_toggle,31 active=2)32 treeview.append_column(column_toggle)
64 Chapter 12. CellRenderers
The Python GTK+ 3 Tutorial, Release 3.4
33
34 self.add(treeview)35
36 self.timeout_id = GObject.timeout_add(100, self.on_timeout, None)37
38 def on_inverted_toggled(self, widget, path):39 self.liststore[path][2] = not self.liststore[path][2]40
41 def on_timeout(self, user_data):42 new_value = self.liststore[self.current_iter][1] + 143 if new_value > 100:44 self.current_iter = self.liststore.iter_next(self.current_iter)45 if self.current_iter == None:46 self.reset_model()47 new_value = self.liststore[self.current_iter][1] + 148
49 self.liststore[self.current_iter][1] = new_value50 return True51
52 def reset_model(self):53 for row in self.liststore:54 row[1] = 055 self.current_iter = self.liststore.get_iter_first()56
57 win = CellRendererProgressWindow()58 win.connect("delete-event", Gtk.main_quit)59 win.show_all()60 Gtk.main()
12.6 CellRendererSpin
Gtk.CellRendererSpin renders text in a cell like Gtk.CellRendererText from which it is derived. Butwhile the latter offers a simple entry to edit the text, Gtk.CellRendererSpin offers a Gtk.SpinButtonwidget. Of course, that means that the text has to be parseable as a floating point number.
The range of the spinbutton is taken from the adjustment property of the cell renderer, which can be set explicitlyor mapped to a column in the tree model, like all properties of cell renders. Gtk.CellRendererSpin also hasproperties for the climb rate and the number of digits to display.
12.6. CellRendererSpin 65
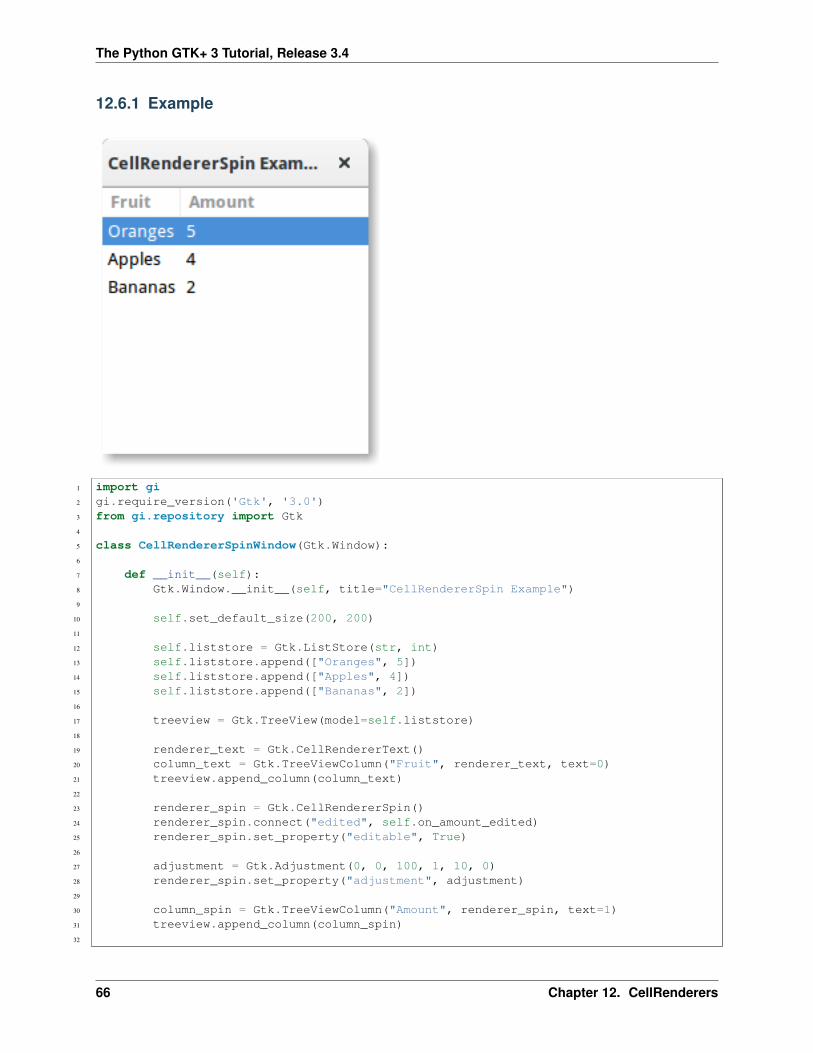
The Python GTK+ 3 Tutorial, Release 3.4
12.6.1 Example
1 import gi2 gi.require_version('Gtk', '3.0')3 from gi.repository import Gtk4
5 class CellRendererSpinWindow(Gtk.Window):6
7 def __init__(self):8 Gtk.Window.__init__(self, title="CellRendererSpin Example")9
10 self.set_default_size(200, 200)11
12 self.liststore = Gtk.ListStore(str, int)13 self.liststore.append(["Oranges", 5])14 self.liststore.append(["Apples", 4])15 self.liststore.append(["Bananas", 2])16
17 treeview = Gtk.TreeView(model=self.liststore)18
19 renderer_text = Gtk.CellRendererText()20 column_text = Gtk.TreeViewColumn("Fruit", renderer_text, text=0)21 treeview.append_column(column_text)22
23 renderer_spin = Gtk.CellRendererSpin()24 renderer_spin.connect("edited", self.on_amount_edited)25 renderer_spin.set_property("editable", True)26
27 adjustment = Gtk.Adjustment(0, 0, 100, 1, 10, 0)28 renderer_spin.set_property("adjustment", adjustment)29
30 column_spin = Gtk.TreeViewColumn("Amount", renderer_spin, text=1)31 treeview.append_column(column_spin)32
66 Chapter 12. CellRenderers
The Python GTK+ 3 Tutorial, Release 3.4
33 self.add(treeview)34
35 def on_amount_edited(self, widget, path, value):36 self.liststore[path][1] = int(value)37
38 win = CellRendererSpinWindow()39 win.connect("delete-event", Gtk.main_quit)40 win.show_all()41 Gtk.main()
12.6. CellRendererSpin 67

The Python GTK+ 3 Tutorial, Release 3.4
68 Chapter 12. CellRenderers
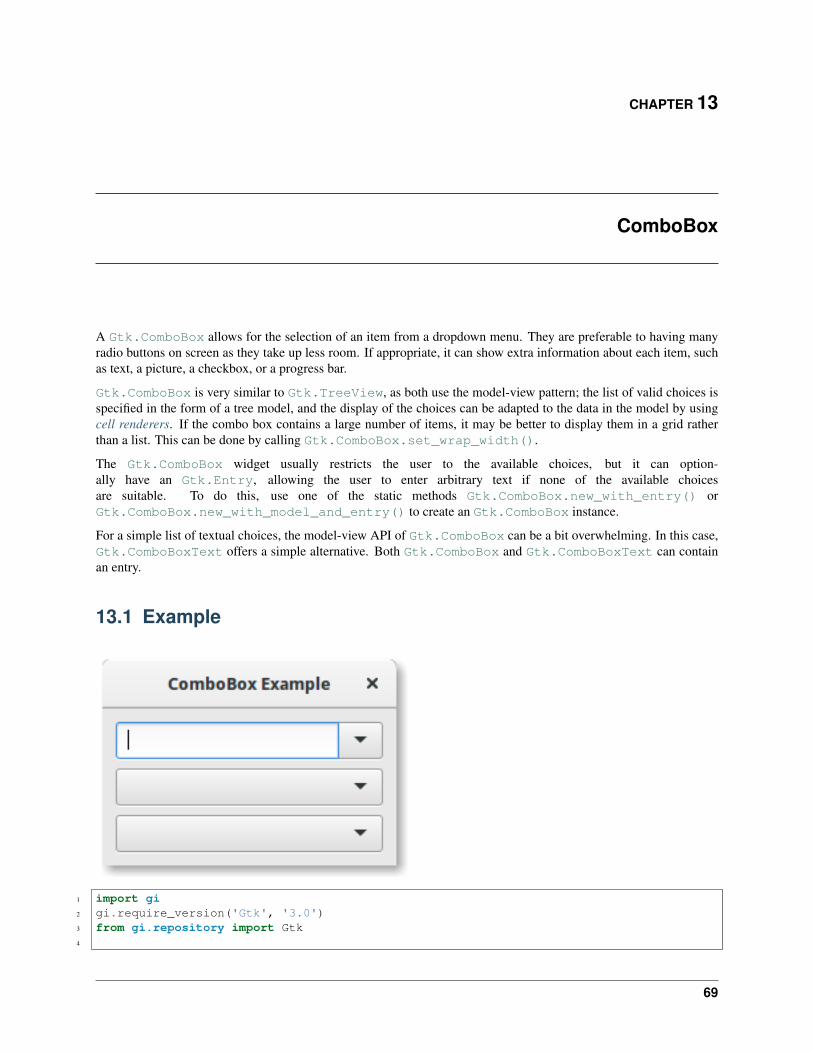
CHAPTER 13
ComboBox
A Gtk.ComboBox allows for the selection of an item from a dropdown menu. They are preferable to having manyradio buttons on screen as they take up less room. If appropriate, it can show extra information about each item, suchas text, a picture, a checkbox, or a progress bar.
Gtk.ComboBox is very similar to Gtk.TreeView, as both use the model-view pattern; the list of valid choices isspecified in the form of a tree model, and the display of the choices can be adapted to the data in the model by usingcell renderers. If the combo box contains a large number of items, it may be better to display them in a grid ratherthan a list. This can be done by calling Gtk.ComboBox.set_wrap_width().
The Gtk.ComboBox widget usually restricts the user to the available choices, but it can option-ally have an Gtk.Entry, allowing the user to enter arbitrary text if none of the available choicesare suitable. To do this, use one of the static methods Gtk.ComboBox.new_with_entry() orGtk.ComboBox.new_with_model_and_entry() to create an Gtk.ComboBox instance.
For a simple list of textual choices, the model-view API of Gtk.ComboBox can be a bit overwhelming. In this case,Gtk.ComboBoxText offers a simple alternative. Both Gtk.ComboBox and Gtk.ComboBoxText can containan entry.
13.1 Example
1 import gi2 gi.require_version('Gtk', '3.0')3 from gi.repository import Gtk4
69
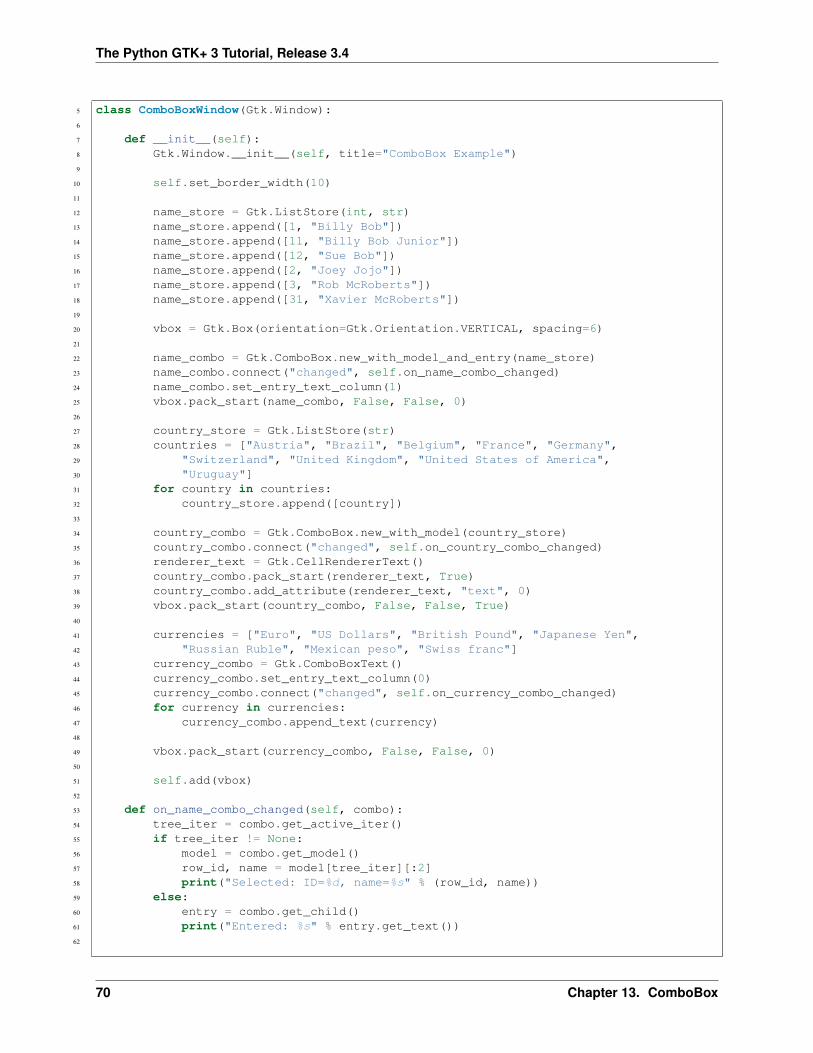
The Python GTK+ 3 Tutorial, Release 3.4
5 class ComboBoxWindow(Gtk.Window):6
7 def __init__(self):8 Gtk.Window.__init__(self, title="ComboBox Example")9
10 self.set_border_width(10)11
12 name_store = Gtk.ListStore(int, str)13 name_store.append([1, "Billy Bob"])14 name_store.append([11, "Billy Bob Junior"])15 name_store.append([12, "Sue Bob"])16 name_store.append([2, "Joey Jojo"])17 name_store.append([3, "Rob McRoberts"])18 name_store.append([31, "Xavier McRoberts"])19
20 vbox = Gtk.Box(orientation=Gtk.Orientation.VERTICAL, spacing=6)21
22 name_combo = Gtk.ComboBox.new_with_model_and_entry(name_store)23 name_combo.connect("changed", self.on_name_combo_changed)24 name_combo.set_entry_text_column(1)25 vbox.pack_start(name_combo, False, False, 0)26
27 country_store = Gtk.ListStore(str)28 countries = ["Austria", "Brazil", "Belgium", "France", "Germany",29 "Switzerland", "United Kingdom", "United States of America",30 "Uruguay"]31 for country in countries:32 country_store.append([country])33
34 country_combo = Gtk.ComboBox.new_with_model(country_store)35 country_combo.connect("changed", self.on_country_combo_changed)36 renderer_text = Gtk.CellRendererText()37 country_combo.pack_start(renderer_text, True)38 country_combo.add_attribute(renderer_text, "text", 0)39 vbox.pack_start(country_combo, False, False, True)40
41 currencies = ["Euro", "US Dollars", "British Pound", "Japanese Yen",42 "Russian Ruble", "Mexican peso", "Swiss franc"]43 currency_combo = Gtk.ComboBoxText()44 currency_combo.set_entry_text_column(0)45 currency_combo.connect("changed", self.on_currency_combo_changed)46 for currency in currencies:47 currency_combo.append_text(currency)48
49 vbox.pack_start(currency_combo, False, False, 0)50
51 self.add(vbox)52
53 def on_name_combo_changed(self, combo):54 tree_iter = combo.get_active_iter()55 if tree_iter != None:56 model = combo.get_model()57 row_id, name = model[tree_iter][:2]58 print("Selected: ID=%d, name=%s" % (row_id, name))59 else:60 entry = combo.get_child()61 print("Entered: %s" % entry.get_text())62
70 Chapter 13. ComboBox
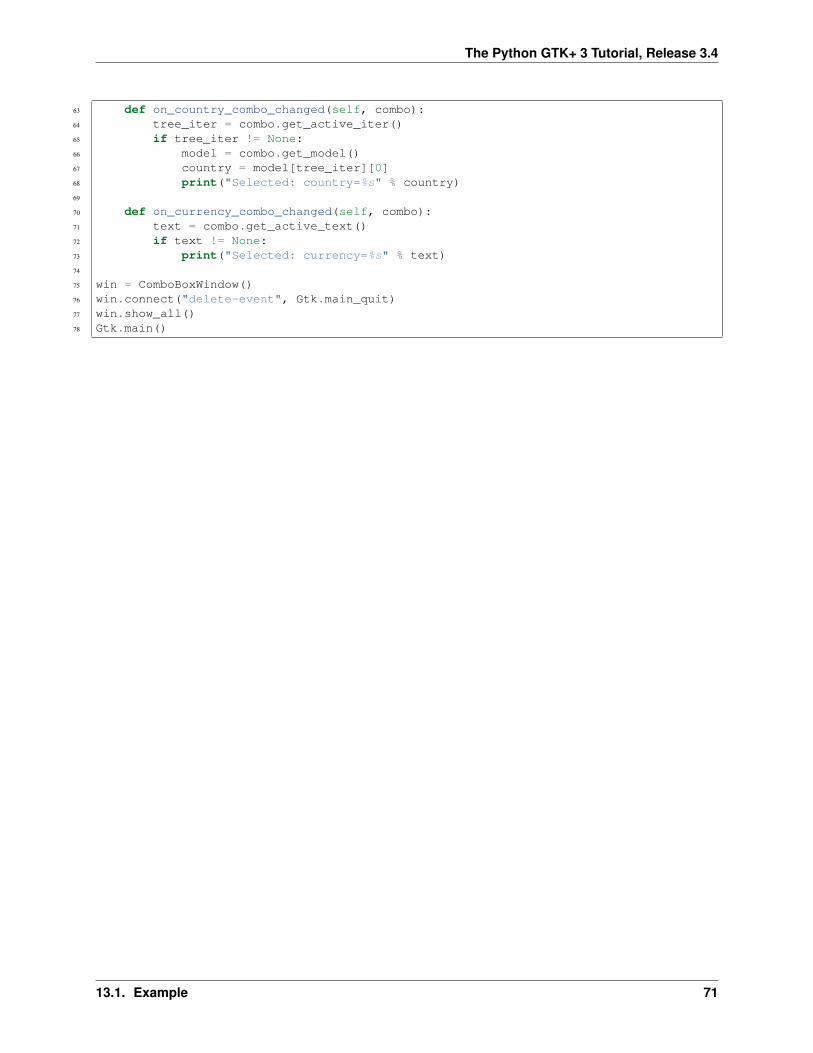
The Python GTK+ 3 Tutorial, Release 3.4
63 def on_country_combo_changed(self, combo):64 tree_iter = combo.get_active_iter()65 if tree_iter != None:66 model = combo.get_model()67 country = model[tree_iter][0]68 print("Selected: country=%s" % country)69
70 def on_currency_combo_changed(self, combo):71 text = combo.get_active_text()72 if text != None:73 print("Selected: currency=%s" % text)74
75 win = ComboBoxWindow()76 win.connect("delete-event", Gtk.main_quit)77 win.show_all()78 Gtk.main()
13.1. Example 71

The Python GTK+ 3 Tutorial, Release 3.4
72 Chapter 13. ComboBox
CHAPTER 14
IconView
A Gtk.IconView is a widget that displays a collection of icons in a grid view. It supports features such as drag anddrop, multiple selections and item reordering.
Similarly to Gtk.TreeView, Gtk.IconView uses a Gtk.ListStore for its model. Instead of using cell ren-derers, Gtk.IconView requires that one of the columns in its Gtk.ListStore contains GdkPixbuf.Pixbufobjects.
Gtk.IconView supports numerous selection modes to allow for either selecting multiple icons at a time, re-stricting selections to just one item or disallowing selecting items completely. To specify a selection mode, theGtk.IconView.set_selection_mode() method is used with one of the Gtk.SelectionMode selectionmodes.
73
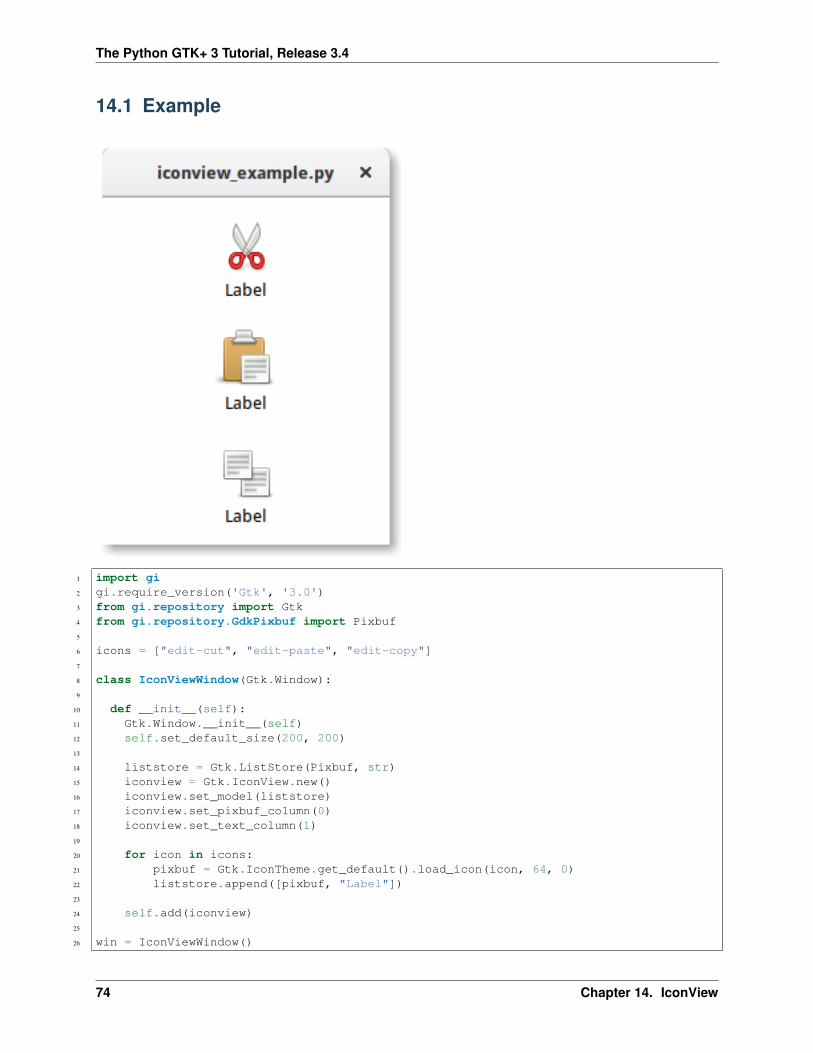
The Python GTK+ 3 Tutorial, Release 3.4
14.1 Example
1 import gi2 gi.require_version('Gtk', '3.0')3 from gi.repository import Gtk4 from gi.repository.GdkPixbuf import Pixbuf5
6 icons = ["edit-cut", "edit-paste", "edit-copy"]7
8 class IconViewWindow(Gtk.Window):9
10 def __init__(self):11 Gtk.Window.__init__(self)12 self.set_default_size(200, 200)13
14 liststore = Gtk.ListStore(Pixbuf, str)15 iconview = Gtk.IconView.new()16 iconview.set_model(liststore)17 iconview.set_pixbuf_column(0)18 iconview.set_text_column(1)19
20 for icon in icons:21 pixbuf = Gtk.IconTheme.get_default().load_icon(icon, 64, 0)22 liststore.append([pixbuf, "Label"])23
24 self.add(iconview)25
26 win = IconViewWindow()
74 Chapter 14. IconView
The Python GTK+ 3 Tutorial, Release 3.4
27 win.connect("delete-event", Gtk.main_quit)28 win.show_all()29 Gtk.main()
14.1. Example 75
The Python GTK+ 3 Tutorial, Release 3.4
76 Chapter 14. IconView
CHAPTER 15
Multiline Text Editor
The Gtk.TextView widget can be used to display and edit large amounts of formatted text. Like theGtk.TreeView, it has a model/view design. In this case the Gtk.TextBuffer is the model which representsthe text being edited. This allows two or more Gtk.TextView widgets to share the same Gtk.TextBuffer, andallows those text buffers to be displayed slightly differently. Or you could maintain several text buffers and choose todisplay each one at different times in the same Gtk.TextView widget.
15.1 The View
The Gtk.TextView is the frontend with which the user can add, edit and delete textual data. They are commonlyused to edit multiple lines of text. When creating a Gtk.TextView it contains its own default Gtk.TextBuffer,which you can access via the Gtk.TextView.get_buffer() method.
By default, text can be added, edited and removed from the Gtk.TextView. You can disable this bycalling Gtk.TextView.set_editable(). If the text is not editable, you usually want to hide the textcursor with Gtk.TextView.set_cursor_visible() as well. In some cases it may be useful to setthe justification of the text with Gtk.TextView.set_justification(). The text can be displayed atthe left edge, (Gtk.Justification.LEFT), at the right edge (Gtk.Justification.RIGHT), centered(Gtk.Justification.CENTER), or distributed across the complete width (Gtk.Justification.FILL).
Another default setting of the Gtk.TextView widget is long lines of text will continue horizontallyuntil a break is entered. To wrap the text and prevent it going off the edges of the screen callGtk.TextView.set_wrap_mode().
15.2 The Model
The Gtk.TextBuffer is the core of the Gtk.TextView widget, and is used to hold whatevertext is being displayed in the Gtk.TextView. Setting and retrieving the contents is possible withGtk.TextBuffer.set_text() and Gtk.TextBuffer.get_text(). However, most text manipulationis accomplished with iterators, represented by a Gtk.TextIter. An iterator represents a position between twocharacters in the text buffer. Iterators are not valid indefinitely; whenever the buffer is modified in a way that affectsthe contents of the buffer, all outstanding iterators become invalid.
Because of this, iterators can’t be used to preserve positions across buffer modifications. To preserve a position, useGtk.TextMark. A text buffer contains two built-in marks; an “insert” mark (which is the position of the cursor)and the “selection_bound” mark. Both of them can be retrieved using Gtk.TextBuffer.get_insert() andGtk.TextBuffer.get_selection_bound(), respectively. By default, the location of a Gtk.TextMark isnot shown. This can be changed by calling Gtk.TextMark.set_visible().
77
The Python GTK+ 3 Tutorial, Release 3.4
Many methods exist to retrieve a Gtk.TextIter. For instance, Gtk.TextBuffer.get_start_iter() re-turns an iterator pointing to the first position in the text buffer, whereas Gtk.TextBuffer.get_end_iter()returns an iterator pointing past the last valid character. Retrieving the bounds of the selected text can be achieved bycalling Gtk.TextBuffer.get_selection_bounds().
To insert text at a specific position use Gtk.TextBuffer.insert(). Another useful method isGtk.TextBuffer.insert_at_cursor() which inserts text wherever the cursor may be currently positioned.To remove portions of the text buffer use Gtk.TextBuffer.delete().
In addition, Gtk.TextIter can be used to locate textual matches in the buffer usingGtk.TextIter.forward_search() and Gtk.TextIter.backward_search(). The start and enditers are used as the starting point of the search and move forwards/backwards depending on requirements.
15.3 Tags
Text in a buffer can be marked with tags. A tag is an attribute that can be applied to some range of text. For example,a tag might be called “bold” and make the text inside the tag bold. However, the tag concept is more general thanthat; tags don’t have to affect appearance. They can instead affect the behaviour of mouse and key presses, “lock” arange of text so the user can’t edit it, or countless other things. A tag is represented by a Gtk.TextTag object. OneGtk.TextTag can be applied to any number of text ranges in any number of buffers.
Each tag is stored in a Gtk.TextTagTable. A tag table defines a set of tags that can be used together. Each bufferhas one tag table associated with it; only tags from that tag table can be used with the buffer. A single tag table can beshared between multiple buffers, however.
To specify that some text in the buffer should have specific formatting, you must define a tag to hold that format-ting information, and then apply that tag to the region of text using Gtk.TextBuffer.create_tag() andGtk.TextBuffer.apply_tag():
tag = textbuffer.create_tag("orange_bg", background="orange")textbuffer.apply_tag(tag, start_iter, end_iter)
The following are some of the common styles applied to text:
• Background colour (“foreground” property)
• Foreground colour (“background” property)
• Underline (“underline” property)
• Bold (“weight” property)
• Italics (“style” property)
• Strikethrough (“strikethrough” property)
• Justification (“justification” property)
• Size (“size” and “size-points” properties)
• Text wrapping (“wrap-mode” property)
You can also delete particular tags later using Gtk.TextBuffer.remove_tag() or delete all tags in a givenregion by calling Gtk.TextBuffer.remove_all_tags().
78 Chapter 15. Multiline Text Editor
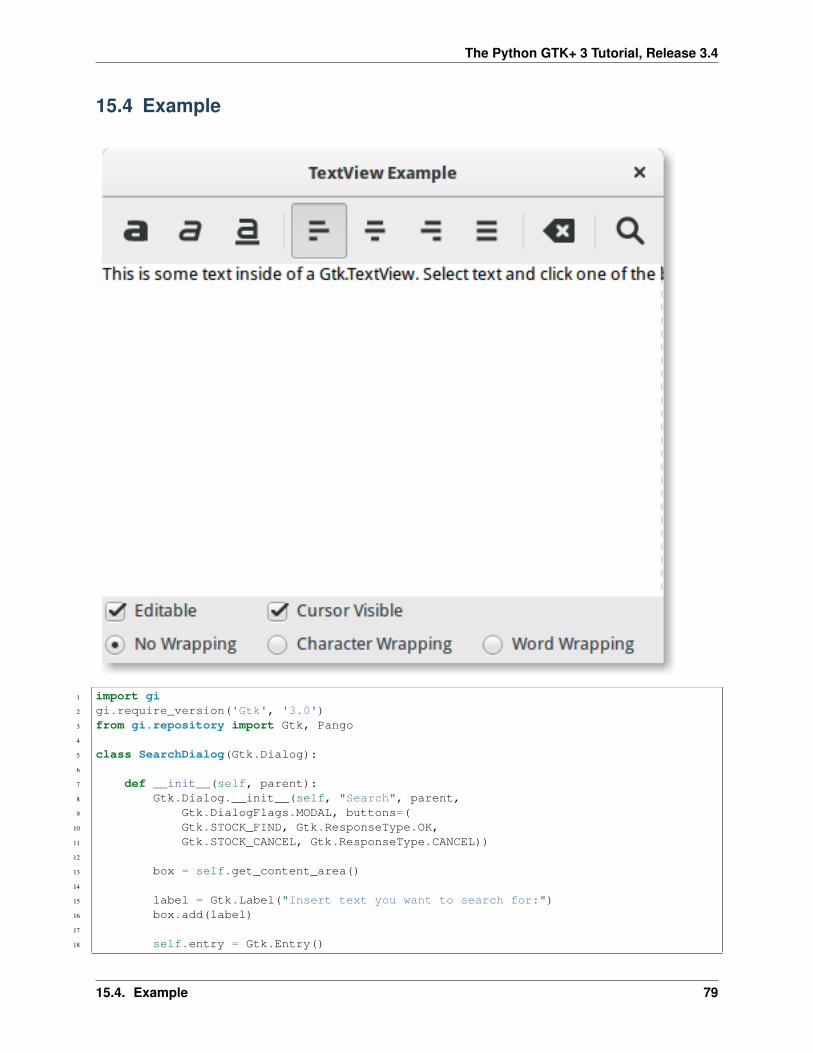
The Python GTK+ 3 Tutorial, Release 3.4
15.4 Example
1 import gi2 gi.require_version('Gtk', '3.0')3 from gi.repository import Gtk, Pango4
5 class SearchDialog(Gtk.Dialog):6
7 def __init__(self, parent):8 Gtk.Dialog.__init__(self, "Search", parent,9 Gtk.DialogFlags.MODAL, buttons=(
10 Gtk.STOCK_FIND, Gtk.ResponseType.OK,11 Gtk.STOCK_CANCEL, Gtk.ResponseType.CANCEL))12
13 box = self.get_content_area()14
15 label = Gtk.Label("Insert text you want to search for:")16 box.add(label)17
18 self.entry = Gtk.Entry()
15.4. Example 79
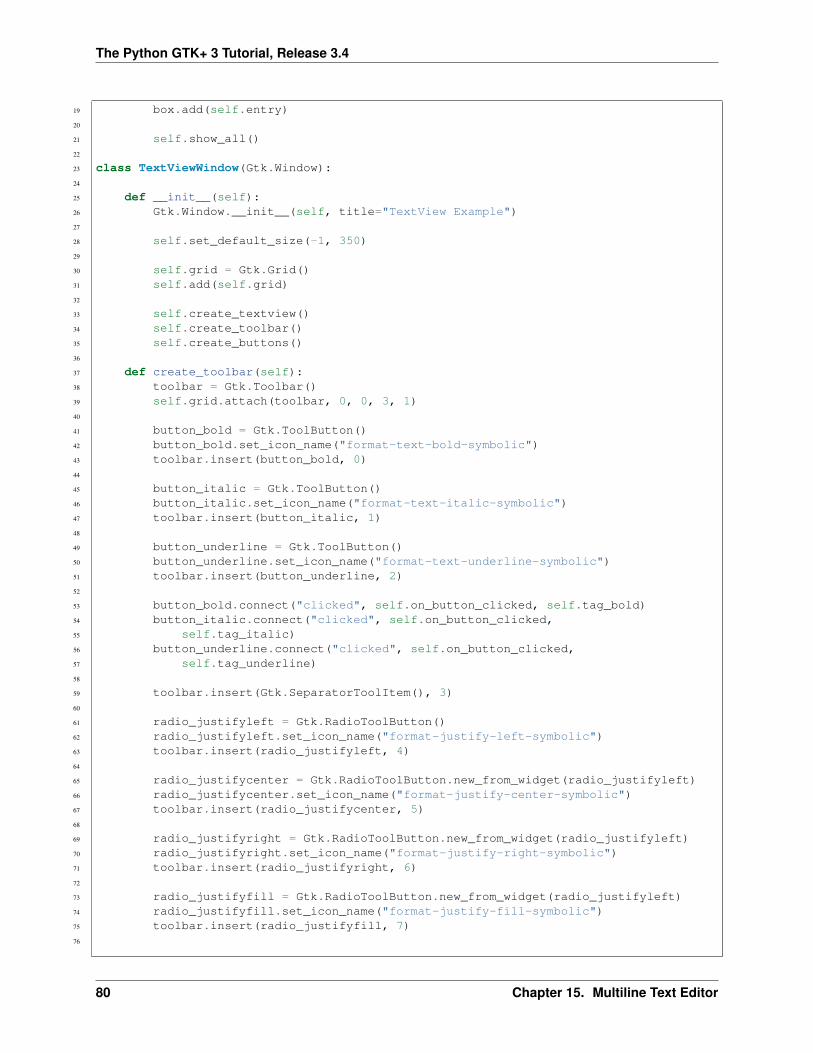
The Python GTK+ 3 Tutorial, Release 3.4
19 box.add(self.entry)20
21 self.show_all()22
23 class TextViewWindow(Gtk.Window):24
25 def __init__(self):26 Gtk.Window.__init__(self, title="TextView Example")27
28 self.set_default_size(-1, 350)29
30 self.grid = Gtk.Grid()31 self.add(self.grid)32
33 self.create_textview()34 self.create_toolbar()35 self.create_buttons()36
37 def create_toolbar(self):38 toolbar = Gtk.Toolbar()39 self.grid.attach(toolbar, 0, 0, 3, 1)40
41 button_bold = Gtk.ToolButton()42 button_bold.set_icon_name("format-text-bold-symbolic")43 toolbar.insert(button_bold, 0)44
45 button_italic = Gtk.ToolButton()46 button_italic.set_icon_name("format-text-italic-symbolic")47 toolbar.insert(button_italic, 1)48
49 button_underline = Gtk.ToolButton()50 button_underline.set_icon_name("format-text-underline-symbolic")51 toolbar.insert(button_underline, 2)52
53 button_bold.connect("clicked", self.on_button_clicked, self.tag_bold)54 button_italic.connect("clicked", self.on_button_clicked,55 self.tag_italic)56 button_underline.connect("clicked", self.on_button_clicked,57 self.tag_underline)58
59 toolbar.insert(Gtk.SeparatorToolItem(), 3)60
61 radio_justifyleft = Gtk.RadioToolButton()62 radio_justifyleft.set_icon_name("format-justify-left-symbolic")63 toolbar.insert(radio_justifyleft, 4)64
65 radio_justifycenter = Gtk.RadioToolButton.new_from_widget(radio_justifyleft)66 radio_justifycenter.set_icon_name("format-justify-center-symbolic")67 toolbar.insert(radio_justifycenter, 5)68
69 radio_justifyright = Gtk.RadioToolButton.new_from_widget(radio_justifyleft)70 radio_justifyright.set_icon_name("format-justify-right-symbolic")71 toolbar.insert(radio_justifyright, 6)72
73 radio_justifyfill = Gtk.RadioToolButton.new_from_widget(radio_justifyleft)74 radio_justifyfill.set_icon_name("format-justify-fill-symbolic")75 toolbar.insert(radio_justifyfill, 7)76
80 Chapter 15. Multiline Text Editor
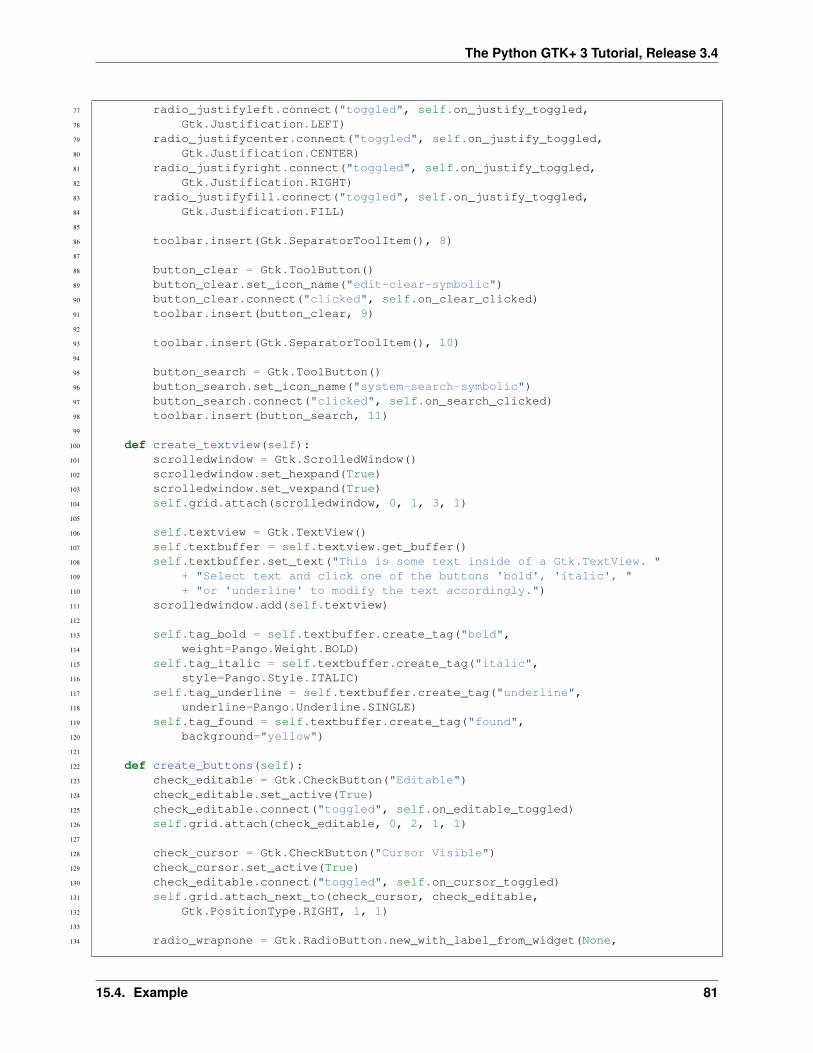
The Python GTK+ 3 Tutorial, Release 3.4
77 radio_justifyleft.connect("toggled", self.on_justify_toggled,78 Gtk.Justification.LEFT)79 radio_justifycenter.connect("toggled", self.on_justify_toggled,80 Gtk.Justification.CENTER)81 radio_justifyright.connect("toggled", self.on_justify_toggled,82 Gtk.Justification.RIGHT)83 radio_justifyfill.connect("toggled", self.on_justify_toggled,84 Gtk.Justification.FILL)85
86 toolbar.insert(Gtk.SeparatorToolItem(), 8)87
88 button_clear = Gtk.ToolButton()89 button_clear.set_icon_name("edit-clear-symbolic")90 button_clear.connect("clicked", self.on_clear_clicked)91 toolbar.insert(button_clear, 9)92
93 toolbar.insert(Gtk.SeparatorToolItem(), 10)94
95 button_search = Gtk.ToolButton()96 button_search.set_icon_name("system-search-symbolic")97 button_search.connect("clicked", self.on_search_clicked)98 toolbar.insert(button_search, 11)99
100 def create_textview(self):101 scrolledwindow = Gtk.ScrolledWindow()102 scrolledwindow.set_hexpand(True)103 scrolledwindow.set_vexpand(True)104 self.grid.attach(scrolledwindow, 0, 1, 3, 1)105
106 self.textview = Gtk.TextView()107 self.textbuffer = self.textview.get_buffer()108 self.textbuffer.set_text("This is some text inside of a Gtk.TextView. "109 + "Select text and click one of the buttons 'bold', 'italic', "110 + "or 'underline' to modify the text accordingly.")111 scrolledwindow.add(self.textview)112
113 self.tag_bold = self.textbuffer.create_tag("bold",114 weight=Pango.Weight.BOLD)115 self.tag_italic = self.textbuffer.create_tag("italic",116 style=Pango.Style.ITALIC)117 self.tag_underline = self.textbuffer.create_tag("underline",118 underline=Pango.Underline.SINGLE)119 self.tag_found = self.textbuffer.create_tag("found",120 background="yellow")121
122 def create_buttons(self):123 check_editable = Gtk.CheckButton("Editable")124 check_editable.set_active(True)125 check_editable.connect("toggled", self.on_editable_toggled)126 self.grid.attach(check_editable, 0, 2, 1, 1)127
128 check_cursor = Gtk.CheckButton("Cursor Visible")129 check_cursor.set_active(True)130 check_editable.connect("toggled", self.on_cursor_toggled)131 self.grid.attach_next_to(check_cursor, check_editable,132 Gtk.PositionType.RIGHT, 1, 1)133
134 radio_wrapnone = Gtk.RadioButton.new_with_label_from_widget(None,
15.4. Example 81
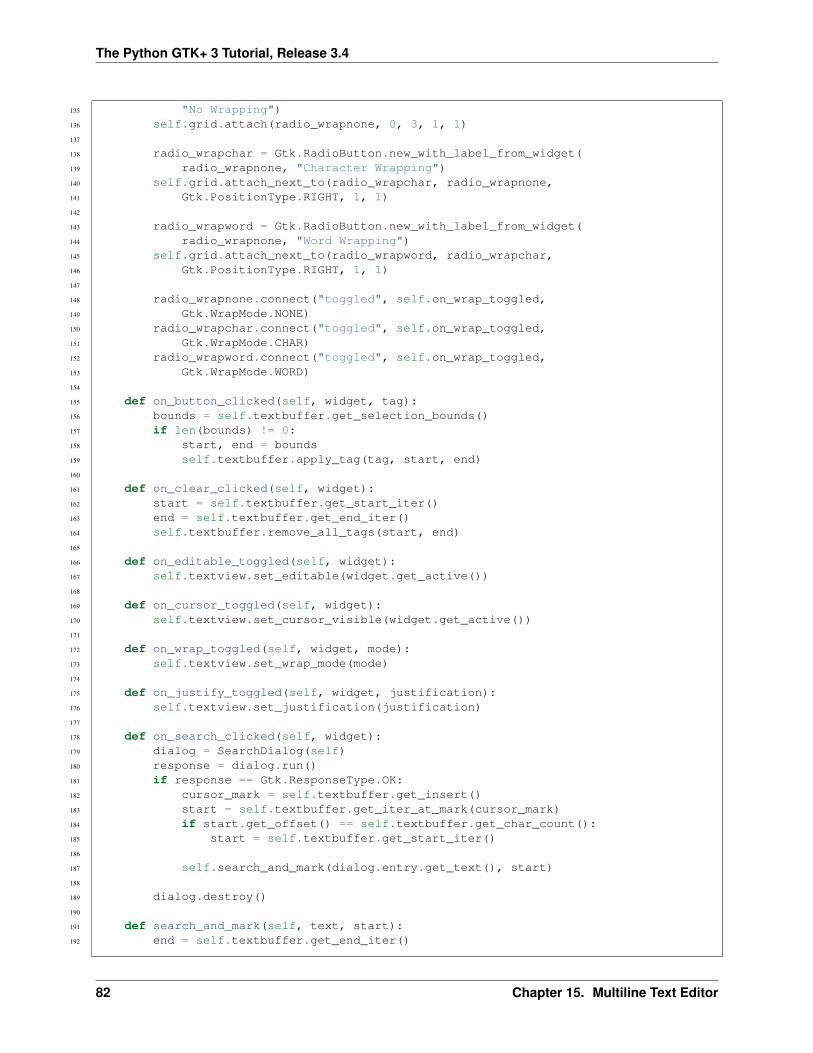
The Python GTK+ 3 Tutorial, Release 3.4
135 "No Wrapping")136 self.grid.attach(radio_wrapnone, 0, 3, 1, 1)137
138 radio_wrapchar = Gtk.RadioButton.new_with_label_from_widget(139 radio_wrapnone, "Character Wrapping")140 self.grid.attach_next_to(radio_wrapchar, radio_wrapnone,141 Gtk.PositionType.RIGHT, 1, 1)142
143 radio_wrapword = Gtk.RadioButton.new_with_label_from_widget(144 radio_wrapnone, "Word Wrapping")145 self.grid.attach_next_to(radio_wrapword, radio_wrapchar,146 Gtk.PositionType.RIGHT, 1, 1)147
148 radio_wrapnone.connect("toggled", self.on_wrap_toggled,149 Gtk.WrapMode.NONE)150 radio_wrapchar.connect("toggled", self.on_wrap_toggled,151 Gtk.WrapMode.CHAR)152 radio_wrapword.connect("toggled", self.on_wrap_toggled,153 Gtk.WrapMode.WORD)154
155 def on_button_clicked(self, widget, tag):156 bounds = self.textbuffer.get_selection_bounds()157 if len(bounds) != 0:158 start, end = bounds159 self.textbuffer.apply_tag(tag, start, end)160
161 def on_clear_clicked(self, widget):162 start = self.textbuffer.get_start_iter()163 end = self.textbuffer.get_end_iter()164 self.textbuffer.remove_all_tags(start, end)165
166 def on_editable_toggled(self, widget):167 self.textview.set_editable(widget.get_active())168
169 def on_cursor_toggled(self, widget):170 self.textview.set_cursor_visible(widget.get_active())171
172 def on_wrap_toggled(self, widget, mode):173 self.textview.set_wrap_mode(mode)174
175 def on_justify_toggled(self, widget, justification):176 self.textview.set_justification(justification)177
178 def on_search_clicked(self, widget):179 dialog = SearchDialog(self)180 response = dialog.run()181 if response == Gtk.ResponseType.OK:182 cursor_mark = self.textbuffer.get_insert()183 start = self.textbuffer.get_iter_at_mark(cursor_mark)184 if start.get_offset() == self.textbuffer.get_char_count():185 start = self.textbuffer.get_start_iter()186
187 self.search_and_mark(dialog.entry.get_text(), start)188
189 dialog.destroy()190
191 def search_and_mark(self, text, start):192 end = self.textbuffer.get_end_iter()
82 Chapter 15. Multiline Text Editor
The Python GTK+ 3 Tutorial, Release 3.4
193 match = start.forward_search(text, 0, end)194
195 if match != None:196 match_start, match_end = match197 self.textbuffer.apply_tag(self.tag_found, match_start, match_end)198 self.search_and_mark(text, match_end)199
200 win = TextViewWindow()201 win.connect("delete-event", Gtk.main_quit)202 win.show_all()203 Gtk.main()
15.4. Example 83
The Python GTK+ 3 Tutorial, Release 3.4
84 Chapter 15. Multiline Text Editor
CHAPTER 16
Dialogs
Dialog windows are very similar to standard windows, and are used to provide or retrieve information from theuser. They are often used to provide a preferences window, for example. The major difference a dialog has is someprepacked widgets which layout the dialog automatically. From there, we can simply add labels, buttons, check but-tons, etc. Another big difference is the handling of responses to control how the application should behave after thedialog has been interacted with.
There are several derived Dialog classes which you might find useful. Gtk.MessageDialog is used for mostsimple notifications. But at other times you might need to derive your own dialog class to provide more complexfunctionality.
16.1 Custom Dialogs
To pack widgets into a custom dialog, you should pack them into the Gtk.Box, available viaGtk.Dialog.get_content_area(). To just add a Gtk.Button to the bottom of the dialog, you could usethe Gtk.Dialog.add_button() method.
A ‘modal’ dialog (that is, one which freezes the rest of the application from user input), can be created by callingGtk.Dialog.set_modal on the dialog or set the flags argument of the Gtk.Dialog constructor to includethe Gtk.DialogFlags.MODAL flag.
Clicking a button will emit a signal called “response”. If you want to block waiting for a dialog to return before return-ing control flow to your code, you can call Gtk.Dialog.run(). This method returns an int which may be a valuefrom the Gtk.ResponseType or it could be the custom response value that you specified in the Gtk.Dialogconstructor or Gtk.Dialog.add_button().
Finally, there are two ways to remove a dialog. The Gtk.Widget.hide() method removes the dialog from view,however keeps it stored in memory. This is useful to prevent having to construct the dialog again if it needs to beaccessed at a later time. Alternatively, the Gtk.Widget.destroy() method can be used to delete the dialogfrom memory once it is no longer needed. It should be noted that if the dialog needs to be accessed after it has beendestroyed, it will need to be constructed again otherwise the dialog window will be empty.
85
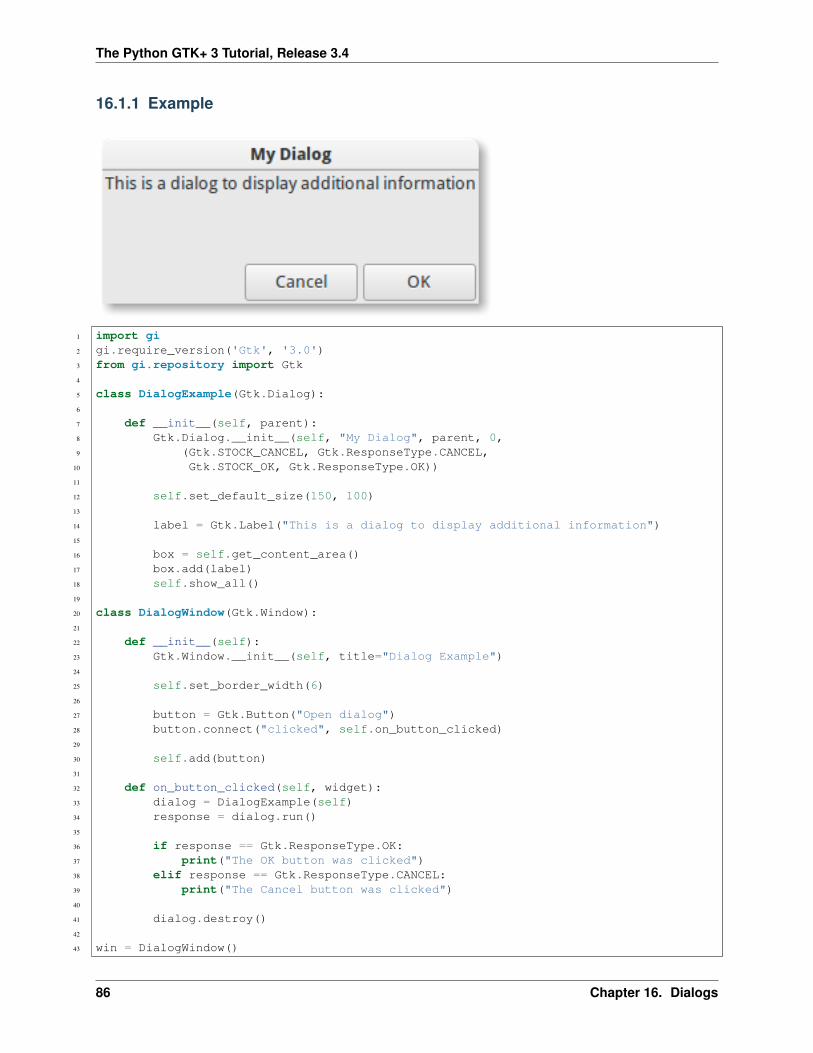
The Python GTK+ 3 Tutorial, Release 3.4
16.1.1 Example
1 import gi2 gi.require_version('Gtk', '3.0')3 from gi.repository import Gtk4
5 class DialogExample(Gtk.Dialog):6
7 def __init__(self, parent):8 Gtk.Dialog.__init__(self, "My Dialog", parent, 0,9 (Gtk.STOCK_CANCEL, Gtk.ResponseType.CANCEL,
10 Gtk.STOCK_OK, Gtk.ResponseType.OK))11
12 self.set_default_size(150, 100)13
14 label = Gtk.Label("This is a dialog to display additional information")15
16 box = self.get_content_area()17 box.add(label)18 self.show_all()19
20 class DialogWindow(Gtk.Window):21
22 def __init__(self):23 Gtk.Window.__init__(self, title="Dialog Example")24
25 self.set_border_width(6)26
27 button = Gtk.Button("Open dialog")28 button.connect("clicked", self.on_button_clicked)29
30 self.add(button)31
32 def on_button_clicked(self, widget):33 dialog = DialogExample(self)34 response = dialog.run()35
36 if response == Gtk.ResponseType.OK:37 print("The OK button was clicked")38 elif response == Gtk.ResponseType.CANCEL:39 print("The Cancel button was clicked")40
41 dialog.destroy()42
43 win = DialogWindow()
86 Chapter 16. Dialogs
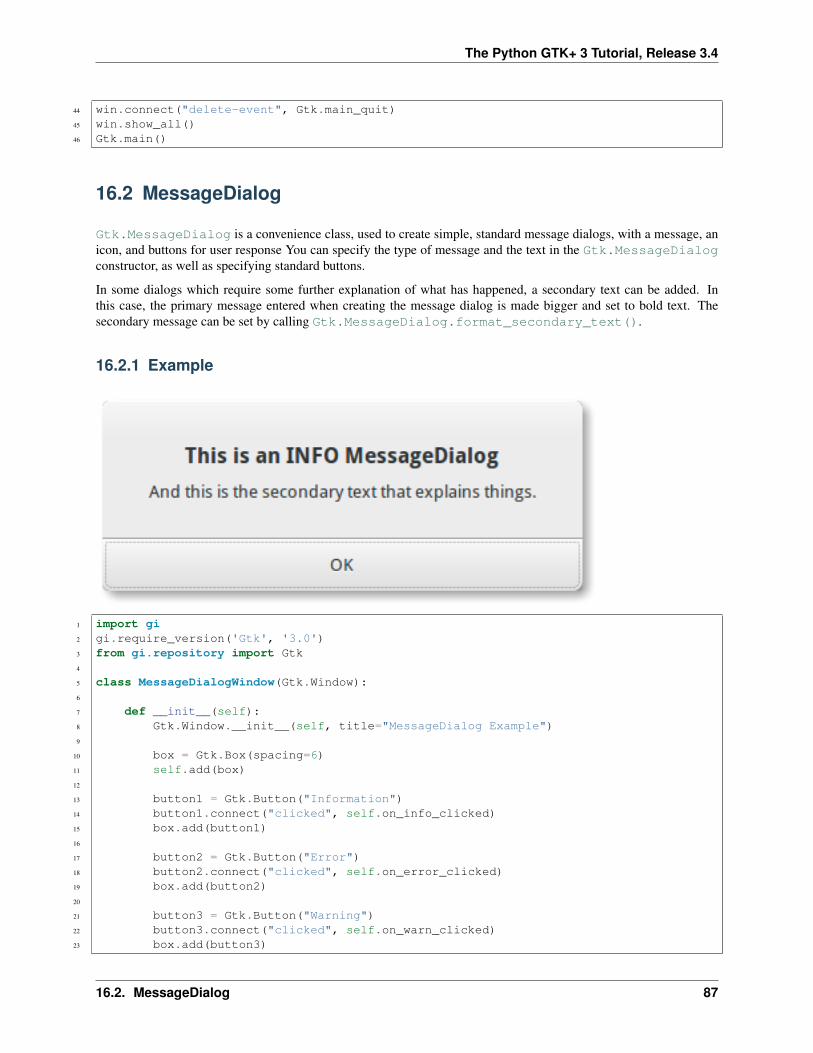
The Python GTK+ 3 Tutorial, Release 3.4
44 win.connect("delete-event", Gtk.main_quit)45 win.show_all()46 Gtk.main()
16.2 MessageDialog
Gtk.MessageDialog is a convenience class, used to create simple, standard message dialogs, with a message, anicon, and buttons for user response You can specify the type of message and the text in the Gtk.MessageDialogconstructor, as well as specifying standard buttons.
In some dialogs which require some further explanation of what has happened, a secondary text can be added. Inthis case, the primary message entered when creating the message dialog is made bigger and set to bold text. Thesecondary message can be set by calling Gtk.MessageDialog.format_secondary_text().
16.2.1 Example
1 import gi2 gi.require_version('Gtk', '3.0')3 from gi.repository import Gtk4
5 class MessageDialogWindow(Gtk.Window):6
7 def __init__(self):8 Gtk.Window.__init__(self, title="MessageDialog Example")9
10 box = Gtk.Box(spacing=6)11 self.add(box)12
13 button1 = Gtk.Button("Information")14 button1.connect("clicked", self.on_info_clicked)15 box.add(button1)16
17 button2 = Gtk.Button("Error")18 button2.connect("clicked", self.on_error_clicked)19 box.add(button2)20
21 button3 = Gtk.Button("Warning")22 button3.connect("clicked", self.on_warn_clicked)23 box.add(button3)
16.2. MessageDialog 87
The Python GTK+ 3 Tutorial, Release 3.4
24
25 button4 = Gtk.Button("Question")26 button4.connect("clicked", self.on_question_clicked)27 box.add(button4)28
29 def on_info_clicked(self, widget):30 dialog = Gtk.MessageDialog(self, 0, Gtk.MessageType.INFO,31 Gtk.ButtonsType.OK, "This is an INFO MessageDialog")32 dialog.format_secondary_text(33 "And this is the secondary text that explains things.")34 dialog.run()35 print("INFO dialog closed")36
37 dialog.destroy()38
39 def on_error_clicked(self, widget):40 dialog = Gtk.MessageDialog(self, 0, Gtk.MessageType.ERROR,41 Gtk.ButtonsType.CANCEL, "This is an ERROR MessageDialog")42 dialog.format_secondary_text(43 "And this is the secondary text that explains things.")44 dialog.run()45 print("ERROR dialog closed")46
47 dialog.destroy()48
49 def on_warn_clicked(self, widget):50 dialog = Gtk.MessageDialog(self, 0, Gtk.MessageType.WARNING,51 Gtk.ButtonsType.OK_CANCEL, "This is an WARNING MessageDialog")52 dialog.format_secondary_text(53 "And this is the secondary text that explains things.")54 response = dialog.run()55 if response == Gtk.ResponseType.OK:56 print("WARN dialog closed by clicking OK button")57 elif response == Gtk.ResponseType.CANCEL:58 print("WARN dialog closed by clicking CANCEL button")59
60 dialog.destroy()61
62 def on_question_clicked(self, widget):63 dialog = Gtk.MessageDialog(self, 0, Gtk.MessageType.QUESTION,64 Gtk.ButtonsType.YES_NO, "This is an QUESTION MessageDialog")65 dialog.format_secondary_text(66 "And this is the secondary text that explains things.")67 response = dialog.run()68 if response == Gtk.ResponseType.YES:69 print("QUESTION dialog closed by clicking YES button")70 elif response == Gtk.ResponseType.NO:71 print("QUESTION dialog closed by clicking NO button")72
73 dialog.destroy()74
75 win = MessageDialogWindow()76 win.connect("delete-event", Gtk.main_quit)77 win.show_all()78 Gtk.main()
88 Chapter 16. Dialogs
The Python GTK+ 3 Tutorial, Release 3.4
16.3 FileChooserDialog
The Gtk.FileChooserDialog is suitable for use with “File/Open” or “File/Save” menu items. You can use allof the Gtk.FileChooser methods on the file chooser dialog as well as those for Gtk.Dialog.
When creating a Gtk.FileChooserDialog you have to define the dialog’s purpose:
• To select a file for opening, as for a File/Open command, use Gtk.FileChooserAction.OPEN
• To save a file for the first time, as for a File/Save command, use Gtk.FileChooserAction.SAVE, andsuggest a name such as “Untitled” with Gtk.FileChooser.set_current_name().
• To save a file under a different name, as for a File/Save As command,use Gtk.FileChooserAction.SAVE, and set the existing filename withGtk.FileChooser.set_filename().
• To choose a folder instead of a file, use Gtk.FileChooserAction.SELECT_FOLDER.
Gtk.FileChooserDialog inherits from Gtk.Dialog, so buttons have response IDs such asGtk.ResponseType.ACCEPT and Gtk.ResponseType.CANCEL which can be specified in theGtk.FileChooserDialog constructor. In contrast to Gtk.Dialog, you can not use custom responsecodes with Gtk.FileChooserDialog. It expects that at least one button will have of the following response IDs:
• Gtk.ResponseType.ACCEPT
• Gtk.ResponseType.OK
• Gtk.ResponseType.YES
• Gtk.ResponseType.APPLY
When the user is finished selecting files, your program can get the selected names either as filenames(Gtk.FileChooser.get_filename()) or as URIs (Gtk.FileChooser.get_uri()).
By default, Gtk.FileChooser only allows a single file to be selected at a time. To enable multiple files to beselected, use Gtk.FileChooser.set_select_multiple(). Retrieving a list of selected files is possiblewith either Gtk.FileChooser.get_filenames() or Gtk.FileChooser.get_uris().
Gtk.FileChooser also supports a variety of options which make the files and folders more configurable andaccessible.
• Gtk.FileChooser.set_local_only(): Only local files can be selected.
• Gtk.FileChooser.show_hidden(): Hidden files and folders are displayed.
• Gtk.FileChooser.set_do_overwrite_confirmation(): If the file chooser was configured inGtk.FileChooserAction.SAVE mode, it will present a confirmation dialog if the user types a file namethat already exists.
Furthermore, you can specify which kind of files are displayed by creating Gtk.FileFilter objects and callingGtk.FileChooser.add_filter(). The user can then select one of the added filters from a combo box at thebottom of the file chooser.
16.3. FileChooserDialog 89
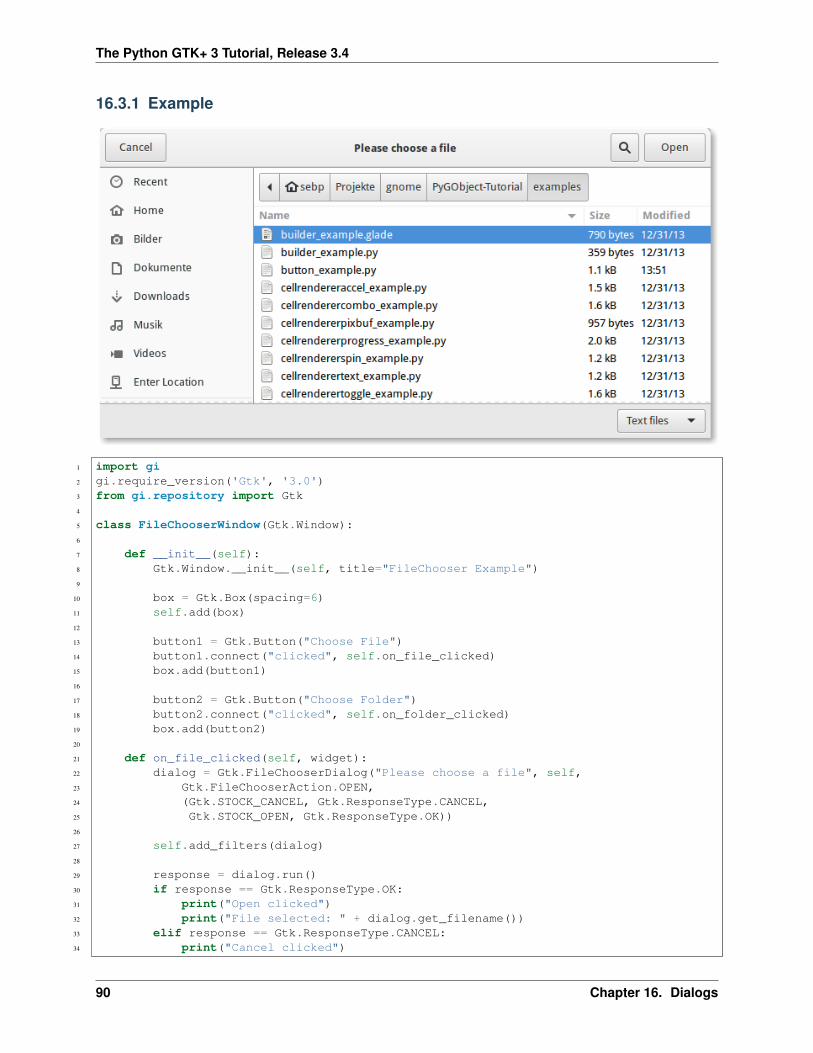
The Python GTK+ 3 Tutorial, Release 3.4
16.3.1 Example
1 import gi2 gi.require_version('Gtk', '3.0')3 from gi.repository import Gtk4
5 class FileChooserWindow(Gtk.Window):6
7 def __init__(self):8 Gtk.Window.__init__(self, title="FileChooser Example")9
10 box = Gtk.Box(spacing=6)11 self.add(box)12
13 button1 = Gtk.Button("Choose File")14 button1.connect("clicked", self.on_file_clicked)15 box.add(button1)16
17 button2 = Gtk.Button("Choose Folder")18 button2.connect("clicked", self.on_folder_clicked)19 box.add(button2)20
21 def on_file_clicked(self, widget):22 dialog = Gtk.FileChooserDialog("Please choose a file", self,23 Gtk.FileChooserAction.OPEN,24 (Gtk.STOCK_CANCEL, Gtk.ResponseType.CANCEL,25 Gtk.STOCK_OPEN, Gtk.ResponseType.OK))26
27 self.add_filters(dialog)28
29 response = dialog.run()30 if response == Gtk.ResponseType.OK:31 print("Open clicked")32 print("File selected: " + dialog.get_filename())33 elif response == Gtk.ResponseType.CANCEL:34 print("Cancel clicked")
90 Chapter 16. Dialogs
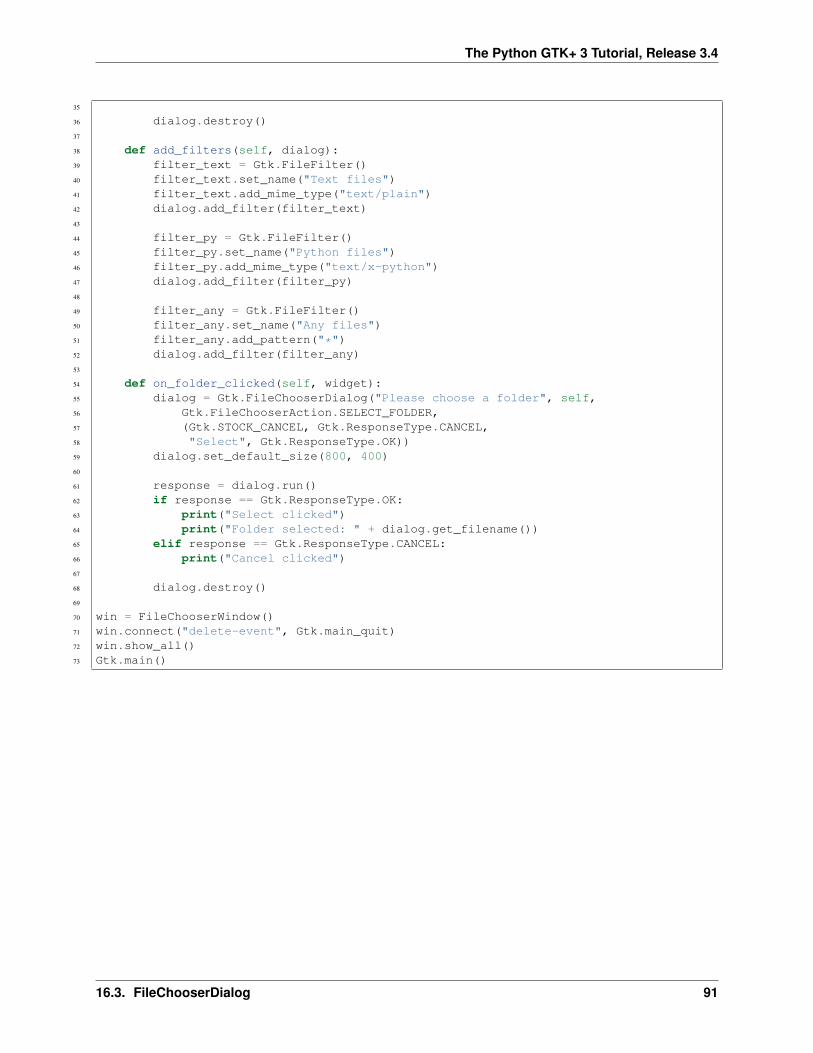
The Python GTK+ 3 Tutorial, Release 3.4
35
36 dialog.destroy()37
38 def add_filters(self, dialog):39 filter_text = Gtk.FileFilter()40 filter_text.set_name("Text files")41 filter_text.add_mime_type("text/plain")42 dialog.add_filter(filter_text)43
44 filter_py = Gtk.FileFilter()45 filter_py.set_name("Python files")46 filter_py.add_mime_type("text/x-python")47 dialog.add_filter(filter_py)48
49 filter_any = Gtk.FileFilter()50 filter_any.set_name("Any files")51 filter_any.add_pattern("*")52 dialog.add_filter(filter_any)53
54 def on_folder_clicked(self, widget):55 dialog = Gtk.FileChooserDialog("Please choose a folder", self,56 Gtk.FileChooserAction.SELECT_FOLDER,57 (Gtk.STOCK_CANCEL, Gtk.ResponseType.CANCEL,58 "Select", Gtk.ResponseType.OK))59 dialog.set_default_size(800, 400)60
61 response = dialog.run()62 if response == Gtk.ResponseType.OK:63 print("Select clicked")64 print("Folder selected: " + dialog.get_filename())65 elif response == Gtk.ResponseType.CANCEL:66 print("Cancel clicked")67
68 dialog.destroy()69
70 win = FileChooserWindow()71 win.connect("delete-event", Gtk.main_quit)72 win.show_all()73 Gtk.main()
16.3. FileChooserDialog 91
The Python GTK+ 3 Tutorial, Release 3.4
92 Chapter 16. Dialogs
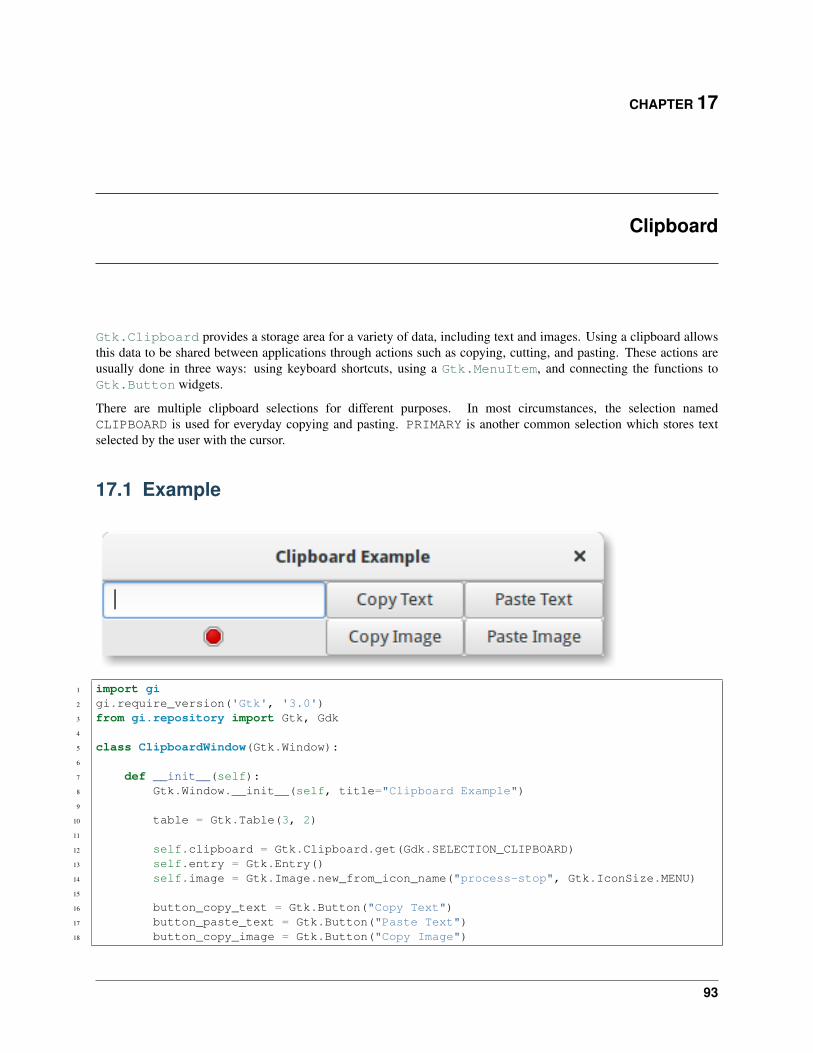
CHAPTER 17
Clipboard
Gtk.Clipboard provides a storage area for a variety of data, including text and images. Using a clipboard allowsthis data to be shared between applications through actions such as copying, cutting, and pasting. These actions areusually done in three ways: using keyboard shortcuts, using a Gtk.MenuItem, and connecting the functions toGtk.Button widgets.
There are multiple clipboard selections for different purposes. In most circumstances, the selection namedCLIPBOARD is used for everyday copying and pasting. PRIMARY is another common selection which stores textselected by the user with the cursor.
17.1 Example
1 import gi2 gi.require_version('Gtk', '3.0')3 from gi.repository import Gtk, Gdk4
5 class ClipboardWindow(Gtk.Window):6
7 def __init__(self):8 Gtk.Window.__init__(self, title="Clipboard Example")9
10 table = Gtk.Table(3, 2)11
12 self.clipboard = Gtk.Clipboard.get(Gdk.SELECTION_CLIPBOARD)13 self.entry = Gtk.Entry()14 self.image = Gtk.Image.new_from_icon_name("process-stop", Gtk.IconSize.MENU)15
16 button_copy_text = Gtk.Button("Copy Text")17 button_paste_text = Gtk.Button("Paste Text")18 button_copy_image = Gtk.Button("Copy Image")
93
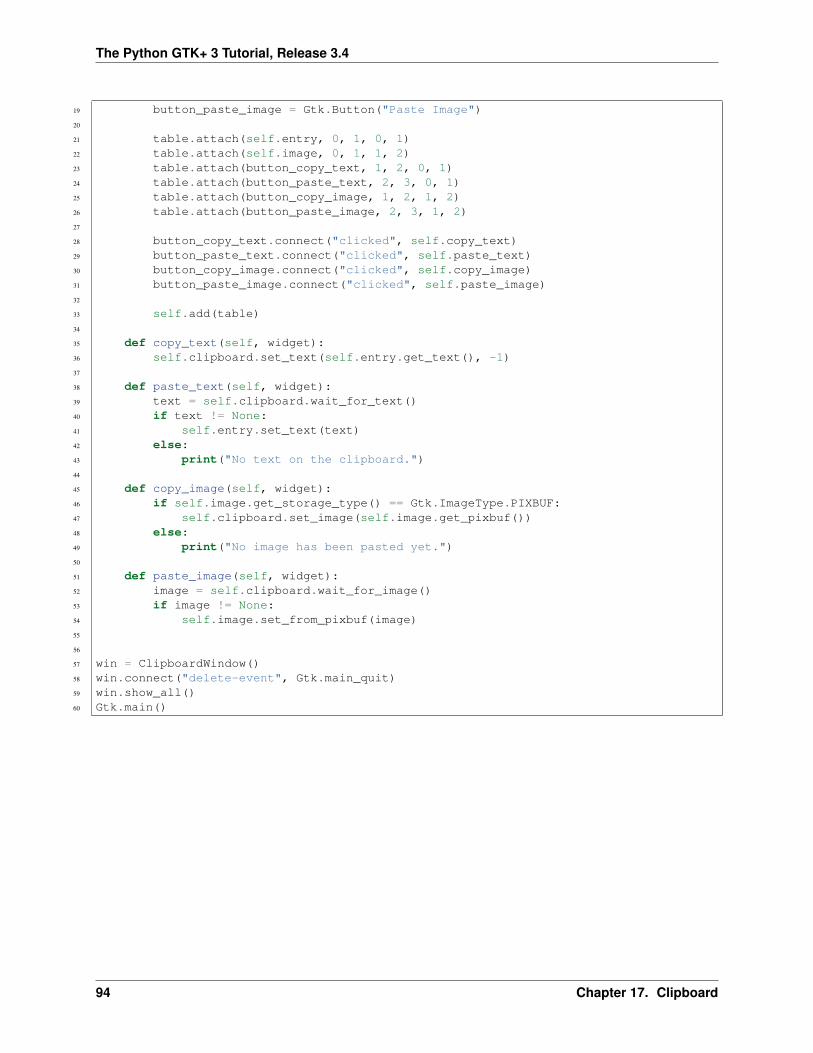
The Python GTK+ 3 Tutorial, Release 3.4
19 button_paste_image = Gtk.Button("Paste Image")20
21 table.attach(self.entry, 0, 1, 0, 1)22 table.attach(self.image, 0, 1, 1, 2)23 table.attach(button_copy_text, 1, 2, 0, 1)24 table.attach(button_paste_text, 2, 3, 0, 1)25 table.attach(button_copy_image, 1, 2, 1, 2)26 table.attach(button_paste_image, 2, 3, 1, 2)27
28 button_copy_text.connect("clicked", self.copy_text)29 button_paste_text.connect("clicked", self.paste_text)30 button_copy_image.connect("clicked", self.copy_image)31 button_paste_image.connect("clicked", self.paste_image)32
33 self.add(table)34
35 def copy_text(self, widget):36 self.clipboard.set_text(self.entry.get_text(), -1)37
38 def paste_text(self, widget):39 text = self.clipboard.wait_for_text()40 if text != None:41 self.entry.set_text(text)42 else:43 print("No text on the clipboard.")44
45 def copy_image(self, widget):46 if self.image.get_storage_type() == Gtk.ImageType.PIXBUF:47 self.clipboard.set_image(self.image.get_pixbuf())48 else:49 print("No image has been pasted yet.")50
51 def paste_image(self, widget):52 image = self.clipboard.wait_for_image()53 if image != None:54 self.image.set_from_pixbuf(image)55
56
57 win = ClipboardWindow()58 win.connect("delete-event", Gtk.main_quit)59 win.show_all()60 Gtk.main()
94 Chapter 17. Clipboard
CHAPTER 18
Drag and Drop
Note: Versions of PyGObject < 3.0.3 contain a bug which does not allow drag and drop to function correctly.Therefore a version of PyGObject >= 3.0.3 is required for the following examples to work.
Setting up drag and drop between widgets consists of selecting a drag source (the widget which the user starts thedrag from) with the Gtk.Widget.drag_source_set() method, selecting a drag destination (the widget whichthe user drops onto) with the Gtk.Widget.drag_dest_set() method and then handling the relevant signals onboth widgets.
Instead of using Gtk.Widget.drag_source_set() and Gtk.Widget.drag_dest_set() some spe-cialised widgets require the use of specific functions (such as Gtk.TreeView and Gtk.IconView).
A basic drag and drop only requires the source to connect to the “drag-data-get” signal and the destination to connectto the “drag-data-received” signal. More complex things such as specific drop areas and custom drag icons will requireyou to connect to additional signals and interact with the Gdk.DragContext object it supplies.
In order to transfer data between the source and destination, you must interact with the Gtk.SelectionDatavariable supplied in the “drag-data-get” and “drag-data-received” signals using the Gtk.SelectionData getand set methods.
18.1 Target Entries
To allow the drag source and destination to know what data they are receiving and sending, a common list ofGtk.TargetEntry’s are required. A Gtk.TargetEntry describes a piece of data that will be sent by thedrag source and received by the drag destination.
There are two ways of adding Gtk.TargetEntry’s to a source and destination. If the drag and drop is simple andeach target entry is of a different type, you can use the group of methods mentioned here.
If you require more than one type of data or wish to do more complex things with the data, you will need to create theGtk.TargetEntry’s using the Gtk.TargetEntry.new() method.
95
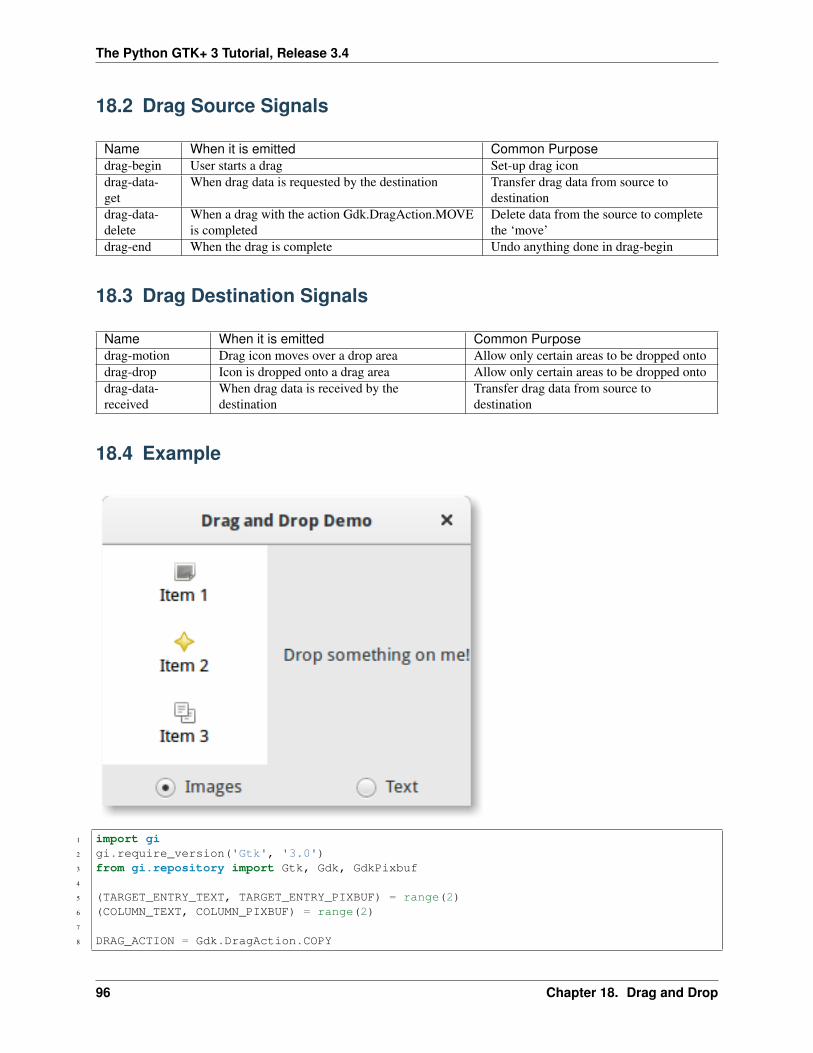
The Python GTK+ 3 Tutorial, Release 3.4
18.2 Drag Source Signals
Name When it is emitted Common Purposedrag-begin User starts a drag Set-up drag icondrag-data-get
When drag data is requested by the destination Transfer drag data from source todestination
drag-data-delete
When a drag with the action Gdk.DragAction.MOVEis completed
Delete data from the source to completethe ‘move’
drag-end When the drag is complete Undo anything done in drag-begin
18.3 Drag Destination Signals
Name When it is emitted Common Purposedrag-motion Drag icon moves over a drop area Allow only certain areas to be dropped ontodrag-drop Icon is dropped onto a drag area Allow only certain areas to be dropped ontodrag-data-received
When drag data is received by thedestination
Transfer drag data from source todestination
18.4 Example
1 import gi2 gi.require_version('Gtk', '3.0')3 from gi.repository import Gtk, Gdk, GdkPixbuf4
5 (TARGET_ENTRY_TEXT, TARGET_ENTRY_PIXBUF) = range(2)6 (COLUMN_TEXT, COLUMN_PIXBUF) = range(2)7
8 DRAG_ACTION = Gdk.DragAction.COPY
96 Chapter 18. Drag and Drop
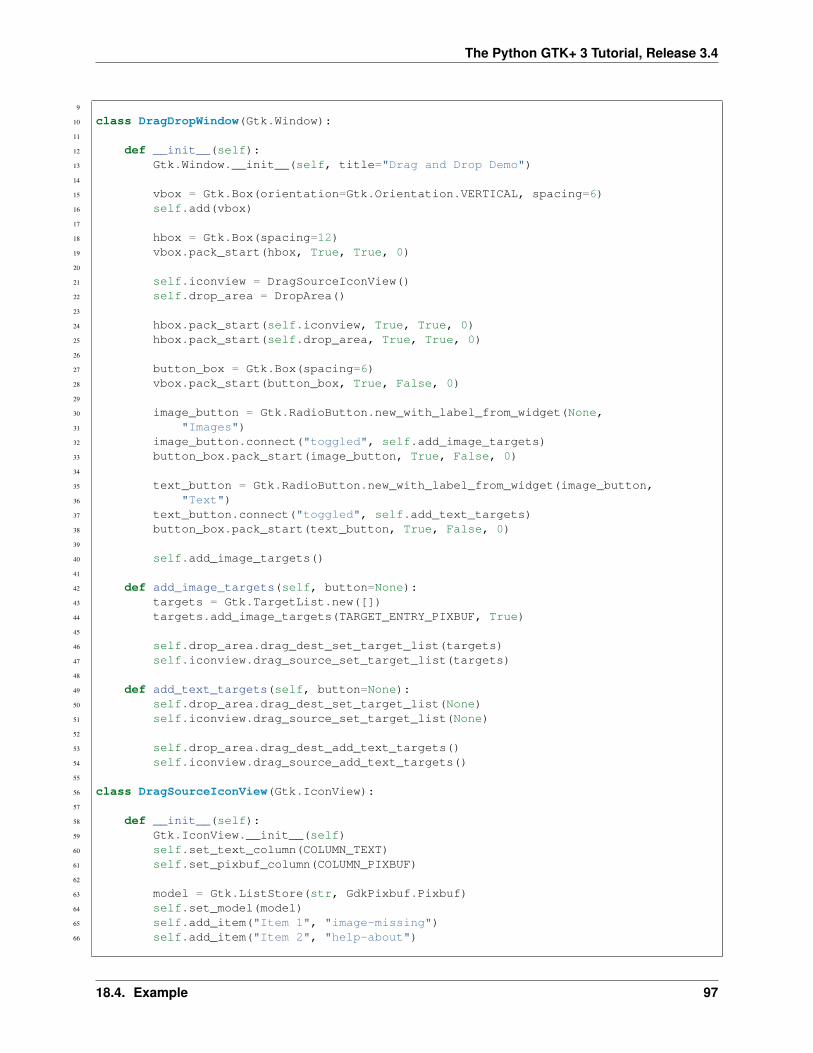
The Python GTK+ 3 Tutorial, Release 3.4
9
10 class DragDropWindow(Gtk.Window):11
12 def __init__(self):13 Gtk.Window.__init__(self, title="Drag and Drop Demo")14
15 vbox = Gtk.Box(orientation=Gtk.Orientation.VERTICAL, spacing=6)16 self.add(vbox)17
18 hbox = Gtk.Box(spacing=12)19 vbox.pack_start(hbox, True, True, 0)20
21 self.iconview = DragSourceIconView()22 self.drop_area = DropArea()23
24 hbox.pack_start(self.iconview, True, True, 0)25 hbox.pack_start(self.drop_area, True, True, 0)26
27 button_box = Gtk.Box(spacing=6)28 vbox.pack_start(button_box, True, False, 0)29
30 image_button = Gtk.RadioButton.new_with_label_from_widget(None,31 "Images")32 image_button.connect("toggled", self.add_image_targets)33 button_box.pack_start(image_button, True, False, 0)34
35 text_button = Gtk.RadioButton.new_with_label_from_widget(image_button,36 "Text")37 text_button.connect("toggled", self.add_text_targets)38 button_box.pack_start(text_button, True, False, 0)39
40 self.add_image_targets()41
42 def add_image_targets(self, button=None):43 targets = Gtk.TargetList.new([])44 targets.add_image_targets(TARGET_ENTRY_PIXBUF, True)45
46 self.drop_area.drag_dest_set_target_list(targets)47 self.iconview.drag_source_set_target_list(targets)48
49 def add_text_targets(self, button=None):50 self.drop_area.drag_dest_set_target_list(None)51 self.iconview.drag_source_set_target_list(None)52
53 self.drop_area.drag_dest_add_text_targets()54 self.iconview.drag_source_add_text_targets()55
56 class DragSourceIconView(Gtk.IconView):57
58 def __init__(self):59 Gtk.IconView.__init__(self)60 self.set_text_column(COLUMN_TEXT)61 self.set_pixbuf_column(COLUMN_PIXBUF)62
63 model = Gtk.ListStore(str, GdkPixbuf.Pixbuf)64 self.set_model(model)65 self.add_item("Item 1", "image-missing")66 self.add_item("Item 2", "help-about")
18.4. Example 97
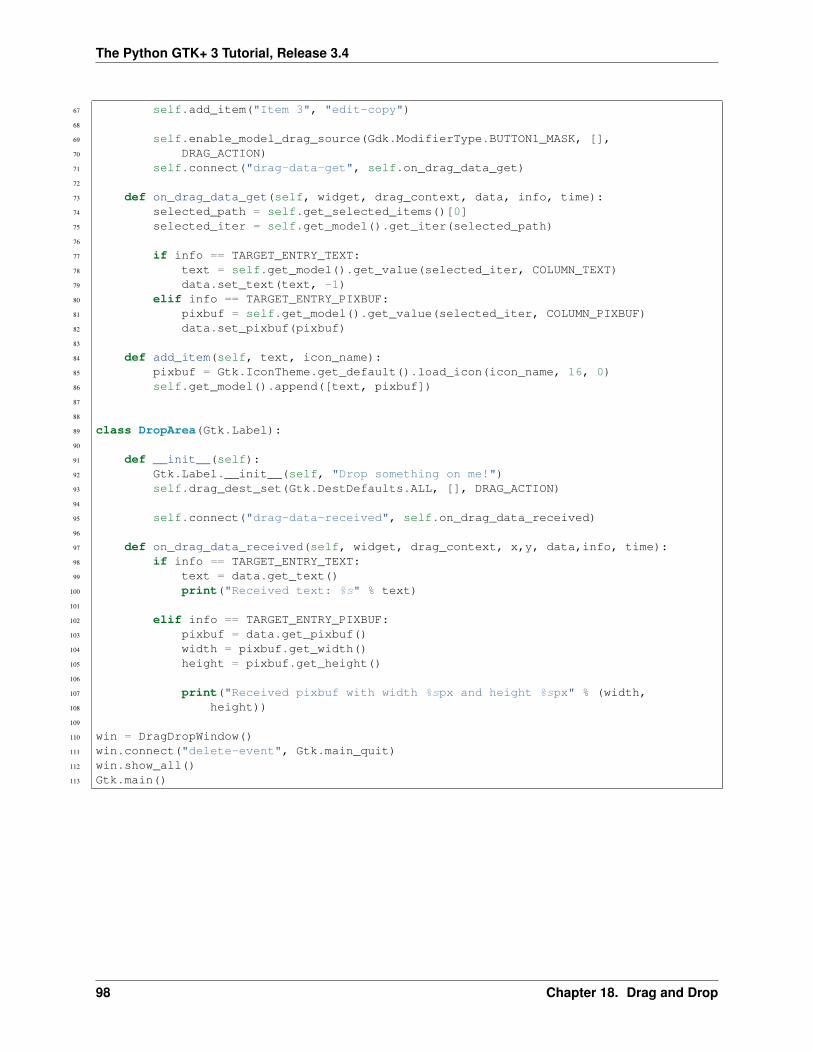
The Python GTK+ 3 Tutorial, Release 3.4
67 self.add_item("Item 3", "edit-copy")68
69 self.enable_model_drag_source(Gdk.ModifierType.BUTTON1_MASK, [],70 DRAG_ACTION)71 self.connect("drag-data-get", self.on_drag_data_get)72
73 def on_drag_data_get(self, widget, drag_context, data, info, time):74 selected_path = self.get_selected_items()[0]75 selected_iter = self.get_model().get_iter(selected_path)76
77 if info == TARGET_ENTRY_TEXT:78 text = self.get_model().get_value(selected_iter, COLUMN_TEXT)79 data.set_text(text, -1)80 elif info == TARGET_ENTRY_PIXBUF:81 pixbuf = self.get_model().get_value(selected_iter, COLUMN_PIXBUF)82 data.set_pixbuf(pixbuf)83
84 def add_item(self, text, icon_name):85 pixbuf = Gtk.IconTheme.get_default().load_icon(icon_name, 16, 0)86 self.get_model().append([text, pixbuf])87
88
89 class DropArea(Gtk.Label):90
91 def __init__(self):92 Gtk.Label.__init__(self, "Drop something on me!")93 self.drag_dest_set(Gtk.DestDefaults.ALL, [], DRAG_ACTION)94
95 self.connect("drag-data-received", self.on_drag_data_received)96
97 def on_drag_data_received(self, widget, drag_context, x,y, data,info, time):98 if info == TARGET_ENTRY_TEXT:99 text = data.get_text()
100 print("Received text: %s" % text)101
102 elif info == TARGET_ENTRY_PIXBUF:103 pixbuf = data.get_pixbuf()104 width = pixbuf.get_width()105 height = pixbuf.get_height()106
107 print("Received pixbuf with width %spx and height %spx" % (width,108 height))109
110 win = DragDropWindow()111 win.connect("delete-event", Gtk.main_quit)112 win.show_all()113 Gtk.main()
98 Chapter 18. Drag and Drop
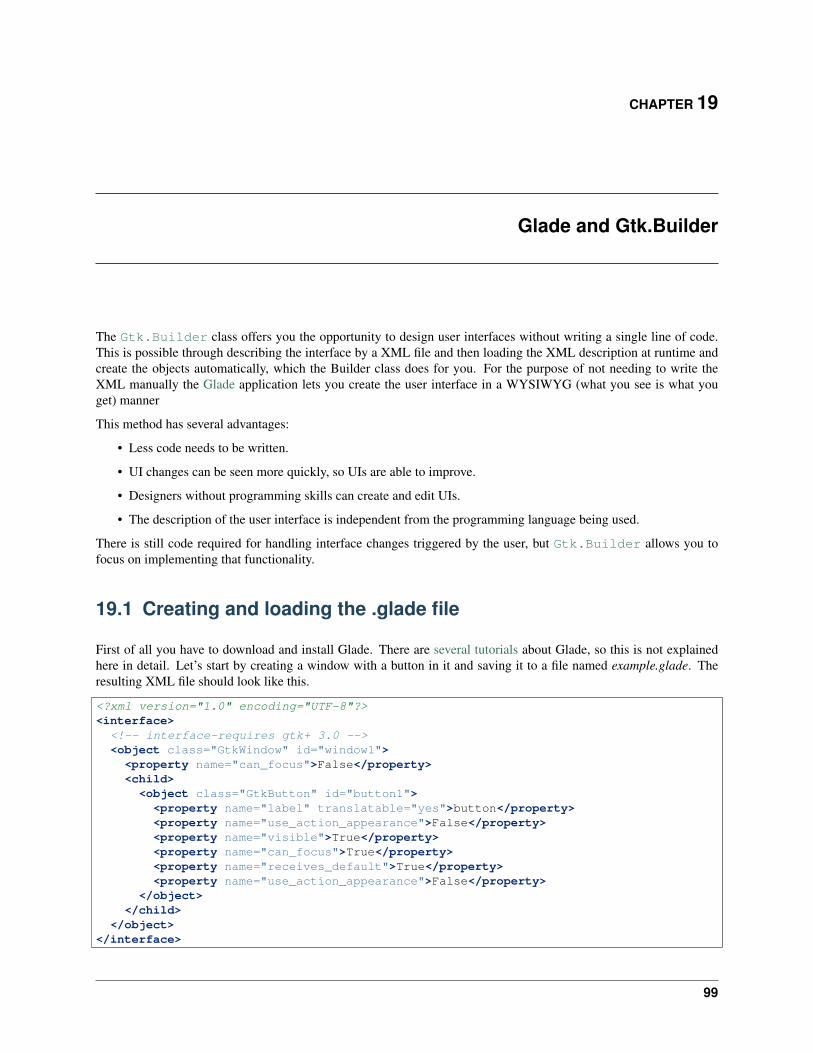
CHAPTER 19
Glade and Gtk.Builder
The Gtk.Builder class offers you the opportunity to design user interfaces without writing a single line of code.This is possible through describing the interface by a XML file and then loading the XML description at runtime andcreate the objects automatically, which the Builder class does for you. For the purpose of not needing to write theXML manually the Glade application lets you create the user interface in a WYSIWYG (what you see is what youget) manner
This method has several advantages:
• Less code needs to be written.
• UI changes can be seen more quickly, so UIs are able to improve.
• Designers without programming skills can create and edit UIs.
• The description of the user interface is independent from the programming language being used.
There is still code required for handling interface changes triggered by the user, but Gtk.Builder allows you tofocus on implementing that functionality.
19.1 Creating and loading the .glade file
First of all you have to download and install Glade. There are several tutorials about Glade, so this is not explainedhere in detail. Let’s start by creating a window with a button in it and saving it to a file named example.glade. Theresulting XML file should look like this.
<?xml version="1.0" encoding="UTF-8"?><interface>
<!-- interface-requires gtk+ 3.0 --><object class="GtkWindow" id="window1"><property name="can_focus">False</property><child>
<object class="GtkButton" id="button1"><property name="label" translatable="yes">button</property><property name="use_action_appearance">False</property><property name="visible">True</property><property name="can_focus">True</property><property name="receives_default">True</property><property name="use_action_appearance">False</property>
</object></child>
</object></interface>
99
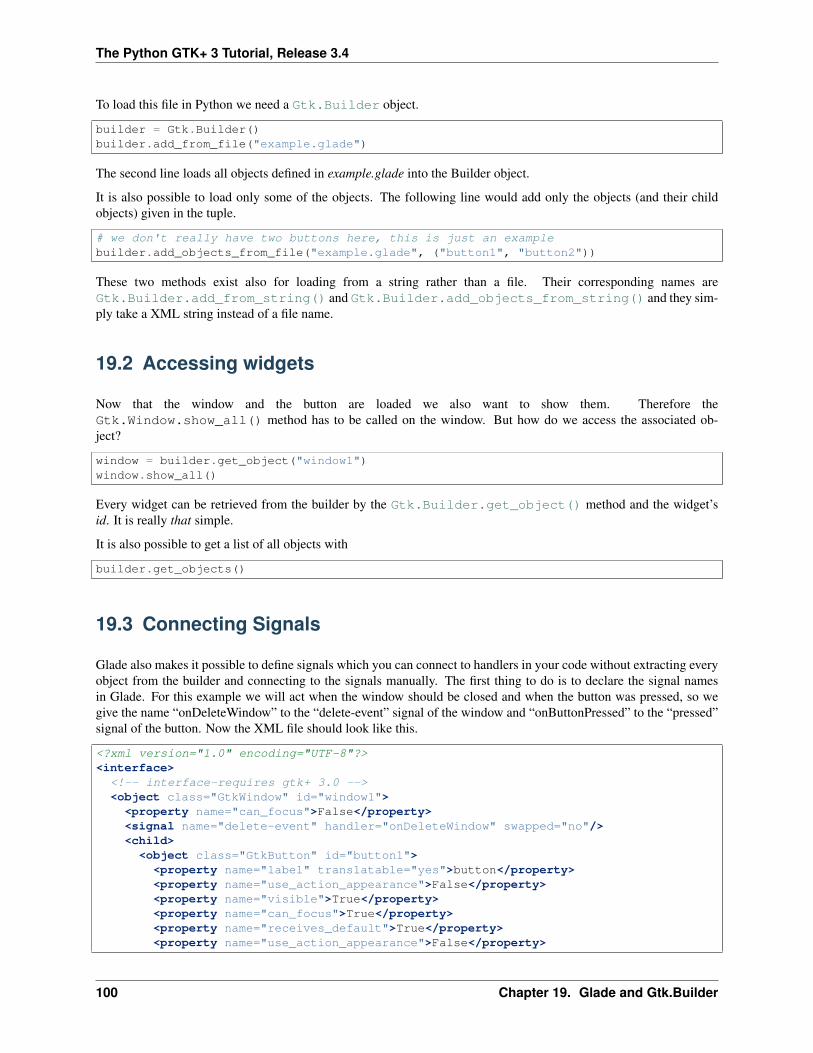
The Python GTK+ 3 Tutorial, Release 3.4
To load this file in Python we need a Gtk.Builder object.
builder = Gtk.Builder()builder.add_from_file("example.glade")
The second line loads all objects defined in example.glade into the Builder object.
It is also possible to load only some of the objects. The following line would add only the objects (and their childobjects) given in the tuple.
# we don't really have two buttons here, this is just an examplebuilder.add_objects_from_file("example.glade", ("button1", "button2"))
These two methods exist also for loading from a string rather than a file. Their corresponding names areGtk.Builder.add_from_string() and Gtk.Builder.add_objects_from_string() and they sim-ply take a XML string instead of a file name.
19.2 Accessing widgets
Now that the window and the button are loaded we also want to show them. Therefore theGtk.Window.show_all() method has to be called on the window. But how do we access the associated ob-ject?
window = builder.get_object("window1")window.show_all()
Every widget can be retrieved from the builder by the Gtk.Builder.get_object() method and the widget’sid. It is really that simple.
It is also possible to get a list of all objects with
builder.get_objects()
19.3 Connecting Signals
Glade also makes it possible to define signals which you can connect to handlers in your code without extracting everyobject from the builder and connecting to the signals manually. The first thing to do is to declare the signal namesin Glade. For this example we will act when the window should be closed and when the button was pressed, so wegive the name “onDeleteWindow” to the “delete-event” signal of the window and “onButtonPressed” to the “pressed”signal of the button. Now the XML file should look like this.
<?xml version="1.0" encoding="UTF-8"?><interface>
<!-- interface-requires gtk+ 3.0 --><object class="GtkWindow" id="window1"><property name="can_focus">False</property><signal name="delete-event" handler="onDeleteWindow" swapped="no"/><child>
<object class="GtkButton" id="button1"><property name="label" translatable="yes">button</property><property name="use_action_appearance">False</property><property name="visible">True</property><property name="can_focus">True</property><property name="receives_default">True</property><property name="use_action_appearance">False</property>
100 Chapter 19. Glade and Gtk.Builder
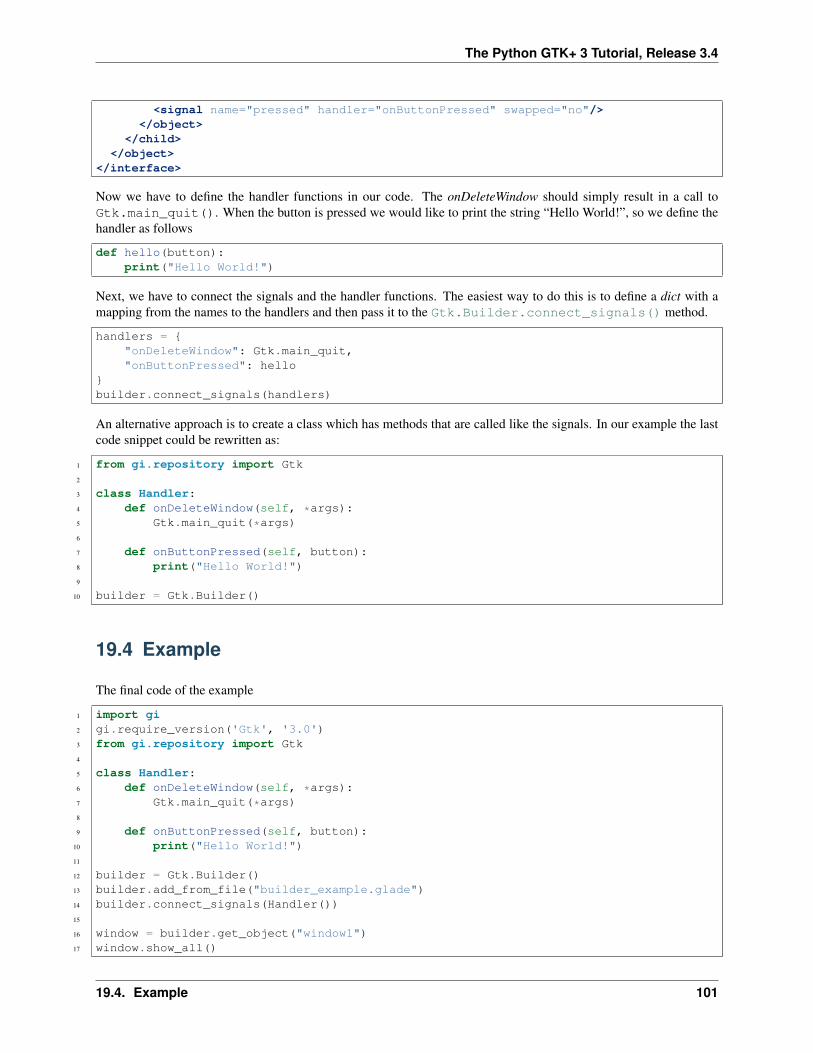
The Python GTK+ 3 Tutorial, Release 3.4
<signal name="pressed" handler="onButtonPressed" swapped="no"/></object>
</child></object>
</interface>
Now we have to define the handler functions in our code. The onDeleteWindow should simply result in a call toGtk.main_quit(). When the button is pressed we would like to print the string “Hello World!”, so we define thehandler as follows
def hello(button):print("Hello World!")
Next, we have to connect the signals and the handler functions. The easiest way to do this is to define a dict with amapping from the names to the handlers and then pass it to the Gtk.Builder.connect_signals() method.
handlers = {"onDeleteWindow": Gtk.main_quit,"onButtonPressed": hello
}builder.connect_signals(handlers)
An alternative approach is to create a class which has methods that are called like the signals. In our example the lastcode snippet could be rewritten as:
1 from gi.repository import Gtk2
3 class Handler:4 def onDeleteWindow(self, *args):5 Gtk.main_quit(*args)6
7 def onButtonPressed(self, button):8 print("Hello World!")9
10 builder = Gtk.Builder()
19.4 Example
The final code of the example
1 import gi2 gi.require_version('Gtk', '3.0')3 from gi.repository import Gtk4
5 class Handler:6 def onDeleteWindow(self, *args):7 Gtk.main_quit(*args)8
9 def onButtonPressed(self, button):10 print("Hello World!")11
12 builder = Gtk.Builder()13 builder.add_from_file("builder_example.glade")14 builder.connect_signals(Handler())15
16 window = builder.get_object("window1")17 window.show_all()
19.4. Example 101
The Python GTK+ 3 Tutorial, Release 3.4
18
19 Gtk.main()
102 Chapter 19. Glade and Gtk.Builder
CHAPTER 20
Objects
GObject is the fundamental type providing the common attributes and methods for all object types in GTK+, Pangoand other libraries based on GObject. The GObject.GObject class provides methods for object construction anddestruction, property access methods, and signal support.
This section will introduce some important aspects about the GObject implementation in Python.
20.1 Inherit from GObject.GObject
A native GObject is accessible via GObject.GObject. It is rarely instantiated directly, we generally use inheritedclass. A Gtk.Widget is an inherited class of a GObject.GObject. It may be interesting to make an inheritedclass to create a new widget, like a settings dialog.
To inherit from GObject.GObject, you must call GObject.GObject.__init__() in your constructor (ifthe class inherits from Gtk.Button, it must call Gtk.Button.__init__() for instance), like in the examplebelow:
from gi.repository import GObject
class MyObject(GObject.GObject):
def __init__(self):GObject.GObject.__init__(self)
20.2 Signals
Signals connect arbitrary application-specific events with any number of listeners. For example, in GTK+, every userevent (keystroke or mouse move) is received from the X server and generates a GTK+ event under the form of a signalemission on a given object instance.
Each signal is registered in the type system together with the type on which it can be emitted: users of the type aresaid to connect to the signal on a given type instance when they register a function to be invoked upon the signalemission. Users can also emit the signal by themselves or stop the emission of the signal from within one of thefunctions connected to the signal.
20.2.1 Receive signals
See Main loop and Signals
103
The Python GTK+ 3 Tutorial, Release 3.4
20.2.2 Create new signals
New signals can be created by adding them to GObject.GObject.__gsignals__, a dictionary:
When a new signal is created, a method handler can also be defined, it will be called each time the signal is emitted. Itis called do_signal_name.
class MyObject(GObject.GObject):__gsignals__ = {
'my_signal': (GObject.SIGNAL_RUN_FIRST, None,(int,))
}
def do_my_signal(self, arg):print("class method for `my_signal' called with argument", arg)
GObject.SIGNAL_RUN_FIRST indicates that this signal will invoke the object method handler(do_my_signal() here) in the first emission stage. Alternatives are GObject.SIGNAL_RUN_LAST (themethod handler will be invoked in the third emission stage) and GObject.SIGNAL_RUN_CLEANUP (invoke themethod handler in the last emission stage).
The second part, None, indicates the return type of the signal, usually None.
(int,) indicates the signal arguments, here, the signal will only take one argument, whose type is int. This argumenttype list must end with a comma.
Signals can be emitted using GObject.GObject.emit():
my_obj.emit("my_signal", 42) # emit the signal "my_signal", with the# argument 42
20.3 Properties
One of GObject’s nice features is its generic get/set mechanism for object properties. Each class inherited fromGObject.GObject can define new properties. Each property has a type which never changes (e.g. str, float, int...).For instance, they are used for Gtk.Button where there is a “label” property which contains the text of the button.
20.3.1 Use existing properties
The class GObject.GObject provides several useful functions to manage existing properties,GObject.GObject.get_property() and GObject.GObject.set_property().
Some properties also have functions dedicated to them, called getter and setter. For the property “label” of a button,there are two functions to get and set them, Gtk.Button.get_label() and Gtk.Button.set_label().
20.3.2 Create new properties
A property is defined with a name and a type. Even if Python itself is dynamically typed, you can’t change the type ofa property once it is defined. A property can be created using GObject.Property.
from gi.repository import GObject
class MyObject(GObject.GObject):
foo = GObject.Property(type=str, default='bar')
104 Chapter 20. Objects
The Python GTK+ 3 Tutorial, Release 3.4
property_float = GObject.Property(type=float)def __init__(self):
GObject.GObject.__init__(self)
Properties can also be read-only, if you want some properties to be readable but not writable. Todo so, you can add some flags to the property definition, to control read/write access. Flags areGObject.PARAM_READABLE (only read access for external code), GObject.PARAM_WRITABLE (only writeaccess), GObject.PARAM_READWRITE (public):
foo = GObject.Property(type=str, flags = GObject.PARAM_READABLE) # not writablebar = GObject.Property(type=str, flags = GObject.PARAM_WRITABLE) # not readable
You can also define new read-only properties with a new method decorated with GObject.Property:
from gi.repository import GObject
class MyObject(GObject.GObject):
def __init__(self):GObject.GObject.__init__(self)
@GObject.Propertydef readonly(self):
return 'This is read-only.'
You can get this property using:
my_object = MyObject()print(my_object.readonly)print(my_object.get_property("readonly"))
The API of GObject.Property is similar to the builtin property(). You can create property setter in a waysimilar to Python property:
class AnotherObject(GObject.Object):value = 0
@GObject.Propertydef prop(self):
'Read only property.'return 1
@GObject.Property(type=int)def propInt(self):
'Read-write integer property.'return self.value
@propInt.setterdef propInt(self, value):
self.value = value
There is also a way to define minimum and maximum values for numbers, using a more verbose form:
from gi.repository import GObject
class MyObject(GObject.GObject):
__gproperties__ = {"int-prop": (int, # type
20.3. Properties 105
The Python GTK+ 3 Tutorial, Release 3.4
"integer prop", # nick"A property that contains an integer", # blurb1, # min5, # max2, # defaultGObject.PARAM_READWRITE # flags
),}
def __init__(self):GObject.GObject.__init__(self)self.int_prop = 2
def do_get_property(self, prop):if prop.name == 'int-prop':
return self.int_propelse:
raise AttributeError, 'unknown property %s' % prop.name
def do_set_property(self, prop, value):if prop.name == 'int-prop':
self.int_prop = valueelse:
raise AttributeError, 'unknown property %s' % prop.name
Properties must be defined in GObject.GObject.__gproperties__, a dictionary, and handled indo_get_property and do_set_property.
20.3.3 Watch properties
When a property is modified, a signal is emitted, whose name is “notify::property-name”:
my_object = MyObject()
def on_notify_foo(obj, gparamstring):print("foo changed")
my_object.connect("notify::foo", on_notify_foo)
my_object.set_property("foo", "bar") # on_notify_foo will be called
Note that you have to use the canonical property name when connecting to the notify signals, as explained inGObject.Object.signals.notify(). For instance, for a Python property foo_bar_baz you would connectto the signal notify::foo-bar-baz using
my_object = MyObject()
def on_notify_foo_bar_baz(obj, gparamstring):print("foo_bar_baz changed")
my_object.connect("notify::foo-bar-baz", on_notify_foo_bar_baz)
106 Chapter 20. Objects
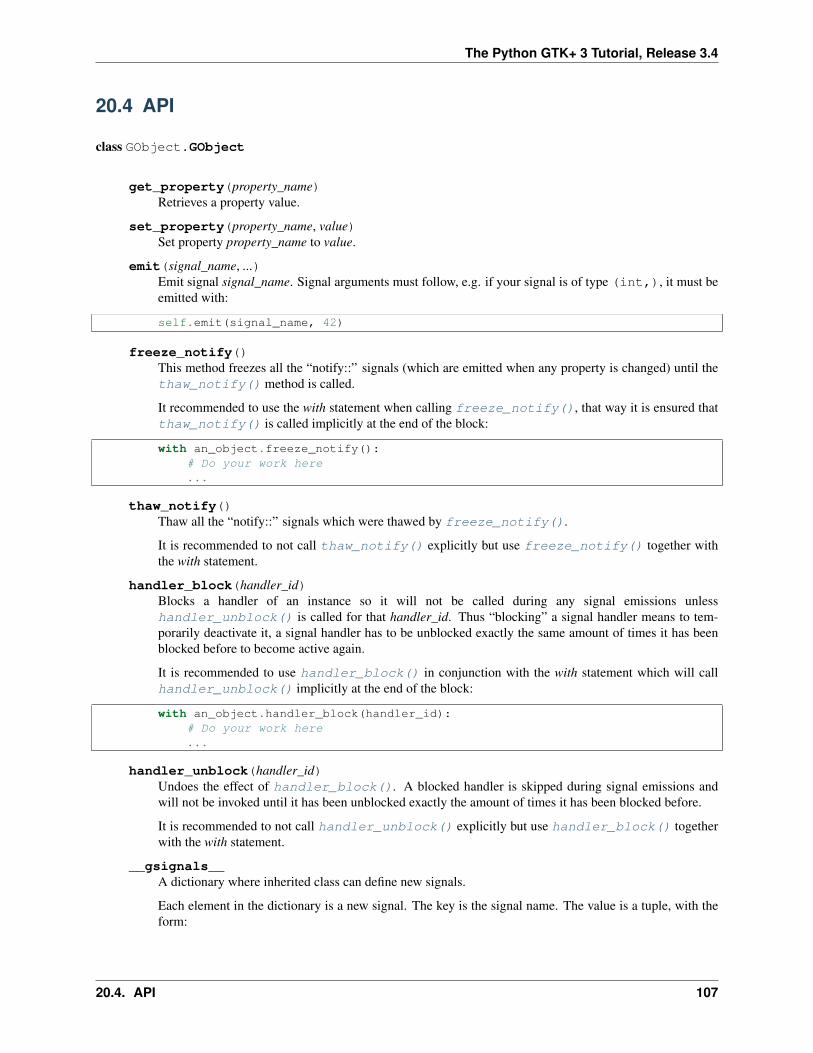
The Python GTK+ 3 Tutorial, Release 3.4
20.4 API
class GObject.GObject
get_property(property_name)Retrieves a property value.
set_property(property_name, value)Set property property_name to value.
emit(signal_name, ...)Emit signal signal_name. Signal arguments must follow, e.g. if your signal is of type (int,), it must beemitted with:
self.emit(signal_name, 42)
freeze_notify()This method freezes all the “notify::” signals (which are emitted when any property is changed) until thethaw_notify() method is called.
It recommended to use the with statement when calling freeze_notify(), that way it is ensured thatthaw_notify() is called implicitly at the end of the block:
with an_object.freeze_notify():# Do your work here...
thaw_notify()Thaw all the “notify::” signals which were thawed by freeze_notify().
It is recommended to not call thaw_notify() explicitly but use freeze_notify() together withthe with statement.
handler_block(handler_id)Blocks a handler of an instance so it will not be called during any signal emissions unlesshandler_unblock() is called for that handler_id. Thus “blocking” a signal handler means to tem-porarily deactivate it, a signal handler has to be unblocked exactly the same amount of times it has beenblocked before to become active again.
It is recommended to use handler_block() in conjunction with the with statement which will callhandler_unblock() implicitly at the end of the block:
with an_object.handler_block(handler_id):# Do your work here...
handler_unblock(handler_id)Undoes the effect of handler_block(). A blocked handler is skipped during signal emissions andwill not be invoked until it has been unblocked exactly the amount of times it has been blocked before.
It is recommended to not call handler_unblock() explicitly but use handler_block() togetherwith the with statement.
__gsignals__A dictionary where inherited class can define new signals.
Each element in the dictionary is a new signal. The key is the signal name. The value is a tuple, with theform:
20.4. API 107
The Python GTK+ 3 Tutorial, Release 3.4
(GObject.SIGNAL_RUN_FIRST, None, (int,))
GObject.SIGNAL_RUN_FIRST can be replaced with GObject.SIGNAL_RUN_LAST orGObject.SIGNAL_RUN_CLEANUP. None is the return type of the signal. (int,) is the listof the parameters of the signal, it must end with a comma.
__gproperties__The __gproperties__ dictionary is a class property where you define the properties of your object.This is not the recommend way to define new properties, the method written above is much less verbose.The benefits of this method is that a property can be defined with more settings, like the minimum or themaximum for numbers.
The key is the name of the property
The value is a tuple which describe the property. The number of elements of this tuple depends on its firstelement but the tuple will always contain at least the following items:
The first element is the property’s type (e.g. int, float...).
The second element is the property’s nick name, which is a string with a short description ofthe property. This is generally used by programs with strong introspection capabilities, like thegraphical user interface builder Glade.
The third one is the property’s description or blurb, which is another string with a longer descrip-tion of the property. Also used by Glade and similar programs.
The last one (which is not necessarily the forth one as we will see later) isthe property’s flags: GObject.PARAM_READABLE, GObject.PARAM_WRITABLE,GObject.PARAM_READWRITE.
The absolute length of the tuple depends on the property type (the first element of the tuple). Thus we havethe following situations:
If the type is bool or str, the forth element is the default value of the property.
If the type is int or float, the forth element is the minimum accepted value, the fifth elementis the maximum accepted value and the sixth element is the default value.
If the type is not one of these, there is no extra element.
GObject.SIGNAL_RUN_FIRSTInvoke the object method handler in the first emission stage.
GObject.SIGNAL_RUN_LASTInvoke the object method handler in the third emission stage.
GObject.SIGNAL_RUN_CLEANUPInvoke the object method handler in the last emission stage.
GObject.PARAM_READABLEThe property is readable.
GObject.PARAM_WRITABLEThe property is writable.
GObject.PARAM_READWRITEThe property is readable and writable.
108 Chapter 20. Objects
CHAPTER 21
Application
Gtk.Application encompeses many repetitive tasks that a modern application needs such as handling multi-ple instances, D-Bus activation, opening files, command line parsing, startup/shutdown, menu management, windowmanagement, and more.
21.1 Actions
Gio.Action is a way to expose any single task your application or widget does by a name. These actions can bedisabled/enabled at runtime and they can either be activated or have a state changed (if they contain state).
The reason to use actions is to separate out the logic from the UI. For example this allows using a menubar on OSXand a gear menu on GNOME both simply referencing the name of an action. The main implementaiton of this youwill be using is Gio.SimpleAction which will be showed off later.
Many classes such as Gio.MenuItem and Gtk.ModelButton support properties to set an action name.
These actions can be grouped together into a Gio.ActionGroup and when these groups are added to a wid-get with Gtk.Widget.insert_action_group() they will gain a prefix. Such as “win” when added to aGtk.ApplicationWindow. You will use the full action name when referencing it such as “app.about” but whenyou create the action it will just be “about” until added to the application.
You can also very easily make keybindings for actions by setting the accel property in the Gio.Menu file or by usingGtk.Application.add_accelerator().
21.2 Menus
Your menus should be defined in XML using Gio.Menu and would reference the previously mentioned actionsyou defined. Gtk.Application allows you to set a menu either via Gtk.Application.set_app_menu()or Gtk.Application.set_menubar(). If you make use of Gio.Resource this can automatically use thecorrect menu based on platform, otherwise you can set them manually. A detailed example is shown below.
21.3 Command Line
When creating your application it takes a flag property of Gio.ApplicationFlags. Using this you can let ithandle everything itself or have more custom behavior.
109
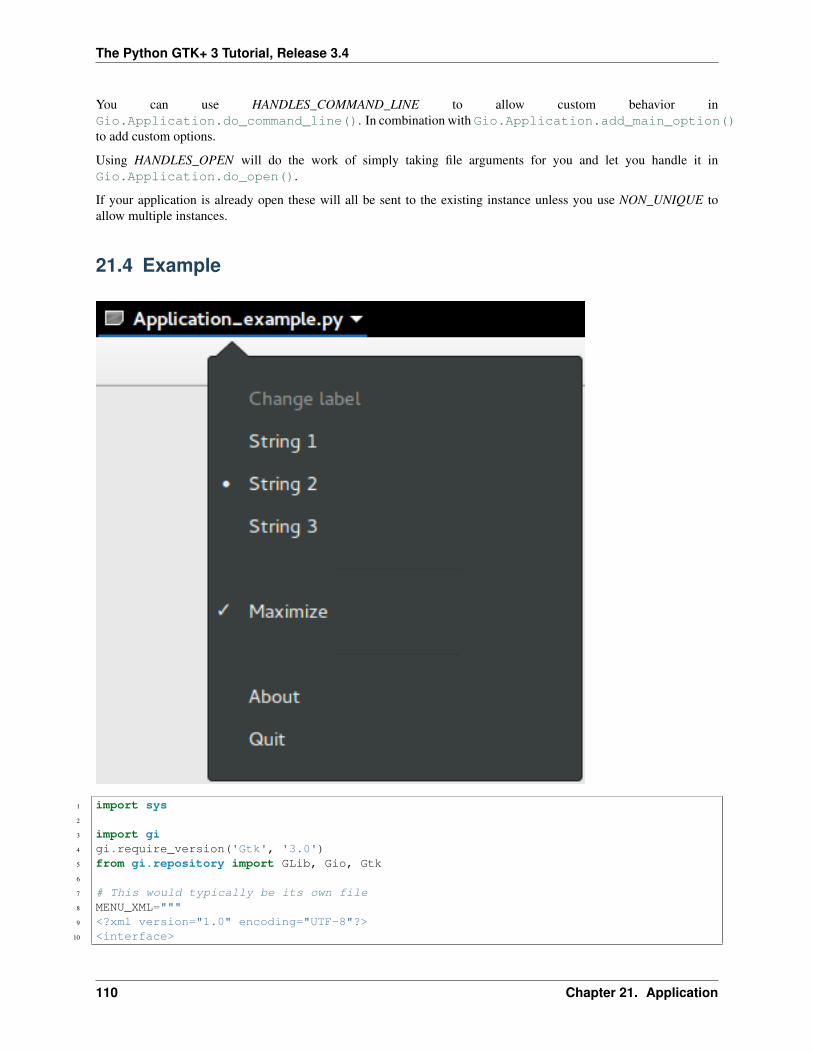
The Python GTK+ 3 Tutorial, Release 3.4
You can use HANDLES_COMMAND_LINE to allow custom behavior inGio.Application.do_command_line(). In combination with Gio.Application.add_main_option()to add custom options.
Using HANDLES_OPEN will do the work of simply taking file arguments for you and let you handle it inGio.Application.do_open().
If your application is already open these will all be sent to the existing instance unless you use NON_UNIQUE toallow multiple instances.
21.4 Example
1 import sys2
3 import gi4 gi.require_version('Gtk', '3.0')5 from gi.repository import GLib, Gio, Gtk6
7 # This would typically be its own file8 MENU_XML="""9 <?xml version="1.0" encoding="UTF-8"?>
10 <interface>
110 Chapter 21. Application
The Python GTK+ 3 Tutorial, Release 3.4
11 <menu id="app-menu">12 <section>13 <attribute name="label" translatable="yes">Change label</attribute>14 <item>15 <attribute name="action">win.change_label</attribute>16 <attribute name="target">String 1</attribute>17 <attribute name="label" translatable="yes">String 1</attribute>18 </item>19 <item>20 <attribute name="action">win.change_label</attribute>21 <attribute name="target">String 2</attribute>22 <attribute name="label" translatable="yes">String 2</attribute>23 </item>24 <item>25 <attribute name="action">win.change_label</attribute>26 <attribute name="target">String 3</attribute>27 <attribute name="label" translatable="yes">String 3</attribute>28 </item>29 </section>30 <section>31 <item>32 <attribute name="action">win.maximize</attribute>33 <attribute name="label" translatable="yes">Maximize</attribute>34 </item>35 </section>36 <section>37 <item>38 <attribute name="action">app.about</attribute>39 <attribute name="label" translatable="yes">_About</attribute>40 </item>41 <item>42 <attribute name="action">app.quit</attribute>43 <attribute name="label" translatable="yes">_Quit</attribute>44 <attribute name="accel"><Primary>q</attribute>45 </item>46 </section>47 </menu>48 </interface>49 """50
51 class AppWindow(Gtk.ApplicationWindow):52
53 def __init__(self, *args, **kwargs):54 super().__init__(*args, **kwargs)55
56 # This will be in the windows group and have the "win" prefix57 max_action = Gio.SimpleAction.new_stateful("maximize", None,58 GLib.Variant.new_boolean(False))59 max_action.connect("change-state", self.on_maximize_toggle)60 self.add_action(max_action)61
62 # Keep it in sync with the actual state63 self.connect("notify::is-maximized",64 lambda obj, pspec: max_action.set_state(65 GLib.Variant.new_boolean(obj.props.is_maximized)))66
67 lbl_variant = GLib.Variant.new_string("String 1")68 lbl_action = Gio.SimpleAction.new_stateful("change_label", lbl_variant.get_type(),
21.4. Example 111
The Python GTK+ 3 Tutorial, Release 3.4
69 lbl_variant)70 lbl_action.connect("change-state", self.on_change_label_state)71 self.add_action(lbl_action)72
73 self.label = Gtk.Label(label=lbl_variant.get_string(),74 margin=30)75 self.add(self.label)76 self.label.show()77
78 def on_change_label_state(self, action, value):79 action.set_state(value)80 self.label.set_text(value.get_string())81
82 def on_maximize_toggle(self, action, value):83 action.set_state(value)84 if value.get_boolean():85 self.maximize()86 else:87 self.unmaximize()88
89 class Application(Gtk.Application):90
91 def __init__(self, *args, **kwargs):92 super().__init__(*args, application_id="org.example.myapp",93 flags=Gio.ApplicationFlags.HANDLES_COMMAND_LINE,94 **kwargs)95 self.window = None96
97 self.add_main_option("test", ord("t"), GLib.OptionFlags.NONE,98 GLib.OptionArg.NONE, "Command line test", None)99
100 def do_startup(self):101 Gtk.Application.do_startup(self)102
103 action = Gio.SimpleAction.new("about", None)104 action.connect("activate", self.on_about)105 self.add_action(action)106
107 action = Gio.SimpleAction.new("quit", None)108 action.connect("activate", self.on_quit)109 self.add_action(action)110
111 builder = Gtk.Builder.new_from_string(MENU_XML, -1)112 self.set_app_menu(builder.get_object("app-menu"))113
114 def do_activate(self):115 # We only allow a single window and raise any existing ones116 if not self.window:117 # Windows are associated with the application118 # when the last one is closed the application shuts down119 self.window = AppWindow(application=self, title="Main Window")120
121 self.window.present()122
123 def do_command_line(self, command_line):124 options = command_line.get_options_dict()125
126 if options.contains("test"):
112 Chapter 21. Application
The Python GTK+ 3 Tutorial, Release 3.4
127 # This is printed on the main instance128 print("Test argument recieved")129
130 self.activate()131 return 0132
133 def on_about(self, action, param):134 about_dialog = Gtk.AboutDialog(transient_for=self.window, modal=True)135 about_dialog.present()136
137 def on_quit(self, action, param):138 self.quit()139
140 if __name__ == "__main__":141 app = Application()142 app.run(sys.argv)
21.5 See Also
• https://wiki.gnome.org/HowDoI/GtkApplication
• https://wiki.gnome.org/HowDoI/GAction
• https://wiki.gnome.org/HowDoI/ApplicationMenu
• https://wiki.gnome.org/HowDoI/GMenu
21.5. See Also 113
The Python GTK+ 3 Tutorial, Release 3.4
114 Chapter 21. Application

CHAPTER 22
Menus
Note: Gtk.UIManager, Gtk.Action, and Gtk.ActionGroup have been deprecated since GTK+ version3.10 and should not be used in newly-written code. Use the Application framework instead.
GTK+ comes with two different types of menus, Gtk.MenuBar and Gtk.Toolbar. Gtk.MenuBar is a standardmenu bar which contains one or more Gtk.MenuItem instances or one of its subclasses. Gtk.Toolbar widgetsare used for quick accessibility to commonly used functions of an application. Examples include creating a newdocument, printing a page or undoing an operation. It contains one or more instances of Gtk.ToolItem or one ofits subclasses.
22.1 Actions
Although, there are specific APIs to create menus and toolbars, you should use Gtk.UIManager and createGtk.Action instances. Actions are organised into groups. A Gtk.ActionGroup is essentially a map fromnames to Gtk.Action objects. All actions that would make sense to use in a particular context should be in a singlegroup. Multiple action groups may be used for a particular user interface. In fact, it is expected that most non-trivialapplications will make use of multiple groups. For example, in an application that can edit multiple documents, onegroup holding global actions (e.g. quit, about, new), and one group per document holding actions that act on thatdocument (eg. save, cut/copy/paste, etc). Each window’s menus would be constructed from a combination of twoaction groups.
Different classes representing different types of actions exist:
• Gtk.Action: An action which can be triggered by a menu or toolbar item
• Gtk.ToggleAction: An action which can be toggled between two states
• Gtk.RadioAction: An action of which only one in a group can be active
• Gtk.RecentAction: An action of which represents a list of recently used files
Actions represent operations that the user can be perform, along with some information how it should be presentedin the interface, including its name (not for display), its label (for display), an accelerator, whether a label indicates atooltip as well as the callback that is called when the action gets activated.
You can create actions by either calling one of the constructors directly and adding them to a Gtk.ActionGroupby calling Gtk.ActionGroup.add_action() or Gtk.ActionGroup.add_action_with_accel(), orby calling one of the convenience functions:
• Gtk.ActionGroup.add_actions(),
• Gtk.ActionGroup.add_toggle_actions()
115
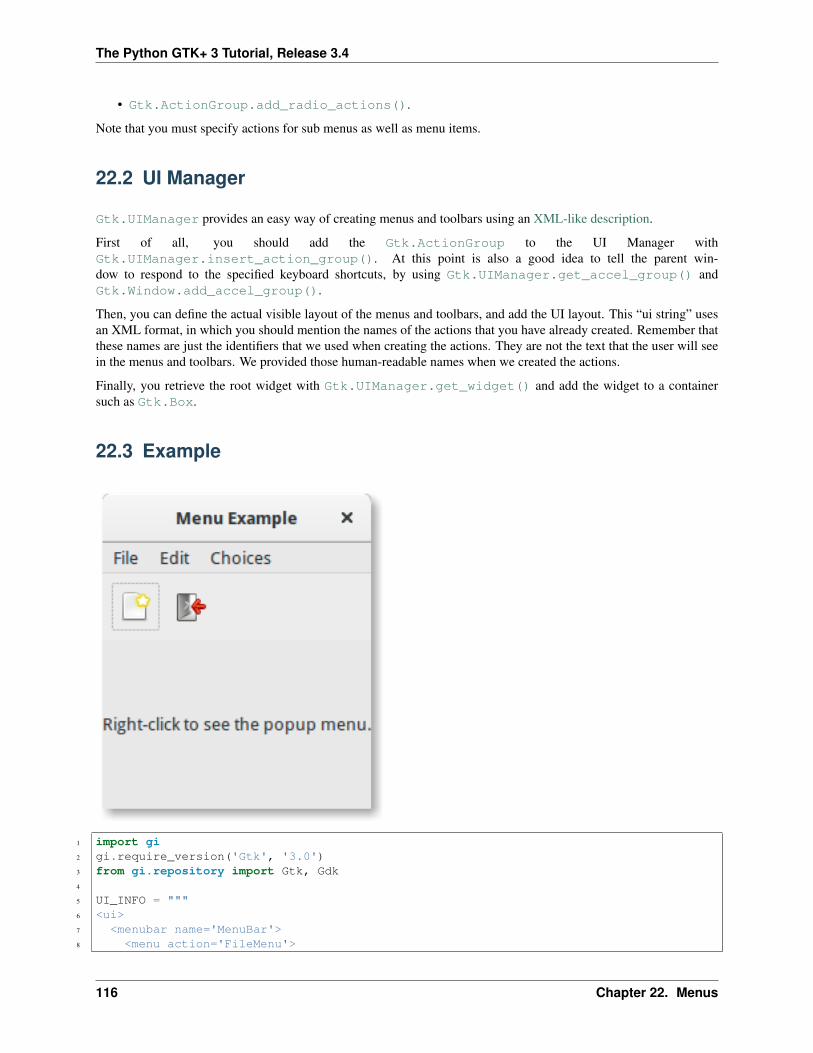
The Python GTK+ 3 Tutorial, Release 3.4
• Gtk.ActionGroup.add_radio_actions().
Note that you must specify actions for sub menus as well as menu items.
22.2 UI Manager
Gtk.UIManager provides an easy way of creating menus and toolbars using an XML-like description.
First of all, you should add the Gtk.ActionGroup to the UI Manager withGtk.UIManager.insert_action_group(). At this point is also a good idea to tell the parent win-dow to respond to the specified keyboard shortcuts, by using Gtk.UIManager.get_accel_group() andGtk.Window.add_accel_group().
Then, you can define the actual visible layout of the menus and toolbars, and add the UI layout. This “ui string” usesan XML format, in which you should mention the names of the actions that you have already created. Remember thatthese names are just the identifiers that we used when creating the actions. They are not the text that the user will seein the menus and toolbars. We provided those human-readable names when we created the actions.
Finally, you retrieve the root widget with Gtk.UIManager.get_widget() and add the widget to a containersuch as Gtk.Box.
22.3 Example
1 import gi2 gi.require_version('Gtk', '3.0')3 from gi.repository import Gtk, Gdk4
5 UI_INFO = """6 <ui>7 <menubar name='MenuBar'>8 <menu action='FileMenu'>
116 Chapter 22. Menus
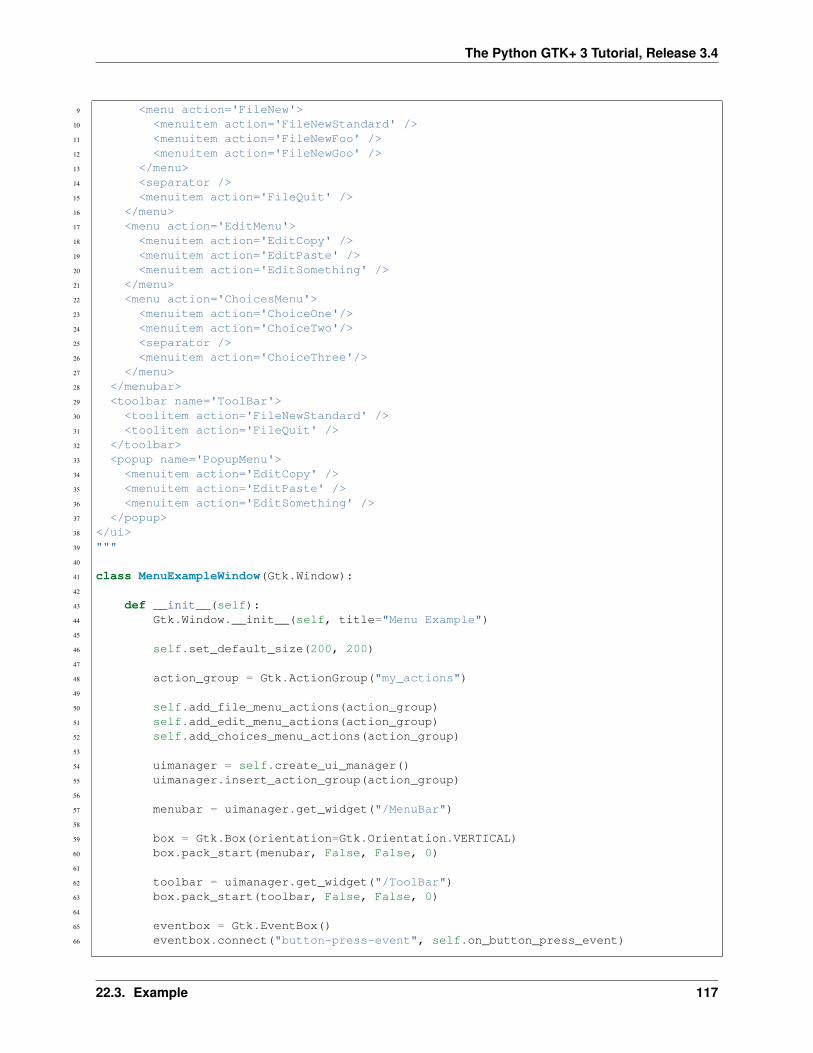
The Python GTK+ 3 Tutorial, Release 3.4
9 <menu action='FileNew'>10 <menuitem action='FileNewStandard' />11 <menuitem action='FileNewFoo' />12 <menuitem action='FileNewGoo' />13 </menu>14 <separator />15 <menuitem action='FileQuit' />16 </menu>17 <menu action='EditMenu'>18 <menuitem action='EditCopy' />19 <menuitem action='EditPaste' />20 <menuitem action='EditSomething' />21 </menu>22 <menu action='ChoicesMenu'>23 <menuitem action='ChoiceOne'/>24 <menuitem action='ChoiceTwo'/>25 <separator />26 <menuitem action='ChoiceThree'/>27 </menu>28 </menubar>29 <toolbar name='ToolBar'>30 <toolitem action='FileNewStandard' />31 <toolitem action='FileQuit' />32 </toolbar>33 <popup name='PopupMenu'>34 <menuitem action='EditCopy' />35 <menuitem action='EditPaste' />36 <menuitem action='EditSomething' />37 </popup>38 </ui>39 """40
41 class MenuExampleWindow(Gtk.Window):42
43 def __init__(self):44 Gtk.Window.__init__(self, title="Menu Example")45
46 self.set_default_size(200, 200)47
48 action_group = Gtk.ActionGroup("my_actions")49
50 self.add_file_menu_actions(action_group)51 self.add_edit_menu_actions(action_group)52 self.add_choices_menu_actions(action_group)53
54 uimanager = self.create_ui_manager()55 uimanager.insert_action_group(action_group)56
57 menubar = uimanager.get_widget("/MenuBar")58
59 box = Gtk.Box(orientation=Gtk.Orientation.VERTICAL)60 box.pack_start(menubar, False, False, 0)61
62 toolbar = uimanager.get_widget("/ToolBar")63 box.pack_start(toolbar, False, False, 0)64
65 eventbox = Gtk.EventBox()66 eventbox.connect("button-press-event", self.on_button_press_event)
22.3. Example 117
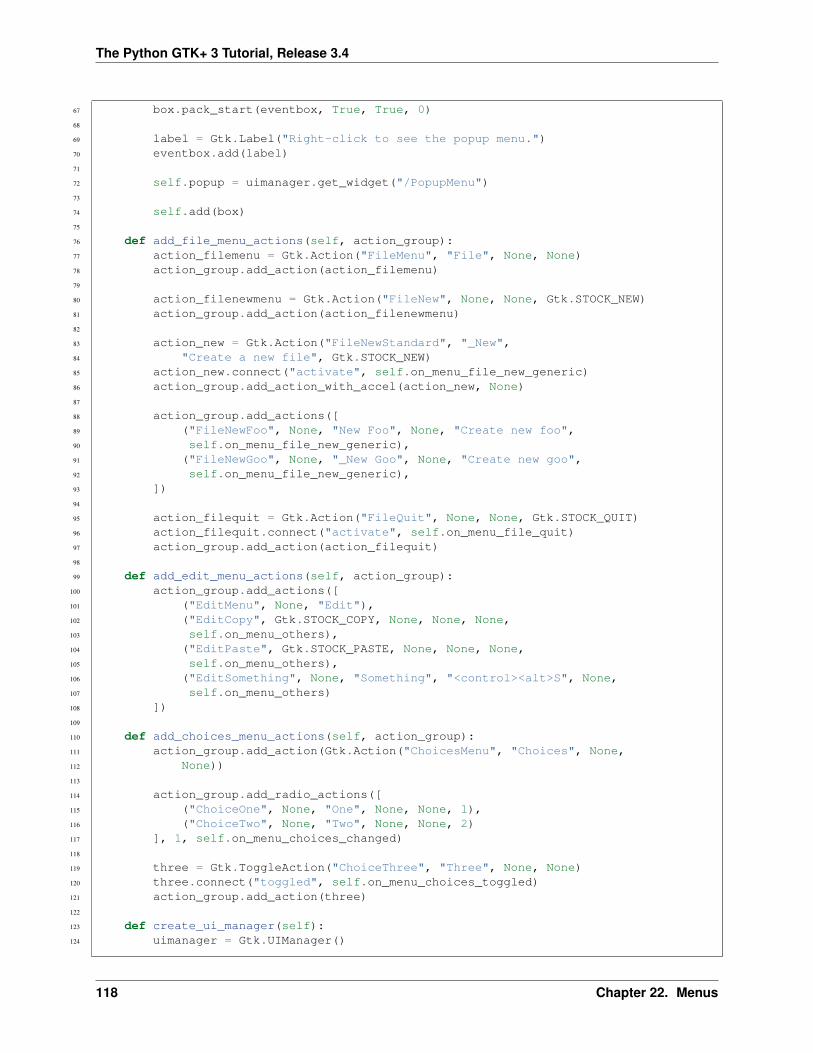
The Python GTK+ 3 Tutorial, Release 3.4
67 box.pack_start(eventbox, True, True, 0)68
69 label = Gtk.Label("Right-click to see the popup menu.")70 eventbox.add(label)71
72 self.popup = uimanager.get_widget("/PopupMenu")73
74 self.add(box)75
76 def add_file_menu_actions(self, action_group):77 action_filemenu = Gtk.Action("FileMenu", "File", None, None)78 action_group.add_action(action_filemenu)79
80 action_filenewmenu = Gtk.Action("FileNew", None, None, Gtk.STOCK_NEW)81 action_group.add_action(action_filenewmenu)82
83 action_new = Gtk.Action("FileNewStandard", "_New",84 "Create a new file", Gtk.STOCK_NEW)85 action_new.connect("activate", self.on_menu_file_new_generic)86 action_group.add_action_with_accel(action_new, None)87
88 action_group.add_actions([89 ("FileNewFoo", None, "New Foo", None, "Create new foo",90 self.on_menu_file_new_generic),91 ("FileNewGoo", None, "_New Goo", None, "Create new goo",92 self.on_menu_file_new_generic),93 ])94
95 action_filequit = Gtk.Action("FileQuit", None, None, Gtk.STOCK_QUIT)96 action_filequit.connect("activate", self.on_menu_file_quit)97 action_group.add_action(action_filequit)98
99 def add_edit_menu_actions(self, action_group):100 action_group.add_actions([101 ("EditMenu", None, "Edit"),102 ("EditCopy", Gtk.STOCK_COPY, None, None, None,103 self.on_menu_others),104 ("EditPaste", Gtk.STOCK_PASTE, None, None, None,105 self.on_menu_others),106 ("EditSomething", None, "Something", "<control><alt>S", None,107 self.on_menu_others)108 ])109
110 def add_choices_menu_actions(self, action_group):111 action_group.add_action(Gtk.Action("ChoicesMenu", "Choices", None,112 None))113
114 action_group.add_radio_actions([115 ("ChoiceOne", None, "One", None, None, 1),116 ("ChoiceTwo", None, "Two", None, None, 2)117 ], 1, self.on_menu_choices_changed)118
119 three = Gtk.ToggleAction("ChoiceThree", "Three", None, None)120 three.connect("toggled", self.on_menu_choices_toggled)121 action_group.add_action(three)122
123 def create_ui_manager(self):124 uimanager = Gtk.UIManager()
118 Chapter 22. Menus
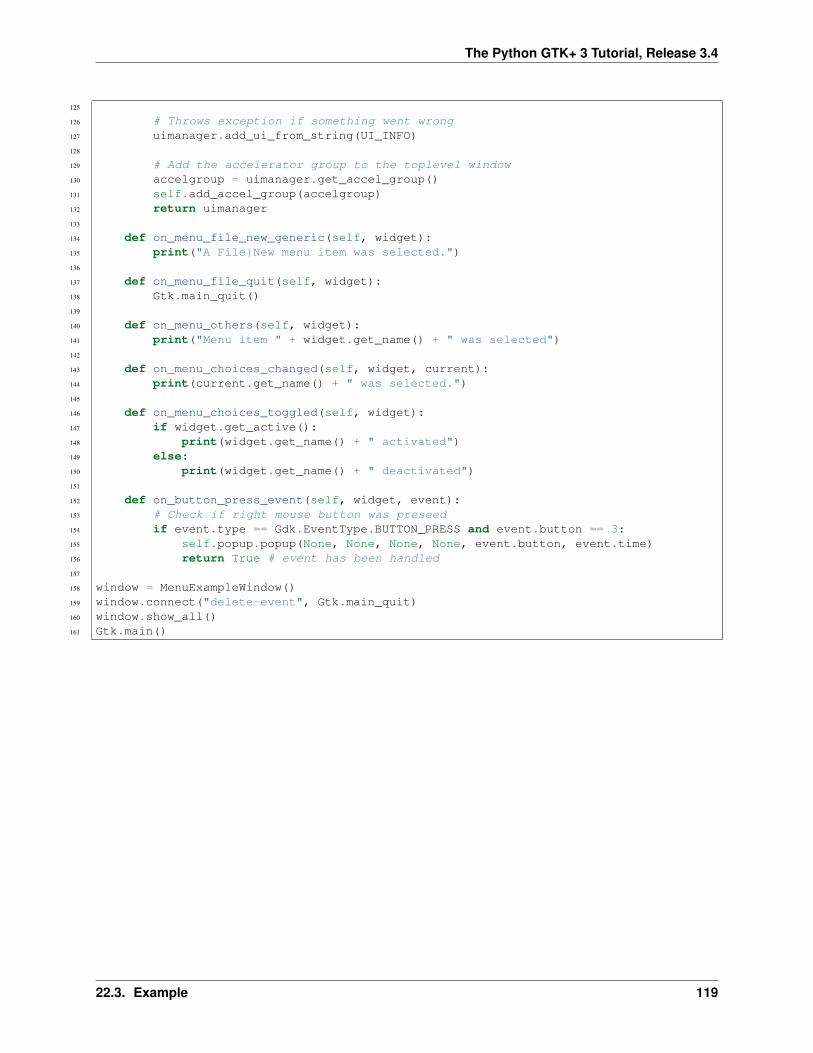
The Python GTK+ 3 Tutorial, Release 3.4
125
126 # Throws exception if something went wrong127 uimanager.add_ui_from_string(UI_INFO)128
129 # Add the accelerator group to the toplevel window130 accelgroup = uimanager.get_accel_group()131 self.add_accel_group(accelgroup)132 return uimanager133
134 def on_menu_file_new_generic(self, widget):135 print("A File|New menu item was selected.")136
137 def on_menu_file_quit(self, widget):138 Gtk.main_quit()139
140 def on_menu_others(self, widget):141 print("Menu item " + widget.get_name() + " was selected")142
143 def on_menu_choices_changed(self, widget, current):144 print(current.get_name() + " was selected.")145
146 def on_menu_choices_toggled(self, widget):147 if widget.get_active():148 print(widget.get_name() + " activated")149 else:150 print(widget.get_name() + " deactivated")151
152 def on_button_press_event(self, widget, event):153 # Check if right mouse button was preseed154 if event.type == Gdk.EventType.BUTTON_PRESS and event.button == 3:155 self.popup.popup(None, None, None, None, event.button, event.time)156 return True # event has been handled157
158 window = MenuExampleWindow()159 window.connect("delete-event", Gtk.main_quit)160 window.show_all()161 Gtk.main()
22.3. Example 119
The Python GTK+ 3 Tutorial, Release 3.4
120 Chapter 22. Menus
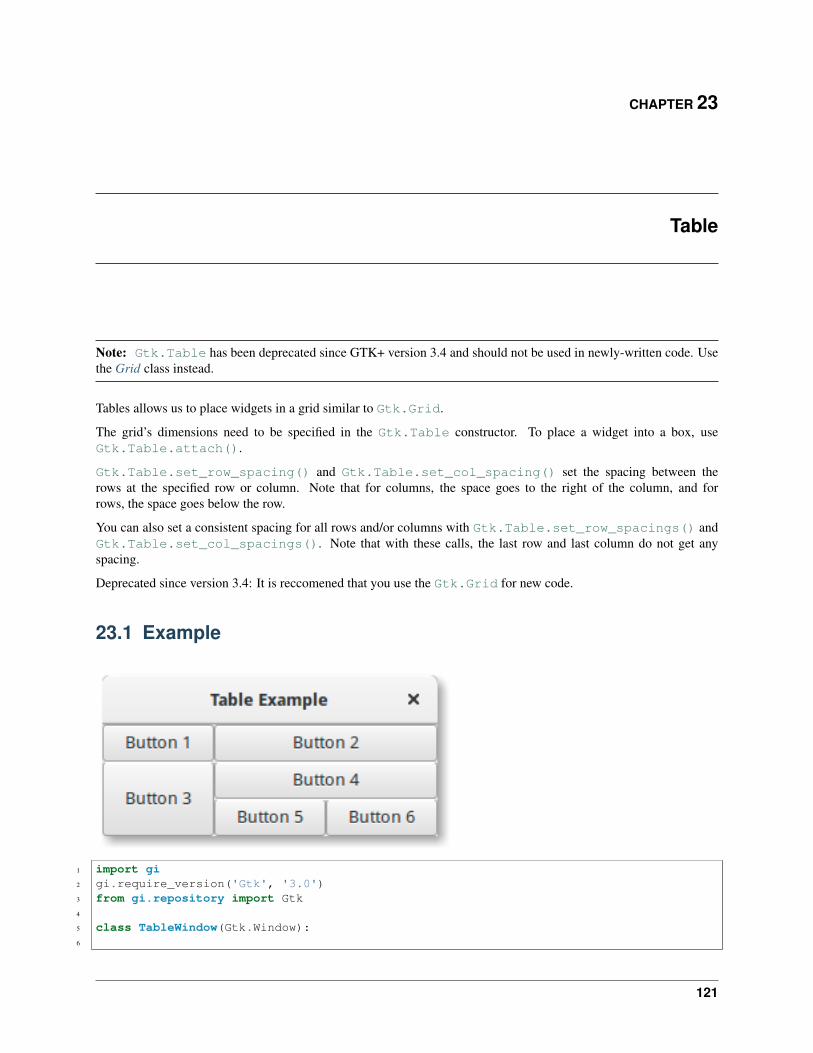
CHAPTER 23
Table
Note: Gtk.Table has been deprecated since GTK+ version 3.4 and should not be used in newly-written code. Usethe Grid class instead.
Tables allows us to place widgets in a grid similar to Gtk.Grid.
The grid’s dimensions need to be specified in the Gtk.Table constructor. To place a widget into a box, useGtk.Table.attach().
Gtk.Table.set_row_spacing() and Gtk.Table.set_col_spacing() set the spacing between therows at the specified row or column. Note that for columns, the space goes to the right of the column, and forrows, the space goes below the row.
You can also set a consistent spacing for all rows and/or columns with Gtk.Table.set_row_spacings() andGtk.Table.set_col_spacings(). Note that with these calls, the last row and last column do not get anyspacing.
Deprecated since version 3.4: It is reccomened that you use the Gtk.Grid for new code.
23.1 Example
1 import gi2 gi.require_version('Gtk', '3.0')3 from gi.repository import Gtk4
5 class TableWindow(Gtk.Window):6
121
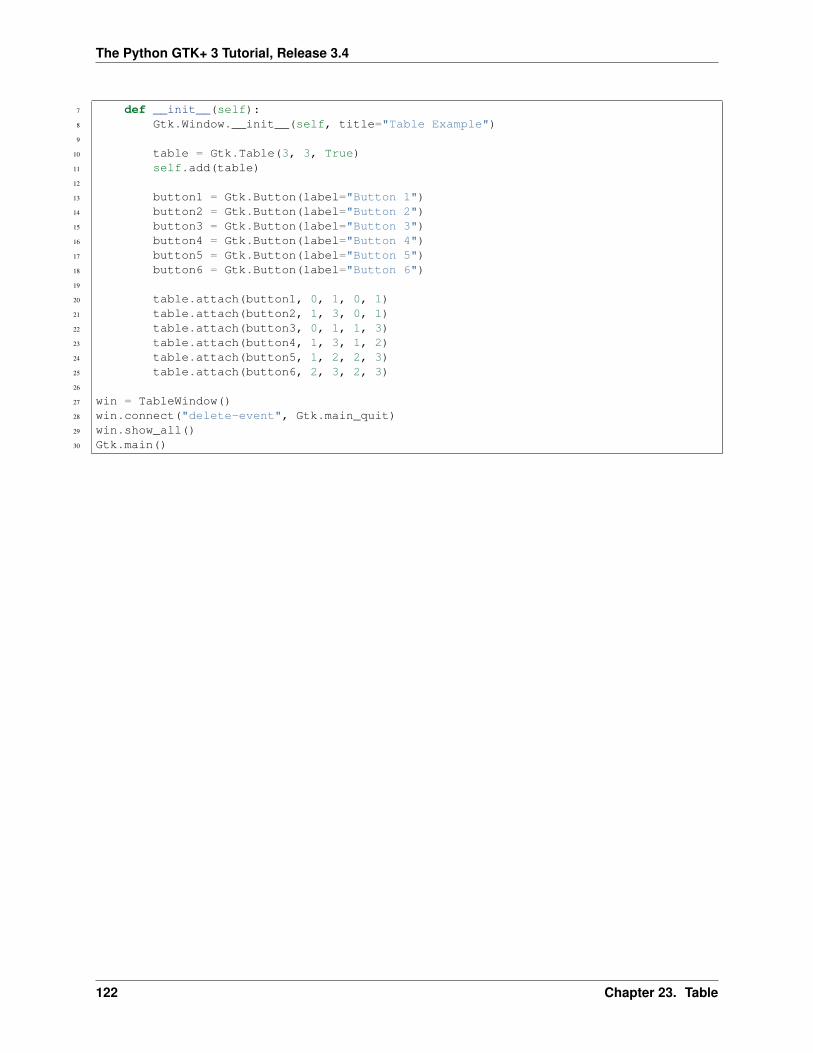
The Python GTK+ 3 Tutorial, Release 3.4
7 def __init__(self):8 Gtk.Window.__init__(self, title="Table Example")9
10 table = Gtk.Table(3, 3, True)11 self.add(table)12
13 button1 = Gtk.Button(label="Button 1")14 button2 = Gtk.Button(label="Button 2")15 button3 = Gtk.Button(label="Button 3")16 button4 = Gtk.Button(label="Button 4")17 button5 = Gtk.Button(label="Button 5")18 button6 = Gtk.Button(label="Button 6")19
20 table.attach(button1, 0, 1, 0, 1)21 table.attach(button2, 1, 3, 0, 1)22 table.attach(button3, 0, 1, 1, 3)23 table.attach(button4, 1, 3, 1, 2)24 table.attach(button5, 1, 2, 2, 3)25 table.attach(button6, 2, 3, 2, 3)26
27 win = TableWindow()28 win.connect("delete-event", Gtk.main_quit)29 win.show_all()30 Gtk.main()
122 Chapter 23. Table

CHAPTER 24
Indices and tables
• search
123

The Python GTK+ 3 Tutorial, Release 3.4
124 Chapter 24. Indices and tables

Index
Symbols__gproperties__ (GObject.GObject attribute), 108__gsignals__ (GObject.GObject attribute), 107
Eemit() (GObject.GObject method), 107
Ffreeze_notify() (GObject.GObject method), 107
Gget_property() (GObject.GObject method), 107GObject.GObject (built-in class), 107
Hhandler_block() (GObject.GObject method), 107handler_unblock() (GObject.GObject method), 107
PPARAM_READABLE (GObject attribute), 108PARAM_READWRITE (GObject attribute), 108PARAM_WRITABLE (GObject attribute), 108
Sset_property() (GObject.GObject method), 107SIGNAL_RUN_CLEANUP (GObject attribute), 108SIGNAL_RUN_FIRST (GObject attribute), 108SIGNAL_RUN_LAST (GObject attribute), 108
Tthaw_notify() (GObject.GObject method), 107
125