The Not So Short Introduction to...
95
The Not So Short Introduction to L A T E X2 ε Or L A T E X2 ε in 81 minutes by Tobias Oetiker Hubert Partl, Irene Hyna and Elisabeth Schlegl Version 3.20, 24 July, 2002
Transcript of The Not So Short Introduction to...

The Not So ShortIntroduction to LATEX2ε
Or LATEX2ε in 81 minutes
by Tobias Oetiker
Hubert Partl, Irene Hyna and Elisabeth Schlegl
Version 3.20, 24 July, 2002

ii
Copyright c©2000 Tobias Oetiker and all the Contributers to LShort. All rights reserved.This document is free; you can redistribute it and/or modify it under the terms of the GNU General
Public License as published by the Free Software Foundation; either version 2 of the License, or (at youroption) any later version.
This document is distributed in the hope that it will be useful, but WITHOUT ANY WARRANTY;without even the implied warranty of MERCHANTABILITY or FITNESS FOR A PARTICULAR PUR-POSE. See the GNU General Public License for more details.
You should have received a copy of the GNU General Public License along with this document; ifnot, write to the Free Software Foundation, Inc., 675 Mass Ave, Cambridge, MA 02139, USA.

Thank you!
Much of the material used in this introduction comes from an Austrian introduction to LATEX2.09 written in German by:
Hubert Partl <[email protected]>Zentraler Informatikdienst der Universitat fur Bodenkultur Wien
Irene Hyna <[email protected]>Bundesministerium fur Wissenschaft und Forschung Wien
Elisabeth Schlegl <no email>in Graz
If you are interested in the German document, you can find a version updated for LATEX 2εby Jorg Knappen atCTAN:/tex-archive/info/lshort/german
While preparing this document, I asked for reviewers on comp.text.tex. I got a lot of response.The following individuals helped with corrections, suggestions and material to improve thispaper. They put in a big effort to help me get this document into its present shape. I wouldlike to sincerely thank all of them. Naturally, all the mistakes you’ll find in this book are mine.If you ever find a word which is spelled correctly, it must have been one of the people belowdropping me a line.
Rosemary Bailey, Friedemann Brauer, Jan Busa, Markus Bruhwiler, David Carlisle,Jose Carlos Santos, Mike Chapman, Christopher Chin, Carl Cerecke, Chris McCormack,Wim van Dam, Jan Dittberner, Michael John Downes, David Dureisseix, Elliot,David Frey, Robin Fairbairns, Jorg— Fischer, Erik Frisk, Frank, Kasper B. Graversen,Alexandre Guimond, Cyril Goutte, Greg Gamble, Neil Hammond, Rasmus Borup Hansen,Joseph Hilferty, Bjorn Hvittfeldt, Martien Hulsen, Werner Icking, Jakob, Eric Jacoboni,Alan Jeffrey, Byron Jones, David Jones, Johannes-Maria Kaltenbach, Michael Koundouros,Andrzej Kawalec, Alain Kessi, Christian Kern, Jorg Knappen, Kjetil Kjernsmo,Maik Lehradt, Alexander Mai, Martin Maechler, Aleksandar S Milosevic, Claus Malten,Kevin Van Maren, Lenimar Nunes de Andrade, Hubert Partl, John Refling, Mike Ressler,Brian Ripley, Young U. Ryu, Bernd Rosenlecher, Chris Rowley, Hanspeter Schmid,Craig Schlenter, Christopher Sawtell, Geoffrey Swindale, Josef Tkadlec, Didier Verna,Fabian Wernli, Carl-Gustav Werner, David Woodhouse, Chris York, Fritz Zaucker,Rick Zaccone, and Mikhail Zotov.


Preface
LATEX [1] is a typesetting system which is very suitable for producing scientific and mathematicaldocuments of high typographical quality. The system is also suitable for producing all sorts ofother documents, from simple letters to complete books. LATEX uses TEX [2] as its formattingengine.
This short introduction describes LATEX 2ε and should be sufficient for most applications ofLATEX. Refer to [1, 3] for a complete description of the LATEX system.
LATEX is available for most computers, from the PC and Mac to large UNIX and VMSsystems. On many university computer clusters, you will find that a LATEX installation isavailable, ready to use. Information on how to access the local LATEX installation should beprovided in the Local Guide [4]. If you have problems getting started, ask the person who gaveyou this booklet. The scope of this document is not to tell you how to install and set up a LATEXsystem, but to teach you how to write your documents so that they can be processed by LATEX.This Introduction is split into 5 chapters:
Chapter 1 tells you about the basic structure of LATEX 2ε documents. You will also learn a bitabout the history of LATEX. After reading this chapter, you should have a rough pictureof LATEX. The picture will only be a framework, but it will enable you to integrate theinformation provided in the other chapters into the big picture.
Chapter 2 goes into the details of typesetting your documents. It explains most of the essentialLATEX commands and environments. After reading this chapter, you will be able to writeyour first documents.
Chapter 3 explains how to typeset formulae with LATEX. Again, a lot of examples help you tounderstand how to use one of LATEX’s main strengths. At the end of this chapter, you willfind tables, listing all the mathematical symbols available in LATEX.
Chapter 4 explains index and bibliography generation, inclusion of EPS graphics, and someother useful extensions.
Chapter 5 contains some potentially dangerous information about how to make alterations tothe standard document layout produced by LATEX. It will tell you how to change thingssuch that the beautiful output of LATEX begins looking quite bad.
It is important to read the chapters in sequential order. The book is not that big after all. Makesure to carefully read the examples, because a great part of the information is contained in thevarious examples you will find all throughout the book.
If you need to get hold of any LATEX related material, have a look at one of the ComprehensiveTEX Archive Network (CTAN) sites. The homesite is at http://www.ctan.org. All packages

vi Preface
can also be retrieved from the ftp archive ftp://www.ctan.org and it’s various mirror sites allover the world. They can be found e.g. at ftp://ctan.tug.org (US), ftp://ftp.dante.de(Germany), ftp://ftp.tex.ac.uk (UK). If you are not in one of these countries, choose thearchive closest to you.
You will find other references to CTAN throughout the book. Especially pointers to softwareand documents you might want to download. Instead of writing down complete urls, I just wroteCTAN: followed by whatever location within the CTAN tree you should go to.
If you want to run LATEX on your own computer, take a look at what is available fromCTAN:/tex-archive/systems.
If you have ideas for something to be added, removed or altered in this document, please let meknow. I am especially interested in feedback from LATEX novices about which bits of this introare easy to understand and which could be explained better.
Tobias Oetiker <[email protected]>
Department of Electrical Engineering,Swiss Federal Institute of Technology
The current version of this document is available onCTAN:/tex-archive/info/lshort
Contents
Thank you! iii
Preface v
1 Things You Need to Know 11.1 The Name of the Game . . . . . . . . . . . . . . . . . . . . . . . . . . . . . . . . 1
1.1.1 TEX . . . . . . . . . . . . . . . . . . . . . . . . . . . . . . . . . . . . . . . 11.1.2 LATEX . . . . . . . . . . . . . . . . . . . . . . . . . . . . . . . . . . . . . . 1
1.2 Basics . . . . . . . . . . . . . . . . . . . . . . . . . . . . . . . . . . . . . . . . . . 21.2.1 Author, Book Designer, and Typesetter . . . . . . . . . . . . . . . . . . . 21.2.2 Layout Design . . . . . . . . . . . . . . . . . . . . . . . . . . . . . . . . . 31.2.3 Advantages and Disadvantages . . . . . . . . . . . . . . . . . . . . . . . . 3
1.3 LATEX Input Files . . . . . . . . . . . . . . . . . . . . . . . . . . . . . . . . . . . . 41.3.1 Spaces . . . . . . . . . . . . . . . . . . . . . . . . . . . . . . . . . . . . . . 41.3.2 Special Characters . . . . . . . . . . . . . . . . . . . . . . . . . . . . . . . 41.3.3 LATEX Commands . . . . . . . . . . . . . . . . . . . . . . . . . . . . . . . 51.3.4 Comments . . . . . . . . . . . . . . . . . . . . . . . . . . . . . . . . . . . . 5
1.4 Input File Structure . . . . . . . . . . . . . . . . . . . . . . . . . . . . . . . . . . 61.5 A Typical Commandline Session . . . . . . . . . . . . . . . . . . . . . . . . . . . 61.6 The Layout of the Document . . . . . . . . . . . . . . . . . . . . . . . . . . . . . 8
1.6.1 Document Classes . . . . . . . . . . . . . . . . . . . . . . . . . . . . . . . 81.6.2 Packages . . . . . . . . . . . . . . . . . . . . . . . . . . . . . . . . . . . . . 8
1.7 Files you might encounter . . . . . . . . . . . . . . . . . . . . . . . . . . . . . . . 101.7.1 Page Styles . . . . . . . . . . . . . . . . . . . . . . . . . . . . . . . . . . . 11
1.8 Big Projects . . . . . . . . . . . . . . . . . . . . . . . . . . . . . . . . . . . . . . . 12
2 Typesetting Text 132.1 The Structure of Text and Language . . . . . . . . . . . . . . . . . . . . . . . . . 132.2 Linebreaking and Pagebreaking . . . . . . . . . . . . . . . . . . . . . . . . . . . . 14
2.2.1 Justified Paragraphs . . . . . . . . . . . . . . . . . . . . . . . . . . . . . . 142.2.2 Hyphenation . . . . . . . . . . . . . . . . . . . . . . . . . . . . . . . . . . 15
2.3 Ready made Strings . . . . . . . . . . . . . . . . . . . . . . . . . . . . . . . . . . 162.4 Special Characters and Symbols . . . . . . . . . . . . . . . . . . . . . . . . . . . . 16
2.4.1 Quotation Marks . . . . . . . . . . . . . . . . . . . . . . . . . . . . . . . . 162.4.2 Dashes and Hyphens . . . . . . . . . . . . . . . . . . . . . . . . . . . . . . 172.4.3 Tilde (∼) . . . . . . . . . . . . . . . . . . . . . . . . . . . . . . . . . . . . 172.4.4 Degree Symbol () . . . . . . . . . . . . . . . . . . . . . . . . . . . . . . . 172.4.5 Ellipsis ( . . . ) . . . . . . . . . . . . . . . . . . . . . . . . . . . . . . . . . . 17
viii CONTENTS
2.4.6 Ligatures . . . . . . . . . . . . . . . . . . . . . . . . . . . . . . . . . . . . 182.4.7 Accents and Special Characters . . . . . . . . . . . . . . . . . . . . . . . . 18
2.5 International Language Support . . . . . . . . . . . . . . . . . . . . . . . . . . . . 192.5.1 Support for German . . . . . . . . . . . . . . . . . . . . . . . . . . . . . . 20
2.6 The Space between Words . . . . . . . . . . . . . . . . . . . . . . . . . . . . . . . 202.7 Titles, Chapters, and Sections . . . . . . . . . . . . . . . . . . . . . . . . . . . . . 212.8 Cross References . . . . . . . . . . . . . . . . . . . . . . . . . . . . . . . . . . . . 222.9 Footnotes . . . . . . . . . . . . . . . . . . . . . . . . . . . . . . . . . . . . . . . . 232.10 Emphasized Words . . . . . . . . . . . . . . . . . . . . . . . . . . . . . . . . . . . 232.11 Environments . . . . . . . . . . . . . . . . . . . . . . . . . . . . . . . . . . . . . . 24
2.11.1 Itemize, Enumerate, and Description . . . . . . . . . . . . . . . . . . . . . 242.11.2 Flushleft, Flushright, and Center . . . . . . . . . . . . . . . . . . . . . . . 242.11.3 Quote, Quotation, and Verse . . . . . . . . . . . . . . . . . . . . . . . . . 252.11.4 Printing Verbatim . . . . . . . . . . . . . . . . . . . . . . . . . . . . . . . 262.11.5 Tabular . . . . . . . . . . . . . . . . . . . . . . . . . . . . . . . . . . . . . 26
2.12 Floating Bodies . . . . . . . . . . . . . . . . . . . . . . . . . . . . . . . . . . . . . 282.13 Protecting fragile commands . . . . . . . . . . . . . . . . . . . . . . . . . . . . . 30
3 Typesetting Mathematical Formulae 313.1 General . . . . . . . . . . . . . . . . . . . . . . . . . . . . . . . . . . . . . . . . . 313.2 Grouping in Math Mode . . . . . . . . . . . . . . . . . . . . . . . . . . . . . . . . 333.3 Building Blocks of a Mathematical Formula . . . . . . . . . . . . . . . . . . . . . 333.4 Math Spacing . . . . . . . . . . . . . . . . . . . . . . . . . . . . . . . . . . . . . . 363.5 Vertically Aligned Material . . . . . . . . . . . . . . . . . . . . . . . . . . . . . . 373.6 Phantom . . . . . . . . . . . . . . . . . . . . . . . . . . . . . . . . . . . . . . . . 383.7 Math Font Size . . . . . . . . . . . . . . . . . . . . . . . . . . . . . . . . . . . . . 393.8 Theorems, Laws, . . . . . . . . . . . . . . . . . . . . . . . . . . . . . . . . . . . . . 393.9 Bold symbols . . . . . . . . . . . . . . . . . . . . . . . . . . . . . . . . . . . . . . 403.10 List of Mathematical Symbols . . . . . . . . . . . . . . . . . . . . . . . . . . . . . 42
4 Specialities 494.1 Including EPS Graphics . . . . . . . . . . . . . . . . . . . . . . . . . . . . . . . . 494.2 Bibliography . . . . . . . . . . . . . . . . . . . . . . . . . . . . . . . . . . . . . . 514.3 Indexing . . . . . . . . . . . . . . . . . . . . . . . . . . . . . . . . . . . . . . . . . 524.4 Fancy Headers . . . . . . . . . . . . . . . . . . . . . . . . . . . . . . . . . . . . . 534.5 The Verbatim Package . . . . . . . . . . . . . . . . . . . . . . . . . . . . . . . . . 544.6 Downloading and Installing LATEX Packages . . . . . . . . . . . . . . . . . . . . . 54
5 Customising LATEX 575.1 New Commands, Environments and Packages . . . . . . . . . . . . . . . . . . . . 57
5.1.1 New Commands . . . . . . . . . . . . . . . . . . . . . . . . . . . . . . . . 585.1.2 New Environments . . . . . . . . . . . . . . . . . . . . . . . . . . . . . . . 585.1.3 Your own Package . . . . . . . . . . . . . . . . . . . . . . . . . . . . . . . 59
5.2 Fonts and Sizes . . . . . . . . . . . . . . . . . . . . . . . . . . . . . . . . . . . . . 605.2.1 Font changing Commands . . . . . . . . . . . . . . . . . . . . . . . . . . . 605.2.2 Danger, Will Robinson, Danger . . . . . . . . . . . . . . . . . . . . . . . . 625.2.3 Advice . . . . . . . . . . . . . . . . . . . . . . . . . . . . . . . . . . . . . . 62
5.3 Spacing . . . . . . . . . . . . . . . . . . . . . . . . . . . . . . . . . . . . . . . . . 635.3.1 Line Spacing . . . . . . . . . . . . . . . . . . . . . . . . . . . . . . . . . . 63

CONTENTS ix
5.3.2 Paragraph Formatting . . . . . . . . . . . . . . . . . . . . . . . . . . . . . 635.3.3 Horizontal Space . . . . . . . . . . . . . . . . . . . . . . . . . . . . . . . . 645.3.4 Vertical Space . . . . . . . . . . . . . . . . . . . . . . . . . . . . . . . . . 64
5.4 Page Layout . . . . . . . . . . . . . . . . . . . . . . . . . . . . . . . . . . . . . . . 655.5 More fun with lengths . . . . . . . . . . . . . . . . . . . . . . . . . . . . . . . . . 675.6 Boxes . . . . . . . . . . . . . . . . . . . . . . . . . . . . . . . . . . . . . . . . . . 675.7 Rules and Struts . . . . . . . . . . . . . . . . . . . . . . . . . . . . . . . . . . . . 69
Bibliography 71
Index 72


List of Figures
1.1 Components of a TEX System. . . . . . . . . . . . . . . . . . . . . . . . . . . . . 21.2 A Minimal LATEX File. . . . . . . . . . . . . . . . . . . . . . . . . . . . . . . . . . 61.3 Example of a Realistic Journal Article. . . . . . . . . . . . . . . . . . . . . . . . . 7
4.1 Example fancyhdr Setup. . . . . . . . . . . . . . . . . . . . . . . . . . . . . . . . . 53
5.1 Example Package. . . . . . . . . . . . . . . . . . . . . . . . . . . . . . . . . . . . 595.2 Page Layout Parameters. . . . . . . . . . . . . . . . . . . . . . . . . . . . . . . . 66

List of Tables
1.1 Document Classes. . . . . . . . . . . . . . . . . . . . . . . . . . . . . . . . . . . . 81.2 Document Class Options. . . . . . . . . . . . . . . . . . . . . . . . . . . . . . . . 91.3 Some of the Packages Distributed with LATEX. . . . . . . . . . . . . . . . . . . . . 101.4 The Predefined Page Styles of LATEX. . . . . . . . . . . . . . . . . . . . . . . . . . 12
2.1 Accents and Special Characters. . . . . . . . . . . . . . . . . . . . . . . . . . . . 182.2 German Special Characters. . . . . . . . . . . . . . . . . . . . . . . . . . . . . . . 202.3 Float Placing Permissions. . . . . . . . . . . . . . . . . . . . . . . . . . . . . . . . 28
3.1 Math Mode Accents. . . . . . . . . . . . . . . . . . . . . . . . . . . . . . . . . . . 423.2 Lowercase Greek Letters. . . . . . . . . . . . . . . . . . . . . . . . . . . . . . . . 423.3 Uppercase Greek Letters. . . . . . . . . . . . . . . . . . . . . . . . . . . . . . . . 423.4 Binary Relations. . . . . . . . . . . . . . . . . . . . . . . . . . . . . . . . . . . . . 433.5 Binary Operators. . . . . . . . . . . . . . . . . . . . . . . . . . . . . . . . . . . . 433.6 BIG Operators. . . . . . . . . . . . . . . . . . . . . . . . . . . . . . . . . . . . . . 433.7 Arrows. . . . . . . . . . . . . . . . . . . . . . . . . . . . . . . . . . . . . . . . . . 443.8 Delimiters. . . . . . . . . . . . . . . . . . . . . . . . . . . . . . . . . . . . . . . . 443.9 Large Delimiters. . . . . . . . . . . . . . . . . . . . . . . . . . . . . . . . . . . . . 443.10 Miscellaneous Symbols. . . . . . . . . . . . . . . . . . . . . . . . . . . . . . . . . 443.11 Non-Mathematical Symbols. . . . . . . . . . . . . . . . . . . . . . . . . . . . . . . 453.12 AMS Delimiters. . . . . . . . . . . . . . . . . . . . . . . . . . . . . . . . . . . . . 453.13 AMS Greek and Hebrew. . . . . . . . . . . . . . . . . . . . . . . . . . . . . . . . 453.14 AMS Binary Relations. . . . . . . . . . . . . . . . . . . . . . . . . . . . . . . . . 453.15 AMS Arrows. . . . . . . . . . . . . . . . . . . . . . . . . . . . . . . . . . . . . . . 463.16 AMS Negated Binary Relations and Arrows. . . . . . . . . . . . . . . . . . . . . . 463.17 AMS Binary Operators. . . . . . . . . . . . . . . . . . . . . . . . . . . . . . . . . 473.18 AMS Miscellaneous. . . . . . . . . . . . . . . . . . . . . . . . . . . . . . . . . . . 473.19 Math Alphabets. . . . . . . . . . . . . . . . . . . . . . . . . . . . . . . . . . . . . 47
4.1 Key Names for graphicx Package. . . . . . . . . . . . . . . . . . . . . . . . . . . . 504.2 Index Key Syntax Examples. . . . . . . . . . . . . . . . . . . . . . . . . . . . . . 52
5.1 Fonts. . . . . . . . . . . . . . . . . . . . . . . . . . . . . . . . . . . . . . . . . . . 605.2 Font Sizes. . . . . . . . . . . . . . . . . . . . . . . . . . . . . . . . . . . . . . . . . 605.3 Absolute Point Sizes in Standard Classes. . . . . . . . . . . . . . . . . . . . . . . 615.4 Math Fonts. . . . . . . . . . . . . . . . . . . . . . . . . . . . . . . . . . . . . . . . 615.5 TEX Units. . . . . . . . . . . . . . . . . . . . . . . . . . . . . . . . . . . . . . . . 65


Chapter 1
Things You Need to Know
In the first part of this chapter, you will get a short overview about the philosophy and history ofLATEX2ε. The second part of the chapter focuses on the basic structures of a LATEX document. Afterreading this chapter, you should have a rough knowledge of how LATEX works. When reading on, thiswill help you to integrate all the new information into the big picture.
1.1 The Name of the Game
1.1.1 TEX
TEX is a computer program created by Donald E. Knuth [2]. It is aimed at typesetting text andmathematical formulae. Knuth started writing the TEX typesetting engine in 1977 to explorethe potential of the digital printing equipment that was beginning to infiltrate the publishingindustry at that time, especially in the hope that he could reverse the trend of deterioratingtypographical quality that he saw affecting his own books and articles. TEX as we use it todaywas released in 1982, with some slight enhancements added in 1989 to better support 8-bitcharacters and multiple languages. TEX is renowned for being extremely stable, for running onmany different kinds of computers, and for being virtually bug free. The version number of TEXis converging to π and is now at 3.14159.
TEX is pronounced “Tech,” with a “ch” as in the German word “Ach” or in the Scottish“Loch.” In an ASCII environment, TEX becomes TeX.
1.1.2 LATEX
LATEX is a macro package which enables authors to typeset and print their work at the highesttypographical quality, using a predefined, professional layout. LATEX was originally written byLeslie Lamport [1]. It uses the TEX formatter as its typesetting engine.
In 1994 the LATEX package was updated by the LATEX3 team, led by Frank Mittelbach, toinclude some long-requested improvements, and to reunify all the patched versions which hadcropped up since the release of LATEX 2.09 some years earlier. To distinguish the new versionfrom the old, it is called LATEX 2ε. This documentation deals with LATEX 2ε.
LATEX is pronounced “Lay-tech” or “Lah-tech.” If you refer to LATEX in an ASCII environ-ment, you type LaTeX. LATEX 2ε is pronounced “Lay-tech two e” and typed LaTeX2e.
Figure 1.1 above shows how TEX and LATEX 2ε work together. This figure is taken fromwots.tex by Kees van der Laan.

2 Things You Need to Know
.pk
?
METAfont?
.mf
driverdvips
xdvi
...?
.dvi
?
TEX PlainLATEX2ε
AMS-Package
...
?
.tex
6
?
editoremacsispell
...?
copy
- - printerscreen
PostScript 6
-
.tfm - -
.log
Fonts - Typesetting -
Figure 1.1: Components of a TEX System.
1.2 Basics
1.2.1 Author, Book Designer, and Typesetter
To publish something, authors give their typed manuscript to a publishing company. One oftheir book designers then decides the layout of the document (column width, fonts, space beforeand after headings, . . . ). The book designer writes his instructions into the manuscript and thengives it to a typesetter, who typesets the book according to these instructions.
A human book designer tries to find out what the author had in mind while writing themanuscript. He decides on chapter headings, citations, examples, formulae, etc. based on hisprofessional knowledge and from the contents of the manuscript.
In a LATEX environment, LATEX takes the role of the book designer and uses TEX as itstypesetter. But LATEX is “only” a program and therefore needs more guidance. The authorhas to provide additional information which describes the logical structure of his work. Thisinformation is written into the text as “LATEX commands.”
This is quite different from the WYSIWYG1 approach which most modern word processorssuch as MS Word or Corel WordPerfect take. With these applications, authors specify thedocument layout interactively while typing text into the computer. All along the way, they cansee on the screen how the final work will look when it is printed.
When using LATEX it is normally not possible to see the final output while typing the text.But the final output can be previewed on the screen after processing the file with LATEX. Thencorrections can be made before actually sending the document to the printer.
1What you see is what you get.
1.2 Basics 3
1.2.2 Layout Design
Typographical design is a craft. Unskilled authors often commit serious formatting errors byassuming that book design is mostly a question of aesthetics—“If a document looks good artist-ically, it is well designed.” But as a document has to be read and not hung up in a picturegallery, the readability and understandability is of much greater importance than the beautifullook of it. Examples:
• The font size and the numbering of headings have to be chosen to make the structure ofchapters and sections clear to the reader.
• The line length has to be short enough to not strain the eyes of the reader, while longenough to fill the page beautifully.
With WYSIWYG systems, authors often generate aesthetically pleasing documents withvery little or inconsistent structure. LATEX prevents such formatting errors by forcing the authorto declare the logical structure of his document. LATEX then chooses the most suitable layout.
1.2.3 Advantages and Disadvantages
When People from the WYSIWYG world meet people who use LATEX, they often discuss “theadvantages of LATEX over a normal word processor” or the opposite. The best thing you cando when such a discussion starts is to keep a low profile, since such discussions often get out ofhand. But sometimes you cannot escape . . .
So here is some ammunition. The main advantages of LATEX over normal word processors arethe following:
• Professionally crafted layouts are available, which make a document really look as if “prin-ted.”
• The typesetting of mathematical formulae is supported in a convenient way.
• The user only needs to learn a few easy-to-understand commands which specify the logicalstructure of a document. They almost never need to tinker with the actual layout of thedocument.
• Even complex structures such as footnotes, references, table of contents, and bibliographiescan be generated easily.
• Free add-on packages exist for many typographical tasks not directly supported by basicLATEX. For example, packages are available to include PostScript graphics or to typesetbibliographies conforming to exact standards. Many of these add-on packages are describedin The LATEX Companion [3].
• LATEX encourages authors to write well-structured texts, because this is how LATEX works—by specifying structure.
• TEX, the formatting engine of LATEX 2ε, is highly portable and free. Therefore the systemruns on almost any hardware platform available.
LATEX also has some disadvantages, and I guess it’s a bit difficult for me to find any sensibleones, though I am sure other people can tell you hundreds ;-)
4 Things You Need to Know
• LATEX does not work well for people who have sold their souls . . .
• Although some parameters can be adjusted within a predefined document layout, thedesign of a whole new layout is difficult and takes a lot of time.2
• It is very hard to write unstructured and disorganized documents.
• Your hamster might, despite some encouraging first steps, never be able to fully grasp theconcept of Logical Markup.
1.3 LATEX Input Files
The input for LATEX is a plain ASCII text file. You can create it with any text editor. It containsthe text of the document as well as the commands which tell LATEX how to typeset the text.
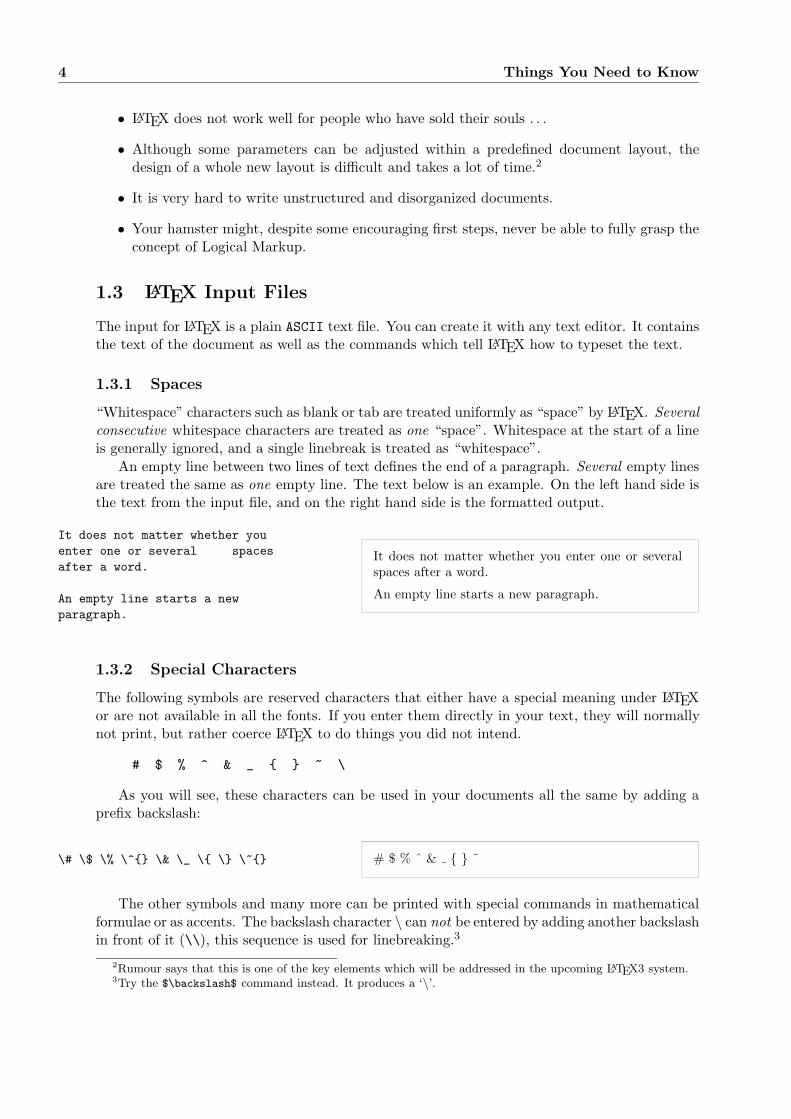
1.3.1 Spaces
“Whitespace” characters such as blank or tab are treated uniformly as “space” by LATEX. Severalconsecutive whitespace characters are treated as one “space”. Whitespace at the start of a lineis generally ignored, and a single linebreak is treated as “whitespace”.
An empty line between two lines of text defines the end of a paragraph. Several empty linesare treated the same as one empty line. The text below is an example. On the left hand side isthe text from the input file, and on the right hand side is the formatted output.
It does not matter whether youenter one or several spacesafter a word.
An empty line starts a newparagraph.
It does not matter whether you enter one or severalspaces after a word.
An empty line starts a new paragraph.
1.3.2 Special Characters
The following symbols are reserved characters that either have a special meaning under LATEXor are not available in all the fonts. If you enter them directly in your text, they will normallynot print, but rather coerce LATEX to do things you did not intend.
# $ % ^ & _ ~ \
As you will see, these characters can be used in your documents all the same by adding aprefix backslash:
\# \$ \% \^ \& \_ \ \ \~ # $ % ˆ & ˜
The other symbols and many more can be printed with special commands in mathematicalformulae or as accents. The backslash character \ can not be entered by adding another backslashin front of it (\\), this sequence is used for linebreaking.3
2Rumour says that this is one of the key elements which will be addressed in the upcoming LATEX3 system.3Try the $\backslash$ command instead. It produces a ‘\’.
1.3 LATEX Input Files 5
1.3.3 LATEX Commands
LATEX commands are case sensitive and take one of the following two formats:
• They start with a backslash \ and then have a name consisting of letters only. Commandnames are terminated by a space, a number or any other ‘non-letter’.
• They consist of a backslash and exactly one special character.
LATEX ignores whitespace after commands. If you want to get a space after a command, youhave to put either and a blank or a special spacing command after the command name. The stops LATEX from eating up all the space after the command name.
I read that Knuth divides thepeople working with \TeX into\TeXnicians and \TeX perts.\\Today is \today.
I read that Knuth divides the people working withTEX into TEXnicians and TEXperts.Today is 24th July 2002.
Some commands need a parameter which has to be given between curly braces afterthe command name. Some commands support optional parameters which are added after thecommand name in square brackets [ ]. The next examples use some LATEX commands. Don’tworry about them, they will be explained later.
You can \textsllean on me! You can lean on me!
Please, start a new lineright here!\newlineThank you!
Please, start a new line right here!Thank you!
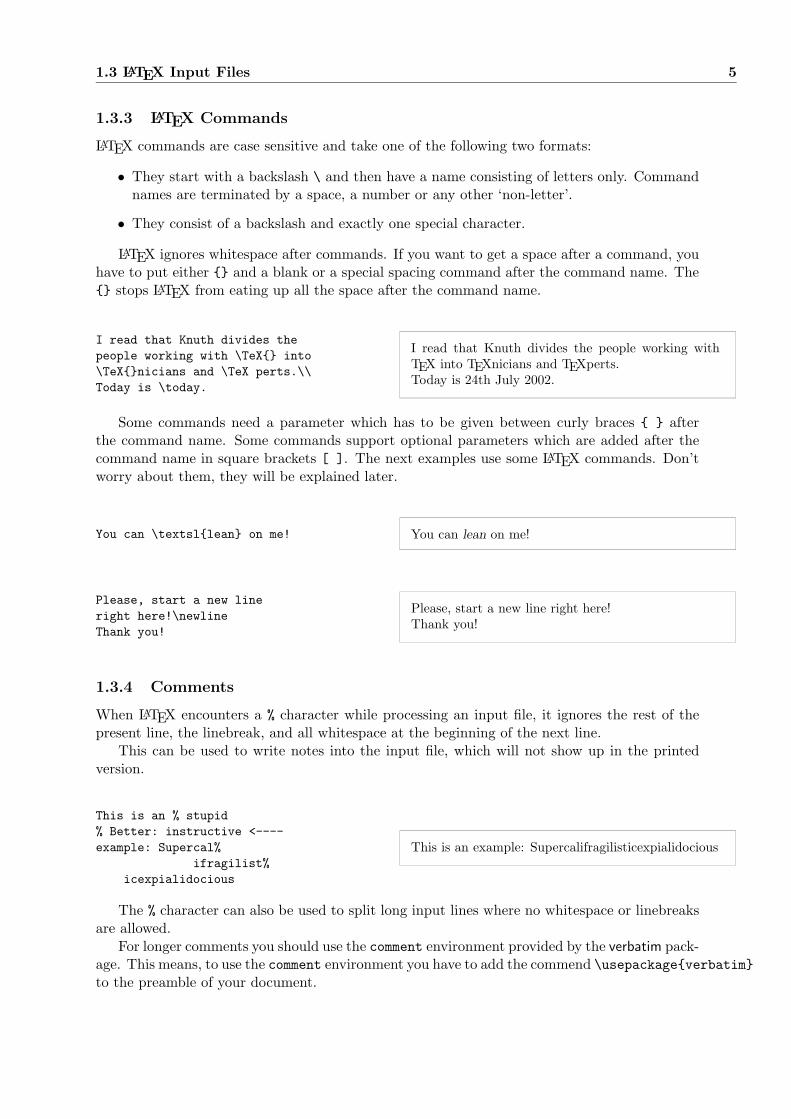
1.3.4 Comments
When LATEX encounters a % character while processing an input file, it ignores the rest of thepresent line, the linebreak, and all whitespace at the beginning of the next line.
This can be used to write notes into the input file, which will not show up in the printedversion.
This is an % stupid% Better: instructive <----example: Supercal%
ifragilist%icexpialidocious
This is an example: Supercalifragilisticexpialidocious
The % character can also be used to split long input lines where no whitespace or linebreaksare allowed.
For longer comments you should use the comment environment provided by the verbatim pack-age. This means, to use the comment environment you have to add the commend \usepackageverbatimto the preamble of your document.
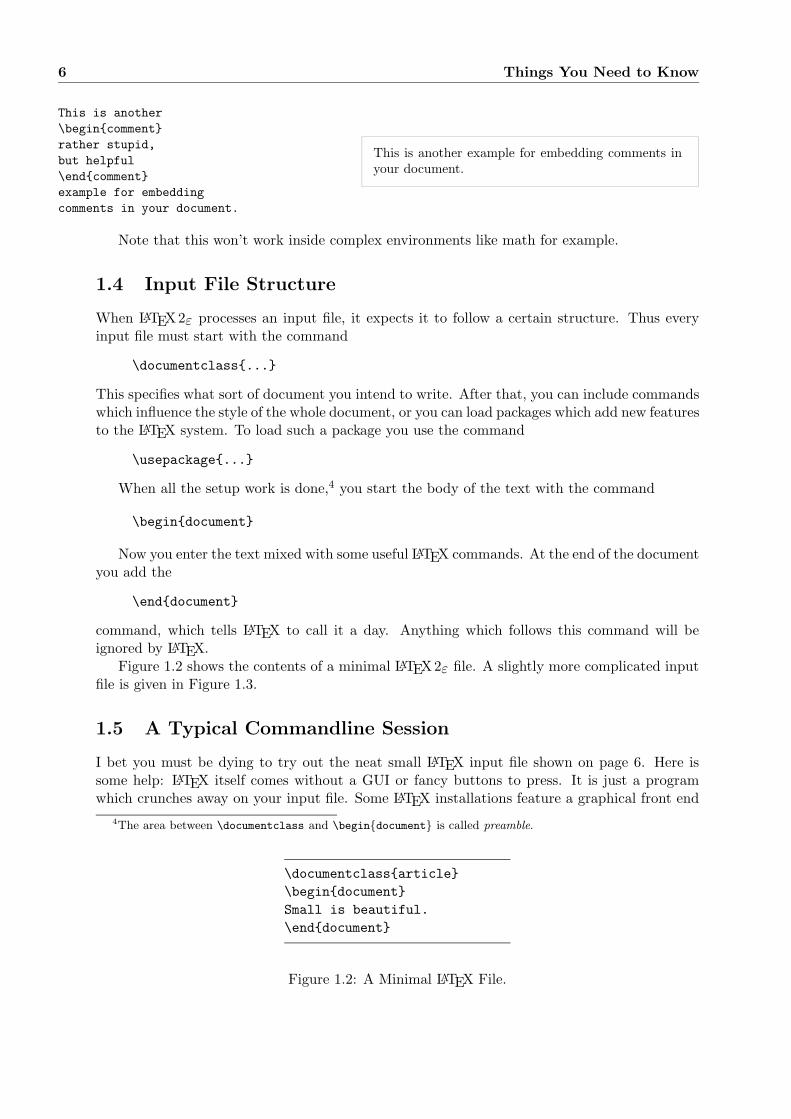
6 Things You Need to Know
This is another\begincommentrather stupid,but helpful\endcommentexample for embeddingcomments in your document.
This is another example for embedding comments inyour document.
Note that this won’t work inside complex environments like math for example.
1.4 Input File Structure
When LATEX 2ε processes an input file, it expects it to follow a certain structure. Thus everyinput file must start with the command
\documentclass...
This specifies what sort of document you intend to write. After that, you can include commandswhich influence the style of the whole document, or you can load packages which add new featuresto the LATEX system. To load such a package you use the command
\usepackage...
When all the setup work is done,4 you start the body of the text with the command
\begindocument
Now you enter the text mixed with some useful LATEX commands. At the end of the documentyou add the
\enddocument
command, which tells LATEX to call it a day. Anything which follows this command will beignored by LATEX.
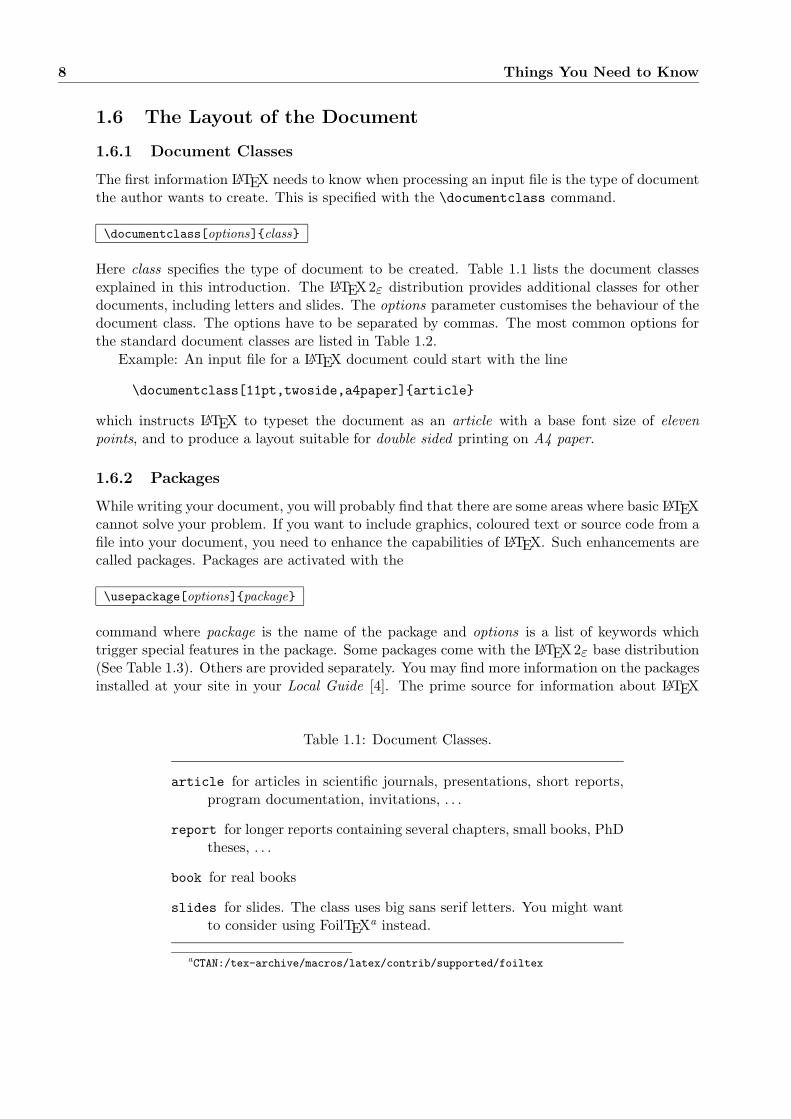
Figure 1.2 shows the contents of a minimal LATEX 2ε file. A slightly more complicated inputfile is given in Figure 1.3.
1.5 A Typical Commandline Session
I bet you must be dying to try out the neat small LATEX input file shown on page 6. Here issome help: LATEX itself comes without a GUI or fancy buttons to press. It is just a programwhich crunches away on your input file. Some LATEX installations feature a graphical front end
4The area between \documentclass and \begindocument is called preamble.
\documentclassarticle\begindocumentSmall is beautiful.\enddocument
Figure 1.2: A Minimal LATEX File.

1.5 A Typical Commandline Session 7
where you can click LATEX into compiling your input file. But Real Men don’t Click, so hereis how to coax LATEX into compiling your input file on a text based system. Please note, thisdescription assumes that a working LATEX installation already sitts on your computer.
1. Edit/Create your LATEX input file. This file must be plain ASCII text. On Unix all theeditors will create just that. On windows you might want to make sure that you save thefile in ASCII or Plain Text format. When picking a name for your file, make sure it bearsthe extention .tex.
2. Run LATEX on your input file. If successful you will end up with a .dvi file.
latex foo.tex
3. Now you may view the DVI file.
xdvi foo.dvi
or convert it to PS
dvips -Pcmz foo.dvi -o foo.ps
xdvi and dvips are open-source tools for handling .dvi files. The first displays them onscreen within the X11 environment and the other creates a PostScript file for printing. Ifyou are not working on a Unix system, other means for handling the .dvi files may beprovided.
\documentclass[a4paper,11pt]article% define the title\authorH.~Partl\titleMinimalism\begindocument% generates the title\maketitle% insert the table of contents\tableofcontents\sectionStartWell, and here begins my lovely article.\sectionEnd\ldots and here it ends.\enddocument
Figure 1.3: Example of a Realistic Journal Article.
8 Things You Need to Know
1.6 The Layout of the Document
1.6.1 Document Classes
The first information LATEX needs to know when processing an input file is the type of documentthe author wants to create. This is specified with the \documentclass command.
\documentclass[options]class
Here class specifies the type of document to be created. Table 1.1 lists the document classesexplained in this introduction. The LATEX 2ε distribution provides additional classes for otherdocuments, including letters and slides. The options parameter customises the behaviour of thedocument class. The options have to be separated by commas. The most common options forthe standard document classes are listed in Table 1.2.
Example: An input file for a LATEX document could start with the line
\documentclass[11pt,twoside,a4paper]article
which instructs LATEX to typeset the document as an article with a base font size of elevenpoints, and to produce a layout suitable for double sided printing on A4 paper.
1.6.2 Packages
While writing your document, you will probably find that there are some areas where basic LATEXcannot solve your problem. If you want to include graphics, coloured text or source code from afile into your document, you need to enhance the capabilities of LATEX. Such enhancements arecalled packages. Packages are activated with the
\usepackage[options]package
command where package is the name of the package and options is a list of keywords whichtrigger special features in the package. Some packages come with the LATEX 2ε base distribution(See Table 1.3). Others are provided separately. You may find more information on the packagesinstalled at your site in your Local Guide [4]. The prime source for information about LATEX
Table 1.1: Document Classes.
article for articles in scientific journals, presentations, short reports,program documentation, invitations, . . .
report for longer reports containing several chapters, small books, PhDtheses, . . .
book for real books
slides for slides. The class uses big sans serif letters. You might wantto consider using FoilTEXa instead.
aCTAN:/tex-archive/macros/latex/contrib/supported/foiltex

1.6 The Layout of the Document 9
Table 1.2: Document Class Options.
10pt, 11pt, 12pt Sets the size of the main font in the document. Ifno option is specified, 10pt is assumed.
a4paper, letterpaper, . . . Defines the paper size. The default sizeis letterpaper. Besides that, a5paper, b5paper,executivepaper, and legalpaper can be specified.
fleqn Typesets displayed formulae left-aligned instead of centred.
leqno Places the numbering of formulae on the left hand sideinstead of the right.
titlepage, notitlepage Specifies whether a new page should bestarted after the document title or not. The article class doesnot start a new page by default, while report and book do.
onecolumn, twocolumn Instructs LATEX to typeset the document inone columntwo columns.
twoside, oneside Specifies whether double or single sided outputshould be generated. The classes article and report are singlesided and the book class is double sided by default. Note thatthis option concerns the style of the document only. The optiontwoside does not tell the printer you use that it should actuallymake a two-sided printout.
openright, openany Makes chapters begin either only on righthand pages or on the next page available. This does not workwith the article class, as it does not know about chapters. Thereport class by default starts chapters on the next page availableand the book class starts them on right hand pages.

10 Things You Need to Know
packages is The LATEX Companion [3]. It contains descriptions of hundreds of packages alongwith information of how to write your own extensions to LATEX 2ε.
Table 1.3: Some of the Packages Distributed with LATEX.
doc Allows the documentation of LATEX programs.Described in doc.dtxa and in The LATEX Companion [3].
exscale Provides scaled versions of the math extension font.Described in ltexscale.dtx.
fontenc Specifies which font encoding LATEX should use.Described in ltoutenc.dtx.
ifthen Provides commands of the form‘if. . . then do. . . otherwise do. . . .’Described in ifthen.dtx and The LATEX Companion [3].
latexsym To access the LATEX symbol font, you should use thelatexsym package. Described in latexsym.dtx and in TheLATEX Companion [3].
makeidx Provides commands for producing indexes. Described insection 4.3 and in The LATEX Companion [3].
syntonly Processes a document without typesetting it.
inputenc Allows the specification of an input encoding such as AS-CII, ISO Latin-1, ISO Latin-2, 437/850 IBM code pages,Apple Macintosh, Next, ANSI-Windows or user-defined one.Described in inputenc.dtx.
aThis file should be installed on your system, and you should be able toget a dvi file by typing latex doc.dtx in any directory where you have writepermission. The same is true for all the other files mentioned in this table.
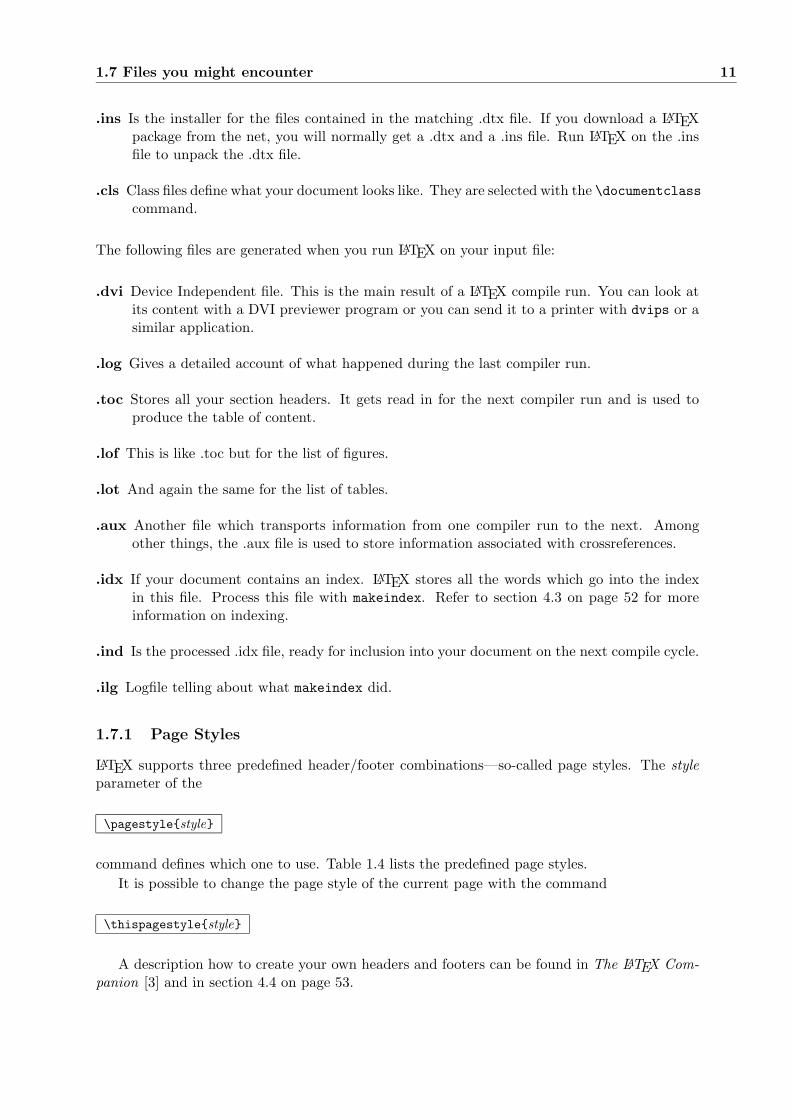
1.7 Files you might encounter
When you work with LATEX you will soon find yourself in a maze of files with various extensionsand probably no clue. Below there is a list telling about the various file types you mightencounter when working with TEX. Please note that this table does not claim to be a completelist of extensions, but if you find one missing which you think is important, please drop a line.
.tex LATEX or TEX input file. Can be compiled with latex.
.sty LATEX Macro package. This is a file you can load into your LATEX document using the\usepackage command.
.dtx Documented TEX. This is the main distribution format for LATEX style files. If you processa .dtx file you get documented macro code of the LATEX package contained in the .dtx file.
1.7 Files you might encounter 11
.ins Is the installer for the files contained in the matching .dtx file. If you download a LATEXpackage from the net, you will normally get a .dtx and a .ins file. Run LATEX on the .insfile to unpack the .dtx file.
.cls Class files define what your document looks like. They are selected with the \documentclasscommand.
The following files are generated when you run LATEX on your input file:
.dvi Device Independent file. This is the main result of a LATEX compile run. You can look atits content with a DVI previewer program or you can send it to a printer with dvips or asimilar application.
.log Gives a detailed account of what happened during the last compiler run.
.toc Stores all your section headers. It gets read in for the next compiler run and is used toproduce the table of content.
.lof This is like .toc but for the list of figures.
.lot And again the same for the list of tables.
.aux Another file which transports information from one compiler run to the next. Amongother things, the .aux file is used to store information associated with crossreferences.
.idx If your document contains an index. LATEX stores all the words which go into the indexin this file. Process this file with makeindex. Refer to section 4.3 on page 52 for moreinformation on indexing.
.ind Is the processed .idx file, ready for inclusion into your document on the next compile cycle.
.ilg Logfile telling about what makeindex did.
1.7.1 Page Styles
LATEX supports three predefined header/footer combinations—so-called page styles. The styleparameter of the
\pagestylestyle
command defines which one to use. Table 1.4 lists the predefined page styles.It is possible to change the page style of the current page with the command
\thispagestylestyle
A description how to create your own headers and footers can be found in The LATEX Com-panion [3] and in section 4.4 on page 53.
12 Things You Need to Know
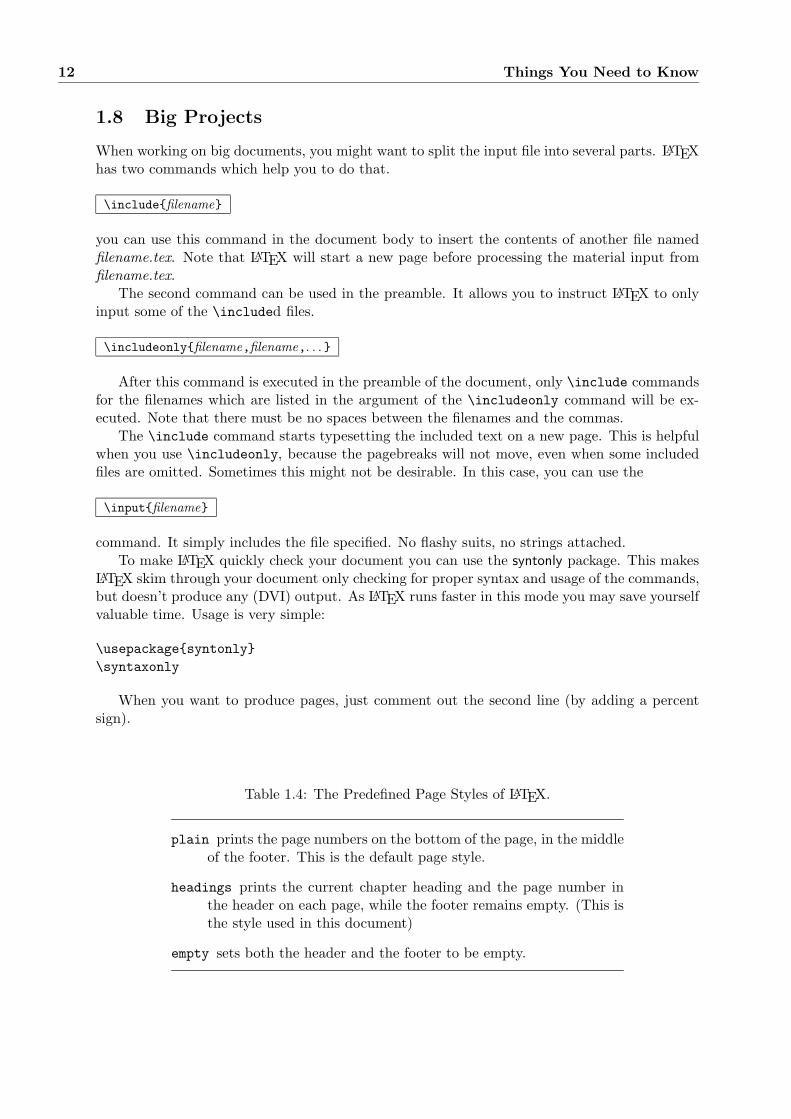
1.8 Big Projects
When working on big documents, you might want to split the input file into several parts. LATEXhas two commands which help you to do that.
\includefilename
you can use this command in the document body to insert the contents of another file namedfilename.tex. Note that LATEX will start a new page before processing the material input fromfilename.tex.
The second command can be used in the preamble. It allows you to instruct LATEX to onlyinput some of the \included files.
\includeonlyfilename,filename,. . .
After this command is executed in the preamble of the document, only \include commandsfor the filenames which are listed in the argument of the \includeonly command will be ex-ecuted. Note that there must be no spaces between the filenames and the commas.
The \include command starts typesetting the included text on a new page. This is helpfulwhen you use \includeonly, because the pagebreaks will not move, even when some includedfiles are omitted. Sometimes this might not be desirable. In this case, you can use the
\inputfilename
command. It simply includes the file specified. No flashy suits, no strings attached.To make LATEX quickly check your document you can use the syntonly package. This makes
LATEX skim through your document only checking for proper syntax and usage of the commands,but doesn’t produce any (DVI) output. As LATEX runs faster in this mode you may save yourselfvaluable time. Usage is very simple:
\usepackagesyntonly\syntaxonly
When you want to produce pages, just comment out the second line (by adding a percentsign).
Table 1.4: The Predefined Page Styles of LATEX.
plain prints the page numbers on the bottom of the page, in the middleof the footer. This is the default page style.
headings prints the current chapter heading and the page number inthe header on each page, while the footer remains empty. (This isthe style used in this document)
empty sets both the header and the footer to be empty.

Chapter 2
Typesetting Text
After reading the previous chapter, you should know about the basic stuff of which a LATEX2εdocument is made. In this chapter I will fill in the remaining structure you will need to know in orderto produce real world material.
2.1 The Structure of Text and Language
The main point of writing a text (some modern DAAC1 literature excluded), is to convey ideas,information, or knowledge to the reader. The reader will understand the text better if theseideas are well-structured, and will see and feel this structure much better if the typographicalform reflects the logical and semantical structure of the content.
LATEX is different from other typesetting systems in that you just have to tell it the logicaland semantical structure of a text. It then derives the typographical form of the text accordingto the “rules” given in the document class file and in various style files.
The most important text unit in LATEX (and in typography) is the paragraph. We call it“text unit” because a paragraph is the typographical form which should reflect one coherentthought, or one idea. You will learn in the following sections, how you can force linebreaks withe.g. \\ and paragraph breaks with e.g. leaving an empty line in the source code. Therefore, if anew thought begins, a new paragraph should begin, and if not, only linebreaks should be used.If in doubt about paragraph breaks, think about your text as a conveyor of ideas and thoughts.If you have a paragraph break, but the old thought continues, it should be removed. If sometotally new line of thought occurs in the same paragraph, then it should be broken.
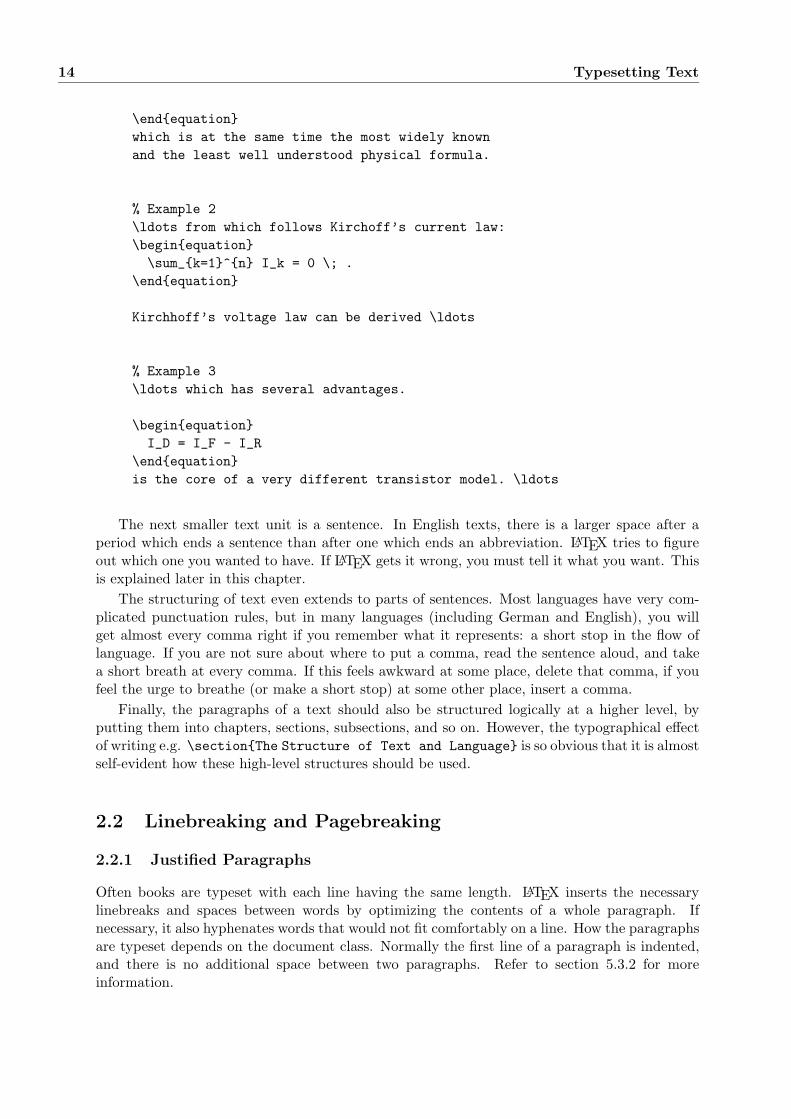
Most people completely underestimate the importance of well-placed paragraph breaks.Many people do not even know what the meaning of a paragraph break is, or, especially inLATEX, introduce paragraph breaks without knowing it. The latter mistake is especially easy tomake if equations are used in the text. Look at the following examples, and figure out why some-times empty lines (paragraph breaks) are used before and after the equation, and sometimesnot. (If you don’t yet understand all commands well enough to understand these examples,please read this and the following chapter, and then read this section again.)
% Example 1\ldots when Einstein introduced his formula\beginequatione = m \cdot c^2 \; ,
1Different At All Cost, a translation of the Swiss German UVA (Um’s Verrecken Anders).
14 Typesetting Text
\endequationwhich is at the same time the most widely knownand the least well understood physical formula.
% Example 2\ldots from which follows Kirchoff’s current law:\beginequation\sum_k=1^n I_k = 0 \; .
\endequation
Kirchhoff’s voltage law can be derived \ldots
% Example 3\ldots which has several advantages.
\beginequationI_D = I_F - I_R
\endequationis the core of a very different transistor model. \ldots
The next smaller text unit is a sentence. In English texts, there is a larger space after aperiod which ends a sentence than after one which ends an abbreviation. LATEX tries to figureout which one you wanted to have. If LATEX gets it wrong, you must tell it what you want. Thisis explained later in this chapter.
The structuring of text even extends to parts of sentences. Most languages have very com-plicated punctuation rules, but in many languages (including German and English), you willget almost every comma right if you remember what it represents: a short stop in the flow oflanguage. If you are not sure about where to put a comma, read the sentence aloud, and takea short breath at every comma. If this feels awkward at some place, delete that comma, if youfeel the urge to breathe (or make a short stop) at some other place, insert a comma.
Finally, the paragraphs of a text should also be structured logically at a higher level, byputting them into chapters, sections, subsections, and so on. However, the typographical effectof writing e.g. \sectionThe Structure of Text and Language is so obvious that it is almostself-evident how these high-level structures should be used.
2.2 Linebreaking and Pagebreaking
2.2.1 Justified Paragraphs
Often books are typeset with each line having the same length. LATEX inserts the necessarylinebreaks and spaces between words by optimizing the contents of a whole paragraph. Ifnecessary, it also hyphenates words that would not fit comfortably on a line. How the paragraphsare typeset depends on the document class. Normally the first line of a paragraph is indented,and there is no additional space between two paragraphs. Refer to section 5.3.2 for moreinformation.
2.2 Linebreaking and Pagebreaking 15
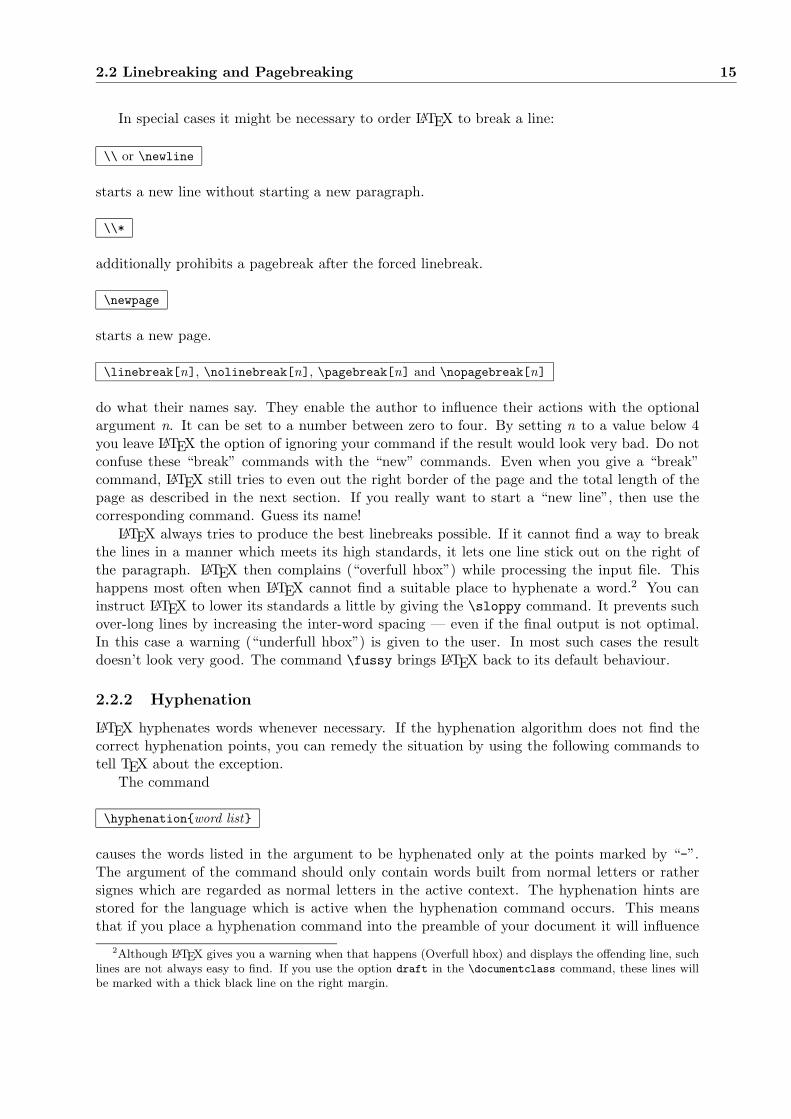
In special cases it might be necessary to order LATEX to break a line:
\\ or \newline
starts a new line without starting a new paragraph.
\\*
additionally prohibits a pagebreak after the forced linebreak.
\newpage
starts a new page.
\linebreak[n], \nolinebreak[n], \pagebreak[n] and \nopagebreak[n]
do what their names say. They enable the author to influence their actions with the optionalargument n. It can be set to a number between zero to four. By setting n to a value below 4you leave LATEX the option of ignoring your command if the result would look very bad. Do notconfuse these “break” commands with the “new” commands. Even when you give a “break”command, LATEX still tries to even out the right border of the page and the total length of thepage as described in the next section. If you really want to start a “new line”, then use thecorresponding command. Guess its name!
LATEX always tries to produce the best linebreaks possible. If it cannot find a way to breakthe lines in a manner which meets its high standards, it lets one line stick out on the right ofthe paragraph. LATEX then complains (“overfull hbox”) while processing the input file. Thishappens most often when LATEX cannot find a suitable place to hyphenate a word.2 You caninstruct LATEX to lower its standards a little by giving the \sloppy command. It prevents suchover-long lines by increasing the inter-word spacing — even if the final output is not optimal.In this case a warning (“underfull hbox”) is given to the user. In most such cases the resultdoesn’t look very good. The command \fussy brings LATEX back to its default behaviour.
2.2.2 Hyphenation
LATEX hyphenates words whenever necessary. If the hyphenation algorithm does not find thecorrect hyphenation points, you can remedy the situation by using the following commands totell TEX about the exception.
The command
\hyphenationword list
causes the words listed in the argument to be hyphenated only at the points marked by “-”.The argument of the command should only contain words built from normal letters or rathersignes which are regarded as normal letters in the active context. The hyphenation hints arestored for the language which is active when the hyphenation command occurs. This meansthat if you place a hyphenation command into the preamble of your document it will influence
2Although LATEX gives you a warning when that happens (Overfull hbox) and displays the offending line, suchlines are not always easy to find. If you use the option draft in the \documentclass command, these lines willbe marked with a thick black line on the right margin.
16 Typesetting Text
the english language hyphenation. If you place the command after the \begindocument andyou are using some package for national language support like babel, then the hyphenation hintswill be active in the language activated through babel.
The example below will allow “hyphenation” to be hyphenated as well as “Hyphenation”,and it prevents “FORTRAN”, “Fortran” and “fortran” from being hyphenated at all. No specialcharacters or symbols are allowed in the argument.
Example:
\hyphenationFORTRAN Hy-phen-a-tion
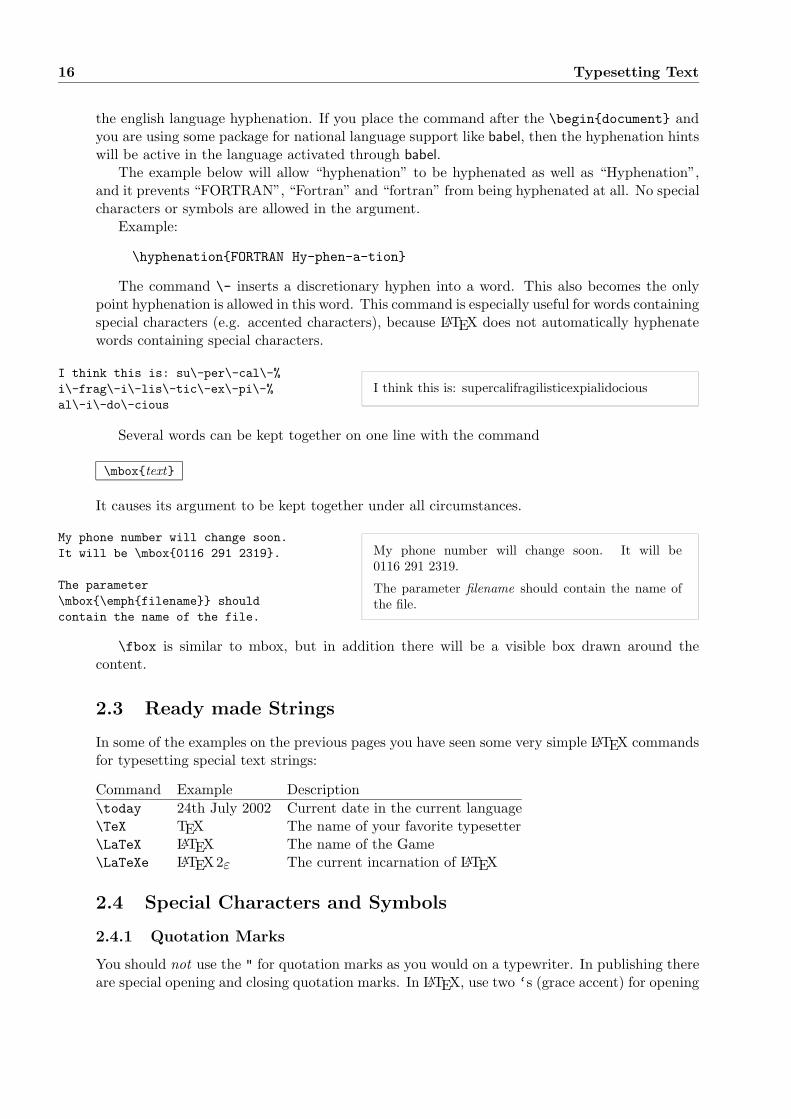
The command \- inserts a discretionary hyphen into a word. This also becomes the onlypoint hyphenation is allowed in this word. This command is especially useful for words containingspecial characters (e.g. accented characters), because LATEX does not automatically hyphenatewords containing special characters.
I think this is: su\-per\-cal\-%i\-frag\-i\-lis\-tic\-ex\-pi\-%al\-i\-do\-cious
I think this is: supercalifragilisticexpialidocious
Several words can be kept together on one line with the command
\mboxtext
It causes its argument to be kept together under all circumstances.
My phone number will change soon.It will be \mbox0116 291 2319.
The parameter\mbox\emphfilename shouldcontain the name of the file.
My phone number will change soon. It will be0116 291 2319.
The parameter filename should contain the name ofthe file.
\fbox is similar to mbox, but in addition there will be a visible box drawn around thecontent.
2.3 Ready made Strings
In some of the examples on the previous pages you have seen some very simple LATEX commandsfor typesetting special text strings:
Command Example Description\today 24th July 2002 Current date in the current language\TeX TEX The name of your favorite typesetter\LaTeX LATEX The name of the Game\LaTeXe LATEX 2ε The current incarnation of LATEX
2.4 Special Characters and Symbols
2.4.1 Quotation Marks
You should not use the " for quotation marks as you would on a typewriter. In publishing thereare special opening and closing quotation marks. In LATEX, use two ‘s (grace accent) for opening

2.4 Special Characters and Symbols 17
quotation marks and two ’s (apostrophe) for closing quotation marks. For single quotes youuse just one of each.
‘‘Please press the ‘x’ key.’’ “Please press the ‘x’ key.”
2.4.2 Dashes and Hyphens
LATEX knows four kinds of dashes. You can access three of them with different numbers ofconsecutive dashes. The fourth sign is actually not a dash at all: It is the mathematical minussign:
daughter-in-law, X-rated\\pages 13--67\\yes---or no? \\$0$, $1$ and $-1$
daughter-in-law, X-ratedpages 13–67yes—or no?0, 1 and −1
The names for these dashes are: ‘-’ hyphen, ‘–’ en-dash, ‘—’ em-dash and ‘−’ minus sign.
2.4.3 Tilde (∼)
A character, often seen with web addresses is the tilde. To generate this in LATEX you can use\~ but the result: ˜ is not really what you want. Try this instead:
http://www.rich.edu/\~bush \\http://www.clever.edu/$\sim$demo
http://www.rich.edu/˜bushhttp://www.clever.edu/∼demo
2.4.4 Degree Symbol ()How to print a degree symbol in LATEX?
Its $-30\,^\circ\mathrmC$,I will soon start tosuper-conduct.
Its −30 C, I will soon start to super-conduct.
2.4.5 Ellipsis ( . . . )
On a typewriter a comma or a period takes the same amount of space as any other letter. Inbook printing these characters occupy only a little space and are set very close to the precedingletter. Therefore you cannot enter ‘ellipsis’ by just typing three dots, as the spacing would bewrong. Besides that there is a special command for these dots. It is called
\ldots

18 Typesetting Text
Not like this ... but like this:\\New York, Tokyo, Budapest, \ldots
Not like this ... but like this:New York, Tokyo, Budapest, . . .
2.4.6 Ligatures
Some letter combinations are typeset not just by setting the different letters one after the other,but by actually using special symbols.
ff fi fl ffi. . . instead of ff fi fl ffi . . .
These so-called ligatures can be prohibited by inserting an \mbox between the two letters inquestion. This might be necessary with words built from two words.
Not shelfful\\but shelf\mboxful
Not shelffulbut shelfful
2.4.7 Accents and Special Characters
LATEX supports the use of accents and special characters from many languages. Table 2.1 showsall sorts of accents being applied to the letter o. Naturally other letters work too.
To place an accent on top of an i or a j, its dots have to be removed. This is accomplishedby typing \i and \j.
H\^otel, na\"\i ve, \’el\‘eve,\\sm\o rrebr\o d, !‘Se\~norita!,\\Sch\"onbrunner Schlo\ssStra\ss e
Hotel, naıve, eleve,smørrebrød, ¡Senorita!,Schonbrunner Schloß Straße
Table 2.1: Accents and Special Characters.
o \‘o o \’o o \^o o \~oo \=o o \.o o \"o c \c c
o \u o o \v o o \H o o \c oo. \d o o
¯\b o oo \t oo
œ \oe Œ \OE æ \ae Æ \AEa \aa A \AA
ø \o Ø \O l \l L \Lı \i \j ¡ !‘ ¿ ?‘

2.5 International Language Support 19
2.5 International Language Support
If you need to write documents in languages other than English, there are two areas where LATEXhas to be configured appropriately:
1. All automatically generated text strings3 have to be adapted to the new language. Formany languages, these changes can be accomplished by using the babel package by Jo-hannes Braams.
2. LATEX needs to know the hyphenation rules for the new language. Getting hyphenationrules into LATEX is a bit more tricky. It means rebuilding the format file with differenthyphenation patterns enabled. Your Local Guide [4] should give more information on this.
If your system is already configured appropriately, you can activate the babel package byadding the command
\usepackage[language]babel
after the \documentclass command. The languages your system supports should also be listedin the Local Guide. Babel will automatically activate the apropriate hyphenation rules for thelanguage you choose. If your LATEX format does not support hyphenation in the language ofyour choice, babel will still work but it will disable hyphenation which has quite a negative effecton the visual appearance of the typeset document.
For some languages, babel also specifies new commands which simplify the input of specialcharacters. The German language, for example, contains a lot of umlauts (aou). With babel,you can enter an o by typing "o instead of \"o.
Some computer systems allow you to input special characters directly from the keyboard.LATEX can handle such characters. Since the December 1994 release of LATEX 2ε, support forseveral input encodings is included in the basic distribution of LATEX 2ε. Check the inputencpackage:
\usepackage[encoding]inputenc
When using this package, you should consider that other people might not be able to displayyour input files on their computer, because they use a different encoding. For example, theGerman umlaut a on a PC is encoded as 132, but on some Unix systems using ISO-LATIN 1it is encoded as 228. Therefore you should use this feature with care. The following encodingsmay come handy, depending on the type of system you are working on:
Operating system encodingMac applemacUnix latin1Windows ansinewOS/2 cp850
Font encoding is a different matter. It defines at which position inside a TEX-font each letteris stored. The original Computer Modern TEX font does only contain the 128 characters ofthe old 7-bit ASCII character set. When accented characters are required, TEX creates themby combining a normal character with an accent. While the resulting output looks perfect,
3Table of Contents, List of Figures, . . .
20 Typesetting Text
this approach stops the automatic hyphenation from working inside words containing accentedcharacters.
Fortunately, most modern TEX distributions contain a copy of the EC fonts. These fontslook like the Computer Modern fonts, but contain special characters for most of the accentedcharacters used in European languages. By using these fonts you can improve hyphenation innon-English documents. The EC fonts are activated by including the fontenc package in thepreamble of your document.
\usepackage[T1]fontenc
2.5.1 Support for German
Some hints for those creating German documents with LATEX. You can load German languagesupport with the command:
\usepackage[german]babel
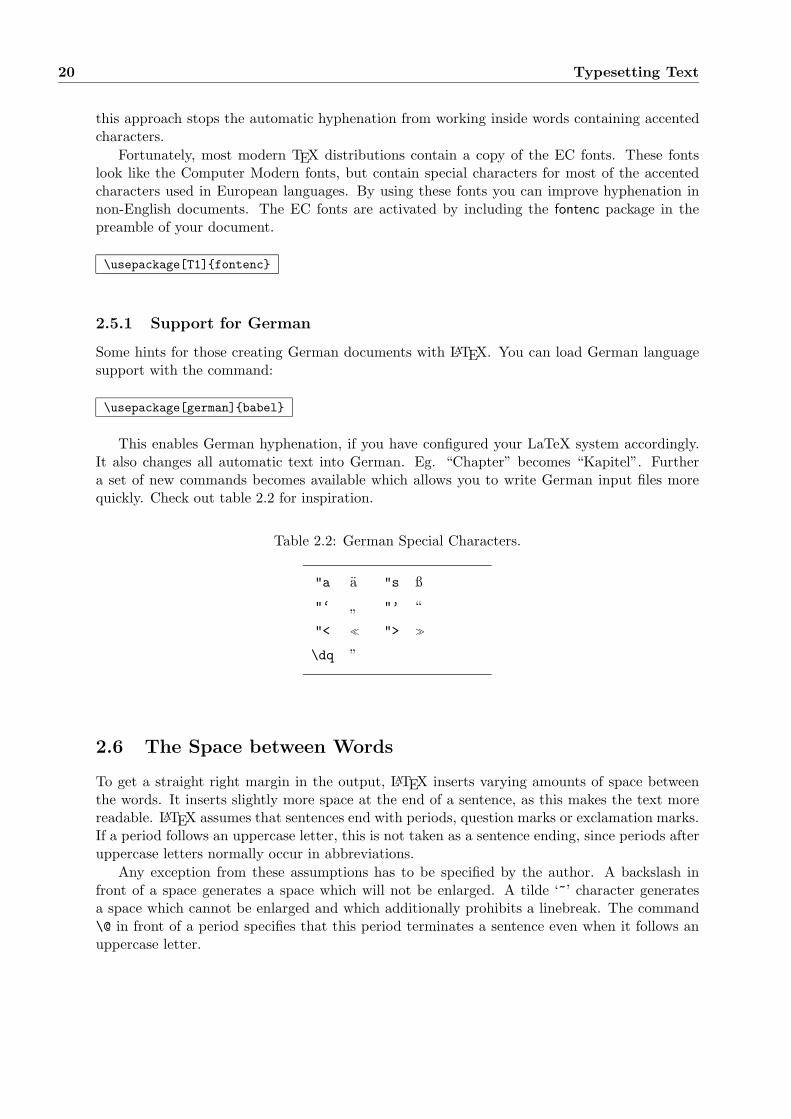
This enables German hyphenation, if you have configured your LaTeX system accordingly.It also changes all automatic text into German. Eg. “Chapter” becomes “Kapitel”. Furthera set of new commands becomes available which allows you to write German input files morequickly. Check out table 2.2 for inspiration.
Table 2.2: German Special Characters.
"a a "s ß
"‘ ” "’ “
"< ">
\dq ”
2.6 The Space between Words
To get a straight right margin in the output, LATEX inserts varying amounts of space betweenthe words. It inserts slightly more space at the end of a sentence, as this makes the text morereadable. LATEX assumes that sentences end with periods, question marks or exclamation marks.If a period follows an uppercase letter, this is not taken as a sentence ending, since periods afteruppercase letters normally occur in abbreviations.
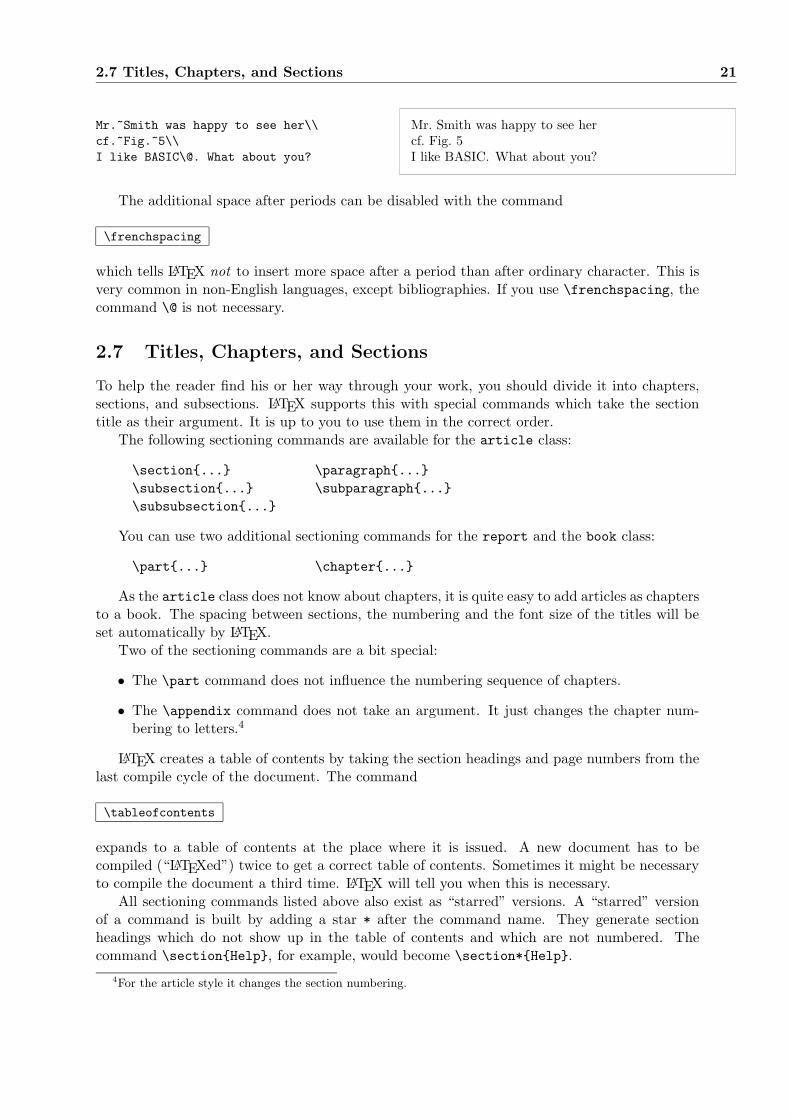
Any exception from these assumptions has to be specified by the author. A backslash infront of a space generates a space which will not be enlarged. A tilde ‘~’ character generatesa space which cannot be enlarged and which additionally prohibits a linebreak. The command\@ in front of a period specifies that this period terminates a sentence even when it follows anuppercase letter.
2.7 Titles, Chapters, and Sections 21
Mr.~Smith was happy to see her\\cf.~Fig.~5\\I like BASIC\@. What about you?
Mr. Smith was happy to see hercf. Fig. 5I like BASIC. What about you?
The additional space after periods can be disabled with the command
\frenchspacing
which tells LATEX not to insert more space after a period than after ordinary character. This isvery common in non-English languages, except bibliographies. If you use \frenchspacing, thecommand \@ is not necessary.
2.7 Titles, Chapters, and Sections
To help the reader find his or her way through your work, you should divide it into chapters,sections, and subsections. LATEX supports this with special commands which take the sectiontitle as their argument. It is up to you to use them in the correct order.
The following sectioning commands are available for the article class:
\section... \paragraph...\subsection... \subparagraph...\subsubsection...
You can use two additional sectioning commands for the report and the book class:
\part... \chapter...
As the article class does not know about chapters, it is quite easy to add articles as chaptersto a book. The spacing between sections, the numbering and the font size of the titles will beset automatically by LATEX.
Two of the sectioning commands are a bit special:
• The \part command does not influence the numbering sequence of chapters.
• The \appendix command does not take an argument. It just changes the chapter num-bering to letters.4
LATEX creates a table of contents by taking the section headings and page numbers from thelast compile cycle of the document. The command
\tableofcontents
expands to a table of contents at the place where it is issued. A new document has to becompiled (“LATEXed”) twice to get a correct table of contents. Sometimes it might be necessaryto compile the document a third time. LATEX will tell you when this is necessary.
All sectioning commands listed above also exist as “starred” versions. A “starred” versionof a command is built by adding a star * after the command name. They generate sectionheadings which do not show up in the table of contents and which are not numbered. Thecommand \sectionHelp, for example, would become \section*Help.
4For the article style it changes the section numbering.
22 Typesetting Text
Normally the section headings show up in the table of contents exactly as they are enteredin the text. Sometimes this is not possible, because the heading is too long to fit into the tableof contents. The entry for the table of contents can then be specified as an optional argumentin front of the actual heading.
\chapter[Title for the table of contents]A longand especially boring title, shown in the text
The title of the whole document is generated by issuing a
\maketitle
command. The contents of the title have to be defined by the commands
\title..., \author... and optionally \date...
before calling \maketitle. In the argument of \author, you can supply several names separatedby \and commands.
An example of some of the commands mentioned above can be found in Figure 1.3 on page 7.Apart from the sectioning commands explained above, LATEX 2ε introduced three additional
commands for use with the book class. They are useful for dividing your publication. Thecommands alter chapter headings and page numbering to work as you would expect it in abook:
\frontmatter should be the very first command after \begindocument. It will switch pagenumbering to Roman numerals. It is common to use the starred sectioning commands (eg\chapter*Preface) for frontmatter as this stopps LATEX from enumerating them.
\mainmatter comes after right befor the first chapter of the book. It turns on Arabic pagenumbering and restarts the page counter.
\appendix marks the start of additional material in your book. After this command chapterswill be numbered with letters.
\backmatter should be inserted before the very last items in your book like the bibliographyand the index. In the standard document classes, this has no visual effect.
2.8 Cross References
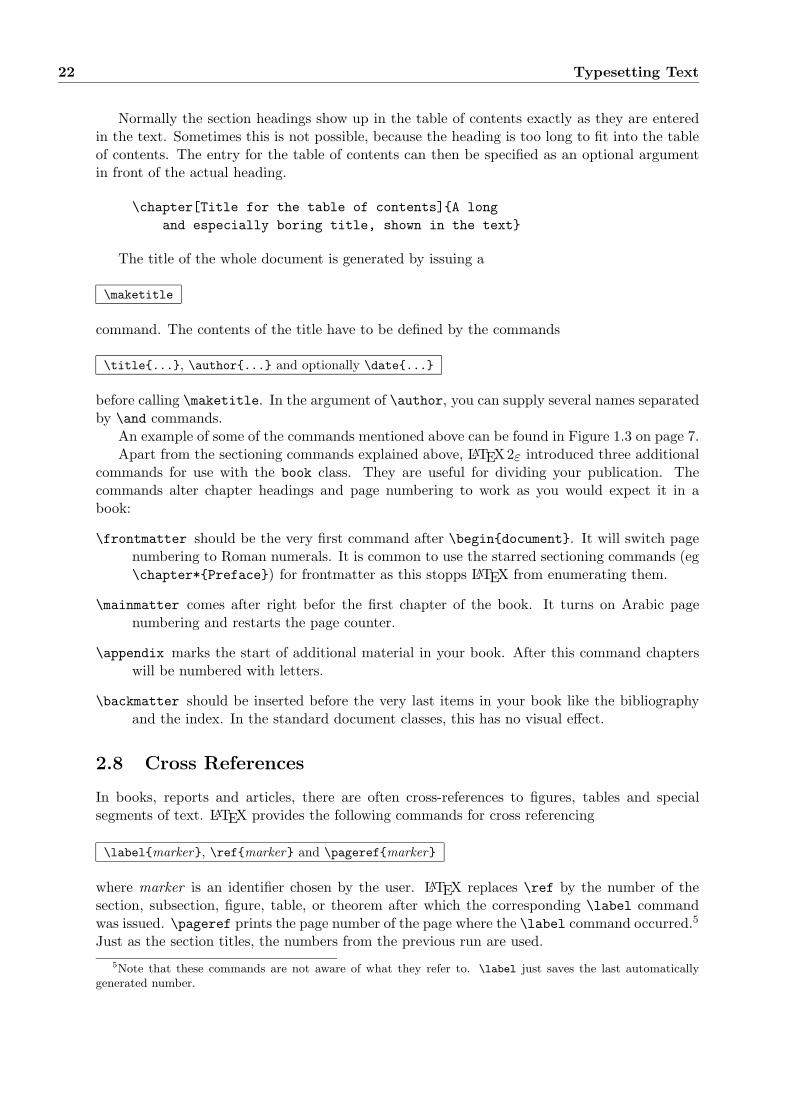
In books, reports and articles, there are often cross-references to figures, tables and specialsegments of text. LATEX provides the following commands for cross referencing
\labelmarker, \refmarker and \pagerefmarker
where marker is an identifier chosen by the user. LATEX replaces \ref by the number of thesection, subsection, figure, table, or theorem after which the corresponding \label commandwas issued. \pageref prints the page number of the page where the \label command occurred.5
Just as the section titles, the numbers from the previous run are used.5Note that these commands are not aware of what they refer to. \label just saves the last automatically
generated number.

2.9 Footnotes 23
A reference to this subsection\labelsec:this looks like:‘‘see section~\refsec:this onpage~\pagerefsec:this.’’
A reference to this subsection looks like: “see sec-tion 2.8 on page 23.”
2.9 Footnotes
With the command
\footnotefootnote text
a footnote is printed at the foot of the current page. Footnotes should always be put6 after theword or sentence they refer to. Footnotes referring to a sentence or part of it should thereforebe put after the comma or period.7
Footnotes\footnoteThis isa footnote. are often used
by people using \LaTeX.
Footnotesa are often used by people using LATEX.
aThis is a footnote.
2.10 Emphasized Words
If a text is typed using a typewriter, important words are emphasized by underliningthem.
\underlinetext
In printed books, however, words are emphasized by typesetting them in an italic font. LATEXprovides the command
\emphtext
to emphasize text. What the command actually does with its argument depends on the context:
\emphIf you useemphasizing inside a pieceof emphasized text, then\LaTeX uses the\emphnormal font foremphasizing.
If you use emphasizing inside a piece of emphasizedtext, then LATEX uses the normal font for emphasizing.
6“put” is one of the most common English words.7Note, that footnotes are distracting the reader from the main body of your document. After all everybody
reads the footnotes, we are a curious species. So why not just integrate everything you want to say into the bodyof the document.8
8A guidepost doesn’t necessarily go where it’s pointing to :-).
24 Typesetting Text
Please note the difference between telling LATEX to emphasize something and telling it to usea different font :
\textitYou can also\emphemphasize text ifit is set in italics,
\textsfin a\emphsans-serif font,
\textttor in\emphtypewriter style.
You can also emphasize text if it is set in italics, in asans-serif font, or in typewriter style.
2.11 Environments
\beginenvironment text \endenvironment
Where environment is the name of the environment. Environments can be called several timeswithin each other as long as the calling order is maintained.
\beginaaa...\beginbbb...\endbbb...\endaaa
In the following sections all important environments are explained.
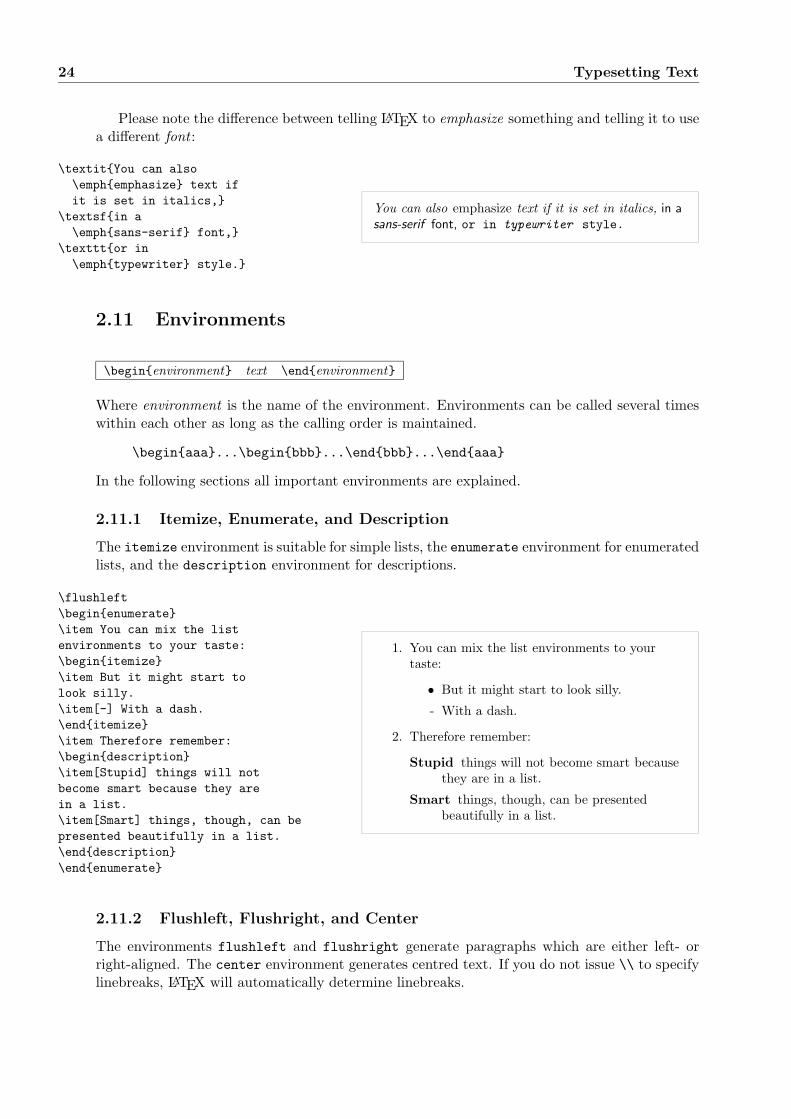
2.11.1 Itemize, Enumerate, and Description
The itemize environment is suitable for simple lists, the enumerate environment for enumeratedlists, and the description environment for descriptions.
\flushleft\beginenumerate\item You can mix the listenvironments to your taste:\beginitemize\item But it might start tolook silly.\item[-] With a dash.\enditemize\item Therefore remember:\begindescription\item[Stupid] things will notbecome smart because they arein a list.\item[Smart] things, though, can bepresented beautifully in a list.\enddescription\endenumerate
1. You can mix the list environments to yourtaste:
• But it might start to look silly.
- With a dash.
2. Therefore remember:
Stupid things will not become smart becausethey are in a list.
Smart things, though, can be presentedbeautifully in a list.
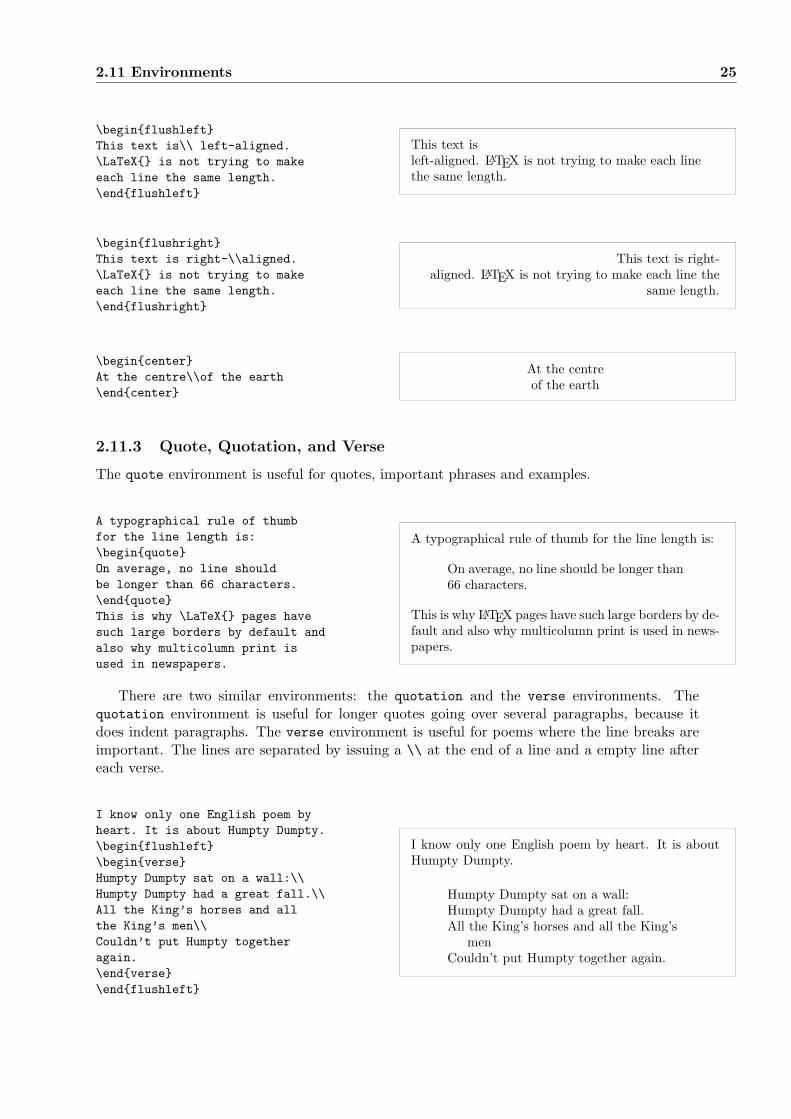
2.11.2 Flushleft, Flushright, and Center
The environments flushleft and flushright generate paragraphs which are either left- orright-aligned. The center environment generates centred text. If you do not issue \\ to specifylinebreaks, LATEX will automatically determine linebreaks.
2.11 Environments 25
\beginflushleftThis text is\\ left-aligned.\LaTeX is not trying to makeeach line the same length.\endflushleft
This text isleft-aligned. LATEX is not trying to make each linethe same length.
\beginflushrightThis text is right-\\aligned.\LaTeX is not trying to makeeach line the same length.\endflushright
This text is right-aligned. LATEX is not trying to make each line the
same length.
\begincenterAt the centre\\of the earth\endcenter
At the centreof the earth
2.11.3 Quote, Quotation, and Verse
The quote environment is useful for quotes, important phrases and examples.
A typographical rule of thumbfor the line length is:\beginquoteOn average, no line shouldbe longer than 66 characters.\endquoteThis is why \LaTeX pages havesuch large borders by default andalso why multicolumn print isused in newspapers.
A typographical rule of thumb for the line length is:
On average, no line should be longer than66 characters.
This is why LATEX pages have such large borders by de-fault and also why multicolumn print is used in news-papers.
There are two similar environments: the quotation and the verse environments. Thequotation environment is useful for longer quotes going over several paragraphs, because itdoes indent paragraphs. The verse environment is useful for poems where the line breaks areimportant. The lines are separated by issuing a \\ at the end of a line and a empty line aftereach verse.
I know only one English poem byheart. It is about Humpty Dumpty.\beginflushleft\beginverseHumpty Dumpty sat on a wall:\\Humpty Dumpty had a great fall.\\All the King’s horses and allthe King’s men\\Couldn’t put Humpty togetheragain.\endverse\endflushleft
I know only one English poem by heart. It is aboutHumpty Dumpty.
Humpty Dumpty sat on a wall:Humpty Dumpty had a great fall.All the King’s horses and all the King’s
menCouldn’t put Humpty together again.

26 Typesetting Text
2.11.4 Printing Verbatim
Text which is enclosed between \beginverbatim and \endverbatim will be directly printed,as if it was typed on a typewriter, with all linebreaks and spaces, without any LATEX commandbeing executed.
Within a paragraph, similar behavior can be accessed with
\verb+text+
The + is just an example of a delimiter character. You can use any character except letters, *or space. Many LATEX examples in this booklet are typeset with this command.
The \verb|\ldots| command \ldots
\beginverbatim10 PRINT "HELLO WORLD ";20 GOTO 10\endverbatim
The \ldots command . . .
10 PRINT "HELLO WORLD ";20 GOTO 10
\beginverbatim*the starred version ofthe verbatimenvironment emphasizesthe spaces in the text\endverbatim*
the starred version ofthe verbatimenvironment emphasizesthe spaces in the text
The \verb command can be used in a similar fashion with a star:
\verb*|like this :-) | like this :-)
The verbatim environment and the \verb command may not be used within parameters ofother commands.
2.11.5 Tabular
The tabular environment can be used to typeset beautiful tables with optional horizontal andvertical lines. LATEX determines the width of the columns automatically.
The table spec argument of the
\begintabulartable spec
command defines the format of the table. Use an l for a column of left-aligned text, r forright-aligned text, and c for centred text; pwidth for a column containing justified text withlinebreaks, and | for a vertical line.
Within a tabular environment, & jumps to the next column, \\ starts a new line and \hlineinserts a horizontal line. You can add partial Lines by using the \clinej-i whereby j and iare the column numbers the line should extend over.

2.11 Environments 27
\begintabular|r|l|\hline7C0 & hexadecimal \\3700 & octal \\ \cline2-211111000000 & binary \\\hline \hline1984 & decimal \\\hline\endtabular
7C0 hexadecimal3700 octal
11111000000 binary1984 decimal
\begintabular|p4.7cm|\hlineWelcome to Boxy’s paragraph.We sincerely hope you’llall enjoy the show.\\\hline\endtabular
Welcome to Boxy’s paragraph.We sincerely hope you’ll all en-joy the show.
The column separator can be specified with the @... construct. This command kills theinter-column space and replaces it with whatever is between the curly braces. One commonuse for this command is explained below in the decimal alignment problem. Another possibleapplication is to suppress leading space in a table with @.
\begintabular@ l @\hlineno leading space\\\hline\endtabular
no leading space
\begintabularl\hlineleading space left and right\\\hline\endtabular
leading space left and right
Since there is no built-in way to align numeric columns to a decimal point,9 we can “cheat”and do it by using two columns: a right-aligned integer and a left-aligned fraction. The @.command in the \begintabular line replaces the normal inter-column spacing with just a“.”, giving the appearance of a single, decimal-point-justified column. Don’t forget to replacethe decimal point in your numbers with a column separator (&)! A column label can be placedabove our numeric “column” by using the \multicolumn command.
\begintabularc r @. lPi expression &\multicolumn2cValue \\\hline$\pi$ & 3&1416 \\$\pi^\pi$ & 36&46 \\$(\pi^\pi)^\pi$ & 80662&7 \\\endtabular
Pi expression Valueπ 3.1416ππ 36.46
(ππ)π 80662.7
9If the ‘tools’ bundle is installed on your system, have a look at the dcolumn package.

28 Typesetting Text
\begintabular|c|c|\hline\multicolumn2|c|Ene \\\hlineMene & Muh! \\\hline\endtabular
EneMene Muh!
Material typeset with the tabular environment always stays together on one page. If youwant to typeset long tables you might want to have a look at the supertabular and the longtabularenvironments.
2.12 Floating Bodies
Today most publications contain a lot of figures and tables. These elements need special treat-ment, because they cannot be broken across pages. One method would be to start a new pageevery time a figure or a table is too large to fit on the present page. This approach would leavepages partially empty, which looks very bad.
The solution to this problem is to ‘float’ any figure or table which does not fit on thecurrent page to a later page, while filling the current page with body text. LATEX offers twoenvironments for floating bodies; one for tables and one for figures. To take full advantage ofthese two environments it is important to understand approximately how LATEX handles floatsinternally. Otherwise floats may become a major source of frustration, because LATEX never putsthem where you want them to be.
Let’s first have a look at the commands LATEX supplies for floats:Any material enclosed in a figure or table environment will be treated as floating matter.
Both float environments support an optional parameter
\beginfigure[placement specifier] or \begintable[placement specifier]
called the placement specifier. This parameter is used to tell LATEX about the locations to whichthe float is allowed to be moved. A placement specifier is constructed by building a string offloat-placing permissions. See Table 2.3.
Note: The 0pt and 1.05em are TEX units. Read more on this in table 5.5 on page 65.
Table 2.3: Float Placing Permissions.
Spec Permission to place the float . . .h here at the very place in the text where it occurred. This is
useful mainly for small floats.t at the top of a pageb at the bottom of a pagep on a special page containing only floats.! without considering most of the internal parametersa which
could stop this float from being placed.
aSuch as the maximum number of floats allowed on one page.
2.12 Floating Bodies 29
A table could be started with the following line e.g.
\begintable[!hbp]
The placement specifier [!hbp] allows LATEX to place the table right here (h) or at the bottom(b) of some page or on a special floats page (p), and all this even if it does not look that good(!). If no placement specifier is given, the standard classes assume [tbp].
LATEX will place every float it encounters, according to the placement specifier supplied bythe author. If a float cannot be placed on the current page it is deferred either to the figuresor the tables queue10. When a new page is started, LATEX first checks if it is possible to fill aspecial ‘float’ page with floats from the queues. If this is not possible, the first float on eachqueue is treated as if it had just occurred in the text: LATEX tries again to place it according to itsrespective placement specifiers (except ‘h’ which is no longer possible). Any new floats occurringin the text get placed into the appropriate queues. LATEX strictly maintains the original order ofappearance for each type of float. That’s why a figure which cannot be placed pushes all furtherfigures to the end of the document. Therefore:
If LATEX is not placing the floats as you expected, it is often only one float jammingone of the two float queues.
While it is possible to give LaTeX single-location placement specifiers, this causes problems.If the float does not fit in the location specified, then it becomes stuck, blocking subsequentfloats. In particular, you should never ever use the [h] option, it is so bad that in more recentversions of LaTeX, it is automatically replaced by [ht].
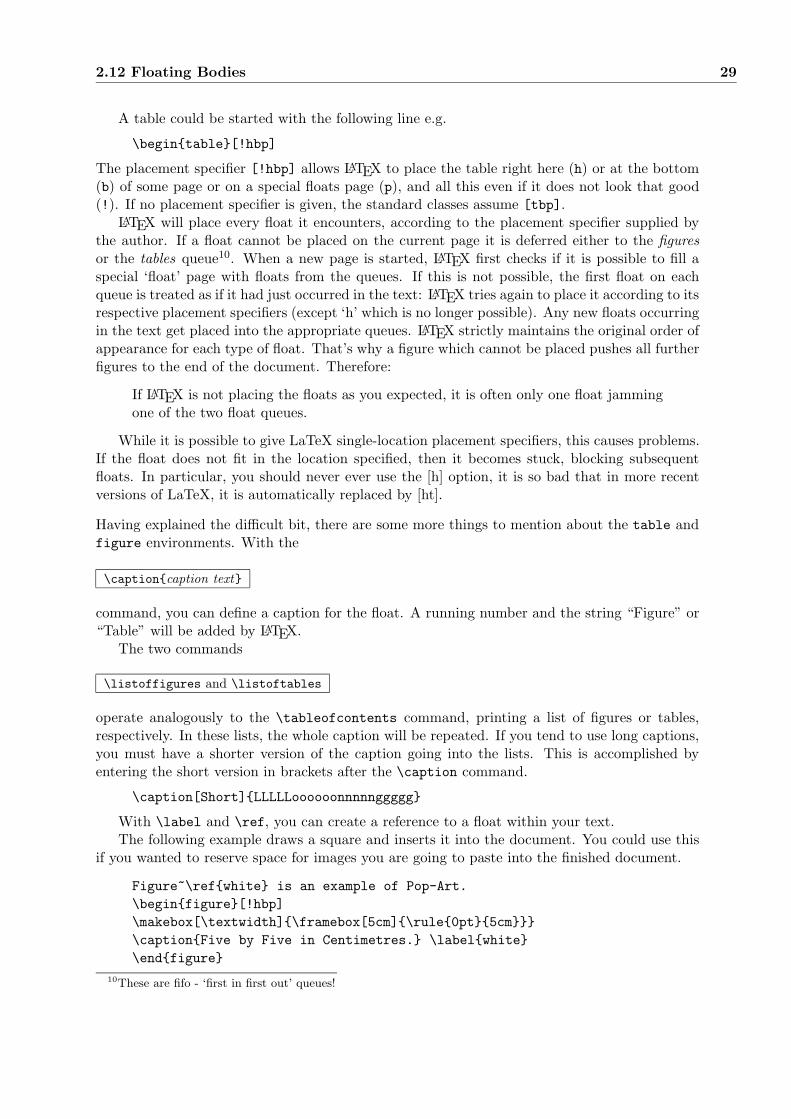
Having explained the difficult bit, there are some more things to mention about the table andfigure environments. With the
\captioncaption text
command, you can define a caption for the float. A running number and the string “Figure” or“Table” will be added by LATEX.
The two commands
\listoffigures and \listoftables
operate analogously to the \tableofcontents command, printing a list of figures or tables,respectively. In these lists, the whole caption will be repeated. If you tend to use long captions,you must have a shorter version of the caption going into the lists. This is accomplished byentering the short version in brackets after the \caption command.
\caption[Short]LLLLLoooooonnnnnggggg
With \label and \ref, you can create a reference to a float within your text.The following example draws a square and inserts it into the document. You could use this
if you wanted to reserve space for images you are going to paste into the finished document.
Figure~\refwhite is an example of Pop-Art.\beginfigure[!hbp]\makebox[\textwidth]\framebox[5cm]\rule0pt5cm\captionFive by Five in Centimetres. \labelwhite\endfigure
10These are fifo - ‘first in first out’ queues!

30 Typesetting Text
In the example above, LATEX will try really hard (!) to place the figure right here (h).11 If thisis not possible, it tries to place the figure at the bottom (b) of the page. Failing to place thefigure on the current page, it determines whether it is possible to create a float page containingthis figure and maybe some tables from the tables queue. If there is not enough material fora special float page, LATEX starts a new page, and once more treats the figure as if it had justoccurred in the text.
Under certain circumstances it might be necessary to use the
\clearpage or even the \cleardoublepage
command. It orders LATEX to immediately place all floats remaining in the queues and thenstart a new page. \cleardoublepage even goes to a new righthand page.
You will learn how to include PostScript drawings into your LATEX 2ε documents later in thisintroduction.
2.13 Protecting fragile commands
Text given as arguments of commands like \caption or \section may show up more than oncein the document (e.g. in the table of contents as well as in the body of the document). Somecommands fail when used in the argument of \section-like commands. These are called fragilecommands. Fragile commands are for example \footnote or \phantom. What these fragilecommands need to work, is protection (don’t we all?). You can protect them by putting the\protect command in front of them.
\protect only refers to the command which follows right behind, not even to its arguments.In most cases a superfluous \protect won’t hurt.
\sectionI am considerate\protect\footnoteand protect my footnotes
11assuming the figure queue is empty.

Chapter 3
Typesetting Mathematical Formulae
Now you are ready! In this chapter, we will attack the main strength of TEX: mathematical type-setting. But be warned, this chapter only scratches the surface. While the things explained here aresufficient for many people, don’t despair if you can’t find a solution to your mathematical typesettingneeds here. It is highly likely that your problem is addressed in AMS-LATEX
1 or some other package.
3.1 General
LATEX has a special mode for typesetting mathematics. Mathematical text within a paragraphis entered between \( and \), between $ and $ or between \beginmath and \endmath.
Add $a$ squared and $b$ squaredto get $c$ squared. Or, usinga more mathematical approach:$c^2=a^2+b^2$
Add a squared and b squared to get c squared. Or,using a more mathematical approach: c2 = a2 + b2
\TeX is pronounced as$\tau\epsilon\chi$.\\[6pt]100~m$^3$ of water\\[6pt]This comes from my $\heartsuit$
TEX is pronounced as τεχ.
100 m3 of water
This comes from my ♥
It is preferable to display larger mathematical equations or formulae, rather than to typesetthem on separate lines. This means you enclose them in \[ and \] or between \begindisplaymathand \enddisplaymath. This produces formulae which are not numbered. If you want LATEXto number them, you can use the equation environment.
Add $a$ squared and $b$ squaredto get $c$ squared. Or, usinga more mathematical approach:\begindisplaymathc^2=a^2+b^2\enddisplaymathAnd just one more line.
Add a squared and b squared to get c squared. Or,using a more mathematical approach:
c2 = a2 + b2
And just one more line.
1CTAN:/tex-archive/macros/latex/required/amslatex
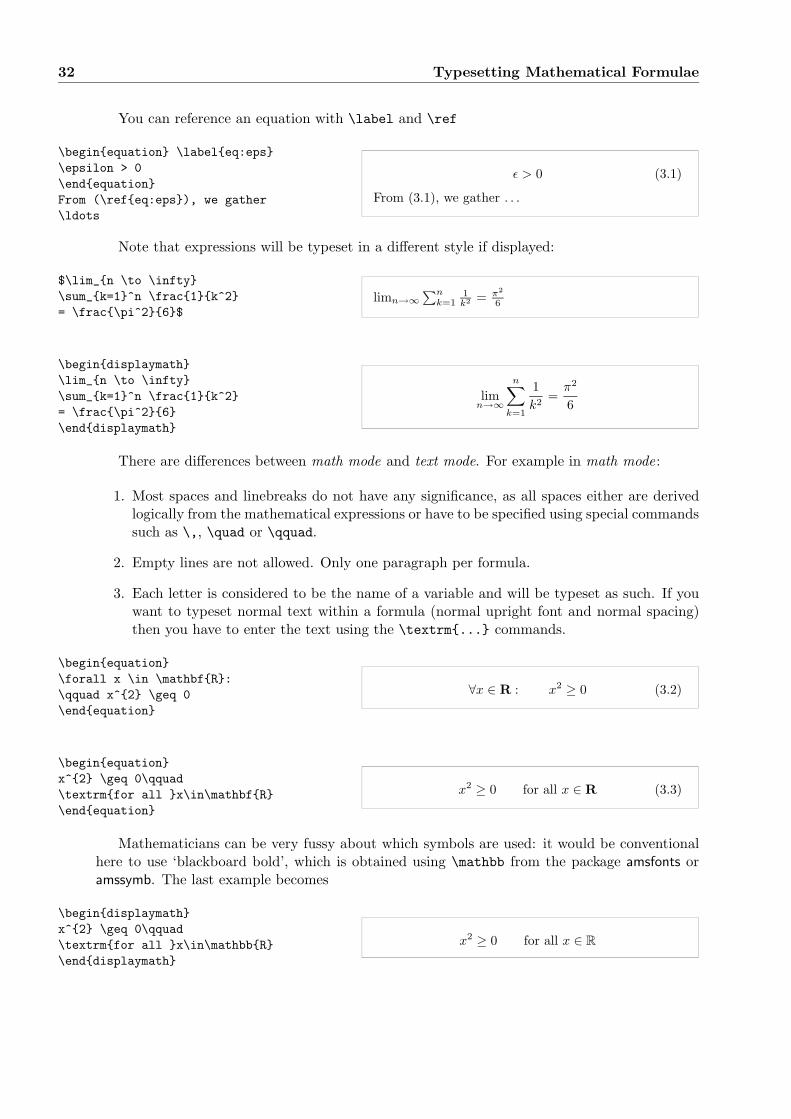
32 Typesetting Mathematical Formulae
You can reference an equation with \label and \ref
\beginequation \labeleq:eps\epsilon > 0\endequationFrom (\refeq:eps), we gather\ldots
ε > 0 (3.1)
From (3.1), we gather . . .
Note that expressions will be typeset in a different style if displayed:
$\lim_n \to \infty\sum_k=1^n \frac1k^2= \frac\pi^26$
limn→∞∑n
k=11k2 = π2
6
\begindisplaymath\lim_n \to \infty\sum_k=1^n \frac1k^2= \frac\pi^26\enddisplaymath
limn→∞
n∑k=1
1k2
=π2
6
There are differences between math mode and text mode. For example in math mode:
1. Most spaces and linebreaks do not have any significance, as all spaces either are derivedlogically from the mathematical expressions or have to be specified using special commandssuch as \,, \quad or \qquad.
2. Empty lines are not allowed. Only one paragraph per formula.
3. Each letter is considered to be the name of a variable and will be typeset as such. If youwant to typeset normal text within a formula (normal upright font and normal spacing)then you have to enter the text using the \textrm... commands.
\beginequation\forall x \in \mathbfR:\qquad x^2 \geq 0\endequation
∀x ∈ R : x2 ≥ 0 (3.2)
\beginequationx^2 \geq 0\qquad\textrmfor all x\in\mathbfR\endequation
x2 ≥ 0 for all x ∈ R (3.3)
Mathematicians can be very fussy about which symbols are used: it would be conventionalhere to use ‘blackboard bold’, which is obtained using \mathbb from the package amsfonts oramssymb. The last example becomes
\begindisplaymathx^2 \geq 0\qquad\textrmfor all x\in\mathbbR\enddisplaymath
x2 ≥ 0 for all x ∈ R

3.2 Grouping in Math Mode 33
3.2 Grouping in Math Mode
Most math mode commands act only on the next character. So if you want a command to affectseveral characters, you have to group them together using curly braces: ....
\beginequationa^x+y \neq a^x+y\endequation
ax + y 6= ax+y (3.4)
3.3 Building Blocks of a Mathematical Formula
In this section, the most important commands used in mathematical typesetting will be de-scribed. Take a look at section 3.10 on page 42 for a detailed list of commands for typesettingmathematical symbols.
Lowercase Greek letters are entered as \alpha, \beta, \gamma, . . . , uppercase letters areentered as \Gamma, \Delta, . . . 2
$\lambda,\xi,\pi,\mu,\Phi,\Omega$ λ, ξ, π, µ,Φ,Ω
Exponents and Subscripts can be specified using the ^ and the _ character.
$a_1$ \qquad $x^2$ \qquad$e^-\alpha t$ \qquad$a^3_ij$\\$e^x^2 \neq e^x^2$
a1 x2 e−αt a3ij
ex2 6= ex2
The square root is entered as \sqrt, the nth root is generated with \sqrt[n]. The size ofthe root sign is determined automatically by LATEX. If just the sign is needed, use \surd.
$\sqrtx$ \qquad$\sqrt x^2+\sqrty $\qquad $\sqrt[3]2$\\[3pt]$\surd[x^2 + y^2]$
√x
√x2 +
√y 3
√2√
[x2 + y2]
The commands \overline and \underline create horizontal lines directly over or underan expression.
$\overlinem+n$ m+ n
The commands \overbrace and \underbrace create long horizontal braces over or underan expression.
2There is no uppercase Alpha defined in LATEX2ε because it looks the same as a normal roman A. Once thenew math coding is done, things will change.
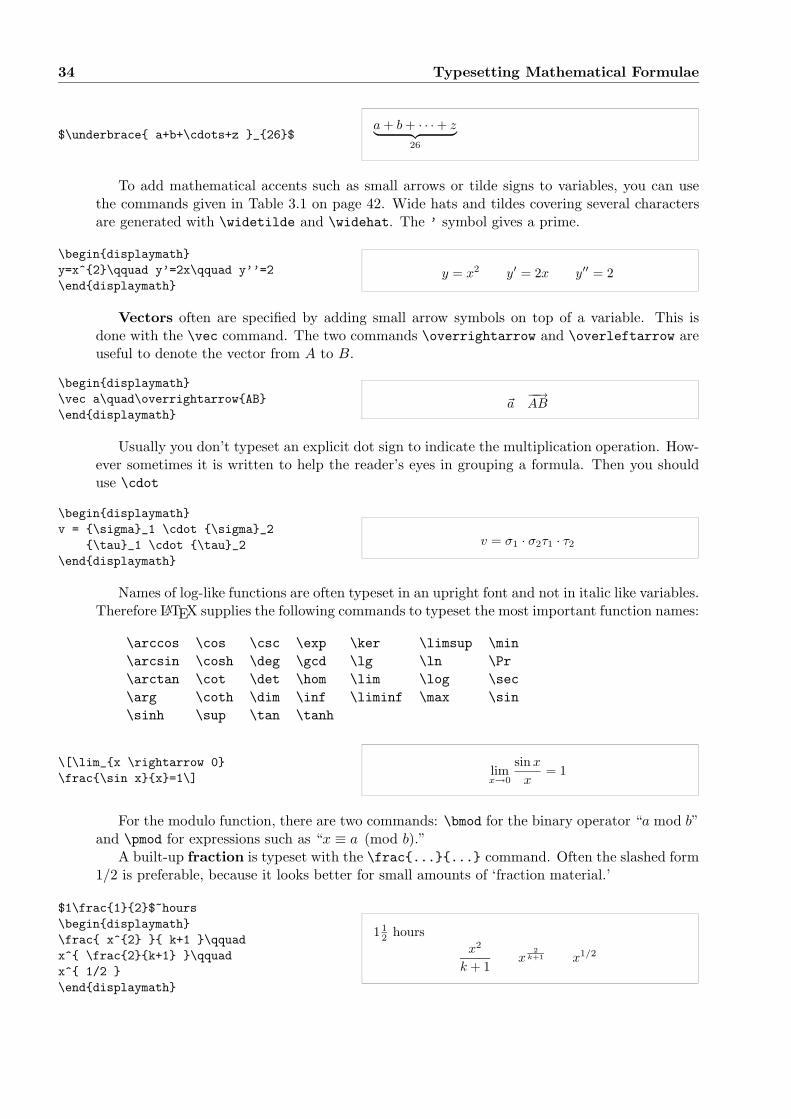
34 Typesetting Mathematical Formulae
$\underbrace a+b+\cdots+z _26$a+ b+ · · ·+ z︸ ︷︷ ︸
26
To add mathematical accents such as small arrows or tilde signs to variables, you can usethe commands given in Table 3.1 on page 42. Wide hats and tildes covering several charactersare generated with \widetilde and \widehat. The ’ symbol gives a prime.
\begindisplaymathy=x^2\qquad y’=2x\qquad y’’=2\enddisplaymath
y = x2 y′ = 2x y′′ = 2
Vectors often are specified by adding small arrow symbols on top of a variable. This isdone with the \vec command. The two commands \overrightarrow and \overleftarrow areuseful to denote the vector from A to B.
\begindisplaymath\vec a\quad\overrightarrowAB\enddisplaymath
~a−−→AB
Usually you don’t typeset an explicit dot sign to indicate the multiplication operation. How-ever sometimes it is written to help the reader’s eyes in grouping a formula. Then you shoulduse \cdot
\begindisplaymathv = \sigma_1 \cdot \sigma_2
\tau_1 \cdot \tau_2\enddisplaymath
v = σ1 · σ2τ1 · τ2
Names of log-like functions are often typeset in an upright font and not in italic like variables.Therefore LATEX supplies the following commands to typeset the most important function names:
\arccos \cos \csc \exp \ker \limsup \min\arcsin \cosh \deg \gcd \lg \ln \Pr\arctan \cot \det \hom \lim \log \sec\arg \coth \dim \inf \liminf \max \sin\sinh \sup \tan \tanh
\[\lim_x \rightarrow 0\frac\sin xx=1\]
limx→0
sin xx
= 1
For the modulo function, there are two commands: \bmod for the binary operator “a mod b”and \pmod for expressions such as “x ≡ a (mod b).”
A built-up fraction is typeset with the \frac...... command. Often the slashed form1/2 is preferable, because it looks better for small amounts of ‘fraction material.’
$1\frac12$~hours\begindisplaymath\frac x^2 k+1 \qquadx^ \frac2k+1 \qquadx^ 1/2 \enddisplaymath
1 12 hours
x2
k + 1x
2k+1 x1/2

3.3 Building Blocks of a Mathematical Formula 35
To typeset binomial coefficients or similar structures, you can use either the command... \choose ... or ... \atop .... The second command produces the same outputas the first one, but without braces. 3
\begindisplaymathn \choose k\qquad x \atop y+2\enddisplaymath
(n
k
)x
y + 2
For binary relations it may be useful to stack symbols over each other. \stackrel puts thesymbol given in the first argument in superscript-like size over the second which is set in itsusual position.
\begindisplaymath\int f_N(x) \stackrel!= 1\enddisplaymath
∫fN (x) != 1
The integral operator is generated with \int, the sum operator with \sum and theproduct operator with \prod. The upper and lower limits are specified with ^ and _ likesubscripts and superscripts. 4
\begindisplaymath\sum_i=1^n \qquad\int_0^\frac\pi2 \qquad\prod_\epsilon\enddisplaymath
n∑i=1
∫ π2
0
∏ε
For braces and other delimiters, there exist all types of symbols in TEX (e.g. [ 〈 ‖ l). Roundand square braces can be entered with the corresponding keys, curly braces with \, all otherdelimiters are generated with special commands (e.g. \updownarrow). For a list of all delimitersavailable, check table 3.8 on page 44.
\begindisplaymatha,b,c\neq\a,b,c\\enddisplaymath
a, b, c 6= a, b, c
If you put the command \left in front of an opening delimiter or \right in front of a closingdelimiter, TEX will automatically determine the correct size of the delimiter. Note that you mustclose every \left with a corresponding \right, and that the size is determined correctly onlyif both are typeset on the same line. If you don’t want anything on the right, use the invisible‘\right.’ !
3Note that the usage of these old-style commands is expressly forbidden by the amsmath package. They arereplaced by \binom and \genfrac. The latter is a superset of all related construct, e.g. you may get a similarconstruct to \atop by \newcommand\newatop[2]\genfrac0pt1#1#2.
4AMS-LATEX in addition has multiline super-/subscripts
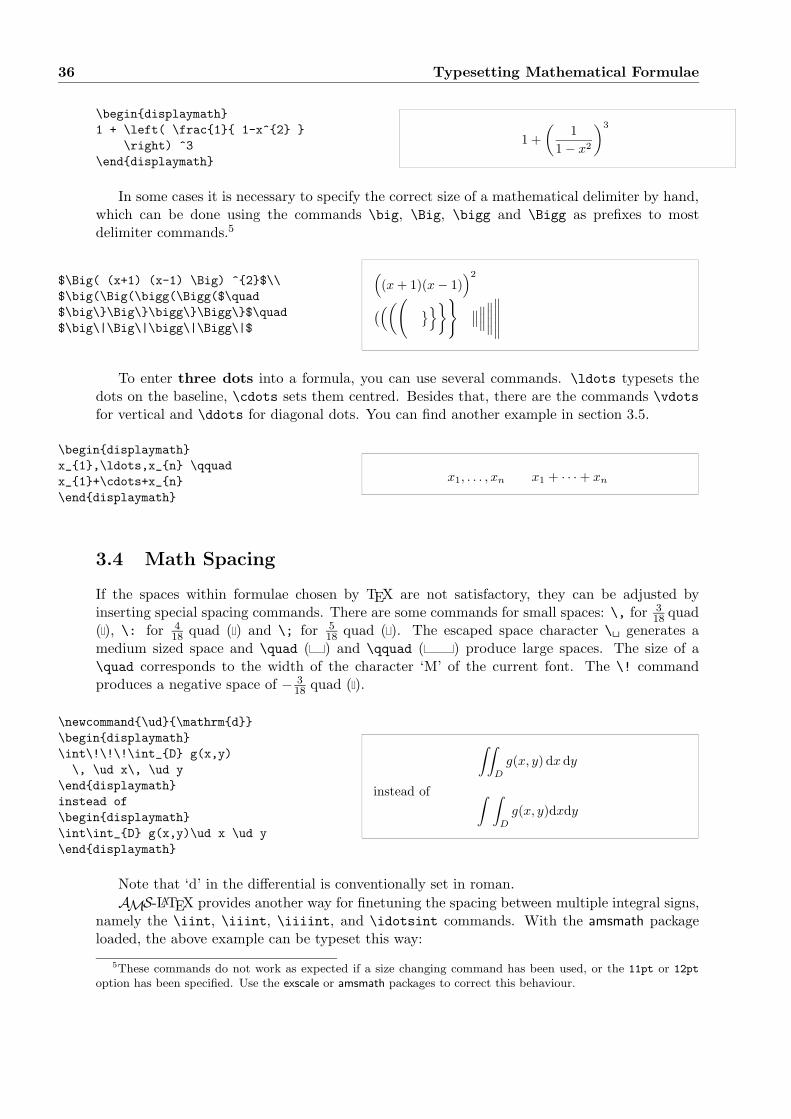
36 Typesetting Mathematical Formulae
\begindisplaymath1 + \left( \frac1 1-x^2
\right) ^3\enddisplaymath
1 +(
11− x2
)3
In some cases it is necessary to specify the correct size of a mathematical delimiter by hand,which can be done using the commands \big, \Big, \bigg and \Bigg as prefixes to mostdelimiter commands.5
$\Big( (x+1) (x-1) \Big) ^2$\\$\big(\Big(\bigg(\Bigg($\quad$\big\\Big\\bigg\\Bigg\$\quad$\big\|\Big\|\bigg\|\Bigg\|$
((x+ 1)(x− 1)
)2
(((( ∥∥∥∥∥∥∥∥∥∥∥∥∥∥
To enter three dots into a formula, you can use several commands. \ldots typesets thedots on the baseline, \cdots sets them centred. Besides that, there are the commands \vdotsfor vertical and \ddots for diagonal dots. You can find another example in section 3.5.
\begindisplaymathx_1,\ldots,x_n \qquadx_1+\cdots+x_n\enddisplaymath
x1, . . . , xn x1 + · · ·+ xn
3.4 Math Spacing
If the spaces within formulae chosen by TEX are not satisfactory, they can be adjusted byinserting special spacing commands. There are some commands for small spaces: \, for 3
18 quad( ), \: for 4
18 quad ( ) and \; for 518 quad ( ). The escaped space character \ generates a
medium sized space and \quad ( ) and \qquad ( ) produce large spaces. The size of a\quad corresponds to the width of the character ‘M’ of the current font. The \! commandproduces a negative space of − 3
18 quad ( ).
\newcommand\ud\mathrmd\begindisplaymath\int\!\!\!\int_D g(x,y)\, \ud x\, \ud y
\enddisplaymathinstead of\begindisplaymath\int\int_D g(x,y)\ud x \ud y\enddisplaymath
∫∫D
g(x, y) dx dy
instead of ∫ ∫D
g(x, y)dxdy
Note that ‘d’ in the differential is conventionally set in roman.AMS-LATEX provides another way for finetuning the spacing between multiple integral signs,
namely the \iint, \iiint, \iiiint, and \idotsint commands. With the amsmath packageloaded, the above example can be typeset this way:
5These commands do not work as expected if a size changing command has been used, or the 11pt or 12pt
option has been specified. Use the exscale or amsmath packages to correct this behaviour.
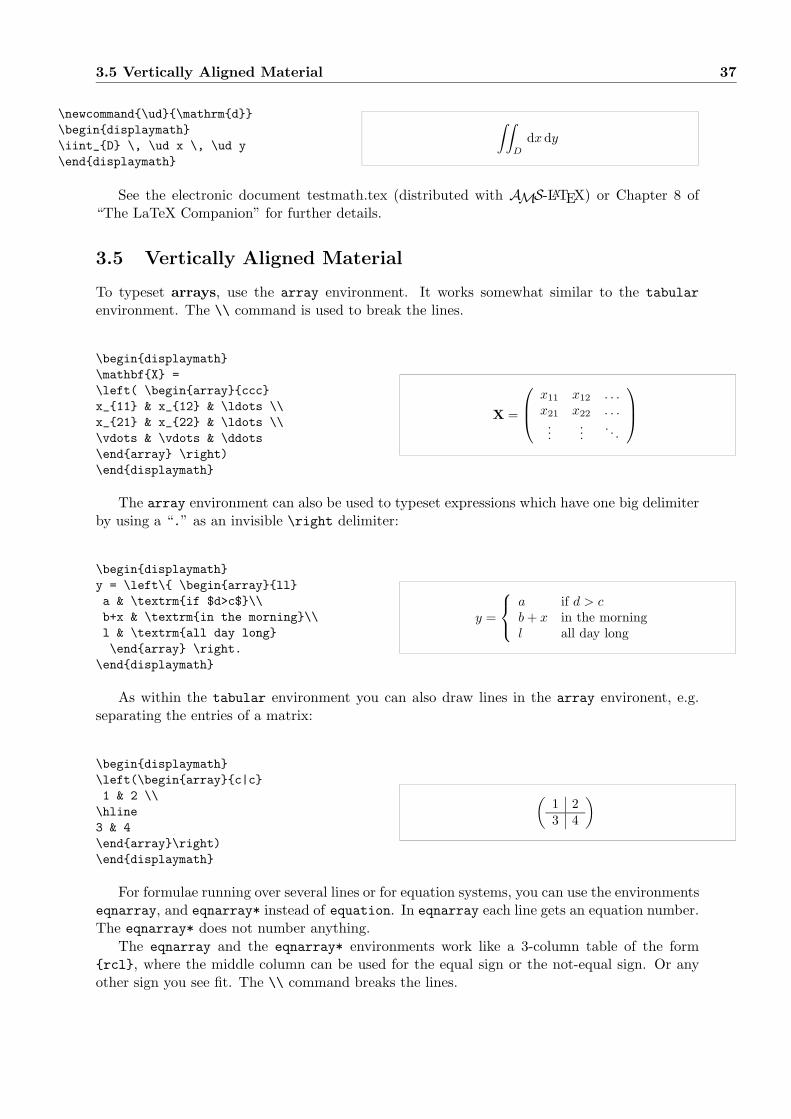
3.5 Vertically Aligned Material 37
\newcommand\ud\mathrmd\begindisplaymath\iint_D \, \ud x \, \ud y\enddisplaymath
∫∫D
dx dy
See the electronic document testmath.tex (distributed with AMS-LATEX) or Chapter 8 of“The LaTeX Companion” for further details.
3.5 Vertically Aligned Material
To typeset arrays, use the array environment. It works somewhat similar to the tabularenvironment. The \\ command is used to break the lines.
\begindisplaymath\mathbfX =\left( \beginarraycccx_11 & x_12 & \ldots \\x_21 & x_22 & \ldots \\\vdots & \vdots & \ddots\endarray \right)\enddisplaymath
X =
x11 x12 . . .x21 x22 . . .
......
. . .
The array environment can also be used to typeset expressions which have one big delimiterby using a “.” as an invisible \right delimiter:
\begindisplaymathy = \left\ \beginarraylla & \textrmif $d>c$\\b+x & \textrmin the morning\\l & \textrmall day long\endarray \right.
\enddisplaymath
y =
a if d > cb+ x in the morningl all day long
As within the tabular environment you can also draw lines in the array environent, e.g.separating the entries of a matrix:
\begindisplaymath\left(\beginarrayc|c1 & 2 \\\hline3 & 4\endarray\right)\enddisplaymath
(1 23 4
)
For formulae running over several lines or for equation systems, you can use the environmentseqnarray, and eqnarray* instead of equation. In eqnarray each line gets an equation number.The eqnarray* does not number anything.
The eqnarray and the eqnarray* environments work like a 3-column table of the formrcl, where the middle column can be used for the equal sign or the not-equal sign. Or anyother sign you see fit. The \\ command breaks the lines.

38 Typesetting Mathematical Formulae
\begineqnarrayf(x) & = & \cos x \\f’(x) & = & -\sin x \\\int_0^x f(y)dy &= & \sin x\endeqnarray
f(x) = cosx (3.5)f ′(x) = − sin x (3.6)∫ x
0
f(y)dy = sin x (3.7)
Notice that the space on either side of the the equal signs is rather large. It can be reducedby setting \setlength\arraycolsep2pt, as in the next example.
Long equations will not be automatically divided into neat bits. The author has to specifywhere to break them and how much to indent. The following two methods are the most commonones used to achieve this.
\setlength\arraycolsep2pt\begineqnarray\sin x & = & x -\fracx^33!
+\fracx^55!-\nonumber\\
& & -\fracx^77!+\cdots\endeqnarray
sinx = x− x3
3!+x5
5!−
− x7
7!+ · · · (3.8)
\begineqnarray\lefteqn \cos x = 1
-\fracx^22! + \nonumber\\
& & +\fracx^44!-\fracx^66!+\cdots
\endeqnarray
cosx = 1− x2
2!+
+x4
4!− x6
6!+ · · · (3.9)
The \nonumber command causes LATEX to not generate a number for this equation.It can be difficult to get vertically aligned equations to look right with these methods; the
package amsmath provides a more powerful set of alternatives. (see split and align environ-ments).
3.6 Phantom
We can’t see phantoms, but they still occupy some space in the minds of a lot of people. LATEXis no different. We can use this for some interesting spacing tricks.
When vertically aligning text using ^ and _ LATEX sometimes is just a little bit too helpful.Using the \phantom command you can reserve space for characters which do not show up in thefinal output. Best is to look at the following examples.
\begindisplaymath^12_\phantom16\textrmC\qquad \textrmversus \qquad^12_6\textrmC\enddisplaymath
126C versus 12
6 C

3.7 Math Font Size 39
\begindisplaymath\Gamma_ij^\phantomijk\qquad \textrmversus \qquad\Gamma_ij^k\enddisplaymath
Γ kij versus Γk
ij
3.7 Math Font Size
In math mode, TEX selects the font size according to the context. Superscripts, for example,get typeset in a smaller font. If you want to typeset part of an equation in roman, don’t usethe \textrm command, because the font size switching mechanism will not work, as \textrmtemporarily escapes to text mode. Use \mathrm instead to keep the size switching mechanismactive. But pay attention, \mathrm will only work well on short items. Spaces are still not activeand accented characters do not work.6
\beginequation2^\textrmnd \quad2^\mathrmnd\endequation
2nd 2nd (3.10)
Nevertheless, sometimes you need to tell LATEX the correct font size. In math mode, thefontsize is set with the four commands:
\displaystyle (123), \textstyle (123), \scriptstyle (123) and \scriptscriptstyle (123).
Changing styles also affects the way limits are displayed.
\begindisplaymath\mathop\mathrmcorr(X,Y)=\frac\displaystyle
\sum_i=1^n(x_i-\overline x)(y_i-\overline y)
\displaystyle\biggl[\sum_i=1^n(x_i-\overline x)^2\sum_i=1^n(y_i-\overline y)^2\biggr]^1/2\enddisplaymath
corr(X,Y ) =
n∑i=1
(xi − x)(yi − y)
[ n∑i=1
(xi − x)2n∑
i=1
(yi − y)2]1/2
This is one of those examples in which we need larger brackets than the standard \left[ \right]provides.
3.8 Theorems, Laws, . . .
When writing mathematical documents, you probably need a way to typeset “Lemmas”, “Defin-itions”, “Axioms” and similar structures. LATEX supports this with the command
\newtheoremname[counter]text[section]
The name argument, is a short keyword used to identify the “theorem”. With the text6The AMS-LATEX package makes the \textrm command work with size changing.
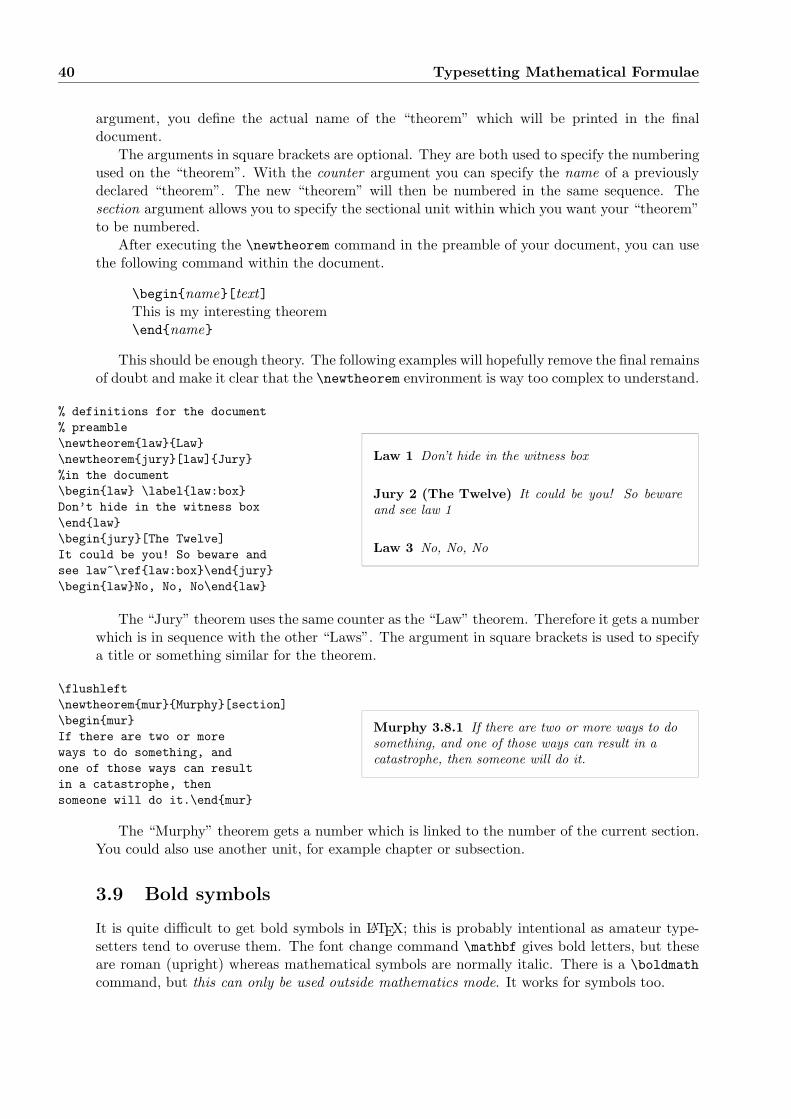
40 Typesetting Mathematical Formulae
argument, you define the actual name of the “theorem” which will be printed in the finaldocument.
The arguments in square brackets are optional. They are both used to specify the numberingused on the “theorem”. With the counter argument you can specify the name of a previouslydeclared “theorem”. The new “theorem” will then be numbered in the same sequence. Thesection argument allows you to specify the sectional unit within which you want your “theorem”to be numbered.
After executing the \newtheorem command in the preamble of your document, you can usethe following command within the document.
\beginname[text]This is my interesting theorem\endname
This should be enough theory. The following examples will hopefully remove the final remainsof doubt and make it clear that the \newtheorem environment is way too complex to understand.
% definitions for the document% preamble\newtheoremlawLaw\newtheoremjury[law]Jury%in the document\beginlaw \labellaw:boxDon’t hide in the witness box\endlaw\beginjury[The Twelve]It could be you! So beware andsee law~\reflaw:box\endjury\beginlawNo, No, No\endlaw
Law 1 Don’t hide in the witness box
Jury 2 (The Twelve) It could be you! So bewareand see law 1
Law 3 No, No, No
The “Jury” theorem uses the same counter as the “Law” theorem. Therefore it gets a numberwhich is in sequence with the other “Laws”. The argument in square brackets is used to specifya title or something similar for the theorem.
\flushleft\newtheoremmurMurphy[section]\beginmurIf there are two or moreways to do something, andone of those ways can resultin a catastrophe, thensomeone will do it.\endmur
Murphy 3.8.1 If there are two or more ways to dosomething, and one of those ways can result in acatastrophe, then someone will do it.
The “Murphy” theorem gets a number which is linked to the number of the current section.You could also use another unit, for example chapter or subsection.
3.9 Bold symbols
It is quite difficult to get bold symbols in LATEX; this is probably intentional as amateur type-setters tend to overuse them. The font change command \mathbf gives bold letters, but theseare roman (upright) whereas mathematical symbols are normally italic. There is a \boldmathcommand, but this can only be used outside mathematics mode. It works for symbols too.
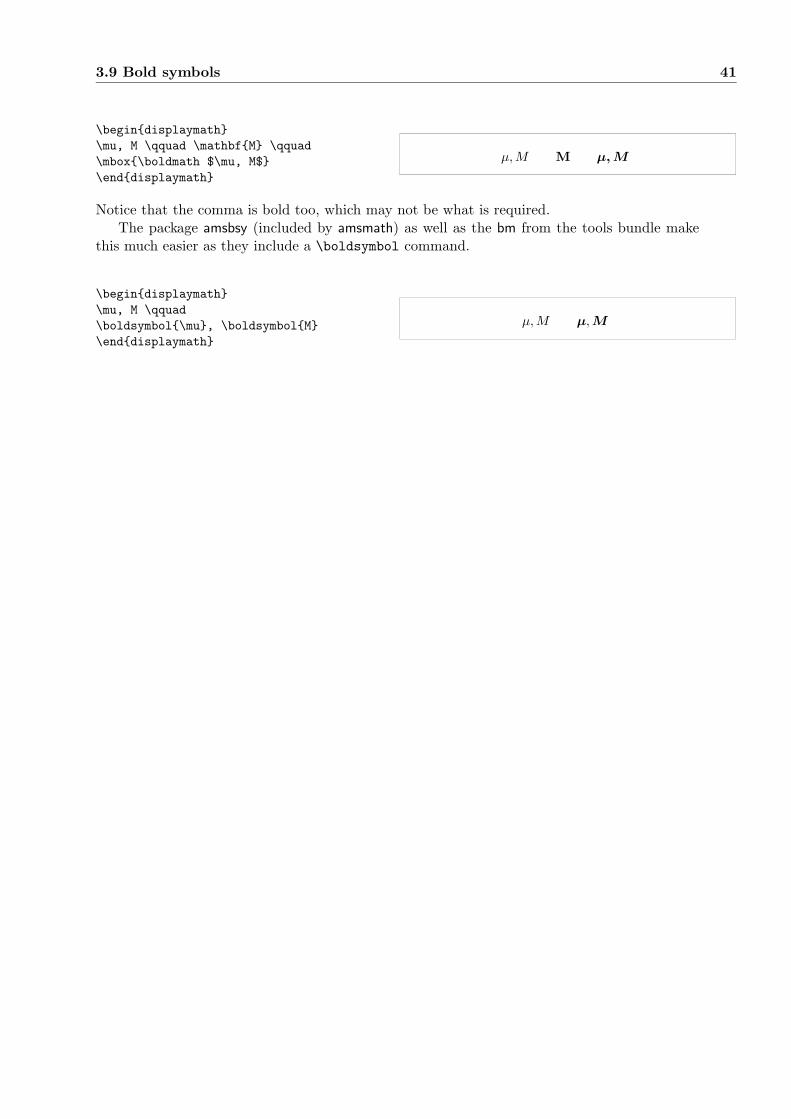
3.9 Bold symbols 41
\begindisplaymath\mu, M \qquad \mathbfM \qquad\mbox\boldmath $\mu, M$\enddisplaymath
µ,M M µ, M
Notice that the comma is bold too, which may not be what is required.The package amsbsy (included by amsmath) as well as the bm from the tools bundle make
this much easier as they include a \boldsymbol command.
\begindisplaymath\mu, M \qquad\boldsymbol\mu, \boldsymbolM\enddisplaymath
µ,M µ,M

42 Typesetting Mathematical Formulae
3.10 List of Mathematical Symbols
In the following tables, you find all the symbols normally accessible from math mode.To use the symbols listed in Tables 3.12–3.16,7 the package amssymb must be loaded in the
preamble of the document and the AMS math fonts must be installed, on the system. If theAMS package and fonts are not installed, on your system, have a look atCTAN:/tex-archive/macros/latex/required/amslatex
Table 3.1: Math Mode Accents.
a \hata a \checka a \tildea a \acutea
a \gravea a \dota a \ddota a \brevea
a \bara ~a \veca A \widehatA A \widetildeA
Table 3.2: Lowercase Greek Letters.
α \alpha θ \theta o o υ \upsilon
β \beta ϑ \vartheta π \pi φ \phi
γ \gamma ι \iota $ \varpi ϕ \varphi
δ \delta κ \kappa ρ \rho χ \chi
ε \epsilon λ \lambda % \varrho ψ \psi
ε \varepsilon µ \mu σ \sigma ω \omega
ζ \zeta ν \nu ς \varsigma
η \eta ξ \xi τ \tau
Table 3.3: Uppercase Greek Letters.
Γ \Gamma Λ \Lambda Σ \Sigma Ψ \Psi
∆ \Delta Ξ \Xi Υ \Upsilon Ω \Omega
Θ \Theta Π \Pi Φ \Phi
7These tables were derived from symbols.tex by David Carlisle and subsequently changed extensively assuggested by Josef Tkadlec.

3.10 List of Mathematical Symbols 43
Table 3.4: Binary Relations.
You can produce corresponding negations by adding a \not command as prefix to the followingsymbols.
< < > > = =
≤ \leq or \le ≥ \geq or \ge ≡ \equiv
\ll \gg.= \doteq
≺ \prec \succ ∼ \sim
\preceq \succeq ' \simeq
⊂ \subset ⊃ \supset ≈ \approx
⊆ \subseteq ⊇ \supseteq ∼= \cong
< \sqsubset a = \sqsupset a 1 \Join a
v \sqsubseteq w \sqsupseteq ./ \bowtie
∈ \in 3 \ni , \owns ∝ \propto
` \vdash a \dashv |= \models
| \mid ‖ \parallel ⊥ \perp
^ \smile _ \frown \asymp
: : /∈ \notin 6= \neq or \neaUse the latexsym package to access this symbol
Table 3.5: Binary Operators.
+ + − -
± \pm ∓ \mp / \triangleleft
· \cdot ÷ \div . \triangleright
× \times \ \setminus ? \star
∪ \cup ∩ \cap ∗ \ast
t \sqcup u \sqcap \circ
∨ \vee , \lor ∧ \wedge , \land • \bullet
⊕ \oplus \ominus \diamond
\odot \oslash ] \uplus
⊗ \otimes © \bigcirc q \amalg
4 \bigtriangleup 5 \bigtriangledown † \dagger
\lhd a \rhd a ‡ \ddagger
\unlhd a \unrhd a o \wr
Table 3.6: BIG Operators.∑\sum
⋃\bigcup
∨\bigvee
⊕\bigoplus∏
\prod⋂
\bigcap∧
\bigwedge⊗
\bigotimes∐\coprod
⊔\bigsqcup
⊙\bigodot∫
\int∮
\oint⊎
\biguplus

44 Typesetting Mathematical Formulae
Table 3.7: Arrows.
← \leftarrow or \gets ←− \longleftarrow ↑ \uparrow
→ \rightarrow or \to −→ \longrightarrow ↓ \downarrow
↔ \leftrightarrow ←→ \longleftrightarrow l \updownarrow
⇐ \Leftarrow ⇐= \Longleftarrow ⇑ \Uparrow
⇒ \Rightarrow =⇒ \Longrightarrow ⇓ \Downarrow
⇔ \Leftrightarrow ⇐⇒ \Longleftrightarrow m \Updownarrow
7→ \mapsto 7−→ \longmapsto \nearrow
← \hookleftarrow → \hookrightarrow \searrow
\leftharpoonup \rightharpoonup \swarrow
\leftharpoondown \rightharpoondown \nwarrow
\rightleftharpoons ⇐⇒ \iff (bigger spaces) ; \leadsto a
aUse the latexsym package to access this symbol
Table 3.8: Delimiters.
( ( ) ) ↑ \uparrow ⇑ \Uparrow
[ [ or \lbrack ] ] or \rbrack ↓ \downarrow ⇓ \Downarrow
\ or \lbrace \ or \rbrace l \updownarrow m \Updownarrow
〈 \langle 〉 \rangle | | or \vert ‖ \| or \Vertb \lfloor c \rfloor d \lceil e \rceil
/ / \ \backslash . (dual. empty)
Table 3.9: Large Delimiters. \lgroup \rgroup
\lmoustache \rmoustache \arrowvert
ww \Arrowvert \bracevert
Table 3.10: Miscellaneous Symbols.
. . . \dots · · · \cdots... \vdots
. . . \ddots
~ \hbar ı \imath \jmath ` \ell
< \Re = \Im ℵ \aleph ℘ \wp
∀ \forall ∃ \exists 0 \mho a ∂ \partial′ ’ ′ \prime ∅ \emptyset ∞ \infty
∇ \nabla 4 \triangle 2 \Box a 3 \Diamond a
⊥ \bot > \top ∠ \angle√
\surd
♦ \diamondsuit ♥ \heartsuit ♣ \clubsuit ♠ \spadesuit
¬ \neg or \lnot [ \flat \ \natural ] \sharpaUse the latexsym package to access this symbol

3.10 List of Mathematical Symbols 45
Table 3.11: Non-Mathematical Symbols.
These symbols can also be used in text mode.
† \dag § \S c© \copyright
‡ \ddag ¶ \P £ \pounds
Table 3.12: AMS Delimiters.
p \ulcorner q \urcorner x \llcorner y \lrcorner
| \lvert | \rvert ‖ \lVert ‖ \rVert
Table 3.13: AMS Greek and Hebrew.
z \digamma κ \varkappa i \beth k \daleth ג \gimel
Table 3.14: AMS Binary Relations.
l \lessdot m \gtrdot + \doteqdot or \Doteq6 \leqslant > \geqslant : \risingdotseq
0 \eqslantless 1 \eqslantgtr ; \fallingdotseq
5 \leqq = \geqq P \eqcirc
≪ \lll or \llless ≫ \ggg or \gggtr $ \circeq
. \lesssim & \gtrsim , \triangleq
/ \lessapprox ' \gtrapprox l \bumpeq
≶ \lessgtr ≷ \gtrless m \Bumpeq
Q \lesseqgtr R \gtreqless ∼ \thicksim
S \lesseqqgtr T \gtreqqless ≈ \thickapprox
4 \preccurlyeq < \succcurlyeq u \approxeq
2 \curlyeqprec 3 \curlyeqsucc v \backsim
- \precsim % \succsim w \backsimeq
w \precapprox v \succapprox \vDash
j \subseteqq k \supseteqq \Vdash
b \Subset c \Supset \Vvdash
< \sqsubset = \sqsupset \backepsilon
∴ \therefore ∵ \because ∝ \varpropto
p \shortmid q \shortparallel G \between
` \smallsmile a \smallfrown t \pitchfork
C \vartriangleleft B \vartriangleright J \blacktriangleleft
E \trianglelefteq D \trianglerighteq I \blacktriangleright

46 Typesetting Mathematical Formulae
Table 3.15: AMS Arrows.
L99 \dashleftarrow 99K \dashrightarrow ( \multimap
⇔ \leftleftarrows ⇒ \rightrightarrows \upuparrows
\leftrightarrows \rightleftarrows \downdownarrows
W \Lleftarrow V \Rrightarrow \upharpoonleft
\twoheadleftarrow \twoheadrightarrow \upharpoonright
\leftarrowtail \rightarrowtail \downharpoonleft
\leftrightharpoons \rightleftharpoons \downharpoonright
\Lsh \Rsh \rightsquigarrow
" \looparrowleft # \looparrowright ! \leftrightsquigarrow
x \curvearrowleft y \curvearrowright
\circlearrowleft \circlearrowright
Table 3.16: AMS Negated Binary Relations and Arrows.
≮ \nless ≯ \ngtr & \varsubsetneqq
\lneq \gneq ' \varsupsetneqq
\nleq \ngeq " \nsubseteqq
\nleqslant \ngeqslant # \nsupseteqq
\lneqq \gneqq - \nmid
\lvertneqq \gvertneqq ∦ \nparallel
\nleqq \ngeqq . \nshortmid
\lnsim \gnsim / \nshortparallel
\lnapprox \gnapprox \nsim
⊀ \nprec \nsucc \ncong
\npreceq \nsucceq 0 \nvdash
\precneqq \succneqq 2 \nvDash
\precnsim \succnsim 1 \nVdash
\precnapprox \succnapprox 3 \nVDash
( \subsetneq ) \supsetneq 6 \ntriangleleft
\varsubsetneq ! \varsupsetneq 7 \ntriangleright
* \nsubseteq + \nsupseteq 5 \ntrianglelefteq
$ \subsetneqq % \supsetneqq 4 \ntrianglerighteq
8 \nleftarrow 9 \nrightarrow = \nleftrightarrow
: \nLeftarrow ; \nRightarrow < \nLeftrightarrow
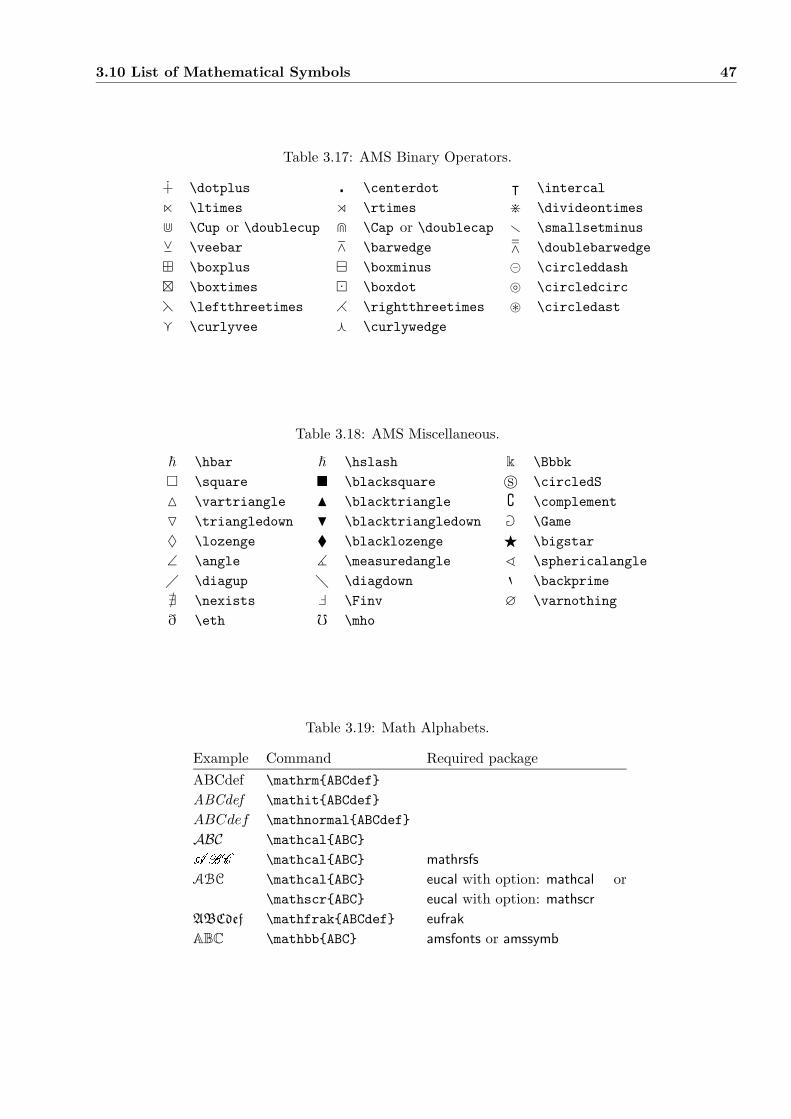
3.10 List of Mathematical Symbols 47
Table 3.17: AMS Binary Operators.
u \dotplus \centerdot ᵀ \intercal
n \ltimes o \rtimes > \divideontimes
d \Cup or \doublecup e \Cap or \doublecap r \smallsetminus
Y \veebar Z \barwedge [ \doublebarwedge
\boxplus \boxminus \circleddash
\boxtimes \boxdot \circledcirc
h \leftthreetimes i \rightthreetimes ~ \circledast
g \curlyvee f \curlywedge
Table 3.18: AMS Miscellaneous.
~ \hbar \hslash k \Bbbk
\square \blacksquare s \circledS
M \vartriangle N \blacktriangle \complement
O \triangledown H \blacktriangledown a \Game
♦ \lozenge \blacklozenge F \bigstar
∠ \angle ] \measuredangle ^ \sphericalangle
\diagup \diagdown 8 \backprime
@ \nexists ` \Finv ∅ \varnothing
ð \eth 0 \mho
Table 3.19: Math Alphabets.
Example Command Required packageABCdef \mathrmABCdef
ABCdef \mathitABCdef
ABCdef \mathnormalABCdef
ABC \mathcalABC
ABC \mathcalABC mathrsfs
ABC \mathcalABC eucal with option: mathcal or\mathscrABC eucal with option: mathscr
ABCdef \mathfrakABCdef eufrak
ABC \mathbbABC amsfonts or amssymb


Chapter 4
Specialities
When putting together a large document, LATEX will help you with some special features like indexgeneration, bibliography management, and other things. A much more complete description ofspecialities and enhancements possible with LATEX can be found in the LATEX Manual [1] and TheLATEX Companion [3].
4.1 Including EPS Graphics
LATEX provides the basic facilities to work with floating bodies such as images or graphics, withthe figure and the table environment.
There are also several possibilities to generate the actual graphics with basic LATEX or a LATEXextension package. Unfortunately, most users find them quite difficult to understand. Thereforethis will not be explained any further in this manual. Please refer to The LATEX Companion [3]and the LATEX Manual [1] for more information on that subject.
A much easier way to get graphics into a document, is to generate them with a specialisedsoftware package1 and then include the finished graphics into the document. Here again, LATEXpackages offer many ways to do that. In this introduction, only the use of Encapsulated Post-Script (EPS) graphics will be discussed, because it is quite easy to do and widely used. In orderto use pictures in the EPS format, you must have a PostScript printer2 available for output.
A good set of commands for inclusion of graphics is provided in the graphicx package byD. P. Carlisle. It is part of a whole family of packages called the “graphics” bundle3.
Assuming you are working on a system with a PostScript printer available for output andwith the graphicx package installed, you can use the following step by step guide to include apicture into your document:
1. Export the picture from your graphics program in EPS format.4
1Such as XFig, CorelDraw!, Freehand, Gnuplot, . . .2Another possibility to output PostScript is the GhostScript program available from
CTAN:/tex-archive/support/ghostscript. Windows and OS/2 users might want to look for GSview.3CTAN:/tex-archive/macros/latex/required/graphics4If your software can not export into EPS format, you can try to install a PostScript printer driver (some
Apple LaserWriter for example) and then print to a file with this driver. With some luck this file will be in EPSformat. Note that an EPS must not contain more than one page. Some printer drivers can be explicitly configuredto produce EPS format.

50 Specialities
2. Load the graphicx package in the preamble of the input file with
\usepackage[driver]graphicx
where driver is the name of your “dvi to postscript” converter program. The most widelyused program is called dvips. The name of the driver is required, because there is nostandard on how graphics are included in TEX. Knowing the name of the driver, thegraphicx package can choose the correct method to insert information about the graphicsinto the .dvi file, so that the printer understands it and can correctly include the .epsfile.
3. Use the command
\includegraphics[key=value, . . . ]file
to include file into your document. The optional parameter accepts a comma separatedlist of keys and associated values. The keys can be used to alter the width, height androtation of the included graphic. Table 4.1 lists the most important keys.
Table 4.1: Key Names for graphicx Package.
width scale graphic to the specified widthheight scale graphic to the specified heightangle rotate graphic counterclockwisescale scale graphic
The following example code will hopefully make things clear:
\beginfigure\begincenter\includegraphics[angle=90, width=0.5\textwidth]test\endcenter\endfigure
It includes the graphic stored in the file test.eps. The graphic is first rotated by an angle of 90degrees and then scaled to the final width of 0.5 times the width of a standard paragraph. Theaspect ratio is 1.0, because no special height is specified. The width and height parameters canalso be specified in absolute dimensions. Refer to Table 5.5 on page 65 for more information. Ifyou want to know more about this topic, make sure to read [8] and [11].

4.2 Bibliography 51
4.2 Bibliography
You can produce a bibliography with the thebibliography environment. Each entry startswith
\bibitemmarker
The marker is then used to cite the book, article or paper within the document.
\citemarker
The numbering of the entries is generated automatically. The parameter after the\beginthebibliography command sets the maximum width of these numbers. In the ex-ample below, 99 tells LATEX to expect that none of the bibliography item numbers will bewider than the number 99.
Partl~\citepa hasproposed that \ldots\beginthebibliography99\bibitempa H.~Partl:\emphGerman \TeX,TUGboat Volume~9, Issue~1 (1988)\endthebibliography
Partl [1] has proposed that . . .
Bibliography
[1] H. Partl: German TEX, TUGboat Volume 9, Is-sue 1 (1988)

52 Specialities
Table 4.2: Index Key Syntax Examples.
Example Index Entry Comment\indexhello hello, 1 Plain entry\indexhello!Peter Peter, 3 Subentry under ‘hello’\indexSam@\textslSam Sam, 2 Formatted entry\indexLin@\textbfLin Lin, 7 Same as above\indexJenny|textbf Jenny, 3 Formatted page number\indexJoe|textit Joe, 5 Same as above
For larger projects, you might want to check out the BibTEX program. BibTEX is includedwith most TEX distributions. It allows you to maintain a bibliographic database and thenextract the references relevant to things you cited in your paper. The visual presentation ofBibTEX generated bibliographies is based on a style sheets concept which allows you to createbibliographies following a wide range of established designs.
4.3 Indexing
A very useful feature of many books is their index. With LATEX and the support programmakeindex5, an index can be generated quite easily. In this introduction, only the basic indexgeneration commands will be explained. For a more in-depth view, please refer to The LATEXCompanion [3].
To enable the indexing feature of LATEX, the makeidx package must be loaded in the preamblewith:
\usepackagemakeidx
and the special indexing commands must be enabled by putting the
\makeindex
command into the input file preamble.The content of the index is specified with
\indexkey
commands, where key is the index entry. You enter the index commands at the points in thetext where you want the final index entries to point to. Table 4.2 explains the syntax of the keyargument with several examples.
When the input file is processed with LATEX, each \index command writes an appropriateindex entry together with the current page number to a special file. The file has the same nameas the LATEX input file, but a different extension (.idx). This .idx file can then be processed
5On systems not necessarily supporting filenames longer than 8 characters, the program may be called makeidx.
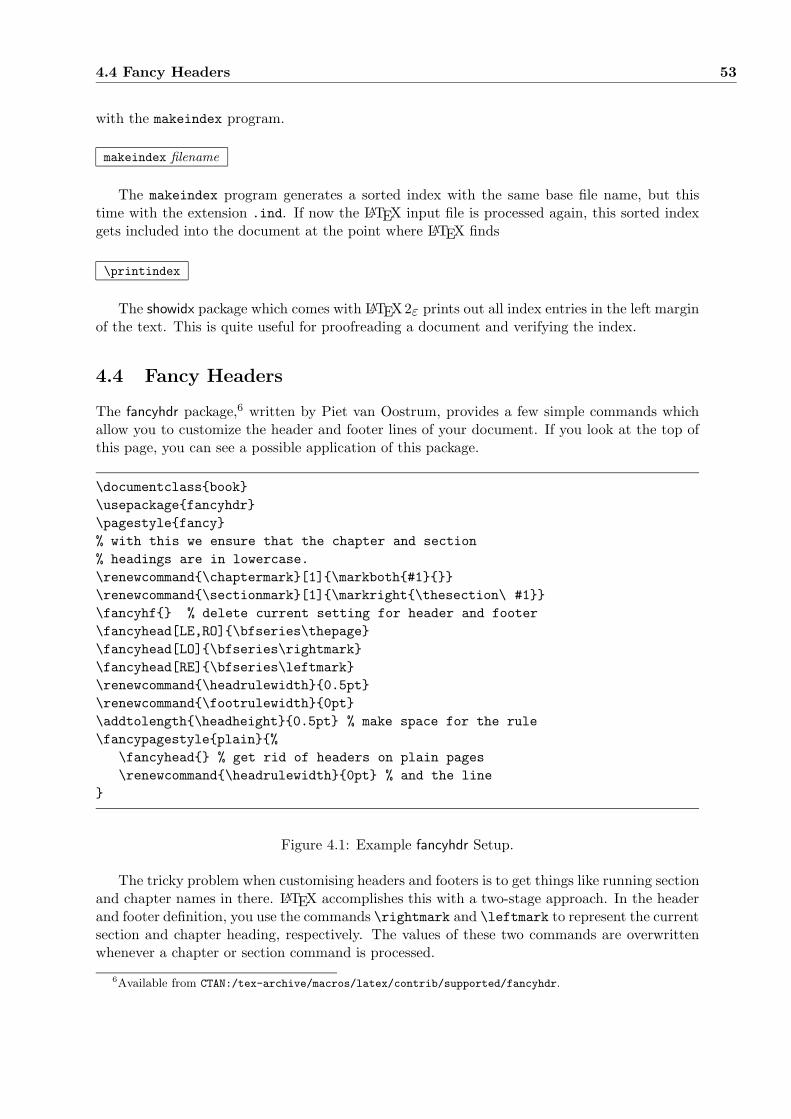
4.4 Fancy Headers 53
with the makeindex program.
makeindex filename
The makeindex program generates a sorted index with the same base file name, but thistime with the extension .ind. If now the LATEX input file is processed again, this sorted indexgets included into the document at the point where LATEX finds
\printindex
The showidx package which comes with LATEX 2ε prints out all index entries in the left marginof the text. This is quite useful for proofreading a document and verifying the index.
4.4 Fancy Headers
The fancyhdr package,6 written by Piet van Oostrum, provides a few simple commands whichallow you to customize the header and footer lines of your document. If you look at the top ofthis page, you can see a possible application of this package.
\documentclassbook\usepackagefancyhdr\pagestylefancy% with this we ensure that the chapter and section% headings are in lowercase.\renewcommand\chaptermark[1]\markboth#1\renewcommand\sectionmark[1]\markright\thesection\ #1\fancyhf % delete current setting for header and footer\fancyhead[LE,RO]\bfseries\thepage\fancyhead[LO]\bfseries\rightmark\fancyhead[RE]\bfseries\leftmark\renewcommand\headrulewidth0.5pt\renewcommand\footrulewidth0pt\addtolength\headheight0.5pt % make space for the rule\fancypagestyleplain%
\fancyhead % get rid of headers on plain pages\renewcommand\headrulewidth0pt % and the line
Figure 4.1: Example fancyhdr Setup.
The tricky problem when customising headers and footers is to get things like running sectionand chapter names in there. LATEX accomplishes this with a two-stage approach. In the headerand footer definition, you use the commands \rightmark and \leftmark to represent the currentsection and chapter heading, respectively. The values of these two commands are overwrittenwhenever a chapter or section command is processed.
6Available from CTAN:/tex-archive/macros/latex/contrib/supported/fancyhdr.
54 Specialities
For ultimate flexibility, the \chapter command and its friends do not redefine \rightmarkand \leftmark themselves, they call yet another command called \chaptermark, \sectionmarkor \subsectionmark which is responsible for redefining \rightmark and \leftmark.
So, if you wanted to change the look of the chapter name in the header line, you simply haveto “renew” the \chaptermark command.
Figure 4.1 shows a possible setup for the fancyhdr package which makes the headers lookabout the same as they look in this booklet. In any case I suggest you fetch the documentationfor the package at the address mentioned in the footnote.
4.5 The Verbatim Package
Earlier in this book, you got to know the verbatim environment. In this section, you are going tolearn about the verbatim package. The verbatim package is basically a re-implementation of theverbatim environment, which works around some of the limitations of the original verbatimenvironment. This by itself is not spectacular, but with the implementation of the verbatimpackage, there was also new functionality added, and this is the reason I am mentioning thepackage here. The verbatim package provides the
\verbatiminputfilename
command which allows you to include raw ASCII text into your document as if it was inside averbatim environment.
As the verbatim package is part of the ‘tools’ bundle, you should find it preinstalled on mostsystems. If you want to know more about this package, make sure to read [9]
4.6 Downloading and Installing LATEX Packages
Most LATEX installations come with a large set of pre-installed style packages, but there aremany more available on the net. The main place to look for style package on the Internet isCTAN (http://www.ctan.org/).
Packages, such as, geometry, hyphenat, and many others, are typically made up of two files:a file with the extension .ins and another with the extension .dtx. Often there will be areadme.txt with a brief description of the package. You should of course read this file first.
In any event, once you have copied the package files onto your machine, you still have toprocess them in a way that (a) your TEX distribution knows about the new style package and(b) you get the documentation. Here’s how you do the first part:
1. Run LATEX on the .ins file. This will extract a .sty file.
2. Move the .sty file to a place where your distribution can find it. Usually this is in your.../localtexmf /tex/latex subdirectory (Windows or OS/2 users should feel free tochange the direction of the slashes).
3. Refresh your distribution’s file-name database. The command depends on the LATEX-Distribution you use: teTeX, fpTeX – texhash; web2c – maktexlsr; MikTeX – initexmf-update-fndb or use the GUI.
Now you can extract the documentation from the .dtx file:
4.6 Downloading and Installing LATEX Packages 55
1. Run LATEX on the .dtx file. This will generate a .dvi file. Note that you may have to runLATEX several times before it gets the cross-references right.
2. Check to see if LATEX has produced a .idx file among the various files you now have. Ifyou do not see this file, then you may proceed to step 5.
3. In order to generate the index, type the following:makeindex -s gind.ist name
(where name stands for the main-file name without any extension).
4. Run LATEX on the .dtx file once again.
5. Last but not least, make a .ps or .pdf file to increase your reading pleasure.
Sometimes you will see that a .glo (glossary) file has been produced. Run the followingcommand between step 4 and 5:makeindex -s gglo.ist -o name.gls name.gloBe sure to run LATEX on the .dtx one last time before moving on to step 5.


Chapter 5
Customising LATEX
Documents produced by using the commands you have learned up to this point will look acceptableto a large audience. While they are not looking fancy, they obey all the established rules of goodtypesetting, which will make them easy to read and pleasant to look at.
However there are situations where LATEX does not provide a command or environment whichmatches your needs, or the output produced by some existing command may not meet your require-ments.
In this chapter, I will try to give some hints on how to teach LATEX new tricks and how to makeit produce output which looks different than what is provided by default.
5.1 New Commands, Environments and Packages
You may have noticed that all the commands I introduce in this book are typeset in a box, andthat they show up in the index at the end of the book. Instead of directly using the necessaryLATEX commands to achieve this, I have created a package in which I defined new commandsand environments for this purpose. Now I can simply write:
\beginlscommand\cidum\endlscommand
\dum
In this example, I am using both a new environment called lscommand which is responsiblefor drawing the box around the command and a new command named \ci which typesets thecommand name and also makes a corresponding entry in the index. You can check this out bylooking up the \dum command in the index at the back of this book, where you’ll find an entryfor \dum, pointing to every page where I mentioned the \dum command.
If I ever decide that I do not like the commands to be typeset in a box any more, I cansimply change the definition of the lscommand environment to create a new look. This is mucheasier than going through the whole document to hunt down all the places where I have usedsome generic LATEX commands to draw a box around some word.

58 Customising LATEX
5.1.1 New Commands
To add your own commands, use the
\newcommandname[num]definition
command. Basically, the command requires two arguments: the name of the command youwant to create, and the definition of the command. The num argument in square brackets isoptional and specifies the number of arguments the new command takes (up to 9 are possible).If missing it defaults to 0, i.e. no argument allowed.
The following two examples should help you to get the idea. The first example defines a newcommand called \tnss. This is short for “The Not So Short Introduction to LATEX 2ε”. Such acommand could come in handy if you had to write the title of this book over and over again.
\newcommand\tnssThe notso Short Introduction to\LaTeXe
This is ‘‘\tnss’’ \ldots‘‘\tnss’’
This is “The not so Short Introduction to LATEX 2ε”. . . “The not so Short Introduction to LATEX 2ε”
The next example illustrates how to define a new command which takes one argument. The#1 tag gets replaced by the argument you specify. If you wanted to use more than one argument,use #2 and so on.
\newcommand\txsit[1]This is the \emph#1 Short
Introduction to \LaTeXe% in the document body:\beginitemize\item \txsitnot so\item \txsitvery\enditemize
• This is the not so Short Introduction toLATEX 2ε
• This is the very Short Introduction to LATEX 2ε
LATEX will not allow you to create a new command which would overwrite an existing one.But there is a special command in case you explicitly want this: \renewcommand. It uses thesame syntax as the \newcommand command.
In certain cases you might also want to use the \providecommand command. It works like\newcommand, but if the command is already defined, LATEX 2ε will silently ignore it.
There are some points to note about whitespace following LATEX commands. See page 5 formore information.
5.1.2 New Environments
Similar to the \newcommand command, there is also a command to create your own environments.The \newenvironment command uses the following syntax:
\newenvironmentname[num]beforeafter
Like the \newcommand command, you can use \newenvironment with an optional argu-ment or without. The material specified in the before argument is processed before the text inthe environment gets processed. The material in the after argument gets processed when the\endname command is encountered.
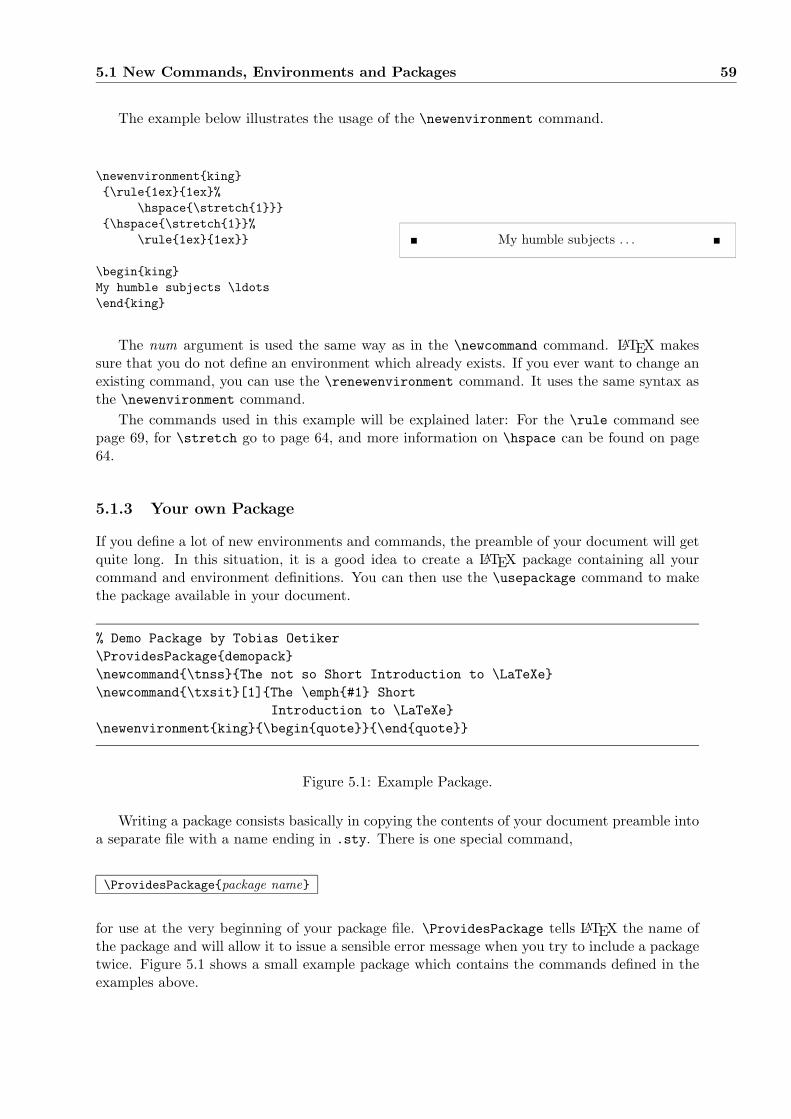
5.1 New Commands, Environments and Packages 59
The example below illustrates the usage of the \newenvironment command.
\newenvironmentking\rule1ex1ex%
\hspace\stretch1\hspace\stretch1%
\rule1ex1ex
\beginkingMy humble subjects \ldots\endking
My humble subjects . . .
The num argument is used the same way as in the \newcommand command. LATEX makessure that you do not define an environment which already exists. If you ever want to change anexisting command, you can use the \renewenvironment command. It uses the same syntax asthe \newenvironment command.
The commands used in this example will be explained later: For the \rule command seepage 69, for \stretch go to page 64, and more information on \hspace can be found on page64.
5.1.3 Your own Package
If you define a lot of new environments and commands, the preamble of your document will getquite long. In this situation, it is a good idea to create a LATEX package containing all yourcommand and environment definitions. You can then use the \usepackage command to makethe package available in your document.
% Demo Package by Tobias Oetiker\ProvidesPackagedemopack\newcommand\tnssThe not so Short Introduction to \LaTeXe\newcommand\txsit[1]The \emph#1 Short
Introduction to \LaTeXe\newenvironmentking\beginquote\endquote
Figure 5.1: Example Package.
Writing a package consists basically in copying the contents of your document preamble intoa separate file with a name ending in .sty. There is one special command,
\ProvidesPackagepackage name
for use at the very beginning of your package file. \ProvidesPackage tells LATEX the name ofthe package and will allow it to issue a sensible error message when you try to include a packagetwice. Figure 5.1 shows a small example package which contains the commands defined in theexamples above.

60 Customising LATEX
5.2 Fonts and Sizes
5.2.1 Font changing Commands
LATEX chooses the appropriate font and font size based on the logical structure of the document(sections, footnotes, . . . ). In some cases, one might like to change fonts and sizes by hand. Todo this, you can use the commands listed in Tables 5.1 and 5.2. The actual size of each font isa design issue and depends on the document class and its options. Table 5.3 shows the absolutepoint size for these commands as implemented in the standard document classes.
\small The small and\textbfbold Romans ruled\Large all of great big\textitItaly.
The small and bold Romans ruled all of greatbig Italy.
One important feature of LATEX 2ε is, that the font attributes are independent. This means,that you can issue size or even font changing commands and still keep the bold or slant attributeset earlier.
In math mode you can use the font changing commands to temporarily exit math mode andenter some normal text. If you want to switch to another font for math typesetting there existsanother special set of commands. Refer to Table 5.4.
In connection with the font size commands, curly braces play a significant role. They areused to build groups. Groups limit the scope of most LATEX commands.
Table 5.1: Fonts.
\textrm... roman \textsf... sans serif\texttt... typewriter
\textmd... medium \textbf... bold face
\textup... upright \textit... italic\textsl... slanted \textsc... small caps
\emph... emphasized \textnormal... document font
Table 5.2: Font Sizes.
\tiny tiny font
\scriptsize very small font
\footnotesize quite small font
\small small font\normalsize normal font\large large font
\Large larger font
\LARGE very large font
\huge huge
\Huge largest
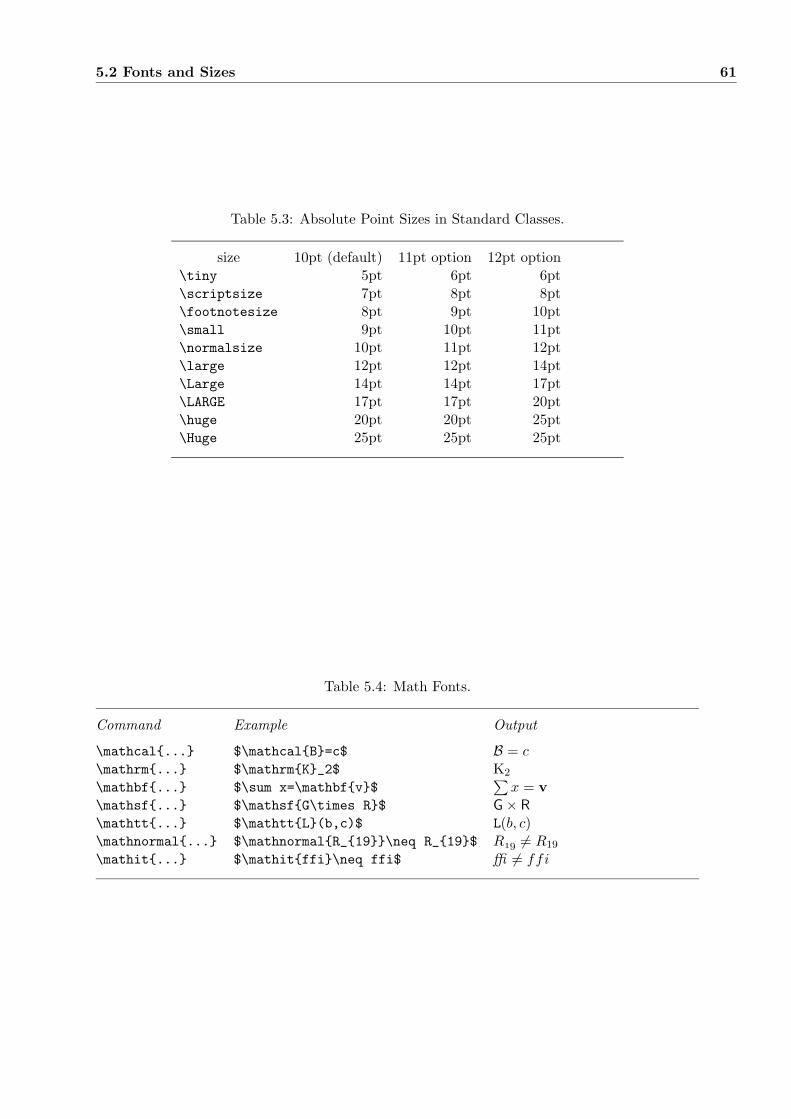
5.2 Fonts and Sizes 61
Table 5.3: Absolute Point Sizes in Standard Classes.
size 10pt (default) 11pt option 12pt option\tiny 5pt 6pt 6pt\scriptsize 7pt 8pt 8pt\footnotesize 8pt 9pt 10pt\small 9pt 10pt 11pt\normalsize 10pt 11pt 12pt\large 12pt 12pt 14pt\Large 14pt 14pt 17pt\LARGE 17pt 17pt 20pt\huge 20pt 20pt 25pt\Huge 25pt 25pt 25pt
Table 5.4: Math Fonts.
Command Example Output
\mathcal... $\mathcalB=c$ B = c\mathrm... $\mathrmK_2$ K2
\mathbf... $\sum x=\mathbfv$∑x = v
\mathsf... $\mathsfG\times R$ G× R\mathtt... $\mathttL(b,c)$ L(b, c)\mathnormal... $\mathnormalR_19\neq R_19$ R 6= R19
\mathit... $\mathitffi\neq ffi$ ffi 6= ffi
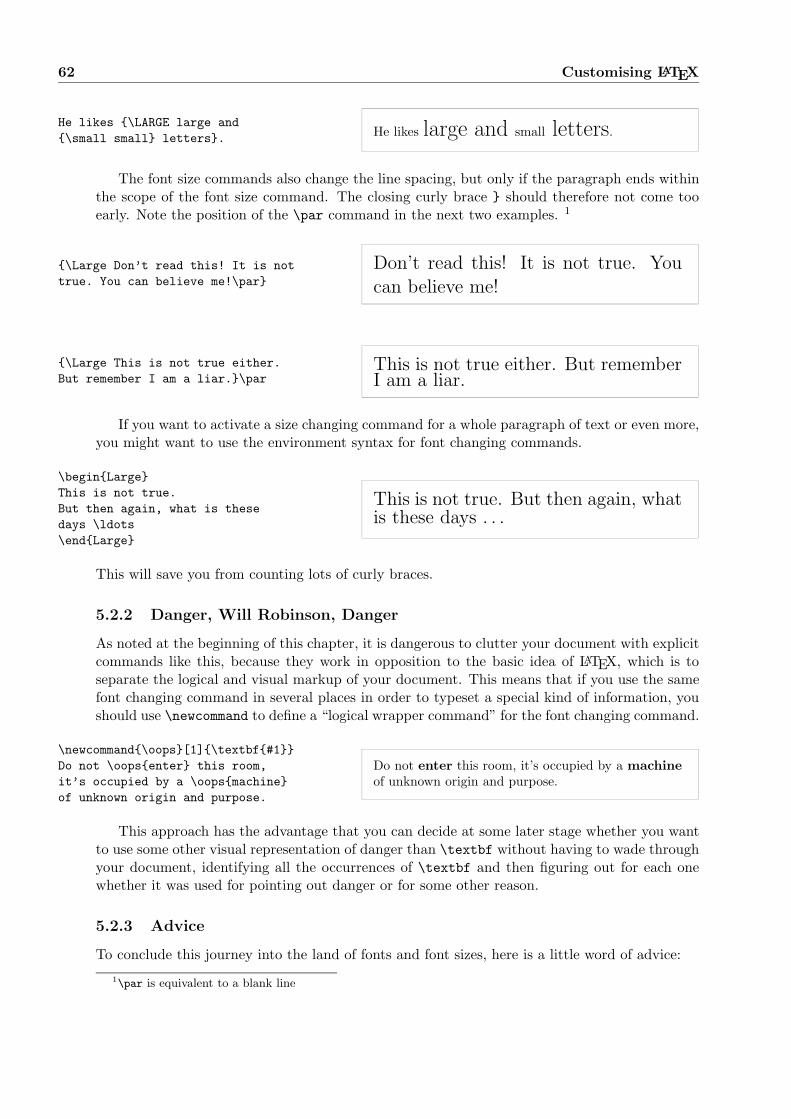
62 Customising LATEX
He likes \LARGE large and\small small letters. He likes large and small letters.
The font size commands also change the line spacing, but only if the paragraph ends withinthe scope of the font size command. The closing curly brace should therefore not come tooearly. Note the position of the \par command in the next two examples. 1
\Large Don’t read this! It is nottrue. You can believe me!\par
Don’t read this! It is not true. Youcan believe me!
\Large This is not true either.But remember I am a liar.\par
This is not true either. But rememberI am a liar.
If you want to activate a size changing command for a whole paragraph of text or even more,you might want to use the environment syntax for font changing commands.
\beginLargeThis is not true.But then again, what is thesedays \ldots\endLarge
This is not true. But then again, whatis these days . . .
This will save you from counting lots of curly braces.
5.2.2 Danger, Will Robinson, Danger
As noted at the beginning of this chapter, it is dangerous to clutter your document with explicitcommands like this, because they work in opposition to the basic idea of LATEX, which is toseparate the logical and visual markup of your document. This means that if you use the samefont changing command in several places in order to typeset a special kind of information, youshould use \newcommand to define a “logical wrapper command” for the font changing command.
\newcommand\oops[1]\textbf#1Do not \oopsenter this room,it’s occupied by a \oopsmachineof unknown origin and purpose.
Do not enter this room, it’s occupied by a machineof unknown origin and purpose.
This approach has the advantage that you can decide at some later stage whether you wantto use some other visual representation of danger than \textbf without having to wade throughyour document, identifying all the occurrences of \textbf and then figuring out for each onewhether it was used for pointing out danger or for some other reason.
5.2.3 Advice
To conclude this journey into the land of fonts and font sizes, here is a little word of advice:
1\par is equivalent to a blank line

5.3 Spacing 63
Remember! The MO RE fonts you use in a document, the more readable andbeautiful it becomes.
5.3 Spacing
5.3.1 Line Spacing
If you want to use larger inter-line spacing in a document, you can change its value by puttingthe
\linespreadfactor
command into the preamble of your document. Use \linespread1.3 for “one and a half” linespacing, and \linespread1.6 for “double” line spacing. Normally the lines are not spread,therefore the default line spread factor is 1.
5.3.2 Paragraph Formatting
In LATEX, there are two parameters influencing paragraph layout. By placing a definition like
\setlength\parindent0pt\setlength\parskip1ex plus 0.5ex minus 0.2ex
in the preamble of the input file, you can change the layout of paragraphs. These two commandsincrease the space between two paragraphs while setting the paragraph indent to zero.
The plus and minus parts of the length above tell TEX, that it can compress and expand theinter paragraph skip by the amount specified if this is necessary to properly fit the paragraphsonto the page.
In continental Europe, paragraphs are often separated by some space and not indented. Butbeware, this also has its effect on the table of contents. Its lines get spaced more loosely now aswell. To avoid this, you might want to move the two commands from the preamble into yourdocument to some place after the \tableofcontents or to not use them at all, because you’llfind that most professional books use indenting and not spacing to separate paragraphs.
If you want to indent a paragraph which is not indented, you can use
\indent
at the beginning of the paragraph.2 Obviously, this will only have an effect when \parindentis not set to zero.
To create a non-indented paragraph, you can use
\noindent
as the first command of the paragraph. This might come in handy when you start a documentwith body text and not with a sectioning command.
2To indent the first paragraph after each section head, use the indentfirst package in the ‘tools’ bundle.
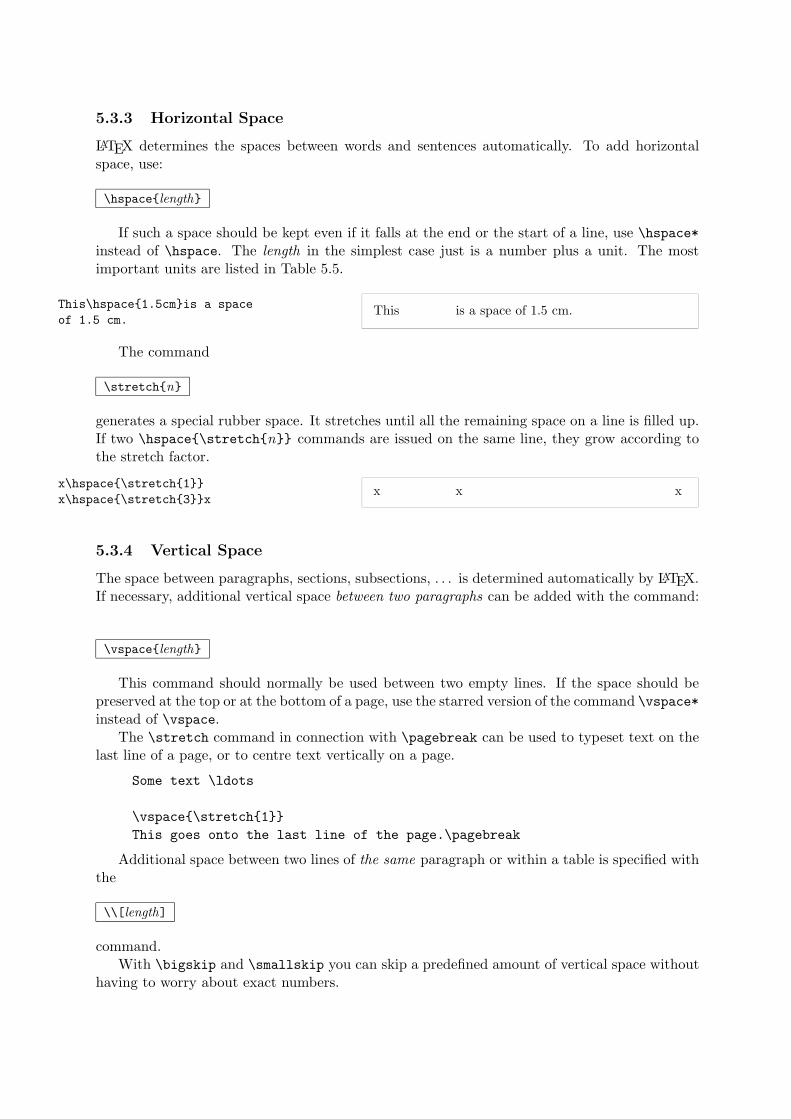
5.3.3 Horizontal Space
LATEX determines the spaces between words and sentences automatically. To add horizontalspace, use:
\hspacelength
If such a space should be kept even if it falls at the end or the start of a line, use \hspace*instead of \hspace. The length in the simplest case just is a number plus a unit. The mostimportant units are listed in Table 5.5.
This\hspace1.5cmis a spaceof 1.5 cm.
This is a space of 1.5 cm.
The command
\stretchn
generates a special rubber space. It stretches until all the remaining space on a line is filled up.If two \hspace\stretchn commands are issued on the same line, they grow according tothe stretch factor.
x\hspace\stretch1x\hspace\stretch3x
x x x
5.3.4 Vertical Space
The space between paragraphs, sections, subsections, . . . is determined automatically by LATEX.If necessary, additional vertical space between two paragraphs can be added with the command:
\vspacelength
This command should normally be used between two empty lines. If the space should bepreserved at the top or at the bottom of a page, use the starred version of the command \vspace*instead of \vspace.
The \stretch command in connection with \pagebreak can be used to typeset text on thelast line of a page, or to centre text vertically on a page.
Some text \ldots
\vspace\stretch1This goes onto the last line of the page.\pagebreak
Additional space between two lines of the same paragraph or within a table is specified withthe
\\[length]
command.With \bigskip and \smallskip you can skip a predefined amount of vertical space without
having to worry about exact numbers.
5.4 Page Layout 65
Table 5.5: TEX Units.
mm millimetre ≈ 1/25 inchcm centimetre = 10 mmin inch = 25.4 mmpt point ≈ 1/72 inch ≈ 1
3 mmem approx width of an ‘M’ in the current fontex approx height of an ‘x’ in the current font
5.4 Page Layout
LATEX 2ε allows you to specify the paper size in the \documentclass command. It then auto-matically picks the right text margins. But sometimes you may not be happy with the predefinedvalues. Naturally, you can change them. Figure 5.2 shows all the parameters which can bechanged. The figure was produced with the layout package from the tools bundle3.
WAIT! . . . before you launch into a “Let’s make that narrow page a bit wider” frenzy, takea few seconds to think. As with most things in LATEX, there is a good reason for the page layoutto be as it is.
Sure, compared to your off-the-shelf MS Word page, it looks awfully narrow. But take alook at your favourite book4 and count the number of characters on a standard text line. Youwill find that there are no more than about 66 characters on each line. Now do the same onyour LATEX page. You will find that there are also about 66 characters per line. Experienceshows that the reading gets difficult as soon as there are more characters on a single line. Thisis because it is difficult for the eyes to move from the end of one line to the start of the nextone. This is also the reason why newspapers are typeset in multiple columns.
So if you increase the width of your body text, keep in mind that you are making life difficultfor the readers of your paper. But enough of the cautioning, I promised to tell you how you doit . . .
LATEX provides two commands to change these parameters. They are usually used in thedocument preamble.
The first command assigns a fixed value to any of the parameters:
\setlengthparameterlength
The second command adds a length to any of the parameters.
\addtolengthparameterlength
This second command is actually more useful than the \setlength command, because youcan now work relative to the existing settings. To add one centimetre to the overall text width,I put the following commands into the document preamble:
\addtolength\hoffset-0.5cm\addtolength\textwidth1cm
3CTAN:/tex-archive/macros/latex/required/tools4I mean a real printed book produced by a reputable publisher.
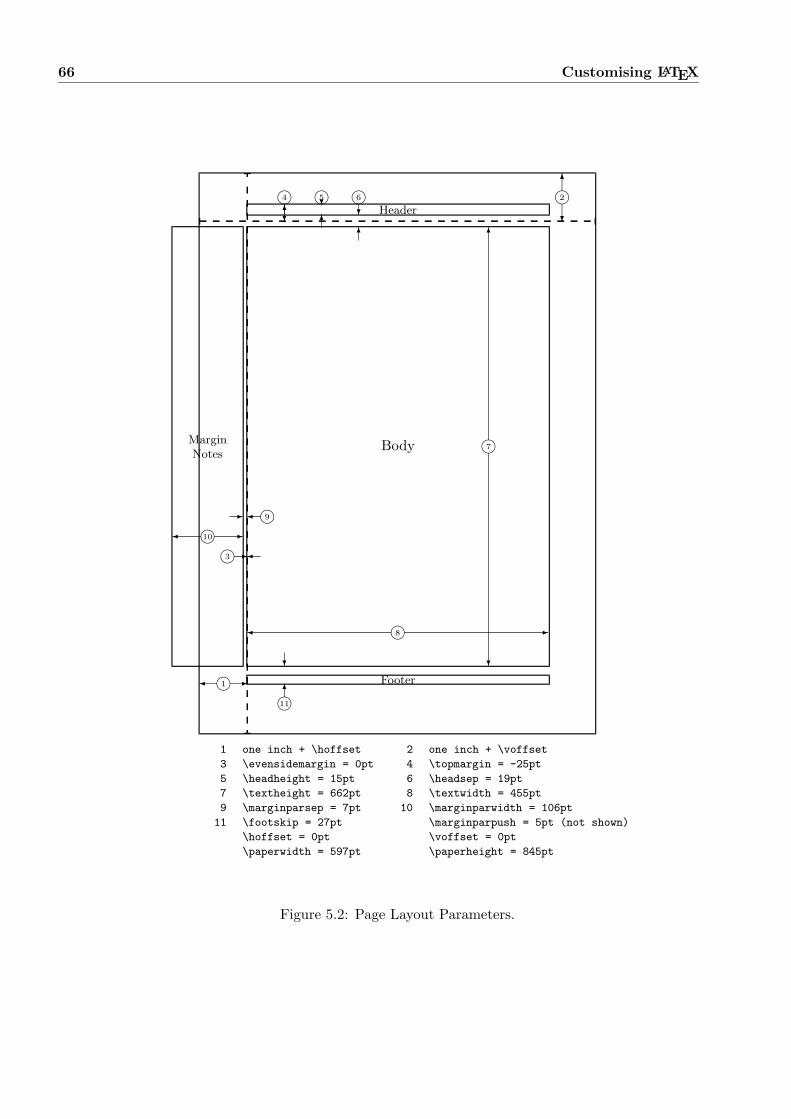
66 Customising LATEX
Header
Body
Footer
MarginNotes
i8 -
i7
?
6
i1 -
-i3i10 -
- i9
6
?
i11
i2?
6i46?
i5
6
? i6
6
?
1 one inch + \hoffset 2 one inch + \voffset
3 \evensidemargin = 0pt 4 \topmargin = -25pt
5 \headheight = 15pt 6 \headsep = 19pt
7 \textheight = 662pt 8 \textwidth = 455pt
9 \marginparsep = 7pt 10 \marginparwidth = 106pt
11 \footskip = 27pt \marginparpush = 5pt (not shown)
\hoffset = 0pt \voffset = 0pt
\paperwidth = 597pt \paperheight = 845pt
Figure 5.2: Page Layout Parameters.

5.5 More fun with lengths 67
In this context, you might want to look at the calc package, it allows you to use arithmeticoperations in the argument of setlength and other places where you can enter numeric valuesinto function arguments.
5.5 More fun with lengths
Whenever possible, I avoid using absolute lengths in LATEX documents. I rather try to basethings on the width or height of other page elements. For the width of a figure this could be\textwidth in order to make it fill the page.
The following 3 commands allow you to determine the width, height and depth of a textstring.
\settoheightlscommandtext\settodepthlscommandtext\settowidthlscommandtext
The example below shows a possible application of these commands.
\flushleft\newenvironmentvardesc[1]%\settowidth\parindent#1:\ \makebox[0pt][r]#1:\
\begindisplaymatha^2+b^2=c^2\enddisplaymath
\beginvardescWhere$a$,$b$ -- are adjunct to the rightangle of a right-angled triangle.
$c$ -- is the hypotenuse ofthe triangle and feels lonely.
$d$ -- finally does not show uphere at all. Isn’t that puzzling?\endvardesc
a2 + b2 = c2
Where: a, b – are adjunct to the right angle of aright-angled triangle.
c – is the hypotenuse of the triangle and feelslonely.
d – finally does not show up here at all. Isn’tthat puzzling?
5.6 Boxes
LATEX builds up its pages by pushing around boxes. At first, each letter is a little box, whichis then glued to other letters to form words. These are again glued to other words, but withspecial glue, which is elastic so that a series of words can be squeezed or stretched as to exactlyfill a line on the page.
I admit, this is a very simplistic version of what really happens, but the point is that TEXoperates on glue and boxes. Not only a letter can be a box. You can put virtually everythinginto a box including other boxes. Each box will then be handled by LATEX as if it was a singleletter.

68 Customising LATEX
In the past chapters you have already encountered some boxes, although I did not tell you.The tabular environment and the \includegraphics, for example, both produce a box. Thismeans that you can easily arrange two tables or images side by side. You just have to make surethat their combined width is not larger than the textwidth.
You can also pack a paragraph of your choice into a box with either the
\parbox[pos]widthtext
command or the
\beginminipage[pos]width text \endminipage
environment. The pos parameter can take one of the letters c, t or b to control the verticalalignment of the box, relative to the baseline of the surrounding text. width takes a lengthargument specifying the width of the box. The main difference between a minipage and aparbox is that you cannot use all commands and environments inside a parbox while almostanything is possible in a minipage.
While \parbox packs up a whole paragraph doing line breaking and everything, there is alsoa class of boxing commands which operates only on horizontally aligned material. We alreadyknow one of them. It’s called \mbox, it simply packs up a series of boxes into another one, andcan be used to prevent LATEX from breaking two words. As you can put boxes inside boxes,these horizontal box packers give you ultimate flexibility.
\makebox[width][pos]text
width defines the width of the resulting box as seen from the outside.5 Apart from the lengthexpressions you can also use \width, \height, \depth and \totalheight in the width para-meter. They are set from values obtained by measuring the typeset text. The pos parametertakes a one letter value: center, left flush, right flush or s which spreads the text inside the boxto fill it.
The command \framebox works exactly the same as \makebox, but it draws a box aroundthe text.
The following example shows you some things you could do with the \makebox and \frameboxcommands.
\makebox[\textwidth]%c e n t r a l\par
\makebox[\textwidth][s]%s p r e a d\par
\framebox[1.1\width]Guess I’mframed now! \par
\framebox[0.8\width][r]Bummer,I am too wide \par
\framebox[1cm][l]nevermind, so am I
Can you read this?
c e n t r a l
s p r e a d
Guess I’m framed now!
Bummer, I am too wide
never mind, so am ICan you read this?
5This means it can be smaller than the material inside the box. You can even set the width to 0pt so that thetext inside the box will be typeset without influencing the surrounding boxes.
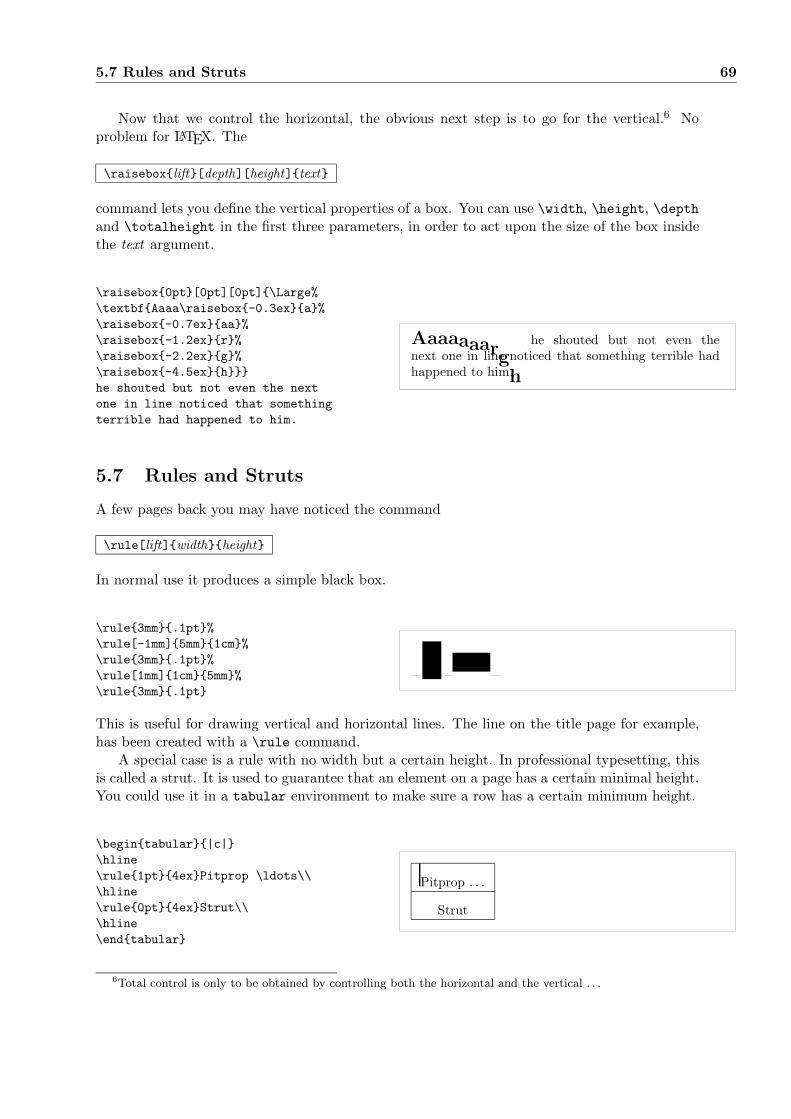
5.7 Rules and Struts 69
Now that we control the horizontal, the obvious next step is to go for the vertical.6 Noproblem for LATEX. The
\raiseboxlift[depth][height]text
command lets you define the vertical properties of a box. You can use \width, \height, \depthand \totalheight in the first three parameters, in order to act upon the size of the box insidethe text argument.
\raisebox0pt[0pt][0pt]\Large%\textbfAaaa\raisebox-0.3exa%\raisebox-0.7exaa%\raisebox-1.2exr%\raisebox-2.2exg%\raisebox-4.5exhhe shouted but not even the nextone in line noticed that somethingterrible had happened to him.
Aaaaaaargh
he shouted but not even thenext one in line noticed that something terrible hadhappened to him.
5.7 Rules and Struts
A few pages back you may have noticed the command
\rule[lift]widthheight
In normal use it produces a simple black box.
\rule3mm.1pt%\rule[-1mm]5mm1cm%\rule3mm.1pt%\rule[1mm]1cm5mm%\rule3mm.1pt
This is useful for drawing vertical and horizontal lines. The line on the title page for example,has been created with a \rule command.
A special case is a rule with no width but a certain height. In professional typesetting, thisis called a strut. It is used to guarantee that an element on a page has a certain minimal height.You could use it in a tabular environment to make sure a row has a certain minimum height.
\begintabular|c|\hline\rule1pt4exPitprop \ldots\\\hline\rule0pt4exStrut\\\hline\endtabular
Pitprop . . .
Strut
6Total control is only to be obtained by controlling both the horizontal and the vertical . . .


Bibliography
[1] Leslie Lamport. LATEX: A Document Preparation System. Addison-Wesley, Reading, Mas-sachusetts, second edition, 1994, ISBN 0-201-52983-1.
[2] Donald E. Knuth. The TEXbook, Volume A of Computers and Typesetting, Addison-Wesley,Reading, Massachusetts, second edition, 1984, ISBN 0-201-13448-9.
[3] Michel Goossens, Frank Mittelbach and Alexander Samarin. The LATEX Companion.Addison-Wesley, Reading, Massachusetts, 1994, ISBN 0-201-54199-8.
[4] Each LATEX installation should provide a so-called LATEX Local Guide which explains thethings which are special to the local system. It should be contained in a file called local.tex.Unfortunately, some lazy sysops do not provide such a document. In this case, go and askyour local LATEX guru for help.
[5] LATEX3 Project Team. LATEX2ε for authors. Comes with the LATEX 2ε distribution asusrguide.tex.
[6] LATEX3 Project Team. LATEX2ε for Class and Package writers. Comes with the LATEX 2εdistribution as clsguide.tex.
[7] LATEX3 Project Team. LATEX2ε Font selection. Comes with the LATEX 2ε distribution asfntguide.tex.
[8] D. P. Carlisle. Packages in the ‘graphics’ bundle. Comes with the ‘graphics’ bundle asgrfguide.tex, available from the same source your LATEX distribution came from.
[9] Rainer Schopf, Bernd Raichle, Chris Rowley. A New Implementation of LATEX’s verbatimEnvironments. Comes with the ‘tools’ bundle as verbatim.dtx, available from the samesource your LATEX distribution came from.
[10] Graham Williams. The TeX Catalogue is a very complete list-ing of many TEX and LATEX related packages. Available online fromCTAN:/tex-archive/help/Catalogue/catalogue.html
[11] Keith Reckdahl. Using EPS Graphics in LATEX2ε Documents which explains everythingand much more than you ever wanted to know about EPS files and their use in LATEXdocuments. Available online from CTAN:/tex-archive/info/epslatex.ps

Index
Symbols\!, 36", 16$, 31’, 34\(, 31\), 31\,, 32, 36-, 17−, 17\-, 16–, 17—, 17., space after, 20. . . , 17.aux, 11.cls, 11.dtx, 10.dvi, 11.idx, 11.ilg, 11.ind, 11.ins, 11.lof, 11.log, 11.lot, 11.sty, 10.tex, 10.toc, 11\:, 36\;, 36\@, 20\[, 31\\, 15, 24–26, 64\\*, 15\], 31^, 33_, 33|, 26~, 20
AA4 paper, 9A5 paper, 9accent, 18acute, 18\addtolength, 65advantages of LATEX, 3æ, 18amsbsy, 41amsfonts, 32, 47amsmath, 35, 36, 38, 41amssymb, 32, 42\and, 22\appendix, 21, 22\arccos, 34\arcsin, 34\arctan, 34\arg, 34array, 37arrow symbols, 34article class, 8\atop, 35\author, 22
BB5 paper, 9babel, 16, 19\backmatter, 22backslash, 5\backslash, 4base font size, 9\begin, 24\bibitem, 51bibliography, 51\Big, 36\big, 36\Bigg, 36\bigg, 36\bigskip, 64\binom, 35blackboard bold, 32

INDEX 73
bm, 41\bmod, 34bold face, 60bold symbols, 32, 40\boldmath, 40\boldsymbol, 41book class, 8braces, 35
Ccalc, 67\caption, 29, 30\cdot, 34\cdots, 36center, 24\chapter, 21\chaptermark, 54\choose, 35\ci, 57\cite, 51\cleardoublepage, 30\clearpage, 30\cline, 26coloured text, 8comma, 17commands, 5
\!, 36\(, 31\), 31\,, 32, 36\-, 16\:, 36\;, 36\@, 20\[, 31\\, 15, 24–26, 64\\*, 15\], 31\addtolength, 65\and, 22\appendix, 21, 22\arccos, 34\arcsin, 34\arctan, 34\arg, 34\atop, 35\author, 22\backmatter, 22\backslash, 4
\begin, 24\bibitem, 51\Big, 36\big, 36\Bigg, 36\bigg, 36\bigskip, 64\binom, 35\bmod, 34\boldmath, 40\boldsymbol, 41\caption, 29, 30\cdot, 34\cdots, 36\chapter, 21\chaptermark, 54\choose, 35\ci, 57\cite, 51\cleardoublepage, 30\clearpage, 30\cline, 26\cos, 34\cosh, 34\cot, 34\coth, 34\csc, 34\date, 22\ddots, 36\deg, 34\depth, 68, 69\det, 34\dim, 34\displaystyle, 39\documentclass, 8, 11, 15\dq, 20\dum, 57\emph, 23, 60\end, 24\exp, 34\fbox, 16\footnote, 23, 30\footnotesize, 60\frac, 34\framebox, 68\frenchspacing, 21\frontmatter, 22\fussy, 15
74 INDEX
\gcd, 34\genfrac, 35\height, 68, 69\hline, 26\hom, 34\hspace, 59, 64\Huge, 60\huge, 60\hyphenation, 15\idotsint, 36\iiiint, 36\iiint, 36\iint, 36\include, 12\includegraphics, 50, 68\includeonly, 12\indent, 63\index, 52\inf, 34\input, 12\int, 35\item, 24\ker, 34\label, 22, 32\LARGE, 60\Large, 60\large, 60\LaTeX, 16\LaTeXe, 16\ldots, 17, 36\left, 35\leftmark, 53, 54\lg, 34\lim, 34\liminf, 34\limsup, 34\linebreak, 15\linespread, 63\listoffigures, 29\listoftables, 29\ln, 34\log, 34\mainmatter, 22\makebox, 68\makeindex, 52\maketitle, 22\mathbb, 32\mathbf, 61
\mathcal, 61\mathit, 61\mathnormal, 61\mathrm, 39, 61\mathsf, 61\mathtt, 61\max, 34\mbox, 16, 18, 68\min, 34\multicolumn, 27\newcommand, 58\newenvironment, 58, 59\newline, 15\newpage, 15\newtheorem, 39, 40\noindent, 63\nolinebreak, 15\nonumber, 38\nopagebreak, 15\normalsize, 60\overbrace, 33\overleftarrow, 34\overline, 33\overrightarrow, 34\pagebreak, 15\pageref, 22\pagestyle, 11\par, 62\paragraph, 21\parbox, 68\parindent, 63\parskip, 63\part, 21\phantom, 30, 38\pmod, 34\Pr, 34\printindex, 53\prod, 35\protect, 30\providecommand, 58\ProvidesPackage, 59\qquad, 32, 36\quad, 32, 36\raisebox, 69\ref, 22, 32\renewcommand, 58\renewenvironment, 59\right, 35, 37
INDEX 75
\right., 35\rightmark, 53, 54\rule, 59, 69\scriptscriptstyle, 39\scriptsize, 60\scriptstyle, 39\sec, 34\section, 21, 30\sectionmark, 54\setlength, 63, 65\settodepth, 67\settoheight, 67\settowidth, 67\sin, 34\sinh, 34\sloppy, 15\small, 60\smallskip, 64\sqrt, 33\stackrel, 35\stretch, 59, 64\subparagraph, 21\subsection, 21\subsectionmark, 54\subsubsection, 21\sum, 35\sup, 34\tableofcontents, 21\tan, 34\tanh, 34\TeX, 16\textbf, 60\textit, 60\textmd, 60\textnormal, 60\textrm, 39, 60\textsc, 60\textsf, 60\textsl, 60\textstyle, 39\texttt, 60\textup, 60\thispagestyle, 11\tiny, 60\title, 22\tnss, 58\today, 16\totalheight, 68, 69
\underbrace, 33\underline, 23, 33\usepackage, 8, 10, 19, 20, 59\vdots, 36\vec, 34\verb, 26\verbatiminput, 54\vspace, 64\widehat, 34\widetilde, 34\width, 68, 69
comment, 5comments, 5\cos, 34\cosh, 34\cot, 34\coth, 34cross-references, 22\csc, 34curly braces, 5, 60
Ddash, 17\date, 22dcolumn, 27\ddots, 36decimal alignment, 27\deg, 34degree symbol, 17delimiters, 35\depth, 68, 69description, 24\det, 34Deutsch, 20diagonal dots, 36\dim, 34dimensions, 64displaymath, 31\displaystyle, 39doc, 10document font size, 9document title, 9\documentclass, 8, 11, 15dotless ı and , 18double line spacing, 63double sided, 9\dq, 20\dum, 57dvips, 7
76 INDEX
Eellipsis, 17em-dash, 17\emph, 23, 60empty, 11en-dash, 17Encapsulated PostScript, 49\end, 24enumerate, 24environments
array, 37center, 24comment, 5description, 24displaymath, 31enumerate, 24eqnarray, 37equation, 31figure, 28, 29flushleft, 24flushright, 24itemize, 24lscommand, 57math, 31minipage, 68parbox, 68quotation, 25quote, 25table, 28, 29tabular, 26, 68thebibliography, 51verbatim, 26, 54verse, 25
eqnarray, 37equation, 31equation system, 37eucal, 47eufrak, 47executive paper, 9\exp, 34exponent, 33exscale, 10, 36extension, 10
Ffancyhdr, 53, 54\fbox, 16figure, 28, 29file types, 10
floating bodies, 28flushleft, 24flushright, 24foiltex, 8font, 60font encoding, 10font size, 60fontenc, 10, 20footer, 11\footnote, 23, 30\footnotesize, 60formulae, 31\frac, 34fraction, 34fragile commands, 30\framebox, 68\frenchspacing, 21\frontmatter, 22\fussy, 15
G\gcd, 34\genfrac, 35geometry, 54German, 19, 20GhostScript, 49graphics, 8, 49graphicx, 49grave, 18Greek letters, 33grouping, 60
Hheader, 11textttheadings, 11\height, 68, 69\hline, 26\hom, 34horizontal
brace, 33dots, 36line, 33space, 64
\hspace, 59, 64\Huge, 60\huge, 60hyphen, 17hyphenat, 54\hyphenation, 15

INDEX 77
I\idotsint, 36ifthen, 10\iiiint, 36\iiint, 36\iint, 36\include, 12\includegraphics, 50, 68\includeonly, 12\indent, 63indentfirst, 63index, 52\index, 52\inf, 34\input, 12input file, 6inputenc, 10, 19\int, 35integral operator, 35international, 19italic, 60\item, 24itemize, 24
K\ker, 34Knuth, Donald E., 1
L\label, 22, 32Lamport, Leslie, 1language, 19\LARGE, 60\Large, 60\large, 60\LaTeX, 16LATEX 2ε, 1LATEX 2.09, 1LATEX3, 1LATEX3, 4\LaTeXe, 16latexsym, 10layout, 65\ldots, 17, 36\left, 35left aligned, 24\leftmark, 53, 54legal paper, 9letter paper, 9
\lg, 34ligature, 18\lim, 34\liminf, 34\limsup, 34line spacing, 63linebreak, 14\linebreak, 15\linespread, 63\listoffigures, 29\listoftables, 29\ln, 34\log, 34long equations, 38longtabular, 28lscommand, 57
M\mainmatter, 22\makebox, 68makeidx, 10, 52makeidx package, 52\makeindex, 52makeindex program, 52\maketitle, 22margins, 65math, 31math font size, 39math spacing, 36\mathbb, 32\mathbf, 61\mathcal, 61mathematical
accents, 34delimiter, 36functions, 34minus, 17
mathematics, 31\mathit, 61\mathnormal, 61\mathrm, 39, 61mathrsfs, 47\mathsf, 61\mathtt, 61\max, 34\mbox, 16, 18, 68\min, 34minipage, 68minus sign, 17

78 INDEX
Mittelbach, Frank, 1modulo function, 34\multicolumn, 27
N\newcommand, 58\newenvironment, 58, 59\newline, 15\newpage, 15\newtheorem, 39, 40\noindent, 63\nolinebreak, 15\nonumber, 38\nopagebreak, 15\normalsize, 60
Oœ, 18one column, 9option, 8optional parameters, 5\overbrace, 33overfull hbox, 15\overleftarrow, 34\overline, 33\overrightarrow, 34
Ppackage, 6, 8, 57packages
amsbsy, 41amsfonts, 32, 47amsmath, 35, 36, 38, 41amssymb, 32, 42babel, 16, 19bm, 41calc, 67dcolumn, 27doc, 10eucal, 47eufrak, 47exscale, 10, 36fancyhdr, 53, 54fontenc, 10, 20geometry, 54graphicx, 49hyphenat, 54ifthen, 10indentfirst, 63
inputenc, 10, 19latexsym, 10layout, 65longtabular, 28makeidx, 10, 52mathrsfs, 47showidx, 53supertabular, 28syntonly, 10, 12verbatim, 5, 54
page layout, 65page style, 11
empty, 11headings, 11plain, 11
\pagebreak, 15\pageref, 22\pagestyle, 11paper size, 9, 65\par, 62paragraph, 13\paragraph, 21parameter, 5\parbox, 68parbox, 68\parindent, 63\parskip, 63\part, 21period, 17\phantom, 30, 38placement specifier, 29plain, 11\pmod, 34PostScript, 49\Pr, 34preamble, 6prime, 34\printindex, 53\prod, 35product operator, 35\protect, 30\providecommand, 58\ProvidesPackage, 59
Q\qquad, 32, 36\quad, 32, 36quotation, 25quotation marks, 16

INDEX 79
quote, 25
R\raisebox, 69\ref, 22, 32\renewcommand, 58\renewenvironment, 59report class, 8reserved characters, 4\right, 35, 37right-aligned, 24\right., 35\rightmark, 53, 54roman, 60\rule, 59, 69
Ssans serif, 60Scandinavian letters, 18\scriptscriptstyle, 39\scriptsize, 60\scriptstyle, 39\sec, 34\section, 21, 30\sectionmark, 54\setlength, 63, 65\settodepth, 67\settoheight, 67\settowidth, 67showidx, 53\sin, 34single sided, 9\sinh, 34slanted, 60slides class, 8\sloppy, 15\small, 60small caps, 60\smallskip, 64space, 4special character, 18\sqrt, 33square brackets, 5square root, 33\stackrel, 35\stretch, 59, 64structure, 6strut, 69\subparagraph, 21
subscript, 33\subsection, 21\subsectionmark, 54\subsubsection, 21\sum, 35sum operator, 35\sup, 34supertabular, 28syntonly, 10, 12
Ttable, 26table, 28, 29table of contents, 21\tableofcontents, 21tabular, 26, 68\tan, 34\tanh, 34\TeX, 16\textbf, 60\textit, 60\textmd, 60\textnormal, 60\textrm, 39, 60\textsc, 60\textsf, 60\textsl, 60\textstyle, 39\texttt, 60\textup, 60thebibliography, 51\thispagestyle, 11three dots, 36tilde, 17, 34tilde ( ~), 20\tiny, 60title, 9, 22\title, 22\tnss, 58\today, 16\totalheight, 68, 69two column, 9
Uumlaut, 18\underbrace, 33underfull hbox, 15\underline, 23, 33units, 64, 65

80 INDEX
upright, 60URL, 17\usepackage, 8, 10, 19, 20, 59
V\vdots, 36\vec, 34vectors, 34\verb, 26verbatim, 5, 54verbatim, 26, 54\verbatiminput, 54verse, 25vertical dots, 36vertical space, 64\vspace, 64
Wwhitespace, 4
after commands, 5at the start of a line, 4
\widehat, 34\widetilde, 34\width, 68, 69www, 17WYSIWYG, 2, 3
Xxdvi, 7

INDEX 81