The Jarl of Trondheim has died. - s3.eu-central-1 ... · 10 Rune Cards 21 Draugr Cards 8 Merchant...
16
Transcript of The Jarl of Trondheim has died. - s3.eu-central-1 ... · 10 Rune Cards 21 Draugr Cards 8 Merchant...

1
The Jarl of Trondheim has died. Without strong leadership, his prosperous port has fallen into a state of catastrophe. Fearsome creatures have sensed this weakness in Midgard and are coming in droves, driving chaos and destruction before them. Trolls attack the town. Draugr terrorize nearby villages. Monsters strike at travelers and merchants alike. The people are suffering and they need a champion.
In Champions of Midgard, you are a Viking Leader who seeks to gain Glory for your clan and fill the boots of the old Jarl. Defeat the Trolls to keep the townsfolk on your side. Slay Draugr to earn gold to fund your journeys. Kill Monsters in their lairs to gain Glory and the Favor of the Gods. By defeating these epic creatures, you will prove yourself worthy to become the new Jarl and be heralded as a Champion of Midgard!
The goal of the game is to have the most Glory at the end of 8 rounds.
Glory is gained primarily through fighting enemies and lost by accruing Blame for failing to defend the town. See end game scoring for more details.

2
34 Viking Warrior Dice 12 Swordsmen (White Dice) 12 Spearmen (Red Dice) 10 Axemen (Black Dice)
1 Start Player Marker
5 Viking Leader Boards Each with a unique special ability
1 Round Marker
1 Game Board
20 Worker Meeples 5 of each player color
20 Wood Cubes
3 Damage Tokens
30 Food Cubes
28 Blame Tokens Blame tokens cause Glory loss at the end of the game
8 Player Color Markers
10 Rune Cards
21 Draugr Cards
8 Merchant Ship Cards
12 Destiny Cards
18 Journey Cards
16 Troll Cards
36 Monster Cards
54 Favor Tokens
60 Coins
4 Private Longships
1 Large Public Longship
1 Small Public Longship
8 Market Stall Tiles 4 Military / 4 Economic

3
B Place the game board in the middle of the table.
C Place the Round Marker in the space marked Round 1.
D Shuffle the Market Stall tiles and add them (face-up) to the empty spaces based on the number of players participating. Market Stall tiles function just like other board locations but provide different options for each game.
In a 2-player game, add 1 Military Tile and 1 Economic Tile. In a 3-player game, add 1 Military Tile and 2 Economic Tiles. In a 4-player game, add 2 Military Tiles and 2 Economic Tiles. Return the remaining Market Stall Tiles to the box.
E Place the Small and Large Public Longships on their corresponding spaces on the board and the Private Longships off to the side of the board near the Shipwright’s Hut. (Private Longships marked 3+ and 4+ should be returned to the box in games with fewer players than indicated.)
F Shuffle the Rune Cards, Destiny Cards, Merchant Ship Cards, Troll Cards, Draugr Cards, Journey Cards, and Monster Cards and place them on their corresponding spaces on the board.
G Place the Food, Wood, Viking Warriors (Swordsman Dice, Spearmen Dice, & Axemen Dice), Coins, Favor tokens, and Blame tokens near the game board where all players can access them.
H The player who has most recently earned glory in battle receives the First Player Marker.(Alternately, select a starting player at random.)
I Beginning with the player to the right of the start player and proceeding counter-clockwise each player chooses a Viking Leader Board. Viking Leader Boards indicate what Special Ability your Leader has, as well as your maximum capacity for Viking Warriors.
J Each player takes worker meeples in their preferred color along with starting resources of 1 Food, 1 Wood, 1 Coin, 1 Favor token, and 1 Swordsman Die.
K Place 1 disc in your player color on the scoreboard and the other on your player board to indicate your color. Then place 1 worker meeple in the general supply (to be earned by the use of the Worker Huts location) and keep the other 3 in your personal supply (4 in a two player game). Any additional worker meeples should be returned to the box.
L Finally, each player receives 1 random Destiny Card – then you are ready to begin.

4
B
C
D
E
F
F
L
F F
F
F
F
E
G
I J
K
K
K
H

5
H Add 1 Viking Warrior (of the appropriate color) to each of the Swordsmith, Hafter, and Blacksmith locations and add 1 Food to the Smokehouse location.
G Reveal the top Merchant Ship Card, placing it on top of any previously revealed Merchant Ship cards.
F Place 1 Monster Card face-up in each empty Monster Space on the board. Note: the rightmost Journey Space and Monster Space are only used in a 4-player game.
E Place 1 Rune Card face-up in each empty space next to the Runesmith Location.
D Place 1 Journey Card face-down in each empty Journey Space on the board.
C Place the top 2 cards of the Draugr Deck face-up in the Draugr Spaces on the board.
B Place the top card of the Troll Deck face-up in the Troll Space on the board.
Blue locations receive an
additional item each round
regardless of whether or not they are empty.
These goods can build up and make these loations more attractive in future
rounds.
The game is played over 8 rounds, during which you send workers from your clan into town to gather weapons and supplies necessary to fend off the hordes of enemies just beyond the walls. Workers may set the stage for your Viking Warriors to fight the Trolls who regularly attack the town, fight the Draugr who plague the neighboring villages, or hunt the Monsters who reside on distant shores poised to strike at the town and the ships which ensure the survival of the Nordic harbor. Most locations on the board can only be occupied by 1 worker per round; if you want something, you had better send your worker there first!
At the end of the 8th round, the player who has earned the most Glory wins the game.
Playing a RoundThe steps you follow to play a complete round of Champions of Midgard are laid out in iconography in the top right of the game board. This should serve as a handy reminder during your game and as a refresher for subsequent plays. These steps are described below.
Round Setup At the start of each round, board and card locations should be stocked as follows. Board locations which need attention in this phase are blue for easy identification.

6
Board locations have a wide variety of effects which are described in detail below. If it is your first time playing Champions of Midgard make sure you read these effects completely in order to better understand the iconography on the board.
Note that many locations allow you to recruit Viking Warrior Dice or collect resources. Food, Wood, Coins, Favor, and Blame are unlimited. Viking Warrior Dice are limited by their supply and each player may only hold 8 at a time as indicated by the longhouse printed on your Viking Leaderboard. If taking dice would ever cause you to exceed 8 Viking Warriors, take as many as you are legally able and return the rest to the supply. (Warriors will not come fight for you if you do not have room for them in your longhouse!)
Red locations are combat locations. These locations have no instant effect. When a player places a worker on a combat location, they are reserving this space to do combat with the associated monster in the next phase Assign Viking Warriors and Resolve Combat.
Blue locations are also resolved immediately. These locations are colored differently because they will recieve special attention during each round setup phase of the game.
Brown locations are resolved immediately. As soon as a player places a worker meeple on a brown location, they follow the instructions for that location.
Worker PlacementDuring the worker placement phase, players take turns placing their workers on board locations and executing their effects. Most locations only have space for a single worker.
Beginning with the player holding the First Player Marker and proceeding clockwise, players take turns assigning 1 worker at a time to an available space on the board and carrying out the associated action. This process is repeated until no player has workers remaining. Then, all players proceed to assigning Viking Warriors.
Board locations are color-coded in order to enable faster understanding of how to resolve each space:
Worker Placement - locations
Note: Public Longships are unique locations in that they are both brown and red. They have 1 effect which is resolved instantly and another effect which is resolved in the Assign Viking Warriors and Resolve Combat phase. This is described in detail in the location descriptions below.
BlacksmithCollect all the Viking Axemen Dice present at this location and place them in your personal supply.
Draugr Card Spaces 1 & 2
During the Assign Viking Warriors Phase, commit Viking Warriors to fight the Draugr.
HafterCollect all the Viking Spearmen Dice present at this location and place them in your personal supply.
Hunting Grounds
Send Viking Warriors hunting for Food during the Combat Resolution phase.
(This space may accommodate several workers – there is no restriction on the number of players who may place a worker here. Favor tokens may be used to reroll here.)
Placing a worker in the Hafter
7
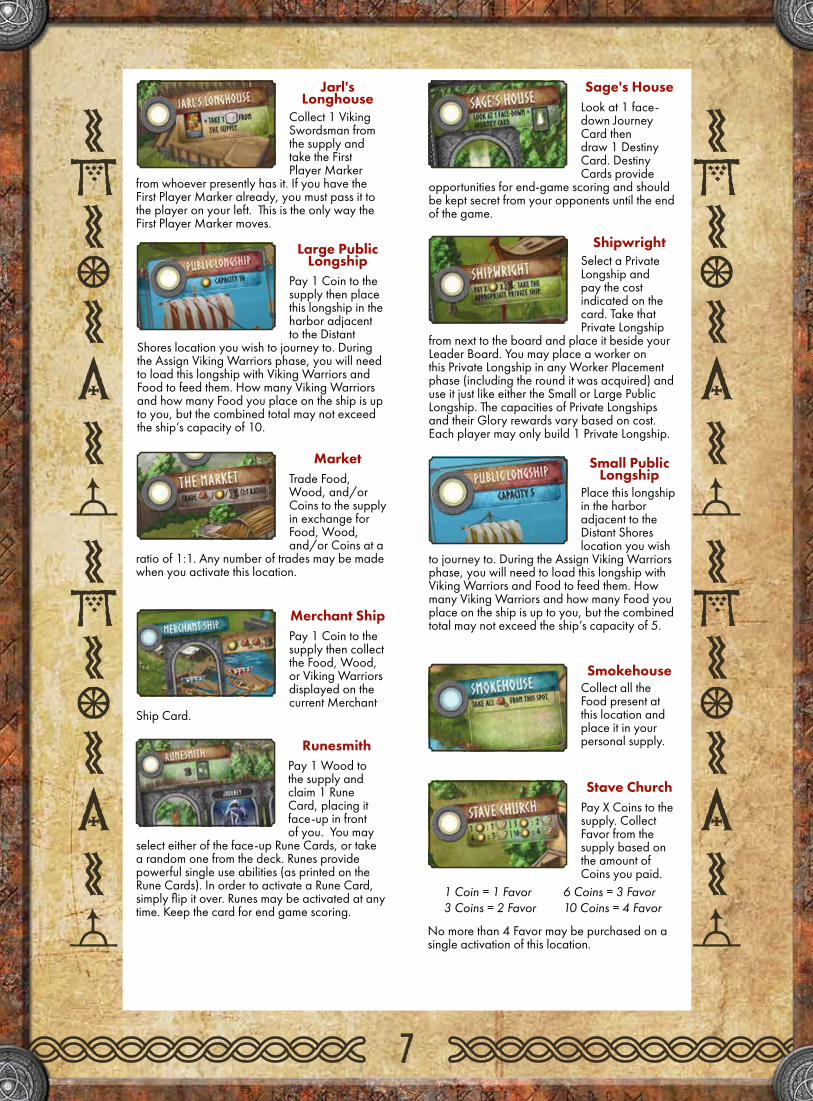
Stave ChurchPay X Coins to the supply. Collect Favor from the supply based on the amount of Coins you paid.
No more than 4 Favor may be purchased on a single activation of this location.
6 Coins = 3 Favor10 Coins = 4 Favor
1 Coin = 1 Favor3 Coins = 2 Favor
SmokehouseCollect all the Food present at this location and place it in your personal supply.
Small Public Longship
Place this longship in the harbor adjacent to the Distant Shores location you wish
to journey to. During the Assign Viking Warriors phase, you will need to load this longship with Viking Warriors and Food to feed them. How many Viking Warriors and how many Food you place on the ship is up to you, but the combined total may not exceed the ship’s capacity of 5.
ShipwrightSelect a Private Longship and pay the cost indicated on the card. Take that Private Longship
from next to the board and place it beside your Leader Board. You may place a worker on this Private Longship in any Worker Placement phase (including the round it was acquired) and use it just like either the Small or Large Public Longship. The capacities of Private Longships and their Glory rewards vary based on cost. Each player may only build 1 Private Longship.
Sage's HouseLook at 1 face-down Journey Card then draw 1 Destiny Card. Destiny Cards provide
opportunities for end-game scoring and should be kept secret from your opponents until the end of the game.
RunesmithPay 1 Wood to the supply and claim 1 Rune Card, placing it face-up in front of you. You may
select either of the face-up Rune Cards, or take a random one from the deck. Runes provide powerful single use abilities (as printed on the Rune Cards). In order to activate a Rune Card, simply flip it over. Runes may be activated at any time. Keep the card for end game scoring.
Merchant ShipPay 1 Coin to the supply then collect the Food, Wood, or Viking Warriors displayed on the current Merchant
Ship Card.
MarketTrade Food, Wood, and/or Coins to the supply in exchange for Food, Wood, and/or Coins at a
ratio of 1:1. Any number of trades may be made when you activate this location.
Large Public Longship
Pay 1 Coin to the supply then place this longship in the harbor adjacent to the Distant
Shores location you wish to journey to. During the Assign Viking Warriors phase, you will need to load this longship with Viking Warriors and Food to feed them. How many Viking Warriors and how many Food you place on the ship is up to you, but the combined total may not exceed the ship’s capacity of 10.
Jarl's Longhouse
Collect 1 Viking Swordsman from the supply and take the First Player Marker
from whoever presently has it. If you have the First Player Marker already, you must pass it to the player on your left. This is the only way the First Player Marker moves.

8
Economic Market Stall Tiles
Wealthy Stranger
Collect 2 Coins from the supply.
SkaldScore 2 Glory.
Generous Merchant
Collect 1 Food and 1 Wood from the supply.
AumingiReturn 1 Food to the supply and collect 1 Favor. You may repeat this action up to 3 times with a single activation.
If you find yourself unable or unwilling to activate a board location, you
must Beg. To Beg, lie a worker down on your player board then take 1 Food and 1 Blame from the supply.
Worker HutsPay 5, 4, 3, or 2 Coins and collect your extra worker. The worker may be used during this game round and
all future game rounds. The first player to use this space pays 5, the next player pays 4 and so on.Troll Card
SpaceDuring the Assign Viking Warriors phase, commit Viking Warriors to fight the Troll.
SwordsmithCollect all the Viking Swordsmen Dice present at this location and place them in your personal supply.
Worker Placement - Market STallsMarket Stall tiles function just like other board locations but provide different options for each game. Market Stalls may only be activated once per placement unless otherwise indicated.
Begging
Military Market Stall Tiles
VaryagsReturn 1 Coin to the supply and collect 1 Viking Swordsman Die and 1 Viking Spearman Die.
RaidersReturn 1 Wood to the supply and collect 2 Viking Spearmen Dice.
JomsvikingsReturn 2 Coins to the supply and collect 1 Viking Swordsman Die and 1 Viking Axeman Die.
Folk WarriorsReturn 1 Food to the supply and collect 2 Viking Swordsmen Dice.

9
Any Viking Warriors not assigned elsewhere are assumed to be hunting if you placed a worker on the Hunting Grounds.
Some enemies have combat restrictions:
If an enemy has a “no swords/axes/spears”symbol on it, players are not permitted to assign that type of Viking Warrior to fight that enemy. Viking Warriors of any type may travel on a longship to face an enemy but Warriors of the prohibited type are destroyed by the enemy before the first round of combat. They do not participate and are discarded to the general supply without ever being rolled.
It is permitted that a player assigns no dice to a combat location.
After all players have finished Assigning Viking Warriors proceed to Combat Resolution.
Viking Warriors sent to fight the Troll should be placed on the Troll Card.
Viking Warriors sent to fight Draugr should be placed on the corresponding Draugr Card.
Longships carry Viking Warriors to distant shores to combat Monsters. Players must assign both Food and Viking Warrior dice to the Longships in this phase. Both Food and Viking Warrior dice count toward a ship's capacity and players are not permitted to assign more objects to a ship than the capacity can support.
Assigning Viking WarriorsAny player who placed a worker on a Combat Location (Troll Card Location, Draugr Card Location, or Longship(s)) now assigns their Viking Warrior Dice. Dice are assigned simultaneously.
Occasionally a player may find it advantageous to wait to assign their Viking Warrior dice until after their opponents have done so. In such a case, any player may request that this phase is resolved in turn order begininng with the start player and proceeding clockwise.
10
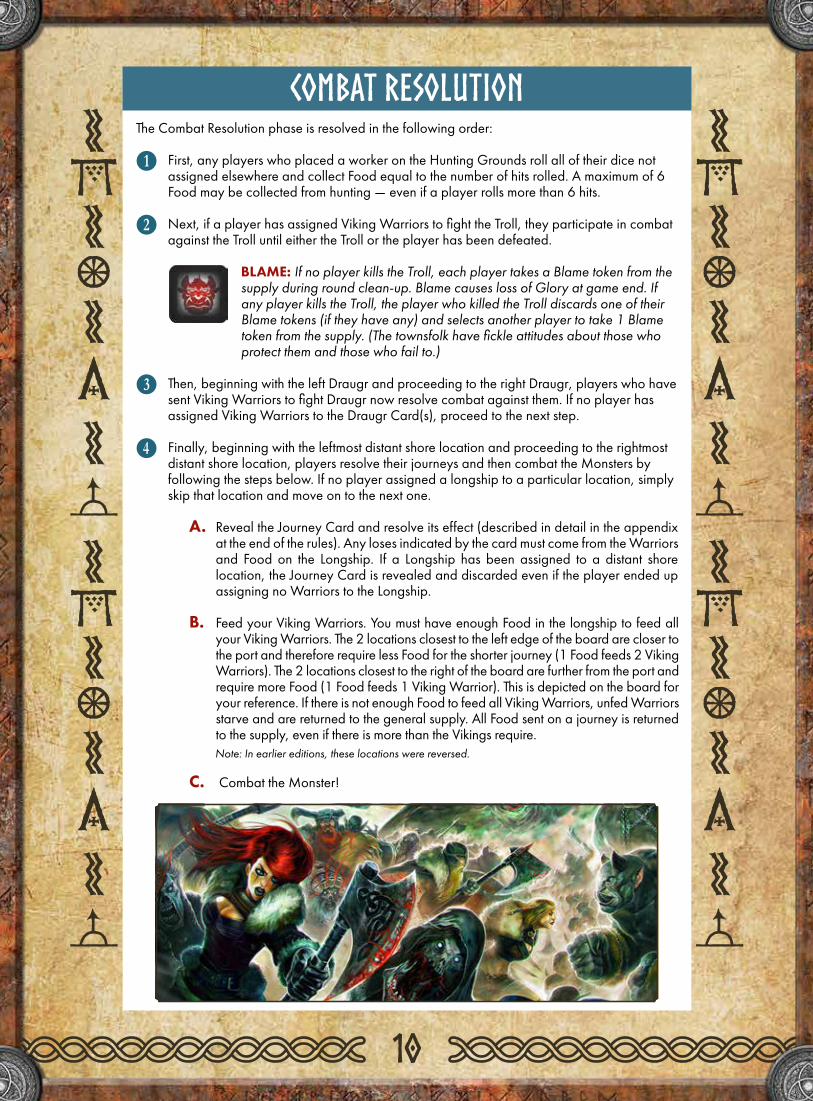
Combat ResolutionThe Combat Resolution phase is resolved in the following order:
B First, any players who placed a worker on the Hunting Grounds roll all of their dice not assigned elsewhere and collect Food equal to the number of hits rolled. A maximum of 6 Food may be collected from hunting — even if a player rolls more than 6 hits.
C Next, if a player has assigned Viking Warriors to fight the Troll, they participate in combat against the Troll until either the Troll or the player has been defeated.
BLAME: If no player kills the Troll, each player takes a Blame token from the supply during round clean-up. Blame causes loss of Glory at game end. If any player kills the Troll, the player who killed the Troll discards one of their Blame tokens (if they have any) and selects another player to take 1 Blame token from the supply. (The townsfolk have fickle attitudes about those who protect them and those who fail to.)
D Then, beginning with the left Draugr and proceeding to the right Draugr, players who have sent Viking Warriors to fight Draugr now resolve combat against them. If no player has assigned Viking Warriors to the Draugr Card(s), proceed to the next step.
E Finally, beginning with the leftmost distant shore location and proceeding to the rightmost distant shore location, players resolve their journeys and then combat the Monsters by following the steps below. If no player assigned a longship to a particular location, simply skip that location and move on to the next one.
A. Reveal the Journey Card and resolve its effect (described in detail in the appendix at the end of the rules). Any loses indicated by the card must come from the Warriors and Food on the Longship. If a Longship has been assigned to a distant shore location, the Journey Card is revealed and discarded even if the player ended up assigning no Warriors to the Longship.
B. Feed your Viking Warriors. You must have enough Food in the longship to feed all your Viking Warriors. The 2 locations closest to the left edge of the board are closer to the port and therefore require less Food for the shorter journey (1 Food feeds 2 Viking Warriors). The 2 locations closest to the right of the board are further from the port and require more Food (1 Food feeds 1 Viking Warrior). This is depicted on the board for your reference. If there is not enough Food to feed all Viking Warriors, unfed Warriors starve and are returned to the general supply. All Food sent on a journey is returned to the supply, even if there is more than the Vikings require.
C. Combat the Monster!
Note: In earlier editions, these locations were reversed.

11
Details of combatCombat against Trolls, Draugr, Krakens, and Monsters (referred to collectively as enemies) is resolved in the same way. Enemies have an Attack Value and a Defense Value. In order to defeat an enemy, a player must deal damage equal to or greater than the enemy’s Defense Value (referred to as lethal damage).
Combat takes place in a series of rounds which consist of the player rolling their Viking Warrior dice in an attempt to deal damage to the enemy and then taking damage from the enemy by discarding their Viking Warriors. A player’s damage and an enemy’s damage are dealt simultaneously so even if a player deals lethal damage to an enemy, they still take damage from that enemy. Combat ends at the end of a round in which at least one of the following is true:
The enemy has taken lethal damage.
All committed Viking Warrior dice have been defeated.
Follow these steps in order to resolve a round of combat:
B Attack with all of your Viking Warriors by rolling the dice you have committed to fight the enemy.
C (Optional) Discard 1 Favor token to reroll some or all of the dice just rolled. This step may be repeated if you have, and wish to spend, multiple Favor tokens.
D For each Weapon Result rolled, place a Damage token on the enemy’s card. (Some dice faces show 2 weapons and count as 2 hits.)
E Discard Viking Warrior dice equal to the Attack Value of the enemy. Reduce these losses by 1 for each Shield Result rolled.
Enemy Attack Value
Enemy Defense Value

12
Clean-UpB Take back your workers from all locations, returning Public Longships to their spaces on the
board and Private Longships to your play area.
C If the Troll was not defeated, discard the Troll Card and give each player 1 Blame token.
D Discard any undefeated Draugr Cards.
E Discard any revealed Journey Cards.
F Add 1 Coin to each undefeated Monster card. This is an additional reward for the player who eventually defeats this Monster. Monsters may gain several Coins before they are defeated.
G If this was Round 8, proceed to final scoring. Otherwise advance the Round Marker and return to Round Setup to play another round.
Discarded Troll and Draugr cards go to the monster discard pile in the bottom right corner of the board.
All enemies provide Glory when defeated. Additionally you collect Wood from defeating Trolls, Coins from defeating Draugr, and Favor from defeating Monsters.
F Check to see if the enemy has been dealt lethal damage:
A. If the enemy has received lethal damage: take the enemy card and collect the reward indicated. Return surviving Viking Warriors to your personal supply. In this example, the player would score 6 Glory on the score track and gain 4 Coins from the supply. Defeated Enemy Cards should be kept in a single face-down pile. The number, type, and color of the enemies defeated throughout the game need not be shared with your opponents.
B. If the enemy has not received lethal damage and you still have Viking Warriors left: begin a new round of combat.
C. If the enemy has not received lethal damage and you have no Viking Warriors left: your Viking Warriors have been defeated and you collect no reward. Remove any Damage tokens placed on the Monster.
Remember that the game steps are indicated on the top right of the board for quick reference and that a reference card is provided to reiterate the meaning of the various icons used in the game.
Quick References

13
Game End & Final ScoringAfter the 8th Round, the game is over and players begin final scoring.
We recommend players calculate their final scores one at a time, beginning with the player furthest behind on the Glory Track.
First, sort your defeated Monsters and Draugr by color and lay them in front of you. Then score the following:
Destiny Cards – If you alone have satisfied the condition of a Destiny Card in your possession, you have completely fulfilled your destiny and score the larger Glory bonus. If you are tied for the condition you have only partially realized your potential and score the smaller Glory bonus. You may only score Glory for your own Destiny Cards. Fufilling or tying for another player's Destiny Card provides you with no Glory, it merely prevents them from gaining it. You must have at least 1 of the required items to satisfy a Destiny Card.
Sets of Enemies (1 of each color) – The townspeople are impressed with your ability to brave varying combat conditions! Score 5 Glory for each complete set.
Trolls do not have a color and do not count for end game scoring.
Runes (used or unused) – Runes are symbols of power and provide varying amounts of Glory indicated on each card.
Private Longships – Longships are status symbols and provide Glory based on the type of longship you built.
Favor of the Gods – Each unspent Favor token is worth 2 Glory at the end of the game.
Coins – Score 1 Glory for every 3 Coins you have remaining.
The player with the most Glory is declared a Champion of Midgard. They earn the title of Jarl and are the winner of the game!
In the case of a tie, the tied player who defeated the most enemies (total cards collected, including Trolls) wins the game. If there is still a tie, the tied players rejoice in their shared victory.
Blame — Lose Glory based on your reputation with the townsfolk. Glory loss is calculated according to this chart:

14
I. Journey Card EffectsAll Quiet – No Effect.
Kraken – Resolve Combat against the Kraken. Defeating the Kraken grants the player 3 glory. Surviving Warriors advance to combat the Monster.
Lost – Lose 2 items of your choice (2 Food, 2 Viking Warriors, or 1 of each).
No Wind – Lose 1 Food.
Storm – Lose 1 Food or 1 Viking Warrior (your choice).
Whirlpool – Lose 1 Viking Warrior.
II.Viking LeadersAsmundr the Pious – Asmundr wishes to be Odin’s Chosen representative in Midgard and has turned acquisition of Favor into a Glorious pursuit! His ability essentially allows Asmundr to use his Favor Tokens for free. He will always gain the 2 Glory from them whether he spends them on rerolling or not. He may still wish to use them sparingly in order to either achieve a destiny or make it more difficult for other players to do so. Asmunder still discards Favor tokens when he uses them to reroll.
Dagrun the Destined – Dagrun has the gift of a sage but never focused on developing it due to all her combat training – she has not however suppressed her abilities completely. Whenever Dagrun places a worker on the Sage’s House location she draws an extra Destiny Card allowing her to more freely choose her destinies. The card she does not select is returned to the bottom of the Destiny Card deck. When used in conjunction with the True Vision Rune Card, Dagrun draws 4 Destiny Cards but still selects only 1 to keep.
Gylfir the Seaworthy – Half merchant and half warrior, Gylfir has connections down at the docks. When going to the Merchant Ship location he finds many warriors willing to fight by his side and many merchants willing to part with some spare supplies to aid his cause. Whenever Gylfir places a worker at the Merchant Ship location he takes whatever is indicated on the card without paying the Coin required of the other leaders.
Svanhildr the Swordmaiden – Svanhildr has specialized in a weapon generally scoffed at by other Viking Leaders. Regarded as weaker than the axe and less versatile than the spear, a sword in Svanhildr’s hands can be just as deadly as either. A result of 1-hit on a Swordsman die does 2 damage for Svanhildr and a result of 2-hits does 3 damage. This does gain her extra Food when hunting but she may still not exceed the maximum of 6 in the Hunting Grounds space – there are only so many deer in the forest after all.
Ullr the Berserker – Ullr was trained in the ways of the berserker and in turn teaches his Warriors how to fight without fear, for the Glory of their clan! During any round of combat in which 1 or more Warrior Dice shows a 2-hit result, Ullr gains 1 Glory to be scored immediately on the track (regardless of the final outcome of the battle).
APPENDIXIII. Rune CardsAll Rune Cards are single use and contain the “flip to activate” symbol. They may be activated at any time.
Gifts – Collect 4 resources from the general supply. Choose any combination of Wood, Food, and/or Coins.
Glory – Use when defeating an enemy (Troll, Draugr, Kraken, or Monster). Gain 50% more Glory for defeating that enemy (rounded down). (e.g. Use when defeating a Monster worth 13 Glory; Gain 6 additional Glory.)
Healing – Negate the loses suffered in a single round of combat. If the combat continues, future losses are suffered in full.
Journey – After revealing a Journey Card, discard it without suffering the consequences. Reveal the next Journey Card in the deck and apply those results instead (even if they are worse).
Knowledge – View all face-down Journey Cards on the board. Do not look at the Journey Cards in the deck.
Potential – Use after rolling for a round of hunting or combat. Any dice which show a blank result are re-rolled and their new result is used instead.
Reaction – Use after rolling for a round of hunting or combat. Count shield results as single hits. They still count as shields as well. (Swordsman dice used this way count as 2-hit results for Svanhildr)
Success – Reveal a Destiny Card in your possession and score it immediately. Keep the card and score it again at game end.
True Vision – Use when activating the Sage’s House. Draw two additional Destiny Cards. Keep just 1 and return the others to the bottom of the deck.
Wealth – Double the amount of Coins currently in your possession. You may not gain more than 5 Coins in this way.

CreditsGame Design: Ole Steiness
Development: Joshua Lobkowicz & Shane Myerscough
Art: Victor P. Corbella
Graphic Design: Andre Garcia
Rulebook Layout: Mathew Hobson & Nick Banjai
Editing: Joshua Lobkowicz, Owen Reissmann, Becky Hislop, Dawn Lobkowicz
Playtesters: Rafael Sanchez, Kyle Perryman, Brad Brooks, Josh Black, Charles Bowman, Robert Jones, Owen Reissmann, Joseph Reissmann, Dawn Lobkowicz, Julian Seppala, Amethyst Gonka, Bailey Coleman, Ve Hermann, Jeff Fournier & C.O.R.P.S.E., J.J.
Novacek & The N.C. Triad Gamers
Variants
Variant #1 – Hall of Records
The townsfolk keep a record of each leader’s successes in battle.
Play with all defeated enemy cards revealed in front of the player who defeated them. This variant allows for more strategic decisions to be made regarding Destiny Cards.
Variant #2 – Mistrustful Villagers
The townsfolk are skeptical of any who seek to replace the old Jarl.
Each player begins the game with a Blame token. This variant tends to lead to more dynamic end game scoring as there are generally more Blame tokens in play.
The following variants are provided to allow you to customize your Champions of Midgard experience. Using these variants is strictly optional and is not recommended for your first few games. We advise you to play with the basic rules before trying one or both of the proposed alterations. Enjoy the game!


![[Jarl Records] Copyright of Songs](https://static.fdocuments.us/doc/165x107/5571fa2f4979599169918340/jarl-records-copyright-of-songs.jpg)