Tenable Core User Guide ·...
79
Tenable Core for Nessus User Guide Last Updated: August 24, 2018
Transcript of Tenable Core User Guide ·...

Tenable Core for Nessus User Guide
Last Updated: August 24, 2018

Table of Contents
Welcome to Tenable Core for Nessus 5
Nessus Virtual Image Installation 10
Installation 11
Installing an ISO for Nessus 12
Install OVA 13
Increase Disk Space 14
Create a New Account 16
Create User 19
Edit User 20
Change Password 21
Nessus Configuration 22
Manual Setup 25
Configure Static IP Addresses 26
System Layout 28
Dashboard 29
Add Server 30
Edit Server 32
Delete Server 34
System 35
Edit Machine Host Name 36
Edit Time and Time Zone 37
Restart 38
Copyright 2017 - 2018 Tenable, Inc. All rights reserved. Tenable Network Security, Nessus, SecurityCenter, SecurityCenter Continuous View and Log Correlation Engine are registered trademarks of Tenable, Inc. Tenable,
Tenable.io, Assure, and The Cyber Exposure Company are trademarks of Tenable, Inc. All other products or services are trademarks of their respective owners.

Shutdown 39
Change Performance Profile 40
System Log 41
Filters 42
Networking 43
Add Bond 44
Add Team 46
Add Bridge 47
Add VLAN 48
Storage 49
Rename File System 50
Delete File System 51
Accounts 52
Services 53
Targets 54
System Services 55
Sockets 56
Timers 57
Create Timer 58
Paths 59
Diagnostic Reports 60
Generate Report 61
Nessus 62
Terminal 67
Copyright 2017 - 2018 Tenable, Inc. All rights reserved. Tenable Network Security, Nessus, SecurityCenter, SecurityCenter Continuous View and Log Correlation Engine are registered trademarks of Tenable, Inc. Tenable,
Tenable.io, Assure, and The Cyber Exposure Company are trademarks of Tenable, Inc. All other products or services are trademarks of their respective owners.

Update Management 68
Timer Configuration Line 70
Offline Updates 71
Software Updates 72
SSL/TLS Security Certificates 74
Server Certificate 75
Trusted Certificate Authority Certificates 78
Copyright 2017 - 2018 Tenable, Inc. All rights reserved. Tenable Network Security, Nessus, SecurityCenter, SecurityCenter Continuous View and Log Correlation Engine are registered trademarks of Tenable, Inc. Tenable,
Tenable.io, Assure, and The Cyber Exposure Company are trademarks of Tenable, Inc. All other products or services are trademarks of their respective owners.

Welcome to Tenable Core for Nessus
The Tenable Virtual Appliance is now known as Tenable Core. The reason for this change is the imple-mentation of a new base operating system. This new model streamlines and simplifies deployment bycreating a build for each Tenable on-premises application. Tenable Core is a deployment architecturethat shortens time to first scan using a secure and stable platform.
Featuresl Built upon CentOS 7 and hardened by targeting the CIS standards for RedHat 7 with SELinuxEnabled.
l Provides automatic install and updates via Tenable Public Repositories.
l Consists of Tenable Core and a Tenable Application. These are independent of one other. The fol-lowing builds are currently available.
l Consists of Tenable Core and a Tenable Application. These are independent of one other.The following builds are currently available.
l Tenable Core + Web Application Scanning
l Tenable Core + Nessus
l Tenable Core + Nessus Network Monitor
l Root access is now enabled to Tenable Core builds
l Root access is now enabled to Tenable Core builds
See the following list for additional information about CIS standards adopted:
l SELinux: SELinux is enabled by default on this image
l CIS Benchmarks: Tenable has implemented the following parts of the CIS Level 1 Benchmark onthe Tenable Core:
CIS Level 1 - 1.xl CIS 1.1.1.* (Disable mounting of miscellaneous filesystems)
l CIS 1.1.21 (Ensure sticky bit is set on all world-writable directories)
Copyright 2017 - 2018 Tenable, Inc. All rights reserved. Tenable Network Security, Nessus, SecurityCenter, SecurityCenter Continuous View and Log Correlation Engine are registered trademarks of Tenable, Inc. Tenable,
Tenable.io, Assure, and The Cyber Exposure Company are trademarks of Tenable, Inc. All other products or services are trademarks of their respective owners.

l CIS 1.4.* (Bootloader adjustments)
l CIS 1.4.1 Ensure permissions on bootloader config are configured
l CIS 1.4.2 Ensure bootloader password is set - set superusers
l CIS 1.7.1.* (Messaging/banners)
l Ensure message of the day is configured properly
l Ensure local login warning banner is configured properly
l Ensure remote login warning banner is configured properly
l Ensure GDM login banner is configured - banner message enabled
l Ensure GDM login banner is configured - banner message text
CIS Level 1 - 2.xl CIS 2.2.* (disabled packages)
l x11
l avahi-server
l CUPS
l nfs
l Rpc
CIS level 1 - 3.xl CIS 3.1.* (packet redirects)
l 3.1.2 Ensure packet redirect sending is disabled - 'net.ipv4.conf.all.send_redirects = 0'
l 3.1.2 Ensure packet redirect sending is disabled - 'net.ipv4.conf.default.send_redir-ects = 0'
l CIS 3.2.* (ipv4, icmp, etc)
l 3.2.1 Ensure source routed packets are not accepted - 'net.ipv4.conf.all.accept_source_route = 0'
l 3.2.1 Ensure source routed packets are not accepted - 'net.ipv4.conf.default.accept_source_route = 0'
l 3.2.2 Ensure ICMP redirects are not accepted - 'net.ipv4.conf.all.accept_redirects = 0'
Copyright 2017 - 2018 Tenable, Inc. All rights reserved. Tenable Network Security, Nessus, SecurityCenter, SecurityCenter Continuous View and Log Correlation Engine are registered trademarks of Tenable, Inc. Tenable,
Tenable.io, Assure, and The Cyber Exposure Company are trademarks of Tenable, Inc. All other products or services are trademarks of their respective owners.
l 3.2.2 Ensure ICMP redirects are not accepted - 'net.ipv4.conf.default.accept_redirects= 0'
l 3.2.3 Ensure secure ICMP redirects are not accepted - 'net.ipv4.conf.all.secure_redir-ects = 0'
l 3.2.3 Ensure secure ICMP redirects are not accepted - 'net.ipv4.conf.default.secure_redirects = 0'
l 3.2.4 Ensure suspicious packets are logged - 'net.ipv4.conf.all.log_martians = 1'
l 3.2.4 Ensure suspicious packets are logged - 'net.ipv4.conf.default.log_martians = 1'
l 3.2.5 Ensure broadcast ICMP requests are ignored
l 3.2.6 Ensure bogus ICMP responses are ignored
l 3.2.7 Ensure Reverse Path Filtering is enabled - 'net.ipv4.conf.all.rp_filter = 1'
l 3.2.7 Ensure Reverse Path Filtering is enabled - 'net.ipv4.conf.default.rp_filter = 1'
l 3.2.8 Ensure TCP SYN Cookies is enabled
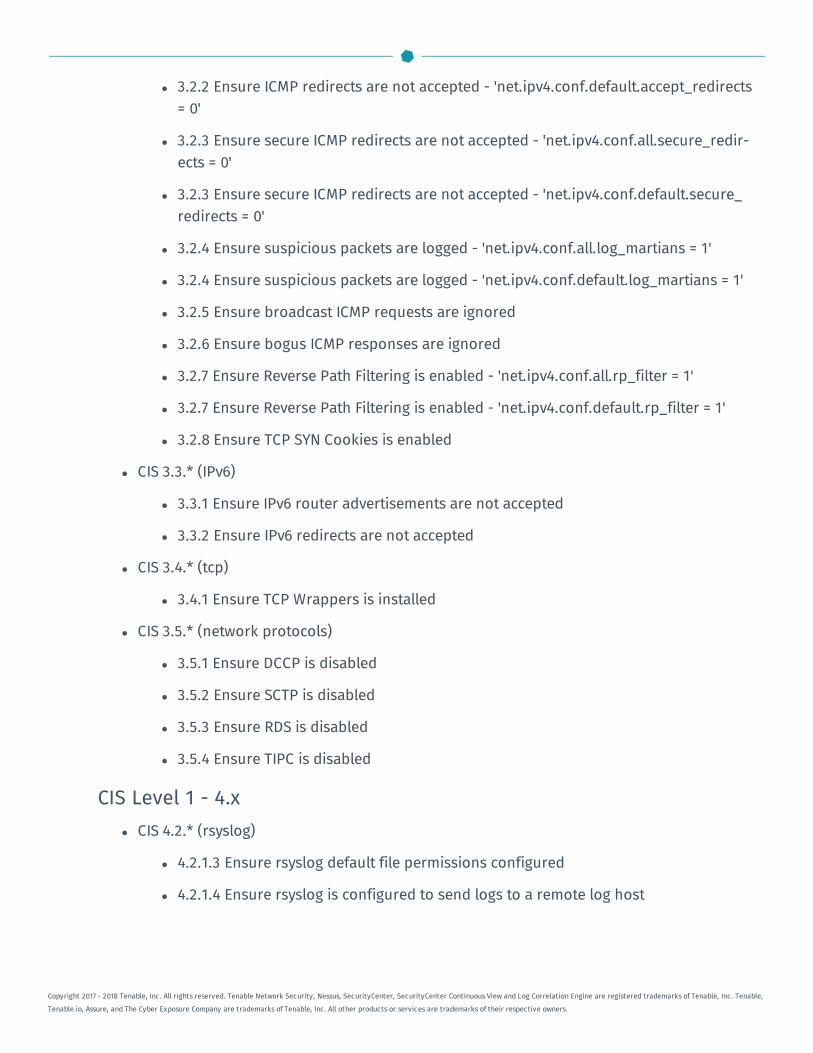
l CIS 3.3.* (IPv6)
l 3.3.1 Ensure IPv6 router advertisements are not accepted
l 3.3.2 Ensure IPv6 redirects are not accepted
l CIS 3.4.* (tcp)
l 3.4.1 Ensure TCP Wrappers is installed
l CIS 3.5.* (network protocols)
l 3.5.1 Ensure DCCP is disabled
l 3.5.2 Ensure SCTP is disabled
l 3.5.3 Ensure RDS is disabled
l 3.5.4 Ensure TIPC is disabled
CIS Level 1 - 4.xl CIS 4.2.* (rsyslog)
l 4.2.1.3 Ensure rsyslog default file permissions configured
l 4.2.1.4 Ensure rsyslog is configured to send logs to a remote log host
Copyright 2017 - 2018 Tenable, Inc. All rights reserved. Tenable Network Security, Nessus, SecurityCenter, SecurityCenter Continuous View and Log Correlation Engine are registered trademarks of Tenable, Inc. Tenable,
Tenable.io, Assure, and The Cyber Exposure Company are trademarks of Tenable, Inc. All other products or services are trademarks of their respective owners.

Note: 4.2.1.4 requires knowing the address of the central log host, thus not easilydone in the kickstart.
l 4.2.4 Ensure permissions on all logfiles are configured
CIS Level 1 - 5.xl CIS 5.1.* (cron permissions)
l 5.1.2 Ensure permissions on /etc/crontab are configured
l 5.1.3 Ensure permissions on /etc/cron.hourly are configured
l 5.1.4 Ensure permissions on /etc/cron.daily are configured
l 5.1.5 Ensure permissions on /etc/cron.weekly are configured
l 5.1.6 Ensure permissions on /etc/cron.monthly are configured
l 5.1.7 Ensure permissions on /etc/cron.d are configured
l 5.1.8 Ensure at/cron is restricted to authorized users - at.allow
l 5.1.8 Ensure at/cron is restricted to authorized users - at.deny
l 5.1.8 Ensure at/cron is restricted to authorized users - cron.allow
l 5.1.8 Ensure at/cron is restricted to authorized users - cron.deny
l CIS 5.2.11 (Turn off Weak Ciphers for SSH)
l CIS 5.3.* (password/pam)
l 5.3.1 Ensure password creation requirements are configured - dcredit
l 5.3.1 Ensure password creation requirements are configured - lcredit
l 5.3.1 Ensure password creation requirements are configured - minlen
l 5.3.1 Ensure password creation requirements are configured - ocredit
l 5.3.1 Ensure password creation requirements are configured - ucredit
l 5.3.2 Lockout for failed password attempts - password-auth 'auth [default=die] pam_faillock.so authfail audit deny=5 unlock_time=900'
l 5.3.2 Lockout for failed password attempts - password-auth 'auth [success=1 default-t=bad] pam_unix.so'
Copyright 2017 - 2018 Tenable, Inc. All rights reserved. Tenable Network Security, Nessus, SecurityCenter, SecurityCenter Continuous View and Log Correlation Engine are registered trademarks of Tenable, Inc. Tenable,
Tenable.io, Assure, and The Cyber Exposure Company are trademarks of Tenable, Inc. All other products or services are trademarks of their respective owners.

l 5.3.2 Lockout for failed password attempts - password-auth 'auth required pam_fail-lock.so preauth audit silent deny=5 unlock_time=900'
l 5.3.2 Lockout for failed password attempts - password-auth 'auth sufficient pam_fail-lock.so authsucc audit deny=5 unlock_time=900'
l 5.3.2 Lockout for failed password attempts - system-auth 'auth [default=die] pam_faillock.so authfail audit deny=5 unlock_time=900'
l 5.3.2 Lockout for failed password attempts - system-auth 'auth [success=1 default-t=bad] pam_unix.so'
l 5.3.2 Lockout for failed password attempts - system-auth 'auth required pam_fail-lock.so preauth audit silent deny=5 unlock_time=900'
l 5.3.2 Lockout for failed password attempts - system-auth 'auth sufficient pam_fail-lock.so authsucc audit deny=5 unlock_time=900'
l 5.3.3 Ensure password reuse is limited - password-auth
l 5.3.3 Ensure password reuse is limited - system-auth
l CIS 5.4.* (user prefs)
l 5.4.1.2 Ensure minimum days between password changes is 7 or more
l 5.4.1.4 Ensure inactive password lock is 30 days or less
l 5.4.4 Ensure default user umask is 027 or more restrictive - /etc/bashrc
l CIS 5.6.* (wheel group)
l 5.6 Ensure access to the su command is restricted - pam_wheel.so
l 5.6 Ensure access to the su command is restricted - wheel group contains root
CIS Level 1 - 6.xl CIS 6.1.* (misc conf permissions)
l 6.1.6 Ensure permissions on /etc/passwd- are configured
l 6.1.8 Ensure permissions on /etc/group- are configured
Copyright 2017 - 2018 Tenable, Inc. All rights reserved. Tenable Network Security, Nessus, SecurityCenter, SecurityCenter Continuous View and Log Correlation Engine are registered trademarks of Tenable, Inc. Tenable,
Tenable.io, Assure, and The Cyber Exposure Company are trademarks of Tenable, Inc. All other products or services are trademarks of their respective owners.
- 10 -
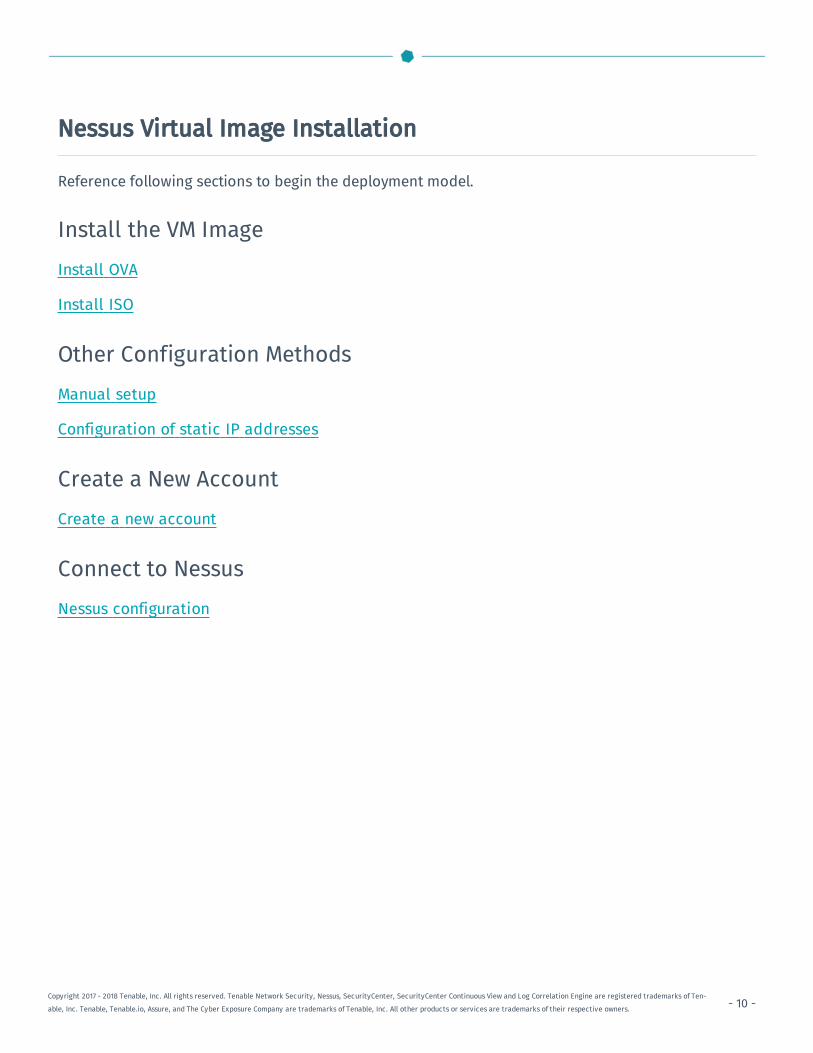
Nessus Virtual Image Installation
Reference following sections to begin the deployment model.
Install the VM ImageInstall OVA
Install ISO
Other Configuration MethodsManual setup
Configuration of static IP addresses
Create a New AccountCreate a new account
Connect to NessusNessus configuration
Copyright 2017 - 2018 Tenable, Inc. All rights reserved. Tenable Network Security, Nessus, SecurityCenter, SecurityCenter Continuous View and Log Correlation Engine are registered trademarks of Ten-
able, Inc. Tenable, Tenable.io, Assure, and The Cyber Exposure Company are trademarks of Tenable, Inc. All other products or services are trademarks of their respective owners.
- 11 -
Installation
Use one of the following options to deploy Tenable Core.
Install ISO
Install OVA
Copyright 2017 - 2018 Tenable, Inc. All rights reserved. Tenable Network Security, Nessus, SecurityCenter, SecurityCenter Continuous View and Log Correlation Engine are registered trademarks of Ten-
able, Inc. Tenable, Tenable.io, Assure, and The Cyber Exposure Company are trademarks of Tenable, Inc. All other products or services are trademarks of their respective owners.
- 12 -
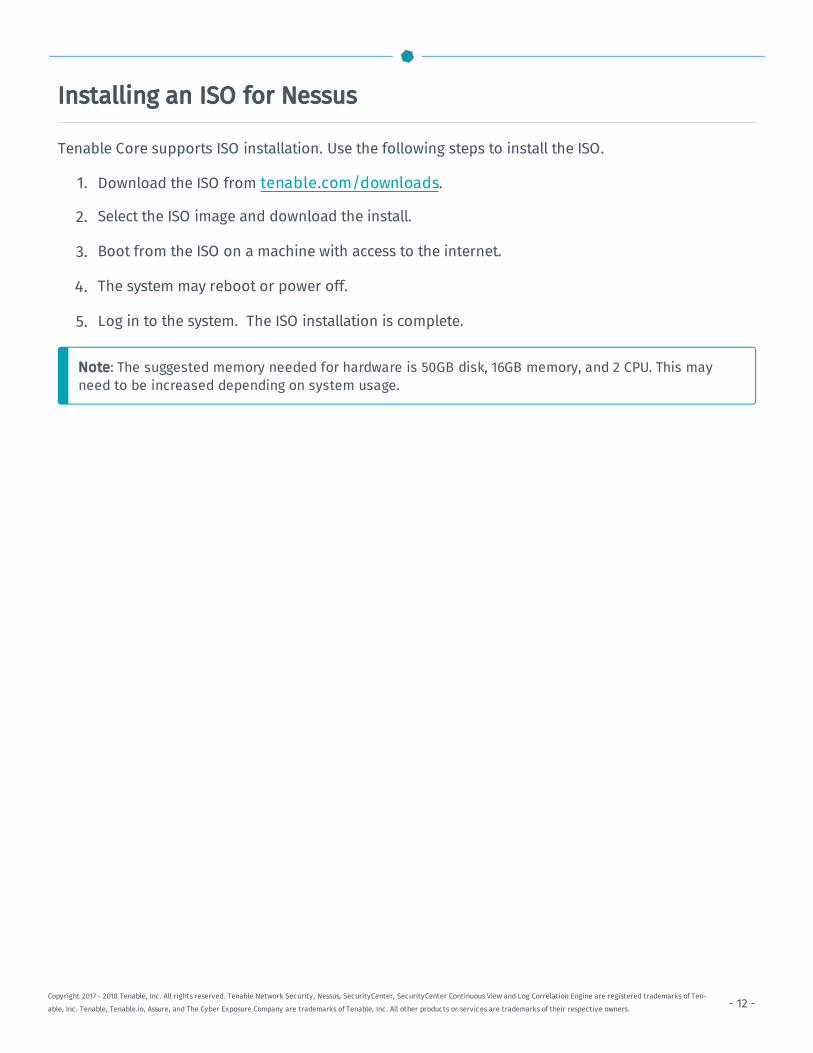
Installing an ISO for Nessus
Tenable Core supports ISO installation. Use the following steps to install the ISO.
1. Download the ISO from tenable.com/downloads.
2. Select the ISO image and download the install.
3. Boot from the ISO on a machine with access to the internet.
4. The system may reboot or power off.
5. Log in to the system. The ISO installation is complete.
Note: The suggested memory needed for hardware is 50GB disk, 16GB memory, and 2 CPU. This mayneed to be increased depending on system usage.
Copyright 2017 - 2018 Tenable, Inc. All rights reserved. Tenable Network Security, Nessus, SecurityCenter, SecurityCenter Continuous View and Log Correlation Engine are registered trademarks of Ten-
able, Inc. Tenable, Tenable.io, Assure, and The Cyber Exposure Company are trademarks of Tenable, Inc. All other products or services are trademarks of their respective owners.

- 13 -
Install OVA
The Tenable VM is available for VMware Server, VMware Player, VMware ESX, VMware Workstation, andVMware Fusion (http://vmware.com/) and can be downloaded from the Tenable Downloads Page.
The Tenable Core VMware image for VMware Server, VMware Fusion, VMware Workstation, VMware ESXserver, and VMware Player is provided as an .ova file with the OS and applications in a 64-bit version.
Note: An internet connection is required for updates and upgrades.
Use the following steps to install the VMware.
1. Download the OVA from tenable.com/downloads.
2. Launch the VMware program and import the .ova file that was downloaded.
3. Adjust the default VM settings as needed for the local environment.
4. The boot process will be displayed in the VM console window when started. (It may take severalminutes for the application services to start.)
Copyright 2017 - 2018 Tenable, Inc. All rights reserved. Tenable Network Security, Nessus, SecurityCenter, SecurityCenter Continuous View and Log Correlation Engine are registered trademarks of Ten-
able, Inc. Tenable, Tenable.io, Assure, and The Cyber Exposure Company are trademarks of Tenable, Inc. All other products or services are trademarks of their respective owners.

- 14 -
Increase Disk Space
Complete the following process to add disk space to your system.
Before you begin:
l Back up your machine.
To increase disk space:
Note: You can add disks by selecting disk instead of space on the current distribution in the PhysicalVolumes section.
Add Disk Space
1. Shut down your virtual machine.
2. Add additional disk space to your server.
3. Reboot your virtual machine.
4. Log in to Tenable Core.
5. In the left navigation pane, click Storage.
The Storage page appears.
The Drives section on the right side of the screen displays the updated disk space.
Configure A New Physical Volume
1. On the Storage page, in the Volume Groups section, click the current volume.
A new page appears.
2. In the Physical Volumes header, click the + button.
3. Select the option to add the extra free space as a new physical volume.
4. Click the Add button.
Expand the Logical Volume
Copyright 2017 - 2018 Tenable, Inc. All rights reserved. Tenable Network Security, Nessus, SecurityCenter, SecurityCenter Continuous View and Log Correlation Engine are registered trademarks of Ten-
able, Inc. Tenable, Tenable.io, Assure, and The Cyber Exposure Company are trademarks of Tenable, Inc. All other products or services are trademarks of their respective owners.

- 15 -
1. On the Storage page, click the file system that contains the target partition /root.
A new page appears.
2. In the Logical Volumes section, click the file system that contains the target partition/root.
The file option expands into a drop down.
3. Next to the size option, click Grow.
An expansion prompt displays.
4. Move the slider to the right (increase) to reflect the new disk space size.
5. Click the Resize button.
The file system /root file displays the increased disk space.
Tip: Run the df -h command in the terminal window to verify the increased disk space.
Copyright 2017 - 2018 Tenable, Inc. All rights reserved. Tenable Network Security, Nessus, SecurityCenter, SecurityCenter Continuous View and Log Correlation Engine are registered trademarks of Ten-
able, Inc. Tenable, Tenable.io, Assure, and The Cyber Exposure Company are trademarks of Tenable, Inc. All other products or services are trademarks of their respective owners.

- 16 -
Create a New Account
1. For the initial log in, administrative users must create an account.
2. The initial screen will request a login. Enter the following:
l Username: wizard
l Password: admin
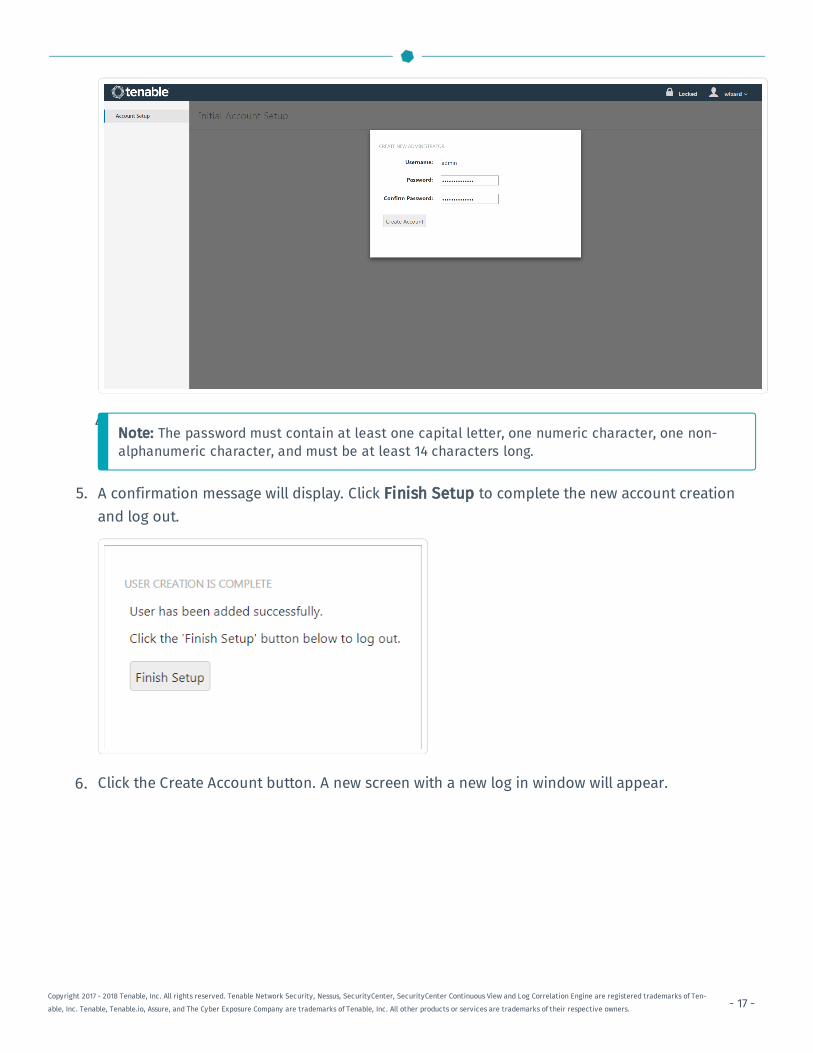
3. The Initial Account Setup screen will appear with a new window to create the new admin-istrator. Enter the new user account information.
Copyright 2017 - 2018 Tenable, Inc. All rights reserved. Tenable Network Security, Nessus, SecurityCenter, SecurityCenter Continuous View and Log Correlation Engine are registered trademarks of Ten-
able, Inc. Tenable, Tenable.io, Assure, and The Cyber Exposure Company are trademarks of Tenable, Inc. All other products or services are trademarks of their respective owners.
- 17 -
4.Note: The password must contain at least one capital letter, one numeric character, one non-alphanumeric character, and must be at least 14 characters long.
5. A confirmation message will display. Click Finish Setup to complete the new account creationand log out.
6. Click the Create Account button. A new screen with a new log in window will appear.
Copyright 2017 - 2018 Tenable, Inc. All rights reserved. Tenable Network Security, Nessus, SecurityCenter, SecurityCenter Continuous View and Log Correlation Engine are registered trademarks of Ten-
able, Inc. Tenable, Tenable.io, Assure, and The Cyber Exposure Company are trademarks of Tenable, Inc. All other products or services are trademarks of their respective owners.

- 18 -
7. Enter the newly created account information to log in to the system.
Caution: Select the Reuse my password for privileged tasks option at the bottom of the log inscreen to ensure access to all of the root administrative tasks. If this is not selected, some roottasks will not work.
Copyright 2017 - 2018 Tenable, Inc. All rights reserved. Tenable Network Security, Nessus, SecurityCenter, SecurityCenter Continuous View and Log Correlation Engine are registered trademarks of Ten-
able, Inc. Tenable, Tenable.io, Assure, and The Cyber Exposure Company are trademarks of Tenable, Inc. All other products or services are trademarks of their respective owners.

- 19 -
Create User
Steps
1. In the left navigation pane, click on Accounts. The Accounts page displays.
2. Click the Create New User button at the top of the page. A new window will appear.
3. Enter the user's information in the new window.
Note: The password must be at least 14 characters.
4. Click the Create button at the bottom of the page.
5. A card with the newly created user will appear on the Accounts page.
Copyright 2017 - 2018 Tenable, Inc. All rights reserved. Tenable Network Security, Nessus, SecurityCenter, SecurityCenter Continuous View and Log Correlation Engine are registered trademarks of Ten-
able, Inc. Tenable, Tenable.io, Assure, and The Cyber Exposure Company are trademarks of Tenable, Inc. All other products or services are trademarks of their respective owners.

- 20 -
Edit User
Click the User's card to access the user's information. The user's name, role, access and password canbe edited on this page. User sessions can be terminated using the Terminate Session button at thetop of the page. In addition, a user can be deleted by clicking the Delete button at the top of the page.
Copyright 2017 - 2018 Tenable, Inc. All rights reserved. Tenable Network Security, Nessus, SecurityCenter, SecurityCenter Continuous View and Log Correlation Engine are registered trademarks of Ten-
able, Inc. Tenable, Tenable.io, Assure, and The Cyber Exposure Company are trademarks of Tenable, Inc. All other products or services are trademarks of their respective owners.

- 21 -
Change Password
Steps
1. In the left navigation pane, click on Accounts.
2. Click the user's card.
3. Click the Set Password button. A new window will appear.
4. Enter the required information in the fields - old password, new password, and confirm newpassword.
5. Next, click the Set button.
6. The password is updated.
Copyright 2017 - 2018 Tenable, Inc. All rights reserved. Tenable Network Security, Nessus, SecurityCenter, SecurityCenter Continuous View and Log Correlation Engine are registered trademarks of Ten-
able, Inc. Tenable, Tenable.io, Assure, and The Cyber Exposure Company are trademarks of Tenable, Inc. All other products or services are trademarks of their respective owners.
- 22 -
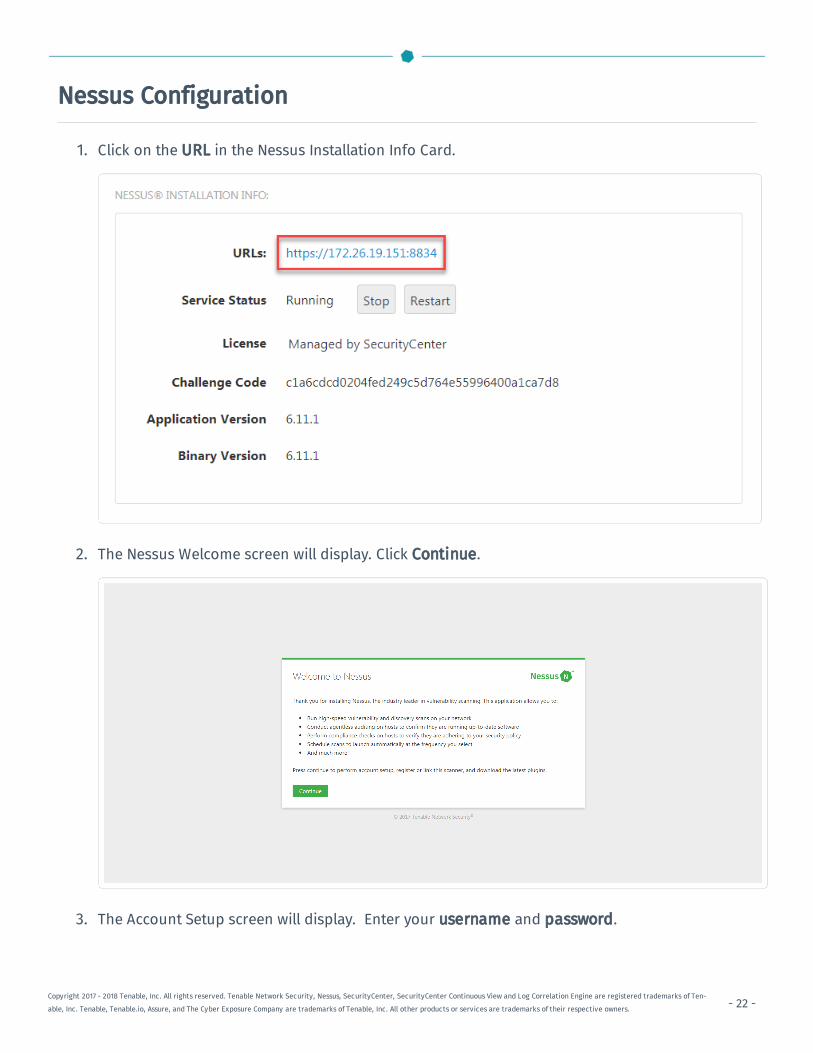
Nessus Configuration
1. Click on the URL in the Nessus Installation Info Card.
2. The Nessus Welcome screen will display. Click Continue.
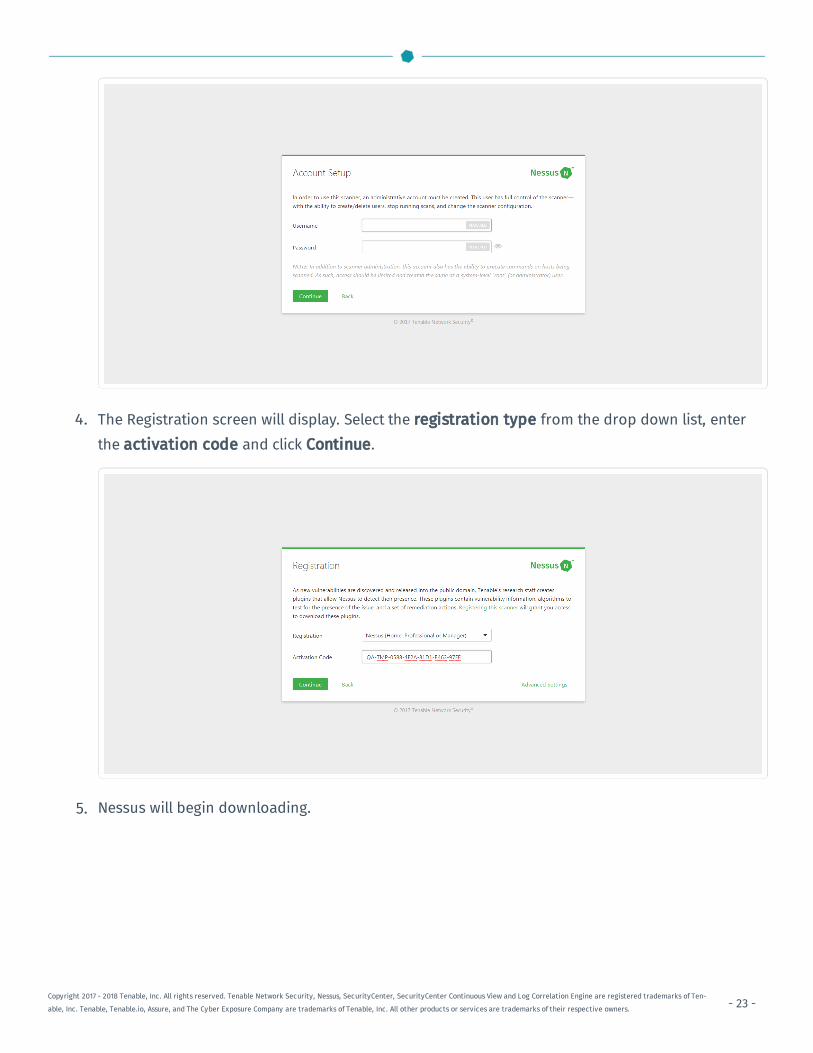
3. The Account Setup screen will display. Enter your username and password.
Copyright 2017 - 2018 Tenable, Inc. All rights reserved. Tenable Network Security, Nessus, SecurityCenter, SecurityCenter Continuous View and Log Correlation Engine are registered trademarks of Ten-
able, Inc. Tenable, Tenable.io, Assure, and The Cyber Exposure Company are trademarks of Tenable, Inc. All other products or services are trademarks of their respective owners.
- 23 -
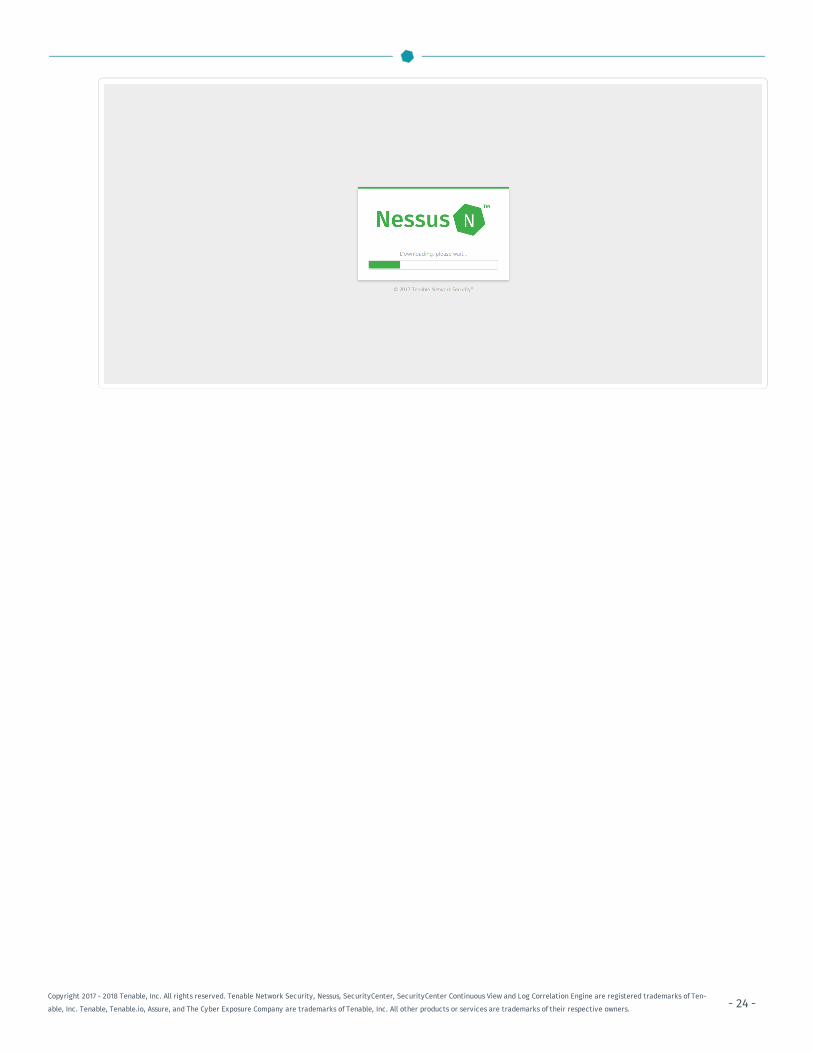
4. The Registration screen will display. Select the registration type from the drop down list, enterthe activation code and click Continue.
5. Nessus will begin downloading.
Copyright 2017 - 2018 Tenable, Inc. All rights reserved. Tenable Network Security, Nessus, SecurityCenter, SecurityCenter Continuous View and Log Correlation Engine are registered trademarks of Ten-
able, Inc. Tenable, Tenable.io, Assure, and The Cyber Exposure Company are trademarks of Tenable, Inc. All other products or services are trademarks of their respective owners.
- 24 -Copyright 2017 - 2018 Tenable, Inc. All rights reserved. Tenable Network Security, Nessus, SecurityCenter, SecurityCenter Continuous View and Log Correlation Engine are registered trademarks of Ten-
able, Inc. Tenable, Tenable.io, Assure, and The Cyber Exposure Company are trademarks of Tenable, Inc. All other products or services are trademarks of their respective owners.

- 25 -
Manual Setup
For users that want to automate VM deployment using tools like Ansible, Puppet, Chef, etc., use the fol-lowing scripts to complete the process manually.
1. Run the /usr/libexec/tenablecore/wizard/wizardadduser.sh shell script.
2. Provide two lines of input on standard input.
3. The first line is the username.
4. The second line is the password.
Example
$ pkexec /usr/libexec/tenablecore/wizard/wizardadduser.sh <<'EOF'newadminsuP3rsaF3p4ssw()rdEOF
or
$ pkexec /usr/libexec/tenablecore/wizard/wizardadduser.shnewadminsuP3rsaF3p4ssw()rd
5. Logout of the wizard account/session.
Copyright 2017 - 2018 Tenable, Inc. All rights reserved. Tenable Network Security, Nessus, SecurityCenter, SecurityCenter Continuous View and Log Correlation Engine are registered trademarks of Ten-
able, Inc. Tenable, Tenable.io, Assure, and The Cyber Exposure Company are trademarks of Tenable, Inc. All other products or services are trademarks of their respective owners.

- 26 -
Configure Static IP Addresses
Static IP addresses can only be configured after creating an admin user and configuring a DHCP con-nection.
Note: Make sure Wired connection 1 is selected.
Note: An alternative connection can be made by going to the connection list and modifying it.
Device ListEnter the following to view the current device list.
$ nmcli device statusDEVICE TYPE STATE CONNECTIONens160 ethernet connected Wired connection 1lo loopback unmanaged --
Note: Make sure Wired connection 1 is selected from the list of available connections.
Note: The value in the DEVICE column.
Add ConnectionEnter the following to fetch the connection associated with that device.
$ conn=$(nmcli -g general.connection device show ens160)$ echo "$conn"
Static ConnectionEnter the following to configure a static connection.
Copyright 2017 - 2018 Tenable, Inc. All rights reserved. Tenable Network Security, Nessus, SecurityCenter, SecurityCenter Continuous View and Log Correlation Engine are registered trademarks of Ten-
able, Inc. Tenable, Tenable.io, Assure, and The Cyber Exposure Company are trademarks of Tenable, Inc. All other products or services are trademarks of their respective owners.

- 27 -
$ nmcli connection modify "$conn" connection.autoconnect yes ipv4.methodmanual ipv4.addr "10.0.0.1/24" ipv4.dns "10.0.1.1, 10.0.1.2" ipv4.gateway"10.0.0.254"
Restart or Reboot the ConnectionEnter the following to restart.
$ nmcli connection down "$conn" && nmcli connection up "$conn"
or
Enter one of the following to reboot.
$ systemctl reboot
$ shutdown -r now
$ reboot
Copyright 2017 - 2018 Tenable, Inc. All rights reserved. Tenable Network Security, Nessus, SecurityCenter, SecurityCenter Continuous View and Log Correlation Engine are registered trademarks of Ten-
able, Inc. Tenable, Tenable.io, Assure, and The Cyber Exposure Company are trademarks of Tenable, Inc. All other products or services are trademarks of their respective owners.
- 28 -
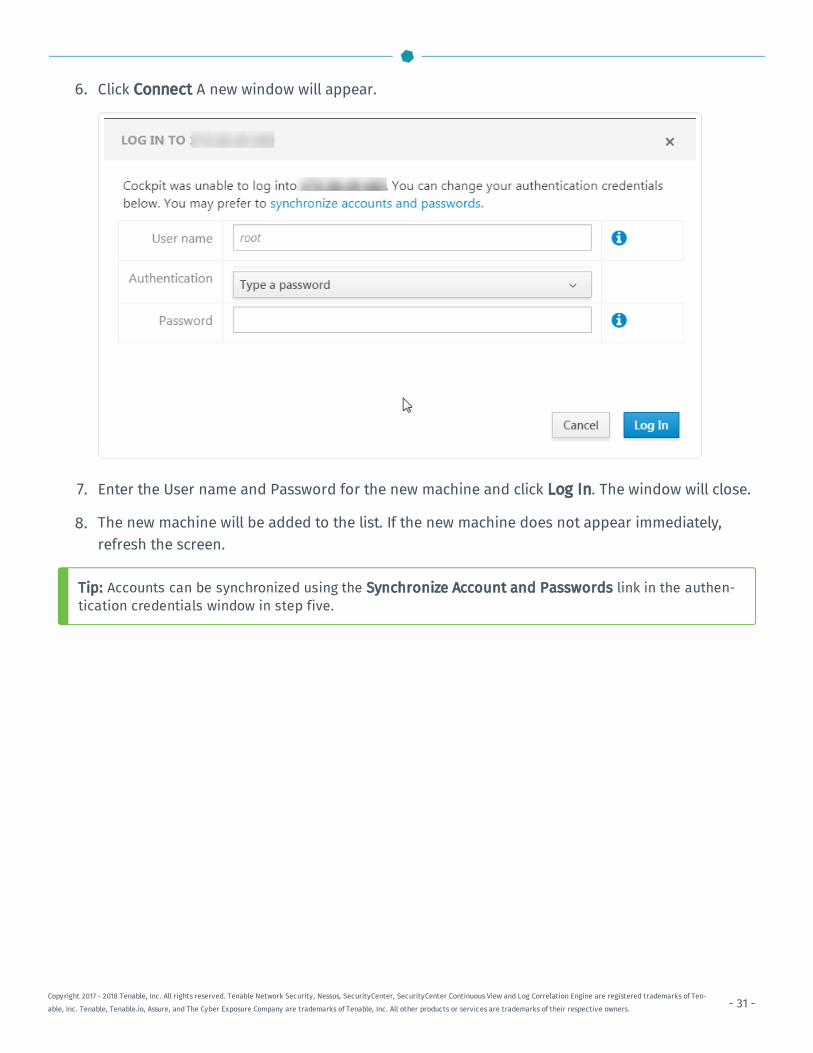
System Layout
The system pages are located in two sections. The Dashboard option is located in the top horizontalmenu listing while the other features are listed in the left navigation pane.
l Dashboard
l System
l System Log
l Networking
l Storage
l Accounts
l Services
l Diagnostic Reports
l Nessus
l Terminal
l Update Management
l Software Updates
l SSL/TLS Certificates
Copyright 2017 - 2018 Tenable, Inc. All rights reserved. Tenable Network Security, Nessus, SecurityCenter, SecurityCenter Continuous View and Log Correlation Engine are registered trademarks of Ten-
able, Inc. Tenable, Tenable.io, Assure, and The Cyber Exposure Company are trademarks of Tenable, Inc. All other products or services are trademarks of their respective owners.

- 29 -
Dashboard
The Dashboard displays a list of systems running on the server. The graph provides information forCPU usage, memory usage, disk I/O, and network traffic. Click on the options above the graph to viewthe corresponding data.
A list of servers are displayed beneath the graph.
Copyright 2017 - 2018 Tenable, Inc. All rights reserved. Tenable Network Security, Nessus, SecurityCenter, SecurityCenter Continuous View and Log Correlation Engine are registered trademarks of Ten-
able, Inc. Tenable, Tenable.io, Assure, and The Cyber Exposure Company are trademarks of Tenable, Inc. All other products or services are trademarks of their respective owners.

- 30 -
Add Server
Steps
1. In the far left navigation pane, click the Dashboard option. The Dashboard page displays.
2. Click the Add Server icon ( ) in the Server heading. A new window will display.
3. Enter the IP address or Host name for the machine to be added.
4. Click the color bar displayed to select the desired color to identify the added machine.
5. Click Add. A new window may display if the new machine requires authentication.
Copyright 2017 - 2018 Tenable, Inc. All rights reserved. Tenable Network Security, Nessus, SecurityCenter, SecurityCenter Continuous View and Log Correlation Engine are registered trademarks of Ten-
able, Inc. Tenable, Tenable.io, Assure, and The Cyber Exposure Company are trademarks of Tenable, Inc. All other products or services are trademarks of their respective owners.
- 31 -
6. Click Connect A new window will appear.
7. Enter the User name and Password for the new machine and click Log In. The window will close.
8. The new machine will be added to the list. If the new machine does not appear immediately,refresh the screen.
Tip: Accounts can be synchronized using the Synchronize Account and Passwords link in the authen-tication credentials window in step five.
Copyright 2017 - 2018 Tenable, Inc. All rights reserved. Tenable Network Security, Nessus, SecurityCenter, SecurityCenter Continuous View and Log Correlation Engine are registered trademarks of Ten-
able, Inc. Tenable, Tenable.io, Assure, and The Cyber Exposure Company are trademarks of Tenable, Inc. All other products or services are trademarks of their respective owners.

- 32 -
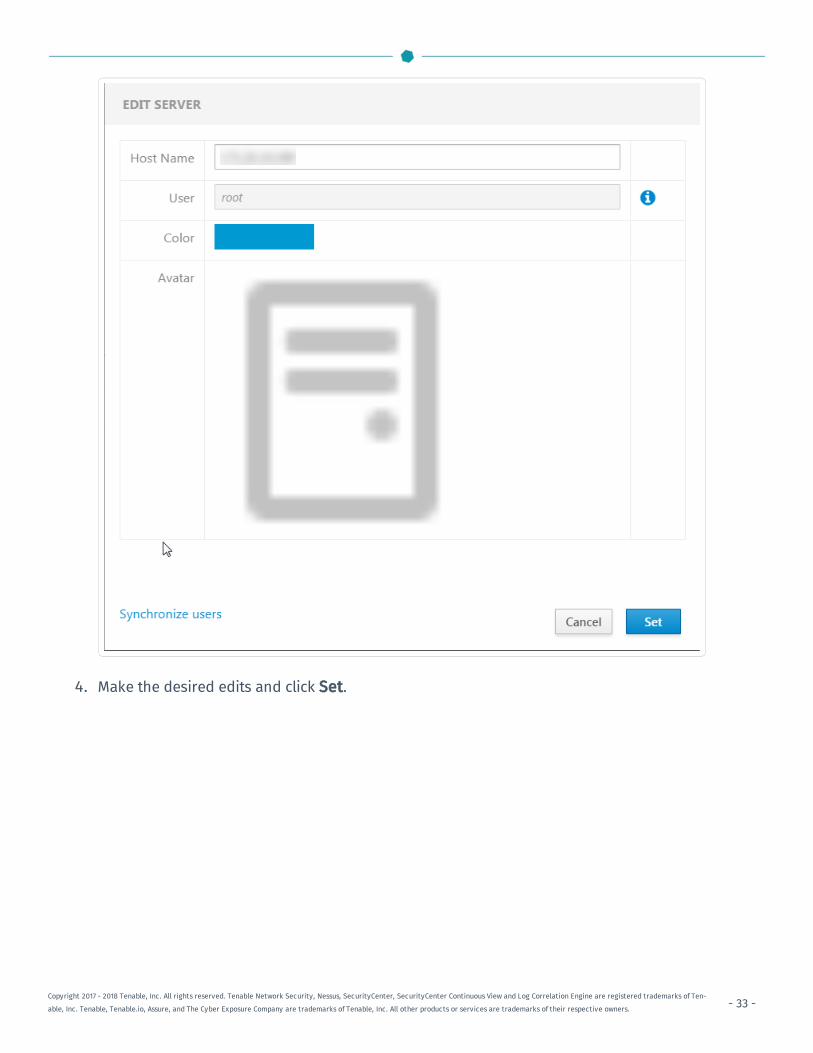
Edit Server
The server name and color designation can be edited. To edit the displayed server information:
Steps
1. In the far left navigation page, click the Dashboard option. The Dashboard page displays.
2. Click the edit server icon in the Server header. Two new icons will display to the right of the lis-ted servers.
3. Click on the edit icon. A new window will display.
Copyright 2017 - 2018 Tenable, Inc. All rights reserved. Tenable Network Security, Nessus, SecurityCenter, SecurityCenter Continuous View and Log Correlation Engine are registered trademarks of Ten-
able, Inc. Tenable, Tenable.io, Assure, and The Cyber Exposure Company are trademarks of Tenable, Inc. All other products or services are trademarks of their respective owners.
- 33 -
4. Make the desired edits and click Set.
Copyright 2017 - 2018 Tenable, Inc. All rights reserved. Tenable Network Security, Nessus, SecurityCenter, SecurityCenter Continuous View and Log Correlation Engine are registered trademarks of Ten-
able, Inc. Tenable, Tenable.io, Assure, and The Cyber Exposure Company are trademarks of Tenable, Inc. All other products or services are trademarks of their respective owners.
- 34 -
Delete Server
Steps
1. In the left navigation pane, click the Dashboard option. The Dashboard page displays.
2. Click the check icon in the Server heading. Two new icons will display to the right of the listedservers.
3. Click the delete icon and the server will be deleted.
Copyright 2017 - 2018 Tenable, Inc. All rights reserved. Tenable Network Security, Nessus, SecurityCenter, SecurityCenter Continuous View and Log Correlation Engine are registered trademarks of Ten-
able, Inc. Tenable, Tenable.io, Assure, and The Cyber Exposure Company are trademarks of Tenable, Inc. All other products or services are trademarks of their respective owners.
- 35 -
System
The System page provides information and graphs about the system on which the machine is running.Graphs provide information for the CPU usage, memory usage, disk I/O, and network traffic. In addi-tion, information for hardware and operating system details are displayed.
Users can view machine SSH fingerprints, view and change the machine host name, time and timezone, restart or shutdown the system, or change the performance profile.
Copyright 2017 - 2018 Tenable, Inc. All rights reserved. Tenable Network Security, Nessus, SecurityCenter, SecurityCenter Continuous View and Log Correlation Engine are registered trademarks of Ten-
able, Inc. Tenable, Tenable.io, Assure, and The Cyber Exposure Company are trademarks of Tenable, Inc. All other products or services are trademarks of their respective owners.

- 36 -
Edit Machine Host Name
Steps
1. In the left navigation pane, click the System option. The System page displays.
2. Click the link next to the Host Name option in the information list that is left of the graph charts.A new window will appear with the options to enter/edit the Pretty Host Name and Real HostName.
3. Enter the Pretty Host Name for the machine. The Real Host Name will update as the PrettyHost Name is entered.
4. Click Change to update the name. The new name will be displayed next to the Hostname option.
Copyright 2017 - 2018 Tenable, Inc. All rights reserved. Tenable Network Security, Nessus, SecurityCenter, SecurityCenter Continuous View and Log Correlation Engine are registered trademarks of Ten-
able, Inc. Tenable, Tenable.io, Assure, and The Cyber Exposure Company are trademarks of Tenable, Inc. All other products or services are trademarks of their respective owners.
- 37 -
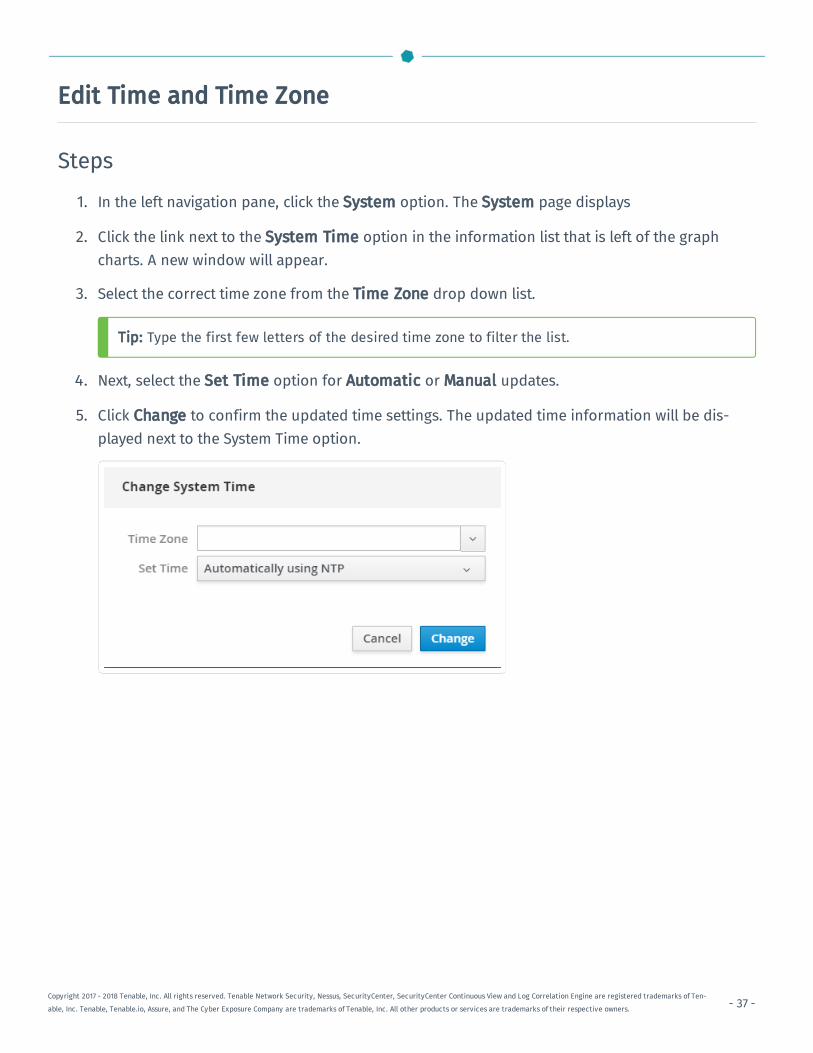
Edit Time and Time Zone
Steps
1. In the left navigation pane, click the System option. The System page displays
2. Click the link next to the System Time option in the information list that is left of the graphcharts. A new window will appear.
3. Select the correct time zone from the Time Zone drop down list.
Tip: Type the first few letters of the desired time zone to filter the list.
4. Next, select the Set Time option for Automatic or Manual updates.
5. Click Change to confirm the updated time settings. The updated time information will be dis-played next to the System Time option.
Copyright 2017 - 2018 Tenable, Inc. All rights reserved. Tenable Network Security, Nessus, SecurityCenter, SecurityCenter Continuous View and Log Correlation Engine are registered trademarks of Ten-
able, Inc. Tenable, Tenable.io, Assure, and The Cyber Exposure Company are trademarks of Tenable, Inc. All other products or services are trademarks of their respective owners.

- 38 -
Restart
Steps
1. In the left navigation pane, click the System option. The System page displays.
2. Next to the Power Optionsitem, click the Restart button or select it from the drop down menu.A new window will appear.
3. Enter a message for the users in the text box.
4. Select the delay time from the drop down menu. This is the time that the restart will start.Choose from one of the minute increments or enter a specific time. There is also an option torestart immediately with no delay.
5. Click the Restart button to initiate and save the updated information.
Copyright 2017 - 2018 Tenable, Inc. All rights reserved. Tenable Network Security, Nessus, SecurityCenter, SecurityCenter Continuous View and Log Correlation Engine are registered trademarks of Ten-
able, Inc. Tenable, Tenable.io, Assure, and The Cyber Exposure Company are trademarks of Tenable, Inc. All other products or services are trademarks of their respective owners.

- 39 -
Shutdown
Steps
1. In the left navigation pane, click the System option. The System page displays.
2. Next to the Power Optionsitem, click the arrow by Restart to display the drop down menu.Select Shut Down. A new window will appear.
3. Enter a message for the users in the text box.
4. Select the delay time from the drop down menu. This is the time that the shut down will start.Choose from one of the minute increments or enter a specific time. There is also an option toShut Down immediately with no delay.
5. Click Shut Down to initiate and save the updated information.
Copyright 2017 - 2018 Tenable, Inc. All rights reserved. Tenable Network Security, Nessus, SecurityCenter, SecurityCenter Continuous View and Log Correlation Engine are registered trademarks of Ten-
able, Inc. Tenable, Tenable.io, Assure, and The Cyber Exposure Company are trademarks of Tenable, Inc. All other products or services are trademarks of their respective owners.

- 40 -
Change Performance Profile
Steps
1. In the left navigation pane, click the System option. The System page displays.
2. Click on the link next to the Performance Profile option in the information list that is left of thegraph charts. A new window will appear displaying Performance Profile options.
3. Select the desired Performance Profile. The recommended profile is labeled in the list.
4. Click Change Profile to confirm the new selection.
Copyright 2017 - 2018 Tenable, Inc. All rights reserved. Tenable Network Security, Nessus, SecurityCenter, SecurityCenter Continuous View and Log Correlation Engine are registered trademarks of Ten-
able, Inc. Tenable, Tenable.io, Assure, and The Cyber Exposure Company are trademarks of Tenable, Inc. All other products or services are trademarks of their respective owners.

- 41 -
System Log
View the System Log when errors are encountered in the system. The System Log lists, categorizes,and stores system issues that have occurred within the last seven days. Click on an individual entry(row) to get additional information.
Copyright 2017 - 2018 Tenable, Inc. All rights reserved. Tenable Network Security, Nessus, SecurityCenter, SecurityCenter Continuous View and Log Correlation Engine are registered trademarks of Ten-
able, Inc. Tenable, Tenable.io, Assure, and The Cyber Exposure Company are trademarks of Tenable, Inc. All other products or services are trademarks of their respective owners.

- 42 -
Filters
Several log type filters are available. The Everything option is selected by default. Select anotheroption using the drop down menu at the top of the page. The logs are listed with the most recent entrydisplayed first. Previous days are divided into sections with the corresponding date displayed in theheader.
The logs can be filtered using the drop down menu. Click on the date to display the filter options forthe logs.
Copyright 2017 - 2018 Tenable, Inc. All rights reserved. Tenable Network Security, Nessus, SecurityCenter, SecurityCenter Continuous View and Log Correlation Engine are registered trademarks of Ten-
able, Inc. Tenable, Tenable.io, Assure, and The Cyber Exposure Company are trademarks of Tenable, Inc. All other products or services are trademarks of their respective owners.

- 43 -
Networking
The Networking page provides real-time system sending/receiving information, interface connectionoptions, and logs. The Interfaces section provides options for Add Bond, Add Bridge, Add Team,and Add VLAN. The Add Bond option provides a method for aggregating multiple network interfacesinto a single bonded interface. Configure team settings with the Add Team option. Use the AddBridge feature to create a single aggregate network from multiple communication networks. The Net-working Logs section provides a daily log of activity for the system network.
Copyright 2017 - 2018 Tenable, Inc. All rights reserved. Tenable Network Security, Nessus, SecurityCenter, SecurityCenter Continuous View and Log Correlation Engine are registered trademarks of Ten-
able, Inc. Tenable, Tenable.io, Assure, and The Cyber Exposure Company are trademarks of Tenable, Inc. All other products or services are trademarks of their respective owners.

- 44 -
Add Bond
Steps
1. In the left navigation pane, click the Networking option. The Networking page displays.
2. In the Interfaces heading, click the Add Bond button on the Interfaces section. A new windowappears.
3. Enter a Name for the bond.
4. Select the members (interfaces) to bond to in theMembers section.
5. Select an option for MAC.
6. Select theMode.
7. Select a Primary.
8. Select the type of Link Monitoring. The recommended type is labeled in the drop down list.
Copyright 2017 - 2018 Tenable, Inc. All rights reserved. Tenable Network Security, Nessus, SecurityCenter, SecurityCenter Continuous View and Log Correlation Engine are registered trademarks of Ten-
able, Inc. Tenable, Tenable.io, Assure, and The Cyber Exposure Company are trademarks of Tenable, Inc. All other products or services are trademarks of their respective owners.

- 45 -
9. Enter theMonitoring Intervals with options to link up or down delay increments.
Copyright 2017 - 2018 Tenable, Inc. All rights reserved. Tenable Network Security, Nessus, SecurityCenter, SecurityCenter Continuous View and Log Correlation Engine are registered trademarks of Ten-
able, Inc. Tenable, Tenable.io, Assure, and The Cyber Exposure Company are trademarks of Tenable, Inc. All other products or services are trademarks of their respective owners.

- 46 -
Add Team
Steps
1. In the left navigation pane, click the Networking option. The Networking page displays.
2. In the Interfaces heading, click the Add Team button on the Interfaces section. A new windowwill appear.
3. Enter the Team Name.
4. Select the Ports needed for the new team.
5. Select the Runner and Link Watch from the drop down list.
6. Enter the Link up and Link down delay increments.
Copyright 2017 - 2018 Tenable, Inc. All rights reserved. Tenable Network Security, Nessus, SecurityCenter, SecurityCenter Continuous View and Log Correlation Engine are registered trademarks of Ten-
able, Inc. Tenable, Tenable.io, Assure, and The Cyber Exposure Company are trademarks of Tenable, Inc. All other products or services are trademarks of their respective owners.
- 47 -
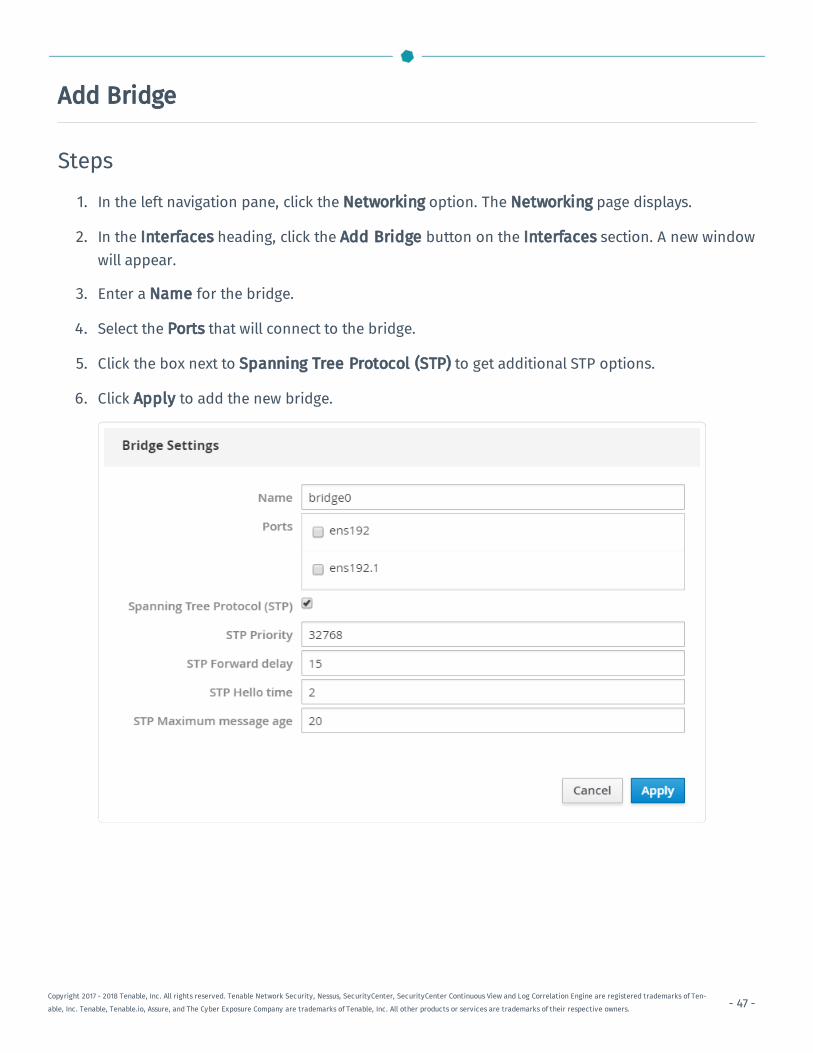
Add Bridge
Steps
1. In the left navigation pane, click the Networking option. The Networking page displays.
2. In the Interfaces heading, click the Add Bridge button on the Interfaces section. A new windowwill appear.
3. Enter a Name for the bridge.
4. Select the Ports that will connect to the bridge.
5. Click the box next to Spanning Tree Protocol (STP) to get additional STP options.
6. Click Apply to add the new bridge.
Copyright 2017 - 2018 Tenable, Inc. All rights reserved. Tenable Network Security, Nessus, SecurityCenter, SecurityCenter Continuous View and Log Correlation Engine are registered trademarks of Ten-
able, Inc. Tenable, Tenable.io, Assure, and The Cyber Exposure Company are trademarks of Tenable, Inc. All other products or services are trademarks of their respective owners.

- 48 -
Add VLAN
Steps
1. Click the Add VLAN button on the Interfaces section. A new window will appear.
2. Select the Parent from the drop down list.
3. Enter the VLAN Id and name.
4. Click Apply to confirm add the VLAN.
5. The new VLAN will display in the Interface list.
Copyright 2017 - 2018 Tenable, Inc. All rights reserved. Tenable Network Security, Nessus, SecurityCenter, SecurityCenter Continuous View and Log Correlation Engine are registered trademarks of Ten-
able, Inc. Tenable, Tenable.io, Assure, and The Cyber Exposure Company are trademarks of Tenable, Inc. All other products or services are trademarks of their respective owners.

- 49 -
Storage
The Storage section provides real-time reading/writing graphs, File Systems information, and Stor-age logs. The File Systems section lists each item noting the name, mount point, and size. Additionaldetails can be viewed by clicking on individual file systems (rows). The detailed view provides inform-ation for capacity, logical volumes, and correlating file storage logs. The file system name can beupdated on the details page. In addition, single file systems can be deleted.
Copyright 2017 - 2018 Tenable, Inc. All rights reserved. Tenable Network Security, Nessus, SecurityCenter, SecurityCenter Continuous View and Log Correlation Engine are registered trademarks of Ten-
able, Inc. Tenable, Tenable.io, Assure, and The Cyber Exposure Company are trademarks of Tenable, Inc. All other products or services are trademarks of their respective owners.

- 50 -
Rename File System
Steps
1. In the left navigation pane, click the Storage option. The Storage page displays.
2. In the File Systems section, click on the individual file in the file systems list. The details pagewill appear.
3. Click the Rename button in the upper right section of the window. A new window will appear.
4. Enter the new name for the File System.
5. Click Create. The new name will immediately display on the page.
Copyright 2017 - 2018 Tenable, Inc. All rights reserved. Tenable Network Security, Nessus, SecurityCenter, SecurityCenter Continuous View and Log Correlation Engine are registered trademarks of Ten-
able, Inc. Tenable, Tenable.io, Assure, and The Cyber Exposure Company are trademarks of Tenable, Inc. All other products or services are trademarks of their respective owners.

- 51 -
Delete File System
Steps
1. In the left navigation pane, click the Storage option. The Storage page displays.
2. In the File System section, click the individual file in the files systems list. The details page willappear.
3. Click the red Delete button in the system heading.
4. Confirm that you want to delete the File System.
5.Caution: Deleting a volume group will erase all data on it.
Copyright 2017 - 2018 Tenable, Inc. All rights reserved. Tenable Network Security, Nessus, SecurityCenter, SecurityCenter Continuous View and Log Correlation Engine are registered trademarks of Ten-
able, Inc. Tenable, Tenable.io, Assure, and The Cyber Exposure Company are trademarks of Tenable, Inc. All other products or services are trademarks of their respective owners.

- 52 -
Accounts
New and existing users are managed through the Accounts section. User accounts are displayed incards on the main screen. Click on the user card to display the user's information. User informationcan also be edited within the user information box.
Copyright 2017 - 2018 Tenable, Inc. All rights reserved. Tenable Network Security, Nessus, SecurityCenter, SecurityCenter Continuous View and Log Correlation Engine are registered trademarks of Ten-
able, Inc. Tenable, Tenable.io, Assure, and The Cyber Exposure Company are trademarks of Tenable, Inc. All other products or services are trademarks of their respective owners.

- 53 -
Services
The Services page provides detailed information for Targets, System Services, Sockets, Timers, andPaths. From this page, a user can stop, start, restart, or reload any installed web service by clicking theservice and selecting the desired option from the drop-down box.
Note: Restarting a service will completely stop and restart the service. Reloading a service will onlyreload the service's configuration files.
Copyright 2017 - 2018 Tenable, Inc. All rights reserved. Tenable Network Security, Nessus, SecurityCenter, SecurityCenter Continuous View and Log Correlation Engine are registered trademarks of Ten-
able, Inc. Tenable, Tenable.io, Assure, and The Cyber Exposure Company are trademarks of Tenable, Inc. All other products or services are trademarks of their respective owners.
- 54 -
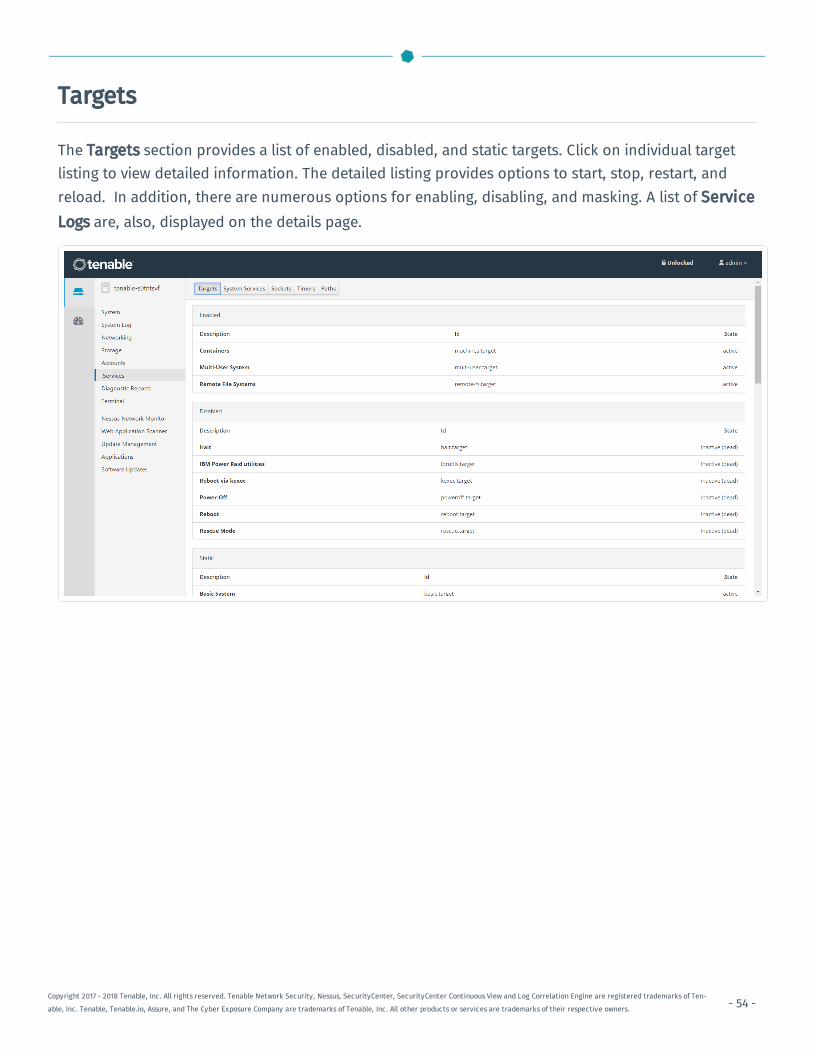
Targets
The Targets section provides a list of enabled, disabled, and static targets. Click on individual targetlisting to view detailed information. The detailed listing provides options to start, stop, restart, andreload. In addition, there are numerous options for enabling, disabling, and masking. A list of ServiceLogs are, also, displayed on the details page.
Copyright 2017 - 2018 Tenable, Inc. All rights reserved. Tenable Network Security, Nessus, SecurityCenter, SecurityCenter Continuous View and Log Correlation Engine are registered trademarks of Ten-
able, Inc. Tenable, Tenable.io, Assure, and The Cyber Exposure Company are trademarks of Tenable, Inc. All other products or services are trademarks of their respective owners.

- 55 -
System Services
The System Services section provides a list of enabled, disabled, and static services. Click on an indi-vidual system services listing to view detailed information. The detailed listing provides options tostart, stop, restart, and reload. In addition, there are numerous options for enabling, disabling, andmasking. A list of Service Logs are, also, displayed on the details page.
Copyright 2017 - 2018 Tenable, Inc. All rights reserved. Tenable Network Security, Nessus, SecurityCenter, SecurityCenter Continuous View and Log Correlation Engine are registered trademarks of Ten-
able, Inc. Tenable, Tenable.io, Assure, and The Cyber Exposure Company are trademarks of Tenable, Inc. All other products or services are trademarks of their respective owners.

- 56 -
Sockets
The Sockets section provides a list of enabled, disabled, and static sockets. Click on an individualsocket listing to view detailed information. The detailed listing provides options to start, stop, restart,and reload. In addition, there are numerous options for enabling, disabling, an masking. A list of Ser-vice Logs are, also, displayed on the details page.
Copyright 2017 - 2018 Tenable, Inc. All rights reserved. Tenable Network Security, Nessus, SecurityCenter, SecurityCenter Continuous View and Log Correlation Engine are registered trademarks of Ten-
able, Inc. Tenable, Tenable.io, Assure, and The Cyber Exposure Company are trademarks of Tenable, Inc. All other products or services are trademarks of their respective owners.
- 57 -
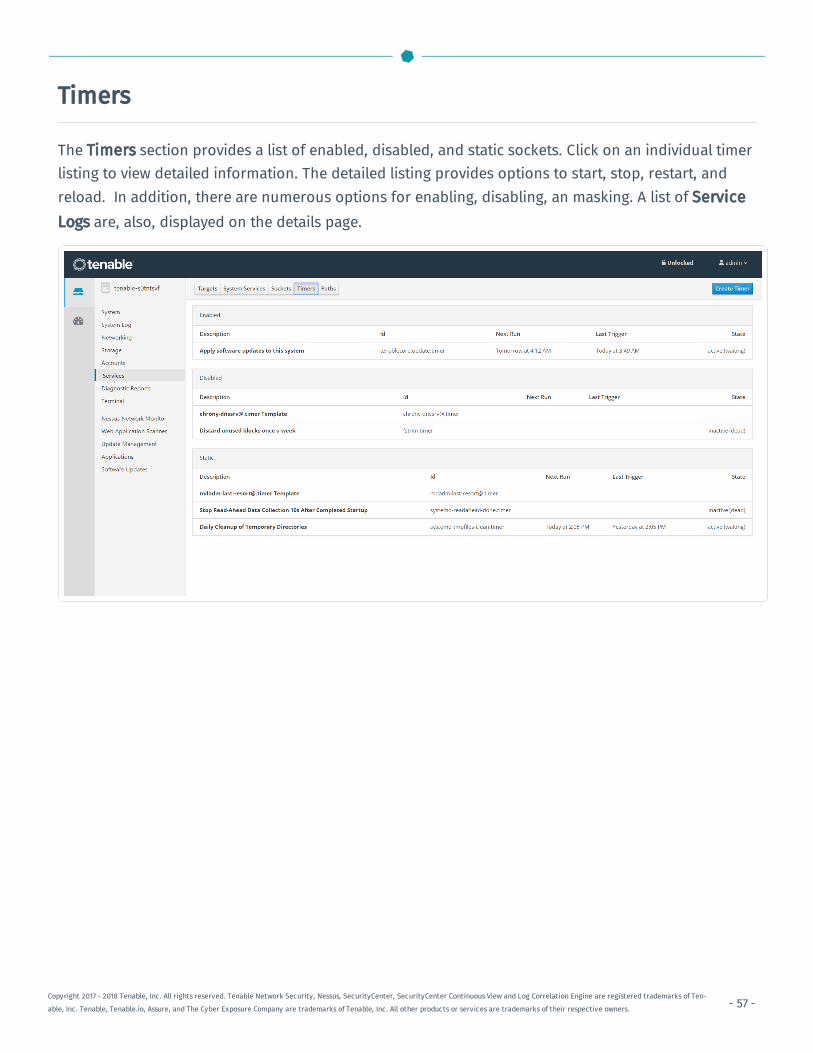
Timers
The Timers section provides a list of enabled, disabled, and static sockets. Click on an individual timerlisting to view detailed information. The detailed listing provides options to start, stop, restart, andreload. In addition, there are numerous options for enabling, disabling, an masking. A list of ServiceLogs are, also, displayed on the details page.
Copyright 2017 - 2018 Tenable, Inc. All rights reserved. Tenable Network Security, Nessus, SecurityCenter, SecurityCenter Continuous View and Log Correlation Engine are registered trademarks of Ten-
able, Inc. Tenable, Tenable.io, Assure, and The Cyber Exposure Company are trademarks of Tenable, Inc. All other products or services are trademarks of their respective owners.

- 58 -
Create Timer
Steps
1. In the left navigation pane, click the Services option. The Services page displays.
2. In the Services page heading, click the Create Timers button. A new window appears.
3. Enter the Service Name, Description, Command, and Run information.
4. Click Save. The new timer will display in the enabled section of the list.
Copyright 2017 - 2018 Tenable, Inc. All rights reserved. Tenable Network Security, Nessus, SecurityCenter, SecurityCenter Continuous View and Log Correlation Engine are registered trademarks of Ten-
able, Inc. Tenable, Tenable.io, Assure, and The Cyber Exposure Company are trademarks of Tenable, Inc. All other products or services are trademarks of their respective owners.

- 59 -
Paths
The Paths section provides a list of enabled, disabled, and static paths. Click on an individual path list-ing to view detailed information. The detailed listing provides options to start, stop, restart, andreload. In addition, there are numerous options for enabling, disabling, an masking. A list of ServiceLogs are, also, displayed on the details page.
Copyright 2017 - 2018 Tenable, Inc. All rights reserved. Tenable Network Security, Nessus, SecurityCenter, SecurityCenter Continuous View and Log Correlation Engine are registered trademarks of Ten-
able, Inc. Tenable, Tenable.io, Assure, and The Cyber Exposure Company are trademarks of Tenable, Inc. All other products or services are trademarks of their respective owners.
- 60 -
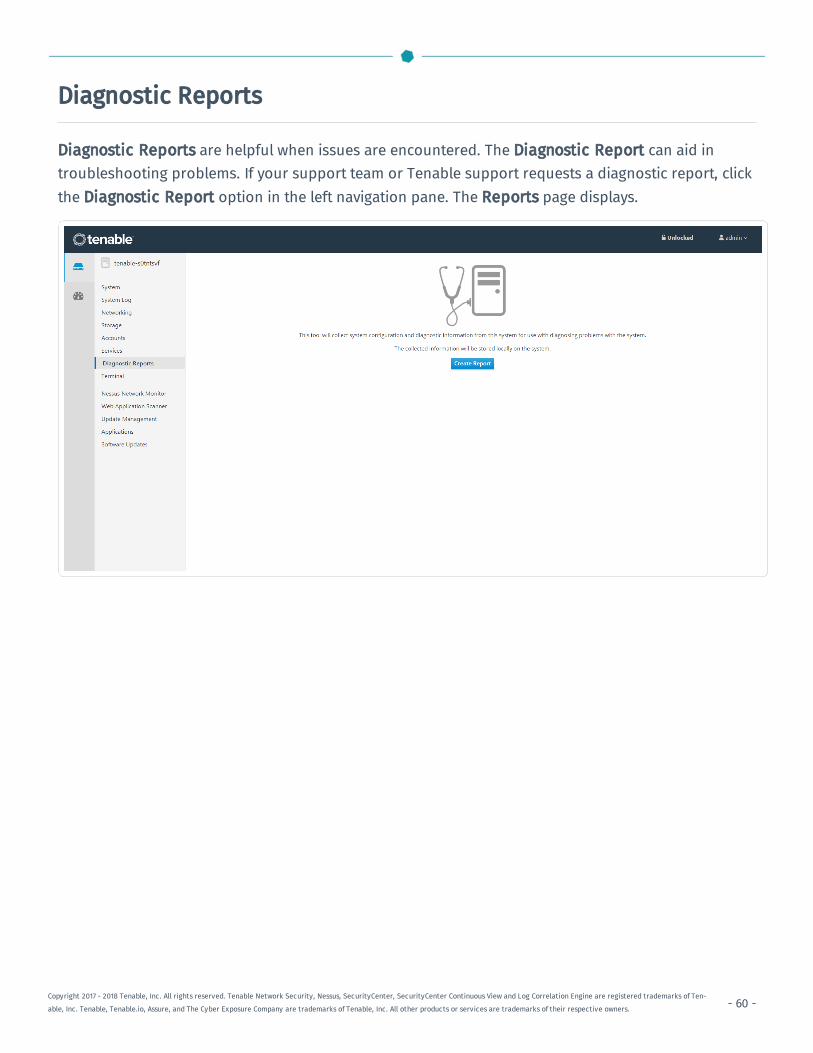
Diagnostic Reports
Diagnostic Reports are helpful when issues are encountered. The Diagnostic Report can aid introubleshooting problems. If your support team or Tenable support requests a diagnostic report, clickthe Diagnostic Report option in the left navigation pane. The Reports page displays.
Copyright 2017 - 2018 Tenable, Inc. All rights reserved. Tenable Network Security, Nessus, SecurityCenter, SecurityCenter Continuous View and Log Correlation Engine are registered trademarks of Ten-
able, Inc. Tenable, Tenable.io, Assure, and The Cyber Exposure Company are trademarks of Tenable, Inc. All other products or services are trademarks of their respective owners.

- 61 -
Generate Report
Steps
1. Click the Create Report button.
2. A new window with a status bar will appear as the report generates.
3. When the report is complete, the status will display Done.
4. Click the Download Report button to save and print the report.
Copyright 2017 - 2018 Tenable, Inc. All rights reserved. Tenable Network Security, Nessus, SecurityCenter, SecurityCenter Continuous View and Log Correlation Engine are registered trademarks of Ten-
able, Inc. Tenable, Tenable.io, Assure, and The Cyber Exposure Company are trademarks of Tenable, Inc. All other products or services are trademarks of their respective owners.
- 62 -
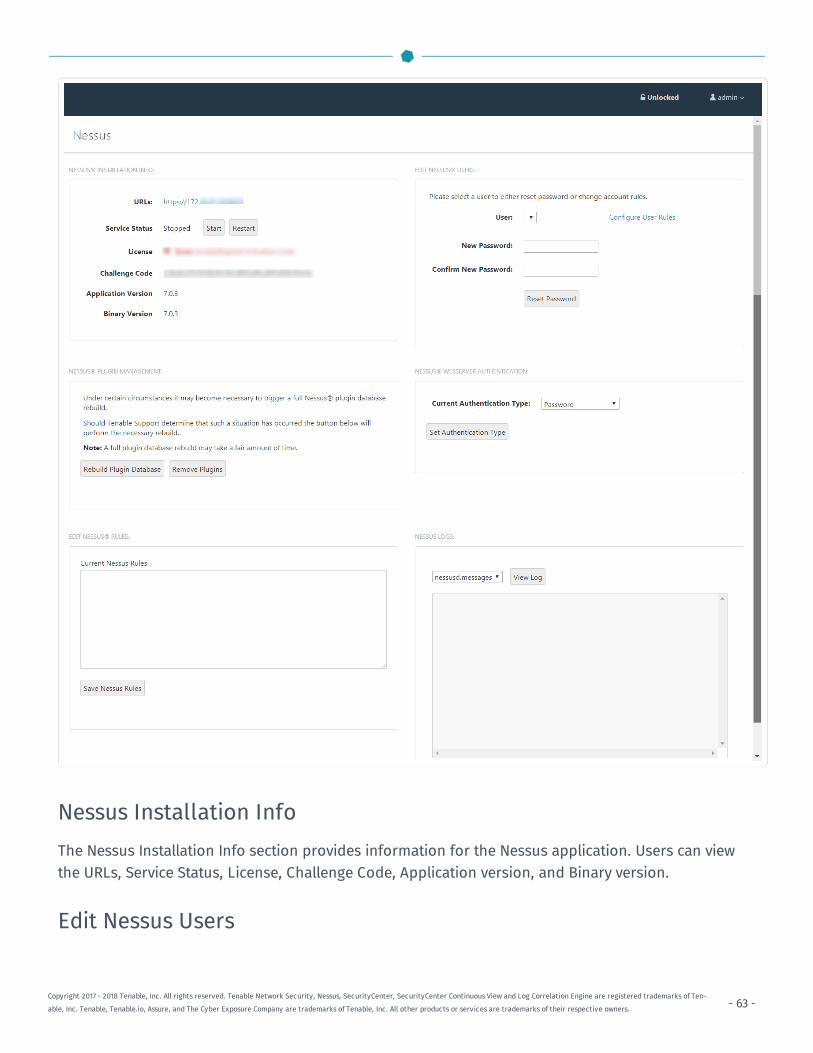
Nessus
The Nessus application must be activated and configured to make the system manageable via a webbrowser or SecurityCenter.
Until a valid Activation Code is entered or the Nessus scanner has been configured to be managed bySecurityCenter, the message Error: Invalid/Expired Activation Code will be displayed in red on theNessus Installation Info card on the Nessus page.
Configuration options for Nessus are available in the cards on the Nessus page.
Copyright 2017 - 2018 Tenable, Inc. All rights reserved. Tenable Network Security, Nessus, SecurityCenter, SecurityCenter Continuous View and Log Correlation Engine are registered trademarks of Ten-
able, Inc. Tenable, Tenable.io, Assure, and The Cyber Exposure Company are trademarks of Tenable, Inc. All other products or services are trademarks of their respective owners.
- 63 -
Nessus Installation InfoThe Nessus Installation Info section provides information for the Nessus application. Users can viewthe URLs, Service Status, License, Challenge Code, Application version, and Binary version.
Edit Nessus Users
Copyright 2017 - 2018 Tenable, Inc. All rights reserved. Tenable Network Security, Nessus, SecurityCenter, SecurityCenter Continuous View and Log Correlation Engine are registered trademarks of Ten-
able, Inc. Tenable, Tenable.io, Assure, and The Cyber Exposure Company are trademarks of Tenable, Inc. All other products or services are trademarks of their respective owners.

- 64 -
The Edit Nessus Users section provides a place where user passwords can be updated and user rulescan be configured.
Update Password
1. Select the user from the drop down list.
2. Enter the New Password in the New Password field.
3. Confirm the New Password in the Confirm New Password field.
4. Click Reset Password. A green success message will display at the bottom of the card.
Configure User Rules
1. Select the user from the drop down list.
2. Click the Configure User Rules link. A new window will open with a text box to enter the userrules.
3. Enter the user rules and click Save.
4. A success message will appear at the bottom of the Edit Nessus User card.
Nessus Plugin ManagementThe Nessus Plugin Management section enables users to manually update their Nessus plugin set. Thisis useful in offline situations where SecurityCenter will not have direct access to Tenable’s plugin
Copyright 2017 - 2018 Tenable, Inc. All rights reserved. Tenable Network Security, Nessus, SecurityCenter, SecurityCenter Continuous View and Log Correlation Engine are registered trademarks of Ten-
able, Inc. Tenable, Tenable.io, Assure, and The Cyber Exposure Company are trademarks of Tenable, Inc. All other products or services are trademarks of their respective owners.
- 65 -
servers. It is important to disable the SecurityCenter nightly plugin update process when using themanual method.
Note: Nessus cannot be running while these builds are performed. Stop Nessus by selecting the Stopoption in the Service Status section on the Nessus Installation Info card.
Rebuild Plugin Database
1. Click the Rebuild Plugin Database button.
2. A message with a status update that the system is rebuilding the plugin database will appear atthe bottom of the card.
3. A green Success message will appear when the rebuild is complete.
Remove Plugins
1. Click the Remove Plugins button.
2. A message with a status update that the system is removing the plugins appears at the bottom ofthe card.
3. A green Successmessage will appear when the removal is complete.
Nessus Webserver AuthenticationThe Web Server Authentication section controls the configuration of the SSL Client Certificate authen-tication permissions. The two options are password or SSL Client Certificate. This setting will controlthe option available for users to log into the Nessus server via SSL client certificate or passwordauthentication.
l The SSL Client Certificate option configures the Nessus web server to only accept connectionsfrom web browsers that present a valid SSL client certificate. Other connection attempts will berejected by the web server with the exact message displayed dependent on the web browser inuse.
l The Password option configures the Nessus web server to ignore any SSL client certificates butallow the web browser connection. This is the default setting and works with most web browserswithout issue.
To change the Nessus Webserver Authentication:
Copyright 2017 - 2018 Tenable, Inc. All rights reserved. Tenable Network Security, Nessus, SecurityCenter, SecurityCenter Continuous View and Log Correlation Engine are registered trademarks of Ten-
able, Inc. Tenable, Tenable.io, Assure, and The Cyber Exposure Company are trademarks of Tenable, Inc. All other products or services are trademarks of their respective owners.
- 66 -
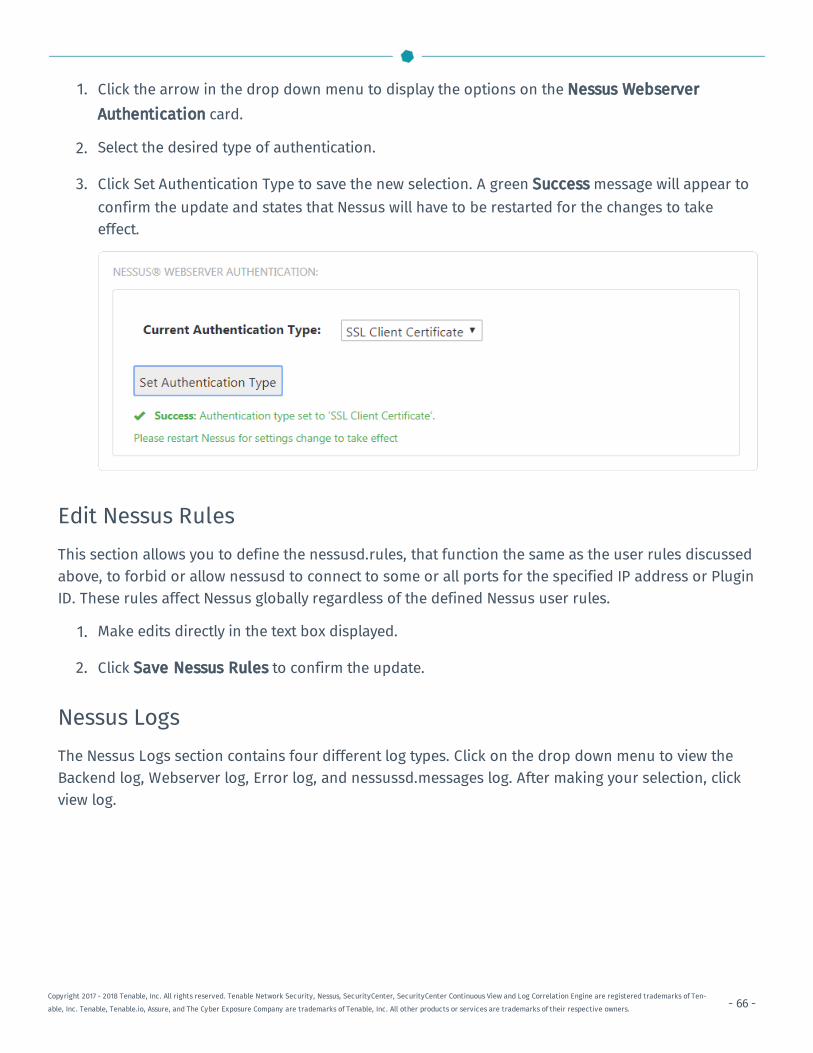
1. Click the arrow in the drop down menu to display the options on the Nessus WebserverAuthentication card.
2. Select the desired type of authentication.
3. Click Set Authentication Type to save the new selection. A green Successmessage will appear toconfirm the update and states that Nessus will have to be restarted for the changes to takeeffect.
Edit Nessus RulesThis section allows you to define the nessusd.rules, that function the same as the user rules discussedabove, to forbid or allow nessusd to connect to some or all ports for the specified IP address or PluginID. These rules affect Nessus globally regardless of the defined Nessus user rules.
1. Make edits directly in the text box displayed.
2. Click Save Nessus Rules to confirm the update.
Nessus LogsThe Nessus Logs section contains four different log types. Click on the drop down menu to view theBackend log, Webserver log, Error log, and nessussd.messages log. After making your selection, clickview log.
Copyright 2017 - 2018 Tenable, Inc. All rights reserved. Tenable Network Security, Nessus, SecurityCenter, SecurityCenter Continuous View and Log Correlation Engine are registered trademarks of Ten-
able, Inc. Tenable, Tenable.io, Assure, and The Cyber Exposure Company are trademarks of Tenable, Inc. All other products or services are trademarks of their respective owners.

- 67 -
Terminal
The Terminal option provides a console for user specific command line interface.
Copyright 2017 - 2018 Tenable, Inc. All rights reserved. Tenable Network Security, Nessus, SecurityCenter, SecurityCenter Continuous View and Log Correlation Engine are registered trademarks of Ten-
able, Inc. Tenable, Tenable.io, Assure, and The Cyber Exposure Company are trademarks of Tenable, Inc. All other products or services are trademarks of their respective owners.
- 68 -
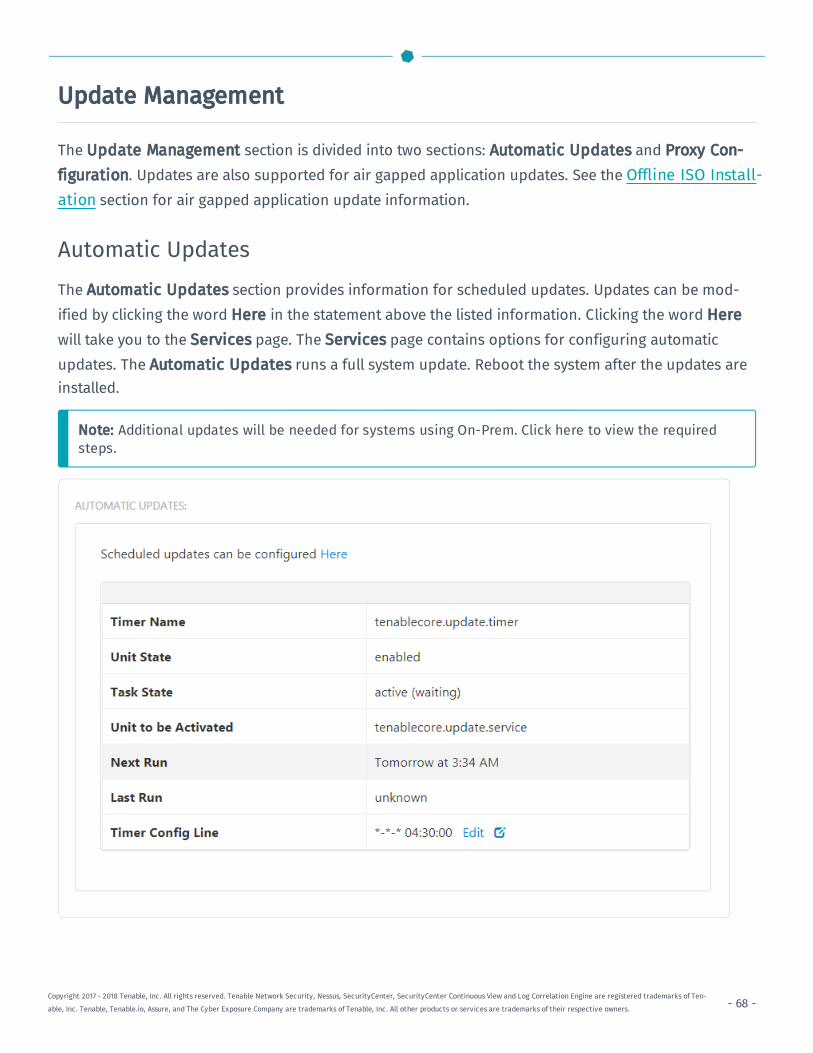
Update Management
The Update Management section is divided into two sections: Automatic Updates and Proxy Con-figuration. Updates are also supported for air gapped application updates. See the Offline ISO Install-ation section for air gapped application update information.
Automatic UpdatesThe Automatic Updates section provides information for scheduled updates. Updates can be mod-ified by clicking the word Here in the statement above the listed information. Clicking the word Herewill take you to the Services page. The Services page contains options for configuring automaticupdates. The Automatic Updates runs a full system update. Reboot the system after the updates areinstalled.
Note: Additional updates will be needed for systems using On-Prem. Click here to view the requiredsteps.
Copyright 2017 - 2018 Tenable, Inc. All rights reserved. Tenable Network Security, Nessus, SecurityCenter, SecurityCenter Continuous View and Log Correlation Engine are registered trademarks of Ten-
able, Inc. Tenable, Tenable.io, Assure, and The Cyber Exposure Company are trademarks of Tenable, Inc. All other products or services are trademarks of their respective owners.
- 69 -
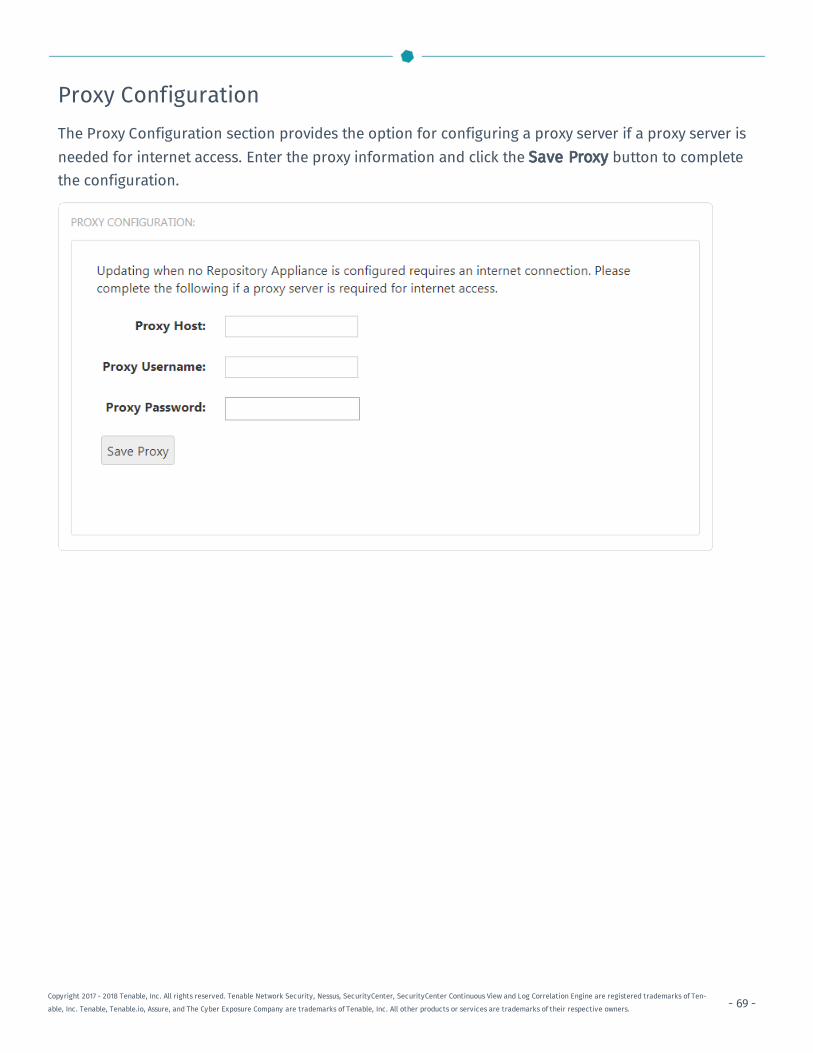
Proxy ConfigurationThe Proxy Configuration section provides the option for configuring a proxy server if a proxy server isneeded for internet access. Enter the proxy information and click the Save Proxy button to completethe configuration.
Copyright 2017 - 2018 Tenable, Inc. All rights reserved. Tenable Network Security, Nessus, SecurityCenter, SecurityCenter Continuous View and Log Correlation Engine are registered trademarks of Ten-
able, Inc. Tenable, Tenable.io, Assure, and The Cyber Exposure Company are trademarks of Tenable, Inc. All other products or services are trademarks of their respective owners.

- 70 -
Timer Configuration Line
Steps
1. Click the Edit option (blue text) in the Timer Config Line row. A window will open.
2. Select the Day of week, Day of month, Hour, and/or Minute for the desired configuration.
Note: If both, Day of week and Day of month are selected, the system will only perform updateson days when those two items coincide. For example, if Wednesday is select for Day of week and8 is selected for Day of month the system will only update on Wednesday's that fall on the 8th.
3. Click Save to confirm the configuration. A confirmation message will appear and the window willclose.
4. Refresh the screen to update the page.
5. The updated configuration will display in the Automatic Updates section.
Copyright 2017 - 2018 Tenable, Inc. All rights reserved. Tenable Network Security, Nessus, SecurityCenter, SecurityCenter Continuous View and Log Correlation Engine are registered trademarks of Ten-
able, Inc. Tenable, Tenable.io, Assure, and The Cyber Exposure Company are trademarks of Tenable, Inc. All other products or services are trademarks of their respective owners.

- 71 -
Offline Updates
You can install updates to Tenable Core without an Internet connection by obtaining the TenableCore Offline Update ISO file from the Internet and copying it to your Tenable Core Machine.To install updates offline:
1. Download the ISO file from the Tenable Downloads page.
2. Upload the file via scp.
Note: The target line may vary; however, the destination must be the following path:/srv/tenablecore/offlineiso/tenable-offline-updates.iso
Example: scp local-iso-file.isouser@host:/srv/tenablecore/offlineiso/tenable-offline-updates.iso
3. After the upload, updates will be applied automatically at the configured time set on the UpdateManagement page or on the next reboot. Alternatively, you can manually install updates on theSoftware Updates page.
Note: Once the ISO file is uploaded, no further action is needed. However, you can make subsequentupdates by replacing the existing ISO file if desired.
Copyright 2017 - 2018 Tenable, Inc. All rights reserved. Tenable Network Security, Nessus, SecurityCenter, SecurityCenter Continuous View and Log Correlation Engine are registered trademarks of Ten-
able, Inc. Tenable, Tenable.io, Assure, and The Cyber Exposure Company are trademarks of Tenable, Inc. All other products or services are trademarks of their respective owners.

- 72 -
Software Updates
The Software Updates page provides information for necessary system updates. Click the Check forUpdates button to scan the system for uninstalled updates.
If updates are found, an Install all updates button will appear at the top of the page. Click the buttonto install the updates.
Updates Requiring RestartWhen updates are made to any of the following packages, you must restart the Tenable Core virtual
Copyright 2017 - 2018 Tenable, Inc. All rights reserved. Tenable Network Security, Nessus, SecurityCenter, SecurityCenter Continuous View and Log Correlation Engine are registered trademarks of Ten-
able, Inc. Tenable, Tenable.io, Assure, and The Cyber Exposure Company are trademarks of Tenable, Inc. All other products or services are trademarks of their respective owners.
- 73 -
machine for the updates to take effect.
l kernel
l glibc
l linux-firmware
l systemd
l udev
Copyright 2017 - 2018 Tenable, Inc. All rights reserved. Tenable Network Security, Nessus, SecurityCenter, SecurityCenter Continuous View and Log Correlation Engine are registered trademarks of Ten-
able, Inc. Tenable, Tenable.io, Assure, and The Cyber Exposure Company are trademarks of Tenable, Inc. All other products or services are trademarks of their respective owners.
- 74 -
SSL/TLS Security Certificates
From the SSL/TLS Security Certificates page, the user can manage their Server and Trusted CertificateAuthority certificates.
Server Certificate
Trusted Certificate Authority Certificate
Copyright 2017 - 2018 Tenable, Inc. All rights reserved. Tenable Network Security, Nessus, SecurityCenter, SecurityCenter Continuous View and Log Correlation Engine are registered trademarks of Ten-
able, Inc. Tenable, Tenable.io, Assure, and The Cyber Exposure Company are trademarks of Tenable, Inc. All other products or services are trademarks of their respective owners.

- 75 -
Server Certificate
When a user initially signs in to Tenable Core, a default self-signed security certificate is installed. Thisdefault certificate is an auto-generated placeholder for the custom certificate; it is not signed by arecognized certificate authority and, if not updated with a valid certificate, will cause security warningsto display in the browser.
Replacing this certificate with a custom certificate allows the user to access Tenable Core securelywithout receiving error messages. A user can also replace these custom certificates as needed orremove the custom certificate entirely, which will then be replaced with a new self-signed auto-gen-erated certificate.
Before you begin:
l Make sure you have the custom security certificate and server key from your organization (.DER,.PEM, or .CRT are all accepted file extensions).
l Make sure you're in the left navigation pane for the appropriate server.
Note: The left navigation pane will list system pages vertically. Click the host navigationbutton in the expanding panel to navigate to the left navigation pane from another section.
To Upload a Custom Security Certificate1. Click SSL/TLS Certificates.
2. On the System Certificate tab, scroll to the Update Certificate section.
3. Locate Server Certificate: and click Choose File.
Copyright 2017 - 2018 Tenable, Inc. All rights reserved. Tenable Network Security, Nessus, SecurityCenter, SecurityCenter Continuous View and Log Correlation Engine are registered trademarks of Ten-
able, Inc. Tenable, Tenable.io, Assure, and The Cyber Exposure Company are trademarks of Tenable, Inc. All other products or services are trademarks of their respective owners.

- 76 -
4. Select the custom certificate.
5. Find Server Key: and click Choose File.
6. Select the server key.
7. Click Install Server Certificates. A success message displays letting you know the upload wassuccessful.
8. From the Services page, restart the Cockpit web service to enable the new certificate.
Note: By default, the custom certificate will apply to all supported Tenable applications you haveinstalled. To override this setting, click the product tab (e.g., Nessus) and uncheck the Reuse SystemCertificate box.
Note: You can replace your custom certificate or server key with a new one by uploading a new file,which will override the existing file.
- or -
To Remove Custom Certificate/Revert to Default Certificate1. From the left navigation pane for the appropriate server, click SSL/TLS Certificates.
2. On the System Certificate tab, scroll to the Update Certificate section.
3. Click Reset Server Certificates. The CONFIRM RESET window appears.
4. Click Reset in the CONFIRM RESET window. A success message displays letting you know thereset was successful.
Copyright 2017 - 2018 Tenable, Inc. All rights reserved. Tenable Network Security, Nessus, SecurityCenter, SecurityCenter Continuous View and Log Correlation Engine are registered trademarks of Ten-
able, Inc. Tenable, Tenable.io, Assure, and The Cyber Exposure Company are trademarks of Tenable, Inc. All other products or services are trademarks of their respective owners.

- 77 -Copyright 2017 - 2018 Tenable, Inc. All rights reserved. Tenable Network Security, Nessus, SecurityCenter, SecurityCenter Continuous View and Log Correlation Engine are registered trademarks of Ten-
able, Inc. Tenable, Tenable.io, Assure, and The Cyber Exposure Company are trademarks of Tenable, Inc. All other products or services are trademarks of their respective owners.

- 78 -
Trusted Certificate Authority Certificates
Uploading a Trusted Certificate Authority certificate authenticates the user to a supportedTenable application and allows the user to securely access an application without having tolog in using a password each time.
Caution: You need to add a Trusted Certificate Authority certificate only when using the SSL/TLS Cer-tificates to authenticate to Nessus, Nessus Network Monitor, or SecurityCenter or when authenticatingSecurityCenter to its Nessus scanners.
Before you begin:
l Make sure you have the Trusted Certificate Authority certificate (.DER, .PEM, or .CRT are all accep-ted file extensions).
l Make sure you're in the left navigation pane for the appropriate server.
Note: The left navigation pane will list system pages vertically. Click the host navigationbutton in the expanding panel to navigate to the left navigation pane from another section.
Upload a Trusted Certificate Authority Certificate:
1. Click SSL/TLS Certificates.
2. On the System Certificate tab, navigate to the TRUSTED CERTIFICATE AUTHORITIES: section.
3. Under Add Certificate Authority:, find the Certificate: field and click Choose File.
Copyright 2017 - 2018 Tenable, Inc. All rights reserved. Tenable Network Security, Nessus, SecurityCenter, SecurityCenter Continuous View and Log Correlation Engine are registered trademarks of Ten-
able, Inc. Tenable, Tenable.io, Assure, and The Cyber Exposure Company are trademarks of Tenable, Inc. All other products or services are trademarks of their respective owners.
- 79 -
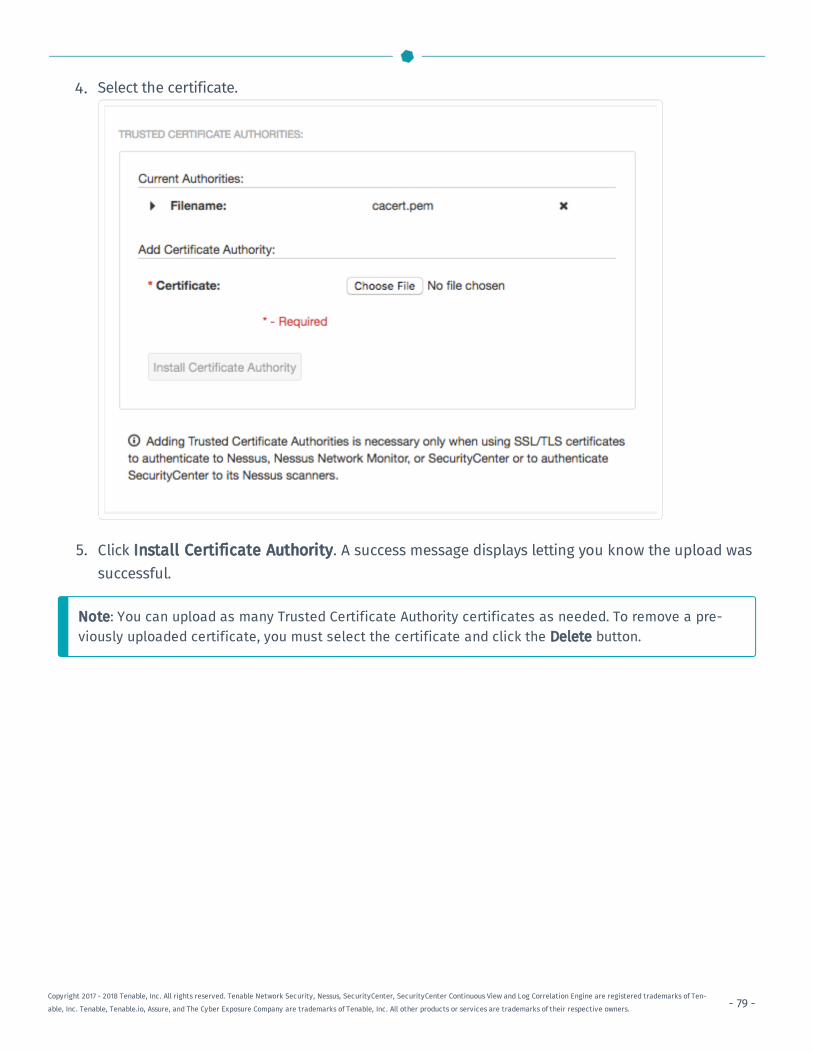
4. Select the certificate.
5. Click Install Certificate Authority. A success message displays letting you know the upload wassuccessful.
Note: You can upload as many Trusted Certificate Authority certificates as needed. To remove a pre-viously uploaded certificate, you must select the certificate and click the Delete button.
Copyright 2017 - 2018 Tenable, Inc. All rights reserved. Tenable Network Security, Nessus, SecurityCenter, SecurityCenter Continuous View and Log Correlation Engine are registered trademarks of Ten-
able, Inc. Tenable, Tenable.io, Assure, and The Cyber Exposure Company are trademarks of Tenable, Inc. All other products or services are trademarks of their respective owners.