Lecture # 10 Knitting Elements and Basic Knitting Structures.
CIRCULAR SAVVY
Techniques for Knitting in the Round by Kathryn Mates
Circular knitting or knitting in the round is a technique that enables
us to create seamless circles and tubes of knitting. Uses fo r circu
lar knitting are numerous. Hats, bags, socks and mittens are often
worked in the round. Many sweaters are designed for circular knit
ting especially multi-colored Fair Isle and Scandinavian garments.
Think about necklines on pullovers and armholes on vests. These
finishing bands are also commonly worked in the round. And let's
not overlook circular shawls, tablecloths and doilies.
Circular knitting presents several benefits. The right side of the
garment faces the knitter so that stitch and color patterns are easy
to see. To work Stockinette stitch, all stitches are knit, no purls are
required. No seam s are needed, eliminating bulkiness, especially
fo r smaller items such as socks or mittens.
TOOLS TO USE
Circular knitting can be done using four or five double pointed
needles or a circular needle. Double pointed needles, as the name
indica tes, have points on both ends. The most common range of
lengths is 4" to 14". They usually come 4 or 5 needles to a package.
Circular needles also com e in a variety of lengths. Circular needles
have a hard tip at each end and a flexible coil in between. Lengths
are measured from tip to tip. Most common lengths for circular
needles range from 16" to 32" although some can be as small as
9" and as long as 60". Some manufacturers have kits that enable
the knitter to change the size and length of the circular needles by
attaching the desi red needle tip onto a separate cable.
The length of the needle should be less than the circumference of
the project. The stitches should sl ide eas ily around the needles.
Do uble pointed needles work well for small items such as socks or
mittens. A circular needle 16" long is good to use for hats. A 29" or
32" needle would be appropriate for an adult sweater. Some pro
jects may require both a circular needle and double points. A hat,
for example, may begin on a 16" circular, but the knitter may need
to change to double pointed needles as the top shaping decreases
the number of stitches to a poin t where they no longer fit easily.
GAUGE
Determining gauge for a circular project requires a gauge swatch
worked in the round. Working back and forth on a flat piece will
result in an inaccurate gauge measurement. For example, stocki
nette stitch worked in the round has all knit stitches. Stockinette
58 Cast On • February- April 2009
stitch worked flat has both knits and purls. Tension often varies be
tween knit and purl stitches and for that reason, the gauge swatch
needs tb match the way the actual project will be worked.
Here is a short-cut technique for working a gauge swatch for a cir
cular project. Using a double point needle, cast on the number of
stitches needed to give a width of about 5 inches. How many stitch
es would be needed? Consult the ya rn band for a recommended
needle size and gauge as a start . Calculate the number required for
a 4 inch width and add a few extra stitches. Starting on the right
side, knit the first row then slide the sti tches to the o ther end of the
needle without turning the work. Leave a long, loose float on the
back and then knit the next row with the righ t side facing. Contin
ue in this manner until the swatch is about 4 inches in length and
bind off. Trim the floa ts in the back and measure a 4 inch width in
the cen ter of the swatch. Count the number of stitches and divide
by 4 to get the st itches per inch. The edge stitches may be a bit loose
because of the stranding, but the center of the swatch should give
an accurate gauge for a pattern worked entirely on the right side.
CIRCULAR TECHNIQUES
The basic idea of circular knitting is that the work is not turned,
but is worked continuously in a forward direction. This creates a
spi ral of stitches. The last stitch of the round is higher than the fi rst
stitch of the round. This spiraling characteristic of working in the
round requires a few special considerations.
Casting On
When using double point needles, cast on to one needle if possible.
Use a point protector or w bber band to prevent st itches from fall
ing off the end. Then distribute the stitches evenly to the two or
three other needles. Move the stitches by slipping them purlwise
to an em pty needle. The reason for doing the cast on this way is to
maintain an even tension. Using multiple needles can cause twisted
or stretched stitches where the needles join. Whether using double
points or a circular needle, make sure to place a marker to identify
the first stitch of the round.
Most pattern instructions for circular knitting include the phrase
"Join round being careful not to twist" as part of the cast on direc
tions. Whether you are using double points or circulars, make sure
the loops of the cast on stitches are all facing upward on the top
of the needle.
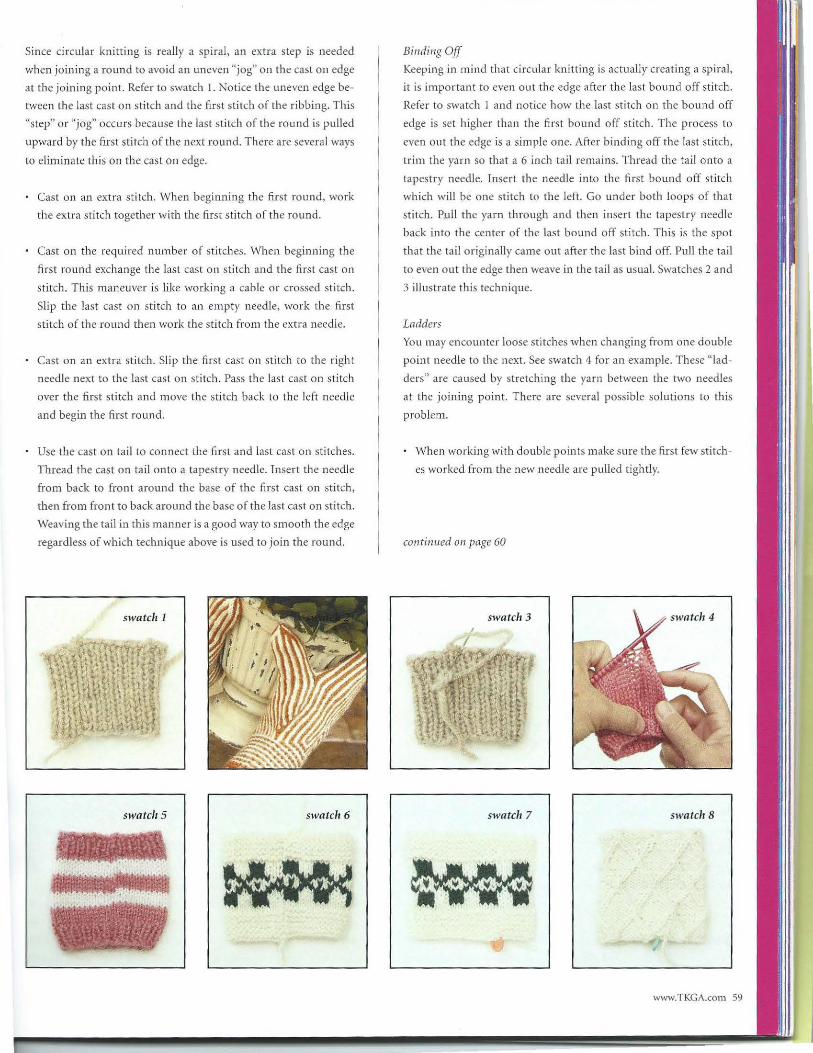
Since circular knitting is really a spiral, an extra step is needed
when joining a round to avoid an uneven "jog" on the cast on edge
at the joining point. Refer to swatch I. Notice the uneven edge be
tween the last cast on stitch and the first stitch of the ribbing. This
"step" or "jog" occurs because the last stitch of the round is pulled
upward by the first stitch of the next round. There arc several ways
to eliminate this on the cast on edge.
Cast on an extra stitch. When beginning the first round , work
the extra stitch together with the first stitch of the round.
Cast on the required number of stitches. vVhen beginning the
first round exchange the last cast o n stitch and the first cast on
stitch. This maneuver is like working a cable or crossed stitch.
Slip the last cast on stitch to an empty needle, work the first
stitch of the round then work the stitch from the extra needle.
Cast on an extra st itch. Slip the first cast on stitch to the right
needle next to the last cast on stitch. Pass the last cast on stitch
over the first stitch and move the stitch back to the left needle
and begin the first round.
Use the cast on tail to connect the first and last cast on stitches.
Thread the cast on tail onto a tapestry needle. Insert the needle
from back to front around the base of the fi rst cast on stitch,
then from front to back around the base of the last cast on stitch.
Weaving the tail in this manner is a good way to smooth the edge
regardless of which technique above is used to join the round.
swatch 1
swatch 5 swatch 6
Binding Off
Keeping in mind tha t circular knitting is actually creating a spiral,
it is important to even out the edge after the last bound off sti tch.
Refer to swatch 1 and notice how the last sti tch on the bound off
edge is set higher than the first bound off stitch. The process to
even out the edge is a simple one. After binding off the last stitch,
trim the ya rn so that a 6 inch ta il remains. Thread the tail onto a
tapestry needle. Insert the needle into the first bound off sti tch
which will be one stitch to the left. Go under both loops of tha t
stitch. Pull the yarn through and then insert the tapestry needle
back into the center of the last bound off stitch. This is the spot
that the ta il originally came out after the last bind off. Pull the tail
to even out the edge then weave in the tail as usual. Swatches 2 and
3 illustrate this technique.
Ladders
You may encounter loose stitches when changing from one double
point needle to the next. See swatch 4 fo r an example. These "lad
ders" are caused by stretching the yarn between the two needles
at the join ing point. There are several possible solutions to this
problem.
When working with double poin ts make sure the first few stitch
es worked from the new needle are pulled tightly.
continued 011 page 60
swatch 3
swatch 7 swatch 8
www.TKGA.com 59
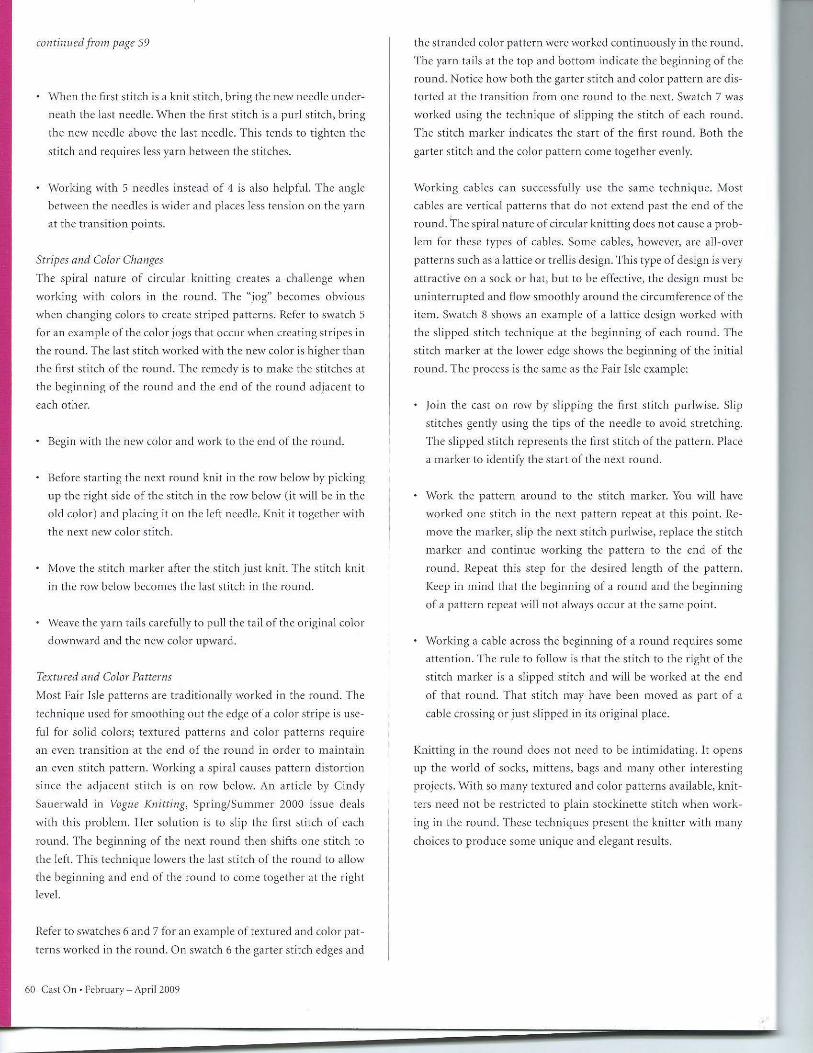
continued from page 59
vVhen the first st itch is a knit sti tch, bring the new needle under
neath the last needle. When the first stitch is a purl stitch, bring
the new needle above the last needle. This tends to tighten the
stitch and requires less yarn between the stitches.
Working with 5 needles instead of 4 is also helpful. The angle
between the needles is wider and places less tension o n the yarn
at the transition points.
Stripes and Color Changes
The spiral nature of circular knitting creates a challenge when
working with colors in the round. The "jog" becomes obvious
when changing colors to create s tr iped patterns. Refer to swatch 5
for an example of the color jogs that occur when creating stripes in
the round. The last stitch worked with the new color is high er than
the fi rst stitch of the rou nd. The remed y is to make the stitches at
the beginni ng of the round and the end of the round adjacent to
each other.
Begin with the new colo r and work to the end of the round.
Before starting the next round knit in the row below by picking
up the right side of the sti tch in the row below (it will be in the
old color ) and placing it on the le ft needle. Kni t it together with
the next new color stitch.
Move the sti tch marker after the stitch just knit. The stitch kn it
in the row below becomes the last stitch in the rou nd .
Weave the ya rn tails carefully to pull the tail of the original color
downward and the new color upward.
Textured and Color Patterns
Most Fair Isle patterns are traditionally worked in the round. Th e
technique used for smoothing out the edge of a color stripe is use
fu l fo r solid colors; textured patterns and color patterns require
an even t ransition at the end of the round in order to maintain
an even stitch pattern. Working a sp iral causes pattern distortion
since the adjacent stitch is on row below. An article by Cindy
Sauerwald in Vogue Knitting, Spring/Summer 2000 issue deals
with thi s p roblem. Her so lution is to slip the first stitch of each
round. The beginning of the next round then shifts one stitch to
the left. This technique lowers the last stitch of the round to allow
the beginning and end of the round to come together at the right
level.
Refe r to swatches 6 and 7 for an example of textured and color pat
terns worked in the round. On swatch 6 the garter stitch edges and
60 Cast On • February - April 2009
the stranded color pattern were worked continuously in the round.
The yarn tails at the top and bottom indica te the beginning of the
round. Notice how both the garter stitch and color pattern are d is
torted at the transition from one round to the next. Swatch 7 was
worked using the technique of slipping the stitch of each round.
The stitch marker indicates the start of the first round. Both the
garter stitch and the color pattern come together evenly.
\'Vorking cables can successfull y use the sam e technique. Most
cables are vertical patterns that do not extend past the end of the
round. The spiral nature of ci rcular knitting does not cause a prob
lem for these types of cables. Some cables, however, a re all-over
pa tterns such as a lattice or trellis design. This type of design is very
attractive on a sock o r hat, bu t to be effective, the design must be
uninterrup ted and flow smoothly around the circumference of the
item. Swatch 8 shows an example of a lattice design worked with
the slipped stitch technique at the beginning of each round. The
stitch marker at the lower edge shows the beginning of the initial
round. The process is the same as the Fair Isle example:
Join the cast on row by slipping the first stitch purlwise. Slip
stitches gently using the tips of the needle to avoid s tretching.
The slipped stitch represents the first stitch of the pattern. Place
a m arker to identify the start of the next round.
Work the pattern around to the stitch marker. You will have
worked one stitch in the next pattern repeat at th is poin t. Re
move the marker, slip the next stitch purlwise, replace the stitch
marker an d continue working the pattern to the end of the
round. Repeat th is step fo r the desired length of the pattern.
Keep in mind that the beginning of a round and the beginning
of a pattern repeat will not always occur at the same poin t.
Working a cable across the beginning of a round requires some
attentio n. The rule to follow is that the stitch to the righ t of the
stitch marker is a slipped stitch and will be worked at the end
of that round . That stitch m ay have been m oved as pa rt of a
cable crossing or just slipped in its original place.
Knitting in the round does not need to be intimidating. It opens
up the world of socks, mittens, bags and many o ther interesting
projects. W ith so many textured and color patterns available, knit
ters need not be restricted to plain stockinette stitch when work
ing in the round. These tech niques present the knitter with many
choices to produce some unique and elegant results.