Teach Geometry for Understanding - MAV - The...
46
Teach Geometry for understanding page 1 1 Teach Geometry for Understanding Polygons 1 Using drawing tools (including software) to draw shapes and patterns p3 2 Recognising, sorting, & drawing familiar two-dimensional shapes p4 3 Properties of angles, triangles and quadrilaterals p5 4 Properties of polygons, inc. regular ones p6 5 Sorting triangles and quadrilaterals (by side lengths, parallel sides, equal angles) p7 6 Constructions of 2D shapes, and congruence including with technology p8 7 Angle properties of parallel lines & transversals from simple tessellations p9 8 Using angle properties for polygons (including triangles, quadrilaterals) p10 9 Construction of 2D shapes; congruence & similarity p12 10 Circle angle 'theorems' p13 Solids 11 Recognising lines, surfaces and planes, corners and boundaries and three- dimensional shapes and objects p14 12 Properties of common solids (spheres, prisms, pyramids) inc. edges, faces, vertices p15 13 Making solids from nets, and drawing the solids p16 14 Sorting solids (by numbers and lengths of edges, numbers and shapes of faces, numbers and angles at vertices) p17 15 Making solids using nets and drawing the solids p18 16 Constructing nets & skeletons to model solids, and congruence p19 17 Single point perspective drawing of solids p20 18 Boundaries, surfaces, nets and interiors of solids (including cylinders, spheres, cones, prisms, polyhedra) p21 19 Creating perspective and isometric images of solids p22 Transformations 20 Creating patterns by turning and flipping shapes p23 21 Recognising and describing symmetry, asymmetry, and congruence p24 22 Applying simple transformations to shapes p25 23 Making tessellations with regular polygons including with technology p26 24 Test generalisations about symmetrical shapes and the effects of slides, reflections and turns on a shape p27 25 Making and solving tangram puzzles p28 26 Transformations (reflection and rotation) and related symmetry including with technology p29 27 Creating complex tessellations using regular polygons p30 28 Similarity and enlargement p31 29 Isometric transformations (including invariant points and lines) including with technology p32 Position, scale and networks 30 Specifying location as a relative position, including left and right p34 31 Interpreting simple networks, diagrams and maps p35 32 Use of maps to identify places and give travel directions p36 33 Using simple compass directions p37 34 Use of scale (distance) and directions on maps p38 35 The effects on area and volume of enlarging or reducing a shape or solid p39 36 Networks (e.g. family trees, road maps) p40 37 Coordinates for positions in the plane p41 38 Location, scale and direction on maps p42 39 Using network diagrams for relationships and problem solving p43 40 The effects of changing scale in 2D and 3D p44 41 Latitude, longitude and great circle distances p45 42 Use of network diagrams to solve problems p46
Transcript of Teach Geometry for Understanding - MAV - The...

Teach Geometry for understanding page 1
1
Teach Geometry for UnderstandingPolygons 1 Using drawing tools (including software) to
draw shapes and patterns p3 2 Recognising, sorting, & drawing familiar
two-dimensional shapes p4 3 Properties of angles, triangles and
quadrilaterals p5 4 Properties of polygons, inc. regular ones p6 5 Sorting triangles and quadrilaterals (by side
lengths, parallel sides, equal angles) p7 6 Constructions of 2D shapes, and
congruence including with technology p8 7 Angle properties of parallel lines &
transversals from simple tessellations p9 8 Using angle properties for polygons
(including triangles, quadrilaterals) p10 9 Construction of 2D shapes; congruence &
similarity p12 10 Circle angle 'theorems' p13
Solids 11 Recognising lines, surfaces and planes,
corners and boundaries and three-dimensional shapes and objects p14
12 Properties of common solids (spheres, prisms, pyramids) inc. edges, faces, vertices p15
13 Making solids from nets, and drawing the solids p16
14 Sorting solids (by numbers and lengths of edges, numbers and shapes of faces, numbers and angles at vertices) p17
15 Making solids using nets and drawing the solids p18
16 Constructing nets & skeletons to model solids, and congruence p19
17 Single point perspective drawing of solids p20
18 Boundaries, surfaces, nets and interiors of solids (including cylinders, spheres, cones, prisms, polyhedra) p21
19 Creating perspective and isometric images of solids p22
Transformations 20 Creating patterns by turning and flipping
shapes p23 21 Recognising and describing symmetry,
asymmetry, and congruence p24 22 Applying simple transformations to shapes
p25 23 Making tessellations with regular polygons
including with technology p26 24 Test generalisations about symmetrical
shapes and the effects of slides, reflections and turns on a shape p27
25 Making and solving tangram puzzles p28 26 Transformations (reflection and rotation) and
related symmetry including with technology p29
27 Creating complex tessellations using regular polygons p30
28 Similarity and enlargement p31 29 Isometric transformations (including
invariant points and lines) including with technology p32
Position, scale and networks 30 Specifying location as a relative position,
including left and right p34 31 Interpreting simple networks, diagrams and
maps p35 32 Use of maps to identify places and give
travel directions p36 33 Using simple compass directions p37 34 Use of scale (distance) and directions on
maps p38 35 The effects on area and volume of enlarging
or reducing a shape or solid p39 36 Networks (e.g. family trees, road maps) p40 37 Coordinates for positions in the plane p41 38 Location, scale and direction on maps p42 39 Using network diagrams for relationships
and problem solving p43 40 The effects of changing scale in 2D and 3D
p44 41 Latitude, longitude and great circle
distances p45 42 Use of network diagrams to solve problems
p46

Teach Geometry for understanding page 2
2
Resources for learning The curriculum described in this section does not use textbooks. Instead it calls on the wealth of high quality learning resources that are available, mainly through MAV. These include lesson plans, worksheets and software. They include hands-on material, DVDs and teaching advice.
Lesson plans Maths300:
RIME:
RIME 5&6:
MCTP: These two books (The Mathematics Curriculum and Teaching Program – Professional Development Package, volumes 1 and 2) was a classic collection of lesson plans, and is now out of print, with no chance of reprinting. Don’t lose your copy!
Teaching advice Continuum:
People Count Guidelines in Measurement:
Mathematics Maths With Attitude:
Mathematics Task Centre:
Worksheets Geoshapes or MiniGeofix These are plastic snap together polygons that can form tessellations or simple to complex ‘solids’ from MAV. They are accompanied by a set of free worksheets with answers. Active Learning:
Active Learning 2:
Maths & Soccer: A DVD about the game and related worksheets from MAV.
Geometry Everywhere: A collection of 84 worksheets and answers with additional ideas, from MAV. Action Numeracy – Middle Primary The following stimulus books include material on space The art of maths, Digging deep, Expeditions, Fun and games, The future of forests, Shapes and scapes, Thrills and spills
Action Numeracy – Upper Primary The following stimulus books include material on space: Exploring space, Leonardo’s legacy
Computers Interactive Learning: Learning Objects: Available to government schools on FUSE or from Scootle.
Resources from MAV may be purchased with a credit card or school order number on-line,
using the MAV’s web site: www.mav.vic.edu.au/shop.

Teach Geometry for understanding page 3
3
1 Using drawing tools (including software) to draw shapes and patterns Children will draw with anything; they should learn to use software such as MS Word and KidPics.
Suggested activities
1. Let children play with drawing programs The most available program is MS Word, and its Drawing tools (under Toolbars) allow many interesting things to be drawn. In particular, students will play and learn with WordArt, Clip Gallery, Lines, Rectangles, Autoshapes, as well as fill and line colour and so on.

Teach Geometry for understanding page 4
4
2 Recognising, sorting & drawing familiar two-dimensional shapes Children need hands-on experience and a discussion of the concepts involved. There are many new names and ideas involved in describing shapes rather than size, e.g. equal, parallel, angle, perpendicular.
Suggested activities
1. Sort prepared shapes
2. Use pattern blocks or other prepared shapes.
3. Create named shapes
4. Children trace around shapes and inside templates. They then draw free-hand or with rulers.
5. Use drawing software Children use drawing tools in MS Word or other programs such as KidPics. They learn to create shapes and to move them around, flip them over, etc.

Teach Geometry for understanding page 5
5
3 Properties of angles, triangles and quadrilaterals Angles are the two lines (segments) meeting at a point (vertex). But the size of the angle is the amount of turning between the two lines, with the vertex as the centre. Right angles (‘square corners’) are of particular importance. Triangles are sorted by numbers of equal sides (scalene, isosceles, equilateral) relating also to symmetry.
Quadrilaterals will have one or two pairs of opposite sides parallel and one or more pairs of opposite or adjacent sides equal. At this stage it is best to make the differences between quadrilaterals the basis of identification. For example, squares are different from (other) rectangles because they have equal sides, and different from (other) rhombuses because they have equal angles (all 90°).
The concept of an angle and its size a Children learn to identify angles in the classroom etc. Find right angles.
b They learn that size of an angle is a measure of the turning between the lines, and use tracing paper to turn one line onto another by holding the vertex in place with a pencil.
c They find equal angles by tracing and matching.
Suggested activities
1. Sorting and sketching triangles Triangles can be sorted by how many equal sides they have. Students will quickly see that this also relates to symmetry; two equal sides => one mirror line, three equal sides => three mirror lines.
2. Sorting and sketching quadrilaterals Quadrilaterals can be sorted by how many equal sides they have. Square and rhombus (4), rectangle, parallelogram (two pairs opposite), kite and arrow head (two pairs adjacent).
These can be distinguished by their symmetry and other ideas, such as right angles
3. Drawing shapes using software Children use drawing tools in MS Word to create accurate shapes using their properties. Other drawing software is available, such as Geometer’s Sketchpad, Cabri Geometrie, Geometry Master 3.0.
Teach Geometry for understanding page 6
6
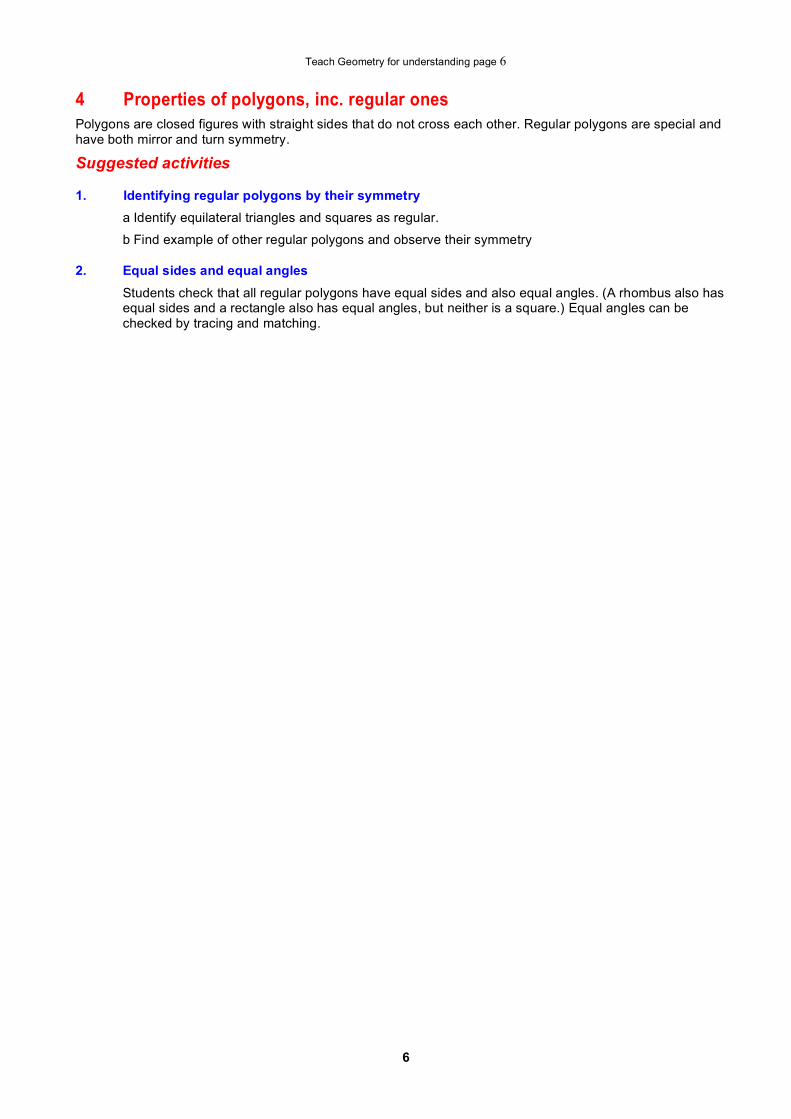
4 Properties of polygons, inc. regular ones Polygons are closed figures with straight sides that do not cross each other. Regular polygons are special and have both mirror and turn symmetry.
Suggested activities
1. Identifying regular polygons by their symmetry a Identify equilateral triangles and squares as regular.
b Find example of other regular polygons and observe their symmetry
2. Equal sides and equal angles Students check that all regular polygons have equal sides and also equal angles. (A rhombus also has equal sides and a rectangle also has equal angles, but neither is a square.) Equal angles can be checked by tracing and matching.

Teach Geometry for understanding page 7
7
5 Sorting triangles and quadrilaterals (by side lengths, parallel sides, equal angles)
There are seven different ‘types’ of triangles. These should be available for sorting, comparing, measuring etc. Triangles can be sorted by angles (acute-angled, obtuse-angled, right-angled) or by side length (scalene, isosceles or equilateral).
There are nine different types of quadrilaterals. They are squares, (non-square) rectangles, (non-square) rhombuses, (non-rectangular and non-rhombic) parallelograms, trapeziums (both isosceles and other), kites (both right-angled and other), and other irregular quadrilaterals.
Suggested activities
1. Sorting triangles - one way Angles: look at how many equal angles there are (0, 2 or 3). Side lengths: we look at how many equal sides there are (0, 2 or 3); gives the same result
Symmetry; the symmetry depends on either numbers of equal angles or equal sides.
Angles: look at the size of the largest angle (acute-angled, right-angled or obtuse-angled).
2. Sorting triangles - two ways at once in a grid Scalene and isosceles triangles can be acute-, obtuse- or right-angled. But equilateral triangles can only be acute-angled.
3. Sorting quadrilaterals - by numbers of equal sides Quadrilaterals could have 2, 3, or 4 equal sides. Two equal pairs might be adjacent (kite) or opposite (parallelogram or rectangle).
4. Sorting quadrilaterals - by numbers of pairs of parallel sides Quadrilaterals could have one pair of parallel sides (trapezium) or two pairs (parallelogram or rectangle).
5. Sorting quadrilaterals - by angle properties Sort by how many pairs of opposite angles are equal Sort by how many right angles there are.
6. Sorting quadrilaterals - by symmetry Sort by type of turn symmetry (none, half and quarter) and numbers of mirror lines (0, 2 and 4). Some quadrilaterals have both.

Teach Geometry for understanding page 8
8
6 Constructions of 2D shapes, and congruence Ruler and compass constructions teach the congruence properties. But for real-life applications students need to learn to use drawing software.
Suggested activities
1. Using traditional tools to construct triangles and quadrilaterals a Use ruler and compasses to construct angles of 90°, 45° (bisecting), 60°, 30° (bisecting).
b Construct triangles (all types) c Construct parallel lines and quadrilaterals (all types)
d Find perpendicular bisectors
2. Using software to construct triangles and quadrilaterals Children use drawing tools to create accurate shapes using their properties. Use MS Word, Geometer’s Sketchpad, Cabri Geometrie, Geometry Master 3.0 or ?? .
3. The meaning of congruence Congruent shapes will fit on top of one another after a number of suitable transformations.
4. There are traditionally known construction conditions that allow this to be deduced logically: • three sides match (SSS), • two sides and the angle between them (SAS), • two angles and the side between them (ASA) and • for right-angled triangles only, matching hypotenuse and one side. Students should construct triangles following the same instructions and show that the triangles are congruent by direct matching.

Teach Geometry for understanding page 9
9
7 Angle properties of parallel lines & transversals from simple tessellations A useful set of relationships applies to two parallel lines crossed by a single line (a ‘transversal’). The angles formed are either equal or add to 18u0° (supplementary).
Suggested activities
1. Two sets of parallel lines, and using symmetry Student use a parallel-sided ruler to create a simple tessellation. Deduce the equal angles.
vo
ci
co
al
ad
2. Learning the names of equal and supplementary angles In the diagram on the right,
angles equal to the ‘dot angle’ are: vo = vertically opposite, co = corresponding, al = alternate, angles making up 180° with the ‘dot angle’ are: ad = adjacent, ci = co-interior

Teach Geometry for understanding page 10
10
8 Using angle properties for polygons (including triangles, quadrilaterals) There is good simple logic to this set of results. The basic one, regarding triangles, can be done experimentally, and will convince most students. But it also can be proved, logically.
Suggested activities
1. Sum of the interior angles of any triangle
AB
B
C
C Draw triangles, each child with a different size or shape.
Name the angles differently. Tear them off and put them together; each one adds to 180°!
Show it logically. Draw a line parallel to the base. Use two pairs of alternate angles.
2. Sum of the exterior angles of any triangle
B
C
A
Exterior angles are formed by extending the sides in order. Cut out the angles formed and put them together to make 360°!
Sum of the interior angles of any quadrilateral
3. Draw quadrilaterals, each child with a different size or shape. Name the angles differently. Tear them off and put them together; each one adds to 360°!
Logically, show that any quadrilateral is formed from two triangles.
The interior angles add to the same as two triangles.
4. Sum of the exterior angles of any quadrilateral
A B
CD
Cut out the angles formed and put them together to make 360°! Every time.
5. Sum of the interior angles of any polygon Draw pentagons, each child with a different size or shape. Name the corner angles differently. Tear them off and put them together;
each one adds to 540°! (It will go completely round and then half more.)
Logically, show that any pentagon is formed from three triangles. Repeat for hexagons (720°, twice round) made from four triangles. Etc.
Logically the number of triangles is always two less than the number of sides. (Why?)
So the sum of the interior angles is 180° x (n – 2) where n is the number of sides.

Teach Geometry for understanding page 11
11
6. Size of each interior angle of any polygon Having shown that equilateral triangle adds to 180°, divide by 3 for the size of each angle. Repeat for squares (360° ÷ 4), pentagons (540° ÷ 5), hexagons (720° ÷ 6), etc.
Generalise to 180 x (n – 2)÷ n.
7. Sum of the exterior angles of any polygon Why is this sum always 360°? At each vertex there are 180°. So in total we have 180 x n°. But the interior angles add to 180 x (n – 2)° which is 180 x n° – 360°.
Take away this and we are left with (wait for it!) 360°.

Teach Geometry for understanding page 12
12
9 Construction of 2D shapes; congruence There are very many fascinating constructions to produce wonderful shapes. Some of them are described briefly below, but good references will take you much further.
Suggested activities
1. Regular polygons and star polygons Constructions for regular hexagons are very simple, octagons more involved and pentagons much more tricky. Regular polygons with pRIME number of sides (except 3) cannot be constructed using classical means.
2. Star polygons (such as the pentagram) have fascinating properties.
3. Golden rectangle The regular pentagon (or pentagram, its star polygon) forms the basis of constructing the golden rectangle. This has wonderful ratio properties, and also forms a spiral.
4. Special properties of triangles a Circumcentre and circumcircle: to find the centre of a circle that will pass through each vertex of any
triangle, find the intersection of the perpendicular bisectors of its sides. b Incentre and incircle; to find the centre of a circle that will just fit inside any triangle, find the
intersection of the bisectors of all its angles.
c Draw the altitude of any side of a triangle (a perpendicular through the opposite vertex).
d The medians (from the midpoint of the sides to the opposite vertex) meet at the centroid. This is the ‘balance point’ of the cardboard triangle, and the centroid divides each median in the ratio 1:2.
5. Constructing spirals a The simplest spiral goes further from the pole as its angle from the starting line increases. The
distance is proportional to the angle. A bit like a CD groove or a coil of rope.
b The aqua-angular spiral (e.g. nautilus shell) uses an exponential formula to relate distance to angle. Both are in the spreadsheet below. This is the spiral of natural shapes.
6. Constructing conic sections (parabolas and ellipses) a The parabola is not only an algebraic shape (quadratic functions) but also a conic section. Students
should see parabolas (inverted) in the flights of balls, and use several methods for constructing parabolas.
The parabola is a set of points equidistant from a point (the focus) and a line (the directrix). See Conics spreadsheet.
b The ellipse is best known as the path of the planets. There is a simple construction using two foci and a fixed length of string joining them. (See spreadsheet.)
The ellipse is a set of points closer – by a fixed fraction – to a point (the focus) than a line (the directrix). See Conics spreadsheet.
c Use a lamp with a cylindrical shade to produce a conical region of light. When this intersects a flat wall it will produce either a parabola, and ellipse or an hyperbola.
7. Congruence The construction specifications for triangles to be congruent are • three sides match (SSS),
• two sides and the angle between them (SAS),
• two angles and the side between them (ASA) and
• for right-angled triangles only, matching hypotenuse and one side. These are used in the spreadsheet Triangle, below. The ‘ambiguous case’, where two sides are the same and one angle not between them, is also shown; there can be 2, 1 or 0 solutions!
Teach Geometry for understanding page 13
13
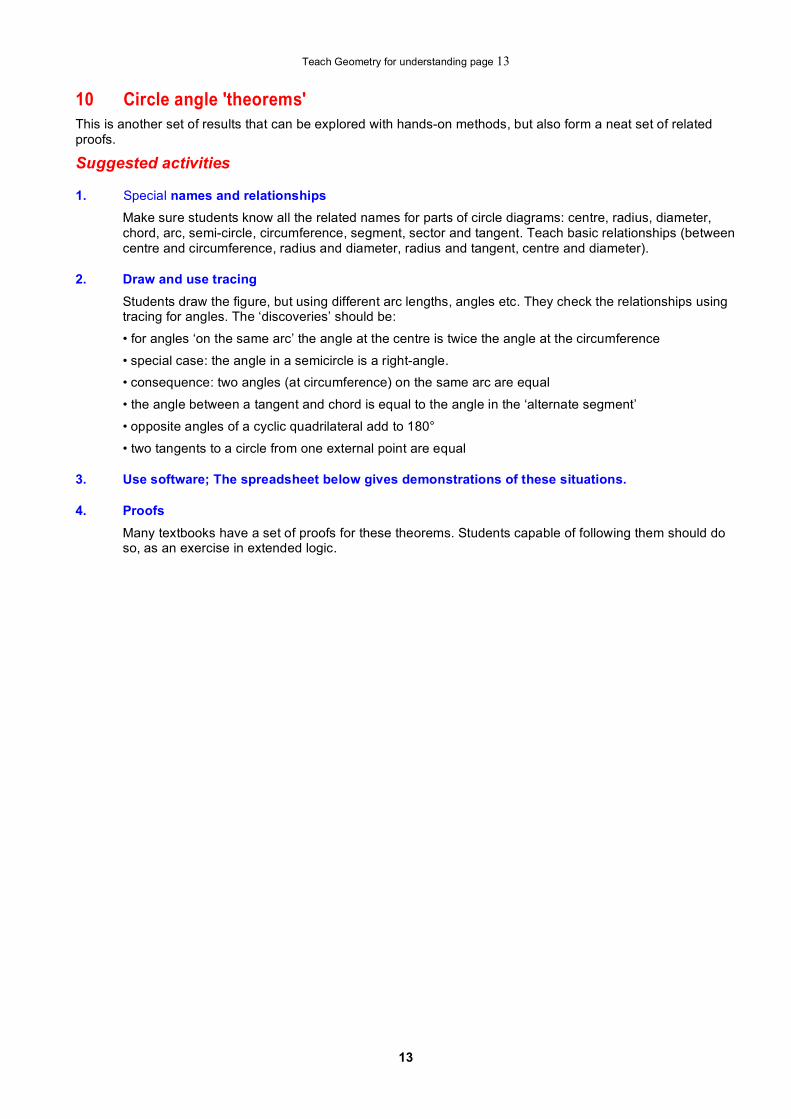
10 Circle angle 'theorems' This is another set of results that can be explored with hands-on methods, but also form a neat set of related proofs.
Suggested activities
1. Special names and relationships Make sure students know all the related names for parts of circle diagrams: centre, radius, diameter, chord, arc, semi-circle, circumference, segment, sector and tangent. Teach basic relationships (between centre and circumference, radius and diameter, radius and tangent, centre and diameter).
2. Draw and use tracing Students draw the figure, but using different arc lengths, angles etc. They check the relationships using tracing for angles. The ‘discoveries’ should be:
• for angles ‘on the same arc’ the angle at the centre is twice the angle at the circumference
• special case: the angle in a semicircle is a right-angle. • consequence: two angles (at circumference) on the same arc are equal
• the angle between a tangent and chord is equal to the angle in the ‘alternate segment’
• opposite angles of a cyclic quadrilateral add to 180°
• two tangents to a circle from one external point are equal
3. Use software; The spreadsheet below gives demonstrations of these situations.
4. Proofs Many textbooks have a set of proofs for these theorems. Students capable of following them should do so, as an exercise in extended logic.

Teach Geometry for understanding page 14
14
11 Recognising lines, surfaces and planes, corners and boundaries and three-dimensional shapes and objects
For young children the world is definitely three-dimensional. Start there.
Suggested activities
1. Look at, feel and talk about large ‘solid’ shapes Students have variety of previous experiences with shapes. They should start to sort them by useful properties: rolling, boxes, saucepans, etc. Some shapes are intriguing, like cones that roll but not in straight lines. Look at surfaces (flat or curved), edges (straight or round) and corners (count them).
2. Naming 3D shapes Start the process of correct names: boxes, cubes, balls, cylinders and cones.

Teach Geometry for understanding page 15
15
12 Finding properties of common solids (spheres, prisms, pyramids) inc. edges, faces, vertices
For this section students should have access to large constructed models, either plastic (purchased) or card (made from nets by the teacher).
Suggested activities
1. Spheres and cylinders Spheres (e.g. balls) are very common for young children and have interesting properties. Cylinders (e.g. drinking straws, crayons, some pencils). Cylinders have curved edges but are not prisms.
2. Distinguishing prisms (e.g. cubes and boxes) from pyramids Both prisms and pyramids are polyhedra, with straight edges and flat faces. Prisms have ‘ends’ (or top and bottom) the same shape and rectangles (or squares) on all sides. Pyramids have one apex at the ‘top’, and triangular faces joining the base to the apex.
3. Vertices, faces and edges Count vertices, faces and edges for many solid shapes. For edges, use the words ‘vertical’ and ‘horizontal’.

Teach Geometry for understanding page 16
16
13 Making solids from nets, and drawing the solids In this section students learn to make their own 3D models and use them to learn to draw them on paper.
Suggested activities
1. Using pre-drawn nets of polyhedra Students fold nets to make cubes, boxes (cuboids), triangular prisms, triangular and square pyramids. They count vertices, faces and edges for many solid shapes. For edges, use the words ‘vertical’ and ‘horizontal’.
2. Drawing 3D shapes on paper Students copy drawings of solids they have made and learn to draw them in different positions.

Teach Geometry for understanding page 17
17
14 Sorting solids Students use solids they have made from nets (or others): cubes, cuboids (boxes), prisms, pyramids, cylinders, cones, and classify them in a number of ways.
Suggested activities
1. Sorting by lengths of edges Cubes and cuboids have pairs of equal edges, prisms have many equal edges but not in the base (except for rectangular and square prisms), pyramids have equal edges (except for the base).
2. Sorting by shapes of faces Given any solid, name all the shapes of its faces, or, given those face shapes name the solid (by imagining the net).
3. Sorting by the size of angles at vertices Cubes and cuboids have right-angles between edges, prisms have many right-angles but not in the base (except for rectangular and square prisms), pyramids have acute angles between edges (except for the base).

Teach Geometry for understanding page 18
18
15 Making solids using nets and drawing the solids The only way to appreciate 3D shapes is to make them. Nets and skeletons are the only practical ways in a classroom. Nets use think paper or light card, cut to shape and folded to make the ‘solid’.
Suggested activities
1. Using pre-drawn nets of polyhedra Students fold nets to make cubes, boxes (cuboids), triangular prisms, triangular and square pyramids. They count vertices, faces and edges for many solid shapes. For edges, use the words ‘vertical’ and ‘horizontal’.
2. Using nets of cylinders and cones Students make curved surfaces: use rectangles for cylinders, and sectors of circles for cones.
3. Drawing 3D shapes on paper Using simple solids made from cubes students draw solids using simple isometric grids, and also draw plans and elevations. Given isometric drawings or plans and elevations of such solids they construct possible solids and check.

Teach Geometry for understanding page 19
19
16 Constructing nets & skeletons to model solids, and congruence Skeletons show only edges and vertices; the faces are empty so the whole figure may be seen at once.
Suggested activities
1. Students use nets Students use nets (or Geoshapes™) to construct prisms, pyramids or platonic solids. (Platonic solids are made from one regular polygon only: from triangles – tetrahedron, octahedron, icosahedron, from squares – cube, from pentagons – dodecahedron.)
2. Using ‘skeletons’ to make solids Polyhedra such as those listed above can be made from bamboo skewers and Bluetack. They are stronger if they contain only triangles – this is the issue of rigidity.
3. Cross-sections of solids Prisms have the same cross-section throughout and so are a good place to start. (See the spreadsheet Prism.) However other cross-sections are possible depending on the angle of ‘cut’.
Cross-sections of cylinders can be either circles or ellipses. Try cutting cardboard tubes.
Cross-sections of cubes can be a wide variety of shapes, from squares, rectangles to hexagons!
(For cross sections of a pyramid, see the spreadsheet below.)

Teach Geometry for understanding page 20
20
17 Single-point perspective (and other) drawing of solids Single-point perspective only applies in the special case of standing directly in front of a solid.
Two-point perspective is the more general case.
Suggested activities
1. Horizon line and vanishing point
For single-point perspective there is only one ‘vanishing point’ on the horizon. Because of the effect of distance, parallel lines appear to ‘meet’ there. Equally spaced objects along these parallel lines appear to get closer together.
2. Sketching in single-point perspective The basic ideas are shown. Use construction lines to get the parallel lines heading to the vanishing point and to get the correct placement of equidistant shapes. Use the spreadsheet below.
Teach Geometry for understanding page 21
21
18 Boundaries, surfaces, nets and interiors of solids (including cylinders, spheres, cones, prisms, polyhedra)
This very broad topic offers many practical possibilities e.g. understanding timber roof frames.
Suggested activities
1. Lines on a 3D solid (parallel, perpendicular, skew) Use solids made from nets, such as triangular prisms, square pyramids, to explore the relationships between edges. If they meet consider the angle between them. If they do not they may be either parallel (in the same plane and never meeting) or skew (not in the same plane).
2. Planes (parallel, perpendicular) Planes can be specified using three points (not in a line), a line and one point not on the line, or two parallel lines. Planes are either parallel (never meeting) or will meet in a line (the edge of a solid). Then they do meet, the angle between them is formed by two lines perpendicular to their meeting line. So planes may be perpendicular or meeting at angles less than or greater than 90°.
3. Cross-sections of common solids, including cones Cross-sections are planes formed by ‘cutting through’ the solid in some way. This is best done by students with knives and clay (in an art room) or pieces of cheese. Demonstrations can be made with wire models. Cross-sections of cones create the famous conic sections: circle, ellipse, parabola or hyperbola. These can be formed with a cone of light hitting a wall in a darkened room.
4. Euler’s rule Euler discovered, and proved, that for all connected polyhedra (with edges that link up) the numbers of vertices, faces and edges are related. Students can ‘discover’ or check this rule for themselves, and use it to calculate (and check) missing data. (Also see the spreadsheet Vertices-faces-edges.)
5. Properties of spheres Latitude and longitude are covered in Scale (maps). Use tennis balls and pieces of string or rubber bands to create great circles (two will always intersect in two places at the ends of a diameter), and spherical triangles (whose angles will always add to more than 180°).

Teach Geometry for understanding page 22
22
19 Creating perspective and isometric images of solids In many real life situations it is valuable to be able to create a convincing sketch of a 3D situation on paper. Learning to do this is the best way to learn to interpret similar drawing done by others.
Suggested activities
1. Perspective sketching Single-point perspective has been discussed in section 7 [VELS 5]. Two-point perspective is more common and more useful. a Horizon line and vanishing point
For two-point perspective there are two ‘vanishing point’ on the horizon. Because of the effect of distance, parallel lines appear to ‘meet’ there. Equally spaced objects along these parallel lines appear to get closer together.
b Sketching in two-point perspective
The basic ideas are shown. Use construction lines to get the parallel lines heading to the vanishing points and to get the correct placement of equidistant shapes. Use the spreadsheet below.
2. Isometric drawings Isometric drawings should have begun in section 5 [VELS 4]. However this is a skill that takes much time to develop. Use isometric dot paper.
3. Plans and elevations The other common representation of 3D solids is plans and elevations. Students will enjoy interpreting house and building plans and elevations.

Teach Geometry for understanding page 23
23
20 Creating patterns by turning and flipping shapes There are two very fundamental ideas in this section – the pattern, and the transformation.
Suggested activities
1. Turning The potato print (or linocut) is a well-known method for producing an image that can be turned and turned again to make a pattern. It is interesting that letters change to another letter in this way.
b q b q b q b q
Turning
2. Flipping There are two ways to create a ‘reflection’ or mirror image: taking a shape and flipping it over, or folding paper in advance, cutting out a shape from the folded paper and then opening it out.
b d b d b d b d Flipping

Teach Geometry for understanding page 24
24
21 Recognising and describing symmetry, asymmetry, and congruence Students enjoy finding symmetrical shapes. At this level the most difficult idea is recognising turn symmetry.
Suggested activities
1. Make and recognise symmetrical shapes Students cutout paper dolls, or chains of people holding hands, ‘snow flakes’ (by folding paper three times and cutting at the folds). Students make symmetrical pattern using pattern blocks (or the software listed below). They recognise mirror symmetry in photos, objects such as flowers, designs on fabrics and letters (such as A B C D E H I M O T U V W X Y). For turn symmetry, look at car wheels, playing cards, and letters (such as H I N O S X Z).
2. Sort shapes according to symmetry Provide a large number of shapes or pictures of objects, e.g. from magazines. Firstly students decide which shapes are symmetrical and which are not (‘asymmetrical’). Then sort the symmetrical ones if possible, for example those with mirror lines and those with turn symmetry.
3. Identify congruent shapes Congruent shapes make an exact match, so this is a matching activity. Congruent shapes need not be symmetrical. But symmetrical shapes will have at least two parts that are congruent. For example, a symmetrical paper doll has left and right halves that match – fold it over to see.

Teach Geometry for understanding page 25
25
22 Applying simple transformations to shapes We can think of symmetrical patterns as the result of actions that move a shape to a new position. These movements are called transformations. At primary level we talk about slides, flips and turns. Slide and turn patterns can be made from potato prints, but for flips you have to cut the reflected pattern on a new potato.
Suggested activities
1. Making patterns – using slides Any strip pattern or fabric pattern will use slides to get from one pattern to another. This example has no other symmetry, and only uses slides.
2. Making patterns – using flips Patterns can also use flips (take the shape and flip it over). Here are three examples.
3. Making patterns – using turns Patterns using just half turns are less common, but easier to make using potato prints.

Teach Geometry for understanding page 26
26
23 Making tessellations with regular polygons, including with technology Tessellations are tiling patterns in which all the tiles fit together without gaps or overlapping. You can see them in floors, pavings, and even brick walls.
Suggested activities
1. Use pattern blocks The three basic tessellations are made from regular polygons. Use pattern blocks – equilateral triangles, squares and hexagons – to make them.
2. Use Geoshapes or MiniGeofix These commercial products (mainly regular polygons with the same side lengths) are specifically designed to snap together, and are ideal for both 2D (tessellations) and 3D (polyhedra).
3. Use software The sites below are particularly good for creating tessellations.

Teach Geometry for understanding page 27
27
24 Test generalisations about symmetrical shapes and the effects of slides, reflections and turns on a shape
This section is about pulling together what students have already experienced about symmetry and transformations.
Suggested activities
1. Mirror symmetry There are many generalisations about mirror symmetry. Students should either invent or test each of these. Suggestion: Have two students do a mirror dance, pretending that there is a large mirror between them, and each imitating the other to form a matching pair.
The mirror line cuts the symmetrical shape exactly in half.
Each point on one side of the mirror has a matching point on the other side.
The matching points are the same distance from the mirror.
The line joining the matching points is at right angles (perpendicular) to the mirror. Anything that goes clockwise on one side goes anticlockwise on the other side.
If you do a reflection of a symmetrical shape in the same mirror line, it still looks the same.
2. Turn symmetry Turn symmetry is more difficult for many students. Because it is so tricky, at this point most of their experience will be limited to half turns and quarter turns. Here are some generalisations.
Any shape with turn symmetry has a centre point.
There will be two or more parts exactly alike, but turned about the centre. Each point has one or more matching points.
All matching points are the same distance from the centre.
If you turn the symmetrical shape around so the centre stays in the same place, there will be at least two different positions in which the shape looks exactly the same. and for half turns only, the centre point is exactly halfway between the two matching points.
3. Slides A slide moves a shape along without turning it. It means that all points move the same distance in the same direction. Each point is matched to another point in the image

Teach Geometry for understanding page 28
28
25 Making and solving tangram puzzles ‘Tangram’ and similar puzzles use the idea of dissection – cutting up a shape and rearranging the parts to make other shapes.
Suggested activities
1. Make your own puzzles Take a square, cut it carefully into four or five parts, shuffle the parts and challenge someone else to put them together to make the square. The RIME lessons ‘Three shape puzzle’, ‘Four triangle puzzle’ and ‘Tangrams’ provide directions. There are other books. You can also buy similar puzzles in toy-shops.
2. Solve puzzles on screen Tangram software below has been designed (using Flash) to let children solve them on screen.

Teach Geometry for understanding page 29
29
26 Transformations (reflection and rotation) and related symmetry, including with technology
Transformations are the moves to get from one position of a shape to another. Transformations do not require symmetry, but if there is symmetry there must be related transformations.
Suggested activities
1. Use dot paper to find mirror images and recognise reflection symmetry Each student draws a shape using dots on a square (or triangular) grid for the vertices. They draw a mirror line also using a row of dots. Then they draw the mirror image. They should recognise that the result has mirror symmetry.
2. Use dot paper to find mirror lines for symmetrical pictures A more challenging task is to draw the mirror line when you are given a symmetrical picture, or a shape and its mirror image (which is of course also a symmetrical picture). Folding, or using a small hand mirror, can help.
quarter turn symmetry
half turn symmetry
mirror symmetry
mirror symmetry
3. Use tracing paper to find turn images Students find turn images much more difficult. Start with half turns. Draw the shape and trace it. Use the pencil to put some carbon on the back of the tracing.
Then hold down a ‘centre’ with the point of the pencil and turn the paper. Trace over the image, and see it come out on the paper.
4. Turn symmetry Turn symmetry exists when the entire pattern can be turned by a fraction of a whole turn (e.g. a quarter turn, 90°) and the pattern still looks exactly the same. See the example.

Teach Geometry for understanding page 30
30
27 Creating complex tessellations using regular polygons There are many tessellations with more than one regular polygon; most are symmetrical.
Suggested activities
1. Use pattern blocks, Geoshapes (or MiniGeofix) or software Several tessellations can be made using triangles and squares, triangles and hexagons, and also squares and hexagons. Several tessellations can be made with all three.

Teach Geometry for understanding page 31
31
28 Similarity and enlargement Up to this point we have considered relationships between small and large things, e.g. maps, plans, diagrams, photos. Now we look at the mathematics of the process of changing size.
The corresponding sides form the same ratio, i.e they are proportional. This is the scale factor. We can use this proportion to find the scale factor and hence any missing length.
Angles in the figure are exactly preserved, i.e. the figures are equi-angular.
Suggested activities
1. Enlargement using two grids Take any drawing. Draw a grid over it, say at 5 mm intervals. Now draw a 10 mm grid on another sheet and reproduce the original drawing at twice the size. See RIME lesson ‘Enlarging cartoons’.
2. Enlargement from a central point Enlargement using similar triangles uses a central point for the ‘source of light’ and the image is either larger or smaller along each ray.
3. Properties of an enlargement using a triangle tessellation Students can understand the properties of enlargement if they see them clearly using the lengths and angles in a triangle tessellation.
a Similar figures are equi-angular
b Similar figures have proportional side lengths

Teach Geometry for understanding page 32
32
29 Isometric transformations (including invariant points and lines) The label ‘isometric’ refers to the transformations that keep lengths equal, that is translations (slides), reflections (flips) and rotations (turns). Enlargements are not isometric, as they also change size.
Points and lines’ are ‘invariant’ if they do not move as the transformation takes place.
Suggested activities
1. Translations (slides)
In a translation all points move in the same direction by the same distance. Parallel lines are produced. Angles stay the same size, so ‘corresponding’ angles are equal. Since all points must move, there are no invariant points or lines.
In the coordinate plane, whatever changes are made to x and y for one point will also be made to all other points.
2. Reflections (flips)
All reflections use a mirror line. All points move perpendicular to the mirror line across it to the same distance on the other side. The mirror line is the perpendicular bisector of the ‘object’ and ‘image’ points. The mirror line does not ‘move’ anywhere, so the mirror line is invariant. Using coordinates, if the mirror line is the y-axis, the y-coordinate stays the same, but the x-coordinate changes to its opposite: (x, y) changes to (–x, y). Note that the informal language of ‘flip’ is not really appropriate to transformations ‘in the plane’ as flipping requires movement into the third dimension!
3. Rotations (turns)
The centre of any rotation is the only point that does not move. It is the invariant point. For a half turn, all points move in a semi-circle around the turn centre. Another way of thinking of this is that they all move through the turn centre and out the other side by an equal distance. Using coordinates, the half turn moves (x, y) to (–x, –y).
Teach Geometry for understanding page 33
33
4. Combinations of translations, reflections and rotations
Any tessellation (simple or complex) demonstrates the combinations of several transformations. The example shows that a half turn followed by a translation is also a rotation about a different turn centre.
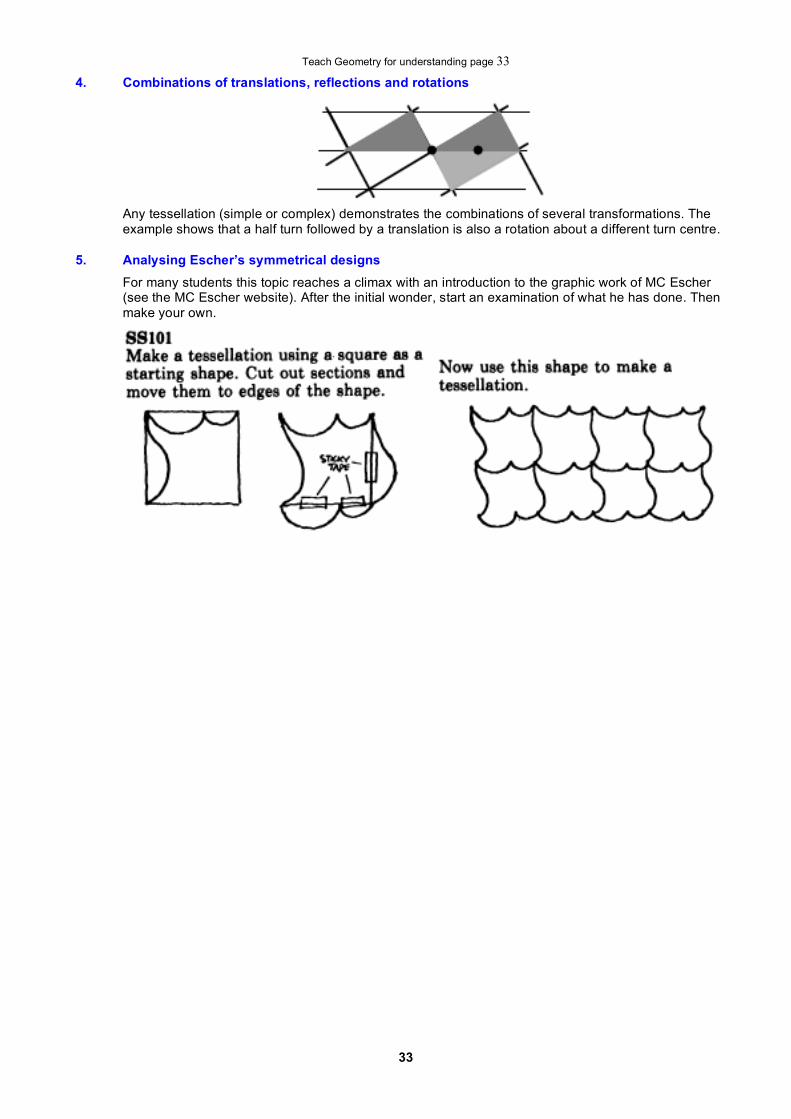
5. Analysing Escher’s symmetrical designs For many students this topic reaches a climax with an introduction to the graphic work of MC Escher (see the MC Escher website). After the initial wonder, start an examination of what he has done. Then make your own.
Teach Geometry for understanding page 34
34
30 Specifying location as a relative position, including left and right Much of this topic is the learning of the correct spatial language, and using it appropriately.
Suggested activities
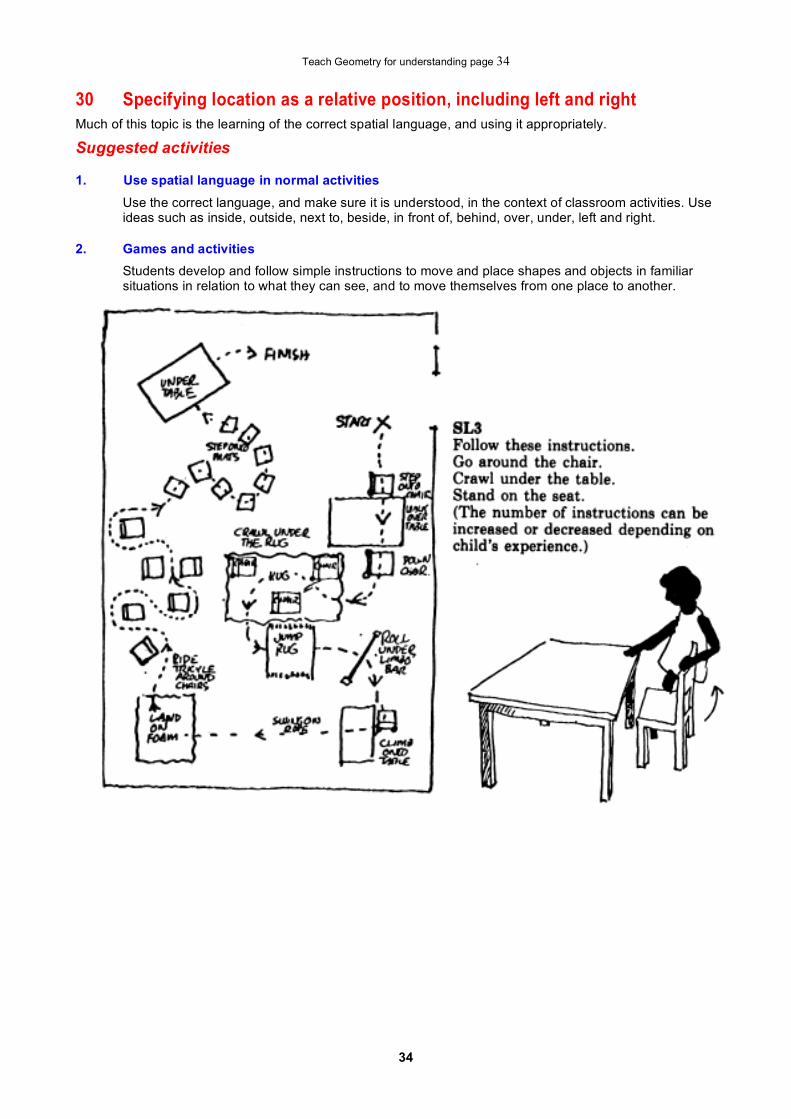
1. Use spatial language in normal activities Use the correct language, and make sure it is understood, in the context of classroom activities. Use ideas such as inside, outside, next to, beside, in front of, behind, over, under, left and right.
2. Games and activities Students develop and follow simple instructions to move and place shapes and objects in familiar situations in relation to what they can see, and to move themselves from one place to another.

Teach Geometry for understanding page 35
35
31 Interpreting simple networks, diagrams and maps The ability to understand a scaled representation, also greatly simplified, of a familiar location takes some time to develop.
Suggested activities
1. Make a plan of the room Students imagine being on the ceiling and draw a possible plan of the room.
2. Learn to read maps and plans
In order for some self-correcting to take place, students compare their plans to a correct one drawn by the teacher. Use this to discuss relative position (further, closer etc.) and size (larger, smaller). They interpret a map of the school ground and walk around it checking the map informally for relative distances and directions. Use a street map of the immediate area near the school.
3. Understanding diagrams Students learn to interpret simple drawings of 3D objects such as boxes, cylinders, balls, etc.
4. Family trees Students represent their family (or extended family) using a tree diagram. Note that blended families, rainbow families, single parent families (including divorced situations) make this very difficult to keep ‘simple’! It can also be somewhat sensitive.

Teach Geometry for understanding page 36
36
32 Using maps to identify places and give travel directions The growing understanding of maps leads to their use in finding locations and giving route directions.
Suggested activities
1. Use a plan of the classroom or map of the school ground Students write directions to travel from one place to another. This might include numbers of steps, and directions to turn. They can then check these directions for themselves.
2. Use a map of the local area Students give directions to one another on how to get from one place to an unknown destination. The second student follows the directions on the map and reports on where they have ‘gone’.
3. Draw a treasure map
This creative activity requires planning the geography of the island, and giving careful written directions to a pirate to locate the buried treasure.

Teach Geometry for understanding page 37
37
33 Using simple compass directions It is important to use real magnetic compasses; some Phys Ed teachers have them. Learn to use N,S,E and W and then move to add NE, SE, SW and NW. Learn to use the compasses outdoors.
Suggested activities
1. Drawing a compass rose Students learn to read magnetic compasses, first 4 and later 8 major directions. A compass rose is a large sheet on the floor that includes the major directions and arrows to other ‘landmarks’.
2. Following a route using compass directions
Students learn to orient themselves using compasses, for example to face north-east. They follow directions that include numbers of steps in given directions. (See ‘Compass walks’ spreadsheet.)
The activity ‘Walking the square’ involves walking equal numbers of steps in four perpendicular directions (e.g. NE, NW, SW, SE) so you should end up where you started.
3. Giving compass directions a In the classroom or school ground: On the plan or map, draw the direction of north, etc.
Use this information to determine (from the plan or map) the rough direction of one place in relation to another and then go to the first location and use the compasses to check.
b From a street directory
Using the same method as above, but this time there is no obvious way to check, unless the landmark is visible from the school ground. Outside students can point in the anticipated directions of locations around their town.
Teach Geometry for understanding page 38
38
34 Using scale (distance) and directions on maps The idea of a scale on a map and its use to related map distances to real distances is one that requires time to build good understanding.
Suggested activities
1. Understanding scale It is helpful to have maps of the same area at different scales. By far the best way to do this is with the Powers of ten website; <http://www.powersof10.com/> with many free dramatic visuals.
2. Geometrical scales on maps The easiest scale to use is one that shows the length on the map that corresponds to a number of metres on the ground. Students can mark off a number of these lengths on the edge of a sheet of paper, and use that as a measuring device on the map. This can give a good estimate ‘directly’, without any calculation.
3. Estimating distances using a simple numerical scale A scale that indicates a map length that is equivalent to a real distance (e.g. 1 cm shows 10 m) is also useful if it is simple and you have a ruler. (Note that using ‘shows’ is more understandable than using ‘=’. There is no way that 1 cm = 10 m!)
4. Direction on a map Many maps or street directories show the direction of north with parallel lines. Students can use a protractor (or a plastic compass rose) to estimate the direction from one place to another. This can be expressed either as one of the 8 or 16 points of a compass, or using bearings (maybe rounded to the nearest 10°.)
Teach Geometry for understanding page 39
39
35 Exploring the effects on area and volume of enlarging or reducing a shape or solid
This topic clearly links with Measurement, with Solids and with Transformations. It will be generalised at a later level – this is preliminary hands-on experience, with squares and cubes.
Suggested activities
1. For 2D shapes - the effect of scale on area Students draw a simple shape using the lines of a 1 cm grid (to keep it simple) and calculate its area. Then they reproduce the original drawing at twice the size on a 2 cm grid, and calculate its area. The area will have become four times as large, and 4 = 2 x 2.
This can be repeated with any shape made from squares (to keep the calculations simple), and the enlarged area is still 4 times the original.
If the enlargement factor is 3, the area is 9 times; and 9 = 3 x 3. You could relate this to the fact that there are 100 x 100 (10 000) square centimetres in a square metre; the square centimetre has been enlarged by a factor of 100.
2. For 3D shapes - the effect of scale on surface area Students look at a simple cubic shape, and calculate its surface area. They build a cube which is twice as high, twice as wide and twice as long from smaller cubes, and calculate its surface area. The area will have become four times as large, and 4 = 2 x 2. This can be repeated with any shape, made from cubes, and the enlarged area is still 4 times the original.
If the enlargement factor is 3, the area is 9 times; and 9 = 3 x 3.
3. For 3D shapes - the effect of scale on volume The cube activity above also shows that if the enlargement factor is 3, the volume is 8 times;
and 8 = 2 x 2 x 2. If the enlargement factor is 3, the volume is 27 times; and 27 = 3 x 3 x 3.

Teach Geometry for understanding page 40
40
36 Using networks (e.g. family trees, road maps) This topic deals with familiar networks showing either decisions (such as routes) or relationships.
Suggested activities
1. Road and rail maps - route planning A common network is the routes of the trains in Melbourne, or country Victoria.
a Rail maps are usually distorted by make them fit more conveniently in a space. Directions and distances are almost ignored, but it is still a network. Students can plan rail trips from one station to another, including where they must change lines.
b Road maps also involve decisions about what to do at each intersection. This time directions and distances are correct (although simplified) but the roads still form a network. Students can plan road trips from one town to another, including where they must change roads.
2. Family trees - showing relationships Students represent their family (or extended family) using a tree diagram. Note that blended families, rainbow families, single parent families (including divorced situations) make this very difficult to keep ‘simple’! It can also be somewhat sensitive.

Teach Geometry for understanding page 41
41
37 Using coordinates for positions in the plane Coordinates, e.g. (2, 1), are extensively used in algebra and will have applications in Structure. However since coordinates describe position they are directly related to Space.
It is common for teachers to relate coordinates to the map references on a street directory, and this can be helpful to students. But it can be confusing for several reasons: only numbers are used; map references describe a square on the map, not a point on the grid; and negative numbers may appear.
Suggested activities
1. Coordinates in first quadrant The ‘first quadrant’ means that both numbers are positive. The important idea is that the horizontal distance (right from the y-axis) is the first number. There are many fun activities (games like Battleship, drawings by coordinates, etc.) that may be used.
2. Coordinates in all quadrants Once students have been introduced to negative numbers on a number line, we can use two perpendicular number lines and find positions in all corners (or ‘quadrants’).
3. Use software The spreadsheets below are some of the many computer activities available.

Teach Geometry for understanding page 42
42
38 Location, scale and direction on maps Learning to make full use of maps is a very practical skill.
Suggested activities
1. Street directories and state maps - finding locations, distances and directions Maps have sets of parallel lines showing the direction of north. Using protractors, students can find the directions from one place to another.
2. Using the scale they can find the distance ‘as the crow flies’. If this is done between places using a map of the school ground students can actually check their measurements, e.g. with compasses and trundle wheel.
3. Using bearings with magnetic compasses a Students should learn how to face in the direction of a given bearing. b Students should be able to follow a trail specified in bearings and distances (e.g. 40° for 15 m, then
180° for 20 m). Such a trail could be created on a map of the school ground and would take them on a tour around the buildings.
c A simple version of this is walking an equilateral triangle where each leg is equal but the directions change by 120° (e.g. 20°, 140°, 260°). At the end they should return to the start.

Teach Geometry for understanding page 43
43
39 Using network diagrams for relationships and problem solving There are many useful applications of simple network ideas, often not recognised as mathematical. A few are described below.
Suggested activities
1. Traversability a Tracing a drawing: Can you draw over every line of this picture once only without lifting your pen?
This innocent question leads to the ideas of even and odd vertices, and the fact that you can for networks (drawings) with only even vertices, and for drawings with exactly two odd vertices (where you start at one and end at the other).
b Junk mail walks: This is a real life application of tracing. This time you walk down one side of the street and at some later time back down the other side, so both sides need to be considered as separate edges in the network diagram.
c Mail collection: Australia Post has to collect mail from all its letter boxes
2. Phone lines Phone and internet cables work if they are connected. A ‘circuit’ is not required. The company wants to use the shortest cable need to link all its customers. If we know the distances between customers we can find the shortest network that links them all.
3. Visiting vertices Imagine a large area with many towns to be visited by a travelling sales-person. There are roads linking all these towns, and the person wants to find the shortest route that allows all to be visited, stopping at each one only once. It is permitted to re-travel any of the roads.

Teach Geometry for understanding page 44
44
40 Exploring the effects of changing scale in 2D and 3D Why does paint dry on the wall but not in the can? Why does a cat stretch out in the sun, but huddle up in the cold? Why can a baby get over-heated in a hot car? Why are giants impossible?
Suggested activities
1. For 2D shapes - the effect of scale on area Students draw any shape (e.g. a circle, triangle or quadrilateral) and calculate its area.
Then they reproduce the original drawing at twice the size, and calculate its area. The area will have become four times as large, and 4 = 2 x 2.
If the enlargement factor is 3, the area is 9 times; and 9 = 3 x 3.
For a scale factor of k, the area increases by a factor of k2. You could relate this to the fact that there are 100 x 100 (10 000) square centimetres in a square metre; the square centimetre has been enlarged by a factor of 100.
2. For 3D shapes - the effect of scale on surface area Students imagine any solid shape, and calculate its surface area. They imagine the same shape with all dimensions doubled, and calculate its surface area. The area will have become four times as large, and 4 = 2 x 2. If the enlargement factor is 3, the area is 9 times; and 9 = 3 x 3.
For a scale factor of k, the surface area increases by a factor of k2.
3. For 3D shapes - the effect of scale on volume The solid activity above also shows that if the enlargement factor is 3, the volume is 8 times; and 8 = 2 x 2 x 2. If the enlargement factor is 3, the volume is 27 times; and 27 = 3 x 3 x 3.
For a scale factor of k, the volume increases by a factor of k3.
4. Surface area to volume ratio For solid shapes, we can find the ratio of surface area to volume. For example a cube of 1 cm3 has a surface area of 6 cm2. Its ratio is 6 to1. Enlarge its sides to 10 cm, and its surface area is 600 cm2 and volume is 1000 cm3. Surface area to volume ratio is now 600 to 1000, or 0.6 to 1. This is important in biological areas such as heat loss, digestion, evaporation rates and strength of bones.

Teach Geometry for understanding page 45
45
41 Using latitude, longitude and great circle distances A good understanding of position on the (near-)spherical Earth needs an understanding of angles of latitude and longitude, and how they are used to locate positions on a sphere. In turn this relates to time and seasons.
Suggested activities
1. Position on the Earth’s surface
N
S
Equator
Primemeridian
Centre of
the earth
N
S
Longitude East
Latitude north
The two key measurements are angles. The vertex of these angles is the Earth’s centre. Teaching this requires good large 3D models, such as a wire frame or a large world globe. Students find it hard to visualise the angles, and 2D diagrams are often not helpful.
2. Great circles ‘Great circles’ are circles that have the Earth’s centre as their centre. Lines of longitude and the equator are all great circles, but any circle of the same size will be a ‘great circle’. Students can calculate their total length. If they can work out the fraction of the circle between two positions (for longitude use difference in latitude angles, for the equator use difference in longitude angles) they can find the great circle difference between two points. One degree along a great circle is almost exactly 111 km. Use an atlas or the internet for the data.
3. Longitude and time Because of the Earth’s rotation (360° in 24 h, or 15° per h) different meridians of longitude come ‘under the sun’ at different times. Time differences are based on the 15° per hour rate, places west of yourself having earlier times of day since they are ‘behind’ in the rotation. To teach this requires a large world globe and a lot of discussion. Go over the logic that leads to the need for an ‘International date line’ and the possibility of having two birthdays when travelling to USA from Australia, but missing out when coming the other way.
4. The seasons All students are aware of the changing day-lengths during the year, causing the seasons. Make sure they can all explain this in terms of the revolution around the sun of the Earth, with its tilted axis. It might be helpful to use a darkened room with a bright light at its centre for the sun. Then have a student walk around the outside of the room and see the effect. Note solstices and equinoxes.
There are applications of this in house design for efficient cooling and heating at opposite times.
5. Latitude and day-length In addition students who have travelled towards or away from the equator will be aware of the differences in day length due to latitude.

Teach Geometry for understanding page 46
46
42 Using network diagrams to solve problems Some simple network applications were introduced in section 10 [VELS 5]. Those described below are providing hints of the more complex applications, such as ‘critical path analysis’, used by industry.
Suggested activities
1. Event maps Networks with arrows are called directed networks. They can be used to show the order in which activities must happen, how long different activities will take, and which can be done at the same time. So in this case, C can be done while A and B are done (in that order) and only then can D start.
A10 B10
C20 D15
2. Representing vertices and edges of solids The network linking all the vertices of a solids uses its edges to show the solid’s edges. The under-side of the solid becomes the outside of the network.
3. Euler’s rule, for planar maps and solids The rule linking the numbers of vertices, faces and edges for connected solids also works for 2D connected networks (vertices, regions and edges), if we include the outside region: V + F (or R) = E + 2.
See the spreadsheets ‘Doodles’ (2D) and Vertices-faces-edges (3D).
4. Clash maps To see whether two events will clash in times, make a network with vertices as the events and with all possible edges drawn. Then whenever two events are seen to differ in time remove the link. At the end the clashes will remain. In the spreadsheet this is seen in the context of planning an examination timetable for students doing various school subjects. Only certain examinations may be run at the same time – those with no clash.