Taurus Tutorial: Sensor Configuration - IPGParnaudl/NanoCD/documentation/Nanometrics/Hardware... ·...
8
Taurus: Sensor Configuration Tutorial_Taurus_Seismometer R1.doc 1 of 8 Taurus Tutorial: Sensor Configuration 1. Summary The purposes of this exercise are to : • Become familiar with the Taurus UI. • Configuring the Taurus to work with a Trillium seismometer. Note: Please refer to the seismometer manual for the exact control lines and their associated levels. 2. Procedure 2.1. Taurus Seismometer Configuration a. Log on to the Taurus using the integrated user interface or by using an external browser. b. Select Factory Settings from the Main Drop Down Menu.
Transcript of Taurus Tutorial: Sensor Configuration - IPGParnaudl/NanoCD/documentation/Nanometrics/Hardware... ·...
Taurus: Sensor Configuration
Tutorial_Taurus_Seismometer R1.doc 1 of 8
Taurus Tutorial: Sensor Configuration 1. Summary
The purposes of this exercise are to :
• Become familiar with the Taurus UI.
• Configuring the Taurus to work with a Trillium seismometer.
Note: Please refer to the seismometer manual for the exact control lines and their associated levels.
2. Procedure
2.1. Taurus Seismometer Configuration
a. Log on to the Taurus using the integrated user interface or by using an external browser.
b. Select Factory Settings from the Main Drop Down Menu.

Taurus: Sensor Configuration
Tutorial_Taurus_Seismometer R1.doc 2 of 8
c. Select the Sensor & Timing hyperlink

Taurus: Sensor Configuration
Tutorial_Taurus_Seismometer R1.doc 3 of 8
d. Select the Sensor hyperlink.

Taurus: Sensor Configuration
Tutorial_Taurus_Seismometer R1.doc 4 of 8
e. The following menu should appear.

Taurus: Sensor Configuration
Tutorial_Taurus_Seismometer R1.doc 5 of 8
f. Type in the desired Sensor ID, in the sensor ID field. g. Select short period (SP) or long period (LP).
h. Select the mode of operation of the seismometer (XYZ or UVW).
i. Select the type calibration (Voltage or Current) to be used with this seismometer.
j. Select the output units for the seismometer (m/s or m/s/s).
k. Input the the sensitivity of the seismometer.
l. Click on the Control Lines hyperlink to configure the seismometer coontrol lines.

Taurus: Sensor Configuration
Tutorial_Taurus_Seismometer R1.doc 6 of 8
m. Set the Assert level of the seismometer (the level that turns on the control line). It can be
High Z, Zero or High. n. Set the Deassert level of the seismometer (the level that turns off the control line). Again,
it can be High Z, Zero or High.
o. Set the Positive Voltage Level for the control pulses (+12 or +5).
p. Set the Pulse Duration in seconds required by the seismometer in order to successfully enable a control line. The length of the pulse can be configured to any of the following values: 1, 3, 5, 7, 10, 15, 20
q. The next step involves mapping the six Taurus control lines to the existing seismometer
control lines. The following options are available for all six control lines:
r. The next step involves mapping the six Taurus control lines to the existing seismometer control lines. The following options are available for all six control lines:
1. Unused Assert 2. Unused Deassert 3. Ch 1 Cal Enable 4. Ch 2 Cal Enable 5. Ch 3 Cal Enable 6. Sp/Lp On=Sp
Taurus: Sensor Configuration
Tutorial_Taurus_Seismometer R1.doc 7 of 8
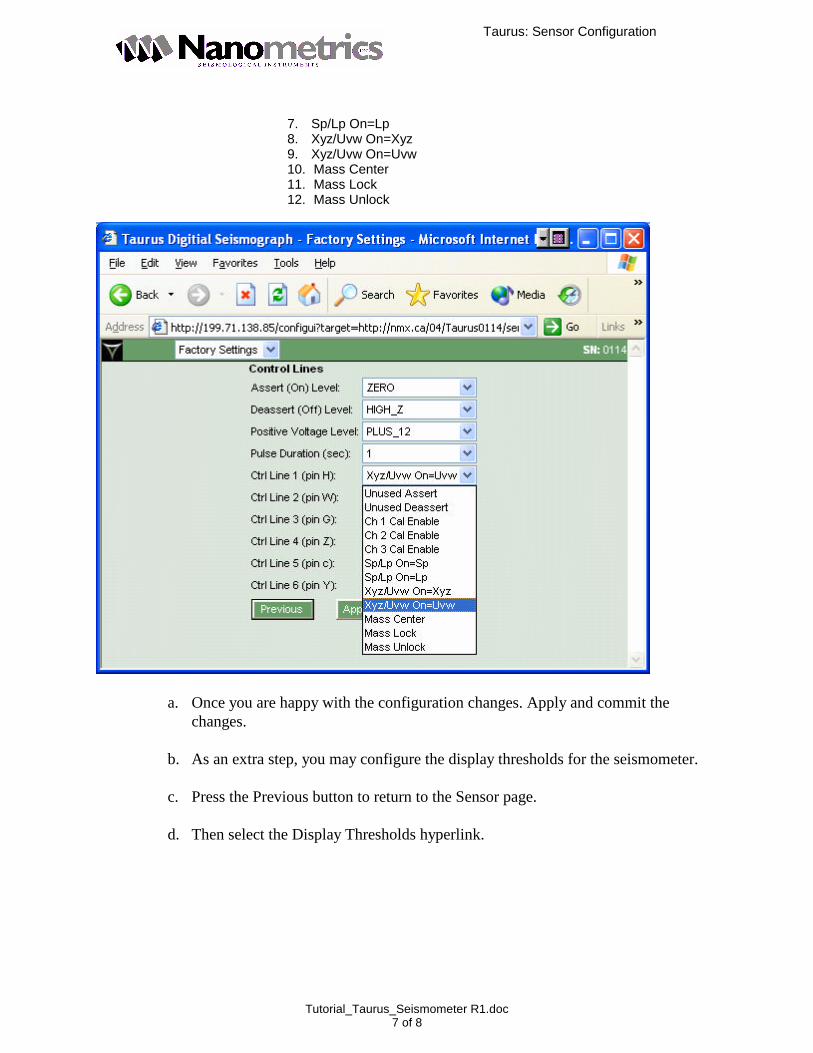
7. Sp/Lp On=Lp 8. Xyz/Uvw On=Xyz 9. Xyz/Uvw On=Uvw 10. Mass Center 11. Mass Lock 12. Mass Unlock
a. Once you are happy with the configuration changes. Apply and commit the changes.
b. As an extra step, you may configure the display thresholds for the seismometer.
c. Press the Previous button to return to the Sensor page.
d. Then select the Display Thresholds hyperlink.
Taurus: Sensor Configuration
Tutorial_Taurus_Seismometer R1.doc 8 of 8
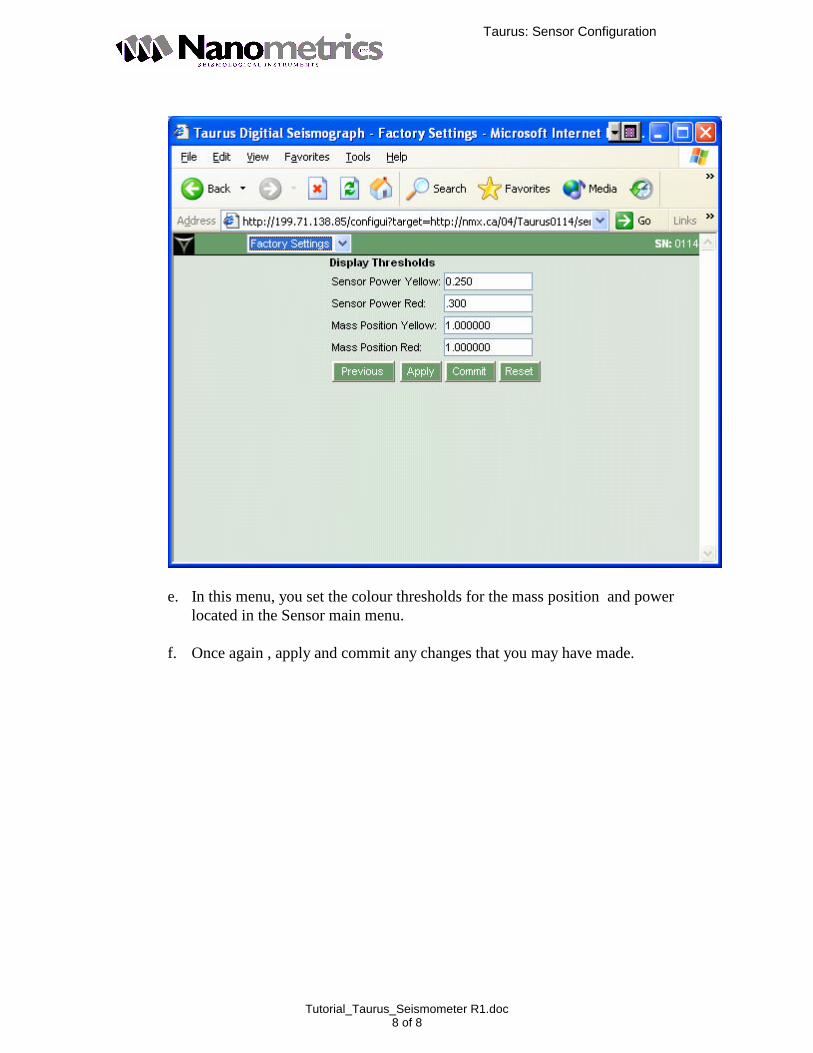
e. In this menu, you set the colour thresholds for the mass position and power located in the Sensor main menu.
f. Once again , apply and commit any changes that you may have made.