
Sun Storagetek 2530 Cam
201
Sun Microsystems, Inc. www.sun.com Submit comments about this document at: http://www.sun.com/hwdocs/feedback Sun StorageTek ™ Array Administration Guide For the Sun StorageTek Common Array Manager, Release 5.1 Part No. 820-0210-11 March, 2007
-
Upload
criis-britez-martinez -
Category
Documents
-
view
913 -
download
0
Transcript of Sun Storagetek 2530 Cam

Sun Microsystems, Inc.www.sun.com
Submit comments about this document at: http://www.sun.com/hwdocs/feedback
Sun StorageTek™ ArrayAdministration Guide
For the Sun StorageTekCommon Array Manager, Release 5.1
Part No. 820-0210-11March, 2007

Copyright 2007 Sun Microsystems, Inc., 4150 Network Circle, Santa Clara, California 95054, U.S.A. All rights reserved.
Sun Microsystems, Inc. has intellectual property rights relating to technology that is described in this document. In particular, and withoutlimitation, these intellectual property rights may include one or more of the U.S. patents listed at http://www.sun.com/patents and one ormore additional patents or pending patent applications in the U.S. and in other countries.
This document and the product to which it pertains are distributed under licenses restricting their use, copying, distribution, anddecompilation. No part of the product or of this document may be reproduced in any form by any means without prior written authorization ofSun and its licensors, if any.
Third-party software, including font technology, is copyrighted and licensed from Sun suppliers.
Parts of the product may be derived from Berkeley BSD systems, licensed from the University of California. UNIX is a registered trademark inthe U.S. and in other countries, exclusively licensed through X/Open Company, Ltd.
Sun, Sun Microsystems, the Sun logo, AnswerBook2, docs.sun.com, Solaris, Sun StorEdge, and Sun StorageTek are trademarks or registeredtrademarks of Sun Microsystems, Inc. in the U.S. and in other countries.
All SPARC trademarks are used under license and are trademarks or registered trademarks of SPARC International, Inc. in the U.S. and in othercountries. Products bearing SPARC trademarks are based upon an architecture developed by Sun Microsystems, Inc.
The OPEN LOOK and Sun™ Graphical User Interface was developed by Sun Microsystems, Inc. for its users and licensees. Sun acknowledgesthe pioneering efforts of Xerox in researching and developing the concept of visual or graphical user interfaces for the computer industry. Sunholds a non-exclusive license from Xerox to the Xerox Graphical User Interface, which license also covers Sun’s licensees who implement OPENLOOK GUIs and otherwise comply with Sun’s written license agreements.
U.S. Government Rights—Commercial use. Government users are subject to the Sun Microsystems, Inc. standard license agreement andapplicable provisions of the FAR and its supplements.
DOCUMENTATION IS PROVIDED "AS IS" AND ALL EXPRESS OR IMPLIED CONDITIONS, REPRESENTATIONS AND WARRANTIES,INCLUDING ANY IMPLIED WARRANTY OF MERCHANTABILITY, FITNESS FOR A PARTICULAR PURPOSE OR NON-INFRINGEMENT,ARE DISCLAIMED, EXCEPT TO THE EXTENT THAT SUCH DISCLAIMERS ARE HELD TO BE LEGALLY INVALID.
Copyright 2007 Sun Microsystems, Inc., 4150 Network Circle, Santa Clara, Californie 95054, Etats-Unis. Tous droits réservés.
Sun Microsystems, Inc. a les droits de propriété intellectuels relatants à la technologie qui est décrit dans ce document. En particulier, et sans lalimitation, ces droits de propriété intellectuels peuvent inclure un ou plus des brevets américains énumérés à http://www.sun.com/patents etun ou les brevets plus supplémentaires ou les applications de brevet en attente dans les Etats-Unis et dans les autres pays.
Ce produit ou document est protégé par un copyright et distribué avec des licences qui en restreignent l’utilisation, la copie, la distribution, et ladécompilation. Aucune partie de ce produit ou document ne peut être reproduite sous aucune forme, par quelque moyen que ce soit, sansl’autorisation préalable et écrite de Sun et de ses bailleurs de licence, s’il y en a.
Le logiciel détenu par des tiers, et qui comprend la technologie relative aux polices de caractères, est protégé par un copyright et licencié par desfournisseurs de Sun.
Des parties de ce produit pourront être dérivées des systèmes Berkeley BSD licenciés par l’Université de Californie. UNIX est une marquedéposée aux Etats-Unis et dans d’autres pays et licenciée exclusivement par X/Open Company, Ltd.
Sun, Sun Microsystems, le logo Sun, AnswerBook2, docs.sun.com, Solaris, Sun StorEdge, et Sun StorageTek sont des marques de fabrique oudes marques déposées de Sun Microsystems, Inc. aux Etats-Unis et dans d’autres pays.
Toutes les marques SPARC sont utilisées sous licence et sont des marques de fabrique ou des marques déposées de SPARC International, Inc.aux Etats-Unis et dans d’autres pays. Les produits portant les marques SPARC sont basés sur une architecture développée par SunMicrosystems, Inc.
L’interface d’utilisation graphique OPEN LOOK et Sun™ a été développée par Sun Microsystems, Inc. pour ses utilisateurs et licenciés. Sunreconnaît les efforts de pionniers de Xerox pour la recherche et le développement du concept des interfaces d’utilisation visuelle ou graphiquepour l’industrie de l’informatique. Sun détient une license non exclusive de Xerox sur l’interface d’utilisation graphique Xerox, cette licencecouvrant également les licenciées de Sun qui mettent en place l’interface d ’utilisation graphique OPEN LOOK et qui en outre se conformentaux licences écrites de Sun.
LA DOCUMENTATION EST FOURNIE "EN L’ÉTAT" ET TOUTES AUTRES CONDITIONS, DECLARATIONS ET GARANTIES EXPRESSESOU TACITES SONT FORMELLEMENT EXCLUES, DANS LA MESURE AUTORISEE PAR LA LOI APPLICABLE, Y COMPRIS NOTAMMENTTOUTE GARANTIE IMPLICITE RELATIVE A LA QUALITE MARCHANDE, A L’APTITUDE A UNE UTILISATION PARTICULIERE OU AL’ABSENCE DE CONTREFAÇON.

1. Overview 18
Array and Software Overview 19
Management Software 19
Remote CLI Client 20
Data Host Software 20
Optional Software 21
Management-Related Service 21
Monitoring Overview 22
How the Monitoring Software Works 22
About Monitoring Strategy 23
About the Monitoring Cycle 23
About the Event Life-Cycle 24
2. Using the Browser Interface 26
About the Browser Interface 27
About the Page Banner 27
About the Navigation Tree 28
About the Page Content Area 29
Controlling Table Display 29
About the Status Icons 31
Using Forms 31
Searching for System Elements 32
Using Help 33
Logging Out of the Management Software 34
3. Performing Connection and Administration Tasks 36
Connection Tasks 37
Managing From the Site LAN 37
Managing an Array Isolated From the LAN 38
1 Sun StorageTek Array Administration Guide • March 2007

Installing the Remote CLI Client 38
About Host Bus Adapters 39
About Multipathing 39
General Administration Tasks 40
Accessing, Adding, and Deleting Storage Arrays 40
Displaying Array Information 41
Planning to Register an Array 41
Registering an Array 42
Unregistering an Array 42
Upgrading Array Firmware 42
Monitoring Array Health 43
Specifying General Settings 43
About the Array Password 44
Changing the Array Password 44
Setting Array Details 45
Enabling Disk Scrubbing 46
Enabling Disk Scrubbing on an Array 46
Disabling and Re-enabling Disk Scrubbing on a Volume 47
Setting the Time 47
Setting the Array IP Address 48
Managing User Accounts 49
About User Accounts 49
Displaying User Information 50
Adding a New User 50
Removing a User 51
Managing Licenses 51
About Licensed Features 51
Displaying License Information 52
2

Adding a License 52
Disabling a License 53
Re-enabling a License 53
Displaying Event Information 53
Monitoring Performance 54
Administering Jobs 54
About Jobs 54
Displaying Job Information 55
Canceling Jobs 56
Viewing the Activity Log 56
Performing Monitoring Administration 57
General Site Setup Tasks 57
Displaying and Editing Site Information 57
Displaying and Editing Agent Timeout Settings 58
About Notification 58
Email Configuration Tasks 59
Configuring Email Notification 59
Testing a Notification Email Address 60
Adding an Email Notification Recipient 60
Editing an Email Notification Recipient 61
Deleting an Email Notification Recipient 61
Using Email Filters 62
About Email Filters 62
Adding an Email Filter 62
Editing an Email Filter 63
Deleting an Email Filter 63
Remote Notification Tasks 64
Subscribing to and Editing Properties of Sun Connection 64
3 Sun StorageTek Array Administration Guide • March 2007

Enabling SNMP Notification 65
Adding an SNMP Notification Recipient 65
Editing an SNMP Notification Recipient 65
Deleting an SNMP Notification Recipient 66
Editing Notification Setup Parameters 67
Agent Tasks 67
Configuring the Agent 67
Activating/Deactivating the Agent 68
Displaying and Editing Health Monitoring Status on an Array 68
Running the Agent 69
4. Performing Configuration Tasks 70
Initial State of the Array 71
About the Initial State of the Array 71
About Provisioning Storage 71
About Physical Storage Elements 72
About Logical Storage Elements 72
Configuring Storage Volumes 74
About Volumes 74
Planning Volumes 76
Managing Volumes 77
Displaying Volume Information 77
Displaying Volume Performance Statistics 78
Creating a Volume 78
Modifying a Volume 79
Copying Volume Information 79
Mapping a Volume to a Host or Host Group 80
Expanding Volume Capacity 80
Unmapping a Volume From a Host or Host Group 81
4

Changing Controller Ownership of a Volume 81
Deleting a Volume 82
Configuring Volume Copies 84
Array Support for Volume Copies 84
About Volume Copies 84
Planning Volume Copies 86
Managing Volume Copies 87
Enabling the Volume Copy Feature 87
Displaying Volume Copy Information 88
Creating a Volume Copy 88
Recopying a Volume Copy 90
Changing the Copy Priority 90
Removing a Copy Pair 91
Configuring Volume Snapshots 92
About Volume Snapshots 92
Planning Volume Snapshots 94
Calculating Reserve Volume Capacity 96
Managing Volume Snapshots 98
Enabling Volume Snapshots 99
Displaying Volume Snapshot Information 99
Creating a Volume Snapshot 100
Resnapping a Volume Snapshot 100
Copying a Volume Snapshot 101
Mapping a Volume Snapshot to a Host or Host Group 102
Expanding Snapshot Capacity 102
Unmapping a Volume Snapshot 103
Disabling a Volume Snapshot 103
Deleting a Volume Snapshot 104
5 Sun StorageTek Array Administration Guide • March 2007

Configuring Virtual Disks 105
About Virtual Disks 105
Displaying Virtual Disk Information 106
Expanding a Virtual Disk 106
Defragmenting a Virtual Disk 107
Configuring Data Replication 108
Array Support for Data Replication 108
About Data Replication 108
About the Replication Process 109
About Replication Sets 110
About the Consistency Group 112
About Replication Links 113
About Replication Set Properties 114
About Primary and Secondary Role Reversal 115
Secondary to Primary 115
Primary to Secondary 116
About Replication Modes 116
Reference: Synchronous Versus Asynchronous Replication Modes 117
About Data Replication Operations 118
Planning for Data Replication 119
General Planning Considerations 119
Planning to Create Replication Sets 120
Managing Data Replication 122
About Data Replication Status 123
Enabling Data Replication 124
Activating and Deactivating Data Replication 124
Disabling Data Replication 125
Displaying Replication Set Information 126
6

Creating Replication Sets 126
Deleting Replication Sets 127
Reversing Roles 128
Changing Replication Modes 128
Suspending and Resuming Data Replication 129
Testing Replication Set Links 130
Troubleshooting Data Replication 130
Configuring Storage Pools 132
About Storage Pools 132
Displaying Pool Information 133
Creating a Storage Pool 133
Modifying a Storage Pool 134
Deleting a Storage Pool 134
Configuring Storage Profiles 135
About Storage Profiles 135
Reference: Standard Storage Profiles 136
Displaying Profile Information 137
Creating a Storage Profile 138
Modifying a Storage Profile 138
Copying a Storage Profile 139
Deleting a Storage Profile 139
Configuring Initiators 141
About Initiators 141
Displaying Initiator Information 142
Creating an Initiator 142
Deleting an Initiator 143
Configuring Host Groups and Hosts 144
About Host Groups 144
7 Sun StorageTek Array Administration Guide • March 2007

Managing Host Groups 145
Displaying Host Group Information 145
Creating a Host Group 146
Adding/Removing Host Group Members 146
Deleting a Host Group 148
Mapping a Host Group to a Volume 148
Unmapping a Host Group From a Volume 149
About Hosts 150
Managing Hosts 151
Displaying Host Information 151
Creating a Host 151
Deleting a Host 152
Mapping a Host to a Volume 153
Unmapping a Host From a Volume 153
Managing Trays and Disk Drives 155
About Trays and Disk Drives 155
Displaying Storage Utilization by Drive Type 157
Displaying General Controller Information 158
Displaying Controller Performance Statistics 158
Testing Controller Communication 159
Displaying Port Information 159
Displaying Tray Information 160
Displaying Disk Information 160
Managing Hot-Spare Drives 161
About Hot-Spare Drives 161
Planning Hot-Spares 162
Assigning and Unassigning Hot-Spares Manually 162
Assigning and Unassigning Hot-Spares Automatically 163
8

Configuring Storage Domains 164
About Storage Domains 164
Preparing to Create a Storage Domain 165
Determining How to Create a Storage Domain 165
Enabling the Storage Domain Feature 166
About Performing Mapping Functions 167
Displaying All Mappings on the Array 168
Creating a Mapping 168
5. Performing Monitoring Tasks 170
Monitoring Alarms and Events 171
About Alarms and Events 171
About Alarm Management 171
Displaying Alarm Information 172
Displaying an Alarm Summary 172
Displaying an Alarm Summary for All Arrays 172
Displaying an Alarm Summary for an Individual Array 172
Displaying Alarm Details 173
Displaying Aggregated Events 173
Acknowledging Alarms 174
Reopening Acknowledged Alarms 175
Deleting Alarms 175
Displaying Event Information 176
Monitoring Devices 177
Displaying Field-Replaceable Unit (FRU) Information 177
Displaying FRU Types 177
6. Troubleshooting the System 178
Troubleshooting With the Software 179
9 Sun StorageTek Array Administration Guide • March 2007

Testing an Email Address 179
Running a Diagnostic Test on a Device 180
Reference: Array Diagnostics 180
Viewing Log Files 181
Resetting a Storage Array Configuration 181
Redistributing Volumes 182
Resetting a Controller 183
Reviving Virtual Disks and Disk Drives 184
Hardware Troubleshooting Basics 185
Keeping Firmware and Patches Up To Date 185
Checking LEDs 186
Responding to an Array Boot-Up Failure 186
Replacing Field-Replaceable Units 186
10

Preface
The Sun StorageTek Array Administration Guide describes how to configure the SunStroageTek 6130, 6140, 6540 and 2500 series arrays.
Before You Read This BookBefore you begin to configure the array, you must have already installed the array asdescribed in these books:
ν Sun StorageTek 6140 Array Getting Started Guide
ν Sun StorageTek 6130 Array Getting Started Guide
ν Sun StorageTek 6540 Array Hardware Installation Guide
ν Sun StorageTek 2500 Series Array Hardware Installation Guide
11

How This Book Is OrganizedChapter 1 provides an overview of the array and management software.
Chapter 2 describes how to use the browser interface.
Chapter 3 describes connection and administration tasks, including general setuptasks.
Chapter 4 describes how to configure the array, including configuring volumes,volume copies, volume snapshots, storage pools and profiles, virtual disks, hostsand host groups, and storage domains.
Chapter 5 describes how to troubleshoot the array.
Using UNIX CommandsThis document does not contain information on basic UNIX® commands andprocedures such as shutting down the system, booting the system, and configuringdevices. Refer to the following for this information:
ν Software documentation that you received with your system
ν Solaris™ Operating System documentation, which is at http://docs.sun.com
Preface 12
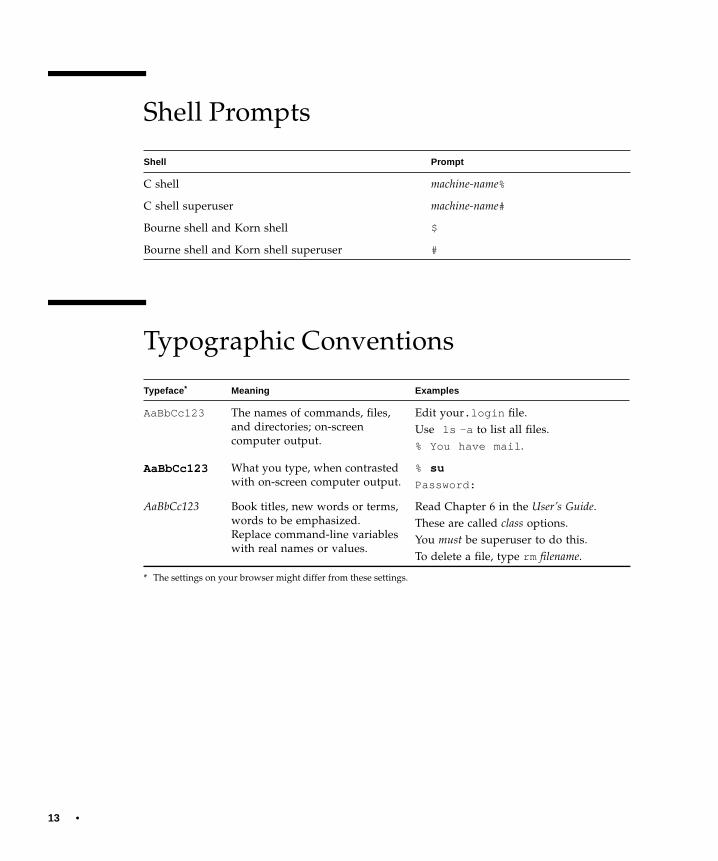
Shell Prompts
Typographic Conventions
Shell Prompt
C shell machine-name%
C shell superuser machine-name#
Bourne shell and Korn shell $
Bourne shell and Korn shell superuser #
Typeface*
* The settings on your browser might differ from these settings.
Meaning Examples
AaBbCc123 The names of commands, files,and directories; on-screencomputer output.
Edit your.login file.Use ls -a to list all files.% You have mail.
AaBbCc123 What you type, when contrastedwith on-screen computer output.
% su
Password:
AaBbCc123 Book titles, new words or terms,words to be emphasized.Replace command-line variableswith real names or values.
Read Chapter 6 in the User’s Guide.These are called class options.You must be superuser to do this.To delete a file, type rm filename.
13 •

Related Documentation
Application Title Part Number
Sun StorageTek 2500series array hardwareinstallation instructions
Sun StorageTek 2500 Series ArrayHardware Installation Guide
820-0015-nn
Late-breaking informationfor the Sun StorageTek2500 series arrays notincluded in theinformation set
Sun StorageTek 2500 Series Array ReleaseNotes
820-0031-nn
Site planning informationfor the Sun StorageTek2500 series array
Sun StorageTek 2500 Series Array SitePreparation Guide
820-0024-nn
Instructions for installingthe Common ArrayManager hostmanagement software
Sun StorageTek Common Array ManagerSoftware Installation Guide
819-7035-nn
Regulatory and safetyinformation
Sun StorageTek 2500 Series ArrayRegulatory and Safety Compliance Manual
820-0025-nn
Sun StorageTek 6540hardware installationinstructions
Sun StorageTek 6540 HardwareInstallation Guide
819-6461-nn
Site planning informationfor the Sun StorageTek6540 array
Sun StorageTek 6540 Array SitePreparation Guide
819-6524-nn
Late-breaking informationfor the Sun StorageTek6540 array not included inthe information set
Sun StorageTek 6540 Array Release Notes 819-6521-nn
Software installationinstructions
Sun StorageTek Common Array ManagerSoftware Installation Guide, v5.1
819-7035-nn
Quick referenceinformation for the CLIfor the Sun StorageTek6130, 6140, 6540, and 2500series arrays
Sun StorageTek Common Array ManagerCLI Quick Reference
820-0029-nn
Regulatory and safetyinformation for the SunStorageTek 6540 array
Sun StorageTek 6540 Array Regulatoryand Safety Compliance Manual
819-6520-nn
Preface 14

Sun StorageTek 6140hardware installationinstructions
Sun StorageTek 6140 Getting StartedGuide
819-5045-nn
Site planning informationfor the Sun StorageTek6140 array
Sun StorageTek 6140 Array SitePreparation Guide
819-5046-nn
Late-breaking informationfor the Sun StorageTek6140 array not included inthe information set
Sun StorageTek 6140 Array Release Notes 819-5044-nn
Quick referenceinformation for installingthe array for the SunStorageTek 6140 array
Sun StorageTek 6140 Poster 819-5064-nn
Printable version of theonline help
Sun StorageTek 6140 Administrator’sGuide
819-5050-nn
Regulatory and safetyinformation for the SunStorageTek 6140 array
Sun StorageTek 6140 Array Regulatoryand Safety Compliance Manual
819-5047-nn
Sun StorageTek 6130hardware installationinstructions
Sun StorageTek 6130 Getting StartedGuide
819-0032-nn
Site planning informationfor the Sun StorageTek6130 array
Sun StorageTek 6130 Array SitePreparation Guide
819-0033-nn
Late-breaking informationnot included in theinformation set for theSun StorageTek 6130 array
Sun StorageTek 6130 Array Release Notes 819-0034-nn
Regulatory and safetyinformation for the SunStorageTek 6130 array
Sun StorageTek 6130 Array Regulatoryand Safety Compliance Manual
819-0035-nn
Instructions for installingthe Sun StorEdgeExpansion cabinet
Sun StorEdge Expansion CabinetInstallation and Service Manual
805-3067-nn
Instructions for installingthe Sun Rack 900/1000cabinets
Sun Rack Installation Guide 816-6386-nn
Application Title Part Number
15 •

Accessing Sun DocumentationYou can obtain Sun network storage documentation at:
http://www.sun.com/products-n-solutions/hardware/docs/Network_Storage_Solutions
You can also view, print, or purchase a broad selection of other Sun documentation,including localized versions, at:
http://www.sun.com/documentation
Third-Party Web SitesSun is not responsible for the availability of third-party web sites mentioned in thisdocument. Sun does not endorse and is not responsible or liable for any content,advertising, products, or other materials that are available on or through such sitesor resources. Sun will not be responsible or liable for any actual or alleged damageor loss caused by or in connection with the use of or reliance on any such content,goods, or services that are available on or through such sites or resources.
Contacting Sun Technical SupportIf you have technical questions about this product that are not answered in thisdocument, go to:
http://www.sun.com/service/contacting
Sun Welcomes Your CommentsSun is interested in improving its documentation and welcomes your comments andsuggestions. You can submit your comments by going to:
Preface 16

http://www.sun.com/hwdocs/feedback
Please include the title and part number of your document with your feedback:
Sun StorageTek Array Administration Guide, part number 820-0210-11.
17 •

18
CHAPTER 1
Overview
This chapter describes the Sun StorageTek arrays, including the 6140, 6130, 6540, and2500 series arrays. It contains the following subsections:
■ “Array and Software Overview” on page 19
■ “Monitoring Overview” on page 22
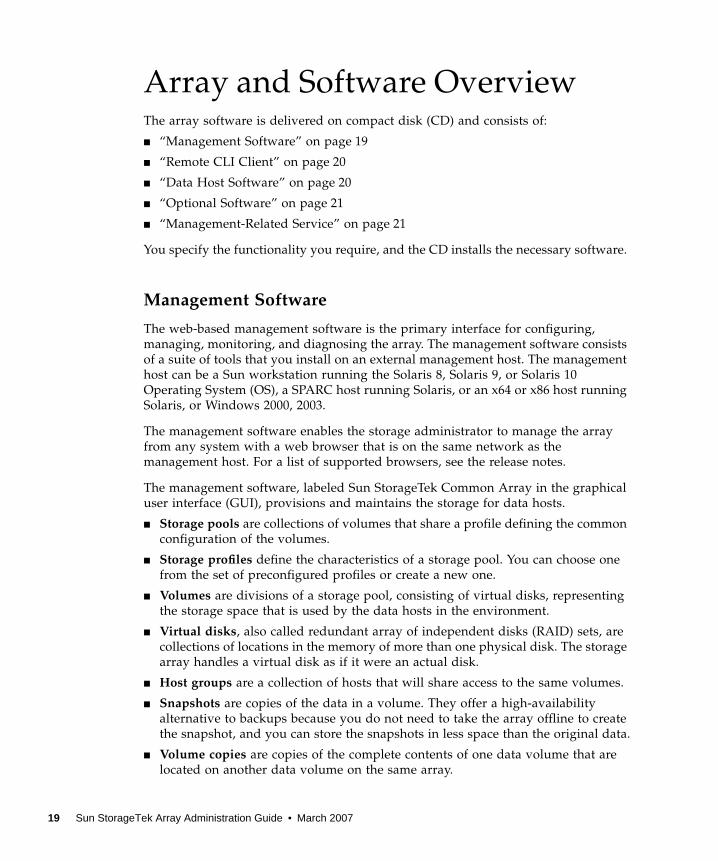
Array and Software OverviewThe array software is delivered on compact disk (CD) and consists of:
■ “Management Software” on page 19
■ “Remote CLI Client” on page 20
■ “Data Host Software” on page 20
■ “Optional Software” on page 21
■ “Management-Related Service” on page 21
You specify the functionality you require, and the CD installs the necessary software.
Management Software
The web-based management software is the primary interface for configuring,managing, monitoring, and diagnosing the array. The management software consistsof a suite of tools that you install on an external management host. The managementhost can be a Sun workstation running the Solaris 8, Solaris 9, or Solaris 10Operating System (OS), a SPARC host running Solaris, or an x64 or x86 host runningSolaris, or Windows 2000, 2003.
The management software enables the storage administrator to manage the arrayfrom any system with a web browser that is on the same network as themanagement host. For a list of supported browsers, see the release notes.
The management software, labeled Sun StorageTek Common Array in the graphicaluser interface (GUI), provisions and maintains the storage for data hosts.
■ Storage pools are collections of volumes that share a profile defining the commonconfiguration of the volumes.
■ Storage profiles define the characteristics of a storage pool. You can choose onefrom the set of preconfigured profiles or create a new one.
■ Volumes are divisions of a storage pool, consisting of virtual disks, representingthe storage space that is used by the data hosts in the environment.
■ Virtual disks, also called redundant array of independent disks (RAID) sets, arecollections of locations in the memory of more than one physical disk. The storagearray handles a virtual disk as if it were an actual disk.
■ Host groups are a collection of hosts that will share access to the same volumes.
■ Snapshots are copies of the data in a volume. They offer a high-availabilityalternative to backups because you do not need to take the array offline to createthe snapshot, and you can store the snapshots in less space than the original data.
■ Volume copies are copies of the complete contents of one data volume that arelocated on another data volume on the same array.
19 Sun StorageTek Array Administration Guide • March 2007

■ Replication sets are the association between primary and secondary volumes.The secondary volume contains a complete copy of the data on the primaryvolume. The data replication software continuously replicates the data betweenvolumes in a replication set.
The management software enables monitoring and diagnostic tasks on the array. Youcan configure the software to monitor on a 24-hour basis, collecting information thatenhances the reliability, availability, and serviceability (RAS) of the array.
The management software records alerts and notifications, which you can monitorby displaying the log file. It also automates the transmission of alerts, which can besent to an email address, to a pager, or to diagnostic software running on amanagement host on the network.
Finally, the management software enables you to run diagnostic tests to troubleshootproblems and access Service Advisor for instruction on replacing field-replaceableunits (FRUs).
Remote CLI Client
You can also manage and configure storage for the array using the remotecommand-line interface (CLI) client. The CLI provides the same control andmonitoring capability as the web browser, and it is also scriptable for runningfrequently performed tasks.
The remote CLI client is available for the Solaris operating system (OS) and severalother operating systems. See the release notes for a list of supported operatingsystem platforms. For more information about the CLI commands, see the sscs manpage.
Data Host Software
The array data host software controls the data path between the data host and thearray. The data host software consists of the following tools:
■ Sun StorageTek SAN Foundation Software for managing the data path I/Oconnections between data hosts and the array. This software includes drivers andutilities that enable Solaris data hosts to connect to, monitor, and transfer data ina storage area network (SAN).
■ Sun StorageTek Traffic Manager software which provides multipathingfunctionality and the ability to reliably communicate with the array’s storage.
Data host software enables Solaris 8, Solaris 9, and Solaris 10 workstations and otheroperating system platforms, including Windows XP and Windows NT, tocommunicate with the array. For a list of supported operating system platforms, seethe release notes.
Chapter 1 Array and Software Overview 20

Data host software for Solaris is distributed on the host software installation CD.You can also obtain the software for other operating systems from Sun’s DownloadCenter.
Optional Software
You can also purchase the additional software, including the following, for use onhosts with data paths or network connections to the array:
■ VERITAS Volume Manager with Dynamic Multipathing (DMP), for installation ona Solaris or third-party data host (DMP can coexist with Sun StorEdge TrafficManager multipathing software)
■ Sun StorEdge SAM-FS software for remote archival and transparent backups
■ Sun Cluster or Microsoft clustering software for clustered configurations
For a complete list of available software for use on hosts with connections to thearray, see the release notes for your array.
Management-Related Service
You can manage the array using the Hypertext Transfer Protocol Secure (HTTPS)web interfaces for management and monitoring of storage. HTTPS is primarily forweb browsers and is protected by passwords and data encryption. The remotecommand-line interface (CLI) client on a management host is also used formanagement and monitoring of storage.
21 Sun StorageTek Array Administration Guide • March 2007

Monitoring OverviewThis chapter describes monitoring and diagnosing storage systems. It contains thefollowing sections:
■ “How the Monitoring Software Works” on page 22
■ “About Monitoring Strategy” on page 23
■ “About the Monitoring Cycle” on page 23
■ “About the Event Life-Cycle” on page 24
How the Monitoring Software WorksThe Fault Management Service (FMS) is a software component of the Sun StorageTekCommon Array Manager that can used to monitor and diagnose the storagesystems. The primary monitoring and diagnostic functions of the software are:
■ Array health monitoring
■ Event and alarm generation
■ Notification to configured recipients
■ Diagnostics
■ Device and device component reporting
An FMS agent, which runs as a background process, monitors all devices managedby the Sun StorageTek Common Array Manager.
The agent at configured intervals, or can be run manually, to probe devices. Eventsare generated with content, such as probable cause and recommended action, to helpfacilitate isolation to a single field-replaceable unit (FRU).
Chapter 1 Monitoring Overview 22

About Monitoring StrategyThe following procedure is a typical strategy for monitoring.
1. Monitor the devices.
To get a broad view of the problem, the site administrator or Sun personnel canreview reported information in context. This can be done by:
■ Displaying the device itself
■ Analyzing the device’s event log
2. Isolate the problem.
For many alarms, information regarding the probable cause and recommendedaction can be accessed from the alarm view. In most cases, this informationenables you to isolate the source of the problem. In cases where the problem isstill undetermined, diagnostic tests are necessary.
Once the problem is fixed, you can clear the alarm for the device.
About the Monitoring CycleThe agent is a process of the Fault Management System (FMS), which is alwaysrunning in the background. The high-level steps of a monitoring cycle are as follows.
1. Verify that the agent is idle.
The system generates instrumentation reports by probing the device for allrelevant information, and it saves this information. The system then compares thereport data to previous reports and evaluates the differences to determinewhether health-related events need to be generated.
Events are also created from problems reported by the array. If the array reports aproblem, an alarm is generated directly. When the problem is no longer reportedby the array, the alarm is removed.
2. Store instrumentation reports for future comparison.
Event logs are accessible by accessing the Events page for an array from thenavigation pane in the user interface. The software updates the database with thenecessary statistics. Some events require that a certain threshold be attainedbefore an event is generated. For example, having the cyclic redundancy count(CRC) of a switch port increase by one is not sufficient to trigger an event, since acertain threshold is required.
23 Sun StorageTek Array Administration Guide • March 2007

3. Send the events or alarms to interested parties.
Events are sent only to recipients that have been set up for notification. The typesof events can be filtered so that only pertinent events are sent to each individual.
Note: If they are enabled, the email providers receive notification of all events.
About the Event Life-CycleMost storage network events are based on health transitions. For example, a healthtransition occurs when the state of a device goes from online to offline. It is thetransition from online to offline that generates an event, not the actual offline value.If the state alone were used to generate events, the same events would be generatedrepeatedly. Transitions cannot be used for monitoring log files, so log events can berepetitive. To minimize this problem, the agent uses predefined thresholds to entriesin the log files.
The software includes an event maximums database that keeps track of the numberof events generated about the same subject in a single eight-hour time frame. Thisdatabase prevents the generation of repetitive events. For example, if the port of aswitch toggles between offline and online every few minutes, the event maximumsdatabase ensures that this toggling is reported only once every eight hours instead ofevery five minutes.
Event generation usually follows this process:
1. The first time a device is monitored, a discovery event is generated. It is notactionable but is used to set a monitoring baseline. This event describes, in detail,the components of the storage device. Every week after a device is discovered, anaudit event is generated with the same content as the discovery event.
2. A log event can be generated when interesting information is found in host orstorage log files. This information is usually associated with storage devices andsent to all users.
3. Events are generated when the software detects a change in the content of theinstrumentation report, probes the device, and compares the report to the lastinstrumentation report, which is usually only minutes old. StateChangeEvent andValueChangeEvent categories represent most of the events that are generated.
Note: Aggregated events and events that require action by service personnel (knownas actionable events) are also referred to as alarms. Some alarms are based on asingle state change and others are a summary of events where the event determinedto be the root cause is advanced to the head of the queue as an alarm. Thesupporting events are grouped under the alarm and are referred to as aggregatedevents.
Chapter 1 Monitoring Overview 24

25 Sun StorageTek Array Administration Guide • March 2007

26
CHAPTER 2
Using the Browser Interface
This chapter describes how to use the browser interface. It contains the followingsections:
■ “About the Browser Interface” on page 27
■ “About the Page Banner” on page 27
■ “About the Navigation Tree” on page 28
■ “About the Page Content Area” on page 29
■ “Controlling Table Display” on page 29
■ “About the Status Icons” on page 31
■ “Using Forms” on page 31
■ “Searching for System Elements” on page 32
■ “Using Help” on page 33
■ “Logging Out of the Management Software” on page 34

About the Browser InterfaceThe browser interface provides a way to configure, manage, and monitor the system.You navigate through the browser interface as you would a typical web page. Youuse the navigation tree to move among pages within an application. You can click alink to get details about a selected item. You can also sort and filter informationdisplayed on a page. When you place your pointer over a button, tree object, link,icon, or column, a tooltip provides a brief description of the object.
Each page uses a form or table format to display data.
About the Page BannerAcross the top of each page, the banner displays buttons, links, system information,alarm status, and the name of the application.
TABLE 2-1 describes the contents of the banner.
TABLE 2-1 Contents of the Banner
Button Description
Returns you to the Java Web Console page, where you can navigatebetween the configuration software and the diagnostic software.
Displays the software version and copyright information.
Refreshes the current page.
Enables you to quickly locate logical and physical elements definedin the system. You select a component and enter a name or WorldWide Name (WWN) for the component you want to locate. Anasterisk (*) searches for all instances of the selected component. Forexample, you can search for all initiators or only those initiators thatmatch a specified name or WWN. For more information, see“Searching for System Elements” on page 32.
Launches Service Advisor.
Logs you out of the Java Web Console and the current application.
27 Sun StorageTek Array Administration Guide • October 2006

About the Navigation TreeThe navigation tree is displayed in the left-hand pane of the interface. You use thenavigation tree to move among folders and pages.
The top level of the navigation pane displays the following links:
■ Alarms
Clicking the Alarms link displays the Alarms page, from which you can viewcurrent alarms for all storage systems and gain access to alarm detail information.
■ Storage Systems
Clicking the Storage Systems link displays the Storage System Summary page,from which you can select an array to manage.
Opens the online help in a separate window.
System Information and Status
Displays the name of the user who is currently logged in to thesystem.
Displays the name of the system.
Displays the number of users currently logged in to the system.Click the link to open the Active User Summary, which displays theuser name, role, client type, and IP address for each logged-in user.
Displays the latest date and time that data was retrieved from theserver that you are administering. The latest data is collected anddisplayed each time you refresh the browser window or perform anaction in the browser.
Displays the current number of each type of alarm. There are fouralarm types:
Down, Critical, Major, and Minor.
To get more information about the alarms, click the Current Alarmslink. The Alarms Summary page is displayed.
TABLE 2-1 Contents of the Banner (Continued)
Button Description
Chapter 2 About the Navigation Tree 28

■ General Configuration
Clicking the General Configuration link displays the Site Information page, whereyou enter company, storage site, and contact information.
About the Page Content AreaThe content section of each page displays storage or system information as a form ortable. You click a link in the page to perform a task or to move among pages. Youcan also move among pages by clicking an object in the navigation tree.
Controlling Table DisplayTables display data in a tabular format. TABLE 2-2describes the objects you can use tocontrol the display of data on a page.
TABLE 2-2 Table Objects
Control/Indicator Description
Enables you to display only theinformation that interests you.When filtering tables, follow theseguidelines:• A filter must have at least one defined
criterion.• A filter applies to the current server
only. You cannot apply a filter to tablesacross multiple servers.
To filter a table, choose the filter criterionyou want from the table’s Filter drop-down menu.
Enable you to toggle between displayingall rows and displaying 15 or 25 rows onepage at a time. When the top icon isdisplayed on a table, click the icon to pagethrough all data in the table. When thebottom icon is displayed in a table, clickthe icon to page through 15 or 25 rows ofdata.
29 Sun StorageTek Array Administration Guide • October 2006

Enable you to select or deselect all of thecheck boxes in the table. Use the icon onthe left to select all of the check boxes onthe current page. Use the icon on the rightto clear all of the check boxes on thecurrent page.
Indicates that the column in the table issorted in ascending order. The ascendingsort order is by number (0-9), byuppercase letter (A-Z), and then bylowercase letter (a-z).Click this icon to change the sort order ofthe column to descending.A closed icon indicates the column bywhich the table is currently sorted.
Indicates that the column in the table issorted in descending order. Thedescending sort order is by lowercaseletter (z-a), by uppercase letter (Z-A), andthen by number (9-0).Click this icon to change the sort order ofthe column to ascending.A closed icon indicates the column bywhich the table is currently sorted.
Enables you to select the entries that youwant to display. Click the button on theleft to display the first 25 table entries.Click the button on the right to displaythe previous 25 table entries.
Click the button on the left to display thenext 15 or 25 table entries. Click thebutton on the right to display the last 15or 25 table entries.
Indicates how many pages are in thetable, and displays the page you arecurrently viewing. To view a differentpage, type the page number in the Pagefield and click Go.
TABLE 2-2 Table Objects (Continued)
Control/Indicator Description
Chapter 2 Controlling Table Display 30

About the Status IconsIcons are displayed to draw your attention to an object’s status. TABLE 2-3 describesthese status icons.
Using FormsForms have menus, buttons, links, and text fields that allow you to select availableoptions and enter information on a page. TABLE 2-4 describes these elements.
TABLE 2-3 Status Icons
Control/Indicator Description
Identifies a critical error. Immediateattention to the failed object is stronglyrecommended.
Identifies a a minor error. The object is notworking within normal operationalparameters.
Identifies an unknown condition. A reporton the status cannot be supplied at thistime.
TABLE 2-4 Form Controls
Control/Indicator Description
Indicates that you must enter informationin this field.
Lists options from which you can make aselection.
Displays the part of the form that isindicated by the text next to this icon.
Returns you to the top of the form.
31 Sun StorageTek Array Administration Guide • October 2006

Searching for System ElementsYou can locate logical and physical elements of the system by using the searchfeature located in the banner of any page.
You can search for all elements of a selected type for particular elements that matcha specified term. For example, you can search for all initiators or you can search foronly the initiators that contain a specific World Wide Name (WWN).
To use the search feature:
1. Click Sun StorageTek Common Array Manager.
2. In the banner, click Search.
The Search window is displayed.
3. Select the type of component you want to locate. You can search for arrays, disks,initiators, storage pools, storage profiles, trays, virtual disks, hosts, host groups,volumes, replication sets, snapshots, or all system elements.
4. If you want to narrow your search, enter a term in the text field.
■ All elements that contain the specified term in the name or description fieldwill be located. For example, the term “primary” will locate elements with thename of primary, demoprimary, primarydemo, and firstprimarylast.
Saves the selections and entries that youhave made.
Sets all page elements to the originalselections that were displayed when thepage was first accessed.
Cancels the current settings.
Causes the current settings to take effect.
TABLE 2-4 Form Controls (Continued)
Control/Indicator Description
Chapter 2 Searching for System Elements 32

■ The search feature is not case-sensitive. For example, the term “primary” willlocate elements that contain primary, Primary, PRIMARY, priMARY, and anyother case combination.
■ Do not embed spaces or special characters in the search term.
■ Use the wildcard (*) only to search for all elements of a selected type. Do notuse the wildcard with the search term. If you do, the system will search for theasterisk character.
5. Click Search.
The result of your search is displayed.
6. Click Back to return to the previous page.
Using HelpTo view additional information about the configuration software, click Help in thebanner of the web browser. The help window consists of a navigation pane on theleft and a topic pane on the right.
To display a help topic, use the Navigation pane's Contents, Index, and Search tabs.Click the Search tab and click Tips on Searching to learn about the search feature.TABLE 2-5 describes the help tabs.
TABLE 2-5 Help Tabs
Tab Description
Contents Click a folder icon to display subtopics. Click a page icon to displaythe help page for that topic in the Topic pane.
Index Click an index entry to display the help page for that topic.
Search Type the words for which you want to search and click Search. TheNavigation pane displays a list of topics that match your searchcriteria in order of relevancy. Click a topic link to display the helppage for that topic.Click the Tips on Searching link for information about how toimprove your search results.To search for a particular word or phrase within a topic, click in theTopic pane, press Ctrl+F, type the word or phrase for which you aresearching, and click Find.
33 Sun StorageTek Array Administration Guide • October 2006

TABLE 2-6 describes the meanings of the Help window icons.
Logging Out of theManagement SoftwareTo log out of the software, click Log Out in the window banner.
TABLE 2-6 Help Icons
Control/Indicator Description
Click to go back to the previous help topicthat you viewed in the current session.
Click to go forward to the next help topicthat you viewed in the current session.
Click to print the current help topic.
Chapter 2 Logging Out of the Management Software 34

35 Sun StorageTek Array Administration Guide • October 2006

36
CHAPTER 3
Performing Connectionand Administration Tasks
This chapter describes performing connection and administration tasks. It containsthe following subsections:
■ “Connection Tasks” on page 37
■ “General Administration Tasks” on page 40
■ “Performing Monitoring Administration” on page 57
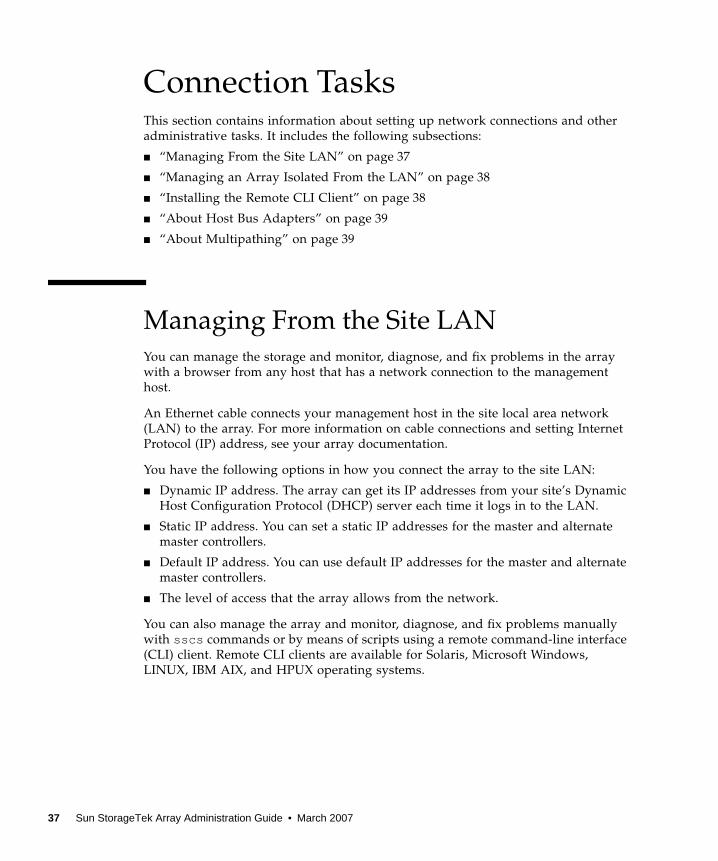
Connection TasksThis section contains information about setting up network connections and otheradministrative tasks. It includes the following subsections:
■ “Managing From the Site LAN” on page 37
■ “Managing an Array Isolated From the LAN” on page 38
■ “Installing the Remote CLI Client” on page 38
■ “About Host Bus Adapters” on page 39
■ “About Multipathing” on page 39
Managing From the Site LANYou can manage the storage and monitor, diagnose, and fix problems in the arraywith a browser from any host that has a network connection to the managementhost.
An Ethernet cable connects your management host in the site local area network(LAN) to the array. For more information on cable connections and setting InternetProtocol (IP) address, see your array documentation.
You have the following options in how you connect the array to the site LAN:
■ Dynamic IP address. The array can get its IP addresses from your site’s DynamicHost Configuration Protocol (DHCP) server each time it logs in to the LAN.
■ Static IP address. You can set a static IP addresses for the master and alternatemaster controllers.
■ Default IP address. You can use default IP addresses for the master and alternatemaster controllers.
■ The level of access that the array allows from the network.
You can also manage the array and monitor, diagnose, and fix problems manuallywith sscs commands or by means of scripts using a remote command-line interface(CLI) client. Remote CLI clients are available for Solaris, Microsoft Windows,LINUX, IBM AIX, and HPUX operating systems.
37 Sun StorageTek Array Administration Guide • March 2007

Managing an Array Isolated From theLANUse the following procedure when your site’s security requirements necessitatehaving the array isolated from any external local area network (LAN):
■ Set up and configure the array using a management host.
■ When you have finished configuring the array, disconnect the management host.
Whenever the array needs to be reconfigured, reconnect the management host.
Another way to secure the system is to install a firewall between the managementhost for the array and the external LAN.
Installing the Remote CLI ClientIf you need to configure the array with the sscs commands from a host other thanthe management host, the host installation software compact disk (CD) contains aremote command-line interface (CLI) that enables you to do all of the taskssupported by the browser interface. The commands can be used in scripts youcreate, or they can be entered directly in a terminal window’s command line. Theclient can run on hosts, including:
■ Windows 2000 Server and Advanced Server
■ Windows Server 2003 Standard, Web, and Enterprise Editions
■ Red Hat Linux
■ SuSE Linux
■ HP-UX
■ IBM AIX
■ Solaris 8 OS 4/01
Solaris 9 (SPARC systems only)
Solaris 10 (SPARC systems only)
Solaris 10x86
■ IRIX
Note: Refer to the Common Array Manager Release Notes for a complete list ofsupported hosts.
Chapter 3 Connection Tasks 38

To install the remote CLI on a Solaris host:
1. Insert the Host Installation Software CD.
2. Run the install script.
3. Select Remote Configuration CLI.
The command for management services is sscs, used with a subcommand to directthe operation. For a list of commands, see the sscs(1M) man page.
For more information, see your array documentation.
About Host Bus AdaptersA data host is any host that uses the array for storage. When a data host is connectedto the array by a host bus adapter (HBA), the HBA is an initiator. The HBA isconnected by a cable to a Fibre Channel (FC) port on the array.
After connecting a data host directly to the array with one or two HBAs, verify thefirmware level of HBAs. Consult the HBA’s operating system documentation to dothis. For Solaris, use the luxadm(1m) command. If the firmware is not at the correctrevision, download the latest revision from the web. To determine the HBA softwareto use, consult the release notes for the Sun StorageTek Common Array Manager.You can then configure the initiator and set up hosts and host groups.
About MultipathingWith multipathing, also called multipath failover, an array or network can detectwhen an adapter has failed and automatically switch access to an alternate adapter.Multipathing enables high-availability configuration because it ensures that the datapath remains active. Multipathing also helps increase performance to multi-controller disk arrays by spreading I/O between multiple paths into the array.
Within the array, storage pools use multipathing by default. To complete the datapath, data hosts also need the ability to multipath.
For more information about the appropriate multipathing software for your datahost, refer to the release notes for the Sun StorageTek Common Array Manager.
39 Sun StorageTek Array Administration Guide • March 2007

General Administration TasksThis section describes performing administration tasks for the array. It includes thefollowing subsections:
■ “Accessing, Adding, and Deleting Storage Arrays” on page 40
■ “Specifying General Settings” on page 43
■ “Managing User Accounts” on page 49
■ “Managing Licenses” on page 51
■ “Displaying Event Information” on page 53
■ “Monitoring Performance” on page 54
■ “Administering Jobs” on page 54
■ “Viewing the Activity Log” on page 56
Accessing, Adding, and Deleting StorageArraysWhen you log in to the management software, you can view the list of availablearrays from the Storage System Summary page.
To manage an existing array, expand it in the navigation pane to gain access tological and physical components associated with the array, or click the array name toconfigure general array setup parameters. Logical and physical components includereplication sets, host groups, hosts, initiators, storage pools, volumes, virtual disks,trays, and disks. Administration information includes the array name, theconfiguration of the cache, array hot-spares, and disk scrubbing.
You can add additional arrays by auto-discovery or manually by individualregistration.
You can also remove existing arrays.
Chapter 3 General Administration Tasks 40

Displaying Array InformationTo display available arrays:
1. Click Sun StorageTek Common Array Manager.
The navigation pane and the Storage System Summary page are displayed.
2. In the navigation pane, expand the array you want to work with.
The navigation tree is expanded for that array.
3. Choose Administration.
The Administration page for the selected array is displayed.
Planning to Register an ArrayUsing the Array Registration wizard, you can have the management software eitherauto-discover one or more arrays that are connected to the network and are notalready registered, or you can choose to manually register an array.
The auto-discover process sends out a broadcast message across the local network toidentify any unregistered arrays. The discovery process displays the percentage ofcompletion while the array management software polls devices in the network todetermine whether any new arrays are available. When complete, a list ofdiscovered arrays is displayed. You can then select one or more arrays to registerfrom the list.
Manual registration enables you to register an array by identifying the IP address ofits controller. This option is typically used only to add a storage array that is outsideof the local network.
The Array Registration wizard displays firmware information for each array andlists any action recommended to bring the array up to the current firmware baselinelevel. You can choose to perform the recommended firmware upgrade action now, oryou can modify the array firmware later by selecting the array and clicking theUpgrade Firmware button on either the Storage System Summary page or theAdministration page.
41 Sun StorageTek Array Administration Guide • March 2007

Registering an ArrayTo register an array:
1. Click Sun StorageTek Common Array Manager.
The navigation pane and the Storage System Summary page are displayed.
2. Click Register.
The management software launches the Register Array wizard.
3. Follow the instructions in the wizard.
Unregistering an ArrayTo unregister an array:
1. Click Sun StorageTek Common Array Manager.
The navigation pane and the Storage System Summary page are displayed.
2. Select the check box to the left of the array you want to remove from the list ofregistered arrays.
This enables the Remove button.
3. Click Remove.
Upgrading Array FirmwareFor optimal performance, Sun Microsystems recommends that the firmware on allarrays be at the level of the current firmware baseline.
To upgrade the array firmware:
1. Click Sun StorageTek Common Array Manager.
The navigation pane and the Storage System Summary page are displayed.
2. Select the check box to the left of one of the displayed arrays.
This enables the Upgrade Firmware button.
3. Click Upgrade Firmware.
The management software launches the Analyze and Upgrade Array Firmwarewizard.
Chapter 3 General Administration Tasks 42

4. Follow the instructions in the wizard.
Note: You can upgrade the firmware during array registration and you can alsolaunch the Upgrade Firmware wizard from the Administration page.
Monitoring Array HealthTo monitor the health of the array:
1. Click Sun StorageTek Common Array Manager.
The navigation pane and the Storage System Summary page are displayed.
2. Note the value in the Health field on the Storage System Summary page. TheHealth field indicates the state of the array. Possible values include:
■ OK - Indicates that every component of the storage array is in the desiredworking condition.
■ Degraded - Indicates that, although the management host can communicatewith the storage array, a problem on the array requires intervention. Forexample, the array may have volumes that are not on the array’s preferred I/Ocontroller path. To view the alarms and the recovery options, go to the Alarmspage for the array.
Typically, multipath drivers move volumes from their preferred ownercontroller when a problem occurs along the data path between the host and thestorage array. Redistributing the volumes causes the volumes to revert back totheir preferred controllers.
Redistributing the volumes while an application is using the affected volumescauses I/O errors unless a multipath driver is installed on the data host.Therefore, before you redistribute volumes, verify either that the volumes arenot in use or that there is a multipath driver installed on all hosts using theaffected volumes.
■ Error - Indicates that the management host cannot communicate with thecontrollers in the storage array over its network management connection. Toview the alarms and the recovery options, go to the Alarms page for the array.
Specifying General SettingsYou use the Administration page to manage passwords, to view and specify arraydetails, to enable disk scrubbing on the array, and to set the time on the array. Anyuser can view the information on this page, but you must be logged in as a user withstorage role to change the settings.
43 Sun StorageTek Array Administration Guide • March 2007

About the Array PasswordAn array password provides access to an array and is required for performance ofnotification operations. When you set the password, the management software storesan encrypted copy of the password in its array registration database. Thereafter, themanagement software can perform modification operations on the array without apassword challenge.
You can change the array password at any time. Changing the array passwordcauses the management software to automatically update the password stored in itsarray registration database.
Multiple management hosts can access a single array. Each management host has itsown instance of management software, each of which has its own array registrationdatabase. For the management software to perform modification operations on anarray, the password stored in the array registration database for that instance of themanagement software must match the password set on the array. When you changethe array password on one management host, only the array registration databaseused by that management host is updated with the changed password. Beforeanother management host can perform modification operations on that array, thearray registration database for that management host must also be updated with thenew password.
You may also need to update the password stored in the array registration databaseif the array was registered without a password or with an incorrectly typedpassword.
If the password stored in the array registration database does not match the arraypassword, the following error message is displayed when you attempt amodification operation on the array: “The operation cannot complete because youdid not provide a valid password.”
Changing the Array PasswordTo change the array password or update the password stored in the arrayregistration database:
1. Click Sun StorageTek Common Array Manager.
The navigation pane and the Storage System Summary page are displayed.
2. In the navigation pane, expand the array you want to work with.
The navigation tree is expanded for that array.
3. Choose Administration.
The Administration page is displayed.
Chapter 3 General Administration Tasks 44

4. Click Manage Passwords.
The Manage Passwords page is displayed.
5. Select one of the following:
■ To change the array password, select Change Array Password. Changing thepassword automatically updates the password stored in the array registrationdatabase.
■ To manually synchronize the password stored in the array registrationdatabase with the password set on the array, select Update Array Password InArray Registration Database. Do this if the array password was previouslychanged from another management host or, if the array was registered withouta password or with an incorrectly typed password.
6. In the Old Password field (available only if you are changing the array password),enter the current password.
7. In the New Password field, enter the new password as an alphanumeric string ofup to eight characters.
8. Enter the same new password in the Verify New Password field.
9. Click OK to apply your changes.
Note: For information about resetting the array password to its factory setting usingthe serial port, refer to the installation documentation for your array.
Setting Array DetailsYou can view details about the array, and you change some, including the arrayname, the number of hot-spares, the default host type, the cache block size, theminimum and maximum cache allocation percentages, disk scrubbing, and failoveralert settings.
To set array details:
1. Click Sun StorageTek Common Array Manager.
The navigation pane and the Storage System Summary page are displayed.
2. In the navigation pane, expand the array you want to work with.
The navigation tree is expanded for that array.
3. Choose Administration.
The Administration page is displayed.
4. Go to the Details section.
45 Sun StorageTek Array Administration Guide • March 2007

5. Specify the new settings you want to change.
6. Click OK to apply your changes.
Enabling Disk ScrubbingDisk scrubbing is a background process performed by the array controllers toprovide error detection on the drive media. Disk scrubbing detects errors andreports them to the event log.
Before disk scrubbing can run, you must enable it on the array. Disk scrubbing thenruns on all volumes on the array. You can disable disk scrubbing on any volume thatyou do not want to have scrubbed. Later, you can re-enable disk scrubbing for anyvolume on which you disabled it.
The advantage of disk scrubbing is that the process can find media errors before theydisrupt normal drive reads and writes. Disk scrubbing scans all volume data toverify that it can be accessed. If you enable a redundancy check, it also scans thevolume redundancy data.
Enabling Disk Scrubbing on an Array
To enable disk scrubbing on an array:
1. Click Sun StorageTek Common Array Manager.
The navigation pane and the Storage System Summary page are displayed.
2. In the navigation pane, expand the array for which you want to enable diskscrubbing.
The navigation tree is expanded for that array.
3. Choose Administration.
The Administration page is displayed.
4. Click the check box to the right of Disk Scrubbing Enabled, and specify thenumber of days you want as an interval between disk scrubbing cycles.
5. Click OK.
Chapter 3 General Administration Tasks 46

Disabling and Re-enabling Disk Scrubbing on a Volume
To disable or re-enable disk scrubbing for an individual volume:
1. Click Sun StorageTek Common Array Manager.
The navigation pane and the Storage System Summary page are displayed.
2. In the navigation pane, expand the array for which you want to disable or re-enable disk scrubbing for a specific volume.
The navigation tree is expanded for that array.
3. Choose Volumes.
The Volume Summary page is displayed.
4. Click the volume on which you want to disable or re-enable disk scrubbing.
The Volume Details page is displayed.
5. Do one of the following:
■ To disable disk scrubbing, select False in the Disk Scrubbing Enabled field.
■ To re-enable disk scrubbing, select True in the Disk Scrubbing Enabled field.
■ To re-enable disk scrubbing so that it also scans the volume redundancy data,select True in the Disk Scrubbing With Redundancy field.
6. Click OK.
Setting the TimeIf the array does not use your network’s network time protocol server, you must setthe array’s clock manually.
To set the array time:
1. Click Sun StorageTek Common Array Manager.
The navigation pane and the Storage System Summary page are displayed.
2. In the navigation pane, choose the array for which you want to set the time.
The Administration page is displayed.
3. Go to the System Time section.
■ To synchronize the array time with the server, click Synchronize With Server.
■ To set the time manually:
Set the hour and minute, using a 24-hour clock.
Set the month, day, and year.
47 Sun StorageTek Array Administration Guide • March 2007
4. Click OK to apply your changes.
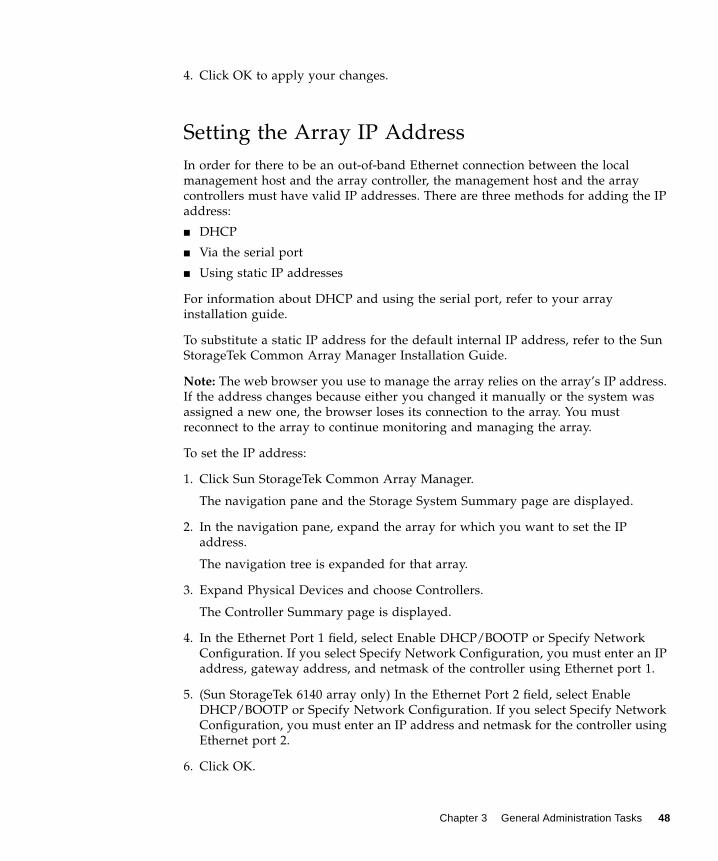
Setting the Array IP AddressIn order for there to be an out-of-band Ethernet connection between the localmanagement host and the array controller, the management host and the arraycontrollers must have valid IP addresses. There are three methods for adding the IPaddress:
■ DHCP
■ Via the serial port
■ Using static IP addresses
For information about DHCP and using the serial port, refer to your arrayinstallation guide.
To substitute a static IP address for the default internal IP address, refer to the SunStorageTek Common Array Manager Installation Guide.
Note: The web browser you use to manage the array relies on the array’s IP address.If the address changes because either you changed it manually or the system wasassigned a new one, the browser loses its connection to the array. You mustreconnect to the array to continue monitoring and managing the array.
To set the IP address:
1. Click Sun StorageTek Common Array Manager.
The navigation pane and the Storage System Summary page are displayed.
2. In the navigation pane, expand the array for which you want to set the IPaddress.
The navigation tree is expanded for that array.
3. Expand Physical Devices and choose Controllers.
The Controller Summary page is displayed.
4. In the Ethernet Port 1 field, select Enable DHCP/BOOTP or Specify NetworkConfiguration. If you select Specify Network Configuration, you must enter an IPaddress, gateway address, and netmask of the controller using Ethernet port 1.
5. (Sun StorageTek 6140 array only) In the Ethernet Port 2 field, select EnableDHCP/BOOTP or Specify Network Configuration. If you select Specify NetworkConfiguration, you must enter an IP address and netmask for the controller usingEthernet port 2.
6. Click OK.
Chapter 3 General Administration Tasks 48

Managing User AccountsThis section describes managing user accounts. It contains the following subsections:
■ “About User Accounts” on page 49
■ “Displaying User Information” on page 50
■ “Adding a New User” on page 50
■ “Removing a User” on page 51
About User AccountsThe management software provides user roles that define the privileges available tothe user. TABLE 3-1 describes the user roles and their privileges.
After installing the array software on a server and logging in to the Common ArrayManager software using root, you can assign one of the roles to valid Solaris useraccounts that have access to the management host. The users can then log in to theCommon Array Manager software using their Solaris user names and passwords.For information about creating Solaris user accounts, refer to the Solaris systemadministration documentation. For information about creating user accounts forWindows, refer to your Windows system administration documentation.
The role assigned to a user determines the degree of access that a user has to thearray and its attributes. All users assigned the guest role can view information. Tomodify array attributes, a user must have storage privileges. Only users assignedthe storage role can add users that have either the guest or storage account role.
If multiple users are logged in to the array and making changes as the storageadministrator, there is a risk of one user’s changes overwriting another user’sprevious changes. Therefore, storage administrators should develop proceduresabout who can make changes and when and about how to notify others.
TABLE 3-1 User Roles and Privileges
Role Description of Role
storage Users assigned the storage role can view and modify all attributes.
guest Users assigned the guest role can view all attributes but not modifyany of them.
49 Sun StorageTek Array Administration Guide • March 2007

Displaying User InformationTo display user information:
1. Click Sun StorageTek Common Array Manager.
The navigation pane and the Storage System Summary page are displayed.
2. In the navigation pane, expand General Configuration and choose UserManagement.
The User Summary page is displayed.
Adding a New UserTo add a new user:
1. Click Sun StorageTek Common Array Manager.
The navigation pane and the Storage System Summary page are displayed.
2. In the navigation pane, expand General Configuration and choose UserManagement.
The User Summary page is displayed.
3. Click Add to add a new user.
The Add New User page is displayed.
4. Enter the name of a valid Solaris account.
Solaris user names should begin with a lowercase letter and can consist of 6 to 8alphanumeric characters, underscores (_), and periods (.). For information aboutcreating Solaris user accounts, refer to the Solaris system administrationdocumentation.
5. Select a role for the Solaris account: storage or guest.
6. Click OK.
The User Summary page lists the newly assigned user and role.
Chapter 3 General Administration Tasks 50

Removing a UserTo remove a user:
1. Click Sun StorageTek Common Array Manager.
The navigation pane and the Storage System Summary page are displayed.
2. In the navigation pane, expand General Configuration and choose UserManagement.
The User Summary page is displayed.
3. Click the check box to the left of the name of the user you want to remove.
This enables the Remove button.
4. Click Remove.
Note: For information about removing user accounts from the server or NIS, consultthe Solaris system administration documentation.
Managing LicensesThis section describes managing licenses. It contains the following subtopics:
■ “About Licensed Features” on page 51
■ “Displaying License Information” on page 52
■ “Adding a License” on page 52
■ “Disabling a License” on page 53
■ “Re-enabling a License” on page 53
About Licensed FeaturesBefore you can use premium features, you must obtain and register licenses for eachpremium feature that you plan to use. Premium features include:
■ Data Replication
■ Volume Copy
■ Snapshots
■ Storage Domains
51 Sun StorageTek Array Administration Guide • March 2007

Displaying License InformationLicense certificates are issued when you purchase premium services and containinstructions for obtaining license information from the Sun Licensing Center.
To display license information:
1. Click Sun StorageTek Common Array Manager.
The navigation pane and the Storage System Summary page are displayed.
2. In the navigation pane, expand the array for which you want to display licenseinformation.
The navigation tree is expanded for that array.
3. Expand Administration and choose Licensing.
The Licensable Feature Summary page is displayed.
4. Click a feature for detailed information on licenses for that feature.
The Licenseable Feature Details page for the selected feature is displayed.
Adding a LicenseLicense certificates are issued when you purchase premium services and containinstructions for obtaining license information from the Sun Licensing Center.
To add a license:
1. Click Sun StorageTek Common Array Manager.
The navigation pane and the Storage System Summary page are displayed.
2. In the navigation pane, expand the array for which you want to display licenseinformation.
The navigation tree is expanded for that array.
3. Expand Administration and choose Licensing.
The Licensable Feature Summary page is displayed.
4. Click Add License.
The Add License page is displayed.
5. Select the type of license you want to add, and specify the version number andkey digest supplied by Sun.
6. Click OK.
Chapter 3 General Administration Tasks 52

Disabling a LicenseTo disable a license:
1. Click Sun StorageTek Common Array Manager.
The navigation pane and the Storage System Summary page are displayed.
2. In the navigation pane, expand the array for which you want to display licenseinformation.
The navigation tree is expanded for that array.
3. Expand Administration and choose Licensing.
The Licensable Feature Summary page is displayed.
4. Click the check box to the left of the license that you want to disable, and clickDisable.
Re-enabling a LicenseTo re-enable a license, contact the Sun License Center(http://www.sun.com/licensing). Be prepared to provide the following information:
■ Name of the product to be licensed
■ Feature serial number, available from the license certificate
■ Controller tray serial number, located on the back of the controller tray and on theLicensable Feature Summary page
Displaying Event InformationTo view event information:
1. Click Sun StorageTek Common Array Manager.
The navigation pane and the Storage System Summary page are displayed.
2. In the navigation pane, expand the array for which you want to display eventinformation.
The navigation tree is expanded for that array.
3. Expand Troubleshooting and choose Events.
The Events page is displayed.
53 Sun StorageTek Array Administration Guide • March 2007
4. Click Details next to an event for detailed information on that event.
The Event Details page for that event is displayed.
Monitoring PerformanceTo monitor array performance:
1. Click Sun StorageTek Common Array Manager.
The navigation pane and the Storage System Summary page are displayed.
2. In the navigation pane, expand the array for which you want to see performancestatistics.
The navigation tree is expanded for that array.
3. Expand Administration and choose Performance Monitoring.
The Performance Monitoring page is displayed.
4. To turn performance monitoring on, select the Performance Monitoring Enabledcheck box and specify the polling interval you want.
5. To view current statistics, go to the Performance Statistics section of the page.
Administering JobsThis section describes jobs. It contains the following subsections:
■ “About Jobs” on page 54
■ “Displaying Job Information” on page 55
■ “Canceling Jobs” on page 56
About JobsWhen you request an operation on one object, the management software processesthat operation immediately. For example, if you select one volume to delete, thevolume is deleted immediately. However, because operations on more than oneobject can affect performance, when you request an operation on several objects, the
Chapter 3 General Administration Tasks 54

system creates a job that completes the operation while you make other selections.You can follow the progress of a job from the Job Summary page and view detailsabout the processing job on the Job Details page.
The management software keeps track of jobs that have completed processing andlists them on the Historical Job Summary page. You can view details about a selectedjob that has already been processed on the Historical Job Details page.
The management software administers both array-based jobs and management host-based jobs. An array-based job runs on the array itself while a management host-based job runs on the management host. Examples of management host-based jobsinclude deleting volumes, deleting initiators, etc.
Management host-based jobs will only appear in the Current Job Summary page andthe Historical Job Summary page when viewed from the management host fromwhich the job was initiated. Array based jobs that are running will display on amanagement host’s Current Job Summary page regardless of which managementhost initiated the job.
Array based jobs which have completed will be listed on a management host’sHistorical Job Summary page only if they had previously been seen on thatmanagement host’s Current Job Summary page.
Displaying Job InformationWhile a job is in progress, it is reported on the Job Summary page.
To display job information:
1. Click Sun StorageTek Common Array Manager.
The navigation pane and the Storage System Summary page are displayed.
2. In the navigation pane, expand the array for which you want to view job status.
The navigation tree is expanded for that array.
3. Choose Jobs.
The Job Summary page lists the jobs that have been processed and their currentstatus.
4. For more information about a job, click its identifier (ID).
The Job Details page for the selected job is displayed.
55 Sun StorageTek Array Administration Guide • March 2007

Canceling JobsYou can cancel only volume copy jobs.
To cancel a job:
1. Click Sun StorageTek Common Array Manager.
The navigation pane and the Storage System Summary page are displayed.
2. In the navigation pane, expand the array for which you want to display jobinformation.
The navigation tree is expanded for that array.
3. Choose Jobs.
The Job Summary page is displayed.
4. Select the job you want to cancel, and click Cancel Job.
Viewing the Activity LogThe activity log lists user-initiated actions performed for all registered arrays, inchronological order. These actions may have been initiated through either the SunStorageTek Common Array Manager or the command-line interface (CLI).
To view the activity log:
1. Click Sun StorageTek Common Array Manager.
The navigation pane and the Storage System Summary page are displayed.
2. In the navigation pane, expand General Configuration.
The navigation tree is expanded.
3. Click Activity Log.
The Activity Log Summary page is displayed.
Chapter 3 General Administration Tasks 56
Performing MonitoringAdministrationThis chapter describes how to monitor and manage devices. It contains the followingsections:
■ “General Site Setup Tasks” on page 57
■ “About Notification” on page 58
■ “Email Configuration Tasks” on page 59
■ “Using Email Filters” on page 62
■ “Remote Notification Tasks” on page 64
■ “Editing Notification Setup Parameters” on page 67
■ “Agent Tasks” on page 67
General Site Setup TasksUse general site setup tasks to configure various features to enable monitoring anddiagnostics of storage system devices.
■ “Displaying and Editing Site Information” on page 57
■ “Displaying and Editing Agent Timeout Settings” on page 58
Displaying and Editing Site InformationSite information parameters are required for service personnel to identify contactand installation information for the customer.
To display and edit site information:
1. Click Sun StorageTek Common Array Manager.
The navigation pane and the Storage System Summary page are displayed.
2. In the navigation pane, choose General Configuration.
The Site Information page is displayed.
3. To edit any parameter:
a. Click in the value field for the parameter and enter the new value.
b. Click Save after completing all required changes.
57 Sun StorageTek Array Administration Guide • March 2007

Displaying and Editing Agent Timeout SettingsYou can display and edit agent timeout settings to match the specific requirements ofyour storage network. The default timeout settings are appropriate for most storagearea network (SAN) devices. However, network latencies, I/O loads, and otherdevice and network characteristics may require that you customize these settings tomeet your configuration requirements.
To display and edit system timeout settings:
1. Click Sun StorageTek Common Array Manager.
The navigation pane and the Storage System Summary page are displayed.
2. In the navigation pane, expand General Configuration and choose General HealthMonitoring.
The General Health Monitoring Setup page is displayed.
3. In the Timeout Setting section, to edit any parameter:
a. Click in the value field for the parameter and enter the new value.
b. When all required changes are complete, click Save.
About NotificationThe monitoring and diagnostic software provides mechanisms to provide alarmnotification to local and remote recipients.
■ Email notification – Email notification options include the ability to send alarmnotification to one or more email and pager addresses. For each recipient, you candefine the level of alarms that will trigger notification.
■ Remote notification – Remote notification options include:
■ Simple Network Management Protocol (SNMP) traps – You can configureremote notification to send SNMP traps upon receipt of alarms. You can alsoconfigure the minimum alarm level at which SNMP traps are sent.
■ Sun Connection – You can configure remote notification by registering themanagement software and the arrays it manages using Sun Connection. SunConnection is a remote notification service that submits device registration andfault event data to a Sun Microsystems service database. The Common ArrayManager provides the interface to activate Sun Connection on behalf of thedevices it manages. It also provides the fault telemetry to notify the Sun servicedatabase of fault events on those devices. Depending on the service offeringimplemented by your service group, the data can be used to monitor the health
58 Sun StorageTek Array Administration Guide • March 2007

and performance of your storage devices, improve system performance, andenable Sun service to respond faster and more accurately to critical on-siteissues.
Email Configuration TasksThis section describes email configuration tasks. It contains the followingsubsections:
■ “Configuring Email Notification” on page 59
■ “Testing a Notification Email Address” on page 60
■ “Adding an Email Notification Recipient” on page 60
■ “Editing an Email Notification Recipient” on page 61
■ “Deleting an Email Notification Recipient” on page 61
Configuring Email NotificationTo configure email notification:
1. Click Sun StorageTek Common Array Manager.
The navigation pane and the Storage System Summary page are displayed.
2. In the navigation pane, expand General Configuration.
3. Expand Notification and choose Email.
The Notification Setup page is displayed.
4. Navigate to the Email Notification Setup section.
5. If the host on which the software is installed is behind a firewall, specify a SimpleMail Transfer Protocol (SMTP) server to use for email instead of the host server.
6. (Optional) Identify the SMTP username and password, and determine whether ornot to use a secure SMTP connection.
7. Identify the SMTP port.
8. Specify a server path to email program if an SMTP server is unavailable.
9. (Optional) Specify an email address to be used as the sender’s address for all sentemail.
10. Specify the maximum size allowed for email messages to be sent.
Chapter 3 Performing Monitoring Administration 59
11. Click Save.
The configured email notification setup parameters are saved.
Testing a Notification Email AddressTo test an email notification address:
1. Click Sun StorageTek Common Array Manager.
The navigation pane and the Storage System Summary page are displayed.
2. In the navigation pane, expand General Configuration and choose Notification.
The Notification Setup page displays notification setup parameters.
3. Specify the Use this Simple Mail Transfer Protocol (SMTP) Server for Emailparameter.
4. Click Test Email.
The Send Test Email window is displayed.
5. In the To field, specify the email address that you want to test.
6. (Optional) Specify a text message in the Message field.
7. Click Test Local Email.
A confirmation message appears at the top of the Send Test Email window if thetest email is successfully sent.
8. Verify that the email was received by the specified email address.
Adding an Email Notification RecipientTo add an email notification recipient:
1. Click Sun StorageTek Common Array Manager.
The navigation pane and the Storage System Summary page are displayed.
2. In the navigation pane, expand General Configuration.
3. Expand Notification and choose Email.
The Email Notification page is displayed.
4. Click New.
The Add Email Notification page is displayed.
60 Sun StorageTek Array Administration Guide • March 2007
5. Define the email address and, optionally, other email properties for thenotification recipient.
6. Click Save.
The Email Notification page is redisplayed, and the new email notificationrecipient is listed.
Editing an Email Notification RecipientTo edit email properties for an email notification recipient:
1. Click Sun StorageTek Common Array Manager.
The navigation pane and the Storage System Summary page are displayed.
2. In the navigation pane, expand General Configuration.
3. Expand Notification and choose Email.
The Email Notification page is displayed.
4. Select the check box of the email notification recipient that you want to edit.
5. Click Edit.
The Edit Email Notification page is displayed.
6. Edit the email properties for the notification recipient as needed.
7. Click Save.
The Email Notification page is redisplayed, and the edited email notificationrecipient is listed. The following confirmation message is displayed at the top ofthe page: This notification successfully updated.
Deleting an Email Notification RecipientTo delete an email notification recipient:
1. Click Sun StorageTek Common Array Manager.
The navigation pane and the Storage System Summary page are displayed.
2. In the navigation pane, expand General Configuration.
3. Expand Notification and choose Email.
The Email Notification page is displayed.
Chapter 3 Performing Monitoring Administration 61
4. Select the check box to the left of each email notification recipient that you wantto delete.
5. Click Delete.
The Email Notification page is redisplayed, and the selected email notificationrecipients are no longer listed.
Using Email FiltersThis section describes email filters. It contains the following subsections:
■ “About Email Filters” on page 62
■ “Adding an Email Filter” on page 62
■ “Editing an Email Filter” on page 63
■ “Deleting an Email Filter” on page 63
About Email FiltersYou can use email filters to prevent email notification about specific events.
To prevent email notification about specific events that occur frequently, obtain theevent code for the event from the Event Details page of the event and add an emailfilter to prevent email notification for events with that event code.
You can still view filtered events in the event log.
Adding an Email FilterTo add an email filter:
1. Click Sun StorageTek Common Array Manager.
The navigation pane and the Storage System Summary page are displayed.
2. In the navigation pane, expand General Configuration.
3. Expand Notification and choose Email Filters.
The Email Filters page is displayed.
62 Sun StorageTek Array Administration Guide • March 2007

4. Click Add New Filter.
The Add New Filter page is displayed.
5. Define the Event Code and Decreased Severity for the filter, and click Save.
The Email Filters page is redisplayed with the new email filter.
Editing an Email FilterTo edit an email filter:
1. Click Sun StorageTek Common Array Manager.
The navigation pane and the Storage System Summary page are displayed.
2. In the navigation pane, expand General Configuration.
3. Expand Notification and choose Email Filters.
The Email Filters page is displayed.
4. Select the check box of the filter you want to edit and click Edit.
The Edit Email Filter page is displayed.
5. Edit the Event Code and Decreased Severity parameters as needed, and clickSave.
The Email Filters page is redisplayed with the edited email filter.
Deleting an Email FilterTo delete an email filter:
1. Click Sun StorageTek Common Array Manager.
The navigation pane and the Storage System Summary page are displayed.
2. In the navigation pane, expand General Configuration.
3. Expand Notification and choose Email Filters.
The Email Filters page is displayed.
4. Select the check boxes of the filters you want to delete, and click Delete.
The Email Filters page is redisplayed without the deleted email filters.
Chapter 3 Performing Monitoring Administration 63

Remote Notification TasksThis section describes remote notification tasks. It contains the followingsubsections:
■ “Subscribing to and Editing Properties of Sun Connection” on page 64
■ “Enabling SNMP Notification” on page 65
■ “Adding an SNMP Notification Recipient” on page 65
■ “Editing an SNMP Notification Recipient” on page 65
■ “Deleting an SNMP Notification Recipient” on page 66
Subscribing to and Editing Properties of SunConnectionWhen you register for Sun Connection through the Common Array Manager, all thedevices registered in Common Array Manager are registered to Sun Connection.
To enable Sun Connection:
1. Click Sun StorageTek Common Array Manager.
The navigation pane and the Storage System Summary page are displayed.
2. In the navigation pane, expand General Configuration and choose SunConnection.
The Sun Connection page displays.
3. Provide the following information:
■ Sun online account username and password
■ Type of internet connection to be used
■ Type of information you want to be sent back to Sun via Sun Connectionservices: fault reporting, reliability reporting, or both.
4. Click OK.
64 Sun StorageTek Array Administration Guide • March 2007

Enabling SNMP NotificationTo enable SNMP notification:
1. Click Sun StorageTek Common Array Manager.
The navigation pane and the Storage System Summary page are displayed.
2. In the navigation pane, expand General Configuration and choose Notification.
The Notification Setup page displays notification setup parameters.
3. In the Remote Notification Setup section, select the SNMP Trap check box.
4. Click Save.
SNMP notification setup is enabled.
Adding an SNMP Notification RecipientTo add a Simple Network Management Protocol (SNMP) notification recipient:
1. Click Sun StorageTek Common Array Manager.
The navigation pane and the Storage System Summary page are displayed.
2. In the navigation pane, expand General Configuration.
The navigation tree is expanded.
3. Expand Notification and choose SNMP.
The SNMP Notification page is displayed.
4. Click New.
The Add SNMP Notification page is displayed.
5. Define the SNMP Properties for the new SNMP notification recipient.
6. Click OK.
The SNMP Notification page is redisplayed, and the new SNMP notificationrecipient is listed.
Editing an SNMP Notification RecipientTo edit Simple Network Management Protocol (SNMP) properties for an SNMPnotification recipient:
Chapter 3 Performing Monitoring Administration 65
1. Click Sun StorageTek Common Array Manager.
The navigation pane and the Storage System Summary page are displayed.
2. In the navigation pane, expand General Configuration.
The navigation tree is expanded.
3. Expand Notification and choose SNMP.
4. Select the check box of the SNMP notification recipient that you want to edit.
5. Click Edit.
The Edit SNMP Notification page is displayed.
6. Edit the SNMP Properties for the notification recipient as needed.
7. Click OK.
The SNMP Notification page is redisplayed and the edited SNMP notificationrecipient is listed. The confirmation message “This notification successfullyupdated” is displayed at the top of the page.
Deleting an SNMP Notification RecipientTo delete a Simple Network Management Protocol (SNMP) notification recipient:
1. Click Sun StorageTek Common Array Manager.
The navigation pane and the Storage System Summary page are displayed.
2. In the navigation pane, expand General Configuration.
The navigation tree is expanded.
3. Choose Notification and Click SNMP.
The SNMP Notification page is displayed.
4. Select the check box to the left of each SNMP notification recipient that you wantto delete.
5. Click Delete.
The SNMP Notification page is redisplayed and the selected SNMP notificationrecipients are no longer listed.
66 Sun StorageTek Array Administration Guide • March 2007

Editing Notification Setup ParametersTo reset notification setup parameters to their last saved values:
1. Click Sun StorageTek Common Array Manager.
The navigation pane and the Storage System Summary page are displayed.
2. In the navigation pane, expand General Configuration.
The navigation tree is expanded.
3. Choose Notification.
The Notification Setup page displays notification setup parameters.
4. Configure Email Notification and Remote Notification setup parameters asneeded.
5. (Optional) Click Reset to return all notification setup parameters to their lastsaved values.
Agent TasksThis section describes agent tasks. It contains the following subsections:
■ Configuring the Agent
■ Activating/Deactivating the Agent
■ Running the Agent
Configuring the AgentTo configure the agent:
1. Click Sun StorageTek Common Array Manager.
The navigation pane and the Storage System Summary page are displayed.
2. In the navigation pane, expand General Configuration.
The navigation tree is expanded.
3. Choose Health Monitoring.
Chapter 3 Performing Monitoring Administration 67

The General Health Monitoring Setup page is displayed.
4. Select the types of arrays that you want to monitor from the Categories toMonitor field. Use the shift key to select more than one array type.
5. Specify how often you want to monitor the arrays by selecting a value in theMonitoring Frequency field.
6. Specify the maximum number of arrays to monitor concurrently by selecting avalue in the Maximum Monitoring Thread field.
7. Click Save.
The configuration is saved.
Activating/Deactivating the AgentTo activate or deactivate the agent:
1. Click Sun StorageTek Common Array Manager.
The navigation pane and the Storage System Summary page are displayed.
2. In the navigation pane, expand General Configuration.
The navigation tree is expanded.
3. Choose Health Monitoring.
The General Health Monitoring Setup page is displayed.
4. Click Activate or Deactivate to activate or deactivate the agent.
A confirmation message displays.
Displaying and Editing Health Monitoring Statuson an ArrayTo activate or deactivate the agent:
1. Click Sun StorageTek Common Array Manager.
The navigation pane and the Storage System Summary page are displayed.
2. In the navigation pane, expand Administration.
The navigation tree is expanded.
3. Choose Health Monitoring.
68 Sun StorageTek Array Administration Guide • March 2007

The Array Health Monitoring Setup page is displayed.
4. Select the check box next to Monitor this Device to enable monitoring. Deselectthe check box to disable monitoring.
Running the AgentTo run the agent:
1. Click Sun StorageTek Common Array Manager.
The navigation pane and the Storage System Summary page are displayed.
2. In the navigation pane, expand General Configuration.
The navigation tree is expanded.
3. Choose Health Monitoring.
The General Health Monitoring Setup page is displayed.
4. Click Run Agent to run the agent.
The Agent Summary page is redisplayed, and the change in agent activation isreflected.
69 Sun StorageTek Array Administration Guide • March 2007

70
CHAPTER 4
Performing ConfigurationTasks
This chapter describes configuration tasks. It contains the following subsections:
■ “Initial State of the Array” on page 71
■ “Configuring Storage Volumes” on page 74
■ “Configuring Volume Copies” on page 84
■ “Configuring Volume Snapshots” on page 92
■ “Configuring Virtual Disks” on page 105
■ “Configuring Data Replication” on page 108
■ “Configuring Storage Pools” on page 132
■ “Configuring Storage Profiles” on page 135
■ “Configuring Initiators” on page 141
■ “Configuring Host Groups and Hosts” on page 144
■ “Managing Trays and Disk Drives” on page 155
■ “Configuring Storage Domains” on page 164
Initial State of the ArrayThis section describes the initial state of the array and factors to consider before youconfigure the array. It contains the following subsections:
■ “About the Initial State of the Array” on page 71
■ “About Provisioning Storage” on page 71
■ “About Physical Storage Elements” on page 72
■ “About Logical Storage Elements” on page 72
About the Initial State of the ArrayAfter you complete the basic configuration tasks described in the installationinstructions for your array, all of the hardware and software is installed and at leastone array is registered and named, and array passwords are set.
In addition, the following tasks will have been completed:
■ The system time has been correctly set.
■ At least one new user has been added and assigned the role of “storage.”
■ An initiator has been created.
■ At least one host has been created and mapped to an initiator.
■ At least one host group has been created.
■ A storage pool has been created.
■ A volume has been created and mapped to a host or host group.
About Provisioning StorageIn a simple storage configuration, all data hosts could share all available storage inone storage pool, and any host mapped to an initiator would have access to anystorage in the pool. Your organization’s needs determine whether you want a morecomplex storage configuration. For example, you might provision the storage foryour organization by creating host groups and pools of virtual storage.
71 Sun StorageTek Array Administration Guide • March 2007
The array has a number of physical and logical storage elements that you can use toprovision your storage:
■ Physical storage elements: initiators, hosts, host groups, trays, and disks
■ Logical storage elements: volumes, virtual disks, and pools
Before you can allocate storage appropriately, consider the following requirementsfor your site:
■ Security – By creating host groups, you segregate initiators. For example, thehosts that handle financial data store their data in a different host group from thehost group consisting of hosts that handle research data.
■ Input/output (I/O) – Some storage profiles specify a general, balanced access tostorage, but some parts of your organization might require one or more of thecharacteristics to be optimized at the expense of other attributes. The arraymanagement software includes a set of profiles to meet various needs. You canalso create custom profiles.
About Physical Storage ElementsConsider the following physical storage elements before you decide how todistribute data across the available physical storage:
■ Trays hold the disk drives and support their operation.
■ Disk drives are nonvolatile, randomly addressable, rewriteable data storagedevices.
■ Initiators are Fibre Channel (FC) ports on host bus adapters (HBAs) that allowhosts to gain access to a storage array.
■ Hosts, or data hosts, are servers that can store data on a storage array. Data hostsare mapped to initiators.
■ A host group is a collection of one or more hosts on one storage array that shareaccess to the same volumes.
About Logical Storage ElementsConsider the following logical storage elements before you decide how to distributedata across the available physical storage and map it to data hosts:
■ Storage pools are collections of volumes that share a profile. The profiles definesthe common configuration of the volumes.
Chapter 4 Initial State of the Array 72

■ Virtual disks, also called redundant array of independent disks (RAID) sets, are acollection of locations in the memory of more than one physical disk. The storagearray handles a virtual disk as if it were an actual disk. You create the virtualdisks during volume creation.
■ Volumes are divisions of a pool, consisting of virtual disks, and are accessed byhosts and host groups.
■ Snapshots are copies of the data in a volume at a specific moment. Snapshots canbe made without interruption of the normal operation of the system.
73 Sun StorageTek Array Administration Guide • March 2007

Configuring Storage VolumesThis section describes storage volumes. It contains the following subsections:
■ “About Volumes” on page 74
■ “Planning Volumes” on page 76
■ “Managing Volumes” on page 77
About VolumesYou manage the array’s physical disks as a pool of storage space for creatingvolumes. Volumes are “containers” into which applications, databases, and filesystems can put data. Volumes are created from the virtual disks, based on thecharacteristics of the storage pool associated with the virtual disks. Based on yourspecifications, the array automatically allocates storage on a virtual disk that cansatisfy your volume configuration requirements.
There are several different types of volumes:
■ Standard volume – A standard volume is a logical structure created on a storagearray for data storage. When you create a volume, initially it is a standardvolume. Standard volumes are the typical volumes that users will access fromdata hosts.
■ Source volume – A standard volume becomes a source volume when itparticipates in a volume copy operation as the source of the data to be copied to atarget volume. The source and target volumes maintain their association througha copy pair. When the copy pair is removed, the source volume reverts back to astandard volume.
■ Target volume – A standard volume becomes a target volume when itparticipates in a volume copy operation as the recipient of the data from a sourcevolume. The source and target volumes maintain their association through a copypair. When the copy pair is removed, the target volume reverts back to a standardvolume.
■ Replicated volume – A replicated volume is a volume that participates in areplication set. A replication set consists of two volumes; each is located on aseparate array. After you create a replication set, the software ensures that thereplicated volumes contain the same data on an ongoing basis.
■ Snapshot volume – A snapshot volume is a point-in-time image of a standardvolume. The management software creates a snapshot volume when you use thesnapshot feature. The standard volume on which a snapshot is based is alsoknown as the base or primary volume.
Chapter 4 Configuring Storage Volumes 74

■ Reserve volume – A snapshot reserve volume is automatically created when youcreate a snapshot. The reserve volume stores information about the data that haschanged since the volume snapshot was created. When you delete a snapshot, themanagement software also deletes its associated reserve volume.
■ Access Volume – An access volume is the volume in the SAN environment usedfor communication between in-band management software and the storage array.This volume uses LUN 31 and consumes 20 MB of storage space that is notavailable for application data storage.
Note: Since the Common Array Manager does not use in-band management forthe arrays it manages and the access volume is not otherwise usable by otherhosts, Sun recommends that you delete the mappings to the access volume.
You can create up to 256 volumes on each virtual disk. During or after standardvolume creation, you can map a host or host group to the volume in order to givethe host or host group read/write privileges to the volume. Each host, including anyhost that is a member of a host group, must be assigned one or more initiators beforethe host or host group can be mapped to the volume. Access volumes areautomatically created and mapped to LUN 31 for the Sun StorageTek 6140, SunStorageTek 6540, and Sun StorageTek 2500 series arrays only. To see the currentvolumes, go to the Volume Summary page, as described in “Displaying VolumeInformation” on page 77.
Note: Access volumes are not listed on the Volume Summary page; they are listed onthe Mapping Summary page only.
There are a number of other things you can do with volumes, depending on theirtype, as described in TABLE 4-1.
TABLE 4-1 Additional Actions on Volumes
Volume Type
Standard Source Target Reserve Access
Map a volume to a host orhost group
- - - - x
Unmap a volume from ahost or host group
- - - - x
Create a volume snapshot x x - -
Recopy a volume copy - - x -
Copy a volume x x x -
Remove a copy pair - - x -
View performance statistics x x x -
Delete the volume x x x -
75 Sun StorageTek Array Administration Guide • March 2007

Planning VolumesCreating a volume involves a number of tasks and decisions about a variety ofelements in your storage configuration. Therefore, before running the New Volumewizard to create a new volume, you should plan your storage.
When you create a volume, be prepared to provide the following information:
■ Volume name
Provide a unique name that identifies the volume.
■ Volume capacity
Identify the capacity of the volume in megabytes, gigabytes, or terabytes.
■ The storage pool for this volume
By default, the management software supplies a default storage pool. This pooluses the default storage profile, which implements RAID-5 storage characteristicsthat can be used in the most common storage environment. Other pools may havealso been configured. Before you run the New Volume wizard, check the list ofconfigured pools to see whether one of the pools has the storage characteristicsyou want. If a suitable pool does not exist, create a new pool using an existing ora new storage profile before you run the New Volume wizard.
■ The way a virtual disk is selected
A volume can be created on a virtual disk as long as the RAID level, the numberof disks, and the disk type (either FC, SATA, or SAS, depending on the arraymodel) of the virtual disk matches the storage profile associated with thevolume’s pool. The virtual disk must also have enough capacity for the volume.You must choose the method of determining which virtual disk will be used tocreate the volume. The following options are available:
■ Automatic – The management software automatically searches for and selects avirtual disk that matches the necessary criteria. If none are available, it createsa new virtual disk if enough space is available.
■ Create Volume on an Existing Virtual Disk – You manually select the virtualdisks on which to create the volume from the list of all available virtual disks.Be sure that disks you select have enough capacity for the volume.
■ Create a New Virtual Disk – You create a new virtual disk on which to createthe volume. Be sure that the number of disks you select have enough capacityfor the volume.
■ Whether you want to map the volume now or later.
You can add the volume to an existing storage domain, including the defaultstorage domain, or create a new one by mapping the volume to a host or hostgroup. A storage domain is a logical entity used to partition storage that allows a
Chapter 4 Configuring Storage Volumes 76

host or host group to have read/write access to the volume. The default storagedomain contains all hosts and host groups without explicit mappings and enablesthem to share access to all volumes that are not explicitly mapped. If you chooseto map the volume later, the management software automatically includes it inthe default storage domain.
Note: A host or host group will be available as a mapping option only if aninitiator is associated with each individual host and each host included in a hostgroup.
Managing VolumesThis section describes managing volumes. It contains the following subsections:
■ “Displaying Volume Information” on page 77
■ “Displaying Volume Performance Statistics” on page 78
■ “Creating a Volume” on page 78
■ “Modifying a Volume” on page 79
■ “Copying Volume Information” on page 79
■ “Mapping a Volume to a Host or Host Group” on page 80
■ “Expanding Volume Capacity” on page 80
■ “Unmapping a Volume From a Host or Host Group” on page 81
■ “Changing Controller Ownership of a Volume” on page 81
■ “Deleting a Volume” on page 82
Displaying Volume InformationYou can display summary and detail information about existing storage volumes.You can also display information about the mapped hosts, mapped host groups, andsnapshots that are associated with each volume.
To display information on volumes:
1. Click Sun StorageTek Common Array Manager.
The navigation pane and the Storage System Summary page are displayed.
2. In the navigation pane, expand the array for which you want to display volumeinformation, and choose Volumes.
The Volume Summary page for that array is displayed.
77 Sun StorageTek Array Administration Guide • March 2007

3. Click a volume name for detailed information on that volume.
The Volume Details page for the selected volume is displayed.
4. Go to Related Information and click any item for more information associatedwith the selected volume.
The Summary page for the selected item is displayed.
Displaying Volume Performance StatisticsTo display information about volume performance:
1. Click Sun StorageTek Common Array Manager.
The navigation pane and the Storage System Summary page are displayed.
2. In the navigation pane, expand the array for which you want to display volumeperformance statistics, and choose Volumes.
The Volume Summary page for that array is displayed.
3. Click View Performance Statistics.
The Performance Statistics Summary - Volumes page is displayed.
Creating a VolumeYou must consider a number of factors and make a number of decisions beforecreating a volume. For information on planning the volume’s storage characteristics,see “Planning Volumes” on page 76.
To create a volume:
1. Click Sun StorageTek Common Array Manager.
The navigation pane and the Storage System Summary page are displayed.
2. In the navigation pane, expand the array for which you want to create a volumeand choose Volumes.
The Volume Summary page for that array is displayed.
3. Click New.
The New Volume wizard is displayed.
4. Follow the steps in the wizard. Click the Help tab in the wizard for moreinformation.
Chapter 4 Configuring Storage Volumes 78

Modifying a VolumeTo modify a volume’s name or description:
1. Click Sun StorageTek Common Array Manager.
The navigation pane and the Storage System Summary page are displayed.
2. In the navigation pane, expand the array for which you want to modify a volume,and choose Volumes.
The Volume Summary page for that array is displayed.
3. Select the volume that you want to modify.
The Volume Details page for that volume is displayed.
4. Make the appropriate modifications, and click Save to save your changes or Resetto reinstate all previously saved settings.
If you clicked Save, a message confirms that the volume was modifiedsuccessfully.
Copying Volume InformationYou can copy an existing volume to a target volume.
To copy an existing volume:
1. Click Sun StorageTek Common Array Manager.
The navigation pane and the Storage System Summary page are displayed.
2. In the navigation pane, expand the array for which you want to copy volumeinformation, and choose Volumes.
The Volume Summary page for that array is displayed.
3. Click a volume name for detailed information on that volume.
The Volume Details page for the selected volume is displayed.
4. Click the Copy button.
The Copy Volume page is displayed.
5. Select a copy priority.
Select a target volume for the copy, and click OK.
79 Sun StorageTek Array Administration Guide • March 2007

Mapping a Volume to a Host or Host GroupTo map a volume to a host or host group:
1. Click Sun StorageTek Common Array Manager.
The navigation pane and the Storage System Summary page are displayed.
2. In the navigation pane, expand the array you want to work with, and chooseVolumes.
The Volume Summary page for that array is displayed.
3. Click the check box to the left of the volume to which you want to map a host orhost group.
This enables the Map button.
4. Click Map.
The Map Volume page displays a list of available hosts and host groups. Use thefilter to display only hosts or host groups.
5. Select the host or host group to which you want to map this volume, and clickOK.
A message specifies that the selected volume was successfully mapped.
Expanding Volume CapacityYou cannot expand the capacity of a volume that has snapshots associated with it.
To expand the capacity of a volume:
1. Click Sun StorageTek Common Array Manager.
The navigation pane and the Storage System Summary page are displayed.
2. In the navigation pane, expand the array you want to work with, and chooseVolumes.
The Volume Summary page for that array is displayed.
3. Click the volume whose capacity you want to expand.
The Volume Details page is displayed.
4. Click Expand.
A message box displays information about volume expansion.
Chapter 4 Configuring Storage Volumes 80

5. Click OK.
The Expand Volume page displays the current capacity.
6. Specify the additional capacity you want, and click OK.
A message specifies that dynamic volume expansion is in progress.
Unmapping a Volume From a Host or Host GroupTo unmap a volume from a host or host group:
1. Click Sun StorageTek Common Array Manager.
The navigation pane and the Storage System Summary page are displayed.
2. In the navigation pane, expand the array you want to work with, and chooseVolumes.
The Volume Summary page for that array is displayed.
3. Click the volume that you want to unmap.
The Volume Details page is displayed.
4. Click Unmap.
Upon completion of the unmapping process, a confirmation message is displayed.
Changing Controller Ownership of a VolumeThe preferred controller owner for a volume is initially selected by the controllerwhen a volume is created.
Under certain circumstances, ownership of a volume is automatically shifted so thatthe alternate controller becomes the current owner. For example, if the controllertray that is the preferred controller owner is being replaced or undergoing afirmware download, ownership of the volumes is automatically shifted to the othercontroller tray, and that controller becomes the current owner of the volumes. Therecan also be a forced failover from the preferred controller to the other controllerbecause of I/O path errors.
Additionally, you can manually change the current owner of a volume to improveperformance. For example, you might want to change the controller ownership ofone or more volumes if you notice a disparity in the total input/output per second(IOPS) of the controllers such that the workload of one controller is heavy or isincreasing over time while that of the other controller is lighter or more stable.
81 Sun StorageTek Array Administration Guide • March 2007

Note: You can change the controller ownership of a standard volume or a snapshotreserve volume. You cannot manually change the controller ownership of a snapshotvolume because it inherits the controller owner of its associated base volume.
Use the Redistribute Volumes button to cause all volumes to return to their preferredcontroller owners.
To change a volume’s controller owner:
1. Click Sun StorageTek Common Array Manager.
The navigation pane and the Storage System Summary page are displayed.
2. In the navigation pane, expand the array you want to work with, and chooseVolumes.
The Volume Summary page for that array is displayed.
3. Click the volume for which you want to change controller ownership.
The Volume Details page is displayed.
4. In the Owning Controller field, select either A or B.
5. Click Save.
Deleting a VolumeBefore deleting a volume, consider the following:
■ Deleting a volume that is mapped to a host or host group also causes themappings to be deleted.
■ Deleting a volume that has snapshots also causes the snapshots to be deleted.
■ Deleting a volume that is part of a replication set also causes the replication set tobe deleted. The remote volume remains intact, however.
■ Deleting the only volume in a virtual disk causes the virtual disk to be deleted. Ifthere are other volumes in the virtual disk, the storage space used by the deletedvolume is converted to a free extent for future volume creation.
To delete a volume:
1. Click Sun StorageTek Common Array Manager.
The navigation pane and the Storage System Summary page are displayed.
2. In the navigation pane, expand the array you want to work with, and chooseVolumes.
The Volume Summary page for that array is displayed.
Chapter 4 Configuring Storage Volumes 82
3. Select the check box for the volume that you want to delete.
This enables the Delete button.
4. Click Delete.
The volume is removed from the Volume Summary table.
83 Sun StorageTek Array Administration Guide • March 2007

Configuring Volume CopiesThis section describes volume copies. It contains the following subsections:
■ “Array Support for Volume Copies” on page 84
■ “About Volume Copies” on page 84
■ “Planning Volume Copies” on page 86
■ “Managing Volume Copies” on page 87
Array Support for Volume CopiesThe Array support for the Volume Copy premium feature is listed in the followingtable:
About Volume CopiesA volume copy is a copy of data on one volume (called a source volume) writtenonto another volume (called a target volume) on the same storage array. A volumecopy can be used to back up data, copy data from volumes that use small-capacitydrives to volumes that use large-capacity drives, and restore snapshot data to theprimary volume.
A source volume accepts host I/O and stores application data. The target volumemaintains a copy of the data from the source volume.
When you create a volume copy, the management software creates a copy pair,which defines the association between the source volume and the target volume.When you no longer need a particular volume copy, you can remove the copy pair.Removing the copy pair dissociates the source volume from the target volume andcauses the target and source volumes to revert their original volume types (such as
TABLE 4-2 Support for Volume Copy Premium Feature by Array Type
Arrays that Support Volume Copies Arrays the Do Not Support Volume Copies
Sun StorageTek 6130 array Sun StorageTek 2500 series arrays
Sun StorageTek 6140 array
Sun StorageTek 6540 array
Chapter 4 Configuring Volume Copies 84

standard volume or volume snapshot), enabling them to participate in other copypairs in different roles. Removing a copy pair does not remove the data on the targetvolume.
The process of creating a volume copy is managed by the redundant array ofindependent disks (RAID) controllers and is transparent to host machines andapplications. When the volume copy process starts, the controller of the sourcevolume reads the data from the source volume and writes it to the target volume.The volume copy has a status of In-progress while the volume copy is beingcompleted. Up to eight volume copies can have the status of In-progress at one time.
While a volume copy has a status of In-progress, the same controller must own boththe source volume and the target volume. If different controllers own the sourcevolume and target volume before the volume copy process is started, themanagement software automatically transfers ownership of the target volume to thecontroller that owns the source volume. When the volume copy process is completedor stopped, the management software restores ownership of the target volume to itsoriginal controller owner. Similarly, if ownership of the source volume is changedduring the volume copy, ownership of the target volume is also changed.
The status of a volume copy can be one those described in TABLE 4-3.
TABLE 4-3 Volume Copy Status
Volume CopyStatus Description
Completed The volume copy process finished successfully.• The source volume is available for both read and write I/O activity.• The target volume is available for read I/O activity, unless the Read-
Only attribute has been set to No.
In-progress Data is being copied from the source volume to the target volume. Amaximum of eight volume copies can be in progress at one time.• The source volume is available for read I/O activity only.• The target volume is not available for read or write I/O activity.
Pending The volume copy is waiting to be processed. If more than eight volumecopies have been requested, subsequent volume copies enter a Pendingstate until one of the volume copies with a status of In-progress iscompleted.• The source volume is available for read I/O activity only.• The target volume is not available for read or write I/O activity
Failed The volume copy process failed.• The source volume is available for read I/O activity only.• The target volume is not available for read or write I/O activity
Copy halted The volume copy was stopped before all of the data on the sourcevolume was copied to the target volume.
85 Sun StorageTek Array Administration Guide • March 2007

Planning Volume CopiesWhen you create a volume copy, be prepared to do the following:
■ Select a source volume from the Volume Summary page or from the SnapshotSummary page.
A source volume can be any of the following volume types:
■ Standard volume
■ Snapshot
■ Base volume of a snapshot (a volume of which you took a snapshot)
■ Target volume
You can copy one source volume to several different target volumes.
■ Select a target volume from the list of target volume candidates.
The target volume must have a capacity that is equal to or greater than the usablecapacity of the source volume. A target volume must be one of the following:
■ Standard volume
■ Base volume of a Failed or Disabled volume snapshot.
Note: In order for a volume to be used as a target volume, its snapshots needto be either failed or disabled.
Caution: A volume copy will overwrite all data on the target volume andautomatically make the target volume read-only to hosts. Ensure that you nolonger need the data or have backed up the data on the target volume beforestarting a volume copy. After the volume copy process has finished, you canenable hosts to write to the target volume by changing the target volume’s Read-Only attribute on the Volume Details page.
Because a target volume can have only one source volume, it can participate inone copy pair as a target. However, a target volume can also be a source volumefor another volume copy, enabling you to make a volume copy of a volume copy.
■ Set the copy priority for the volume copy.
During a volume copy, the storage array’s resources may be diverted fromprocessing I/O activity to completing a volume copy, which may affect thestorage array’s overall performance.
Several factors contribute to the storage array’s performance, including I/Oactivity, volume redundant array of independent disks (RAID) level, volumeconfiguration (number of drives and cache parameters), and volume type(volume snapshots may take more time to copy than standard volumes).
Chapter 4 Configuring Volume Copies 86

When you create a new volume copy, you will define the copy priority todetermine how much controller processing time is allocated for the volume copyprocess and diverted from I/O activity.
There are five relative priority settings. The Highest priority rate supports thevolume copy at the expense of I/O activity. The Lowest priority rate supports I/Oactivity at the expense of volume copy speed.
You can specify the copy priority before the volume copy process begins, while itis in progress, or after it has finished (in preparation for recopying the volume).
Managing Volume CopiesBefore you can use the volume copy feature, you must enable it.
This section describes how to manage volume copies. It contains the followingsubsections:
■ “Enabling the Volume Copy Feature” on page 87
■ “Displaying Volume Copy Information” on page 88
■ “Creating a Volume Copy” on page 88
■ “Recopying a Volume Copy” on page 90
■ “Changing the Copy Priority” on page 90
■ “Removing a Copy Pair” on page 91
Enabling the Volume Copy FeatureTo enable the volume copy feature:
1. Click Sun StorageTek Common Array Manager.
The navigation pane and the Storage System Summary page are displayed.
2. In the navigation pane, expand the array you want to work with.
The navigation tree is expanded for that array.
3. Expand Administration and choose Licensing.
The Licensable Feature Summary page is displayed.
4. Click Add License.
The Add License page is displayed.
87 Sun StorageTek Array Administration Guide • March 2007
5. Select Sun StorageTek Data Volume Copy Software from the License Type menu.
6. Enter the version number and the key digest, and click OK.
Note: If you disable the volume copy feature, but volume copy pairs still exist, youcan still remove the copy pair, start a copy using the existing copy pair, and changethe setting of the read-only attribute for target volumes. However, you cannot createnew volume copies.
Displaying Volume Copy InformationTo determine which volumes are involved in a volume copy, see the Volume Detailspage. For the source volume, the Related Information section identifies associatedtarget volumes. For the target volume, the Volume Details page identifies theassociated source volume, the copy priority, and the target volume read-only status.
To display information on source volumes:
1. Click Sun StorageTek Common Array Manager.
The navigation pane and the Storage System Summary page are displayed.
2. In the navigation pane, expand the array you want to work with, and chooseVolumes.
The Volume Summary page is displayed.
3. Click a source or target volume name for detailed information on that volume.
The Volume Details page for the selected volume is displayed.
4. Go to Related Information and click any item for more information associatedwith the selected volume.
5. Click Targets.
The Volume Copies Summary page lists the target volumes associated withselected volume.
6. Click a target volume name to display information about that volume.
The Volume Details page for the selected target volume is displayed.
Creating a Volume CopyBefore creating a volume copy, be sure that a suitable target volume exists on thestorage array, or create a new target volume specifically for the volume copy. Forinformation on planning volume copies, see “Planning Volume Copies” on page 86.
Chapter 4 Configuring Volume Copies 88

You can create a copy of a standard volume, a target volume, or a snapshot volume.For information about copying a snapshot volume, see “Copying a VolumeSnapshot” on page 101.
To create a volume copy of a standard volume or a target volume:
1. Click Sun StorageTek Common Array Manager.
The navigation pane and the Storage System Summary page are displayed.
2. In the navigation pane, expand the array you want to work with, and chooseVolumes.
The Volume Summary page is displayed.
3. Click the name of the volume whose contents you want to copy to anothervolume. The volume you select must be a standard volume, a snapshot volume,or a target volume.
The Volume Details page for that volume is displayed.
4. Click Copy.
5. When prompted to continue, click OK.
The Copy Volume page is displayed.
6. Select the copy priority.
The higher the priority you select, the more resources will be allocated to thevolume copy operation at the expense of the storage array’s performance.
7. Select the target volume you want from the Target Volumes list.
Select a target volume with a capacity similar to the usable capacity of the sourcevolume to reduce the risk of having unusable space on the target volume after thevolume copy is created.
8. Before starting the volume copy process:
a. Stop all I/O activity to the source and target volumes.
b. Unmount any file systems on the source and target volumes, if applicable.
9. Review the specified information on the Copy Volume page. If you are satisfied,click OK to start the volume copy.
A message confirms that the volume copy has successfully started.
10. After the volume copy process has finished:
a. Remount any file systems on the source volume and target volume, ifapplicable.
b. Enable I/O activity to the source volume and target volume.
89 Sun StorageTek Array Administration Guide • March 2007

Recopying a Volume CopyYou can recopy a volume copy for an existing copy pair. Recopying a volume copy isuseful when you want to perform a scheduled, complete backup of the targetvolume that can then be copied to a tape drive for off-site storage.
Caution: Recopying a volume copy will overwrite all data on the target volume andautomatically make the target volume read-only to hosts. Ensure that you no longerneed the data or have backed up the data on the target volume before recopying avolume copy.
To recopy a volume copy:
1. Click Sun StorageTek Common Array Manager.
The navigation pane and the Storage System Summary page are displayed.
2. In the navigation pane, expand the array you want to work with, and chooseVolumes.
The Volume Summary page is displayed.
3. Click the name of the target volume that you want to recopy.
The Volume Details page for that volume is displayed.
4. Stop all I/O activity to the source volume and target volume.
5. Unmount any file systems on the source volume and target volume, if applicable.
6. Click Recopy.
The management software recopies the source volume to the target volume anddisplays a confirmation message.
7. Remount any file systems on the source volume and target volume, if applicable.
8. Enable I/O activity to the source volume and target volume.
Changing the Copy PriorityTo change the copy priority for a volume copy:
1. Click Sun StorageTek Common Array Manager.
The navigation pane and the Storage System Summary page are displayed.
2. In the navigation pane, expand the array you want to work with, and chooseVolumes.
The Volume Summary page is displayed.
Chapter 4 Configuring Volume Copies 90
3. Click the name of the volume for which you want to change the copy priority.
The Volume Details page for the selected volume is displayed.
4. In the Copy Priority field, select the copy priority you want.
The higher the priority you select, the more resources will be allocated to thevolume copy operation at the expense of the storage array’s performance.
5. Click OK.
A confirmation message indicates that the change was successful.
Removing a Copy PairRemoving a copy pair removes the association between a source volume and a targetvolume, enabling each to participate in another volume copy in a different role.
You cannot remove a copy pair while a volume copy using that copy pair is inprogress.
To remove a copy pair:
1. Click Sun StorageTek Common Array Manager.
The navigation pane and the Storage System Summary page are displayed.
2. In the navigation pane, expand the array you want to work with, and chooseVolumes.
The Volume Summary page is displayed.
3. Click the name of the target volume in the copy pair that you want to remove.
The Volume Details page for that volume is displayed.
4. Click Related Information to ensure that a volume copy using the selected volumeis not in progress.
5. Return to the top of the Details page, and click Remove Copy Pair.
91 Sun StorageTek Array Administration Guide • March 2007

Configuring Volume SnapshotsThis section describes configuring and managing volume snapshots. It contains thefollowing subsections:
■ “About Volume Snapshots” on page 92
■ “Planning Volume Snapshots” on page 94
■ “Calculating Reserve Volume Capacity” on page 96
■ “Managing Volume Snapshots” on page 98
About Volume SnapshotsA snapshot is a copy of the data on a volume at the moment at which you create thesnapshot. It is the logical equivalent of a complete physical copy, but you create itmuch more quickly than a physical copy, and it requires less disk space. Creating asnapshot causes the array controller tray to suspend I/O to the base volume while itcreates a physical volume, called the reserve volume. The reserve volume storesinformation about the data that has changed since the snapshot was created. Thecapacity of the reserve volume is a configurable percentage of the base volume.
Snapshot is a premium feature that requires a license. You must enable the snapshotlicense before you can use the snapshot feature. For information on licenses, see“Managing Licenses” on page 51.
You work with a snapshot as you would with any other volume, with the exceptionthat you cannot take a snapshot of a snapshot. Each snapshot can be accessedindependently by other applications. A snapshot can be mounted on another serverand used in the following ways:
■ As an alternative backup method to reduce downtime for backup operations
Backing up snapshots, rather than online data, enables critical transactions tokeep running during the backup process. Mount the snapshot to the backupserver, and then back up the snapshot’s data to tape.
■ For data analysis and testing of applications with actual, current data
Instead of working with operating data or interfering with critical transactions,use the most recent snapshot for analysis or testing of data.
Chapter 4 Configuring Volume Snapshots 92

■ To restart applications
If an application problem causes bad data to be written to the primary volume,restart the application with the last known good snapshot until it is convenient toperform a full recovery.
Note: A snapshot of data is not suitable for failure recovery. Continue to useoffline backup methods to create full-volume backup copies.
Snapshots on the array are copy-on-write or dependent copies. In this type ofsnapshot, write operations to the primary volume causes the management softwareto copy the snapshot metadata and copy-on-write data to the reserve volume.Because the only blocks that are physically stored in the reserve volume are thosethat have changed since the time the snapshot was created, the snapshot uses lessdisk space than a full physical copy.
When a write operation occurs on the primary volume to a data block in which thedata has not changed since the snapshot was created, the management software doesthe following:
■ Copies the old data to the reserve volume
■ Writes the new data to the primary volume
■ Adds a record to the snapshot bitmap indicating the location of the new data
When a data host sends a read request to the snapshot, the management softwarechecks whether the requested blocks have changed on the primary volume since thesnapshot was created. If they have changed, the read request is satisfied from thedata stored in the snapshot reserve volume. If blocks have not changed, the readrequest is satisfied from the primary volume. Snapshots can also accept writeoperations. Write operations to a snapshot are stored in the snapshot reservevolume.
The management software provides a warning message when the reserve volumenears the threshold, which is a configurable percentage of the full capacity of thesnapshot reserve (the default is 50 percent). When the reserve volume threshold ismet, the reserve volume’s capacity can be expanded using the free capacity on thevirtual disk.
As long as a snapshot is enabled, storage array performance is affected by the copy-on-write activity to the associated reserve volume. If a snapshot is no longer needed,you can stop the copy-on-write activity by either disabling or deleting the snapshot.
When a snapshot is disabled, it and its associated reserve volume still exist. Whenyou need to create a different point-in-time image of the same primary volume, youcan resnap the volume to reuse the disabled snapshot and its associated reservevolume. This takes less time than creating a new snapshot.
If you do not intend to re-create a snapshot, you can delete the snapshot instead ofdisabling it. When you delete a snapshot, the management software also deletes theassociated reserve volume.
93 Sun StorageTek Array Administration Guide • March 2007

To see the current snapshots for a particular volume, go to the Related Informationsection of Snapshot Summary page for that volume, as described in “DisplayingVolume Snapshot Information” on page 99.
Planning Volume SnapshotsCreating a volume snapshot involves a number of tasks and decisions about avariety of factors. Therefore, before running the Create a Snapshot Volume wizard,you should plan the following aspects of your snapshots:
■ The name of the snapshot reserve volume
When you create a snapshot, you must provide a unique name for the snapshotthat enables you to easily identify the primary volume.
Each snapshot has an associated reserve volume that stores information about thedata that has changed since the snapshot was created. You must provide a uniquename for the reserve volume that enables you to easily identify the snapshot towhich it corresponds.
■ The capacity of the reserve volume
To determine the appropriate capacity, you must calculate both the managementoverhead required and percentage of change you expect on the base volume. Formore information, see “Calculating Reserve Volume Capacity” on page 96.
■ The warning threshold
When you create a snapshot volume, you can specify the threshold at which themanagement software will generate messages to indicate the level of space left inthe reserve volume. By default, the software generates a warning notificationwhen data in the reserve volume reaches 50 percent of the available capacity. Youcan monitor the percentage of space used on the Snapshot Details page for thesnapshot.
■ The method used to handle snapshot failures
When you create a snapshot volume, you can determine how the managementsoftware will respond when the reserve volume for the snapshot becomes full.The management software can do either of the following:
■ Fail the snapshot volume. In this case the snapshot becomes invalid, but thebase volume continues to operate normally.
■ Fail the base volume. In this case, attempts to write new data to the primaryvolume fail. This leaves the snapshot as a valid copy of the original basevolume.
Chapter 4 Configuring Volume Snapshots 94

■ The virtual disk selection method
A snapshot can be created on a virtual disk as long as the virtual disk has enoughcapacity for the snapshot.
The following options are available:
■ Automatic – The management software automatically searches for and selects avirtual disk that matches the necessary criteria. If there are none, and enoughspace is available, it creates a new virtual disk.
■ Create Volume on an Existing Virtual Disk – You manually select the virtualdisks on which you want to create the volume from the list of all availablevirtual disks. Be sure that the number of disks you select have enough capacityfor the volume.
■ Create a New Virtual Disk – You create a new virtual disk on which to createthe volume. Be sure that the virtual disk that you create has enough capacityfor the volume.
■ The snapshot mapping option
You can add the snapshot to an existing storage domain, including the defaultstorage domain, or create a new storage domain by mapping the snapshot to ahost or host group. A storage domain is a logical entity used to partition storagethat allows a host or host group to have read/write access to the snapshot. Thedefault storage domain contains all hosts and host groups without explicitmappings and enables them to share access to all snapshots that are not explicitlymapped.
During snapshot creation, you can choose between the following mappingoptions:
■ Map Snapshot to One Host or Host Group - this option enables you toexplicitly map the snapshot to a specific host or host group, or to include thesnapshot in the default storage domain.
■ Do Not Map this Snapshot - this option causes the management software toautomatically include the snapshot in the default storage domain.
Note: A host or host group will be available as a mapping option only if aninitiator is associated with each individual host and each host included in a hostgroup.
95 Sun StorageTek Array Administration Guide • March 2007

Calculating Reserve Volume CapacityWhen you create a snapshot, you specify the size of the snapshot reserve volumethat will store snapshot data and any other data that is needed during the life of thesnapshot. When prompted to specify the size of the snapshot reserve volume, youmust enter a percentage of the size of the base volume, as long as that percentagedoes not translate to a size of less than 8 megabytes.
The capacity needed for the snapshot reserve volume varies, depending on thefrequency and size of I/O writes to the base volume and how long you need to keepthe snapshot volume. In general, choose a large capacity for the reserve volume ifyou intend to keep the snapshot volume for a long period of time or if you anticipateheavy I/O activity, which will cause a large percentage of data blocks to change onthe base volume during the life of the snapshot volume. Use historical performanceto monitor data or other operating system utilities to help you determine typical I/Oactivity on the base volume.
When the snapshot reserve volume reaches a specified capacity threshold, you aregiven a warning. You set this threshold when you create a snapshot volume. Thedefault threshold level is 50 percent.
If you receive a warning and determine that the snapshot reserve volume is indanger of filling up before you have finished using the snapshot volume, you canincrease its capacity by navigating to the Snapshot Details page and clickingExpand. If the snapshot reserve volume fills up before you have finished using thesnapshot, the snapshot failure handling conditions specify the action that will betaken.
When you create a snapshot volume, you can allocate as large a snapshot reservevolume as you have space for.
Use the following information to determine the appropriate capacity of the snapshotreserve volume:
■ A snapshot reserve volume cannot be smaller than 8 megabytes.
■ The amount of write activity to the base volume after the snapshot volume hasbeen created dictates how large the snapshot reserve volume needs to be. As theamount of write activity to the base volume increases, the number of original datablocks that need to be copied from the base volume to the snapshot reservevolume also increases.
■ The estimated life expectancy of the snapshot volume contributes to determiningthe appropriate capacity of the snapshot reserve volume. If the snapshot volumeis created and remains enabled for a long period of time, the snapshot reservevolume runs the risk of reaching its maximum capacity.
Chapter 4 Configuring Volume Snapshots 96

■ The amount of management overhead required on the snapshot reserve volumefor storage of snapshot volume data contributes to determining the appropriatecapacity of the snapshot reserve volume. The amount of management overheadactually required is fairly small, and can be calculated with the simple formulathat is presented later in this topic.
■ There is not necessarily a one-to-one correlation between the number of datablocks that change on the base volume and the amount of data stored in thesnapshot reserve volume. Depending on the location of data blocks that need tobe copied, performance factors might dictate that the controller copy over a fullset of 32 blocks, even if only one set of blocks has changed. Consider this whendetermining the percentage of the base volume's capacity that can be copied tothe snapshot reserve volume.
Use the following formula to calculate the amount of management overheadrequired to store snapshot data on the snapshot reserve volume.
192 Kbytes + (x/2000)
where x is the capacity of the base volume in bytes.
Note: This formula is merely a guide. You should re-estimate the snapshot reservevolume capacity periodically.
The conversion process involves conversion from bytes to kilobytes and then tomegabytes or gigabytes. For example, for a 5-gigabyte base volume, you wouldcalculate the estimated snapshot reserve volume capacity as follows:
1. Convert the base volume's capacity to bytes.
When converted, 5 gigabytes equals 5,368,709,120 bytes.
2. Divide the base volume's capacity (in bytes) by 2000.
The result is 2,684,354.56 bytes.
3. Convert bytes to kilobytes.
The result is 2621.44 kilobytes.
4. Add 192 kilobytes to the results from Step 3.
192 Kbytes + 2621.44 Kbytes = 2813.44 Kbytes
5. Convert the result from Step 4 to megabytes.
The resulting amount of management overhead required is 2.75 megabytes (or0.002686 gigabytes).
Continuing in this example, suppose that you expect 30 percent of the data blocks onthe base volume to change. To accurately calculate the snapshot reserve volumecapacity, you must allow sufficient space for the snapshot reserve volume as well asfor the management overhead.
97 Sun StorageTek Array Administration Guide • March 2007

To determine the snapshot reserve volume, calculate the percentage of change youexpect on the base volume:
30 percent x 5 gigabytes = 1.5 gigabytes
To obtain the final estimated snapshot reserve volume capacity, add this number tothe previously calculated amount of management overhead:
1.5 gigabytes + 0.002686 gigabytes = 1.502686 gigabytes
In the Create Snapshot Volume Wizard: Specify Reserve Capacity dialog box, use thepercentage (%) of base volume to specify the estimated capacity of the snapshotreserve volume.
When you create a snapshot, you will specify this snapshot reserve volume capacityas a percentage of the base volume. You can increase or decrease the percentage untilthe Snapshot Reserve Volume Capacity value matches the estimated capacity thatyou calculated. Some rounding up may be required.
Managing Volume SnapshotsBefore you can use the snapshots feature, you must enable it.
This section describes managing volume snapshots. It contains the followingsubsections:
■ “Enabling Volume Snapshots” on page 99
■ “Displaying Volume Snapshot Information” on page 99
■ “Creating a Volume Snapshot” on page 100
■ “Resnapping a Volume Snapshot” on page 100
■ “Copying a Volume Snapshot” on page 101
■ “Mapping a Volume Snapshot to a Host or Host Group” on page 102
■ “Expanding Snapshot Capacity” on page 102
■ “Unmapping a Volume Snapshot” on page 103
■ “Disabling a Volume Snapshot” on page 103
■ “Deleting a Volume Snapshot” on page 104
Chapter 4 Configuring Volume Snapshots 98

Enabling Volume SnapshotsBefore you can use the snapshots feature, you must enable it.
To enable the volume snapshots feature:
1. Click Sun StorageTek Common Array Manager.
The navigation pane and the Storage System Summary page are displayed.
2. In the navigation pane, expand the array you want to work with.
The navigation tree is expanded for that array.
3. Expand Administration and choose Licensing.
The Licensable Feature Summary page is displayed.
4. Click Add License.
The Add License page is displayed.
5. Select Sun StorageTek Data Snapshot Software from the License Type menu.
6. Enter the version number and the digest, and click OK.
Displaying Volume Snapshot InformationYou can display summary and detail information for existing snapshots.
To display information on snapshots:
1. Click Sun StorageTek Common Array Manager.
The navigation pane and the Storage System Summary page are displayed.
2. In the navigation pane, expand the array you want to work with, and chooseSnapshots.
The Snapshot Summary page is displayed.
3. Click the snapshot name for detailed information on that snapshot.
The Snapshot Details page for the selected snapshot is displayed.
99 Sun StorageTek Array Administration Guide • March 2007
Creating a Volume SnapshotYou must consider a number of factors and make a number of decisions beforecreating a snapshot. For information on planning a snapshot, see “Planning VolumeSnapshots” on page 94.
Note: You cannot create a snapshot of a target volume.
To create a volume snapshot:
1. Click Sun StorageTek Common Array Manager.
The navigation pane and the Storage System Summary page are displayed.
2. In the navigation pane, expand the array you want to work with.
The navigation tree is expanded for that array.
3. Click the volume for which you want to create a snapshot.
The Volume Details page for that volume is displayed.
4. Click Snapshot.
The Create Snapshot Volume wizard is launched.
5. Follow the steps in the wizard. Click the Help tab in the wizard for moreinformation.
Note: After you select an array to work with, you can also launch the CreateSnapshot Volume wizard by choosing Snapshots in the navigation pane and thenclicking New on the Snapshot Summary page.
Resnapping a Volume SnapshotTo resnap a volume snapshot:
1. Click Sun StorageTek Common Array Manager.
The navigation pane and the Storage System Summary page are displayed.
2. In the navigation pane, expand the array you want to work with, and chooseSnapshots.
The Snapshot Summary page is displayed.
3. Select the snapshot that you want to resnap.
This enables the Resnap button.
4. Click Resnap.
Upon completion of the new snapshot, a confirmation message is displayed.
Chapter 4 Configuring Volume Snapshots 100

Copying a Volume SnapshotBefore copying a snapshot, be sure that a suitable target volume exists on the storagearray, or create a new target volume specifically for the snapshot.
Caution: Like any volume copy, a volume copy of a snapshot overwrites all data onthe target volume and automatically makes the target volume read-only to datahosts. Ensure that you no longer need the data or have backed up the data on thetarget volume before starting a volume copy.
To copy a snapshot:
1. Click Sun StorageTek Common Array Manager.
The navigation pane and the Storage System Summary page are displayed.
2. In the navigation pane, expand the array you want to work with, and chooseSnapshots.
The Snapshot Summary page is displayed.
3. Click the name of the snapshot that you want to copy.
The Snapshot Details page is displayed.
4. Click Copy.
The Copy Snapshot page is displayed.
5. Select a copy priority.
Valid values are Highest, High, Medium, Low, and Lowest. The higher thepriority, the more resources will be allocated at the expense of the storage array’sperformance.
6. Select a target volume from the Target Volumes list.
Only valid target volumes with capacities equal to or greater than the capacity ofthe source snapshot are displayed.
Note: Selecting a target volume with a capacity similar to that of the sourcesnapshot reduces the risk of there being unusable space on the target volume afterthe volume copy has been created.
7. Stop all I/O activity to the snapshot and target volume.
8. Unmount any file systems on the source volume and target volume, if applicable.
9. Review the specified information. If you are satisfied, click OK.
10. Remount any file systems on the source volume and target volume, if applicable.
11. Enable I/O activity to the snapshot volume and target volume.
101 Sun StorageTek Array Administration Guide • March 2007

Mapping a Volume Snapshot to a Host or HostGroupTo map a volume snapshot to a host or host group:
1. Click Sun StorageTek Common Array Manager.
The navigation pane and the Storage System Summary page are displayed.
2. In the navigation pane, expand the array you want to work with, and chooseSnapshots.
The Snapshot Summary page is displayed.
3. Click the snapshot to which you want to map the host or host group.
This enables the Map button.
4. Click Map.
The Map Snapshot page displays a list of available hosts and host groups. Use thefilter to display only hosts and host groups.
5. Select the host or host group that you want to map to this volume, and click OK.
A message confirms that the snapshot was mapped successfully.
Expanding Snapshot CapacityTo expand the capacity of a snapshot volume:
1. Click Sun StorageTek Common Array Manager.
The navigation pane and the Storage System Summary page are displayed.
2. In the navigation pane, expand the array you want to work with, and chooseSnapshots.
The Snapshot Summary page is displayed.
3. Click the snapshot whose capacity you want to expand.
The Snapshot Details page is displayed.
4. Go to the Reserve Details section of the page, and click the Expand button.
The Expand Volume page displays the current capacity.
5. Specify the volume capacity you want, and click OK.
A message specifies that dynamic volume expansion is in progress.
Chapter 4 Configuring Volume Snapshots 102

Unmapping a Volume SnapshotTo unmap a volume snapshot:
1. Click Sun StorageTek Common Array Manager.
The navigation pane and the Storage System Summary page are displayed.
2. In the navigation pane, expand the array you want to work with, and chooseSnapshots.
The Snapshot Summary page is displayed.
3. Select the snapshot that you want to unmap.
The Snapshot Details page is displayed.
4. Click Unmap.
You are prompted to confirm the unmapping.
5. Click OK.
When the unmapping is complete, a confirmation message is displayed.
Disabling a Volume SnapshotDisabling a volume snapshot does not remove either the volume snapshot or itsassociated reserve volume.
When you disable a volume snapshot:
■ You can re-enable the snapshot by selecting it from the Snapshot Summary pageand clicking the Re-snap button.
■ Only the specified snapshot is disabled. All other snapshots remain functional.
To disable a volume snapshot:
1. Click Sun StorageTek Common Array Manager.
The navigation pane and the Storage System Summary page are displayed.
2. In the navigation pane, expand the array for which you want to disable asnapshot, and choose Snapshot.
The Snapshot Summary page is displayed.
3. Select the snapshot that you want to disable.
This enables the Disable button.
103 Sun StorageTek Array Administration Guide • March 2007

4. Click Disable.
You are prompted to confirm the disabling of the snapshot volume.
5. Click OK.
When the selected snapshot has been disabled, a confirmation message isdisplayed.
Deleting a Volume SnapshotWhen you delete a volume snapshot, the corresponding reserve volume is alsodeleted, thus freeing up the capacity allocated to the reserve volume.
To delete a volume snapshot:
1. Click Sun StorageTek Common Array Manager.
The navigation pane and the Storage System Summary page are displayed.
2. In the navigation pane, expand the array you want to work with, and chooseSnapshots.
The Snapshot Summary page is displayed.
3. Select the snapshot that you want to delete.
This enables the Delete button.
4. Click Delete.
You are prompted to confirm the deletion.
5. Click OK.
When the selected snapshot has been deleted, a confirmation message isdisplayed.
Chapter 4 Configuring Volume Snapshots 104
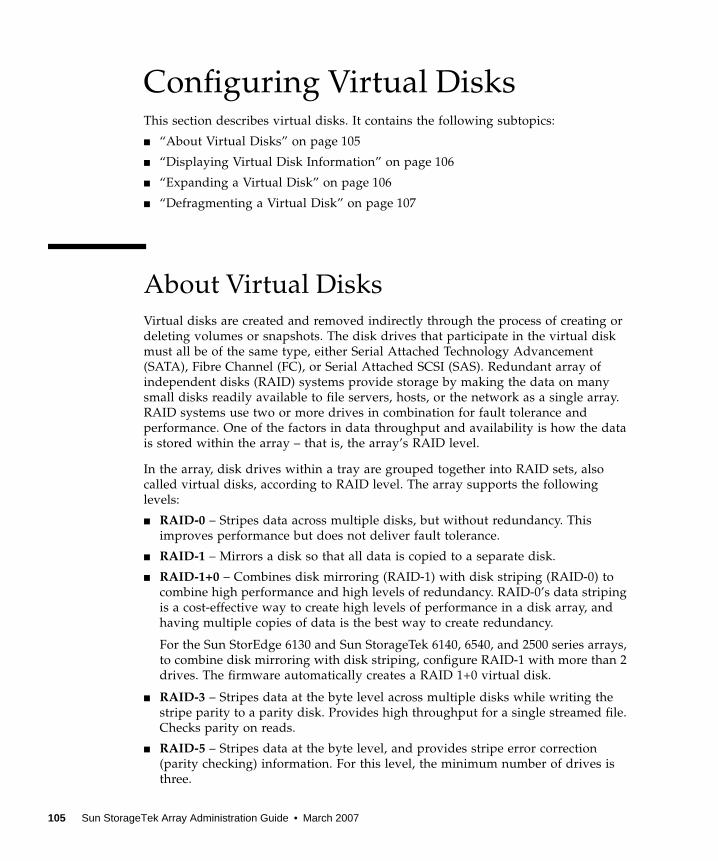
Configuring Virtual DisksThis section describes virtual disks. It contains the following subtopics:
■ “About Virtual Disks” on page 105
■ “Displaying Virtual Disk Information” on page 106
■ “Expanding a Virtual Disk” on page 106
■ “Defragmenting a Virtual Disk” on page 107
About Virtual DisksVirtual disks are created and removed indirectly through the process of creating ordeleting volumes or snapshots. The disk drives that participate in the virtual diskmust all be of the same type, either Serial Attached Technology Advancement(SATA), Fibre Channel (FC), or Serial Attached SCSI (SAS). Redundant array ofindependent disks (RAID) systems provide storage by making the data on manysmall disks readily available to file servers, hosts, or the network as a single array.RAID systems use two or more drives in combination for fault tolerance andperformance. One of the factors in data throughput and availability is how the datais stored within the array – that is, the array’s RAID level.
In the array, disk drives within a tray are grouped together into RAID sets, alsocalled virtual disks, according to RAID level. The array supports the followinglevels:
■ RAID-0 – Stripes data across multiple disks, but without redundancy. Thisimproves performance but does not deliver fault tolerance.
■ RAID-1 – Mirrors a disk so that all data is copied to a separate disk.
■ RAID-1+0 – Combines disk mirroring (RAID-1) with disk striping (RAID-0) tocombine high performance and high levels of redundancy. RAID-0’s data stripingis a cost-effective way to create high levels of performance in a disk array, andhaving multiple copies of data is the best way to create redundancy.
For the Sun StorEdge 6130 and Sun StorageTek 6140, 6540, and 2500 series arrays,to combine disk mirroring with disk striping, configure RAID-1 with more than 2drives. The firmware automatically creates a RAID 1+0 virtual disk.
■ RAID-3 – Stripes data at the byte level across multiple disks while writing thestripe parity to a parity disk. Provides high throughput for a single streamed file.Checks parity on reads.
■ RAID-5 – Stripes data at the byte level, and provides stripe error correction(parity checking) information. For this level, the minimum number of drives isthree.
105 Sun StorageTek Array Administration Guide • March 2007
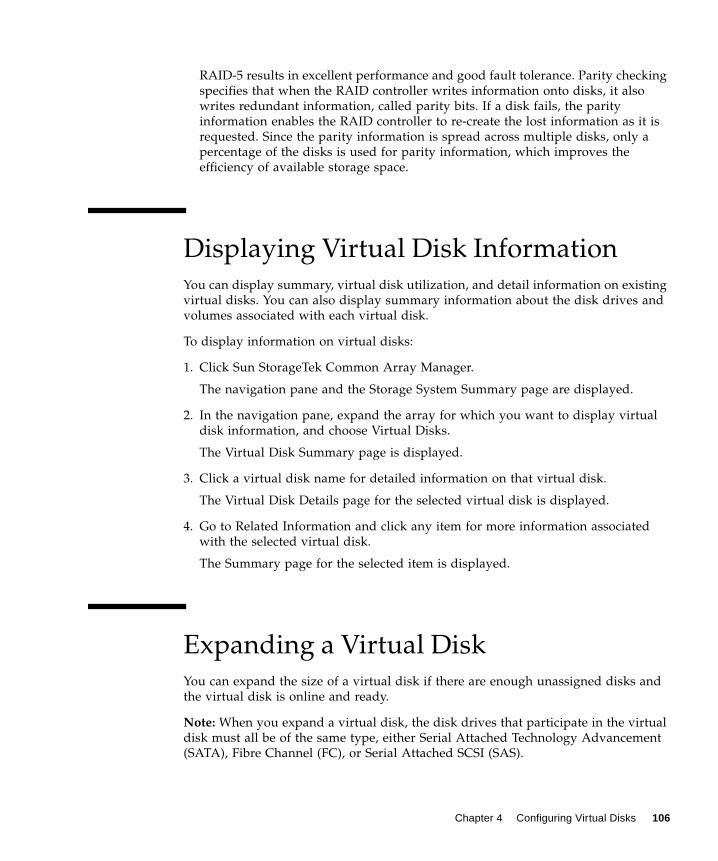
RAID-5 results in excellent performance and good fault tolerance. Parity checkingspecifies that when the RAID controller writes information onto disks, it alsowrites redundant information, called parity bits. If a disk fails, the parityinformation enables the RAID controller to re-create the lost information as it isrequested. Since the parity information is spread across multiple disks, only apercentage of the disks is used for parity information, which improves theefficiency of available storage space.
Displaying Virtual Disk InformationYou can display summary, virtual disk utilization, and detail information on existingvirtual disks. You can also display summary information about the disk drives andvolumes associated with each virtual disk.
To display information on virtual disks:
1. Click Sun StorageTek Common Array Manager.
The navigation pane and the Storage System Summary page are displayed.
2. In the navigation pane, expand the array for which you want to display virtualdisk information, and choose Virtual Disks.
The Virtual Disk Summary page is displayed.
3. Click a virtual disk name for detailed information on that virtual disk.
The Virtual Disk Details page for the selected virtual disk is displayed.
4. Go to Related Information and click any item for more information associatedwith the selected virtual disk.
The Summary page for the selected item is displayed.
Expanding a Virtual DiskYou can expand the size of a virtual disk if there are enough unassigned disks andthe virtual disk is online and ready.
Note: When you expand a virtual disk, the disk drives that participate in the virtualdisk must all be of the same type, either Serial Attached Technology Advancement(SATA), Fibre Channel (FC), or Serial Attached SCSI (SAS).
Chapter 4 Configuring Virtual Disks 106

To expand a virtual disk:
1. Click Sun StorageTek Common Array Manager.
The navigation pane and the Storage System Summary page are displayed.
2. In the navigation pane, expand the array you want to work with, and chooseVirtual Disks.
The Virtual Disk Summary page is displayed.
3. Click the name of the virtual disk you want to expand.
The Virtual Disk Details page for that virtual disk is displayed.
4. Click Expand to see the disks available for the expansion of this virtual disk.
The Expand Virtual Disk page is displayed.
5. Select the disks you want to include in the virtual disk to expand its capacity, andclick OK.
The Virtual Disk Details page is refreshed, and a message confirms the virtualdisk expansion.
Defragmenting a Virtual DiskTo defragment a virtual disk:
1. Click Sun StorageTek Common Array Manager.
The navigation pane and the Storage System Summary page are displayed.
2. In the navigation pane, expand the array you want to work with, and chooseVirtual Disks.
The Virtual Disk Summary page is displayed.
3. Click the name of the virtual disk that you want to defragment.
The Virtual Disk Details page for that virtual disk is displayed.
4. Click Defragment.
The Virtual Disk Details page is refreshed, and a message confirms that thedefragmentation process has successfully started.
107 Sun StorageTek Array Administration Guide • March 2007

Configuring Data ReplicationThis section describes data replication. It contains the following subsections:
■ “Array Support for Data Replication” on page 108
■ “About Data Replication” on page 108
■ “Planning for Data Replication” on page 119
■ “Managing Data Replication” on page 122
Array Support for Data ReplicationArray support for the Data Replication premium feature is listed in the followingtable:
About Data ReplicationThis section describes data replication concepts. It contains the following subtopics:
■ “About the Replication Process” on page 109
■ “About Replication Sets” on page 110
■ “About the Consistency Group” on page 112
■ “About Replication Links” on page 113
■ “About Replication Set Properties” on page 114
■ “About Primary and Secondary Role Reversal” on page 115
■ “About Replication Modes” on page 116
■ “Reference: Synchronous Versus Asynchronous Replication Modes” on page 117
■ “About Data Replication Operations” on page 118
TABLE 4-4 Support for Data Replication Premium Feature by Array Type
Arrays that Support Data Replication Arrays the Do Not Support Data Replication
Sun StorageTek 6130 array Sun StorageTek 2500 series arrays
Sun StorageTek 6140 array
Sun StorageTek 6540 array
Chapter 4 Configuring Data Replication 108

About the Replication ProcessThe data replication software is a volume-level replication tool that protects yourdata. You can use this software to replicate volumes between physically separateprimary and secondary arrays in real time. The software is active while yourapplications access the volumes, and it continuously replicates the data betweenvolumes.
As part of a disaster recovery and business continuance plan, the software enablesyou to keep up-to-date copies of critical data from the primary volume on thesecondary volume. You can also rehearse your data recovery strategy to fail dataover to the secondary volume. Later, you can write any data changes that occurredback to the primary volume.
The software replicates data from a primary volume to a secondary volume. Theassociation between the primary and secondary volumes constitutes a replicationset. After the volumes in a replication set have been initially synchronized, thesoftware ensures that the primary and secondary volumes contain the same data onan ongoing basis.
Note: There are exceptions if you use asynchronous replication mode. See “AboutReplication Modes” on page 116 for more information.
Note: Third-party applications can continue to write to the primary volume while itis replicating, but the secondary volume is read only.
The software transports data between the two arrays by means of synchronous orasynchronous replication mode, using a dedicated Fibre Channel (FC) connection(FC port 4 for the Sun StorageTek 6140 array and the 6540 array with a 4-portconfiguration, and host port 2 for the 6130 array and the 6540 array with a 2-portconfiguration). Both of the arrays with volumes participating in the replication setmust be registered with Sun’s management software, and must be reachable throughthe out-of-band management network.
Note: The system does not provide built-in authentication or encryption for datatraveling outside of your data center over a long-distance replication link. It isassumed that customers implementing data replication strategies using multiplearrays will replicate data over secure leased lines or use edge devices to provideencryption and authentication. For assistance with setting up appropriate security,contact Sun Client Solutions.
If there is a break in the network or if the secondary volume is unavailable, thesoftware automatically switches to suspended mode, in which it ceases replicationand tracks changes to the primary volume in a separate volume known as areplication repository. When communication is restored, the software uses theinformation in the replication repository volume to resynchronize the volumes andreturns to replicating the data.
109 Sun StorageTek Array Administration Guide • March 2007

When replicating data in synchronous replication mode, the software preserveswrite order consistency. That is, the software ensures that write operations to thesecondary volume occur in the same order as the write operations to the primaryvolume. This ensures that the data on the secondary volume is consistent with dataon the primary volume and does not compromise an attempt to recover the data if adisaster occurs at the primary volume.
If you need to ensure write order consistency across multiple volumes, such as foran application that builds its database on multiple volumes, you can place multiplereplication sets into the consistency group. Each array supports only one consistencygroup and replication sets in the consistency group must use asynchronousreplication mode. The consistency group enables you to manage several replicationsets as one. By using the consistency group, the software maintains write orderingfor volumes in a group to ensure that the data on all secondary volumes is aconsistent copy of the corresponding primary volumes.
You can also restore data from a secondary volume to a primary volume byreversing the roles of the primary and secondary volumes. Role reversal is a failovertechnique in which a primary volume failure causes the secondary volume toassume the role of the primary volume. The application software accesses thesecondary volume directly until you can correct the failure at the primary volume.
About Replication SetsA replication set includes the following:
■ A volume residing on an array and a reference to a volume residing on another,physically separate array. One array contains the primary volume, which copiesthe data, and the other array contains the secondary volume, which is therecipient of the data.
■ The replication mode between both arrays: synchronous or asynchronous.
■ The role that the volume plays within the replication set, either as a primary or asa secondary volume.
Up to 32 replication sets are supported per array. You can create and configure areplication set from either array. It is not necessary to set up the replication setproperties on both arrays.
Note: Multi-hop and one-to-many data replication are not supported.
You can update the secondary volumes synchronously in real time orasynchronously using a store-and-forward technique. When the replication set isfirst created, a primary volume is first wholly copied to a designated secondaryvolume to establish matching contents. As applications write to the primary volume,the data replication software copies the changes from the primary volume to thesecondary volume, keeping the two images consistent.
Chapter 4 Configuring Data Replication 110

When you activate the Sun StorageTek Data Replicator software premium feature oneach array (see “Activating and Deactivating Data Replication” on page 124), tworeplication repository volumes are created on each array, one per controller. Thecontroller stores replication information in the replication repository volume,including information about write operations to the destination volume in thereplication set that are not yet completed. The controller can then use thisinformation to recover from controller resets or array outages, by copying only theblocks that have changed since the reset or outage occurred.
FIGURE 4-1 shows the relationship between the two arrays and their correspondingreplication sets (for simplicity, only one controller/replication repository volume oneach array is shown).
FIGURE 4-1 Relationship Between Arrays and Their Corresponding Replication Sets
After you create a replication set, you can modify its properties (see “AboutReplication Set Properties” on page 114 for more information). You can also performvolume operations, such as the following:
■ Extend replicated volumes, by adding storage first to the secondary volume andthen to the primary volume.
■ Create snapshots.
You can create a snapshot of either the primary or the secondary volume within areplication set at any time.
PrimaryVolume
Secondary
Array A Array B
Data
Physical connection
Volume
Replicationrepositoryvolume
Replicationrepositoryvolume
111 Sun StorageTek Array Administration Guide • March 2007

■ Make volume copies.
A primary volume in a replication set can be a source volume or a target volumein a volume copy. Volume copies are not allowed on secondary volumes. If a copyof a secondary volume is required, perform a role reversal to change thesecondary volume to a primary volume. If a role reversal is initiated during avolume copy in progress, the copy will fail and you cannot restart it. For more onrole reversal, see “About Primary and Secondary Role Reversal” on page 115.
■ Change volume mappings.
You can also delete a replication set. This removes the association between theprimary and secondary volumes, and the volumes revert to independent volumes.
Note: You cannot replicate a volume that is already in a replication set.
If the primary volume becomes unavailable, the secondary volume assumes the roleof primary volume. This role reversal allows applications to continue theiroperations by using the newly designated primary volume. When the formerprimary volume is again available, you must synchronize it with the more recentdata on the other volume to restore the functions of the replication set.
About the Consistency GroupThe consistency group is a collection of replication sets that have the same role andthat only use asynchronous replication mode. The purpose of the consistency groupis to ensure write order consistency across multiple volumes. Only one consistencygroup is supported per array.
When you perform an operation on the consistency group, the operation applies toall the replication sets, and consequently their volumes, in the consistency group. Ifyou make a change to the consistency group, the change occurs on every replicationset in the consistency group; if an operation fails on a single replication set in theconsistency group, it fails on every replication set in the consistency group.
Note: Volume snapshot operations are the exception. You must create a snapshot ofeach volume in a replication set individually.
When you include replication sets in the consistency group, the system preserveswrite ordering among the volumes in the replication sets. Because you control thereplication sets as a single unit, data replication operations are executed on everymember of the consistency group. Write operations to the secondary volume occur inthe same order as the write operations to the primary volume. The softwaremaintains write ordering among volumes in a group to ensure that the data on eachsecondary volume is a consistent copy of the corresponding primary volume.
Chapter 4 Configuring Data Replication 112

Before you include a replication set in the consistency group, consider the guidelinesin the TABLE 4-5.
A best practice is to plan the consistency group in advance and include thereplication set in the consistency group at the same time that you create thereplication set. To do this, select the Add to Write Consistency Group check boxwhen you are specifying replication properties in the Create Replication Set wizard.
To add an existing replication set with asynchronous replication mode to theconsistency group, select the Consistency Group check box on the Replication SetDetails page for the replication set, then click OK to save.
About Replication LinksA replication link is a logical and physical connection between two arrays thatallows for data replication. A replication link transports data between the primaryand secondary arrays. This link transfers data as well as replication controlcommands.
To establish a replication link between two arrays, you must use Fibre Channel (FC)port 2 for the Sun StorEdge 6130 and the Sun StorageTek 6540 arrays, and FC port 4for the Sun StorageTek 6140 array and the Sun StorageTek 6540 array with a 4-portconfiguration. Additionally, you must configure any FC switches that you use tomake the connection to the array for long-distance operations and apply zoningpractices. For more information on configurations and switch zoning for datareplication, see the documentation for your array.
Note: The system does not provide built-in authentication/encryption for datatraveling outside of your data center over a long-distance replication link. It isassumed that customers implementing data replication strategies using multiple
TABLE 4-5 Consistency Group Guidelines
Regarding Note
Write order If you need to preserve write order consistency for a set of volumes, include the replication setsthat comprise the volumes in the consistency group. You can add an existing replication set tothe consistency group from the replication set’s Replication Set Details page.
Volumes All primary volumes in the consistency group must reside on the same primary array. Youcannot preserve write ordering when you have primary volumes originating on differentarrays.
Replicationsets
Replication sets in the consistency group must all use asynchronous replication mode. Theconsistency group supports up to 32 replication sets.
113 Sun StorageTek Array Administration Guide • March 2007

arrays will replicate data over secure leased lines or use edge devices to provideencryption and authentication. For assistance with setting up appropriate security,contact Sun Client Solutions.
See the FC switch vendor’s documentation for information about operating overlong distances.
About Replication Set PropertiesWhen you define a replication set or the consistency group, you set replicationproperties. To set these properties, do the following:
■ Specify a secondary volume. When you create the replication set, the local volumeassumes the primary role by default, and you are prompted to choose thesecondary volume. Once the replication set is created, you can change the role ofa volume on the Replication Set Details page as needed without suspendingreplication. See “Reversing Roles” on page 128 for more information.
■ Set the replication mode to synchronous or asynchronous. See “About ReplicationModes” on page 116 for more information. If the mode is asynchronous, you havethe option of including the replication set in the consistency group. See “Aboutthe Consistency Group” on page 112 for more information.
■ Set the priority of the synchronization rate relative to I/O activity to highest,high, medium, low, or lowest.
■ If appropriate for your environment, set the resynchronization method in theCreate Replication Set wizard to Automatic.
Automatic resynchronization is an alternative to manual synchronization (youmanually synchronize by clicking the Resume button on the Replication SetDetails page). The Automatic resynchronization option supports both replicationsets and the consistency group. If you enable this option, the softwaresynchronizes the volumes on both arrays and resumes replication as soon aspossible.
For example, if a network link fails and causes the software to cease replication,resynchronization will occur when the link is restored. If the replication set is amember of the consistency group and it becomes unsynchronized (replication issuspended) due to a link failure or other problem, all replication sets in theconsistency group with primary volumes on the local array will becomeunsynchronized. When the problem is resolved, all of the replication sets willautomatically become resynchronized.
However, the software will not perform an automatic resynchronization if youmanually suspended a replication set (or all of the replication sets in theconsistency group, if the replication set is a member of the group). In this case,you will need to click the Resume button to resynchronize the replication sets.
Chapter 4 Configuring Data Replication 114

You can enable automatic resynchronization for an existing replication set byselecting the Auto-synchronize check box on the Replication Set Details page.This check box is available only if the local volume is the primary volume.
About Primary and Secondary Role ReversalA role reversal promotes the secondary volume to the primary volume within thereplication set, and demotes the primary volume to the secondary volume.
Note: If you change the role of a volume in a replication set that is a member of theconsistency group, the replication set will become a member of the consistencygroup on the array that hosts the newly promoted primary volume.
Caution: If I/O operations to the primary and secondary volumes occur during arole reversal, data is lost when you initiate a synchronization operation. The currentsecondary volume is brought into synchronization with the current primary volume,and any writes that have been written to the secondary volume are lost.
Secondary to Primary
You usually promote a secondary volume to a primary volume in a replication setwhen a catastrophic failure has occurred on the array that contains the primaryvolume. You need to promote the secondary volume so that host applications thatare mapped to the primary volume can still access data and so that businessoperations can continue. If the replication set is operating normally with a viablelink, promoting the secondary volume to the primary volume automatically demotesthe primary volume to the secondary volume.
When the secondary volume becomes a primary volume, any hosts that are mappedto the volume through a volume-to-LUN mapping will now be able to read or writeto the volume. If a communication problem between the secondary and primarysites prevents the demotion of the primary volume, an error message is displayed.However, you are given the opportunity to proceed with the promotion of thesecondary volume, even though this will lead to a dual-primary condition.
To promote a secondary volume to a primary volume, see “Reversing Roles” onpage 128.
115 Sun StorageTek Array Administration Guide • March 2007

Primary to Secondary
You can demote a primary volume to a secondary role during normal operatingconditions. If the replication set is operating normally with a viable link, demotingthe primary volume to the secondary volume automatically promotes the secondaryvolume to the primary volume.
When the secondary volume becomes a primary volume, any host that accesses theprimary volume through a volume-to-LUN mapping will no longer be able to writeto the volume. When the primary volume becomes a secondary volume, only remotewrites initiated by the primary controller will be written to the volume. If acommunication problem between the primary and secondary sites prevents thepromotion of the secondary volume, an error message is displayed. However, youare given the opportunity to proceed with the demotion of the primary volume,even though this will lead to a dual-secondary condition.
To demote a primary volume to a secondary volume, see “Reversing Roles” onpage 128.
Note: To correct a dual-primary or dual-secondary condition, you must delete thereplication set and then create a new one.
About Replication ModesThe replication mode is a user-selectable property that defines the communicationmode for a replication set. The software supports two modes of data replication:
■ Synchronous mode – In synchronous mode replication, a write operation to theprimary volume is not confirmed as complete until the secondary volume hasbeen updated. Synchronous replication forces the software to wait until theprimary volume receives an acknowledgment of the receipt of the data from thesecondary volume before returning to the application. This mode offers the bestchance of full data recovery from the secondary volume, at the expense of hostI/O performance.
■ Asynchronous mode – In asynchronous mode replication, data is written to theprimary volume and confirmed as complete before the secondary volume hasbeen updated. Asynchronous replication enables the data replication software toreturn to the primary volume as soon as the write operation has been completedon the primary volume. The data is then copied to the secondary volume. Thismode provides faster I/O performance, but does not guarantee that the copy tothe secondary volume was completed before processing the next write request.
You can change the replication mode at any time during the life of a replication set,and you do not need to suspend replication before a mode change.
Chapter 4 Configuring Data Replication 116

Note: If a replication set is a member of the consistency group, it must, by definition,use asynchronous mode replication. If you change the replication set to synchronousmode replication, it will no longer be part of the consistency group and will notaffect the properties of the remaining replication sets in the group in any way.
Reference: Synchronous Versus AsynchronousReplication ModesWhen you choose a replication mode, consider the characteristics of each, asdescribed in TABLE 4-6.
TABLE 4-6 Synchronous and Asynchronous Mode Comparison
Synchronous Replication Asynchronous Replication
A write operation to the primary volume is notconsidered complete until the user data is written tothe secondary volume.
The write operation is considered complete as soon asthe user data is written to the primary volume. Thedata is then copied to the secondary volume.
The response time depends on the network.The network latency must be low enough that yourapplication response time is not affected dramaticallyby the time of the network round trip of each writeoperation. Also, the bandwidth of the network mustbe sufficient to handle the amount of write trafficgenerated during the application’s peak writeperiod. If the network cannot handle the write trafficat any time, the application response time will beaffected.
The response time does not depend on the network.The bandwidth of the network link must be able tohandle the write traffic generated during theapplication’s average write period.
Provides high data availability at the expense oflonger latency across the wide area network.
Offers higher performance and availability inexchange for delayed synchronization of all copies ofdata.
Might result in an increase in write response time,especially for large data sets or long-distancereplication (where write operations can incuradditional latency because of the time required totransfer data and return acknowledgments).
Can potentially result in a longer response time thansynchronous replication.
117 Sun StorageTek Array Administration Guide • March 2007
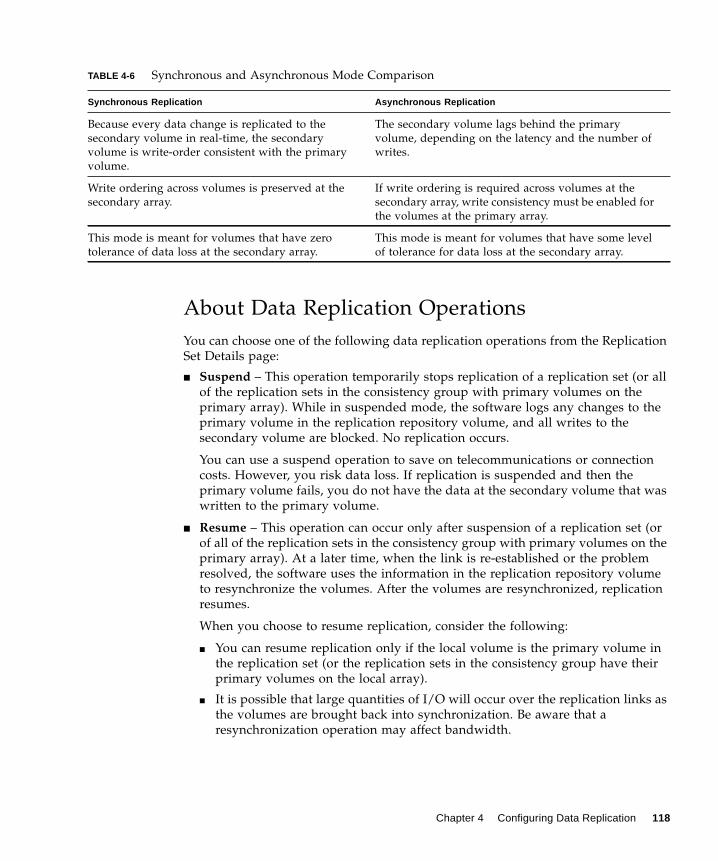
About Data Replication OperationsYou can choose one of the following data replication operations from the ReplicationSet Details page:
■ Suspend – This operation temporarily stops replication of a replication set (or allof the replication sets in the consistency group with primary volumes on theprimary array). While in suspended mode, the software logs any changes to theprimary volume in the replication repository volume, and all writes to thesecondary volume are blocked. No replication occurs.
You can use a suspend operation to save on telecommunications or connectioncosts. However, you risk data loss. If replication is suspended and then theprimary volume fails, you do not have the data at the secondary volume that waswritten to the primary volume.
■ Resume – This operation can occur only after suspension of a replication set (orof all of the replication sets in the consistency group with primary volumes on theprimary array). At a later time, when the link is re-established or the problemresolved, the software uses the information in the replication repository volumeto resynchronize the volumes. After the volumes are resynchronized, replicationresumes.
When you choose to resume replication, consider the following:
■ You can resume replication only if the local volume is the primary volume inthe replication set (or the replication sets in the consistency group have theirprimary volumes on the local array).
■ It is possible that large quantities of I/O will occur over the replication links asthe volumes are brought back into synchronization. Be aware that aresynchronization operation may affect bandwidth.
Because every data change is replicated to thesecondary volume in real-time, the secondaryvolume is write-order consistent with the primaryvolume.
The secondary volume lags behind the primaryvolume, depending on the latency and the number ofwrites.
Write ordering across volumes is preserved at thesecondary array.
If write ordering is required across volumes at thesecondary array, write consistency must be enabled forthe volumes at the primary array.
This mode is meant for volumes that have zerotolerance of data loss at the secondary array.
This mode is meant for volumes that have some levelof tolerance for data loss at the secondary array.
TABLE 4-6 Synchronous and Asynchronous Mode Comparison
Synchronous Replication Asynchronous Replication
Chapter 4 Configuring Data Replication 118

Planning for Data ReplicationThis section describes planning for data replication. It contains the followingsubtopics:
■ “General Planning Considerations” on page 119
■ “Planning to Create Replication Sets” on page 120
General Planning ConsiderationsReplicating data and modifying replication properties may require a significantchange to your system’s configuration. You must plan accordingly before youperform data replication operations. Consider the following:
■ Business needs – When you decide to replicate your business data, consider themaximum delay: How long out of date can you allow the data on the secondaryvolume to become? This determines the replication mode and how often youshould back up the data. Additionally, it is very important to know whether theapplications that you are replicating require the write operations to the secondaryvolume to be replicated in the correct order.
■ Data loss – Disaster can occur during any phase of data replication, such asduring a synchronization operation. Although data replication does not affect theintegrity of the data on the primary volume, the data on the secondary volume isvulnerable during synchronization because write order is not preserved.Therefore, to ensure a high level of data integrity on both volumes during normaloperations or data recovery, back up the data on both volumes before youperform a synchronization operation so that you always have a consistent copy ofyour data. If a failure occurs, the backup provides a “known good” copy fromwhich your data can be restored.
■ Application write load – Understanding the average and peak write loads iscritical to determining the type of network connection required between theprimary and secondary volumes. To make decisions about the configuration,collect the following information:
■ The average rate and size of data write operations
The average rate is the number of data write operations while the applicationis under typical load. Application read operations are not important to theprovisioning and planning of your data replication.
■ The peak rate and size of data write operations
The peak rate is the largest amount of data written by the application over ameasured duration.
119 Sun StorageTek Array Administration Guide • March 2007

■ The duration and frequency of the peak write rate
The duration is how long the peak write rate lasts, and the frequency is howoften this condition occurs.
■ Network characteristics – The most important network properties to consider arethe network bandwidth and the network latency between the primary andsecondary volumes.
Planning to Create Replication SetsBefore you can replicate data to a secondary volume, use the Create Replication Setwizard to create a replication set. Before you use the wizard, you must do thefollowing:
■ The storage domain definitions for the primary and secondary arrays areindependent of each other. If these definitions are put into place while a volume isin a secondary role, it will reduce the administrative effort associated with siterecovery if it becomes necessary to promote the volume to a primary role.
■ The size of the secondary volume must be equal to or greater than the size ofthe corresponding primary volume.
■ Primary and secondary volumes do not need to have the same redundant arrayof independent disks (RAID) level for replication.
■ The synchronization process overwrites all data on the secondary volume andmakes it read-only. If you need to save any data on the secondary volume, backit up before creating the replication set.
■ You cannot use a replicated volume or a snapshot volume to create areplication set.
■ Any host mapped to a volume will no longer have write access to it once itbecomes a secondary volume in a replication set. For this reason, avoid usingmapped volumes as secondary volumes. However, any defined mappings willremain after the replication set is created, and any mapped host can resumewriting to the volume if it is ever promoted to a primary volume or thereplication set is deleted.
■ A volume can be the secondary volume for only one replication set.
■ Make sure that you have configured the volumes for data replication on botharrays and that a viable Fibre Channel (FC) link exists between the arrays.Configure both the primary and secondary volumes as you would any othervolume. The capacity of the secondary volume must be equal to or greater thanthat of the primary volume.
Chapter 4 Configuring Data Replication 120

■ Make sure that the secondary array is connected to the local primary array bymeans of an existing FC link. Data replication uses a dedicated FC port (FC port 2on the Sun StorEdge 6130 array and the Sun StorageTek 6540 array having a 2-port configuration; FC port 4 on the Sun StorageTek 6140 array and the SunStorageTek 6540 array having a 4-port configuration).
■ Configure the FC switches that provide the connection between arrays for long-distance operations. See the FC switch vendor’s documentation for informationabout operating over long distances. For more information on configurations andswitch zoning for data replication, see the documentation for your array.
■ Make sure that both of the arrays with volumes participating in the replication setare registered with Sun’s management software, and are reachable through theout-of-band management network.
■ Record the names of the secondary array and secondary volume. You can findthese names on the Volume pages for the secondary volume.
■ Back up the data on both volumes so that you can restore it easily if there is aproblem.
■ Ensure that the Sun StorageTek Data Replicator software premium feature isenabled and activated on both arrays participating in data replication, asdescribed in “Enabling Data Replication” on page 124 and “Activating andDeactivating Data Replication” on page 124.
■ Define the characteristics of the replication set:
■ Write order consistency – Determine whether you need to preserve write orderconsistency across volumes and manage the volumes as a group. If so, you willinclude the replication set in the consistency group by selecting the Add toWrite Consistency Group check box. See “About the Consistency Group” onpage 112 for more information about the consistency group.
■ Roles – Determine which array and volume will assume the primary role. Bydefault, the array and volume where you are running the Create ReplicationWizard are assigned the primary role. For information about changing roles forexisting replication sets, see “About Primary and Secondary Role Reversal” onpage 115.
■ Replication mode – Determine whether synchronous or asynchronous datareplication mode is the best method of data communication for yourapplication. Consider network latency, bandwidth, and security when youchoose the path through the storage area network (SAN) that you will use fordata replication.
Note: The full synchronization that occurs when you first create the replicationset is the most time consuming data replication operation. For this reason,avoid creating a new replication set across a limited-bandwidth link.
For more information about replication modes, see “About Replication Modes”on page 116.
121 Sun StorageTek Array Administration Guide • March 2007

■ Synchronization priority – Determine whether you want the system to assigna higher or lower priority to the rate of synchronization relative to I/O activity.A high synchronization rate might lead to degraded I/O performance, so youcan choose a faster synchronization rate if your environment can sustainslower I/O activity. Conversely, you can choose slower synchronization rate toensure quicker I/O activity.
■ Synchronization method – Determine whether you want the system toautomatically synchronize the volumes on both arrays whenever there is aworking link, or whether you want to initiate synchronization manually. Formore information about the Resynchronization Method option, see “AboutData Replication Operations” on page 118 and “About Replication SetProperties” on page 114.
Managing Data ReplicationThis section describes data replication tasks. It contains the following subsections:
■ “About Data Replication Status” on page 123
■ “Enabling Data Replication” on page 124
■ “Activating and Deactivating Data Replication” on page 124
■ “Disabling Data Replication” on page 125
■ “Displaying Replication Set Information” on page 126
■ “Creating Replication Sets” on page 126
■ “Deleting Replication Sets” on page 127
■ “Reversing Roles” on page 128
■ “Changing Replication Modes” on page 128
■ “Suspending and Resuming Data Replication” on page 129
■ “Testing Replication Set Links” on page 130
■ “Troubleshooting Data Replication” on page 130
Chapter 4 Configuring Data Replication 122

About Data Replication StatusThe data replication status is managed independently for the primary array and thesecondary array. There are four possible data replication statuses, described inTABLE 4-7.
To determine whether data replication is enabled or disabled for an array, select thearray, and then choose Administration > Licensing in the navigation pane to viewthe Licensable Feature Summary page.
To determine whether the data replicator software has been activated clickReplication Sets, in the Available Features section on the Licenseable FeatureSummary page, to view the Licenseable Feature Details - Replication Sets page.
TABLE 4-7 Data Replication Status
Status Description
Disabled/Deactivated No data replication functions can be performed. The SunStorageTek Data Replicator software premium feature is notavailable until it is enabled and activated. To enable datareplication, see “Enabling Data Replication” on page 124. Toactivate data replication, see “Activating and Deactivating DataReplication” on page 124.
Disabled/Activated Data replication is disabled, preventing new replication sets frombeing created. However, existing replication sets can bemaintained with all functions of the Sun StorageTek DataReplicator software premium feature. To enable data replication,see “Enabling Data Replication” on page 124.
Enabled/Deactivated Data replication is enabled, but not activated. Until datareplication is activated, you cannot use any of the data replicationfunctions. To activate data replication, see “Activating andDeactivating Data Replication” on page 124.
Enabled/Activated Data replication is enabled and activated. Replication sets can becreated and maintained with volumes on this array and any otherarray on which data replication is enabled and activated. To createand manage replication sets, see “Managing Data Replication” onpage 122.
123 Sun StorageTek Array Administration Guide • March 2007

Enabling Data ReplicationInstalling the license for the Sun StorageTek Data Replicator software premiumfeature on an array enables data replication for that array only. Since two arraysparticipate in a replication set, you must install a license on both arrays that youplan to have participate in a replication set.
Note: The Sun StorEdge 6130 array and the Sun StorageTek 6540 array having a 2-port configuration dedicates Fibre Channel (FC) port 2, and the Sun StorageTek 6140array and the Sun StorageTek 6540 array having a 4-port configuration dedicateshost port 4 on each controller for use with the Sun StorageTek Data Replicatorsoftware premium feature. Before enabling data replication on an array, you mustensure that FC port 2 on each controller on the 6130 array and 6540 array having a 2-port configuration, and FC port 4 on each controller on the 6140 array and the 6540array having a 4-port configuration is not currently in use. If it is in use, you mustmove all connections from FC port 2 to FC port 1 for the 6130 array and 6540 arrayhaving a 2-port configuration, and from FC port 4 to FC port 3, 2, or 1 for the 6140array and the 6540 array having a 4-port configuration.
To enable data replication on an array:
1. Click Sun StorageTek Common Array Manager.
The navigation pane and the Storage System Summary page are displayed.
2. In the navigation pane, expand the array on which you want to enable datareplication.
The navigation tree is expanded for that array.
3. Expand Administration and choose Licensing.
The Licensable Feature Summary page is displayed.
4. Click Add License.
The Add License page is displayed.
5. Select Sun StorageTek Data Replicator Software from the License Type menu.
6. Enter the version number and the key digest, and click OK.
Activating and Deactivating Data ReplicationActivating the Sun StorageTek Data Replicator software premium feature preparesthe array to create and configure replication sets. After data replication is activated,the secondary ports for each of the array’s controllers are reserved and dedicated todata replication. In addition, a replication repository volume is automatically createdfor each controller in the array.
Chapter 4 Configuring Data Replication 124

Note: The replication repository volumes require 256 megabytes of availablecapacity on an array. The two replication repository volumes are created with thiscapacity, one for each controller.
If no replication sets exist and the Sun StorageTek Data Replicator software premiumfeature is no longer required, you can deactivate data replication in order to re-establish normal use of dedicated ports on both storage arrays and delete bothreplication repository volumes.
Note: You must delete all replication sets before you can deactivate the premiumfeature.
To activate or deactivate the Sun StorageTek Data Replicator software premiumfeature:
1. Click Sun StorageTek Common Array Manager.
The navigation pane and the Storage System Summary page are displayed.
2. In the navigation pane, expand the array you want to work with.
The navigation tree is expanded for that array.
3. Expand Administration and choose Licensing.
The Licensable Feature Summary page is displayed.
4. Click Replication Sets.
The Licenseable Feature Details - Replication Sets page is displayed.
5. Click Activate or Deactivate, as appropriate.
A confirmation dialog box indicates success or failure.
Disabling Data ReplicationWhen data replication is in the disabled/activated state, previously existingreplication sets can still be maintained and managed; however, new data replicationsets cannot be created. When in the disabled/deactivated state, no data replicationactivity can occur.
To disable data replication:
1. Click Sun StorageTek Common Array Manager.
The navigation pane and the Storage System Summary page are displayed.
2. In the navigation pane, expand the array you want to work with.
The navigation tree is expanded for that array.
125 Sun StorageTek Array Administration Guide • March 2007

3. Expand Administration and choose Licensing.
The Licensable Feature Summary page is displayed.
4. Click the check box to the left of Replication Sets.
This enables the Disable button.
5. Click Disable.
Displaying Replication Set InformationTo display information about the replication sets in an array:
1. Click Sun StorageTek Common Array Manager.
The navigation pane and the Storage System Summary page are displayed.
2. In the navigation pane, expand the array you want to work with, and chooseReplication Sets.
The Replication Set Summary page is displayed.
3. Click the name of a replication set.
The Replication Set Details page for the selected replication set is displayed.
Creating Replication SetsYou must do three things before creating a replication set:
■ Consider a number of factors and make a number of decisions. For informationon planning a replication set, see “Planning for Data Replication” on page 119.
■ Stop all I/O activity and unmount any file systems on the secondary volume. Dothis just before creating the replication set.
■ Log in to the system using the storage user role.
The Create Replication Set wizard enables you to create a replication set, eitherstandalone or as part of the consistency group.
To create a replication set:
1. Click Sun StorageTek Common Array Manager.
The navigation pane and the Storage System Summary page are displayed.
2. In the navigation pane, expand the array you want to work with, and chooseVolumes.
The Volume Summary page is displayed.
Chapter 4 Configuring Data Replication 126

3. Click the name of the primary volume that you want to replicate to the secondaryvolume.
The Volume Details page for the selected volume is displayed.
Note: You cannot replicate a volume that is already in a replication set.
4. Click Replicate.
The Create Replication Set wizard is displayed.
5. Follow the steps in the wizard. The Create Replication Set wizard also allows youto include the new replication set in the consistency group, if desired.
When creating the replication set, the system copies all data from the primaryvolume to the secondary volume, overwriting any existing data on the secondaryvolume. If replication is suspended, either manually or due to a system orcommunication problem, and then resumed, only the differences in data betweenvolumes are copied.
Note: An alternative method of creating a replication set is to go to the ReplicationSet Summary page and click the New button. In this case, an additional step in thewizard prompts you to filter and select the primary volume from the current array.
Deleting Replication SetsWhen you delete a replication set, the primary volume stops replicating data to thesecondary volume. The association between the primary and secondary volumes isremoved, and both revert to conventional volumes. The data stored on the volumesis not affected, and the volumes can remain mapped. You can delete multiplereplication sets simultaneously.
To remove the replication relationship between volumes:
1. Click Sun StorageTek Common Array Manager.
The navigation pane and the Storage System Summary page are displayed.
2. In the navigation pane, expand the array you want to work with, and chooseReplication Sets.
The Replication Set Summary page is displayed.
3. Select the replication set that you want to delete, and click Delete.
A confirmation message is displayed.
4. Click OK.
The replication set is deleted.
127 Sun StorageTek Array Administration Guide • March 2007

Reversing RolesYou can reverse the roles of the primary and secondary volumes in a replication setin the event of a failure of the primary volume. The secondary volume assumes therole of the primary volume so that the application software now accesses thesecondary volume directly while the primary volume failure is corrected.
You can perform the role reversal from either volume in the replication set. Forexample, when you promote the secondary volume to a primary role, the existingprimary volume is automatically demoted to a secondary role (unless the systemcannot communicate with the existing primary volume).
Note: If you change the role of a volume in a replication set that is a member of theconsistency group, the replication set will become a member of the consistencygroup on the array that hosts the newly promoted primary volume.
To reverse the role of volumes within a replication set:
1. Click Sun StorageTek Common Array Manager.
The navigation pane and the Storage System Summary page are displayed.
2. In the navigation pane, expand the array you want to work with, and chooseReplication Sets.
The Replication Set Summary page is displayed.
3. Click the name of the replication set that includes the volume.
The Replication Set Details page is displayed.
4. Click Role to Secondary or Role to Primary, as appropriate.
A confirmation message is displayed.
5. Click OK.
The roles of the volumes are now reversed.
Changing Replication ModesYou must consider a number of factors and make a number of decisions beforechanging the replication mode of a replication set. For information on planningreplication modes, see “About Replication Modes” on page 116.
To change the replication mode of a replication set:
1. Click Sun StorageTek Common Array Manager.
The navigation pane and the Storage System Summary page are displayed.
Chapter 4 Configuring Data Replication 128

2. In the navigation pane, expand the array you want to work with, and chooseReplication Sets.
The Replication Set Summary page is displayed.
3. Click the name of the replication set whose replication mode you want to change.
The Replication Set Details page is displayed.
4. Select Asynchronous or Synchronous, as appropriate, from the mode drop-downlist.
If you select Asynchronous, write order consistency is disabled by default. Toenable write order consistency for all replication sets using asynchronous mode,select the Consistency Group check box.
5. Click OK to save the changes.
Suspending and Resuming Data ReplicationTo suspend or resume data replication in an existing replication set:
1. Click Sun StorageTek Common Array Manager.
The navigation pane and the Storage System Summary page are displayed.
2. In the navigation pane, expand the array you want to work with, and chooseReplication Sets.
The Replication Set Summary page is displayed.
3. Click the name of the replication set for which you want to suspend or resumereplication.
The Replication Set Details page is displayed.
4. Do one of the following:
■ If you want to suspend replication and track changes between the volumes,click Suspend.
Note: If the replication set is already in a Suspended, Unsynchronized, orFailed/Suspended state, only the Resume button is available.
Note: Suspending a replication set will stop the coordination of data betweenthe primary and the secondary volume. Any data that is written to the primaryvolume will be tracked while the replication set is suspended and willautomatically be written to the secondary volume when replication is resumed.A full synchronization will not be required.
■ If you want to resume replication and copy only the data changes, not theentire contents of the volume, click Resume.
129 Sun StorageTek Array Administration Guide • March 2007

Note: Any data that is written to the primary volume will be tracked while thereplication set is suspended and will automatically be written to the secondaryvolume when replication is resumed. A full synchronization will not berequired.
5. When prompted to confirm the selected action, click OK.
Note: If you are suspending or resuming replication for a replication set that is partof the consistency group, all other replication sets in the group with primaryvolumes on the primary array will also be suspended or resumed.
Testing Replication Set LinksYou can test communication between volumes in a replication set by clicking theTest Communication button on the Replication Set Details page. If a viable link existsbetween primary and secondary volumes, a message displays indicating thatcommunication between the primary and secondary volume is normal. If there is aproblem with the link, a message displays details about the communication problem.
Troubleshooting Data ReplicationIf data replication does not occur, make sure that:
■ There is a working Fibre Channel connection on port 2 on both the primary andsecondary controllers on the Sun StorEdge 6130 array and Sun StorageTek 6540array having a 2-port configuration or on port 4 on both the primary andsecondary controllers on the Sun StorageTek 6140 array or Sun StorageTek 6540array having a 4-port configuration. To test link communication, see “TestingReplication Set Links” on page 130.
■ You selected the correct secondary array and volume names in the CreateReplication Set wizard. If you did not, you must delete the replication set andcreate a new one with the correct secondary array and volume names.
Chapter 4 Configuring Data Replication 130

TABLE 4-8 describes some of the other problems that you may encounter when usingdata replication, possible causes, and resolution.
TABLE 4-8 Troubleshooting Data Replication Table
Symptom Cause Resolution
After a replication set isdeleted on the primaryarray, the secondary arrayshows that the replicationset still exists.
During the deletion operation, there was alink failure between primary and secondaryarrays.
Delete the replication set on thesecondary array.
After a replication set isdeleted on the secondaryarray, the primary arrayshows that the replicationset still exists.
During the deletion operation, there was alink failure between primary and secondaryarrays.
Delete the replication set on theprimary array.
The SynchronizationProgress field shows anUnsynchronized state forthe primary volume.
The data replicated between the primaryand secondary volumes is no longeridentical. Link errors, a failed primary orsecondary volume, or a dual-primary ordual-secondary condition (see “AboutPrimary and Secondary Role Reversal” onpage 115) can all cause an Unsynchronizedstate.
If the controller owner of theprimary volume cancommunicate with the controllerowner of the secondary volumeand the volume is online andreplicating, and the Auto-synchronize option is selected, afull synchronizationautomatically takes place.Otherwise, click the Resumebutton to start fullsynchronization.
131 Sun StorageTek Array Administration Guide • March 2007

Configuring Storage PoolsThis section describes storage pools. It contains the following subsections:
■ “About Storage Pools” on page 132
■ “Displaying Pool Information” on page 133
■ “Creating a Storage Pool” on page 133
■ “Modifying a Storage Pool” on page 134
■ “Deleting a Storage Pool” on page 134
About Storage PoolsA storage environment can be divided into storage pools. Each pool is associatedwith a profile that allows the storage pool to meet specific I/O requirements. Eacharray has a default pool that uses the default profile which implements RAID-5storage characteristics.
The default pool satisfies most common storage requirements. The array alsoprovides a set of storage profiles that satisfy certain I/O requirements which areoptimal for the type of application to which they refer. If none of the factory profilesare suitable for your site’s needs, you can create a custom storage profile. When youcreate a new storage pool, you assign a specific profile to it.
To see the current storage pools, go to the Storage Pool Summary page, as describedin “Displaying Pool Information” on page 133.
Note: Removing a storage pool destroys all stored data in the pool and removes allvolumes that are members of the pool. The data can be restored from backup afternew storage pools are added, but it is far easier to avoid the data restoration in thefirst place. You cannot, however, remove the default storage pool.
Chapter 4 Configuring Storage Pools 132
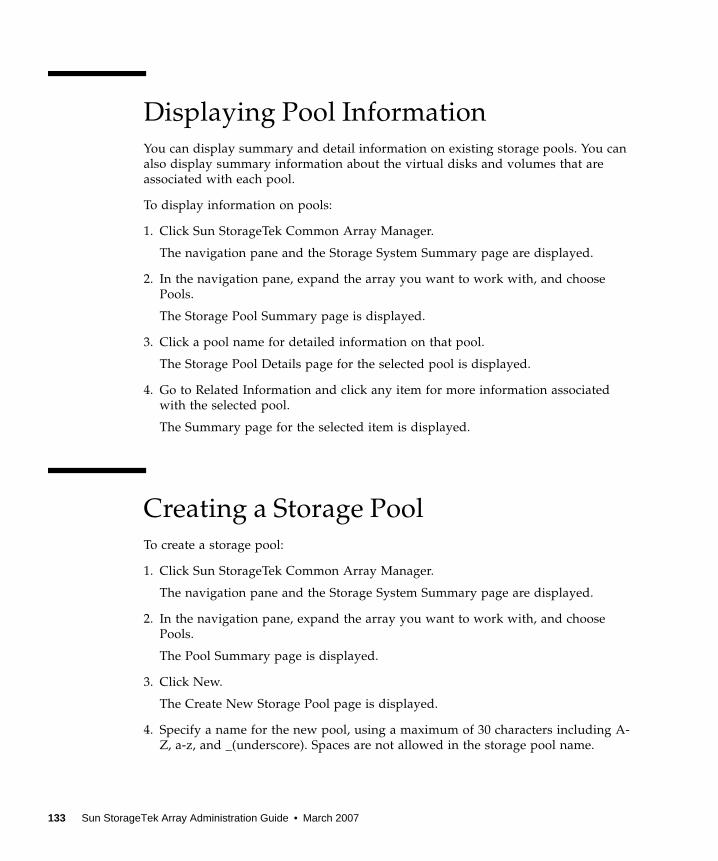
Displaying Pool InformationYou can display summary and detail information on existing storage pools. You canalso display summary information about the virtual disks and volumes that areassociated with each pool.
To display information on pools:
1. Click Sun StorageTek Common Array Manager.
The navigation pane and the Storage System Summary page are displayed.
2. In the navigation pane, expand the array you want to work with, and choosePools.
The Storage Pool Summary page is displayed.
3. Click a pool name for detailed information on that pool.
The Storage Pool Details page for the selected pool is displayed.
4. Go to Related Information and click any item for more information associatedwith the selected pool.
The Summary page for the selected item is displayed.
Creating a Storage PoolTo create a storage pool:
1. Click Sun StorageTek Common Array Manager.
The navigation pane and the Storage System Summary page are displayed.
2. In the navigation pane, expand the array you want to work with, and choosePools.
The Pool Summary page is displayed.
3. Click New.
The Create New Storage Pool page is displayed.
4. Specify a name for the new pool, using a maximum of 30 characters including A-Z, a-z, and _(underscore). Spaces are not allowed in the storage pool name.
133 Sun StorageTek Array Administration Guide • March 2007

5. Enter a description of the new storage pool.
6. Select a storage profile for this pool, and click OK.
Modifying a Storage PoolTo modify a storage pool:
1. Click Sun StorageTek Common Array Manager.
The navigation pane and the Storage System Summary page are displayed.
2. In the navigation pane, expand the array you want to work with, and choosePools.
The Storage Pool Summary page is displayed.
3. Click the storage pool that you want to modify.
The Storage Pool Details page for that pool is displayed.
4. Make the appropriate modifications, and click OK.
Deleting a Storage PoolYou cannot delete the factory default storage pool. If a storage pool is in use,deleting that storage pool will also delete all volumes associated with the pool.
To delete a storage pool:
1. Click Sun StorageTek Common Array Manager.
The navigation pane and the Storage System Summary page are displayed.
2. In the navigation pane, expand the array you want to work with, and choosePools.
3. Click the check box for the storage pool that you want to delete.
This enables the Delete button.
4. Click Delete.
The selected storage pool is no longer displayed in the Storage Pools table.
Chapter 4 Configuring Storage Pools 134

Configuring Storage ProfilesThis section describes storage profiles. It contains the following subtopics:
■ “About Storage Profiles” on page 135
■ “Reference: Standard Storage Profiles” on page 136
■ “Displaying Profile Information” on page 137
■ “Creating a Storage Profile” on page 138
■ “Modifying a Storage Profile” on page 138
■ “Copying a Storage Profile” on page 139
■ “Deleting a Storage Profile” on page 139
About Storage ProfilesA storage profile is set of attributes that you apply to a storage pool to allocatestorage, instead of having to set each attribute individually. The system has apredefined set of storage profiles. The array comes with a number of preconfiguredstorage profiles to meet different requirements. You can choose a profile suitable forthe application that is using the storage, or you can create a custom profile.
The array has a default storage profile with RAID-5 storage characteristics that issuitable for many storage applications. The default pool uses the default profile.
Each storage profile has the settings described in TABLE 4-9.
TABLE 4-9 Storage Profile Settings
Parameter Value or Variable Type Description
Name Up to 32 characters Unique identifier for the storage profile.
RAID Level 0, 1, 3, 5 RAID level configured across all diskswithin a virtual disk.
Segment Size 8 KB, 16 KB, 32 KB, 64 KB,128 KB, 256 KB, 512 KB
Segment size for this profile.
Readahead Enabled or Disabled Read-ahead mode of the array. Cacheread-ahead enables the controller tocopy additional data blocks into cachewhile the controller reads and copieshost requested data blocks from diskinto cache.
135 Sun StorageTek Array Administration Guide • March 2007

Reference: Standard Storage ProfilesThe array includes the storage profiles described in the following table described inTABLE 4-10, all of which can be used with any disk type.
Disk Type ANY, FC, SATA, or SAS Disk type.
No. of Disks 1 to 14, or variable The number of disks to be groupedtogether in a virtual disk. For example, ifyou create a storage pool with a profilethat has the number of disks parameterset to a number, all virtual disks that arepart of that storage pool must have thesame number of disks. If the number ofdisks parameter is set to the Variablevalue you are prompted for the numberof disks when storage is added to thepool.
TABLE 4-10 Standard Storage Profiles
Name RAID Level Segment Size
Read-AheadMode
DiskDriveType No. of Disks
Default RAID-5 512 KB Enabled FC Variable
High_Capacity_Computing RAID-5 512 KB Enabled SATA Variable
High_Performance_Computing RAID-5 512 KB Enabled FC Variable
Mail_Spooling RAID-1 512 KB Enabled FC Variable
Microsoft_Exchange RAID-5 32 KB Enabled FC 4
Microsoft_NTFS RAID-5 64 KB Enabled Any 4
Microsoft_NTFS_HA RAID-1 64 KB Enabled FC Variable
NFS_Mirroring RAID-1 512 KB Enabled FC Variable
NFS_Striping RAID-5 512 KB Enabled FC Variable
Oracle_10_ASM_XvFS_HA RAID-5 256 KB Enabled FC 4
Oracle_8_VxFS RAID-5 128 KB Enabled FC 4
TABLE 4-9 Storage Profile Settings (Continued)
Parameter Value or Variable Type Description
Chapter 4 Configuring Storage Profiles 136

Displaying Profile InformationYou can display summary and detail information on existing storage profiles. Youcan also display summary information about pools and volumes associated witheach storage profile.
To display information on storage profiles:
1. Click Sun StorageTek Common Array Manager.
The navigation pane and the Storage System Summary page are displayed.
2. In the navigation pane, expand the array you want to work with, and chooseProfiles.
The Storage Profile Summary page is displayed.
3. Click a profile name for detailed information on that profile.
The Storage Profile Details page for that profile is displayed.
Oracle_9_VxFS RAID-5 128 KB Enabled FC 4
Oracle_9_VxFS_HA RAID-1 128 KB Enabled FC Variable
Oracle_DSS RAID-5 512 KB Enabled FC Variable
Oracle_OLTP RAID-5 512 KB Enabled FC Variable
Oracle_OLTP_HA RAID-1 512 KB Enabled FC Variable
Random_1 RAID-1 512 KB Enabled FC Variable
Sequential RAID-5 512 KB Enabled FC Variable
Sun_SAM-FS RAID-5 128 KB Enabled Any 4
Sun_ZFS RAID-5 128 KB Enabled Any 4
Sybase_DSS RAID-5 512 KB Enabled FC Variable
Sybase_OLTP RAID-5 512 KB Enabled FC Variable
Sybase_OLTP_HA RAID-1 512 KB Enabled FC Variable
VxFS RAID-5 128 KB Enabled Any 4
TABLE 4-10 Standard Storage Profiles (Continued)
Name RAID Level Segment Size
Read-AheadMode
DiskDriveType No. of Disks
137 Sun StorageTek Array Administration Guide • March 2007

4. Go to Related Information and click an item for more information associated withthe selected profile.
The Summary page for the selected item is displayed.
Creating a Storage ProfileTo create a storage profile:
1. Click Sun StorageTek Common Array Manager.
The navigation pane and the Storage System Summary page are displayed.
2. In the navigation pane, expand the array you want to work with, and chooseProfiles.
The Storage Profile Summary page is displayed.
3. Click New.
The New Storage Profile page is displayed.
4. Specify a name for the new profile, using a maximum of 30 characters includingA-Z, a-z, and _(underscore). Spaces are not allowed in the storage profile name.
5. Specify a description for the new profile, using a maximum of 256 characters.
6. Specify the remaining profile attributes.
7. Review the specified information for the new storage profile. If you are satisfied,click OK.
Modifying a Storage ProfileYou cannot modify the default factory profiles. If a profile’s state is In Use, then youcan change the profile name and description only. A profile is in the In Use statewhen it is associated with a storage pool.
To modify a storage profile:
1. Click Sun StorageTek Common Array Manager.
The navigation pane and the Storage System Summary page are displayed.
Chapter 4 Configuring Storage Profiles 138

2. Expand the array you want to work with, and choose Profiles.
The Storage Profile Summary page is displayed.
3. Click the storage profile that you want to modify.
The Storage Profile Details page for the selected profile is displayed.
4. Make the appropriate modifications, and click OK.
Copying a Storage ProfileYou can copy a profile to another array or other arrays.
To copy a storage profile:
1. Click Sun StorageTek Common Array Manager.
The navigation pane and the Storage System Summary page are displayed.
2. In the navigation pane, expand the array you want to work with, and chooseProfiles.
The Storage Profile Summary page is displayed.
3. Select the check box to the left of the storage profile that you want to copy.
The Copy button is enabled.
4. Click Copy.
The Copy Storage Profile page is displayed.
5. Select the array or arrays to which you want to copy the profile, and click OK.
Deleting a Storage ProfileYou cannot delete the default factory profiles, nor can you delete a profile that is inthe In Use state (associated with a storage pool).
To delete a storage profile:
1. Click Sun StorageTek Common Array Manager.
The navigation pane and the Storage System Summary page are displayed.
139 Sun StorageTek Array Administration Guide • March 2007

2. In the navigation pane, expand the array you want to work with, and chooseProfiles.
The Storage Profile Summary page is displayed.
3. Select the check box to the left of the storage profile that you want to delete.
This enables the Delete button.
4. Click Delete.
The selected storage profile is removed from the Storage Profiles table.
Chapter 4 Configuring Storage Profiles 140

Configuring InitiatorsThis section describes initiators. It contains the following subsections:
■ “About Initiators” on page 141
■ “Displaying Initiator Information” on page 142
■ “Creating an Initiator” on page 142
■ “Deleting an Initiator” on page 143
About InitiatorsAn initiator is the protocol-specific physical port that initiates the I/O exchangeswith the array. In a Fibre Channel (FC) storage area network (SAN), an initiator isthe FC port that is identified by a port World Wide Name (WWN). If a data host isconnected to the array by two host bus adapters (HBAs), the array handles the host astwo different initiators. FC array LUN masking and mapping uses initiator portidentifiers to authenticate storage customers.
When a new initiator is connected to the storage environment, the array detects it,and the management software displays it on the Initiator Summary page. Toconfigure the initiator, select it from the list, add a description to identify it,assigning a host type, and then associate the initiator with a host. When youassociate the host or its host group with a volume, you form a storage domain.
The array firmware retains all created or discovered WWNs until they are manuallydeleted. If the WWNs no longer apply because a server is moved or rezoned, deletethe initiators with the affected WWNs from the Initiator Summary page.
To see the current initiators, go to the Initiator Summary page, as described in“Displaying Initiator Information” on page 142.
141 Sun StorageTek Array Administration Guide • March 2007

Displaying Initiator InformationYou can display summary and detail information about existing initiators. You canalso display summary information about mapped hosts associated with eachinitiator.
To display information on initiators:
1. Click Sun StorageTek Common Array Manager.
The navigation pane and the Storage System Summary page are displayed.
2. In the navigation pane, expand the array you want to work with.
The navigation tree is expanded for that array.
3. Expand Physical Devices and choose Initiators.
The Initiator Summary page is displayed.
4. Click an initiator name for detailed information on that initiator.
The Initiator Details page for the selected initiator is displayed.
5. Go to Related Information and click Mapped Volumes for more informationassociated with the selected initiator.
The Summary page for the selected item is displayed.
Creating an InitiatorWhen you create an initiator, you name it and associate it to one specific host, andset the host type.
You will need the World Wide Name (WWN) for the initiator that you want toassociate with a volume.
To create an initiator:
1. Click Sun StorageTek Common Array Manager.
The navigation pane and the Storage System Summary page are displayed.
2. In the navigation pane, expand the array you want to work with.
The navigation tree is expanded for that array.
Chapter 4 Configuring Initiators 142

3. Expand Physical Devices and choose Initiators.
The Initiator Summary page is displayed.
4. Click New.
The New Initiator page is displayed.
5. Specify a name for the new initiator, using a maximum of 30 characters includingA-Z, a-z, and _(underscore). Spaces are not allowed in the initiator name.
6. Select an existing World Wide Name (WWN) or specify a new WWN for theinitiator.
The list displays only existing WWNs that are currently unassigned. The WWNthat you select is automatically displayed in the Type a New WWN field. If nounassigned WWNs exist, the list is empty and you must enter a new WWN in theType a New WWN field.
7. Select the host with which you want to associate the initiator.
8. Select the host type, usually the data host operating system, of the initiator.
9. Review the specified information. If you are satisfied, click OK.
Deleting an InitiatorTo delete an initiator:
1. Click Sun StorageTek Common Array Manager.
The navigation pane and the Storage System Summary page are displayed.
2. In the navigation pane, expand the array you want to work with.
The navigation tree is expanded for that array.
3. Expand Physical Devices and choose Initiators.
The Initiator Summary page is displayed.
4. Select the initiator that you want to delete.
This enables the Delete button.
5. Click Delete.
6. Confirm the deletion.
The initiator disappears from the Initiator Summary page.
143 Sun StorageTek Array Administration Guide • March 2007

Configuring Host Groups andHostsThis section describes storage host groups and hosts. It contains the followingsubsections:
■ “About Host Groups” on page 144
■ “Managing Host Groups” on page 145
■ “About Hosts” on page 150
■ “Managing Hosts” on page 151
About Host GroupsA host group is collection of one or more data hosts. The hosts in a host group accessa storage array volume when the host group and the specified volume are includedin a storage domain, which is a logical entity used to partition storage.
When you create a host group, the management software automatically includes it inthe default storage domain. The default storage domain contains all hosts and hostgroups without explicit mappings and enables them to share access to volumesassigned a default logical unit number (LUN) mapping during volume creation.When you explicitly map a host group to a specific volume and LUN, the host groupand volume are removed from the default storage domain and create a separatestorage domain, which enables only the hosts in the group to share access to thespecified volume.
A host group can be mapped to up to 256 volumes or snapshots.
A host can be a member of a host group. As a member of the group, the host hasaccess to all volumes that are mapped to the host group, in addition to any volumesthat are mapped directly to the host. For example, suppose that Host 1 is mapped tovolume1, volume2, and volume3 and Host Group A is mapped to volume4 andvolume5. If we add Host 1 to Host Group A, Host 1 now has access to volume1,volume2, volume3, volume4, and volume5.
Chapter 4 Configuring Host Groups and Hosts 144

Managing Host GroupsYou can create host groups, you can add hosts to and remove hosts from a hostgroup, you can map a host group to a volume, and you can display informationabout existing host groups and the mappings associated with them.
Displaying Host Group InformationYou can display summary and detail information on existing host groups. You canalso display summary information about the hosts and volumes that are associatedwith each host group.
To display information on host groups:
1. Click Sun StorageTek Common Array Manager.
The navigation pane and the Storage System Summary page are displayed.
2. In the navigation pane, expand the array you want to work with.
The navigation tree is expanded for that array.
3. Expand Physical Devices and choose Host Groups.
The Host Group Summary page is displayed.
4. Click a host group name for detailed information on that host group.
The Host Group Details page for the selected host group is displayed.
5. Go to Related Information and click any item for more information associatedwith the selected host group.
The Summary page for the selected item is displayed.
145 Sun StorageTek Array Administration Guide • March 2007

Creating a Host GroupWhen you create a host group, it is automatically included in the default storagedomain.
To create a new host group:
1. Click Sun StorageTek Common Array Manager.
The navigation pane and the Storage System Summary page are displayed.
2. In the navigation pane, expand the array you want to work with.
The navigation tree is expanded for that array.
3. Expand Physical Devices and choose Host Groups.
The Host Group Summary page is displayed.
4. Click New.
The New Host Group page is displayed.
5. Specify a name for the new host name, using a maximum of 30 charactersincluding A-Z, a-z, and _(underscore). Spaces are not allowed in the host groupname.
6. Specify which of the available hosts you want to add to the group by double-clicking the host name or names. Click Add All to add all of the hosts defined onthe storage array to the host group.
Note: A host can be in at most one host group at a time. If a host is alreadyincluded in one host group, adding that host to another host group will move thehost from one group to the other.
7. Click OK.
The Host Group Summary page is displayed listing the new host group.
Adding/Removing Host Group MembersA host can be a member of at most one host group. To move a host from one hostgroup to another, you must first remove it from its current host group before you canadd it to another host group.
If a host is mapped to one or more volumes and you move the host from one hostgroup to another, the mappings specific to the host are retained but mappingsassociated with the host group from which the host was moved are not retained.Instead, the host inherits any mappings associated with the new host group to whichit is moved.
Chapter 4 Configuring Host Groups and Hosts 146

If you move a host from a host group that has no mappings and that has hostmembers without specific mappings, the host group and hosts are moved to thedefault storage domain.
For example, suppose that two host groups are created on an array, Host Group 1and Host Group 2. Host Group 1 has three member hosts: Host1, Host2, and Host3.Host Group 1 has no mappings, and Host1 is the only of its hosts with anymappings. Host Group 2 has two member hosts: Host4 and Host5. Host Group 2 ismapped to one volume, and Host4 and Host5 have no specific mappings.
When you move Host1 from Host Group 1 to Host Group 2, the following occurs:
■ Host1 keeps its specific mappings and inherits the mapping associated with HostGroup 2.
■ Host Group 1, Host2, and Host3 become part of the default storage domain,because they have no specific mappings.
■ Host4 and Host5 are unaffected because they have no specific mappings.
To add hosts to or remove hosts from a host group:
1. Click Sun StorageTek Common Array Manager.
The navigation pane and the Storage System Summary page are displayed.
2. In the navigation pane, expand the array you want to work with.
The navigation tree is expanded for that array.
3. Expand Physical Devices and choose Host Groups.
The Host Group Summary page is displayed.
4. Click the name of the host group that you want to modify.
The Host Group Details page is displayed.
5. Click Add/Remove Members.
The Add/Remove Host Group Members page is displayed.
6. Specify which of the available hosts you want to add to or remove from thegroup. To move an individual host, double-click the host name. To add all of theavailable hosts to the host group, click Add All. To remove all of the selectedhosts from the host group, click Remove All.
7. Click OK.
The Host Group Summary page is displayed with the updated information.
147 Sun StorageTek Array Administration Guide • March 2007

Deleting a Host GroupDeleting a host group will also delete all associated hosts and all associatedinitiators. In addition, all associated volume and snapshot mappings will beremoved.
To delete a host group:
1. Click Sun StorageTek Common Array Manager.
The navigation pane and the Storage System Summary page are displayed.
2. In the navigation pane, expand the array you want to work with.
The navigation tree is expanded for that array.
3. Expand Physical Devices and choose Host Groups.
The Host Group Summary page is displayed.
4. Select the check box net to the name of the host group that you want to delete.
This enables the Delete button.
5. Click Delete.
The Host Group Summary page is displayed with the updated information.
Mapping a Host Group to a VolumeBefore you can map a host group to one or more volumes, the host group must haveat least one host associated to at least one initiator.
When you explicitly map a host group to a volume, the management softwareremoves the host group and specified volume from the default storage domain andcreates a separate storage domain.
To map a host group to one or more volumes:
1. Click Sun StorageTek Common Array Manager.
The navigation pane and the Storage System Summary page are displayed.
2. In the navigation pane, expand the array you want to work with.
The navigation tree is expanded for that array.
3. Expand Physical Devices and choose Host Groups.
The Host Group Summary page is displayed.
Chapter 4 Configuring Host Groups and Hosts 148

4. Click the name of the host group that you want to map.
The Host Group Details page is displayed.
5. Click Map.
The Map Host Group page is displayed.
Note: The Map button is disabled when 256 volumes are assigned to the selectedhost group.
6. Select the check box next to the names of one or more volumes that you want tomap to this host group.
7. Specify the logical unit number (LUN) (0 to 255 for the Sun StorEdge 6130 andSun StorageTek 6140 arrays; 0 to 31 for the Sun StorageTek 6540 and SunStorageTek 2500 series arrays) for each volume that you want to map to this hostgroup.
8. Click OK.
The management software maps the volume to the host group and displays theHost Group Details page with the updated information.
Unmapping a Host Group From a VolumeUnmapping a host group from a volume removes the mapping between the volumeand the host group (including all host group members). The volume is moved to anunmapped state. If this mapping was the last mapping to the host group and thereare no other volume mappings to the hosts in the host group, this host group and allits members become part of the default storage domain.
To unmap a host group from a volume:
1. Click Sun StorageTek Common Array Manager.
The navigation pane and the Storage System Summary page are displayed.
2. In the navigation pane, expand the array you want to work with.
The navigation tree is expanded for that array.
3. Expand Physical Devices and choose Host Groups.
The Host Group Summary page is displayed.
4. Click the name of the host group that you want to unmap.
The Host Group Details page is displayed.
5. Click Unmap.
The Mapped Volumes and Snapshots page is displayed.
149 Sun StorageTek Array Administration Guide • March 2007

6. Select the check box next to volume or volumes that you want to unmap from thishost group.
7. Click OK.
About HostsA host represents a data host, which is a server that is attached to the storage arrayand generates data to be saved in a storage array. The data host sends data to thestorage array using a Fibre Channel (FC) connection. A host must have one or moreassociated initiators to enable you to map volumes to the host.
A host can access a storage array volume when both the host and the volume areincluded in a storage domain, which is a logical entity used to partition storage.
When you create a host, the management software automatically includes it in thedefault storage domain. The default storage domain contains all hosts and hostgroups without explicit mappings and enables them to share access to volumesassigned a default logical unit number (LUN) mapping during volume creation.When you explicitly map a host to a specific volume and LUN, the host and volumeare removed from the default storage domain and create a separate storage domain,which enables only that host to access the specified volume.
An individual host can be explicitly mapped to one volume. A host can also be amember of a host group. As a member of the group it has access to all volumes thatare mapped to the hostgroup, in addition to any volumes that are mapped directlyto the host. For example, Host 1 is mapped to volume1, volume2, and volume3 andHostgroup A is mapped to volume4 and volume5. If we add Host 1 to Hostgroup A,Host 1 now has access to volume1, volume2, volume3, volume4, and volume5.
Chapter 4 Configuring Host Groups and Hosts 150
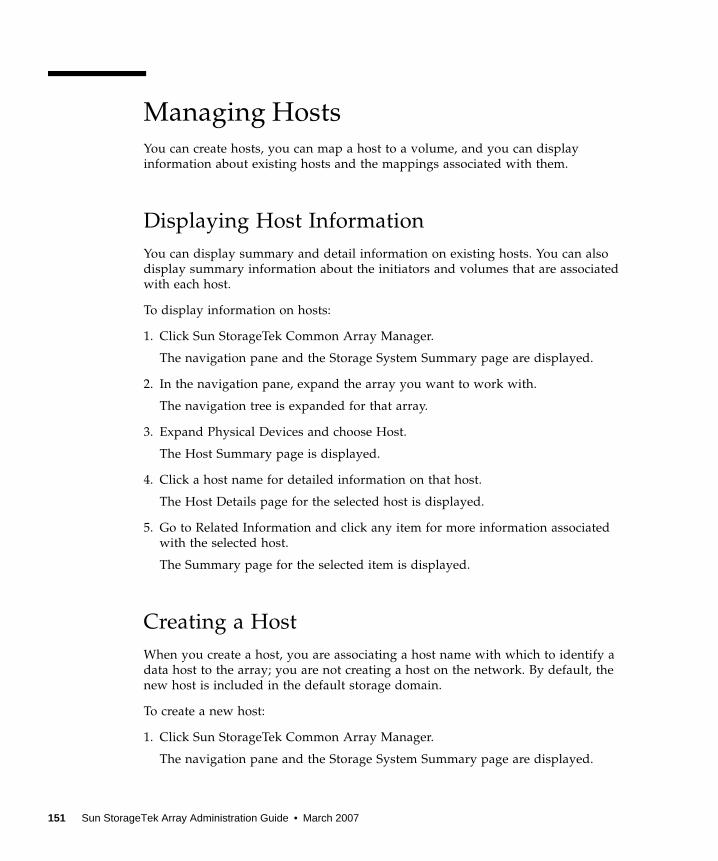
Managing HostsYou can create hosts, you can map a host to a volume, and you can displayinformation about existing hosts and the mappings associated with them.
Displaying Host InformationYou can display summary and detail information on existing hosts. You can alsodisplay summary information about the initiators and volumes that are associatedwith each host.
To display information on hosts:
1. Click Sun StorageTek Common Array Manager.
The navigation pane and the Storage System Summary page are displayed.
2. In the navigation pane, expand the array you want to work with.
The navigation tree is expanded for that array.
3. Expand Physical Devices and choose Host.
The Host Summary page is displayed.
4. Click a host name for detailed information on that host.
The Host Details page for the selected host is displayed.
5. Go to Related Information and click any item for more information associatedwith the selected host.
The Summary page for the selected item is displayed.
Creating a HostWhen you create a host, you are associating a host name with which to identify adata host to the array; you are not creating a host on the network. By default, thenew host is included in the default storage domain.
To create a new host:
1. Click Sun StorageTek Common Array Manager.
The navigation pane and the Storage System Summary page are displayed.
151 Sun StorageTek Array Administration Guide • March 2007
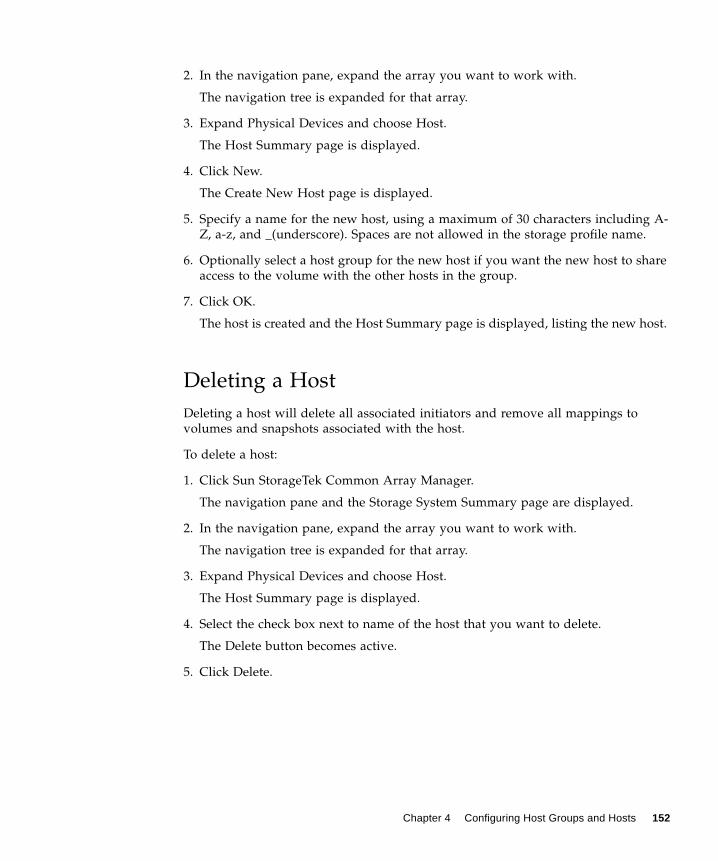
2. In the navigation pane, expand the array you want to work with.
The navigation tree is expanded for that array.
3. Expand Physical Devices and choose Host.
The Host Summary page is displayed.
4. Click New.
The Create New Host page is displayed.
5. Specify a name for the new host, using a maximum of 30 characters including A-Z, a-z, and _(underscore). Spaces are not allowed in the storage profile name.
6. Optionally select a host group for the new host if you want the new host to shareaccess to the volume with the other hosts in the group.
7. Click OK.
The host is created and the Host Summary page is displayed, listing the new host.
Deleting a HostDeleting a host will delete all associated initiators and remove all mappings tovolumes and snapshots associated with the host.
To delete a host:
1. Click Sun StorageTek Common Array Manager.
The navigation pane and the Storage System Summary page are displayed.
2. In the navigation pane, expand the array you want to work with.
The navigation tree is expanded for that array.
3. Expand Physical Devices and choose Host.
The Host Summary page is displayed.
4. Select the check box next to name of the host that you want to delete.
The Delete button becomes active.
5. Click Delete.
Chapter 4 Configuring Host Groups and Hosts 152

Mapping a Host to a VolumeUp to 256 volumes can be explicitly mapped to an individual host You can alsoinclude the same host in one or more host groups which are mapped to othervolumes.
Before you map a host to a volume, make sure that it is associated with an initiator.
To map a host to a volume:
1. Click Sun StorageTek Common Array Manager.
The navigation pane and the Storage System Summary page are displayed.
2. In the navigation pane, expand the array you want to work with.
The navigation tree is expanded for that array.
3. Expand Physical Devices and choose Host.
The Host Summary page is displayed.
4. Click the name of the host that you want to map.
The Host Details page is displayed.
5. Click Map.
The Map Host page is displayed.
Note: The Map button is disabled when maximum number of volumes areassigned to the selected host.
6. Click the name of the volume that you want to map to the host.
7. Specify the logical unit number (LUN) (0 to 255 for Sun StorEdge 6130 and SunStorageTek 6140 arrays, and 0 to 31 for the Sun StorageTek 6540 and SunStorageTek 2500 series arrays) of this volume to map to the host.
8. Click OK.
A confirmation message is displayed.
Unmapping a Host From a VolumeUnmapping a host from a volume removes the mapping between the host and thevolume. The volume is moved to the unmapped state.
If this mapping was the last mapping to the host and the host is not a member of ahost group, this host becomes part of the default storage domain.
153 Sun StorageTek Array Administration Guide • March 2007

If this mapping was the last mapping to the host and the host is member of a hostgroup and there are no other explicit mappings to the host group or any other hostin the host group, then this host group and all of its members become part of thedefault storage domain.
To unmap a host from a volume:
1. Click Sun StorageTek Common Array Manager.
The navigation pane and the Storage System Summary page are displayed.
2. In the navigation pane, expand the array you want to work with.
The navigation tree is expanded for that array.
3. Expand Physical Devices and choose Host.
The Host Summary page is displayed.
4. Click the name of the host that you want to unmap.
The Host Details page is displayed.
5. Click Unmap.
The Mapped Volumes and Snapshots page is displayed.
6. Click the volume that you want to unmap from this host.
7. Click OK.
A confirmation message is displayed.
Chapter 4 Configuring Host Groups and Hosts 154

Managing Trays and DiskDrivesThis section describes storage trays and disk drives. It contains the followingsubsections:
■ “About Trays and Disk Drives” on page 155
■ “Displaying Storage Utilization by Drive Type” on page 157
■ “Displaying General Controller Information” on page 158
■ “Displaying Controller Performance Statistics” on page 158
■ “Testing Controller Communication” on page 159
■ “Displaying Port Information” on page 159
■ “Displaying Tray Information” on page 160
■ “Displaying Disk Information” on page 160
■ “Managing Hot-Spare Drives” on page 161
About Trays and Disk DrivesStorage trays are identified according to whether they contain a redundant array ofindependent disks (RAID) controller:
■ A controller tray contains two redundant array of independent disks (RAID)controllers, which operate independently and provide failover capability for thedata and management paths. The controller tray provides RAID functionality andcaching. The controller tray for the Sun StorEdge 6130, Sun StorageTek 6140, andSun StorageTek 2500 series arrays also provides disk storage. The Sun StorageTek6540 array disk storage is provided by expansion trays only.
■ An expansion tray is a storage tray that has disks only and no controller. Anexpansion tray is cabled directly to a controller tray and cannot operateindependently.
155 Sun StorageTek Array Administration Guide • March 2007

The following table lists the number of disk drives supported per array.
When a drive is installed, the drive and tray slot designations are set automatically.Disk drives are numbered consecutively, starting at 1, from left to right.
For the Sun StorageTek 6140 array, you can use either 4-gigabyte or 2-gigabyte FibreChannel (FC) or Serial Advanced Technology Attachment (SATA) disk drives.Although you can mix drive types in the same tray, for optimal performance Sunrecommends that all disk drives in a tray must be of the same type.
For the Sun StorEdge 6130 and Sun StorageTek 6540 arrays, you can use 2 gigabyteFibre Channel (FC) or Serial Advanced Technology Attachment (SATA) disk drives.All disk drives in a tray must be of the same type.
For the Sun StorEdge 2500 Series storage arrays, you can use Serial Attached SCSI(SAS) disk drives.
TABLE 4-11
Array Minimum Numberof Disk Drives
Maximum Numberof Disk Drives
Maximum Numberof Trays PerCabinet
Maximum Numberof Disk Drives PerCabinet
Sun StorageTek6140 Array
5 16 8 128
Sun StorEdge6130 Array
5 14 8 112
Sun StorageTek6540 Array
5 16 14 224
Sun StorageTek2500 SeriesArrays
2 12 3 36
Chapter 4 Managing Trays and Disk Drives 156
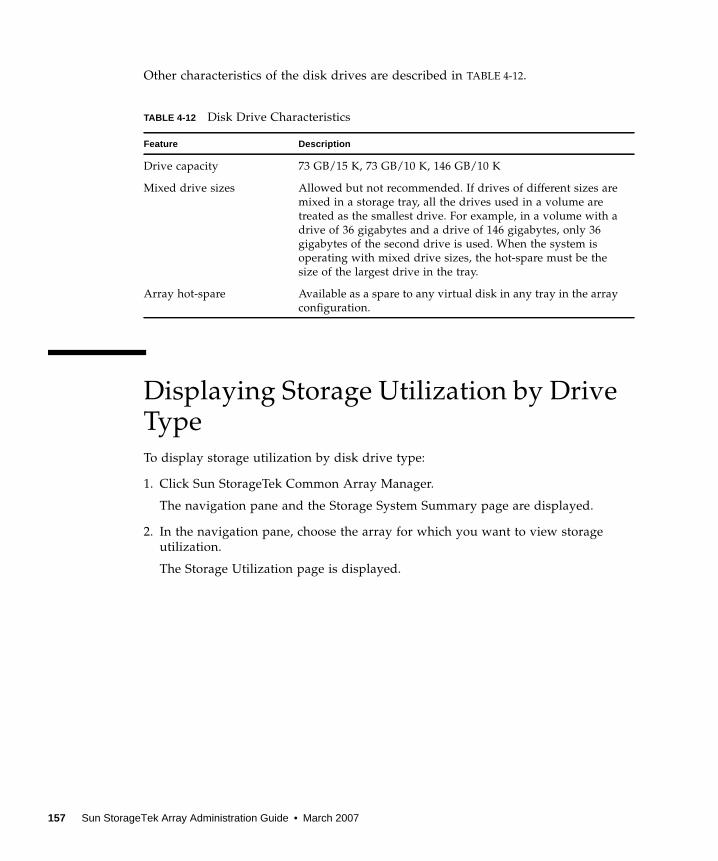
Other characteristics of the disk drives are described in TABLE 4-12.
Displaying Storage Utilization by DriveTypeTo display storage utilization by disk drive type:
1. Click Sun StorageTek Common Array Manager.
The navigation pane and the Storage System Summary page are displayed.
2. In the navigation pane, choose the array for which you want to view storageutilization.
The Storage Utilization page is displayed.
TABLE 4-12 Disk Drive Characteristics
Feature Description
Drive capacity 73 GB/15 K, 73 GB/10 K, 146 GB/10 K
Mixed drive sizes Allowed but not recommended. If drives of different sizes aremixed in a storage tray, all the drives used in a volume aretreated as the smallest drive. For example, in a volume with adrive of 36 gigabytes and a drive of 146 gigabytes, only 36gigabytes of the second drive is used. When the system isoperating with mixed drive sizes, the hot-spare must be thesize of the largest drive in the tray.
Array hot-spare Available as a spare to any virtual disk in any tray in the arrayconfiguration.
157 Sun StorageTek Array Administration Guide • March 2007

Displaying General ControllerInformationTo display general information on controllers:
1. Click Sun StorageTek Common Array Manager.
The navigation pane and the Storage System Summary page are displayed.
2. In the navigation pane, expand the array you want to work with.
The navigation tree is expanded for that array.
3. Expand Physical Devices and choose Controllers.
The Controller Summary page is displayed.
Displaying Controller PerformanceStatisticsTo display information about the controllers’ performance:
1. Click Sun StorageTek Common Array Manager.
The navigation pane and the Storage System Summary page are displayed.
2. In the navigation pane, expand the array you want to work with.
The navigation tree is expanded for that array.
3. Expand Physical Devices and choose Controllers.
The Controller Summary page is displayed.
4. Click View Performance Statistics.
The Performance Statistics Summary - Controllers page is displayed.
Chapter 4 Managing Trays and Disk Drives 158

Testing Controller CommunicationYou can determine whether the management host has direct Ethernet connectivity toa specific controller on an array.
To test the communication between the management host and the array controller:
1. Click Sun StorageTek Common Array Manager.
The navigation pane and the Storage System Summary page are displayed.
2. In the navigation pane, expand the array you want to work with.
The navigation tree is expanded for that array.
3. Expand Physical Devices and choose Controllers.
The Controller Summary page is displayed.
4. Click Test Communications.
An informational message is displayed that identifies the controller, the Ethernetport, the IP address, and whether the array has passed or failed thecommunication test.
Displaying Port InformationYou can display summary and detail information about the ports.
To display information on the ports:
1. Click Sun StorageTek Common Array Manager.
The navigation pane and the Storage System Summary page are displayed.
2. In the navigation pane, expand the array you want to work with.
The navigation tree is expanded for that array.
3. Expand Physical Devices and choose Ports.
The Port Summary page is displayed.
4. Click a port name for detailed information on that port.
The Port Details page for the selected port is displayed.
159 Sun StorageTek Array Administration Guide • March 2007

Displaying Tray InformationYou can display summary and detail information about existing storage trays. Youcan also display summary information about the disks that are associated with eachtray.
To display information on trays:
1. Click Sun StorageTek Common Array Manager.
The navigation pane and the Storage System Summary page are displayed.
2. In the navigation pane, expand the array you want to work with.
The navigation tree is expanded for that array.
3. Expand Physical Devices and choose Trays.
The Tray Summary page is displayed.
4. Click a tray name for detailed information on that tray.
The Tray Details page for the selected tray is displayed.
5. Go to Related Information and click any item for additional informationassociated with the selected tray.
The Summary page for the selected item is displayed.
Displaying Disk InformationYou can display summary and detail information on existing disks.
To display information on disks:
1. Click Sun StorageTek Common Array Manager.
The navigation pane and the Storage System Summary page are displayed.
2. In the navigation pane, expand the array you want to work with.
The navigation tree is expanded for that array.
3. Expand Physical Devices and choose Disks.
The Disk Summary page is displayed.
Chapter 4 Managing Trays and Disk Drives 160

4. Click a disk name for detailed information on that disk.
The Disk Details page for the selected disk is displayed.
5. Go to Related Information and click any item for more information associatedwith the selected disk.
The Summary page for the selected item is displayed.
Managing Hot-Spare DrivesThis section describes how to manage hot-spare drives. It includes the followingsubsections:
■ “About Hot-Spare Drives” on page 161
■ “Planning Hot-Spares” on page 162
■ “Assigning and Unassigning Hot-Spares Manually” on page 162
■ “Assigning and Unassigning Hot-Spares Automatically” on page 163
About Hot-Spare DrivesA hot-spare is a disk drive, containing no data, that acts as a standby in the storagearray in case a drive fails in a RAID-1, RAID-3, or RAID-5 volume. The hot-spareadds another level of redundancy to the storage array. The array supports up to 15hot-spares.
If a hot-spare is available when a disk drive fails, the hot-spare is automaticallysubstituted for the failed disk drive, without intervention. The controller usesredundancy data to reconstruct the data from the failed drive onto the hot-spare.When you have physically replaced the failed disk drive, the data from the hot-spareis copied back to the replacement drive. This is called copyback.
If you do not have a hot-spare, you can still replace a failed disk drive while thestorage array is operating. If the disk drive is part of a RAID-1, RAID-3, or RAID-5volume group, the controller uses redundancy data to automatically reconstruct thedata onto the replacement disk drive. This is called reconstruction.
161 Sun StorageTek Array Administration Guide • March 2007

Planning Hot-SparesA disk drive should be assigned as a hot-spare only if it meets the following criteria:
■ The hot-spare must have a capacity that is equal to or greater than the capacity ofthe largest drive on the storage array. If a hot-spare is smaller than a failedphysical disk drive, the hot-spare cannot be used to rebuild the data from thefailed physical disk drive.
■ The hot-spare drive must be the same type of physical disk as the physical diskdrive that failed. For example, a SATA hot-spare cannot replace a Fibre Channelphysical disk drive.
■ The disk drive’s role must be unassigned, its state must be enabled, and it musthave an optimal status.
Information about individual disk drives is available on the Disk Summary page.
Assigning and Unassigning Hot-Spares ManuallyTo manually assign or unassign a hot-spare:
1. Click Sun StorageTek Common Array Manager.
The navigation pane and the Storage System Summary page are displayed.
2. In the navigation pane, expand the array you want to work with.
The navigation tree is expanded for that array.
3. Expand Physical Devices and choose Disks.
The Disk Summary page is displayed.
4. Select the disk drive you want to assign or unassign as a hot-spare drive.
5. Do one of the following:
■ To assign the selected disk as a hot-spare, click Assign Hot-Spare.
■ To unassign the selected disk as a hot-spare, click Unassign Hot-Spare.
The Disk Summary page is displayed with the updated information.
Chapter 4 Managing Trays and Disk Drives 162

Assigning and Unassigning Hot-SparesAutomaticallyWhen the management software assigns the hot-spares, it balances the request forspares across all trays within the array and ensures that the hot-spare drive is of thesame type as the other disks in the same tray. It also verifies that the disk drives areunassigned, enabled, and in the optimal state.
To enable the management software to assign or unassign a hot-spare:
1. Click Sun StorageTek Common Array manager.
The navigation pane and the Storage System Summary page is displayed.
2. In the navigation pane, expand the array for which you want to assign a hot-spare.
The navigation tree is expanded for that array.
3. Choose Administration.
The Administration page is displayed.
4. In the Array Hot Spares Change field, select the number of hot-spares that youwant to assign to this array.
5. Click OK.
The management software assigns or unassigns the specified number of hot-spares, balancing the selection among trays within the array.
163 Sun StorageTek Array Administration Guide • March 2007

Configuring Storage DomainsThis section describes storage domains. It contains the following subsections:
■ “About Storage Domains” on page 164
■ “Preparing to Create a Storage Domain” on page 165
■ “Determining How to Create a Storage Domain” on page 165
■ “Enabling the Storage Domain Feature” on page 166
■ “About Performing Mapping Functions” on page 167
About Storage DomainsA storage domain, also called a set or a storage partition, is a logical entity used topartition storage. To create a storage domain after volume creation, you must definea single host or a collection of hosts (called a host group) that will access the storagearray. Then, you will need to define a volume-to-logical unit number (LUN)mapping, which will allow you to specify the host or host group that will haveaccess to a particular volume in your storage array. The storage domain designatesthat only the selected host or host group has access to that particular volumethrough the assigned LUN.
When the storage domain consists of a volume mapped to a host group, it can enablehosts with different operating systems (heterogeneous hosts), to share access to astorage volume. A host within a host group can be mapped separately to a differentvolume.
A storage domain can contain up to 256 volumes. A volume can be included in onlyone storage domain and each LUN, from 0 to 255, can only be used once per storagedomain.
Note: Not all operating systems support up to 256 LUN IDs. See the documentationfor your operating system for more information.
A default storage domain exists to include the following:
■ All host groups and hosts that are not explicitly mapped to a volume.
■ All volumes that have a default volume-to-LUN mapping assigned.
■ All automatically detected initiators.
Any volumes within the default storage domain can be accessed by all hosts andhost groups within that storage domain.
Chapter 4 Configuring Storage Domains 164

Creating an explicit volume-to-LUN mapping for any host or host group andvolume within the default storage domain causes the management software toremove the specified host or host group and volume from the default storagedomain and create a new separate storage domain.
The array management software supplies eight storage domains. You must obtain alicense for additional storage domain support.
Preparing to Create a Storage DomainYou create a storage domain by explicitly mapping a volume or snapshot to a host orhost group. Before creating a storage domain, you should perform the followingtasks:
1. Create one or more hosts.
2. Create one or more initiators for each host.
A host included in a storage domain, either as an individual host or as a memberof a host group, can have access to storage volumes only if it is associated withone or more initiators.
3. Create a host group, if needed, and add one or more hosts to it.
4. Create one or more volumes.
Determining How to Create a StorageDomainThere are several ways to create a storage domain:
■ During standard volume or snapshot creation
When you create a volume or snapshot, the wizard prompts you to map thevolume either now or later.
Create a storage domain at this time by mapping the volume to either the defaultstorage domain or to hosts or hosts that you have already created.
165 Sun StorageTek Array Administration Guide • March 2007
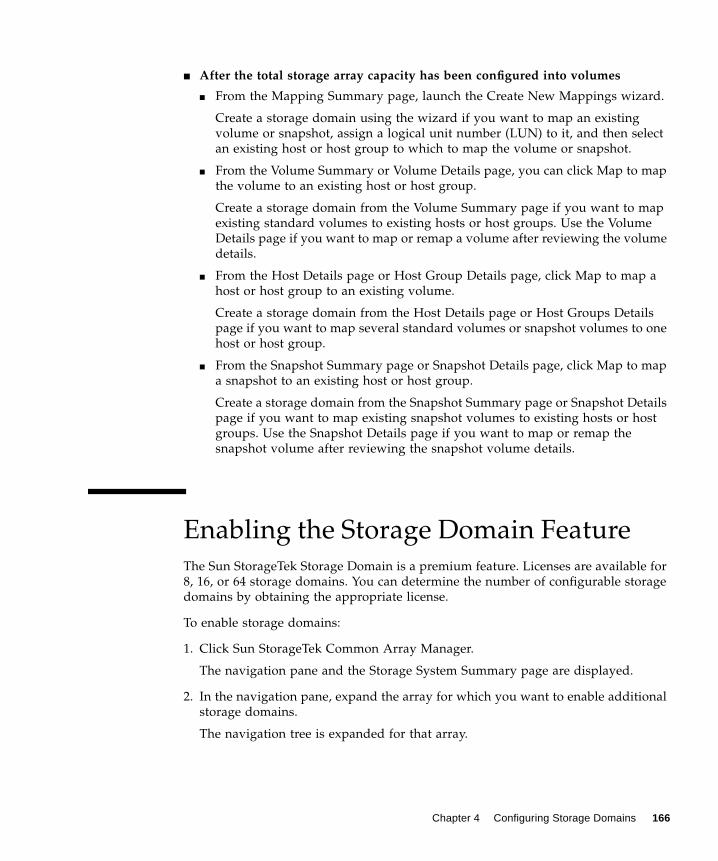
■ After the total storage array capacity has been configured into volumes
■ From the Mapping Summary page, launch the Create New Mappings wizard.
Create a storage domain using the wizard if you want to map an existingvolume or snapshot, assign a logical unit number (LUN) to it, and then selectan existing host or host group to which to map the volume or snapshot.
■ From the Volume Summary or Volume Details page, you can click Map to mapthe volume to an existing host or host group.
Create a storage domain from the Volume Summary page if you want to mapexisting standard volumes to existing hosts or host groups. Use the VolumeDetails page if you want to map or remap a volume after reviewing the volumedetails.
■ From the Host Details page or Host Group Details page, click Map to map ahost or host group to an existing volume.
Create a storage domain from the Host Details page or Host Groups Detailspage if you want to map several standard volumes or snapshot volumes to onehost or host group.
■ From the Snapshot Summary page or Snapshot Details page, click Map to mapa snapshot to an existing host or host group.
Create a storage domain from the Snapshot Summary page or Snapshot Detailspage if you want to map existing snapshot volumes to existing hosts or hostgroups. Use the Snapshot Details page if you want to map or remap thesnapshot volume after reviewing the snapshot volume details.
Enabling the Storage Domain FeatureThe Sun StorageTek Storage Domain is a premium feature. Licenses are available for8, 16, or 64 storage domains. You can determine the number of configurable storagedomains by obtaining the appropriate license.
To enable storage domains:
1. Click Sun StorageTek Common Array Manager.
The navigation pane and the Storage System Summary page are displayed.
2. In the navigation pane, expand the array for which you want to enable additionalstorage domains.
The navigation tree is expanded for that array.
Chapter 4 Configuring Storage Domains 166

3. Expand Administration and choose Licensing.
The Licensable Feature Summary page is displayed.
4. Click Add License.
The Add License page is displayed.
5. Select the type of storage domain license that you have purchased from theLicense Type menu.
6. Enter the version number and the key digest, and click OK.
A message indicates that the operation was successful, and the Licensable FeatureSummary page displays the updated information.
About Performing Mapping FunctionsThe management software enables you to manage mappings from the MappingSummary page. However, it also provides several other locations from which youcan perform specific mapping functions or view mappings.
TABLE 4-13shows the locations from which you can perform mapping operations.
TABLE 4-13 Mapping Matrix
Object to BeMapped/Unmapped Source of Mapping or Unmapping Mapping Location
Volume Host or host group Map Volume pageMapping Summary page
Snapshot Host or host group Map Snapshot pageMapping Summary page
Host Volume or snapshot Map Host pageMapping Summary page
Host group Volume or snapshot Map Host Group pageMapping Summary page
167 Sun StorageTek Array Administration Guide • March 2007

Displaying All Mappings on the ArrayTo display all mappings on the array:
1. Click Sun StorageTek Common Array Manager.
The navigation pane and the Storage System Summary page are displayed.
2. In the navigation pane, expand the array for which you want to display allmappings and choose Mappings.
The Mapping Summary page lists all mappings on the array.
Creating a MappingThe management software enables you to map a volume or snapshot to a host orhost group from the Mapping Summary page. In addition, you can perform morespecific mappings from the following locations:
■ Volume Summary page
■ Snapshot Summary page
■ Host Group Summary page
■ Host Summary page
The process of mapping a volume or snapshot to a host or host group creates astorage domain
To map a volume or snapshot to a host or host group:
1. Click Sun StorageTek Common Array Manager.
The navigation pane and the Storage System Summary page are displayed.
2. In the navigation pane, expand the array for which you want to create a mappingand choose Mappings.
The Mapping Summary page lists all mappings on the array.
3. Click Map.
The Create New Mappings wizard is displayed.
4. Follow the steps in the wizard.
Click the Help tab in the wizard for more information.
The access volume, which is listed only on the Mapping Summary page and iscreated on the Sun StorageTek 6140, Sun StorageTek 6540, and Sun StorageTek2500 series arrays for communication between in-band management software andthe storage array, is mapped to LUN 31. Since the Common Array Manager does
Chapter 4 Configuring Storage Domains 168

not use in-band management for the arrays it manages and the access volume isnot otherwise usable by other hosts, Sun recommends that you delete themappings to the access volume.
169 Sun StorageTek Array Administration Guide • March 2007

170
CHAPTER 5
Performing MonitoringTasks
This chapter describes troubleshooting. It contains the following subsection:
■ “Monitoring Alarms and Events” on page 171
■ “Monitoring Devices” on page 177

Monitoring Alarms and EventsThis chapter describes alarms and events. It contains the following sections:
■ “About Alarms and Events” on page 171
■ “About Alarm Management” on page 171
■ “Displaying Alarm Information” on page 172
■ “Acknowledging Alarms” on page 174
■ “Reopening Acknowledged Alarms” on page 175
■ “Deleting Alarms” on page 175
■ “Displaying Event Information” on page 176
About Alarms and EventsEvents are generated to signify a health transition in a monitored device or devicecomponent. Events that require action are classified as alarms.
There are four event severity levels:
■ Down – Identifies a device or component as not functioning and in need ofimmediate service
■ Critical – Identifies a device or component in which a significant error conditionis detected that requires immediate service
■ Major – Identifies a device or component in which a major error condition isdetected and service may be required
■ Minor – Identifies a device or component in which a minor error condition isdetected or an event of significance is detected
About Alarm ManagementAn alarm that has the Auto Clear function set will be automatically deleted from thealarms page when the underlying fault has been addressed and corrected. Todetermine whether an alarm will be automatically deleted when it has beenresolved, view the alarm summary page and examine the Auto Clear column. If theAuto Clear column is set to yes, then that alarm will be automatically deleted whenthe fault has been corrected, otherwise, the alarm will need to be manually removedafter a service operation has been completed.
171 Sun StorageTek Array Administration Guide • March 2007

If the Auto Clear function is set to No, when resolved that alarm will not beautomatically deleted from the Alarms page and you must manually delete thatalarm from the Alarms page.
Displaying Alarm InformationThis section describes how to display alarm information. It contains the followingsubsections:
■ “Displaying an Alarm Summary” on page 172
■ “Displaying Alarm Details” on page 173
■ “Displaying Aggregated Events” on page 173
Displaying an Alarm SummaryYou can display alarms for all arrays listed or for an individual array.
Displaying an Alarm Summary for All Arrays
To display alarm summary information for all arrays:
1. Click Sun StorageTek Common Array Manager.
The navigation pane and the Storage System Summary page are displayed.
2. In the navigation pane, choose Alarms.
The Alarm Summary page for all arrays is displayed.
Displaying an Alarm Summary for an Individual Array
To display an alarm summary for an individual array:
1. Click Sun StorageTek Common Array Manager.
The navigation pane and the Storage System Summary page are displayed.
2. Expand the array for which you want to view alarms, and choose Alarms belowit.
The Alarm Summary page for that array is displayed.
Chapter 5 Monitoring Alarms and Events 172

Displaying Alarm DetailsTo display detailed information about an alarm:
1. Click Sun StorageTek Common Array Manager.
The navigation pane and the Storage System Summary page are displayed.
2. Display the Alarm Summary page by doing one of the following in the navigationpane:
■ To see the Alarm Summary page for all arrays, choose Alarms.
■ To see alarms for a particular array, expand that array and choose Alarmsbelow it.
3. Click Details for the alarm for which you want to display detailed information.
The Alarm Details page is displayed for the selected alarm.
Displaying Aggregated EventsTo display aggregated events for an alarm:
1. Click Sun StorageTek Common Array Manager.
The navigation pane and the Storage System Summary page are displayed.
2. Display the Alarm Summary page by doing one of the following in the navigationpane:
■ To see the Alarm Summary page for all arrays, choose Alarms.
■ To see alarms for a particular array, expand that array and choose Alarmsbelow it.
3. Click Details for the alarm for which you want to display detailed information.
The Alarm Details page is displayed for the selected alarm.
4. Click View Aggregated Events.
A list of all events associated with the displayed alarm is displayed.
173 Sun StorageTek Array Administration Guide • March 2007

Acknowledging AlarmsWhen an alarm is generated, it remains open in the Alarm Summary page until youacknowledge it. Acknowledging an alarm is a way for administrators to indicate thatan alarm has been seen and evaluated; it does not affect if or when an alarm will becleared.
To acknowledge one or more alarms:
1. Click Sun StorageTek Common Array Manager.
The navigation pane and the Storage System Summary page are displayed.
2. Display the Alarm Summary page by doing one of the following in the navigationpane:
■ To see the Alarm Summary page for all arrays, choose Alarms.
■ To see alarms for a particular array, expand that array and choose Alarmsbelow it.
3. Select the check box for each alarm you want to acknowledge, and clickAcknowledge.
The Acknowledge Alarms confirmation window is displayed.
4. Enter an identifying name to be associated with this action, and clickAcknowledge.
The Alarm Summary page is redisplayed, and the state of the acknowledgedalarms is displayed as Acknowledged.
Note: You can also acknowledge an alarm from the Alarm Details page.
Chapter 5 Monitoring Alarms and Events 174

Reopening Acknowledged AlarmsTo reopen one or more previously acknowledged alarms:
1. Click Sun StorageTek Common Array Manager.
The navigation pane and the Storage System Summary page are displayed.
2. Display the Alarm Summary page by doing one of the following in the navigationpane:
■ To see the Alarm Summary page for all arrays, choose Alarms.
■ To see alarms for a particular array, expand that array and choose Alarmsbelow it.
3. Select the check box for each acknowledged alarm you want to reopen, and clickReopen.
The Reopen Alarms confirmation window is displayed.
4. Enter an identifying name to be associated with this action, and click Reopen.
The Alarm Summary page is redisplayed, and the state of the reopened alarms isdisplayed as Open.
Note: You can also reopen an alarm from the Alarm Details page.
Deleting AlarmsWhen you delete an open or acknowledged alarm, it is permanently removed fromthe Alarm Summary page.
Note: You cannot delete alarms which are designated as Auto Clear alarms. Thesealarms are removed from the Alarm Summary page either when the array isremoved from the list of managed arrays or when the condition related to theproblem is resolved.
175 Sun StorageTek Array Administration Guide • March 2007

To delete one or more alarms:
1. Click Sun StorageTek Common Array Manager.
The navigation pane and the Storage System Summary page are displayed.
2. Display the Alarm Summary page by doing one of the following in the navigationpane:
■ To see the Alarm Summary page for all arrays, choose Alarms.
■ To see alarms for a particular array, expand that array and choose Alarmsbelow it.
3. Select the check box for each acknowledged alarm you want to delete, and clickDelete.
The Delete Alarms confirmation window is displayed.
4. Click OK.
The Alarm Summary page is redisplayed without the deleted alarms.
Displaying Event InformationTo gather additional information about an alarm, you can display the event log toview the underlying events on which the alarm is based.
To display event log information:
1. Click Sun StorageTek Common Array Manager.
The navigation pane and the Storage System Summary page are displayed.
2. In the navigation pane, expand the array for which you want to view the eventlog.
The navigation tree is expanded for that array.
3. Expand Troubleshooting and choose Events.
The Events page displays a summary of all events in the system event log.
4. To see detailed information about an event, click Details in the row thatcorresponds to the event.
The Event Details page is displayed for the selected event.
Chapter 5 Monitoring Alarms and Events 176

Monitoring DevicesThis chapter describes how to monitor and manage devices. It contains the followingsection:
■ “Displaying Field-Replaceable Unit (FRU) Information” on page 177
Displaying Field-Replaceable Unit(FRU) InformationThis section describes how to display device information. It contains the followingsubsections:
■ “Displaying FRU Types” on page 177
Displaying FRU TypesTo display summary information about all field-replaceable units (FRUs):
1. Click Sun StorageTek Common Array Manager.
The navigation pane and the Storage System Summary page are displayed.
2. Expand the array for which you want to display FRU information.
The navigation tree is expanded for that array.
3. Expand Troubleshooting and choose FRUs.
The page is displayed for the selected array.
4. Choose the type of FRU for which you want detailed information.
The Component Summary page for the selected FRU type is displayed.

178
CHAPTER 6
Troubleshooting theSystem
This chapter describes troubleshooting. It contains the following subsection:
■ “Troubleshooting With the Software” on page 179
■ “Hardware Troubleshooting Basics” on page 185

Troubleshooting With theSoftwareThis chapter describes troubleshooting procedures. It contains the followingsections:
■ “Testing an Email Address” on page 179
■ “Running a Diagnostic Test on a Device” on page 180
■ “Resetting a Controller” on page 183
■ “Viewing Log Files” on page 181
■ “Resetting a Storage Array Configuration” on page 181
■ “Redistributing Volumes” on page 182
■ “Resetting a Controller” on page 183
■ “Reviving Virtual Disks and Disk Drives” on page 184
Testing an Email AddressTo verify that the monitoring and diagnostic software can successfully send email toa specific email address:
1. Click Sun StorageTek Common Array Manager.
The navigation pane and the Storage System Summary page are displayed.
2. In the navigation pane, expand General Configuration and choose Notification.
The Notification Setup page is displayed.
3. Click Test Email.
The Send Test Email window is displayed.
4. In the To field, specify the email address you want to test.
5. (Optional) Specify a test message in the Message field.
6. Click Send.
If the message is successfully sent, the following message is displayed:
The test email has been sent successfully.
179 Sun StorageTek Array Administration Guide •March 2007

7. Click Close to close the Send Test Email window.
8. Check email to verify that the test message was received.
Running a Diagnostic Test on a DeviceTo run a diagnostic test on a device:
1. Click Sun StorageTek Common Array Manager.
The navigation pane and the Storage System Summary page are displayed.
2. In the navigation pane, expand the array on which you want to run a diagnostictest and choose Troubleshooting.
The Troubleshooting Test List page is displayed.
3. Select the diagnostic test you want to run and click Run Test.
The Test Setup page is displayed for the selected diagnostic test.
Note: When running diagnostics on a Sun StorageTek 6130, 6140, 6540 or 2500series array, both controllers must be installed and online.
4. Complete the diagnostic setup options and click Run.
The Job Details - Diagnostics page displays while the test executes. The TestResults page is displayed. Results are added when the test is completed.
Note: Refer to the man pages for information about command line interface (CLI)diagnostic test options.
Reference: Array DiagnosticsThe following diagnostic options are available:
■ Controller Read Test
The Read Test initiates a read command as it would be sent over an I/O datapath. It compares data with a known, specific data pattern, checking for dataintegrity and redundancy errors. If the read command is unsuccessful or the datacompared is not correct, the controller is considered to be in error and is failed.
180 Sun StorageTek Array Administration Guide •March 2007
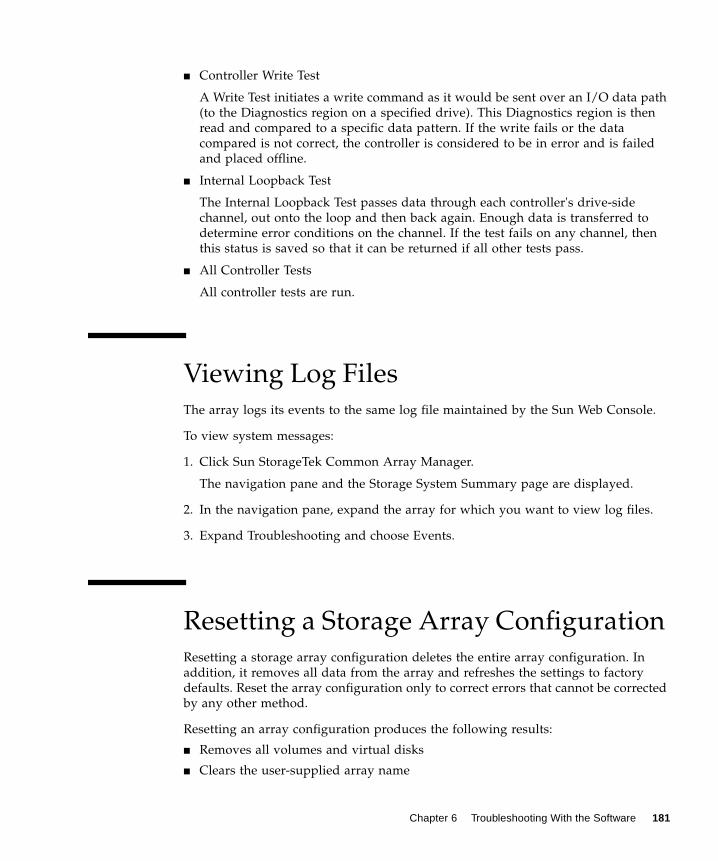
■ Controller Write Test
A Write Test initiates a write command as it would be sent over an I/O data path(to the Diagnostics region on a specified drive). This Diagnostics region is thenread and compared to a specific data pattern. If the write fails or the datacompared is not correct, the controller is considered to be in error and is failedand placed offline.
■ Internal Loopback Test
The Internal Loopback Test passes data through each controller's drive-sidechannel, out onto the loop and then back again. Enough data is transferred todetermine error conditions on the channel. If the test fails on any channel, thenthis status is saved so that it can be returned if all other tests pass.
■ All Controller Tests
All controller tests are run.
Viewing Log FilesThe array logs its events to the same log file maintained by the Sun Web Console.
To view system messages:
1. Click Sun StorageTek Common Array Manager.
The navigation pane and the Storage System Summary page are displayed.
2. In the navigation pane, expand the array for which you want to view log files.
3. Expand Troubleshooting and choose Events.
Resetting a Storage Array ConfigurationResetting a storage array configuration deletes the entire array configuration. Inaddition, it removes all data from the array and refreshes the settings to factorydefaults. Reset the array configuration only to correct errors that cannot be correctedby any other method.
Resetting an array configuration produces the following results:
■ Removes all volumes and virtual disks
■ Clears the user-supplied array name
Chapter 6 Troubleshooting With the Software 181

■ Clears the array password
■ Removes all data from the array
Note: Before you begin, be sure that all data on the storage array has been backed upto tape or another storage array.
To reset the array configuration:
1. Click Sun StorageTek Common Array Manager.
The navigation pane and the Storage System Summary page are displayed.
2. In the navigation pane, choose the array whose configuration you want to reset.
The Administration page is displayed.
3. Click Reset Configuration.
A confirmation dialog box prompts you to confirm the selected action.
4. Click OK to continue.
Note: The array will not be available and will be in an error state until thereconfiguration process has been completed.
Redistributing VolumesWhen volumes are created, they are assigned a preferred owner controller. Theowner controller of the volume sometimes shifts from the preferred controller whenthe controller is being replaced or is undergoing a firmware download. In addition,multipath drivers move volumes from their preferred controller owner when aproblem occurs along the data path between the host and the storage array. Whenyou redistribute the volumes, you cause the volumes to move back to their preferredcontroller owners.
Note: Redistributing the volumes while an application is using the affected volumescauses I/O errors unless a multipath driver is installed on the data host. Therefore,before you redistribute volumes, verify either that the volumes are not in use or thatthere is a multipath driver installed on all hosts using the affected volumes.
182 Sun StorageTek Array Administration Guide •March 2007
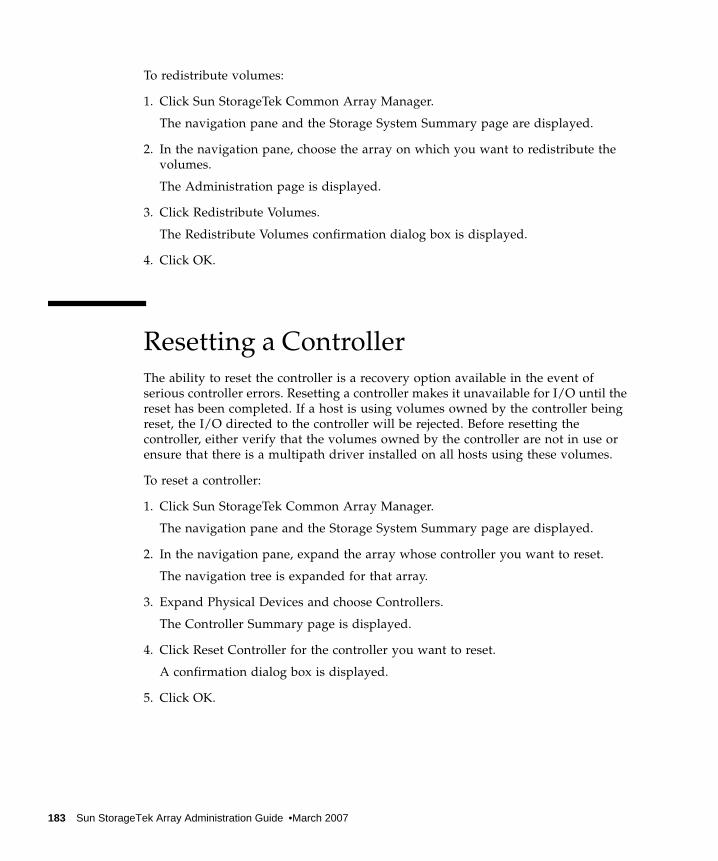
To redistribute volumes:
1. Click Sun StorageTek Common Array Manager.
The navigation pane and the Storage System Summary page are displayed.
2. In the navigation pane, choose the array on which you want to redistribute thevolumes.
The Administration page is displayed.
3. Click Redistribute Volumes.
The Redistribute Volumes confirmation dialog box is displayed.
4. Click OK.
Resetting a ControllerThe ability to reset the controller is a recovery option available in the event ofserious controller errors. Resetting a controller makes it unavailable for I/O until thereset has been completed. If a host is using volumes owned by the controller beingreset, the I/O directed to the controller will be rejected. Before resetting thecontroller, either verify that the volumes owned by the controller are not in use orensure that there is a multipath driver installed on all hosts using these volumes.
To reset a controller:
1. Click Sun StorageTek Common Array Manager.
The navigation pane and the Storage System Summary page are displayed.
2. In the navigation pane, expand the array whose controller you want to reset.
The navigation tree is expanded for that array.
3. Expand Physical Devices and choose Controllers.
The Controller Summary page is displayed.
4. Click Reset Controller for the controller you want to reset.
A confirmation dialog box is displayed.
5. Click OK.
183 Sun StorageTek Array Administration Guide •March 2007

Reviving Virtual Disks and Disk DrivesThe Sun StorageTek Common Array Manager software enables you to more closelymanage the states of the virtual disks and physical disk drives and recover fromfailures.
If one or more disk drives in a virtual disk are in the Failed state, you can recoverfrom this failure by reviving the virtual disk. Reviving a virtual disk automaticallyrevives the failed disk drives included in the virtual disk, assuming that the diskdrives are still usable.
You should manually revive an individual disk drive only if reviving the virtual diskfails to revive any failed disk drives in the virtual disk.
Caution: These tasks must be performed in a specific order and only under thedirect supervision of a Sun Customer and Technical Support representative.
From the Virtual Disk Details page, you can:
■ Revive a virtual disk
If one or more disk drives in a virtual disk are in the failed state, you can recoverfrom this failure by reviving the virtual disk. Reviving a virtual diskautomatically revives the failed disk drives included in the virtual disk.
■ Place a virtual disk offline
Placing a virtual disk offline disables the virtual disk.
■ Place a virtual disk online
Placing a virtual disk online enables the virtual disk.
From the Disk Details page you can:
■ Revive the disk drive
If reviving a virtual disk fails to revive an individual disk drive, you canmanually revive that disk drive.
■ Reconstruct the disk drive
You can reconstruct a disk drive only when it meets the following criteria:
■ The disk drive is assigned to a RAID-1, -3, or -5 virtual disk.
■ The disk drive has a Failed or Replaced status and was not automaticallyrevive during a virtual disk revive operation.
■ Fail the disk drive
Failing the disk drive disables the drive.
Chapter 6 Troubleshooting With the Software 184

Hardware TroubleshootingBasicsThis section described updating array components and troubleshooting the array:
■ “Keeping Firmware and Patches Up To Date” on page 185
■ “Checking LEDs” on page 186
■ “Responding to an Array Boot-Up Failure” on page 186
■ “Replacing Field-Replaceable Units” on page 186
Keeping Firmware and Patches Up ToDateYou can use the Sun Services web site or compact discs (CDs) to keep the arraypatches, software, and firmware up to date. Use these tools to do the following:
■ Make sure all patches, firmware, and software are up to date at array startup.
■ Establish a site process for making sure patches, firmware, and software are keptcurrent.
■ Monitor the levels manually at any time.
Check the release notes for each software release to check patch, firmware, andsoftware changes and upgrades. Sun Services can make updates available from theweb site or on CD.
The upgradable components are:
■ Array firmware
■ Controller image
■ Disk image
Because components in the array depend on each other, upgrade all components totheir current version whenever a patch or new version becomes available. Duringthe upgrade procedure, check that each component has upgraded successfully. If acomponent’s upgrade procedure fails, repeat the procedure. If this second attemptalso fails, you must back out the changes on the components that were successful sothat the array operates properly. Then contact Sun Services with a description of thecomponent’s failed upgrade process.
185 Sun StorageTek Array Administration Guide • March 2007

Checking LEDsLight-emitting diodes (LEDs) provide status information on each array tray and itscomponents. Green lights indicate a normal operating status, and amber lightsindicate a hardware fault. Always check the status lights on the front and back ofeach array tray whenever you turn on the power. During power-up, the lights blinkintermittently as the array and components complete the power-up process.
Caution: Electrostatic discharge can damage sensitive components. Touching thecommand tray or its components without using a proper ground may damage theequipment. To avoid damage, use proper antistatic protection before handling anycomponents.
Responding to an Array Boot-Up FailureIf the array does not boot after a shutdown, the failure could have several causes,both hardware and software. Check the messages reported on the console and in theevent log to diagnose the problem.
Replacing Field-Replaceable UnitsField-replaceable units (FRUs) can be replaced by Sun field engineers or by Sun-trained customer administrators.
To see a list of the hardware components that can be replaced at the customer site:
1. Click Sun StorageTek Common Array Manager.
The navigation pane and the Storage System Summary page are displayed.
2. In the top right of the page, click Service Advisor.
The Service Advisor page is displayed. The Service Advisor provides informationand procedures for replacing storage network device components. Choose one ofthe types of FRUs or other options to see the procedures.
Chapter 5 Hardware Troubleshooting Basics 186

187 Sun StorageTek Array Administration Guide • March 2007

Glossary
Definitions obtained from the Storage Networking Industry Association (SNIA)Dictionary are indicated with “(SNIA)” at the end. For the complete SNIADictionary, go to www.snia.org/education/dictionary.
agent The component of the system monitoring and diagnostic software thatcollects health and asset information about the array.
alarm A type of event that requires service action. See also event.
alert A subtype of an event that requires user intervention. The term actionable eventoften describes an alert. See also event.
array Multiple disk drives that function as a single storage device. A high-availability (HA) array configuration has multiple controller and expansiontrays of disk drives.
array hot spare A disk that serves as a hot-spare within an array as part of a storage pool; areserve disk that can be made available to all virtual disks within an array. Seealso hot-spare.
block The amount of data sent or received by the host per I/O operation; the size ofa data unit.
capacity The amount of storage you must allocate to storage elements, includingvolumes, pools, and virtual disks. Capacity planning should includeallocations for volume snapshots and volume copies.
CLI Command-line interface. The SSCS command-line interface is available fromthe remote CLI client or through an SSCS directory on the Solaris OperatingSystem management software station.
controller tray A tray with an installed redundant RAID controller pair.
control path The route used for communication of system management information, usuallyan out-of-band connection.
customer LAN See site LAN.
188

DAS See direct attached storage (DAS).
data host Any host that uses the system for storage. A data host can be connecteddirectly to the array (direct attach storage, or DAS) or can be connected to anexternal switch that supports multiple data hosts (storage area network, orSAN). See also host.
data path The route taken by a data packet between a data host and the storage device.
direct attached storage(DAS) A storage architecture in which one or two hosts that access data are connected
physically to a storage array.
disk A physical drive component that stores data.
event A notification of something that happened on a device. There are many typesof events, and each type describes a separate occurrence. See also alarm andalert.
expansion tray A tray that does not have a RAID controller, used to expand the capacity of anarray. This type of tray must be attached to a controller tray to function.
extent A set of contiguous blocks with consecutive logical addresses on a physical orvirtual disk.
failover and recovery The process of changing the data path automatically to an alternate path.
fault coverage The percentage of faults detected against all possible faults or against all faultsof a given type.
FC See Fibre Channel (FC).
Fibre Channel (FC) A set of standards for a serial I/O bus capable of transferring data betweentwo ports at up to 100 megabytes/second, with standards proposals to go tohigher speeds. Fibre Channel supports point to point, arbitrated loop, andswitched topologies. Fibre Channel was completely developed throughindustry cooperation, unlike SCSI, which was developed by a vendor andsubmitted for standardization after the fact. (SNIA)
Fibre Channel switch A networking device that can send packets directly to a port associated with agiven network address in a Fibre Channel storage area network (SAN). FibreChannel switches are used to expand the number of servers that can connect toa particular storage port. Each switch is managed by its own managementsoftware.
field-replaceable unit(FRU) An assembly component that is designed to be replaced on site, without the
system having to be returned to the manufacturer for repair.
FRU See field-replaceable unit (FRU).
HBA See host bus adapter (HBA).
189 Sun StorageTek Array Administration Guide · March 2007

host As a function of the storage configuration, a representation of a data host thatis mapped to initiators and volumes to create a storage domain. See also datahost, initiator.
host bus adapter(HBA) An I/O adapter that connects a host I/O bus to a computer’s memory system.
(SNIA) See also initiator.
host group A group of hosts with common storage characteristics that can be mapped tovolumes. See also host.
hot-spare The drive used by a controller to replace a failed disk. See also array hot spare.
in-band traffic System management traffic that uses the data path between a host and astorage device. See also out-of-band traffic.
initiator A system component that initiates an I/O operation over a Fibre Channel (FC)network. If allowed by FC fabric zoning rules, each host connection within theFC network has the ability to initiate transactions with the storage array. Eachhost in the FC network represents a separate initiator, so if a host is connectedto the system through two host bus adapters (HBAs), the system identifies twodifferent initiators (similar to multi-homed, Ethernet-based hosts). In contrast,when multipathing is used in round-robin mode, multiple HBAs are groupedtogether, and the multipathing software identifies the group of HBAs as asingle initiator.
IOPS A measure of transaction speed, representing the number of input and outputtransactions per second.
LAN Local area network.
logical unit number(LUN) The SCSI identifier for a volume as it is recognized by a particular host. The
same volume can be represented by a different LUN to a different host.
LUN See logical unit number (LUN).
MAC Address See media access control (MAC) address.
management host A host serving the configuration, management, and monitoring softwarefor a storage array. The software on the station can be accessed with abrowser interface or with a remote scripting command-line interface (CLI)client.
media access control(MAC) address The physical address identifying an Ethernet controller board. The MAC
address, also called an Ethernet address, is set at the factory and must bemapped to the IP address of the device.
Glossary 190

mirroring A form of storage – also called RAID Level 1, independent copy, and real-timecopy – whereby two or more independent, identical copies of data aremaintained on separate media. Typical mirroring technologies enable thecloning of data sets to provide redundancy for a storage system.
multipathing A design for redundancy that provides at least two physical paths to a target.
out-of-band traffic System management traffic outside of the primary data path that uses anEthernet network. See also in-band traffic.
pool See storage pool.
profile See storage profile.
provisioning The process of allocation and assignment of storage to hosts.
RAID An acronym for Redundant Array of Independent Disks, a family oftechniques for managing multiple disks to deliver desirable cost, dataavailability, and performance characteristics to host environments. (SNIA)
remote scripting CLIclient A command-line interface (CLI) that enables you to manage the system from a
remote management host. The client communicates with the managementsoftware through a secure out-of-band interface, HTTPS, and provides thesame control and monitoring capability as the browser interface. The clientmust be installed on a host that has network access to the system.
SAN See storage area network (SAN).
site LAN The local area network at your site. When the system is connected to yourLAN, the system can be managed through a browser from any host on theLAN.
snapshot A copy of a volume’s data at a specific point in time.
SSCS Sun Storage Command System, the command-line interface (CLI) that can beused to manage the array.
storage area network(SAN) An architecture in which the storage elements are connected to each other and
to a server that is the access point for all systems that use the SAN to storedata.
storage domain A secure container that holds a subset of the system’s total storage resources.Multiple storage domains can be created to securely partition the system’s totalset of storage resources. This enables you to organize multiple departments orapplications into a single storage management infrastructure.
storage pool A container that groups physical disk capacity (abstracted as virtual disks inthe browser interface) into a logical pool of available storage capacity. Astorage pool’s characteristics are defined by a storage profile. You can create
191 Sun StorageTek Array Administration Guide · March 2007

multiple storage pools to segregate storage capacity for use in various types ofapplications (for example, high throughput and online transaction-processingapplications).
storage profile A defined set of storage performance characteristics such as RAID level,segment size, dedicated hot-spare, and virtualization strategy. You can choosea predefined profile suitable for the application that is using the storage, or youcan create a custom profile.
storage tray An enclosure containing disks. A tray with dual RAID controllers is called acontroller tray; a tray without a controller is called an expansion tray.
stripe size The number of blocks in a stripe. A striped array’s stripe size is the stripedepth multiplied by the number of member extents. A parity RAID array’sstripe size is the stripe depth multiplied by one less than the number ofmember extents. (SNIA) See also striping.
striping Short for data striping; also known as RAID Level 0 or RAID 0. A mappingtechnique in which fixed-size consecutive ranges of virtual disk data addressesare mapped to successive array members in a cyclic pattern. (SNIA).
target The system component that receives a SCSI I/O command. (SNIA)
thin-scripting client See remote scripting CLI client.
tray See storage tray.
virtual disk A set of disk blocks presented to an operating environment as a range ofconsecutively numbered logical blocks with disk-like storage and I/Osemantics. The virtual disk is the disk array object that most closely resemblesa physical disk from the operating environment’s viewpoint. (SNIA)
volume A logically contiguous range of storage blocks allocated from a single pool andpresented by a disk array as a logical unit number (LUN). A volume can spanthe physical devices that constitute the array, or it can be wholly containedwithin a single physical disk, depending on its virtualization strategy, size, andthe internal array configuration. The array controller makes these detailstransparent to applications running on the attached server system.
volume snapshot See snapshot.
WWN World Wide Name. A unique 64-bit number assigned by a recognized namingauthority such as the Institute of Electrical and Electronics Engineers (IEEE)that identifies a connection (device) or a set of connections to the network. TheWorld Wide Name (WWN) is constructed from the number that identifies thenaming authority, the number that identifies the manufacturer, and a uniquenumber for the specific connection.
Glossary 192

193 Sun StorageTek Array Administration Guide · March 2007

Aaccess volume 75, 168account passwords, changing 44acknowledged alarms
deleting 175reopening 175
actionable events 24activating the agent 68, 69administrative settings 43agent
activating 68, 69deactivating 68, 69overview of 22viewing 67
agent timeout settingsdisplaying 58editing 58
aggregated eventsdisplaying information about 173
alarm notification, types of 58alarms
acknowledging 174clearing 23current 28deleting 175displaying detailed information about 173displaying summary information about 172overview of 171reopening 175types of 28
alertstransmission of 20
all controller tests 181array
firmware upgrades to 185array configuration
resetting 181array performance
factors in 86RAID levels and 106
array segments, storage profiles and 135arrays
auto-discovering 41changing settings for 45deleting 42displaying information on 41
managing 40methods for adding 40monitoring the performance of 54registering 42upgrading firmware 42
asterisk, meaning ofin forms 31in searches 33
Bbanner, described 27boot-up failure, responding 186browser interface
navigating 27
Cclustering software 21column sort order, changing 30console, accessing 27content pane, elements in 29controller
resetting 183controller ownership 81controller read test 180controller tray
described 155controller write test 181controllers
displaying performance statistics on 158copy pairs
described 84recopying volume copies for 90removing 91
copy prioritieschanging 90for volume copies 86
current alarms 28current user logins 28
Ddata host software 20data hosts
management software and 19data replication
enabling 124deactivating the agent 68, 69
194

default storage configuration 71Default storage domain, initiators and 141Default storage profile, characteristics of 136devices
running diagnostic tests on 180diagnostic software 20diagnostic software, described 22diagnostic tests 180
all controller tests 181controller read test 180controller write test 181internal loopback test 181running 180
discovery events 24disk drives 72
described 157displaying information for 160RAID levels and 105types of 156
disk mirroring, RAID levels and 105disk scrubbing 46disk types
profiles and 136display filters, applying 29
Eemail filters
adding 62deleting 63editing 63overview of 62
email notificationadding a recipient for 60configuring 59deleting a recipient for 61described 58editing a recipient for 61testing addresses for 60, 179using filters for 62
errordetection 46reporting 46
error conditions, indications of 171error detection, enabling 46event generation, overview of 24event life-cycle, described 24
event logdisplaying 176
event maximums database 24events
actionable 24aggregated, displaying information about 173causes of 23displaying information about 53displaying the log for 176email notification for 62overview of 22, 171
events logs 23expansion trays
described 155
Ffailure handling considerations, in snapshot
planning 94Fault Management Service 20, 22fault tolerance, RAID levels and 106Fibre Channel (FC) ports
initiators and 141field-replaceable units (FRUs) 186filters
using for email notification 62filters, display, applying 29firmware upgrades 185FMS 22
Gguest role 49
HHelp button 28help function, using 33High Performance Computing storage profile 136High_Capacity_Computing profile 136host bus adapters (HBAs) 72
initiators and 141overview of 39
host groupsadding and removing members 146creating 146deleting 148described 19displaying information about 145
195 Sun StorageTek Array Administration Guide • February 2006

managing 145mapping a volume to 80mapping snapshots to 102mapping to a volume 148overview of 144planning volume mapping for 76snapshot planning and 95storage domains and 164unmapping 149unmapping a snapshot from 103unmapping a volume from 81
hostsaccess to multiple volumes by 144creating 151deleting 152displaying information about 151initiators and 141managing 151mapping a volume to 80mapping snapshots to 102mapping to a volume 153overview of 150planning volume mapping for 76snapshot planning and 95storage domains and 164unmapping 153unmapping a snapshot from 103unmapping a volume from 81
hot-spares 157
Iinitiators 72
deleting 143displaying information for 142host bus adapters (HBAs) and 39mapping to hosts or host groups 77, 95overview of 141restrictions on deleting 143storage domains and 141, 164volumes and 75
interface, navigating 27internal loop 181internal loopback test 181
JJava Web Console, accessing 27jobs
canceling 56
displaying information for 55overview of 55
LLED indicators
checking 186licenses
adding 52disabling 53displaying information about 52obtaining 51
log events, generation of 24log files
viewing 181Log Out button 27logging out 34logical storage elements 72
searching for 32logins
current user 28LUN masking 141
MMail Spool storage profile 136management host
isolated array and 38remote CLI client and 38system IP address and 48
management software 19monitoring cycle
described 23monitoring software 20monitoring software, described 22monitoring strategy, overview of 23multipathing 39
Nnavigational pane 28NFS Mirroring storage profile 136NFS Striping storage profile 136notification setup parameters, editing 67notification, types of 58number of disks, setting in storage profiles 136
196

OOracle DSS storage profile 137Oracle OLTP HA storage profile 137Oracle OLTP storage profile 137
Ppage banner, described 27page display controls 29pane, navigational 28parity checks, RAID levels and 105passwords
changing 44patch upgrades 185performance statistics
controller, displaying 158volume, displaying 78
performance, monitoring 54physical storage elements 72
searching for 32preferred controller 81, 182premium features
obtaining licenses for 51
RRAID controllers
tray types and 155RAID levels
described 105RAID sets 19, 73, 105Random 1 storage profile 137read-ahead mode, profiles and 135redistributing volumes 182Refresh button 27remote CLI client
described 20installing 38
remote notificationconfiguring 65SNMP traps 58Sun Connection 58types of 58
replicated volumesdescribed 74
replication setsdescribed 20
reserve volumesdeleted snapshots and 93described 75, 92disabled snapshots and 93planning the capacity of 96threshold for 93
Reset button 32resetting a controller 183resetting an array configuration 181
SSave button 32search function 27
in help 33using 32
security considerations 72site information
displaying 57editing 57
site LANisolating the array from 38managing the array from 37
snapshot volumes, described 74snapshots
described 19expanding the capacity of 102mapping of host groups to 144storage domains and 165
SNMP notificationadding a recipient for 65deleting a recipient for 66editing a recipient for 65
SNMP traps, described 58software version, displaying 27source volumes
described 74displaying 88removing copy pairs and 91types of 86volume copies and 84
sscs command 39standard volumes, described 74storage area networks (SANs)
initiators in 141storage customers, authentication of 141storage domains 164
197 Sun StorageTek Array Administration Guide • February 2006
enabling 166host groups and 144hosts and 150licensing 166methods for creating 165preparing to create 165
storage elementslogical 72physical 72
storage pools 72creating 133default 71deleting 134described 19, 132displaying information for 133effect of deleted volumes on 82modifying 134multipathing and 39planning 76profiles and 135restrictions on deleting 132storage profiles and 132
storage profilescopying 139creating 138deleting 139described 19displaying information for 137modifying 138optimizing attributes with 72overview of 135standard 136
storage provisioning 71storage role 49storage trays 72
displaying information for 160types of 155
storage volumes 73changing the name or description of 79creating 78deleting 82described 19displaying information for 77extending the capacity of 80managing 77mapping to hosts or host groups 80maximum number of 75overview of 74
planning 76resnapping 100restrictions on deleting 82storage pools and 132types of 74unmapping from hosts or host groups 81
Sun Connection, described 58Sun StorageTek SAM-FS software 21Sun StorageTek SAN Foundation Software 20Sun StorageTek Traffic Manager software 20Sybase DSS storage profile 137Sybase OLTP HA storage profile 137Sybase OLTP storage profile 137system defaults 71system IP address
management host connection and 48specifying the method for setting 48
system monitoring software, described 22system name, displayed in banner 28
Ttable columns, changing the sort order of 30tables, filtering information in 29target volumes
described 74displaying 88removing copy pairs and 91types of 86volume copies and 84
telemetry 58troubleshooting 185
Uuser accounts 49user name, displayed in banner 28users
adding 50deleting 51displaying information about 50
VVERITAS Volume Manager with DMP 21Version button 27viewing
agent 67
198

virtual disks 19, 73, 105defragmenting 107displaying information for 106expanding the size of 106planning the assignment of volumes to 76requirements for 95storage pools and 74volumes and 74
volume capacity, extending 80volume copies
changing the copy priority for 90creating 88described 19displaying information on 88enabling 87managing 87overview of 84planning 86recopying 90status of 85
volume snapshots 73creating 88, 100, 101deleting 104disabled 93disabling 103displaying information for 88, 90, 99managing 87, 98mapping to hosts and host groups 102overview of 92planning 94resnapping 100unmapping 103uses for 92volume capacity and 80write operations and 93
volumesdisplaying performance statistics on 78mapping of host groups to 144mapping of hosts to 150redistributing 182storage domains and 164
Wweb browser
content pane elements in 29navigating 27
wildcard character, in searches 33
199 Sun StorageTek Array Administration Guide • February 2006


![[1]StorageTek Enterprise Library Software …1]StorageTek Enterprise Library Software Introducing ELS Release 7.3 E60322-02 September 2016](https://static.fdocuments.us/doc/165x107/5abff6bd7f8b9a4e7c8b520f/1storagetek-enterprise-library-software-1storagetek-enterprise-library-software.jpg)