STYLE RA DIO France Inter - DCF - ANCA elektronic · STYLE RA DIO France Inter - DCF ... the 230...
16
STYLE RADIO France Inter - DCF Style 7 Style 7D Style 7E INSTALLATION AND OPERATING INSTRUCTIONS When receiving goods please check nothing is broken otherwise make a claim near shipping company. B.P. 1 49340 TRÉMENTINES FRANCE Tél. : 02 41 71 72 00 Fax : 02 41 71 72 01 www.bodet.com Réf.: 605723 G
Transcript of STYLE RA DIO France Inter - DCF - ANCA elektronic · STYLE RA DIO France Inter - DCF ... the 230...

STYLE RA DIOFrance Inter - DCF
Style 7
Style 7D Style 7E
INSTALLATION AND OPERATING INSTRUCTIONS
When receiving goods please check nothing is broken otherwise make a claim near shipping company.
B.P. 149340 TRÉMENTINESFRANCETél. : 02 41 71 72 00Fax : 02 41 71 72 01www.bodet.com
Réf.: 605723 G

Table of contents
1) GENERAL INFORMATION . . . . . . . . . . . . . . . . . . . . . . . 4Security rules : . . . . . . . . . . . . . . . . . . . . . . . . . . . 4Initial check : . . . . . . . . . . . . . . . . . . . . . . . . . . . . 4Product information labels : . . . . . . . . . . . . . . . . . . . . . 4
2) INSTALLATION AND ELECTRICAL CONNECTIONS . . . . . . . . . 5Wall mounting : . . . . . . . . . . . . . . . . . . . . . . . . . . . 5Mounting on vertical or ceiling bracket :. . . . . . . . . . . . . . . 5Electrical connections : . . . . . . . . . . . . . . . . . . . . . . . 5
3) QUICK SETTING IN OPERATION . . . . . . . . . . . . . . . . . . . 6
4) DISPLAY BRIGHTNESS ADJUSTMENT . . . . . . . . . . . . . . . . 6
5) COMPLETE SETTING IN OPERATION. . . . . . . . . . . . . . . . . 6
5-A.Radio synchronisation concept . . . . . . . . . . . . . . . . . . 6Antenna Orientation (F) . . . . . . . . . . . . . . . . . . . . . . . 6General information on radio synchronisation : . . . . . . . . . . . 7Automatic synchronisation : . . . . . . . . . . . . . . . . . . . . . 7
5-B. Radio synchronisation in difficult environment . . . . . . . . . . . 8
5-C. Clock configuration . . . . . . . . . . . . . . . . . . . . . . . . 8Access to the menu . . . . . . . . . . . . . . . . . . . . . . . . . 8Time setting : . . . . . . . . . . . . . . . . . . . . . . . . . . . . 9Configuration menu . . . . . . . . . . . . . . . . . . . . . . . . . 10Configuration of Style 7 and Style 7 Ellipse clocks. . . . . . . . . . 11Configuration of Style 7 date clocks . . . . . . . . . . . . . . . . 11Summer / Winter time changeovers : . . . . . . . . . . . . . . . . 13
6) WHAT TO DO IF ......? ......CHECK . . . . . . . . . . . . . . . . . . . 14
7) GENERAL INFORMATION . . . . . . . . . . . . . . . . . . . . . . . 15
7–A. Data saving . . . . . . . . . . . . . . . . . . . . . . . . . . . . 15
7-B. Cleaning . . . . . . . . . . . . . . . . . . . . . . . . . . . . . . 15
7-C . Technical features . . . . . . . . . . . . . . . . . . . . . . . . 15
2

1) GENERAL INFORMATION
Security rules :
Caution : The installation and the maintenance service of this clock has tobe done by skilled person.n The installation has to be done according to electrical standards
(NFC 15-100 for France). Refer to your local norms.n You need a 4A break circuit before the power supply.n This break circuit has to be turned off in case of maintenance
service.n Clocks must be protect by a 0,8A, 2,5A or 4A fuse (F1) (See Technical
features page 14).n The power supply has to be turned on only after fixing the clock.
Connection according to the installation instructions TN (ground/phase)or TT (ground/ground).
Any operation not complying with the present instructions can causeirreversible damage to the clock, and renders the warranty invalid.The Bodet company declines any responsibility in case of productoperation not in accordance with previous instructions.
Initial check :
In its original packaging, eachStyle clock is supplied clipped on to its wall holder, together with acleaning kit (impregnatedanti-static cloth), a bagcontaining 3 screws, and 3 pegs.Unclip the holder (A) : insert your finger at the base of theopening (B), then pull firmlytowards you.
Product information labels :
A descriptive label is fixed to the back of the clock, and visible once theholder has been removed. It indicates the following information :Clock model ( Style 7, ...), power supply, display color, antenna modelFrance Inter or DCF. This clock is radio synchronised with a France Inter or DCF radio antenna.
3
S E
CBA 115 or 230V

2) INSTALLATION AND ELECTRICAL CONNECTIONS
Wall mounting :
Fix the holder (A) in the chosen position, usingthe 3 rawlplugs and 3 screws supplied.
I )- Clip the clock onto its holder, by introducing
the two studs (E) into the two corresponding
openings made in the back of the clock, and
then by pressing firmly on the lower part of
the clock, until it clicks into place. Take care
not to jam the cables during this
operation.
II )- The clock can be subsequently unclipped
from its holder, by pulling the lower part of the clock firmly towards you,
and then by removing it via the top.
Mounting on vertical or ceiling bracket :
The holder ( A) fits the single-sided mounting bracket, P/N 936301, thedouble-sided mounting bracket, P/N 936300, and the double-sided chainsuspension P/N 936302. Use the tapping screws supplied with the bracket.
Electrical connections :
NB : Style clocks have been designed for a 230 Volt +/- 10 % mainssupply.E.g.: 230 V clock operates correctly in countries where the mains voltageis 220 or 240 Volts.Remove the black protective cover (covering the terminal strip (C). Connect the 230 Volt 50/60 Hz mains supply line to the terminal strip : Live andNeutral on terminal 1 and 2 (Wire max. section : 1.5 mm2 with 5 mm bare).As this clock is classified on the 2nd level, the connection to the earth is notrequired because it is not used. Put the protective cover back in place.Lock wires with collars (S).
4
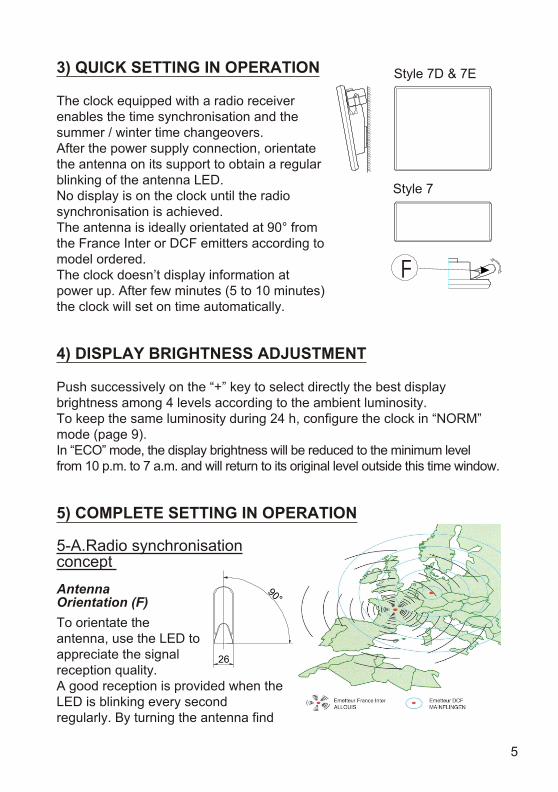
3) QUICK SETTING IN OPERATION
The clock equipped with a radio receiverenables the time synchronisation and thesummer / winter time changeovers.After the power supply connection, orientatethe antenna on its support to obtain a regularblinking of the antenna LED.No display is on the clock until the radiosynchronisation is achieved.The antenna is ideally orientated at 90° fromthe France Inter or DCF emitters according to model ordered.The clock doesn’t display information atpower up. After few minutes (5 to 10 minutes) the clock will set on time automatically.
4) DISPLAY BRIGHTNESS ADJUSTMENT
Push successively on the “+” key to select directly the best displaybrightness among 4 levels according to the ambient luminosity.To keep the same luminosity during 24 h, configure the clock in “NORM”mode (page 9).In “ECO” mode, the display brightness will be reduced to the minimum levelfrom 10 p.m. to 7 a.m. and will return to its original level outside this time window.
5) COMPLETE SETTING IN OPERATION
5-A.Radio synchronisationconcept
AntennaOrientation (F)
To orientate theantenna, use the LED to appreciate the signalreception quality.A good reception is provided when the LED is blinking every secondregularly. By turning the antenna find
5
F
Style 7
Style 7D & 7E
26
90°

the correct position offering the best reception.Generally, the best orientation is perpendicular to the emitter direction(DCF or France Inter according to the antenna selected).After few minutes (5 to 10 minutes) the clock will set on time automatically.
General information on radio synchronisation :
The clock is radio synchronised with a France Inter or DCF integratedantenna.
– France Inter antenna :The receiver France Inter picks up the time signals supplied in phasemodulation by the France Inter emitter 162 kHz based in Allouis (France).
– DCF antenna :The DCF receiver picks up the amplitude modulated time signalstransmitted by the DCF 77.5 kHz emitter based in Mainfligen(Germany).
The time code received by the 2 antenna models includes hour, minute,day, date and a signal data for synchronisation (Western Europe time).These antennas automatically ensure the summer / winter timechangeovers and guarantee absolute accuracy.In principle, signals are received all over Europe and North Africa (see map).A daily time code reception of a few minutes is sufficient to maintain theclock synchronisation.The time signal acquisition by the master clock is normally achieved after 5or 10 minutes after power up. However in case of difficult reception ormeteorological interference, the signal acquisition can last up to 24 hours.The signal is usually well received during the night.No display is on the clock until it has correctly received the radio signalunless a manual time setting is made.When hour and date are displayed, check if they are correct. If they aren’t,set manually on time (see page 7) or do a RESET (page 9 TEST menu).
Automatic synchronisation :
Every night, the clock is automatically checking the radio reception. Ifbefore 3 a.m. no correct radio signal is received the clock display becomesblank. The clock is then in the “LISTENING” mode until it receives a signal(the blank display improves the radio reception quality).If the radio reception becomes correct, the clock is automaticallysynchronised and displays the time again.If the radio reception is impossible before 5 a.m., the clock displays therunning time, but keeps the 2 central diodes fixed (instead of blinking) toinform that the radio reception has not been done.
6

5-B. Radio synchronisation in difficult environment
In case the clock is not automatically set on time as explained in § 3, followthe steps as ordered :
1- Wait 24 h to check if the radio synchronisation is
made. (the radio synchronisation is generally
better during the night).
2- In case step 1 is not sufficient to ensure the
synchronisation, change the antenna location by
fixing its support on a non metallic surface
from 15 to 20 cm of the clock after unplugging or
unscrewing the antenna. Pull on the cable to free the corresponding
cable length stored in the clock body (20 cm cable is stored in the
clock).
Fix again and orientate the antenna. Wait for the synchronisation.
5-C. Clock configuration
Access to the menu
– Control keys location :These 2 keys are located on the back of the clock on thebottom left.
– To enter the menu :Push the “Select” key then keeping the “Select” key presseddown push the “+” key both keys pushed down during 3 seconds.
– To exit the menu :Repeat this operation to exit the menu at any time or exit the program atthe end of the menu.
The clock delivered with a France Inter antenna is set in French language.The clock delivered with a DCF antenna is set in German language.To access to this configuration menu :Press both keys “+” & “SELECT” simultaneously for 3 seconds and browseusing the “SELECT” key until you reach the ECO or NORM menu.
Time setting :
Be careful, time automatically sets is always the correct time. So, if awrong time is manually set, the clock never automatically correct it.
7

To have an automatic synchronisation you must reset the clock after theconfiguration (see page 9 TEST menu).Enter the menu (see above).
– The minutes are blinking :With the “+” key, increment the minutesdisplay step by step or with a rapidscrolling up to the desired minute value.Seconds begins to elapse since minuteis selected.For example, to set time at 20 h 29 min,increment minutes up to the 28th minute,then when the reference time reachesthe 29th minute, push the “+” key.Push the “SELECT” key to select hours.
– The hours are blinking :With the “+” key, increment the hourdisplay step by step or with a rapidscrolling up to the desired hour value.Validate with “SELECT” key.
– 24 h or 12 a.m. is blinking :A) The clock displays “24 h” ( timedisplay from 0:00 to 23:59).B) The clock displays “12 a.m.” (UK /USA display from 1:00 to 12:59).You can choose one of these optionusing the “+” key.Enter by pressing the “SELECT” key.
– The year is blinking :Select the current year (from 1993to 2092) using the “+” key, then enter bypressing the “SELECT” key.
8

– The month is blinking :Select the current month using the “+”key, then enter by pressing the“SELECT” key.
– The date is blinking :Select the date using the “+” key, thenenter by pressing the “SELECT” key.This last operation enables to exit theTIME SETTING menu and going to theCONFIGURATION menu.
Configuration menu
– Eco mode displayn Press “+” key to show the modes, then
enter by pressing the “SELECT” key.n ECO : Reduction of the clock
luminosity at its minimum from “10 p.m.” to “7 a.m.”.(power consumption saving). Eco mode is set asstandard.
n NORM : Normal mode, the clockluminosity is kept the same all daylong.
n TEST : Calibration diode testing.
Be careful, if press on the “+” key during the test, a RESET is activate. In thatcase, the clock is blanked and researching a radio signalto be synchronised (same case with a first power up).
n Select the required mode with “SELECT” key.To return to display mode after a RESET, push the “Select” key thenkeeping the “Select” key pressed down push the “+” key both keys pusheddown during 3 seconds.
9

According to the clock model refer to the following chapters.
Configuration of Style 7 and Style 7 Ellipse clocks.
Display choice :
n Hour and minute fixed display.
n Hour and minute display alternates with date andmonth display.
n Hour and minute display alternate with month and datedisplay (US mode).
n Hour and minute display alternate with the weeknumber.
Select the required display choice with “+” key.Validate by pressing the “select” key.
The programming go on with the summer / winner time changeover, go to§ Summer/Winter changeover, page 12.
Configuration of Style 7 date clocks
– Language selection :
Select the desired language using the “+” key.Enter by pressing the “Select” key.Using the “+” key, choose any second language asrequired for alternate display.If you select “- -”, only the first language will be used.Enter by pressing the “Select” key.
10

Available languages :
F French N Norwegian
GB English S Swedish
SP Spanish DK Danish
D German FI Finnish
I Italian CA Catalan
P Portuguese BA Basque
NL Dutch GA Gallego
(Other languages are available in EST and EXO eproms. See attached pages).
– Choice of display :Using the “+” key, select the type of central displayrequired from one of the following 3 options then validatewith “SELECT” key :
n Day of the week (MON, TUE, ..., SUN).
n “52". This selection corresponds to the week numberdisplay.
n “365". This selection corresponds to the Julian calendar display(Day number of the year 1 to 365).
11

– Fix or Alternate display :NOTE : this function is not available if an alternate display between 2 languageshas been selected.Using the “+” key, select whether thecentral display is to be permanent oralternate :(Only if “Day of the week” has beenchosen, or if an alternate display with 2languages has been selected).The display chosen previously (week number or Julian calendar) will bepermanent.The display chosen previously (week number or Julian calendar) willalternate with the day of the week.
Enter by pressing the “Select” key.
Summer / Winter time changeovers :
The automatic time summer / winter changeover and the time differencewith the radio time is made with the following mode :
– Style 7/7E Style 7DEUR EUR = European time change
- time display = radio time.GB UK = European time change
- time display = radio time -1h.EST EST = European time change
- time display = radio time + 1h.GMT HGMT = Minute synchronisation
- no automatic time changeover neither date reception
Select with the “+” key the required mode.Validate by pressing the “Select” key. Wait for the radiosynchronisation. The clock display is blank until a goodradio reception is achieved.
The time changeover is made at the following time in themorning :EUR : at 2h00 (W>S) or 3h00 (S>W) local time.GB : at 1h00 (W>S) or 2h00 (S>W) local time.EST : at 3h00 (W>S) or 4h00 (S>W) locale time.
12
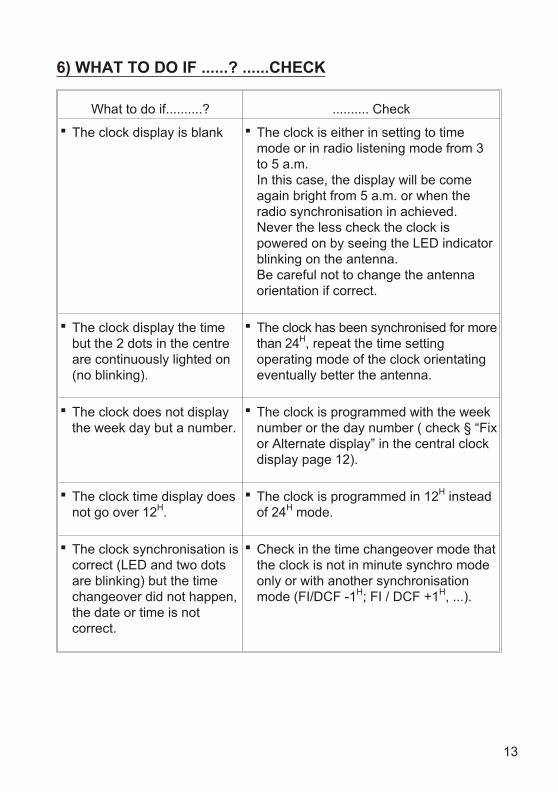
6) WHAT TO DO IF ......? ......CHECK
What to do if..........? .......... Check
n The clock display is blank n The clock is either in setting to timemode or in radio listening mode from 3to 5 a.m.In this case, the display will be comeagain bright from 5 a.m. or when theradio synchronisation in achieved.Never the less check the clock ispowered on by seeing the LED indicatorblinking on the antenna.Be careful not to change the antennaorientation if correct.
n The clock display the timebut the 2 dots in the centreare continuously lighted on(no blinking).
n The clock has been synchronised for more than 24H, repeat the time settingoperating mode of the clock orientatingeventually better the antenna.
n The clock does not displaythe week day but a number.
n The clock is programmed with the weeknumber or the day number ( check § “Fix or Alternate display” in the central clockdisplay page 12).
n The clock time display doesnot go over 12H.
n The clock is programmed in 12H insteadof 24H mode.
n The clock synchronisation is correct (LED and two dotsare blinking) but the timechangeover did not happen, the date or time is notcorrect.
n Check in the time changeover mode that the clock is not in minute synchro modeonly or with another synchronisationmode (FI/DCF -1H; FI / DCF +1H, ...).
13
7) GENERAL INFORMATION
7–A. Data saving
Style clocks possess a permanent data back-up facility up to one weekwhich permits the clock to store all the configuration parameters anddisplay selections.On the other hand, the date and the time can be “lost” following anexceptionally long mains power failure (i.e. one lasting more than oneweek) ; in which case, once the mains power supply is restored, the clockdisplay is blank.The clock setting to time is achieved automatically with the radio receptionsuch as the initial setting in operation.
7-B. Cleaning
Use an anti-static cleaner similar to that supplied in the original packaging.Never use cleaning spirits, acetone or any other solvents which are likely to damage the casing and the filter of your Style clock.
7-C . Technical featuresn Power supply : 230 V +/- 10 % 50/60 Hz. (optional 110V)n Protection by a fuse (F1).
– Style 7 : 0,8 A temporised– Style 7E : 2,5 A temporised– Style 7D : 4 A temporised
n Date and Time back-up without power supply : 1 week.n Other data back-up : permanent.n Operating temperature : 0 to 50° Cn Storage temperature : -30 to +65°Cn Protection: IP.30.n Electric protection class II (Level 2).n Style clocks are complying with the electromagnetic compatibility
directive 89/336/EEC.n They are aimed for a residential, commercial or industrial environment.n They are in agreement with the European norms :
– NF EN 55022 (DEC. 1994) Radio disturbance of informationtechnology equipment.
– NF EN 50082-1 (JUNE 1992) Generic immunity standard electromagnetic compatibility.
– NF 60950 Directive of low voltage equipment 73/23/EEC.
14

– Style 7Size (in mm) :Weight : 1,1 kgMaximum nominal current : 65 mA.
– Style 7DSize (in mm) :Weight : 2,2 kgMaximum nominal current : 150 mA.
– Style 7ESize (in mm) :Weight : 2,1 kgMaximum nominal current : 80 mA.
– Antenna Size ( in mm) :Weight : 0,17 KgPower by the clock 8-12 VDC.
– Wall bracket
15
26
75
73
5
6
7
8
23
0V
.AC
50.25 50.25
69 69
42
.56
3.9
8
4.2
165
74
.12
9

16