Student-Focused School Trachoma Prevention and Control ... an… · The student-focused trachoma...
50
Student-Focused School Trachoma Prevention and Control Curriculum Teachers’ Manual Amhara National Regional State Education Bureau April 2016 Addis Ababa Photo Credits: The Carter Center
Transcript of Student-Focused School Trachoma Prevention and Control ... an… · The student-focused trachoma...

Student-Focused School Trachoma Prevention and
Control Curriculum
Teachers’ Manual
Amhara National Regional State Education Bureau
April 2016 Addis Ababa
Photo Credits: The Carter Center
2
Foreword
The student-focused trachoma control and prevention curriculum aims to actively engage grade 1-4 students in personal hygiene and environmental sanitation activities, as a mechanism to decrease the spread and prevalence of trachoma in the Amhara National Regional State. This curriculum builds school children’s capacity to prevent trachoma and promote health in their families, and in their communities through dramas, games and stories. In particular, it assumes children can have an effect on the health knowledge and behaviors of their younger brothers and sisters, and of children who do not attend school. Therefore, this curriculum promotes behaviorsand actions that can be supported by existing school and community infrastructure. This curriculum has been designed to complement the existing formal school curriculum and is an extension of the 2008 curriculum for trachoma prevention for primary school health programs.
This teachers’ manual is designed to empower primary school teachers and principals to deliver trachoma prevention and control strategies, with emphasis on face washing and latrine use. Ultimately, the lessons delivered through the teachers’ manual will foster positive and long-lasting behavior change in grade 1-4 children and the larger community, with the intention of protecting Amhara National Regional State residents from active and blinding trachoma. This manual discusses the roles of teachers and students in preventing trachoma. More importantly, the manual instructs teachers on how to plan and deliver trachoma-related lessons.
Lessons from this curriculum will be used to directly address the burden of trachoma found in the Amhara National Regional State. Baseline surveys conducted throughout Ethiopia in 2006 showed that the Amhara region was disproportionately affected by trachoma. The region wasalso found to harbor almost half of the national burden of trachomatous trichiasis. As a result, the Amhara National Regional State has recognized trachoma as a barrier for development, and the disease has become one of the state health bureau’s priorities. The best way to prevent blindness from trachoma is to prevent trachoma itself. Trachoma usually starts in childhood. Repeated infections may result in low vision, and possibly blindness over time. Cleanliness is an important factor that contributes to preventing blindness from trachoma.
I would like to extend my heartfelt appreciations for those who dedicated their knowledge, skill and time to produce this valuable student-focused trachoma prevention and control curriculum. Special thanks goes to our regional, zonal and woreda educational bureau staffs, specifically to the curriculum department and The Carter Center-Ethiopia.
XXXXHead, Amhara National Regional State Education Bureau
3
Table of Contents
1.0 PART I: GENERAL INTRODUCTION ........................................................................................................... 41.1 Trachoma Background ............................................................................................................................................ 41.2 Objectives of the Manual ........................................................................................................................................ 41.3 Organization of the Manual ................................................................................................................................... 41.4 How to Use the Manual........................................................................................................................................... 5
1.4.1 Using Part II: The Lesson Plans................................................................................................................... 51.4.2 Using Part III: Trachoma Clubs ................................................................................................................... 5
1.5 Childrens’ Role in Trachoma Prevention .......................................................................................................... 51.6 Teachers’ Role in Trachoma Prevention............................................................................................................ 6
2.0 PART II: THE LESSON PLANS ......................................................................................................................... 72.1 Grade 1 Lesson Plans ............................................................................................................................................... 7
2.1.1 Lesson 1: Cleanliness ...................................................................................................................................... 72.1.2 Lesson 2: Flies and Dirt .................................................................................................................................. 82.1.3 Lesson 3: Hand and Face Washing ...........................................................................................................102.1.4 Lesson 4: Using a Latrine.............................................................................................................................122.1.5 Lesson 5: Proper Use of Latrines...............................................................................................................13
2.2 Grade 2 Lesson Plans .............................................................................................................................................152.2.1 Lesson 1: Eye – an Important Part of the Body ....................................................................................152.2.2 Lesson 2: Eye Sickness .................................................................................................................................172.2.3 Lesson 3: Trachoma .......................................................................................................................................192.2.4 Lesson 4: Identifying an Unhealthy Environment................................................................................212.2.5 Lesson 5: Good Choices for Our Health .................................................................................................23
2.3 Grade 3 Lesson Plans .............................................................................................................................................262.3.1 Lesson 1: Germs and How They Spread .................................................................................................262.3.2 Lesson 2: The Transmission of Trachoma..............................................................................................282.3.3 Lesson 3: Hand and Face Washing ...........................................................................................................302.3.4 Lesson 4: Having and Using a Latrine .....................................................................................................332.3.5 Lesson 5: Environmental Sanitation .........................................................................................................36
2.4 Grade 4 Lesson Plans .............................................................................................................................................392.4.1 Lesson 1: Signs and Symptoms of Trachoma........................................................................................392.4.2 Lesson 2: Treatment of Trachoma.............................................................................................................402.4.3 Lesson 3: Hygiene Checklist.......................................................................................................................432.4.4 Lesson 4: Community Hygiene and Sanitation ........................Error! Bookmark not defined.
3.0 PART III: TRACHOMA CLUBS ......................................................................................................................473.1 Trachoma Club.........................................................................................................................................................47
3.1.1 Possible Activities ..........................................................................................................................................473.1.2 Membership ......................................................................................................................................................503.1.3 Stakeholders and Their Roles and Responsibilities .............................................................................50
4
1.0 PART I: GENERAL INTRODUCTION
1.1 Trachoma Background
Trachoma is an infectious, preventable eye disease caused by ocular infection with the bacteria (germ) called Chlamydia trachomatis. Trachoma germs can spread from one person’s eyes to another person’s eyes through contact with nasal and/or ocular discharge of an infected individual. This can occur directly – through close play or sleeping in the same bed – or indirectly, through flies or contaminated clothing, which carry the trachoma germ from an infected individual to a new host.
Trachoma is the world’s leading infectious cause of blindness. Within Ethiopia, the prevalence of trachoma is highest in the Amhara National Regional State. However, trachoma is preventable. The World Health Organization recommends the SAFE strategy to control trachoma. SAFE stands for: Surgery to correct trachomatous trichiasis (blinding trachoma), Antibiotics to treat infection, Facial cleanliness to reduce transmission and Environmental improvement to reduce transmission through use of latrines.
School teachers and school children can play a major role in trachoma control. School children should be encouraged to keep their faces clean, use latrines for defecation and to communicate messages learned in the classroom to their family and community members. This manual is updated from the 2008 Trachoma Health Education co-curricular manual. It has been updated so that lesson plans presented here can be easily integrated into the national primary school curriculum.
1.2 Objectives of the Manual
The purpose of this manual is to equip primary school teachers with skills and resources to educate school children on personal hygiene and environmental sanitation. Specifically, this manual focuses on the importance of face washing, good personal hygiene and latrine use as a mechanism of protecting children and the community against blinding trachoma and preventing the spread of the infection. Through interactive lessons, this curriculum ultimately aims to foster positive and long-lasting behavior change.
The objectives of this manual include:1. To develop teachers’ knowledge and understanding of trachoma, including the effects of
trachoma, transmission, prevention and treatment.2. To assist teachers in identifying ways to demonstrate positive hygiene and sanitation
behaviors so that they act as role models for their students and the community in the prevention and control of trachoma.
3. To identify ways in which teachers can support students to develop appropriate hygiene and sanitation behaviors that are valuable for the prevention and control of trachoma.
4. To identify ways in which teachers can encourage students to serve as positive role models for their family and the community at large.
1.3 Organization of the Manual
5
This manual is organized into 3 major parts:x Part I: provides a general overview of the manual, including how to use the manual,
methodological considerations and theoretical perspectives about children’s role in trachoma prevention.
x Part II: provides grade-specific lesson plans for teachers to incorporate into the formalschool curriculum.
x Part III: provides details about reaching the community with trachoma-related education through trachoma clubs.
1.4 How to Use the Manual
1.4.1 Using Part II: The Lesson Plans
Part II of this manual includes general lessons plans for grades 1-4. Each lesson plan takes up to40 minutes to teach, and can be taught together with specific lessons from the formal schoolcurriculum. You may use this teachers’ manual either alongside the formal curriculum, or independent of it. Suggestions on as where each of these lessons fit within the formal school curriculum are given within each lesson.
1.4.2 Using Part III: Trachoma Clubs
Details regarding the formation of trachoma clubs including membership and activities are included in Part III. Teachers are encouraged to use this information to either form or enhance existing trachoma (or related health) clubs as a way to reinforce messages about trachoma, hygiene and sanitation that are learned in the classroom.
1.5 Students’ Role in Trachoma Prevention
This student-focused school trachoma prevention and control curriculum is based largely on a “child-to-child”1 health education approach. This approach asserts that school children have immense potential to disseminate health ideas and practices to other children, their families and communities. Children can play a crucial role in promoting health messages that they learn in school, particularly those related to trachoma including:
1. Children can share health messages that they learn at school with other children, their family and community;
2. Children can act as role models to others, especially to younger children, by demonstrating and regularly practicing good hygiene and sanitation;
3. Children can learn positive health ideas and practices from each other by engaging in activities together to improve hygiene and sanitation, like assisting with the construction of a latrine; and
4. Children can identify common community hygiene and sanitation problems, draw out action plans to resolve the problems and do their best to improve the situation.
1 Hawes, H. W. R. (Hubert William Richmond) & Bonati, Grazyna & Child-to-Child Trust (1992). Child-to-child: a resource book. Child-to-Child Trust, London
6
1.6 Teachers’ Role in Trachoma Prevention
The teachers’ role in trachoma prevention and health promotion includes: 1. Acting as role models for students and community members by keeping themselves and
their environment clean;2. Facilitating their students’ understanding and practice of hygiene and sanitation;3. Assessing students’ personal hygiene and sanitation and providing guidance and
opportunities for improvement; and4. Monitoring and encouraging student-led trachoma prevention efforts in school (e.g.
trachoma clubs) and in the community (e.g. in collaboration with health workers and volunteers).
7
2.0 PART II: THE LESSON PLANS
2.1 Grade 1 Lesson Plans
In grade 1, students are expected to learn about and understand personal hygiene and sanitationthrough practical lessons that encourage the practice of the behaviors learned in the classroom.
2.1.1 Lesson 1: Cleanliness
Lesson Objectives: At the end of this lesson, students will be able to: 1. Identify and differentiate between clean and unclean students using pictures and other
students in their class.2. Identify parts of their body as either clean or unclean.3. Do their best to make themselves clean.
Time Duration: 40 minutes.
Required Materials: The following materials will be required for this lesson:1. School trachoma program flipchart.2. A mirror in the school.3. Water – ask each student to bring at least 1 liter of water from home. If water is available
at your school, you may use the school water instead.
Suggestion for Integrating the Lesson with the Formal School Curriculum: You may incorporate this lesson into the formal school curriculum by teaching it immediately after and/orrepeating messages from this lesson in the following subjects:
1. Environmental Science: In the grade 1 environmental science textbook (page 5), there is a lesson called ‘Taking Care of External Parts of the Body’.
2. English: In the grade 1 English textbook (page 8), there is a lesson entitled the ‘Parts of the Body’. In that lesson you can ask students ‘What do you do to keep the parts of your body clean?’
Procedure: This lesson will have 3 activities:
Activity 1: Use pictures to identify clean and unclean faces (5 minutes).ª Show children page 1 of the school trachoma program flipchart, which has pictures of 2
students with clean and unclean faces.ª Ask the students: ‘Which of the students in the picture has a clean face and which one is
unclean?’ Specifically, ‘which part of the individuals’ face is clean or unclean?’ They can answer the question by raising their hands turn by turn. Make sure that the students have listed the important aspect of cleanliness in a person: clean face, clean eyes, clean nose etc.
ª Now ask students to clean their hands and faces (specifically their eyes and nose) using the water they brought from home or water from the school.
8
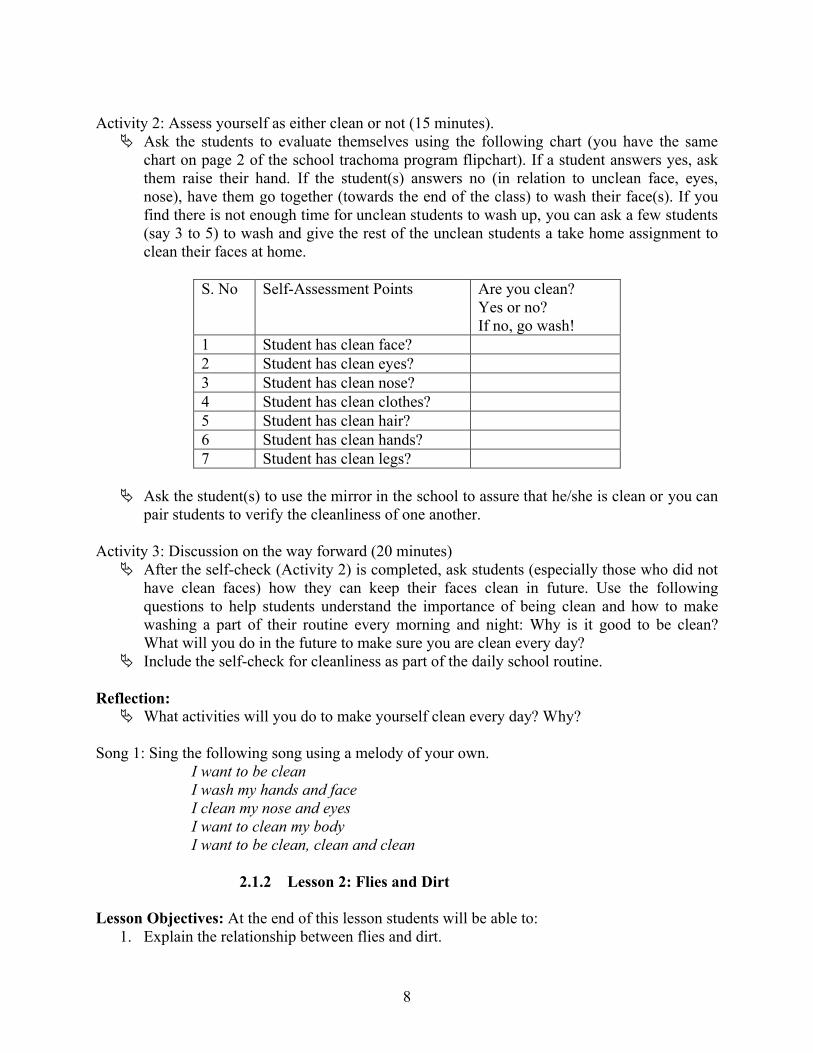
Activity 2: Assess yourself as either clean or not (15 minutes).ª Ask the students to evaluate themselves using the following chart (you have the same
chart on page 2 of the school trachoma program flipchart). If a student answers yes, ask them raise their hand. If the student(s) answers no (in relation to unclean face, eyes, nose), have them go together (towards the end of the class) to wash their face(s). If you find there is not enough time for unclean students to wash up, you can ask a few students (say 3 to 5) to wash and give the rest of the unclean students a take home assignment to clean their faces at home.
S. No Self-Assessment Points Are you clean? Yes or no? If no, go wash!
1 Student has clean face?2 Student has clean eyes?3 Student has clean nose?4 Student has clean clothes?5 Student has clean hair?6 Student has clean hands?7 Student has clean legs?
ª Ask the student(s) to use the mirror in the school to assure that he/she is clean or you can pair students to verify the cleanliness of one another.
Activity 3: Discussion on the way forward (20 minutes)ª After the self-check (Activity 2) is completed, ask students (especially those who did not
have clean faces) how they can keep their faces clean in future. Use the following questions to help students understand the importance of being clean and how to make washing a part of their routine every morning and night: Why is it good to be clean? What will you do in the future to make sure you are clean every day?
ª Include the self-check for cleanliness as part of the daily school routine.
Reflection: ª What activities will you do to make yourself clean every day? Why?
Song 1: Sing the following song using a melody of your own.I want to be cleanI wash my hands and faceI clean my nose and eyesI want to clean my bodyI want to be clean, clean and clean
2.1.2 Lesson 2: Flies and Dirt
Lesson Objectives: At the end of this lesson students will be able to:1. Explain the relationship between flies and dirt.
9
Time Duration: 40 minutes.
Required Materials:1. School trachoma program flipchart.
Suggestion for Integrating the Lesson with the Formal School Curriculum: You may incorporate this lesson into the formal school curriculum by teaching it immediately after and/or repeating messages from this lesson in the following subjects:
1. Environmental science: In the grade 1 environmental science textbook (page 5), there is a lesson called ‘Taking Care of External Parts of the Body’.
2. English: In the grade 1 English textbook (page 8), there is a lesson entitled with the ‘Parts of the Body’. In that lesson you can ask students, ‘what do you do to keep the parts of your body clean? What can we do to keep flies way from our body and face?’
Procedure: This lesson has 2 activities:
Activity 1: Telling a folktale (20 minutes).ª Tell the students the following folktale while showing page 3 of the flipchart.
Nebit and ZinbitIt happened many, many years ago... Once up on a time a bee, whose name was ‘Nebit’ saw a fly hovering on a child’s face. The name of the fly was ‘Zinbit’. Nebit asked Zinbit what she was doing there. Zinbit said (putting her hand on her lip) su..su..su.. ‘Keep quiet, keep quiet; the child I am hovering around must not hear you; he thinks that I am dancing or I am telling him a joke’. su..su..su...
“So, what are you doing?” asked Nebit with surprise.Zinbit said, “I am looking for my food. Ideal places to get my food are dirty areas like this child’s face. I can easily find my food from the child’s eyes, nose or face.Nebit again asked Zinbit, “Doesn’t this hurt the child?”Zinbit replied, “After a few days, he may get sick. But who cares? It is up to him to be clean. I have to find my food. Otherwise I might die.”
Nebit was very upset with what Zinbit was doing; she thought, “I better be good friend!” Finally, Nebit decided to alert the child and keep the fly away from him. She went to the child and advised him to clean himself so as to be free from flies. Otherwise, Nebit said to the child “If you do not wash to keep Zinbit away, you will get sick! I don’t mean to hurt you, but sometimes I will sting you to remind you to always stay clean!”
From that time onwards Nebit stings someone to remind people to wash to keep Zinbit away.
ª Now ask the following questions to your students to check that they understood the folk tale:
o Why does Zinbit hover on the child’s face?
10
o What may happen when Zinbit hovers on the child’s face?o What was Nebit’s advice to the child to keep flies away?
Activity 2: Discussion (20 minutes).ª As a class, discuss the responses you receive and guide the students to the following
answers if necessary: o Flies like dirty places. Flies can make us sick. Clean faces keep flies away and
keep us healthy. ª Ask if any students have flies on their faces. Students can identify those who have flies
hovering on their faces. Ask a few students to give the class advice about how to free yourself from flies. Those students with flies hovering on their face should go to the school water source to wash their faces and hands, at or towards the end of the lesson. If the school has no water source, the students can be given a take home assignment to wash their faces and hands before coming to school the next morning. Also as a take home assignment, students should be asked to bring at least 1 liter of water to school the next day in plastic containers (or any other vessel).
Reflection: ª Ask students the following questions: Where do flies like to land? Why?ª What does it mean for you when there are flies on your face? What shall be done?
Song: You can repeat the song you learned in lesson 1:I want to be cleanI wash my hands and faceI clean my nose and eyesI want to clean my bodyI want to be clean, clean and clean
2.1.3 Lesson 3: Hand and Face Washing
Lesson Objectives: At the end of this lesson students will be able to:1. Develop and practice good hand and face washing habits.
Time Duration: 40 minutes.
Required Materials:1. Water: ask students to bring some water from home (about 1 liter each) in plastic bottles
or any other container. However, if water is available in the school compound, you may use that water instead. Note: it is preferable and advisable that you conduct this lesson when you have access to water. If no water is available in the school or in the community, you may teach this lesson by simulating the steps.
2. Soap, ash or locally growing leaf or material (Ahmed in Amharic). 3. School trachoma program flipchart.
Suggestion for Integrating the Lesson with the Formal School Curriculum: You may incorporate this lesson into the formal school curriculum by teaching it immediately after and/or
11
repeating messages from this lesson in the following subject:x Environmental science: In the grade 1 environmental science textbook (page 10), there is
a lesson titled ‘Common Diseases of Humans’. In unit 3 of the same book, there is a lesson titled ‘Our School’ (page 49) and a sub-topic called ‘Cleaning the Hands’.
Procedure: This lesson will have 2 activities:
Activity 1: Demonstrating hand and face washing (10 minutes).ª Take students to the schoolyard where there is water, or take them out to the schoolyard
with the bottles of water that the students brought from home. Demonstrate to them how you wash their hands and face using the pictures on pages 4 and 5 of the school trachoma program flipchart. Wash your hands for at least 20 seconds by following these steps:
1. Wet hands with water.2. Apply soap to cover all surfaces of the hands.3. Rub hands palm to palm.4. Rub each palm over the back of the other hand.5. Rub palm to palm with fingers interlaced.6. Rub back of fingers to opposing palms with fingers interlocked.7. Rub each thumb clasped in opposing palm.8. Clasp fingers and circular rub opposing palm.9. Rinse well with water.10. Allow hands to dry completely before touching anything else (if you don’t have to
wash your face). Otherwise continue to the next step:a. Use your fingers to wash around the eyes and nose to remove all discharge. b. Turn water back on and rinse off face and hands. c. Let hands air-dry.
Activity 2: Practicing hand and face washing (30 minutes).ª Pair up the students. In each pair, have one student wash his/her face while the other one
watches. Have the student who is watching give his/her partner feedback, including what was done well and what could be improved. Switch roles within the pairs so that each student has the opportunity to practice hand and face washing.
ª After everyone has washed their hands and face, have them talk about their experience. Prompt discussion by asking, ‘How did you feel about this activity?’ ‘What was difficult/challenging about the exercise?’ ‘What can you do to overcome those challenges?’
ª Remind students to share this information with their families and help their small siblings to wash their hands and faces correctly every morning and night. Remind them that they need to be role models to the rest of their family members.
ª End the lesson by restating these key points about cleanliness. First write these sentences on the chalkboard and then have students repeat each sentence after you.
o I must wash my hands properly frequently and whenever needed. o I must wash my face properly every morning and night.
12
Reflection:ª Ask students the following question: When should we wash our hands and face? Why?
2.1.4 Lesson 4: Using a Latrine
Lesson Objectives: At the end of this lesson students will be able to:1. Understand how to use a latrine properly.
Time Duration: 40 minutes.
Required Materials:1. The school latrine. A clean and appropriate latrine is required for this lesson. This
lesson must not be presented to students in schools where there is no latrine.
Suggestion for Integrating the Lesson with the Formal School Curriculum: You may incorporate this lesson into the formal school curriculum by teaching it immediately after and/or repeating messages from this lesson in the following subject:
1. Environmental science: In unit 3 of the grade 1 environmental science textbook, there is a lesson titled ‘Our School’ on page 48, and a sub-topic called ‘How to Use Latrine’. Therefore, you can use that topic of the formal school curriculum to integrate this lesson of the manual.
Procedure: This lesson will have 2 activities:
Activity 1: Demonstrating how to use latrine (10 minutes).ª Take students to the school latrine. The teacher should first demonstrate how to use the
latrine without removing his/her trousers or dress using these steps:1. Step into the latrine. 2. Remove the latrine cover (if cover is available).3. Simulate urinating or defecating directly in to the hole of the latrine. 4. Simulate cleaning your bottom with toilet paper, or with softened paper, or
washing with water or with any locally available material used for cleaning bottom.
5. Put the used materials into the pit. 6. Make sure your school has an appropriate plan for someone to respond to and
clean dirty latrines.7. Put ash (if available) into the latrine hole, or on the feces so that the latrine does
not smell bad. 8. If there is a cover available, cover up the latrine. 9. Wash hands properly as practiced in lesson 3.
ª Following this demonstration, select one student to demonstrate how to use a latrinewithout removing his/her trousers or dress. Ask students to provide feedback and discuss what the student did well and did not do well. And how the student can improve their technique.
13
Activity 2: Practicing appropriate ways of using a latrine (30 minutes).ª Pair up students (males with males and females with females). In each pair have one
student demonstrate how to properly use a latrine without removing his/her trousers or dress (defecation should only be simulated) while the other one watches and give feedback. Tell them to say things that their partner did well and at least one thing that they could improve on. Those students who are waiting to do the practices and those who had already practiced should watch those who are practicing. You can select one boy and one girl to assist you in managing the students during this activity.
ª If there is enough time, give your students a second chance to reuse the latrine and improve the issues observed in their first trial. Otherwise, let them try it again at home.
ª After everyone has had at least 1 chance to practice using the latrine, give the students time to talk about what they did. You can use the following questions to initiate discussion: Did you feel comfortable? Why? Why not? Is it easy for you to use the latrine every time you need to urinate or defecate? If not, why not?
ª Remind students that they should use the latrine at home in the same way that they learned during this lesson. Remind them that they need to be role models to the rest of their family members.
ª End the lesson by restating these key points about cleanliness. First write the sentences on the chalkboard and then have students repeat each sentence after you.
o I must use the latrine properly. o I will teach my family to use the latrine properly.
Reflection:ª Ask students the following questions: What are some of the challenges you face in using
the latrine every time you need to urinate or defecate? How can you ensure that you willuse the latrine every day? What precautions should be taken when using latrine? Why?
2.1.5 Lesson 5: Proper Use of Latrines
Lesson Objectives: At the end of this lesson, students will be able to:1. Differentiate between good and bad latrine hygiene shown in pictures2.
Time Duration: 40 minutes
Required Materials: 1. School Trachoma Program Flipchart
Suggestion for Integrating the Lesson with the Formal School Curriculum: You may incorporate this lesson into the formal school curriculum by teaching it immediately after and/or repeating messages from this lesson in the following subject:
2 This lesson was adopted from the Manual on Hygiene Promotion in Schools: Teachers Guidebook from UNICEF.
14
1. Environmental science: In unit 3 of the grade 1 Environmental Science textbook in, thereis a lesson titled ‘Our School’ on page 48 there is a sub-topic called ‘How to Use Latrine’.
Procedure: This lesson will have 2 activities:
Activity 1: Explaining why it is important to use latrines (5 minutes).ª Explain that we use latrines to keep flies away. Flies can make people sick, so we want to
keep them away as much as possible. When we use the latrine we help keep flies away from our families, the community and ourselves.
ª Explain that we also use latrines to keep feces out of our way. Feces can also make us sick. Flies can carry feces that are not in a latrine onto our bodies and food. It is very unhealthy to have feces lying out on the ground. Ask the students if they have had an experience using the latrine and if they have, ask them to share their experiences. Ask if they have something to cover up the drop hole in their household latrine. If so, have them tell the class about this. Encourage students to ask their parents to find something to cover up the drop hole. Explain that this is a very simple way they can keep flies and disease away.
Activity 2: Identifying good and bad latrine use behaviors (35 minutes).ª Explain that next they are going to look at pictures on pages 6, 7 and 8 of the school
trachoma program flipchart to find examples of good and bad things to do when you have to use the latrine. Some of the pictures show people going to the latrine correctly. Some of the pictures show people using the latrine incorrectly. For the good examples, the students should raise their hands to explain what the person is doing correctly. For the bad examples, the students should raise their hands to explain what they are doing wrongand what they should do instead.
o The good pictures show:� Using the latrine and covering feces with ash.� Using the latrine and covering the drop hole with cover.� Using the latrine and washing hands with soap (or amed) and water.� Using the latrine with shoes.
o The bad pictures show:� Defecating in the field/bush.� Defecating near the house or in the compound.� Urinating against a building.� Using a latrine without shoes.
ª After reviewing all the pictures on the flipchart for this lesson, reinforce the idea that it is very important to use latrines and cover up feces in order to stay healthy and keep flies away.
ª End the lesson by having the students repeat the following statements after you:o I must wash my hands with soap and water after using the latrine. o I must cover up the drop hole every time I use the latrine.
15
2.2 Grade 2 Lesson Plans
In grade 2, students are expected to demonstrate an understanding of trachoma, including causes and effects of the disease. This will encourage students to maintain personal hygiene and sanitation in order to avoid contracting trachoma. To accomplish this, students will learn about the importance of eyes, problems associated with eyes and the causes of eye sickness.
2.2.1 Lesson 1: Eye – an Important Part of the Body
Lesson Objectives: At the end of this lesson:1. Students will develop positive attitudes about having and wanting healthy eyes.2. Students will learn how to prevent their eyes from blindness.
Duration: 40 minutes.
Required Materials:1. Picture of a blind person found in the student trachoma program flipchart.2. Blindfold - please tell students to bring one clean scarf or piece of cloth one day before
you present this lesson.
Suggestion for Integrating the Lesson with the Formal School Curriculum: You may incorporate this lesson into the formal school curriculum by teaching it immediately after and/or repeating messages from this lesson in the following subject:
1. Environmental science: In unit 1 (man and his living) of the grade 2 environmental science textbook, there is a sub-topic titled ‘Comparing a Healthy and Sick Person’.
Procedure: This lesson will have 2 activities:
Activity 1: Imagining what it would be like to be blind (5 minutes).ª Show students the visual aid image of a blind person on page 9 of the school trachoma
program flipchart and ask, “Have you seen someone like this before? Do you know someone like this? What happened to her?”
ª Ask students several questions about what it would be like to be blind. Elicit answers orally. You can use the following statements to guide the discussion: “Today we’re going to be talking about what our eyesight means to us. Have you ever thought about what it would be like to be blind? What do you think it would be like?” Allow students to share their opinions.
Activity 2: Feeling what it would be like to be blind (25 minutes).ª Take the students to the schoolyard and divide the class in half. Assign one group to act
“blind”, while the other group is assigned to have normal sight, or “seeing”. Pair “blind” students with a “seeing” student and tell the “blind” students to genuinely shut their eyes and/or cover their eyes with blindfolds.
ª Instruct the “seeing” students to tell their “blind” partners how to go somewhere in the school courtyard. “Seeing” students may walk near the “blind” students giving
16
instructions about which way to go, (straight ahead, turn left, turn right to avoid the tree or the person), but may not touch the “blind” students.
ª Continue this activity for about 10 minutes, and then have the “blind” students remove their blindfolds and put them in a bag/box.
ª If there is time, the activity can be repeated with the groups changing roles. (Note: if the groups change places, new/clean blindfolds would need to be used.) Alternatively, the teacher may want to recommend that students organize themselves to complete that activity at recess/after school and simply shut their eyes.
ª After the activity, ask the students to go back to the classroom.
Note if blindfolds were used: Ask students if they know why the blindfolds were collected and could not be shared between students? Explain that sharing blindfolds is a way to transmit the eye disease trachoma. The blindfolds have to be washed before they are used again. Mention that any dirty or shared cloth that you use to wipe your face and eyes could give you trachoma, so it is important to use clean cloth to wipe faces and have clean clothes.
Activity 3: Discussing how it feels to be blind (10 minutes).ª After the activity and back in the classroom, ask the “blind” students how they felt as
they walked. Did they feel comfortable? Was it difficult for them? Were they confused at all? Did they want to open their eyes? Did they open their eyes? If so, why? Is that because they felt scared? What would it be like to spend the rest of their lives unable to see?
ª Finally, explain to the students that one cause of blindness is an eye disease called trachoma. The disease can be easily prevented by keeping your face clean, and by washing both your hands and face at least twice a day.
Reflection: ª Ask the students to honestly assess themselves based on the following chart. Ask students
who assessed themselves as being clean to raise their hands. Students who did not assess themselves as clean should be encouraged to wash their hands and faces at school or given a take home assignment to come clean the next day.
S. No Questions for Self-Assessment Total Number of Students
1 Students with clean hands
2 Students who keep their face clean3 Students who never touch their eyes with dirty fingers4 Students with clean clothes5 Students who never touch their eyes with dirty clothes6 Students with no discharge on their eyes and nose
ª After you have completed discussing the chart above, ask each student: Do you think you are effectively protecting your eyes from blinding trachoma? If not, why not? What are you going to do in the future?
17
2.2.2 Lesson 2: Eye Sickness
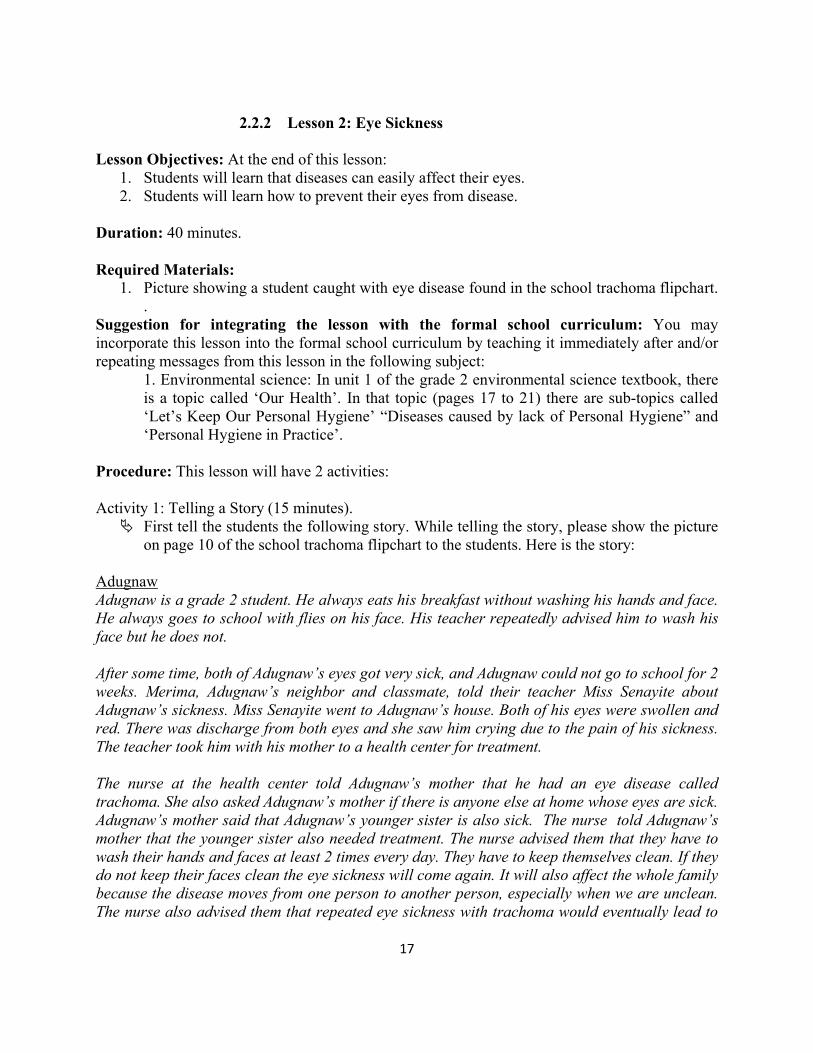
Lesson Objectives: At the end of this lesson:1. Students will learn that diseases can easily affect their eyes. 2. Students will learn how to prevent their eyes from disease.
Duration: 40 minutes.
Required Materials:1. Picture showing a student caught with eye disease found in the school trachoma flipchart.
.Suggestion for integrating the lesson with the formal school curriculum: You may incorporate this lesson into the formal school curriculum by teaching it immediately after and/or repeating messages from this lesson in the following subject:
1. Environmental science: In unit 1 of the grade 2 environmental science textbook, thereis a topic called ‘Our Health’. In that topic (pages 17 to 21) there are sub-topics called ‘Let’s Keep Our Personal Hygiene’ “Diseases caused by lack of Personal Hygiene” and ‘Personal Hygiene in Practice’.
Procedure: This lesson will have 2 activities:
Activity 1: Telling a Story (15 minutes).ª First tell the students the following story. While telling the story, please show the picture
on page 10 of the school trachoma flipchart to the students. Here is the story:
AdugnawAdugnaw is a grade 2 student. He always eats his breakfast without washing his hands and face. He always goes to school with flies on his face. His teacher repeatedly advised him to wash his face but he does not.
After some time, both of Adugnaw’s eyes got very sick, and Adugnaw could not go to school for 2 weeks. Merima, Adugnaw’s neighbor and classmate, told their teacher Miss Senayite about Adugnaw’s sickness. Miss Senayite went to Adugnaw’s house. Both of his eyes were swollen and red. There was discharge from both eyes and she saw him crying due to the pain of his sickness. The teacher took him with his mother to a health center for treatment.
The nurse at the health center told Adugnaw’s mother that he had an eye disease called trachoma. She also asked Adugnaw’s mother if there is anyone else at home whose eyes are sick. Adugnaw’s mother said that Adugnaw’s younger sister is also sick. The nurse told Adugnaw’s mother that the younger sister also needed treatment. The nurse advised them that they have to wash their hands and faces at least 2 times every day. They have to keep themselves clean. If they do not keep their faces clean the eye sickness will come again. It will also affect the whole family because the disease moves from one person to another person, especially when we are unclean. The nurse also advised them that repeated eye sickness with trachoma would eventually lead to
18
irreversible blindness. She warned, “Although now you are cured, unless you keep yourself clean you will be sick again. Be careful not to be blind in the future.”
Activity 2: Discussion on what to do (25 minutes)ª Ask the students what they understand from the story. You can raise several questions
like: o What happened to Adugnaw? (Answer: his eyes got sick; he had to miss school;
he had to go to the doctor/health center).o Why did Adugnaw become sick? (Answer: He did not wash his face and flies
rested on it).o How did he become cured? (Answer: he was given medication at the health center
to treat the disease).o What can Adugnaw do to stay healthy? (Answer: he can be like Merima and wash
his face and hands with soap (or amed) and water every day; he can wash the towels and blanket he and his sister use so that they are always clean; he can remind his sister to wash her hands and face every day.)
Note: the answers given to each question above are not the only correct answers and additional answers are encouraged. ª After the discussion, students should check how clean they are by using the checklist
below. Ask students to raise their hands in response to the questions below. If you find any of the students responding in a wrong way, you can ask them to check their cleanliness using the school mirror or have other students check for them.
ª Ask students with clean faces and healthy eyes to give advice to those with dirty faces and/or unhealthy eyes. If the clean students miss any of the following points, make sure you inform the class that these are all things they should do: be free from flies by making yourself clean every day; use soap (or locally available material- amed) to wash your face and hands; keep the environment clean to eliminate flies. Remember trachoma (the eye disease) transmits from one person to another person with flies, dirty fingers, dirty clothes, etc. Finally, you can let unclean students wash their faces, provided that there is enough time to do so; otherwise, you can ask them to wash at home and come clean to class the next day.
Reflection: ª Ask students the following questions: What causes the eye disease trachoma? How can
we prevent ourselves from trachoma? If anyone has an eye sickness, what should they do?
S.No Questions for check up No of students with 1 How many of the students in the class have dirty faces?2 How many of the students feel their eyes are currently sick?3 How many of the students have ever had their eyes feel sick?4 How many of the students have red, itchy and puffy eyes with
discharge?

19
2.2.3 Lesson 3: Trachoma
Lesson Objectives: At the end of this lesson:1. Students will be able to identify what causes trachoma.2. Students will understand the negative effects of trachoma and decide to protect
themselves from it.
Duration: 40 minutes.
Materials Required:1. White gown for ‘the doctor’ in the role-play (ask the HEW for a white gown if you do not
have one at the school).2. Simple model of a stethoscope (optional). 3. School trachoma flipchart.
Suggestion for Integrating the Lesson with the Formal School Curriculum: You may incorporate this lesson into the formal school curriculum by teaching it immediately after and/or repeating messages from this lesson in the following subject:
1. Environmental science: In unit 1 of the grade 2 environmental science textbook, there is a topic called ‘Our Health’. In this unit, there is a sub topic called “Diseases caused by lack of cleanliness” (page 19). You can integrate this lesson with the one from the environmental science subject.
Preparation: A week before this lesson, select 2 students with the ability to act, for the role-play (possibly a girl and a boy). Assign 1 of the students (suggest the girl student) to act as a doctor. Assign the other student (suggest the boy student) to act as a student whose grandmother is affected by trachoma. Ask the children you select to copy the role-play below so that they can study it at home. Ask them to prepare and memorize the following role-play for a week so they can perform the role-play for the class.
Role-play: [The boy comes to the doctor very worried about his grandmother and the health problem she isfaced with. He asks the doctor:]
Student: Doctor what happened to my grandma? She cannot see.Doctor: Maybe your grandmother is affected by trachoma.Student: Trachoma?Doctor: Yes, trachoma is a preventable eye disease. But if it is untreated it makes people blind
for their whole lives. Many people in Ethiopia are blind because of trachoma. Student: Do you mean my grandma will remain blind for the rest of her life?Doctor: Yes.Student: What is the cause of trachoma [with a very worried facial expression]?Doctor: Trachoma is a disease that comes from lack of cleanliness, that is, it is spread when
people have a dirty face, dirty eyes, dirty fingers, dirty clothes, flies carrying dirty things on their feet, etc.
20
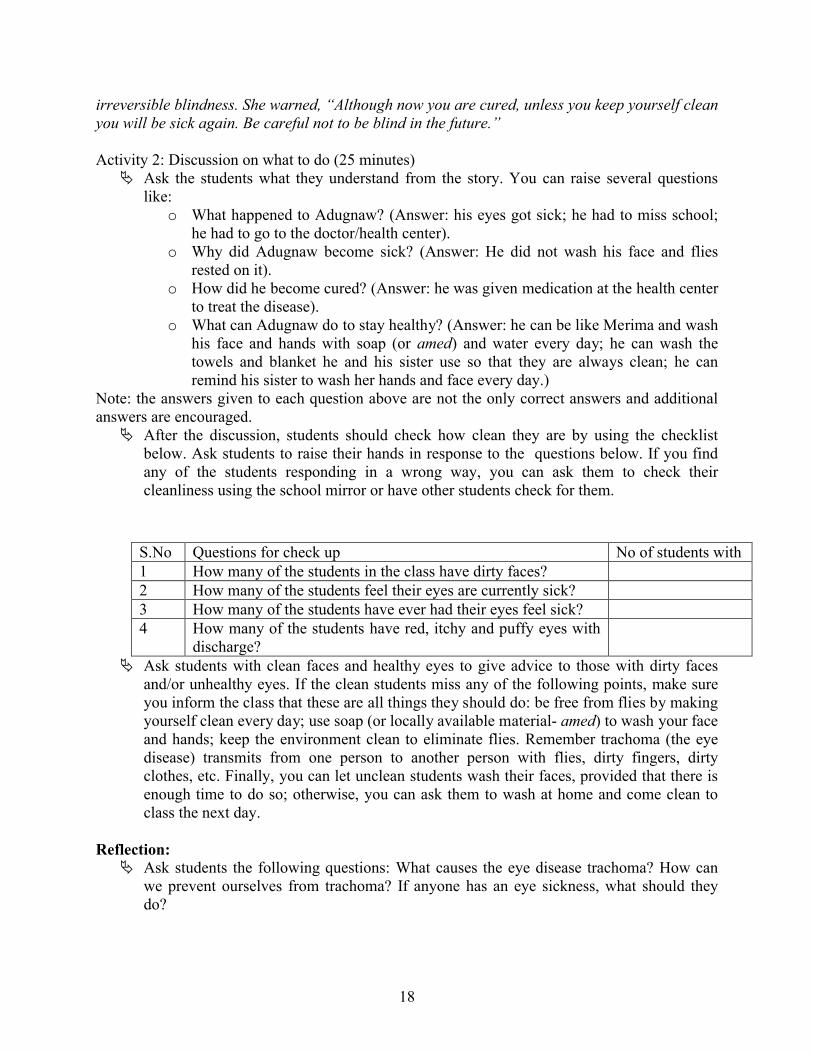
Student: Do you mean that dirty things can make our eyes sick? Doctor: Exactly. Trachoma makes people’s eyes itchy and sore, and repeated infection with
trachoma can eventually lead to blindness.Student: Is it possible to treat trachoma?Doctor: This is good question. You can prevent trachoma by keeping your face clean and by
keeping flies away. You can also keep flies away by using a latrine every time you defecate and clean your household environment. But! If you get trachoma, you can be treated with a medicine distributed once per year during Trachoma Weeks, or at a health facility. But remember, a person cannot be cured after he/she goes blind. Are you clear now?
Student: Yes doctor, I am clear with it. I thank you doctor. Doctor: It is ok. I thank you too.
[Now the student departs after greeting the doctor. This is the end of the role-play.]Procedure: There are 2 activities in this lesson:
Activity 1: Presenting the role-play about trachoma (7 minutes).ª Tell your students that they will have a role-play to observe and that they will be asked
several questions after viewing the role-play. Therefore, advise your students to watch the role-play attentively. Then let the students who have prepared for the role-play present it in front of their fellow students.
Activity 2: Discussion on what is learned from the role-play (33 minutes).ª At the end of the role-play, ask students several questions like:
o What happened to the student’s grandmother? (Answer: she became blind due to trachoma)
o What is trachoma? (Answer: it is a preventable eye disease that will cause permanent blindness if it is not treated)
o Which part of our body does it affect? (Answer: it affects our eyes)o Can it be prevented? How? (Answer: By washing hands and face, using the latrine
and keeping flies away)ª Finally conclude the lesson by telling the students that the eye disease (trachoma) is
caused by lack of cleanliness. It is transmitted through contact with eye and nose discharge of infected people. Young children are the main source of infection. It is also spread by flies, which have been in contact with the eyes and noses of infected people. Therefore, it is possible to prevent us and our community from trachoma by keeping our environment and ourselves clean.
Reflection: ª Ask the students to assess themselves based on the following chart (you also have this
chart in school trachoma flipchart), therefore there is no need to write this chart on the chalkboard. Encourage your students to be honest while evaluating their cleanliness. Ask students who assessed themselves as being clean to raise their hands. Students who did not assess themselves as clean should be encouraged to wash their hands and faces at school or given a take home assignment to come clean the next day.
21
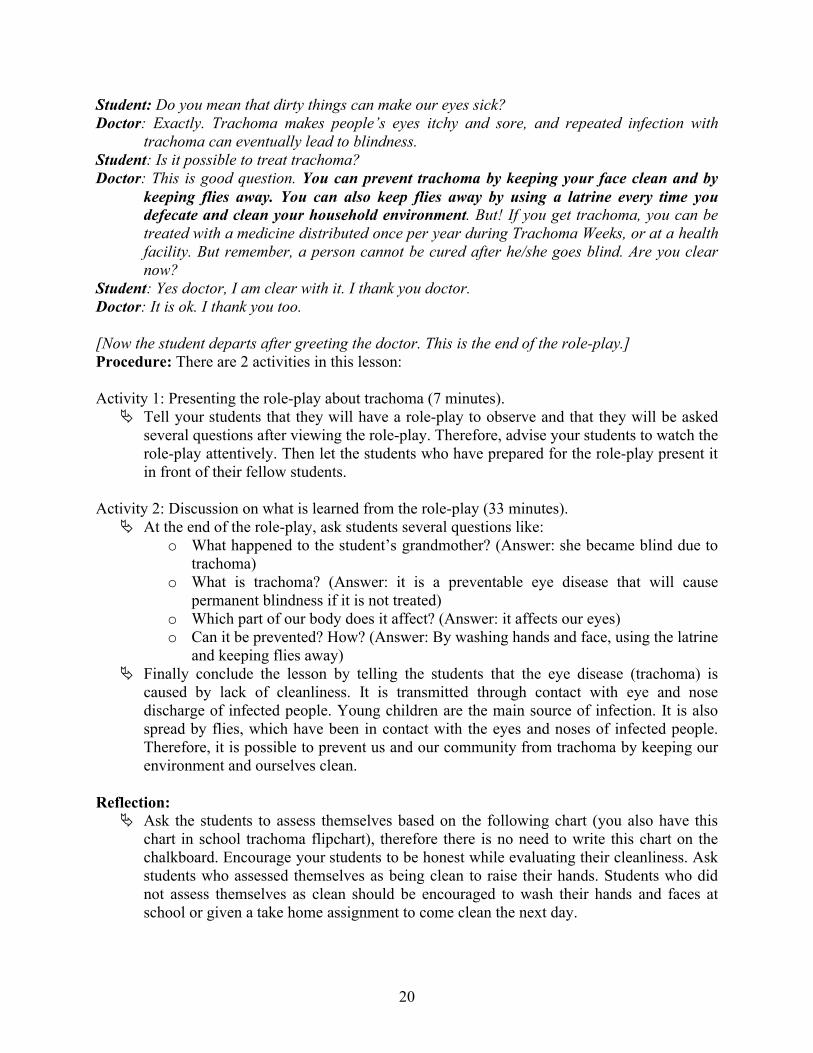
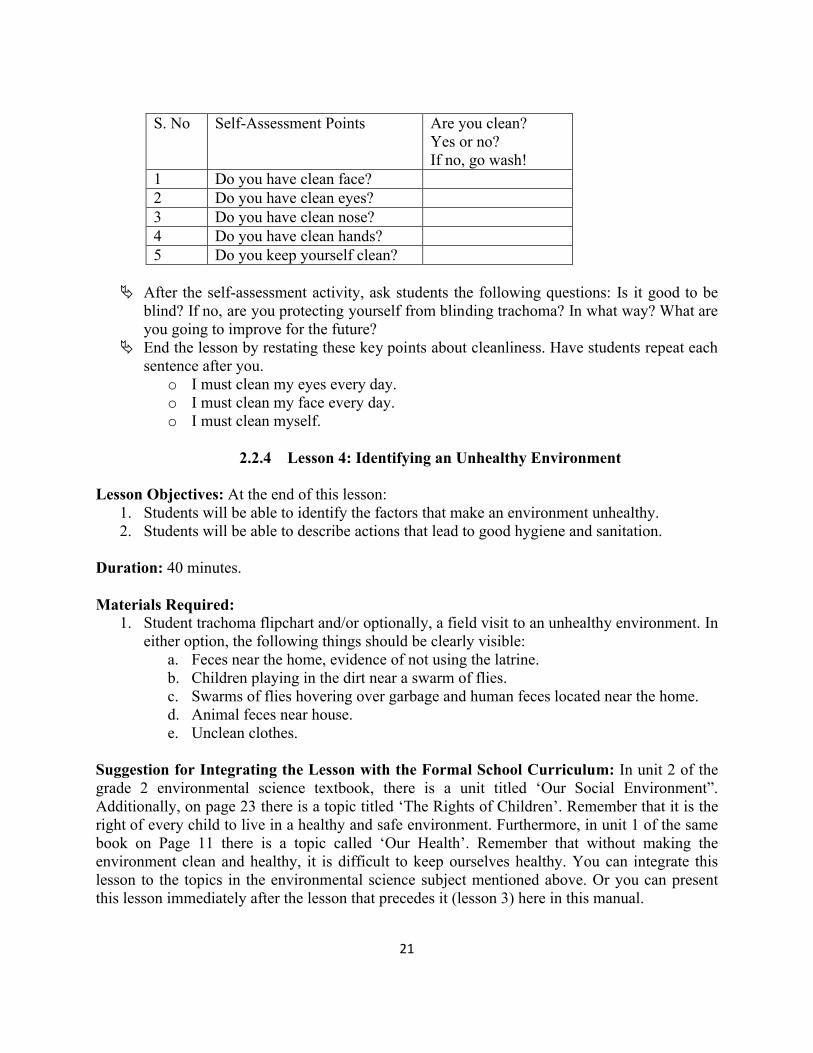
S. No Self-Assessment Points Are you clean? Yes or no? If no, go wash!
1 Do you have clean face?2 Do you have clean eyes?3 Do you have clean nose?4 Do you have clean hands?5 Do you keep yourself clean?
ª After the self-assessment activity, ask students the following questions: Is it good to be blind? If no, are you protecting yourself from blinding trachoma? In what way? What are you going to improve for the future?
ª End the lesson by restating these key points about cleanliness. Have students repeat each sentence after you.
o I must clean my eyes every day. o I must clean my face every day. o I must clean myself.
2.2.4 Lesson 4: Identifying an Unhealthy Environment
Lesson Objectives: At the end of this lesson:1. Students will be able to identify the factors that make an environment unhealthy. 2. Students will be able to describe actions that lead to good hygiene and sanitation.
Duration: 40 minutes.
Materials Required: 1. Student trachoma flipchart and/or optionally, a field visit to an unhealthy environment. In
either option, the following things should be clearly visible: a. Feces near the home, evidence of not using the latrine.b. Children playing in the dirt near a swarm of flies.c. Swarms of flies hovering over garbage and human feces located near the home. d. Animal feces near house.e. Unclean clothes.
Suggestion for Integrating the Lesson with the Formal School Curriculum: In unit 2 of the grade 2 environmental science textbook, there is a unit titled ‘Our Social Environment”. Additionally, on page 23 there is a topic titled ‘The Rights of Children’. Remember that it is the right of every child to live in a healthy and safe environment. Furthermore, in unit 1 of the same book on Page 11 there is a topic called ‘Our Health’. Remember that without making the environment clean and healthy, it is difficult to keep ourselves healthy. You can integrate this lesson to the topics in the environmental science subject mentioned above. Or you can present this lesson immediately after the lesson that precedes it (lesson 3) here in this manual.
22
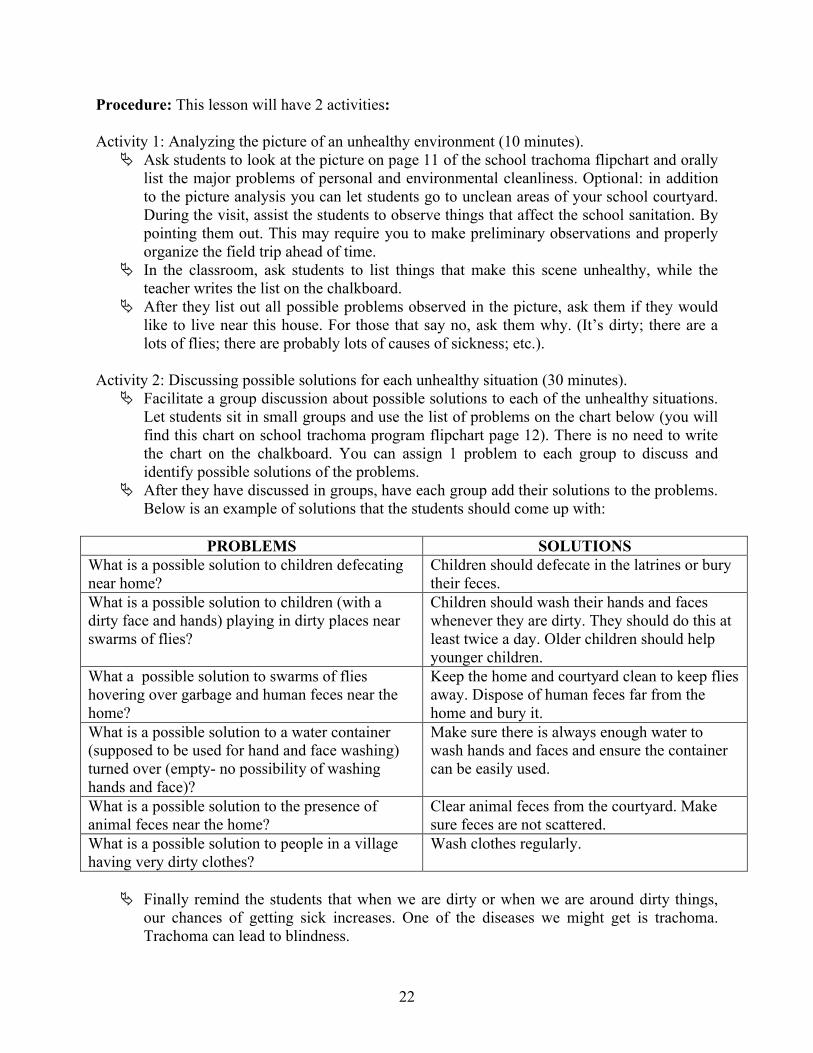
Procedure: This lesson will have 2 activities:
Activity 1: Analyzing the picture of an unhealthy environment (10 minutes).ª Ask students to look at the picture on page 11 of the school trachoma flipchart and orally
list the major problems of personal and environmental cleanliness. Optional: in addition to the picture analysis you can let students go to unclean areas of your school courtyard.During the visit, assist the students to observe things that affect the school sanitation. By pointing them out. This may require you to make preliminary observations and properly organize the field trip ahead of time.
ª In the classroom, ask students to list things that make this scene unhealthy, while the teacher writes the list on the chalkboard.
ª After they list out all possible problems observed in the picture, ask them if they would like to live near this house. For those that say no, ask them why. (It’s dirty; there are alots of flies; there are probably lots of causes of sickness; etc.).
Activity 2: Discussing possible solutions for each unhealthy situation (30 minutes).ª Facilitate a group discussion about possible solutions to each of the unhealthy situations.
Let students sit in small groups and use the list of problems on the chart below (you will find this chart on school trachoma program flipchart page 12). There is no need to write the chart on the chalkboard. You can assign 1 problem to each group to discuss and identify possible solutions of the problems.
ª After they have discussed in groups, have each group add their solutions to the problems. Below is an example of solutions that the students should come up with:
PROBLEMS SOLUTIONSWhat is a possible solution to children defecating near home?
Children should defecate in the latrines or bury their feces.
What is a possible solution to children (with a dirty face and hands) playing in dirty places near swarms of flies?
Children should wash their hands and faces whenever they are dirty. They should do this at least twice a day. Older children should help younger children.
What a possible solution to swarms of flies hovering over garbage and human feces near the home?
Keep the home and courtyard clean to keep flies away. Dispose of human feces far from the home and bury it.
What is a possible solution to a water container (supposed to be used for hand and face washing) turned over (empty- no possibility of washing hands and face)?
Make sure there is always enough water to wash hands and faces and ensure the container can be easily used.
What is a possible solution to the presence of animal feces near the home?
Clear animal feces from the courtyard. Make sure feces are not scattered.
What is a possible solution to people in a village having very dirty clothes?
Wash clothes regularly.
ª Finally remind the students that when we are dirty or when we are around dirty things, our chances of getting sick increases. One of the diseases we might get is trachoma. Trachoma can lead to blindness.
23
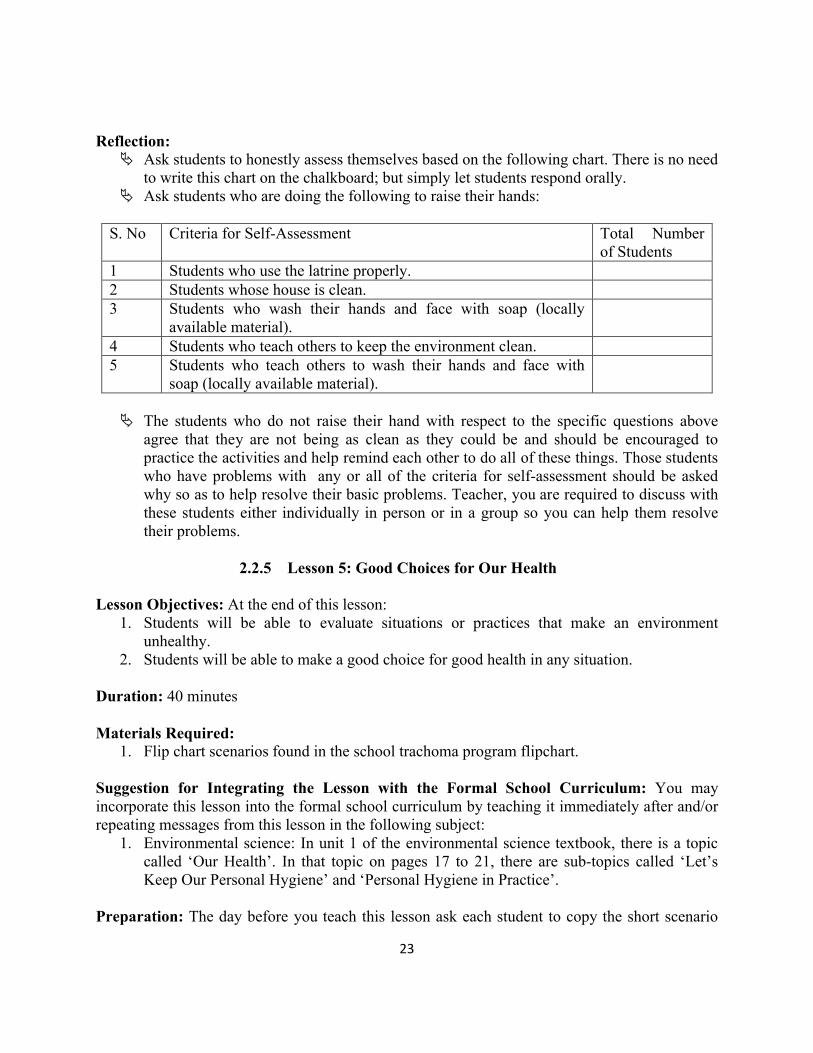
Reflection: ª Ask students to honestly assess themselves based on the following chart. There is no need
to write this chart on the chalkboard; but simply let students respond orally. ª Ask students who are doing the following to raise their hands:
S. No Criteria for Self-Assessment Total Number of Students
1 Students who use the latrine properly. 2 Students whose house is clean. 3 Students who wash their hands and face with soap (locally
available material). 4 Students who teach others to keep the environment clean.5 Students who teach others to wash their hands and face with
soap (locally available material).
ª The students who do not raise their hand with respect to the specific questions above agree that they are not being as clean as they could be and should be encouraged to practice the activities and help remind each other to do all of these things. Those students who have problems with any or all of the criteria for self-assessment should be asked why so as to help resolve their basic problems. Teacher, you are required to discuss with these students either individually in person or in a group so you can help them resolve their problems.
2.2.5 Lesson 5: Good Choices for Our Health
Lesson Objectives: At the end of this lesson:1. Students will be able to evaluate situations or practices that make an environment
unhealthy. 2. Students will be able to make a good choice for good health in any situation.
Duration: 40 minutes
Materials Required: 1. Flip chart scenarios found in the school trachoma program flipchart.
Suggestion for Integrating the Lesson with the Formal School Curriculum: You may incorporate this lesson into the formal school curriculum by teaching it immediately after and/or repeating messages from this lesson in the following subject:
1. Environmental science: In unit 1 of the environmental science textbook, there is a topic called ‘Our Health’. In that topic on pages 17 to 21, there are sub-topics called ‘Let’s Keep Our Personal Hygiene’ and ‘Personal Hygiene in Practice’.
Preparation: The day before you teach this lesson ask each student to copy the short scenario
24
given to them on page 12 of the school trachoma program flipchart in their exercise books. For homework, have each student discuss the scenario with his/her family and come up with an ending to the scenario and 2-3 ideas for good choices that the character can make.
Here is the scenario: Fatuma is playing with Rahel. Rahel has very dirty eyes, face and hands. Flies are hovering on her face. What good choices for better health should Fatuma suggest to help her friend?
Procedure: This lesson will have 2 activities:
Activity 1: Defining the meaning of “good choice for our health” (5 minutes).ª Ask students what a good choice for our health means to them. You can use the following
question: “What do you think the phrase, ‘a good choice for our health’ means?” Review the responses from the students and come to a consensus about what it means to make a healthy choice. (Answers may include: a good choice for our health is any choice that prevents us from getting sick; it is any choice that helps us keep our health.)
Activity 2: Finishing a scenario with a healthy choice (35 minutes).ª Explain to your students that they are going to be working in the groups on the scenario
they were assigned the day before. Each group should come up with the best ending for the scenario.
ª Allow time for each group member to share the choices that he/she thought of with his/her family the previous day.
ª Once each group member has shared, encourage the groups to add more to the scenario to make it more interesting. But inform them that they do not have to worry about writing long sentences.
ª Finally give each group a turn to present their scenarios. Encourage students in other groups to raise issues and questions about anything that is unclear in the presentation.
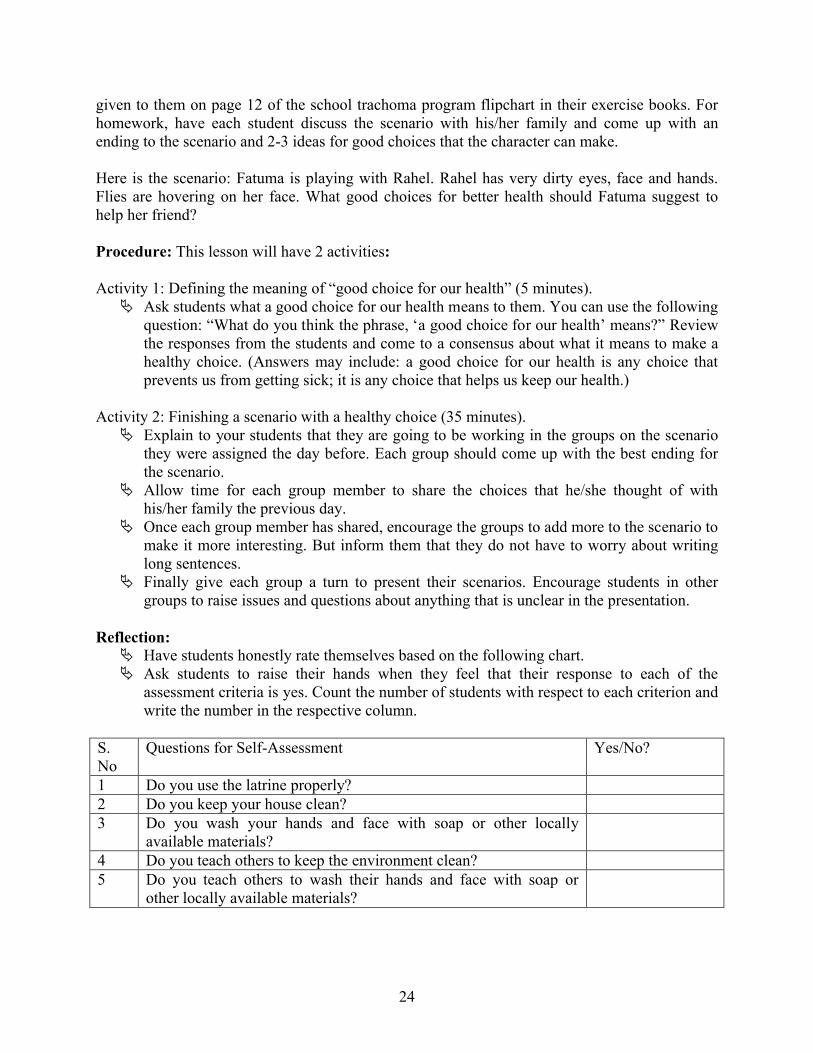
Reflection: ª Have students honestly rate themselves based on the following chart. ª Ask students to raise their hands when they feel that their response to each of the
assessment criteria is yes. Count the number of students with respect to each criterion and write the number in the respective column.
S. No
Questions for Self-Assessment Yes/No?
1 Do you use the latrine properly? 2 Do you keep your house clean?3 Do you wash your hands and face with soap or other locally
available materials? 4 Do you teach others to keep the environment clean?5 Do you teach others to wash their hands and face with soap or
other locally available materials?
25
ª Finally, individually discuss each child’s chart with them and ask the following questions: do you think that you are doing your best to make sure your community and the environment are clean and healthy? What are you going to do for the future?
26
2.3 Grade 3 Lesson Plans
Trachoma is not only an individual problem, but also a problem of the family and the communityat large. Therefore, in this grade level, students are expected to learn about their role in preventing their family members from getting trachoma. To this end, students are required to be role models for their families.
2.3.1 Lesson 1: Germs and How They Spread
Lesson Objectives: At the end of this lesson: 1. Students will be able to explain how germs spread.2. Students will be able to make hand and face washing part of their daily routine to get rid
of germs.
Duration: 40 minutes.
Materials Required: 1. Turmeric (eried in Amharic – a yellow powder used for making wot).2. Small amount of water – ask 3 to 5 students to bring at least 3 liters of water. If water is
available at your school, you may use that water. 3. Soap or amed.
Preparation: Please bring turmeric powder from your home. You only need a handful.
Suggestion for Integrating the Lesson with the Formal School Curriculum: You may incorporate this lesson into the formal school curriculum by teaching it immediately after and/or repeating messages from this lesson in the following subject:
1. Environmental science in unit 1 of the grade 3 environmental science textbook (page 9), there is a topic titled ‘Keeping Family Health’. In that topic (pages 9-14), there are sub-topics like: ‘Activities related with keeping family health’, ‘Activities related with environmental sanitation’, ‘Diseases caused by lack of cleanliness’. You can integrate this lesson with either of those sub-topics.
Procedure: There are 2 activities in this lesson:
Activity 1: Reviewing or introducing germs (5 minutes).ª Ask students what germs are. Students should have already learned about germs in grade 1
and 2 in their environmental science class. You can use the following questions for review: “What are germs? Where do germs usually live?” After students respond you can summarizethe discussion by stating the fact that germs are very small organisms that can cause disease and make people sick. They cannot be seen with our naked eyes, but with a magnifying instrument called a microscope. Germs live everywhere. They are all around us. They can spread from person to person, from things to people and from people to things.
Activity 2: Experimenting how germs spread (35 minutes).
27
ª Explain that today we are going to do an activity showing how quickly germs can spread. Have 3 students come up to the front of the room. Have them show their hands to the class. Ask the class if they can see germs on their hands. Explain that germs are very small and cannot be seen by our eyes without a microscope.
ª Show the class the yellow powder (eried/turmeric). Explain that today the yellow powder will represent germs. Explain that they are going to see if germs spread. If the yellow powder representing germs spreads from person to person then the students can understand that germs can spread from person to person.
ª Pour just enough water on the first volunteer’s hands to make sure they are wet. Explain the water is going to represent the sweat on our hands. (Remember that our hands and the rest of our bodies sweat when we play, cook, run, and do other activities).
ª Put the yellow powder into the hand of the first volunteer. Have him/her touch hands together so that the yellow powder spread all over his/her hands. Have the child show his/her hands to the class. They should see the yellow powder and recognize that it represents germs on that person’s hands. Have the student touch his/her face to show how germs spread to our face from our hands.
ª Have the second volunteer come up and pour water on his/her hands. Make sure the student does not dry his/her hands. You want the yellow powder to easily stick to the hands. Have the first volunteer shake the second volunteer’s hands. Have both students show their hands to the class. The class should be able to see that the “germs” spread just by touching each other.
ª Repeat the same process with the third volunteer. Have the second volunteer shake the third volunteer’s hands. The first and third volunteer should not shake hands.
ª Have all 3 children show their hands to the class. Ask them what they notice. (Answer: everyone’s hands have germs on them.) Ask them if the first and the third volunteer ever touched hands? Of course they did not. Have them notice the third volunteer got germs from the first volunteer even though he/she never touched him/her. Explain that, this shows that germs spread from people to people. Similarly if you put your hands on your face, germs easily spread from your hands to your face.
ª Also explain that if someone sneezes into his/her hands, he/she could spread germs to other people. Explain that if we have germs on our hands and touch our eyes, those germs could spread to our eyes and make us sick. Explain that it is very important to use soap (or locally available material that is used for washing) and water to eliminate germs.
ª Now let the 3 volunteer students wash their hands with soap (or with any locally available material that is used for washing). They have to use the soap for at least 20 seconds while washing their hands. Have them show their hands to the class again after washing to make sure they washed their hands well to get rid of all the powder/germs.
ª Finally inform the students that keeping themselves clean is the way we get rid of germs. This is why we advocate for hand and face washing as a means to protect us from germs and the resulting diseases.
Reflection: ª Please copy the yes/no column of the chart on the chalkboard so that students can copy it in
their exercise books. Ask students to only make a yes/ no column in the exercise book, read them the questions so that they can write the answers to the questions in their exercise books.
28
Based on this practice you can let them assess themselves. Encourage them to be honest and put a tick mark (√) in the right column (yes or no) that their answers reflect their own experience and feelings. If you feel some students are not answering honestly, you can let other students or you can use a mirror (if one is available)to verify the reality.
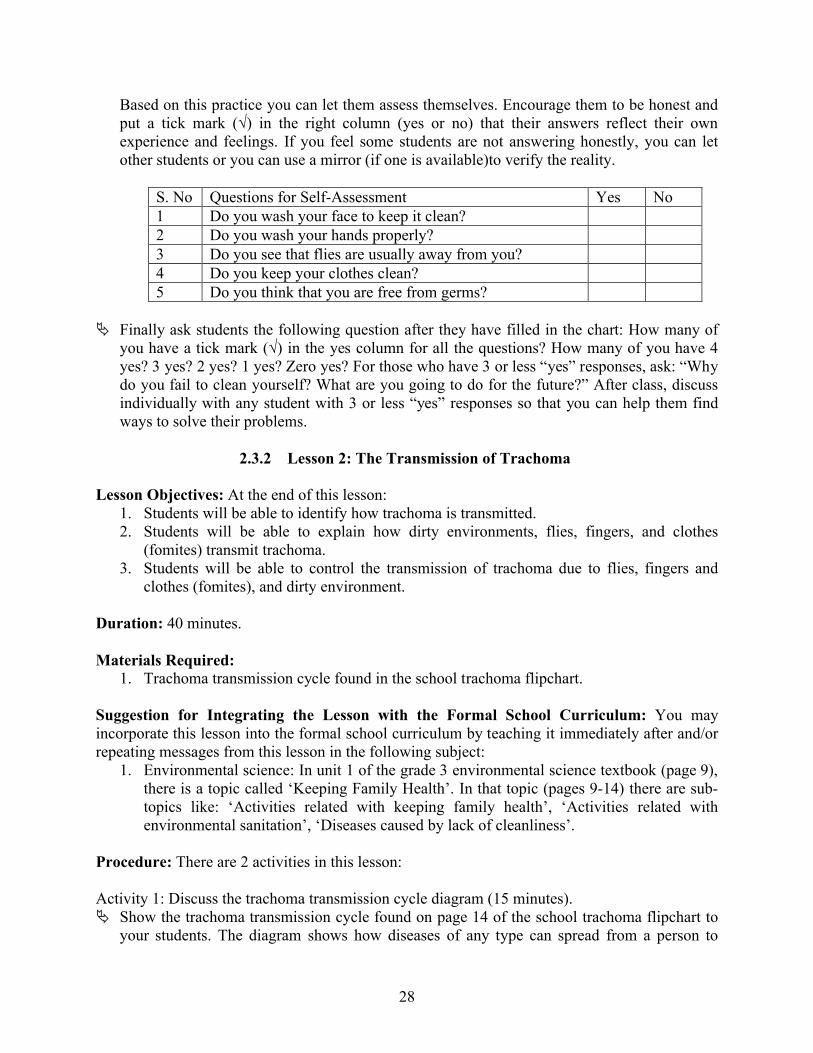
S. No Questions for Self-Assessment Yes No1 Do you wash your face to keep it clean? 2 Do you wash your hands properly?3 Do you see that flies are usually away from you?4 Do you keep your clothes clean?5 Do you think that you are free from germs?
ª Finally ask students the following question after they have filled in the chart: How many of you have a tick mark (√) in the yes column for all the questions? How many of you have 4 yes? 3 yes? 2 yes? 1 yes? Zero yes? For those who have 3 or less “yes” responses, ask: “Why do you fail to clean yourself? What are you going to do for the future?” After class, discuss individually with any student with 3 or less “yes” responses so that you can help them find ways to solve their problems.
2.3.2 Lesson 2: The Transmission of Trachoma
Lesson Objectives: At the end of this lesson:1. Students will be able to identify how trachoma is transmitted.2. Students will be able to explain how dirty environments, flies, fingers, and clothes
(fomites) transmit trachoma.3. Students will be able to control the transmission of trachoma due to flies, fingers and
clothes (fomites), and dirty environment.
Duration: 40 minutes.
Materials Required: 1. Trachoma transmission cycle found in the school trachoma flipchart.
Suggestion for Integrating the Lesson with the Formal School Curriculum: You may incorporate this lesson into the formal school curriculum by teaching it immediately after and/or repeating messages from this lesson in the following subject:
1. Environmental science: In unit 1 of the grade 3 environmental science textbook (page 9), there is a topic called ‘Keeping Family Health’. In that topic (pages 9-14) there are sub-topics like: ‘Activities related with keeping family health’, ‘Activities related with environmental sanitation’, ‘Diseases caused by lack of cleanliness’.
Procedure: There are 2 activities in this lesson:
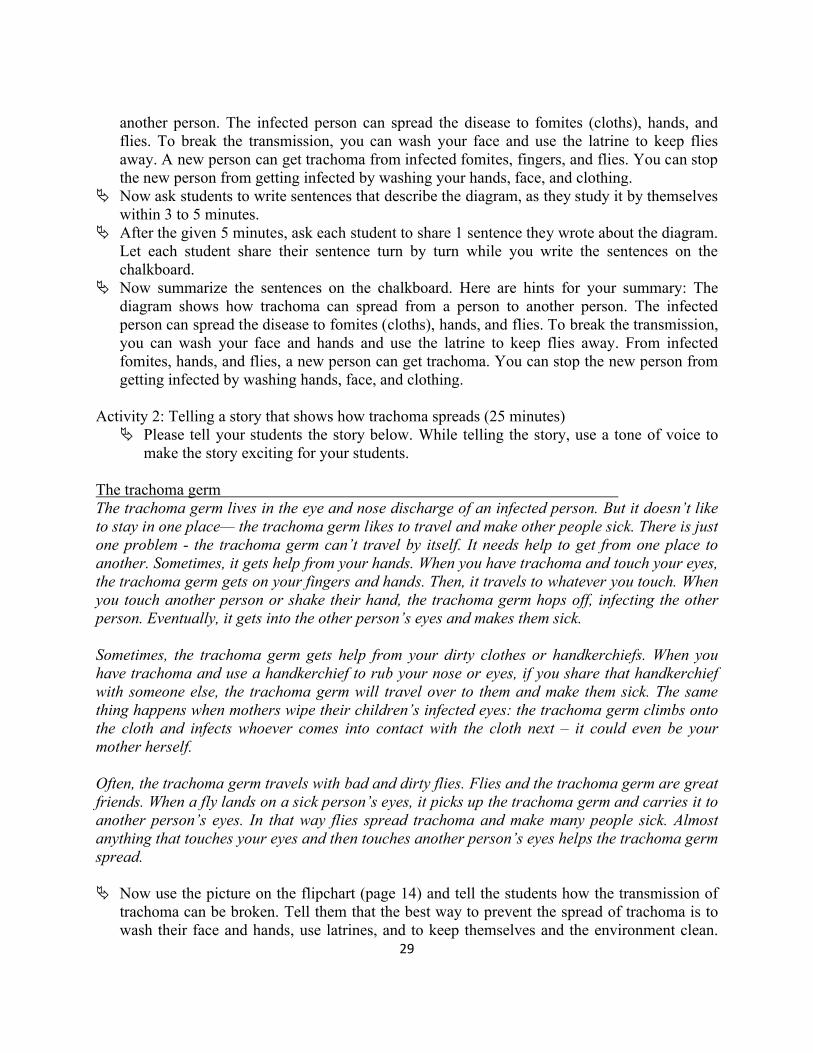
Activity 1: Discuss the trachoma transmission cycle diagram (15 minutes).ª Show the trachoma transmission cycle found on page 14 of the school trachoma flipchart to
your students. The diagram shows how diseases of any type can spread from a person to
29
another person. The infected person can spread the disease to fomites (cloths), hands, and flies. To break the transmission, you can wash your face and use the latrine to keep flies away. A new person can get trachoma from infected fomites, fingers, and flies. You can stop the new person from getting infected by washing your hands, face, and clothing.
ª Now ask students to write sentences that describe the diagram, as they study it by themselves within 3 to 5 minutes.
ª After the given 5 minutes, ask each student to share 1 sentence they wrote about the diagram. Let each student share their sentence turn by turn while you write the sentences on the chalkboard.
ª Now summarize the sentences on the chalkboard. Here are hints for your summary: The diagram shows how trachoma can spread from a person to another person. The infected person can spread the disease to fomites (cloths), hands, and flies. To break the transmission, you can wash your face and hands and use the latrine to keep flies away. From infected fomites, hands, and flies, a new person can get trachoma. You can stop the new person from getting infected by washing hands, face, and clothing.
Activity 2: Telling a story that shows how trachoma spreads (25 minutes)ª Please tell your students the story below. While telling the story, use a tone of voice to
make the story exciting for your students.
The trachoma germThe trachoma germ lives in the eye and nose discharge of an infected person. But it doesn’t like to stay in one place— the trachoma germ likes to travel and make other people sick. There is just one problem - the trachoma germ can’t travel by itself. It needs help to get from one place to another. Sometimes, it gets help from your hands. When you have trachoma and touch your eyes, the trachoma germ gets on your fingers and hands. Then, it travels to whatever you touch. When you touch another person or shake their hand, the trachoma germ hops off, infecting the other person. Eventually, it gets into the other person’s eyes and makes them sick.
Sometimes, the trachoma germ gets help from your dirty clothes or handkerchiefs. When you have trachoma and use a handkerchief to rub your nose or eyes, if you share that handkerchief with someone else, the trachoma germ will travel over to them and make them sick. The same thing happens when mothers wipe their children’s infected eyes: the trachoma germ climbs onto the cloth and infects whoever comes into contact with the cloth next – it could even be your mother herself.
Often, the trachoma germ travels with bad and dirty flies. Flies and the trachoma germ are great friends. When a fly lands on a sick person’s eyes, it picks up the trachoma germ and carries it to another person’s eyes. In that way flies spread trachoma and make many people sick. Almost anything that touches your eyes and then touches another person’s eyes helps the trachoma germ spread.
ª Now use the picture on the flipchart (page 14) and tell the students how the transmission of trachoma can be broken. Tell them that the best way to prevent the spread of trachoma is to wash their face and hands, use latrines, and to keep themselves and the environment clean.
30
Having said this, ask them whether they do things to prevent trachoma. If not ask them why and discuss how to do those activities more.
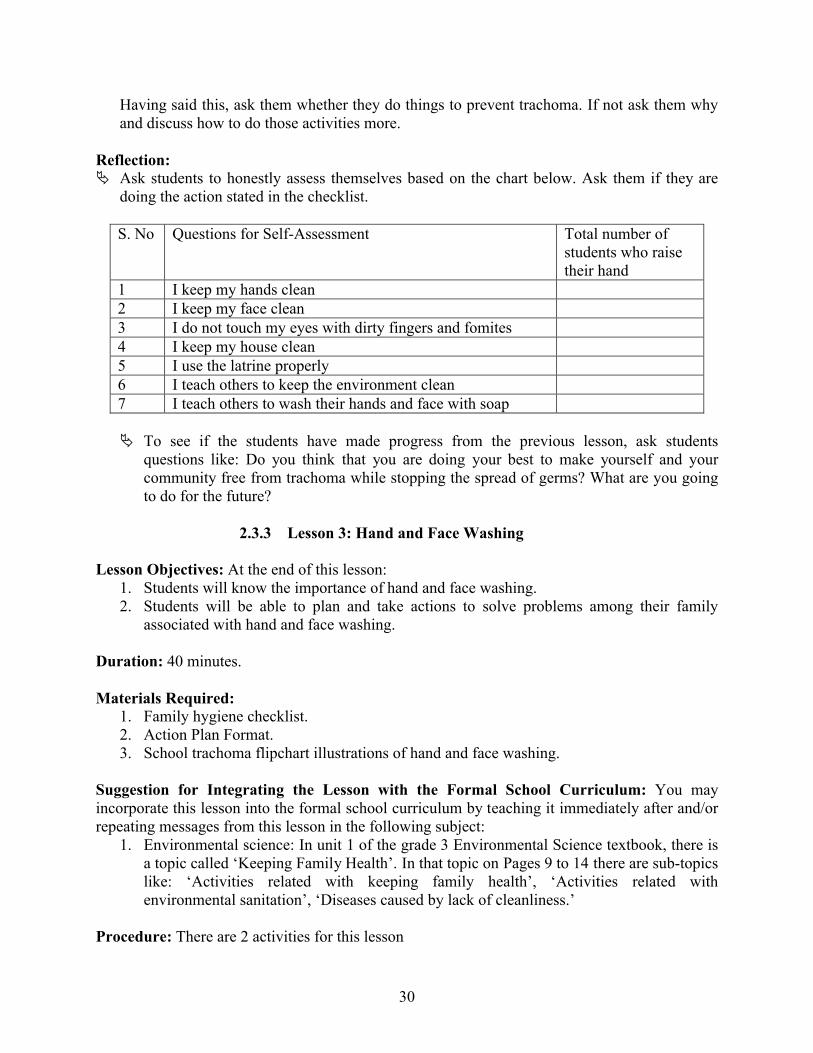
Reflection: ª Ask students to honestly assess themselves based on the chart below. Ask them if they are
doing the action stated in the checklist.
S. No Questions for Self-Assessment Total number of students who raise their hand
1 I keep my hands clean2 I keep my face clean3 I do not touch my eyes with dirty fingers and fomites4 I keep my house clean5 I use the latrine properly 6 I teach others to keep the environment clean 7 I teach others to wash their hands and face with soap
ª To see if the students have made progress from the previous lesson, ask students questions like: Do you think that you are doing your best to make yourself and your community free from trachoma while stopping the spread of germs? What are you going to do for the future?
2.3.3 Lesson 3: Hand and Face Washing
Lesson Objectives: At the end of this lesson:1. Students will know the importance of hand and face washing.2. Students will be able to plan and take actions to solve problems among their family
associated with hand and face washing.
Duration: 40 minutes.
Materials Required: 1. Family hygiene checklist.2. Action Plan Format.3. School trachoma flipchart illustrations of hand and face washing.
Suggestion for Integrating the Lesson with the Formal School Curriculum: You may incorporate this lesson into the formal school curriculum by teaching it immediately after and/or repeating messages from this lesson in the following subject:
1. Environmental science: In unit 1 of the grade 3 Environmental Science textbook, there is a topic called ‘Keeping Family Health’. In that topic on Pages 9 to 14 there are sub-topics like: ‘Activities related with keeping family health’, ‘Activities related with environmental sanitation’, ‘Diseases caused by lack of cleanliness.’
Procedure: There are 2 activities for this lesson
31
Activity 1: Analyzing family experience of hand and face washing (15 minutes).ª Briefly demonstrate the appropriate hand and face washing procedures. Remember, your
explanation should be short and precise. Students do not need to memorize these exact steps, but should be able to explain each step in their own words. Remember that the list below are only for you to understand, then demonstrate to the students.1. Turn on the water or pour water from plastic bottle and put your hands and soap
underneath it. 2. Turn off the water or stop pouring from the plastic bottle and get the soap to lather in
your hands. 3. When lathering your hands, make sure to take enough time (count to 20) to remove as
many germs as possible. During the hand washing demonstration, be sure to show thefollowing steps:
1. Wet hands with water.2. Apply soap to cover all surfaces of the hands.3. Rub hands palm to palm.4. Rub each palm over the back of the other hand.5. Rub palm to palm with fingers interlaced.6. Rub back of fingers to opposing palms with fingers interlocked.7. Rub each thumb clasped in opposing palm.8. Clasp fingers and circular rub opposing palm.9. Rinse well with water. 10. Allow hands to dry completely before touching anything else (if you don’t have to
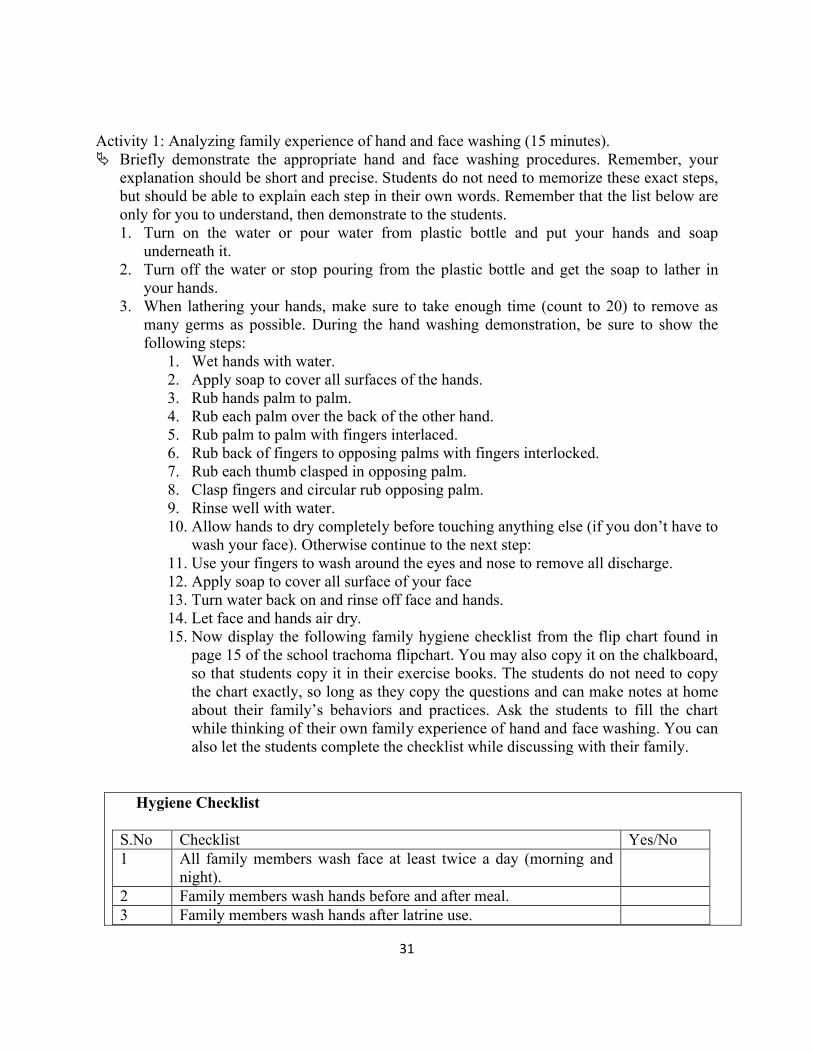
wash your face). Otherwise continue to the next step:11. Use your fingers to wash around the eyes and nose to remove all discharge.12. Apply soap to cover all surface of your face 13. Turn water back on and rinse off face and hands. 14. Let face and hands air dry. 15. Now display the following family hygiene checklist from the flip chart found in
page 15 of the school trachoma flipchart. You may also copy it on the chalkboard, so that students copy it in their exercise books. The students do not need to copy the chart exactly, so long as they copy the questions and can make notes at home about their family’s behaviors and practices. Ask the students to fill the chart while thinking of their own family experience of hand and face washing. You can also let the students complete the checklist while discussing with their family.
Hygiene Checklist
S.No Checklist Yes/No1 All family members wash face at least twice a day (morning and
night).2 Family members wash hands before and after meal. 3 Family members wash hands after latrine use.
32
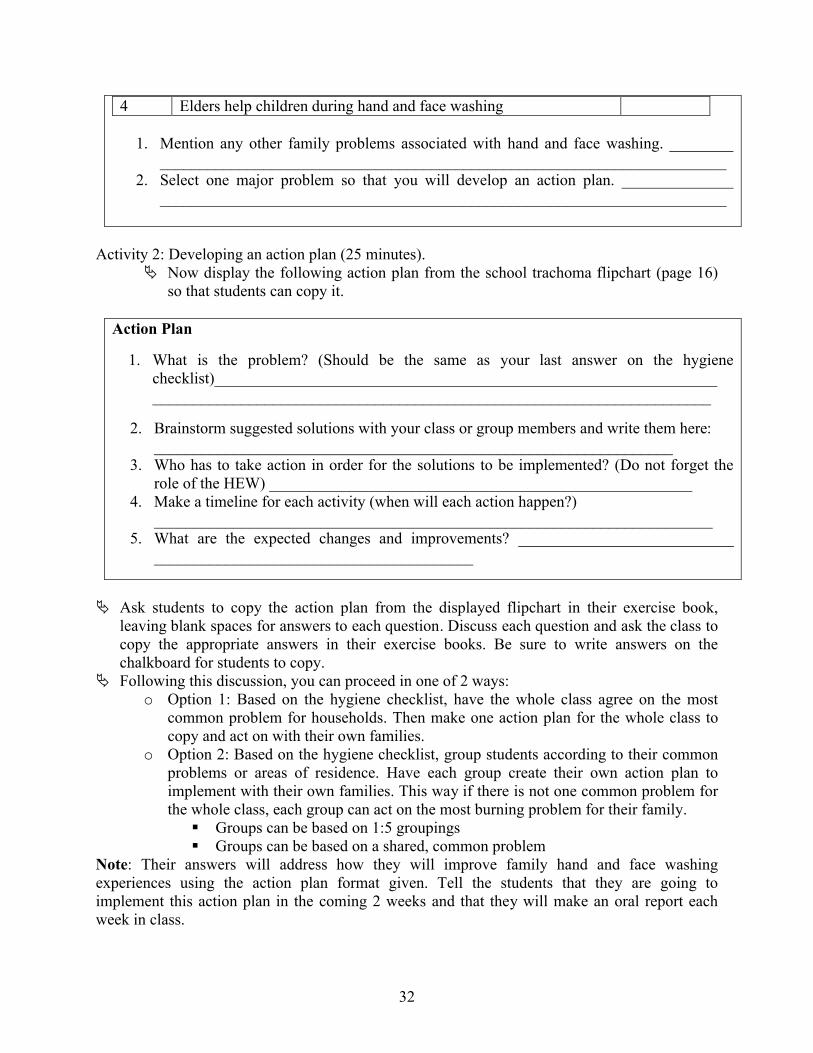
4 Elders help children during hand and face washing
1. Mention any other family problems associated with hand and face washing. ________ _______________________________________________________________________
2. Select one major problem so that you will develop an action plan. ______________ _______________________________________________________________________
Activity 2: Developing an action plan (25 minutes).ª Now display the following action plan from the school trachoma flipchart (page 16)
so that students can copy it.
Action Plan
1. What is the problem? (Should be the same as your last answer on the hygiene checklist)_____________________________________________________________________________________________________________________________________
2. Brainstorm suggested solutions with your class or group members and write them here: _________________________________________________________________
3. Who has to take action in order for the solutions to be implemented? (Do not forget the role of the HEW) _____________________________________________________
4. Make a timeline for each activity (when will each action happen?) ______________________________________________________________________
5. What are the expected changes and improvements? ___________________________ ________________________________________
ª Ask students to copy the action plan from the displayed flipchart in their exercise book, leaving blank spaces for answers to each question. Discuss each question and ask the class tocopy the appropriate answers in their exercise books. Be sure to write answers on the chalkboard for students to copy.
ª Following this discussion, you can proceed in one of 2 ways: o Option 1: Based on the hygiene checklist, have the whole class agree on the most
common problem for households. Then make one action plan for the whole class to copy and act on with their own families.
o Option 2: Based on the hygiene checklist, group students according to their common problems or areas of residence. Have each group create their own action plan to implement with their own families. This way if there is not one common problem for the whole class, each group can act on the most burning problem for their family.� Groups can be based on 1:5 groupings� Groups can be based on a shared, common problem
Note: Their answers will address how they will improve family hand and face washing experiences using the action plan format given. Tell the students that they are going to implement this action plan in the coming 2 weeks and that they will make an oral report each week in class.
33
ª Over the next 2 or 3 weeks, supervise each student’s progress with respect to the set action plan. If you observe improvements in hand and face washing in the oral reports, you can move to the next lesson (lesson 4).If there are no improvements, repeat this lesson and have students improve their action plan with more realistic goals and/or activities for the timeline and implement it again.
Reflection:ª Ask the following question to students after they have filled in their action plan: How can
you make the action plan work better? How can you use the action plan in the future to make significant changes? What will you do to make sure your family improves their hand and face washing routine?
2.3.4 Lesson 4: Having and Using a Latrine
Lesson Objectives: At the end of this lesson:1. Students will understand the importance of having and using a latrine.2. Students will be able to develop a plan of action to solve problems among their family
associated with latrine use.
Duration: 40 minutes.
Materials Required: 1. Family hygiene checklist.2. Action plan format.
Suggestion for Integrating the Lesson with the Formal School Curriculum: You may incorporate this lesson into the formal school curriculum by teaching it immediately after and/or repeating messages from this lesson in the following subject:
1. Environmental science: In unit 1 of the grade 3 environmental science textbook, there is a topic titled ‘Keeping Family Health’. In that topic (pages 9-14) there are sub-topics like: ‘Activities related with keeping family health’, ‘Activities related with environmental sanitation’, ‘Diseases caused by lack of cleanliness’.
2. Amharic: In grade 3 Amharic textbook (page 4), there is a short reading passage titled ‘Environmental Pollution’ and another on Page 7 titled ‘Health Living’. Those topics offer repeated suggestions for students saying ‘prevention is better than suffering from sickness’. Therefore, you can use those topics and concepts as foundations for teaching and integrating this lesson.
Procedure: This lesson has 2 activities:
Activity 1: Analyzing family experience of latrine use (15 minutes).ª Briefly review the appropriate steps and behaviors of using a latrine. Remember, your
explanation should be short and precise. The 2 sets of lists below are not to be lectured, but to be demonstrated.
o A pit latrine is said to be appropriate if it has the following features:
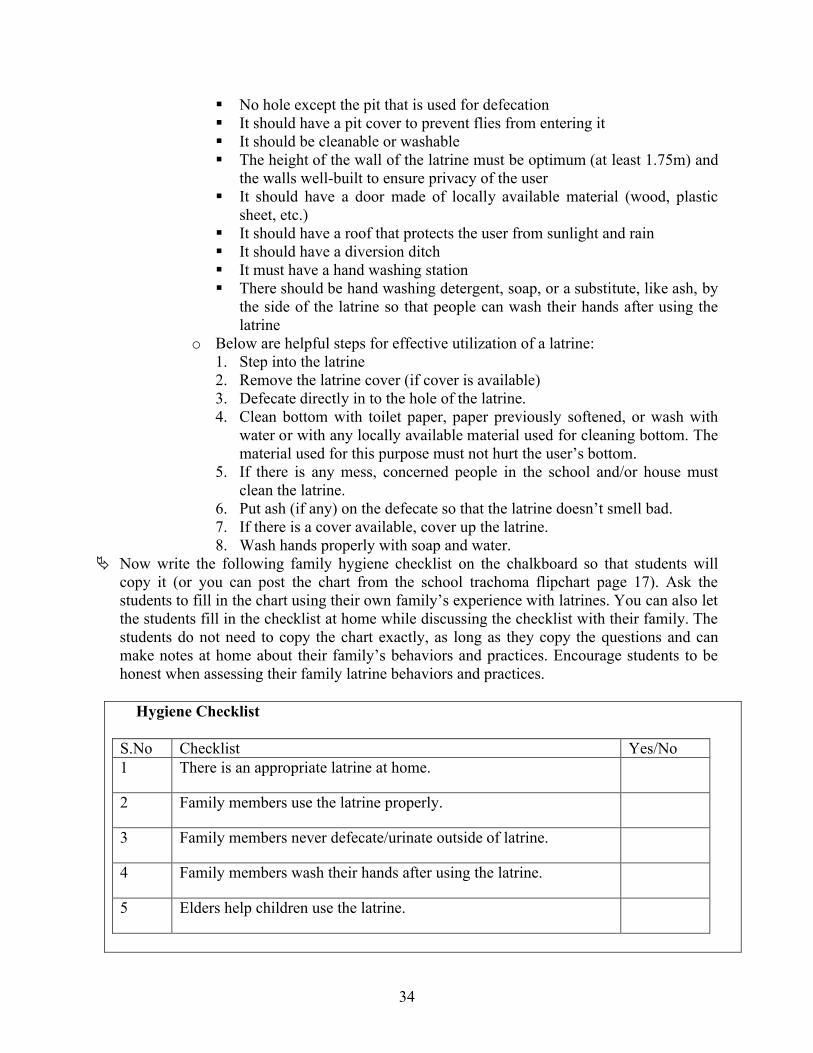
34
� No hole except the pit that is used for defecation� It should have a pit cover to prevent flies from entering it � It should be cleanable or washable� The height of the wall of the latrine must be optimum (at least 1.75m) and
the walls well-built to ensure privacy of the user� It should have a door made of locally available material (wood, plastic
sheet, etc.)� It should have a roof that protects the user from sunlight and rain� It should have a diversion ditch� It must have a hand washing station� There should be hand washing detergent, soap, or a substitute, like ash, by
the side of the latrine so that people can wash their hands after using the latrine
o Below are helpful steps for effective utilization of a latrine: 1. Step into the latrine 2. Remove the latrine cover (if cover is available) 3. Defecate directly in to the hole of the latrine. 4. Clean bottom with toilet paper, paper previously softened, or wash with
water or with any locally available material used for cleaning bottom. The material used for this purpose must not hurt the user’s bottom.
5. If there is any mess, concerned people in the school and/or house must clean the latrine.
6. Put ash (if any) on the defecate so that the latrine doesn’t smell bad. 7. If there is a cover available, cover up the latrine. 8. Wash hands properly with soap and water.
ª Now write the following family hygiene checklist on the chalkboard so that students will copy it (or you can post the chart from the school trachoma flipchart page 17). Ask thestudents to fill in the chart using their own family’s experience with latrines. You can also let the students fill in the checklist at home while discussing the checklist with their family. The students do not need to copy the chart exactly, as long as they copy the questions and can make notes at home about their family’s behaviors and practices. Encourage students to be honest when assessing their family latrine behaviors and practices.
Hygiene Checklist
S.No Checklist Yes/No1 There is an appropriate latrine at home.
2 Family members use the latrine properly.
3 Family members never defecate/urinate outside of latrine.
4 Family members wash their hands after using the latrine.
5 Elders help children use the latrine.
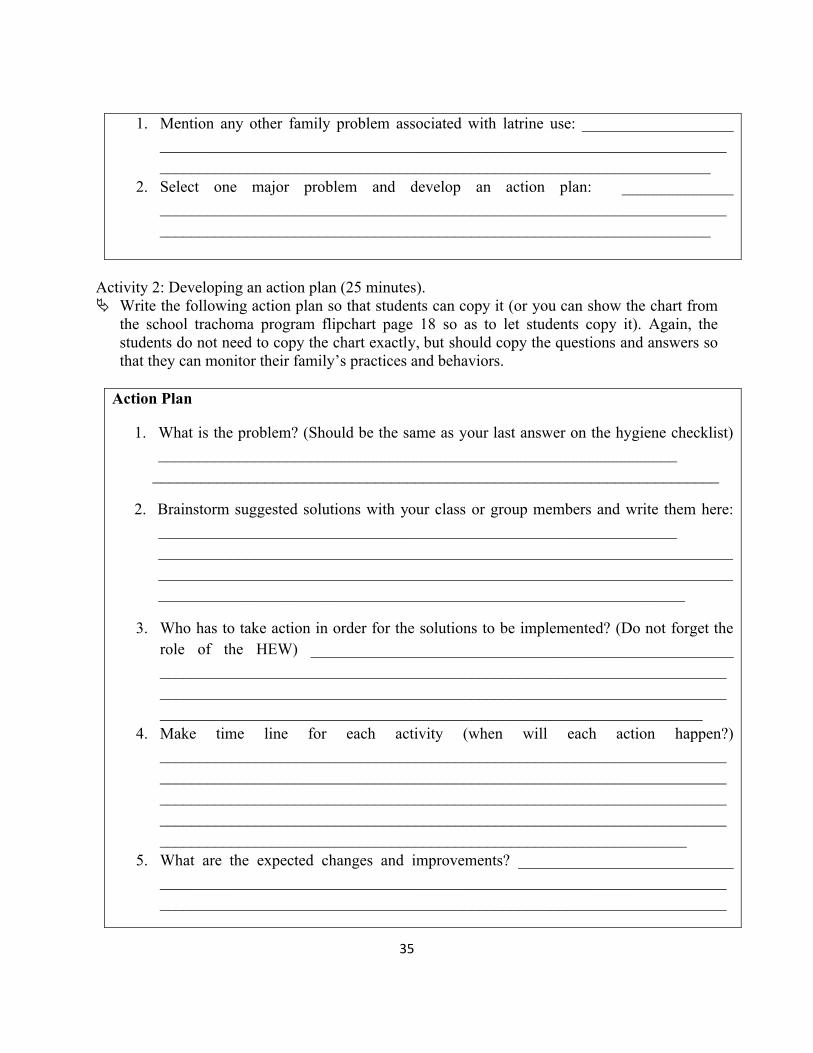
35
1. Mention any other family problem associated with latrine use: ___________________ ____________________________________________________________________________________________________________________________________________
2. Select one major problem and develop an action plan: ______________ ____________________________________________________________________________________________________________________________________________
Activity 2: Developing an action plan (25 minutes).ª Write the following action plan so that students can copy it (or you can show the chart from
the school trachoma program flipchart page 18 so as to let students copy it). Again, the students do not need to copy the chart exactly, but should copy the questions and answers so that they can monitor their family’s practices and behaviors.
Action Plan
1. What is the problem? (Should be the same as your last answer on the hygiene checklist) _________________________________________________________________
_______________________________________________________________________
2. Brainstorm suggested solutions with your class or group members and write them here: _________________________________________________________________ __________________________________________________________________________________________________________________________________________________________________________________________________________________
3. Who has to take action in order for the solutions to be implemented? (Do not forget the role of the HEW) _____________________________________________________ __________________________________________________________________________________________________________________________________________________________________________________________________________________
4. Make time line for each activity (when will each action happen?) ______________________________________________________________________________________________________________________________________________________________________________________________________________________________________________________________________________________________________________________________________________________________
5. What are the expected changes and improvements? ___________________________ ______________________________________________________________________________________________________________________________________________
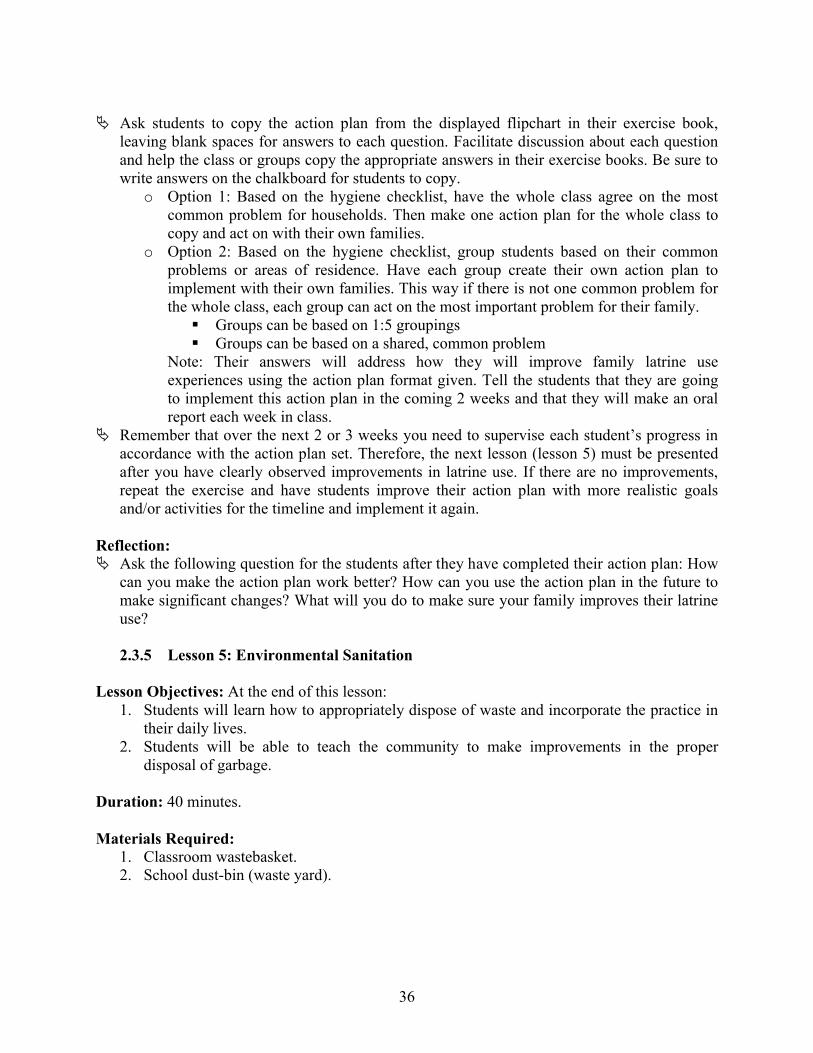
36
ª Ask students to copy the action plan from the displayed flipchart in their exercise book, leaving blank spaces for answers to each question. Facilitate discussion about each question and help the class or groups copy the appropriate answers in their exercise books. Be sure to write answers on the chalkboard for students to copy.
o Option 1: Based on the hygiene checklist, have the whole class agree on the most common problem for households. Then make one action plan for the whole class to copy and act on with their own families.
o Option 2: Based on the hygiene checklist, group students based on their common problems or areas of residence. Have each group create their own action plan to implement with their own families. This way if there is not one common problem for the whole class, each group can act on the most important problem for their family.� Groups can be based on 1:5 groupings� Groups can be based on a shared, common problem
Note: Their answers will address how they will improve family latrine use experiences using the action plan format given. Tell the students that they are going to implement this action plan in the coming 2 weeks and that they will make an oral report each week in class.
ª Remember that over the next 2 or 3 weeks you need to supervise each student’s progress in accordance with the action plan set. Therefore, the next lesson (lesson 5) must be presented after you have clearly observed improvements in latrine use. If there are no improvements, repeat the exercise and have students improve their action plan with more realistic goals and/or activities for the timeline and implement it again.
Reflection:ª Ask the following question for the students after they have completed their action plan: How
can you make the action plan work better? How can you use the action plan in the future to make significant changes? What will you do to make sure your family improves their latrine use?
2.3.5 Lesson 5: Environmental Sanitation
Lesson Objectives: At the end of this lesson:1. Students will learn how to appropriately dispose of waste and incorporate the practice in
their daily lives. 2. Students will be able to teach the community to make improvements in the proper
disposal of garbage.
Duration: 40 minutes.
Materials Required: 1. Classroom wastebasket.2. School dust-bin (waste yard).
37
Suggestion for Integrating the Lesson with the Formal School Curriculum: You may incorporate this lesson into the formal school curriculum by teaching it immediately after and/or repeating messages from this lesson in the following subject:
1. Environmental science: In unit 1 of the grade 3 environmental science textbook, there is a topic titled ‘Keeping Family Health’. In that topic (pages 9-14) there are sub-topics like: ‘Activities related with keeping family health’, ‘Activities related with environmental sanitation’, ‘Diseases caused by lack of cleanliness’. Therefore, you can integrate this lesson with either of those sub-topics preferably with the sub topic ‘Activities related with environmental sanitation’ found on Page 10 or in lesson 4 of this manual (immediately preceding this lesson).
2. Amharic: In the grade 3 Amharic textbook (page 4), there is a short reading passage titled “Environmental Pollution” and another on page 7, titled ‘Health Living’. In those topics there are repeated suggestions for students saying ‘prevention is better than suffering from sickness’. Therefore, you can use those topics and concepts as a foundation for teaching and integrating this lesson.
Procedure: This lesson has 2 activities:
Activity 1: Discussion on why we need to have proper disposal of garbage (10 minutes).ª Ask students to brainstorm and discuss why we worry about the proper disposal of
garbage. You can start the discussion by asking, “Why do we need to properly dispose of garbage?”
ª In your discussion make sure you cover these topics: feces, unless buried, attracts flies. Garbage also attracts flies. Flies usually breed and like to live in dirty places like areas where there are feces and garbage. Flies carry germs. Germs cause us to be sick. In the case of trachoma, sickness eventually causes us to be blind.
o During the discussion, recommend correct behaviors including: proper latrine use or bury feces if a latrine is not accessible and dispose garbage appropriately.
Activity 2: Field visit to the schoolyard (30 minutes).ª Take the students out to the schoolyard to the place where waste is collected and
disposed. On the way, point out anywhere garbage is not disposed of properly. Go around the schoolyard to different places and ask: “What should be done to alleviate the problem of garbage in the schoolyard? Who should do what? What is the responsibility of students in the school?”
ª Discuss the questions above in the classroom. Write the students’ answers to each question on the chalkboard. Ask the students about possible solutions to the problems identified.
ª Finally let the class create a report for the trachoma club about what they have observed and their recommendations for how to improve the school sanitation through club activities. Let the class select 1 representative to submit the report. This representative may choose to keep watch on the classroom sanitation after the report is submitted to the Trachoma Club.
Reflection:
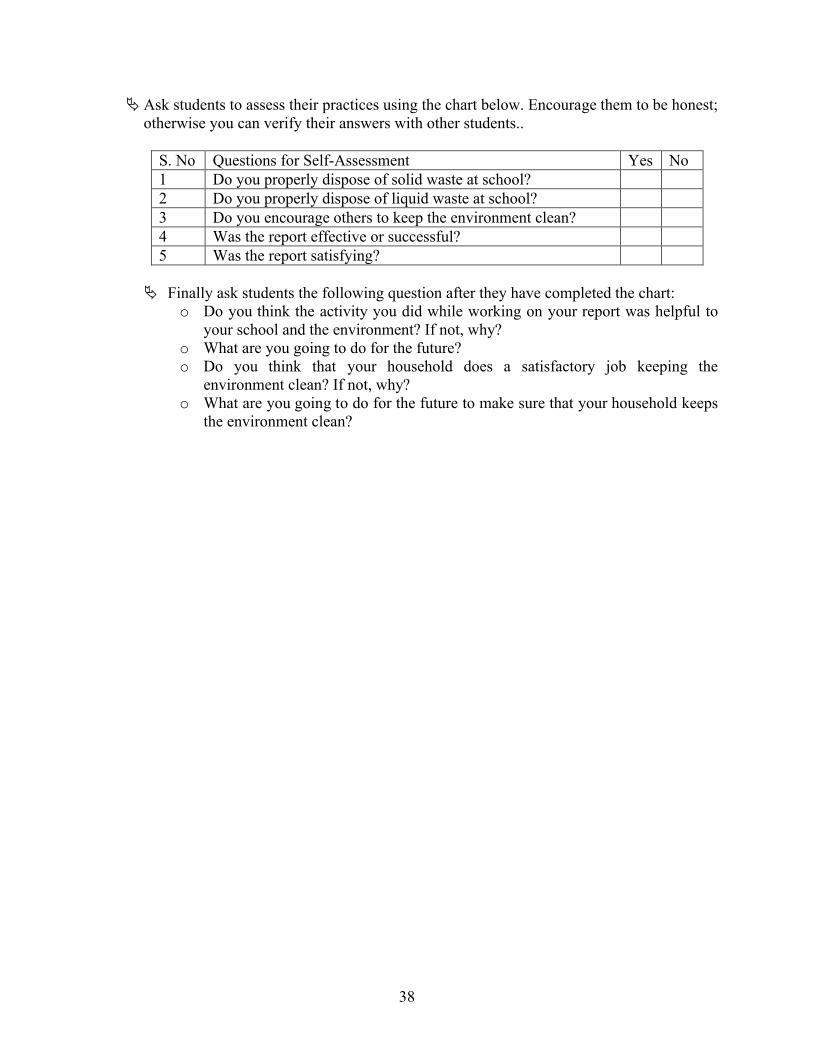
38
ª Ask students to assess their practices using the chart below. Encourage them to be honest; otherwise you can verify their answers with other students..
S. No Questions for Self-Assessment Yes No1 Do you properly dispose of solid waste at school? 2 Do you properly dispose of liquid waste at school? 3 Do you encourage others to keep the environment clean?4 Was the report effective or successful?5 Was the report satisfying?
ª Finally ask students the following question after they have completed the chart: o Do you think the activity you did while working on your report was helpful to
your school and the environment? If not, why? o What are you going to do for the future?o Do you think that your household does a satisfactory job keeping the
environment clean? If not, why?o What are you going to do for the future to make sure that your household keeps
the environment clean?
39
2.4 Grade 4 Lesson Plans
As mentioned in previous lessons, trachoma is largely a disease that clusters within households and communities. Therefore, involving the community is an important step to reducing transmission of the disease. Lessons in this grade level are designed to address the local community. Students can encourage the local community to take action to prevent trachoma.
2.4.1 Lesson 1: Signs and Symptoms of Trachoma
Lesson Objectives: At the end of this lesson:1. Students will be able to identify and list the signs and symptoms of trachoma. 2. Students will be able to refer people with trachoma to health centers to get treatment.
Duration: 40 minutes.
Required Materials: 1. Diagram of the lifecycle of trachoma found in the school trachoma program flipchart.2. Transparent glass or light bulb (optional).3. Diagram of the eye found in the school trachoma program flipchart.
Suggestion for Integrating the Lesson with the Formal School Curriculum: You may incorporate this lesson into the formal school curriculum by teaching it immediately after and/or repeating messages from this lesson in the following subject:
1. Although there is no topic in the formal school curriculum that is exactly synonymous with this lesson, there are opportunities where by this lesson can be integrated. For instance, in unit 1 of the grade 4 environmental science textbook (page 14), there is a topic called HIV/AIDS as a serious problem in the community. Trachoma as a serious health problem in the community can be addressed here.
2. On page 41 of the grade 4 Amharic subject, there is a paragraph titled “Attention to Physically Impaired People” one of which are blind people. Blindness caused by trachoma can also be addressed here.
Procedure: There are 2 activities in this lesson:
Activity 1: Presentation about the signs and symptoms of trachoma (10 minutes).ª Give a short presentation on the signs and symptoms of trachoma using the information
below or invite a health professional from the local health center as a guest speaker.Please consult the respective health professional ahead of time. Deliver this portion of the lesson in the form of a story. While telling the story show the lifecycle of trachoma on page 19 of the flipchart.
TrachomaTrachoma is an eye disease caused by bacteria (a germ) called Chlamydia trachomatis. Once the germ infects an individual, the trachoma infection causes very painful and itchy eyes. In addition, the infection causes redness and discharge from the eyes and nose, and swelling of the
40
inner lining of the eyelids. At this stage flies and dirty hands can carry the germs from one person’s eyes to another person’s eyes. That stage is called ‘active trachoma’.
After repeated infections, the inflammation causes scarring of the inner lining of the eyelid. This makes the skin tight. This scarring and skin tightening makes the eyelashes turn inwards. This stage is called trichiasis. The in-turned eyelashes scratch the cornea (the outermost layer of the eye). (Note: Optional- use the transparent glass or the light bulb to show them how cornea is affected while scratching the glass. Otherwise, show the diagram of the eye to show where the cornea is on page 20 of the student trachoma program flipchart)
There is a small operation that can correct the turning in of the eyelashes; if the person does not get surgery, the continued scratching of the cornea can lead to permanent blindness.
Activity 2. Discussion Session (30 minutes).ª Ask the students if they have ever experienced any of the symptoms discussed above.
Ask them what they should do when they feel these signs and symptoms. Tell them that whenever they feel the signs and symptoms of trachoma, they should visit and/or consult a health worker in their community. Otherwise the trachoma germ will be transmitted to many people in the community. This makes it difficult to control trachoma.
ª Finally inform students that the best way to prevent blindness from trachoma is by keeping their faces clean. Furthermore, tell students to advise others in the community suffering from trichiasis to report to a health worker.
Reflection:ª Use the following question to guide students to list the signs and symptoms of trachoma
and connect this lesson to their daily life: Have you ever seen people suffering from eye diseases such as trachoma? Have you ever had an eye disease such as trachoma? How do they feel when they are sick? What do you do when you find people suffering from trachoma, especially trichiasis? Why?
2.4.2 Lesson 2: Treatment of Trachoma
Lesson Objectives: At the end of this lesson:1. Students will be able to decide to visit health centers when they experience any signs and
symptoms of trachoma. 2. Students will be able to refer people with trachoma to health centers to help stop the
spread of the disease.
Duration: 40 minutes.
Required Materials: 1. Image of a blind woman begging found in the school trachoma program flipchart.
41
Suggestion for Integrating the Lesson with the Formal School Curriculum: You may incorporate this lesson into the formal school curriculum by teaching it immediately after and/or repeating messages from this lesson in the following subject:
1. Environmental science: Although there is no topic in the formal school curriculum that is exactly synonymous with this lesson, there are opportunities where this lesson can be integrated. For instance, in unit 1 of the grade 4 Environmental Science textbook (page 14), there is a topic called HIV/AIDS as a serious problem in the community. Trachoma as a serious health problem of the community can be addressed here. Or in grade 4 Environmental Science on Page 109 there is a topic in unit 4, which says ‘Social Relations and Values’. One important value in our society is to care for the self and others too. Therefore, you may use that topic to teach about the opportunity to refer people to health centers when they are sick.
2. Amharic: In grade 4 Amharic subject on page 41 there is a paragraph titled “Attention to Physically Impaired People” one of which are blind people. Trachoma can also be addressed here. This lesson can also be taught immediately after Lesson 1 (above).
Procedure:Activity 1: Analyzing a case study (20 minutes).ª Tell students that they are going to listen to a case and that they are required to critically
analyze it. While telling the story, please show the picture on page 21 of the school trachoma program flipchart. Here is the case:
‘The beggar – Emama Mulu’Emama Mulu is an old woman who lives in the countryside. When she was young she frequently suffered from eye sickness. Her eyes were red and produced discharge. In order to get relief from the burning and itching she felt from the sickness, she scratched her eyes with her fingers rather than going to health center. She believed that scratching would give her relief, but instead, her eyes swelled and itched more.
During a mass drug administration, the health professional offered Mulu medication to help the eye infection, but Mulu refused to take it because she heard incorrect information about side effects from the medication. When her neighbors asked about the medicine, she told them she did not take it because her eye sickness is caused by her frequent crying due to the death of her mother, and sometimes due to smoke from the cooking fire. As time passed, Emama Mulu’s eyelashes turned into her eyes and caused more pain. Still, she did not go to the health center. Eventually her vision became impaired, and now she is totally blind and unable to work. She therefore became a beggar in order to get money for food.
ª Now ask students the following questions to elicit discussion. If students give incorrect answers, discuss and guide them to the correct answers.
o What did you learn from this case study?o Have you seen people like Emama Mulu in your community?o What would you do if you were Emama Mulu to protect yourself from blindness?
� Possible answers:
42
x Wash your face to prevent discharge from eyes and flies.x Go to your nearest health center for treatment if you have
discharge and redness starts– take treatment as prescribed.x Take the drugs given during mass drug administration.x Crying and smoke cannot cause trachoma.x If your eyelashes turn in (trichiasis) you can get free surgery to
reverse the eyelashes and reduce pain and vision loss.x Teach neighbors the above answers..
Activity 2: Discussion Session (20 minutes).ª Ask the following questions in order to elicit discussion from the students:
1. What are you doing now to protect yourself from trachoma? Answers should match the points above.
2. What are you going to do when you see people suffering from trachoma? Why? Answers:
i. If you see someone with red eyes and discharge, direct them to go to the health center and seek treatment.
ii. If you see someone with trichiasis, help him or her register with the HEW for free surgery.
ª Remind students that it is important for them and their neighbors to take the drugs at the mass drug administration during Trachoma Campaign Weeks. Explain that side effects from the antibiotics are minimal and do not cause harm.
ª Guide the discussion to make sure that all of the following important points are covered: o Prevention is better than treatment. There are many people who suffer from eye
sickness and who become blind due to trachoma. To be free from the disease,protect yourself by washing your face and using a latrine.
ª End the lesson by restating these key points about treatment for trachoma. Have students repeat each sentence after you:
o Prevention is better than treatment.o Treatment or surgery is better than becoming blind.o I must face my wash every day.
Reflection:ª Ask the students the following questions:
o Some people say that trachoma is caused by frequent crying and smoke. Do you agree with this? Why or why not? � Answer: Crying and smoke do not cause trachoma.
o What is the best measure to be taken when people suffer from trachoma?� Answer: Prevention is best; treatment or surgery is better than blindness.
ª Now, lead the students in the following song:
I do not want to be blind when I am old.In order not to be blind I must protect myself from trachoma.I clean myself to protect from trachoma.I keep my hygiene to protect from trachoma.I do not want to be blind.
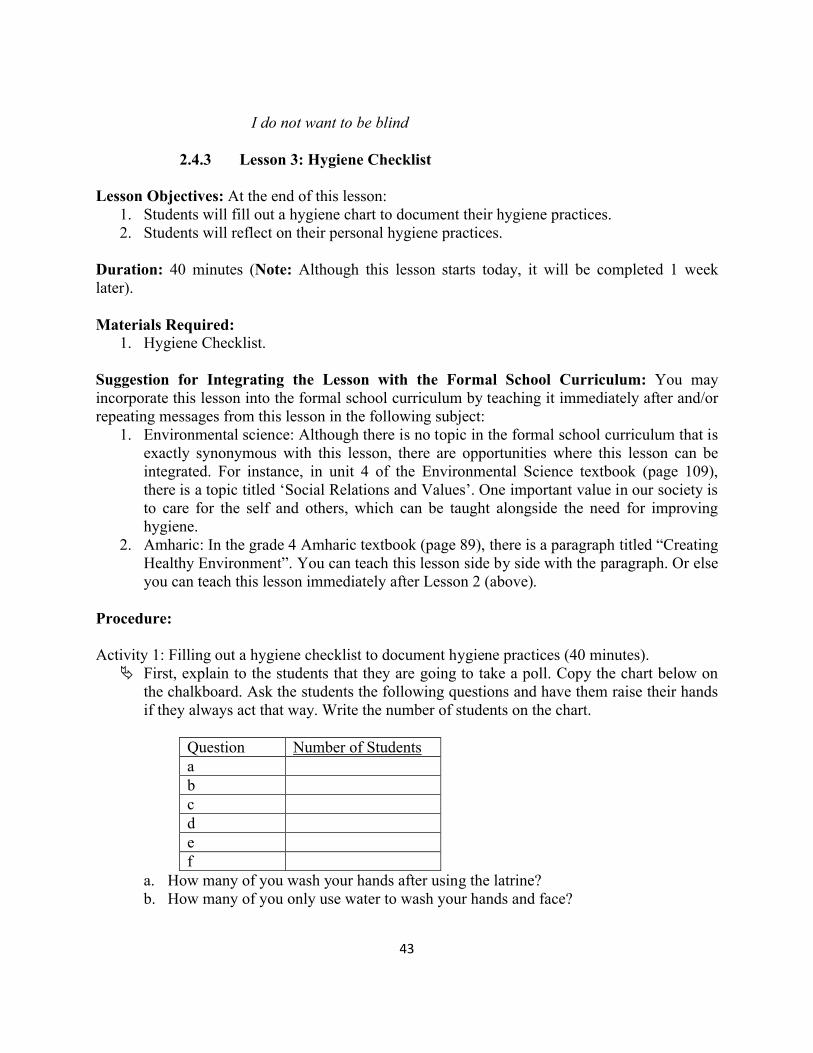
43
I do not want to be blind
2.4.3 Lesson 3: Hygiene Checklist
Lesson Objectives: At the end of this lesson:1. Students will fill out a hygiene chart to document their hygiene practices. 2. Students will reflect on their personal hygiene practices.
Duration: 40 minutes (Note: Although this lesson starts today, it will be completed 1 week later).
Materials Required: 1. Hygiene Checklist.
Suggestion for Integrating the Lesson with the Formal School Curriculum: You may incorporate this lesson into the formal school curriculum by teaching it immediately after and/or repeating messages from this lesson in the following subject:
1. Environmental science: Although there is no topic in the formal school curriculum that is exactly synonymous with this lesson, there are opportunities where this lesson can be integrated. For instance, in unit 4 of the Environmental Science textbook (page 109), there is a topic titled ‘Social Relations and Values’. One important value in our society is to care for the self and others, which can be taught alongside the need for improving hygiene.
2. Amharic: In the grade 4 Amharic textbook (page 89), there is a paragraph titled “Creating Healthy Environment”. You can teach this lesson side by side with the paragraph. Or else you can teach this lesson immediately after Lesson 2 (above).
Procedure:
Activity 1: Filling out a hygiene checklist to document hygiene practices (40 minutes). ª First, explain to the students that they are going to take a poll. Copy the chart below on
the chalkboard. Ask the students the following questions and have them raise their hands if they always act that way. Write the number of students on the chart.
Question Number of Studentsabcdef
a. How many of you wash your hands after using the latrine? b. How many of you only use water to wash your hands and face?
44
c. How many of you use soap (or ash or any locally available material) and water when you wash your hands? How many of you use soap (or ash or any locally available material) for washing your face?
d. How many of you rub your hands together with soap (or ash or any locally available material) and water for 20 seconds while washing your hands?
e. How many of you implement proper garbage disposal practices?ª After you have completed the poll above, summarize the findings. ª Briefly review the appropriate procedures for hand and face washing through explanation
and demonstration. Students do not need to memorize these exact steps, but should be able to explain each step in their own words.
1. Wet your hands with water from a tap or by pouring water from a bottle. 2. Lather your hands for about 20 seconds, while demonstrating the steps below:
Hand washing1. Apply soap to cover all surfaces of the hands.2. Rub hands palm to palm.3. Rub each palm over the back of the other hand.4. Rub palm to palm with fingers interlaced.5. Rub back of fingers to opposing palms with fingers interlocked.6. Rub each thumb clasped in opposing palm.7. Clasp fingers and circular rub opposing palm.8. Rinse well with water. 9. Allow hands to dry completely before touching anything else
Face washing: 1. Use your fingers to wash around the eyes and nose to remove all discharge.2. Apply soap to cover all surface of your face.3. Turn water back on and rinse off face and hands. 4. Let face and hands air dry.
ª Summarize that good hygiene means washing hands and face with soap (or amed, a locally available material used for washing) and water.
ª Explain that this week they are going to be filling out a Hygiene Checklist. Explain that they will have to put a star (or some other symbol) in the box to show that they have done that procedure that day. They will have to turn the checklist in at the end of a full week (7 days). They should also answer the questions at the end of the checklist.
ª Have the students carefully copy the hygiene checklist below and/or page 22 of the school trachoma program flipchart in their exercise books on a full, blank sheet. Remind them to fill them out each day of the week.
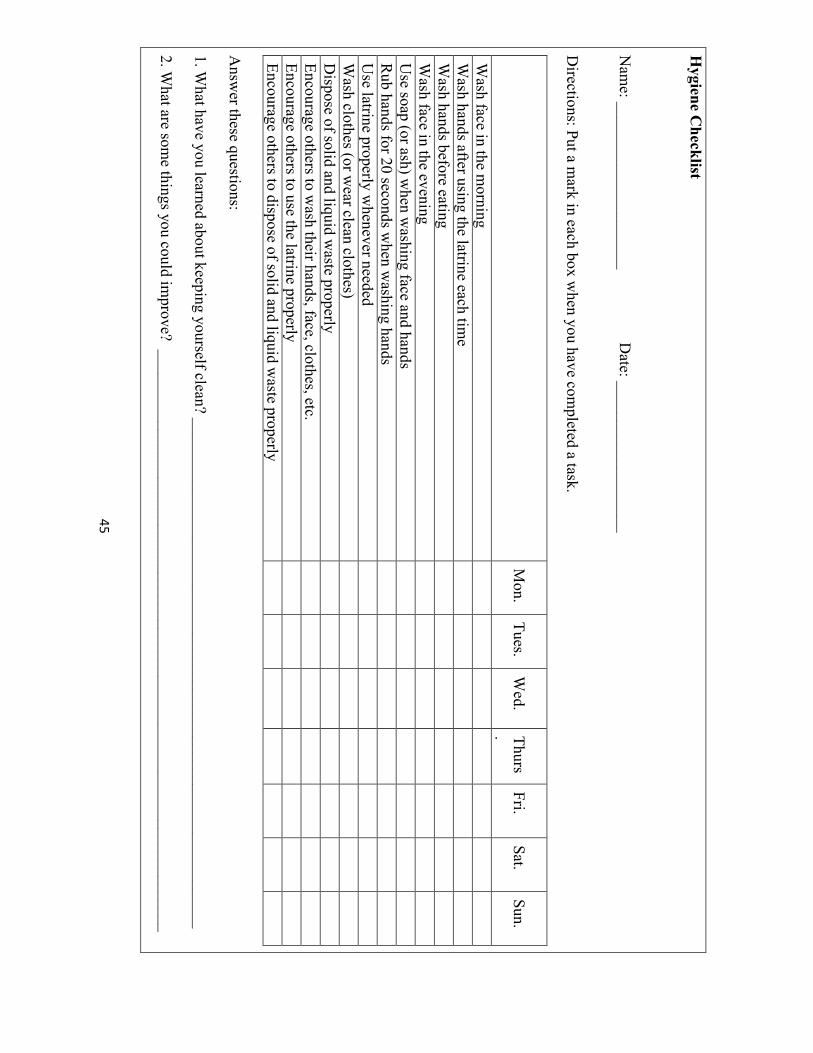
45
Hygiene C
hecklist
Nam
e: _____________________D
ate: ___________________
Directions: Put a m
ark in each box when you have com
pleted a task.
Mon.
Tues.W
ed.Thurs.
Fri.Sat.
Sun.
Wash face in the m
orningW
ash hands after using the latrine each time
Wash hands before eating
Wash face in the evening
Use soap (or ash) w
hen washing face and hands
Rub hands for 20 seconds w
hen washing hands
Use latrine properly w
henever neededW
ash clothes (or wear clean clothes)
Dispose of solid and liquid
waste
properly Encourage others to w
ash their hands, face, clothes, etc. Encourage others to use the latrine properly Encourage others to dispose of solid and liquid
waste
properly
Answ
er these questions:
1. What have you learned about keeping yourself clean? ________________________________________________________________
2. What are som
e things you could improve? _________________________________________________________________________

46
ª At the end of the week, collect the checklists. Divide the students into groups and have them answer the following questions. It would be helpful to write these questions on the chalkboard first.
a. Was the checklist helpful? b. What did you learn about your hygiene skills? Is there anything you did really well?
Is there anything you could work on? c. Why is it important to have good hygiene skills? d. Why is it important to spread the message of practicing good hygiene to others?
ª Give students 15-20 minutes to discuss this in a group. Ask if anyone would like to share what he or she learned about his or her hygiene practices with the whole class. Then remind students about the importance of good hygiene (keeps us from getting sick) and ways we can practice good hygiene (washing hands, faces, and clothes, washing hands after using latrine, washing hands with soap and water for at least 20 seconds).
Reflection: ª Collect and review each student’s hygiene and sanitation checklist. Critically comment on
each student’s checklist and return it back to the student. Encourage the students to use the checklist for the coming 1 or 2 months to track progress.
47
3.0 PART III: TRACHOMA CLUBS
As illustrated throughout this curriculum, trachoma is a major health problem in Ethiopia. One way to involve the community in prevention and control efforts is through co-curricular activities such as clubs. School clubs are established to enhance the formal curriculum by putting the theoretical and classroom based education in to practice. Co-curricular activities prepare students practically for real life experiences and issues. This part of the manual gives a brief descriptionof how the trachoma clubs should function, as well as possible activities the club can facilitate.
3.1 Trachoma Club
The school trachoma club should either be called “trachoma club” or “WASH club for trachoma.” In English, WASH stands for Water And Sanitation and Hygiene. The school trachoma club is a group of people who have joined together to share their interest and concern for themselves and the community in relation to sanitation and hygiene, trachoma, and preventing blindness due to trachoma. Here it should be noted that in schools, club members are students and teachers. Through students, messages can reach out to their families at home and the wider community. This will increase awareness and influence attitudes and activities
3.1.1 Possible Activities
The trachoma club plays an important role in increasing student’s and the larger community’s awareness of the need for face and hand washing, latrine use, and sanitation to protect against blindness due to trachoma as well as protecting against other diseases. To achieve this goal, the club can conduct several activities. These activities include:
Within the School:1. Perform weekly hygiene checks during flag-ceremony for the entire school, and daily
classroom hygiene checks for all students. If any children do not have a clean face or hands, they should be instructed to wash with soap and water.
2. Hold environmental sanitation campaigns with the school community including teachers, staff, and students. Help organize the students and have them collect, bury, and burn waste as is appropriate.
3. If there is no piped water at school, organize students to bring water. This plan may work in many different ways, but it requires students to bring water in a bottles or another containerfrom home according to a predetermined and regular schedule.
4. Facilitate a process of checking and maintaining school latrine cleanliness ● Identify problems of the school latrine that do not allow for easy use by grade 1-4
students. ● Try to enforce that the school and their family household should have an available
latrine appropriate to their age level. ● Make sure that the school latrines have all of these things:
o No hole except the pit that is/are used for defecation;
48
o It should have a pit cover to prevent entrance of flies;o It should be cleanable or washable;o The height of the wall of the latrine must be optimum (at least 1.75m) and
the walls well-built to ensure privacy of the user;o It should have a door made of locally available material (wood, plastic sheet
etc.);o It should have a roof that protects the user from sun light and rain;o It should have a diversion ditch;o It must have a hand washing station; ando There should be hand washing detergent, soap, or a substitute, like ash, by
the side of the latrine so that people can wash their hands after using thelatrine.
5. Accept reports from other students about the school’s sanitation and hygiene. Depending on what problems are listed in the reports, create action plans to change the school to have better hygiene and sanitation practices. Use the action plan format provided earlier in the manual.
6. Use the school mini-media, if available, to promote the profile of your club and its activities. Use the mini-media to create trachoma-specific messages.
7. Prepare dramas, role-plays, songs, and question and answer sessions about health, and specifically about trachoma. Present them for students and staff at the school and for the local community. Be sure to invite parents and prepare presentations for special parents’ days at the school (e.g. Hand-washing day, Parents’ Day, etc.).
8. Invite and arrange for the HEW and other health workers to come to the school and present messages related to sanitation, hygiene, and trachoma. The presentation may be for the club, the whole school, or each grade. Make sure you get permission from the school director and specific teachers about the class time used for these special presentations. Write the HEW or other health worker a thank-you note from the club listing things they learned after the presentation.
9. Promote the school club using the club notice board. To be effective, clubs need to keep the notice board up-to-date by regularly changing notices about upcoming events, activities, and meetings.
10. Organize a club library. Include messages, pamphlets, and books (preferably full of pictorial illustrations) on the shelves in the library. Collect all relevant books, magazines, pamphlets, and newspapers to loan to anyone in the school community. You can also try to enrich your library with audiovisual materials like video films. You can also take photographs and put them on a display board with captions. Realize that audiovisuals are expensive, and are not just to be seen once and then thrown away.
11. Organize a club museum. Use space in one room in the school or use a corner in your classroom to organize pictorials such as photos, posters, and cartoons that can be viewed by students and teachers. Inform viewers that items should remain in the room.
12. Run different types of competitions between club members and with neighboring schools’ trachoma clubs. These could be competitions for “cleanest school yard,” “most number of environmental sanitation campaigns in one quarter,” etc. They could also be question and answer sessions where teams from each school’s trachoma club compete to answer the most questions correctly. You are encouraged to be creative in the types of competitions and engage the other clubs to participate.
49
13. Give a specific subject or issue to be studied by an individual or some members of the club so that they can research their topic and present it to other members.
14. Organize or create various games to play about trachoma, sanitation, and/or hygiene. For example, you can create a game of tag where the person who is “it” is a fly. Anytime the fly tags another student, that student must freeze and wait for another player to bring soap and symbolize, or actually wash, the frozen student’s face. If all students end up frozen, then the fly wins. If, at the end of 20-30 minutes, no students or very few students arefrozen, then the students win. You can change who is the fly or how many students are flies to vary the game and see what happens.
Outside the School:1. Make trips to places of interest to study a particular theme associated with hygiene and
sanitation (Examples of such places are health institutions where there are people suffering from trachoma or passing through surgery, places where there are good practices of sanitation, etc.). Whenever you plan a field trip, 1 or 2 committee members should first visit the area or should collect information from others who know the area. This will help to plan what the other members could learn from the trip. It is also good to invite people who can give you explanations about what will be observed.
2. Teach the community how to build latrines. You can build a model latrine at your school so that the community can see what it should look like. You can hold a workshop for community members to attend.
3. Teach the community to wash their faces and keep their personal hygiene at different gathering places (e.g. ekub, idir, coffee ceremony, etc.).
4. Organize small, practical projects in which students carry out tasks in groups, to learn about particular aspects of trachoma, particularly within and around your school compound/campus. You can have a small project to support blind people in your community, to resolve problems related with environmental sanitation in the community, etc.
5. Have older children help identify Trachomatous Trichiasis (TT) cases in the community and help the TT cases link with the HEW and health center for registration. TT is caused by repeated infections by the trachoma causing bacteria Chlamydia trachomatis. It causes the patient’s eyelashes to invert, fall into the eye and scratch the cornea every time the patient blinks. This causes the patient to feel pain and may cause blindness over time.
6. Invite staff members or people from other institutions who have a special interest in health issues and are willing to give a talk. You can invite health workers who are specifically trained to work on trachoma. You can invite people from concerned organizations to talk about their organization and its work.
7. Borrow films or videos from health institutions and NGOs like The Carter Center to show to the school and the community.
8. Put up a box in your meeting room or by your notice board to encourage people in the school and the general community to ask questions. You can choose one question from the box each week and answer it. Display the question and answer on the notice board.
50
9. Organize a rally or community event where there is some sort of display, demonstration, film show, and/or lecture by club members or guest speakers. \.
10. Write club newsletter at least once per semester. This could contain items about club activities, interesting essays, poems, stories, and can be distributed to educate other people or sold to raise funds.
11. Club members can make artistic work like drawings, paintings, photos, poems, songs and essays that can be used in many ways to create interest in the clubs activities and/or sold to raise funds.
12. Attend traditional festivals, for example, the Ethiopian New Year, “Timket”, “Genna”, “Meskel,” “Mewlide,” “Arefa,” “Shadey,” “Erecha,” etc. and find out from traditional leaders about the cultural importance and uses of our community in these festivals and how people attending use latrines during the activities and keep the environment clean.
13. Prepare dramas on health and specifically trachoma themes. Present them for students and staff at the school and invite everyone in the local community to attend the performance.
3.1.2 Membership
Membership should be open to all grade levels and all students regardless of age, gender, or any other factor. Membership should be based on interest and full participation.
3.1.3 Stakeholders and Their Roles and Responsibilities
Various stakeholders are involved in the proper functioning of trachoma clubs. Among these stakeholders, the following must be involved in the planning and funding process:
A. School Administration: Once you have decided to form a club you must gain permission and full support from your school’s administration to establish a trachoma club. You need to explain what topic your club focuses on and the activities you intend to do. School administrators should be committed to the development and success of the clubs. Your school director should nominate a teacher or accept a volunteer teacher as the club leader. The director should allocate a budget for the club and may provide an office, whenever possible.
B. Club Leader (Teacher): A trachoma club needs a club leader. Without close supervision and guidance of a leader on the staff it is very difficult, if not impossible, to run a trachoma club. Hence, having a leader is a prerequisite.
C. Club members: Club members are the most important stakeholders of any club. They are the students who want to be agents of change with respect to the objectives of the club. They are the ones who accomplish duties of the club and make is successful.
D. Health workers in the community: Health workers, especially the HEW, are important resources for teaching, training, and provision of medication. Work with your HEW to approve the plan of the club and endorse its yearly goals.
E. Governmental organizations: These are very helpful in the provision of financial, human, and material support. Governmental organizations include officials in different ministries (Ministry of Health, Ministry of Education, Ministry of Agriculture, etc.) and can be reached at different levels or organization: Woreda, Zone, Regional, and Federal.
F. The wider community: The people in the community are the target population of the school club’s content and activities.