STRUCTURAL RETAINING WALL - Keystone Hardscapes
2
STRUCTURAL RETAINING WALL Note: Unit color, dimensions, weight, and availability varies by manufacturer. KEYSTONE STANDARD ® III - RockFace Aesthetics • Rustic RockFace finish evokes the look and feel of naturally weathered stone. • Variety of colors complement any landscape. • Capping and corner units available. The structural unit that set the original bar has raised it. The Keystone Standard III unit’s improved design, combines with sound engineering, to create a commercial retaining wall solution that provides unrivaled structural stability and efficiencies. From backyard landscaping to large, load-bearing reinforced structures, the Keystone Standard unit’s face styles, colors and design possibilities make it a favorite of architects, engineers and contractors worldwide. Maximum Versatility and Performance • Height-to-depth ratio delivers superior construction stability, durability, and strength. • Higher unit-to-unit shear resistance. • Open cores allow for gravel interlock across block interfaces. • Near vertical or battered installation options. • The 21” unit depth allow for higher gravity wall construction. Ease of Installation • Trapezoidal shaped sides offer ease in constructing radii. • Tail design shape makes for easier handling in the field. • Triangular shaped pin connection hole allows for installer-friendly construction adjustments. • The Standard III design results in decreased unit weight when compared to the original Standard unit. RETAINING WALLS COLUMNS STEPS FEATURES & BENEFITS #110174 - RockFace Unit 2 Connection pins required per unit. Pins allow for near-vertical or battered setback construction options. Before specifying a specific product, please confirm availability with your local Keystone Hardscapes producer. PRODUCT DIMENSIONS WEIGHT/ UNIT (LBS) PRODUCT # Height Width Depth RockFace 8” 203.2mm 18” 457.2mm 21” 533.4mm 85-96 110174 Pins ½” x 5¼” Fiberglass Connection Pins
Transcript of STRUCTURAL RETAINING WALL - Keystone Hardscapes
S T R U C T U R A L R E T A I N I N G W A L L
Note: Unit color, dimensions, weight, and availability varies by manufacturer.
KEYSTONE STANDARD® III - RockFace
Aesthetics• Rustic RockFace finish evokes the look and
feel of naturally weathered stone.
• Variety of colors complement any landscape.
• Capping and corner units available.
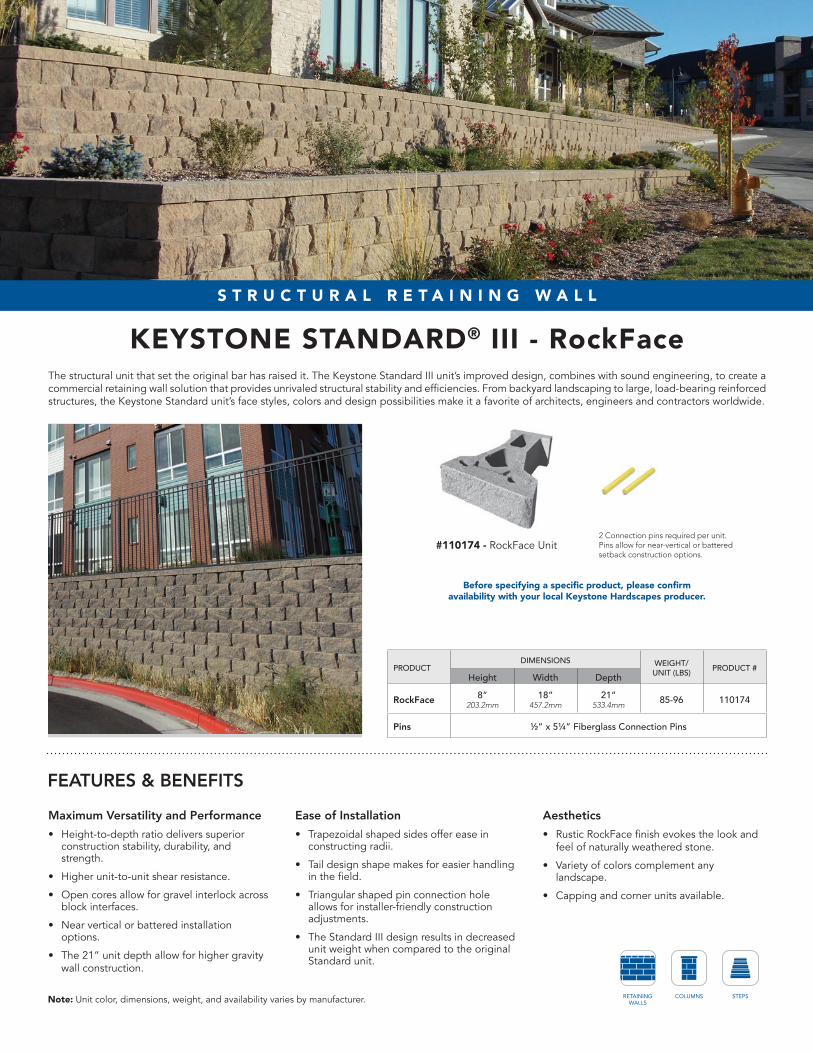
The structural unit that set the original bar has raised it. The Keystone Standard III unit’s improved design, combines with sound engineering, to create a commercial retaining wall solution that provides unrivaled structural stability and efficiencies. From backyard landscaping to large, load-bearing reinforced structures, the Keystone Standard unit’s face styles, colors and design possibilities make it a favorite of architects, engineers and contractors worldwide.
Maximum Versatility and Performance• Height-to-depth ratio delivers superior
construction stability, durability, and strength.
• Higher unit-to-unit shear resistance.
• Open cores allow for gravel interlock across block interfaces.
• Near vertical or battered installation options.
• The 21” unit depth allow for higher gravity wall construction.
Ease of Installation• Trapezoidal shaped sides offer ease in
constructing radii.
• Tail design shape makes for easier handling in the field.
• Triangular shaped pin connection hole allows for installer-friendly construction adjustments.
• The Standard III design results in decreased unit weight when compared to the original Standard unit.
retainingwalls
columns steps
FEATURES & BENEFITS
#110174 - RockFace Unit2 Connection pins required per unit. Pins allow for near-vertical or battered setback construction options.
Before specifying a specific product, please confirm availability with your local Keystone Hardscapes producer.
PRODUCTDIMENSIONS WEIGHT/
UNIT (LBS) PRODUCT #Height Width Depth
RockFace 8”203.2mm
18”457.2mm
21”533.4mm
85-96 110174
Pins ½” x 5¼” Fiberglass Connection Pins

STRUCTURAL RETAINING WALL | KEYSTONE STANDARD ® I I I - ROCK FA CE
INSTALLATION INSTRUCTIONS
www.keystonehardscapes.com
STEP 1
STEP 2
STEP 3
STEP 4
STEP 5
STEP 6
Note: If drain tile is required for your project, consult an engineer or visit www.keystonehardscapes.com for more information.Colors are shown as accurately as possible in brochures and samples, but due to the nature of the product, regional color
differences and variables in print reproduction, colors may not match exactly.
Complete installation and specification details are available by contacting your Keystone Hardscapes Sales Representative.
Prepare the Base Leveling Pad.Excavate the base trench to the designed width and depth. Start the leveling pad at the lowest elevation along the wall alignment. Step up in 8” increments with the base as required at elevation change in the foundation. Level the prepared base with maximum lifts of 6” of well compacted granular fill (gravel, road base, or ½” to ¾” crushed stone). Compact to 95% Standard Proctor or greater. Do not use PEA GRAVEL or SAND for leveling pad.
Install Fill & Compaction.Provide ½” - ¾” clean crushed stone drainage fill behind the units to a minimum distance behind the tail of one foot. Fill all open spaces between units and open cavities/cores with the same drainage material. Proceed to place backfill in maximum 6-8” layers and compact to 95% Standard Proctor with the appropriate compaction equipment.
Install the Base Course.Place the first course of Keystone units end to end (with face of wall corners touching) on the prepared base. The receiving pin holes should face upward, as shown. Make sure each unit is level front to back and left to right. Leveling the first course is critical for accurate and acceptable results. Minimum embedment depth below grade is 6”. Consult wall design details for site specific embedment requirements.
Install Additional Courses.Clean any debris off the top course of units. Place the next course of Keystone units over the fiberglass pins, fitting the pins into the triangular shaped receiving hole in the units above. Push the units toward the face of the wall until they make full contact with the pins. Continue backfilling and building to desired top elevation.
Insert the Fiberglass Pins.Place the straight fiberglass pins into the holes of each Keystone unit as required. Once placed, the pins create an automatic setback for the additional courses. Place pins in the front holes for near vertical (1⁄8”) setback and the rear holes for 11⁄8” setback per course.
Capping the Wall.Complete your wall with the appropriate Keystone capping units. With units dry and clean, use exterior construction grade adhesive on the top surface of the last course before applying cap units. Backfill and compact to finish grade.
© 2019 The QUIKRETE Companies – KHS 02/19
FOLLOW US