STOR 320.1 Shiny R
28
STOR 320.1 Shiny R
Transcript of STOR 320.1 Shiny R
STOR 320.1 Shiny R
Introduction
2
• Web Applications with R Shiny
• Requires the Shiny Package in R
• Check Out R Shiny Cheat Sheet
• Gallery of Shiny Applications
• Deployable by shinyapps.io
Introduction
3
• Planning What You Want to Do
• User Controls ____________
• Output Given is ___________
• R Code I Need is __________
Getting Started
4
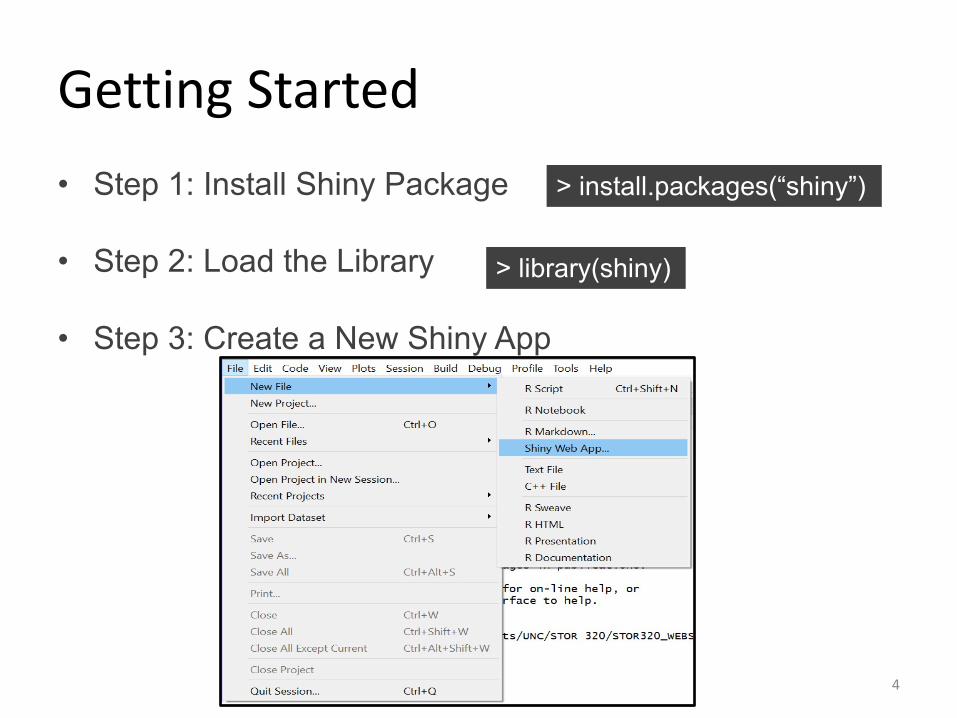
• Step 1: Install Shiny Package
• Step 2: Load the Library
• Step 3: Create a New Shiny App
> install.packages(“shiny”)
> library(shiny)
Getting Started
5
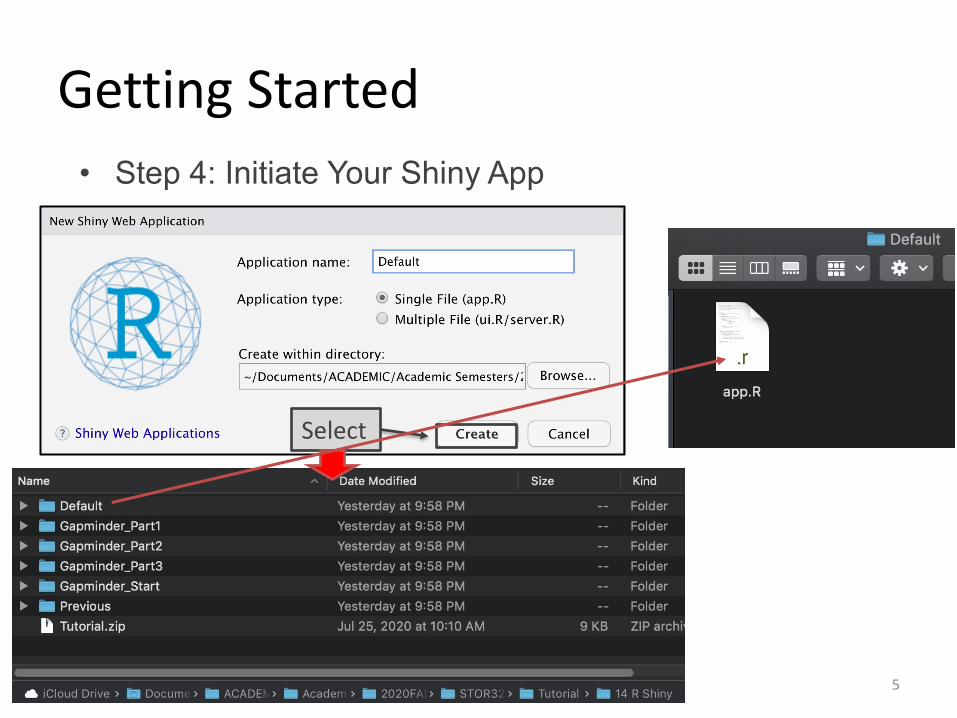
• Step 4: Initiate Your Shiny App
•
Select
Example
6
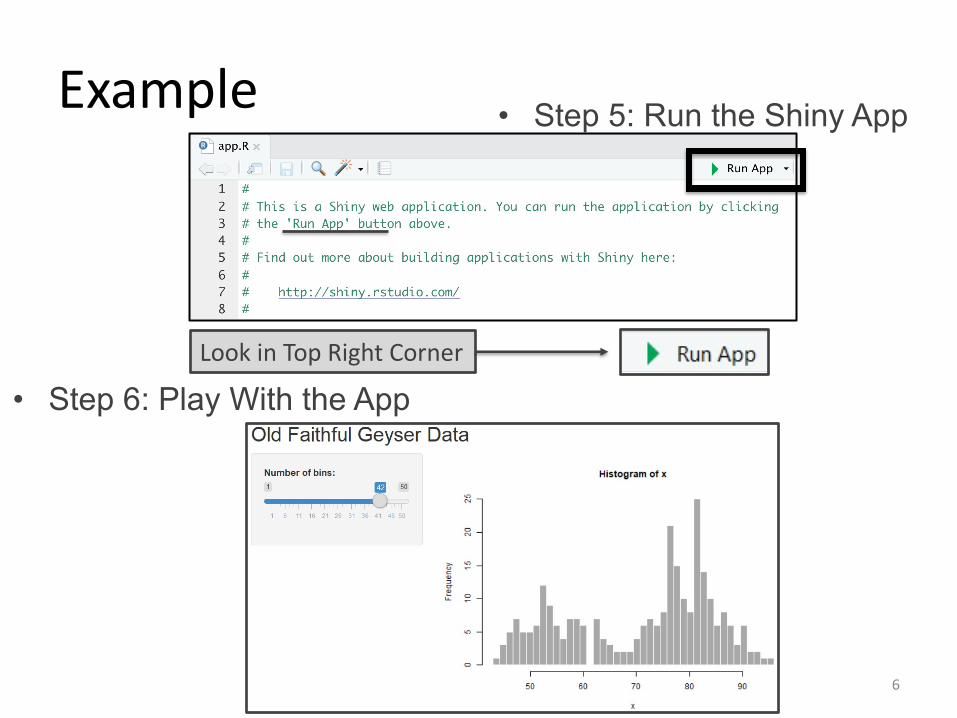
• Step 6: Play With the AppLook in Top Right Corner
• Step 5: Run the Shiny App
Architecture
7
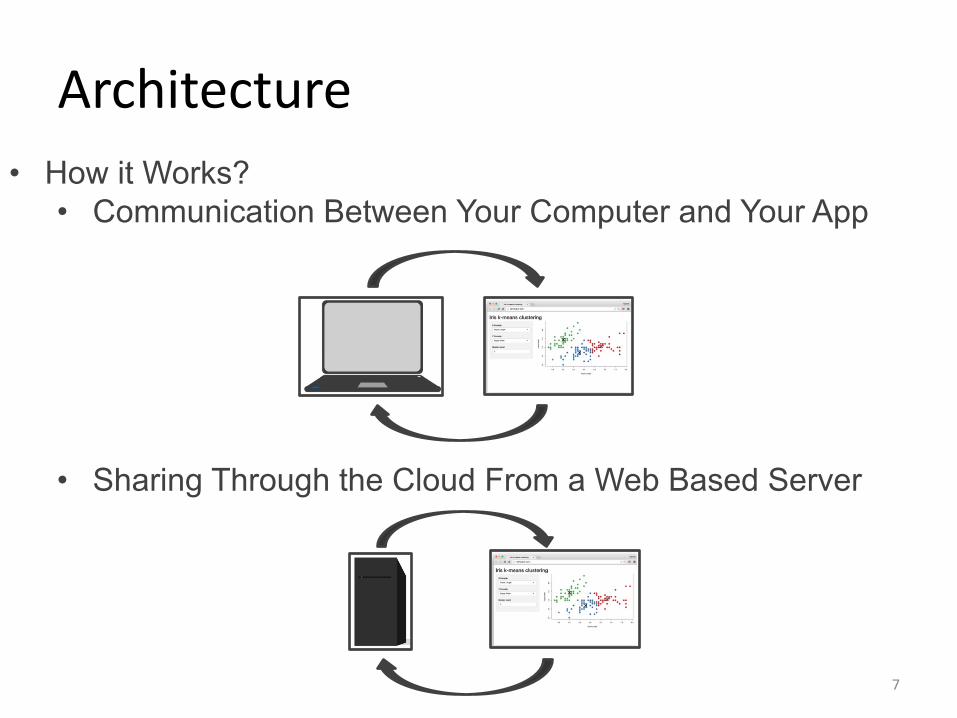
• How it Works?• Communication Between Your Computer and Your App
• Sharing Through the Cloud From a Web Based Server
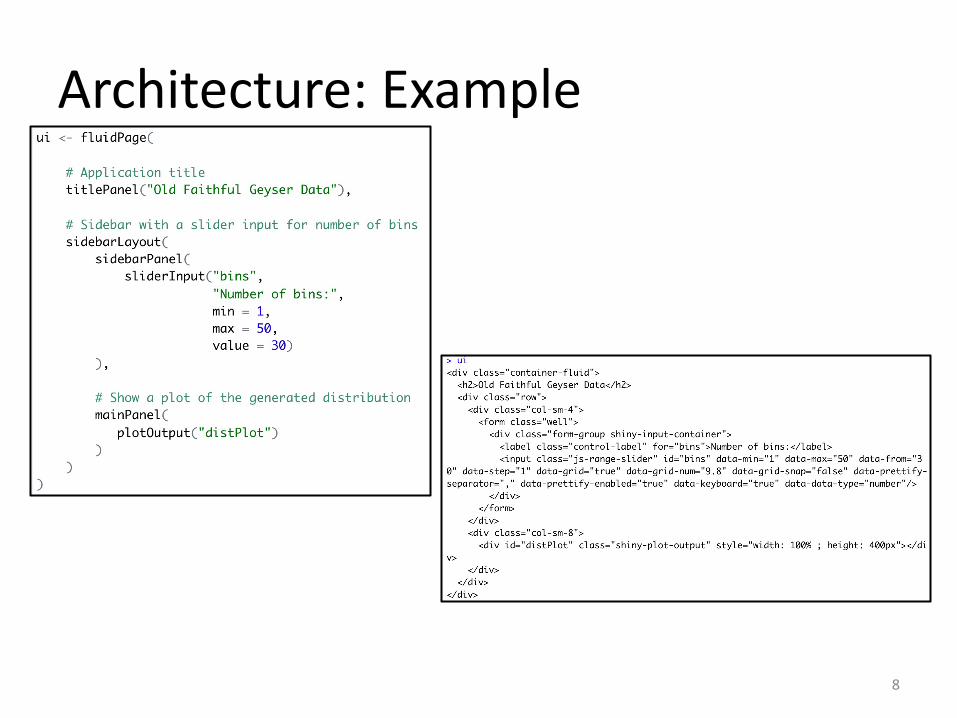
Architecture: Example
8
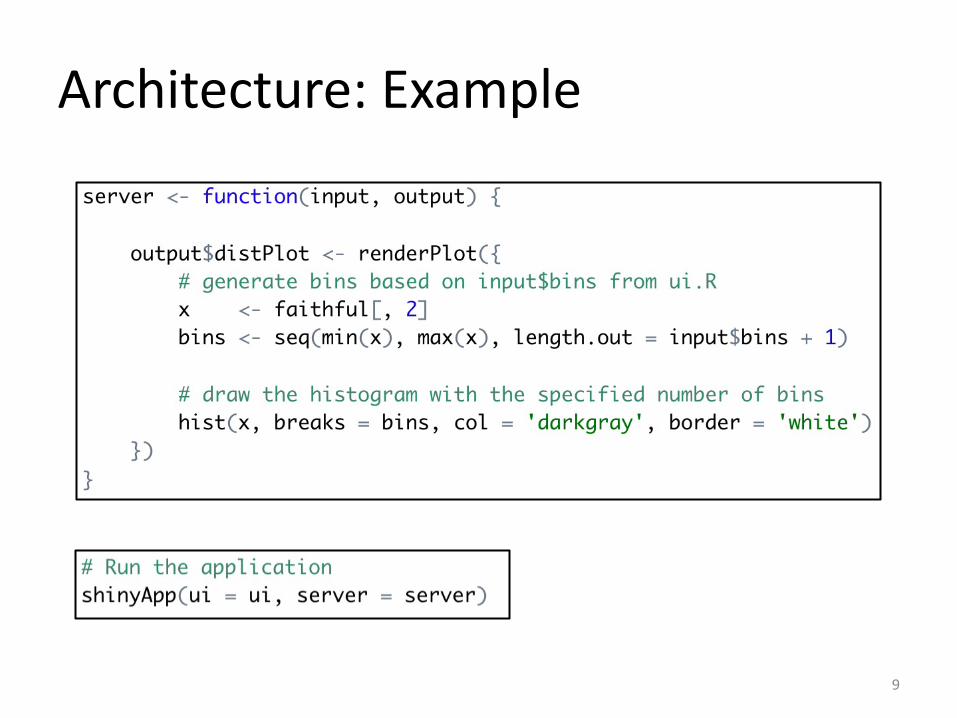
Architecture: Example
9
Template
10
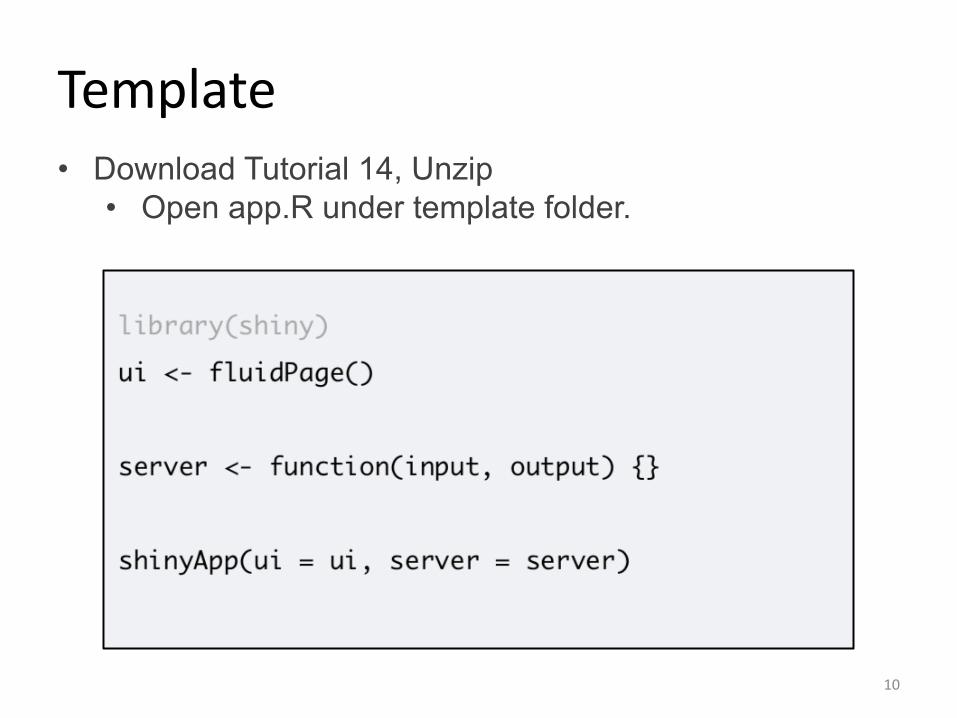
• Download Tutorial 14, Unzip• Open app.R under template folder.
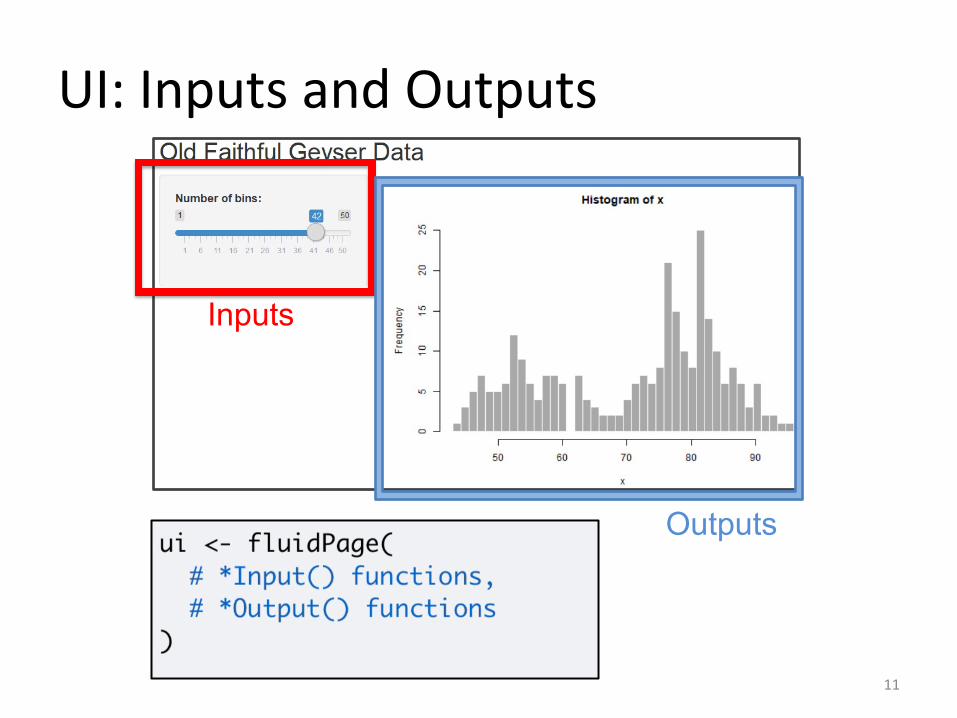
UI: Inputs and Outputs
11
Inputs
Outputs
UI: Inputs
12
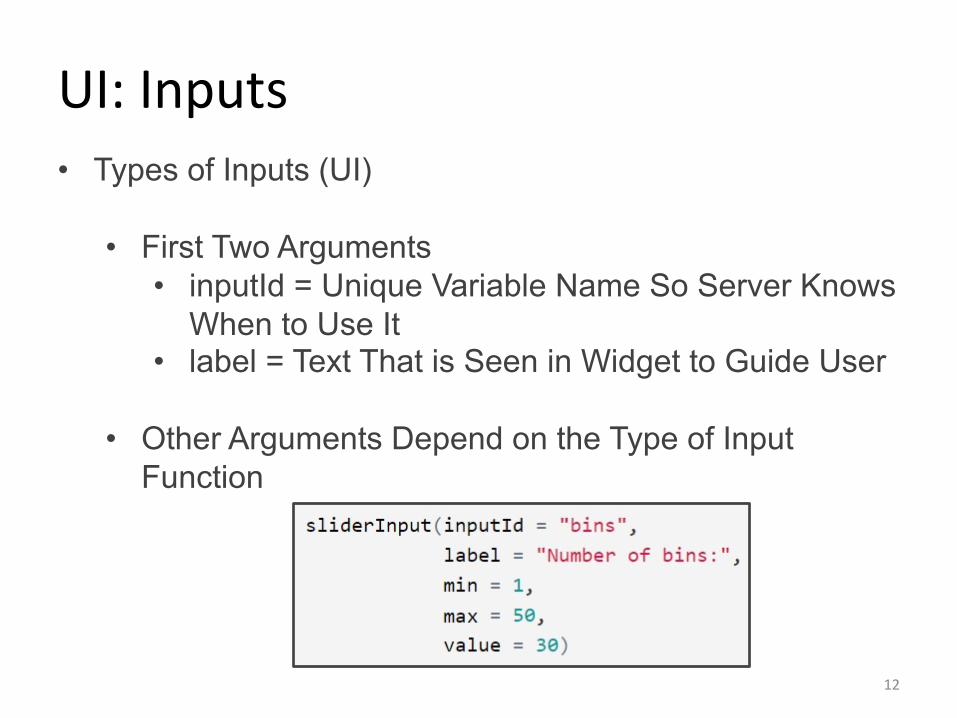
• Types of Inputs (UI)
• First Two Arguments• inputId = Unique Variable Name So Server Knows
When to Use It• label = Text That is Seen in Widget to Guide User
• Other Arguments Depend on the Type of Input Function
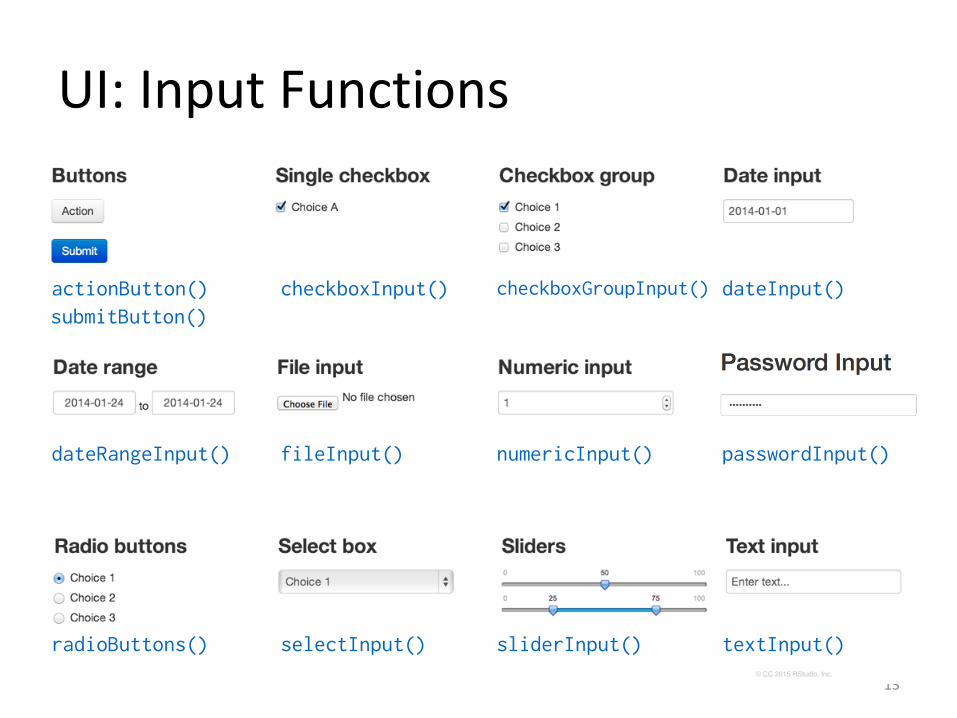
UI: Input Functions
13 © CC 2015 RStudio, Inc.
actionButton()submitButton()
checkboxInput() checkboxGroupInput() dateInput()
dateRangeInput() fileInput() numericInput() passwordInput()
radioButtons() selectInput() sliderInput() textInput()
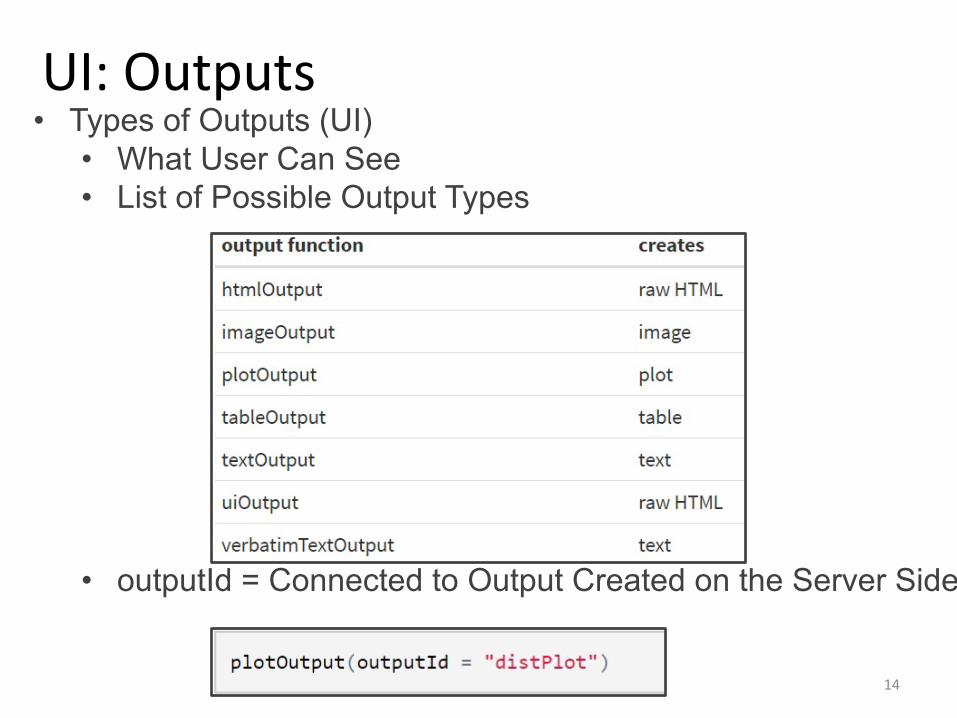
UI: Outputs
14
• Types of Outputs (UI)• What User Can See• List of Possible Output Types
• outputId = Connected to Output Created on the Server Side
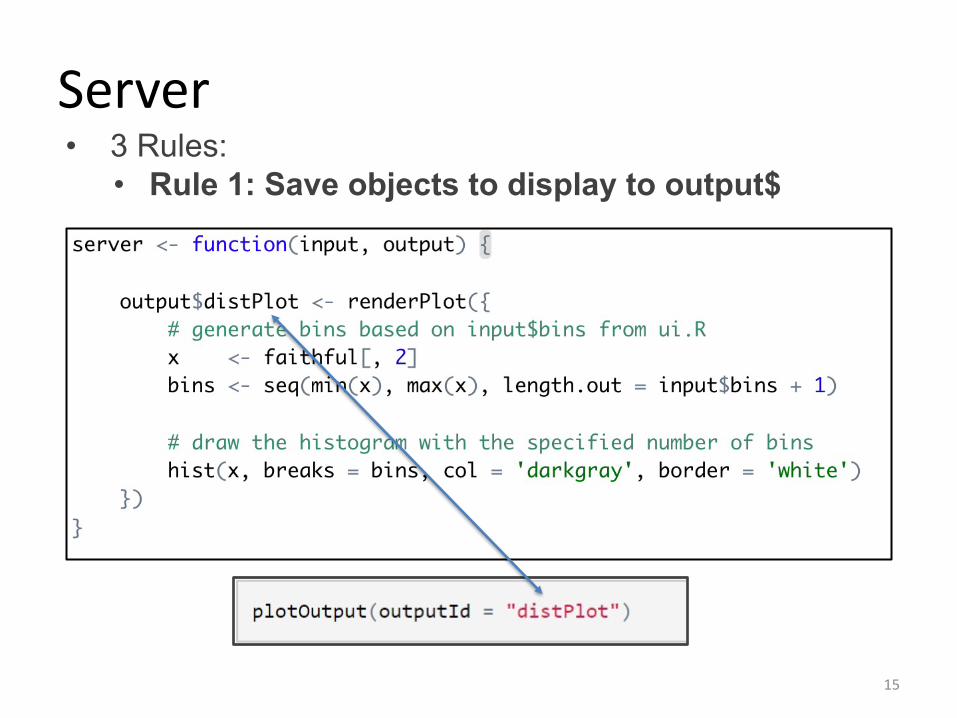
Server
15
• 3 Rules:• Rule 1: Save objects to display to output$
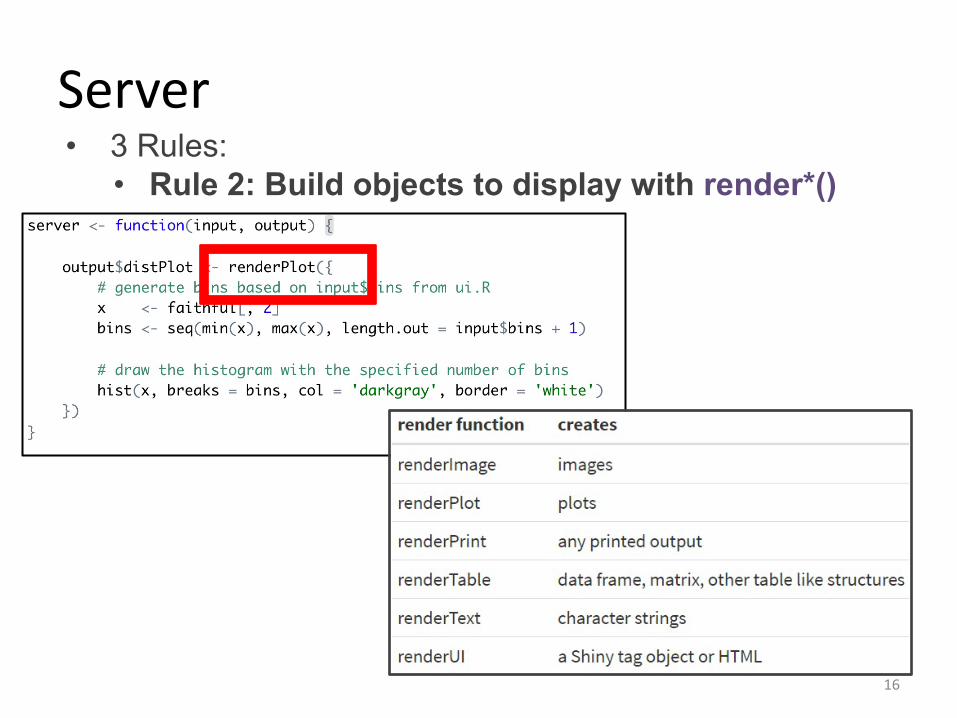
Server
16
• 3 Rules:• Rule 2: Build objects to display with render*()
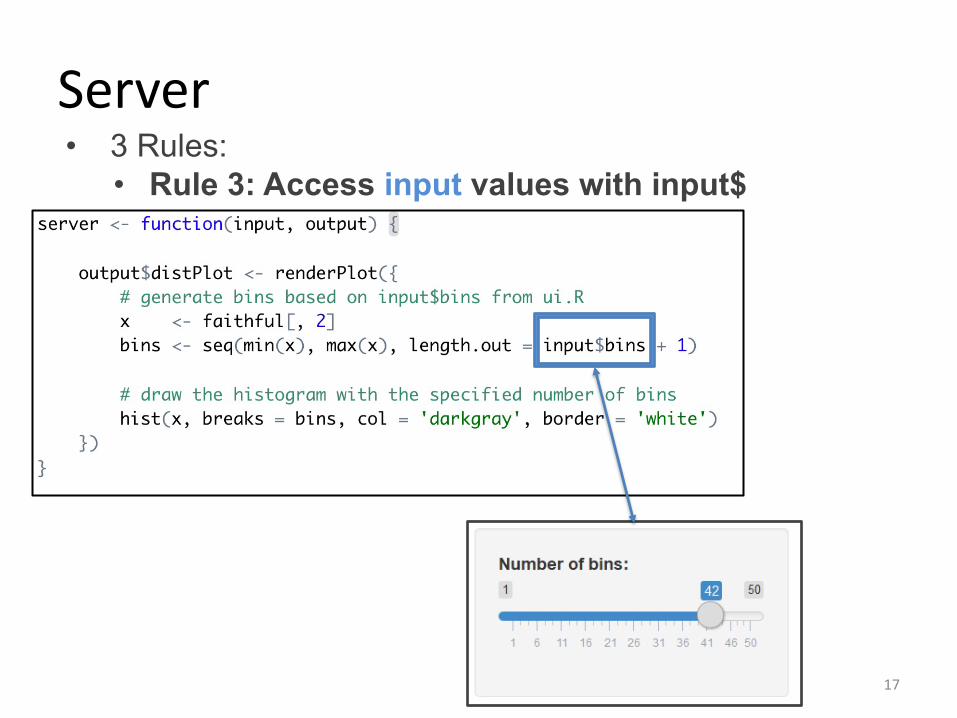
Server
17
• 3 Rules:• Rule 3: Access input values with input$
Server: Recap
• Rule 1: Save objects to display to output$
• Rule 2: Build objects to display with render*()
• Rule 3: Access input values with input$
18
Gapminder Shiny App
19
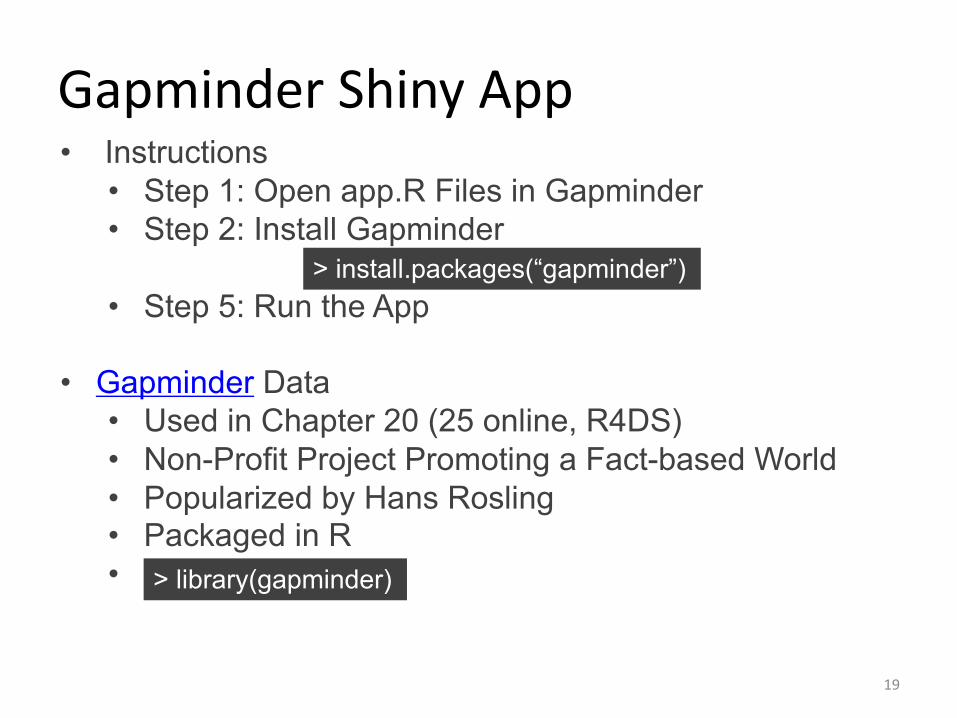
• Instructions• Step 1: Open app.R Files in Gapminder• Step 2: Install Gapminder
• Step 5: Run the App
• Gapminder Data• Used in Chapter 20 (25 online, R4DS)• Non-Profit Project Promoting a Fact-based World• Popularized by Hans Rosling• Packaged in R• > library(gapminder)
> install.packages(“gapminder”)
Gapminder Shiny App
20
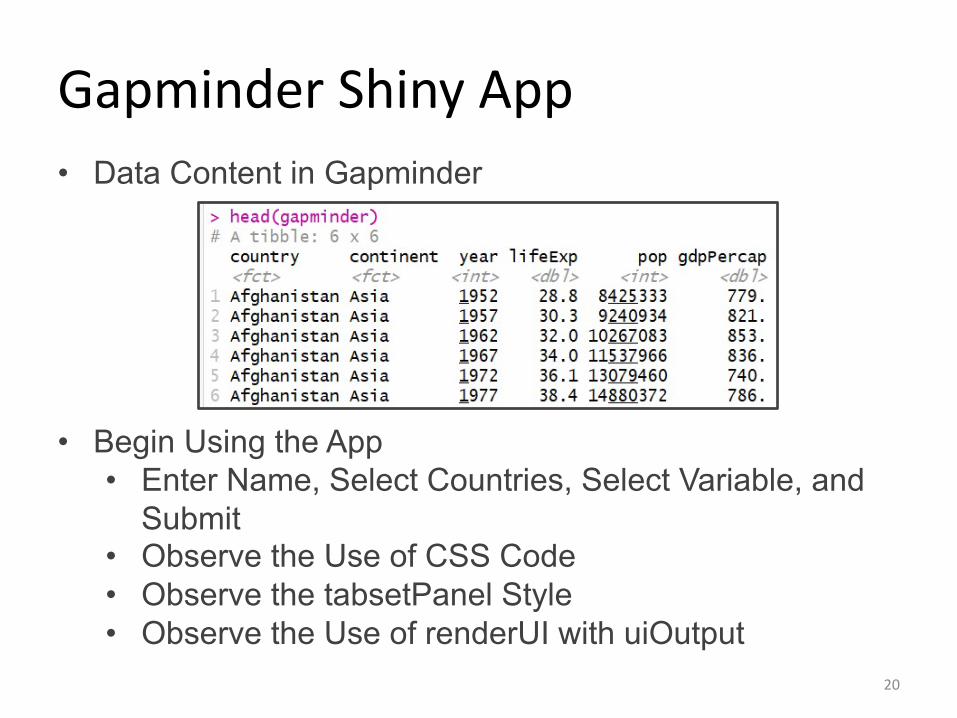
• Data Content in Gapminder
• Begin Using the App• Enter Name, Select Countries, Select Variable, and
Submit• Observe the Use of CSS Code• Observe the tabsetPanel Style• Observe the Use of renderUI with uiOutput
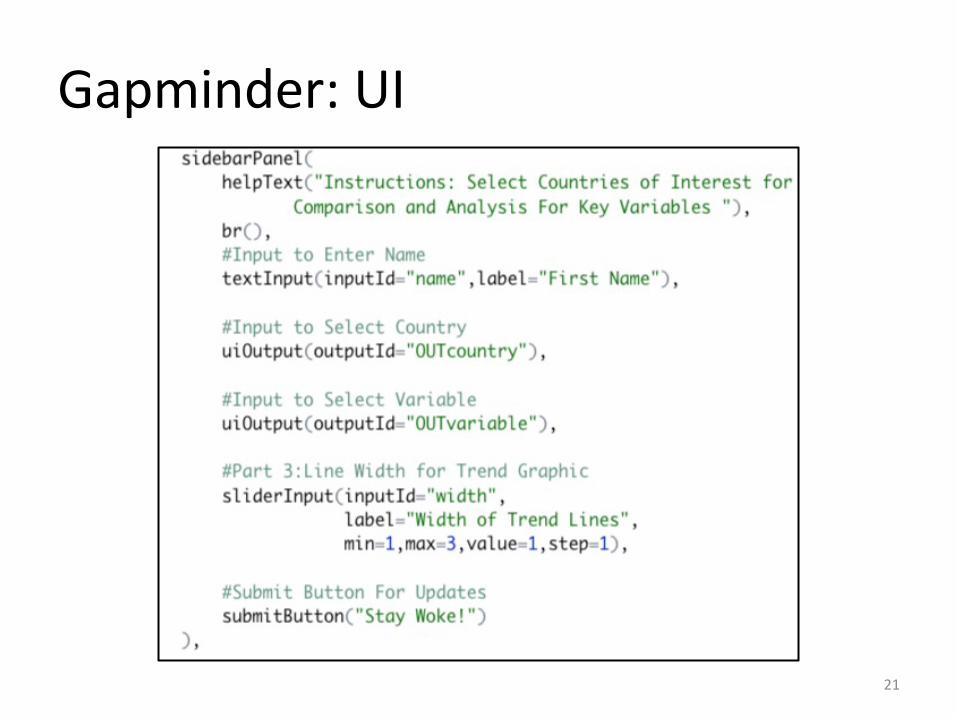
Gapminder: UI
21
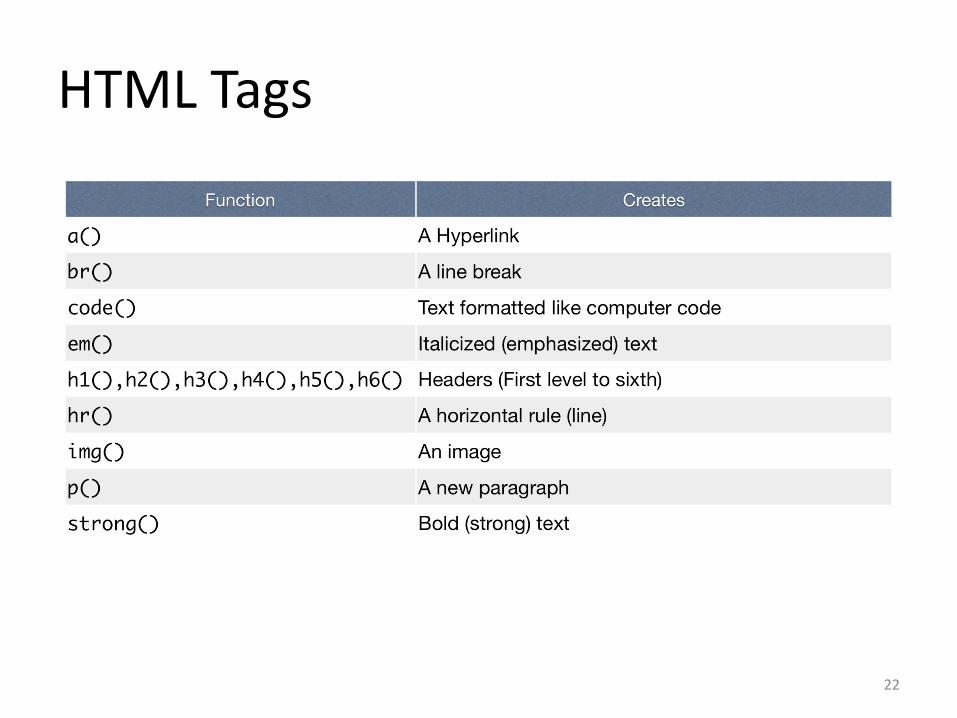
HTML Tags
22
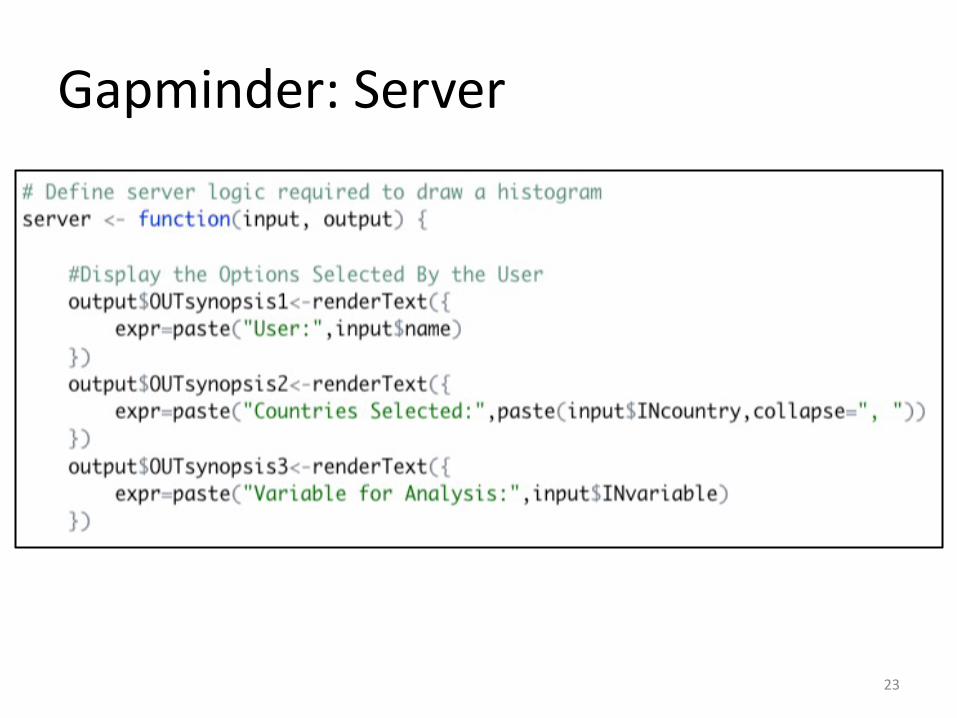
Gapminder: Server
23
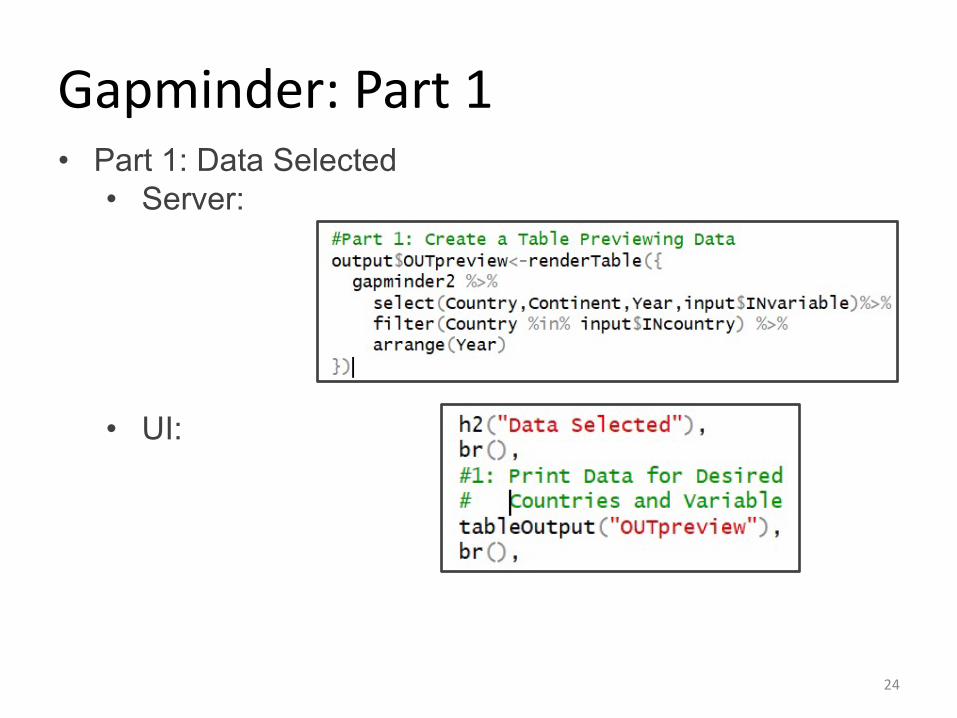
Gapminder: Part 1
24
• Part 1: Data Selected• Server:
• UI:
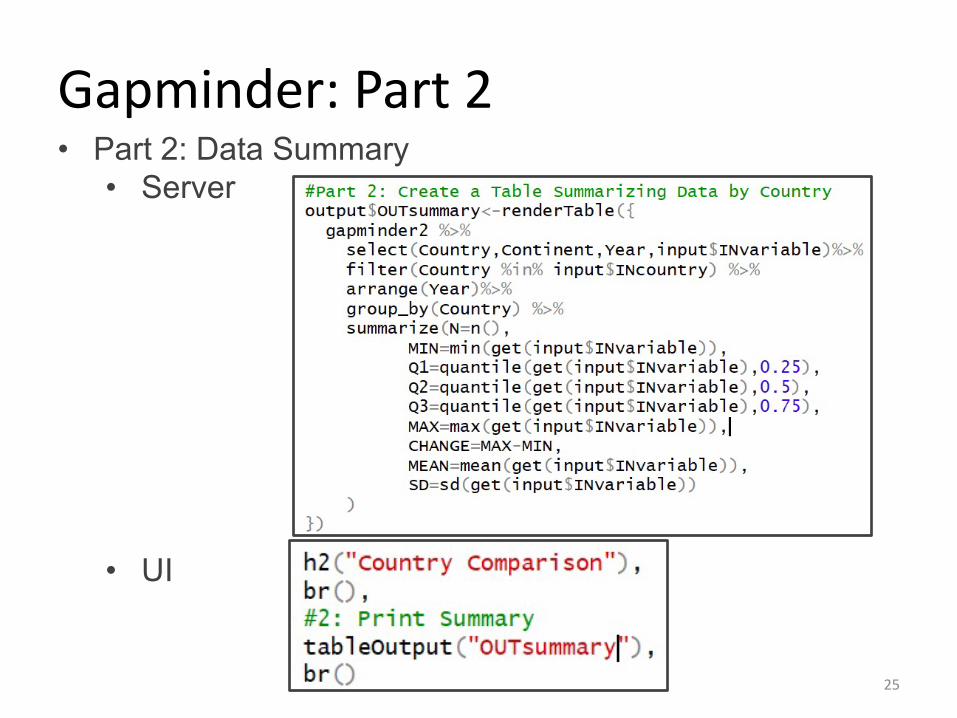
Gapminder: Part 2
25
• Part 2: Data Summary• Server
• UI
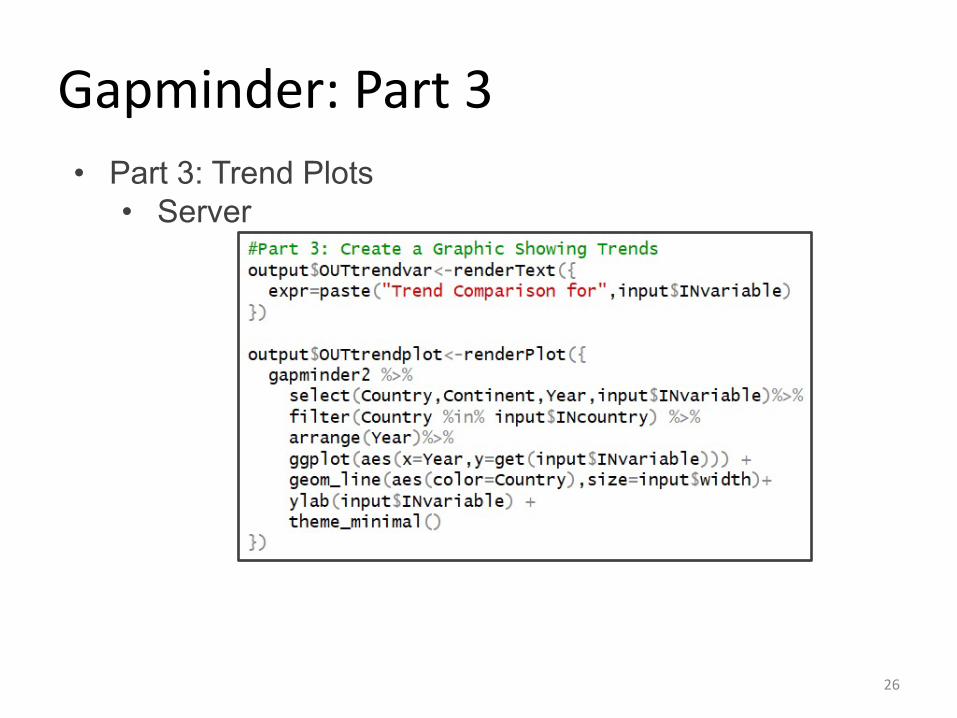
Gapminder: Part 3
26
• Part 3: Trend Plots• Server
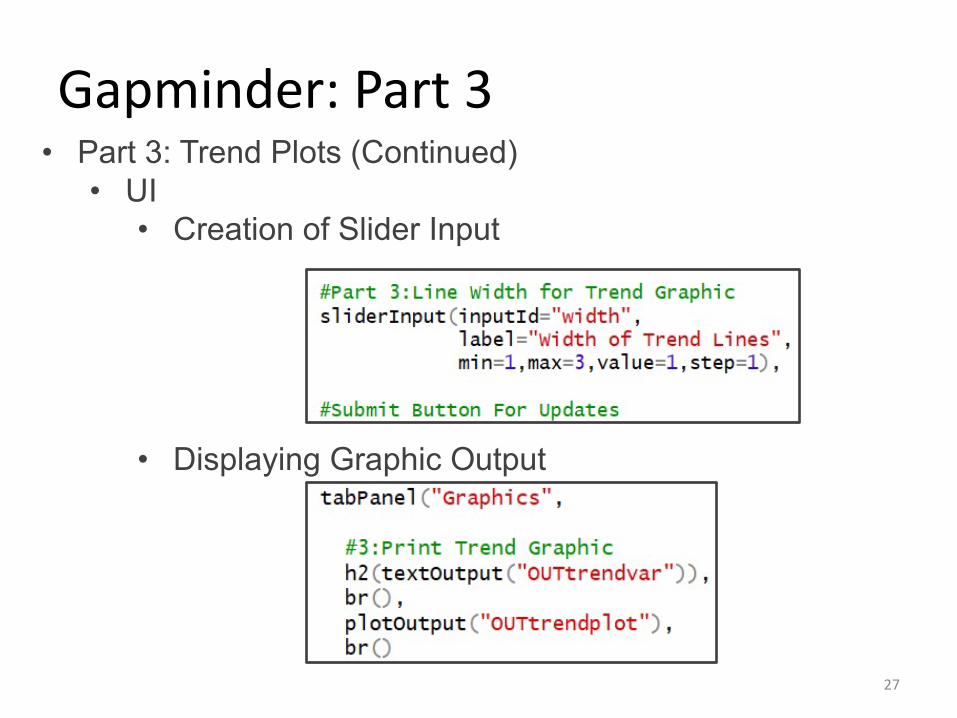
Gapminder: Part 3
27
• Part 3: Trend Plots (Continued)• UI
• Creation of Slider Input
• Displaying Graphic Output
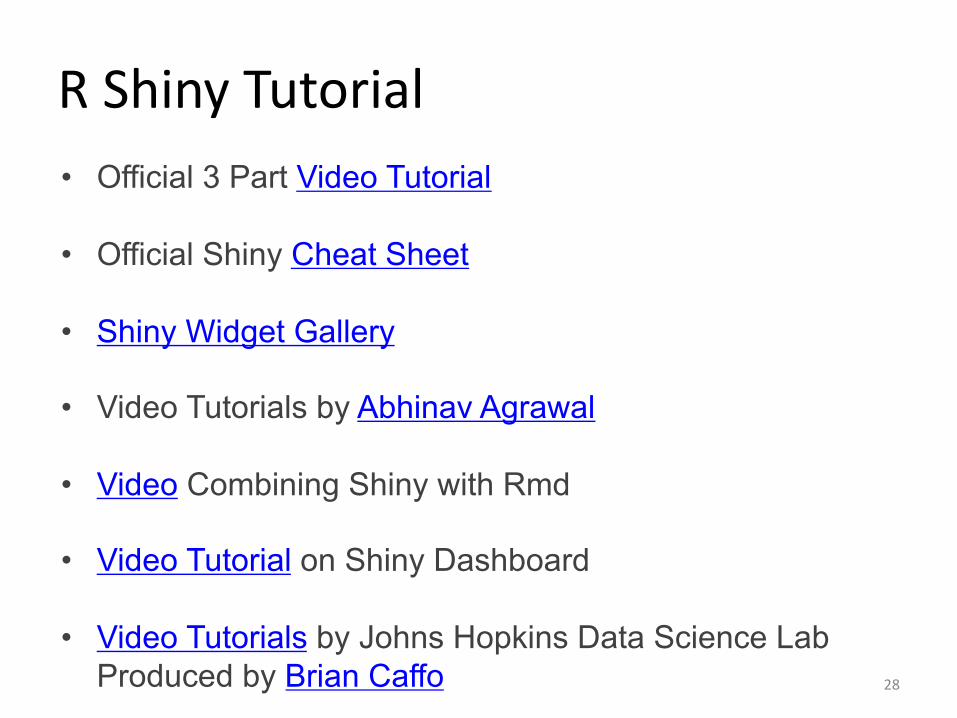
R Shiny Tutorial
28
• Official 3 Part Video Tutorial
• Official Shiny Cheat Sheet
• Shiny Widget Gallery
• Video Tutorials by Abhinav Agrawal
• Video Combining Shiny with Rmd
• Video Tutorial on Shiny Dashboard
• Video Tutorials by Johns Hopkins Data Science Lab Produced by Brian Caffo