
Stitch Freemium DressSkirts3
92
© INTERWEAVE PRESS LLC Not to be reprinted. All rights reserved. PAGE 1 OF 92 visit sewdaily.com Please respect the copyright by not forwarding or distributing this document. 1 One Pleat Skirt The Big Blue Tie Front, Tie Back 1 2 3 sewdaily daily sewing made modern. STYLISH skirt AND dress PATTERNS: 3 FREE Sewing Patterns for Women 3 2
-
Upload
daisy-khavesa -
Category
Documents
-
view
226 -
download
1
Transcript of Stitch Freemium DressSkirts3
© Interweave Press LLC Not to be reprinted. All rights reserved.
page 1 of 92 visit sewdaily.com
Please respect the copyright by not forwarding or distributing this document.
1
one pleat Skirt
The Big Blue
Tie front, Tie Back
1
2
3sewdailysewdaily
sewing made modern.
stylish skirt and dress patterns: 3 free Sewing patterns for Women
32
sewdailysewdaily
© Interweave Press LLC Not to be reprinted. All rights reserved.
Please respect the copyright by not forwarding or distributing this document.
stylish skirt anD dress patterns 3 Free Sewing Patterns for Women
page 2 of 92 visit sewdaily.com
1 One Pleat Skirt....................................32 The Big Blue.........................................6
3 Tie Front, Tie Back.............................8
Photo by Larry Stein
Editor Amber EdendEsignEr Jocelin Damien
illustration Ann Sabin SwansonPhotograPhy Joe Hancock and Larry Stein
ProjEct dEsignErs
Beki Wilson, Amber Eden, and Jil Cappuccio
Projects and information are for inspiration and personal use only. Sew Daily and Stitch magazine are not responsible for any liability arising from errors, omissions, or mistakes contained in this eBook, and readers should proceed cau-tiously, especially with respect to technical information. Interweave grants per-mission to photocopy any patterns published in this issue for personal use only.
sewdailysewdaily
Welcome to the Sew Daily eBook: Stylish Skirt and Dress Patterns: 3 Free Sewing Patterns for Women.
We have gathered together a collection of skirt and dress patterns that have timeless style and simple silhouettes. They are patterns you can use again and again, creating a new look by changing the fabric or adding a different embellishment.
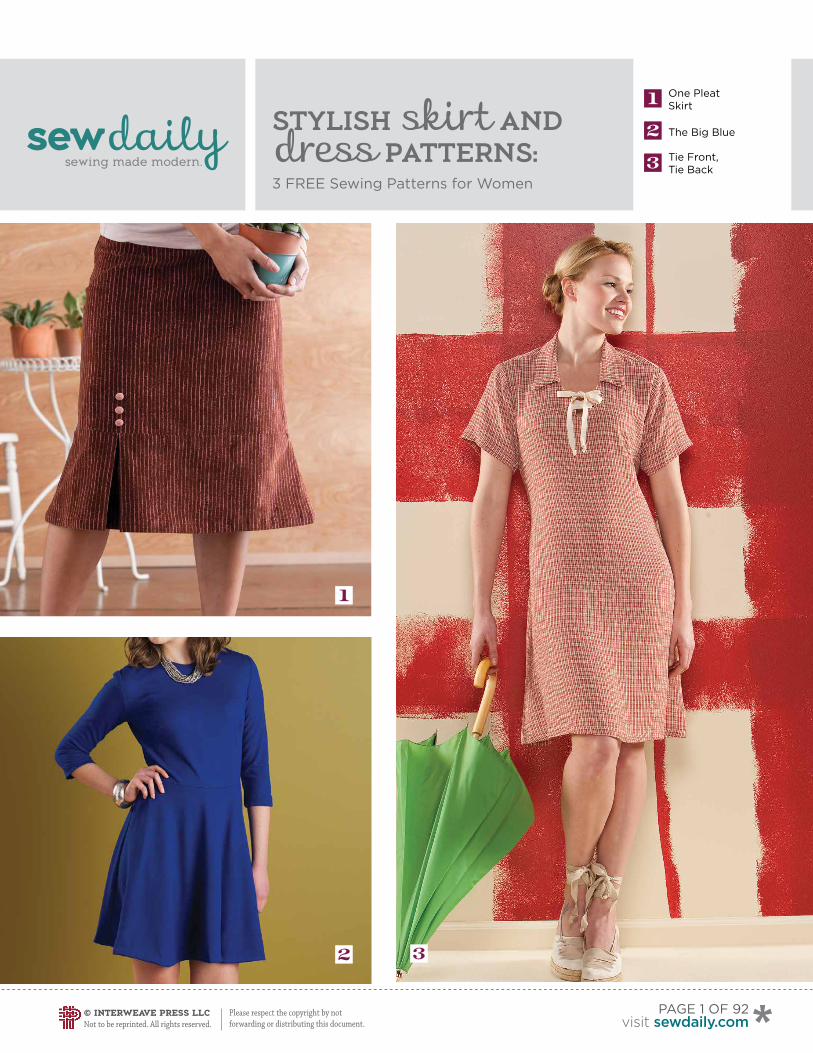
The One Pleat Skirt by Beki Wilson is a fun twist on a simple A-line skirt that features a single pleat accented with three buttons. Made with a lightweight stretch fabric and side zipper closure, it’s as easy to wear as it is to make.
The Big Blue dress by me is a chic frock that is ready for any special event. With its clean lines, flared skirt, subtle French darts, and vintage styling, all eyes will be on you. This is a dress that you wear, not the other way around—a classic that will be in your closet for years to come.
The Tie Front, Tie Back dress by Jil Cappuccio is an update on a simple shift dress with a lace-up collar and crisscross back ties to add shaping. With a super-simple pattern and lightweight rayon fabric, this dress is as easy to make as it is to wear.
Each of these one-of-a-kind designs will be a great and lasting addition to your wardrobe, and they are elegant enough to please advanced sewists, while also being simple enough for a beginner to take on. I hope you will enjoy all of these special dress and skirt patterns and get much sewing pleasure from them.
Happy stitching,
amber edenEditor, Stitch magazine and SewDaily
sewdailysewdaily
© Interweave Press LLC Not to be reprinted. All rights reserved.
Please respect the copyright by not forwarding or distributing this document.
stylish skirt anD dress patterns 3 Free Sewing Patterns for Womensewdaily
sewdaily
page 3 of 92visit sewdaily.com
Please respect the copyright by not forwarding or distributing this document
For explanations oF terms + techniques used
click here For our sewing Basics online
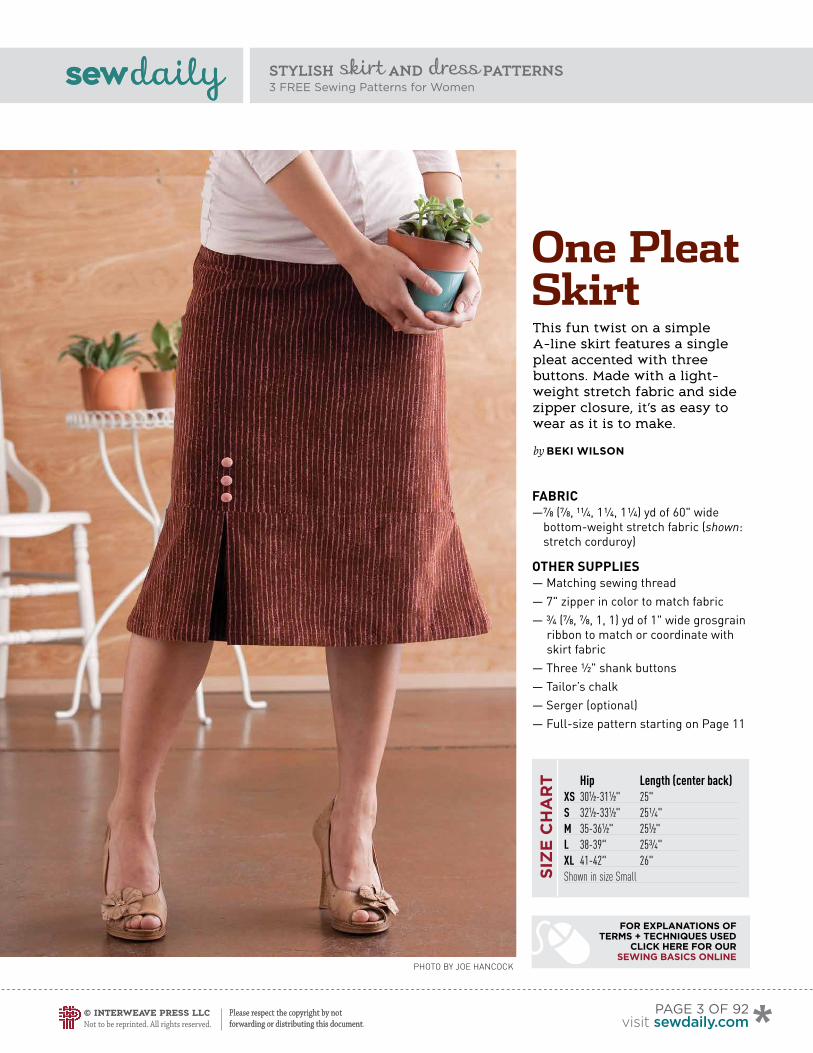
One Pleat SkirtThis fun twist on a simple A-line skirt features a single pleat accented with three buttons. Made with a light-weight stretch fabric and side zipper closure, it’s as easy to wear as it is to make.
by Beki wilson
Photo by Joe hancock
Fabric— 7⁄8 (7⁄8, 11⁄4, 1 1⁄4, 1 1⁄4) yd of 60" wide
bottom-weight stretch fabric (shown: stretch corduroy)
Other SupplieS— Matching sewing thread— 7" zipper in color to match fabric— 3⁄4 (7⁄8, 7⁄8, 1, 1) yd of 1" wide grosgrain
ribbon to match or coordinate with skirt fabric
— Three 1⁄2" shank buttons — Tailor’s chalk— Serger (optional)— Full-size pattern starting on Page 11
Hip Length (center back)XS 301⁄2-311⁄2" 25"S 321⁄2-331⁄2" 251⁄4"M 35-361⁄2" 251⁄2"L 38-39" 253⁄4"XL 41-42" 26"Shown in size Small
sewdailysewdaily
© Interweave Press LLC Not to be reprinted. All rights reserved.
Please respect the copyright by not forwarding or distributing this document.
stylish skirt anD dress patterns 3 Free Sewing Patterns for Women
page 4 of 92visit sewdaily.com
sewingmade modern.bsewdaily
sewingmade modern.sewdaily
NOteS— All seam allowances are 5⁄8" unless
otherwise indicated.— When instructed to finish the raw
edges you have a few options. Serge the edges, use a zigzag or an overcasting stitch on your sewing machine along the edges, or stitch 1⁄4" from the edge and then pink the raw edges to prevent raveling.
cut Fabric1 Cut the pattern pieces from the pattern provided. Lay the pattern pieces on the fabric as shown in the layout diagram and cut out the pieces. Transfer all pattern markings to the fabric wrong side with tailor’s chalk. Designate one skirt piece as the Front and mark with a safety pin or tailor’s chalk on the fabric wrong side.
aSSemble Skirt2 Matching the guidelines, pin and sew each dart. Press the darts toward the center front (on Front piece) or center back (on Back piece).
3 Lay the skirt pieces right sides together. Measure 8½" from the waistline raw edge along the left side seam and mark. Set the machine for a long stitch (4.0 mm) and baste the seam from the waistline to the mark. Return the stitch to its regular length (2.5 mm) and stitch the side seam below the zipper opening. Finish the raw edges, press the seam open, and sew in the zipper behind the basting stitches. Remove the basting stitches when the zipper is in place.
4 Pin and sew the other skirt side seam. Finish the raw edges and press the seam open.
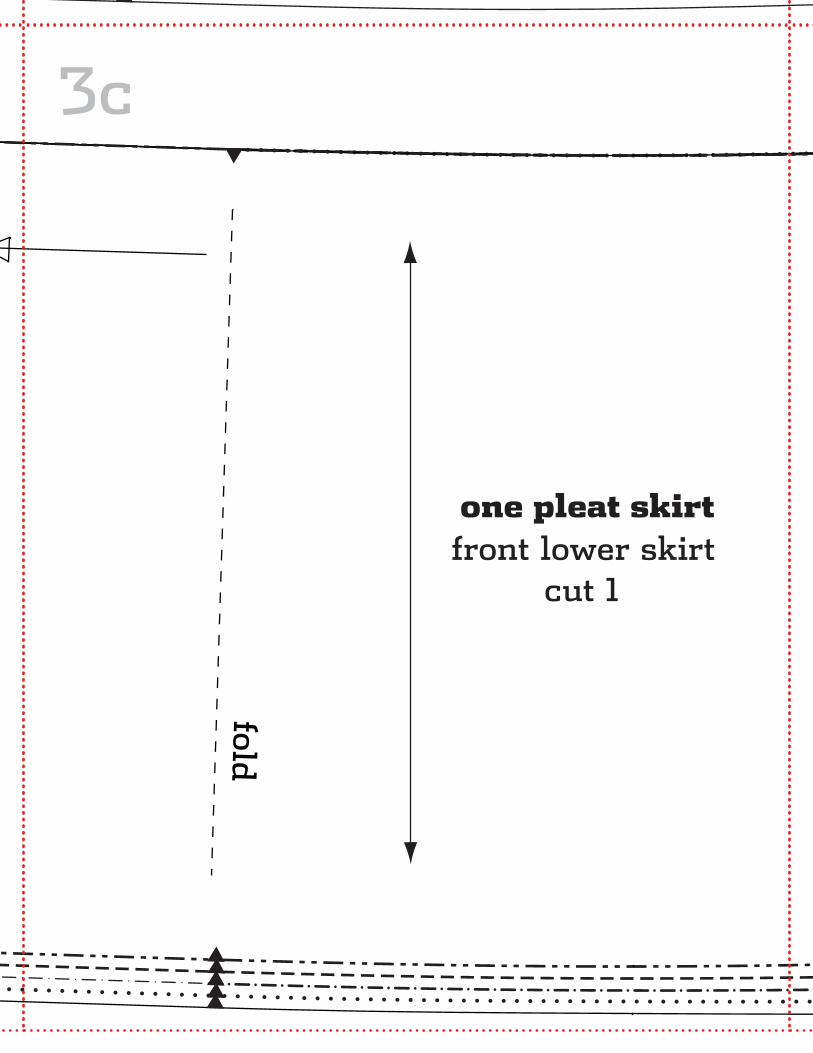
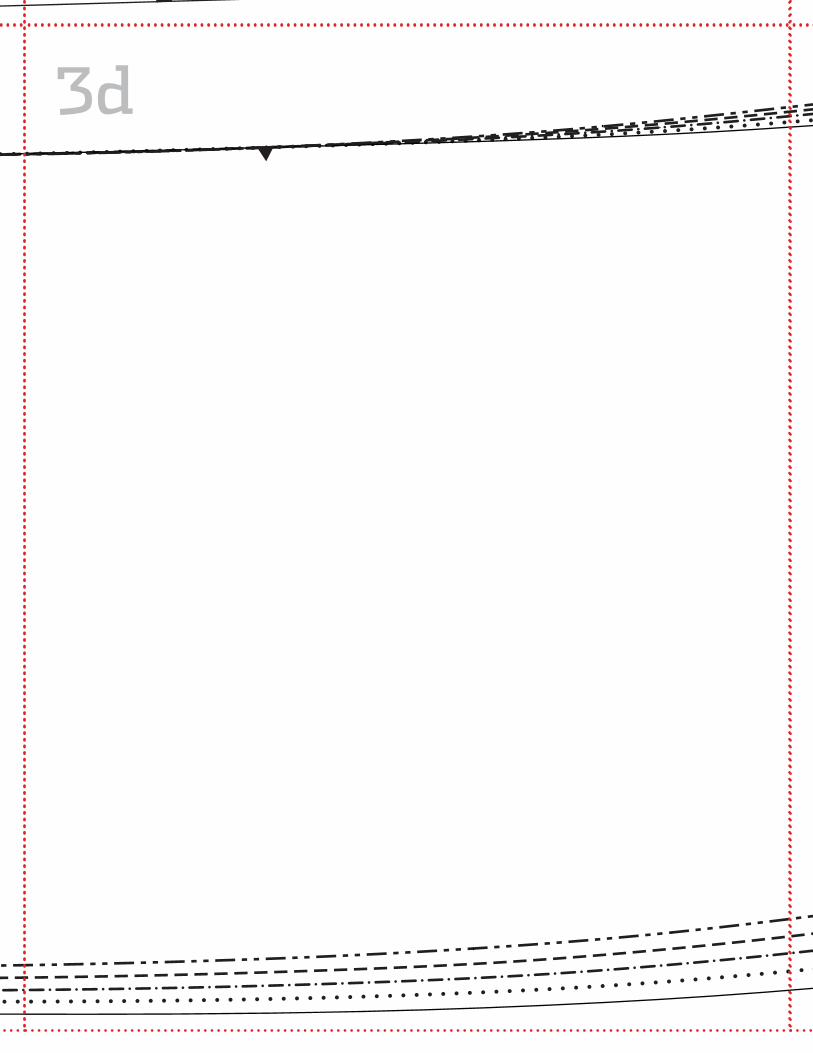
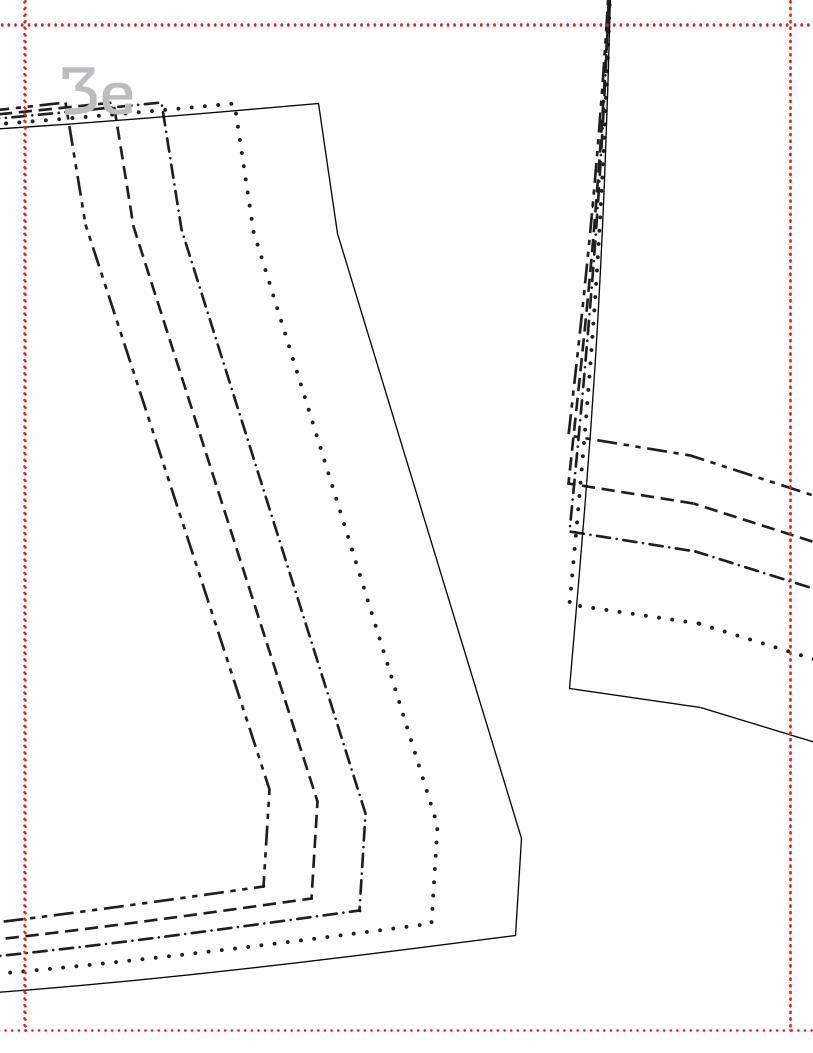
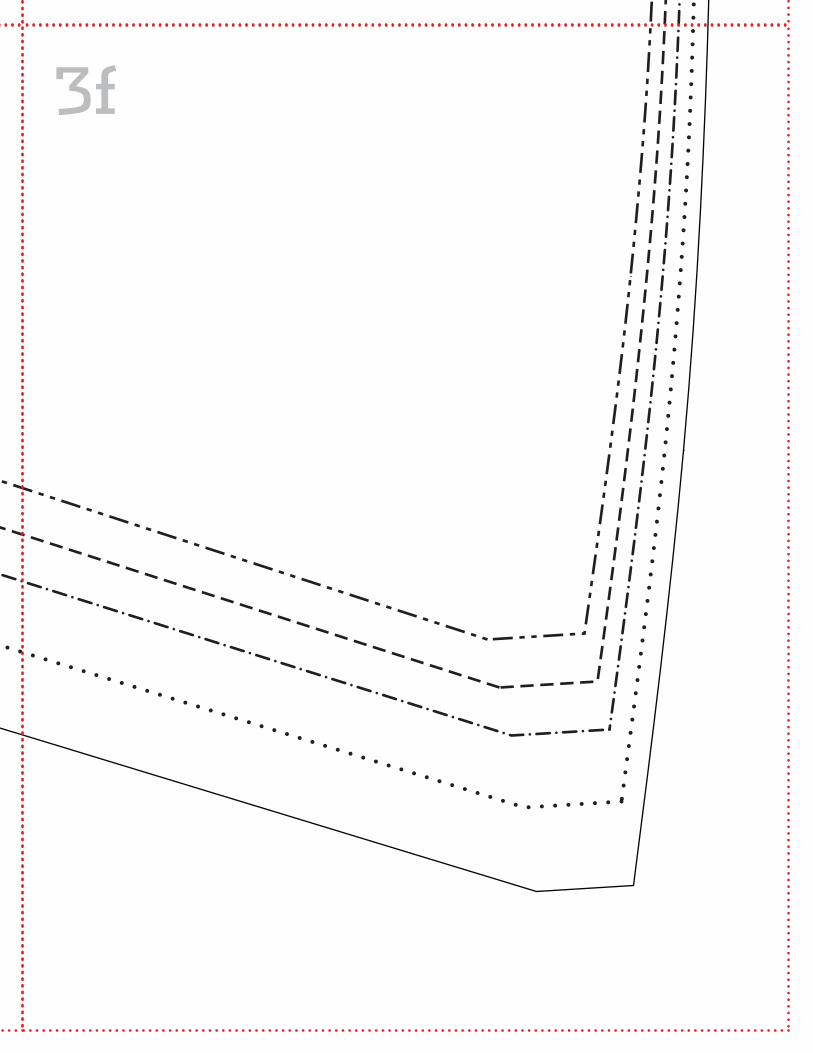
5 Fold the Lower Skirt Front, wrong sides together, along each dashed line. Bring the folds to meet at the solid line, forming a pleat. Press to set the folds and pin the folds at the upper edge. Lay both the Lower Skirt pieces right sides together and sew the side seams. Finish the raw edges and press the side seams open.
6 Turn the lower skirt inside out and place it on the skirt body, right sides together, matching the skirt’s lower
edge to the lower skirt’s upper raw edge. Align the side seams and make sure the pleat is positioned on the skirt front. Pin and sew. Finish the raw edges and press both seam allowances down.
figure 3
figure 4
7 Measure the waistline seam on the skirt pattern pieces without seam allowances. Cut a piece of grosgrain ribbon 1" longer than the measurement. Fold 1⁄2" to the wrong side on each ribbon end and press.
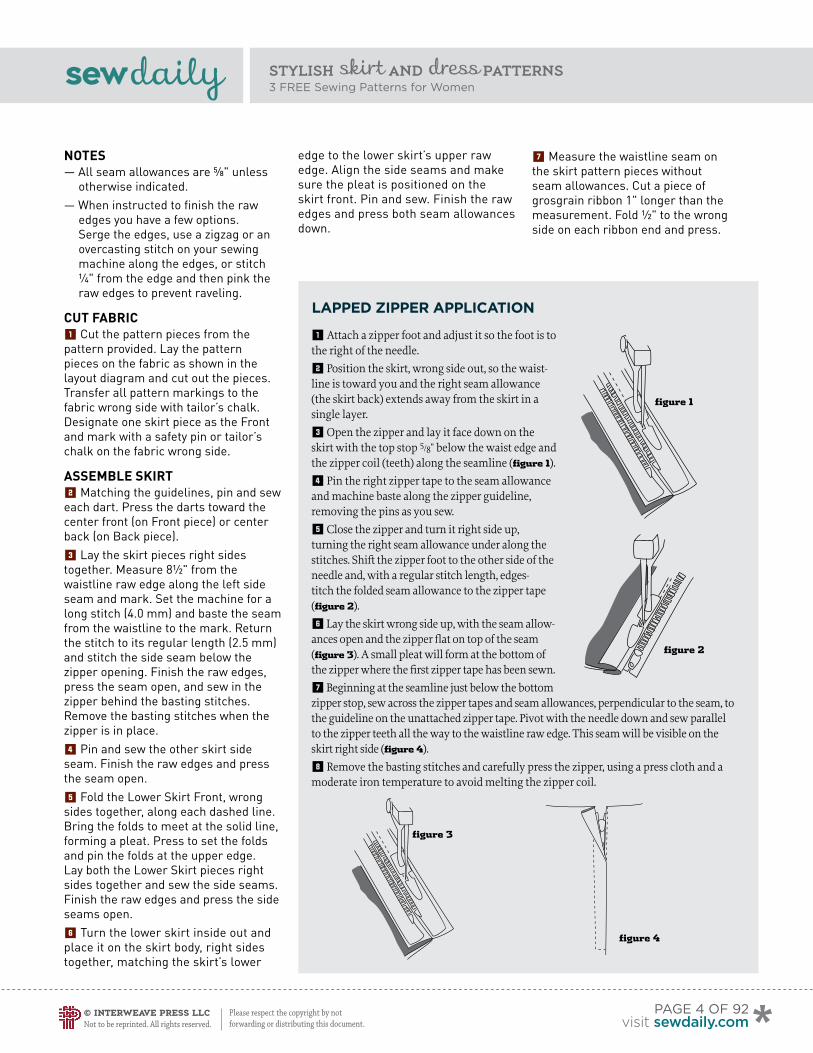
1 Attach a zipper foot and adjust it so the foot is to the right of the needle.
2 Position the skirt, wrong side out, so the waist-line is toward you and the right seam allowance (the skirt back) extends away from the skirt in a single layer.
3 Open the zipper and lay it face down on the skirt with the top stop 5/8" below the waist edge and the zipper coil (teeth) along the seamline (figure 1).
4 Pin the right zipper tape to the seam allowance and machine baste along the zipper guideline, removing the pins as you sew.
5 Close the zipper and turn it right side up, turning the right seam allowance under along the stitches. Shift the zipper foot to the other side of the needle and, with a regular stitch length, edges-titch the folded seam allowance to the zipper tape (figure 2).
6 Lay the skirt wrong side up, with the seam allow-ances open and the zipper flat on top of the seam (figure 3). A small pleat will form at the bottom of the zipper where the first zipper tape has been sewn.
7 Beginning at the seamline just below the bottom zipper stop, sew across the zipper tapes and seam allowances, perpendicular to the seam, to the guideline on the unattached zipper tape. Pivot with the needle down and sew parallel to the zipper teeth all the way to the waistline raw edge. This seam will be visible on the skirt right side (figure 4).
8 Remove the basting stitches and carefully press the zipper, using a press cloth and a moderate iron temperature to avoid melting the zipper coil.
figure 2
figure 1
lapped Zipper application
sewdailysewdaily
© Interweave Press LLC Not to be reprinted. All rights reserved.
Please respect the copyright by not forwarding or distributing this document.
stylish skirt anD dress patterns 3 Free Sewing Patterns for Women
8 Open the zipper. Turn the 3⁄8" waistline seam allowance to the wrong side and press to crease, then reopen the seam allowance. Lay the prepared ribbon right side up on the waistline seam allowance, overlapping the raw edge 1⁄4". Match the pressed ribbon ends to the seamline at the zipper opening and pin the ribbon along the waistline seam allowance.
9 Edgestitch the ribbon to the seam allowance around the entire waistline. Press the skirt along the seamline again, pressing the ribbon to the inside. Slip stitch the folded ribbon ends to the side seam allowances, making sure the zipper teeth are free. Topstitch the waistline 1⁄4" below the fold, through all layers, to secure the ribbon waistline facing.
0 For the hem, fold the bottom edge to the wrong side 1⁄2" and press. Fold an additional 1⁄2" to the wrong side and press again. Stitch close to the upper fold through all thicknesses.
- Sew 3 buttons to the skirt front in a vertical line directly above the center of the pleat. Position the first button 3⁄4" above the seamline and space buttons 1" apart.
Beki Wilson is a Seattle designer with a passion for fabric and garment construction. She launched a line of clothing, Out of Line, in 2000, offering casual and wearable designs sprinkled with unexpected design elements. Visit her at outoflinefashion.com.
post. discuss. watch. comment. learn. connect. Join us at Sew Daily, the new online community for modern sewists! Discuss sewing techniques and tips, get feedback and help, chat about Stitch, or start a sew-along. You can also upload photos of your work, share information about yourself and your projects, and make friends in the community. Watch technique videos, see what other users are working on, find the best magazines, books, and instructional DVDs, and more!
all for Free at sewdaily.com
sewingmade modern.sewdaily
page 5 of 92visit sewdaily.com
sewdailysewdaily
© Interweave Press LLC Not to be reprinted. All rights reserved.
Please respect the copyright by not forwarding or distributing this document.
stylish skirt anD dress patterns 3 Free Sewing Patterns for Women
For explanations oF terms + techniques used
click here For our sewing Basics online
page 6 of 92visit sewdaily.com
Photo by Larry Stein
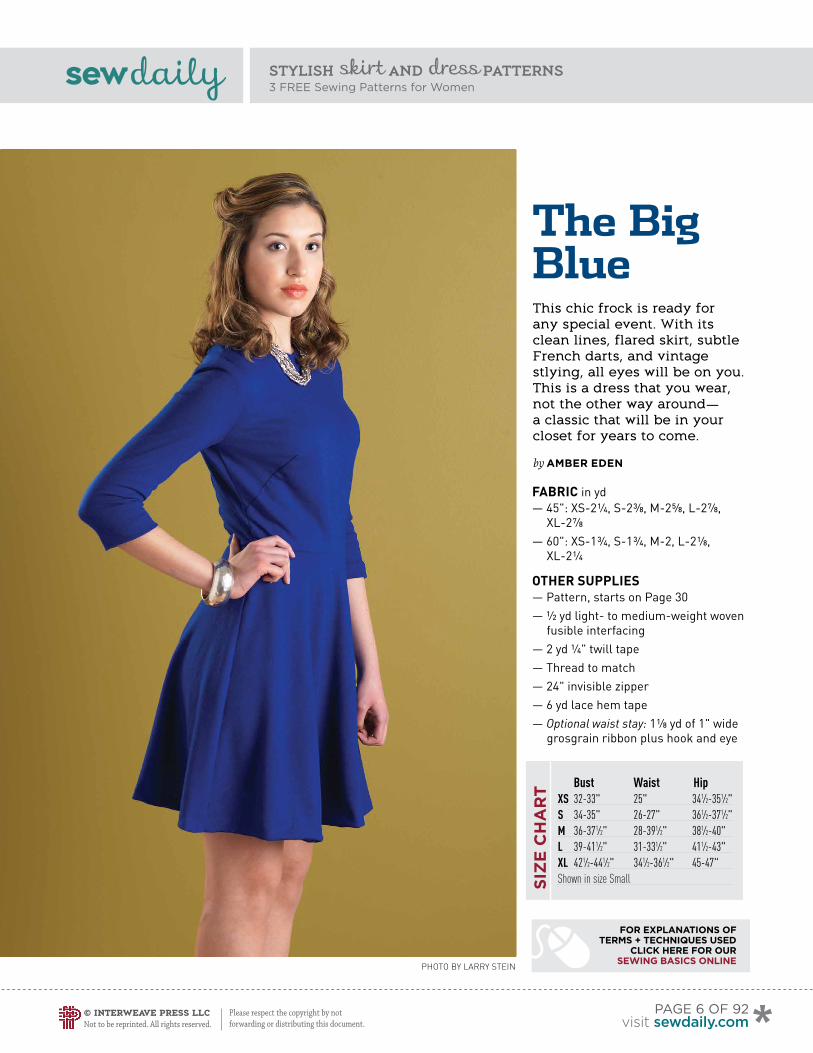
The Big BlueThis chic frock is ready for any special event. With its clean lines, flared skirt, subtle French darts, and vintage stlying, all eyes will be on you. This is a dress that you wear, not the other way around—a classic that will be in your closet for years to come.
by amBer eden
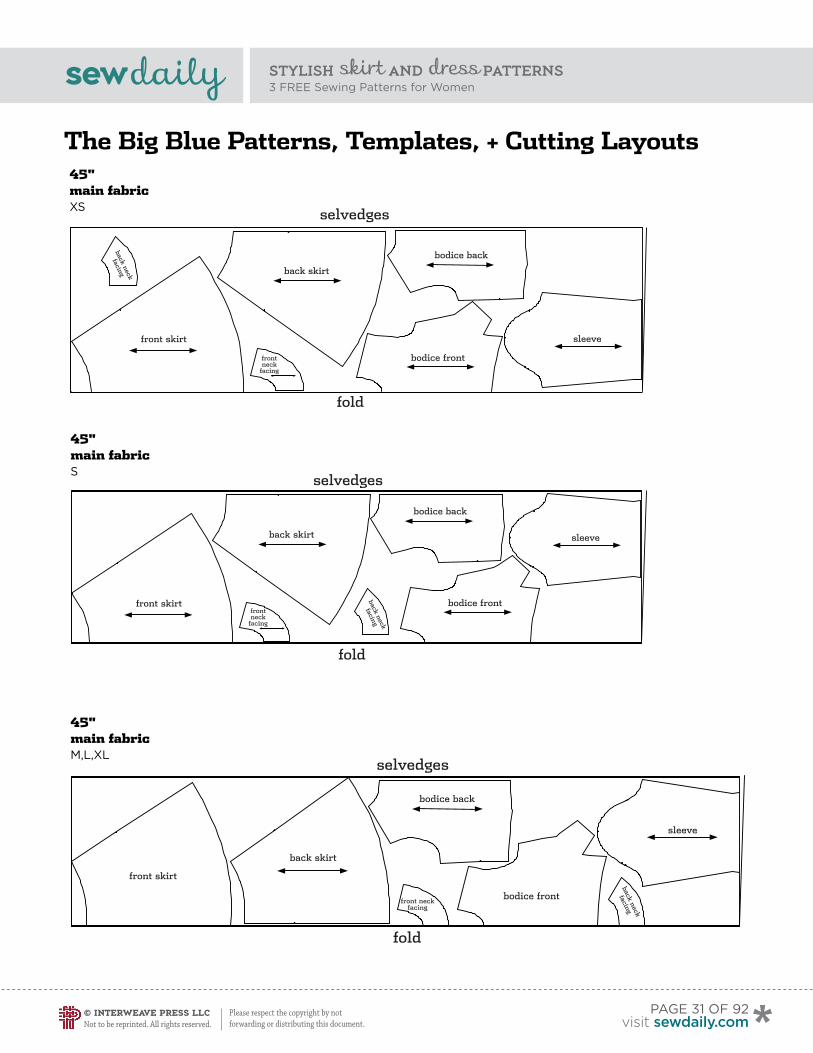
Fabric in yd— 45": XS-2 1⁄4, S-2 3⁄8, M-2 5⁄8, L-2 7⁄8,
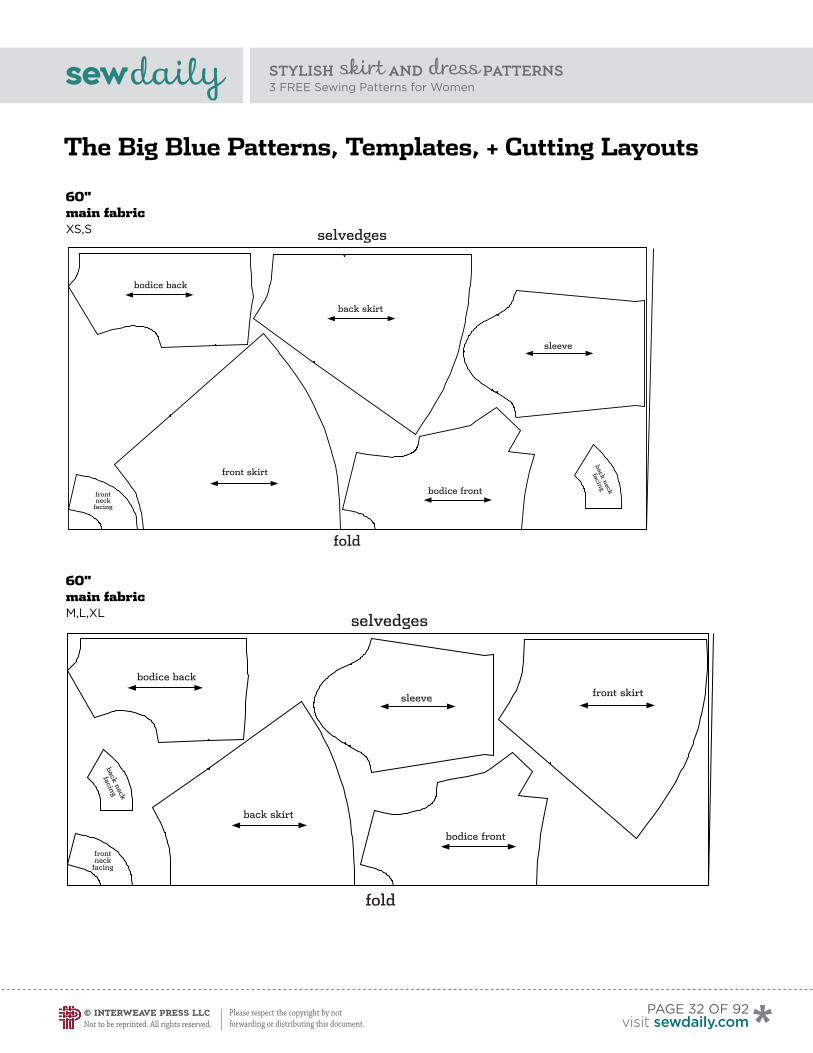
XL-2 7⁄8— 60": XS-1 3⁄4, S-1 3⁄4, M-2, L-2 1⁄8,
XL-2 1⁄4
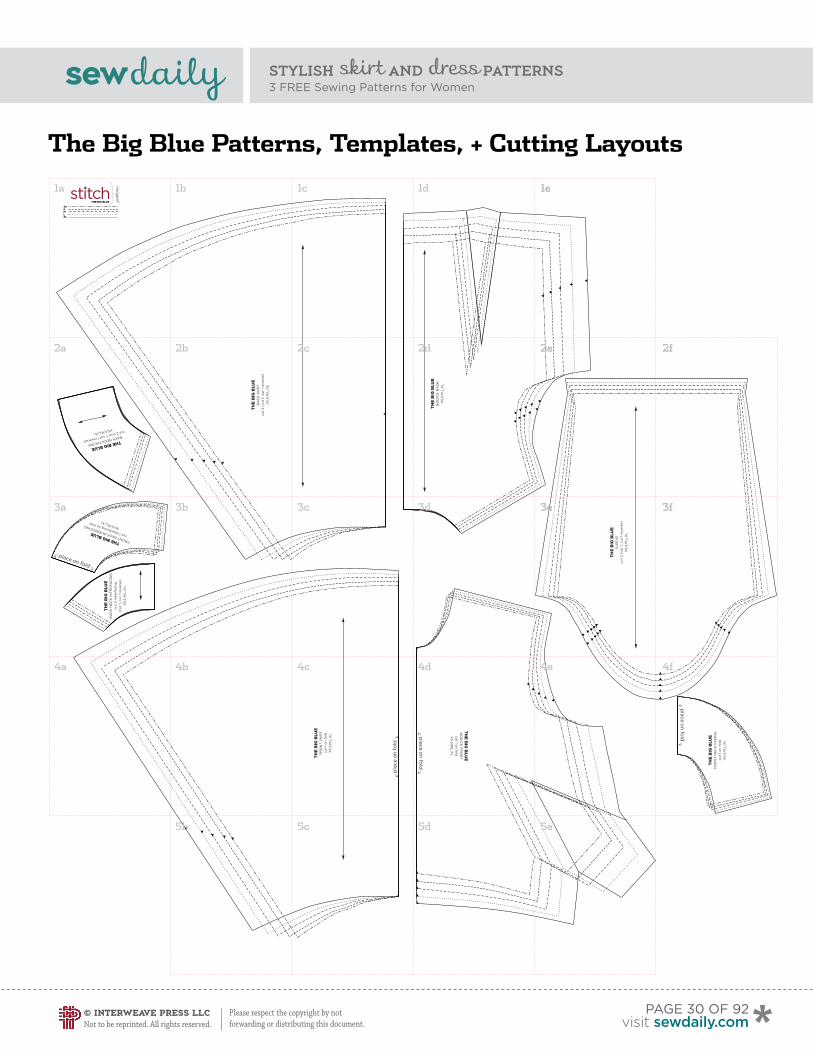
Other SupplieS— Pattern, starts on Page 30— 1⁄2 yd light- to medium-weight woven
fusible interfacing— 2 yd 1⁄4" twill tape— Thread to match— 24" invisible zipper— 6 yd lace hem tape— Optional waist stay: 1 1⁄8 yd of 1" wide
grosgrain ribbon plus hook and eye
Bust Waist HipXS 32-33" 25" 341⁄2-351⁄2"S 34-35" 26-27" 361⁄2-371⁄2"M 36-371⁄2" 28-391⁄2" 381⁄2-40"L 39-411⁄2" 31-331⁄2" 411⁄2-43"XL 421⁄2-441⁄2" 341⁄2-361⁄2" 45-47"Shown in size Small
sewdailysewdaily
© Interweave Press LLC Not to be reprinted. All rights reserved.
Please respect the copyright by not forwarding or distributing this document.
stylish skirt anD dress patterns 3 Free Sewing Patterns for Women
page 7 of 92visit sewdaily.com
NOteS— First pin—then baste—then stitch.
This is the key to accurate sewing for anything other than a straight seam.
— Make a muslin sample as a test garment. Adjust pattern as needed.
— Try putting the zipper in by hand with a pick-stitch for a clean, couture finish. A pick-stitch is sewn by hand like a straight stitch except the distance between the stitches is less than the length of the stitch. When finished it resembles a machine-stitched line.
— To keep the French dart bias line from stretching, reinforce with lightweight woven interfacing.
— If needed, reinforce the waist, shoulder seams, and neckline with 1⁄4" twill tape. Visit the SewDaily.com blog for more information.
— Clip curves and grade seams as needed.
— Finish seam allowances with preferred method. A Hong Kong finish is a seam allowance that is enclosed with bias strips, usually silk, a material whose fluidity keeps the seams from becoming too bulky. Serging, pinking, or zigzag stitching are also good seam finishes.
— Allow dress to hang 24 hours before hemming.
— All seam allowances are 1⁄2" unless otherwise indicated.
— RST= right sides together— For explanations of terms and
techniques, see Sewing Basics.
cut + mark + iNterFace1 Cut out all pieces as indicated on pattern.
2 Mark notches and darts.
3 Fuse interfacing to facing pieces according to manufacturer’s directions.
Stitch bODice4 Stitch darts in Front and Back Bodice. Reinforce darts with fusible interfacing as needed.
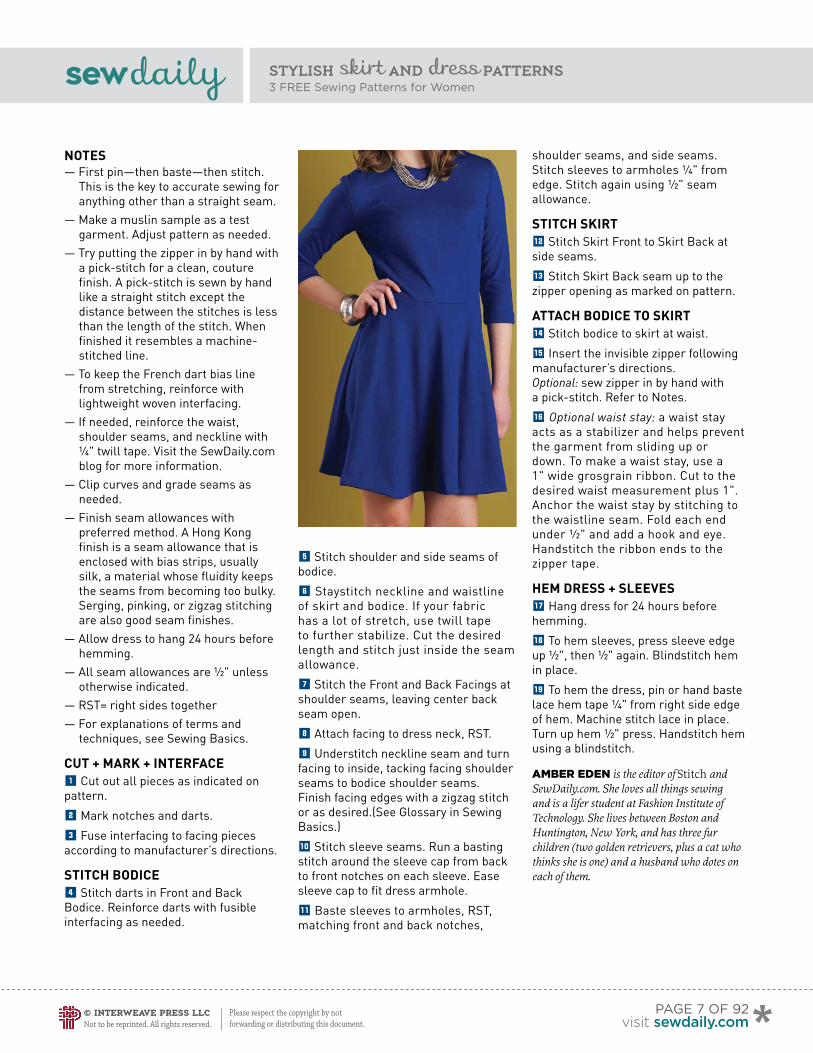
5 Stitch shoulder and side seams of bodice.
6 Staystitch neckline and waistline of skirt and bodice. If your fabric has a lot of stretch, use twill tape to further stabilize. Cut the desired length and stitch just inside the seam allowance.
7 Stitch the Front and Back Facings at shoulder seams, leaving center back seam open.
8 Attach facing to dress neck, RST.
9 Understitch neckline seam and turn facing to inside, tacking facing shoulder seams to bodice shoulder seams. Finish facing edges with a zigzag stitch or as desired.(See Glossary in Sewing Basics.)
0 Stitch sleeve seams. Run a basting stitch around the sleeve cap from back to front notches on each sleeve. Ease sleeve cap to fit dress armhole.
- Baste sleeves to armholes, RST, matching front and back notches,
shoulder seams, and side seams. Stitch sleeves to armholes 1⁄4" from edge. Stitch again using 1⁄2" seam allowance.
Stitch Skirt= Stitch Skirt Front to Skirt Back at side seams.
q Stitch Skirt Back seam up to the zipper opening as marked on pattern.
attach bODice tO Skirtw Stitch bodice to skirt at waist.
e Insert the invisible zipper following manufacturer’s directions. Optional: sew zipper in by hand with a pick-stitch. Refer to Notes.
r Optional waist stay: a waist stay acts as a stabilizer and helps prevent the garment from sliding up or down. To make a waist stay, use a 1" wide grosgrain ribbon. Cut to the desired waist measurement plus 1". Anchor the waist stay by stitching to the waistline seam. Fold each end under 1⁄2" and add a hook and eye. Handstitch the ribbon ends to the zipper tape.
hem DreSS + SleeVeS t Hang dress for 24 hours before hemming.
y To hem sleeves, press sleeve edge up 1⁄2", then 1⁄2" again. Blindstitch hem in place.
u To hem the dress, pin or hand baste lace hem tape 1⁄4" from right side edge of hem. Machine stitch lace in place. Turn up hem 1⁄2" press. Handstitch hem using a blindstitch.
AmBer eden is the editor of Stitch and SewDaily.com. She loves all things sewing and is a lifer student at Fashion Institute of Technology. She lives between Boston and Huntington, New York, and has three fur children (two golden retrievers, plus a cat who thinks she is one) and a husband who dotes on each of them.
sewdailysewdaily
© Interweave Press LLC Not to be reprinted. All rights reserved.
Please respect the copyright by not forwarding or distributing this document.
stylish skirt anD dress patterns 3 Free Sewing Patterns for Women
page 8 of 92visit sewdaily.com
Photo by Larry Stein
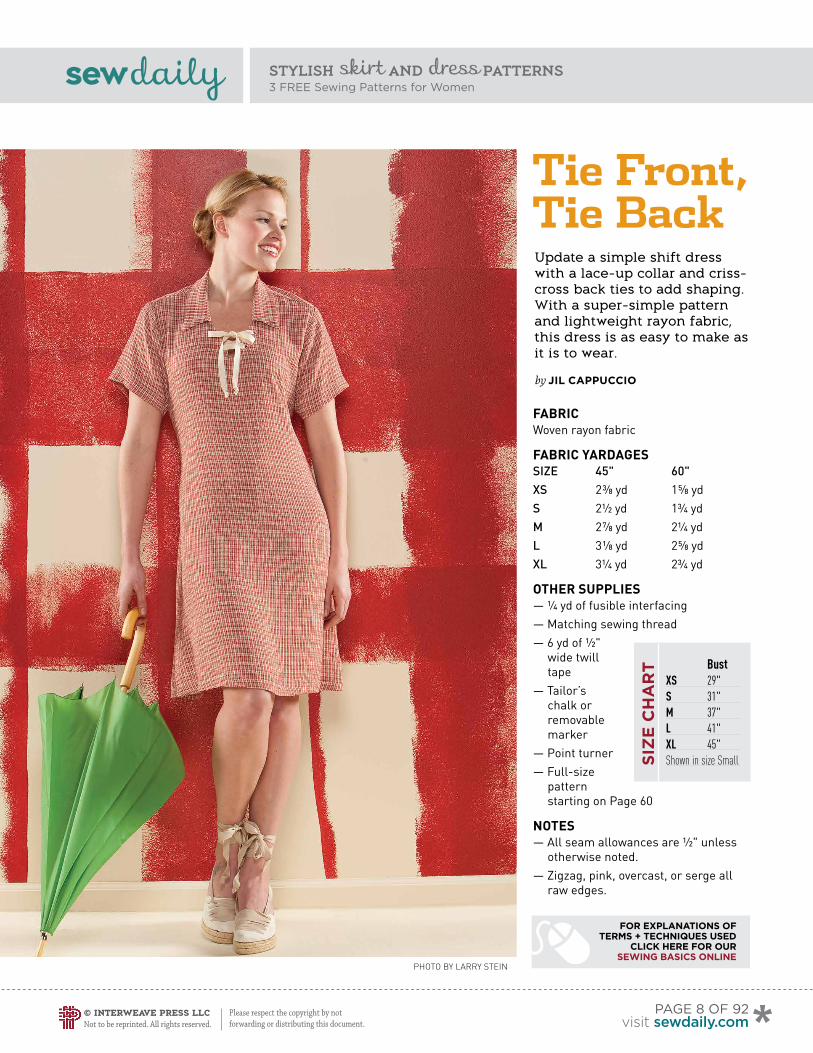
Tie Front, Tie BackUpdate a simple shift dress with a lace-up collar and criss-cross back ties to add shaping. With a super-simple pattern and lightweight rayon fabric, this dress is as easy to make as it is to wear.
by Jil cappuccio
FabricWoven rayon fabric
Fabric YarDageSSIZE 45" 60" XS 2 3⁄8 yd 1 5⁄8 ydS 2½ yd 1¾ ydM 2 7⁄8 yd 2¼ ydL 3 1⁄8 yd 2 5⁄8 yd XL 3¼ yd 2¾ yd
Other SupplieS— ¼ yd of fusible interfacing— Matching sewing thread— 6 yd of ½"
wide twill tape
— Tailor’s chalk or removable marker
— Point turner— Full-size
pattern starting on Page 60
NOteS— All seam allowances are ½" unless
otherwise noted.— Zigzag, pink, overcast, or serge all
raw edges.
For explanations oF terms + techniques used
click here For our sewing Basics online
BustXS 29"S 31"M 37"L 41"XL 45"Shown in size Small
sewdailysewdaily
© Interweave Press LLC Not to be reprinted. All rights reserved.
Please respect the copyright by not forwarding or distributing this document.
stylish skirt anD dress patterns 3 Free Sewing Patterns for Women
page 9 of 92visit sewdaily.com
— Press seams open unless otherwise noted.
cut Out Fabric1 Print and assemble the pattern pieces from the pattern provided.
2 Pin the pattern pieces to the fabric or interfacing, as directed, and cut out all pieces. Transfer all pattern markings to the fabric wrong side with tailor’s chalk.
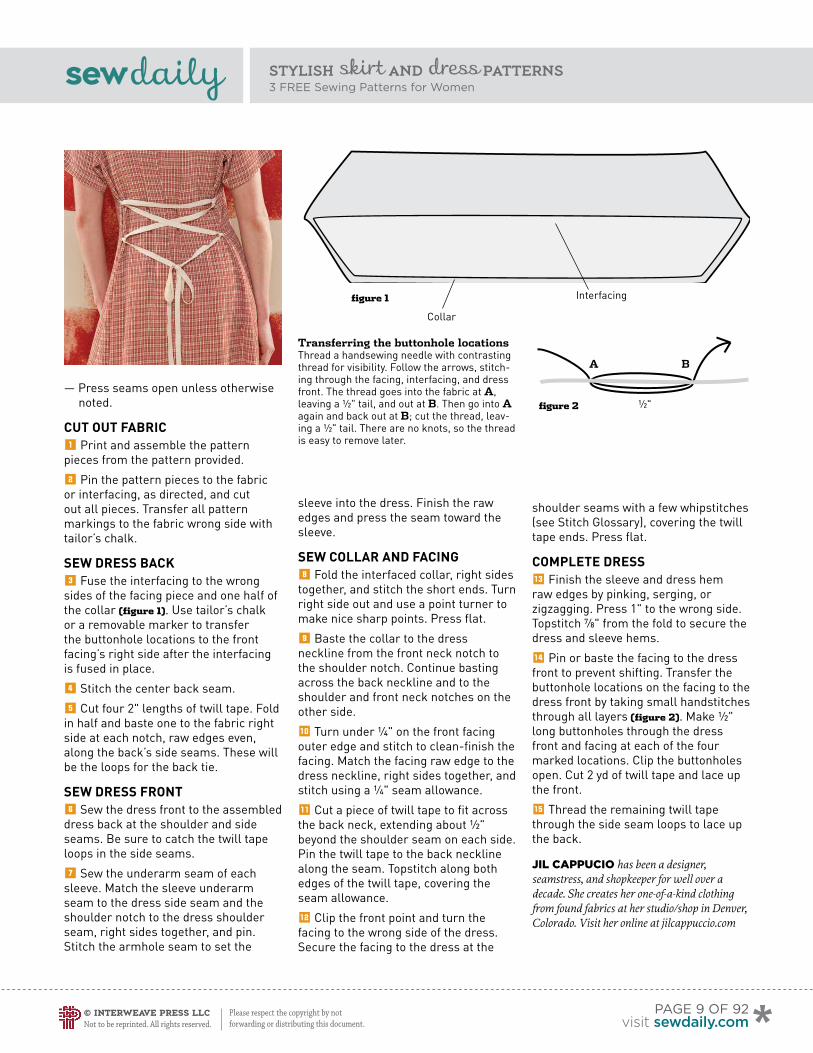
Sew DreSS back3 Fuse the interfacing to the wrong sides of the facing piece and one half of the collar (figure 1). Use tailor’s chalk or a removable marker to transfer the buttonhole locations to the front facing’s right side after the interfacing is fused in place.
4 Stitch the center back seam.
5 Cut four 2" lengths of twill tape. Fold in half and baste one to the fabric right side at each notch, raw edges even, along the back’s side seams. These will be the loops for the back tie.
Sew DreSS FrONt6 Sew the dress front to the assembled dress back at the shoulder and side seams. Be sure to catch the twill tape loops in the side seams.
7 Sew the underarm seam of each sleeve. Match the sleeve underarm seam to the dress side seam and the shoulder notch to the dress shoulder seam, right sides together, and pin. Stitch the armhole seam to set the
sleeve into the dress. Finish the raw edges and press the seam toward the sleeve.
Sew cOllar aND FaciNg8 Fold the interfaced collar, right sides together, and stitch the short ends. Turn right side out and use a point turner to make nice sharp points. Press flat.
9 Baste the collar to the dress neckline from the front neck notch to the shoulder notch. Continue basting across the back neckline and to the shoulder and front neck notches on the other side.
0 Turn under ¼" on the front facing outer edge and stitch to clean-finish the facing. Match the facing raw edge to the dress neckline, right sides together, and stitch using a ¼" seam allowance.
- Cut a piece of twill tape to fit across the back neck, extending about ½" beyond the shoulder seam on each side. Pin the twill tape to the back neckline along the seam. Topstitch along both edges of the twill tape, covering the seam allowance.
= Clip the front point and turn the facing to the wrong side of the dress. Secure the facing to the dress at the
shoulder seams with a few whipstitches (see Stitch Glossary), covering the twill tape ends. Press flat.
cOmplete DreSSq Finish the sleeve and dress hem raw edges by pinking, serging, or zigzagging. Press 1" to the wrong side. Topstitch 7⁄8" from the fold to secure the dress and sleeve hems.
w Pin or baste the facing to the dress front to prevent shifting. Transfer the buttonhole locations on the facing to the dress front by taking small handstitches through all layers (figure 2). Make ½" long buttonholes through the dress front and facing at each of the four marked locations. Clip the buttonholes open. Cut 2 yd of twill tape and lace up the front.
e Thread the remaining twill tape through the side seam loops to lace up the back.
jil cAppucio has been a designer, seamstress, and shopkeeper for well over a decade. She creates her one-of-a-kind clothing from found fabrics at her studio/shop in Denver, Colorado. Visit her online at jilcappuccio.com
tie front tie back
collar with interfacing
Interfacing
Collar
Transferring the buttonhole locationsThread a handsewing needle with contrasting thread for visibility. Follow the arrows, stitch-ing through the facing, interfacing, and dress front. The thread goes into the fabric at A, leaving a ½" tail, and out at B. Then go into A again and back out at B; cut the thread, leav-ing a ½" tail. There are no knots, so the thread is easy to remove later.
tie front tie back
collar with interfacing
½"
BA
figure 1
figure 2
© Interweave Press LLC Not to be reprinted. All rights reserved.
Please respect the copyright by not forwarding or distributing this document
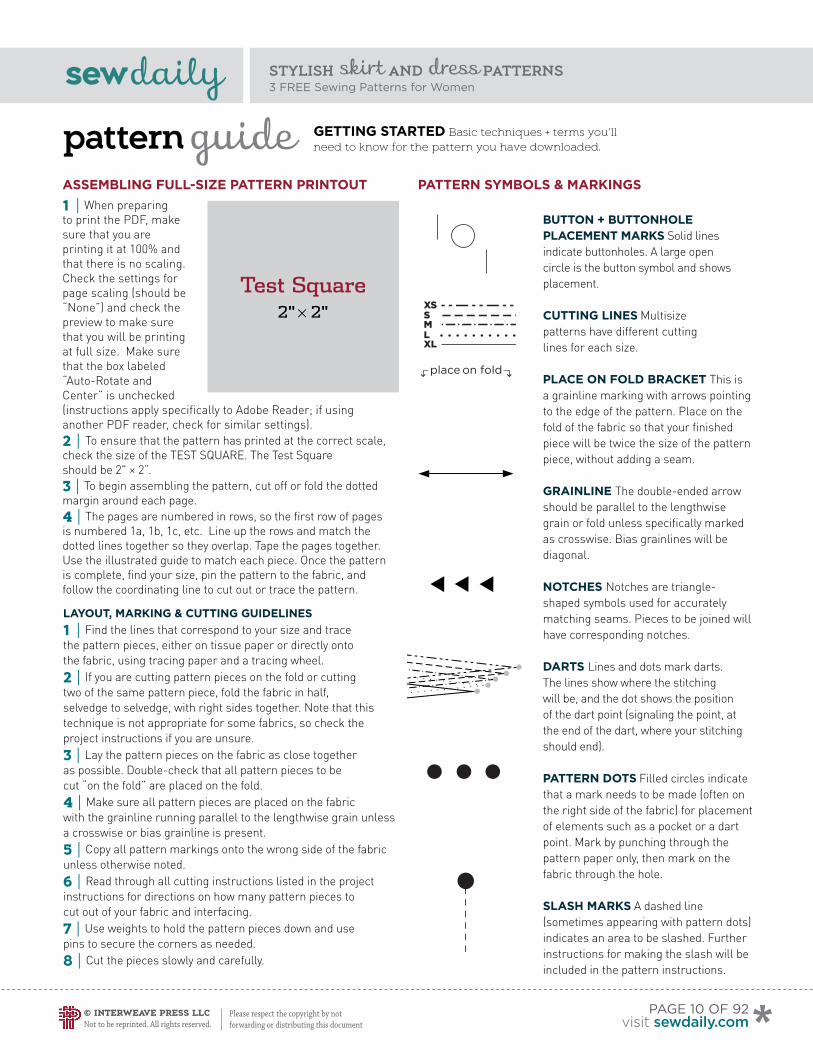
GettinG Started Basic techniques + terms you’ll need to know for the pattern you have downloaded.guide
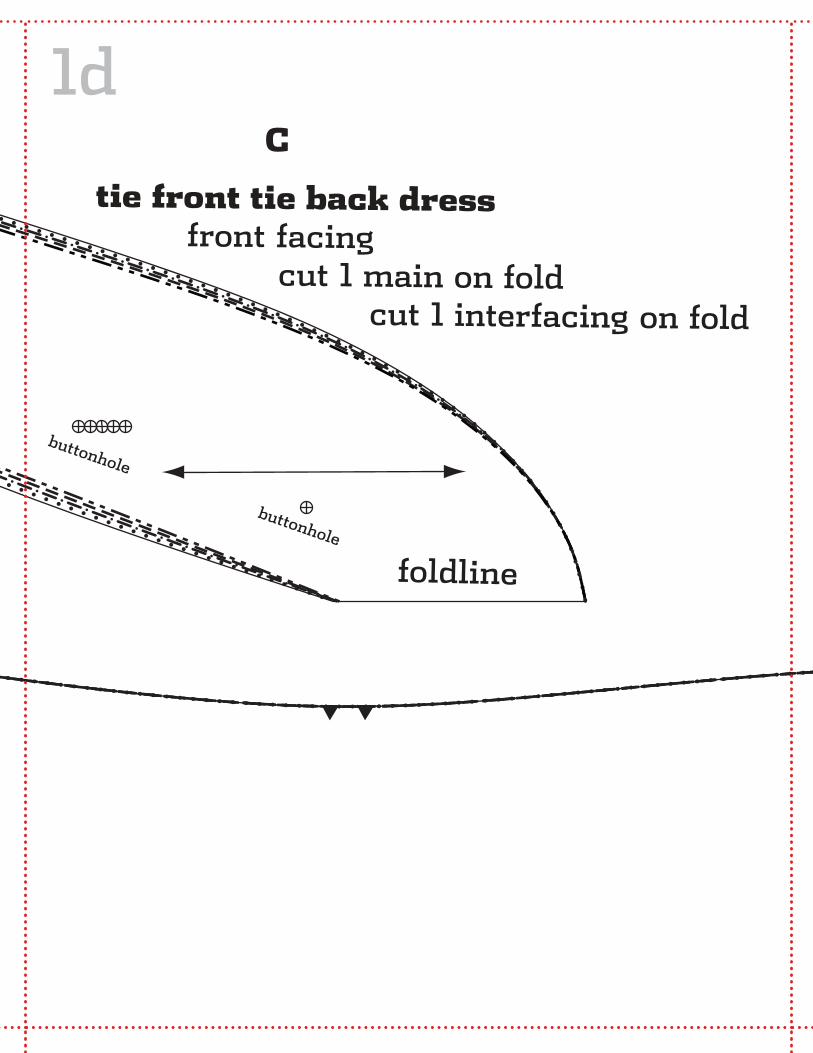
Button + Buttonhole placement markS Solid lines indicate buttonholes. A large open circle is the button symbol and shows placement.
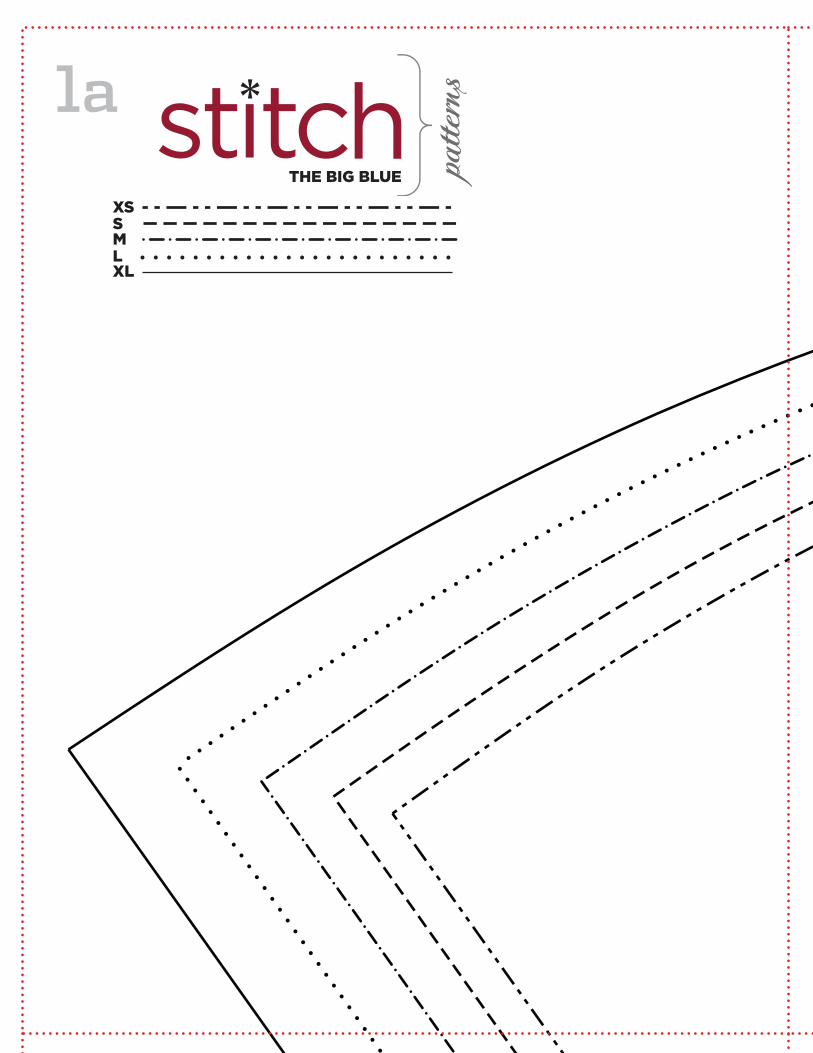
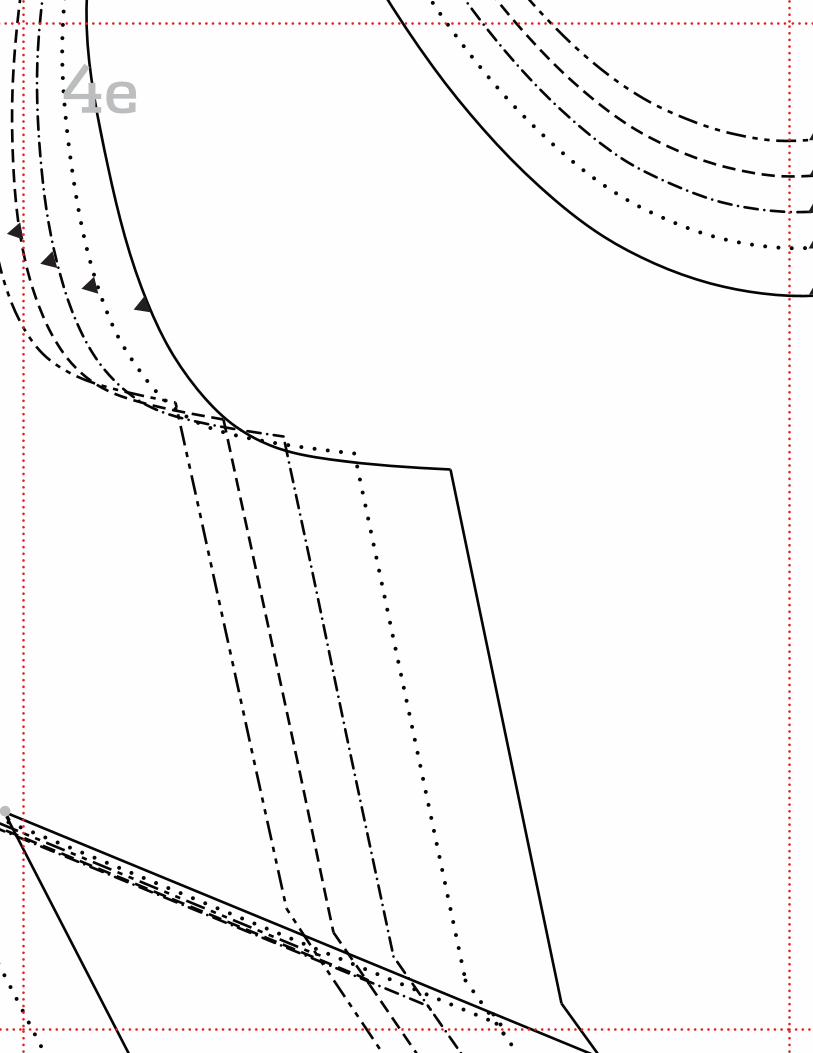
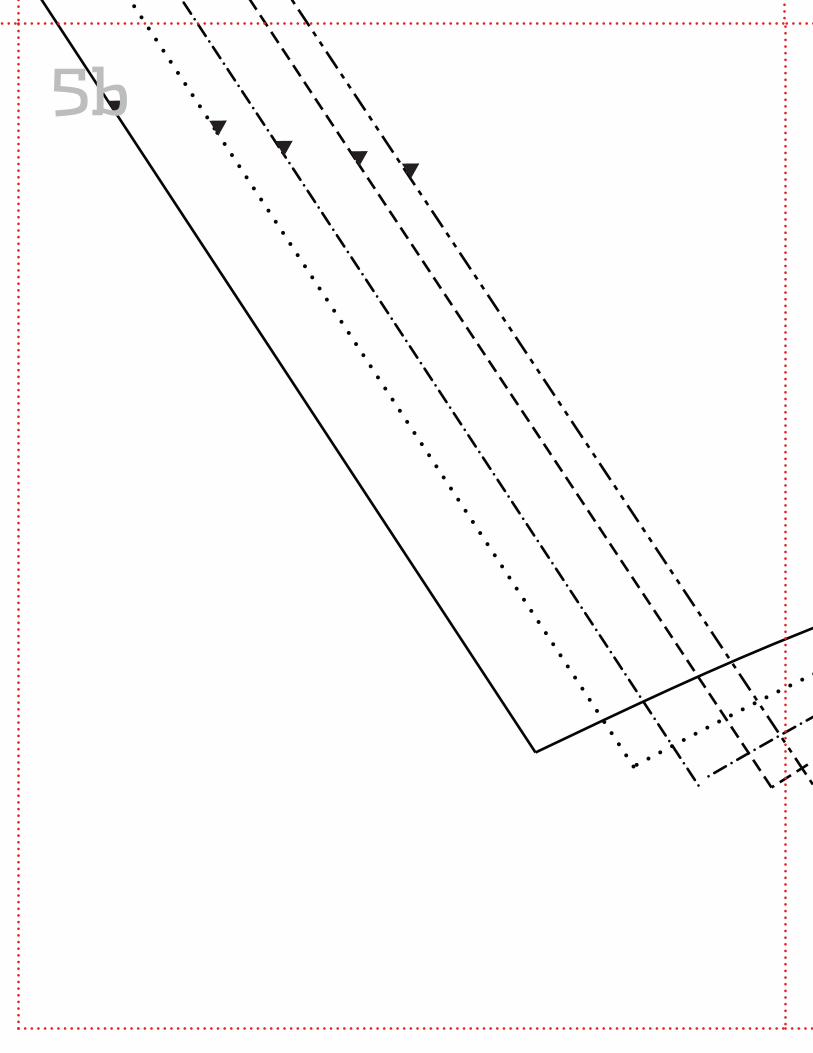
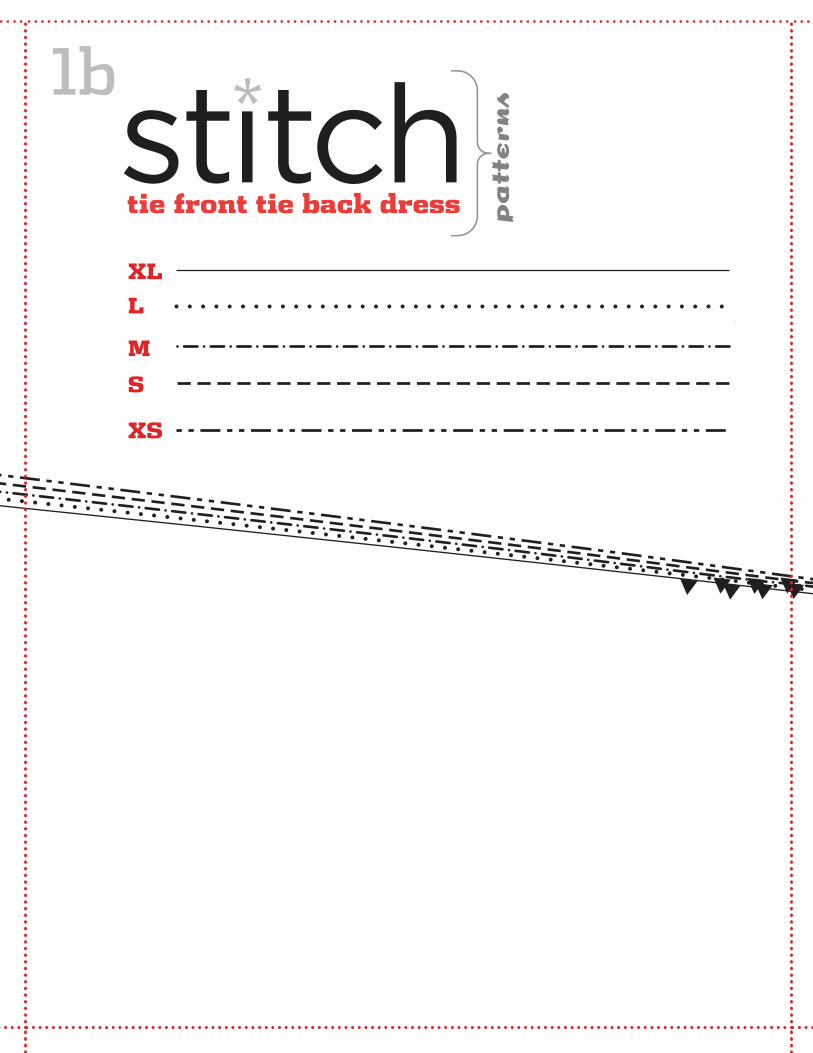
cuttinG lineS Multisize patterns have different cutting lines for each size.
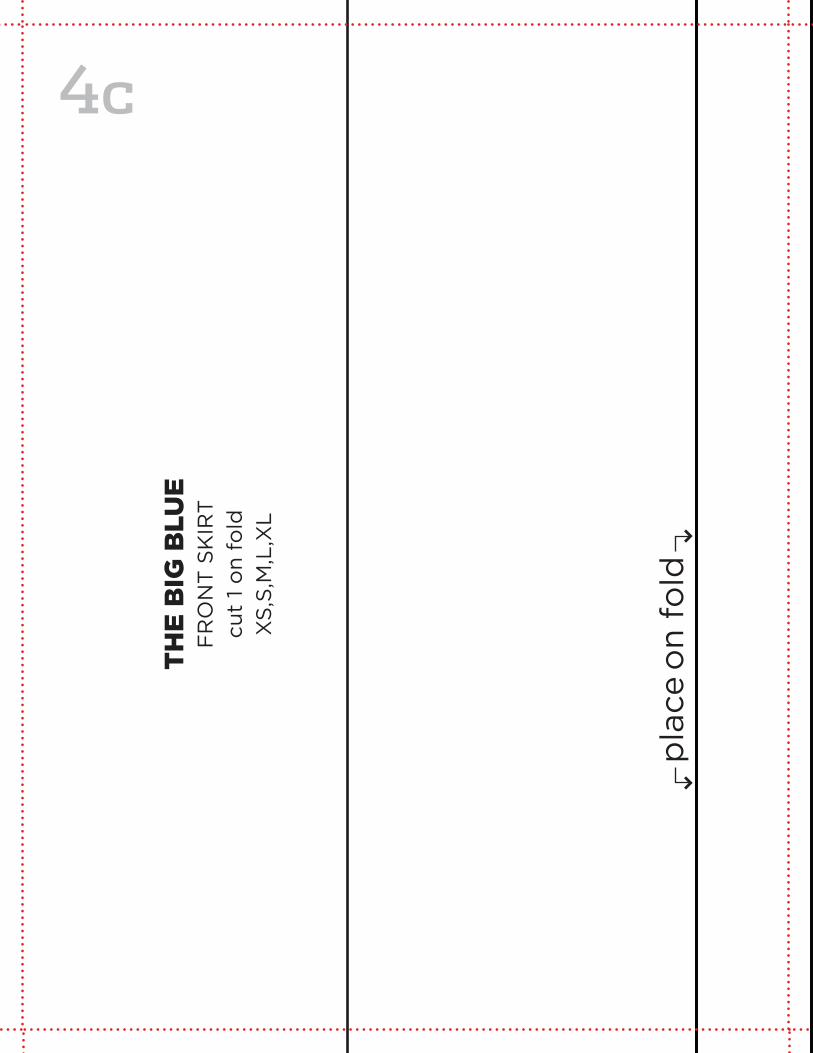
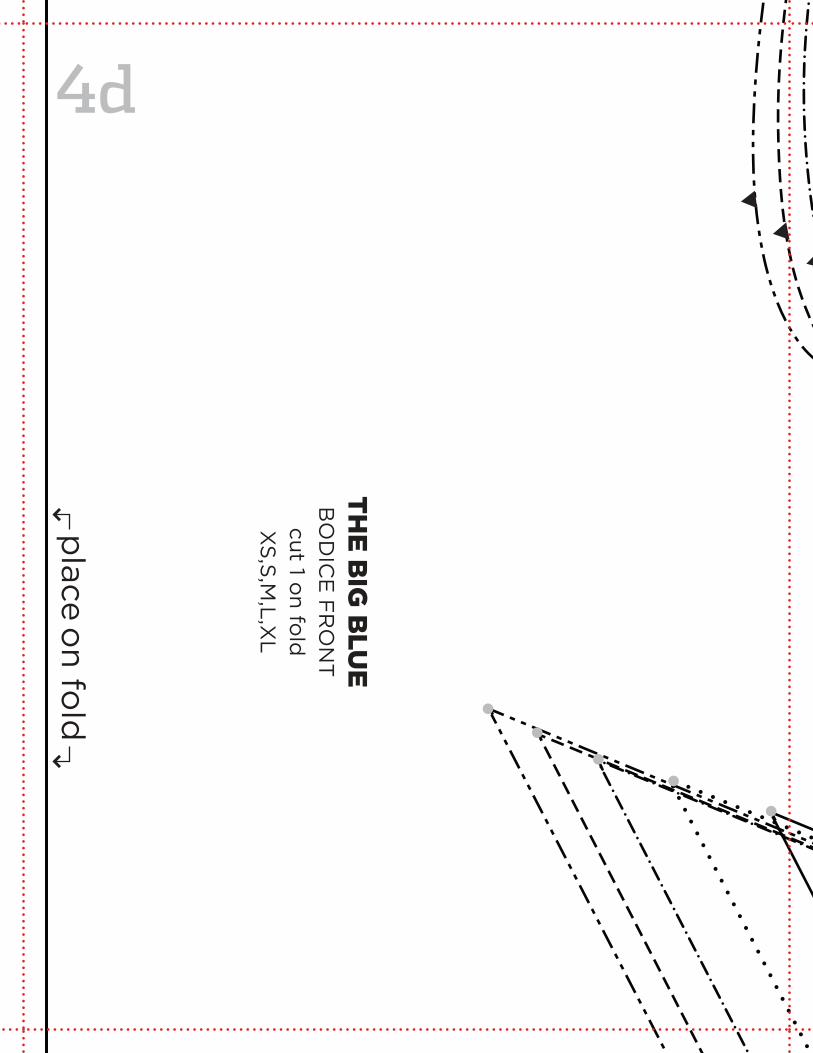
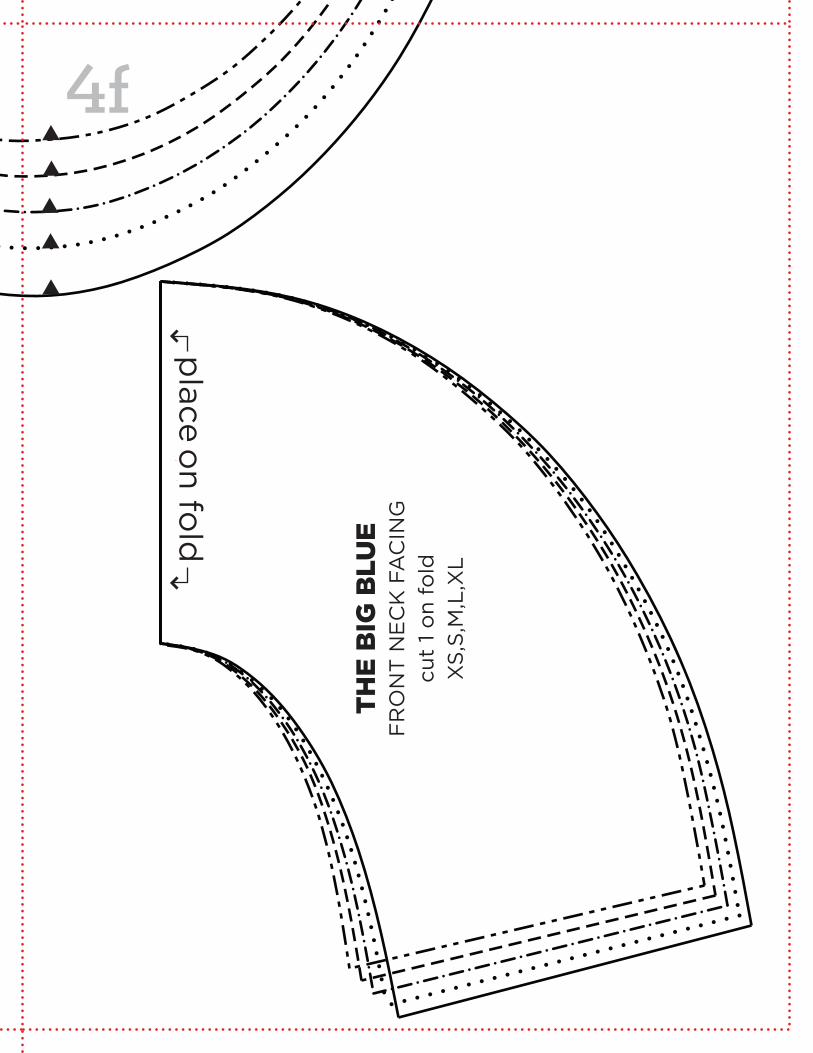
place on fold Bracket This is a grainline marking with arrows pointing to the edge of the pattern. Place on the fold of the fabric so that your finished piece will be twice the size of the pattern piece, without adding a seam.
Grainline The double-ended arrow should be parallel to the lengthwise grain or fold unless specifically marked as crosswise. Bias grainlines will be diagonal.
notcheS Notches are triangle-shaped symbols used for accurately matching seams. Pieces to be joined will have corresponding notches.
dartS Lines and dots mark darts. The lines show where the stitching will be, and the dot shows the position of the dart point (signaling the point, at the end of the dart, where your stitching should end).
pattern dotS Filled circles indicate that a mark needs to be made (often on the right side of the fabric) for placement of elements such as a pocket or a dart point. Mark by punching through the pattern paper only, then mark on the fabric through the hole.
SlaSh markS A dashed line (sometimes appearing with pattern dots) indicates an area to be slashed. Further instructions for making the slash will be included in the pattern instructions.
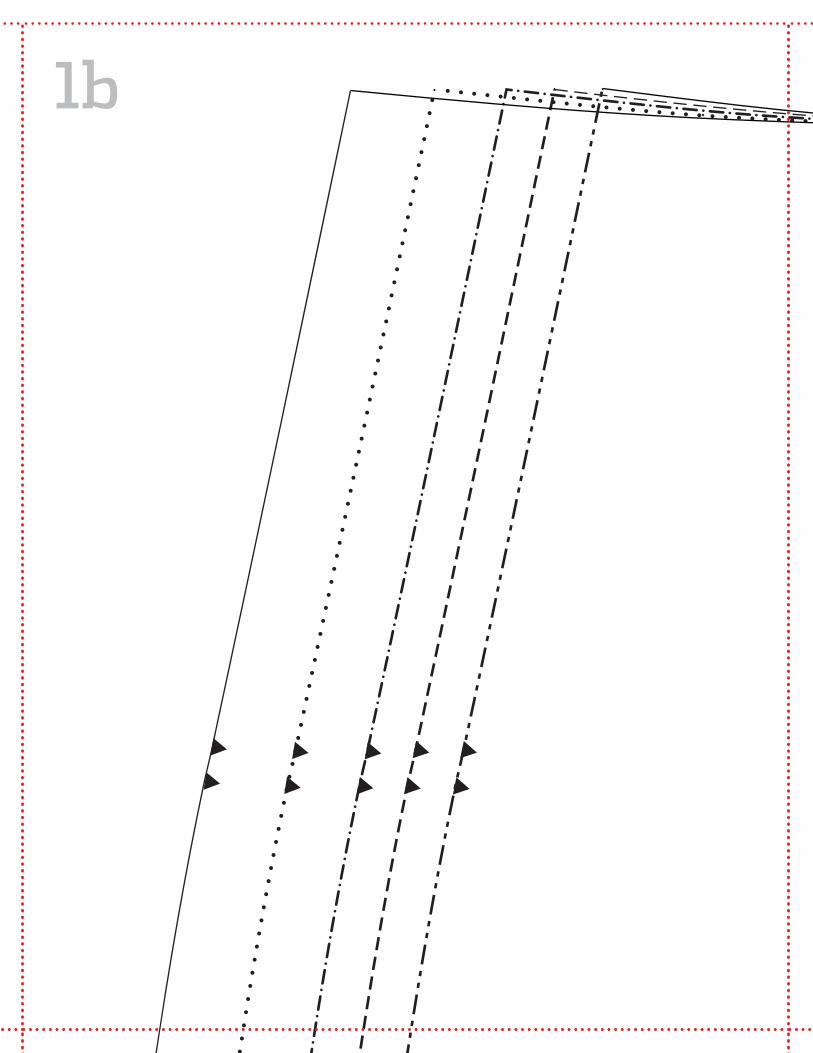
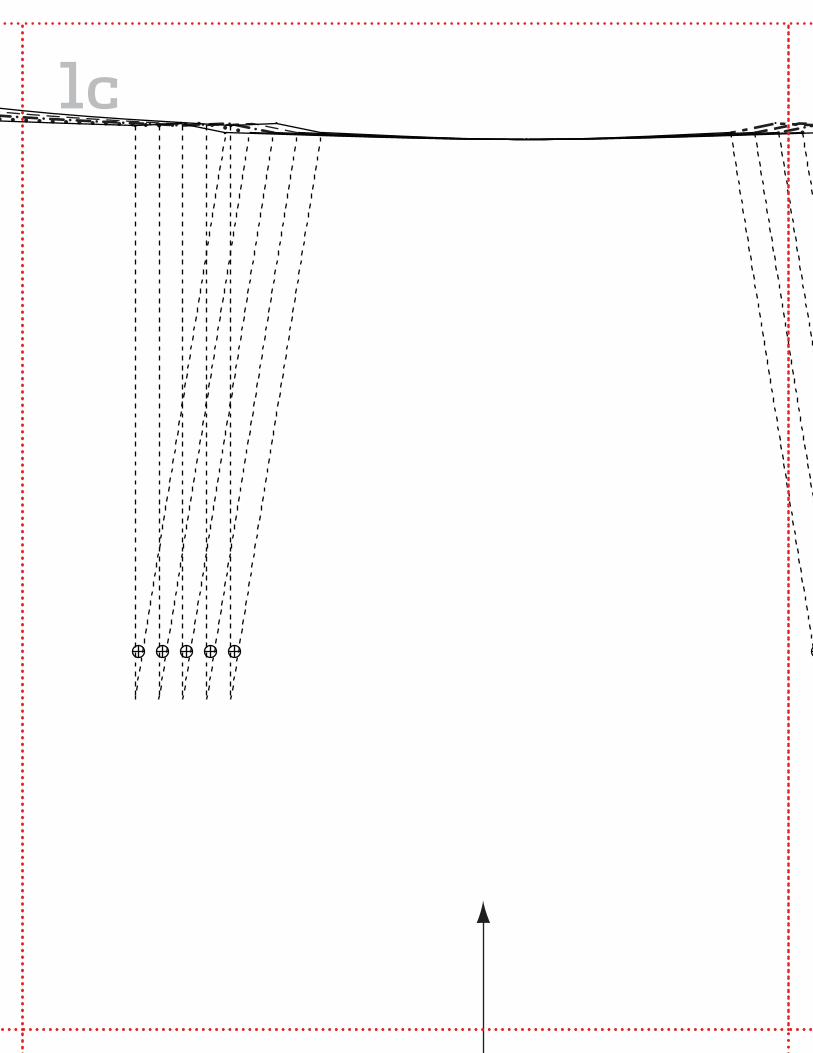
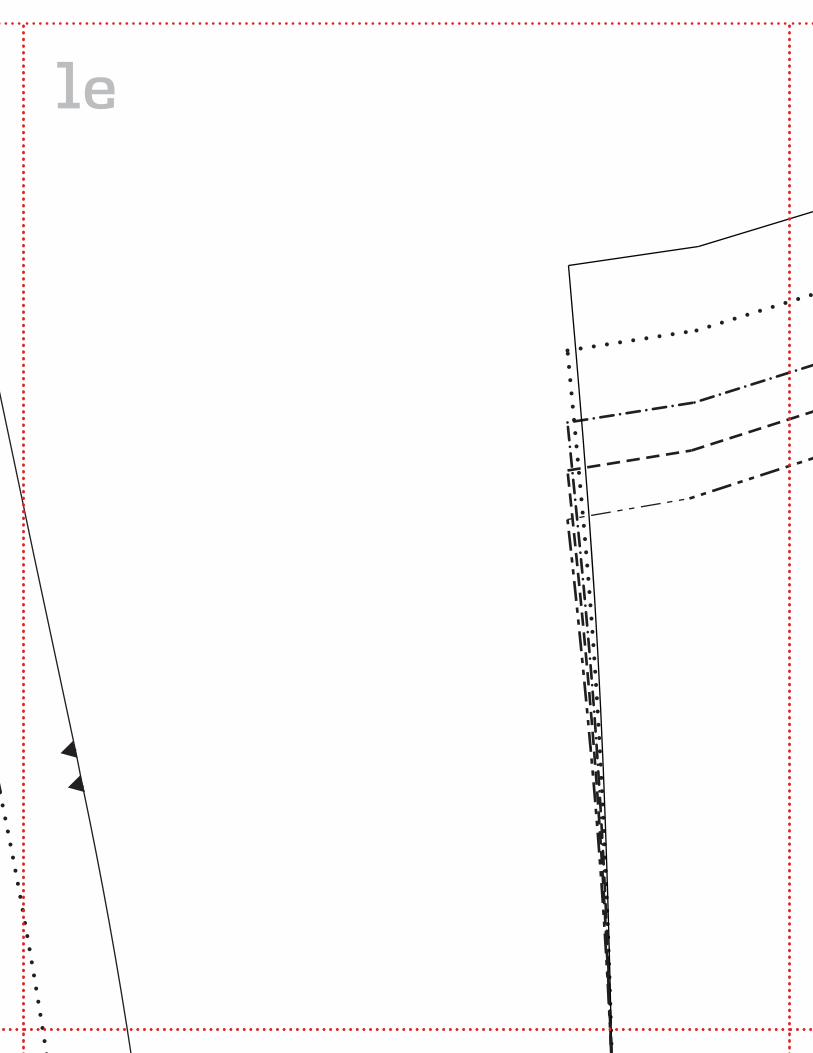
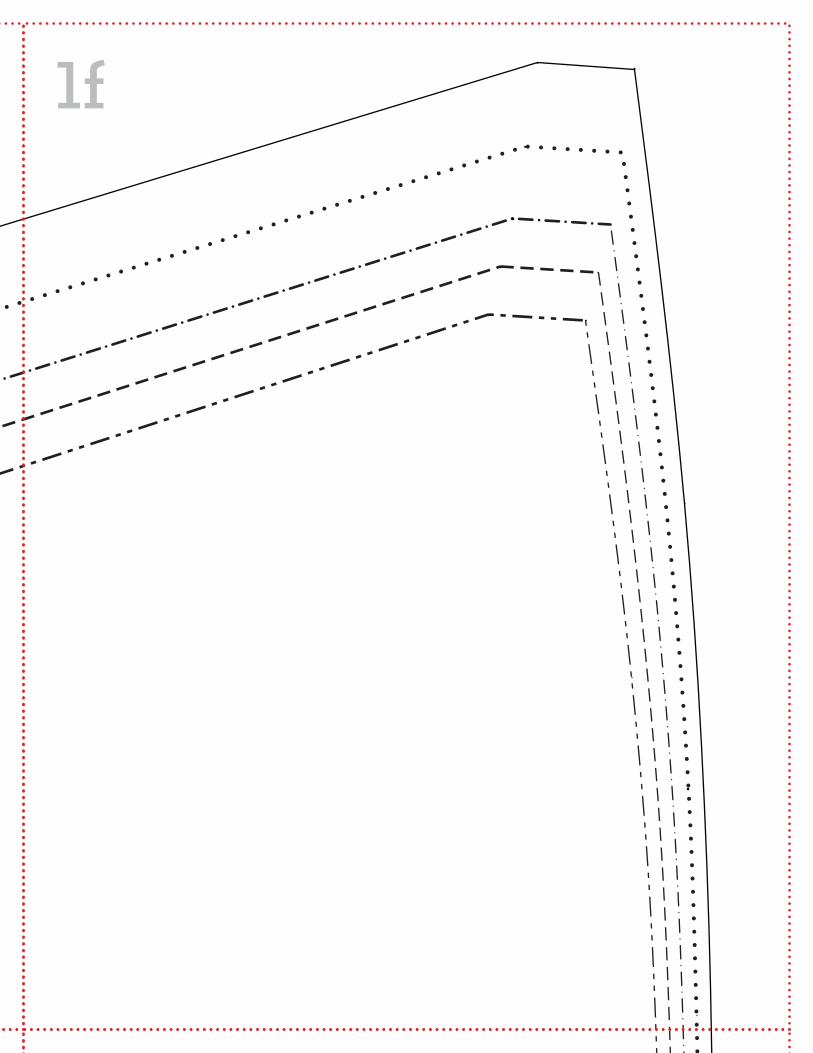
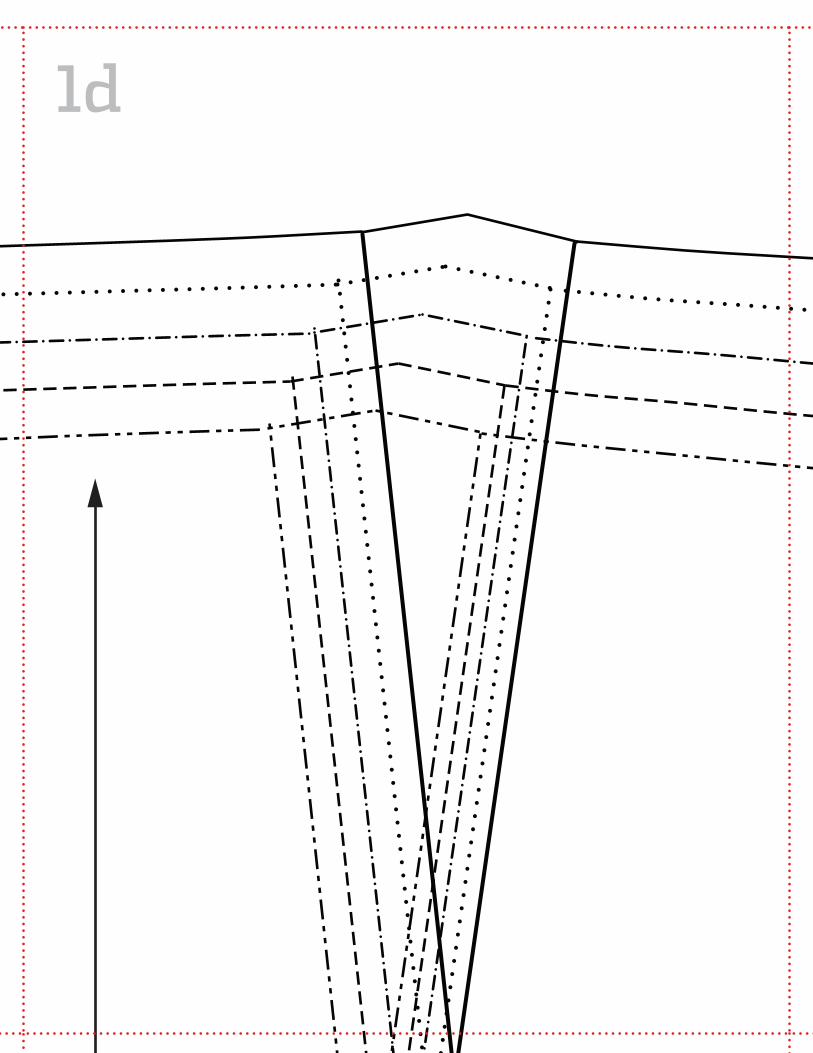
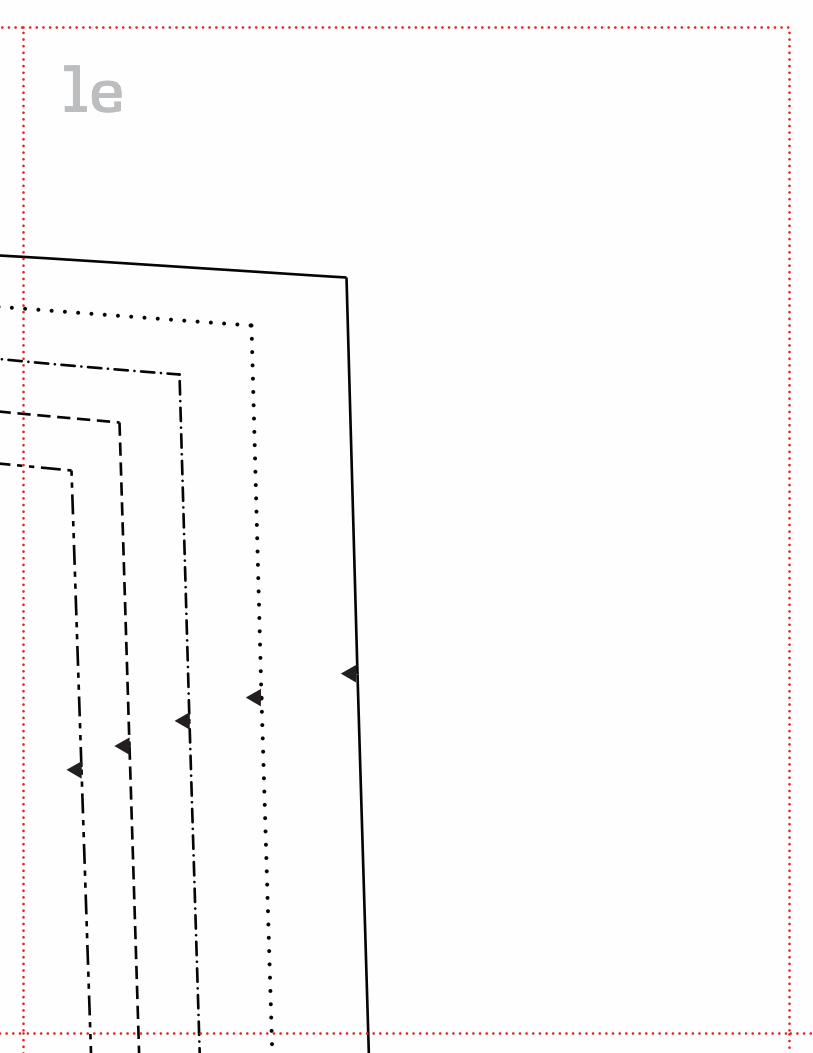
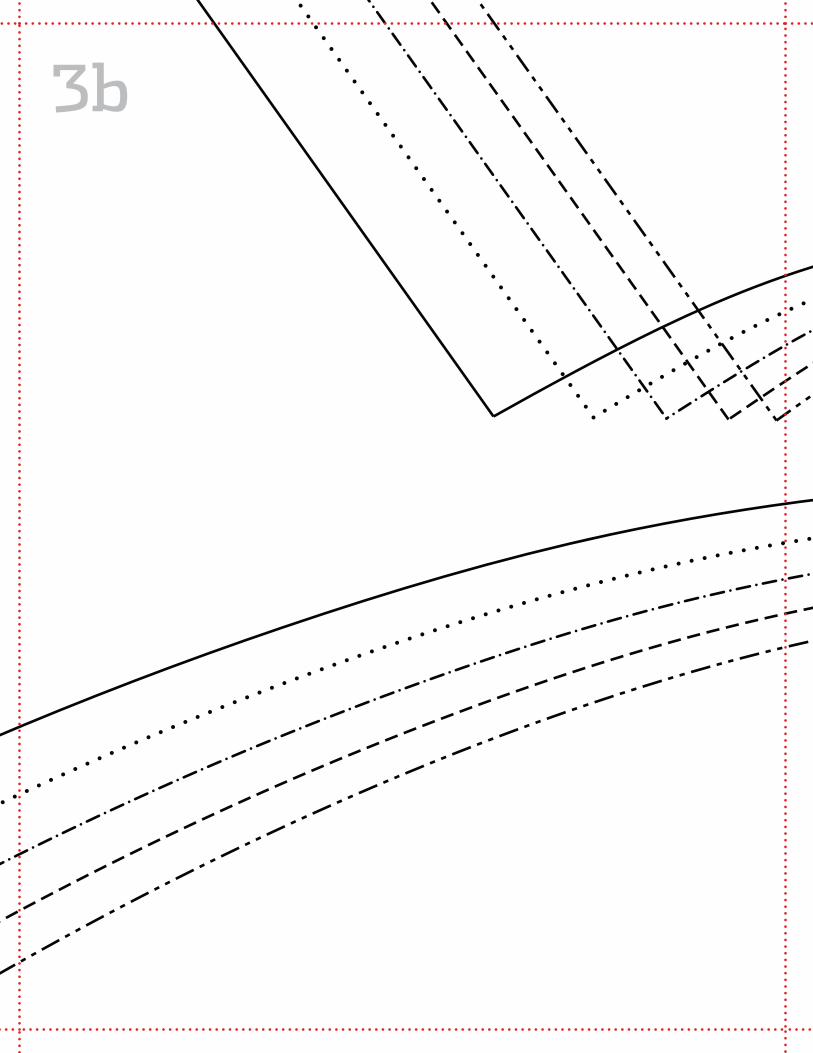
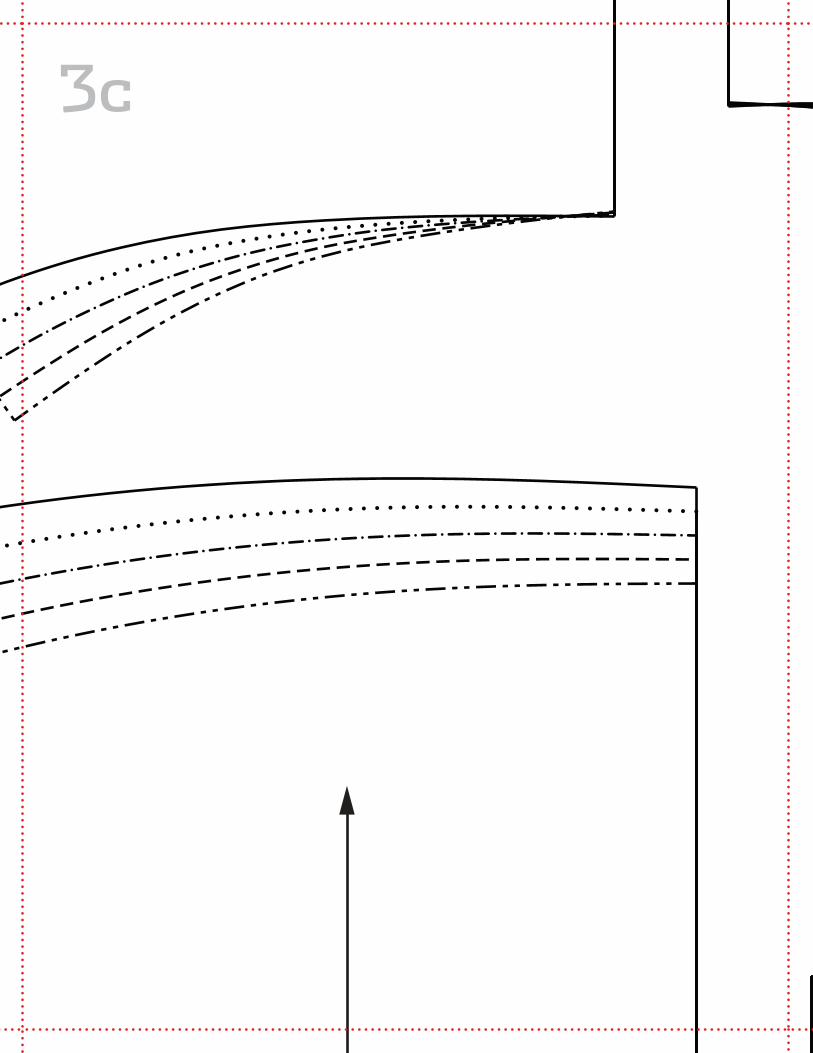
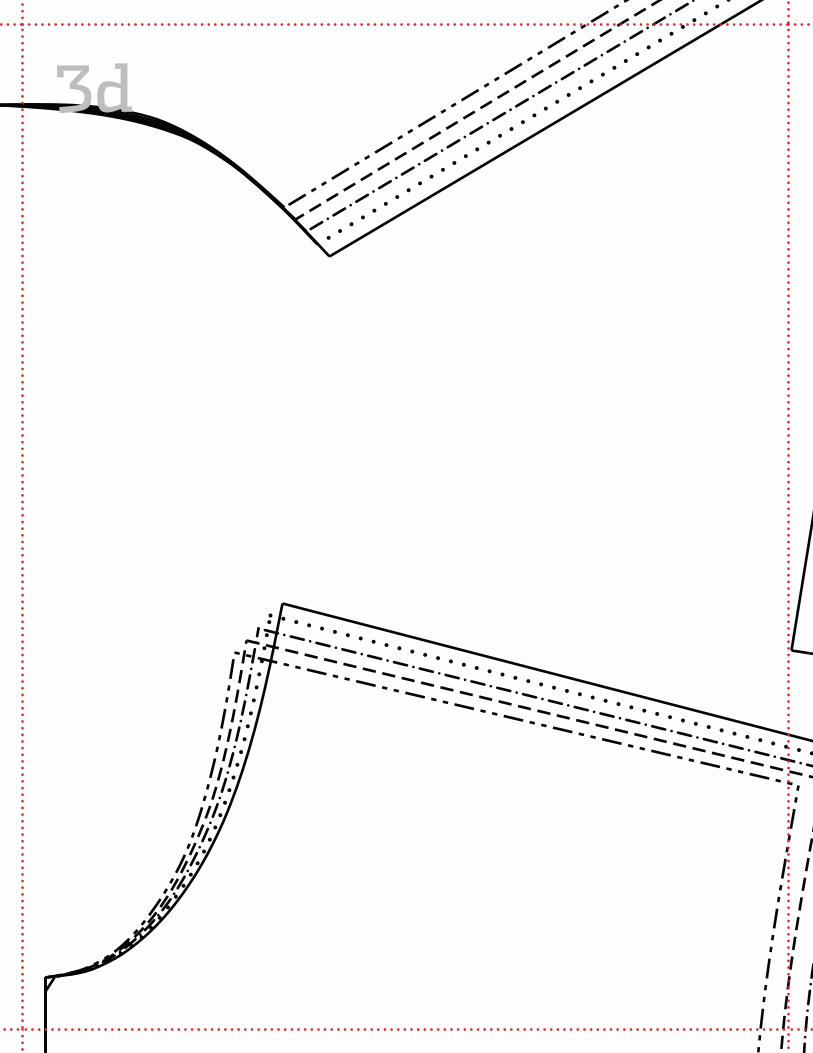
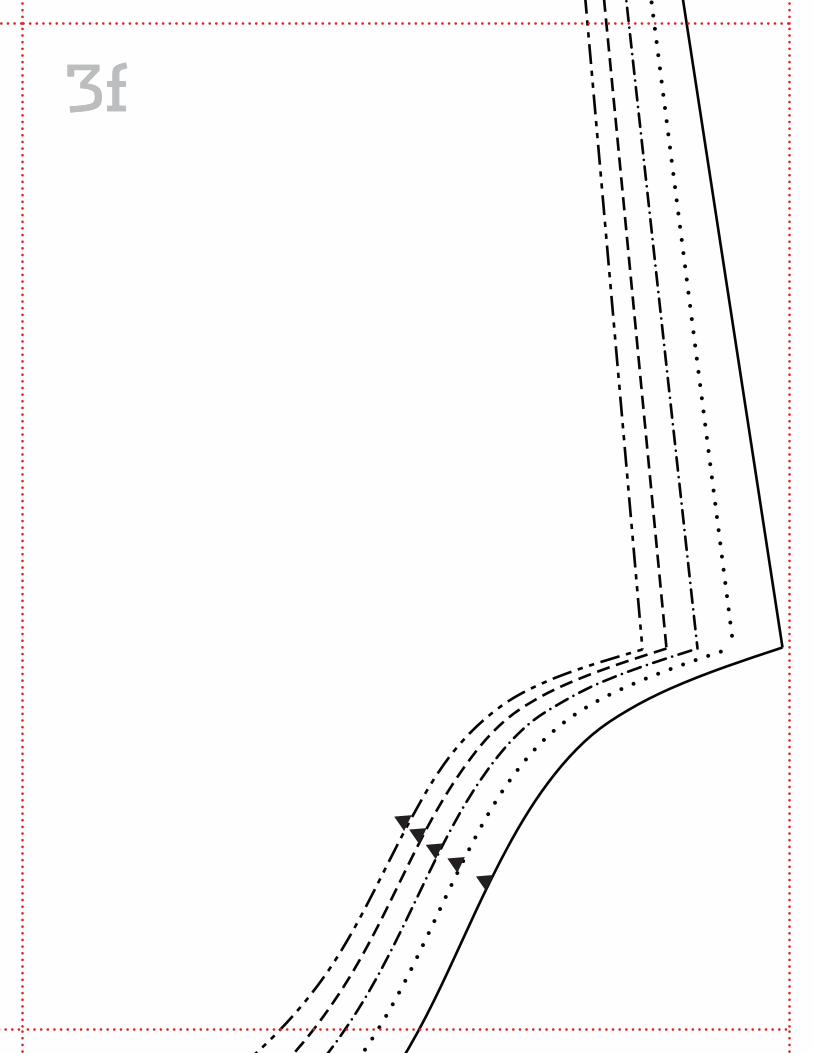
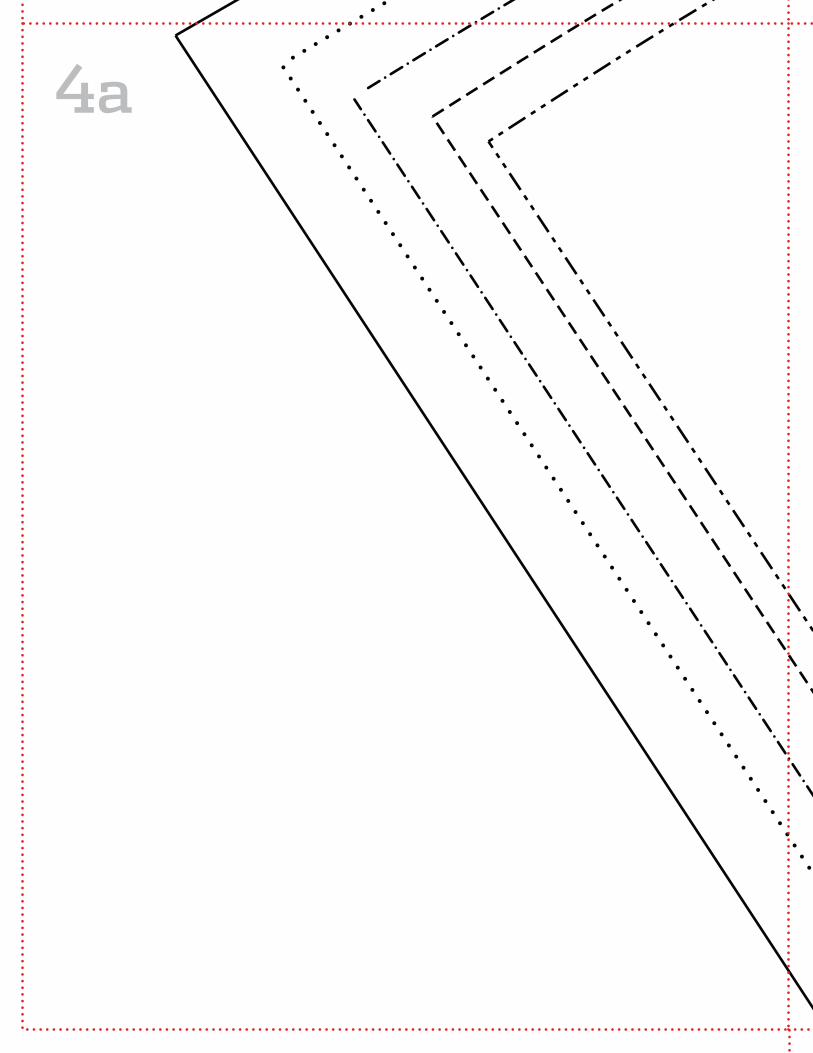
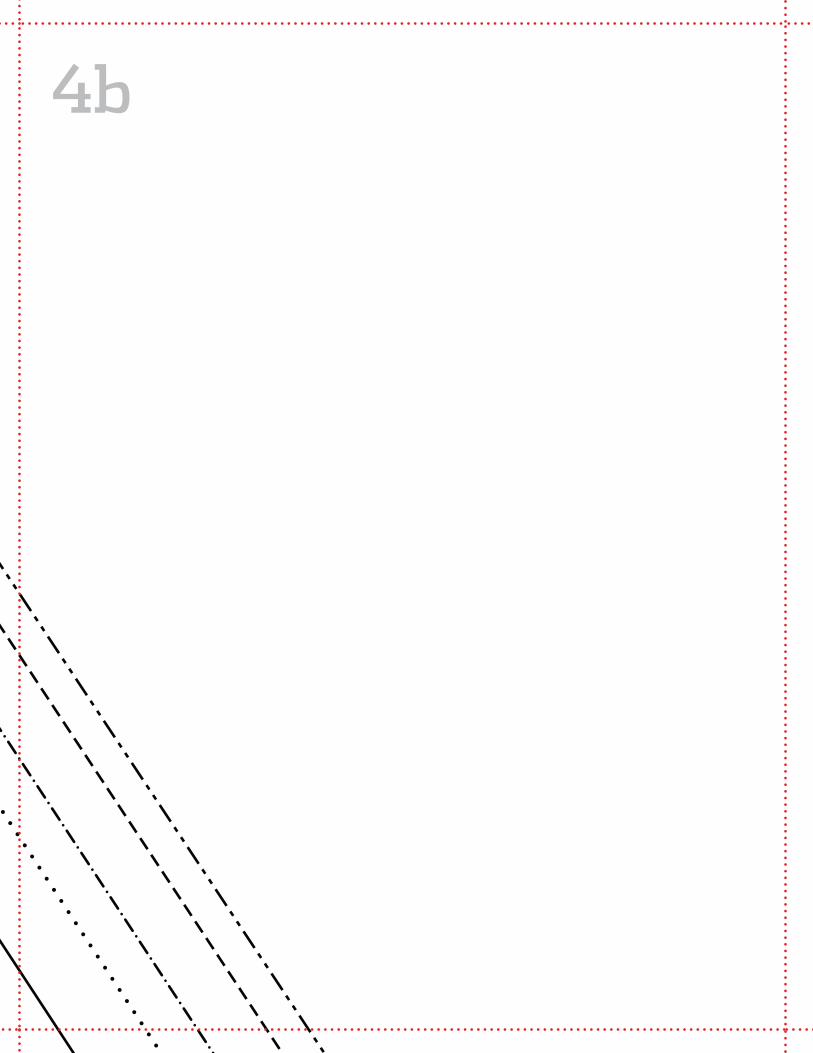
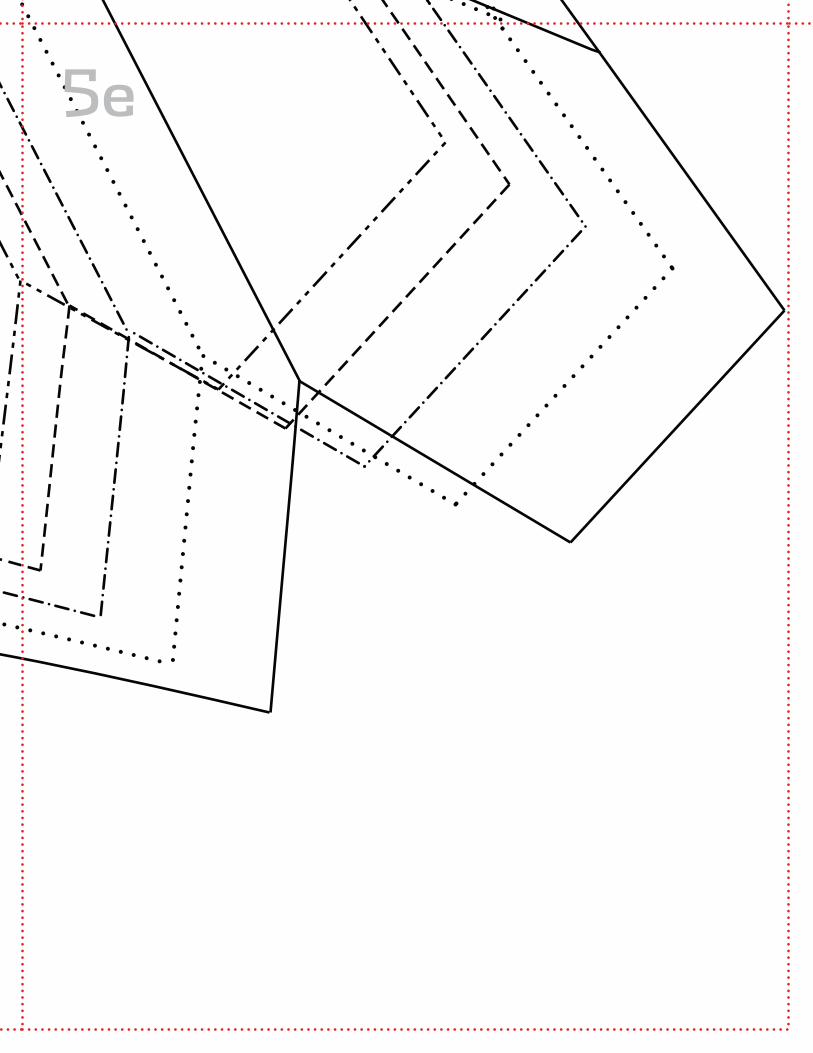
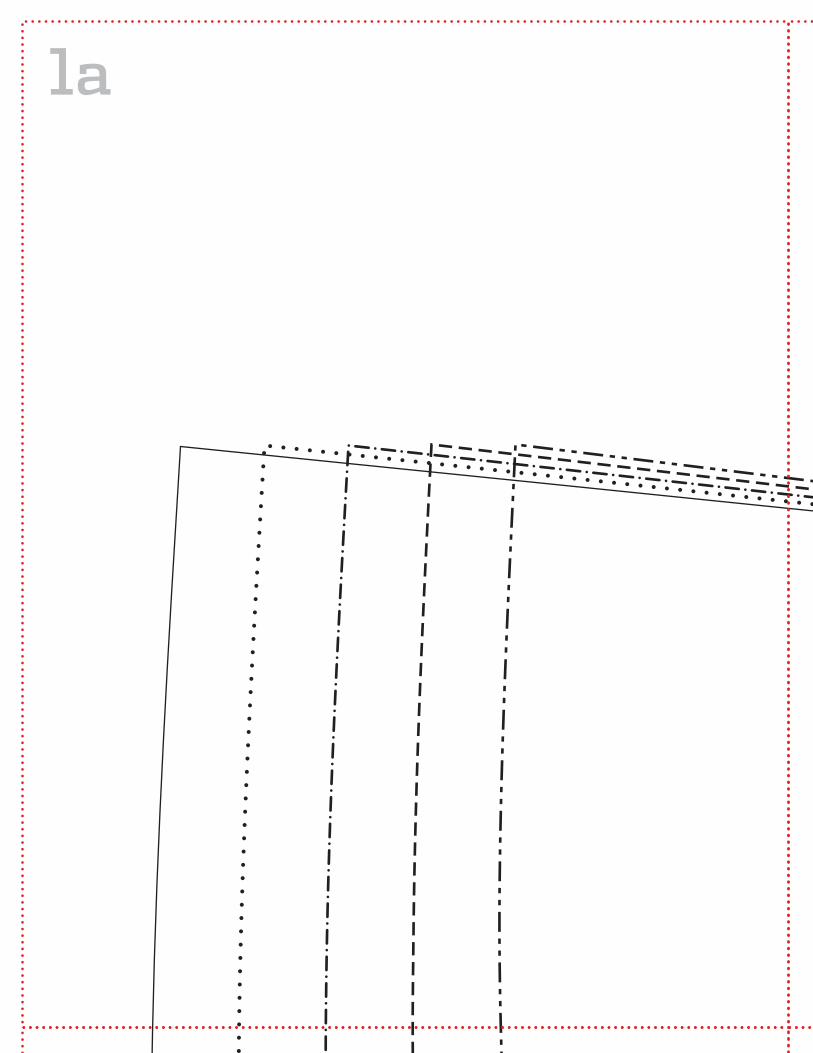
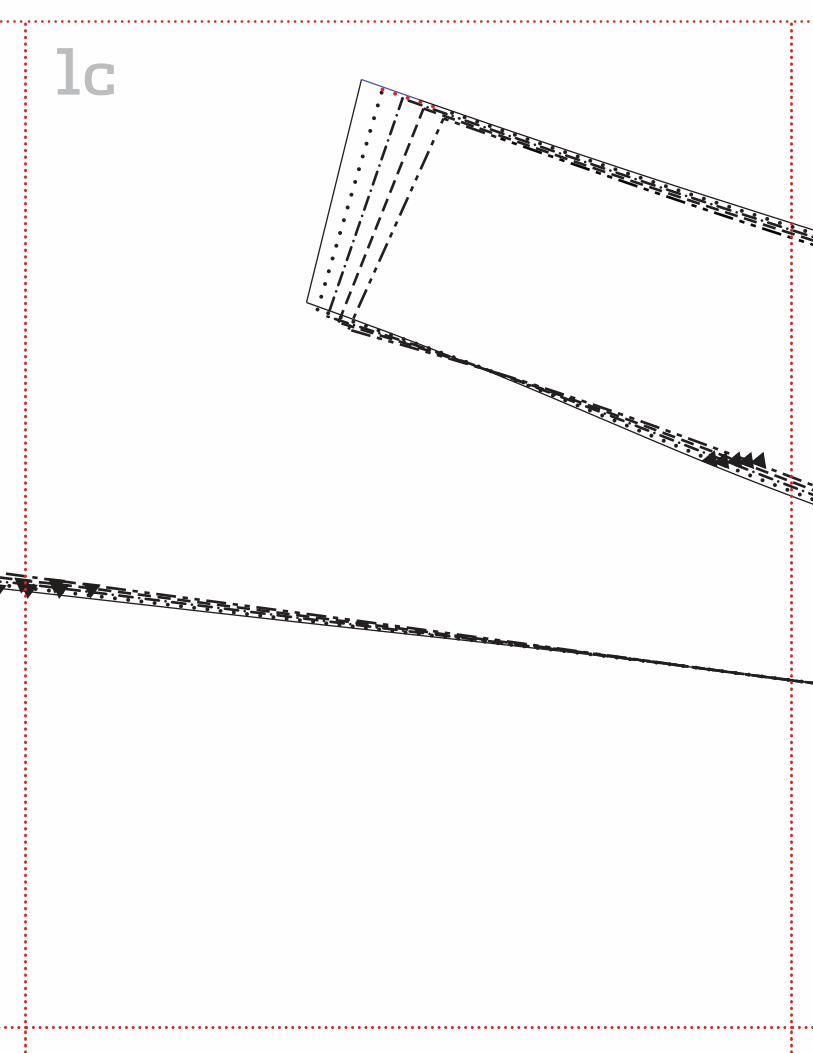
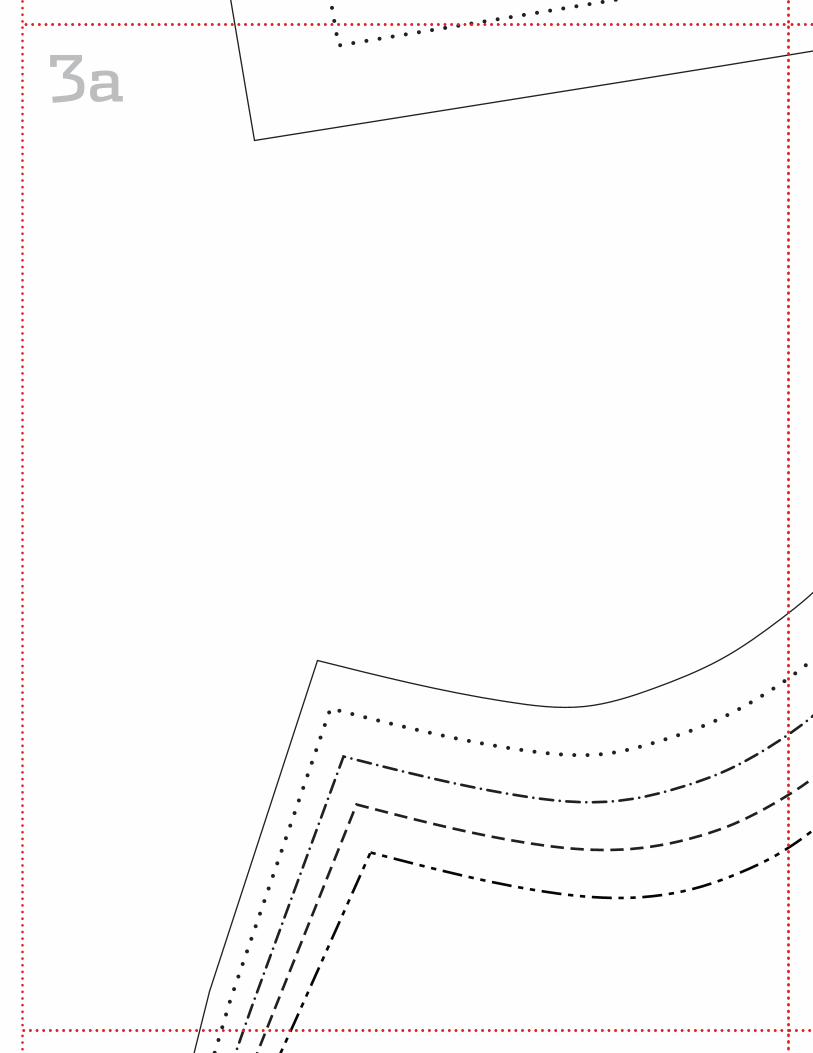
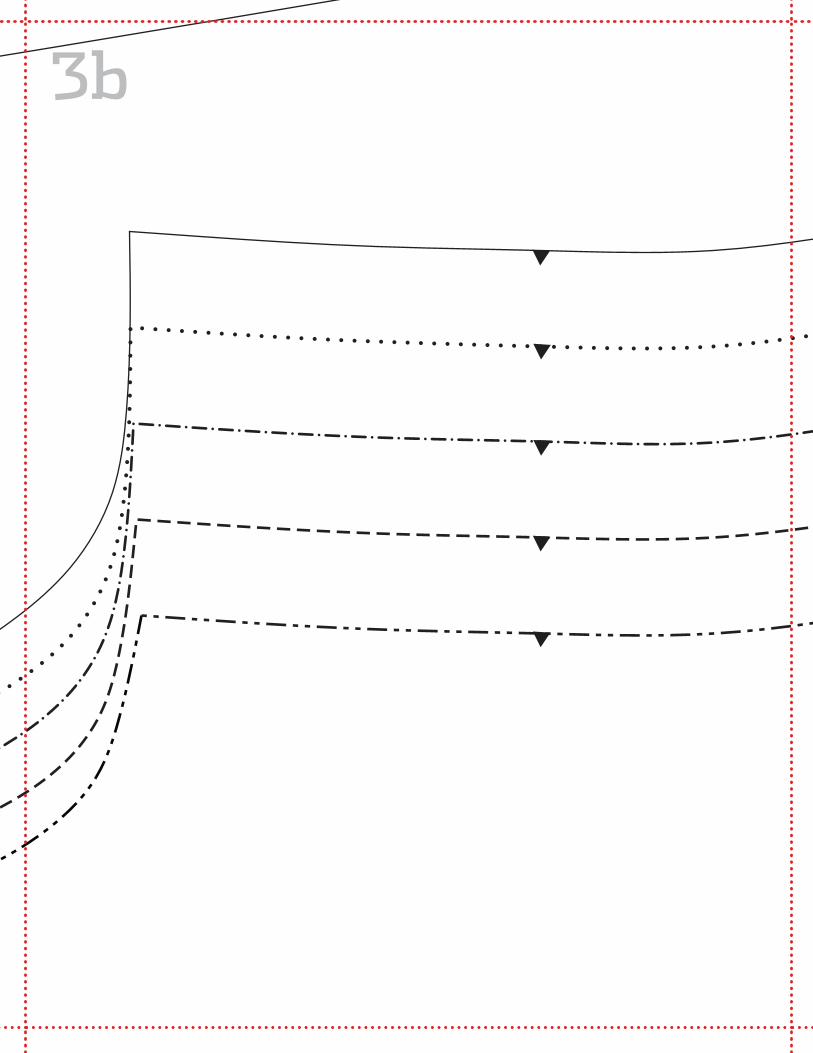
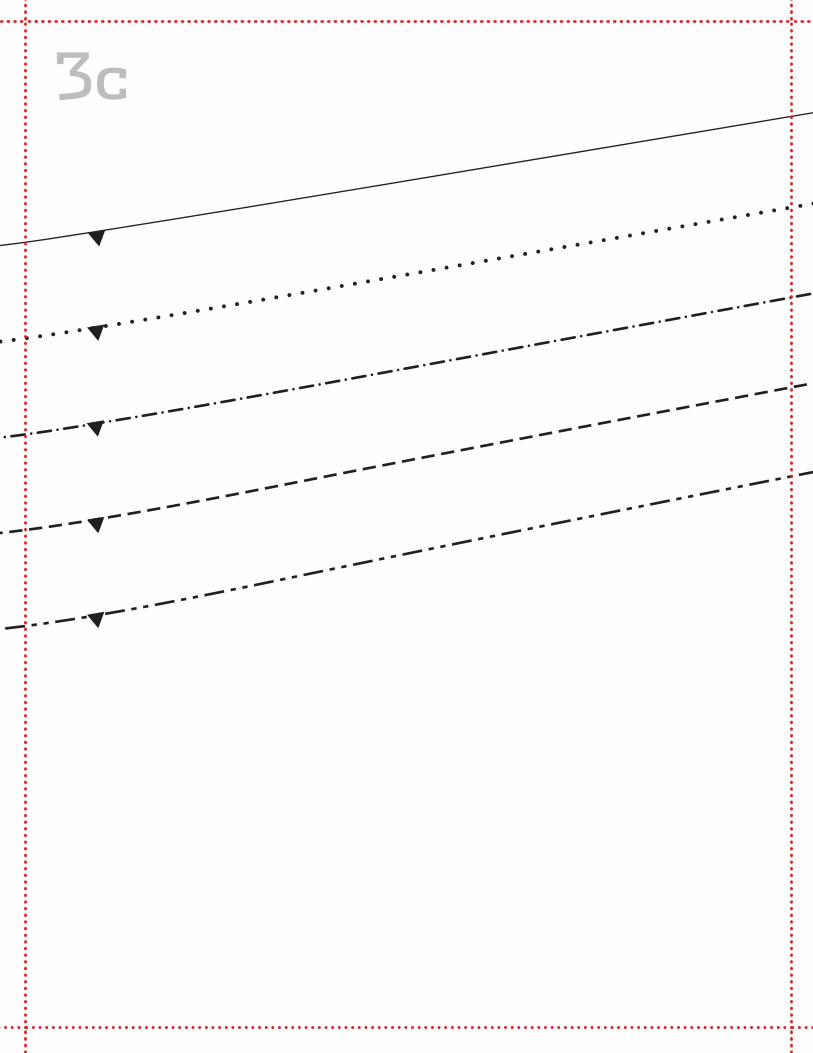
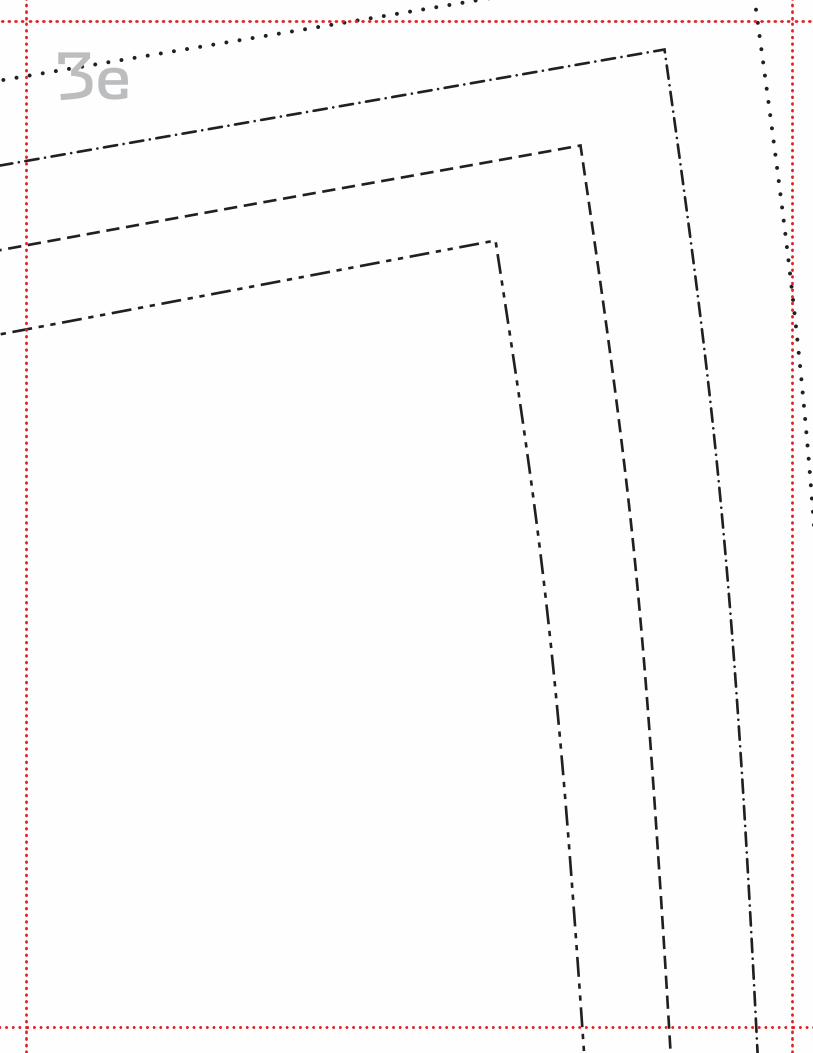
pattern SymBolS & markinGSaSSemBlinG full-Size pattern printout1 | When preparing to print the PdF, make sure that you are printing it at 100% and that there is no scaling. Check the settings for page scaling (should be “None”) and check the preview to make sure that you will be printing at full size. Make sure that the box labeled “Auto-Rotate and Center” is unchecked (instructions apply specifically to Adobe Reader; if using another PdF reader, check for similar settings).2 | To ensure that the pattern has printed at the correct scale, check the size of the TEST SQUARE. The Test Square should be 2" × 2”.3 | To begin assembling the pattern, cut off or fold the dotted margin around each page.4 | The pages are numbered in rows, so the first row of pages is numbered 1a, 1b, 1c, etc. Line up the rows and match the dotted lines together so they overlap. Tape the pages together. Use the illustrated guide to match each piece. Once the pattern is complete, find your size, pin the pattern to the fabric, and follow the coordinating line to cut out or trace the pattern.
layout, markinG & cuttinG GuidelineS1 | Find the lines that correspond to your size and trace the pattern pieces, either on tissue paper or directly onto the fabric, using tracing paper and a tracing wheel. 2 | If you are cutting pattern pieces on the fold or cutting two of the same pattern piece, fold the fabric in half, selvedge to selvedge, with right sides together. Note that this technique is not appropriate for some fabrics, so check the project instructions if you are unsure. 3 | Lay the pattern pieces on the fabric as close together as possible. double-check that all pattern pieces to be cut “on the fold” are placed on the fold.4 | Make sure all pattern pieces are placed on the fabric with the grainline running parallel to the lengthwise grain unless a crosswise or bias grainline is present. 5 | Copy all pattern markings onto the wrong side of the fabric unless otherwise noted.6 | Read through all cutting instructions listed in the project instructions for directions on how many pattern pieces to cut out of your fabric and interfacing.7 | Use weights to hold the pattern pieces down and use pins to secure the corners as needed.8 | Cut the pieces slowly and carefully.
Test Square2" 2"
ASYMMETRICAL FOLDS SKIRTRIGHT FRONT
cut 2 XXxx
XL
L
M
S
XS
XLLMSXS
cut on foldother text
selvedges foldback
LABELS FOR YIELDS
ASYMMETRICAL FOLDS SKIRTRIGHT FRONT
cut 2 XXxx
XL
L
M
S
XS
XLLMSXS
cut on foldother text
selvedges foldback
LABELS FOR YIELDS
ASYMMETRICAL FOLDS SKIRTRIGHT FRONT
cut 2 XXxx
XL
L
M
S
XS
XLLMSXS
cut on foldother text
selvedges foldback
LABELS FOR YIELDS
ASYMMETRICAL FOLDS SKIRTRIGHT FRONT
cut 2 XXxx
XL
L
M
S
XS
XLLMSXS
cut on foldother text
selvedges foldback
LABELS FOR YIELDS
ASYMMETRICAL FOLDS SKIRTRIGHT FRONT
cut 2 XXxxX
L
L
M
S
XS
XLLMSXS
cut on foldother text
selvedges foldback
LABELS FOR YIELDS
ASYMMETRICAL FOLDS SKIRTRIGHT FRONT
cut 2 XXxx
XL
L
M
S
XS
XLLMSXS
cut on foldother text
selvedges foldback
LABELS FOR YIELDS
ASYMMETRICAL FOLDS SKIRTRIGHT FRONT
cut 2 XXxx
XL
L
M
S
XS
XLLMSXS
cut on foldother text
selvedges foldback
LABELS FOR YIELDS
ASYMMETRICAL FOLDS SKIRTRIGHT FRONT
cut 2 XXxx
XL
L
M
S
XS
XLLMSXS
cut on foldother text
selvedges foldback
LABELS FOR YIELDS
sewdailysewdaily
stylish skirt anD dress patterns 3 Free Sewing Patterns for Women
page 10 of 92visit sewdaily.com
sewdailysewdaily
© Interweave Press LLC Not to be reprinted. All rights reserved.
Please respect the copyright by not forwarding or distributing this document.
stylish skirt anD dress patterns 3 Free Sewing Patterns for Women
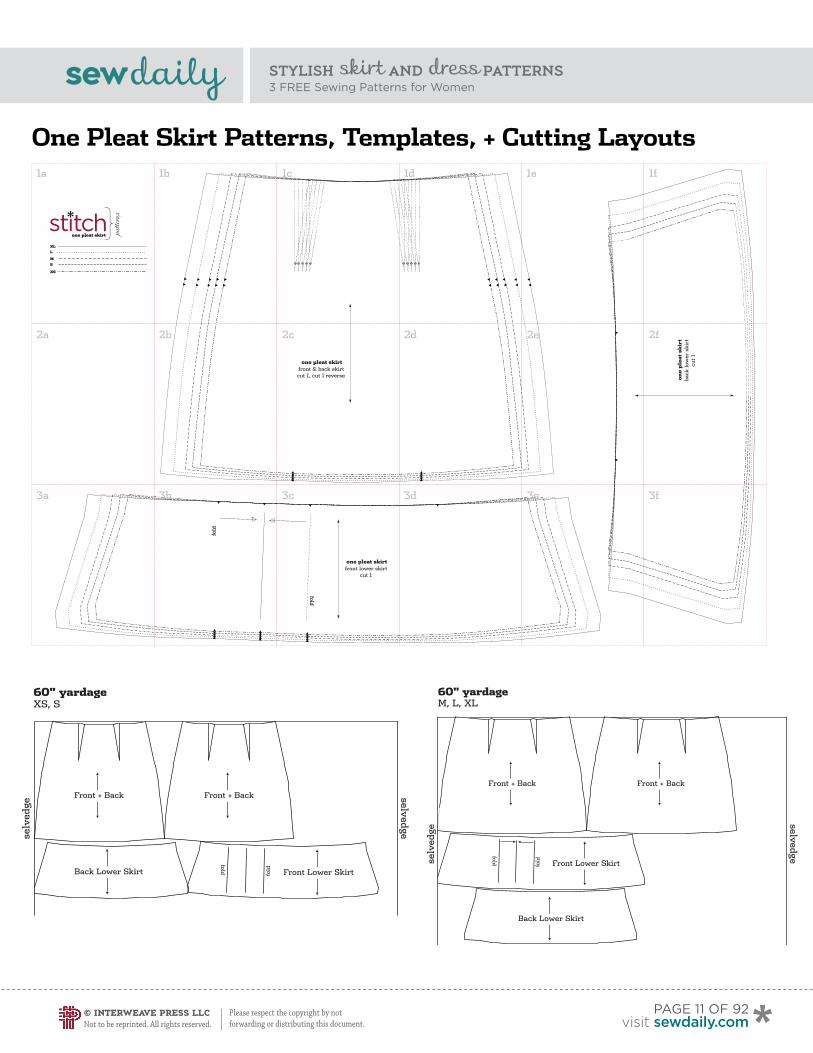
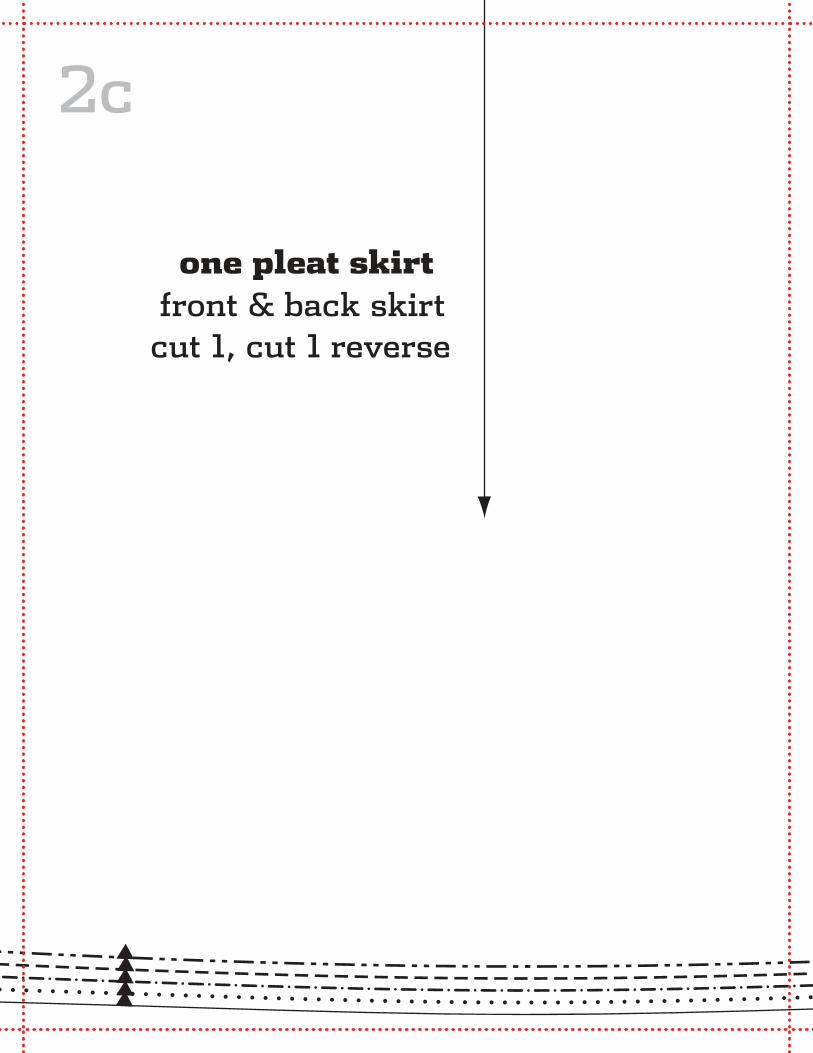
one pleat skirtfront & back skirtcut 1, cut 1 reverse on
e p
leat
sk
irt
back
low
er s
kir
tcu
t 1
one pleat skirtfront lower skirt
cut 1
fold
fold
one pleat skirt
1a 1b 1c 1d 1e 1f
2a 2b 2c 2d 2e 2f
3a 3b 3c 3d 3e 3f
fold
fold Front Lower SkirtBack Lower Skirt
Front + BackFront + Back
60" yardage XS, S
selv
edge
selvedge
fold
fold
Back Lower Skirt
Front Lower Skirt
Front + BackFront + Back
60" yardage M, L, XL
selv
edge
selvedge
One Pleat Skirt Patterns, Templates, + Cutting Layouts
page 11 of 92visit sewdaily.com
one pleat skirt
1a
1b
1c

1d
1e
1f
2a
2b
one pleat skirtfront & back skirtcut 1, cut 1 reverse
2c
2d
2e
one
ple
at s
kir
tba
ck l
ower
skir
tcu
t 1
2f
3a
fold
3b
one pleat skirtfront lower skirt
cut 1fold
3c
3d
3e
3f
sewdailysewdaily
© Interweave Press LLC Not to be reprinted. All rights reserved.
Please respect the copyright by not forwarding or distributing this document.
stylish skirt anD dress patterns 3 Free Sewing Patterns for Women
THE
BIG
BLU
EB
OD
ICE
BA
CK
XS
,S,M
,L,X
L
THE
BIG
BLU
EF
RO
NT
SK
IRT
cut
1 o
n fo
ldX
S,S
,M,L
,XL
THE B
IG B
LUE
BO
DIC
E F
RO
NT
cut 1 on fo
ldX
S,S
,M,L,X
L
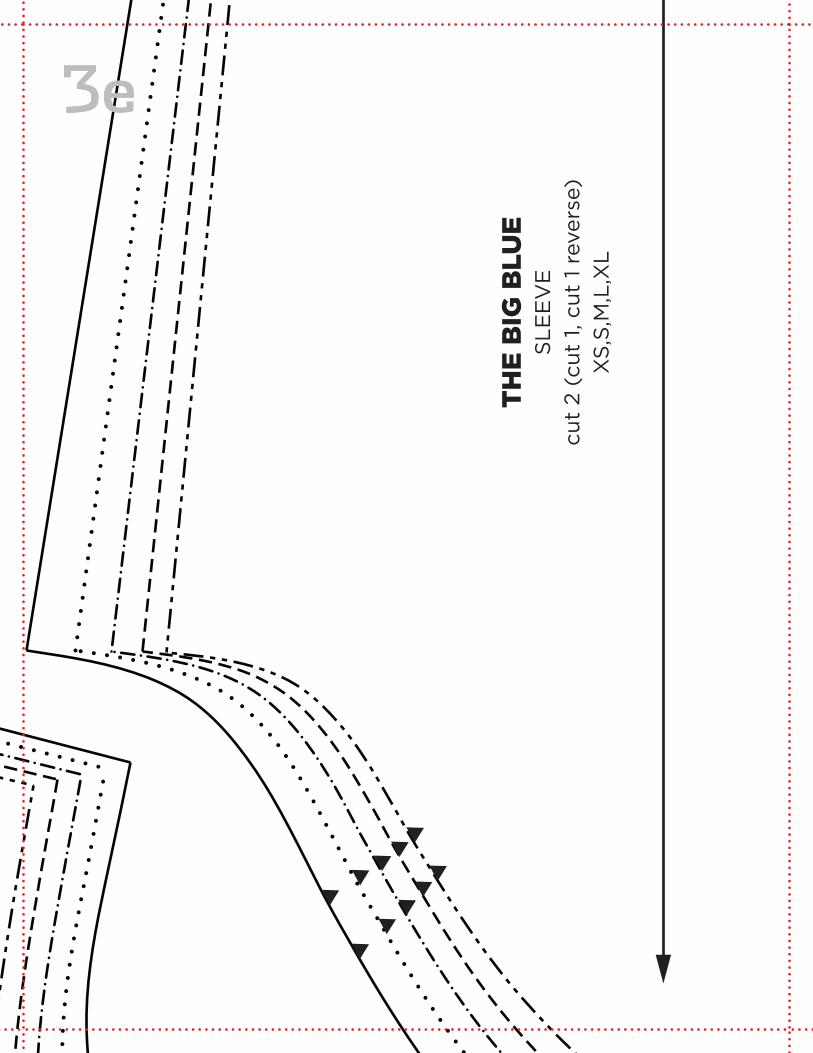
THE
BIG
BLU
ES
LEE
VE
cut
2 (c
ut 1
, cut
1 r
ever
se)
XS
,S,M
,L,X
L
THE
BIG
BLU
EF
RO
NT
NE
CK
FA
CIN
Gcu
t 1
on
fold
XS
,S,M
,L,X
L
THE
BIG
BLU
EB
AC
K N
EC
K IN
TE
RFA
CIN
Gcu
t 2
inte
rfac
ing
(c
ut 1
, cut
1 r
ever
se)
XS
,S,M
,L,X
L
THE BIG BLUE
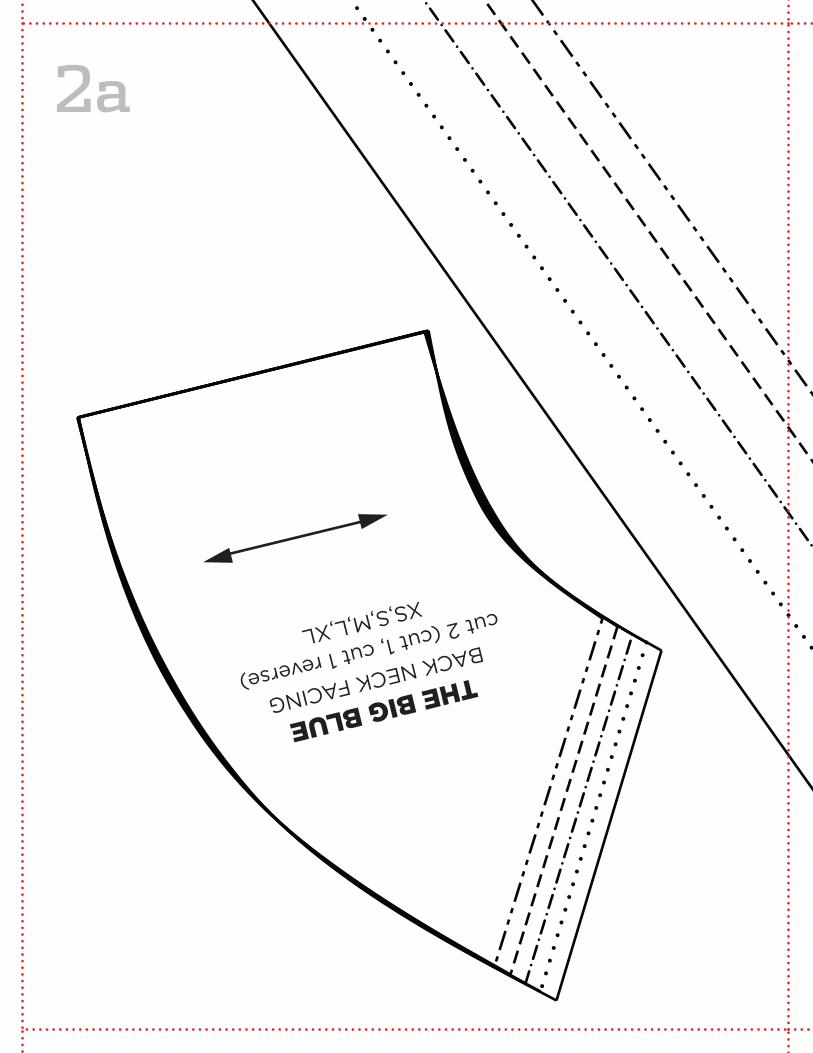
BACK NECK FACING
cut 2 (cut 1, cut 1 reverse)
XS,S,M,L,XL
THE BIG BLUE
FRONT NECK INTERFACING
cut 1 interfacing on fold
XS,S,M,L,XL
THE
BIG
BLU
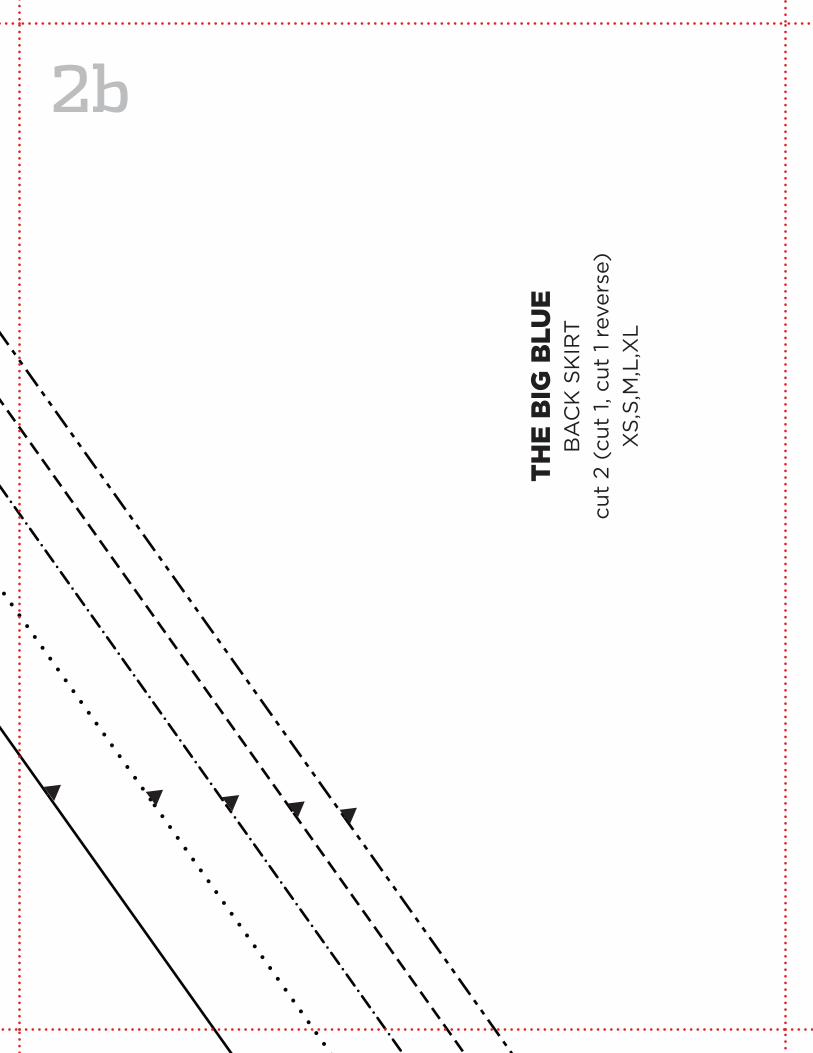
EB
AC
K S
KIR
Tcu
t 2
(cut
1, c
ut 1
rev
erse
)X
S,S
,M,L
,XL
THE BIG BLUE
XLLMSXS
1a 1b 1c 1d
2a 2b 2c 2d
3a 3b 3c 3d
4a 4b 4c 4d
1e
2f2e
3e
4e
5b 5c 5d 5e
3f
1e
2f2e
3e 3f
4f
The Big Blue Patterns, Templates, + Cutting Layouts
page 30 of 92visit sewdaily.com
sewdailysewdaily
© Interweave Press LLC Not to be reprinted. All rights reserved.
Please respect the copyright by not forwarding or distributing this document.
stylish skirt anD dress patterns 3 Free Sewing Patterns for Women
45" main fabricXS
04/10/12
Big Blue Dress45” fabric
XS 2 1/4 yds
selvedges
fold
front skirt
back skirt
bodice back
sleeve
bodice frontfront neck
facing
back neck
facing
45" main fabricS
04/10/23
Big Blue Dress45” fabric
S 2 3/8 yds
selvedges
fold
front skirt
back skirt
bodice back
sleeve
bodice frontfront neck
facing
back neck
facing
45" main fabricM,L,XL
04/10/12
Big Blue Dress45” fabric
M 2 5/8 ydsL-XL 2 7/8 yds
selvedges
fold
front skirt
back skirt
bodice back
bodice frontfront neck
facing
sleeve
back neck
facing
The Big Blue Patterns, Templates, + Cutting Layouts
page 31 of 92visit sewdaily.com
sewdailysewdaily
© Interweave Press LLC Not to be reprinted. All rights reserved.
Please respect the copyright by not forwarding or distributing this document.
stylish skirt anD dress patterns 3 Free Sewing Patterns for Women
60" main fabricXS,S
04/10/12
Big Blue Dress60” fabric
XS-S 1 3/4 yds
front skirt
bodice back
sleeve
bodice frontfront neck
facing
back neck
facing
selvedges
fold
back skirt
60" main fabricM,L,XL
04/10/12
Big Blue Dress60” fabric
M 2 ydsL 2 1/8 ydsXL 2 1/4 yds
front skirt
bodice back
sleeve
bodice front
front neck
facing
back neck
facing
selvedges
fold
back skirt
The Big Blue Patterns, Templates, + Cutting Layouts
page 32 of 92visit sewdaily.com
THE BIG BLUE
XLLMSXS
1a 1b

1b 1c

1c 1d
1d
1e1e
THE BIG BLUE
BACK NECK FACING
cut 2 (cut 1, cut 1 reverse)
XS,S,M,L,XL
2a 2b
THE
BIG
BLU
EB
AC
K S
KIR
Tcu
t 2
(cut
1, c
ut 1
rev
erse
)X
S,S
,M,L
,XL
2b 2c
2c 2d
THE
BIG
BLU
EB
OD
ICE
BA
CK
XS
,S,M
,L,X
L
2d
THE
BIG
BLU
ES
LEE
VE
cut
2 (c
ut 1
, cut
1 r
ever
se)
XS
,S,M
,L,X
L
2e2e
2f2f

THE
BIG
BLU
EB
AC
K N
EC
K IN
TE
RFA
CIN
Gcu
t 2
inte
rfac
ing
(c
ut 1
, cut
1 r
ever
se)
XS
,S,M
,L,X
L
THE BIG BLUE
FRONT NECK INTERFACING
cut 1 interfacing on fold
XS,S,M,L,XL
3a 3b
3b 3c
3c 3d
3d
THE
BIG
BLU
ES
LEE
VE
cut
2 (c
ut 1
, cut
1 r
ever
se)
XS
,S,M
,L,X
L
3e3e
3f3f
4a 4b
4b 4c
THE
BIG
BLU
EF
RO
NT
SK
IRT
cut
1 o
n fo
ldX
S,S
,M,L
,XL
4c 4d
THE B
IG B
LUE
BO
DIC
E F
RO
NT
cut 1 on fo
ldX
S,S
,M,L,X
L
4d
4e
THE
BIG
BLU
EF
RO
NT
NE
CK
FA
CIN
Gcu
t 1
on
fold
XS
,S,M
,L,X
L
4f
5b 5c

5c 5d

5d
5e
sewdailysewdaily
© Interweave Press LLC Not to be reprinted. All rights reserved.
Please respect the copyright by not forwarding or distributing this document.
stylish skirt anD dress patterns 3 Free Sewing Patterns for Women
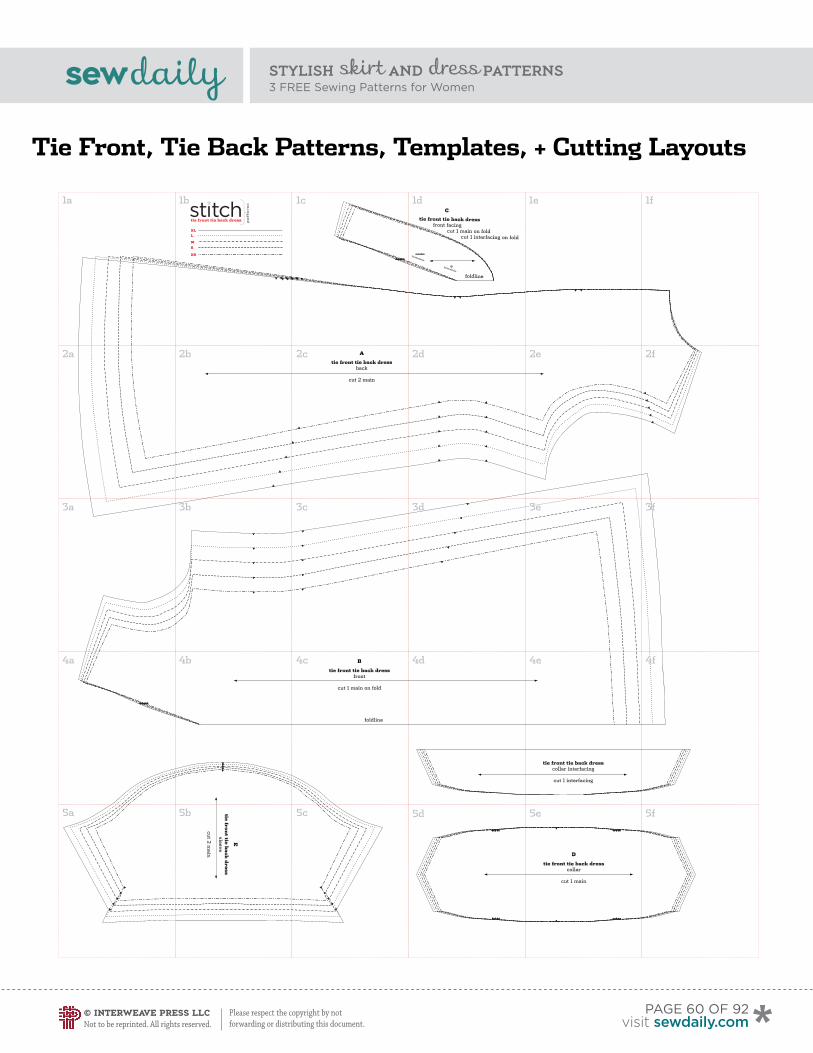
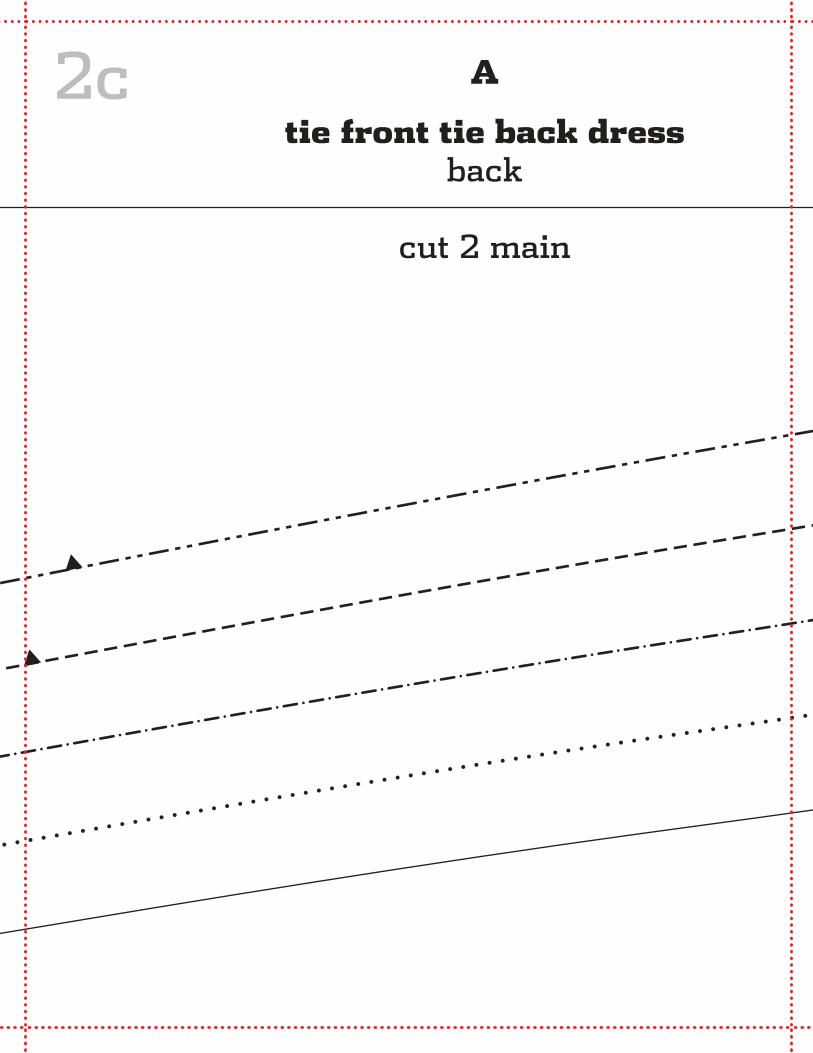
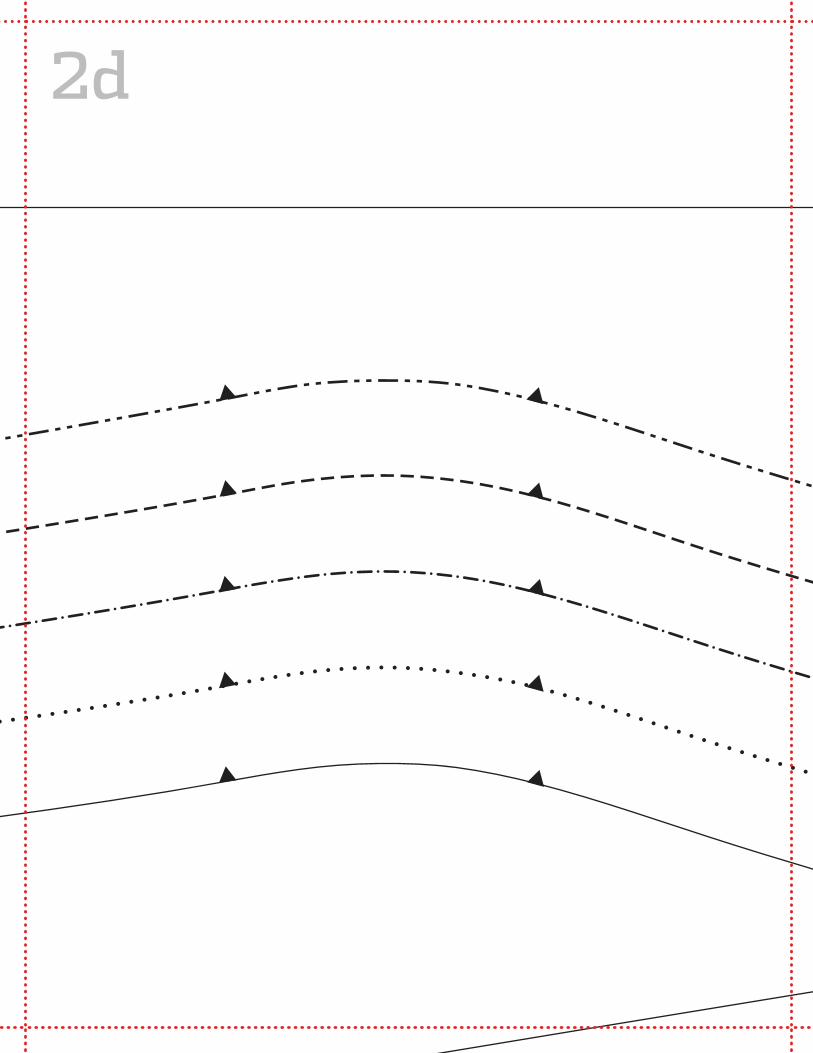
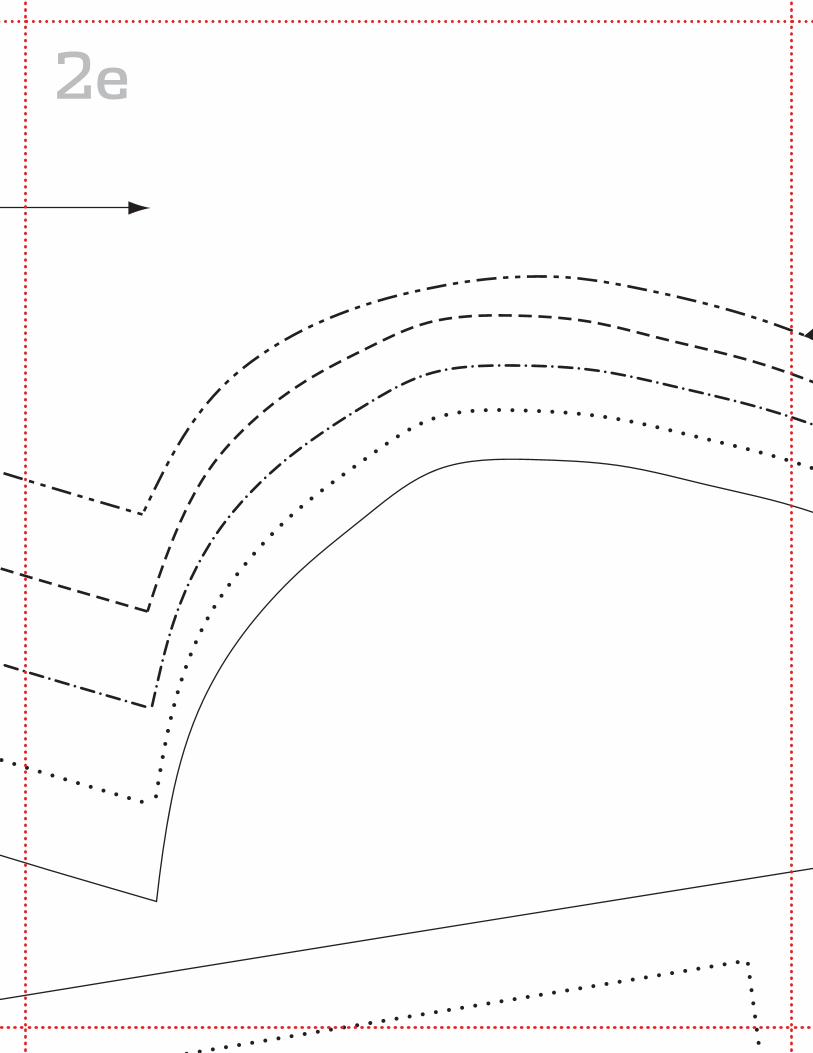
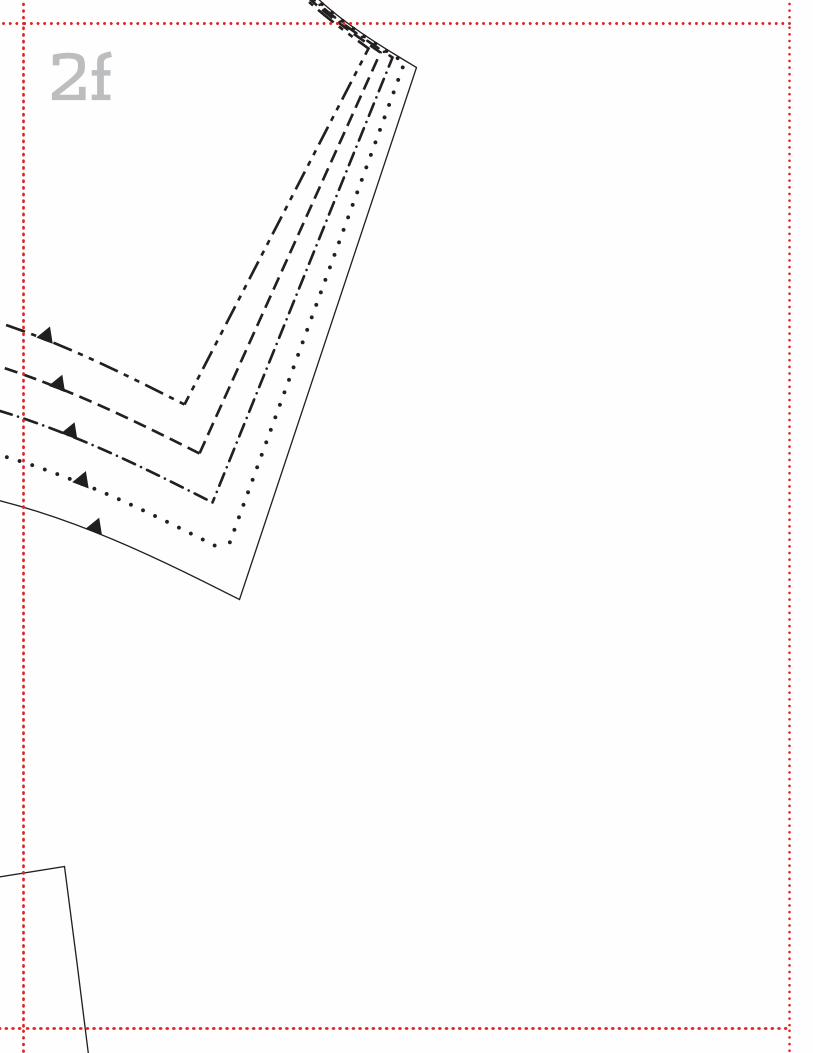
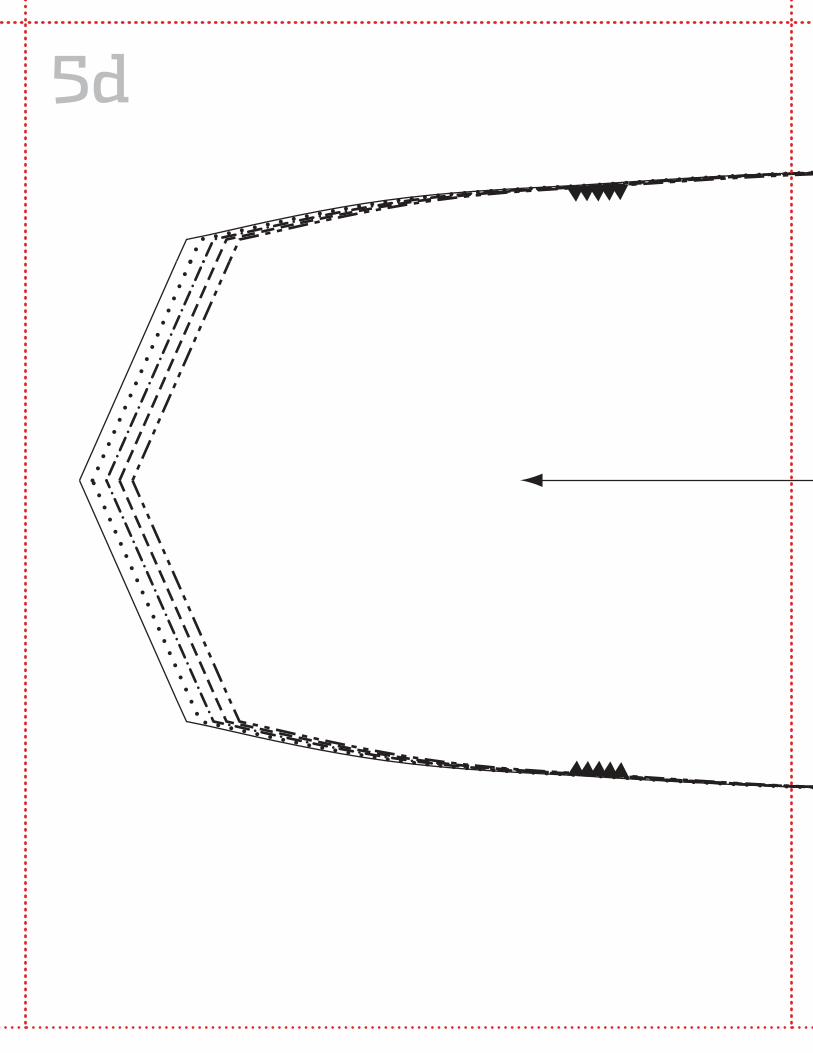
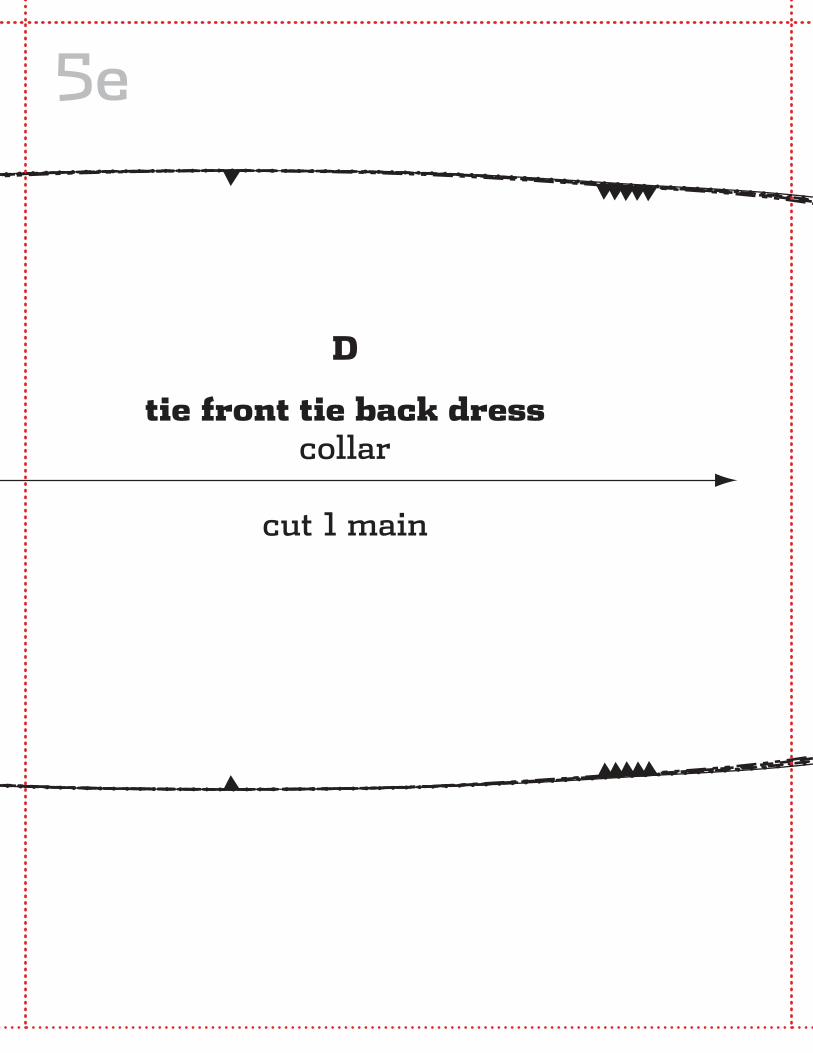
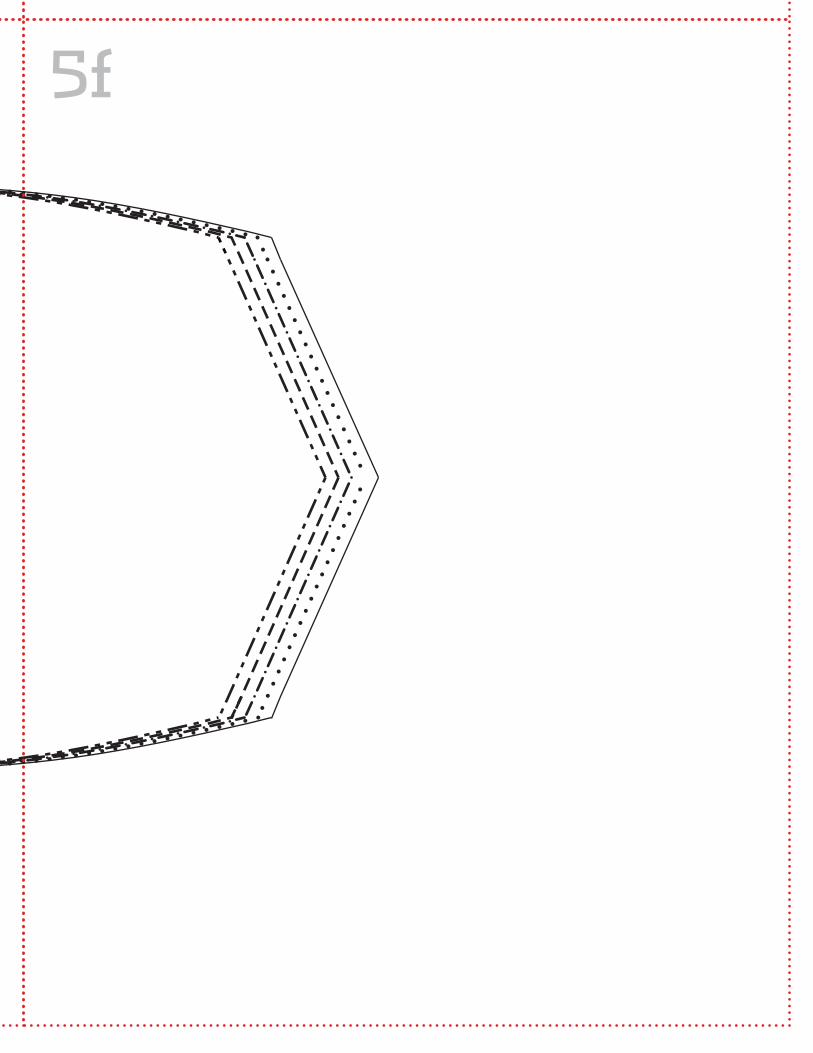
tie front tie back dress
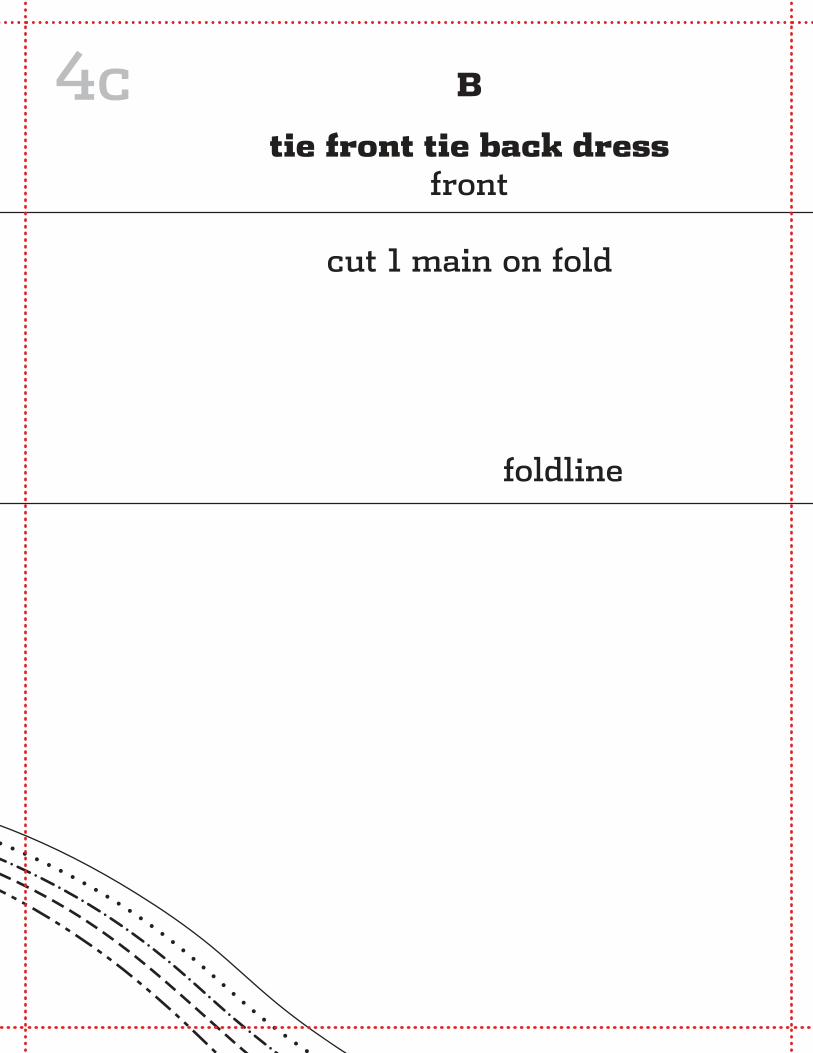
tie front tie back dressfront
cut 1 main on fold
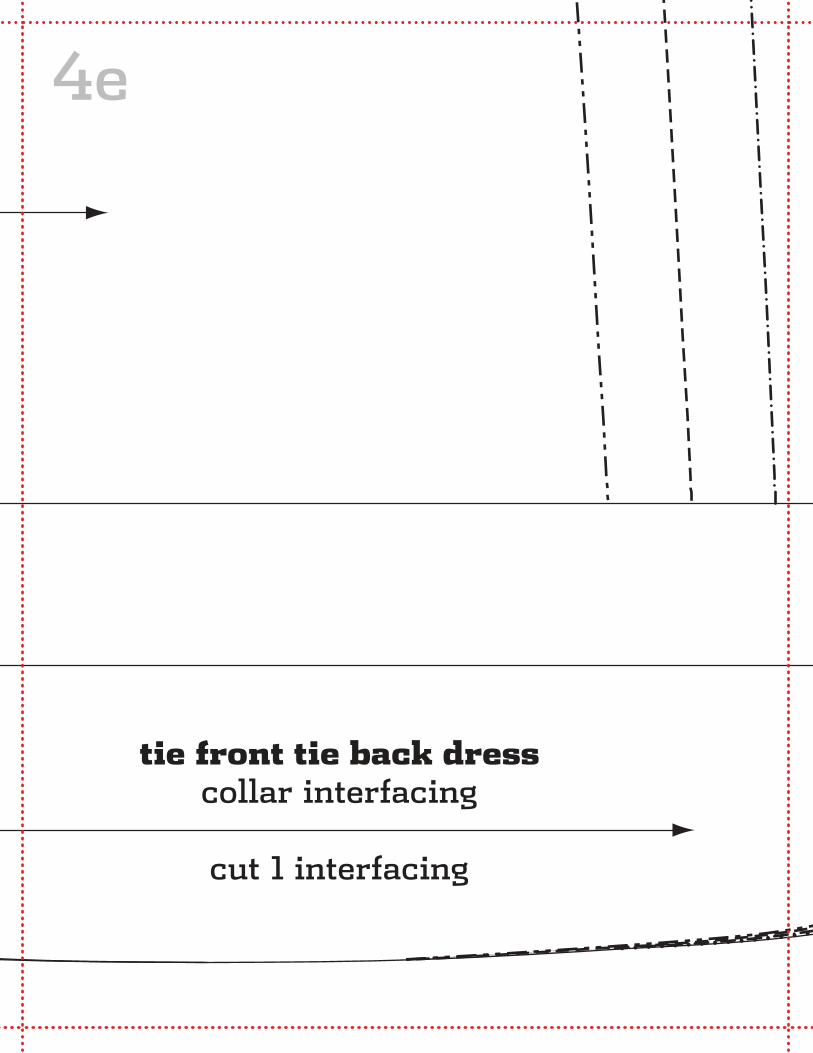
tie front tie back dresscollar interfacing
cut 1 interfacing
tie front tie back dresscollar
cut 1 main
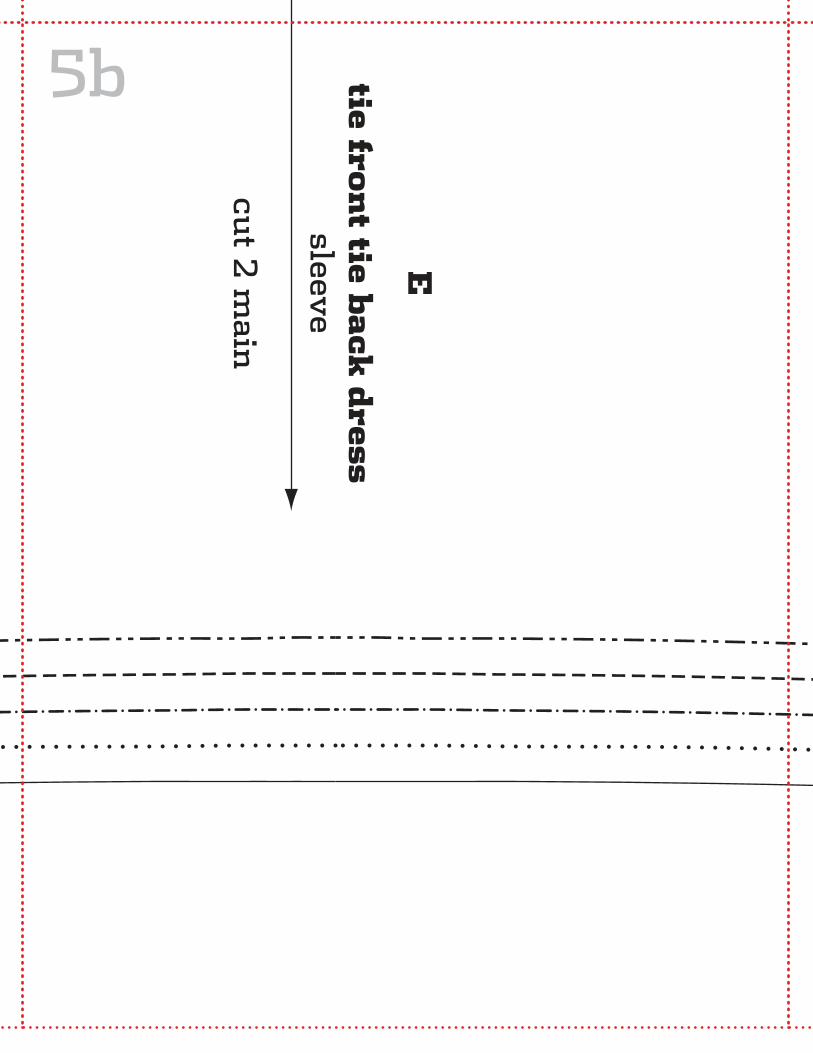
tie front tie b
ack d
resssleeve
cut 2
main
foldline
foldline
tie front tie back dressback
cut 2 main
buttonhole
buttonhole
tie front tie back dressfront facing
cut 1 main on foldcut 1 interfacing on fold
A
C
B
D
E
1a 1b 1c 1d 1e 1f
2a 2b 2c 2d 2e 2f
3a 3b 3c 3d 3e 3f
4a 4b 4c
5a 5b 5c
4d 4e 4f
5e 5f5d
Tie Front, Tie Back Patterns, Templates, + Cutting Layouts
page 60 of 92visit sewdaily.com
sewdailysewdaily
© Interweave Press LLC Not to be reprinted. All rights reserved.
Please respect the copyright by not forwarding or distributing this document.
stylish skirt anD dress patterns 3 Free Sewing Patterns for Women
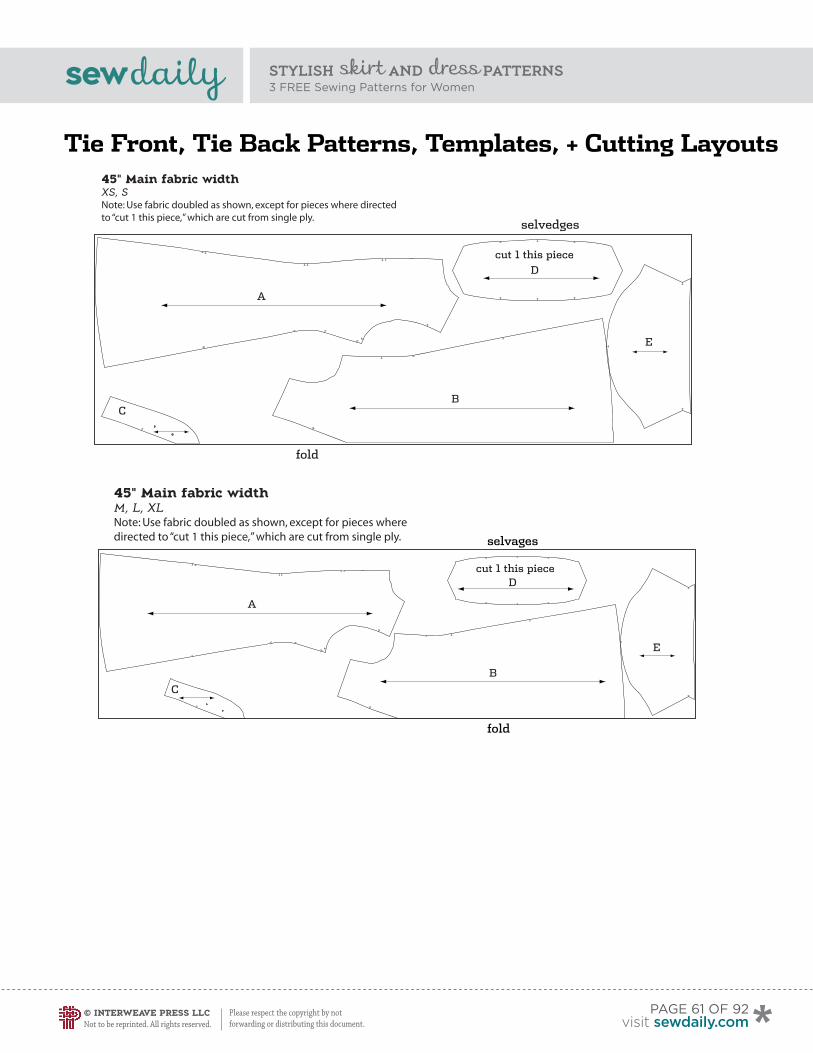
Tie Front, Tie Back Patterns, Templates, + Cutting Layouts45" Main fabric widthXS, SNote: Use fabric doubled as shown, except for pieces where directed to “cut 1 this piece,” which are cut from single ply.
A
BC
D
E
cut 1 this piece
fold
selvedges
45" Main fabric widthM, L, XLNote: Use fabric doubled as shown, except for pieces where directed to “cut 1 this piece,” which are cut from single ply.
A
B
C
D
E
fold
selvages
cut 1 this piece
page 61 of 92visit sewdaily.com
sewdailysewdaily
© Interweave Press LLC Not to be reprinted. All rights reserved.
Please respect the copyright by not forwarding or distributing this document.
stylish skirt anD dress patterns 3 Free Sewing Patterns for Women
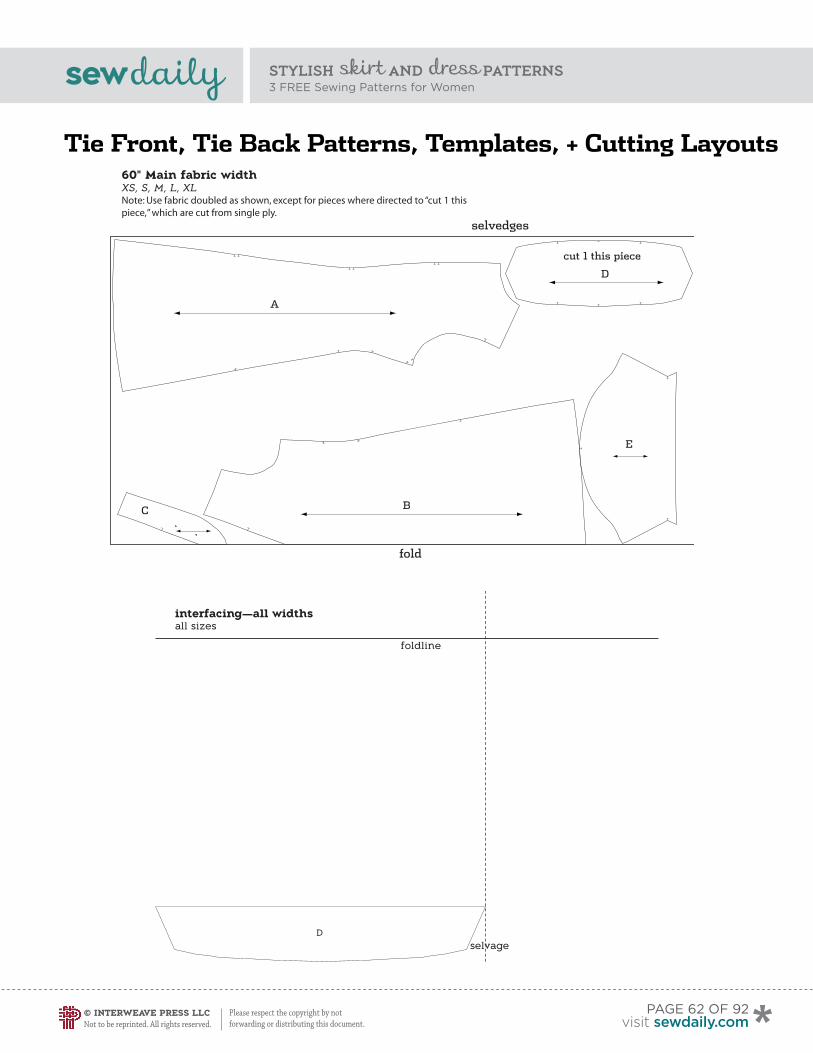
Tie Front, Tie Back Patterns, Templates, + Cutting Layouts60" Main fabric widthXS, S, M, L, XLNote: Use fabric doubled as shown, except for pieces where directed to “cut 1 this piece,” which are cut from single ply.
A
BC
D
E
cut 1 this piece
fold
selvedges
interfacing—all widthsall sizes
foldline
selvageD
page 62 of 92visit sewdaily.com
tie front tie back dress
tie front tie back dressfront
cut 1 main on fold
tie front tie back dresscollar interfacing
cut 1 interfacing
tie front tie back dresscollar
cut 1 main
tie front tie b
ack d
resssleeve
cut 2
main
foldline
foldline
tie front tie back dressback
cut 2 main
buttonhole
buttonhole
tie front tie back dressfront facing
cut 1 main on foldcut 1 interfacing on fold
A
C
B
D
E
1a 1b 1c 1d 1e 1f
2a 2b 2c 2d 2e 2f
3a 3b 3c 3d 3e 3f
4a 4b 4c
5a 5b 5c
4d 4e 4f
5e 5f5d
tie front tie back dress
tie front tie back dressfront
cut 1 main on fold
tie front tie back dresscollar interfacing
cut 1 interfacing
tie front tie back dresscollar
cut 1 maintie fron
t tie back
dress
sleeve
cut 2
main
foldline
foldline
tie front tie back dressback
cut 2 main
buttonhole
buttonhole
tie front tie back dressfront facing
cut 1 main on foldcut 1 interfacing on fold
A
C
B
D
E
1a 1b 1c 1d 1e 1f
2a 2b 2c 2d 2e 2f
3a 3b 3c 3d 3e 3f
4a 4b 4c
5a 5b 5c
4d 4e 4f
5e 5f5d
tie front tie back dress
tie front tie back dressfront
cut 1 main on fold
tie front tie back dresscollar interfacing
cut 1 interfacing
tie front tie back dresscollar
cut 1 main
tie front tie b
ack d
resssleeve
cut 2
main
foldline
foldline
tie front tie back dressback
cut 2 main
buttonhole
buttonhole
tie front tie back dressfront facing
cut 1 main on foldcut 1 interfacing on fold
A
C
B
D
E
1a 1b 1c 1d 1e 1f
2a 2b 2c 2d 2e 2f
3a 3b 3c 3d 3e 3f
4a 4b 4c
5a 5b 5c
4d 4e 4f
5e 5f5d
tie front tie back dress
tie front tie back dressfront
cut 1 main on fold
tie front tie back dresscollar interfacing
cut 1 interfacing
tie front tie back dresscollar
cut 1 main
tie front tie b
ack d
resssleeve
cut 2
main
foldline
foldline
tie front tie back dressback
cut 2 main
buttonhole
buttonhole
tie front tie back dressfront facing
cut 1 main on foldcut 1 interfacing on fold
A
C
B
D
E
1a 1b 1c 1d 1e 1f
2a 2b 2c 2d 2e 2f
3a 3b 3c 3d 3e 3f
4a 4b 4c
5a 5b 5c
4d 4e 4f
5e 5f5d
tie front tie back dress
tie front tie back dressfront
cut 1 main on fold
tie front tie back dresscollar interfacing
cut 1 interfacing
tie front tie back dresscollar
cut 1 main
tie front tie b
ack d
resssleeve
cut 2
main
foldline
foldline
tie front tie back dressback
cut 2 main
buttonhole
buttonhole
tie front tie back dressfront facing
cut 1 main on foldcut 1 interfacing on fold
A
C
B
DE
1a 1b 1c 1d 1e 1f
2a 2b 2c 2d 2e 2f
3a 3b 3c 3d 3e 3f
4a 4b 4c
5a 5b 5c
4d 4e 4f
5e 5f5d
tie front tie back dress
tie front tie back dressfront
cut 1 main on fold
tie front tie back dresscollar interfacing
cut 1 interfacing
tie front tie back dresscollar
cut 1 main
tie front tie b
ack d
resssleeve
cut 2
main
foldline
foldline
tie front tie back dressback
cut 2 main
buttonhole
buttonhole
tie front tie back dressfront facing
cut 1 main on foldcut 1 interfacing on fold
A
C
B
D
E
1a 1b 1c 1d 1e 1f
2a 2b 2c 2d 2e 2f
3a 3b 3c 3d 3e 3f
4a 4b 4c
5a 5b 5c
4d 4e 4f
5e 5f5d
tie front tie back dress
tie front tie back dressfront
cut 1 main on fold
tie front tie back dresscollar interfacing
cut 1 interfacing
tie front tie back dresscollar
cut 1 main
tie front tie b
ack d
resssleeve
cut 2
main
foldline
foldline
tie front tie back dressback
cut 2 main
buttonhole
buttonhole
tie front tie back dressfront facing
cut 1 main on foldcut 1 interfacing on fold
A
C
B
D
E
1a 1b 1c 1d 1e 1f
2a 2b 2c 2d 2e 2f
3a 3b 3c 3d 3e 3f
4a 4b 4c
5a 5b 5c
4d 4e 4f
5e 5f5d