STANDARD OPERATING PROCEDURE SOP/POCT…€¦ · STANDARD OPERATING PROCEDURE SOP/POCT/15/18 ......
29
RUH Bath NHS Foundation Trust – Pathology Department STANDARD OPERATING PROCEDURE SOP/POCT/15/18 Title: OMNI-S+COBAS b221 Blood Gas Analysers Effective date: 06/03/2017 Printed copies are uncontrolled unless there is an allocated Copy Number on page 1 Author: H.Witham Checked by:E.Macdonald Approved by:E.Macdonald Page 1 of 29 COPY Summary of Significant Changes at this Revision Update Author/Approver Remove all references to ITU Include Bath Birthing Centre (BBC) Purpose and Scope This SOP describes the principles and procedures involved in the analysis of: Blood gases – pH, pCO 2 , pO 2 Bicarbonate – cHCO 3 - Electrolytes – Na + , K + , ionised Ca ++ , Cl - Hb derivatives – COHb (Carboxyhaemoglobin) etc. Bilirubin (neonatal) Glucose Lactate Using Omni –S and Cobas b221 POC analysers. Items Required Omni – S analyser. Cobas b221 analyser. Analyser reagents and consumables as supplied by Roche for the running of the POC analysers. Heparinised blood gas collection syringes. Heparinised blood gas collection capillary tubes. Clot catchers. Ampoule adapters. IQC materials. Definitions and Abbreviations POC – Point of Care QC – Quality Control IQC – Internal Quality Control EQA – External Quality Assurance QA – Quality Assurance WEQAS – Welsh External Quality Assurance AQC – Auto Quality Control ABG – Arterial Blood Gas CPAP – Continuous positive airways pressure MSS – Metabolite Sensitive Sensors ISE – Ion Selective Electrodes TB – Tuberculosis Bacilli T/D – Turn and Dock Grade / Qualifications Required Biomedical Scientist Doctor Nurse Emergency Department Assistant (EDA) Competencies Required: Current Version of: QMS/FM/CH/TRG/24 (Lab staff) QMS/FM/POCT/7 (Users) QMS/FM/POCT/8 (Super - Users) QMS/FM/POCT/9 (Link trainers) Risk Assessment: Current Version of: QMS/RA/CH/28
Transcript of STANDARD OPERATING PROCEDURE SOP/POCT…€¦ · STANDARD OPERATING PROCEDURE SOP/POCT/15/18 ......

RUH Bath NHS Foundation Trust – Pathology Department
STANDARD OPERATING PROCEDURE SOP/POCT/15/18 Title: OMNI-S+COBAS b221 Blood Gas Analysers
Effective date: 06/03/2017
Printed copies are uncontrolled unless there is an allocated Copy Number on page 1
Author: H.Witham Checked by:E.Macdonald Approved by:E.Macdonald Page 1 of 29
COPY
Summary of Significant Changes at this Revision
Update Author/Approver Remove all references to ITU Include Bath Birthing Centre (BBC)
Purpose and Scope This SOP describes the principles and procedures involved in the analysis of: Blood gases – pH, pCO2, pO2 Bicarbonate – cHCO3
- Electrolytes – Na+, K+, ionised Ca++, Cl- Hb derivatives – COHb (Carboxyhaemoglobin) etc. Bilirubin (neonatal) Glucose Lactate Using Omni –S and Cobas b221 POC analysers.
Items Required Omni – S analyser. Cobas b221 analyser. Analyser reagents and consumables as supplied by Roche for the running of the POC analysers. Heparinised blood gas collection syringes. Heparinised blood gas collection capillary tubes. Clot catchers. Ampoule adapters. IQC materials.
Definitions and Abbreviations POC – Point of Care QC – Quality Control IQC – Internal Quality Control EQA – External Quality Assurance QA – Quality Assurance WEQAS – Welsh External Quality Assurance AQC – Auto Quality Control ABG – Arterial Blood Gas CPAP – Continuous positive airways pressure MSS – Metabolite Sensitive Sensors ISE – Ion Selective Electrodes TB – Tuberculosis Bacilli T/D – Turn and Dock
Grade / Qualifications Required Biomedical Scientist Doctor Nurse Emergency Department Assistant (EDA) Competencies Required: Current Version of: QMS/FM/CH/TRG/24 (Lab staff) QMS/FM/POCT/7 (Users) QMS/FM/POCT/8 (Super - Users) QMS/FM/POCT/9 (Link trainers)
Risk Assessment: Current Version of: QMS/RA/CH/28

RUH Bath NHS Foundation Trust – Pathology Department
STANDARD OPERATING PROCEDURE SOP/POCT/15/18 Title: OMNI-S+COBAS b221 Blood Gas Analysers
Effective date: 06/03/2017
Printed copies are uncontrolled unless there is an allocated Copy Number on page 1
Author: H.Witham Checked by:E.Macdonald Approved by:E.Macdonald Page 2 of 29
INDEX
1. INTRODUCTION ........................................................................................................................... 3 2. PROCEDURAL SUMMARY ......................................................................................................... 3 3. CLINICAL APPLICATION ........................................................................................................... 3 4. METHOD PRINCIPLES ................................................................................................................. 6 5. REAGENT INFORMATION .......................................................................................................... 6 6. CALIBRATION .............................................................................................................................. 8 7. QUALITY CONTROL .................................................................................................................... 9 8. MAINTENANCE .......................................................................................................................... 11
8.1 Daily Maintenance ..................................................................................................................... 11 8.2 Weekly Maintenance .................................................................................................................. 13 8.3 Monthly Maintenance ................................................................................................................ 15 8.4 Three-Monthly maintenance ...................................................................................................... 17 8.5 Six - Monthly Maintenance ........................................................................................................ 18 8.6 As Required Maintenance .......................................................................................................... 18
9. SAMPLE REQUIREMENTS ........................................................................................................ 20 10. PATIENT TESTING ................................................................................................................. 21
10.1 Capillary Measurement ............................................................................................................ 22 10.2 Syringe Measurement ............................................................................................................... 22 10.3 Small Syringe Samples (<100μL) ............................................................................................. 22 10.4 Bicarbonate (cHCO3-st)(Lab only) .......................................................................................... 23 10.5 Pleural Fluid pH syringe sample (Lab only) ........................................................................... 23
11. REPORTING AND INTERPRETATION .................................................................................... 24 11.1 Interferences ......................................................................................................................... 24 11.2 Analytical ranges .................................................................................................................. 24 11.3 Reference ranges .................................................................................................................. 25 11.4 Results Entry ......................................................................................................................... 25 11.5 Limitations ............................................................................................................................ 26
12. REFERENCES ............................................................................................................................... 26 APPENDIX - NEW LOT NUMBER OF IQC ............................................................................................. 28

RUH Bath NHS Foundation Trust – Pathology Department
STANDARD OPERATING PROCEDURE SOP/POCT/15/18 Title: OMNI-S+COBAS b221 Blood Gas Analysers
Effective date: 06/03/2017
Printed copies are uncontrolled unless there is an allocated Copy Number on page 1
Author: H.Witham Checked by:E.Macdonald Approved by:E.Macdonald Page 3 of 29
1. INTRODUCTION The Roche OMNI-S/Cobas b221 POC analysers are used for the measurement of blood gases, electrolytes, haemoglobin derivatives, neonatal bilirubin, glucose and lactate in whole blood, serum, plasma, dialysate (electrolytes only), pleural fluid (pH only) and QC material. In addition to this, there are a number of calculated parameters available e.g. bicarbonate (cHCO3
-).
2. PROCEDURAL SUMMARY Blood gas samples sent to the lab should be received on ice, within 1 hour of sampling
via the portering service. Samples should NOT be analysed if received via the pneumatic transfer system.
Lab samples - request the sample in Ultra using the test code ‘GAS’ On the OMNI-S/Cobas b221 screen, check that the status window displays ‘Ready’ and
the parameter buttons that you require are green. Mix the sample well and expel the first few drops to eliminate clots. Attach a clot catcher Press the syringe firmly to the fill port. Inject the sample slowly. Remove the syringe when prompted to do so by the analyser. NB. Refer to later in the SOP for further details for analysing capillary/small syringe
samples. While the sample is being analysed, enter the mandatory information (highlighted red)
using the touch screen. When measurement is complete, remove the printout from the analyser. Ward samples – transcribe the results into the patient’s notes along with the date +time
performed, the location of the analyser used + signature of operator Lab samples - enter the results in Ultra using the ‘VRES’ program Lab samples - Release the results for authorisation from ‘VRES’. Lab samples - Check the ‘Telephone Queue’ for any results, which need to be
telephoned.
3. CLINICAL APPLICATION Blood Gases The measurement of ABGs provides valuable information in assessing and managing a patient’s respiratory (ventilation) and metabolic (renal) acid-base and electrolyte homeostasis. It is also used to assess the adequacy of oxygenation. ABGs are used to monitor patients on ventilators, monitor clinically ill non-ventilated patients, establish pre-operative baseline parameters, and regulate electrolyte therapy. Repeat blood gases enables the assessment of oxygen pressure to guide therapy of patients on ventilators or continuous positive airways pressure (CPAP) machines so that the treatment can be adapted to preserve the patient’s normal physiological balance. The measurement of pH and pCO2 (and subsequent calculation of HCO3
-) enables the assessment of acid-base balance. This provides the means of identifying many diseases,

RUH Bath NHS Foundation Trust – Pathology Department
STANDARD OPERATING PROCEDURE SOP/POCT/15/18 Title: OMNI-S+COBAS b221 Blood Gas Analysers
Effective date: 06/03/2017
Printed copies are uncontrolled unless there is an allocated Copy Number on page 1
Author: H.Witham Checked by:E.Macdonald Approved by:E.Macdonald Page 4 of 29
especially when combined with determination of electrolytes. For further information, please refer to references 1 and 2. Electrolytes Sodium and Potassium The electrolytes Na+ and K+ are measured as part of a routine laboratory evaluation of all patients. They are used to evaluate and monitor fluid and electrolyte balance and response to therapy. Sodium is the principal extracellular cation and determinant of extracellular fluid osmolality and volume, and its concentration is the result of a balance between dietary sodium intake and renal excretion. Potassium is the major intracellular cation, and is important in maintaining membrane electrical potential, especially in neuromuscular tissue (most notably, heart muscle). Potassium also contributes to the metabolic portion of acid-base balance. It is a very important test, but especially to those who take diuretics or heart medications. Chloride Chloride is the most important anion in bodily fluids and is located mainly in the extracellular area. Chloride is glomerularly filtered in the kidneys and is tubularly reabsorbed by passively following sodium. Chloride works with sodium to regulate the acid/base status and may be exchanged for bicarbonates during acid/base disturbances. Hypochloremic alkalosis may occur during extended periods of vomiting, in which chloride is lost in the gastric juices. Ionised Calcium Calcium in blood is distributed as free calcium ions (50%), bound to protein (mostly albumin, 40%), and 10% bound to anions such as bicarbonate, citrate, phosphate and lactate. However, only ionised calcium can be used by the body in such vital processes as muscular contraction, cardiac function, and transmission of nerve impulses and blood clotting. Patients with renal disease caused by glomerular failure often have altered concentrations of calcium, phosphate, albumin, magnesium and pH. Since these conditions tend to change the ionised calcium independently of total calcium, ionised calcium is the preferred method of accurately monitoring calcium in renal disease. (See reference 3) Haemoglobin Derivatives (Haemoximetry) Haemoximetry is used for:
i) Investigation of the efficiency of haemoglobin oxygenation by the lungs (Hb saturation)
ii) Measurement of non-oxygen-carrying blood pigments (Carboxyhaemoglobin, Methaemoglobin and Sulphaemoglobin)
iii) Investigation of patients with likely abnormalities of oxygen carriage and release, e.g. acidosis, alkalosis, hypoxaemia.
Carboxyhaemoglobin is measured in the investigation of possible carbon monoxide exposure and poisoning. Methaemoglobin and Sulphaemoglobin are measured in the investigation of unexplained central cyanosis and possible oxidant drug haemolysis (e.g. sulphonamides, aniline dyes, nitrates and nitrites). Increased levels of Methaemoglobin are seen in patients with HbM haemoglobinopathy or Methaemoglobin-reductase deficiency and flowing oxidant drug exposure. Sulphaemoglobin may occur with exposure to certain drugs, especially sulphonamides.

RUH Bath NHS Foundation Trust – Pathology Department
STANDARD OPERATING PROCEDURE SOP/POCT/15/18 Title: OMNI-S+COBAS b221 Blood Gas Analysers
Effective date: 06/03/2017
Printed copies are uncontrolled unless there is an allocated Copy Number on page 1
Author: H.Witham Checked by:E.Macdonald Approved by:E.Macdonald Page 5 of 29
Bilirubin (neonatal) Bilirubin is formed in the reticuloendothelial system during the degradation of erythrocytes. The haem portion from haemoglobin and from other haem-containing proteins is removed, metabolised to bilirubin, and transported as a tightly bound complex with serum albumin to the liver. In the liver, bilirubin is conjugated with glucuronic acid for solubilisation and subsequent transport through the bile duct and elimination via the digestive tract. The concentration of bilirubin in the plasma of an individual is determined by the balance between production and clearance. Any disease process which disrupts this balance will lead to an increase in plasma bilirubin. In the newborn, the massive red cell destruction occurring in haemolytic disease of the newborn, coupled with the immature hepatic handling of bilirubin, can produce elevations of unconjugated bilirubin of 400 – 500 μmol/L or greater. Such elevations are associated with the risk of developing kernicterus (deposition in the brain with cerebral damage) and levels may be reduced by exchange transfusion. Also, in premature infants, the poorly developed conjugating mechanism may result in so-called ‘physiological’ jaundice with markedly raised levels of unconjugated bilirubin, necessitating ultraviolet light treatment or exchange transfusion. Some drugs can further influence the course and severity of neonatal unconjugated hyperbilirubinaemia caused by the immature hepatic handling of bilirubin by: a) displacing bilirubin from plasma albumin, b) inhibiting the glucuronyl transferase system c) causing haemolysis. Another reason for measuring bilirubin in neonates is for the diagnosis of Crigler-Najjar syndrome. This harmful congenital disease presents in the first few days of life as jaundice, due to a rise in unconjugated bilirubin levels that may often be high enough to cause kernicterus, and is caused by a deficiency of glucuronyl transferase. In infants who survive, the level of bilirubin tends to stabilise, suggesting the existence of alternative pathways of bilirubin excretion. Rarely, a baby may be born with a congenital condition called biliary atresia, in which the bile ducts do not drain. It usually presents within the first few weeks of life, with jaundice that does not improve with time. This form of hyperbilirubinaemia is largely due to conjugated bilirubin and may be corrected by surgery. Delay in diagnosis of the condition can lead to irreversible liver damage. Glucose Glucose measurements are used in the diagnosis and treatment of carbohydrate metabolism disorders including diabetes mellitus and hypoglycaemia. Glucose is the major carbohydrate present in the peripheral blood. Oxidation of glucose is the major source of cellular energy in the body. Glucose derived from dietary sources is converted to glycogen for storage in the liver or to fatty acids for storage in adipose tissue. The concentration of glucose in blood is controlled within narrow limits by many hormones, the most important of which is insulin produced by the pancreas. The most frequent cause of hyperglycaemia is diabetes mellitus, resulting from a deficiency in insulin secretion or action. A number of secondary factors also contribute to elevated blood glucose levels. These include pancreatitis, thyroid dysfunction, renal failure, and liver disease. Hypoglycaemia is less frequently observed. A variety of conditions may cause low blood glucose levels such as insulinoma, hypopituitarism, or insulin-induced hypoglycaemia.

RUH Bath NHS Foundation Trust – Pathology Department
STANDARD OPERATING PROCEDURE SOP/POCT/15/18 Title: OMNI-S+COBAS b221 Blood Gas Analysers
Effective date: 06/03/2017
Printed copies are uncontrolled unless there is an allocated Copy Number on page 1
Author: H.Witham Checked by:E.Macdonald Approved by:E.Macdonald Page 6 of 29
Lactate Lactate acts as an early warning signal for hypoxic states in human tissues. Anaerobic glycolysis markedly increases blood lactate and causes some increase in pyruvate levels, especially with prolonged exercise. The common cause for increased blood lactate and pyruvate is anoxia resulting from such conditions as shock, pneumonia and congestive heart failure. Lactic acidosis may also occur in renal failure and leukemia. Thiamine deficiency and diabetic ketoacidosis are associated with increased levels of lactate and pyruvate. Lactate measurements that evaluate the acid-base status are used in the diagnosis and treatment of lactic acidosis.
4. METHOD PRINCIPLES The blood gases and electrolyte concentrations of the sample are all measured by electrodes. pH, Na+, K+, Ca++ and Cl-electrodes are potentiometric electrodes. Special glasses are used as the sensitive element for pH and Na+. The potassium and calcium membranes contain special neutral carriers. A special ion exchanger is used for Cl- membranes. Calculations of these variables also requires the use of a reference electrode – a permanently contacted chloride electrode. pCO2 electrode is a Severinghouse model - Potentiometric measurement of the pH change in the electrode caused by CO2. pO2 electrode is a Clark electrode - Measurement of current generated by the reduction of oxygen. Glucose and Lactate are measured in the MSS measuring chamber, by the MSS cartridge, which is a multi-parameter sensor. Glucose is oxidised by glucose oxidase and atmospheric oxygen to form gluconolactone. Lactate is oxidised by lactate oxidase to form pyruvate. The H2O2 generated from these reactions is determined amperometrically using manganese dioxide/carbon electrodes at 350mV. Haematocrit - measurementof the sample’s conductivity in the ISE measuring chamber. Haemoglobin Derivatives and Bilirubin (neonatal) are measured by co-oximetry; they are determined spectrophotometrically based on Beer-Lambert’s law. Following haemolysis, absorbency of the sample is measured at various wavelengths and the resulting equation is solved to determine the concentration of the constituent haemoglobin derivatives. Light emitted by a halogen lamp is partially absorbed by the sample, partially transmitted. The transmitted light is directed onto the polychromator, where it is diffracted and imaged onto the surface of a photosensitive device. The resulting electrical signal is used to determine the absorption, and thus the concentration of the haemoglobin derivatives.
5. REAGENT INFORMATION Reagent location A supply of reagent packs is kept alongside each analyser as appropriate.

RUH Bath NHS Foundation Trust – Pathology Department
STANDARD OPERATING PROCEDURE SOP/POCT/15/18 Title: OMNI-S+COBAS b221 Blood Gas Analysers
Effective date: 06/03/2017
Printed copies are uncontrolled unless there is an allocated Copy Number on page 1
Author: H.Witham Checked by:E.Macdonald Approved by:E.Macdonald Page 7 of 29
These are:
S1 Rinse Solution (03260917184) – Wash water
S2 Fluid Pack (03260925184) – Calibration and reference solutions for the Blood Gas and ISE modules, Na conditioning solution, O2 zero point solution, cleaning solution.
S3 Fluid Pack (03260933184) – 4 Calibration solutions for glucose and lactate, MSS standby solution, MSS reference solution. Deproteiniser (03110435180) – A stronger cleaning solution for the sample path when necessary. tHb Calibrator (03110923035) – A dye solution for the calibration of the CO-OX module. Stock solutions Lab/NICU – further supplies of reagents are stored in the bulk store in the pathology department.
A+E/MAU/BBC – further supplies of reagents are stored in the appropriate departmental store rooms.
Stock Quality Control Material is stored in the pathology department cold store.
Only one full mat of each level of QC should be kept on the analyser at a time, because the OMNI-S/Cobas b221 QC drawers are NOT temperature controlled.
Please complete the stock control sheet for the appropriate reagent when a box is finished, or a new box is started.
Reagent preparation All reagents are supplied ready for use.
Reagent Storage & Stability All the reagents have a storage temperature requirement of 15 - 30°C with the exception of the S3 reagent pack, which must be stored below 25°C.
The Quality Control Material is stored at 2 - 8°C
All the reagents are stable on the shelf until their expiration date, which is printed on the containers. They should not be used beyond this date.
Once on board the analyser, the reagent packs will expire after 42 days, and cannot be used after this time.
COSHH Deproteiniser : An aqueous solution of Sodium Hypochlorite (NaOCl) containing ≤ 2% active chlorine. Due to the basic and oxidising character of the reagent local irritations may occur after contact with eyes, skin or mucous membranes. Deproteiniser is used by lab staff only and any waste solution should be flushed away down the laboratory sluice (in line with POL/HS/1). The plastic bottle should be rinsed and disposed of in the lab plastic recycling.

RUH Bath NHS Foundation Trust – Pathology Department
STANDARD OPERATING PROCEDURE SOP/POCT/15/18 Title: OMNI-S+COBAS b221 Blood Gas Analysers
Effective date: 06/03/2017
Printed copies are uncontrolled unless there is an allocated Copy Number on page 1
Author: H.Witham Checked by:E.Macdonald Approved by:E.Macdonald Page 8 of 29
All other reagents and QC Materials used on the OMNI-S/Cobas b221 analysers contain no substances hazardous to health in reportable quantities. The tHb Calibrator/IQC glass ampoules should be disposed of in a sharps container after use. All non-hazardous reagent containers can be emptied and put in landfill or plastic recycling waste. Refer to the Safety Data Sheets in the Roche blood gas analyser Reference Manual for further information.
6. CALIBRATION Blood Gas and ISE Calibration The OMNI-S/Cobas b221 analysers use two aqueous base solutions for the simultaneous calibration of the pCO2, pH, Na+, K+, iCa++ and Cl- sensors. This calibration is based on the generation of calibration solutions as part of the calibration process by mixing two stable solutions, calibration solution A and calibration solution B (in the S2 fluid pack). The pO2-value of room air, determined by the continuously monitored barometric pressure and a solution with a pO2 of zero (also in the S2 Fluid pack), are used for the calibration of the pO2 sensor. Glucose and Lactate Calibration (Cobas b221 only) Calibration of the MSS parameters takes place using 4 solutions, whose weighing concentration forms the basis for determining the measured values. All MSS calibrations are referenced to a reference measurement using a standby solution. This reference measurement is carried out after the calibration solution has been measured. Co-Ox Calibration A charge-coupled device is used to collect the spectral information at several wavelengths in the visible range. Once a day, during the system calibration, a complete wavelength calibration is automatically performed using a built-in light source. As part of the 3-monthly maintenance, and after any cuvette manipulation, an external tHb-calibrator is used for calibration of the tHb channel. The following calibrations are automatically initiated and performed by the analyser:
CALIBRATIONS TIME INTERVALS DURATION (mins) without MSS
DURATION (mins) with MSS
SYSTEM EVERY 24H 11 16 1 POINT EVERY 30 MINS 2 3 2 POINT EVERY 12 HRS 6 11
ELECTRODE EXCHANGE AS REQUIRED 25 50 When an automatic calibration is imminent, the calibration window at the bottom of the screen flashes red. If it is not interrupted within 20 seconds, the OMNI-S/Cobas b221 will start the calibration. N.B. Do not interrupt a calibration once it has started.

RUH Bath NHS Foundation Trust – Pathology Department
STANDARD OPERATING PROCEDURE SOP/POCT/15/18 Title: OMNI-S+COBAS b221 Blood Gas Analysers
Effective date: 06/03/2017
Printed copies are uncontrolled unless there is an allocated Copy Number on page 1
Author: H.Witham Checked by:E.Macdonald Approved by:E.Macdonald Page 9 of 29
Calibration for Ready Failed Calibrations: Parameters that are grey with a red cross – can be corrected by
• Press: System > Calibration (from the Analyser Mode screen) • Press: Calibration for ‘Ready’ – automatically selects a calibration which will transfer
all selected parameters to the ‘Ready’ state. • Press: Start
Further user-activated calibrations can be initiated following troubleshooting investigations by:
• Pressing: System > Calibration (from the Analyser Mode screen) • Select the relevant calibration (eg PO2, 2P Cal) • Press: Start
Storage & Stability All the calibration solutions have a storage temperature requirement of 15 - 30°C. All are stable until their expiration date, which is printed on the containers; and an on-board expiration of 42 days. They should not be used beyond these dates. COSHH All the calibration solutions used on the OMNI-S/Cobas b221analysers contain no substances hazardous to health in reportable quantities. Refer to Safety Data Sheets (Roche OMNI S/Cobas b221 Reference Manual) for further information.
7. QUALITY CONTROL IQC is used to ensure analytical precision on a daily basis. The IQC materials control all of the measured parameters on all of the modules (electrolytes, gases, co-oximetry, bilirubin, glucose and lactate.). Calculated parameters e.g. bicarbonate (HCO3
-) and base excess (BE) are not controlled by IQC as they are a factor of the measured parameters. The following IQC materials are used:
Auto-trol Plus B Level 1 (Product No. 03321169001) Auto-trol Plus B Level 2 (Product No. 03321177001) Auto-trol Plus B Level 3 (Product No. 03321185001)
The OMNI-S/Cobas b221 analysers are set up to do automatic measurement of three QC materials with known values or ranges of expected values - two are analysed on a daily basis, which checks the precision and accuracy of the analyser. The QC results are acceptable if they come within the 2 standard deviation ranges set up on the instrument.
RUH Bath NHS Foundation Trust – Pathology Department
STANDARD OPERATING PROCEDURE SOP/POCT/15/18 Title: OMNI-S+COBAS b221 Blood Gas Analysers
Effective date: 06/03/2017
Printed copies are uncontrolled unless there is an allocated Copy Number on page 1
Author: H.Witham Checked by:E.Macdonald Approved by:E.Macdonald Page 10 of 29
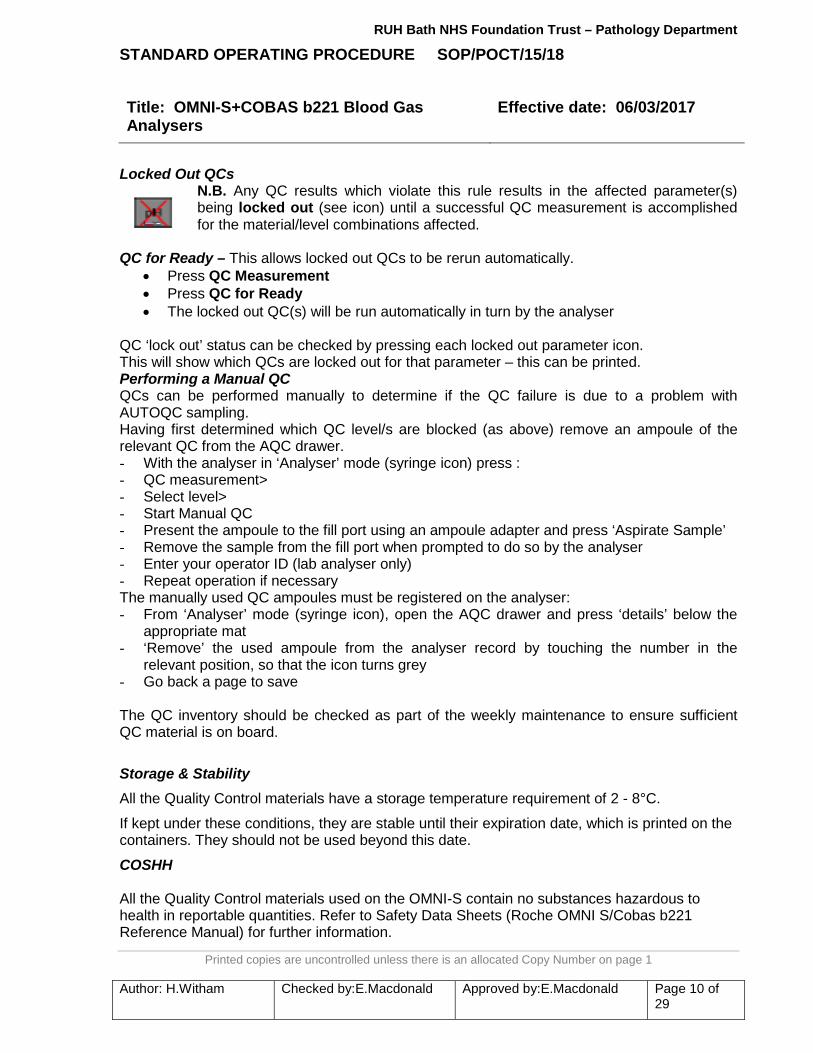
Locked Out QCs N.B. Any QC results which violate this rule results in the affected parameter(s) being locked out (see icon) until a successful QC measurement is accomplished for the material/level combinations affected.
QC for Ready – This allows locked out QCs to be rerun automatically.
• Press QC Measurement • Press QC for Ready • The locked out QC(s) will be run automatically in turn by the analyser
QC ‘lock out’ status can be checked by pressing each locked out parameter icon. This will show which QCs are locked out for that parameter – this can be printed. Performing a Manual QC QCs can be performed manually to determine if the QC failure is due to a problem with AUTOQC sampling. Having first determined which QC level/s are blocked (as above) remove an ampoule of the relevant QC from the AQC drawer. - With the analyser in ‘Analyser’ mode (syringe icon) press : - QC measurement> - Select level> - Start Manual QC - Present the ampoule to the fill port using an ampoule adapter and press ‘Aspirate Sample’ - Remove the sample from the fill port when prompted to do so by the analyser - Enter your operator ID (lab analyser only) - Repeat operation if necessary The manually used QC ampoules must be registered on the analyser: - From ‘Analyser’ mode (syringe icon), open the AQC drawer and press ‘details’ below the
appropriate mat - ‘Remove’ the used ampoule from the analyser record by touching the number in the
relevant position, so that the icon turns grey - Go back a page to save The QC inventory should be checked as part of the weekly maintenance to ensure sufficient QC material is on board.
Storage & Stability All the Quality Control materials have a storage temperature requirement of 2 - 8°C. If kept under these conditions, they are stable until their expiration date, which is printed on the containers. They should not be used beyond this date. COSHH All the Quality Control materials used on the OMNI-S contain no substances hazardous to health in reportable quantities. Refer to Safety Data Sheets (Roche OMNI S/Cobas b221 Reference Manual) for further information.

RUH Bath NHS Foundation Trust – Pathology Department
STANDARD OPERATING PROCEDURE SOP/POCT/15/18 Title: OMNI-S+COBAS b221 Blood Gas Analysers
Effective date: 06/03/2017
Printed copies are uncontrolled unless there is an allocated Copy Number on page 1
Author: H.Witham Checked by:E.Macdonald Approved by:E.Macdonald Page 11 of 29
External Quality Assurance (EQA) The purpose of EQA is to assess the accuracy (bias) of results produced compared to target values achieved by other method users nationally. Thus performance is monitored retrospectively. WEQAS samples are received and analysed for all analytes except Bilirubin, on a monthly basis. Blood Gas and Co-Ox EQA samples are analysed on the lab analyser and are also sent out by the lab to the following departments: NICU, A+E, MAU, RESPIRATORY WARD/LAB, ITU and CARDIAC CENTRE.
8. MAINTENANCE Maintenance actions should be recorded on the maintenance schedule list using: Quick Access > Maintenance > Do - as well as on the Maintenance tick charts. 8.1 Daily Maintenance
1. Check fluid levels and replace reagent packs and/or waste container if necessary. Press: >Fill levels This screen gives you a display of the current levels of fluid in the fluid packs along with lot number and expiry date details and a date on which a change of bottle is to be expected. Solutions will need to be changed depending on the rate of measurement and/or the onboard stability. Exchange empty bottles, bottles whose usage date has expired, and full waste bottle. If a fluid pack needs replacing: - From the main ‘Analyser mode’ screen
- Open the bottle compartment cover - The bottle exchange image appears on the display. - Open the docking mechanism and pull out the bottle/pack to be exchanged. - N.B. Empty S1 bottles should be kept for use as a waste container – see later. - Remove the rubber seal from the new pack. - Insert the new bottle or pack in the corresponding position until it stops. - The Roche OMNI-S/Cobas b221 recognises the correct bottle or pack and verifies
the expiration date. If the bottle has passed its expiration date, the screen displays a warning.
- Close the docking mechanism. - Close the bottle compartment cover. The solutions are automatically aspirated
upwards (detection in the flap) and the appropriate prime and calibration are initiated as required.
If the waste container needs replacing:
- From the main ‘Analyser mode’ screen - Open the bottle compartment cover.

RUH Bath NHS Foundation Trust – Pathology Department
STANDARD OPERATING PROCEDURE SOP/POCT/15/18 Title: OMNI-S+COBAS b221 Blood Gas Analysers
Effective date: 06/03/2017
Printed copies are uncontrolled unless there is an allocated Copy Number on page 1
Author: H.Witham Checked by:E.Macdonald Approved by:E.Macdonald Page 12 of 29
- The bottle exchange image appears on the display - Open the docking mechanism, hold the waste bottle by the grip recesses and
remove carefully. - Discard in accordance with local regulations. - Prepare a new waste container by taking one of the empty S1 fluid bottles and
preparing it by removing the sticker to reveal a ‘Waste’ sticker underneath. - If there are no spare waste bottles or empty S1 bottles, the waste container can be
emptied for re-use. (Refer to Roche manual for instructions). - Insert the bottle into the waste bottle position until it engages. - Close the docking mechanism - The fill-level monitoring feature recognizes the waste container as ‘empty’. If the
waste container to be used is not empty press: waste fill level, and enter the fill level (a scaling on the container label gives an approximate value).
- Close the bottle compartment cover.
2. Check the printer paper:
- Lift the grey cover towards the back of the right hand side of the analyser. - Check there is sufficient printer paper. - If insufficient, see below.
To change the printer paper
- Remove the printer cover - Open the paper lid - Lift the blue lever to release the paper - Remove the empty paper roll - Ensure the paper has a clean leading edge to help start the paper through the
rollers. If necessary, cut the paper at a right angle. - Place the new paper roll into the holder, so that the roll feeds from the bottom - (NB the printer paper is heat sensitive on one side only). - Ensure that the blue printer lever is in the down position. - Feed in the beginning of the paper according to the instructions on the inside of the
lid. - The paper is automatically pulled into the printer. If the paper is pulled in incorrectly,
open the paper cover, open the printer lever and realign the paper, close the printer lever and close the paper lid again.
- Close the paper lid - If you are having difficulties, refer to the Roche OMNI-S/Cobas b221 Manual.
3. ISE + Blood Gas Wetting Routine (lab analyser only)
- From ready screen press: System > Utilities > Fluid Actions > Wetting Routines - Select: Automatic
- Select ISE from list > DO - Attach sample container – ampoule adapter in serum sample

RUH Bath NHS Foundation Trust – Pathology Department
STANDARD OPERATING PROCEDURE SOP/POCT/15/18 Title: OMNI-S+COBAS b221 Blood Gas Analysers
Effective date: 06/03/2017
Printed copies are uncontrolled unless there is an allocated Copy Number on page 1
Author: H.Witham Checked by:E.Macdonald Approved by:E.Macdonald Page 13 of 29
- Aspirate sample - Analyser holds sample for approximately 1 minute to wet electrodes
- Repeat procedure for BG - Back arrow out of the screen once wetting complete
- Press analyser mode (top left icon) to return to ready screen 8.2 Weekly Maintenance
1. Checking the QC inventory (lab staff only) - Press: - Pull out the AQC drawer (located on the left-hand side of the analyser) - The ‘mat change’ screen appears, showing how many vials of each QC material,
level and lot no. are left on each mat.
If more mats need to be added: NB: QC requires refrigeration. It is guaranteed stable on board the analyser for 28 days.
Therefore, only one full mat of each level should be on board at any one time. Place a second mat on only when the first mat is down to 2 or 3 ampoules.
- Remove the empty mat from the holder. - Replace with a new mat of the same level and lot number, checking that the necks
of the ampoules are free of air bubbles. - Press: Refill - The screen will then prompt you to check that the lot number is the same - Press: Yes - If the mat that you are putting in is not completely full (eg due to breakage), press:
Details. By pressing the corresponding key, the status of the selected ampoule can be changed.
- Close the AutoQC drawer. NB: When a new reagent order is imminent, there may be no new mats to put on. This is not
usually a problem, but inform a senior member of staff if this is the case! Record QC usage in the stock control book If the new mat is a different lot no. from the existing lot.
- refer to the SOP for New Lot Numbers of QC (Appendix)

RUH Bath NHS Foundation Trust – Pathology Department
STANDARD OPERATING PROCEDURE SOP/POCT/15/18 Title: OMNI-S+COBAS b221 Blood Gas Analysers
Effective date: 06/03/2017
Printed copies are uncontrolled unless there is an allocated Copy Number on page 1
Author: H.Witham Checked by:E.Macdonald Approved by:E.Macdonald Page 14 of 29
2. Setting up the AQC Timer (lab staff only) This should not need adjusting, but if the information is somehow lost and needs reprogramming
Press: >Times & intervals > QC timing A little marker (‘QC’) on the timescale indicates the defined start time(s) and for a better coordination with the QC timing, little markers on the timescale also indicate the defined calibration intervals (System cal = red, 2P cal = green) If adjustment is required, refer to Roche Manual ‘Instructions for use’ and select the start time and the appropriate QC level(s) for each day. (M-1, 2+3; Tu, Th +Sa – 1+2; W, Fri,+ Su-1+3).
3. Cleaning Sample Fill Port/T/D Disk (Cobas b221 analysers only)
N.B. WARD ANALYSERS ONLY: The ‘LOG OFF’ TIMEOUT needs to be extended from 60s for maintenance - Press: Log on User - Type in Operator ID (lower case), enter. - Scan in operator barcode as the password, enter. - Select: Setup - Select: Times & Intervals > Timeouts > Log Off User - Edit time to 6000s - Carry out maintenance as below - Remember to repeat procedure to change ‘Timeout’ time back to 60s when finished
- Press: to log off - Press: Yes to Log Off when finished Maintenance: - Press: System > Utilities > Maintenance - Arrow down to: Change Fill Port (even though only cleaning is being done) - Press: Do and carry out cleaning of fill port and T+D disk as follows:-
- Pull the sample drip tray forward to remove it from its slot. - Clean the drip tray and fill port with a disinfectant wipe (alcohol free). - Remove the T/D unit cover. - Remove the fill port by rotating the white holder 90º downward and pulling it gently
towards you (you may need to gently wiggle it, taking care not to bend the needle which goes into the back of the holder).
- Use the fill port holder as a tool to turn the screw of the T/D by 90º.

RUH Bath NHS Foundation Trust – Pathology Department
STANDARD OPERATING PROCEDURE SOP/POCT/15/18 Title: OMNI-S+COBAS b221 Blood Gas Analysers
Effective date: 06/03/2017
Printed copies are uncontrolled unless there is an allocated Copy Number on page 1
Author: H.Witham Checked by:E.Macdonald Approved by:E.Macdonald Page 15 of 29
- Remove and clean/decontaminate the front and back of the T/D disk with a disinfectant wipe (alcohol free).
- Re-assemble the parts in the reverse order. - Press: Continue - Please Wait is displayed while an automatic T+D disk initialisation is carried out - Press the ‘back page’ icon until Wait for Ready is displayed - The analyser will then carry out a wash before returning to the Ready screen - N.B. This procedure can be used to change the fill port, T+D disk or needle – see
Section 8.6 - As Required Maintenance.
4. Clean the touch screen - Press and hold the corner of the touch screen firmly with one thumb to disable the
screen - Clean/decontaminate the screen with a disinfectant wipe (alcohol free). - Do not use water and sprays!
8.3 Monthly Maintenance
1. Check/Adjust Date and Time. Press > Times and intervals > Current date & time
- Check the displayed date and time are correct. - If required press: Set date and adjust - If required press: Set time and adjust This process is important due to the reagent registration and expiry times.
2. Change/Clean Waste Separator/Sensor
N.B. WARD ANALYSERS ONLY: The ‘LOG OFF’ TIMEOUT needs to be extended from 60s for maintenance (see weekly maintenance procedure)
- A cleaned waste separator is kept in the lab to exchange for the dirty one – stored in
the ‘Cleaned Waste Separator’ box in the blood gas store room - N.B. First deactivate the analyser by opening the reagent compartment door - Remove the top cover of the analyser - The waste separator is the plastic dome positioned at the front left of the analyser - The waste sensor is the dome-shaped plastic piece situated inside the waste
separator, with wires at the base providing the electrical connection - Remove the waste separator by turning anti-clockwise and lifting out of its location - Disconnect all the attached tubing - Remove the waste sensor by pressing evenly on the lugs at either side of the base
and carefully levering it out of the waste separator – N.B. Do not pull on the wires - Clean the waste sensor by wiping with a moist paper towel and moisten the black o-
ring at the base to make re-insertion easier

RUH Bath NHS Foundation Trust – Pathology Department
STANDARD OPERATING PROCEDURE SOP/POCT/15/18 Title: OMNI-S+COBAS b221 Blood Gas Analysers
Effective date: 06/03/2017
Printed copies are uncontrolled unless there is an allocated Copy Number on page 1
Author: H.Witham Checked by:E.Macdonald Approved by:E.Macdonald Page 16 of 29
- Exchange the dirty waste separator for the clean one, ensure the white plastic insert is in the top channel, and re-attach all the waste tubing
- Insert the waste sensor into the clean waste separator – press on the lugs at the base and push the sensor in evenly, making sure it is fully inserted
- Relocate the waste separator by inserting the lugs at the base into the original location and turn clockwise to re-seat
- Carry out a Vacuum Pressure Check → System → Component Test → Control Sensors → Vacuum System
- Change the ‘Low Pressure’ to ‘MAX’ in the bottom box - Turn the vacuum pump ‘ON’ - The Low Pressure reading should change to ≈ 800 – 900 mbar - Turn vacuum pump ‘OFF’ – the Low Pressure reading should slowly decrease - Back arrow through the screens to return to the Ready screen - Replace the analyser cover and close the reagent compartment door - Clean the dirty waste separator by soaking in deproteiniser for 2 hours, or until it
looks clean, and then rinsing in tap water - Leave to air dry and then store in the ‘Cleaned Waste Separator’ box ready for re-
use
3. Change MSS Cassette (Cobas b221 analysers only - every 28 days) N.B. WARD ANALYSERS ONLY: The ‘LOG OFF’ TIMEOUT needs to be extended from 60s for maintenance (see weekly maintenance for procedure) MSS cassettes are stored at 2 – 8OC in the main cold room storage – these must be allowed to equilibrate to room temperature for a minimum of 30 minutes, but ideally for 2 hours, before installation. MSS Module Cleaning - MSS module cleaning should be performed before every MSS cassette exchange,
but not more than once per month. - N.B. Cleaning destroys the MSS cassette therefore DO NOT clean a new
cassette - Press: System > Wash & Cleaning > Cleaning Modules - Select MSS module - Press: Start External Cleaning and aspirate deproteiniser using an ampoule
adapter - Proceed to change MSS cassette Change MSS Cassette - Remove the top analyser cover. - Open the MSS module cover. - Open the contact clip and the locking lever. - Push the reference electrodes slightly to the left and remove the MSS cassette. - Hold the MSS cassette by the designated handle only, and avoid touching the
contacts.

RUH Bath NHS Foundation Trust – Pathology Department
STANDARD OPERATING PROCEDURE SOP/POCT/15/18 Title: OMNI-S+COBAS b221 Blood Gas Analysers
Effective date: 06/03/2017
Printed copies are uncontrolled unless there is an allocated Copy Number on page 1
Author: H.Witham Checked by:E.Macdonald Approved by:E.Macdonald Page 17 of 29
- Insert the new MSS cassette and close the locking lever and the contact clip. - Read in the barcode from the MSS cassette packaging - Close the measuring chamber and top cover. - Follow the instructions on screen to carry out an MSS cassette polarisation. - Insert a serum or whole blood sample (lithium heparin sample <24 hrs old) via an
ampoule adapter - The MSS cassette is subsequently exposed to liquid, polarised, heated and
calibrated. - If the automatic polarisation is not successful and the MSS parameters are not
calibrated, a manual polarisation must be performed :- - Starting from analyzer mode.
- Press: System > Utilities > MSS polarisation. - Follow instructions on screen. - All 3 QC levels must be performed after every MSS cassette exchange.
8.4 Three-Monthly maintenance
1. Change the Prefilter
- Pull out the air filter from its holder on the rear of the instrument. - Date a new filter and replace in the holder.
2. Calibrate the CO-OX Module - Remove an ampoule of tHb calibrator from the package and shake carefully. - Tap gently to remove any liquid from the head of the ampoule and carefully break it
open. - Insert an ampoule adapter into the ampoule. - Press: System > Cal > COOX Cal > Start - Using the keyboard icon, enter the ‘tHb (target value) in g/L’, g/dl figure is printed
on the calibrator ampoule label – multiply x 10 to get g/l value. - ‘Cuvette replaced?’ – press: No
- Results for the measured and target values will be displayed (+/- 10% is acceptable) - Press: Accept – the calibration values are saved and used to calculate the layer
thickness of the cuvette. - If the cuvette has been replaced, CO-OX calibration performed appears instead of
the calibration value. - If the calibration is not acceptable, press: Reject. The module is not calibrated and
is transferred to an alarm state. A recalibration should be performed. If problems persist, contact Roche for advice.
- N.B. Run all 3 levels of QC after completion of the Co-Ox calibration

RUH Bath NHS Foundation Trust – Pathology Department
STANDARD OPERATING PROCEDURE SOP/POCT/15/18 Title: OMNI-S+COBAS b221 Blood Gas Analysers
Effective date: 06/03/2017
Printed copies are uncontrolled unless there is an allocated Copy Number on page 1
Author: H.Witham Checked by:E.Macdonald Approved by:E.Macdonald Page 18 of 29
8.5 Six - Monthly Maintenance
Change the Peristaltic Pump Tubes.
- OMNI-S – Main peristaltic pump only - top left-hand corner of the instrument.
- Cobas b221 – 3 peristaltic pumps (from left to right):- - A. Main pump - B. MSS output pump - C. MSS input pump
- Press: Quick Access > Maintenance - Select the appropriate pump tube to be changed and press Do - Remove the analyser cover. - Open the tension lever (clear plastic cover). - Push the white plastic linear bracket upwards - Remove the old tubing. - Check if the five rollers are easily moveable (in case of malfunction, call Roche). - Place the new tubing set around the rolling wheel (with the arrow on the grip
pointing upwards). - Close the tension lever. - Select Continue to start initialising routine. - Press the back page icon until the ready screen is reached. - The analyser will go into a System Cal. - Replace the analyser cover.
8.6 As Required Maintenance
1. Replace the fill-port
If the fill-port becomes damaged, remove, as in weekly cleaning maintenance, and replace with a new one.
2. Replace T/D disk If the T/D disk becomes damaged e.g. cracked, or does not function properly, remove, as in weekly cleaning maintenance, and replace with a new one.
3. Replace Electrodes
- Remove the top cover and open the measuring chamber cover of the corresponding measurement module, the following screen appears, for the appropriate module.

RUH Bath NHS Foundation Trust – Pathology Department
STANDARD OPERATING PROCEDURE SOP/POCT/15/18 Title: OMNI-S+COBAS b221 Blood Gas Analysers
Effective date: 06/03/2017
Printed copies are uncontrolled unless there is an allocated Copy Number on page 1
Author: H.Witham Checked by:E.Macdonald Approved by:E.Macdonald Page 19 of 29
- Open the locking lever on the left hand side of the module. - Take hold of the appropriate electrode, move it to the left, and remove it. - If removing the reference electrode, remove the white connector from the measuring
chamber cartridge - If necessary, clean the measuring chamber with a tissue moistened with 70%
isopropanol - Hold the new electrode vertically and tap lightly with a fingernail to remove any air
bubbles from the internal electrolyte solution. - Insert it into the measuring chamber according to the colour code. - If replacing the reference electrode, attach the white connector at the end of the
tube to the measuring chamber cartridge and insert the tube into the tube-guide channel
- Push all electrodes slightly to the right so that they are all lined up together without any gaps.
- Close the locking lever and run a finger along the top of the electrodes to check that they are correctly placed.
- Scan the barcodes located on the inner packaging of the electrode (or enter manually having pressed the ‘keyboard’ icon if the scanner is not working)
- The replaced electrode is shown slightly lower than the others displayed on the screen.
- Read: Next actions, their duration, and the sensor data. - Close the measuring chamber and then the top cover. - A calibration is performed following a warm-up phase. - After the calibration is complete, perform a QC measurement on all 3 levels.
4. Print a Status Report
To print a status report:
Press: > Miscellaneous reports > Status report >

RUH Bath NHS Foundation Trust – Pathology Department
STANDARD OPERATING PROCEDURE SOP/POCT/15/18 Title: OMNI-S+COBAS b221 Blood Gas Analysers
Effective date: 06/03/2017
Printed copies are uncontrolled unless there is an allocated Copy Number on page 1
Author: H.Witham Checked by:E.Macdonald Approved by:E.Macdonald Page 20 of 29
And then: Times and Intervals, Parameter Info, and Misc Settings and Infos in turn.
Store the resulting printouts with the disk in the AQC drawer.
9. SAMPLE REQUIREMENTS Biological material must be considered potentially infectious and handled with proper precautions. There is low overall risk if the test is performed using good working and safe laboratory practice. (Refer to Health and Safety Policy Documents)
Specimen Collection and Handling: Blood Gases Whole blood samples are used, drawn into heparinised syringes or capillaries. Samples should be analysed as soon as possible after collection. Air bubbles should be removed from the sample collection container immediately after sampling, and the sample mixed with the anticoagulant by rolling between both hands.
Syringe samples that are not analysed immediately should be sealed and placed on an ice slurry - stable up to 1 hour maximum.
Capillary samples that are analysed within 15 minutes may be retained at room temperature, but should be sealed with end caps. If unable to analyse within 15 minutes, place sample on an ice slurry – stable up to 1 hour maximum.
Lithium heparin or balanced heparin salts are the only acceptable anticoagulants for Blood Gas and ISE analysis. Other anticoagulants such as EDTA, citrate, oxalate, fluoride and anticoagulants containing ammonium have a significant effect on blood pH and should not be used.
Specimen Collection and Handling: Electrolytes Electrolytes can be measured on samples collected as above for blood gases and also on heparinised whole blood in a lithium heparin vacutainer and on serum.
Specimen Collection and Handling: Bicarbonate (cHCO3-st)
Bicarbonate can be calculated on serum and plasma samples, ie: it is not a measured parameter. Standard bicarbonate of the blood, is defined as the plasma bicarbonate concentration in blood which has equilibrated at 37°C with a gas mixture having a PCO2 = 40mmHg
Specimen Collection and Handling: Ionised Calcium Blood should be collected into a Lithium Heparin (green top) vacutainer, which should be completely filled. This should be analysed immediately at point of care, or transported to the

RUH Bath NHS Foundation Trust – Pathology Department
STANDARD OPERATING PROCEDURE SOP/POCT/15/18 Title: OMNI-S+COBAS b221 Blood Gas Analysers
Effective date: 06/03/2017
Printed copies are uncontrolled unless there is an allocated Copy Number on page 1
Author: H.Witham Checked by:E.Macdonald Approved by:E.Macdonald Page 21 of 29
laboratory on ice, in order to minimize metabolism. The whole-blood sample should be analysed as soon as possible after receipt. N.B. A part-filled vacutainer is not acceptable as this increases the final concentration of heparin in the tube to levels that can significantly lower the free calcium levels. Likewise, many widely used blood gas syringes contain concentrations of heparin which can lower the free calcium by 15 – 25%. Liquid heparin can result in the inaccurate measure of low free calcium levels because of both dilution and high final concentrations of heparin.
Specimen Collection and Handling: Haemoglobin derivatives There are no special requirements for sample handling – samples should be well mixed before analysis. Haemoglobin derivatives, predominantly Co-Hb, can be measured on samples collected as above for blood gases and also on whole blood in an EDTA tube.
Specimen Collection and Handling: Pleural Fluid pH (Lab Analysis only) Pleural fluid pH must be measured on an anaerobic (capped) syringe sample sent to the laboratory on ice. This sample type is stable for 2 hours. It must be stated in the clinical details that the sample has a minimal risk of TB. Specimen Collection and Handling: Bilirubin (neonatal) Whole blood samples for the analysis of bilirubin, must be treated as light sensitive:
- Transport the sample container protected from light - Avoid direct sunlight - Samples should be analysed immediately after collection
Specimen Collection and Handling: Glucose and Lactate There are no special requirements for sample handling. Samples should be analysed immediately after collection, since sample metabolism causes:
- A decrease in the glucose concentration within a few minutes of collection - An increase in the lactate concentration within a few minutes of collection
10. PATIENT TESTING N.B. Patient results should be reviewed and acted on by appropriately qualified staff with particular reference to patient's history. Repeat spurious results/results that do not fit the clinical picture. Confirm abnormal results by sending a sample to the lab. Neonatal Bilirubins - neonatal staff should refer to the following RUH Neonatal Protocols before carrying out bilirubin analysis:- NEO-007 - Jaundice in Neonates NEO-005 - Exchange Transfusion of the Newborn.

RUH Bath NHS Foundation Trust – Pathology Department
STANDARD OPERATING PROCEDURE SOP/POCT/15/18 Title: OMNI-S+COBAS b221 Blood Gas Analysers
Effective date: 06/03/2017
Printed copies are uncontrolled unless there is an allocated Copy Number on page 1
Author: H.Witham Checked by:E.Macdonald Approved by:E.Macdonald Page 22 of 29
A measurement can be started when the fill port is open, the status window displays: Ready, and the parameter button is green. N.B. a minimum volume of 40μl of sample is required per module, even if only one parameter from that module is being measured. Deselect any modules that are not required. N.B. If an insufficient/inadequate sample has been obtained and the sample fails to be analysed, a repeat sample will have to be obtained from the patient in order to repeat the test(s) – and this must be recorded in the patient’s notes – and recorded as an incident in Datix if appropriate. 10.1 Capillary Measurement
- Attach a clot catcher to the capillary - Insert the capillary into the sample port - If the position is correct, the T/D will be backlit in green and the
Measurement screen appears. - Press: Aspirate Sample until a beep is sounded. - Remove the capillary when prompted, and measurement will start.
10.2 Syringe Measurement - Mix the sample well and expel any air and the first few drops of blood to
eliminate clots - Attach a clot catcher - Press the syringe firmly to the fill port. - If the position is correct, the T/D will be backlit in green and the
Measurement screen appears - Inject the sample slowly until a beep is sounded. - Remove the syringe when prompted and measurement will start
10.3 Small Syringe Samples (<100μL) - Mix the sample well, and expel any air and the first few drops of blood to
eliminate clots - Attach a clot catcher - Press the syringe firmly to the fill port. If the position is correct, the T/D will
be backlit in green and the Measurement screen appears. - Inject the sample slowly until you have injected it all. - There will be no beep for small samples - Remove the syringe from the fill port and press: Aspirate Sample on the
screen. - The sample will be moved forward to the optical sensors and on to the BG
module and then on to the other modules, depending on the volume of the sample available.
- Alternatively, deselect any modules not required on the sample to make sure that you get the most urgent results (min. 40μL per module).
- Remove the syringe when prompted and measurement will start.
RUH Bath NHS Foundation Trust – Pathology Department
STANDARD OPERATING PROCEDURE SOP/POCT/15/18 Title: OMNI-S+COBAS b221 Blood Gas Analysers
Effective date: 06/03/2017
Printed copies are uncontrolled unless there is an allocated Copy Number on page 1
Author: H.Witham Checked by:E.Macdonald Approved by:E.Macdonald Page 23 of 29
10.4 Bicarbonate (cHCO3-st)(Lab only) Bicarbonate can be calculated on serum and plasma samples
- Select the Bicarbonate panel - Place either an ‘Adapter for sample Containers’ or an ‘Ampoule Adapter’
into the fill port. - Place the other end of the adapter into the serum or plasma sample - Press: Aspirate - Remove the sample when prompted, and measurement will start
NB: Analysing small/paediatric samples for Bicarbonate
- Select the Bicarbonate panel - Fill a blood gas capillary to the first line (50µl) with serum/plasma. - Introduce the capillary to the fill port. - Press: Aspirate - Remove the capillary when prompted, and measurement will start
10.5 Pleural Fluid pH syringe sample (Lab only)
- N.B. Goggles must be worn when analysing pleural fluid samples - Attach a clot catcher - Select the Pleural Fluid panel - Press the syringe firmly to the fill port. - If the position is correct, the T/D will be backlit in green and the
Measurement screen appears - Inject the sample slowly until a beep is sounded. - Remove the syringe when prompted, and measurement will start.
10.6 CO-Hb EDTA sample
- N.B. EDTA samples must not be put through any modules except the CO-OX
- Select the ‘CO-OX’ panel (to de-activate the other modules) - Place either an ‘Adapter for sample Containers’ or an ‘Ampoule Adapter’ into
the fill port. - Place the other end of the adapter into the EDTA sample - Press: Aspirate - Remove the sample when prompted, and measurement will start -
10.7 Neonatal Bilirubin sample (Lab only)
- If sufficient sample – run on modulars – code ‘BIL’ - If small sample – run whole blood sample on lab blood gas analyser – code
‘BAB’ - 40ul minimum whole blood volume required for analysis on blood gas
analyser - Select ‘CO-OX’ only panel button (includes bilirubin) - Mix sample well - Run sample into blood gas capillary tube + attach clot catcher to analyse

RUH Bath NHS Foundation Trust – Pathology Department
STANDARD OPERATING PROCEDURE SOP/POCT/15/18 Title: OMNI-S+COBAS b221 Blood Gas Analysers
Effective date: 06/03/2017
Printed copies are uncontrolled unless there is an allocated Copy Number on page 1
Author: H.Witham Checked by:E.Macdonald Approved by:E.Macdonald Page 24 of 29
- Do not use ampoule adapters - All ‘BAB’ results will go to phone queue – do not need to phone NICU results - Remember to phone all community bilirubins.
During measurement, various patient, user and sample specific data can be entered. NB Any mandatory input fields will be displayed in red. An input must be made or the measurement values will be rejected and will not be displayed or printed Press the ∆ and ∇ keys to select an entry. Press: Set input value to modify the highlighted entry (a keyboard appears on the screen). If the patient is not yet registered (on the analyser), press: New patient - and the patient related data will be stored. After completion of measurement and input of all data, the results will be displayed on the screen and printed When the measurement and clean-up are complete, the analyser will revert back to the ‘Ready’ screen. Ward patient results should be transcribed into the patient’s notes, along with the date/time performed, location of the analyser and the operator signature. Lab results should be entered into Ultra. The sample can be disposed of immediately into a burn bin, according to local health and safety guidelines. (Refer to Health and Safety Policy Documents).
11. REPORTING AND INTERPRETATION 11.1 Interferences Contaminating the blood sample with air will significantly distort the blood gas measurements. Transport of the sample to the laboratory via the pneumatic tube system can also affect these parameters, particularly pCO2. Any substance which affects the pH of a sample (eg Aspirin) will affect the iCa due to changes in the dissociation equilibrium. In all cases, the notes and restrictions, such as anticoagulant type in the ‘Specimen Collection and Handling’ section should be observed. Various drugs and dyes can cause interference with some parameters, please refer to the Roche Operator Manual for full details. The user should be immediately informed of abnormal deviations of the measurement results, and evaluate the complete picture of the patient or perform expanded tests if necessary. 11.2 Analytical ranges Blood gas module PO2 0 – 106.4 kPa PCO2 0.53 – 26.6 kPa pH 6.0 – 8.0 ctCO2 mmol/L BE mmol/L

RUH Bath NHS Foundation Trust – Pathology Department
STANDARD OPERATING PROCEDURE SOP/POCT/15/18 Title: OMNI-S+COBAS b221 Blood Gas Analysers
Effective date: 06/03/2017
Printed copies are uncontrolled unless there is an allocated Copy Number on page 1
Author: H.Witham Checked by:E.Macdonald Approved by:E.Macdonald Page 25 of 29
Co-oximetry module tHb 30 – 250 g/L HHb 0.0 – 100.0 % COHb 0.0 – 100.0 % MetHb 0.0 – 20.0 % Bilirubin 51.3 – 855 µmol/L Electrolyte module Na 20 – 250 mmol/L K 0.2 – 20 mmol/L Cl 20 – 250 mmol/L iCa 0.1 – 4.0 mmol/L MSS Module Glucose 0.5 – 40 mmol/L Lactate 0.2 – 20 mmol/L 11.3 Reference ranges Please refer to the Operator’s Manual (QPulse external document EXT/BIO/14) 11.4 Results Entry Wards Only Results must be transcribed into the patient’s notes – rather than inserting the print-out – as the paper is heat sensitive and the print fades with time. The date/time of analysis and the location of the blood gas analyser used must also be included, as well as the signature of the operator carrying out the analysis. Lab Only The results are entered into ‘Ultra’ using the ‘Vertical Result Entry’ program, taking care not to make any transcription errors. Results must be checked for accuracy of transcription by a second individual. In the absence of another member of staff, the BMS can enter the result but must then: •exit from the request completely in Ultra,
•re-enter the request / specimen number,
•check the patient demographics,
•check that the manually entered results are correct

RUH Bath NHS Foundation Trust – Pathology Department
STANDARD OPERATING PROCEDURE SOP/POCT/15/18 Title: OMNI-S+COBAS b221 Blood Gas Analysers
Effective date: 06/03/2017
Printed copies are uncontrolled unless there is an allocated Copy Number on page 1
Author: H.Witham Checked by:E.Macdonald Approved by:E.Macdonald Page 26 of 29
Blood Gases: • pH • pCO2 kPa • pO2 kPa • ctCO2 mmol/L • BE mmol/L
Pleural Fluid pH
• pH Bicarbonate
• cHCO3- mmol/L
Carboxyhaemoglobin
• COHb % Bilirubin
• Bili µmol/L • Any results outside pre-determined limits will go to the ‘Telephone Queue’ for
telephoning to the requesting ward / doctor. 11.5 Limitations Haemoglobin The Hb result obtained from the Cobas b221/Omni S blood gas analysers must not be used in direct patient care – it is to be used as a guide only. If an Hb is required for direct patient care then an EDTA sample must be sent to the lab. Any individual using the blood gas analyser Hb in patient care will be responsible for their own actions. Glucose Roche state in the Cobas b221/Omni S blood gas analyser Operator manual that: Due to the current specifications, clinically significant deviations in the range <3 mmol/L can occur compared to other glucose measuring systems, especially in the neonatal field. This means that for any patient samples that produce a result of <3 mmol/l a repeat sample should be sent to the lab for confirmation. (NICU were informed of this when the Cobas b221 gas analysers were installed in Feb 2010) 12. REFERENCES 1. Roche OMNI-S/Cobas b221 Reference Manual 2. Roche OMNI-S/Cobas b221 Instructions for Use 3. Principles & Practice of Point-of-Care Testing. Edited by: Gerald J.Kost

RUH Bath NHS Foundation Trust – Pathology Department
STANDARD OPERATING PROCEDURE SOP/POCT/15/18 Title: OMNI-S+COBAS b221 Blood Gas Analysers
Effective date: 06/03/2017
Printed copies are uncontrolled unless there is an allocated Copy Number on page 1
Author: H.Witham Checked by:E.Macdonald Approved by:E.Macdonald Page 27 of 29
4. Tietz Textbook of Clinical Chemistry; Burtis, Carl A., PhD; Ash, Edward R., M.D., 3rd edition.

RUH Bath NHS Foundation Trust – Pathology Department
STANDARD OPERATING PROCEDURE SOP/POCT/15/18 Title: OMNI-S+COBAS b221 Blood Gas Analysers
Effective date: 06/03/2017
Printed copies are uncontrolled unless there is an allocated Copy Number on page 1
Author: H.Witham Checked by:E.Macdonald Approved by:E.Macdonald Page 28 of 29
APPENDIX - New Lot Number of IQC If the new mat is a different lot no. from the existing lot no:
- To ‘empty’ the mat position in the AQC drawer of the old lot no press: Setup > QC material > QC material
- Select the lot no/level of the old material and press: Mat - Select the mat you want to remove and press: Delete - Press: Back-a-page to save
The new lot no. of AQC can be added in 2 ways:
1. QC Setup Wizard:-
The quickest way to start the QC Setup Wizard is: - Open the AQC drawer - Select: Yes to the query: Start up QC Wizard? (Yes or No) - Scan in new material barcode as instructed - Press: Continue - Select lot no. for change lot – select the in use lot no. if not already selected - Select: Continue with lot change - Scan in additional barcodes for the ranges (or enter manually) - Press: Continue - Assign Mat – Press: Set under the mat to be used for the new lot no. - Insert new mat in correct position and close AQC drawer - Material was successfully installed – will be displayed – check material details on
screen are correct - Select: Exit – or – Read in additional material if required - N.B. It is necessary to go back in to QC Material → Ranges, to delete some
analytes as follows: - LAB/A+E/MAU/NICU/BBC - Delete Cl- line on ranges screen, as Cl- not in use in
these departments - Press the Back-a-page icon to save changes then press the Return to front
screen icon to finish. 2. Manually:-
- Select the level of the new material to be entered and press: Set - Scan in the material code on the pack insert, or press: New and enter the
information manually. The material code contains the information for the material, level, lot number, expiration date and sample types.
- Press: Back-a-page to save - Press: Ranges and scan in the additional barcodes for the ranges (or enter
manually).

RUH Bath NHS Foundation Trust – Pathology Department
STANDARD OPERATING PROCEDURE SOP/POCT/15/18 Title: OMNI-S+COBAS b221 Blood Gas Analysers
Effective date: 06/03/2017
Printed copies are uncontrolled unless there is an allocated Copy Number on page 1
Author: H.Witham Checked by:E.Macdonald Approved by:E.Macdonald Page 29 of 29
- N.B. LAB/A+E/MAU/NICU/BBC - Delete Cl- line on ranges screen, as Cl- not in use in these departments
- Press Back-a-page to save - Assign Mat - Select the new material from the list and press: Mat - Select the required mat position from the list and press: Set - Press: Back-a-page to save the material assignment. - Press: to return to the top level of setup mode. - - Press: to return to analyser mode. - Pull out the AutoQC drawer – the mat change screen appears. - Take a full mat of QC ampoules from the package and, checking that the necks of
the ampoules are free of air bubbles, place in the defined position of the ampoule block.
- Press: Refill. (NB incomplete mat details can be entered by pressing Details at this point and amending as necessary)
- OMNI-S prompt: ‘is the material the same lot number?’ press ‘Yes’ - Close the Auto QC drawer. - Press >QC material>change lot - Tab down to the current lot and press Select new lot no (OMNI-S/Cobas b221 will
automatically go on to use this lot number when the current one has finished and will replace it in the QC timer setup)
- Press the Back-a-page icon to save changes then press the Return to front screen icon to finish.
If the Auto QC Timer Setup is lost:
Refer to Roche OMNI-S/Cobas b221 Instructions for Use Manual for details on how to reprogramme it, selecting the appropriate start time(s) (15 minute increments between each level) and QC levels for each day (M-1,2+3; Tu,Th + Sa 1+2; W,Fri + Su 1+3).
Copy number Location held 1 Lab – Omni – S SOP Folder 2 NICU – Cobas b221 SOP Folder 3 A+E – Cobas b221 SOP Folder 4 MAU – Cobas b221 SOP Folder 5 BBC – Cobas b221 SOP folder