SS2FREE Installation Manual
8
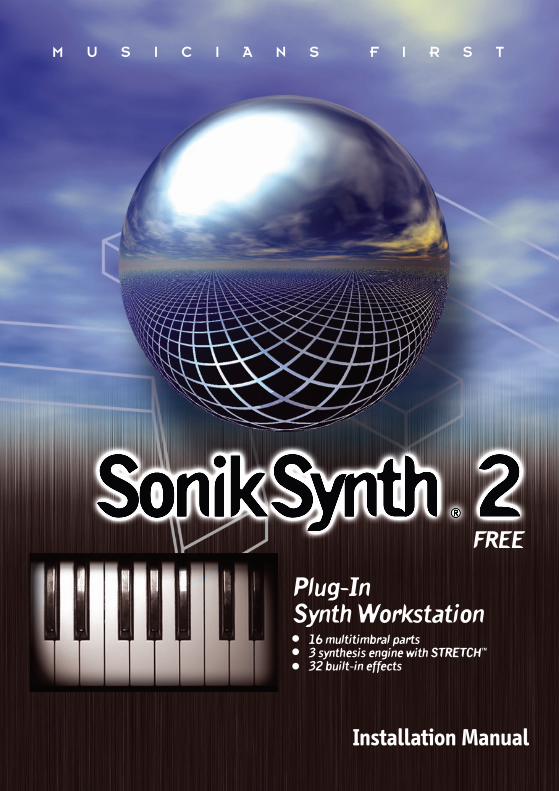
M U S I C I A N S F I R S T Plug-In Synth Workstation 16 multitimbral parts 3 synthesis engine with STRETCH™ 32 built-in effects Installation Manual FREE
-
Upload
alejandro-rodriguez-parra -
Category
Documents
-
view
183 -
download
1
Transcript of SS2FREE Installation Manual
M U S I C I A N S F I R S T
Plug-InSynth Workstation 16 multitimbral parts 3 synthesis engine with STRETCH™ 32 built-in effects
Installation Manual
FREE

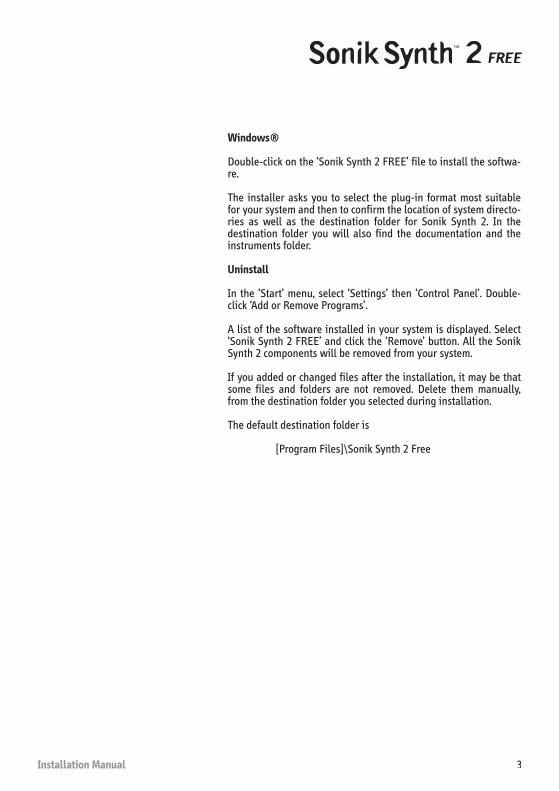
Sonik Synth™ 2 FREE
Installation Manual2 Installation Manual
System Requirements
The following are the suggested system characteristics for using Sonik Synth 2 FRE.
Macintosh®
Power Macintosh® G4, with Mac OS X 10.2 or later; 512 MB of RAM, 1024x768 screen with thousands of colors, 200MB of hard disk space.
Windows®
Intel Pentium® IV with Windows® 2000/XP; 512 MB of RAM, 1024x768 screen with thousands of colors, 200MB of hard disk space.
Installation
Macintosh® OS 10.2 and later
Double-click on the ‘Install Sonik Synth 2 FREE’ icon to install the software. The installer asks you to select the plug-in format most suitable for your system. Documentation for Sonik Synth™ 2 FREE are placed in the Applications folder in your system disk.
Please note: you must be a user with Administrator rights to install Sonik Synth™ 2 FREE in Mac OS X. Otherwise the installation fails.
Uninstall
Run the installer application again, this time selecting the ‘Uninstall’ mode.
You may have to manually delete some files.This is the complete list of files and folders installed with Sonik Synth™ 2:
[Library]/IK Multimedia/Sonik Synth 2 Free[Library]/Audio/Plug-Ins/Components/Sonik Synth 2 Free.component[Library]/Audio/Plug-Ins/VST/Sonik Synth 2 Free.vst[Applications]/Sonik Synth 2 Free[Users]/[Username]/[Library]/Preferences/IK Multimedia/Sonik Synth 2 Free
(for RTAS only) [Library]/Application Support/Digidesign/Plug-Ins/ Sonik Synth 2 FREE
Chapter 1
Chapter 2
Installation Manual
Sonik Synth™ 2 FREE
Installation Manual 3
Windows®
Double-click on the ‘Sonik Synth 2 FREE’ file to install the softwa-re.
The installer asks you to select the plug-in format most suitable for your system and then to confirm the location of system directo-ries as well as the destination folder for Sonik Synth 2. In the destination folder you will also find the documentation and the instruments folder.
Uninstall
In the ‘Start’ menu, select ‘Settings’ then ‘Control Panel’. Double-click ‘Add or Remove Programs’.
A list of the software installed in your system is displayed. Select ‘Sonik Synth 2 FREE’ and click the ‘Remove’ button. All the Sonik Synth 2 components will be removed from your system.
If you added or changed files after the installation, it may be that some files and folders are not removed. Delete them manually, from the destination folder you selected during installation.
The default destination folder is
[Program Files]\Sonik Synth 2 Free
Sonik Synth™ 2 FREE
Installation Manual4 Installation Manual
Chapter 3 How the Authorization System works
Sonik Synth™ 2 FREE must be authorized to work with unrestricted functionality. You will need to authorize the product within this time frame to enable permanent unrestricted functionality.
To authorize you Sonik Synth™ 2 FREE you’ll need three numbers:
- Serial Number: this is unique for all Sonik Synth™ 2 FREE and pre-fi lled in the Authorization Wizard
- Digital Id: this will be shown during the authorization process and linked to the hardware where you are running the software
- Authorization Code: this will be generated online by registering and inserting the Serial Number and Digital Id

Installation Manual
Sonik Synth™ 2 FREE
Installation Manual 5
Authorization
A built in software Wizard helps you in the authorization of your IK software. The fi st time the software is launched the Wizard is displayed(step 1. Winzard introduction). Click Cancel to return to the software. Click Next to go to Wizard’s next step and authorize the software.
In order to obtain the Authorization Code you’ll need to go online using an internet connection. In this window (step 2. Connect to the Internet) you are asked if you will connect to the internet using your current computer or a separate one . Make your choice and click on the Next button to proceed directly to step 3 . In case you already have an
Chapter 4
step 1. Wizard introduction
step 2. Connect to the Internet

Sonik Synth™ 2 FREE
Installation Manual6 Installation Manual
authorization code select the third option and click on Next (in this case you’ll proceed directly to step 4). At this point the Wizard present you with a window where where you can fi nd your Serial Number and the Digital Id required to register online (step 3a. Online registration on the same computer). By clicking Register On Line, your default browser will be opened and directed to the IK Multimedia registration page (if you have an internet connection
on the machine that you are installing). Now simply fi ll out the manda-tory fi elds of the registration page with your data.Your serial number and Digital Id should have been pre fi lled-in (otherwise COPY and PASTE them from your Wizard window to the registration page fi elds).
step 3a. Online registration on the same computer
step 3b. Online registration on a separate computer
Installation Manual
Sonik Synth™ 2 FREE
Installation Manual 7
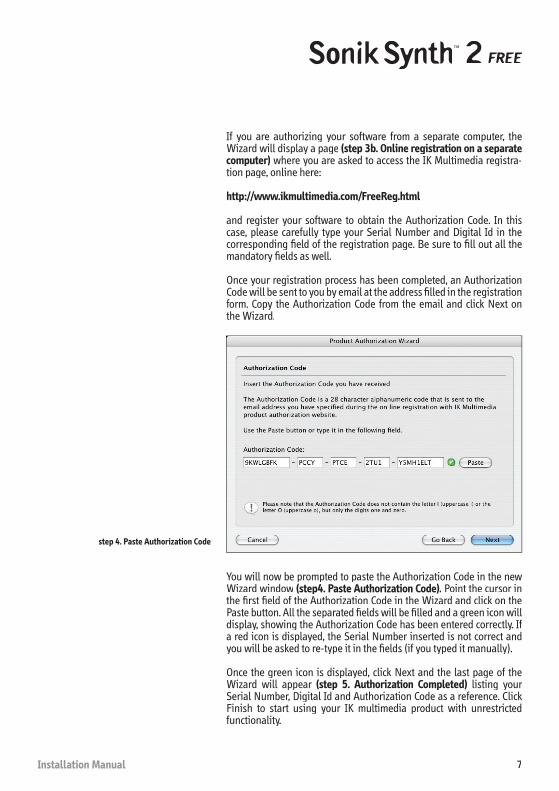
If you are authorizing your software from a separate computer, the Wizard will display a page (step 3b. Online registration on a separate computer) where you are asked to access the IK Multimedia registra-tion page, online here:
http://www.ikmultimedia.com/FreeReg.html
and register your software to obtain the Authorization Code. In this case, please carefully type your Serial Number and Digital Id in the corresponding fi eld of the registration page. Be sure to fi ll out all the mandatory fi elds as well.
Once your registration process has been completed, an Authorization Code will be sent to you by email at the address fi lled in the registration form. Copy the Authorization Code from the email and click Next on the Wizard.
You will now be prompted to paste the Authorization Code in the new Wizard window (step4. Paste Authorization Code). Point the cursor in the fi rst fi eld of the Authorization Code in the Wizard and click on the Paste button. All the separated fi elds will be fi lled and a green icon will display, showing the Authorization Code has been entered correctly. If a red icon is displayed, the Serial Number inserted is not correct and you will be asked to re-type it in the fi elds (if you typed it manually).
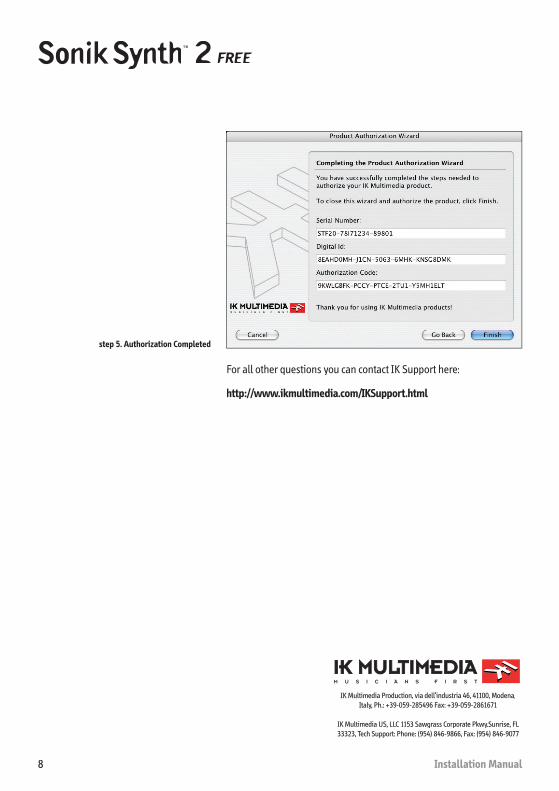
Once the green icon is displayed, click Next and the last page of the Wizard will appear (step 5. Authorization Completed) listing your Serial Number, Digital Id and Authorization Code as a reference. Click Finish to start using your IK multimedia product with unrestricted functionality.
step 4. Paste Authorization Code
Sonik Synth™ 2 FREE
Installation Manual8
For all other questions you can contact IK Support here:
http://www.ikmultimedia.com/IKSupport.html
step 5. Authorization Completed
M U S I C I A N S F I R S T
IK Multimedia Production, via dell’industria 46, 41100, Modena, Italy, Ph.: +39-059-285496 Fax: +39-059-2861671
IK Multimedia US, LLC 1153 Sawgrass Corporate Pkwy.Sunrise, FL 33323, Tech Support: Phone: (954) 846-9866, Fax: (954) 846-9077