Spot the Sunspots - Science Friday
5
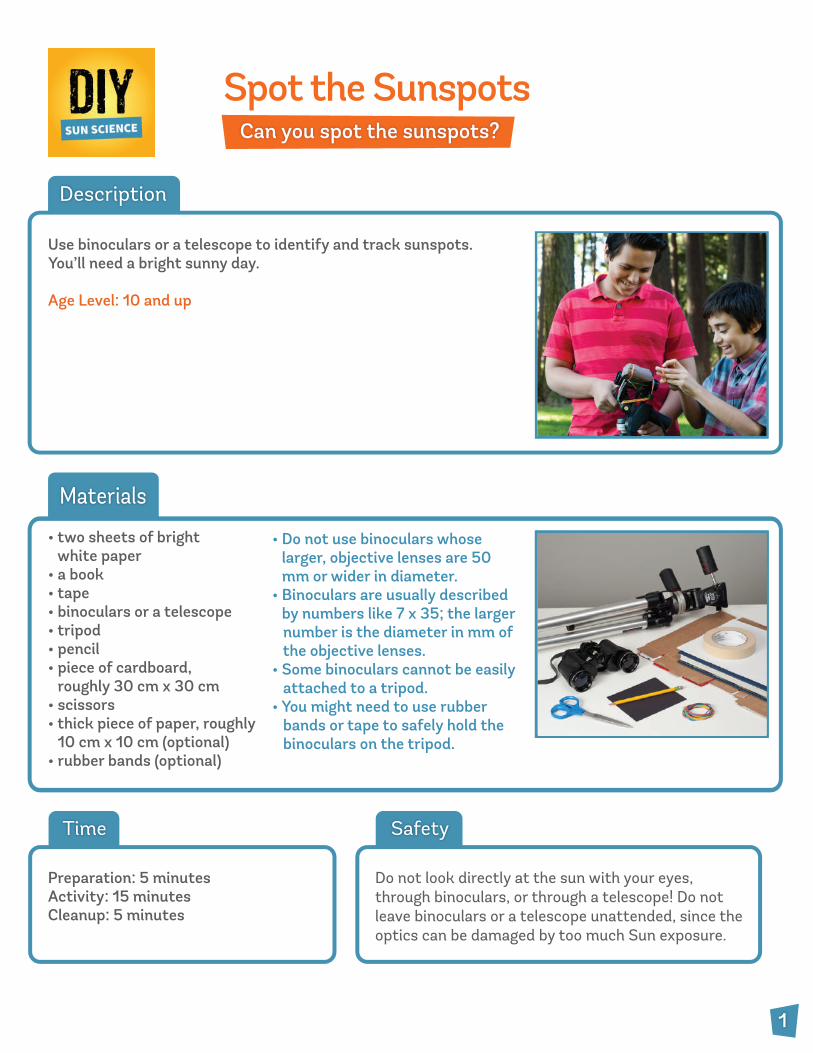
Spot the Sunspots Use binoculars or a telescope to identify and track sunspots. You’ll need a bright sunny day. Age Level: 10 and up • two sheets of bright white paper • a book • tape • binoculars or a telescope • tripod • pencil • piece of cardboard, roughly 30 cm x 30 cm • scissors • thick piece of paper, roughly 10 cm x 10 cm (optional) • rubber bands (optional) • Do not use binoculars whose larger, objective lenses are 50 mm or wider in diameter. • Binoculars are usually described by numbers like 7 x 35; the larger number is the diameter in mm of the objective lenses. • Some binoculars cannot be easily attached to a tripod. • You might need to use rubber bands or tape to safely hold the binoculars on the tripod. 1 Description Can you spot the sunspots? Materials Time Preparation: 5 minutes Activity: 15 minutes Cleanup: 5 minutes Safety Do not look directly at the sun with your eyes, through binoculars, or through a telescope! Do not leave binoculars or a telescope unattended, since the optics can be damaged by too much Sun exposure.
Transcript of Spot the Sunspots - Science Friday
Spot the Sunspots
Use binoculars or a telescope to identify and track sunspots. You’ll need a bright sunny day.
Age Level: 10 and up
• two sheets of bright white paper
• a book• tape• binoculars or a telescope• tripod• pencil• piece of cardboard,
roughly 30 cm x 30 cm• scissors• thick piece of paper, roughly
10 cm x 10 cm (optional)• rubber bands (optional)
• Do not use binoculars whose larger, objective lenses are 50
mm or wider in diameter. • Binoculars are usually described
by numbers like 7 x 35; the larger number is the diameter in mm of the objective lenses. • Some binoculars cannot be easily attached to a tripod. • You might need to use rubber bands or tape to safely hold the binoculars on the tripod.
1
Description
Can you spot the sunspots?
Materials
Time
Preparation: 5 minutesActivity: 15 minutes Cleanup: 5 minutes
Safety
Do not look directly at the sun with your eyes, through binoculars, or through a telescope! Do not leave binoculars or a telescope unattended, since the optics can be damaged by too much Sun exposure.
2
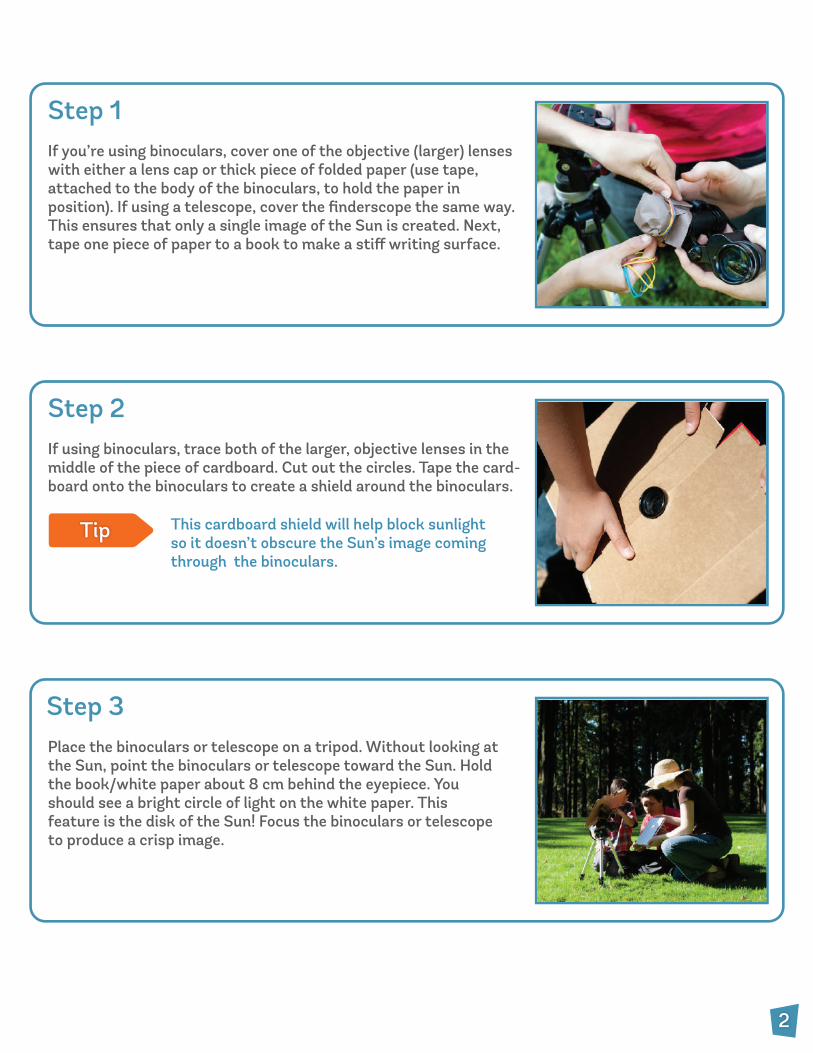
If using binoculars, trace both of the larger, objective lenses in the middle of the piece of cardboard. Cut out the circles. Tape the card-board onto the binoculars to create a shield around the binoculars.
This cardboard shield will help block sunlight so it doesn’t obscure the Sun’s image coming through the binoculars.
Tip
If you’re using binoculars, cover one of the objective (larger) lenses with either a lens cap or thick piece of folded paper (use tape, attached to the body of the binoculars, to hold the paper in position). If using a telescope, cover the finderscope the same way. This ensures that only a single image of the Sun is created. Next, tape one piece of paper to a book to make a stiff writing surface.
Place the binoculars or telescope on a tripod. Without looking at the Sun, point the binoculars or telescope toward the Sun. Hold the book/white paper about 8 cm behind the eyepiece. You should see a bright circle of light on the white paper. This feature is the disk of the Sun! Focus the binoculars or telescope to produce a crisp image.
Remember not to leave binoculars pointed at the Sun for too long!
Tip
3
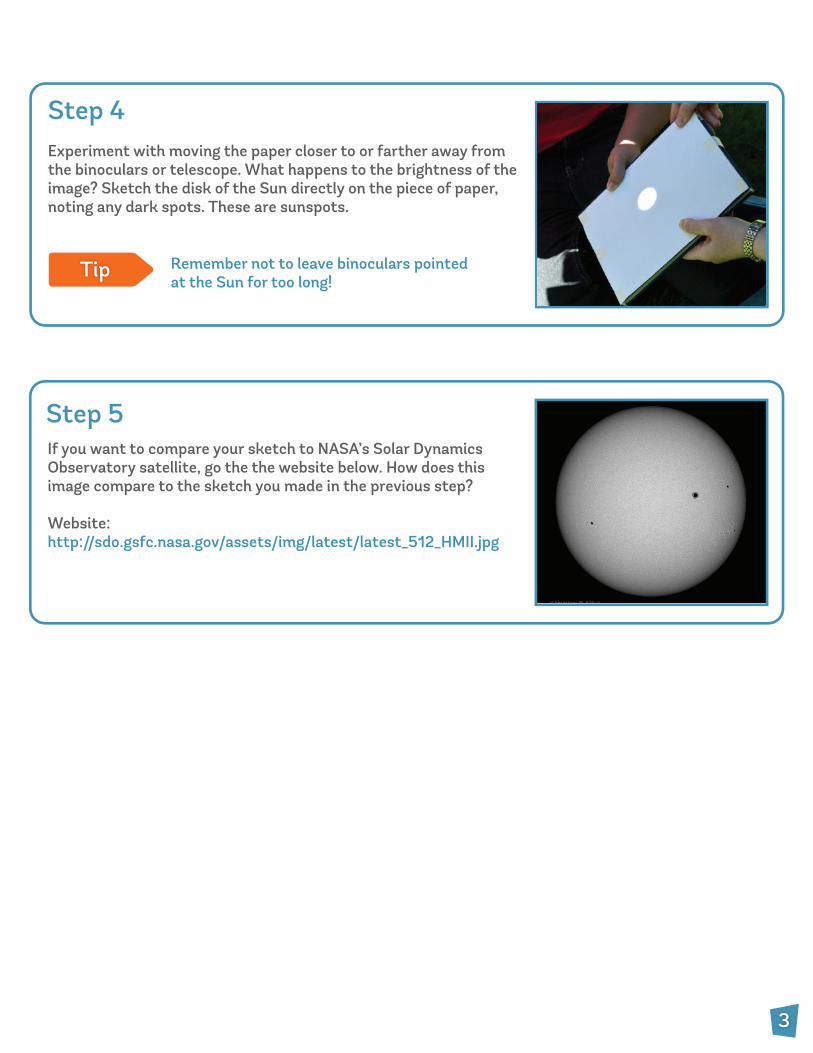
Experiment with moving the paper closer to or farther away from the binoculars or telescope. What happens to the brightness of the image? Sketch the disk of the Sun directly on the piece of paper, noting any dark spots. These are sunspots.
If you want to compare your sketch to NASA’s Solar Dynamics Observatory satellite, go the the website below. How does this image compare to the sketch you made in the previous step?
Website:http://sdo.gsfc.nasa.gov/assets/img/latest/latest_512_HMII.jpg
Step 5
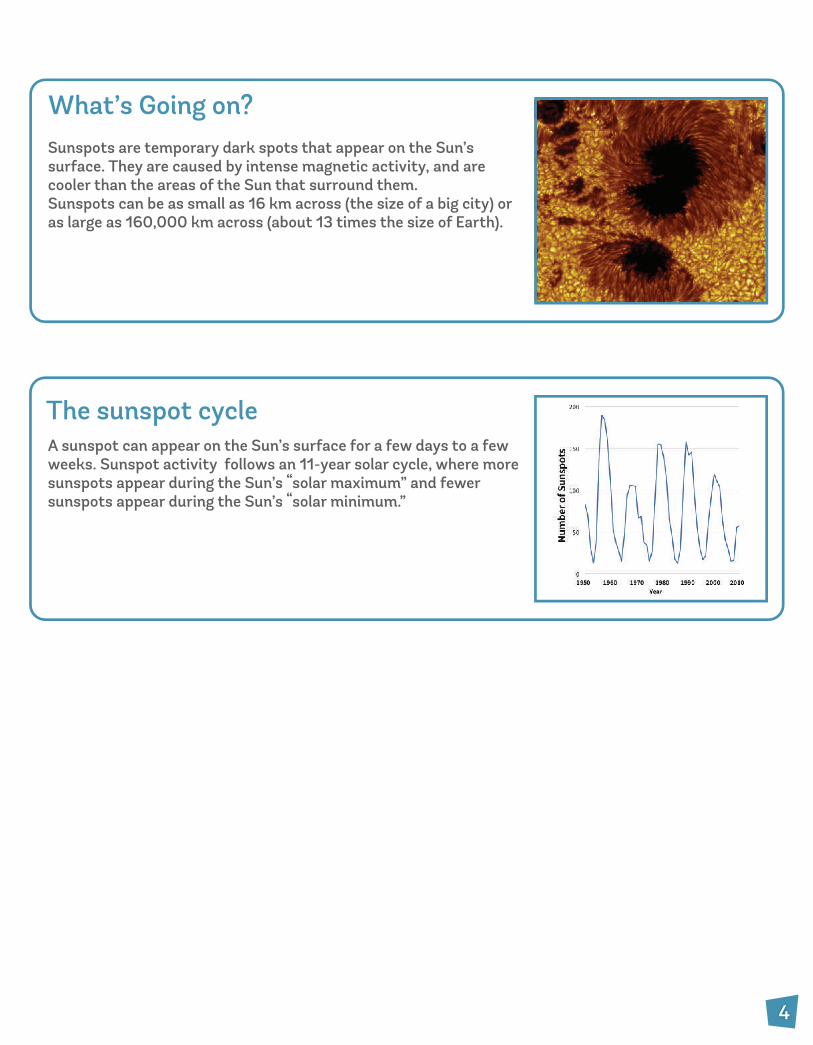
Sunspots are temporary dark spots that appear on the Sun’s surface. They are caused by intense magnetic activity, and are cooler than the areas of the Sun that surround them. Sunspots can be as small as 16 km across (the size of a big city) or as large as 160,000 km across (about 13 times the size of Earth).
4
A sunspot can appear on the Sun’s surface for a few days to a few weeks. Sunspot activity follows an 11-year solar cycle, where more sunspots appear during the Sun’s “solar maximum” and fewer sunspots appear during the Sun’s “solar minimum.”
The sunspot cycle

Learn More
For more info and other activities, visit:
LawrenceHallofScience.org/do_science_now/diy_sun_science
Credits
5
This project was supported by NASA under award numberNNX10AE05G. Any opinions, findings, conclusions or recommenda-tions expressed in this program are those of the author and do not reflect the views of NASA.
The DIY Sun Science app allows families and educators to investi-gate and learn about the Sun at home, at school, or anywhere you go! The app features thirteen hands-on investigations, as well as images and videos.
© 2014 The Regents of the University of California. All rights reserved.
Activity inspired by “Safely Viewing Sunspots,” Space Science Lab, University of California, Berkeley.
Image 7, NASA/SDO. Image 8, Göran Scharmer, Swedish 1-m Solar Telescope, Institute for Solar
Physics.