Soil Stack Installation Guide - drainage pipe
4
Note: This typical installation applies to the video at www.floplast.co.uk. Other installations may take a different form etc. * For replacement, first remove the existing soil stack and fittings, starting at the top of the stack and working your way down. * At this stage you will have previously installed the internal fittings leading to the new stack on the outside. * Install the new soil stack in the reverse order of the removal of the old stack working from the ground to the top. A brand new installation should also be carried out in this way. * Next, plan out where all the fittings will go. * Begin by offering up the first fitting. * In this instance It is often advisable to install an access fitting at the base which is good practice to aid rodding. * Spray the fitting with silicone lubricant and push into the branch. * Measure and mark the correct length on the pipes. 7 5 4 * New Stack 3 Old Stack - removed 2 1a 6 DRAINAGE SALES in association with
Transcript of Soil Stack Installation Guide - drainage pipe
Step by Step Installation Guide - Soil Stack
Note: This typical installation applies to the video at www.floplast.co.uk. Other installations may take a different form etc.
* For replacement, first remove the existing soil stack and fittings, starting at the
top of the stack and working your way down.
* At this stage you will have previously
installed the internal fittings leading
to the new stack on the outside.
* Install the new soil stack in the reverse order of the removal of
the old stack working from the ground to the top. A brand
new installation should also be carried out in this way.
* Next, plan out where all the fittings will go.
* Begin by offering up the first fitting.
* In this instance It is often advisable
to install an access fitting at the
base which is good practice to aid
rodding.
* Spray the fitting with silicone
lubricant and push into the
branch.
* Measure and mark the correct length
on the pipes.
7 5
4*
New Stack
3
Old Stack - removed
2 1a
6
DRAINAGE SALES in association with
Step by Step Installation Guide - Soil Stack
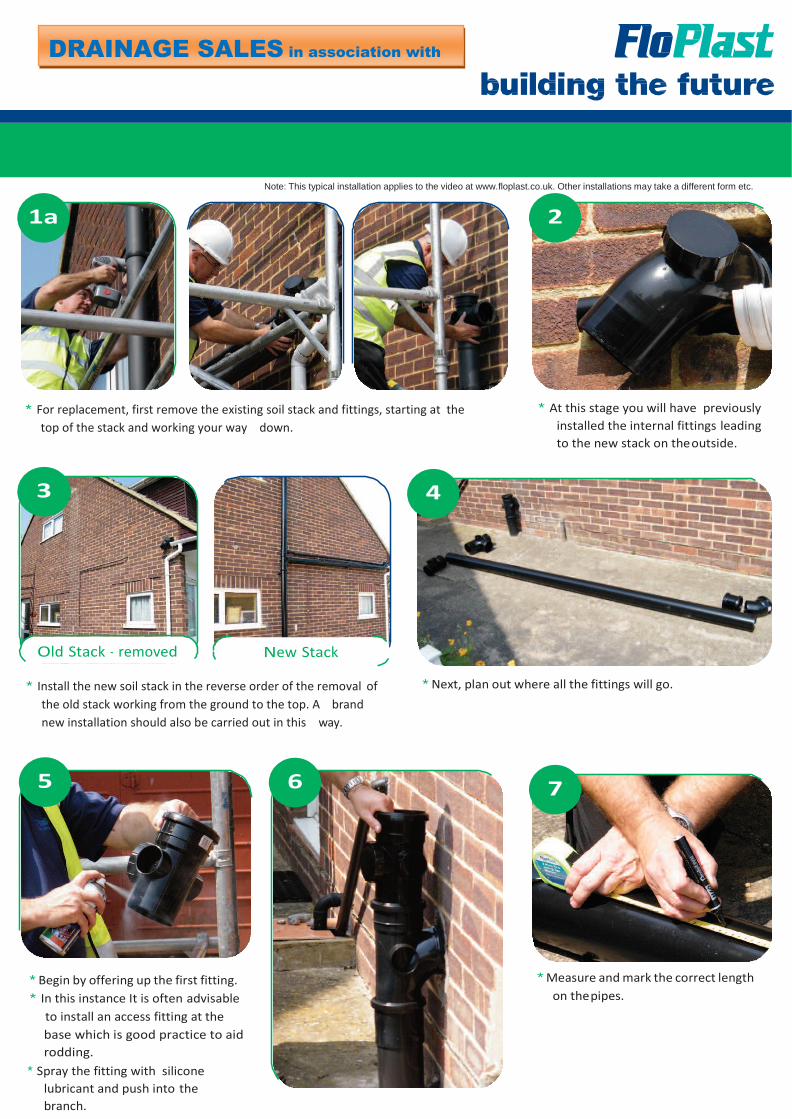
* Cut the pipes to the correct lengths. * Ensure all the cut lengths of pipe are
chamfered to roughly a *5 degree
angle.
* Use a silicone lubricant to make the
fitting easier.
* Insert the pipe and fitting into the
access fitting.
* Fit the pipe or socket brackets at a
maximum of 2 metres on vertical pipe
and a maximum of 1 metre on
horizontal pipe.
* Mark the position where you want the
bracket to go.
* Drill a hole. * Then using *0mm x 5.5mm
roundhead brass or zinc screws,
attach the first bracket to the pipe.
* Next, establish the joining point of
any horizontal and vertical pipes that
may be required.
16 15 14
13 12 11
10 9 8
DRAINAGE SALES in association with

Step by Step Installation Guide - Soil Stack
* Then measure and install the
connecting branch and pipes
securing with FloPlast’s pipe or
socket brackets.
* Ensure pipe is vertical by measuring
with a spirit level.
* Continue installing the soil stack
following the same procedure until
you are ready to install the
ventilation section.
* Apply silicone lubricant to the branch.
* Insert branch into pipe. * Apply silicone lubricant to the bend. * Install bend into access bend.
* Measure, mark and cut horizontal
pipe to correct length.
* Install pipe between bend and branch.
* Fix vertical and horizontal pipe or socket brackets.
To view our Waste & Traps
installation instructions please
visit
www.drainagesales.co.uk
25b 25a
24b 24a 23
22 21 20
19 18 17
DRAINAGE SALES in association with

Step by Step Installation Guide - Soil Stack
* The ventilation pipe open to
the outside, should finish at
least 900mm above any
opening into the building
that is within 3 metres of the
soil stack.
* Alternatively fit FloPlast’s
external air admittance valve.
This will allow you to install
an external soil pipe within 3
metres of any opening and it
can terminate at a minimum
of 200mm from the wet entry
point.
If a waste pipe fits to the soil stack, then use our range of Boss pipes.
.
* To complete the installation, use a cement mix to make good
any holes.
* Once your installation is complete,
please dispose of old or unwanted
items including pipes and fittings in
a responsible manner.
For additional installation advice, please check our website:
www.drainagesales.co.uk
28 27
90 0m m
Less than 3m
Minimum 200mm
26
DRAINAGE SALES in association with