Sogang University IoT Project - Smart Plant Kit
14
SOGANG UNIVERSITY COMPUTER SCIENCE & ENGINEERING TEAM FULL STACK - KWAKJAEHOON VER 0.1 IoT Project – Smart Plant Kit (Using Arduino, Sensors, Spray, LED bulb …)
-
Upload
jaehoon-kwak -
Category
Technology
-
view
86 -
download
1
Transcript of Sogang University IoT Project - Smart Plant Kit

SOGANG UNIVERSITY COMPUTER SCIENCE & ENGINEER-ING TEAM FULL STACK - KWAKJAEHOON
VER 0.1
IoT Project – Smart Plant Kit (Using Arduino, Sensors, Spray, LED bulb …)

WHAT IS THIS? WHO WANTS THIS? Smart Plant Kit : Grow your plant, it will cover
clients’ job. Who wants this? - People who love their plant, however, don’t
want to be stuck in plant related works.
This kit will give you a convenience.
<Out Kit →>

THIS IS IOT PROJECT - COMPRESSION Using ‘ATmega8-Arduino’
With this Arduino, First, we will get sensing data(temperature,
illumination, soil moisture). Second, do some order to our machine(fan,
LED lamp, water spray).

HOW? – FIRST, SENSE a. Temperature sensing. ( sensor name :
DS18B20 ) In below picture, there are two difference with our
project. First, they use ‘Arduino Uno’ but we use ‘Arduino Fio’. Second, they use ‘Digital in 0’ and we use ‘digital pin 8’.

HOW? – FIRST, SENSE After finish circuit connection, start ‘Sketch’.(Download: https://
www.arduino.cc/download_handler.php) Temperature sensing code for Arduino is hear. (http://
www.hobbytronics.co.uk/ds18b20-arduino) (Be careful! In this link’s code, they use ‘digital pin 2’. And also, you should add libraries. - OneWire.h, Dal-
lasTemperature.h) ← At ‘Manage Libraries’ ,
you can add libraries.

HOW? – FIRST, SENSE b. Illumination sensing. ( sensor name : CDS ) Circuit is hear. (This is ‘Analog In’) Relate to resistance, lux is different. (Check it hear, https://learn.adafruit.com/
photocells/using-a-photocell) Illumination sensing code for Arduino is hear.
https://learn.adafruit.com/adafruit-arduino-lesson-9-sensing-light/arduino-code

HOW? – FIRST, SENSE c. Soil moisture sensing. Code and circuit is very easy.
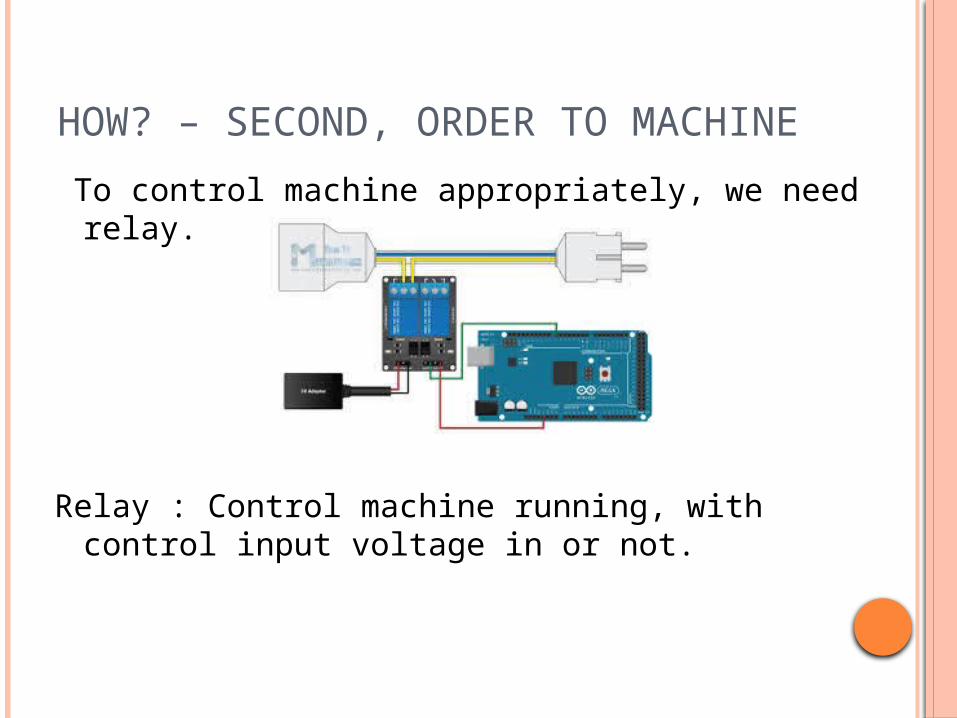
HOW? – SECOND, ORDER TO MA-CHINE To control machine appropriately, we need relay.
Relay : Control machine running, with control input voltage in or not.

HOW? – SECOND, ORDER TO MA-CHINE a. Temperature and Fan mechanism. After you complete circuit. In arduino code, #define RELAY3 7 // Fan Pin number and after setup()
pinMode(RELAY3, OUTPUT); and after you want to use, if(lightVal >= 1000){ digitalWrite(RELAY2, LOW); } else{ digitalWrite(RELAY2, HIGH); }

HOW? – SECOND, ORDER TO MA-CHINE
It works when more than 30 degree of celsius. (I set-up with 30.)When you touch the temperature sensor, fan is working and when you de-touch, fan is not working anymore. Click to
watch

HOW? – SECOND, ORDER TO MA-CHINE b. Illumination and LED Lamp mecha-
nism. We open the LED lamp’s head, and connect it
with relay. Code is similar with a.Click to watch

HOW? – SECOND, ORDER TO MA-CHINE c. Water spray and soil moisture mecha-
nism. We but smart spray which is triggered by switch
and motor. Similar to LED lamp, we open this sprays head and connect appropriately with re-lay motor to control our wants.

HOW? – SECOND, ORDER TO MA-CHINE
When we put out soil moisture sensor to water, it means there is no water in soil, so trigger spray.(This is demo, so we code trigger spray when moisture is 0.)
Click to watch

NODEMCU AND DB Man in working