Software License Registration Guide - Canon Inc.
74
Software License Registration Guide Software License Registration Guide When you have purchased new software → Chapter 2 Authenticating a License When you would like to use the software on a different PC → Chapter 3 Transferring a License to Another PC When the PC on which the software is installed breaks down → Chapter 4 Transferring a License From a Broken PC to Another PC
Transcript of Software License Registration Guide - Canon Inc.

Software License Registration GuideSoftware License Registration Guide
When you have purchased new software → Chapter 2 Authenticating a LicenseWhen you would like to use the software on a different PC → Chapter 3 Transferring a License to Another PC When the PC on which the software is installed breaks down → Chapter 4 Transferring a License From a Broken PC to Another PC


i
Contents
Preface........................................................................................................................... iv
How to Use This Manual ............................................................................................... ivSymbols Used in This Manual .............................................................................................................ivButtons and Icons Used in This Manual ...........................................................................................ivDisplays Used in This Manual ..............................................................................................................vAbbreviations Used in This Manual ...................................................................................................v
System Requirements .................................................................................................. vi
Trademarks and Copyright .......................................................................................... vi
Notes ............................................................................................................................. vi
Chapter 1 Overview of License Authentication
About Licenses ............................................................................................................1-2
License Types ..............................................................................................................1-3Full License .......................................................................................................................................... 1-3Trial License ......................................................................................................................................... 1-3
License Authentication Procedures ..........................................................................1-4Performing License Authentication by Connecting to the Internet ....................................... 1-4Performing License Authentication without Connecting to the Internet ............................. 1-4
License Transfer Procedures ......................................................................................1-5Transferring a License to Another PC ............................................................................................ 1-6
If the PC on which the license was authenticated is connected to the Internet .................1-6If the PC on which the license was authenticated is not connected to the Internet ........1-6
Specifying the Transfer Destination PC before Transferring the License .............................. 1-7If the PC on which the license was authenticated is connected to the Internet .................1-7If the PC on which the license was authenticated is not connected to the Internet ........1-7
Recovering a License from a Broken PC and Transferring to Another PC .............................. 1-8
About the License Repair Function ...........................................................................1-9
Using a Trial License .................................................................................................1-10

ii
Chapter 2 Authenticating a License
Operating Procedures ................................................................................................2-2
Online Authentication................................................................................................2-3STEP 1: Perform License Authentication ....................................................................................... 2-3
Offline Authentication ...............................................................................................2-5STEP 1: Create a Request Data File ................................................................................................. 2-5STEP 2: Request for a License File to be Issued ............................................................................ 2-8STEP 3: Read the License File ........................................................................................................... 2-9
Verifying the Authentication Status of a License ...................................................2-11Displaying the License Information Management Window ...................................................2-11Reading the License Information Management Window .......................................................2-12
Chapter 3 Transferring a License to Another PC
Operating Procedures ................................................................................................3-2
Online Return ..............................................................................................................3-3STEP 1: Return the License ............................................................................................................... 3-3STEP 2: Re-authenticate the License .............................................................................................. 3-5
Offline Return .............................................................................................................3-6STEP 1: Create a Request Data File for Returning ....................................................................... 3-6STEP 2: Request for a License to be Returned .............................................................................. 3-9STEP 3: Re-authenticate the License .............................................................................................. 3-9
About License Transfers ...........................................................................................3-10Online Transfer .................................................................................................................................3-10
STEP 1: Create a Request Data File on the Transfer Destination PC .............................................3-10STEP 2: Transfer the Created Request Data File ...................................................................................3-10STEP 3: Load the Request Data File onto the Destination PC ......................................................3-11STEP 4: Re-authenticate the License ..........................................................................................................3-13
Offline Transfer .................................................................................................................................3-14STEP 1: Create a Request Data File on the Transfer Destination PC .........................................3-14STEP 2: Transfer the Created Request Data File ...................................................................................3-14STEP 3: Create a Request Data File for Transferring ...........................................................................3-15STEP 4: Request for a License File to be Issued ....................................................................................3-19STEP 5: Re-authenticate the License ..........................................................................................................3-19
Chapter 4 Transferring a License From a Broken PC to Another PC
Using the License From a Broken PC on Another PC ................................................4-2STEP 1: Recovering the License from a Broken PC ...................................................................... 4-2STEP 2: Re-authenticate the License .............................................................................................. 4-2
iii
Chapter 5 Appendix
Warnings When Using the Software .........................................................................5-2If the License Repair Function Launches....................................................................................... 5-2
Support Menu ............................................................................................................................................................5-2Cases Where the Software May Not Launch ............................................................................................5-3
About the License Repair Function ................................................................................................ 5-4
When Extending or Updating a SUM Period ............................................................5-6Extending the SUM Period ............................................................................................................... 5-7Updating the SUM Period ................................................................................................................ 5-7
FAQs (Frequently Asked Questions) ..........................................................................5-8

iv
PrefaceThank you for purchasing this software. License authentication is required in order to use the software safely. This document describes the license authentication procedure. Please read this manual thoroughly before using this software. Please store this in a safe place for future reference.It is recommended that you also read the material with the License Access Number that is provided with the software product.
How to Use This ManualThe target readers of this manual are those who have basic knowledge on operating Windows and Web browsers.
Symbols Used in This ManualThe following symbols are used in this manual for safety measures, handling restrictions, and precautions:
Buttons and Icons Used in This ManualIn this manual, window name, field names and button names that are displayed on the window are enclosed in square brackets ([]). Example: [Next], [Close]

v
Displays Used in This ManualBelow is a sample window shot of the operational window. The window may appear differently, depending on your environment.
Areas relating to an operation are displayed surrounded by . When there are multiple areas of this kind on the window, they are all surrounded. Example:
1. In the [License Authentication] window, select [Online Authentication], and click [Next].
Abbreviations Used in This ManualIn this manual, product names and model names are abbreviated as follows:Microsoft Windows operating system is abbreviated as Windows.Microsoft Internet Explorer is abbreviated as Internet Explorer.

vi
System RequirementsThe following system requirements are required to use the software.
Operating SystemRefer to the documentation accompanying your software.
Web browserInternet Explorer (versions 6.0 through 10.0)
IMPORTANT
• If you use the tabbed browsing function in Internet Explorer 7.0 through 10.0, please do not perform actions simultaneously from multiple browser tabs.
Trademarks and CopyrightMicrosoft and Windows are registered trademarks of Microsoft Corporation in the United States and other countries. Windows Server and Windows Vista are trademarks of Microsoft Corporation in the United States and other countries.Other products and company names herein may be the trademarks of their respective owners.
Notes
• The contents of this document may partially differ from your software due to improvement and modification of the software. • Considerable effort has been made to ensure that this manual is free of inaccuracies and omissions. However, as we are constantly improving our products, if you need an exact specification, please contact Canon Inc. • No part of this publication may be reproduced or transmitted in any form or by any means, electronic or mechanical, including photocopying and recording, or by any information storage or retrieval system without the prior permission of Canon Inc. • The license authentication system is a system for authenticating licenses, and is not a tool for managing licenses after authentication. The customers shall be responsible for managing items such as license expiration dates and the number of authorized licenses after authentication.
Copyright 2013 Canon Inc. All rights reserved.

1-1
1CHAPTER
Overview of License AuthenticationThis chapter describes basic license concepts and the sequence of license operations.
About Licenses ............................................................................................................................1-2
License Types ...............................................................................................................................1-3Full License ............................................................................................................................................................... 1-3Trial License .............................................................................................................................................................. 1-3
License Authentication Procedures ...........................................................................................1-4Performing License Authentication by Connecting to the Internet ............................................................ 1-4Performing License Authentication without Connecting to the Internet .................................................. 1-4
License Transfer Procedures ......................................................................................................1-5Transferring a License to Another PC ................................................................................................................. 1-6Specifying the Transfer Destination PC before Transferring the License ................................................... 1-7Recovering a License from a Broken PC and Transferring to Another PC .................................................. 1-8
About the License Repair Function ............................................................................................1-9
Using a Trial License ..................................................................................................................1-10
About Licenses1-2
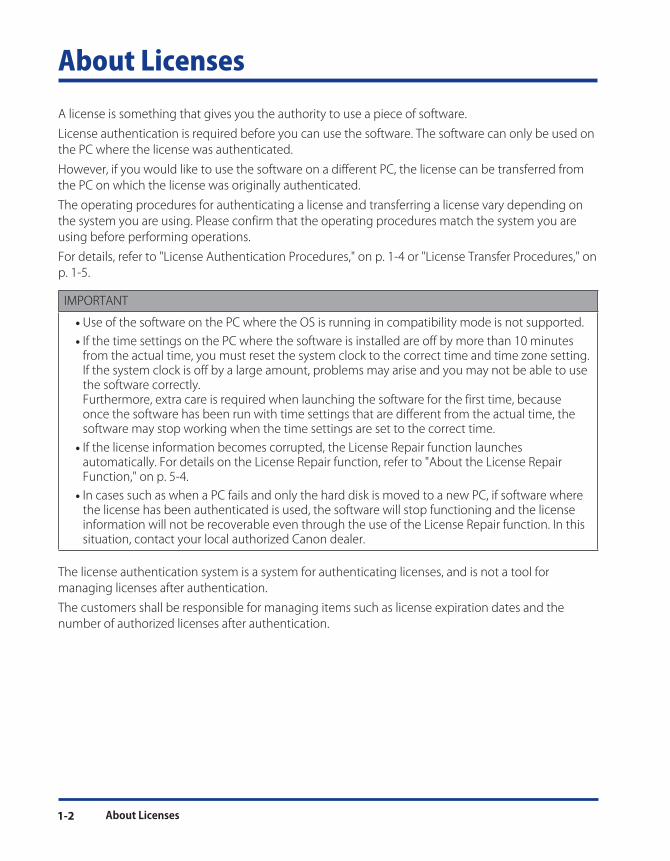
About LicensesA license is something that gives you the authority to use a piece of software.License authentication is required before you can use the software. The software can only be used on the PC where the license was authenticated.However, if you would like to use the software on a different PC, the license can be transferred from the PC on which the license was originally authenticated.The operating procedures for authenticating a license and transferring a license vary depending on the system you are using. Please confirm that the operating procedures match the system you are using before performing operations.For details, refer to "License Authentication Procedures," on p. 1-4 or "License Transfer Procedures," on p. 1-5.
IMPORTANT
• Use of the software on the PC where the OS is running in compatibility mode is not supported. • If the time settings on the PC where the software is installed are off by more than 10 minutes from the actual time, you must reset the system clock to the correct time and time zone setting. If the system clock is off by a large amount, problems may arise and you may not be able to use the software correctly. Furthermore, extra care is required when launching the software for the first time, because once the software has been run with time settings that are different from the actual time, the software may stop working when the time settings are set to the correct time. • If the license information becomes corrupted, the License Repair function launches automatically. For details on the License Repair function, refer to "About the License Repair Function," on p. 5-4. • In cases such as when a PC fails and only the hard disk is moved to a new PC, if software where the license has been authenticated is used, the software will stop functioning and the license information will not be recoverable even through the use of the License Repair function. In this situation, contact your local authorized Canon dealer.
The license authentication system is a system for authenticating licenses, and is not a tool for managing licenses after authentication. The customers shall be responsible for managing items such as license expiration dates and the number of authorized licenses after authentication.

License Types 1-3
License TypesThere are two types of licenses for this product, a full license and a trial license.
Full LicenseA full license is a license that allows you to use the software without any restrictions, and has no expiration date.If you are going to be using the software continuously, authenticate the software with a full license. The software can only be used on the PC where the license was authenticated.For information on how to perform license authentication of a full product license, refer to "License Authentication Procedures," on p. 1-4.
NOTE
• Your License Access Number is required in order to perform authentication of a full license. Your License Access Number can be found in the material included in the package of the software product.
Trial LicenseA trial license allows you to use the same functions as a full license, but has a limited period of use.The trial period is counted from when the software is first launched on the system. The software cannot be launched again after the trial period has expired. Please authenticate the full license during the trial period.
NOTE
• By registering the full license during or even after the trial period, you can continue to use the software with no time limit.
For information on how to use the trial license, refer to "Using a Trial License," on p. 1-10.

License Authentication Procedures1-4
License Authentication ProceduresThe license authentication procedure differs depending on whether the PC you would like to use the software on is connected to the Internet or not. Verify that the license authentication procedure matches the system you are using.
• Performing License Authentication by Connecting to the Internet P. 1-4 • Performing License Authentication without Connecting to the Internet P. 1-4
Performing License Authentication by Connecting to the Internet
STEP 1: Perform License Authentication by Connecting to the Internet
a. Enter the License Access Number.
b. Acquire the license.
PC on which you would like to use
the softwareCanon
License Issuing Server
Performing License Authentication without Connecting to the Internet
PC on which you would like to use
the software
STEP 1: Create a Request Data File
STEP 3: Read the License File
STEP 2: Ask Your Local Authorized Canon Dealer to Issue a License File
a. Send the request data file.
c. Acquire the license file.
Local Authorized
Canon Dealer
A license file is issued.
b.

License Transfer Procedures 1-5
License Transfer ProceduresIf a situation arises where you would like to use the software on a different PC or if the PC you are using breaks, you can transfer the license to a different PC.A license transfer can be performed by using "Return License" or "Transfer License" in the "License Information Management function."The "License Information Management function" can be used on the PC where the software is installed.To launch the "License Information Management function," select [All Programs] → [Canon LMS] → [License Information Management] from the Start menu.If the PC you are using is connected to the Internet, the license is first transferred to the Canon license issuing server. If the PC you are using is not connected to the Internet, you should request your local authorized Canon dealer to return or transfer the license. After returning or transferring the license, license authentication is performed on the PC where you would like to use the software. Verify that the license transfer procedure matches the system you are using.
• Transferring a License to Another PC P. 1-6 • Specifying the Transfer Destination PC before Transferring the License P. 1-7 • Recovering a License from a Broken PC and Transferring to Another PC P. 1-8

License Transfer Procedures1-6
Transferring a License to Another PCIf you would like to use the software on another PC, first perform "Return License" and then re-authenticate the license.
If the PC on which the license was authenticated is connected to the Internet
PC on which license was
authenticated
PC on which you would like to use
the software
STEP 1: Return the License Canon License Issuing
Server
Local Authorized
Canon Dealer
a. Return the license.
STEP 2: Re-authenticate the License
a. Authenticate the license.
b. Acquire the license.
If the PC on which the license was authenticated is not connected to the Internet
PC on which license was
authenticated
PC on which you would like to use
the software
STEP 2: Return the License
a. Send the license for returning.
STEP 3: Re-authenticate the License
a. Authenticate the license.
b. Acquire the license.
STEP 1: Create a Request Data File for Returning
Local Authorized
Canon Dealer
Canon License Issuing
Server

License Transfer Procedures 1-7
Specifying the Transfer Destination PC before Transferring the License
If you have already determined the transfer destination PC in advance, first perform "Transfer License" and then re-authenticate the license.When "Transfer License" is used, the transfer destination PC is defined before the license is transferred.If when using "Return License" there is a risk of your license being authenticated by another PC in the period from when the license is returned until the license is re-authenticated, please use "Transfer License" instead.
If the PC on which the license was authenticated is connected to the Internet
PC on which license was
authenticated STEP 3: Transfer the License
PC on which you would like to use
the software
STEP 1: Create a Request Data File
STEP 2: Transfer the Request Data File
Canon License Issuing Servera. Transfer the license.
STEP 4: Re-authenticate the License
a. Authenticate the license.
b. Acquire the license.
Local Authorized
Canon Dealer
If the PC on which the license was authenticated is not connected to the Internet
PC on which license was
authenticated
STEP 3: Create a Request Data File for Transferring
STEP 2: Transfer the Request Data File for Authentication
PC on which you would like to use
the software
STEP 1: Create a Request Data File for Authentication
STEP 4: Issue a License File
Send the request data file for transferring.
a.
Issue a license filefor transferring.
b.
STEP 5: Re-authenticate the License
a. Authenticate the license.
b. Acquire the license.
Canon License Issuing Server
Local Authorized
Canon Dealer

License Transfer Procedures1-8
Recovering a License from a Broken PC and Transferring to Another PC
If the PC on which a license is authenticated breaks down, the software can be still used by transferring the license to a different PC.Contact your local authorized Canon dealer and request to "Return the license." The license for the broken PC is recovered and the license is re-authenticated.
Broken PC on which license was
authenticated
PC on which you would like to use
the software
STEP 1: Ask Your Local Authorized Canon Dealer to Recover the License
a. Return the license.
STEP 2: Re-authenticate the License
a. Authenticate the license.
b. Acquire the license.
Local Authorized
Canon Dealer
Canon License Issuing Server

About the License Repair Function 1-9
About the License Repair FunctionIn situations such as when the license information has become corrupted, the License Repair function launches automatically and repairs the license information.The procedure differs depending on whether the PC you are using is connected to the Internet or not.For details on the License Repair function operating procedure, refer to "About the License Repair Function," on p. 5-4.
NOTE
• Depending on the software you are using, the application may exit without automatically launching the License Repair function. In this situation, you are kindly requested to contact your local authorized Canon dealer.

Using a Trial License1-10
Using a Trial LicenseThe trial license allows you to use the same functions as the full license. However, there is a limit on the time that the software can be used.The trial period is counted from when the software is first launched on the system. The software cannot be launched again after the trial period has expired. Please authenticate the full license during the trial period.The [License Authentication] window is displayed every time the software is launched until a full license is authenticated.
1. In the [License Authentication] window, select [Trial] and click [Next].
NOTE
• If the trial period has already expired, "This trial license will expire in 0 days." is displayed in the [License Authentication] window and [Trial] cannot be selected. To use the software, authenticate using a full license.
The [Trial] window is displayed.

Using a Trial License 1-11
2. Note the trial license expiration date, and click [Trial].
The software launches.

Using a Trial License1-12

2-1
2CHAPTER
Authenticating a LicenseThis chapter describes license authentication procedures to suit the system you are using.
Operating Procedures .................................................................................................................2-2
Online Authentication ................................................................................................................2-3STEP 1: Perform License Authentication ............................................................................................................ 2-3
Offline Authentication ................................................................................................................2-5STEP 1: Create a Request Data File ...................................................................................................................... 2-5STEP 2: Request for a License File to be Issued ................................................................................................ 2-8STEP 3: Read the License File ................................................................................................................................ 2-9
Verifying the Authentication Status of a License ...................................................................2-11Displaying the License Information Management Window ........................................................................2-11Reading the License Information Management Window ............................................................................2-12

Operating Procedures2-2
Operating ProceduresThis section describes how to authenticate a license.Verify that the license authentication procedure matches the system you are using.
Perform License Authentication by Connecting to the Internet
A Full License Authentication Procedures is Completed
Install the software
Launch the software
Perform License Authentication without Connecting to the Internet
Connected to the Internet: Yes Connected to the Internet: No
STEP 3: Read a License File
STEP 2: Issue a License File
STEP 1: Create a Request Data FileSTEP 1: Perform License Authentication by Connecting to the Internet

Online Authentication 2-3
Online AuthenticationIf the PC on which you would like to use the software is connected to the Internet, authenticate the license by connecting to the Internet. In this case, select [Online Authentication] from the [License Authentication] window.When online authentication is used, the license authentication is completed and the software can be used immediately after you have entered the required information.
NOTE
• The windows that are displayed may differ depending on the software you are using.
STEP 1: Perform License Authentication
1. In the [License Authentication] window, select [Online Authentication], and click [Next].
The [Online Authentication] window is displayed.
2. Enter the License Access Number of the software as 16 (4 groups of 4 characters) alphanumeric characters.

Online Authentication2-4
NOTE
• Enter the License Access Number using alphanumeric characters. The License Access Number is not case-sensitive. • The License Access Number can be found in the material included in the package of the software product. • If the License Access Number is not correctly entered, an error message window is displayed. Click [Back] to re-enter the correct License Access Number.
3. Follow the on-window directions.The [License Authentication Completed] window is displayed.
4. Click [Finished].The License Authentication is completed, and the software launches.

Offline Authentication 2-5
Offline AuthenticationIf the PC on which you would like to use the software is not connected to the Internet, select [Offline Authentication] from the [License Authentication] window.
STEP 1: Create a Request Data File
1. In the [License Authentication] window, select [Offline Authentication] and [Create Request Data], and click [Next].
The [Create Request Data for Offline Authentication (Step1)] window is displayed.

Offline Authentication2-6
2. Enter the License Access Number of the software as 16 (4 groups of 4 characters) alphanumeric characters, then click [Next].
IMPORTANT
• Enter the License Access Number correctly, making sure there are no errors.
NOTE
• Enter the License Access Number using alphanumeric characters. The License Access Number is not case-sensitive. • The License Access Number can be found in the material included in the package of the software product. • If the License Access Number is not correctly entered, an error message window is displayed. Click [Back] to re-enter the correct License Access Number.
The [Create Request Data for Offline Authentication (Step2)] window is displayed.

Offline Authentication 2-7
3. Specify the destination folder to store the request data file and click [Next].Enter the full path in the input field or click [Browse] to select the store destination.
The default file name is displayed as "req_<ID>_<PC Hostname>."You can change the file name. However, the following symbols cannot be entered \ / : * ? “ < > | ; . & % ‘
NOTE
• The dialog box that is displayed when you click [Browse] may vary depending on the system you are using. • If the file cannot be stored, an error message window is displayed. Click [Back] and specify the destination folder again.
The request data files (two types, .dat format and .txt format) are stored and the [Create Request Data for Offline Authentication (Complete)] window is displayed.
Offline Authentication2-8
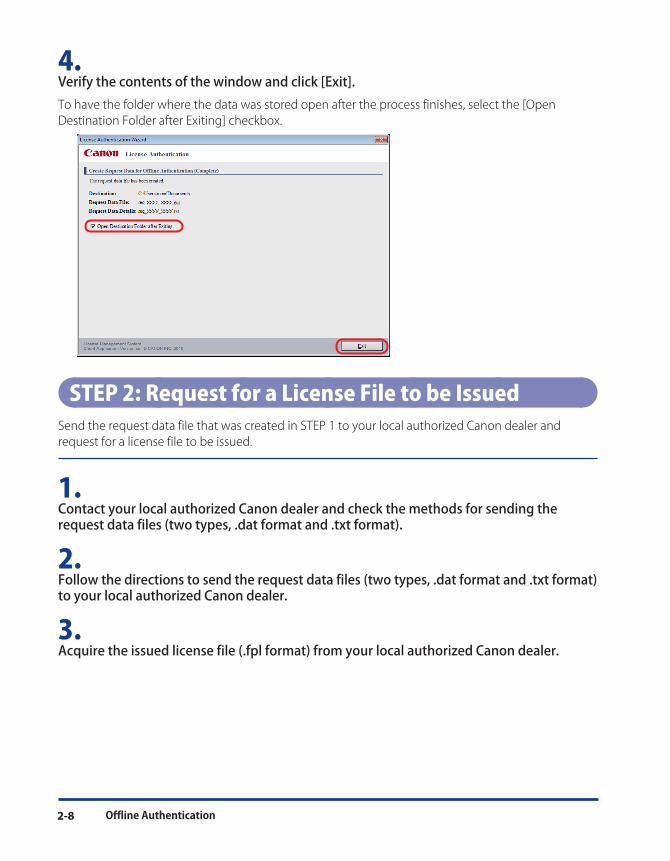
4. Verify the contents of the window and click [Exit].To have the folder where the data was stored open after the process finishes, select the [Open Destination Folder after Exiting] checkbox.
STEP 2: Request for a License File to be IssuedSend the request data file that was created in STEP 1 to your local authorized Canon dealer and request for a license file to be issued.
1. Contact your local authorized Canon dealer and check the methods for sending the request data files (two types, .dat format and .txt format).
2. Follow the directions to send the request data files (two types, .dat format and .txt format) to your local authorized Canon dealer.
3. Acquire the issued license file (.fpl format) from your local authorized Canon dealer.

Offline Authentication 2-9
STEP 3: Read the License FileRead the license file (.fpl format) that was created in STEP 2 on the PC where you would like to use the software.
1. In the [License Authentication] window, select [Offline Authentication] and [Read License], and click [Next].
The [Read License File for Offline Authentication] window is displayed.

Offline Authentication2-10
2. Specify the license file (.fpl format) and click [Next].Enter the full path in the input field or click [Browse] to specify the license file (.fpl format).
NOTE
• The dialog box that is displayed when you click [Browse] may vary depending on the system you are using. • If the license file is not readable, an error message window is displayed. Click [Back] and specify the license file again.
The [License Authentication Completed] window is displayed.
3. Click [Finished].
The License Authentication is completed, and the software launches.

Verifying the Authentication Status of a License 2-11
Verifying the Authentication Status of a LicenseThe authentication status of the licenses can be checked from the [License Information Management] window.
IMPORTANT
• Installation of the License Information Management application requires 40 MB of free disk space. Check the free disk space on your PC before installing it. • A minimum of 128 MB of RAM is recommended to run this application. • Even if the software is uninstalled, the License Information Management application is not uninstalled. Furthermore, it cannot be uninstalled from the Start menu by using [Programs and Features].
Displaying the License Information Management Window
1. From the Start menu, select [All Programs] → [Canon LMS] → [License Information Management]. The [License Information Management] window is displayed.

Verifying the Authentication Status of a License2-12
Reading the License Information Management Window
This section describes how to read the [License Information Management] window.
(1) [Product Name]: Displays the product name of the software.
(2) [License Access Number]: Displays the License Access Number.
(3) [SUM Period]: Displays the SUM (Software Update Management) period.
(4) [License Type]: Displays "PC Dedicated License." "PC Dedicated License" refers to licenses that can only be used on the PC where the license was originally authenticated.
(5) [Expiration]: Displays the number of days remaining until the license expires. Alternatively, displays "Does Not Expire" if the license does not expire.
(6) [Operations Available]: Displays the number of times the license can be returned or transferred. Displays "-" if there is no restriction on the number of operations that can be performed.
(7) [Return]: Click this button to perform the "Return License" function, which transfers a license.For details on "Return License," refer to "Transferring a License to Another PC," on p. 3-1.
(8) [Transfer]: Click this button to perform the "Transfer License" function, which transfers a license by specifying a transfer destination PC.For details on "Transfer License," refer to "About License Transfers," on p. 3-10.

Verifying the Authentication Status of a License 2-13
(9) [SUM Menu]: Click this button to extend the maintenance period of the license. Depending on the software you are using, this button may not be displayed. For details on the "SUM Menu," refer to "When Extending or Updating a SUM Period," on p. 5-6.
(10) [Support Menu]: Click this button when you want to use the "Support Menu" function. In the "Support Menu," you can use the "License Repair Tool" and "Log File Collection Tool." For details on the "Support Menu," refer to "Support Menu," on p. 5-2.
(11) [Export License Information]:
Click this button when you want to output current license information. License information is output in .txt format. With the output license information, you can check the License Access Number, license type, and other details of your current license.
NOTE
• In any of the submenu windows, you can return to the previous window by clicking [Back]. Click [Close] to exit the License Information Management application. • If a system error occurs, the system error message window is displayed. Click [Close] and contact your local authorized Canon dealer. Your License Access Number is required when making inquiries. Your License Access Number can be found in the material included in the package of the software product.

Verifying the Authentication Status of a License2-14

3-1
3CHAPTER
Transferring a License to Another PCThis chapter describes how to transfer an authenticated license to a different PC on which you would like to use the software.
Operating Procedures .................................................................................................................3-2
Online Return ..............................................................................................................................3-3STEP 1: Return the License .................................................................................................................................... 3-3STEP 2: Re-authenticate the License ................................................................................................................... 3-5
Offline Return ..............................................................................................................................3-6STEP 1: Create a Request Data File for Returning ............................................................................................ 3-6STEP 2: Request for a License to be Returned .................................................................................................. 3-9STEP 3: Re-authenticate the License ................................................................................................................... 3-9
About License Transfers ...........................................................................................................3-10Online Transfer ......................................................................................................................................................3-10Offline Transfer ......................................................................................................................................................3-14

Operating Procedure3-2
Operating ProceduresIf a situation arises where you would like to use the software on a different PC or if the PC you are using breaks, you can transfer the license to a different PC.If the PC you are using is connected to the Internet, the license is first transferred to the Canon license issuing server. If the PC you are using is not connected to the Internet, you should request your local authorized Canon dealer to return or transfer the license. After returning or transferring the license, license authentication is performed on the PC where you would like to use the software.Verify that the license transfer procedure matches the system you are using.
IMPORTANT
• "Return License" is a function for transferring licenses so that you can transfer the software installed on the PC you are using to a different PC. This function is not for transferring OS data or other software data from the PC you are using to another PC.
PC on which you would like to use the software
Online Authentication (P. 2-3)
Re-authenticate the License
Connected to the Internet: Yes Connected to the Internet: No
PC on which license was authenticated
Connected to the Internet: Yes Connected to the Internet: No
Display the [License Information Management] Window
STEP2: Return the License
STEP 1: Create a Request Data File for Returning
STEP 1: Return the License
Offline Authentication (P. 2-5)
NOTE
• If when using "Return License" there is a risk of your license being authenticated by another PC in the period from when the license is returned until the license is re-authenticated, please use "Transfer License" instead. For details on how to specify the transfer destination PC before transferring the license, refer to "About License Transfers," on p. 3-10.

Online Return 3-3
Online Return
STEP 1: Return the LicenseReturn the license from the PC on which the license is authenticated (transfer source) to the Canon license issuing server.
1. From the Start menu, select [All Programs] → [Canon LMS] → [License Information Management]. The [License Information Management] window is displayed.
2. In the [License Information Management] window, click [Return].
The [Select Return Method] window is displayed.

Online Return3-4
3. Select [Online Return] and click [Next].
The [Confirm PC Dedicated License to Return] window is displayed.
4. Verify the information displayed in the window, and click [Return License].
NOTE
• If the license cannot be returned, an error message window is displayed. Click [Back], and then try to operate again.
The [License Returning Completed] window is displayed.

Online Return 3-5
5. Click [Close].
STEP 2: Re-authenticate the LicenseUse the same License Access Number as the license you returned to re-authenticate the license on the PC where you would like to use the software (transfer destination).For details on how to authenticate a license, refer to "Authenticating a License," on p. 2-1.

Offline Return3-6
Offline Return
STEP 1: Create a Request Data File for ReturningCreate the request data file for returning (.ret format) from the PC on which the license is already authenticated (transfer source).
1. From the Start menu, select [All Programs] → [Canon LMS] → [License Information Management]. The [License Information Management] window is displayed.
2. In the [License Information Management] window, click [Return].
The [Select Return Method] window is displayed.

Offline Return 3-7
3. Select [Offline Return] and click [Next].
The [Create Request Data File for Returning (Step 1)] window is displayed.
4. Specify the destination folder to store the request data file for returning and click [Next].Enter the full path in the input field or click [Browse] to select the store destination.
The default file name is displayed as "ret_<ID>_<PC Hostname>."You can change the file name. However, the following symbols cannot be entered \ / : * ? “ < > | ; . & % ‘
NOTE
• The dialog box that is displayed when you click [Browse] may vary depending on the system you are using.
The [Create Request Data File for Returning (Step 2)] window is displayed.

Offline Return3-8
5. Verify the contents of the window and click [Create].
NOTE
• If the file cannot be stored, an error message window is displayed. Click [Back] and specify the destination folder again.
The request data file for returning (.ret format) is stored and the [Create Request Data File for Returning (Complete)] window is displayed.
6. Click [Close].

Offline Return 3-9
STEP 2: Request for a License to be ReturnedSend the request data file for returning that was created in STEP 1 to your local authorized Canon dealer and request for the license to be returned.
1. Contact your local authorized Canon dealer and check the method for sending the request data file for returning (.ret format).
2. Follow the directions to send the request data file for returning (.ret format) to your local authorized Canon dealer.
3. Confirm that the license is returned by your local authorized Canon dealer.
STEP 3: Re-authenticate the LicenseUse the same License Access Number as the license you returned to re-authenticate the license on the PC where you would like to use the software (transfer destination).For details on how to authenticate a license, refer to "Authenticating a License," on p. 2-1.

About License Transfers3-10
About License TransfersIf you have already determined the transfer destination PC in advance, first perform "Transfer License" and then re-authenticate the license.When "Transfer License" is used, the transfer destination PC is defined before the license is transferred.If when using "Return License" there is a risk of your license being authenticated by another PC in the period from when the license is returned until the license is re-authenticated, please use "Transfer License" instead.
Online Transfer
STEP 1: Create a Request Data File on the Transfer Destination PC Create the request data file on the PC where you would like to use the software (transfer destination).
1. Install the software on the PC where you would like to use the software.
2. Launch the software.
3. Create the request data files (two types, .dat format and .txt format) from the [License Authentication] window.
NOTE
• For information on how to create a request data file, refer to "STEP 1: Create a Request Data File," on p. 2-5.
STEP 2: Transfer the Created Request Data FileTransfer the request data files that you created in STEP 1 from the PC on which you would like to use the software (transfer destination) to the PC on which the license is authenticated (transfer source) via email, recordable media, etc.
1. Transfer the created request data file (.dat format) to the PC on which the license is authenticated using recordable media, etc.

About License Transfers 3-11
STEP 3: Load the Request Data File onto the Destination PCOn the PC where the license is authenticated (transfer source), specify the request data file (.dat format) that you created in STEP 1 and transfer the license from the [License Information Management] window.
1. From the Start menu, select [All Programs] → [Canon LMS] → [License Information Management]. The [License Information Management] window is displayed.
2. In the [License Information Management] window, click [Transfer].
The [Load Request Data File on Destination PC] window is displayed.

About License Transfers3-12
3. Specify the request data file (.dat format) of the PC on which you would like to use the software (transfer destination), and click [Next].Enter the full path in the input field or click [Browse] to select the request data file (.dat format).
NOTE
• The dialog box that is displayed when you click [Browse] may vary depending on the system you are using. • If the request data file is not readable, an error message window is displayed. Click [Back], and then specify the request data file again.
The [Select Transfer Method] window is displayed.
4. Select [Online Transfer] and click [Next].
The [Confirm License to Transfer] window is displayed.

About License Transfers 3-13
5. Verify the contents of the window and click [Transfer License].
The [License Transferal Completed] window is displayed.
6. Click [Close].
Information about the PC on which you would like to use the software is sent to the Canon license issuing server.
STEP 4: Re-authenticate the LicenseUse the same License Access Number as the license you transferred to re-authenticate the license on the PC where you would like to use the software (transfer destination).For details on how to authenticate a license, refer to "Authenticating a License," on p. 2-1.

About License Transfers3-14
Offline Transfer
STEP 1: Create a Request Data File on the Transfer Destination PCCreate the request data file on the PC where you would like to use the software (transfer destination).
1. Install the software on the PC where you would like to use the software.
2. Launch the software.
3. Create the request data files (two types, .dat format and .txt format) from the [License Authentication] window.
NOTE
• For information on how to create a request data file, refer to "STEP 1: Create a Request Data File," on p. 2-5.
STEP 2: Transfer the Created Request Data FileTransfer the request data files that you created in STEP 1 from the PC on which you would like to use the software (transfer destination) to the PC on which the license is authenticated (transfer source) via email, recordable media, etc.
1. Transfer the created request data file (.dat format) to the PC on which the license is authenticated using recordable media, etc.

About License Transfers 3-15
STEP 3: Create a Request Data File for TransferringOn the PC where the license is authenticated (transfer source), specify the request data file (.dat format) that you created in STEP 1 and create the request data file for transfer (.tsf format).
1. From the Start menu, select [All Programs] → [Canon LMS] → [License Information Management]. The [License Information Management] window is displayed.
2. In the [License Information Management] window, click [Transfer].
The [Load Request Data File on Destination PC] window is displayed.

About License Transfers3-16
3. Specify the request data file (.dat format) of the PC on which you would like to use the software (transfer destination), and click [Next].Enter the full path in the input field or click [Browse] to select the request data file (.dat format).
NOTE
• The dialog box that is displayed when you click [Browse] may vary depending on the system you are using. • If the request data file is not readable, an error message window is displayed. Click [Back], and then specify the request data file again.
The [Select Transfer Method] window is displayed.
4. Select [Offline Transfer] and click [Next].
The [Create Request Data File for Transferring (Step 1)] window is displayed.

About License Transfers 3-17
5. Specify the destination folder to store the request data file for transferring and click [Next].Enter the full path in the input field or click [Browse] to select the store destination.
The default file name is displayed as "tsf_<ID>_<PC Hostname>."You can change the file name. However, the following symbols cannot be entered \ / : * ? “ < > | ; . & % ‘
NOTE
• The dialog box that is displayed when you click [Browse] may vary depending on the system you are using.
The [Create Request Data File for Transferring (Step 2)] window is displayed.

About License Transfers3-18
6. Verify the contents of the window and click [Create].
NOTE
• If the file cannot be stored, an error message window is displayed. Click [Back] and specify the destination folder again.
The request data file for transfer (.tsf format) is stored and the [Create Request Data File for Transferring (Complete)] window is displayed.
7. Click [Close].

About License Transfers 3-19
STEP 4: Request for a License File to be IssuedSend the request data file for transferring that was created in STEP 3 to your local authorized Canon dealer and request for a license file to be issued.
1. Contact your local authorized Canon dealer and check the method for sending the request data file for transferring (.tsf format).
2. Follow to the directions to send the request data file for transferring (.tsf format) to your local authorized Canon dealer.
3. Acquire the issued license file (.fpl format) from your local authorized Canon dealer.
STEP 5: Re-authenticate the LicenseRe-authenticate the license on the PC where you would like to use the software (transfer destination).
• If the PC on which you would like to use the software (transfer destination) is connected to the InternetUse the same License Access Number as the license you transferred to re-authenticate the license on the PC where you would like to use the software (transfer destination).Refer to "Online Authentication," on p. 2-3.
NOTE
• If a license is authenticated using the Internet, the license file is not required. Discard the license file issued in STEP 4.
• If the PC on which you would like to use the software (transfer destination) is not connected to the InternetRe-authenticate the license on the PC where you would like to use the software (transfer destination) with the license file that you acquired in STEP 4.Refer to "STEP 3: Read the License File," on p. 2-9 of "Offline Authentication."

About License Transfers3-20

4-1
4CHAPTER
Transferring a License From a Broken PC to Another PCThis chapter describes how to recover the license from a broken PC and transfer it to a different PC on which you would like to use the software.
Using the License From a Broken PC on Another PC ................................................................4-2STEP 1: Recovering the License from a Broken PC ........................................................................................... 4-2STEP 2: Re-authenticate the License ................................................................................................................... 4-2

Using the License From a Broken PC on Another PC4-2
Using the License From a Broken PC on Another PCIf the PC on which a license is authenticated breaks down, the software can be still used by transferring the license to a different PC. In this situation, ask your local authorized Canon dealer to return the license, recover the license, and then authenticate the license on the PC where you would like to use the software.
STEP 1: Recovering the License from a Broken PCInform your local authorized Canon dealer that your PC has broken down, and ask that the license be returned and recovered.
NOTE
• Your License Access Number is required when making inquiries. Your License Access Number can be found in the material included in the package of the software product.
STEP 2: Re-authenticate the LicenseUse the same License Access Number as the license you recovered to re-authenticate the license on the PC where you would like to use the software (transfer destination).For details on how to authenticate a license, refer to "Authenticating a License," on p. 2-1.

5-1
5CHAPTER
AppendixThis chapter describes points to note regarding the license authentication.
Warnings When Using the Software ...........................................................................................5-2If the License Repair Function Launches ............................................................................................................ 5-2About the License Repair Function ...................................................................................................................... 5-4
When Extending or Updating a SUM Period ..............................................................................5-6Extending the SUM Period ..................................................................................................................................... 5-7Updating the SUM Period ...................................................................................................................................... 5-7
FAQs (Frequently Asked Questions) ...........................................................................................5-8

Warnings When Using the Software5-2
Warnings When Using the SoftwareIn situations such as when the software stops working, please check the "Warnings When Using the Software."
If the License Repair Function LaunchesIn situations such as when the license information becomes corrupted on the PC you are using, the software may not launch. The License Repair function launches automatically when the license file becomes corrupted or when the following operations are performed. For details on how to repair a license, refer to "About the License Repair Function," on p. 5-4.
NOTE
• Depending on the software you are using, the application may close without automatically launching the License Repair function. If this happens, you are kindly requested to contact your local authorized Canon dealer.
Support MenuThe functions of the Support Menu can be used when a problem with the software occurs, such as the software not launching. The [Support Menu] window is also displayed automatically in situations when a problem with license information occurs.

Warnings When Using the Software 5-3
Launching the License Repair ToolIf the license is thought to be damaged because software does not launch, etc., click [Restore License] to launch the License Repair Tool.For details on how to use the License Repair Tool, refer to the Readme file for the License Repair Tool.
Launching the Log File Collection ToolIn a situation such as your local authorized Canon dealer requesting that you send the operation log, click [Collect Operation Log] and launch the Log File Collection Tool.For details on the Log File Collection Tool, contact your local authorized Canon dealer, and follow the directions of the Canon representative to resolve the situation.
Cases Where the Software May Not Launch • You use a backup tool and have copied or restored the disk image of your PC to another PC or to a different hard disk. • The power has been forcibly turned off or the process has been forcibly terminated under the following circumstances.
- While the [License Authentication] window is being displayed - While executing return or transfer using the License Information Management application - While the software is launching
• A new OS is installed onto the existing OS hard drive (overwrite install) on the PC you are using.
* The software can be launched by deleting and reinstalling the OS, and then installing the software and re-authenticating the license. Before initializing the OS, return the license. For details on "Return License," refer to "Transferring a License to Another PC," on p. 3-1. The reinstallation method may vary depending on factors such as the system configuration of the software you are using. Refer to the operating manual of the software for details, and contact your local authorized Canon dealer if anything is unclear.

Warnings When Using the Software5-4
About the License Repair FunctionIn situations such as when the license information becomes corrupted, the License Repair function launches automatically and repairs the license information.Although the License Repair function recovers the license by connecting to the Internet, it is also possible to recover licenses from a system that is not connected to the Internet.
If the PC you are using is connected to the InternetFollow the directions as given on the following windows.
If the PC you are using is not connected to the InternetThe following window is displayed.
Click [OK] to exit the License Repair function.Send the output log file to your local authorized Canon dealer and follow the directions of the Canon representative to resolve the situation. Log files are output to the desktop of your PC.

Warnings When Using the Software 5-5
If the license cannot be recoveredIf the license information cannot be recovered, the following error message is displayed. Follow the directions as given on the following error messages.
If you would like to repair the license information again, reactivate the software. The License Repair function launches automatically. Follow the directions as given on the window.If the license cannot be recovered, send the output log file to your local authorized Canon dealer and follow the directions of the Canon representative to resolve the situation. Log files are output to the desktop of your PC.
IMPORTANT
• If a file with the same file name is already on the desktop when outputting an "spsmessage.log" log file, the content of the file is overwritten and saved. • If a file with the same file name is already on the desktop and is locked by another application, an error message window is displayed. Follow the directions as given on the window. • Depending on the software you are using, the application may exit without automatically launching the License Repair function. If this happens, you are kindly requested to contact your local authorized Canon dealer.

When Extending or Updating a SUM Period5-6
When Extending or Updating a SUM Period
NOTE
• This may not be displayed depending on the license you have.
Extend or update the SUM period.

When Extending or Updating a SUM Period 5-7
Extending the SUM Period
1. Click [Extend] in the [SUM Menu] window.Your Web browser launches, and a window for entering an extension ticket is displayed.
2. Following the directions as given on the window, enter 12 (3 groups of 4 characters) alphanumeric characters as an extension ticket in [Extension Ticket] and click [Register].
3. Follow the directions as given on the window that is displayed and click [Register].
Updating the SUM Period
1. Click [Update to Latest Information] in the [SUM Menu] window.
NOTE
• If it is not updatable, an error message window is displayed. Follow the directions as given on the window that is displayed.

FAQs (Frequently Asked Questions)5-8
FAQs (Frequently Asked Questions)
QThe software does not launch.
AThere is a possibility that the license may have been lost. In this case, please re-authenticate your license.Use of the software on the PC where the OS is running in compatibility mode is not supported.Furthermore, if the time settings on the PC where the software is installed are off by more than 10 minutes from the actual time you must reset the system clock to the correct time and time zone setting.If the License Repair function launches, following the on-window directions to repair the license. For details on how to repair a license, refer to "About the License Repair Function," on p. 5-4.If you still have trouble, please contact your local authorized Canon dealer for details.
QDuring online authentication, a connection error message is displayed. What should I do?
AMake sure that the PC you are using is connected to the Internet.
QA message is displayed saying that the number of licenses is insufficient. What should I do?
ACheck the number of licenses allocated to the provided License Access Number.You cannot use more than the permitted number of licenses. In this case, transfer a license to the PC on which you would like to use the software. For details on how to transfer a license, refer to "License Transfer Procedures," on p. 1-5.
QDo I need to perform license authentication again if I have re-installed the software?
AThere is no need to re-authenticate your license, as long as the hardware configuration of the PC you are using has not changed; for example, if the software has been installed on a different PC.

FAQs (Frequently Asked Questions) 5-9
QHow can I get the License Access Number to upgrade my trial license to a full license?
AIf you have already purchased the software, check the License Access Number and material provided with the software product. If you would like to purchase the software, please contact any supplier of Canon products.
QThe PC on which the license was authenticated has broken.
AAsk your local authorized Canon dealer to recover the license. When the license is recovered, you can use the same License Access Number to re-authenticate the license on another PC where you would like to use the software.Your License Access Number is required when making inquiries. Your License Access Number can be found in the material included in the package of the software product.
QAfter I selected [Online Authentication] and clicked [Next] in the [License Authentication] window, a blank window is displayed. What should I do?
AThis problem occurs if the security level of Internet Explorer is set to [High], or if the software is installed on a Windows Server 2003 or Windows Server 2008 based PC and the security level of Internet Explorer is set to the default.Any of the following Internet Explorer settings will fix the problem:
i. Add the URL of the Canon license issuing server to [Trusted sites]. (P. 5-10)
ii. Set the security level to the lowest level, perform license authentication, and then reset the security level to the default. (P. 5-12)
iii. Perform License Authentication without connecting to the Internet. (P. 5-16)
IMPORTANT
• If all of the following conditions are satisfied, the only security level that can be selected is [High]. - The OS is Windows Server 2003 or Windows Server 2008 - The version of Internet Explorer is 6.0 SP1 or higher - [Internet Explorer Enhanced Security Configuration] is enabled
• It is thus impossible to change the security setting to the lowest level as described in ii. above. The problem can be solved, however, by using either of the other two methods.

FAQs (Frequently Asked Questions)5-10
i.Add the URL of the Canon License Issuing Server to [Trusted sites]:
1. Launch Internet Explorer.
2. Select [Internet Options] from the [Tools] menu. The [Internet Options] dialog box is displayed.
3. Select the [Security] tab in the [Internet Options] dialog box.

FAQs (Frequently Asked Questions) 5-11
4. Select the [Trusted sites] icon and click [Sites].
The [Trusted sites] dialog box is displayed.
5. Enter "https://c-lms.com" in [Add this website to the zone] ([Add this Web site to the zone] for Internet Explorer 6.0), and click [Add].

FAQs (Frequently Asked Questions)5-12
6. Click [Close] ([OK] for Internet Explorer 6.0).
NOTE
• If the blank window is still displayed after the above operations are executed, close Internet Explorer and carry out online authentication again.
ii.To Change the Security Level:
1. Launch Internet Explorer.
2. Select [Internet Options] from the [Tools] menu. The [Internet Options] dialog box is displayed.

FAQs (Frequently Asked Questions) 5-13
3. Select the [Security] tab in the [Internet Options] dialog box.
4. Select the [Internet] icon and click [Custom level] ([Custom Level] for Internet Explorer 6.0).
The [Security Settings - Internet Zone] dialog box ([Security Settings] dialog box for Internet Explorer 6.0) is displayed.

FAQs (Frequently Asked Questions)5-14
5. Select the lowest level from the [Reset to] drop-down list in [Reset custom settings], and click [Reset].
NOTE
• The number of levels that are displayed varies depending on the version of Internet Explorer and OS. Choose the lowest level.
A message warning that the security level set to the zone is to be changed is displayed.
6. Click [Yes].
The security level is set to the lowest level.
7. Perform license authentication by connecting to the Internet. For details on how to perform license authentication by connecting to the Internet, refer to "Online Authentication," on p. 2-3.Reset the security level to the default level.
8. Launch Internet Explorer.
9. Select [Internet Options] from the [Tools] menu. The [Internet Options] dialog box is displayed.

FAQs (Frequently Asked Questions) 5-15
10. Select the [Security] tab in the [Internet Options] dialog box.
11. Select the [Internet] icon, and click [Default level] ([Default Level] for Internet Explorer 6.0).

FAQs (Frequently Asked Questions)5-16
iii.Perform License Authentication without Connecting to the Internet: For details on how to perform license authentication without connecting to the Internet, refer to "Offline Authentication," on p. 2-5.


CANON INC. Pub No. SE-IE-1158-V4 ©