SOFTWARE INSTALLATION MANUAL - Highpower Security Products
50
TEL: (203)-634-3900 FAX: (203)-238-2425 EMAIL: [email protected] WEB: WWW.HIGHPOWERSECURITY.COM FTP: FTP.HPTECH.INFO HIGHPOWER MANAGEMENT SYSTEM ENTERPRISE (HMS) SOFTWARE VERSION 3.1 SOFTWARE INSTALLATION MANUAL DOCUMENT REVISION 1.0 DOCUMENT PART NUMBER: 980-1000-1.0 Introduction ...................................................................................................................... 2 Key Features .................................................................................................................... 3 Hardware Compatibility .................................................................................................... 3 Minimum System Requirements ....................................................................................... 3 Tested Operating Systems ........................................................................................... 3 Non-tested Operating Systems .................................................................................... 4 Hardware Requirements ............................................................................................... 4 Installation Procedure ....................................................................................................... 4 Installation Procedure Overview ................................................................................... 4 Windows Prerequisites ................................................................................................. 5 Microsoft SQL Database Installation ............................................................................ 5 Microsoft SQL Server 2005 System Requirements .................................................. 6 Microsoft SQL Server 2005 Express Edition Installation Procedure ......................... 6 Microsoft SQL Server 2005 Service Pack 3 Installation .......................................... 17 HMS Server Installation .............................................................................................. 27 Server Setup .......................................................................................................... 27 Configuring the HMS Server ................................................................................... 32 Upgrading an Old HMS Database to the Current Version ....................................... 35 Start Up HMS Server with Server Manager ............................................................ 35 Firewall Settings & Port Functions .......................................................................... 35 Configuring the Windows Firewall to Work with HMS Clients ................................. 36 Licensing Your Installation ...................................................................................... 41 HMS Client Installation ............................................................................................... 42 Client Setup ............................................................................................................ 42 HMS Client Operation .................................................................................................... 46 System Administrator Client Login .............................................................................. 46 Notes on Using “localhost” to Point to the HMS Server .......................................... 48 HMS Client Main Interface .......................................................................................... 49 Appendix ........................................................................................................................ 50 Solving Start Up Problems with HMS Server .............................................................. 50
Transcript of SOFTWARE INSTALLATION MANUAL - Highpower Security Products

TEL: (203)-634-3900 FAX: (203)-238-2425EMAIL: [email protected]
WEB: WWW.HIGHPOWERSECURITY.COMFTP: FTP.HPTECH.INFO
HIGHPOWER MANAGEMENT SYSTEM ENTERPRISE (HMS)SOFTWARE VERSION 3.1
SOFTWARE INSTALLATION MANUALDOCUMENT REVISION 1.0
DOCUMENT PART NUMBER: 980-1000-1.0
Introduction ...................................................................................................................... 2 Key Features .................................................................................................................... 3 Hardware Compatibility .................................................................................................... 3 Minimum System Requirements ....................................................................................... 3
Tested Operating Systems ........................................................................................... 3 Non-tested Operating Systems .................................................................................... 4 Hardware Requirements ............................................................................................... 4
Installation Procedure ....................................................................................................... 4 Installation Procedure Overview ................................................................................... 4 Windows Prerequisites ................................................................................................. 5 Microsoft SQL Database Installation ............................................................................ 5
Microsoft SQL Server 2005 System Requirements .................................................. 6 Microsoft SQL Server 2005 Express Edition Installation Procedure ......................... 6 Microsoft SQL Server 2005 Service Pack 3 Installation .......................................... 17
HMS Server Installation .............................................................................................. 27 Server Setup .......................................................................................................... 27 Configuring the HMS Server ................................................................................... 32 Upgrading an Old HMS Database to the Current Version ....................................... 35 Start Up HMS Server with Server Manager ............................................................ 35 Firewall Settings & Port Functions .......................................................................... 35 Configuring the Windows Firewall to Work with HMS Clients ................................. 36 Licensing Your Installation ...................................................................................... 41
HMS Client Installation ............................................................................................... 42 Client Setup ............................................................................................................ 42
HMS Client Operation .................................................................................................... 46 System Administrator Client Login .............................................................................. 46
Notes on Using “localhost” to Point to the HMS Server .......................................... 48 HMS Client Main Interface .......................................................................................... 49
Appendix ........................................................................................................................ 50 Solving Start Up Problems with HMS Server .............................................................. 50
Introduction
The Highpower Management System Enterprise is a set of .NET 2.0 applications designed to run under the most common versions of Microsoft Windows. HMS Enterprise is comprised of four main applications that create a client/server based environment that is used to manage access control hardware. These four applications include HMS Client, HMS Server, HMS Server Manager and Microsoft SQL Server Database.
HMS Client is the main application that users use to manage the system. HMS Client allows administrators to add users, manage user’s cards and fingerprint data, setup holidays, schedules, access levels, email alerts and can be used to monitor the status of the hardware in the system. HMS Client is the daily working interface to the system. You can run multiple client application in each installation in order to allow management by many different authorized administrators.
HMS Server is an advanced network management application that runs in the background under Windows, running as a Windows service. This application continually operates to manage network traffic to the access control hardware, to collect data from the hardware in a continuous manner and handles requests between multiple instances of the HMS Client application and the network hardware. Each HMS installation must have only one HMS Server but may have multiple HMS Clients.
HMS Server Manager is a small application that is used to manage the underlying database and operations of the HMS Server. HMS Server Manager is used to create HMS databases, start and stop the HMS Server service, authorize the HMS Server with license codes and to provide connection strings to HMS Server to allow connection to the database.
The Microsoft SQL Server is one of the most popular databases available for the Windows environment and is used to quickly store, recall and manage data entered into the system. The HMS Server communicates with the database continually in order to handle requests from the Clients and to log system events.
Optional tools can also be installed to manage and backup your database. The Microsoft SQL Server Management Studio is a useful tool for doing backups. If you chose to install this optional application, you would have five applications in your installation.
The HMS Server, HMS Client and SQL Server applications can be on the same computer or dispersed over the network on many different computers. HMS Server Manager is always installed on the computer that is running the HMS Server application.
Key Features• Designed to work with the Highpower 8000 Power-Over-Ethernet Access
Controller STA Series Version 8 readers and the new Model 901 Fingerprint Reader.
• Client-Server based technology allows multiple computers managing the same access control system.
• Can handle virtually unlimited number of door controllers or readers. • Virtually unlimited number of card holders with up to 10,000 card holders per
door with some card formats. • Real-Time card activity logging. • HMSE Server runs as a Windows Service to log transactions even when the
client software is not running. • Email Alerts - HMSE can send emails notifying that a particular card or card
holder has accessed the system. • Hyper-Syncing - HMSE can synchronize with multiple controllers simultaneously
(up to 32,000 units at one time) dramatically cutting down the time to update systems with many 8000 panels.
• Microsoft Excel spreadsheet data import. • Redesigned Crystal Reports for data export to many formats. • Re-optimized SQL code speeds up transactions with the Microsoft SQL
database. • Uses TCP/IP based Microsoft .NET Remoting for fast client transactions with the
HMS Server. • Tested to run on 32 & 64 bit Windows XP SP2, Windows Vista, Windows 7,
Windows Server 2003 and Windows Server 2008.
Hardware Compatibility
Currently, the Highpower Management System can manage the Model 8000 two-door power-over-Ethernet door controller, the stand alone Smart Series STA card readers and the Models 902 and 901 Fingerprint Readers. The different types of hardware can be intermixed in the same system simultaneously.
Minimum System Requirements
HMS Enterprise has been tested to work on both 32 bit and 64 bit Microsoft Windows Operating systems.
Tested Operating Systems
Windows XP Home & Professional w/ Service Pack 2, 32 and 64 Bit VersionsWindows Vista, All Editions, 32 & 64 Bit VersionsWindows 7, All Editions, 32 & 64 Bit VersionsWindows Server 2003, All Editions, 32 & 64 Bit VersionsWindows Server 2008, All Editions, 32 & 64 Bit Versions
Non-tested Operating Systems
Windows 2000 w/ Service Pack 3, 32 BitWindows 98Windows 98 Second EditionWindows ME
Hardware Requirements
For 32 & 64 bit Windows Systems running HMS Server & Client
• PC with Intel Pentium 4 or higher.• 1GHz or faster processor.• Minimum of 2 GB of RAM (4GB recommended).• 750 MB of available hard disk space (1 GB recommended).
Installation Procedure
Installation of HMS Enterprise has several steps due to the fact that four applications are involved in the system. The HMS Server, HMS Client and Microsoft SQL Database can be on the same computer or a number of different computers on the same network. Corporate customers typically chose to have the HMS Server on the same computer that runs Microsoft SQL Server and then disperse the Clients over computers in different departments of the company. It does not have to be this way though, as HMS Server can connect to remote database servers and HMS client can connect remotely to the HMS Server. Any computer that runs the Server application will also have the HMS Server Manager application installed which is used to manage the Server.
Installation Procedure Overview
1. Install Microsoft SQL Server Database and setup the SQL Administrator password.
2. Install any Service Packs to Microsoft SQL Server Database.3. Install the Highpower Server on the computer that is to act as the hardware
server. The Highpower Server can only be on one computer in the network.4. Use HMS Server Manager application to build the database on the SQL Server.5. Install the Highpower Client application(s) on computers that will be administering
the system.6. User HMS Server Manager to start the Highpower Server service.7. Use HMS Server Manager to enter your License codes to the Highpower Server.8. Start the HMS Client application and add the new hardware to the system.9. Use the HMS Client application to setup the schedules, cards, fingerprints and
other system information in the system10. Use the HMS Client to send the database to the hardware and perform
monitoring and administrative tasks on the system11. Optionally install Microsoft SQL Server Management Studio Express software to
perform backups of your database.
Windows Prerequisites
Earlier versions of Windows XP, Windows ME, Windows 2000, Windows 98 may require the following applications to be installed before installing HMS Enterprise:
Microsoft .NET 2.0 Framwork for x86 (32 Bit Versions of Windows XP and earlier) http://www.microsoft.com/downloads/details.aspx?FamilyID=0856EACB-4362-4B0D-8EDD-AAB15C5E04F5&displaylang=en
Microsoft .NET 2.0 Framework for x64 (64 Bit Versions of Windows XP and earlier)http://www.microsoft.com/downloads/details.aspx?familyid=B44A0000-ACF8-4FA1-AFFB-40E78D788B00&displaylang=en
Windows Installer Version 2.0 for Windows 98 & Windows ME:http://www.microsoft.com/downloads/details.aspx?familyid=cebbacd8-c094-4255-b702-de3bb768148f&displaylang=en
Windows Installer Version 2.0 for Windows 2000http://www.microsoft.com/downloads/details.aspx?familyid=4B6140F9-2D36-4977-8FA1-6F8A0F5DCA8F&displaylang=en
Please ensure that these are installed if you are running one of the operating systems listed.
Microsoft SQL Database Installation
HMS Enterprise has been tested to operate using either SQL Server 2005 or SQL Server 2008. If you do not own a full version of SQL Server, you can obtain a free version of SQL Server from the Microsoft website. The free version is quite suitable for small to medium size HMS Enterprise installations. The SQL Server can be installed on the same computer as the HMS Server application or a different computer on the network.
Download Microsoft SQL Server from one of the following locations:
Microsoft SQL Server Express 2005 SP3 for x86, x64http://www.microsoft.com/downloads/details.aspx?FamilyId=AE7387C3-348C-4FAA-8AE5-949FDFBE59C4&displaylang=en
Microsoft SQL Server Express 2008 http://www.microsoft.com/downloads/details.aspx?FamilyId=AE7387C3-348C-4FAA-8AE5-949FDFBE59C4&displaylang=en
If you are running a large HMS Enterprise system with many clients, it might be advisable to obtain the full version of Microsoft SQL Server from Microsoft. It may be good experience to try the Express version first to determine suitability.
Microsoft SQL Server 2005 System Requirements
• Supported Operating Systems: Windows 2000 Service Pack 4; Windows 7; Windows Server 2003; Windows Server 2008; Windows Server 2008 R2; Windows Vista; Windows XP
• 32-bit systems (x86) - PC with Intel or compatible Pentium III 600 MHz or higher processor (1 GHz or faster recommended)
• 64-bit systems (x64, ia64) - 1GHz or faster processor • Minimum of 512 MB of RAM (1 GB or more recommended) • 675 MB of available hard disk space
Microsoft SQL Server 2005 Express Edition Installation Procedure
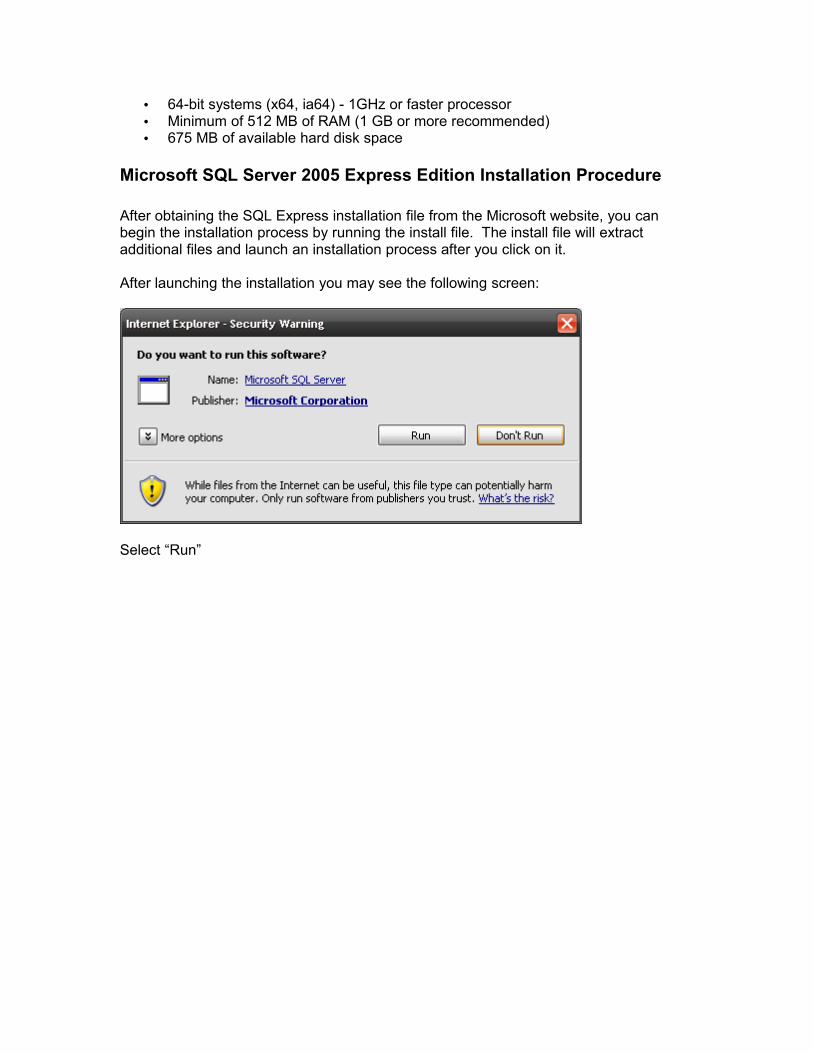
After obtaining the SQL Express installation file from the Microsoft website, you can begin the installation process by running the install file. The install file will extract additional files and launch an installation process after you click on it.
After launching the installation you may see the following screen:
Select “Run”

The first screen provides licensing information:
The express version of SQL Server can be used for both business and personal use.
Select the checkbox for “I accept the licensing terms and conditions” and then select “Next>”
The next screen will prepare some files for the installation of SQL Server:
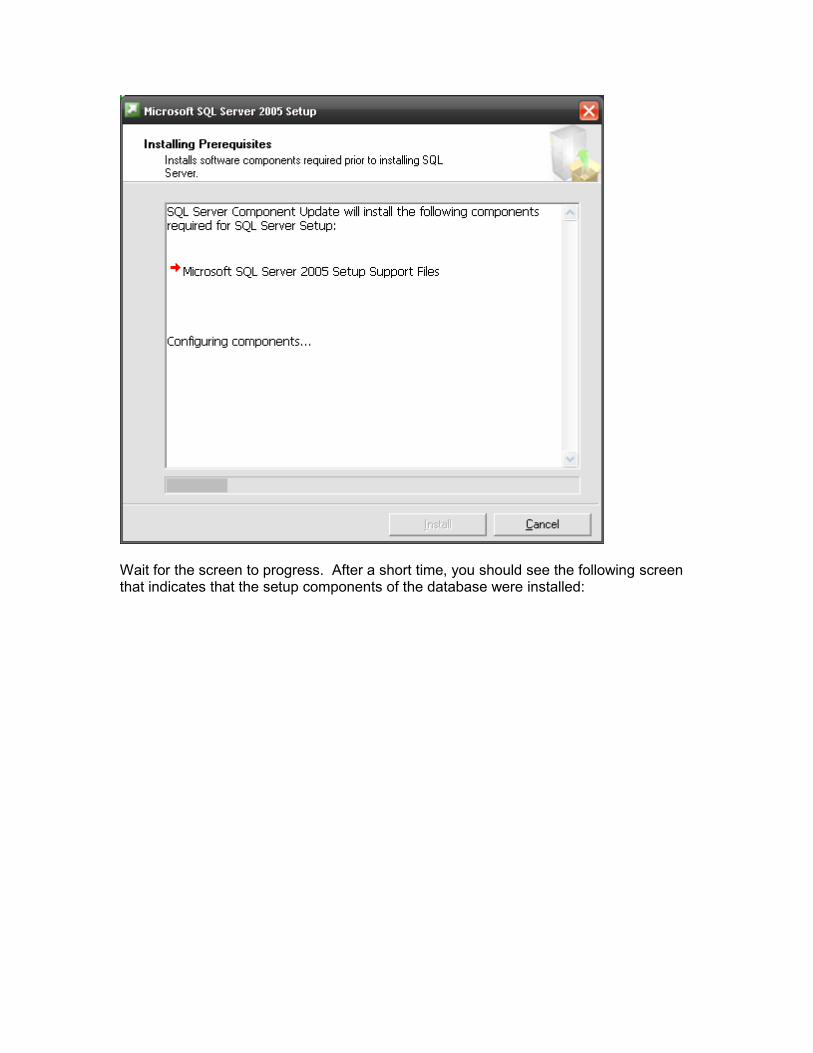
Wait for the screen to progress. After a short time, you should see the following screen that indicates that the setup components of the database were installed:
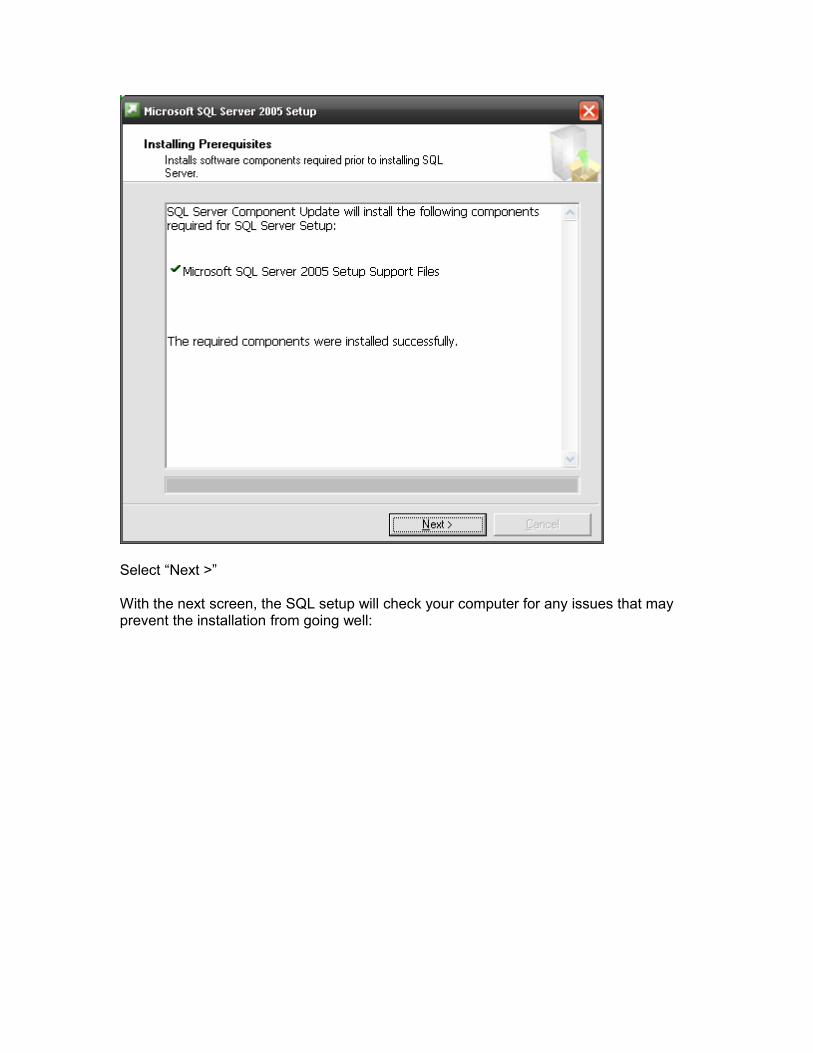
Select “Next >” With the next screen, the SQL setup will check your computer for any issues that may prevent the installation from going well:
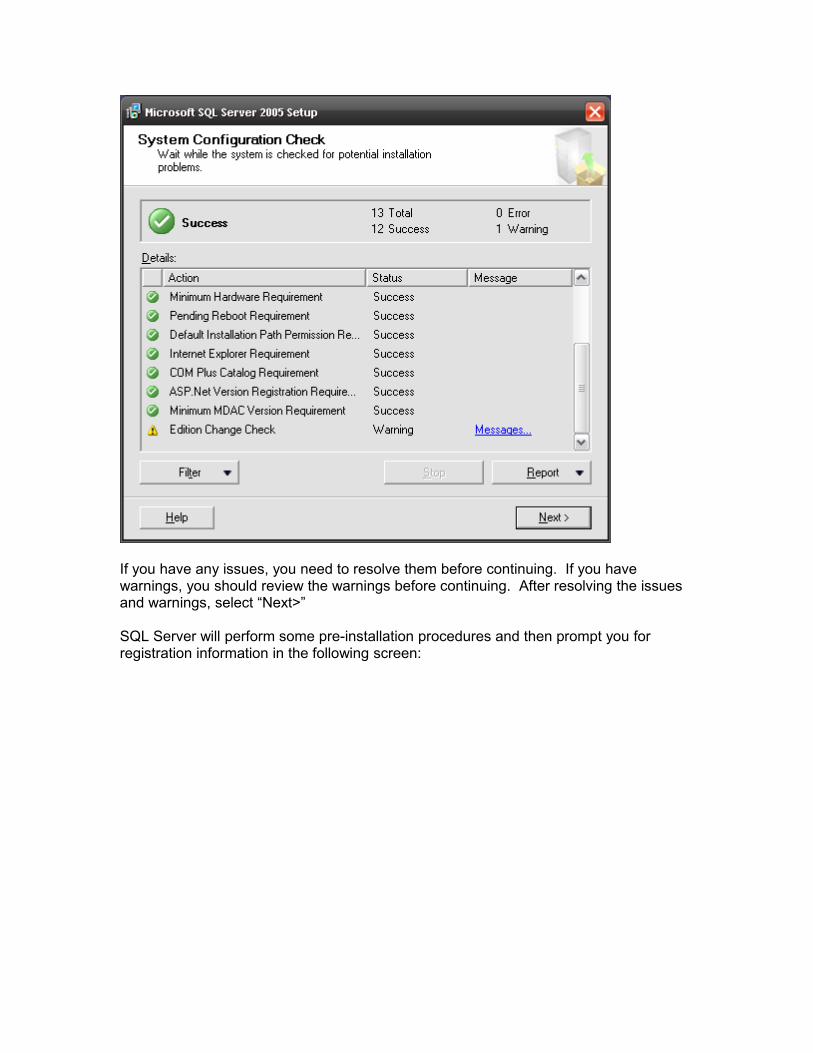
If you have any issues, you need to resolve them before continuing. If you have warnings, you should review the warnings before continuing. After resolving the issues and warnings, select “Next>”
SQL Server will perform some pre-installation procedures and then prompt you for registration information in the following screen:
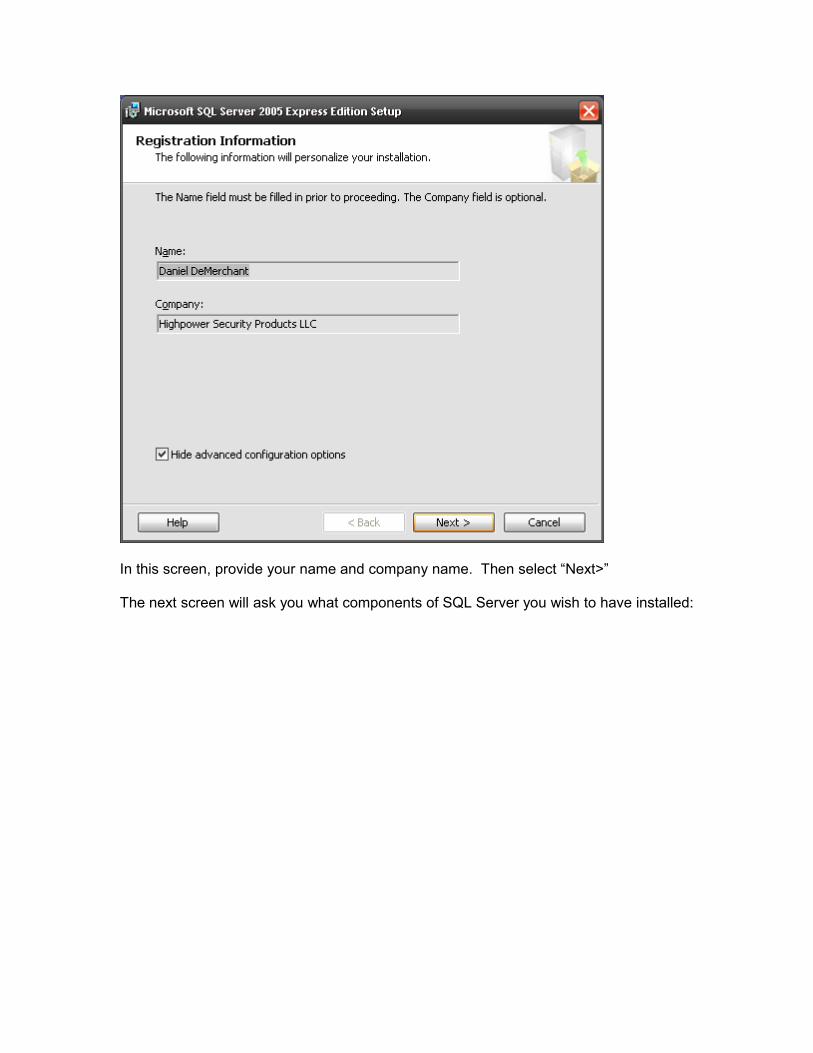
In this screen, provide your name and company name. Then select “Next>”
The next screen will ask you what components of SQL Server you wish to have installed:
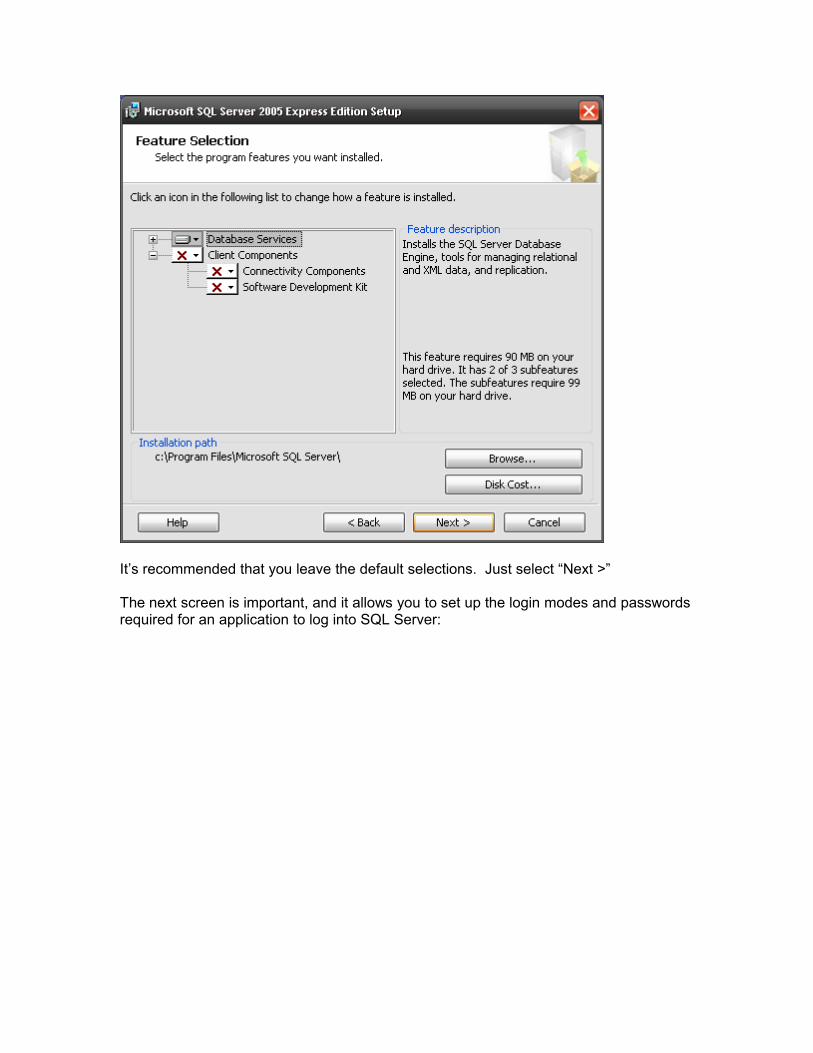
It’s recommended that you leave the default selections. Just select “Next >”
The next screen is important, and it allows you to set up the login modes and passwords required for an application to log into SQL Server:
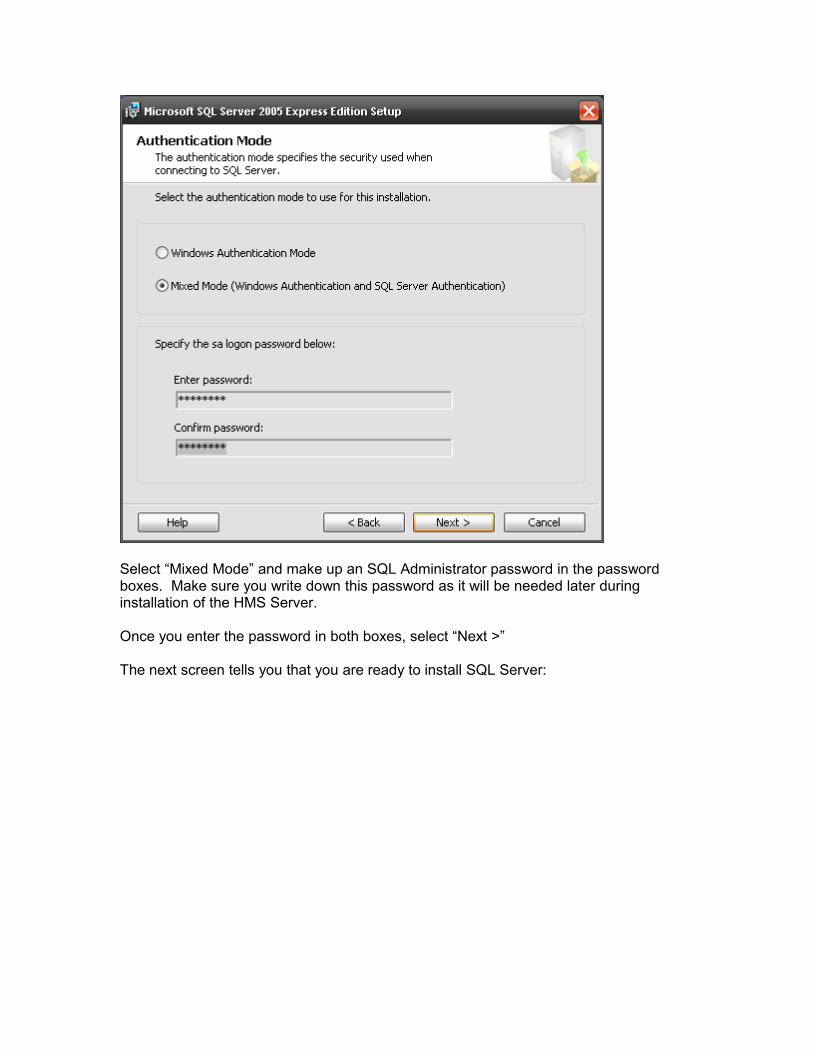
Select “Mixed Mode” and make up an SQL Administrator password in the password boxes. Make sure you write down this password as it will be needed later during installation of the HMS Server.
Once you enter the password in both boxes, select “Next >”
The next screen tells you that you are ready to install SQL Server:

Select “Install”
This will be followed by an installation progress screen:

When the installation is complete you will see:
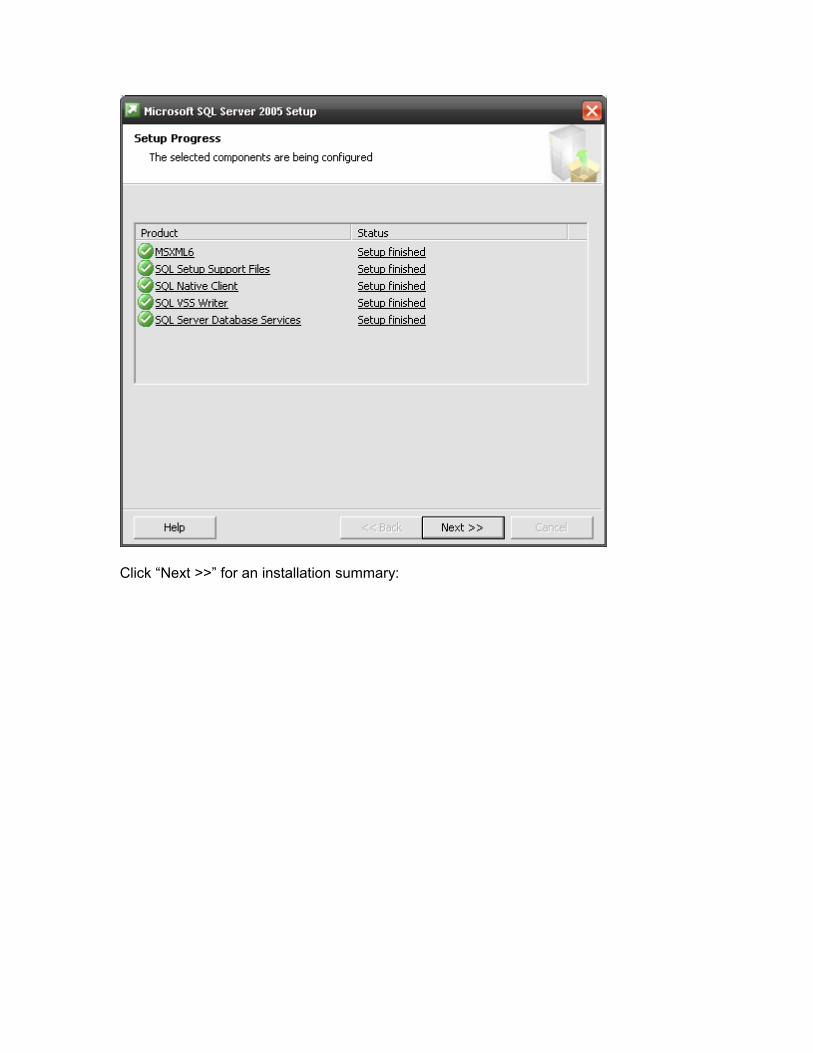
Click “Next >>” for an installation summary:
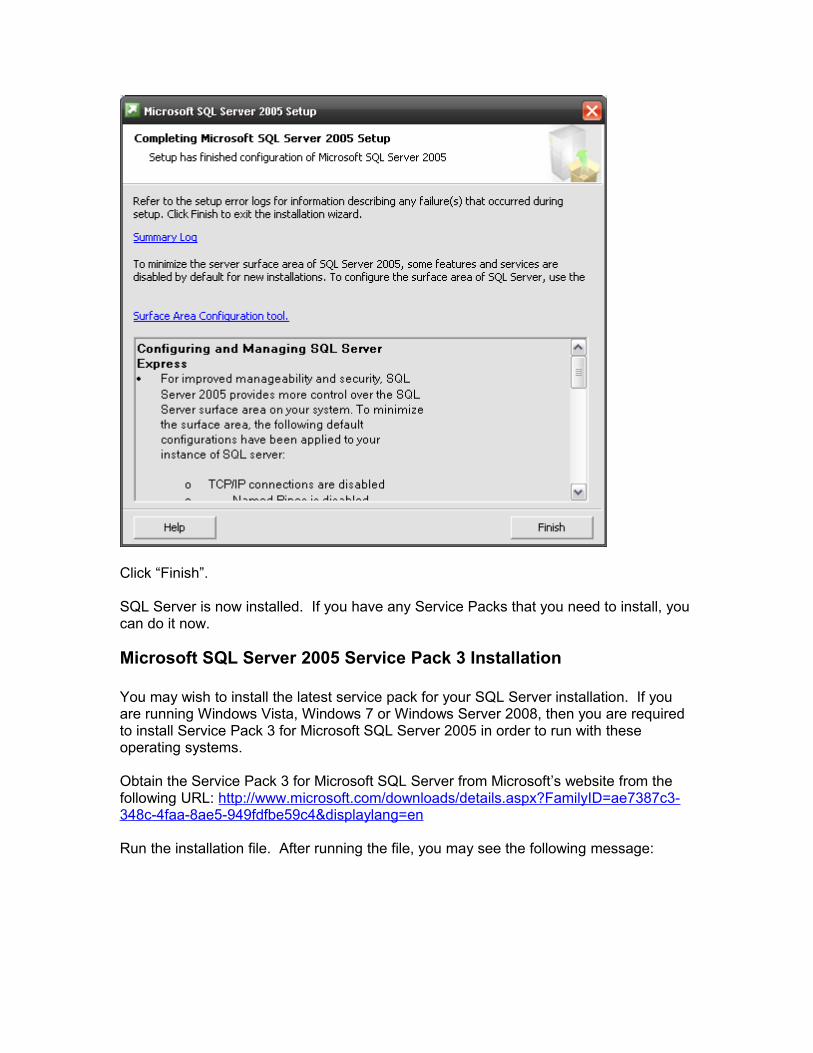
Click “Finish”.
SQL Server is now installed. If you have any Service Packs that you need to install, you can do it now.
Microsoft SQL Server 2005 Service Pack 3 Installation
You may wish to install the latest service pack for your SQL Server installation. If you are running Windows Vista, Windows 7 or Windows Server 2008, then you are required to install Service Pack 3 for Microsoft SQL Server 2005 in order to run with these operating systems.
Obtain the Service Pack 3 for Microsoft SQL Server from Microsoft’s website from the following URL: http://www.microsoft.com/downloads/details.aspx?FamilyID=ae7387c3-348c-4faa-8ae5-949fdfbe59c4&displaylang=en
Run the installation file. After running the file, you may see the following message:
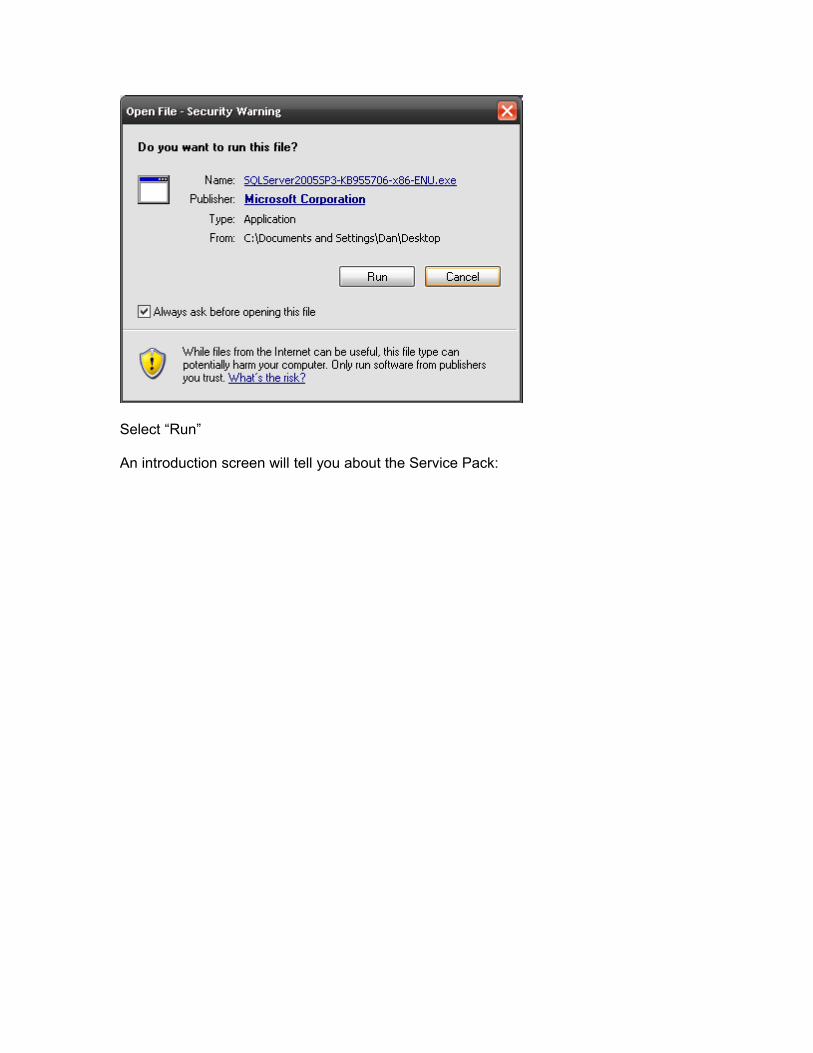
Select “Run”
An introduction screen will tell you about the Service Pack:
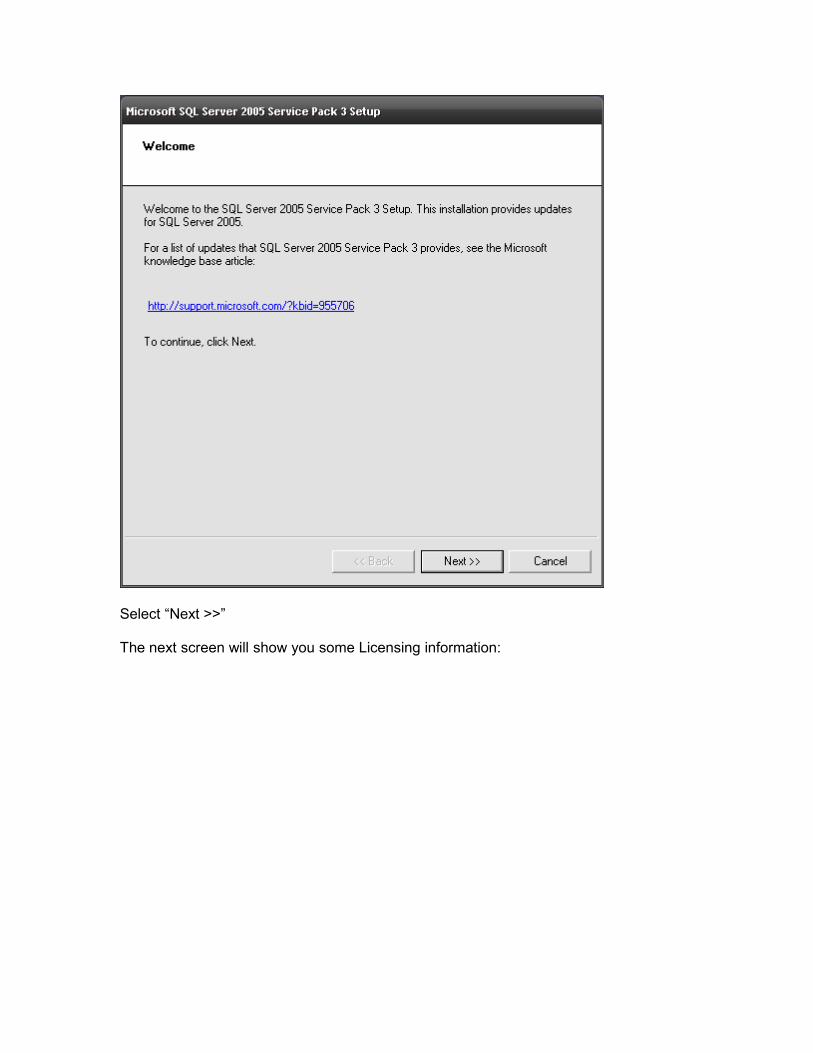
Select “Next >>”
The next screen will show you some Licensing information:
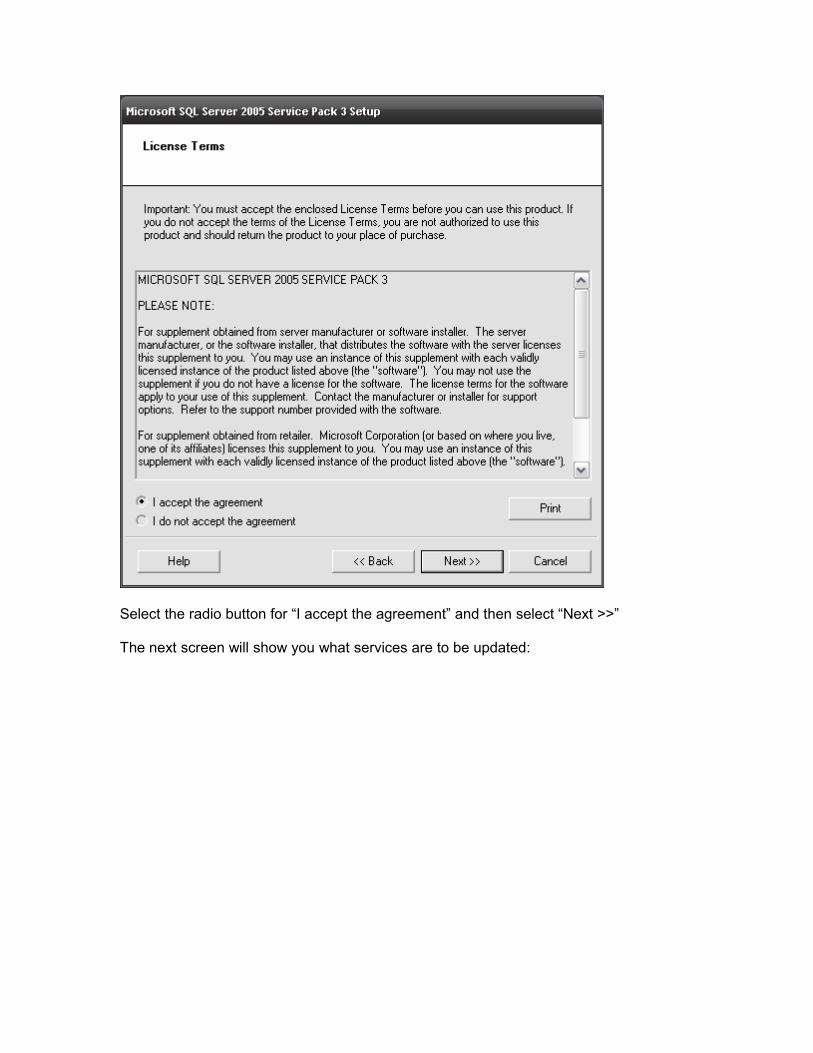
Select the radio button for “I accept the agreement” and then select “Next >>”
The next screen will show you what services are to be updated:
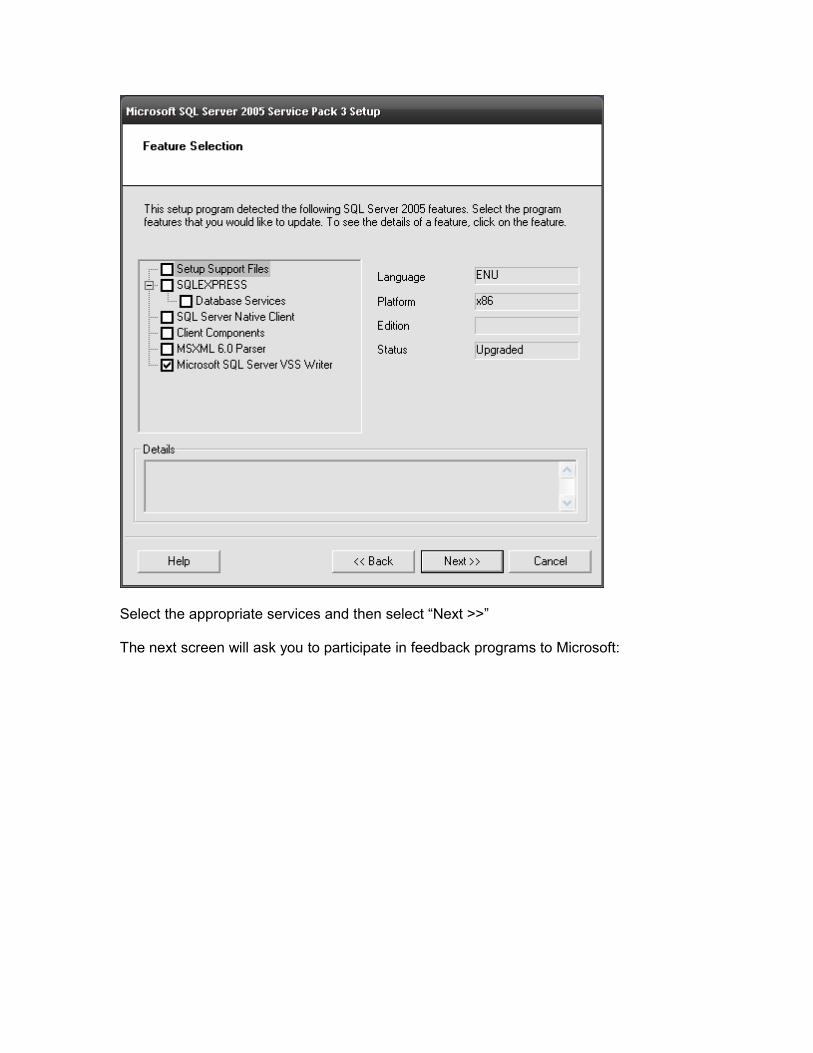
Select the appropriate services and then select “Next >>”
The next screen will ask you to participate in feedback programs to Microsoft:

You may or may not wish to participate. Select the appropriate check boxes and then select “Next >>”
The next screen will checked for locked files and processes:
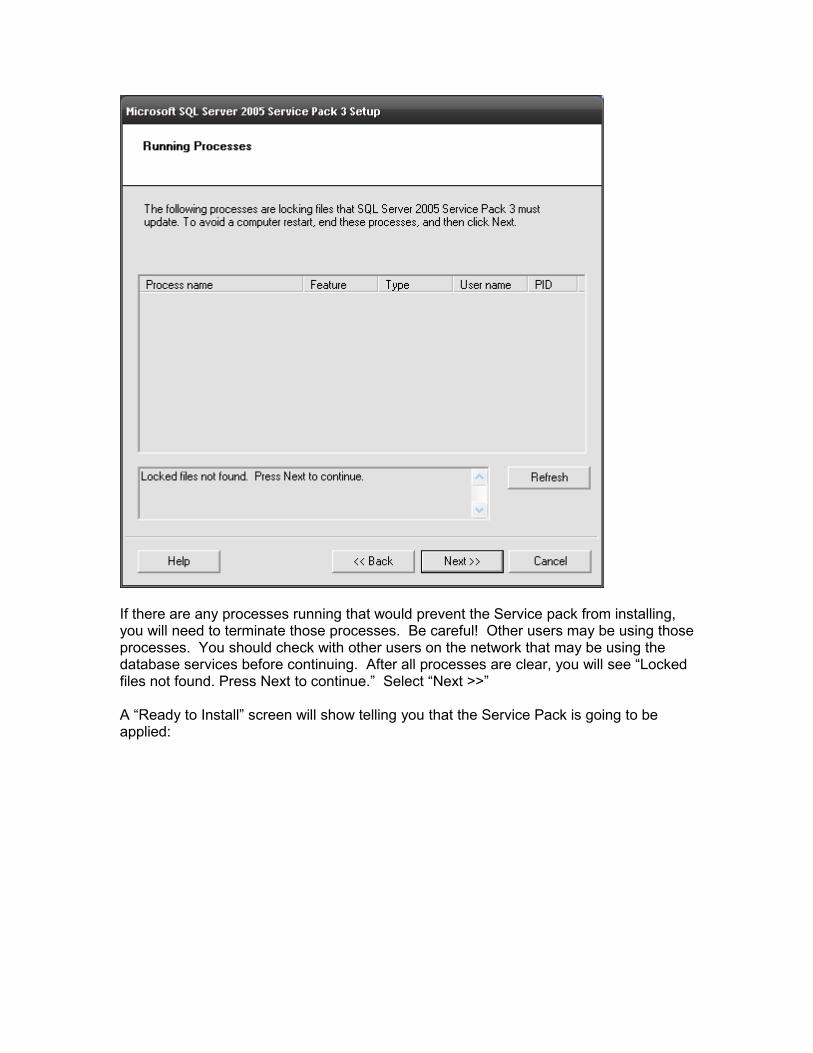
If there are any processes running that would prevent the Service pack from installing, you will need to terminate those processes. Be careful! Other users may be using those processes. You should check with other users on the network that may be using the database services before continuing. After all processes are clear, you will see “Locked files not found. Press Next to continue.” Select “Next >>”
A “Ready to Install” screen will show telling you that the Service Pack is going to be applied:

Select “Install” to apply the Service Pack.
Wait until the progress screen completes:
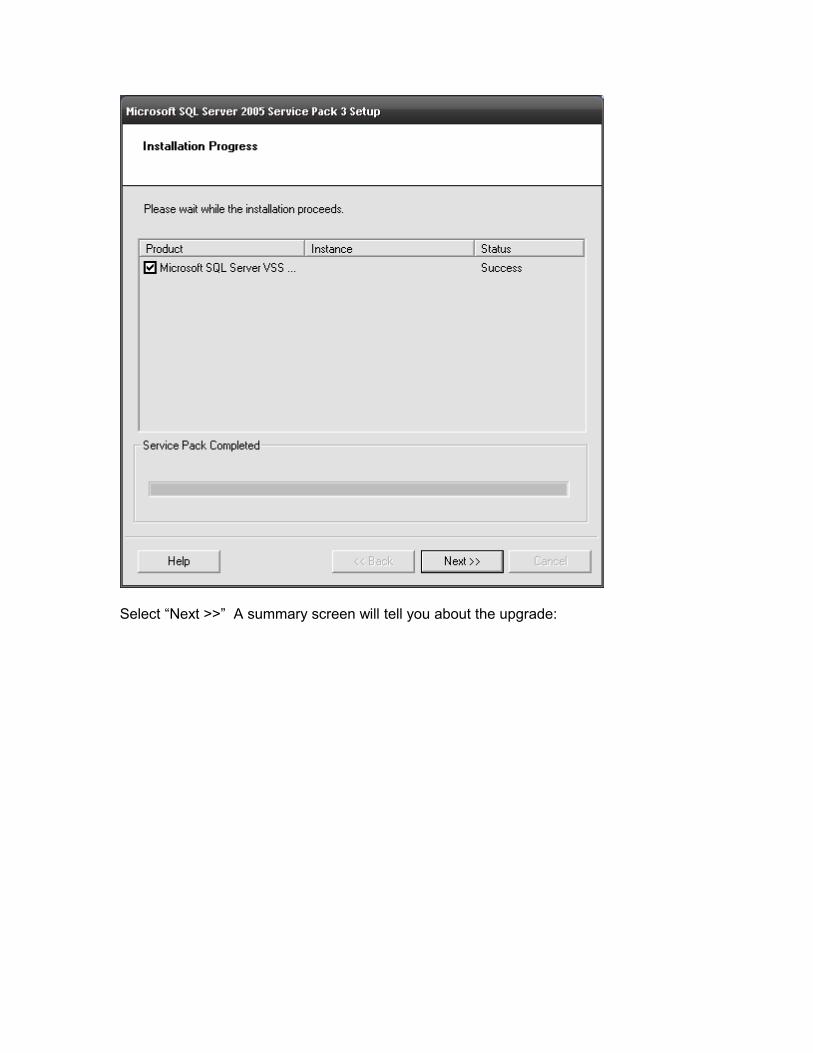
Select “Next >>” A summary screen will tell you about the upgrade:
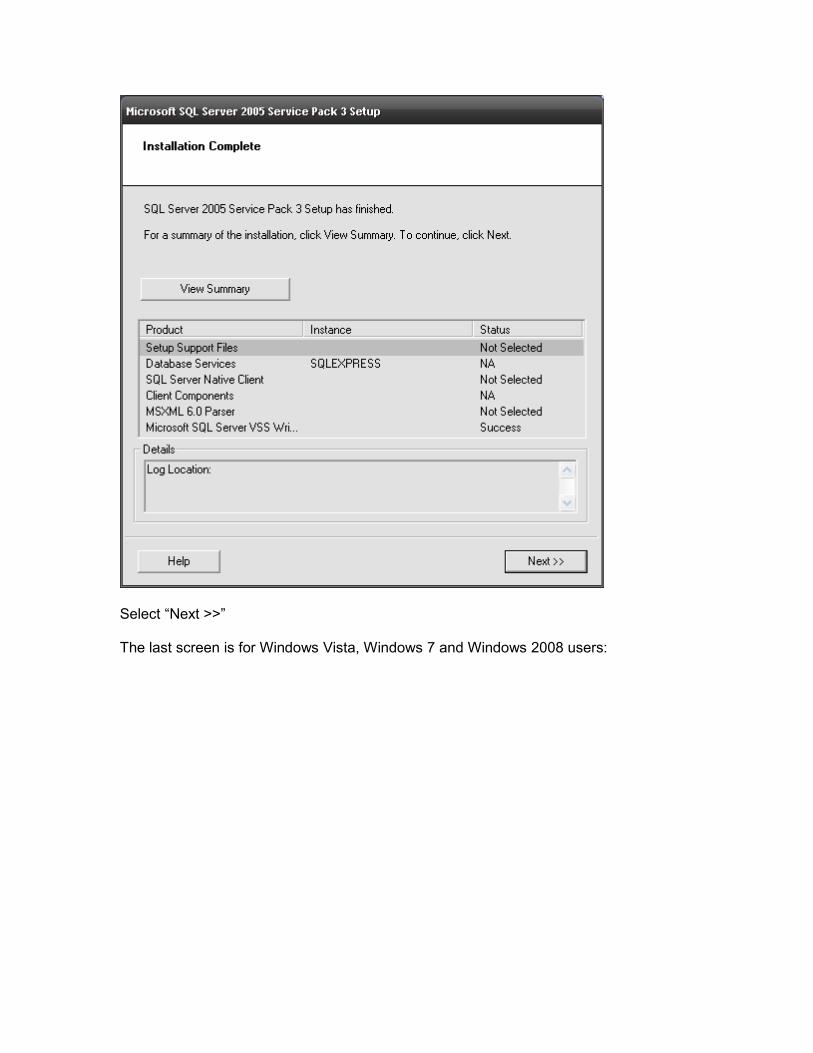
Select “Next >>”
The last screen is for Windows Vista, Windows 7 and Windows 2008 users:
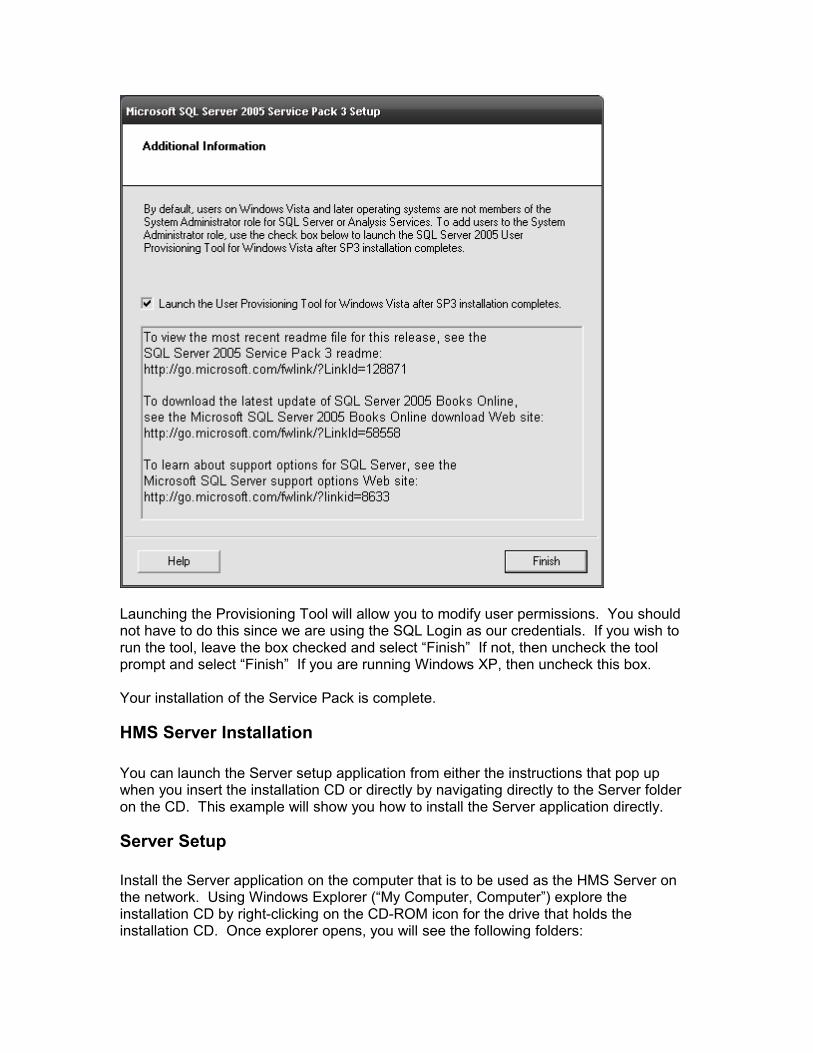
Launching the Provisioning Tool will allow you to modify user permissions. You should not have to do this since we are using the SQL Login as our credentials. If you wish to run the tool, leave the box checked and select “Finish” If not, then uncheck the tool prompt and select “Finish” If you are running Windows XP, then uncheck this box.
Your installation of the Service Pack is complete.
HMS Server Installation
You can launch the Server setup application from either the instructions that pop up when you insert the installation CD or directly by navigating directly to the Server folder on the CD. This example will show you how to install the Server application directly.
Server Setup
Install the Server application on the computer that is to be used as the HMS Server on the network. Using Windows Explorer (“My Computer, Computer”) explore the installation CD by right-clicking on the CD-ROM icon for the drive that holds the installation CD. Once explorer opens, you will see the following folders:
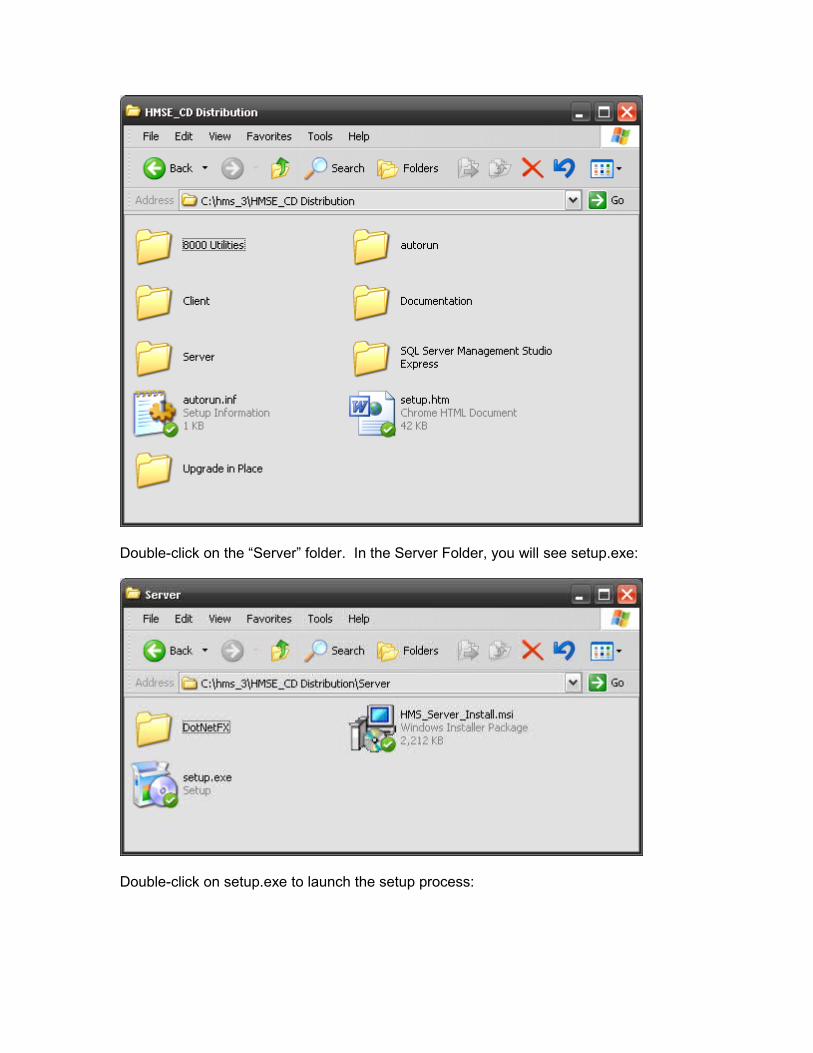
Double-click on the “Server” folder. In the Server Folder, you will see setup.exe:
Double-click on setup.exe to launch the setup process:

Click “Next >” The next screen will ask you to specify the installation folder location for the Server. It’s a good idea to use the default folder:

Leave the “Install HMS Server for yourself, or for anyone who uses this computer” on “Everyone” as it does not apply to the installation. Once you have specified the installation directory, just select “Next >”
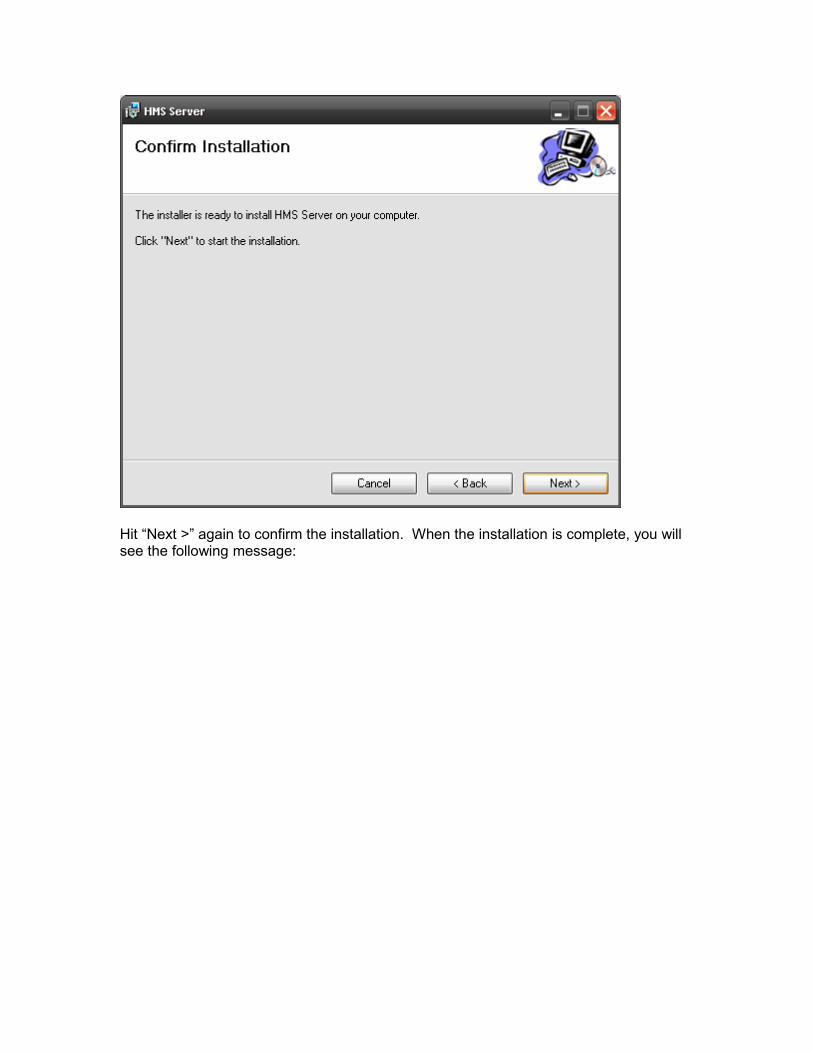
Hit “Next >” again to confirm the installation. When the installation is complete, you will see the following message:
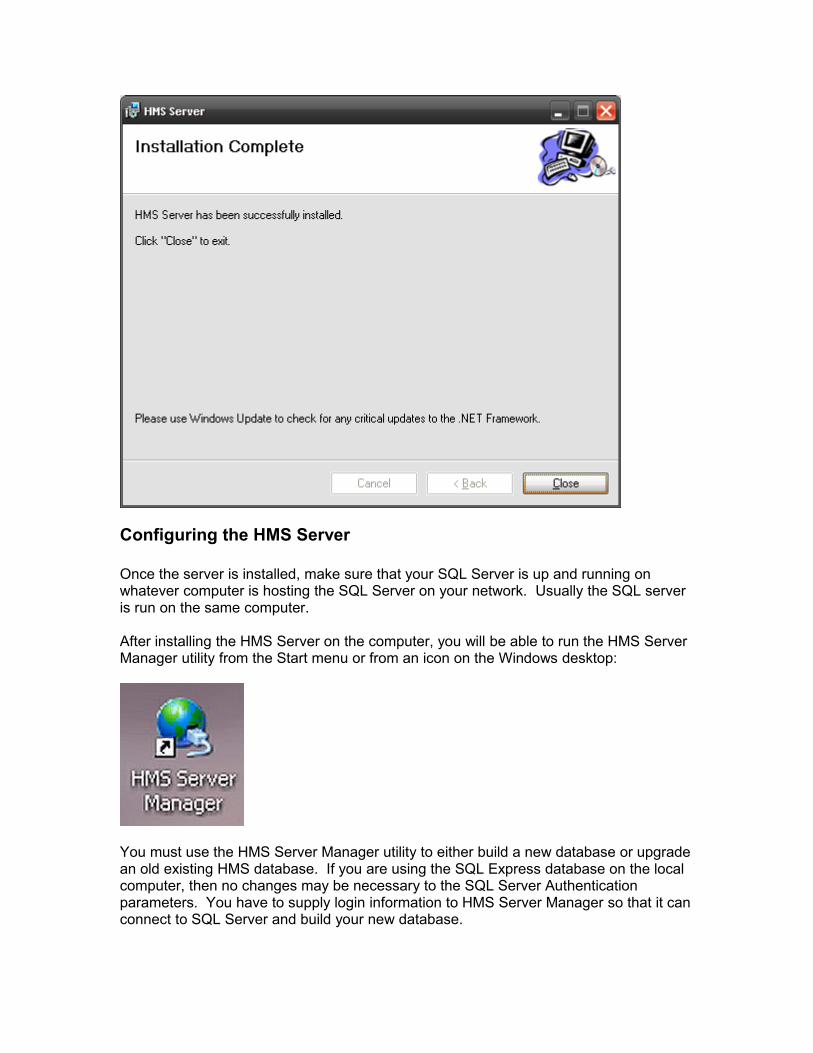
Configuring the HMS Server
Once the server is installed, make sure that your SQL Server is up and running on whatever computer is hosting the SQL Server on your network. Usually the SQL server is run on the same computer.
After installing the HMS Server on the computer, you will be able to run the HMS Server Manager utility from the Start menu or from an icon on the Windows desktop:
You must use the HMS Server Manager utility to either build a new database or upgrade an old existing HMS database. If you are using the SQL Express database on the local computer, then no changes may be necessary to the SQL Server Authentication parameters. You have to supply login information to HMS Server Manager so that it can connect to SQL Server and build your new database.

Launch HMS Server Manager. After launching, you will see the main screen of Server Manager:
Specify the Login Parameters for SQL Server
Since the HMS Server runs as a Windows Service, a proper installation requires that we provide a login and a password for the database. Since Windows services do not run under a specific user account, you should not use the “Windows Authentication Mode” although you may be able to if the SQL Server is running on the same computer that you are installing the HMS Server on.
During the installation of SQL Server, we provided a password for the Administrative account. Here, we will use that password to allow us to connect to the database using that account. If you are savvy with SQL Server and you are interested in connection parameters that provide a higher security, you can set up your own user account in SQL Server and you also have the ability to specify login parameters manually using the “Manual Edit Connection String” tab.
In this example to keep things basic we will use the standard Administrator account. First, select the “SQL Server Authentication” mode. Next, provide the user name of “sa” as the Administrator Login (which stands for “Super Administrator”) and supply the

password that you created when you installed SQL Server. Your Server Manager should look like the following:
Hit the “Test Connection” button. This will test to see if you have a connection to the database and will verify that your login is incorrect. If you get an error after hitting Test Connection, you need to verify that you entered your password correctly, need to verify that the SQL Server is running and need to verify that a Firewall is not blocking your connection. After a successful connection, you will see a message telling you that the connection was successful:
Click “OK”

Create the Initial Database
After clicking OK, you will be back at the main screen of the Server Manager. Click on the “Create Database” button at the bottom of the screen. If the database was created correctly, you will see the following confirmation:
Error During the Creation of Database
If you get an error at this point, then you may be trying to over-write an old un-mounted database. You may have to correct this. If there is a database named “Highpower.mdf” and a log file named “Highpower_log.LDF” in the data folder of the server, you will need to delete these manually to correct the issue. The data folder is normally located at the following path: C:\Program Files\Microsoft SQL Server\MSSQL.1\MSSQL\Data
Upgrading an Old HMS Database to the Current Version
If you are upgrading your HMS installation from earlier versions, then update the database instead of creating a new one. First make a backup of the current database by selecting “Backup Database to File” under the “SQL Server” pull-down menu.
After performing the backup, update the database by pulling down the SQL Server pull down menu and selecting “Upgrade Database to Current Version. Only use this option if you are a current HMS user with an old database that has information you need in your new installation.
Once the HMS Server Management utility creates the database, it will automatically create a couple of small entries in the Windows registry. These entries tell HMS Server where to find the database.
Start Up HMS Server with Server Manager
Once the database is created, you can start the Highpower server. To start the Highpower Server using HMS Server Manager, pull-down the “HMSE Server” menu and then select “Start the Highpower Server”.
Firewall Settings & Port Functions
If you are running clients on remote computers, you need to add the server access ports to your firewall on the server computers. Add the following ports to your firewall on the
computer that is running HMS Server: TCPIP port 50000, TCPIP port 50001 and UDP port 53001.
Port Functions:
TCPIP Port 50000 – Used for communications of .NET Remoted routines running on the server. The clients use code that runs on the server computer in some cases. In order for this code to run remoted on the client, this port needs to be opened on the server. Not opening this port will prevent the clients from connecting to the server.
TCPIP Port 50001 – Used for quick direct messages from clients with immediate responses from the Server. If this port is not opened, your client will connect to the server but direct commands (like door unlock commands) will not get to the HMS Server and the server will not be able to service your request.
UDP Port 53000 – Used to detect the hardware devices on the network. HMS Server allows you to setup device TCPIP parameters through this port. If you are having problems detecting your devices in the HMS Client, make sure this port is opened on the Server computer.
If you are using the Windows firewall, you need to add these two ports as exceptions.
Configuring the Windows Firewall to Work with HMS Clients
This section will show you how to configure the Windows firewall on the computer that is running HMS Server. If you are running a firewall from another vendor, the procedure could be much different. If you are running the Windows firewall, this procedure will allow your clients to connect to the HMS Server.
If you are running Active Directory, you will have to contact your network administrator to open up these ports using Group Policies. This procedure is outside of the scope of this document.
The following example is given using Windows XP, but other Windows operating systems are similar.
Navigate to the Windows Control Panel from the Start Menu:

Under Control Panel, there should be an entry for “Windows Firewall”. The control panel usually lists entries in alphabetical order, so you might have to look towards the end of the panel to find it.
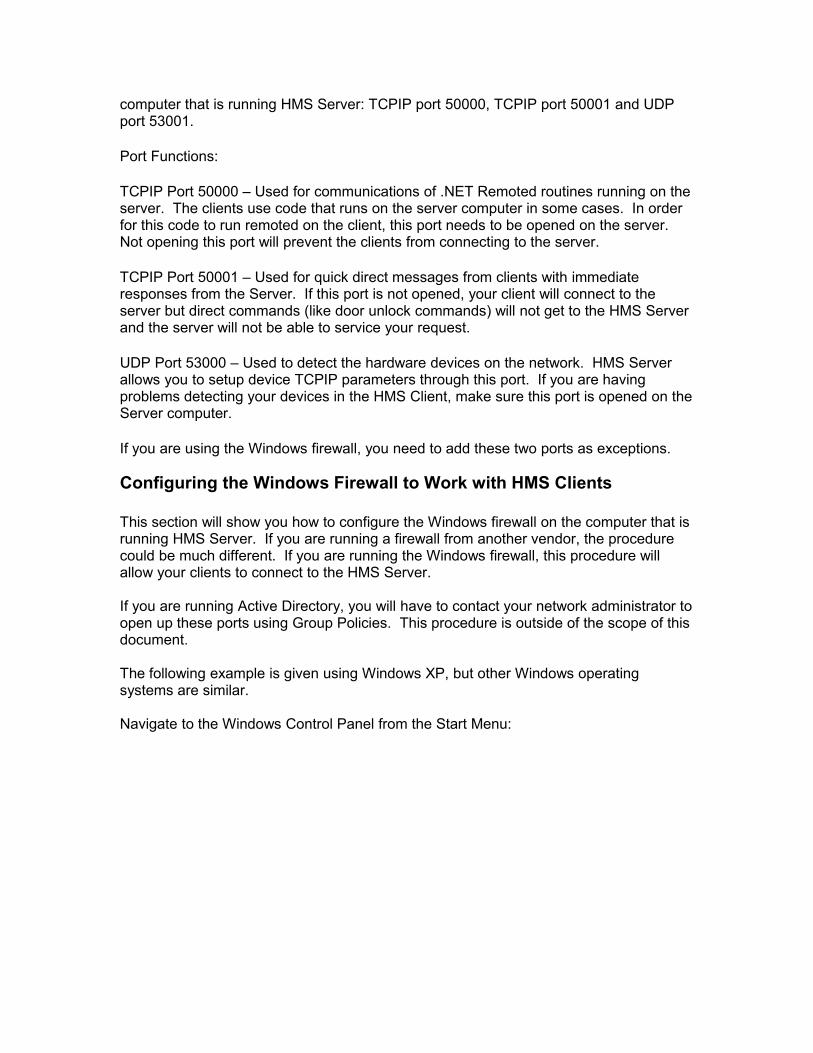
Double click on the Windows Firewall icon. The Windows Firewall configuration screen will open:
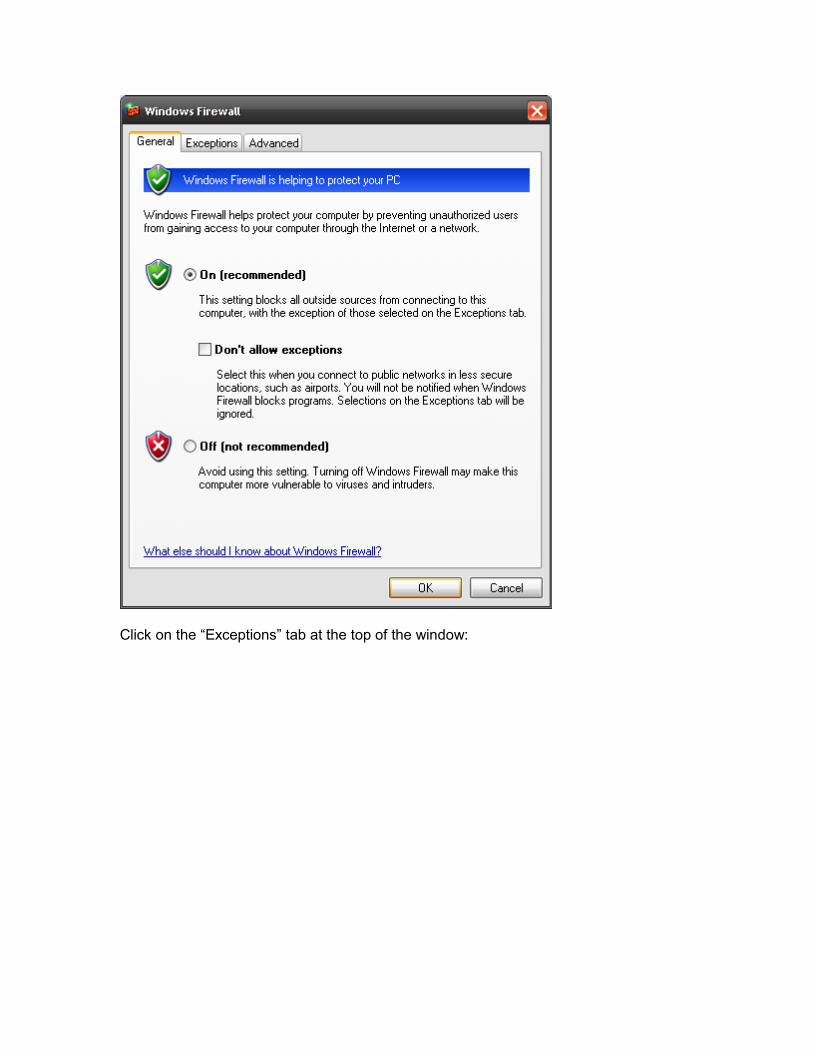
Click on the “Exceptions” tab at the top of the window:
Click on the “Add Port…” button:

For the “Name” field, enter a name that references the purpose of this exception. You may want to use “HMS Server” as a name for all of these Exceptions.
Then enter the appropriate Port Number and select the Port type:
Once this is completed, click “OK” This will add the exception to the Windows Firewall:

Repeat the process for the other ports.
Licensing Your Installation
HMS Server can work with hardware from different manufacturers. It’s normally licensed to customers based on the number of doors that they have in the system. For customers that purchase hardware directly from Highpower, a software license is provided to you with your purchase. For customers that use HMS with hardware from other manufacturers, they need to contact Highpower to purchase a license based on the number of doors in your system.
You register your server installation using Server Manager using the “Activation” pull-down menu. The HMS Server will generate request codes that are supplied to Highpower sales during the unlocking of the software. Contact Highpower at 203-634-3900 to obtain your software license.
If you do not provide a license to the HMS Server, HMS Server will run in full demonstration mode, which allows you to use all features except the full synchronization.
HMS Client Installation
After finalizing your server installation you will want to install HMS Clients on every computer that requires an instance of the software. The client software must be installed separately and in addition to the server software if you require a client application on the server computer. You can have as many clients as you require in an HMS system, but you can have only one server.
Client Setup
You can launch the Client setup application from the instructions that pop up when you insert the installation CD or directly by navigating directly to the Client folder on the CD. This example will show you how to install the Client application directly.
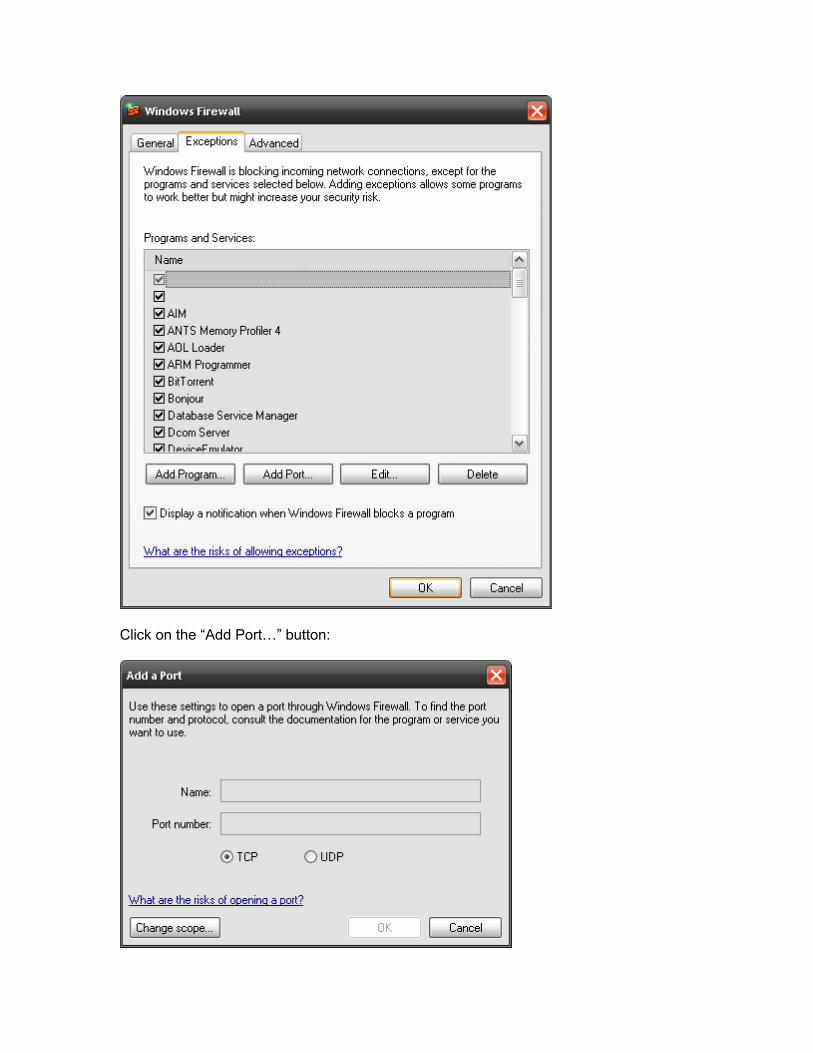
Install the Client application on any computer where a system administrator needs access to the HMS system. Using Windows Explorer (“My Computer” or “Computer”) explore the installation CD by right-clicking on the CD-ROM icon for the drive that holds the installation CD. Once explorer opens, you will see the following folders:
Double-click on the “Client” folder. In the Client Folder, you will see setup.exe:

Double click on setup.exe. The following screen will appear:
Click “Next >” The next screen will ask you to specify the installation folder location for the Client. It’s a good idea to use the default folder:
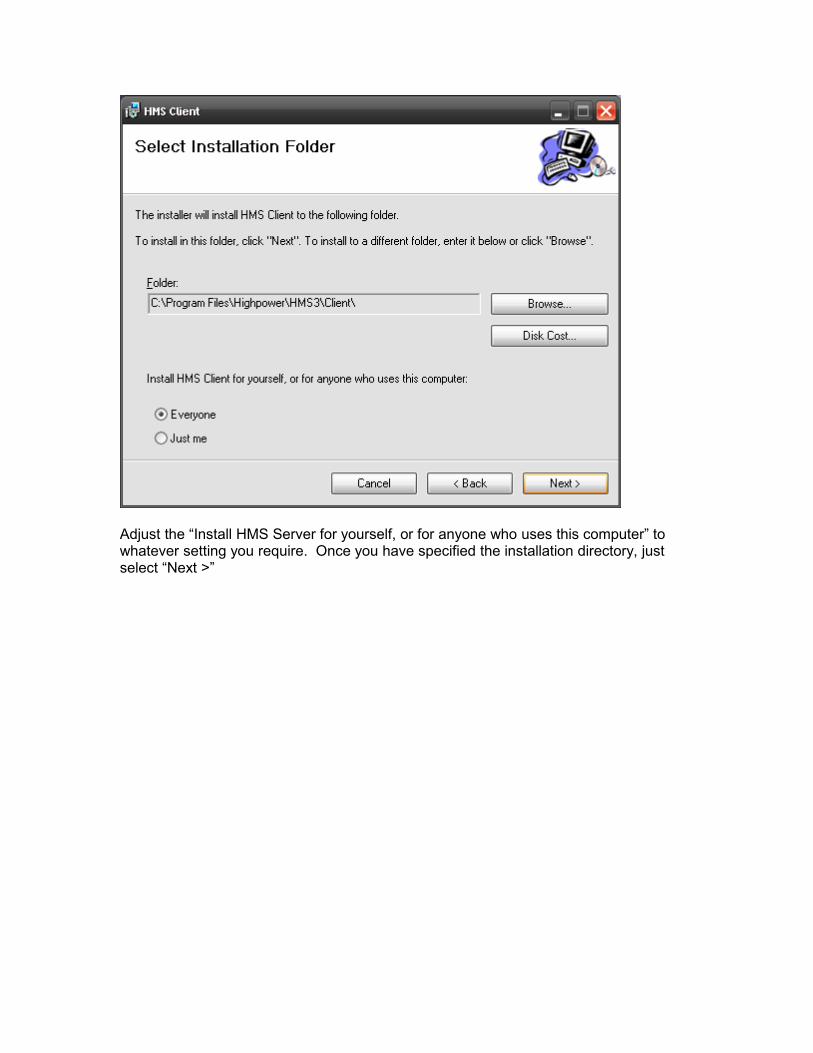
Adjust the “Install HMS Server for yourself, or for anyone who uses this computer” to whatever setting you require. Once you have specified the installation directory, just select “Next >”
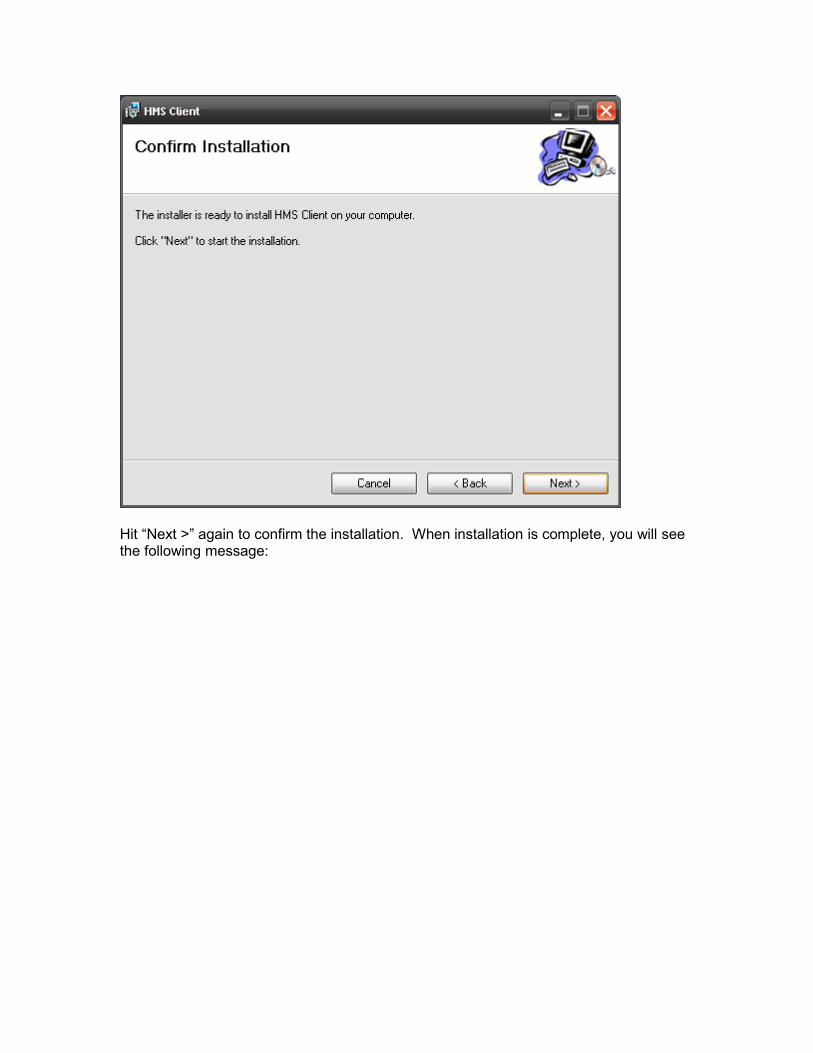
Hit “Next >” again to confirm the installation. When installation is complete, you will see the following message:
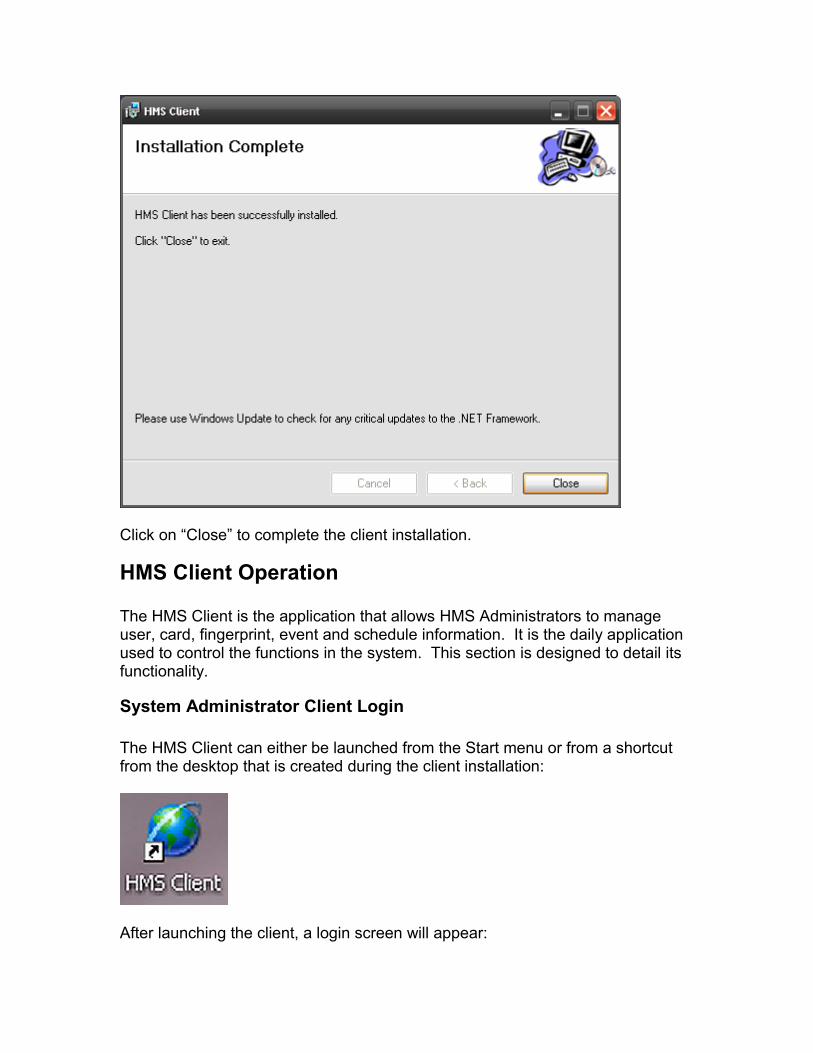
Click on “Close” to complete the client installation.
HMS Client Operation
The HMS Client is the application that allows HMS Administrators to manage user, card, fingerprint, event and schedule information. It is the daily application used to control the functions in the system. This section is designed to detail its functionality.
System Administrator Client Login
The HMS Client can either be launched from the Start menu or from a shortcut from the desktop that is created during the client installation:
After launching the client, a login screen will appear:
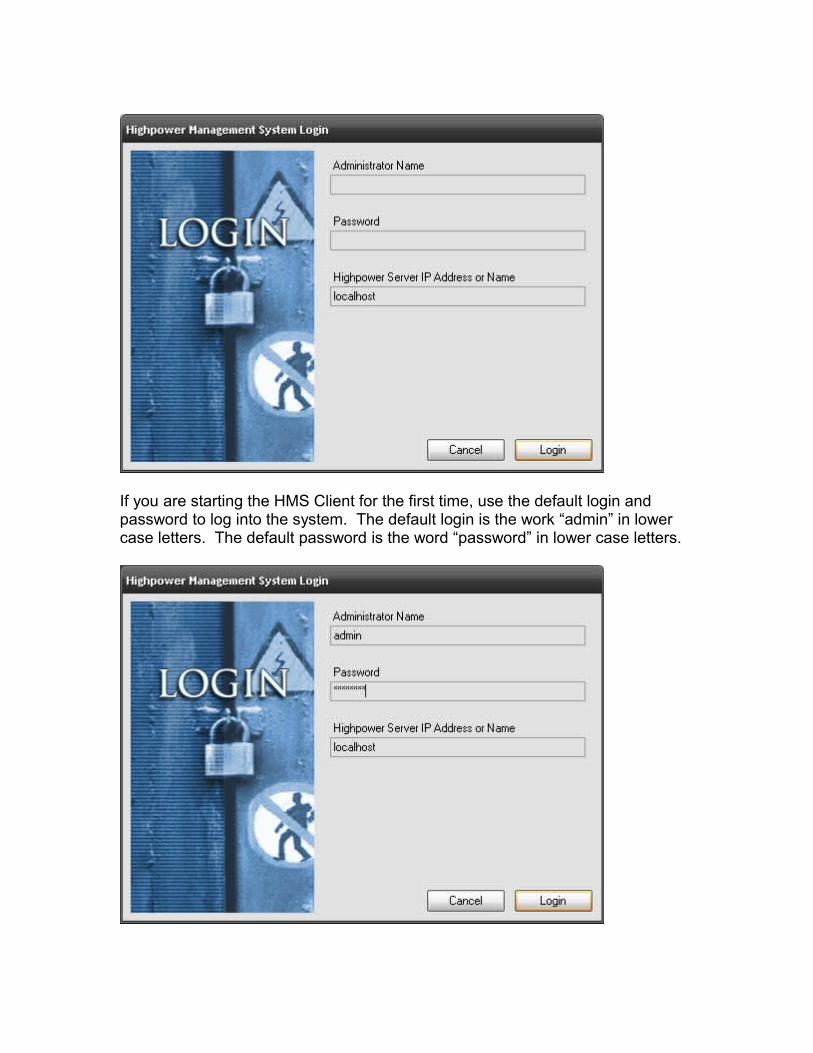
If you are starting the HMS Client for the first time, use the default login and password to log into the system. The default login is the work “admin” in lower case letters. The default password is the word “password” in lower case letters.

Next, enter the name or IP address of the computer that is hosting the HMS Server. If your computer has only one network adaptor, and the HMS Server is running on your machine, you can use the word “localhost” in this field to connect to the server. If HMS Server is hosted on another computer in your network, enter the network name of that computer or that computer’s IP address.
Any network name or IP address you enter in this field will be saved and recalled automatically the next time you login.
Once your login is accepted, the client will open allowing you to manage the system. If your password or login is incorrect, the password text box will clear itself after you click on the “Login” button. In this case, you should verify your login information and make sure that the ports are opened up on the server computer for client connections.
Notes on Using “localhost” to Point to the HMS Server
If your computer has multiple network adaptors, or you have IPV6 enabled, you may find that “localhost” will not allow you to connect properly to a local HMS Server. If so, enter one of the IP addresses of your computer in this text box instead of the word “localhost” as your computer may have trouble resolving “localhost” as a network name.
If you do not know the IP addresses of your computer, you can find out by opening a Command Prompt, and running “ipconfig”. The command prompt can be launched from the start menu directly or by using the “Run…” feature of the start menu and entering “cmd”.
IPCONFIG will give you detailed information about your computer’s network setup similar to the following:
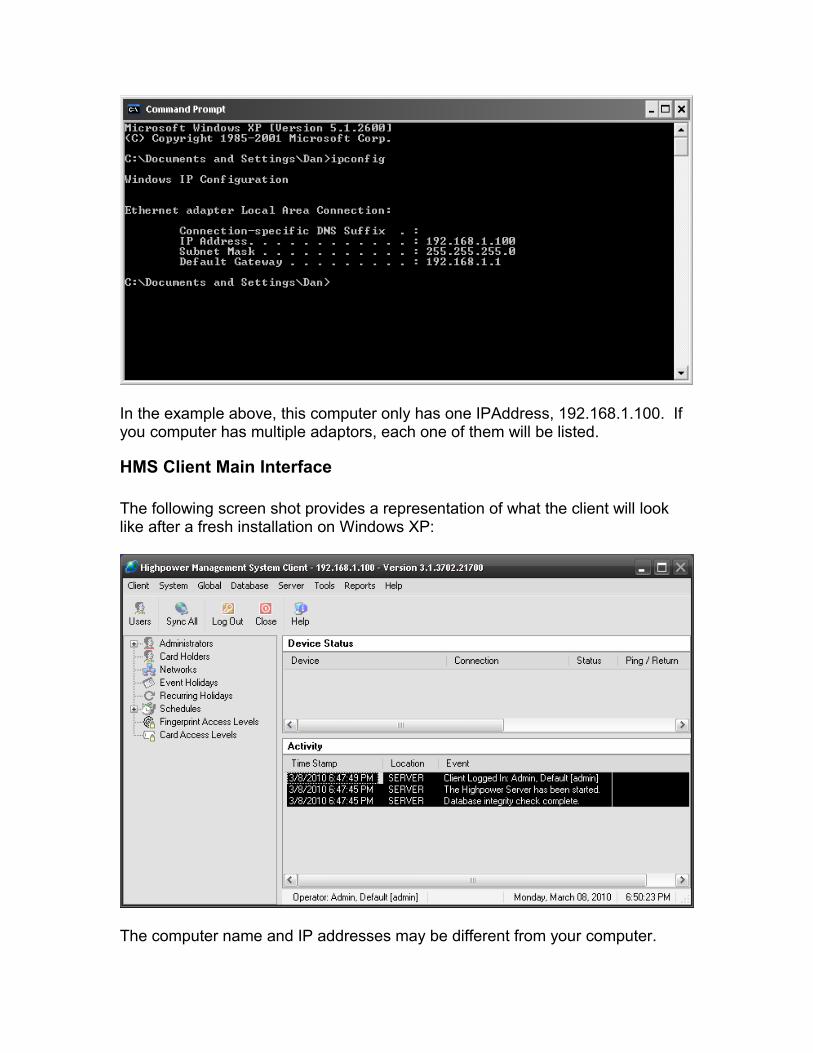
In the example above, this computer only has one IPAddress, 192.168.1.100. If you computer has multiple adaptors, each one of them will be listed.
HMS Client Main Interface
The following screen shot provides a representation of what the client will look like after a fresh installation on Windows XP:
The computer name and IP addresses may be different from your computer.
AppendixSolving Start Up Problems with HMS Server
Your HMS Server should be up and running at this point. If you get an error and can not start the server, you can check your Windows application log to determine the problem. The Server will not start under the following conditions:
1. The HMS Server can not connect to the SQL Database. Check password, login and firewall settings.
2. The SSCProt.dll file is unregistered. This is a very rare occurrence. Register this file manually to correct the problem. To register this file, open a command prompt and navigate to the Server installation folder (which is normally C:\Program Files\Highpower\HMS3\Server). Then type “regsvr32 SSCProt.dll” and hit enter. This will permanently register this file, resolving this issue.
3. The database is not the correct version for this HMS Server. Verify that your upgrade has been done to bring the database to the current version.