SMAW Pipe Welding Techniques. Positions 1G 2G 5G 6G 1F 2F 2FR 4F 5F.
Upload
pranavjoshi84Category
view
42download
3description

SMAW Welding Techniques
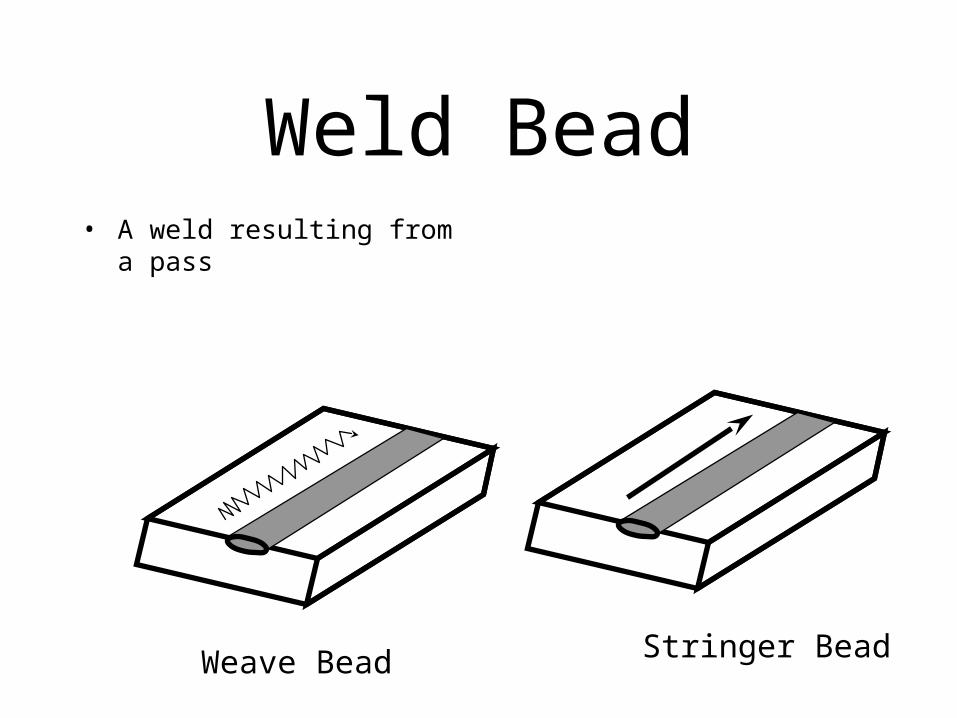
Weld Bead• A weld resulting from a pass
Stringer BeadWeave Bead

Passes
• Weld Pass - A single progression of welding along a joint. The result of a pass is a weld bead or layer
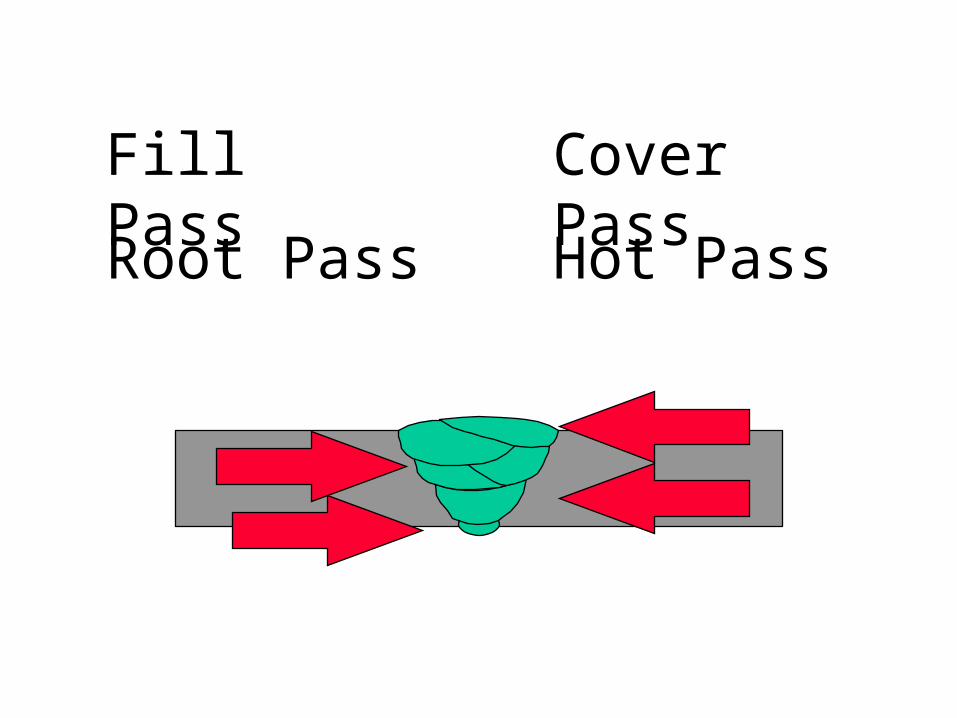
Root Pass Hot Pass
Fill Pass Cover Pass

Techniques• Stringer (drag) (whip)• Weave
– Circles– crescent– zig zag– box weave– double J

Progression (vertical)
• Up– deeper penetration – Higher deposit rate (lb/hr)– Use near 90 degree travel angle or slightly up
• Down – faster (point to point)– less penetration for thin metal– less dilution– Use steep grag angle

Travel Speed
• Stay on the leading edge of the puddle

Flat Position
• Fillet/Groove - stringer or weave, split bead or wide weave

Horizontal• Fillet/Groove - stringers (small weave may be used in tight place)
• Bead Placement - bottom to top

Vertical
• Fillet/Groove - weave (or whip but not straight stringers)
• Root pass 6010 whip
• Root pass 7018 straight stringer or weave (open closed)
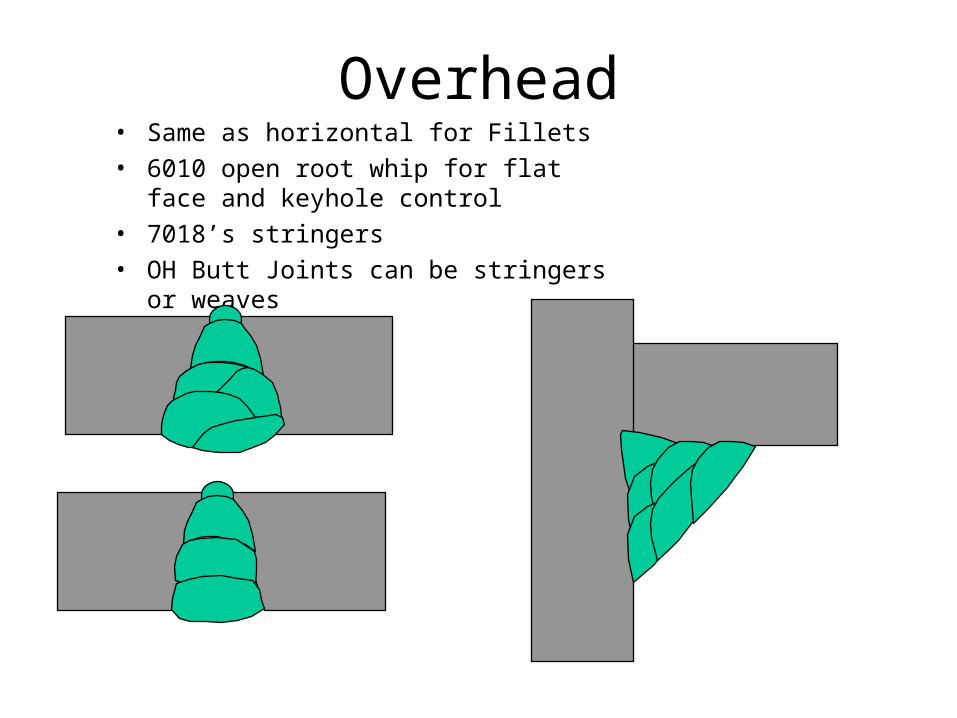
Overhead• Same as horizontal for Fillets
• 6010 open root whip for flat face and keyhole control
• 7018’s stringers
• OH Butt Joints can be stringers or weaves
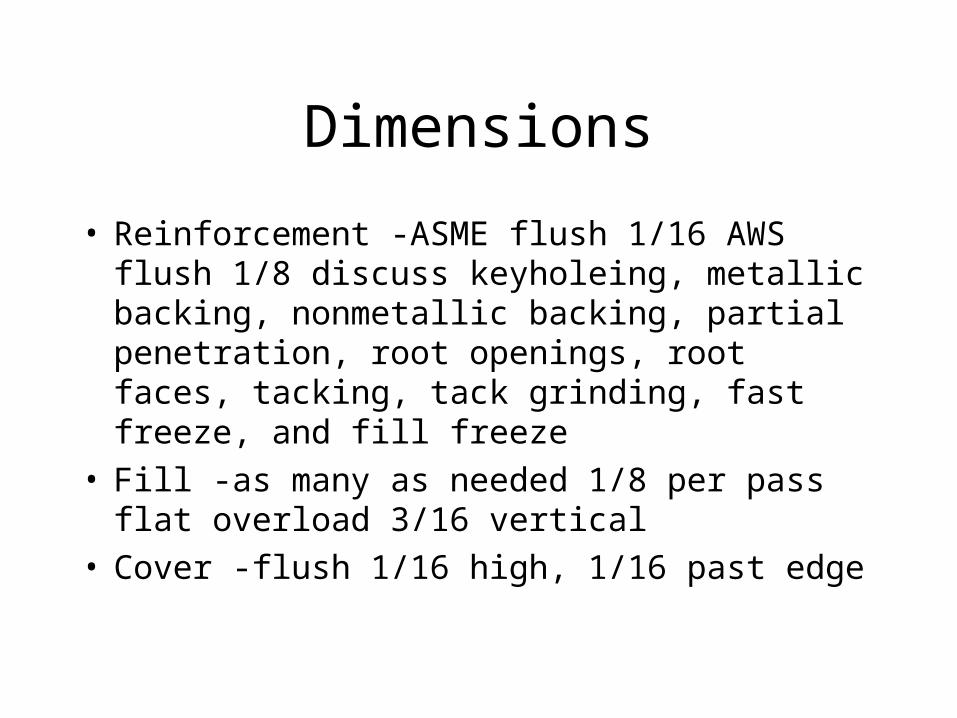
Dimensions
• Reinforcement -ASME flush 1/16 AWS flush 1/8 discuss keyholeing, metallic backing, nonmetallic backing, partial penetration, root openings, root faces, tacking, tack grinding, fast freeze, and fill freeze
• Fill -as many as needed 1/8 per pass flat overload 3/16 vertical
• Cover -flush 1/16 high, 1/16 past edge

600 included angle
Root faces
Tacking
Feather Tacks
Butt Joint Preperation
1/16-1/8
(Joints without backing)
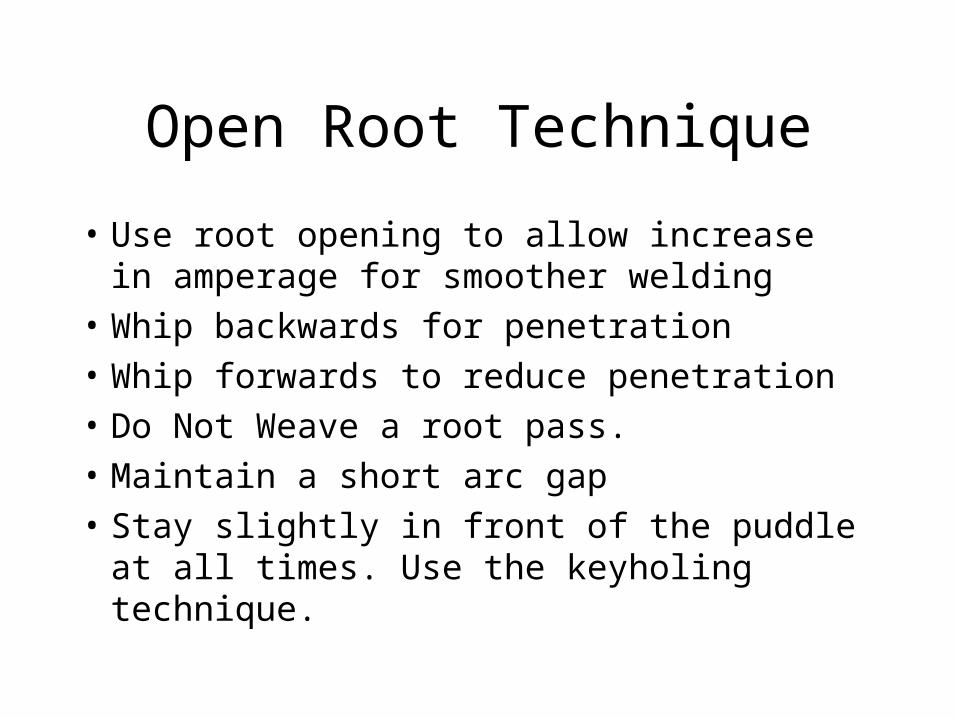
Open Root Technique
• Use root opening to allow increase in amperage for smoother welding
• Whip backwards for penetration
• Whip forwards to reduce penetration
• Do Not Weave a root pass.
• Maintain a short arc gap
• Stay slightly in front of the puddle at all times. Use the keyholing technique.

Root faces - 0
450 included angle
Remove all mill scales and rust
Tacking - not in groove
Tack away from coupon area.
Flush on backing
Butt Joint Preperation(With Backing)

Welding grooves with Backing
• Keep the root opening wide
• Make the root pass in one bead
• Avoid tight areas at the weld toes
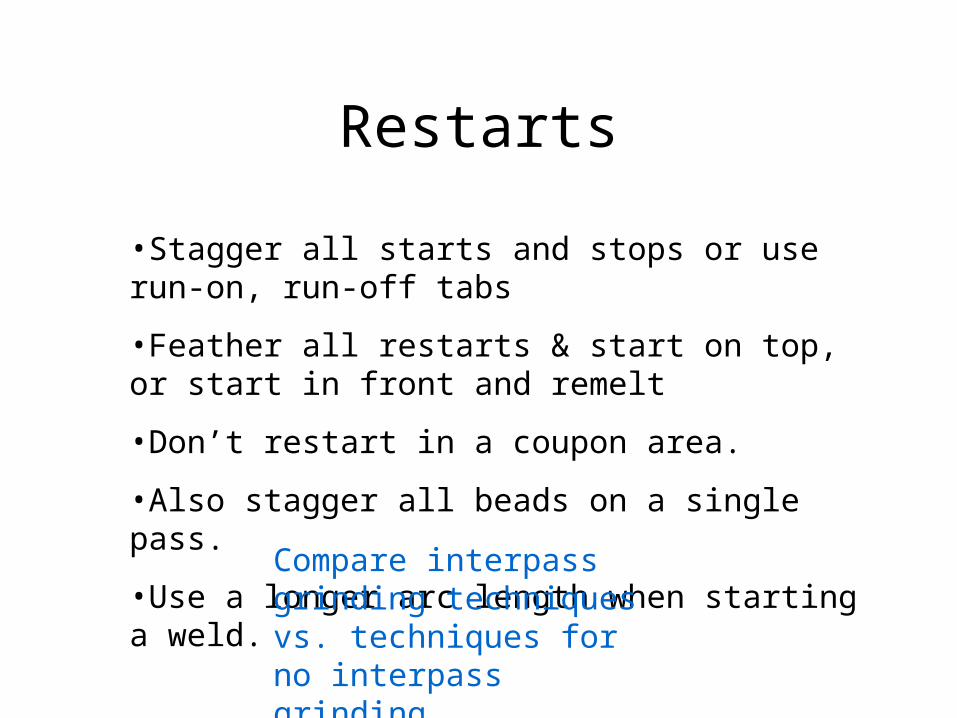
Restarts
•Stagger all starts and stops or use run-on, run-off tabs
•Feather all restarts & start on top, or start in front and remelt
•Don’t restart in a coupon area.
•Also stagger all beads on a single pass.
•Use a longer arc length when starting a weld.Compare interpass grinding techniques vs. techniques for no interpass grinding.

Craters
• Fill craters by reversing direction at the weld end
• Use a short arc length to control heat.
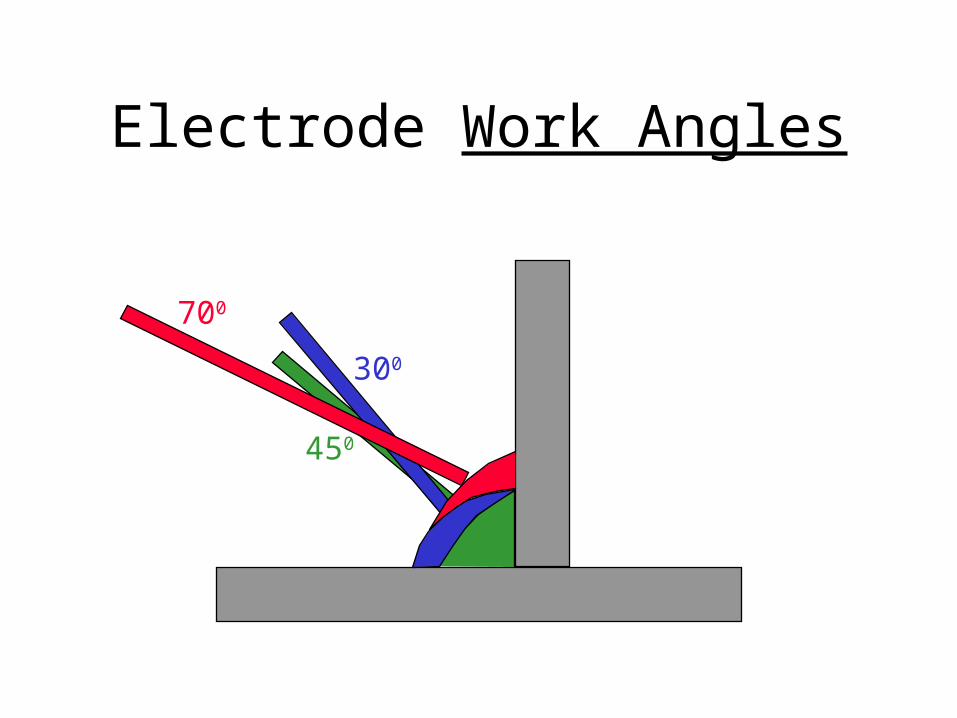
Electrode Work Angles
450
300
700

work angle (transverse angle)• middle of joint
• directs heat between sides
• may need to direct more on heavy plate

Transverse Angle Effects

Drag Angle increases Penetration
Increases crown height
Push Angle gives shallow penetration, and flattens out the weld surface.
Electrode Travel Angles
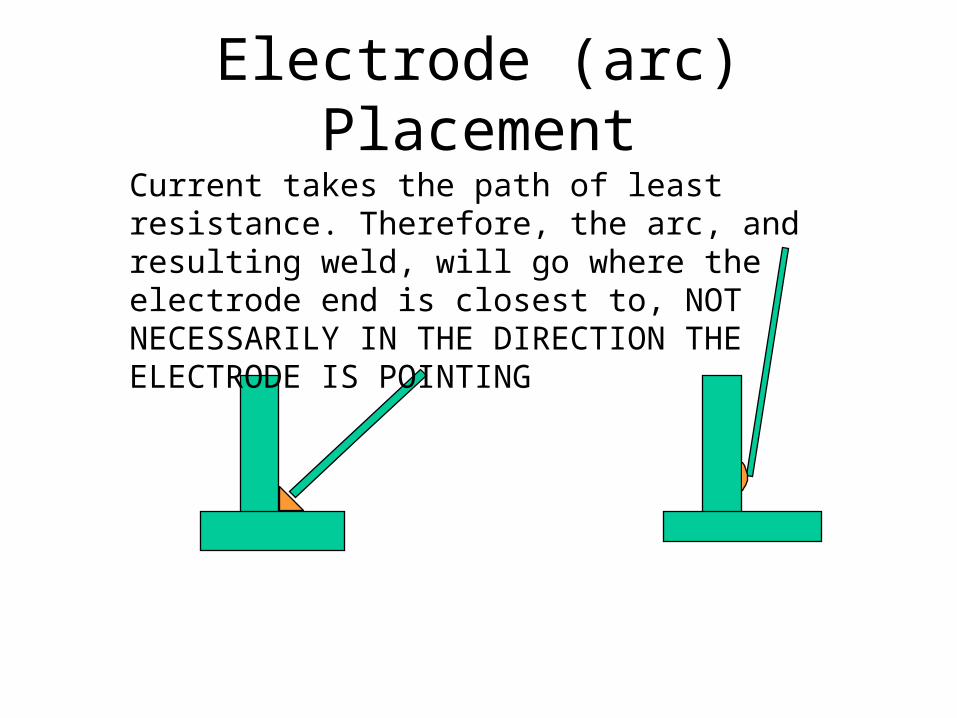
Electrode (arc) Placement
Current takes the path of least resistance. Therefore, the arc, and resulting weld, will go where the electrode end is closest to, NOT NECESSARILY IN THE DIRECTION THE ELECTRODE IS POINTING

Arc Length
•Longer arc lengths = increased puddle heat, flatter welds, deeper penetration
•Shorter arc lengths = less puddle heat, flatter welds, less penetration
•Use arc length to control puddle size, penetration, and burn through.
•Normal arc length is 1/16” - 1/8”
•Use a slightly longer arc length during a start or restart.

Helpful Tips
•Clean your Welding Hood lens
•Drape the cable over your shoulder or knee
•Get Comfortable
•Watch the puddle, not the arc
•Concentrate on steady travel speed and arc length
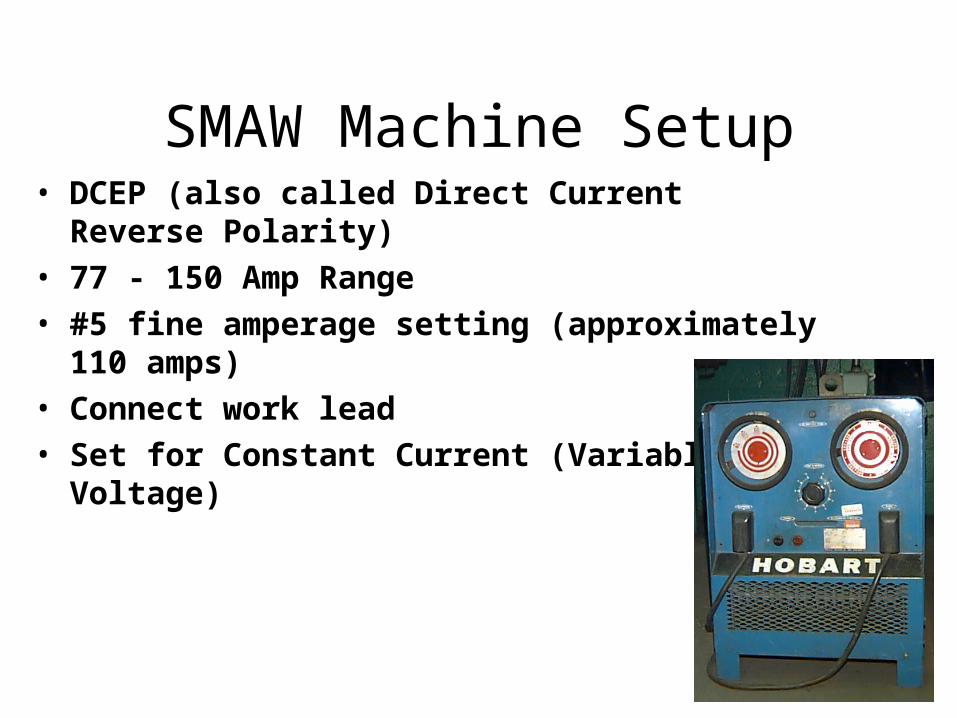
SMAW Machine Setup• DCEP (also called Direct Current Reverse Polarity)
• 77 - 150 Amp Range
• #5 fine amperage setting (approximately 110 amps)
• Connect work lead
• Set for Constant Current (Variable Voltage)

Amperage Calculations
Range: 77 - 150
Fine tune dial: 0 - 10
Desired amperage: 105 amps
150 - 77 = 73
73 / 10 = 7.3
7.3 x 6 = 43.8
43.8 + 77 = 120.8
150 - 77 = 73
73 / 10 = 7.3
105 - 77 = 28
28 / 7.3 = 3.836
Range: 77 - 150
fine tune dial: 0 - 10
dial set at: 6

Do SMAW Pipe Welding Techniques Lecture Now