Smart Hub ENG 0302 (1)
23
USER GUIDE
-
Upload
rosana-gutierrez -
Category
Documents
-
view
21 -
download
1
Transcript of Smart Hub ENG 0302 (1)
USER GUIDE
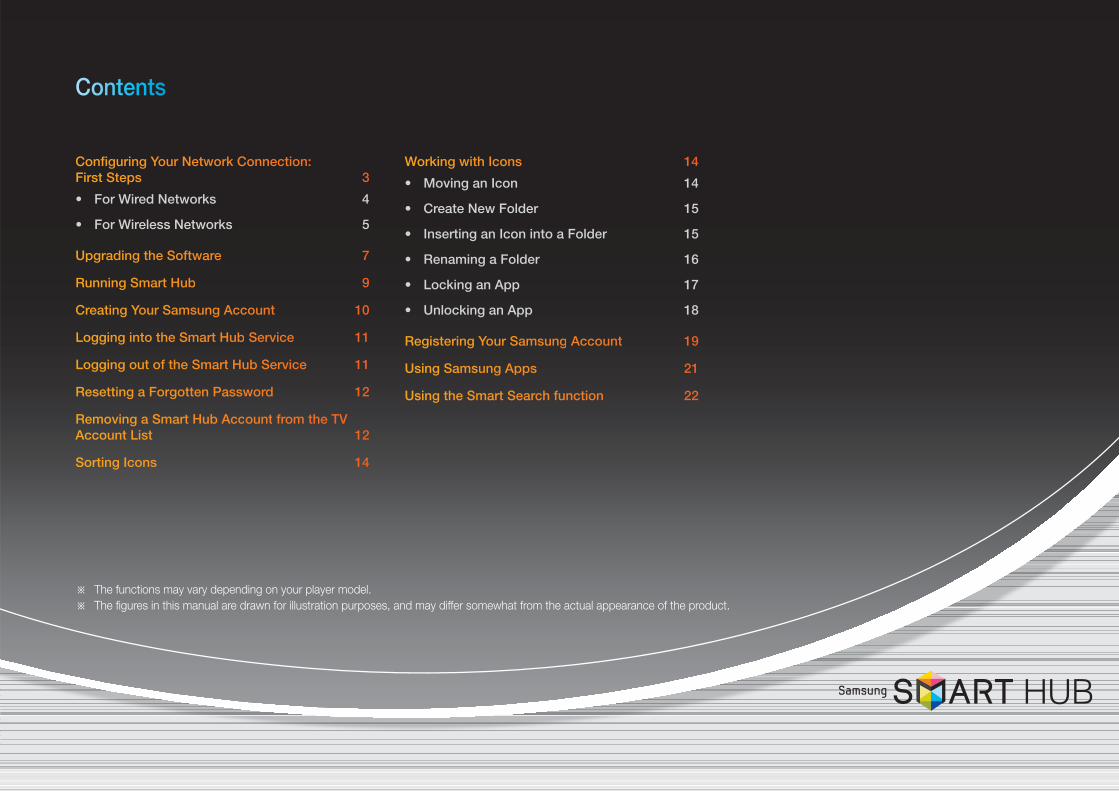
CConfigguring YYour Neetworkk Connnection: FFirst SSteps 3• For Wired Networks 4
• For Wireless Networks 5
UUpgradding thhe Softwware 7
RRunninng Smaart Hubb 9
CCreatinng Youur Samssung AAccounnt 10
LLogginng into the Smmart Huub Serrvice 11
LLogginng out of the SSmart Hub SService 11
RResettting a FForgottten Passswordd 12
RRemovving a SSmart Hub Acccountt from tthe TVV AAccount List 12
SSortingg Iconss 14
WWorkinng withh Icons 14• Moving an Icon 14
• Create New Folder 15
• Inserting an Icon into a Folder 15
• Renaming a Folder 16
• Locking an App 17
• Unlocking an App 18
RRegisttering YYour Saamsungg Accoount 19
UUsing Samsuung Apps 21
UUsing the Smmart Seearch fuunctionn 22
CCCoonntteeennnttsss
※ The functions may vary depending on your player model.
※ The figures in this manual are drawn for illustration purposes, and may differ somewhat from the actual appearance of the product.
3 - English
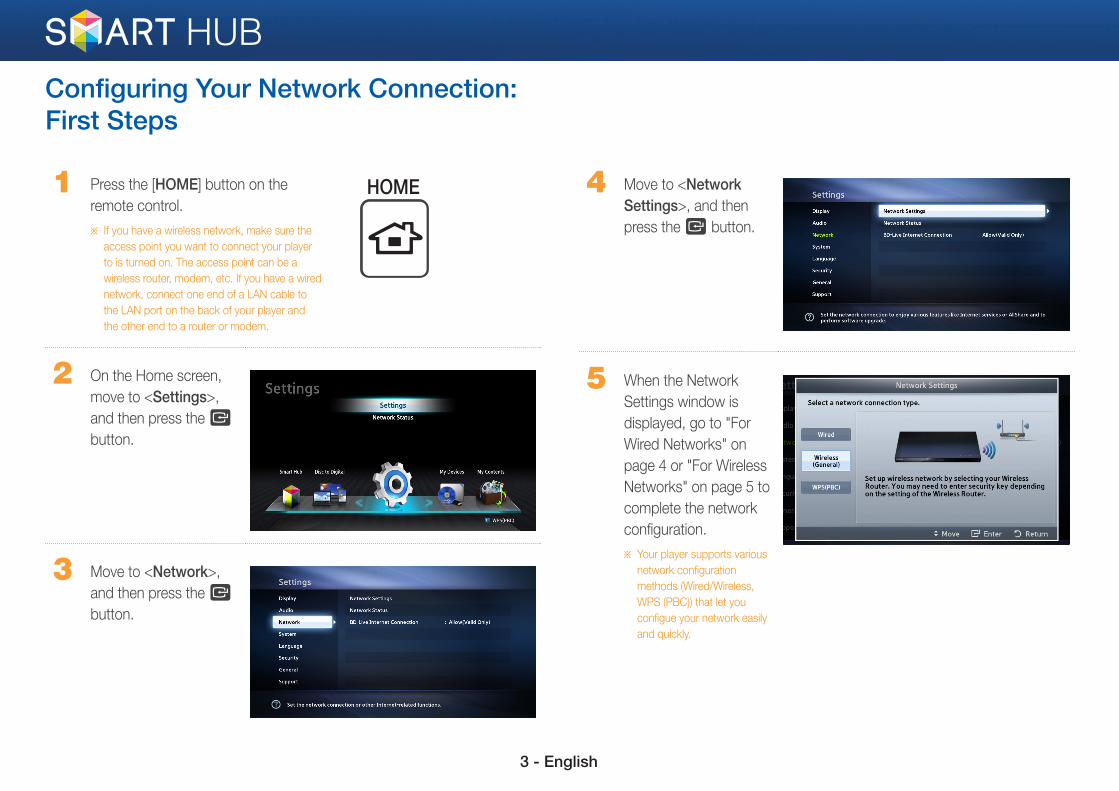
Configuring Your Network Connection: First Steps
1 Press the [HOME] button on the
remote control.
※ If you have a wireless network, make sure the
access point you want to connect your player
to is turned on. The access point can be a
wireless router, modem, etc. If you have a wired
network, connect one end of a LAN cable to
the LAN port on the back of your player and
the other end to a router or modem.
2 On the Home screen,
move to <Settings>,
and then press the e
button.
3 Move to <Network>,
and then press the e
button.
4 Move to <Network Settings>, and then
press the e button.
5 When the Network
Settings window is
displayed, go to "For
Wired Networks" on
page 4 or "For Wireless
Networks" on page 5 to
complete the network
configuration.
※ Your player supports various
network configuration
methods (Wired/Wireless,
WPS (PBC)) that let you
configue your network easily
and quickly.
HOME
4 - English
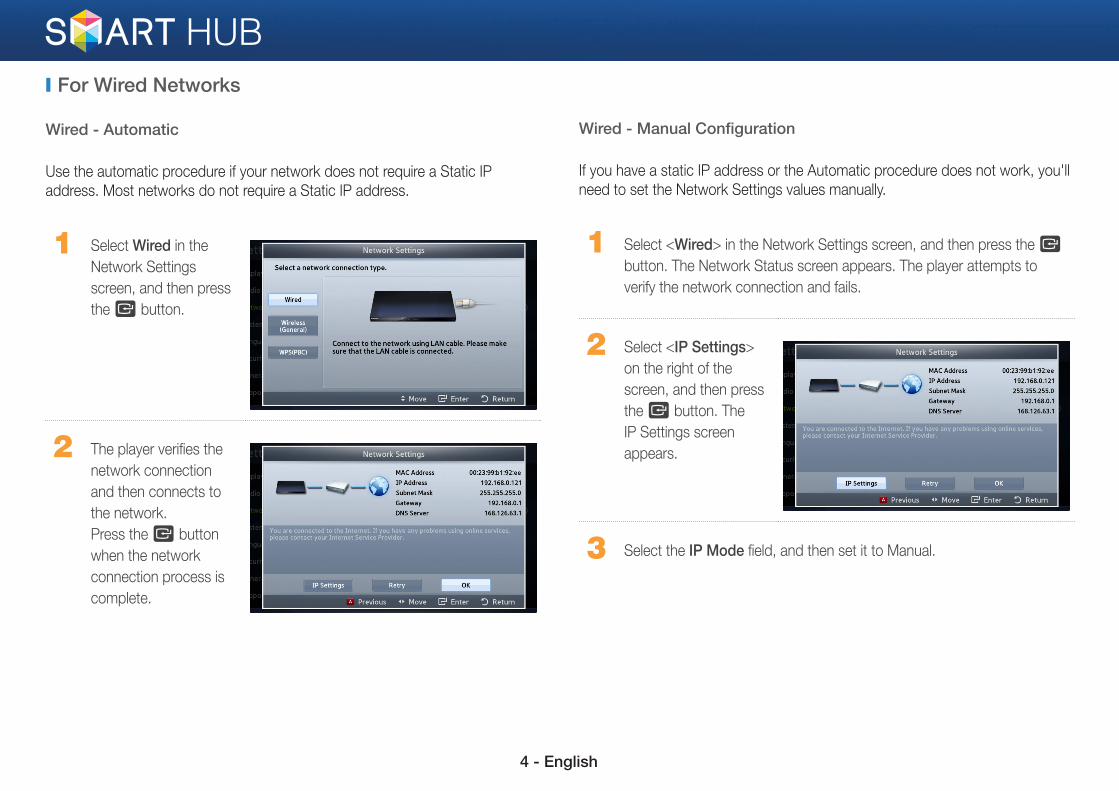
❙ For Wired Networks
Wired - Automatic
Use the automatic procedure if your network does not require a Static IP
address. Most networks do not require a Static IP address.
1 Select Wired in the
Network Settings
screen, and then press
the e button.
2 The player verifies the
network connection
and then connects to
the network.
Press the e button
when the network
connection process is
complete.
Wired - Manual Configuration
If you have a static IP address or the Automatic procedure does not work, you'll
need to set the Network Settings values manually.
1 Select <Wired> in the Network Settings screen, and then press the e
button. The Network Status screen appears. The player attempts to
verify the network connection and fails.
2 Select <IP Settings>
on the right of the
screen, and then press
the e button. The
IP Settings screen
appears.
3 Select the IP Mode field, and then set it to Manual.
5 - English
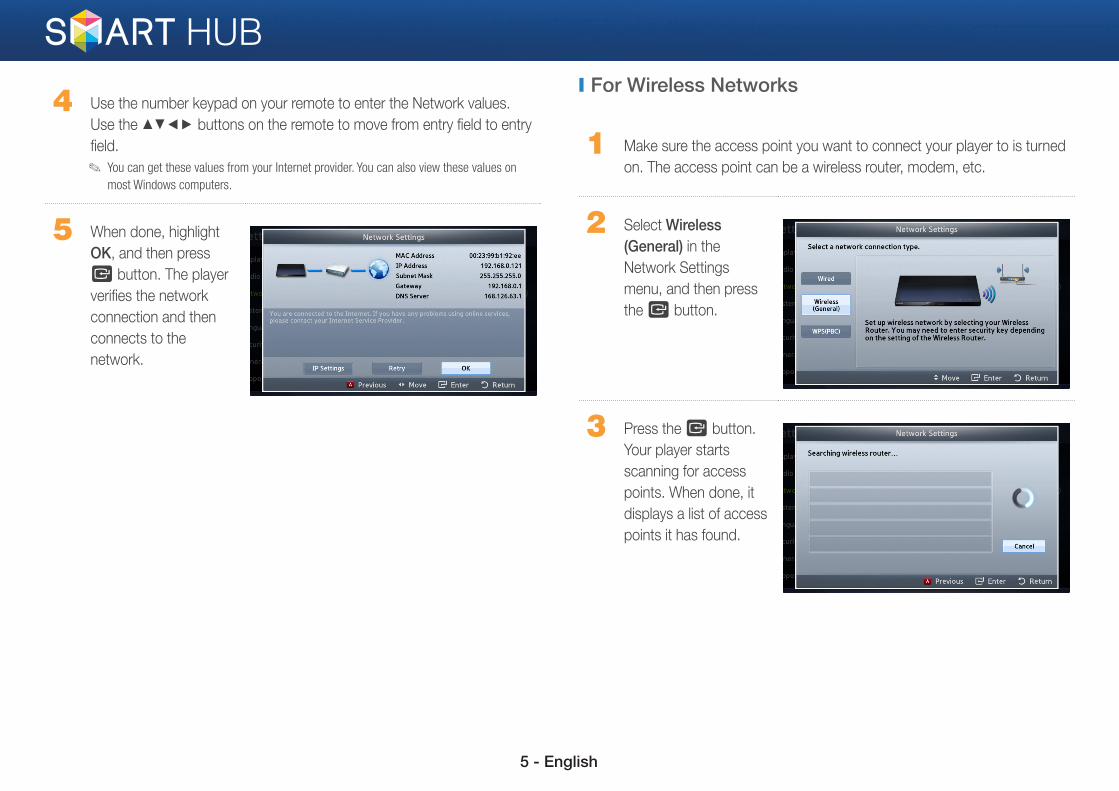
4 Use the number keypad on your remote to enter the Network values.
Use the ▲▼◄► buttons on the remote to move from entry field to entry
field.
✎ You can get these values from your Internet provider. You can also view these values on
most Windows computers.
5 When done, highlight
OK, and then press
e button. The player
verifies the network
connection and then
connects to the
network.
❙ For Wireless Networks
1 Make sure the access point you want to connect your player to is turned
on. The access point can be a wireless router, modem, etc.
2 Select Wireless (General) in the
Network Settings
menu, and then press
the e button.
3 Press the e button.
Your player starts
scanning for access
points. When done, it
displays a list of access
points it has found.
6 - English
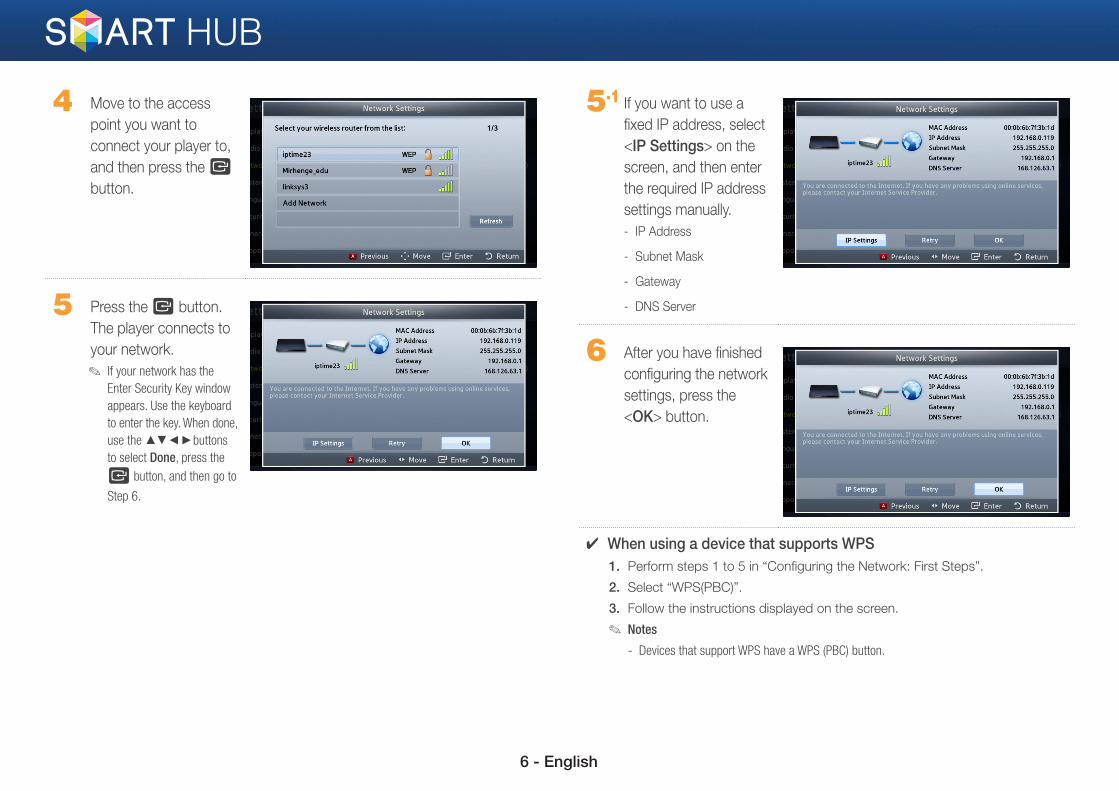
4 Move to the access
point you want to
connect your player to,
and then press the e
button.
5 Press the e button.
The player connects to
your network.
✎ If your network has the
Enter Security Key window
appears. Use the keyboard
to enter the key. When done,
use the ▲▼◄►buttons
to select Done, press the
e button, and then go to
Step 6.
5-1 If you want to use a
fixed IP address, select
<IP Settings> on the
screen, and then enter
the required IP address
settings manually.
- IP Address
- Subnet Mask
- Gateway
- DNS Server
6 After you have finished
configuring the network
settings, press the
<OK> button.
✔ When using a device that supports WPS1. Perform steps 1 to 5 in “Configuring the Network: First Steps”.
2. Select “WPS(PBC)”.
3. Follow the instructions displayed on the screen.
✎ Notes - Devices that support WPS have a WPS (PBC) button.
7 - English
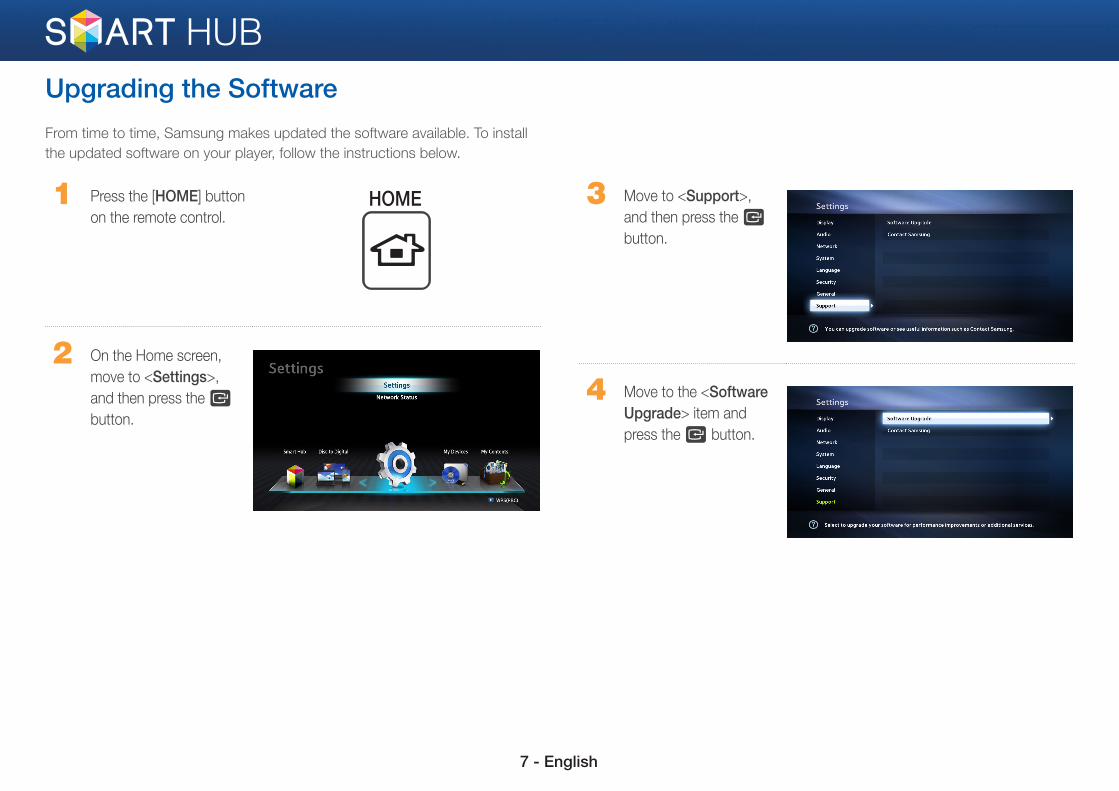
Upgrading the SoftwareFrom time to time, Samsung makes updated the software available. To install
the updated software on your player, follow the instructions below.
1 Press the [HOME] button
on the remote control.HOME
2 On the Home screen,
move to <Settings>,
and then press the e
button.
3 Move to <Support>,
and then press the e
button.
4 Move to the <Software Upgrade> item and
press the e button.
8 - English
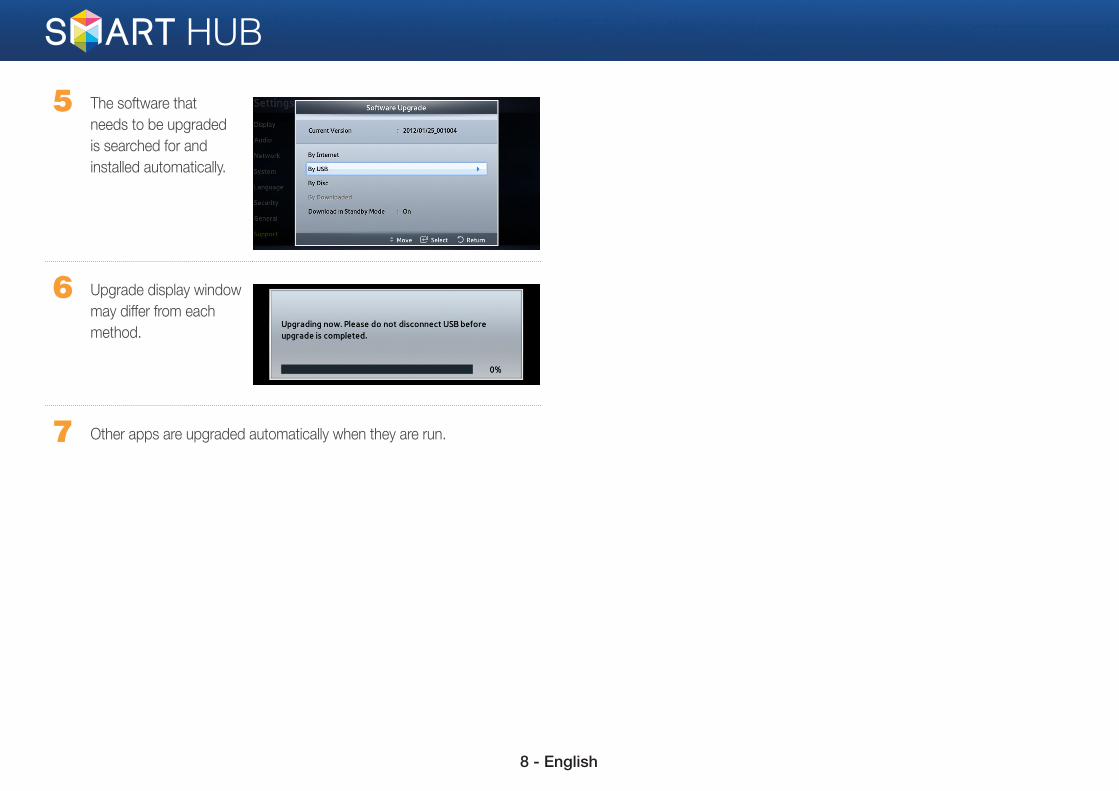
5 The software that
needs to be upgraded
is searched for and
installed automatically.
6 Upgrade display window
may differ from each
method.
7 Other apps are upgraded automatically when they are run.
9 - English
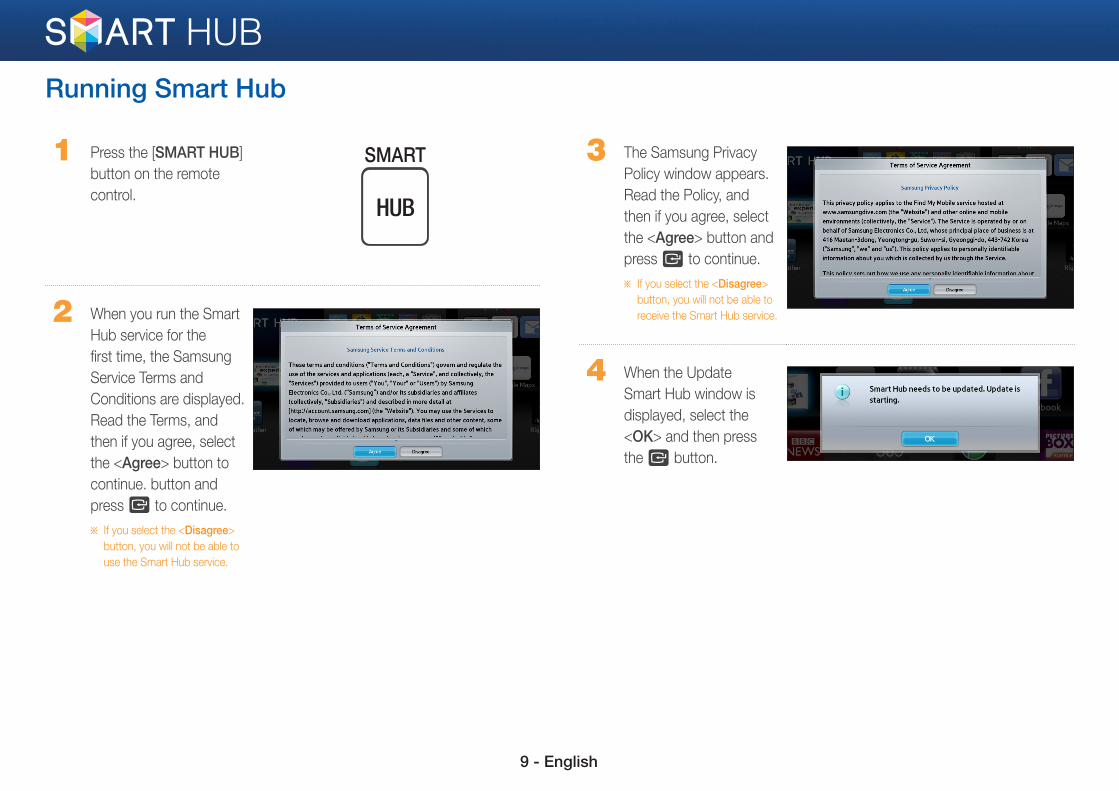
Running Smart Hub
1 Press the [SMART HUB]
button on the remote
control.
SMART
HUB
2 When you run the Smart
Hub service for the
first time, the Samsung
Service Terms and
Conditions are displayed.
Read the Terms, and
then if you agree, select
the <Agree> button to
continue. button and
press e to continue.
※ If you select the <Disagree>
button, you will not be able to
use the Smart Hub service.
3 The Samsung Privacy
Policy window appears.
Read the Policy, and
then if you agree, select
the <Agree> button and
press e to continue.
※ If you select the <Disagree>
button, you will not be able to
receive the Smart Hub service.
4 When the Update
Smart Hub window is
displayed, select the
<OK> and then press
the e button.
10 - English
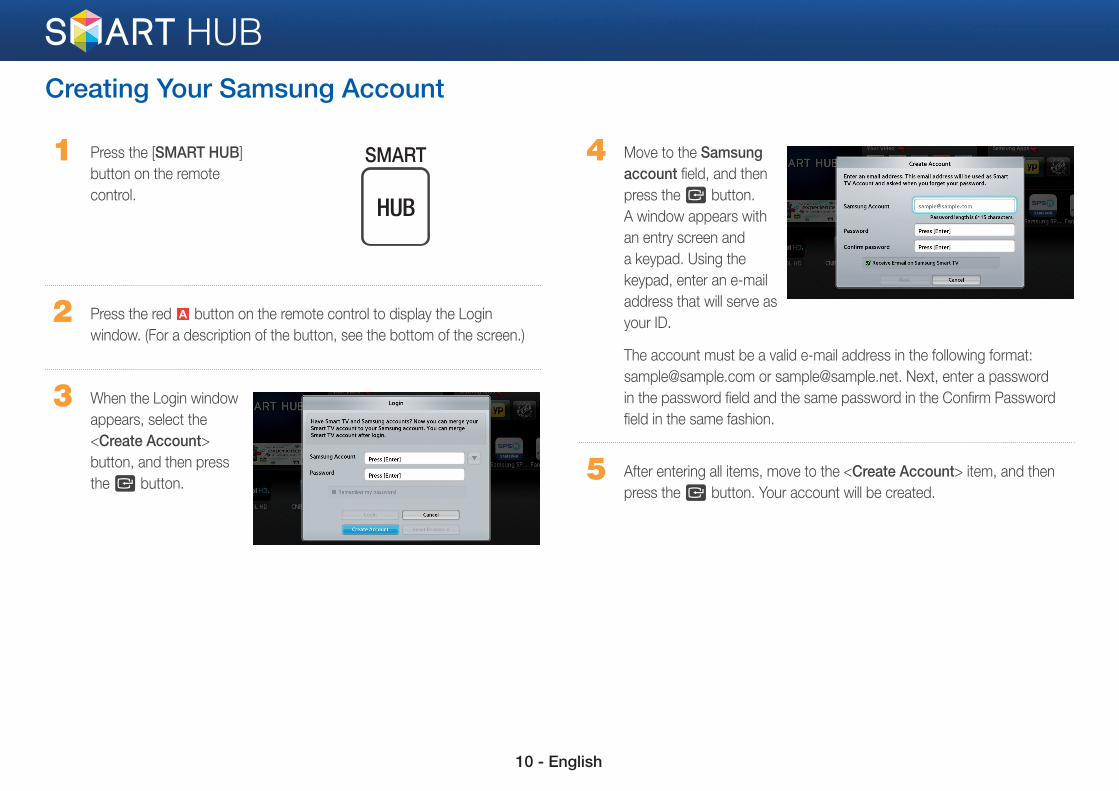
Creating Your Samsung Account
1 Press the [SMART HUB]
button on the remote
control.
SMART
HUB
2 Press the red a button on the remote control to display the Login
window. (For a description of the button, see the bottom of the screen.)
3 When the Login window
appears, select the
<Create Account>
button, and then press
the e button.
4 Move to the Samsung account field, and then
press the e button.
A window appears with
an entry screen and
a keypad. Using the
keypad, enter an e-mail
address that will serve as
your ID.
The account must be a valid e-mail address in the following format:
[email protected] or [email protected]. Next, enter a password
in the password field and the same password in the Confirm Password
field in the same fashion.
5 After entering all items, move to the <Create Account> item, and then
press the e button. Your account will be created.
11 - English
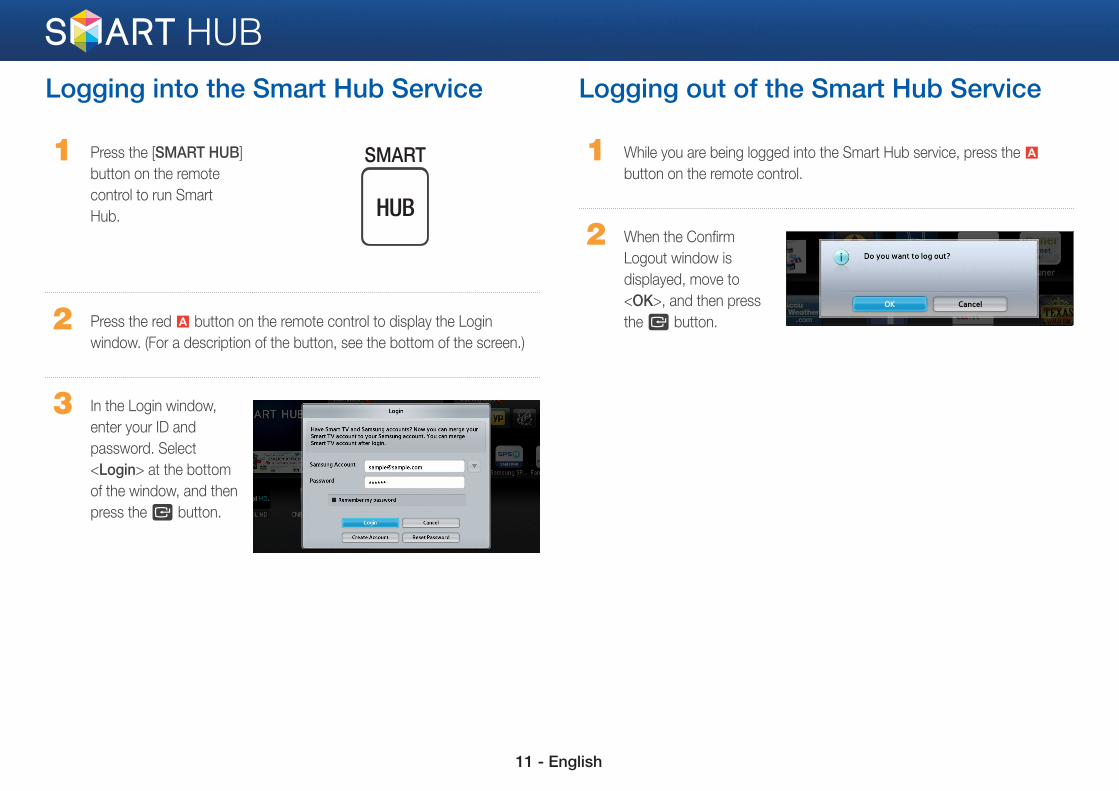
Logging into the Smart Hub Service
1 Press the [SMART HUB]
button on the remote
control to run Smart
Hub.
SMART
HUB
2 Press the red a button on the remote control to display the Login
window. (For a description of the button, see the bottom of the screen.)
3 In the Login window,
enter your ID and
password. Select
<Login> at the bottom
of the window, and then
press the e button.
Logging out of the Smart Hub Service
1 While you are being logged into the Smart Hub service, press the a
button on the remote control.
2 When the Confirm
Logout window is
displayed, move to
<OK>, and then press
the e button.
12 - English
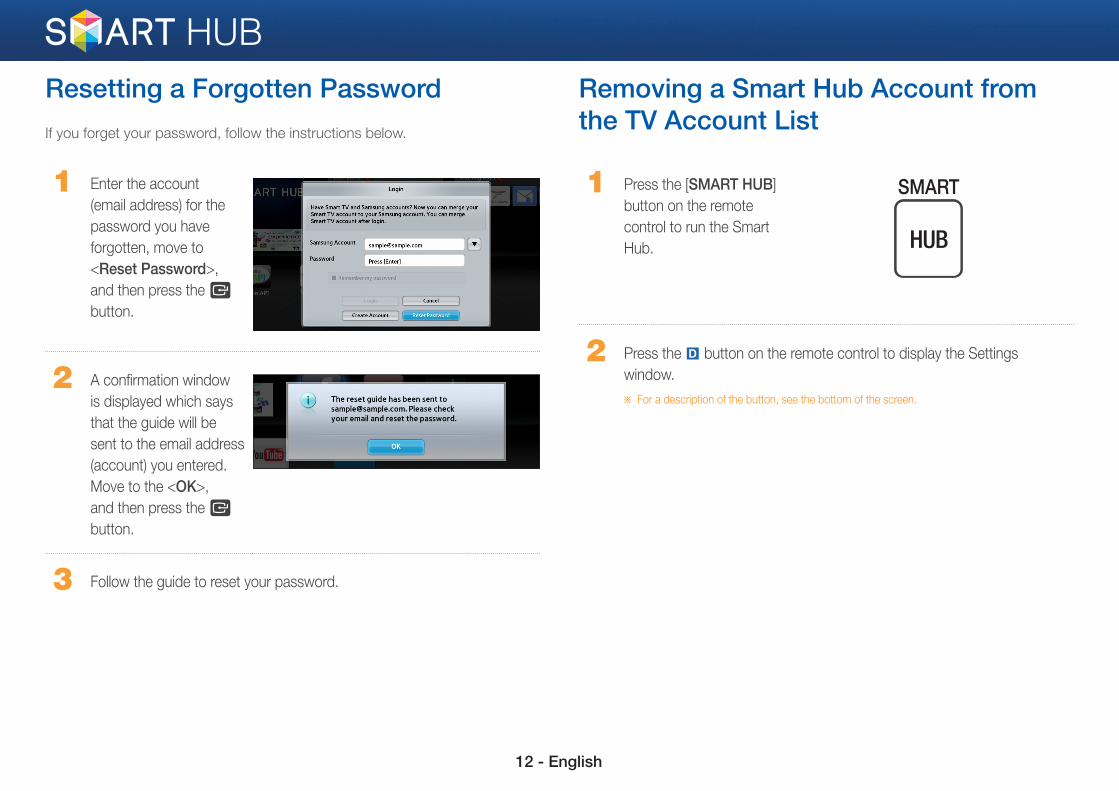
Resetting a Forgotten PasswordIf you forget your password, follow the instructions below.
1 Enter the account
(email address) for the
password you have
forgotten, move to
<Reset Password>,
and then press the e
button.
2 A confirmation window
is displayed which says
that the guide will be
sent to the email address
(account) you entered.
Move to the <OK>,
and then press the e button.
3 Follow the guide to reset your password.
Removing a Smart Hub Account from the TV Account List
1 Press the [SMART HUB]
button on the remote
control to run the Smart
Hub.
SMART
HUB
2 Press the } button on the remote control to display the Settings
window.
※ For a description of the button, see the bottom of the screen.
13 - English
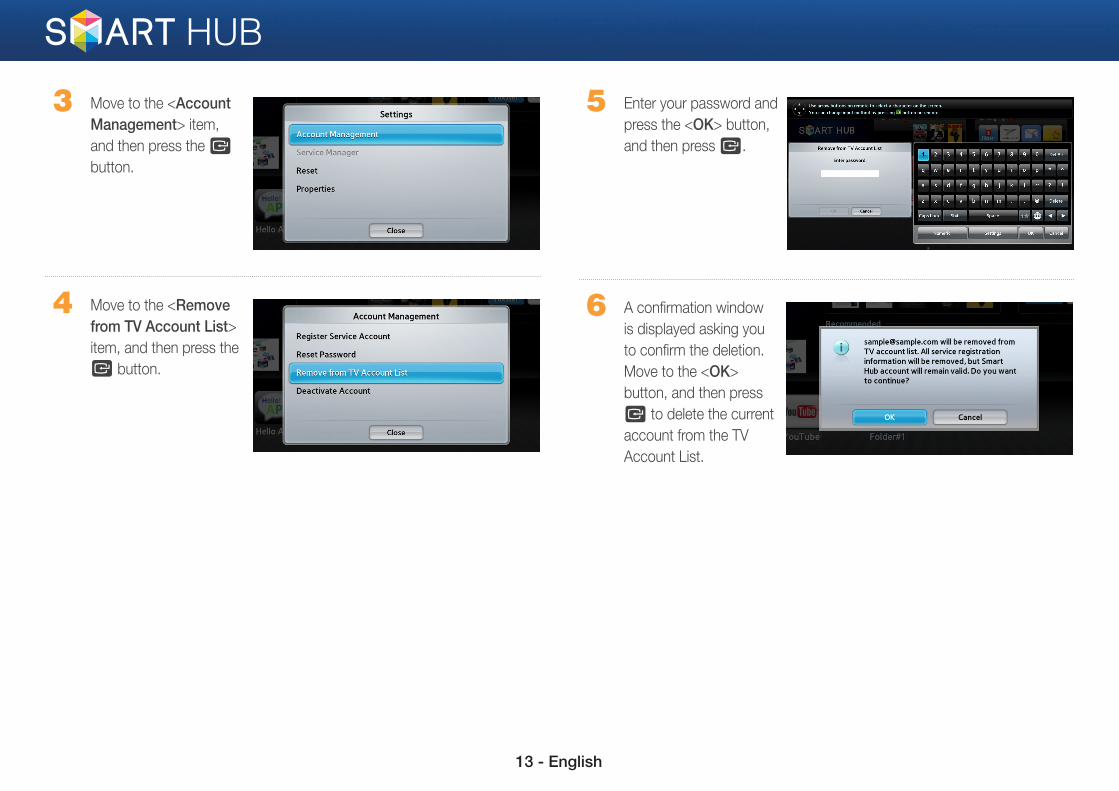
3 Move to the <Account Management> item,
and then press the e
button.
4 Move to the <Remove from TV Account List>
item, and then press the
e button.
5 Enter your password and
press the <OK> button,
and then press e.
6 A confirmation window
is displayed asking you
to confirm the deletion.
Move to the <OK>
button, and then press
e to delete the current
account from the TV
Account List.
14 - English
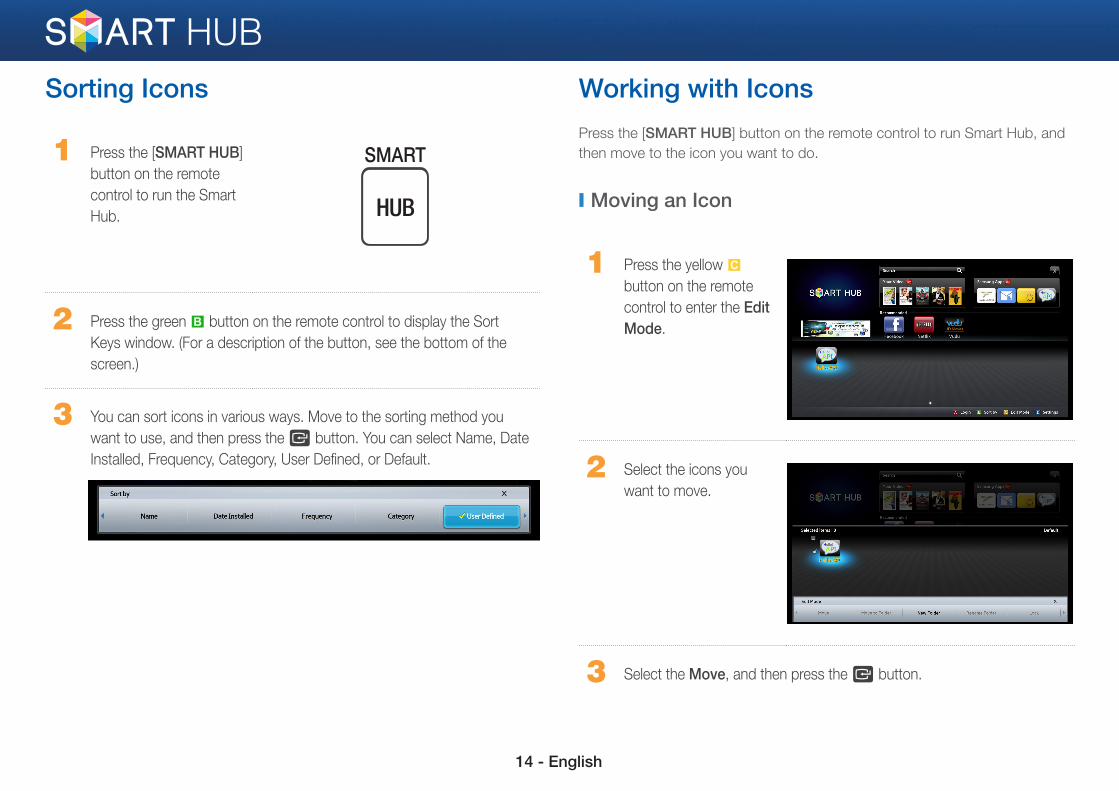
Sorting Icons
1 Press the [SMART HUB]
button on the remote
control to run the Smart
Hub.
SMART
HUB
2 Press the green b button on the remote control to display the Sort
Keys window. (For a description of the button, see the bottom of the
screen.)
3 You can sort icons in various ways. Move to the sorting method you
want to use, and then press the e button. You can select Name, Date
Installed, Frequency, Category, User Defined, or Default.
Working with IconsPress the [SMART HUB] button on the remote control to run Smart Hub, and
then move to the icon you want to do.
❙ Moving an Icon
1 Press the yellow {
button on the remote
control to enter the Edit Mode.
2 Select the icons you
want to move.
3 Select the Move, and then press the e button.
15 - English
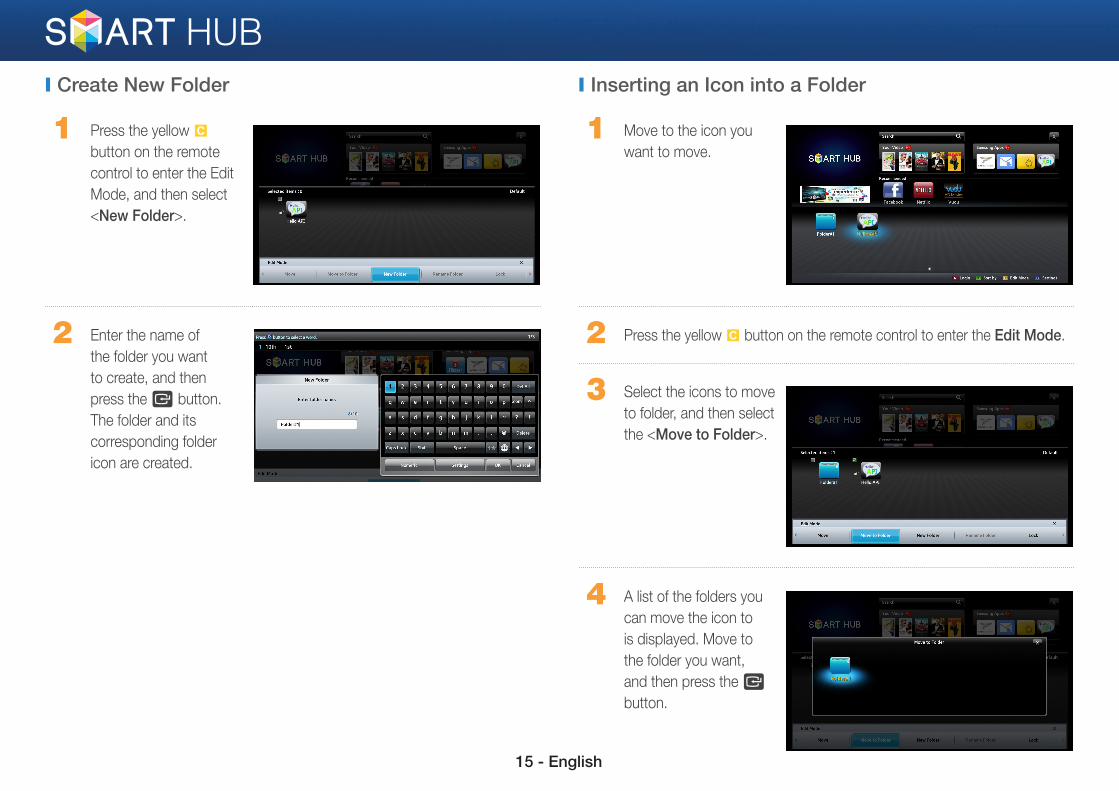
❙ Create New Folder
1 Press the yellow {
button on the remote
control to enter the Edit
Mode, and then select
<New Folder>.
2 Enter the name of
the folder you want
to create, and then
press the e button.
The folder and its
corresponding folder
icon are created.
❙ Inserting an Icon into a Folder
1 Move to the icon you
want to move.
2 Press the yellow { button on the remote control to enter the Edit Mode.
3 Select the icons to move
to folder, and then select
the <Move to Folder>.
4 A list of the folders you
can move the icon to
is displayed. Move to
the folder you want,
and then press the e
button.

16 - English
❙ Renaming a Folder
1 Move to the icon you
want to rename, and
then press the yellow {
button on the remote
control to enter the Edit Mode.
2 Move to the <Rename Folder> item using the
arrow buttons, and then
press the e button.
3 Enter the new name
you want to apply to the
selected folder, and then
press the e button.
The name of the selected
folder is changed.

17 - English
❙ Locking an App
• You can lock specific apps to prevent other persons from using them.
(You cannot lock the folders and the apps provided by default.)
1 Move to the icon you
want to lock, and then
press the yellow {
button on the remote
control.
2 Select the icons to lock,
and then select the
<Lock>.
3 Enter a password which
is 4 characters long. The
Service Lock Activated
pop-up appears. Press
the e button. The Lock
symbol next to the app
closes. You now must
enter the password to
access the app.
18 - English
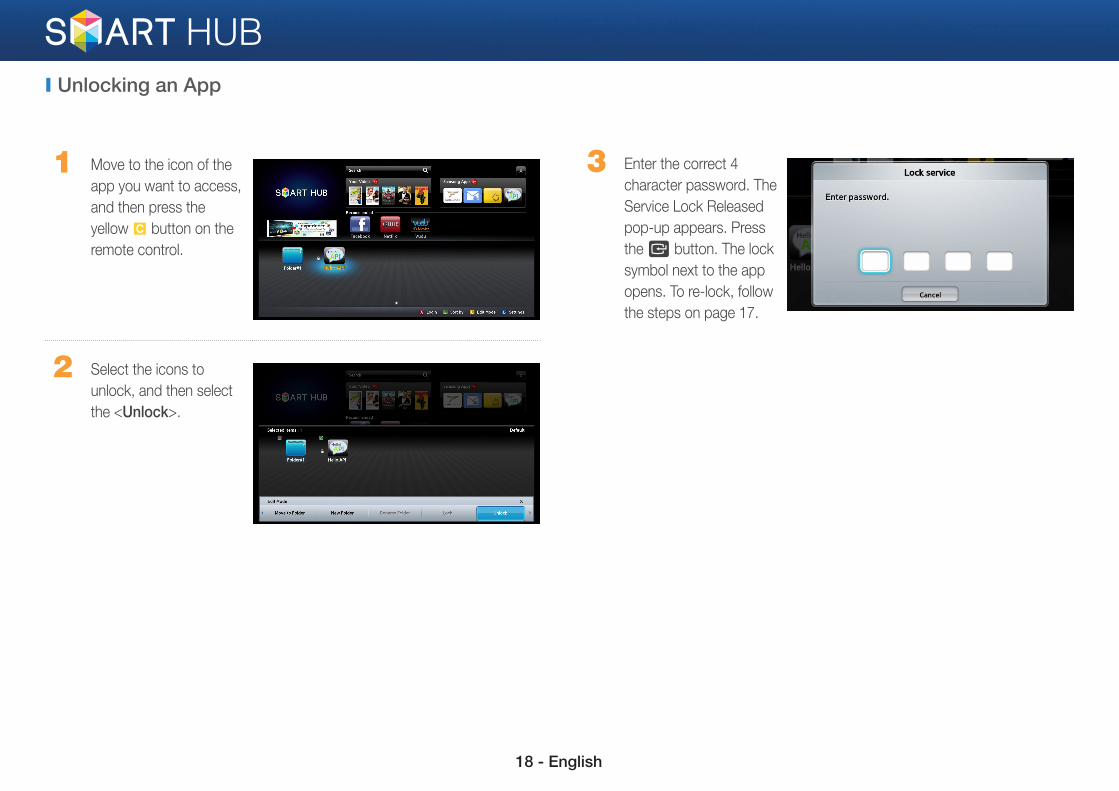
❙ Unlocking an App
1 Move to the icon of the
app you want to access,
and then press the
yellow { button on the
remote control.
2 Select the icons to
unlock, and then select
the <Unlock>.
3 Enter the correct 4
character password. The
Service Lock Released
pop-up appears. Press
the e button. The lock
symbol next to the app
opens. To re-lock, follow
the steps on page 17.
19 - English
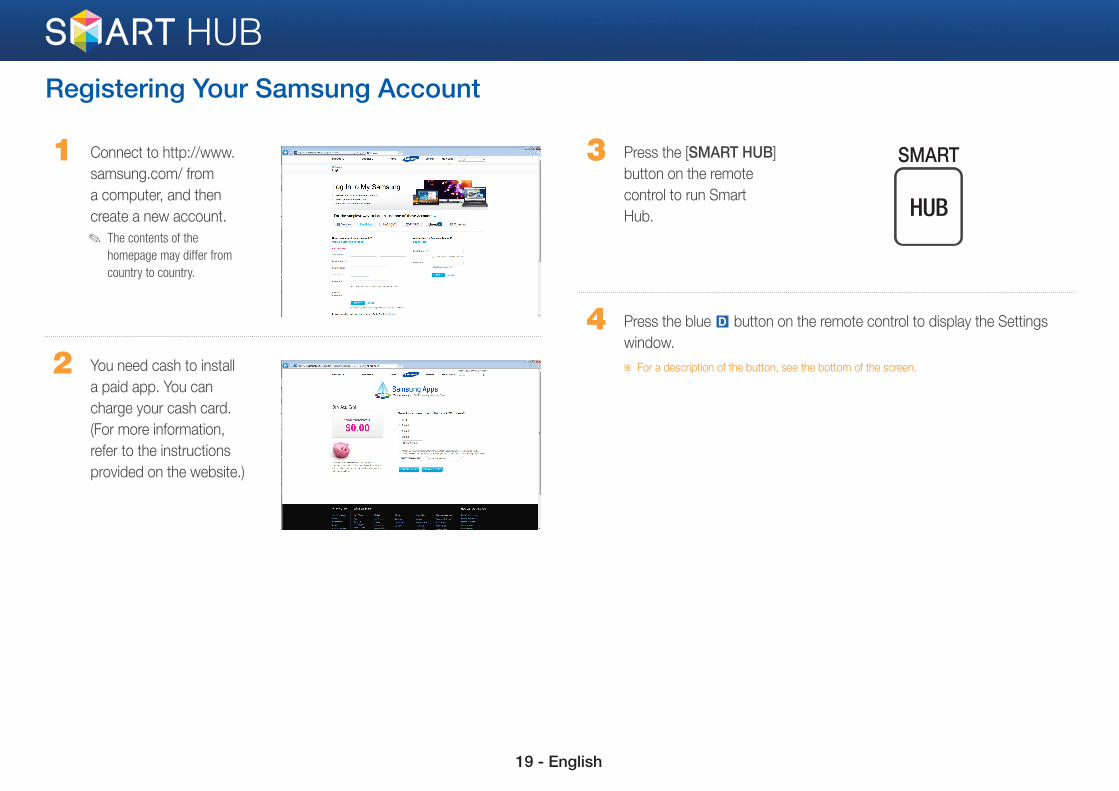
Registering Your Samsung Account
1 Connect to http://www.
samsung.com/ from
a computer, and then
create a new account.
✎ The contents of the
homepage may differ from
country to country.
2 You need cash to install
a paid app. You can
charge your cash card.
(For more information,
refer to the instructions
provided on the website.)
3 Press the [SMART HUB]
button on the remote
control to run Smart
Hub.
SMART
HUB
4 Press the blue } button on the remote control to display the Settings
window.
※ For a description of the button, see the bottom of the screen.
20 - English
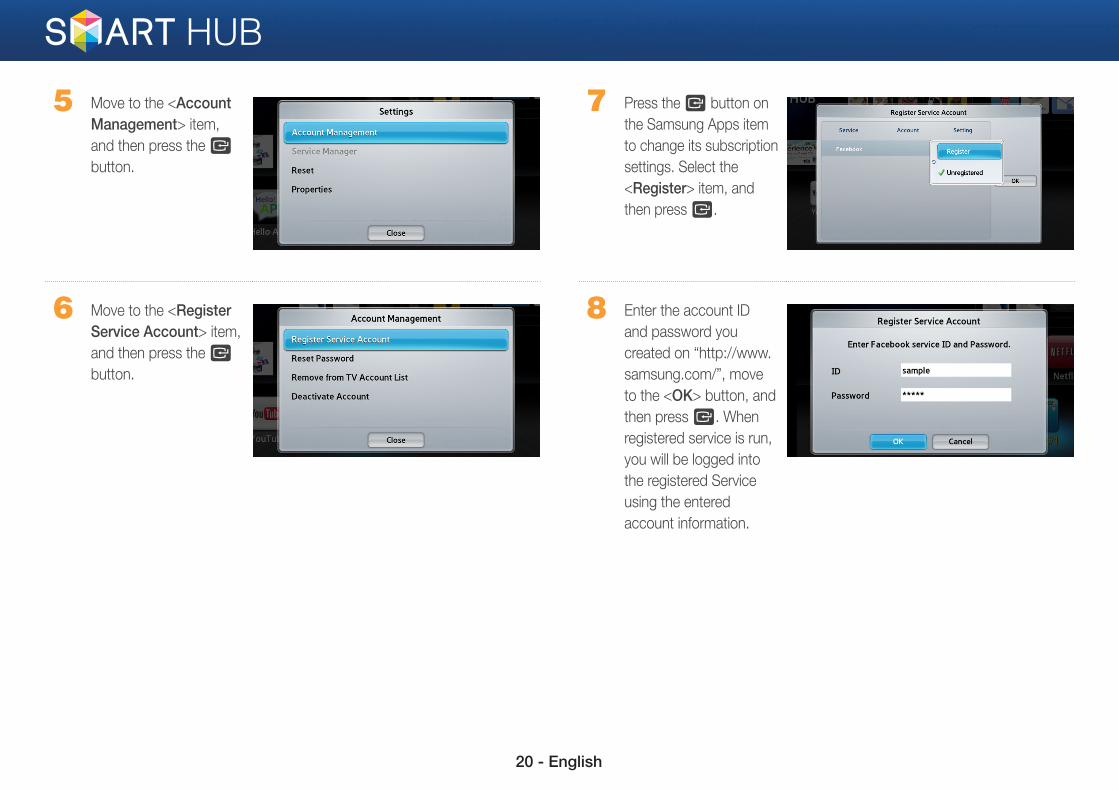
5 Move to the <Account Management> item,
and then press the e
button.
6 Move to the <Register Service Account> item,
and then press the e
button.
7 Press the e button on
the Samsung Apps item
to change its subscription
settings. Select the
<Register> item, and
then press e.
8 Enter the account ID
and password you
created on “http://www.
samsung.com/”, move
to the <OK> button, and
then press e. When
registered service is run,
you will be logged into
the registered Service
using the entered
account information.

21 - English
Using Samsung Apps
1 Press the [SMART HUB]
button on the remote
control to run the Smart
Hub.
SMART
HUB
2 Run “Samsung Apps”
located at the middle left
of the screen.
3 You must have a Samsung Apps account to install a paid app. If you do
not have an account, register an account by referring to the section in
this manual that describes how to register a Samsung account.
(refer to page 19~20.)
4 Move to the icon of
the app you want to
install, and then press
the e button. The
App Details window
showing the information
on the selected app is
displayed.
22 - English
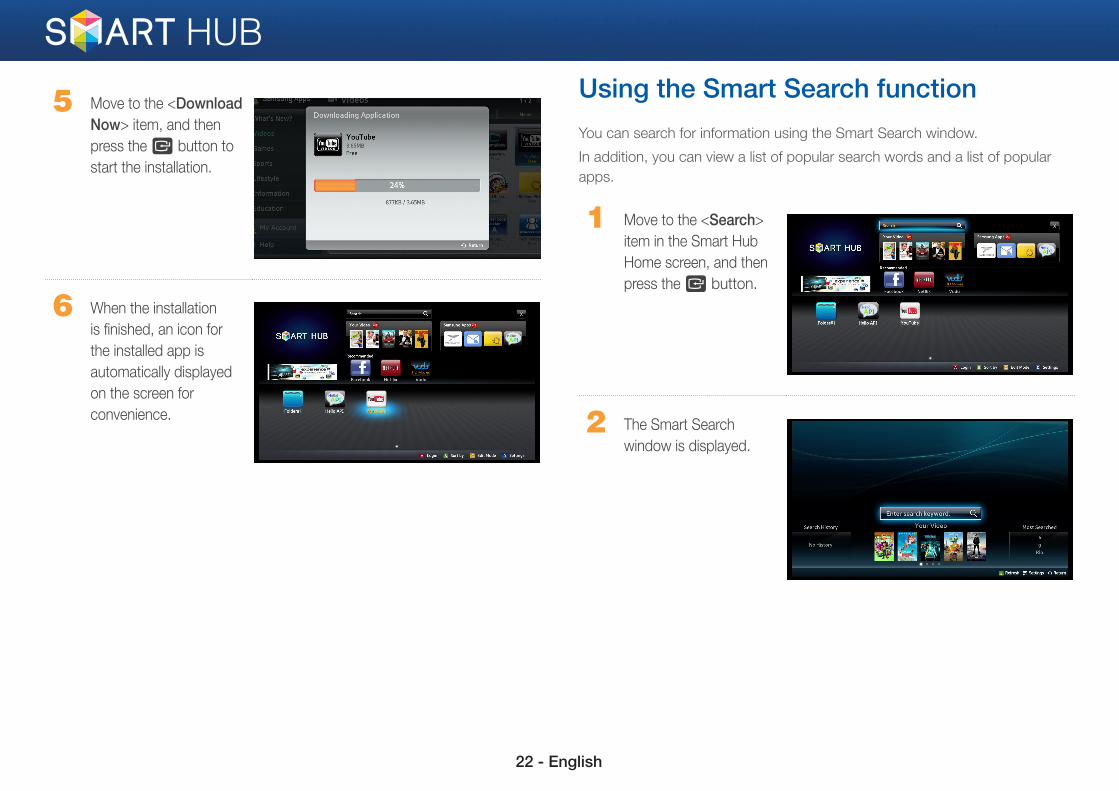
5 Move to the <Download Now> item, and then
press the e button to
start the installation.
6 When the installation
is finished, an icon for
the installed app is
automatically displayed
on the screen for
convenience.
Using the Smart Search functionYou can search for information using the Smart Search window.
In addition, you can view a list of popular search words and a list of popular
apps.
1 Move to the <Search>
item in the Smart Hub
Home screen, and then
press the e button.
2 The Smart Search
window is displayed.
23 - English
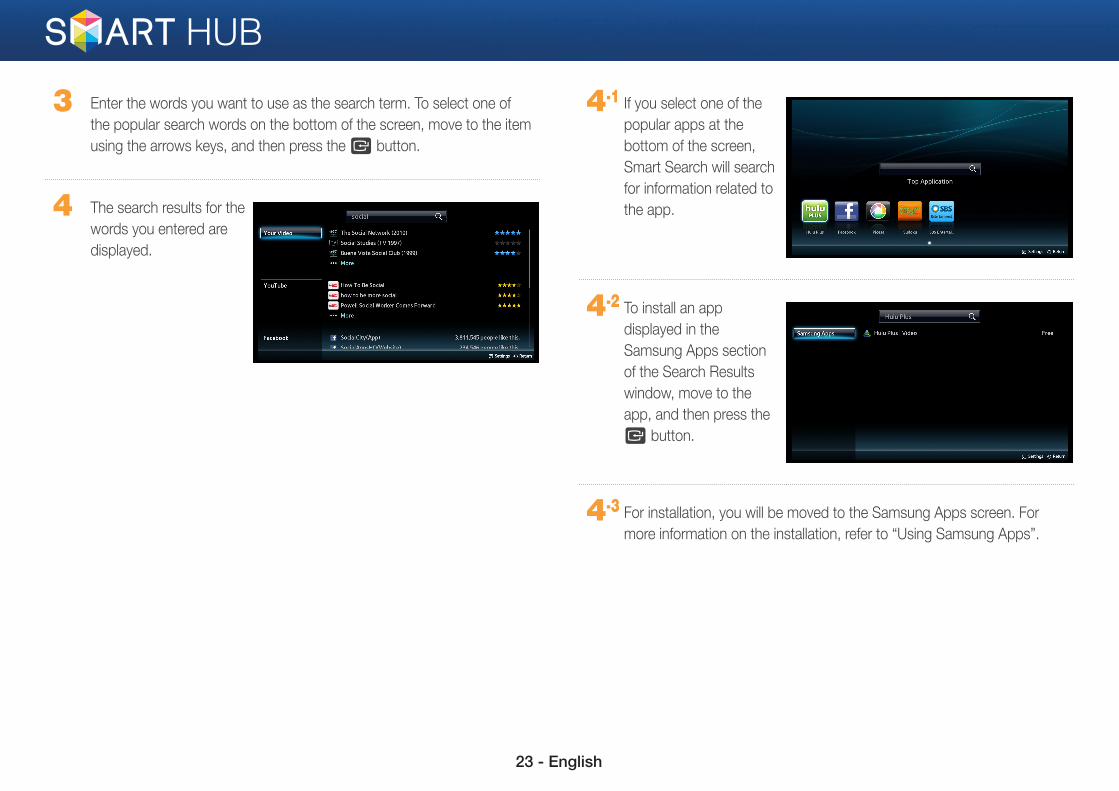
3 Enter the words you want to use as the search term. To select one of
the popular search words on the bottom of the screen, move to the item
using the arrows keys, and then press the e button.
4 The search results for the
words you entered are
displayed.
4-1 If you select one of the
popular apps at the
bottom of the screen,
Smart Search will search
for information related to
the app.
4-2 To install an app
displayed in the
Samsung Apps section
of the Search Results
window, move to the
app, and then press the
e button.
4-3 For installation, you will be moved to the Samsung Apps screen. For
more information on the installation, refer to “Using Samsung Apps”.