Sitecore Experience Commerce Installation Guide · Sitecore Experience Commerce 9.0 4 1.1 Sitecore...
22
Rev: January 30, 2018 Sitecore Experience Commerce Installation Guide for On-Premise Solutions Sitecore Experience Commerce 9.0 Installation guide for administrators and developers
Transcript of Sitecore Experience Commerce Installation Guide · Sitecore Experience Commerce 9.0 4 1.1 Sitecore...
Rev: January 30, 2018
Sitecore Experience Commerce Installation Guide for On-Premise Solutions Sitecore Experience Commerce 9.0
Installation guide for administrators and developers

Sitecore Experience Commerce 9.0
2
Table of Contents
Chapter 1 Getting started............................................................................................................................ 3 1.1 Sitecore Experience Commerce solution ......................................................................................... 4 1.2 Overview of the installation process ................................................................................................ 5 1.3 System requirements ...................................................................................................................... 6
1.3.1 Hosting environment requirements............................................................................................. 6 1.3.2 Hardware requirements .............................................................................................................. 6
Chapter 2 Preparing for a Sitecore XC installation ....................................................................................... 7 2.1 Verify your Sitecore XP 9.0 setup .................................................................................................... 8
2.1.1 Search provider setup ................................................................................................................. 8 2.1.2 SQL server setup ......................................................................................................................... 8 2.1.3 IIS setup ...................................................................................................................................... 8
2.2 Download the Sitecore XC release package and prerequisites ......................................................... 9 2.3 Create a certificate for Sitecore Commerce Engine Connect ......................................................... 10 2.4 Stop the xConnect site .................................................................................................................. 11
Chapter 3 Installing Sitecore XC ................................................................................................................ 12 3.1 Deployment script overview .......................................................................................................... 13
3.1.1 Deployment script parameters .................................................................................................. 13 3.2 Customize the deployment script .................................................................................................. 16 3.3 Run the deployment script ............................................................................................................ 18
Chapter 4 Post-installation steps ............................................................................................................... 19 4.1 Restart the xConnect site .............................................................................................................. 20 4.2 Configure user accounts ................................................................................................................ 21 4.3 Update Sitecore credential information (optional) ........................................................................ 22
4.3.1 Update the Sitecore Connection Policy configuration file .......................................................... 22 4.3.2 Bootstrap the Sitecore XC engine ............................................................................................. 22
Sitecore® is a registered trademark. All other brand and product names are the property of their respective holders. The contents of this document are the property of Sitecore. Copyright © 2001-2018 Sitecore. All rights reserved.
Sitecore Experience Commerce Installation Guide
3
3
Chapter 1 Getting started
This guide describes how to install Sitecore® Experience Commerce™ (XC) 9.0 in a single-server configuration (local environment). For details on installing Sitecore XC in other environments (for example, production environments), see the Sitecore Experience Commerce DevOps Guide.
Note This document assumes that you have already installed the Sitecore Experience Platform 9.0 software (using the XP0 configuration), as described in the Sitecore Experience Platform Installation Guide, available from dev.sitecore.net.
The document contains the following chapters:
Chapter 1 – Getting started An introduction to the Sitecore Experience Commerce (XC) 9.0 solution and a description of system software and hardware requirements.
Chapter 2 – Preparing for Sitecore XC installation Describes tasks you must complete before deploying Sitecore XC on top of your Sitecore XP installation.
Chapter 3 – Installing Sitecore XC Describes the Sitecore XC deployment script and how to customize your configuration for Sitecore XC installation in your environment.
Chapter 4 – Post-installation steps Describes necessary actions after installation.
Sitecore Experience Commerce 9.0
4
1.1 Sitecore Experience Commerce solution
Sitecore Experience Commerce (XC) is an e-commerce solution, built on the Sitecore Experience Platform (Sitecore XP).
The Sitecore XC solution provides a core framework for rapidly delivering commerce functionality through the following components:
Commerce Engine An extensible commerce core framework, hosting commerce services such as Cart, Order, Pricing, Promotions, Catalogs, and Inventory. The Commerce Engine includes a pluggable framework for extending the engine to modify or add to existing functionality.
Commerce Business Tools A set of rich business tools for merchandisers and customer service representatives. The business tools are built on the Angular framework, and can also be extended using the same pluggable framework.
Sitecore Experience Accelerator (SXA) Storefront A sample storefront website that is integrated with the Commerce Engine. You can use the SXA Storefront as a starting point to building a customized storefront.
For more information about Sitecore XP, refer to the Sitecore Documentation site – http://doc.sitecore.net.
For assistance, or to report any discrepancies between this document and the product, please contact http://support.sitecore.net/helpdesk/.
As of Sitecore 9.0, the on-premises installation of the platform occurs in the context of the Sitecore Installation Framework (SIF). The framework deploys Web Deploy Packages (WDP) by passing parameters to configuration files through a Microsoft® PowerShell module.
Sitecore Experience Commerce Installation Guide
5
5
1.2 Overview of the installation process
This section provides an overview of the installation process using the Sitecore Installation Framework.
For more information about the installation framework, cmdlets, and extensibility points, refer to the Sitecore Installation Framework Configuration Guide. You can download the guide from the Sitecore Downloads page – https://dev.sitecore.net.
To install an instance of Sitecore Experience Commerce on your local machine:
1. Ensure you meet the software and hardware requirements as described in the System requirements section of this guide.
2. Install the Sitecore Installation Framework (SIF) and Sitecore XP 9.0 software (using the XP0 configuration). For detailed instructions, see the Sitecore Experience Platform 9.0 Installation Guide, available for download from the Sitecore Downloads page on dev.sitecore.net.
3. Download the release package for Sitecore XC 9.0 and complete the following prerequisite tasks:
Create a certificate for Commerce Engine Connect.
Stop the XConnect site.
4. Customize the Sitecore XC deployment script to reflect your own environment, and run the script to install the software on your local machine.
5. Complete the post-installation set-up steps to finish the installation.
Sitecore Experience Commerce 9.0
6
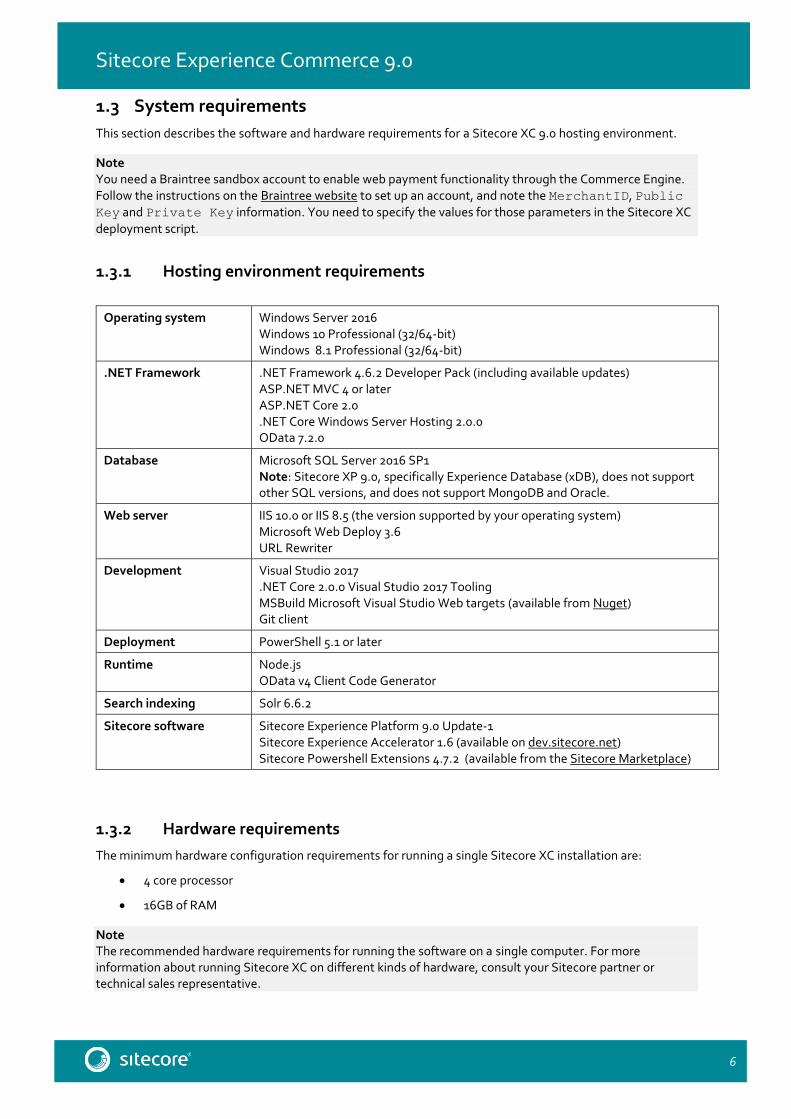
1.3 System requirements
This section describes the software and hardware requirements for a Sitecore XC 9.0 hosting environment.
Note You need a Braintree sandbox account to enable web payment functionality through the Commerce Engine. Follow the instructions on the Braintree website to set up an account, and note the MerchantID, Public
Key and Private Key information. You need to specify the values for those parameters in the Sitecore XC
deployment script.
1.3.1 Hosting environment requirements
Operating system Windows Server 2016 Windows 10 Professional (32/64-bit) Windows 8.1 Professional (32/64-bit)
.NET Framework .NET Framework 4.6.2 Developer Pack (including available updates) ASP.NET MVC 4 or later ASP.NET Core 2.0 .NET Core Windows Server Hosting 2.0.0 OData 7.2.0
Database Microsoft SQL Server 2016 SP1 Note: Sitecore XP 9.0, specifically Experience Database (xDB), does not support other SQL versions, and does not support MongoDB and Oracle.
Web server IIS 10.0 or IIS 8.5 (the version supported by your operating system) Microsoft Web Deploy 3.6 URL Rewriter
Development Visual Studio 2017 .NET Core 2.0.0 Visual Studio 2017 Tooling MSBuild Microsoft Visual Studio Web targets (available from Nuget) Git client
Deployment PowerShell 5.1 or later
Runtime Node.js OData v4 Client Code Generator
Search indexing Solr 6.6.2
Sitecore software Sitecore Experience Platform 9.0 Update-1 Sitecore Experience Accelerator 1.6 (available on dev.sitecore.net) Sitecore Powershell Extensions 4.7.2 (available from the Sitecore Marketplace)
1.3.2 Hardware requirements
The minimum hardware configuration requirements for running a single Sitecore XC installation are:
4 core processor
16GB of RAM
Note The recommended hardware requirements for running the software on a single computer. For more information about running Sitecore XC on different kinds of hardware, consult your Sitecore partner or technical sales representative.
Sitecore Experience Commerce Installation Guide
7
7
Chapter 2 Preparing for a Sitecore XC installation
This chapter outlines the tasks you must complete before installing Sitecore XC 9.0 on a single machine in a non-production environment.
This chapter includes the following sections:
Verify your Sitecore XP 9.0 setup
Download the Sitecore XC release package and prerequisites
Create a certificate for Sitecore Commerce Engine Connect
Stop the xConnect site
Sitecore Experience Commerce 9.0
8
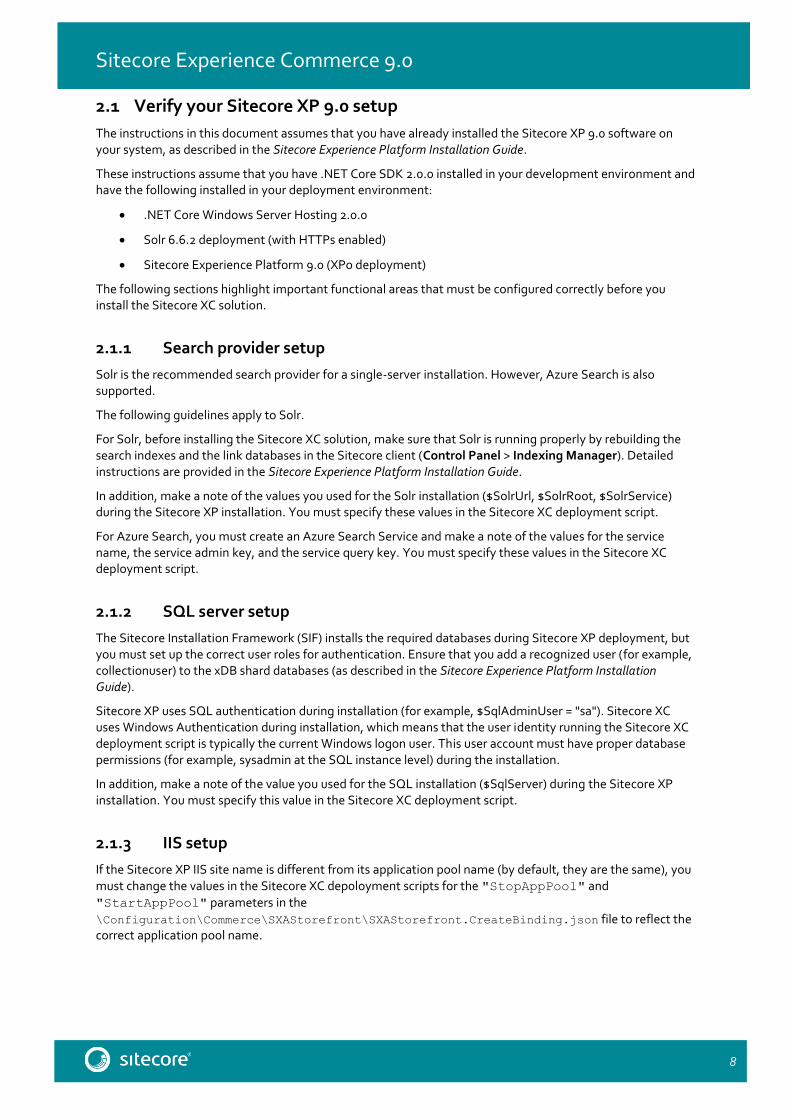
2.1 Verify your Sitecore XP 9.0 setup
The instructions in this document assumes that you have already installed the Sitecore XP 9.0 software on your system, as described in the Sitecore Experience Platform Installation Guide.
These instructions assume that you have .NET Core SDK 2.0.0 installed in your development environment and have the following installed in your deployment environment:
.NET Core Windows Server Hosting 2.0.0
Solr 6.6.2 deployment (with HTTPs enabled)
Sitecore Experience Platform 9.0 (XPo deployment)
The following sections highlight important functional areas that must be configured correctly before you install the Sitecore XC solution.
2.1.1 Search provider setup
Solr is the recommended search provider for a single-server installation. However, Azure Search is also supported.
The following guidelines apply to Solr.
For Solr, before installing the Sitecore XC solution, make sure that Solr is running properly by rebuilding the search indexes and the link databases in the Sitecore client (Control Panel > Indexing Manager). Detailed instructions are provided in the Sitecore Experience Platform Installation Guide.
In addition, make a note of the values you used for the Solr installation ($SolrUrl, $SolrRoot, $SolrService) during the Sitecore XP installation. You must specify these values in the Sitecore XC deployment script.
For Azure Search, you must create an Azure Search Service and make a note of the values for the service name, the service admin key, and the service query key. You must specify these values in the Sitecore XC deployment script.
2.1.2 SQL server setup
The Sitecore Installation Framework (SIF) installs the required databases during Sitecore XP deployment, but you must set up the correct user roles for authentication. Ensure that you add a recognized user (for example, collectionuser) to the xDB shard databases (as described in the Sitecore Experience Platform Installation Guide).
Sitecore XP uses SQL authentication during installation (for example, $SqlAdminUser = "sa"). Sitecore XC uses Windows Authentication during installation, which means that the user identity running the Sitecore XC deployment script is typically the current Windows logon user. This user account must have proper database permissions (for example, sysadmin at the SQL instance level) during the installation.
In addition, make a note of the value you used for the SQL installation ($SqlServer) during the Sitecore XP installation. You must specify this value in the Sitecore XC deployment script.
2.1.3 IIS setup
If the Sitecore XP IIS site name is different from its application pool name (by default, they are the same), you must change the values in the Sitecore XC dep0loyment scripts for the "StopAppPool" and
"StartAppPool" parameters in the
\Configuration\Commerce\SXAStorefront\SXAStorefront.CreateBinding.json file to reflect the correct application pool name.
Sitecore Experience Commerce Installation Guide
9
9
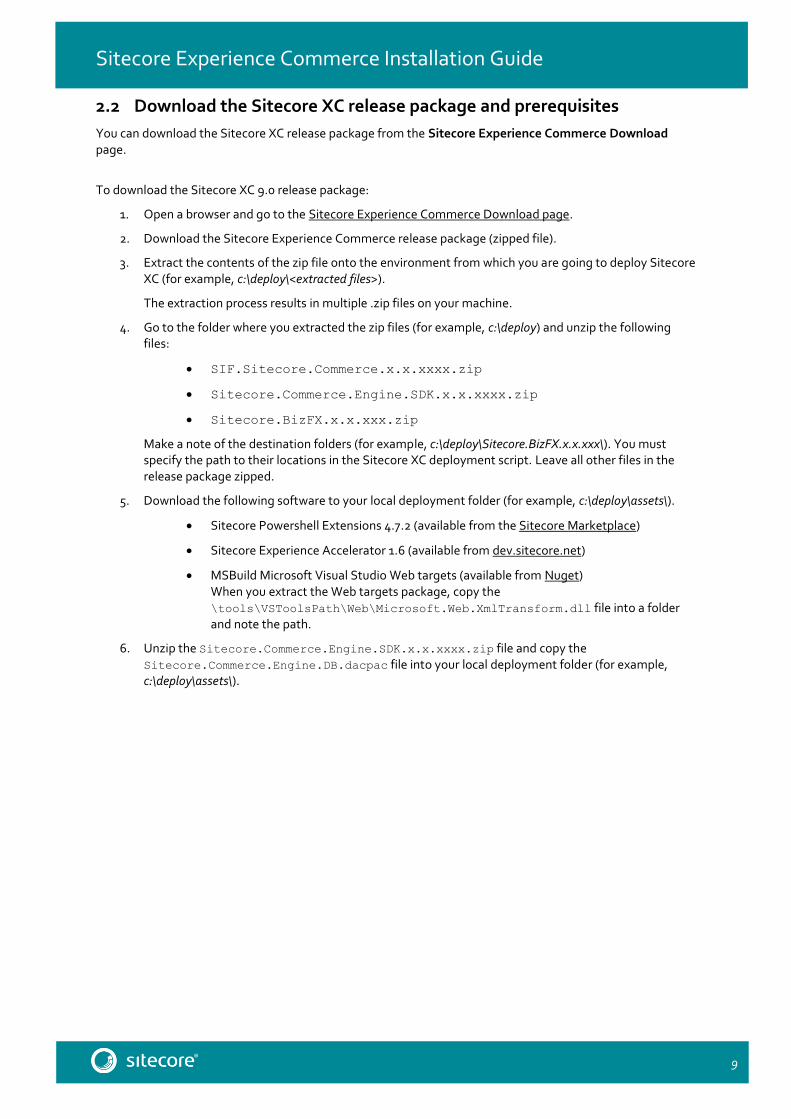
2.2 Download the Sitecore XC release package and prerequisites
You can download the Sitecore XC release package from the Sitecore Experience Commerce Download page.
To download the Sitecore XC 9.0 release package:
1. Open a browser and go to the Sitecore Experience Commerce Download page.
2. Download the Sitecore Experience Commerce release package (zipped file).
3. Extract the contents of the zip file onto the environment from which you are going to deploy Sitecore XC (for example, c:\deploy\<extracted files>).
The extraction process results in multiple .zip files on your machine.
4. Go to the folder where you extracted the zip files (for example, c:\deploy) and unzip the following files:
SIF.Sitecore.Commerce.x.x.xxxx.zip
Sitecore.Commerce.Engine.SDK.x.x.xxxx.zip
Sitecore.BizFX.x.x.xxx.zip
Make a note of the destination folders (for example, c:\deploy\Sitecore.BizFX.x.x.xxx\). You must specify the path to their locations in the Sitecore XC deployment script. Leave all other files in the release package zipped.
5. Download the following software to your local deployment folder (for example, c:\deploy\assets\).
Sitecore Powershell Extensions 4.7.2 (available from the Sitecore Marketplace)
Sitecore Experience Accelerator 1.6 (available from dev.sitecore.net)
MSBuild Microsoft Visual Studio Web targets (available from Nuget) When you extract the Web targets package, copy the \tools\VSToolsPath\Web\Microsoft.Web.XmlTransform.dll file into a folder and note the path.
6. Unzip the Sitecore.Commerce.Engine.SDK.x.x.xxxx.zip file and copy the Sitecore.Commerce.Engine.DB.dacpac file into your local deployment folder (for example, c:\deploy\assets\).
Sitecore Experience Commerce 9.0
10
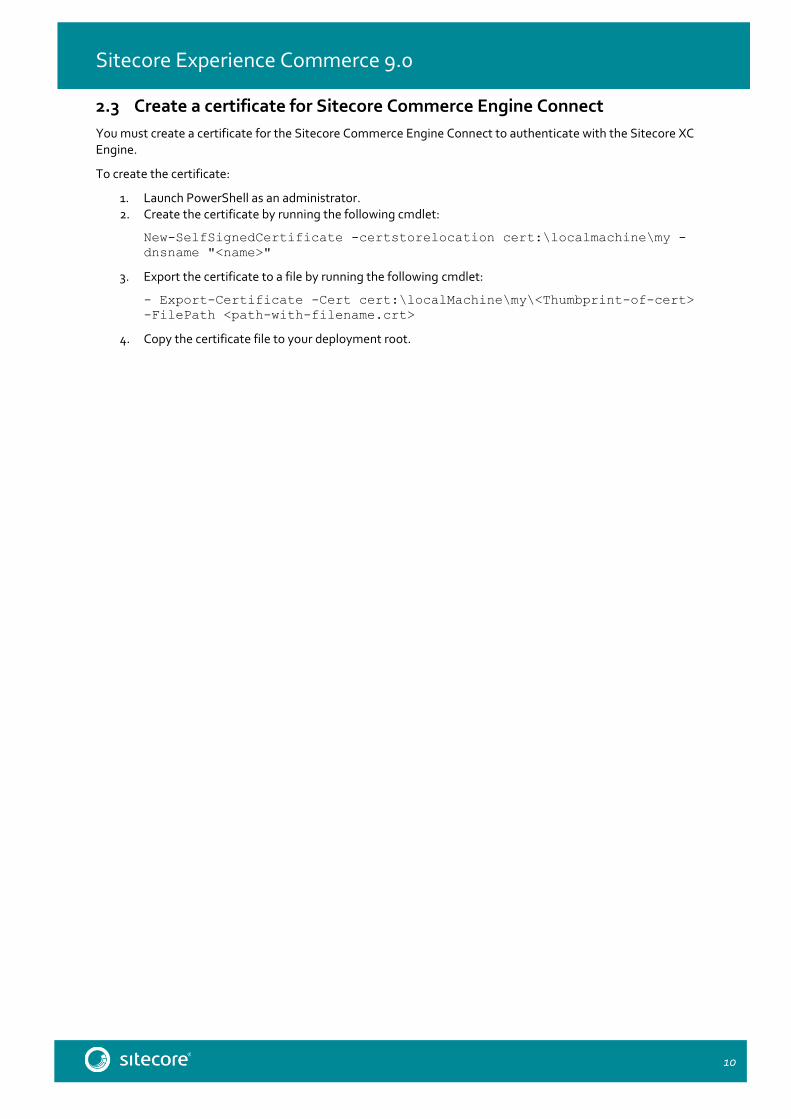
2.3 Create a certificate for Sitecore Commerce Engine Connect
You must create a certificate for the Sitecore Commerce Engine Connect to authenticate with the Sitecore XC Engine.
To create the certificate:
1. Launch PowerShell as an administrator. 2. Create the certificate by running the following cmdlet:
New-SelfSignedCertificate -certstorelocation cert:\localmachine\my -
dnsname "<name>"
3. Export the certificate to a file by running the following cmdlet:
- Export-Certificate -Cert cert:\localMachine\my\<Thumbprint-of-cert>
-FilePath <path-with-filename.crt>
4. Copy the certificate file to your deployment root.
Sitecore Experience Commerce Installation Guide
11
11
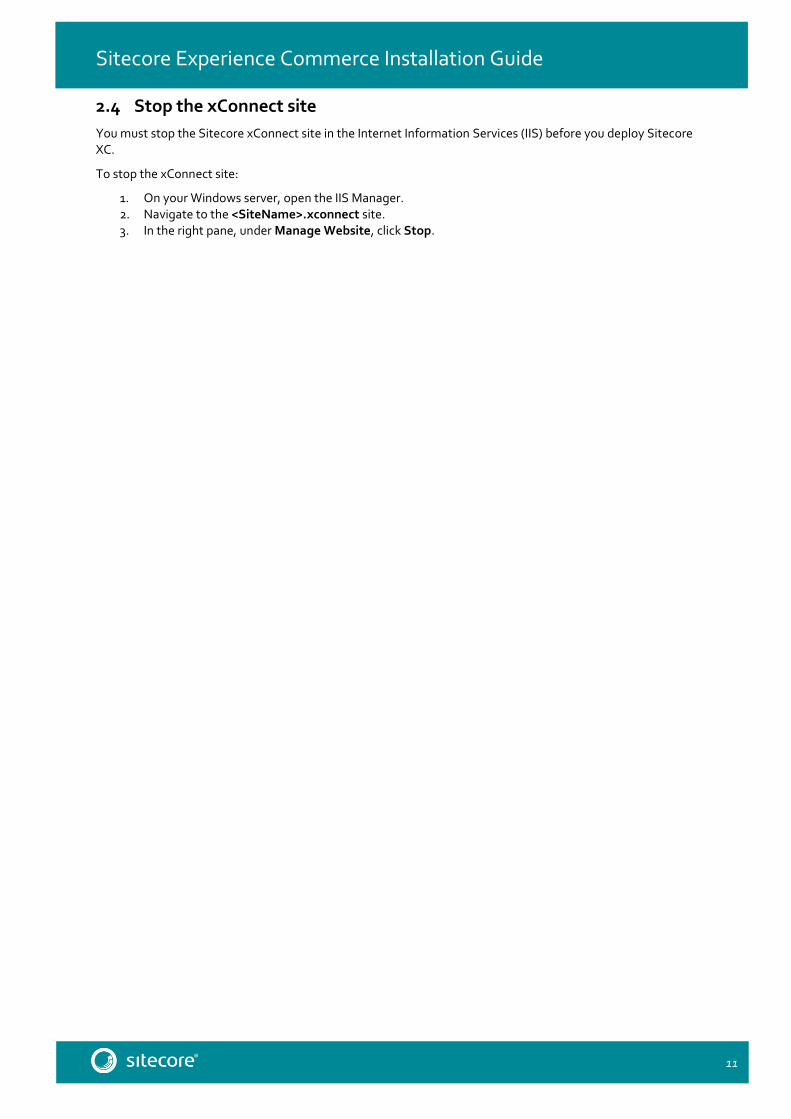
2.4 Stop the xConnect site
You must stop the Sitecore xConnect site in the Internet Information Services (IIS) before you deploy Sitecore XC.
To stop the xConnect site:
1. On your Windows server, open the IIS Manager. 2. Navigate to the <SiteName>.xconnect site. 3. In the right pane, under Manage Website, click Stop.
Sitecore Experience Commerce 9.0
12
Chapter 3 Installing Sitecore XC
The Sitecore XC release package includes PowerShell scripts for installing Sitecore XC. The Deploy-Sitecore-Commerce.ps1 script (located in the SIF Sitecore Commerce folder) installs all of the Sitecore XC modules and the SXA Storefront site.
This chapter includes the following sections:
Deployment script overview
Customize the deployment script
Run the deployment script
Sitecore Experience Commerce Installation Guide
13
13
3.1 Deployment script overview
The deployment script performs the following tasks:
Deploys the following packages into Sitecore: o Commerce Engine o ConnectCE o Connect o Sitecore Identity Server o SXA Storefront (including prerequisites package) o Habitat and Adventure Works Images
Sets up the following sites using pre-built or user-generated content: o Business Tools site o Identity Server site
o Commerce Engine Authoring, Shops, Ops and Minions service
Creates the Solr cores required for Sitecore XC (Catalog, Customers, Orders).
Completes additional configuration necessary across all sites to support the data passed in as part of the script (for example, certificates, updates to configuration files).
Generates Catalog templates.
Installs the SXA Storefront site.
Publishes the entire Sitecore site.
Indexes the entire Sitecore site.
The deployment script uses default values (as specified in the Master_SingleServer.json configuration file). After you specify values and paths to reflect your own deployment environment you can run the script to install the solution. If there are any parameters for which no value is specified, the script prompts you to enter a value during installation.
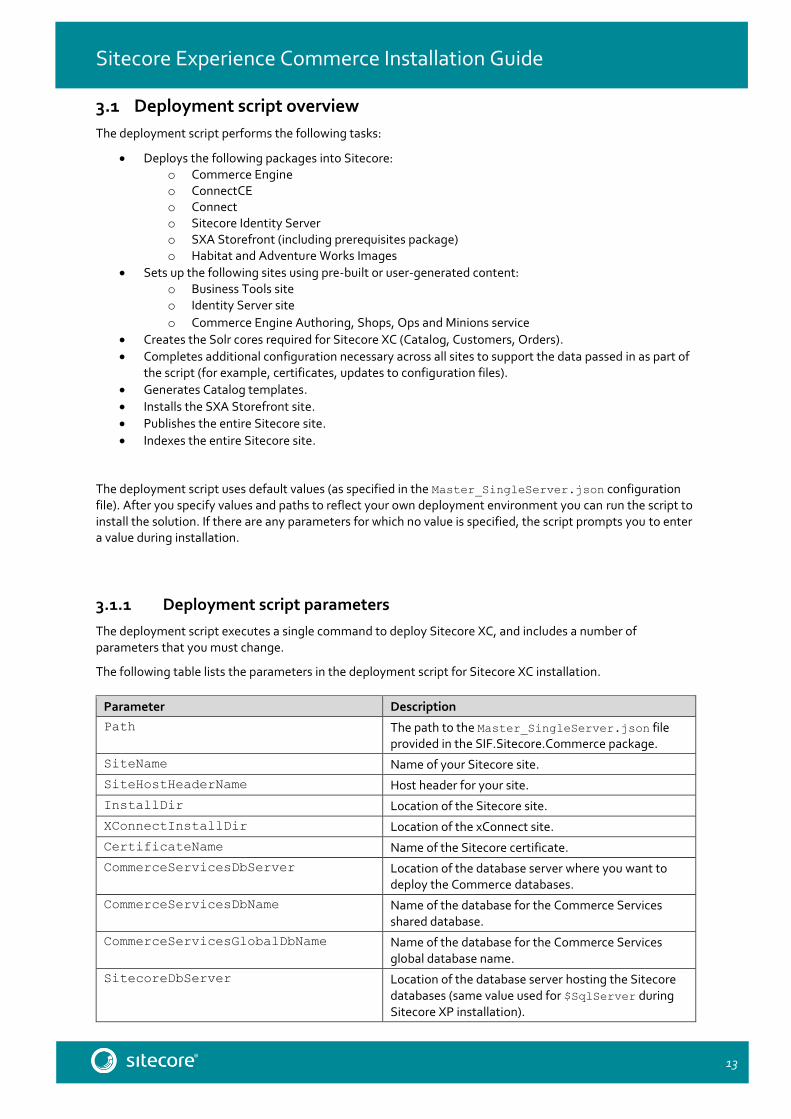
3.1.1 Deployment script parameters
The deployment script executes a single command to deploy Sitecore XC, and includes a number of parameters that you must change.
The following table lists the parameters in the deployment script for Sitecore XC installation.
Parameter Description
Path The path to the Master_SingleServer.json file provided in the SIF.Sitecore.Commerce package.
SiteName Name of your Sitecore site.
SiteHostHeaderName Host header for your site.
InstallDir Location of the Sitecore site.
XConnectInstallDir Location of the xConnect site.
CertificateName Name of the Sitecore certificate.
CommerceServicesDbServer Location of the database server where you want to deploy the Commerce databases.
CommerceServicesDbName Name of the database for the Commerce Services shared database.
CommerceServicesGlobalDbName Name of the database for the Commerce Services global database name.
SitecoreDbServer Location of the database server hosting the Sitecore databases (same value used for $SqlServer during Sitecore XP installation).
Sitecore Experience Commerce 9.0
14
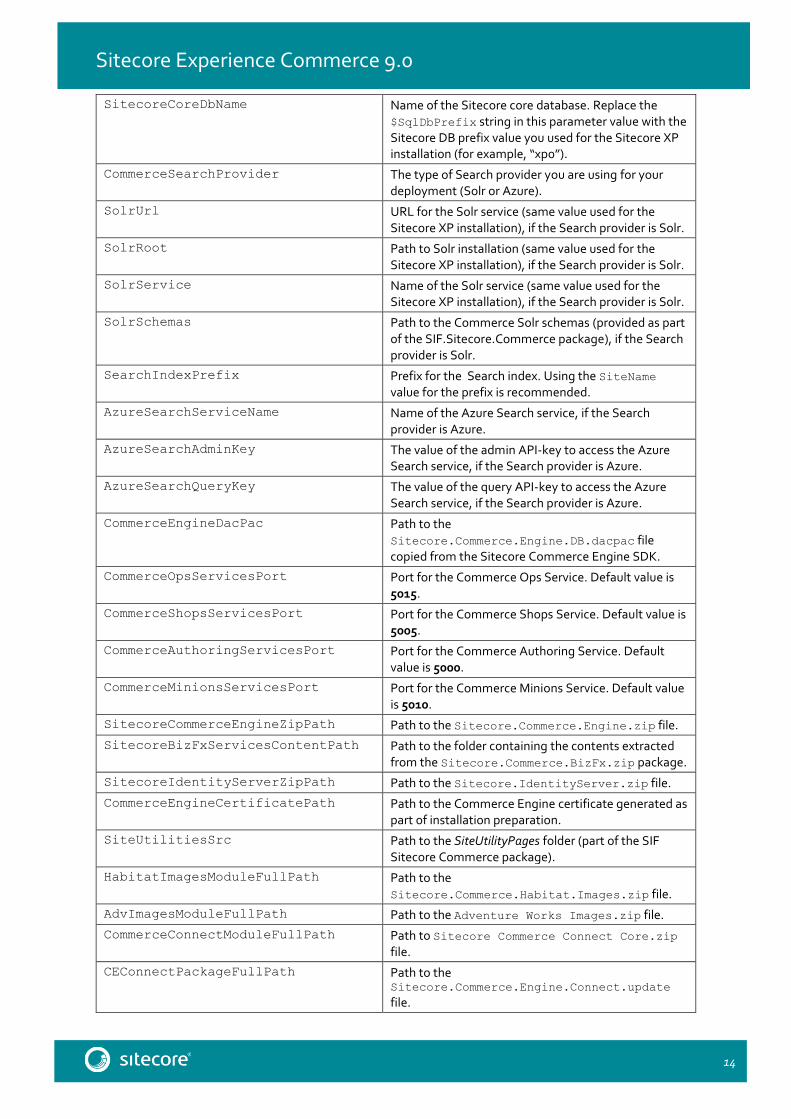
SitecoreCoreDbName Name of the Sitecore core database. Replace the $SqlDbPrefix string in this parameter value with the Sitecore DB prefix value you used for the Sitecore XP installation (for example, “xp0”).
CommerceSearchProvider The type of Search provider you are using for your deployment (Solr or Azure).
SolrUrl URL for the Solr service (same value used for the Sitecore XP installation), if the Search provider is Solr.
SolrRoot Path to Solr installation (same value used for the Sitecore XP installation), if the Search provider is Solr.
SolrService Name of the Solr service (same value used for the Sitecore XP installation), if the Search provider is Solr.
SolrSchemas Path to the Commerce Solr schemas (provided as part of the SIF.Sitecore.Commerce package), if the Search provider is Solr.
SearchIndexPrefix Prefix for the Search index. Using the SiteName value for the prefix is recommended.
AzureSearchServiceName Name of the Azure Search service, if the Search provider is Azure.
AzureSearchAdminKey The value of the admin API-key to access the Azure Search service, if the Search provider is Azure.
AzureSearchQueryKey The value of the query API-key to access the Azure Search service, if the Search provider is Azure.
CommerceEngineDacPac Path to the Sitecore.Commerce.Engine.DB.dacpac file copied from the Sitecore Commerce Engine SDK.
CommerceOpsServicesPort Port for the Commerce Ops Service. Default value is 5015.
CommerceShopsServicesPort Port for the Commerce Shops Service. Default value is 5005.
CommerceAuthoringServicesPort Port for the Commerce Authoring Service. Default value is 5000.
CommerceMinionsServicesPort Port for the Commerce Minions Service. Default value is 5010.
SitecoreCommerceEngineZipPath Path to the Sitecore.Commerce.Engine.zip file.
SitecoreBizFxServicesContentPath Path to the folder containing the contents extracted from the Sitecore.Commerce.BizFx.zip package.
SitecoreIdentityServerZipPath Path to the Sitecore.IdentityServer.zip file.
CommerceEngineCertificatePath Path to the Commerce Engine certificate generated as part of installation preparation.
SiteUtilitiesSrc Path to the SiteUtilityPages folder (part of the SIF Sitecore Commerce package).
HabitatImagesModuleFullPath Path to the Sitecore.Commerce.Habitat.Images.zip file.
AdvImagesModuleFullPath Path to the Adventure Works Images.zip file.
CommerceConnectModuleFullPath Path to Sitecore Commerce Connect Core.zip file.
CEConnectPackageFullPath Path to the Sitecore.Commerce.Engine.Connect.update file.
Sitecore Experience Commerce Installation Guide
15
15
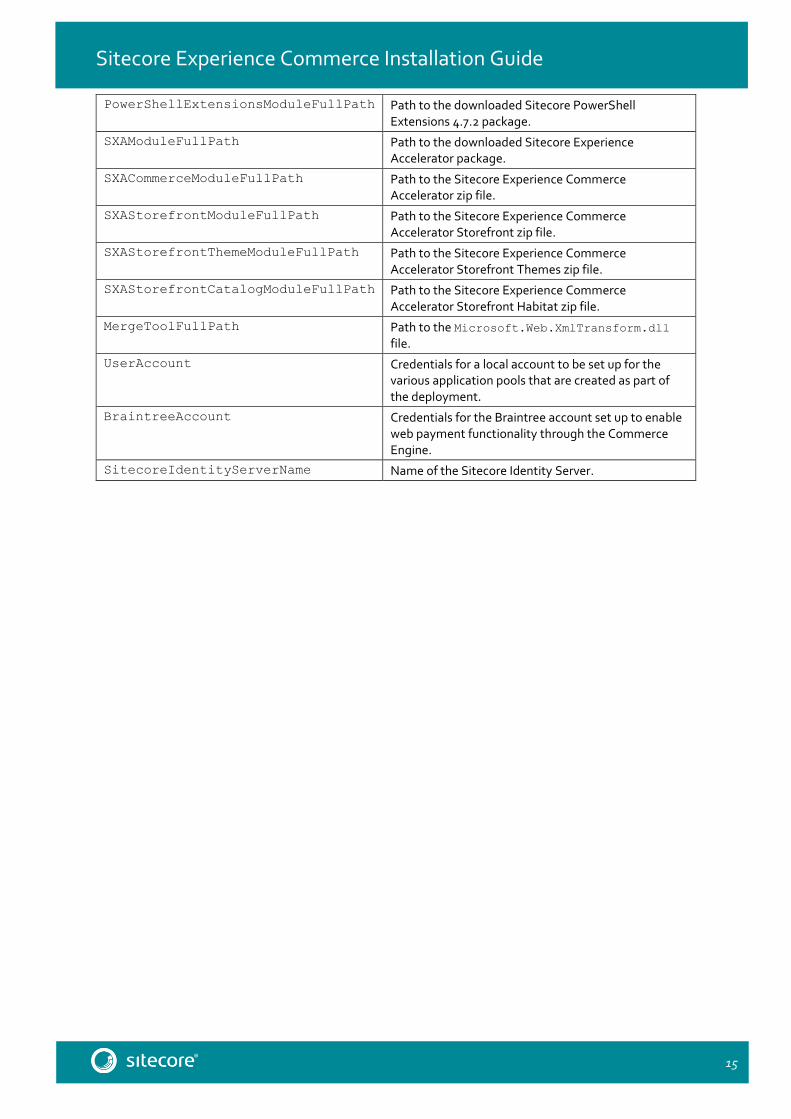
PowerShellExtensionsModuleFullPath Path to the downloaded Sitecore PowerShell Extensions 4.7.2 package.
SXAModuleFullPath Path to the downloaded Sitecore Experience Accelerator package.
SXACommerceModuleFullPath Path to the Sitecore Experience Commerce Accelerator zip file.
SXAStorefrontModuleFullPath Path to the Sitecore Experience Commerce Accelerator Storefront zip file.
SXAStorefrontThemeModuleFullPath Path to the Sitecore Experience Commerce Accelerator Storefront Themes zip file.
SXAStorefrontCatalogModuleFullPath Path to the Sitecore Experience Commerce Accelerator Storefront Habitat zip file.
MergeToolFullPath Path to the Microsoft.Web.XmlTransform.dll file.
UserAccount Credentials for a local account to be set up for the various application pools that are created as part of the deployment.
BraintreeAccount Credentials for the Braintree account set up to enable web payment functionality through the Commerce Engine.
SitecoreIdentityServerName Name of the Sitecore Identity Server.
Sitecore Experience Commerce 9.0
16
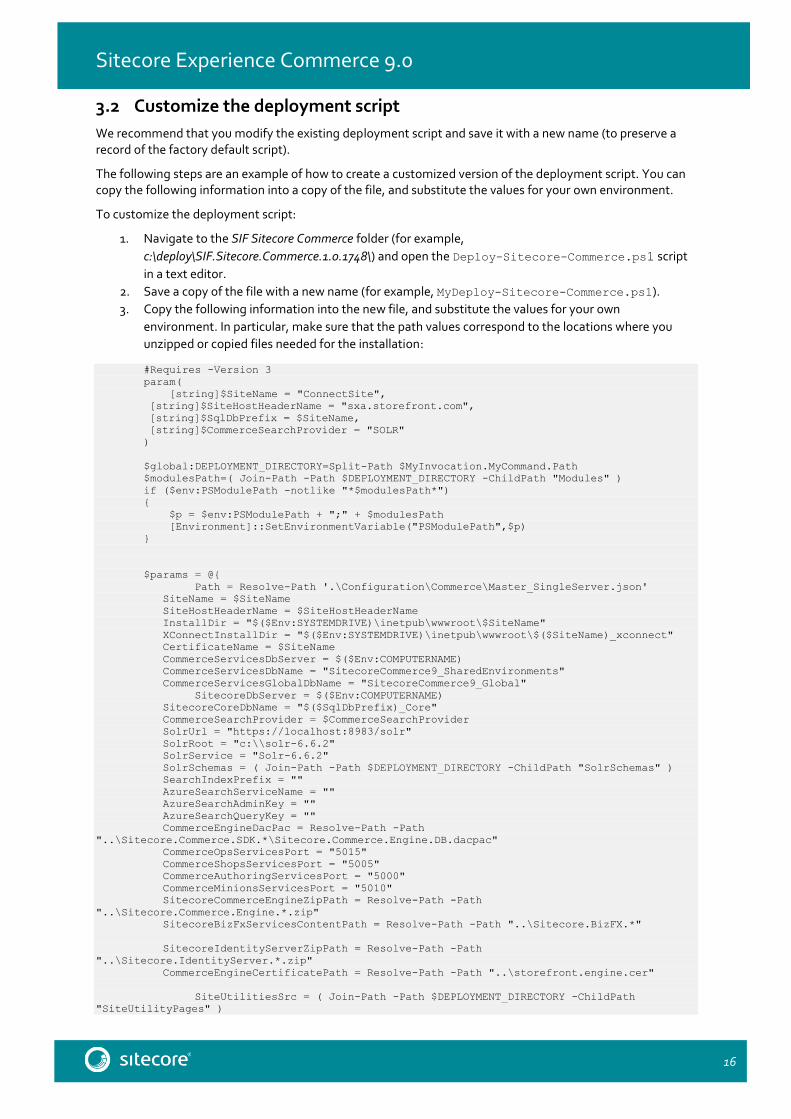
3.2 Customize the deployment script
We recommend that you modify the existing deployment script and save it with a new name (to preserve a record of the factory default script).
The following steps are an example of how to create a customized version of the deployment script. You can copy the following information into a copy of the file, and substitute the values for your own environment.
To customize the deployment script:
1. Navigate to the SIF Sitecore Commerce folder (for example,
c:\deploy\SIF.Sitecore.Commerce.1.0.1748\) and open the Deploy-Sitecore-Commerce.ps1 script
in a text editor.
2. Save a copy of the file with a new name (for example, MyDeploy-Sitecore-Commerce.ps1).
3. Copy the following information into the new file, and substitute the values for your own
environment. In particular, make sure that the path values correspond to the locations where you
unzipped or copied files needed for the installation:
#Requires -Version 3
param(
[string]$SiteName = "ConnectSite",
[string]$SiteHostHeaderName = "sxa.storefront.com",
[string]$SqlDbPrefix = $SiteName,
[string]$CommerceSearchProvider = "SOLR"
)
$global:DEPLOYMENT_DIRECTORY=Split-Path $MyInvocation.MyCommand.Path
$modulesPath=( Join-Path -Path $DEPLOYMENT_DIRECTORY -ChildPath "Modules" )
if ($env:PSModulePath -notlike "*$modulesPath*")
{
$p = $env:PSModulePath + ";" + $modulesPath
[Environment]::SetEnvironmentVariable("PSModulePath",$p)
}
$params = @{
Path = Resolve-Path '.\Configuration\Commerce\Master_SingleServer.json'
SiteName = $SiteName
SiteHostHeaderName = $SiteHostHeaderName
InstallDir = "$($Env:SYSTEMDRIVE)\inetpub\wwwroot\$SiteName"
XConnectInstallDir = "$($Env:SYSTEMDRIVE)\inetpub\wwwroot\$($SiteName)_xconnect"
CertificateName = $SiteName
CommerceServicesDbServer = $($Env:COMPUTERNAME)
CommerceServicesDbName = "SitecoreCommerce9_SharedEnvironments"
CommerceServicesGlobalDbName = "SitecoreCommerce9_Global"
SitecoreDbServer = $($Env:COMPUTERNAME)
SitecoreCoreDbName = "$($SqlDbPrefix)_Core"
CommerceSearchProvider = $CommerceSearchProvider
SolrUrl = "https://localhost:8983/solr"
SolrRoot = "c:\\solr-6.6.2"
SolrService = "Solr-6.6.2"
SolrSchemas = ( Join-Path -Path $DEPLOYMENT_DIRECTORY -ChildPath "SolrSchemas" )
SearchIndexPrefix = ""
AzureSearchServiceName = ""
AzureSearchAdminKey = ""
AzureSearchQueryKey = ""
CommerceEngineDacPac = Resolve-Path -Path
"..\Sitecore.Commerce.SDK.*\Sitecore.Commerce.Engine.DB.dacpac"
CommerceOpsServicesPort = "5015"
CommerceShopsServicesPort = "5005"
CommerceAuthoringServicesPort = "5000"
CommerceMinionsServicesPort = "5010"
SitecoreCommerceEngineZipPath = Resolve-Path -Path
"..\Sitecore.Commerce.Engine.*.zip"
SitecoreBizFxServicesContentPath = Resolve-Path -Path "..\Sitecore.BizFX.*"
SitecoreIdentityServerZipPath = Resolve-Path -Path
"..\Sitecore.IdentityServer.*.zip"
CommerceEngineCertificatePath = Resolve-Path -Path "..\storefront.engine.cer"
SiteUtilitiesSrc = ( Join-Path -Path $DEPLOYMENT_DIRECTORY -ChildPath
"SiteUtilityPages" )
Sitecore Experience Commerce Installation Guide
17
17
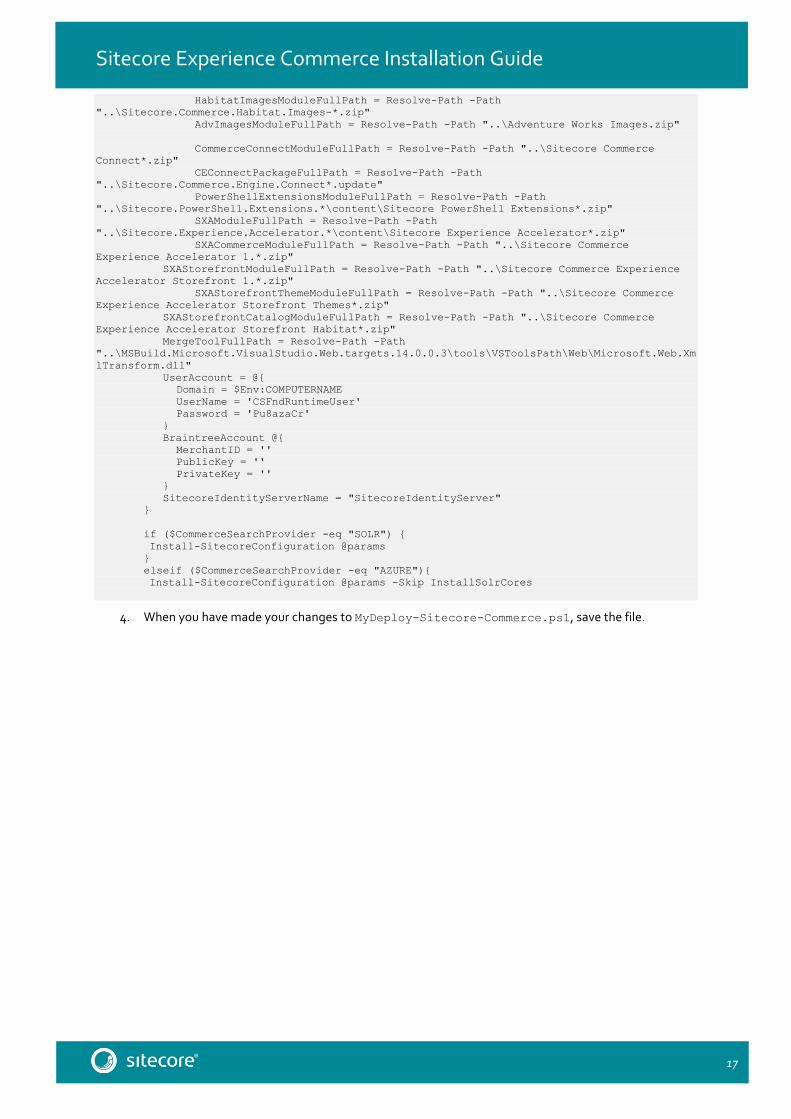
HabitatImagesModuleFullPath = Resolve-Path -Path
"..\Sitecore.Commerce.Habitat.Images-*.zip"
AdvImagesModuleFullPath = Resolve-Path -Path "..\Adventure Works Images.zip"
CommerceConnectModuleFullPath = Resolve-Path -Path "..\Sitecore Commerce
Connect*.zip"
CEConnectPackageFullPath = Resolve-Path -Path
"..\Sitecore.Commerce.Engine.Connect*.update"
PowerShellExtensionsModuleFullPath = Resolve-Path -Path
"..\Sitecore.PowerShell.Extensions.*\content\Sitecore PowerShell Extensions*.zip"
SXAModuleFullPath = Resolve-Path -Path
"..\Sitecore.Experience.Accelerator.*\content\Sitecore Experience Accelerator*.zip"
SXACommerceModuleFullPath = Resolve-Path -Path "..\Sitecore Commerce
Experience Accelerator 1.*.zip"
SXAStorefrontModuleFullPath = Resolve-Path -Path "..\Sitecore Commerce Experience
Accelerator Storefront 1.*.zip"
SXAStorefrontThemeModuleFullPath = Resolve-Path -Path "..\Sitecore Commerce
Experience Accelerator Storefront Themes*.zip"
SXAStorefrontCatalogModuleFullPath = Resolve-Path -Path "..\Sitecore Commerce
Experience Accelerator Storefront Habitat*.zip"
MergeToolFullPath = Resolve-Path -Path
"..\MSBuild.Microsoft.VisualStudio.Web.targets.14.0.0.3\tools\VSToolsPath\Web\Microsoft.Web.Xm
lTransform.dll"
UserAccount = @{
Domain = $Env:COMPUTERNAME
UserName = 'CSFndRuntimeUser'
Password = 'Pu8azaCr'
}
BraintreeAccount @{
MerchantID = ''
PublicKey = ''
PrivateKey = ''
}
SitecoreIdentityServerName = "SitecoreIdentityServer"
}
if ($CommerceSearchProvider -eq "SOLR") {
Install-SitecoreConfiguration @params
}
elseif ($CommerceSearchProvider -eq "AZURE"){
Install-SitecoreConfiguration @params -Skip InstallSolrCores
4. When you have made your changes to MyDeploy-Sitecore-Commerce.ps1, save the file.
Sitecore Experience Commerce 9.0
18
3.3 Run the deployment script
To run your customized Sitecore XC deployment script:
1. Launch PowerShell as an administrator. 2. Run the deployment script by running the following command (using the file name you used for your
deployment script):
c:\deploy\SIF.Sitecore.Commerce.1.0.1748\MyDeploy-Sitecore-
Commerce.ps1
Sitecore Experience Commerce Installation Guide
19
19
Chapter 4 Post-installation steps
Once you have successfully installed the Sitecore XC software, you must complete the following tasks to complete your deployment:
Restart the xConnect site
Configure user accounts
Update Sitecore credential information (optional)
Sitecore Experience Commerce 9.0
20
4.1 Restart the xConnect site
Before you can perform any actions in the SXA Storefront, you must restart the xConnect site in IIS
Important You must ensure that the xConnect Site is still stopped before you navigate to Sitecore or the SXA Storefront.
To restart the xConnect site:
1. Open a browser, and load the Sitecore Launchpad (for example, https://<server>/sitecore). 2. Open a new tab in the browser and load the SXA Storefront. You access the storefront at
https://sxa.storefront.com. 3. After the sites have loaded, on your Windows server, open the IIS Manager. 4. Navigate to the <SiteName>.xconnect site. 5. In the right pane, under Manage Website, click Start.
Sitecore Experience Commerce Installation Guide
21
21
4.2 Configure user accounts
After you have deployed your Sitecore XC solution, you must create user accounts and assign the appropriate roles.
Sitecore XC provides the following pre-defined roles:
Commerce Administator
Commerce Business User
Customer Service Representative
Customer Service Representative Administrator
Pricer
Pricer Manager
Promotioner
Promotioner Manager
You configure users and assign roles using the User Manager tool on the Sitecore Launchpad.
To create users and assign roles:
1. Open a browser, and load the Sitecore Launchpad (e.g., https://<server>/sitecore). 2. Click on User Manager and create the user accounts (with assigned roles) you need for your
deployment, as described on the Documentation Portal.
Note Every Sitecore XC user who requires access to the Business Tools must have the Commerce Business User role assigned, at a minimum.

Sitecore Experience Commerce 9.0
22
4.3 Update Sitecore credential information (optional)
If you are not using the default Sitecore credentials in your solution, you must update the SitecoreConnnectionPolicy information in the \wwwroot\data\Environments\PlugIn.Content.PolicySet-1.0.0.json file.
4.3.1 Update the Sitecore Connection Policy configuration file
You must update the Sitecore Connection Policy configuration file with the system credentials you are using for your Sitecore solution (if you are not using the Sitecore default values).
To update the Sitecore Connection Policy plugin configuration file:
1. Open the PlugIn.Content.PolicySet-1.0.0.json file (in the \wwwroot\data\Environments\).
2. Enter the correct values for the following highlighted parameters:
"$type": "Sitecore.Commerce.Plugin.Management.SitecoreConnectionPolicy,
Sitecore.Commerce.Plugin.Management",
"Host": "sxa.storefront.com",
"SitecoreDatabase": "master",
"UserName": "admin",
"Domain": "sitecore",
"Password": "b",
"ConnectionLeaseTimeout": 60000,
"AuthRequestUrl": "sitecore/api/ssc/auth/login"
3. Save the file.
4.3.2 Bootstrap the Sitecore XC engine
You must run the Sitecore XC bootstrap operation to ensure the changes to the Plugin.Content.PolicySet-1.0.0.json file (and other files in the Environments folder) are written to the database.
The Sitecore XC SDK includes code samples for DevOps operations, so that you can access the Sitecore XC API directly. The following instructions assume that you are using Postman to exercise the Sitecore XC API.
To run the bootstrap operation:
1. Install Postman and launch the application.
2. Navigate to the Sitecore Commerce SDK folder and open the Postman folder.
3. Import the Adventure Works and Habitat environments into Postman.
Note: Make any necessary changes to the global variables in the environment you are using (such as ServiceHost) under the Settings > Manage Environments menu in Postman.
4. In the Collections pane in Postman, navigate to the Authentication folder.
5. Open the Sitecore folder and execute the GetToken call.
When Postman displays an access token in the Body pane, authentication is successful.
6. In the Collections pane, navigate to the SitecoreCommerce_DevOps folder.
7. Open the 1 Environment Bootstrap folder, and execute the Bootstrap Sitecore Commerce call.