shuttering
72
Transcript of shuttering

TechniHemp and limetechniques
- Shuttering- Slab / sreed- Coating / renders /plasters- Hempwool®
- Hemp brick
Hemp solutions for building

TechniHemp and lime
in shuttering
shuttering
Hemp solutions for building
Timber frame preparation
First stage :
Hemp solutions for building
shuttering

Apparent framework:
Moveable shutter are screweddirectly on the timber framework
Two solutions for shuttering
Result
shuttering

Exposed framework:Put screws in framework to shift themoveable shutter (around 3 to 5 cm). Moveables shutters are fixed to the timberframe to form the finished size and shapeof the walls.
After this, framework will be lumped in withthe mortar
moveable shutterEx: plywood 18 mm
Timber frameResult
shuttering
screw
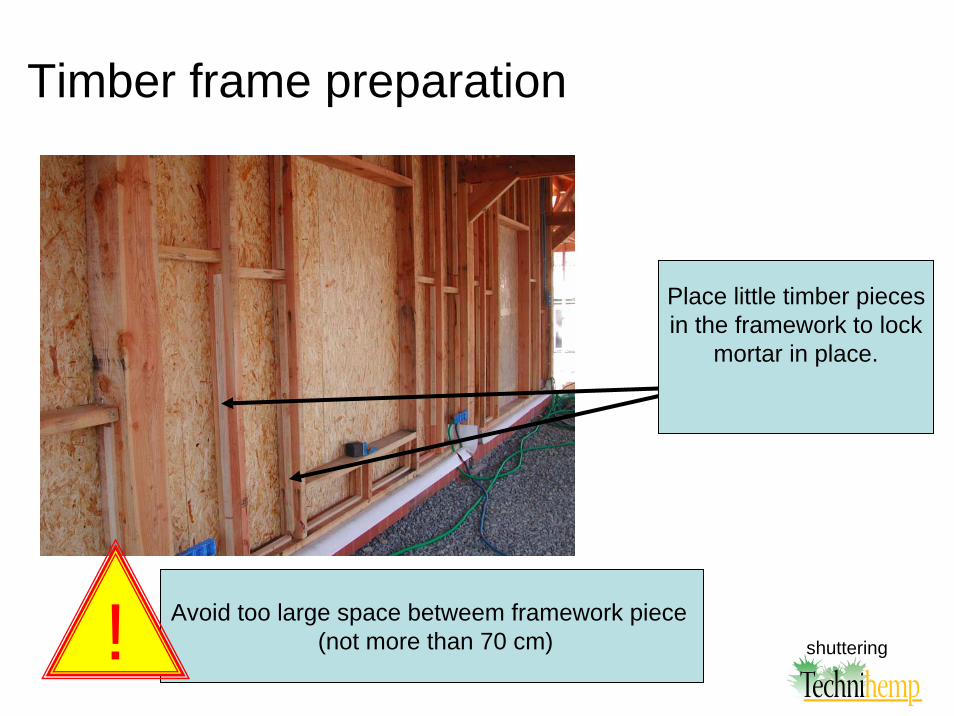
Timber frame preparation
Place little timber piecesin the framework to lock
mortar in place.
Avoid too large space betweem framework piece(not more than 70 cm)! shuttering
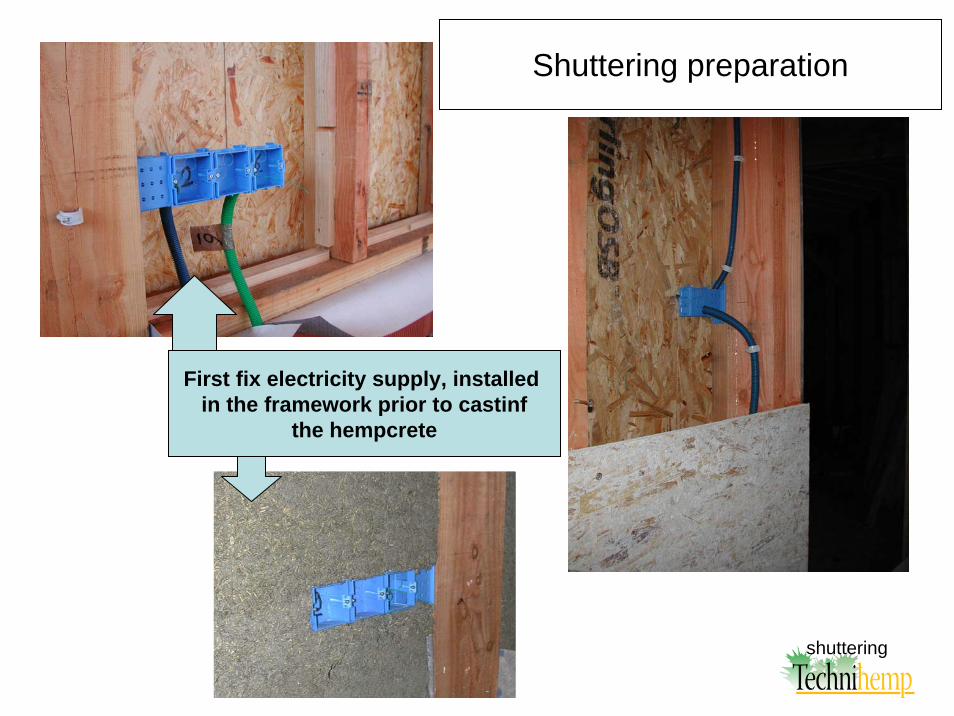
First fix electricity supply, installedin the framework prior to castinf
the hempcrete
Shuttering preparation
shuttering

The two faces offramework are walled-up
All of outside is coveredand inside step by step
Timber frame preparation
shuttering

Cast of TechniHemp & lime mortar in framework
Second stage :
Hemp solutions for building
shuttering

Prepare your mixin a cement mixerHemp solutions for building
TheThe mortarmortar
1 : Water2 : Lime3 : Technihemp
shuttering

Pour TechniHemp & limein schuttering
shuttering

« Pack » slowlythe mixture in moulding
Pour and« pack »
the mortar by lenght of
60 cm
One trick :A tool with two screeded
timber pieces
shuttering

Take off interiormoveable shutter
the next day
The externalmoveable shutter
a week after
shuttering

Take off first sidethe next day and
second side the week after
Lime + water to protect the mortarbefore timber cladding
on a 50*50 batten
shut
terin
g

After drying :2 solutions : coating or a timber cladding
Exposed framework = timber cladding(with air between mortar and timber cladding)
Inclusive framework = coat of sand +lime
shuttering

Hemp lime walls can easily be finished witha simple render or plaster on the inside andoutside and lime is usually recommended forthis as it has good vapour permeability whichis essential for the hygrothermal performanceof hemp lime. The outer render will provide
weather protection. If hemp lime is cast carefullyit may not be necessary to plaster it internally
shuttering

Realisations examplesTechniHemp & lime
in shuttering
Hemp solutions for building
shuttering

Timber frame house with techniHemp & lime
shuttering

12
3
shuttering

TechniHemp & lime in slab
Slab
Hemp solutions for building

The layer of gravels (20/40)
The gravels (20/40 in diameter) shouldbe clean (without sand) to ensure no
capillary movement of waterThickness : 15 to 20 cm
Slab

Keep a space of 2 cmto avoid
capillarity water problem
Slab

Electric cable are put on gravels and will belumped in the mortar
Slab

Recommanded thickness of TechniHemp + lime : 15 cm
Slab
Line of mortar at correct thicknessIt will be your level reference
Guides or markers could be set up to help keep the hemp layer level

Fill the space with mortar
and « pack » slowly
1 – Layed out mortar
2 – « Pack » slowlySlab
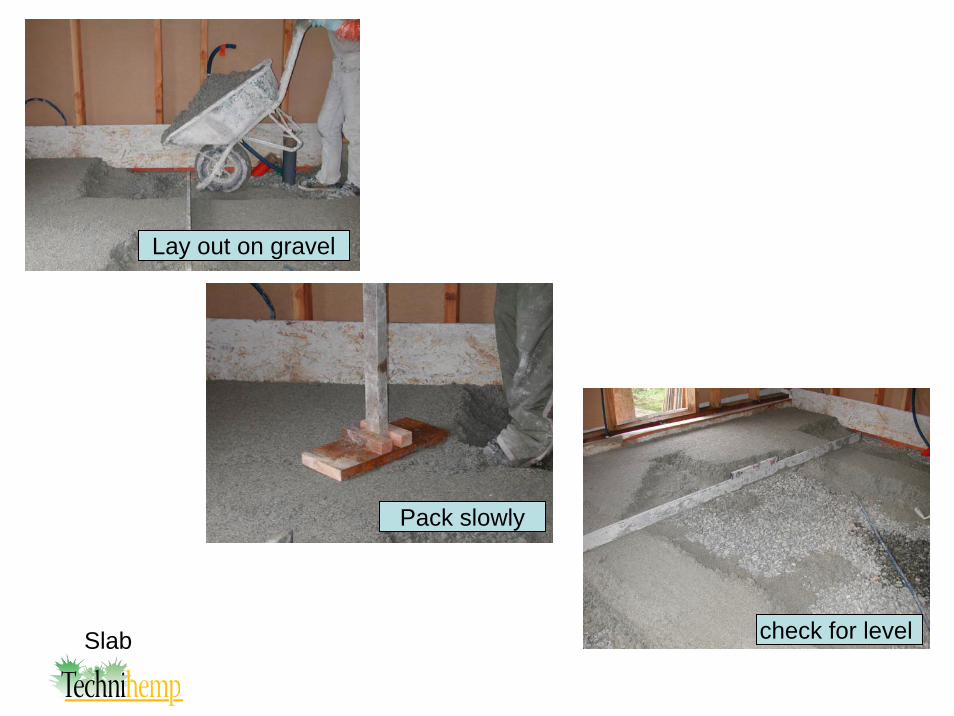
Lay out on gravel
check for level
Pack slowly
Slab

When it’s finished :
Heating floor is consistent with hempcrete slabYou must fix it on the slab with plastic clip. All will be slumped in a lime + sand mortar. After use a permeable tiling(ex: terracotta tiles ) fix with a mixture of lime + fine sand.
flow a lime + sand clevis and pastedirectly your permeable terracotta tiles on
or
Slab

TechniHemp & lime in renders
/ plasters / coating /
Renders
Hemp solutions for building

Spring the wall(stones, brick…)
The day before andin the morning
The wall must beHEALTHY and CLEAN(before application,
break cement or plaster coatif necessary )
NB : on classic cement brickforecast an fist layer of
hydraulic lime+ sandRenders

Trunkings are fixedon wall
with plastic clips andwall plugs
End
uit

First layerAround 3 cm directly
on the wet wall
RendersWARNING : IT’S ESSENTIAL TO WEAR GLOVES
LIME + WATER + RUBING = BURN = caustic effects of lime!

Trunkings are lumpedin first layer
Enduit

When first layer is dressed, letIt dry between 3 to 10 days
before the second layer
Renders

On first layer dressed and dry :It’s possible to finish
With a lime and sand coat or a hemp and lime dress coat
In fact a permeable finishion ….
Lime and sand render on hemp + lime Renders
WARNINGWITH LIME YOU’RE OBLIGED
TO DO THE FINISHION IN ONE TIME
!

Second layer ofTechniHemp & Lime
Second layer is made intoa stiff creamly consistency
(hydrated lime only with hemp)
WARNINGIf you begin a wall you must finish
it in the day
!

Put the second layerwith hand (2 to 3cm),
directly on the first
Renders

Dress the second coat with careIt will be easier for finishing
Renders

Let the second layer to dry (~ 2 hours )
before finishing
Renders

TheThe gesturegesture ::circulars movements
+ sweat …
= quality renders …
Finishing (smooth) with theappropriate tool : a plastic float

Smooth hemp plaster(= strong push)
Rough hemp plaster

It’s possibleto make round corner, to put stone in renderor piece of timber …
As hemp plaster is such a malleableMaterial it can ve used to create
Quite artistic effects

BEFORE
Example
AFTER
Enduit

TECHNIHEMP® HEMPWOOL®
in ROOF
Hempwool ®

THE FRAME
Piece of 10 cm
herringbone (ép. 5cm)
Hempwool ®

The indoor frame for insulation
Leave air ( ~ 5 cm) betweenroof and insulation .
Hempwool ®

Two types of interior frame
Hempwool ®

The gap is managedby a timber piece
of 20 cm
Some details
Hempwool ®

The interior frame could be realised withSteel stud
Datas are the same :
- Leave some air (~ 5 cm).- Gap of 25cm between roof and steel stud- Put a double face adhesive on the steel stud toFix the permable vapour regulator
double face adhesive
Hempwool ®

First layer is fix withstaple on timber roof
Hempwool ®
Technihemp will be
stapled on frame
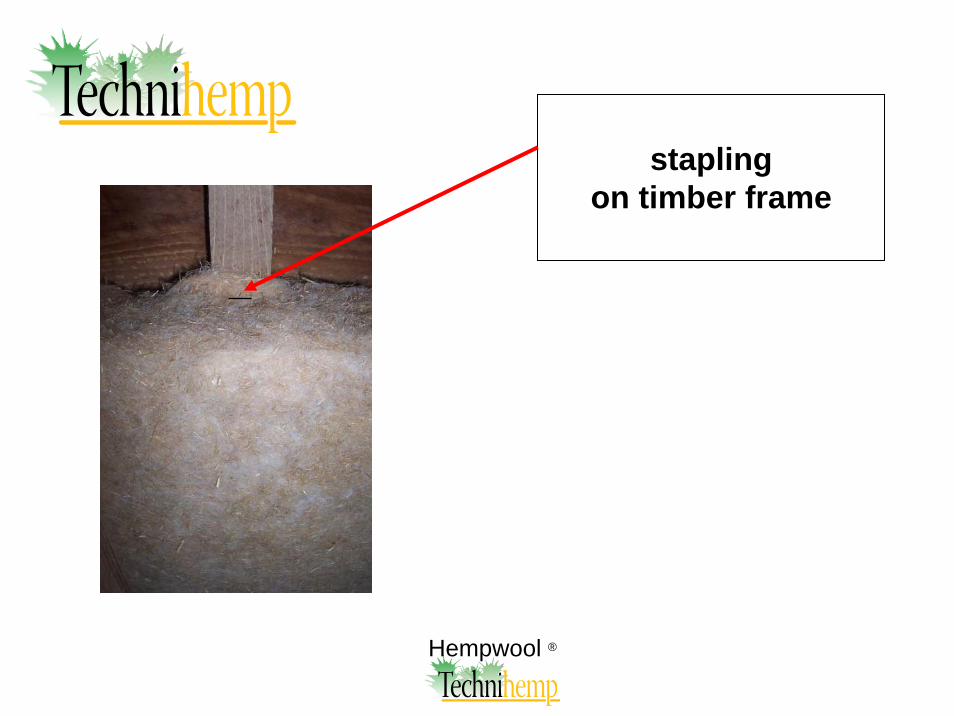
staplingon timber frame
Hempwool ®

stapling toolsimple & efficient !
Hempwool ®

Cross the two layersso as to keep thethermal insulation
!
Hempwool ®

It’s possible to reinforce fixations with some string.
Hempwool ®

Hempwool rolls in two thicknessof 100 mm are inserted between
the rafters
Hempwool ®
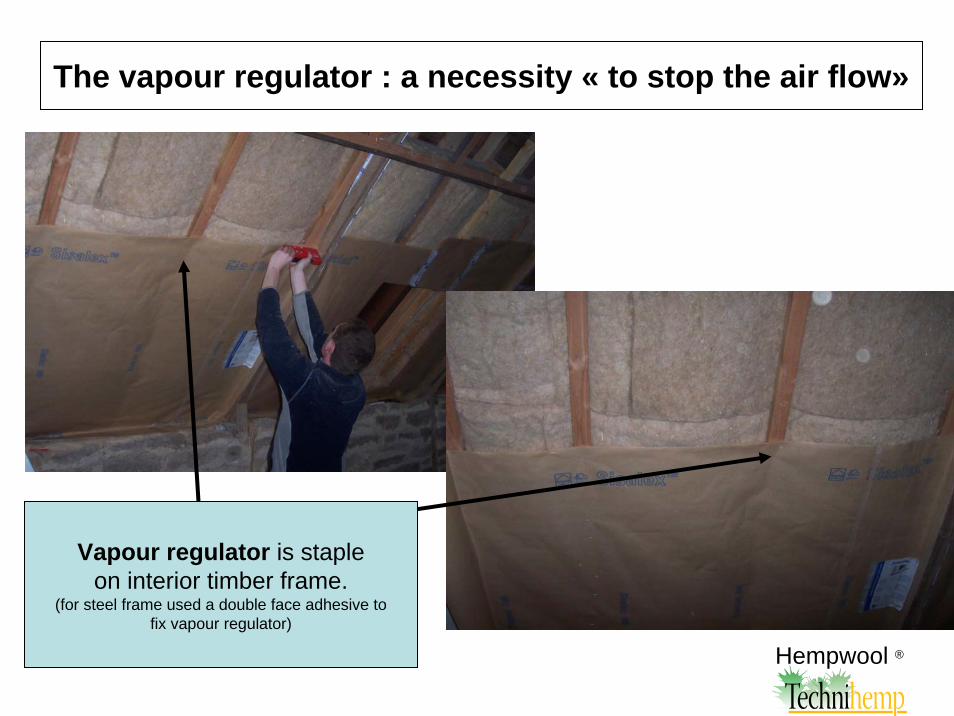
The vapour regulator : a necessity « to stop the air flow»
Vapour regulator is stapleon interior timber frame.
(for steel frame used a double face adhesive tofix vapour regulator)
Hempwool ®

Screwed the facing (preferably of
breathable type) on timber frameor steel frame
Hempwool ®

Hempwool ®
TECHNIHEMP® HEMPWOOL®
in TIMBER FRAMEWORK

Insulation of a timber frame
(145 mm)with woodfibre
rain screen
Hempwool ®
Now panelof 145 mmis available

First layer of 40mm hight density (80kg/m3) :
AimAim :: increase inerty of this timber frame
Hempwool ®
Now panelof 145 mmis available
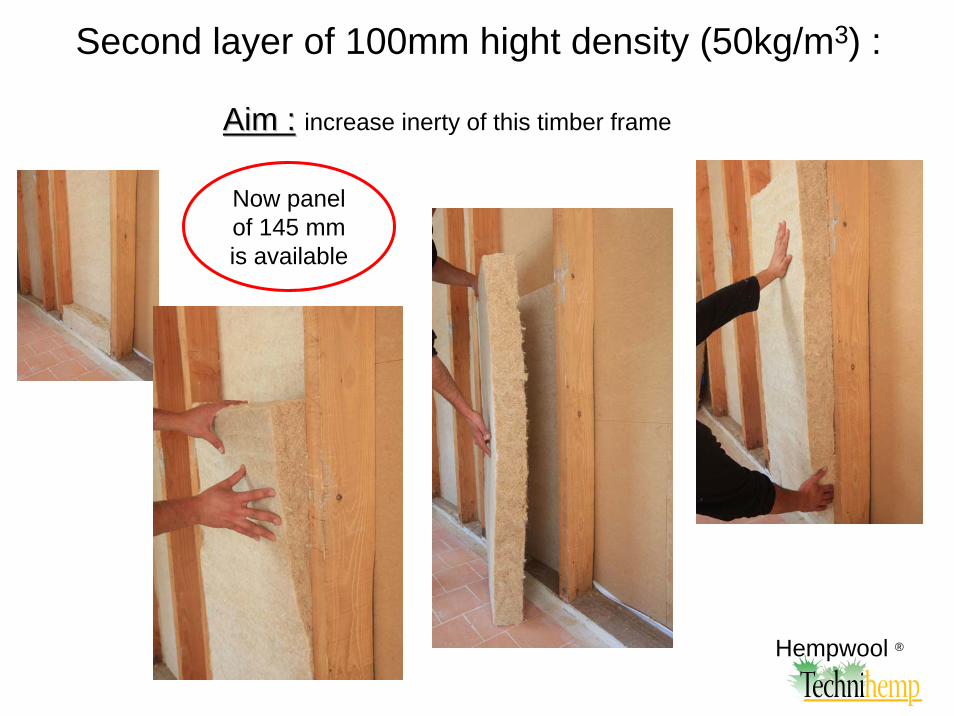
Second layer of 100mm hight density (50kg/m3) :
Hempwool ®
AimAim :: increase inerty of this timber frame
Now panelof 145 mmis available

To cut panels use good tools
Hempwool ®
Now panelof 145 mmis available

For panels in 30kg/m3 : staple on timber frame
Hempwool ®

staple vapourregulator on timber frame
Warning:necessity « to stop
the air flow».Use the adhesive
Hempwool ®

Put batten on the vapour regulatorfor the electricity
Goal :Goal : do not perforate the vapour regulator
Hempwool ®

Screw facing(preferably of breathable type)
Hempwool ®

Hemp brick
TECHNIHEMP® brick in PARTITION

Brick are fixed byA mortar (lime+sand)
Easy to cut
Hemp brick

Easy, simple and quickIn a timber frame
Hemp brick

Hemp brick

Light and easy.
Acoustic and thermal qualities
Hemp brick

Find our technical data on :
www.technichanvre.com