Shorty leto
13
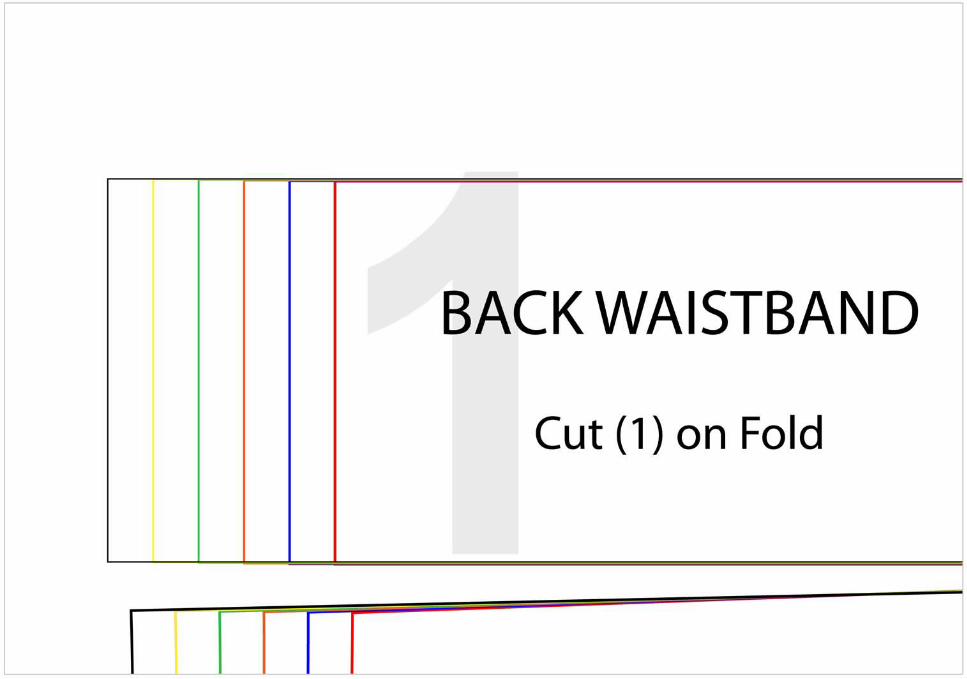
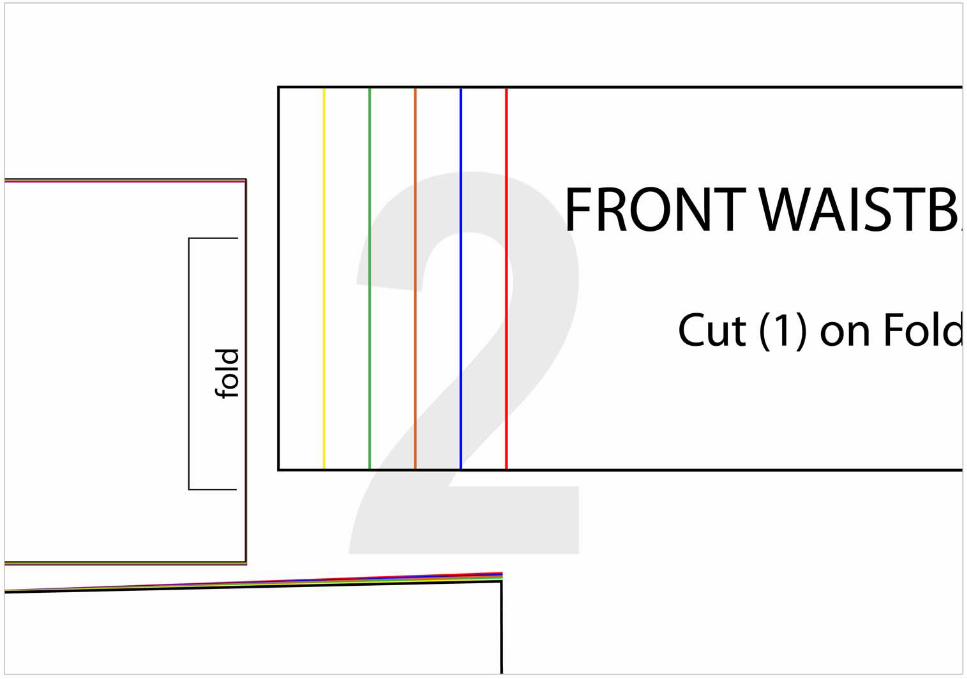
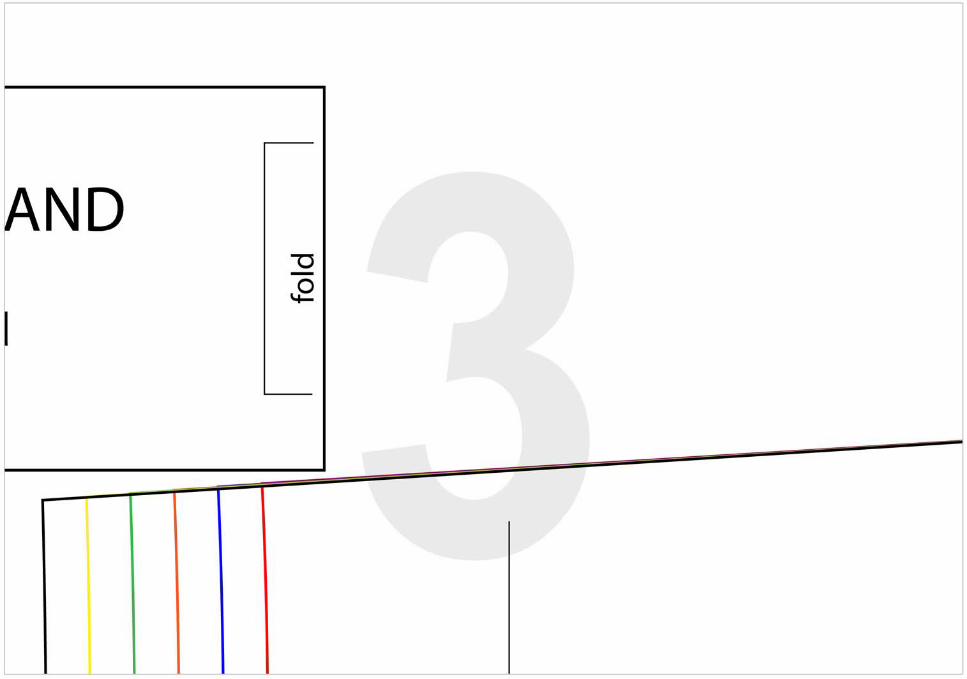
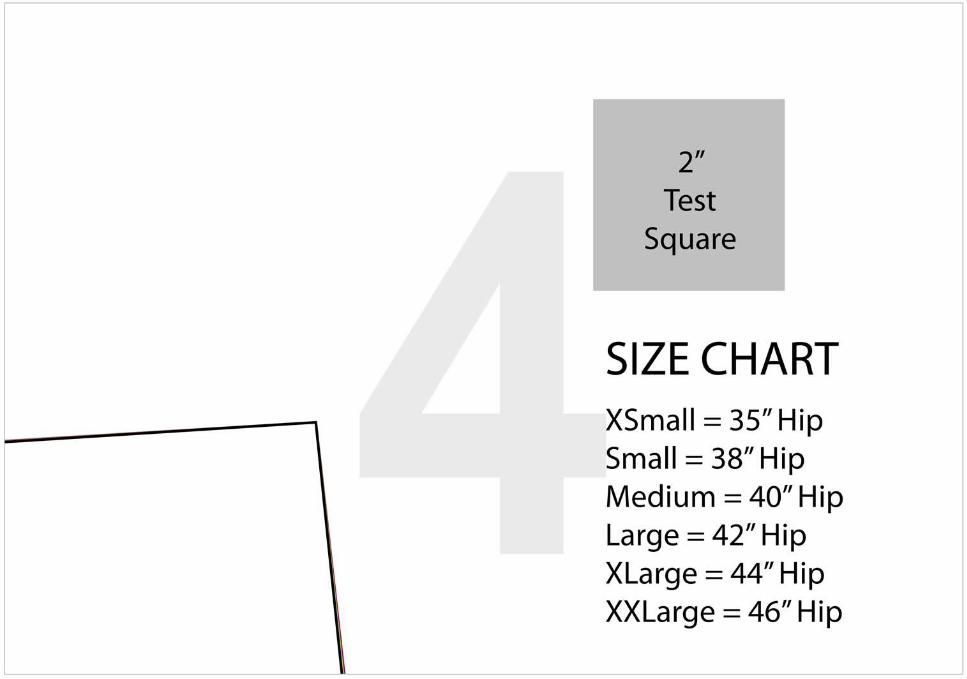
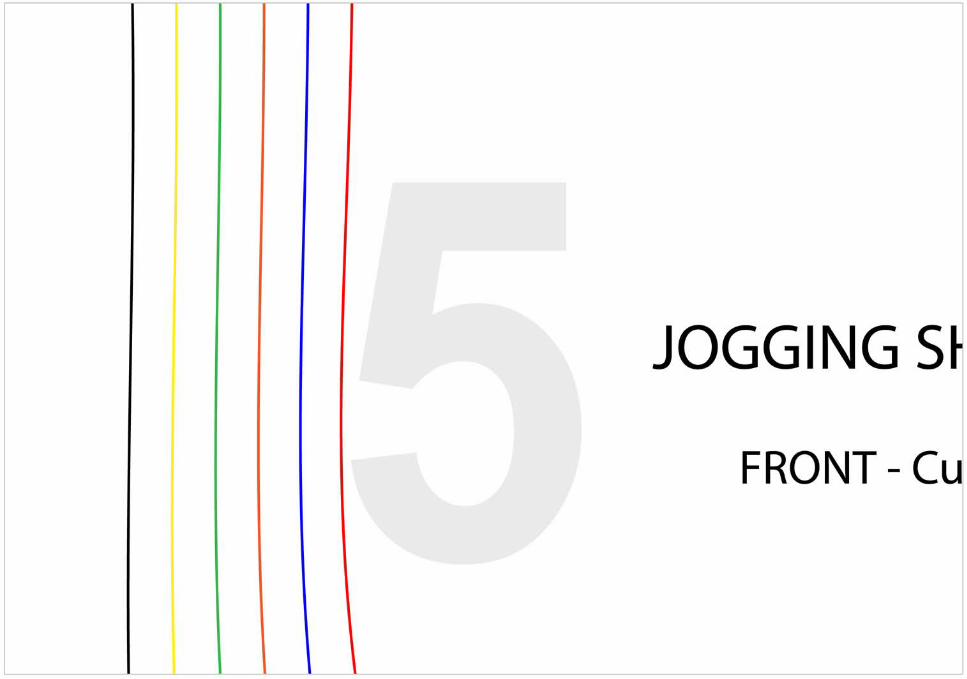
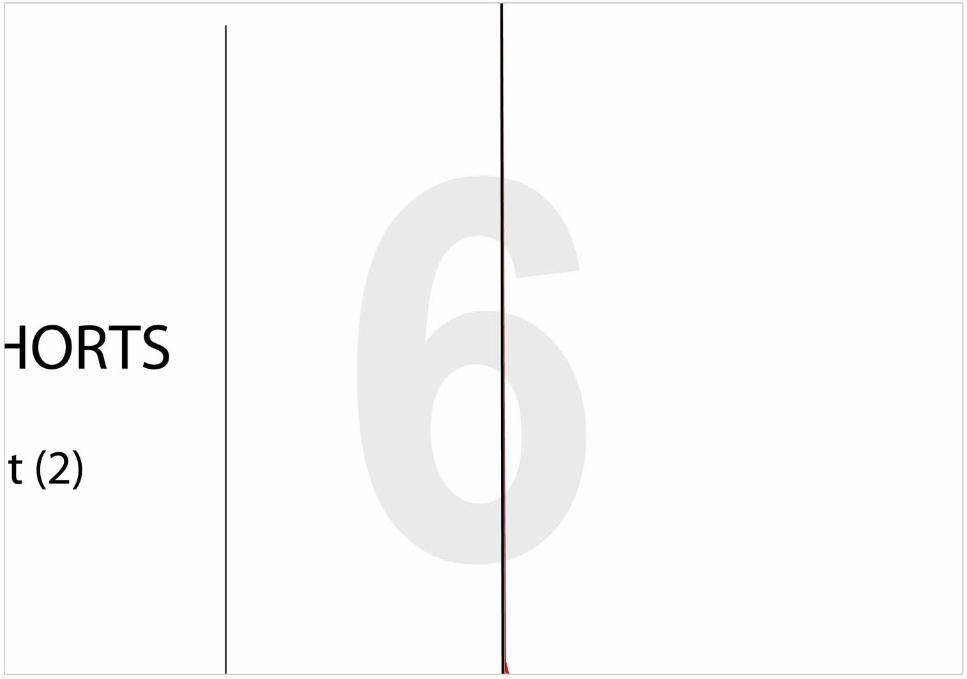
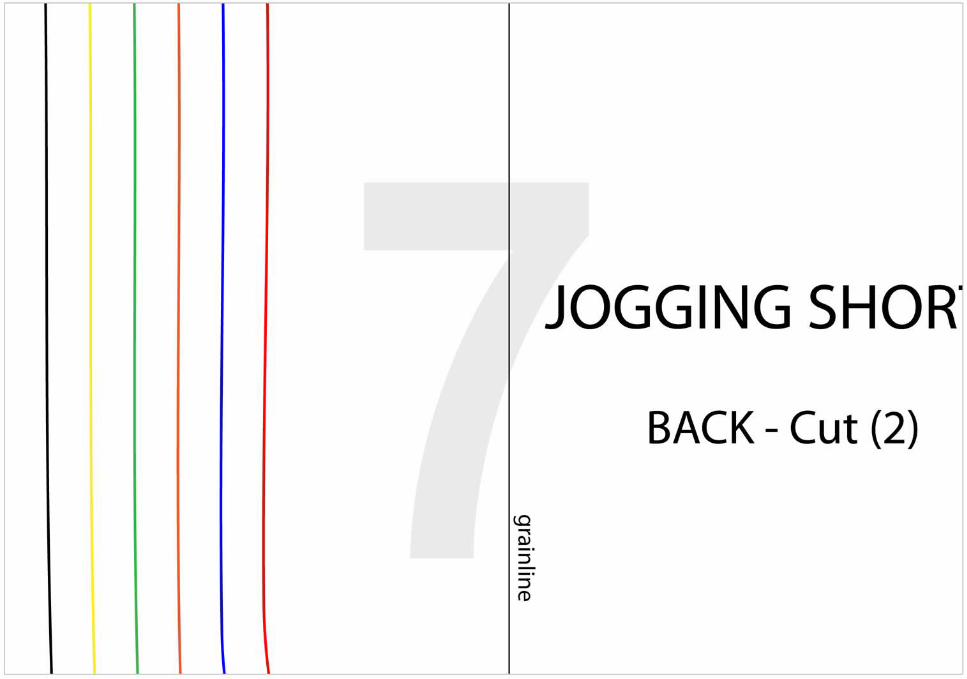
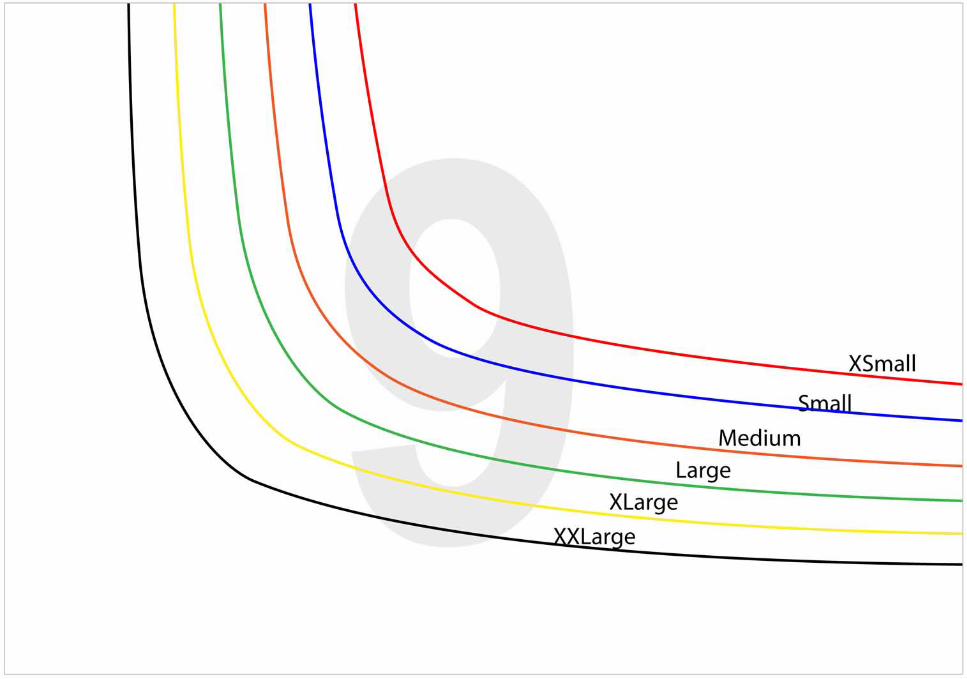
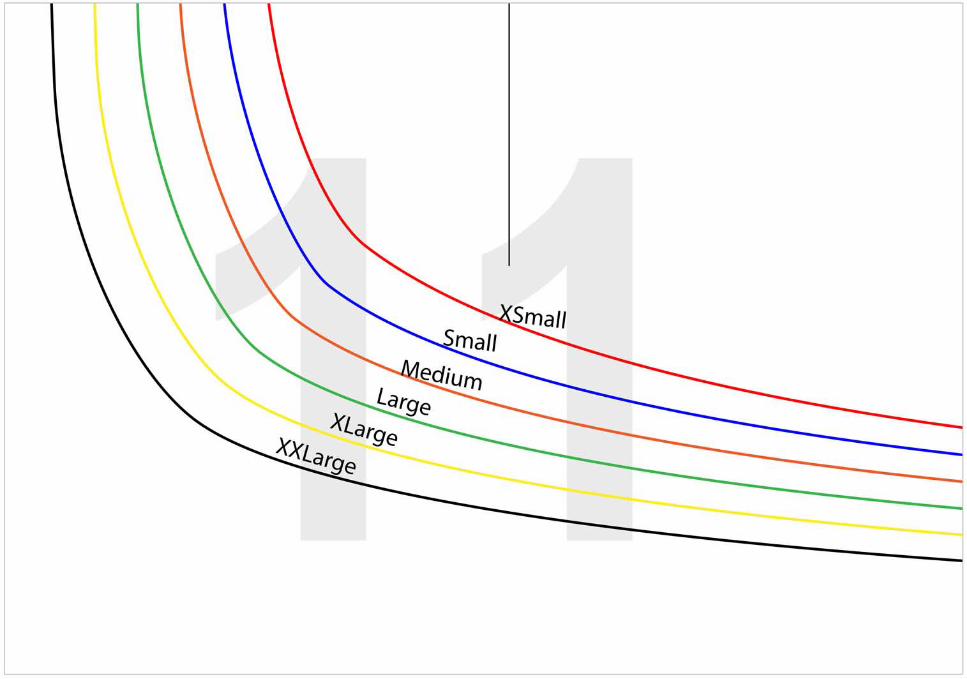
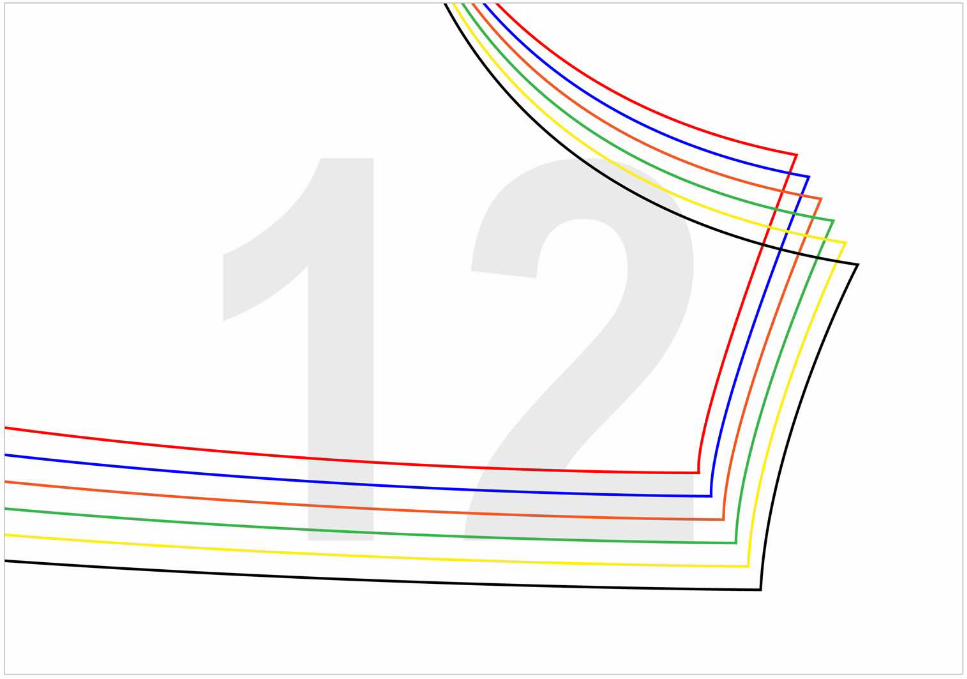
Jogging Shorts Sewing ePattern Jess Abbott: www.sewingrabbit.com for eHow Printing and Piecing Instructions ● All pages should be printed on standard paper. Using Adobe Reader (free to download) is recommended but may not be necessary. ● Make sure that “Auto Rotate and Center” is checked and that “Scaling” is NOT checked (scaling may be in a dropdown menu make sure to find it and check the setting). If you have a newer version of Adobe Reader, your options might look like “Fit to Size” or “Actual Size”. If that is the case, make sure you choose “Actual Size”. ● To make sure you’re printing the right size pattern, measure the 2 inch test square. Do your troubleshooting here so you don’t print out the wrong size pages. ● If you live outside Canada or the US, print the pages to your standard paper size. ● To connect each page, trim to the grey border (do not cut the grey border off), and match up the numbers of each page with the pattern image diagram below. ● Tape the pages together. ● Once the whole pattern is printed and taped, cut along your size line according to the size chart. You may prefer to trace your size onto tracing paper and then cut it out. Pattern Diagram Pattern includes a ½” seam allowance.
-
Upload
share-sewing -
Category
Design
-
view
20 -
download
0
Transcript of Shorty leto
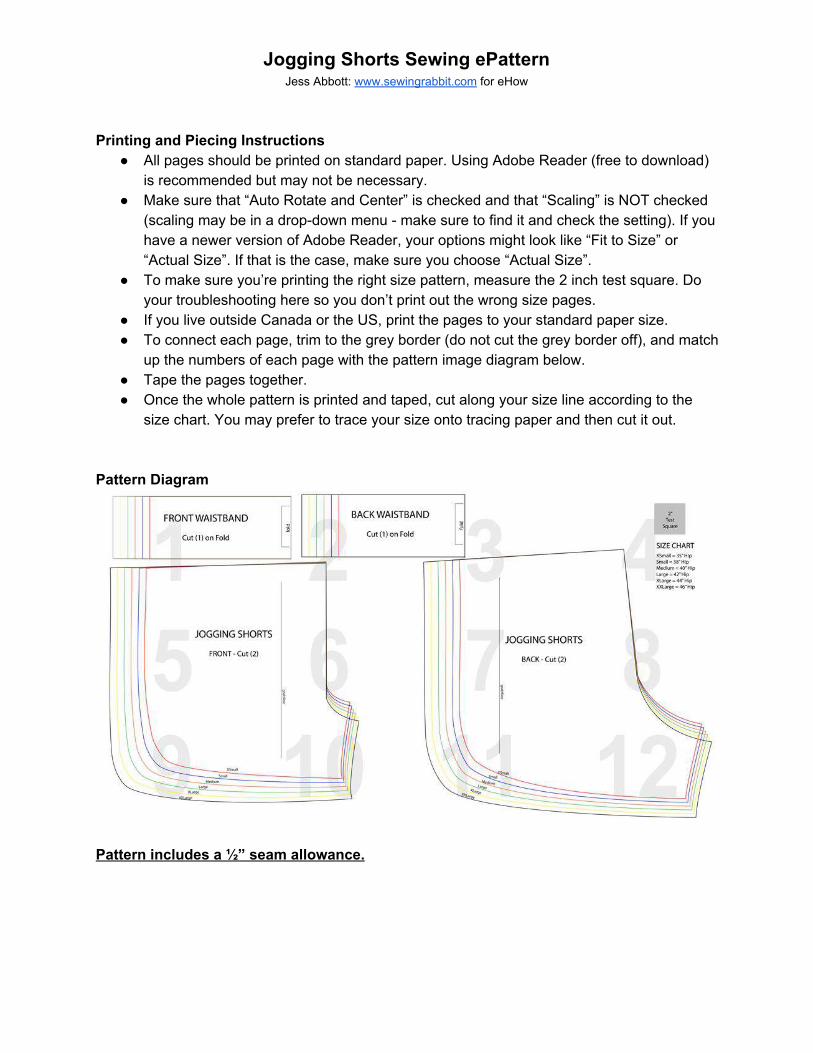
Jogging Shorts Sewing ePattern Jess Abbott: www.sewingrabbit.com for eHow
Printing and Piecing Instructions
● All pages should be printed on standard paper. Using Adobe Reader (free to download) is recommended but may not be necessary.
● Make sure that “Auto Rotate and Center” is checked and that “Scaling” is NOT checked (scaling may be in a dropdown menu make sure to find it and check the setting). If you have a newer version of Adobe Reader, your options might look like “Fit to Size” or “Actual Size”. If that is the case, make sure you choose “Actual Size”.
● To make sure you’re printing the right size pattern, measure the 2 inch test square. Do your troubleshooting here so you don’t print out the wrong size pages.
● If you live outside Canada or the US, print the pages to your standard paper size. ● To connect each page, trim to the grey border (do not cut the grey border off), and match
up the numbers of each page with the pattern image diagram below. ● Tape the pages together. ● Once the whole pattern is printed and taped, cut along your size line according to the
size chart. You may prefer to trace your size onto tracing paper and then cut it out. Pattern Diagram
Pattern includes a ½” seam allowance.