Seven Simple Steps to Setting Up Your Printerh10032. Simple Steps to Setting Up Your Printer HP...
16
Seven Simple Steps to Setting Up Your Printer HP DeskJet 720C Series Printer ®
Transcript of Seven Simple Steps to Setting Up Your Printerh10032. Simple Steps to Setting Up Your Printer HP...
SevenSimple Stepsto Setting UpYour Printer
HP DeskJet720C Series Printer
®
SetupGuide Page 1 Friday, July 25, 1997 1:13 PM
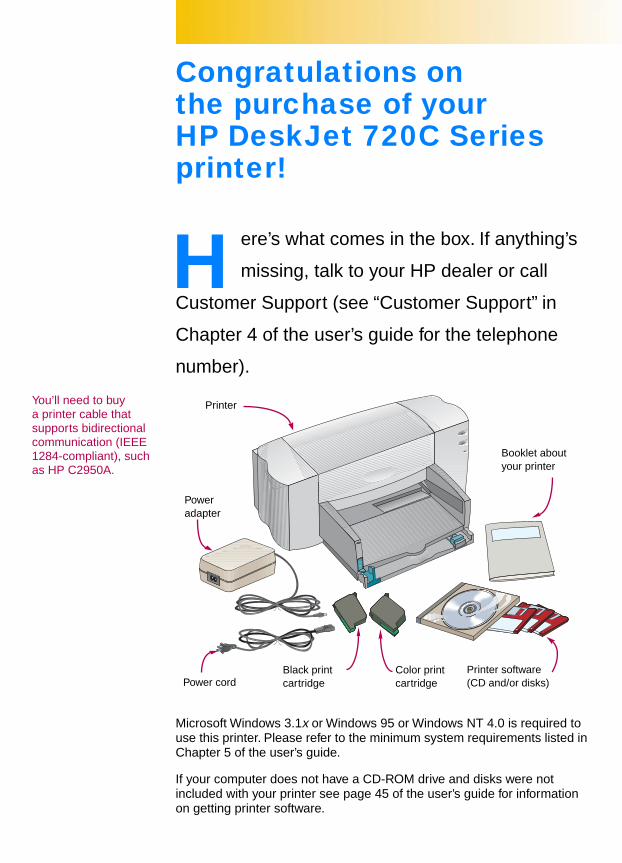
You’ll need to buy a printer cable that supports bidirectional communication (IEEE 1284-compliant), such as HP C2950A.
SetupGuide Page 2 Friday, July 25, 1997 1:13 PM
Congratulations on the purchase of your HP DeskJet 720C Series printer!
ere’s what comes in the box. If anything’s
missing, talk to your HP dealer or call
Customer Support (see “Customer Support” in
Chapter 4 of the user’s guide for the telephone
number).
Microsoft Windows 3.1x or Windows 95 or Windows NT 4.0 is required to use this printer. Please refer to the minimum system requirements listed in Chapter 5 of the user’s guide.
If your computer does not have a CD-ROM drive and disks were not included with your printer see page 45 of the user’s guide for information on getting printer software.
H
Black print cartridge
Printer software(CD and/or disks)
Color print cartridge
Printer
Power adapter
Booklet about your printer
Power cord
S T E P
1
SetupGuide Page 3 Friday, July 25, 1997 1:13 PM
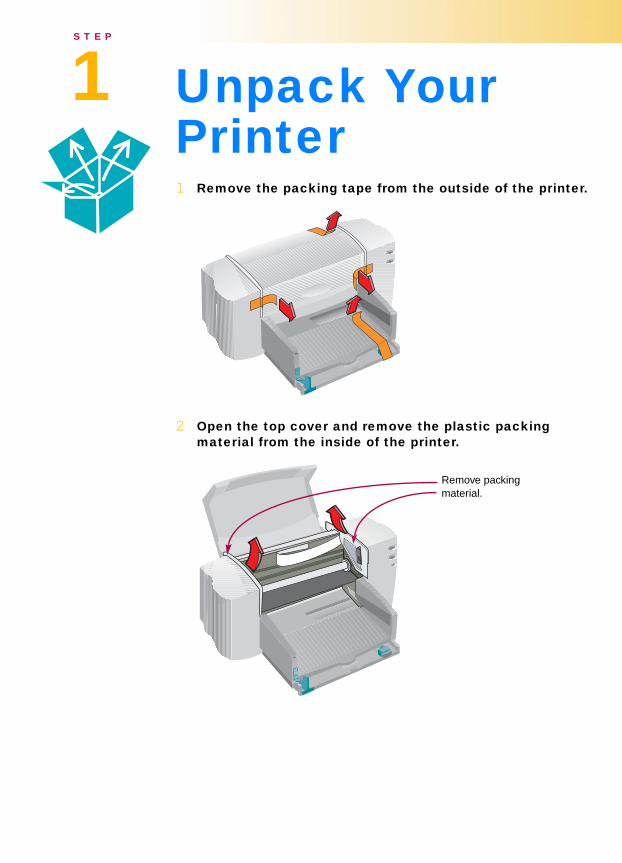
Unpack Your Printer1 Remove the packing tape from the outside of the printer.
2 Open the top cover and remove the plastic packing material from the inside of the printer.
Remove packing material.
S T E P
2
You’ll need to buy a printer cable that supports bidirectional communication (IEEE 1284-compliant), such as HP C2950A.
SetupGuide Page 4 Friday, July 25, 1997 1:13 PM
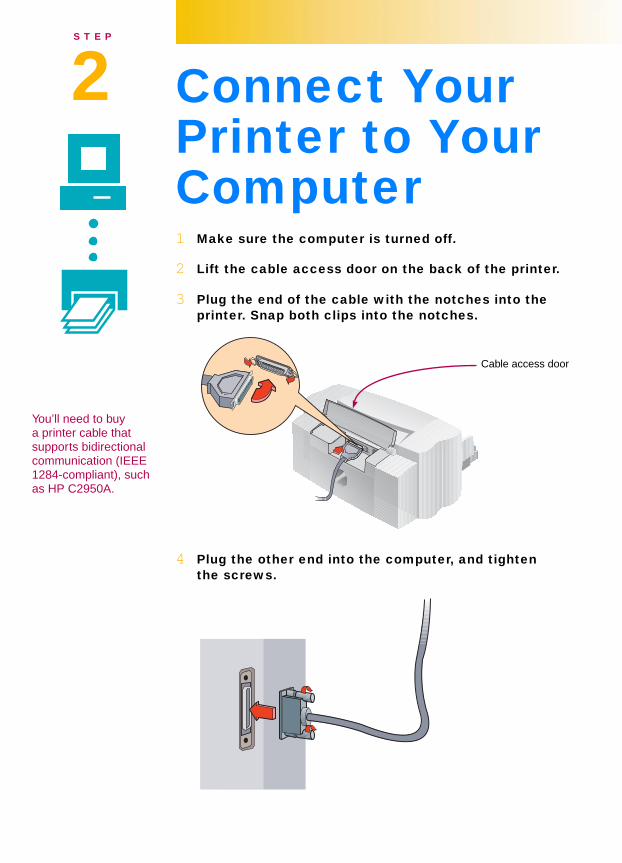
Connect Your Printer to Your Computer1 Make sure the computer is turned off.
2 Lift the cable access door on the back of the printer.
3 Plug the end of the cable with the notches into the printer. Snap both clips into the notches.
4 Plug the other end into the computer, and tighten the screws.
Cable access door

S T E P
3
SetupGuide Page 5 Friday, July 25, 1997 1:13 PM
Plug in Your Printer1 Lift the cable access door and plug the power adapter
cord firmly into the connector.
2 Plug the appropriate end of the power cord into the power adapter.
3 Plug the other end of the power cord into an electrical outlet.
Electrical outlet
1
2
3
Power adapter
Power adapter cord
S T E P
4
It is a good idea to keep spare ink cartridges on hand.
When buying ink cartridges check part numbers carefully to make sure you buy the right ones.
Black 51645AColor C1823A
These print cartridges have been specifically designed to work with your printer.
SetupGuide Page 6 Friday, July 25, 1997 1:13 PM
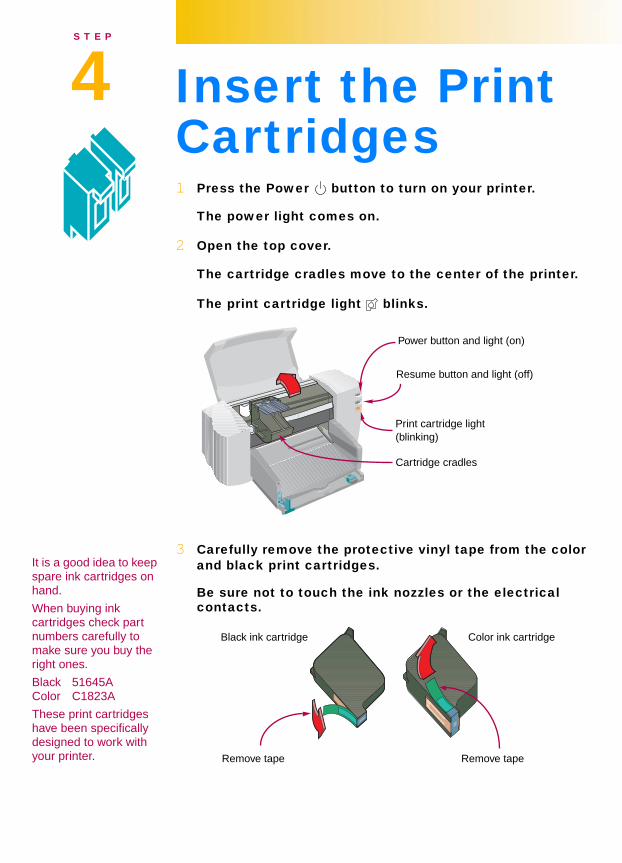
Insert the Print Cartridges1 Press the Power button to turn on your printer.
The power light comes on.
2 Open the top cover.
The cartridge cradles move to the center of the printer.
The print cartridge light blinks.
3 Carefully remove the protective vinyl tape from the color and black print cartridges.
Be sure not to touch the ink nozzles or the electrical contacts.
Cartridge cradles
Print cartridge light (blinking)
Power button and light (on)
Resume button and light (off)
Remove tape Remove tape
Black ink cartridge Color ink cartridge
If the print cartridge light
continues to blink, take out both cartridges and reinsert them.
SetupGuide Page 7 Friday, July 25, 1997 1:13 PM
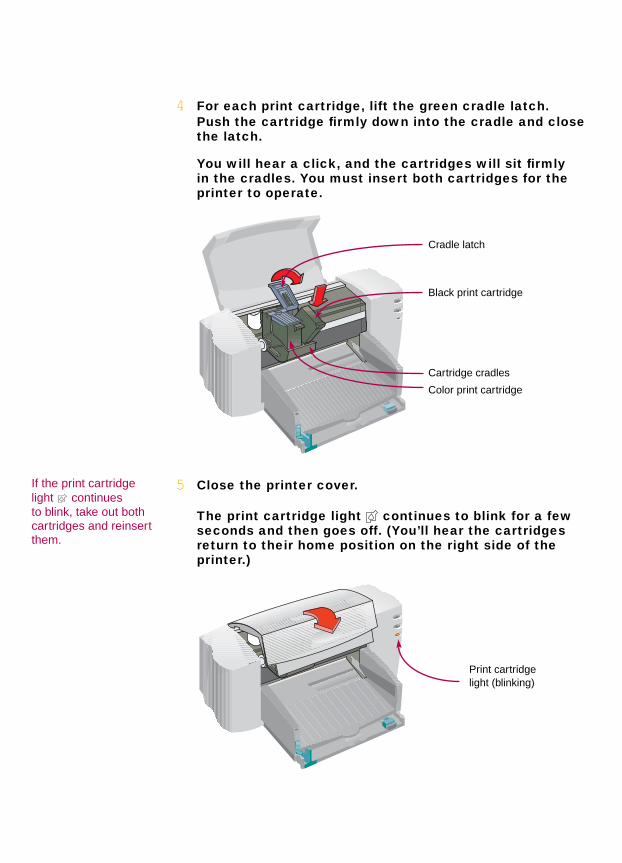
4 For each print cartridge, lift the green cradle latch. Push the cartridge firmly down into the cradle and close the latch.
You will hear a click, and the cartridges will sit firmly in the cradles. You must insert both cartridges for the printer to operate.
5 Close the printer cover.
The print cartridge light continues to blink for a few seconds and then goes off. (You’ll hear the cartridges return to their home position on the right side of the printer.)
Black print cartridge
Color print cartridge
Cradle latch
Cartridge cradles
Print cartridge light (blinking)
S T E P
5
SetupGuide Page 8 Friday, July 25, 1997 1:13 PM
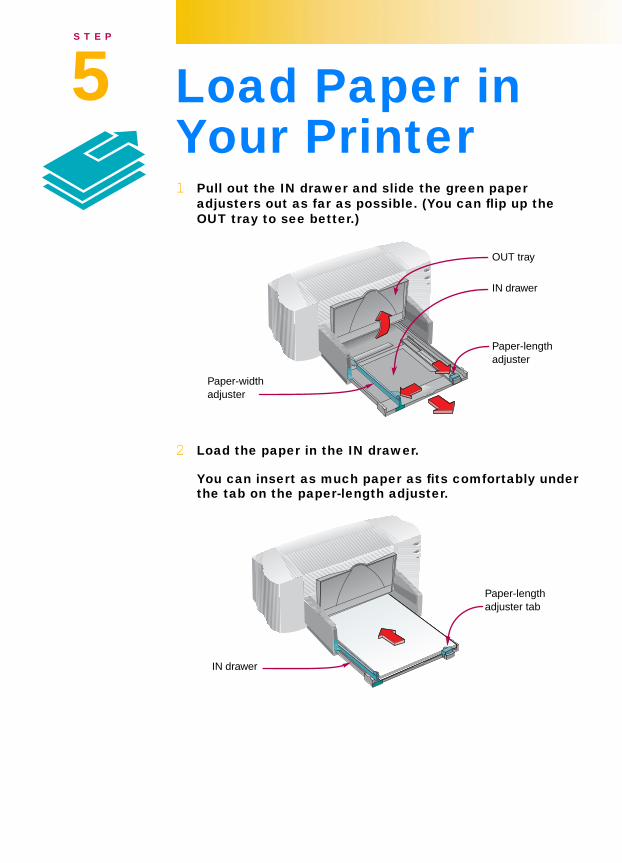
Load Paper in Your Printer1 Pull out the IN drawer and slide the green paper
adjusters out as far as possible. (You can flip up the OUT tray to see better.)
2 Load the paper in the IN drawer.
You can insert as much paper as fits comfortably under the tab on the paper-length adjuster.
OUT tray
IN drawer
Paper-length adjuster
Paper-width adjuster
IN drawer
Paper-length adjuster tab
SetupGuide Page 9 Friday, July 25, 1997 1:13 PM
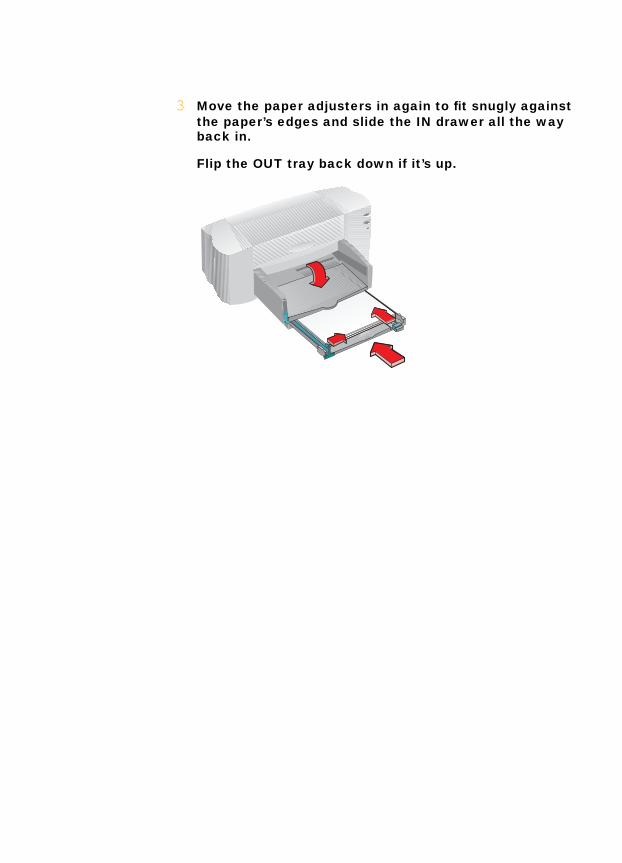
3 Move the paper adjusters in again to fit snugly against the paper’s edges and slide the IN drawer all the way back in.
Flip the OUT tray back down if it’s up.
S T E P
6
If your computer does not have a CD-ROM drive and disks were not included with your printer see page 45 of the user’s guide for information on getting printer software.
SetupGuide Page 10 Friday, July 25, 1997 1:13 PM
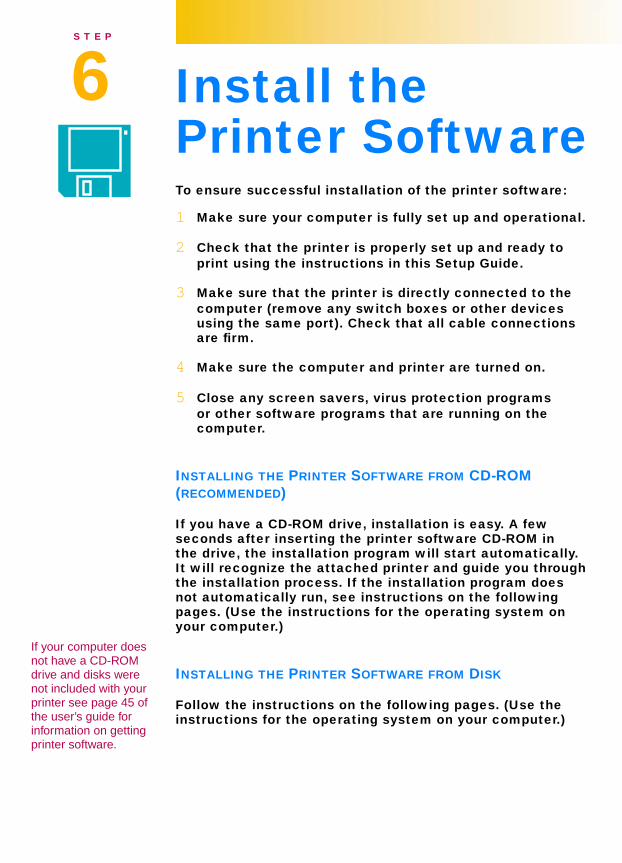
Install the Printer SoftwareTo ensure successful installation of the printer software:
1 Make sure your computer is fully set up and operational.
2 Check that the printer is properly set up and ready to print using the instructions in this Setup Guide.
3 Make sure that the printer is directly connected to the computer (remove any switch boxes or other devices using the same port). Check that all cable connections are firm.
4 Make sure the computer and printer are turned on.
5 Close any screen savers, virus protection programs or other software programs that are running on the computer.
INSTALLING THE PRINTER SOFTWARE FROM CD-ROM (RECOMMENDED)
If you have a CD-ROM drive, installation is easy. A few seconds after inserting the printer software CD-ROM in the drive, the installation program will start automatically. It will recognize the attached printer and guide you through the installation process. If the installation program does not automatically run, see instructions on the following pages. (Use the instructions for the operating system on your computer.)
INSTALLING THE PRINTER SOFTWARE FROM DISK
Follow the instructions on the following pages. (Use the instructions for the operating system on your computer.)
SetupGuide Page 11 Friday, July 25, 1997 1:13 PM
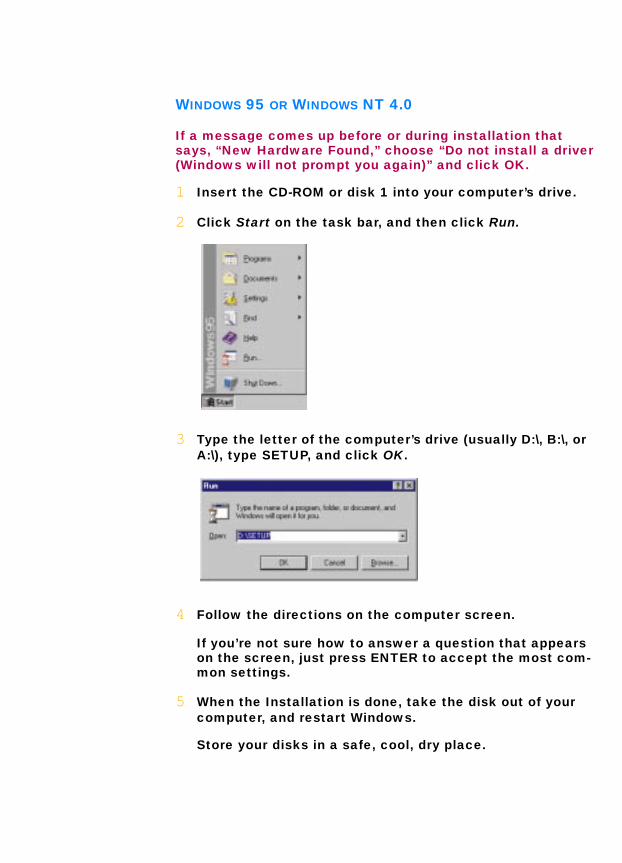
WINDOWS 95 OR WINDOWS NT 4.0
If a message comes up before or during installation that says, “New Hardware Found,” choose “Do not install a driver (Windows will not prompt you again)” and click OK.
1 Insert the CD-ROM or disk 1 into your computer’s drive.
2 Click Start on the task bar, and then click Run.
3 Type the letter of the computer’s drive (usually D:\, B:\, or A:\), type SETUP, and click OK.
4 Follow the directions on the computer screen.
If you’re not sure how to answer a question that appears on the screen, just press ENTER to accept the most com-mon settings.
5 When the Installation is done, take the disk out of your computer, and restart Windows.
Store your disks in a safe, cool, dry place.
SetupGuide Page 12 Friday, July 25, 1997 1:13 PM
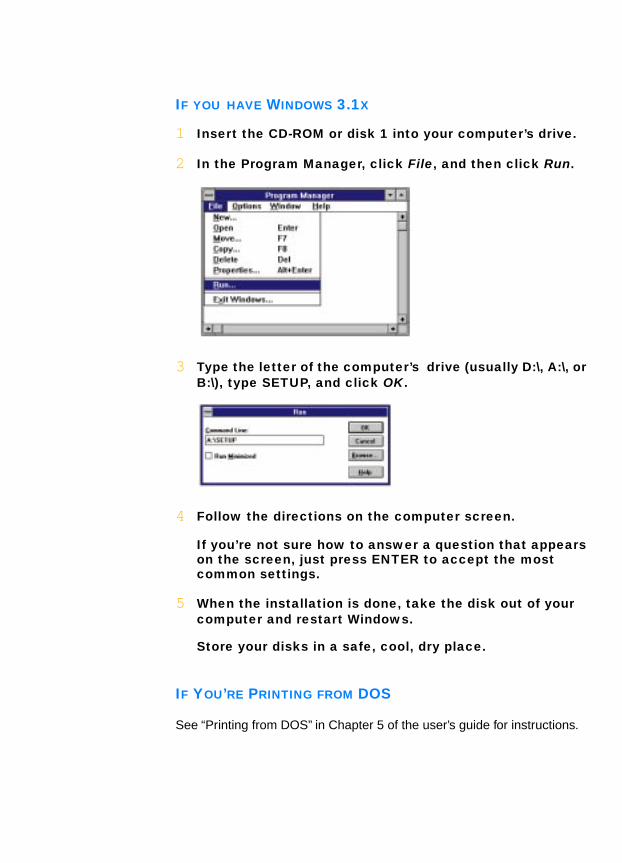
IF YOU HAVE WINDOWS 3.1X
1 Insert the CD-ROM or disk 1 into your computer’s drive.
2 In the Program Manager, click File, and then click Run.
3 Type the letter of the computer’s drive (usually D:\, A:\, or B:\), type SETUP, and click OK.
4 Follow the directions on the computer screen.
If you’re not sure how to answer a question that appears on the screen, just press ENTER to accept the most common settings.
5 When the installation is done, take the disk out of your computer and restart Windows.
Store your disks in a safe, cool, dry place.
IF YOU’RE PRINTING FROM DOS
See “Printing from DOS” in Chapter 5 of the user’s guide for instructions.
See “Printer Communi-cations” in Chapter 4 of the user’s guide for more information.
If you attempted to install using the Windows 95 Add Printer feature, refer to the instructions under“Windows 95 and Windows NT” in Step 6 of the Setup Guide.
SetupGuide Page 13 Friday, July 25, 1997 1:13 PM
IF YOU HAVE PROBLEMS INSTALLING
If you get a message that communication between the printer and computer cannot be established, try the following steps to establish communications. If you aren’t successful, the printer might be unable to send messages to the computer screen, but you’ll still be able to print.
1 Make sure your printer is on and all connections are firm. Ensure that no other peripherals are connected to the printer cable. Make sure your cable is IEEE 1284 compliant.
2 Click the Retry button in the message box.
If the message appears again, continue with the following steps:
3 Exit your software program and turn off the computer and the printer. Turn the printer back on, and then turn on the computer.
4 Close any screen saver or other software programs that are open and running in the background on your computer.
In Windows 95 and Windows NT 4.0 press CTRL+ALT+DEL to bring up the Close Program box and close down every-thing except Explorer and Systray.
In Windows 3.1x press CTRL+ESC to bring up the Close Program box and close down everything except Program Manager.
5 Try the installation process again. If you’re using Windows 3.1x, make sure you’re running the setup from the Program Manager and not from the File Manager.
6 If the No Communication message appears again, “Skip” the communication test and continue with the rest of the installation. Your printer might be unable to send sta-tus messages to the computer screen but you will still be able to print.
If you’re having other problems with the installation, call an authorized HP dealer or call your HP Customer Support representative. (For phone numbers, see “Customer Support” in Chapter 5 of the user’s guide.)
S T E P
7
SetupGuide Page 14 Friday, July 25, 1997 1:13 PM
Align the Print CartridgesYou’re ready for the final step in setting up your printer: aligning the cartridges to make sure you get the best print quality. Be sure to align the cartridges whenever you install a new cartridge.
1 Be sure there’s paper in the printer’s IN drawer and that the drawer and the paper adjusters are pushed in.
2 Double-click the HP Toolbox icon on the computer screen:
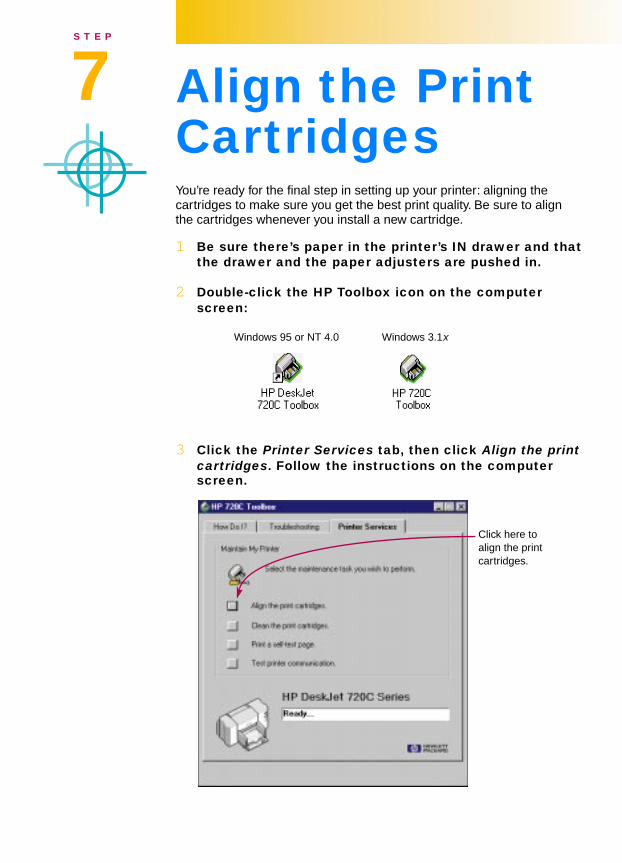
3 Click the Printer Services tab, then click Align the print cartridges. Follow the instructions on the computer screen.
Windows 95 or NT 4.0 Windows 3.1x
Click here to align the print cartridges.
SetupGuide Page 15 Friday, July 25, 1997 1:13 PM
Print a PageYou’re done setting up your printer! While you still have the HP Toolbox open, you can try printing a page, just to see what your printer can do.
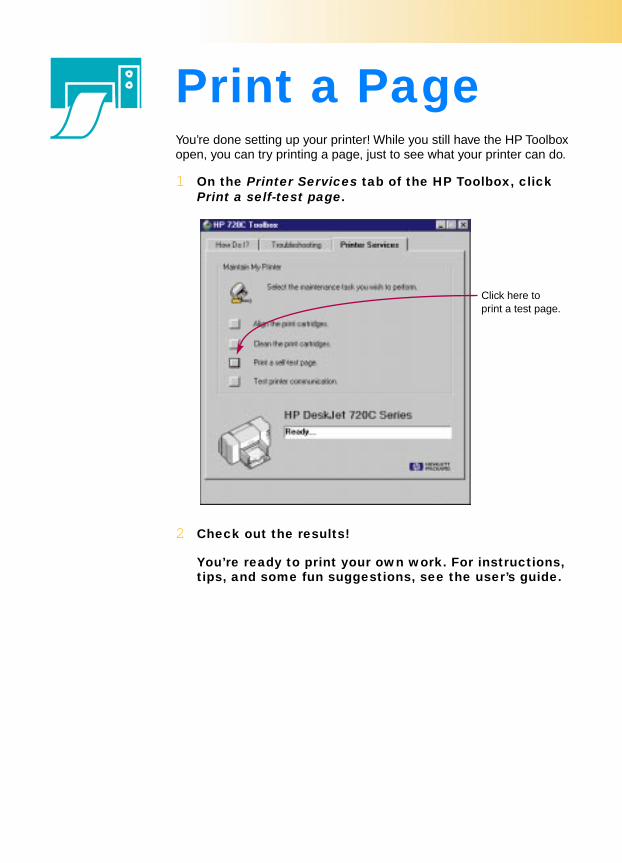
1 On the Printer Services tab of the HP Toolbox, click Print a self-test page.
2 Check out the results!
You’re ready to print your own work. For instructions, tips, and some fun suggestions, see the user’s guide.
Click here to print a test page.
SetupGuide Page 16 Friday, July 25, 1997 1:13 PM
ExtendedWarranty OptionsIf you would like to extend your printer coverage beyond the one year factory warranty, you have the following options:
■ Consult your reseller to get extended coverage.
■ If your reseller does not offer service contracts, please call Hewlett-Packard directly and ask about our service agreement offering. In the U.S. call (800) 446-0522, in Canada call (800) 268-1221. For service agreements outside the U.S. and Canada, contact your local HP Sales Office.
Printed on recycled paper.Reorder number C5870-60014Part number C5870-90005Printed in USA. 6/97


![HP Color LaserJet 5/5M Printerh10032. type indicates text visible on the printer display or commands seen on the computer display. [Keyface] indicates one of several keys on the printer](https://static.fdocuments.us/doc/165x107/5b1b2c467f8b9a2d258e4650/hp-color-laserjet-55m-type-indicates-text-visible-on-the-printer-display-or-commands.jpg)
