Setting Standards Tips Tricks (CATIA)
18
SETTING DRAFTING STANDARDS AND LOCKING USER SETTINGS In our last article you saw how to create a Customized Environment. This article is in addition to that and this explains how to Set Standards of the Drafting workbench and how to lock the User Settings. After adopting CATIA as their technological solution and building the design or R & D on around CATIA, companies tend to standardize everything. For example they want to standardize the way the GUI appears, the standards used in drafting, color of entities, fonts and so on. This needs an initial brainstorming in creating standards specific to their company and then customizing CATIA according to those standards. This article aims at educating those who are ready to define their own working methodologies & standards for CATIA. Create a folder in the name of say EDS on say desktop. Refer Fig A01 Fig A01 Creating a folder on Desktop Inside EDS folder create two more folders in the name of say CATCollectionStandards & CATreferenceSettingPath. Refer Fig A02
-
Upload
speja9694859 -
Category
Documents
-
view
61 -
download
4
description
podešavanje standarda u CATIA
Transcript of Setting Standards Tips Tricks (CATIA)
SETTING DRAFTING STANDARDS AND LOCKING USER SETTINGS In our last article you saw how to create a Customized Environment. This article is in addition to that and this explains how to Set Standards of the Drafting workbench and how to lock the User Settings. After adopting CATIA as their technological solution and building the design or R & D on around CATIA, companies tend to standardize everything. For example they want to standardize the way the GUI appears, the standards used in drafting, color of entities, fonts and so on. This needs an initial brainstorming in creating standards specific to their company and then customizing CATIA according to those standards. This article aims at educating those who are ready to define their own working methodologies & standards for CATIA. Create a folder in the name of say EDS on say desktop. Refer Fig A01
Fig A01 Creating a folder on Desktop
Inside EDS folder create two more folders in the name of say CATCollectionStandards & CATreferenceSettingPath. Refer Fig A02

Fig A02 Creating required folders
Click on CATReferenceSettingPath folder it will show the complete path in the Address bar, refer Fig A03
Fig A03 Going inside CATReferenceSettingpath folder Copy the complete path using the contextual menu. Fig A04

Fig A04 Copying path from the address bar
Go to Start > Programs > CATIA > Tools > Environment Editor V5R16. Fig A05
Fig A05 Invoking the Environment Editor dialog box
The Environment Editor dialog box is now invoked. Environment Editor Message will display a message click on OK button to proceed further. Refer Fig A06.

Fig A06 Environment Editor Message
Again you will get Environment Editor Message click on Yes to confirm that you want to modify the environment. Refer Fig A07
Fig A07 Environment Editor Message

Make sure that CATIA.V5R16.B16 is selected from the Name list of the Environment Editor dialog box. We have recently created two folders and you can see that there are two variables highlighted in red in the Environment Editor Dialog box with the same name. We need to give the Value of these variables equivalent to those folders. I’m assuming that the Path that you copied earlier is still copied, as we will need it in our coming steps. Refer Fig A08
Fig A08 Selecting CATIA.V5R16.B16 environment
Right click on the CATCollectionStandard variable from the Name area of the Environment Editor dialog box to invoke the shortcut menu. Choose the Edit Variable option from the shortcut menu thus invoked. Refer Fig A 09
Fig A 09 Editing the variable

The Edit Variable dialog box is now invoked. Paste the path that you have copied previously in the Value Edit box of the Variable Editor dialog box. Refer Fig A 10. Choose the OK button from the Variable Editor dialog box to confirm the new value of the variable.
Fig A 10 Assigning value to the CATCollectionStandard variable
Follow the same step and give the path of CATReferenceSettingpath variable also. Refer Fig A 11
Fig A 11 Assigning value to the CATReferenceSettingpath variable

Choose the Close button available on the top right corner of the Environment Editor dialog box. You will be prompted that environment has been modified and do you want to change these modifications. Choose the Yes button to confirm the changes made. Refer Fig A 12
Fig A 12 Confirming the changes
Next go to the following path C:\Program Files\Dassault Systemes\B16\intel_a\code\bin and copy the path. Refer Fig A 13
Fig A 13 Browsing the bin folder
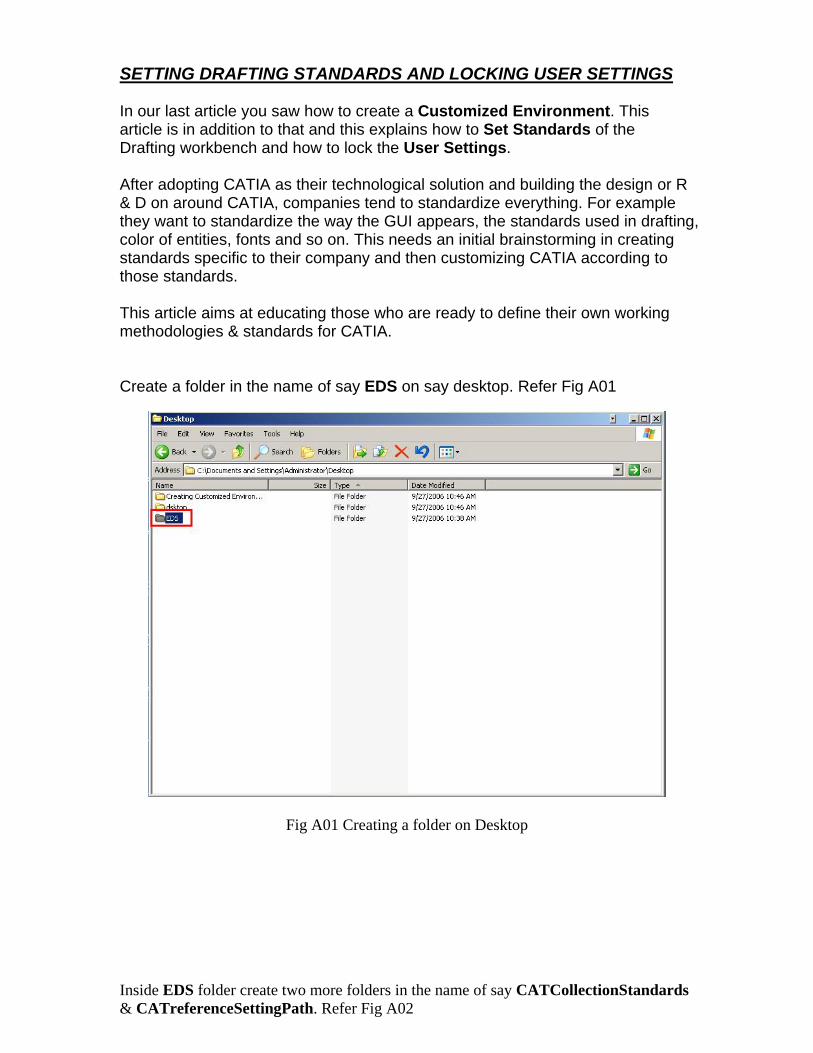
Open the command prompt window and change the present working directory to bin. To do so type cd C:\Program Files\Dassault Systemes\B16\intel_a\code\bin at the command prompt and press Enter from the keyboard. Refer Fig A 14.
Fig A 14 Changing present working directory to bin
Type cnext –admin at the command prompt and press Enter from the keyboard. Refer Fig A 15
Fig A 15 Starting CATIA in Administration Mode
Note: Please not that if you have only CATIA V5 R16 installed on your system then you can only type cnext –admin at the Run dialog box. To invoke the Run dialog box select Start > Run. Above 3 steps are required only if you have multiple environments on your system and you want to set the standards for any specific environment.

Now you can see that CATIA has opened. The Adminstration Mode dialog box confirms that you are running CATIA in administration mode. Choose the OK button to continue. Refer Fig A 16
Fig A 16 The Administration Mode dialog box
The License Manager error dialog box is now invoked. For the first time you will be prompted to select the suitable license. Choose the OK button for now. Refer Fig A 17
Fig A 17 The License Manager error dialog box
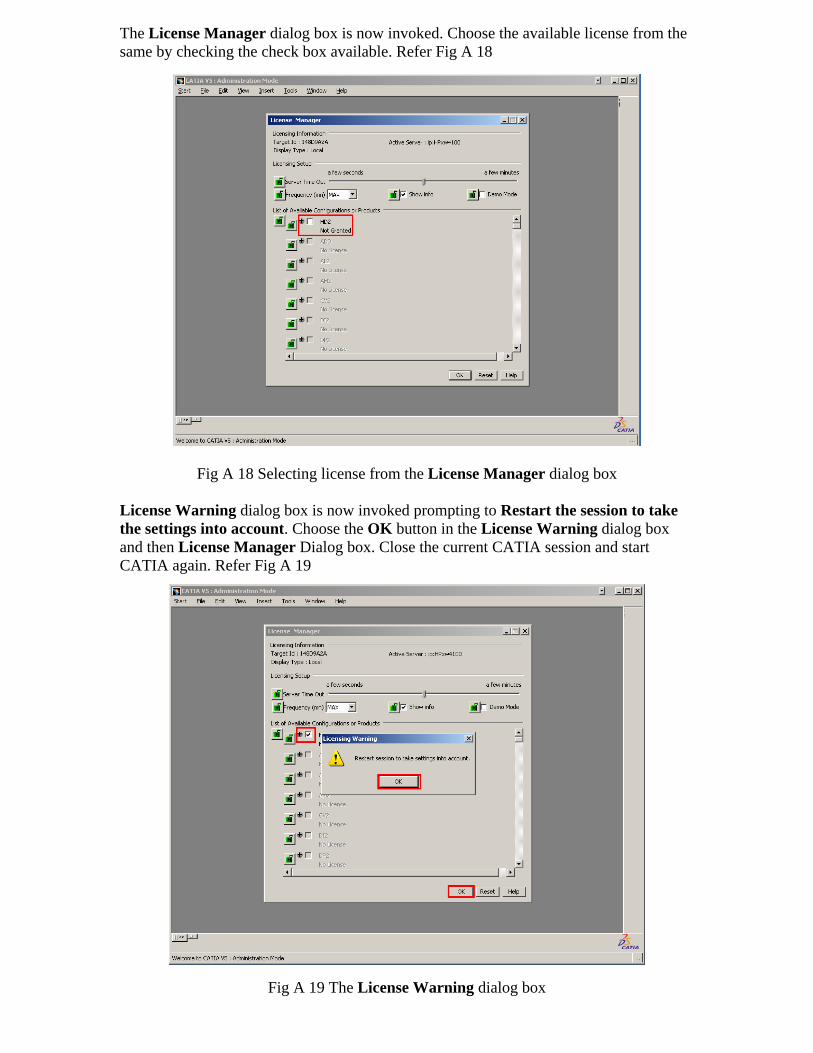
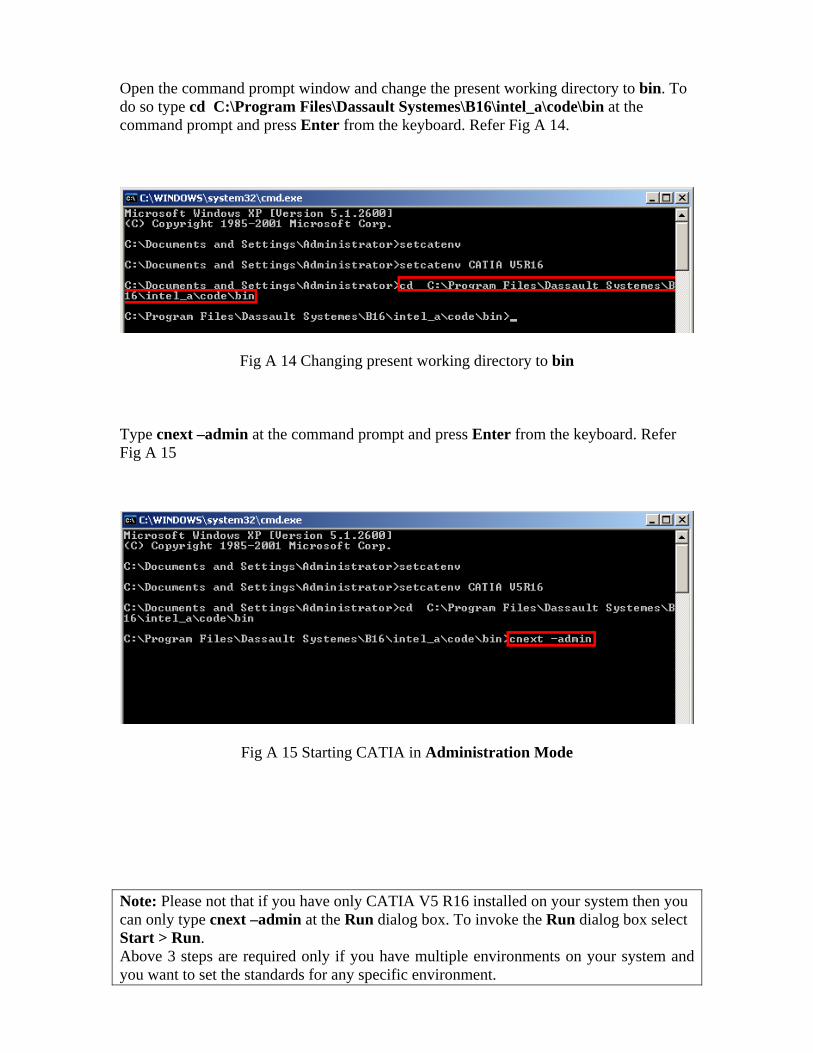
The License Manager dialog box is now invoked. Choose the available license from the same by checking the check box available. Refer Fig A 18
Fig A 18 Selecting license from the License Manager dialog box
License Warning dialog box is now invoked prompting to Restart the session to take the settings into account. Choose the OK button in the License Warning dialog box and then License Manager Dialog box. Close the current CATIA session and start CATIA again. Refer Fig A 19
Fig A 19 The License Warning dialog box

As the new session is launched the Administration Mode dialog box gives the message that you are Running Administration Mode. Choose the OK button to proceed further. Fig A 20
Fig A 20 The Administration Mode dialog box
Next step is to lock the user settings. To do so, go to Tools > Options. Refer Fig A 21
Fig A 21 Invoking the Options dialog box
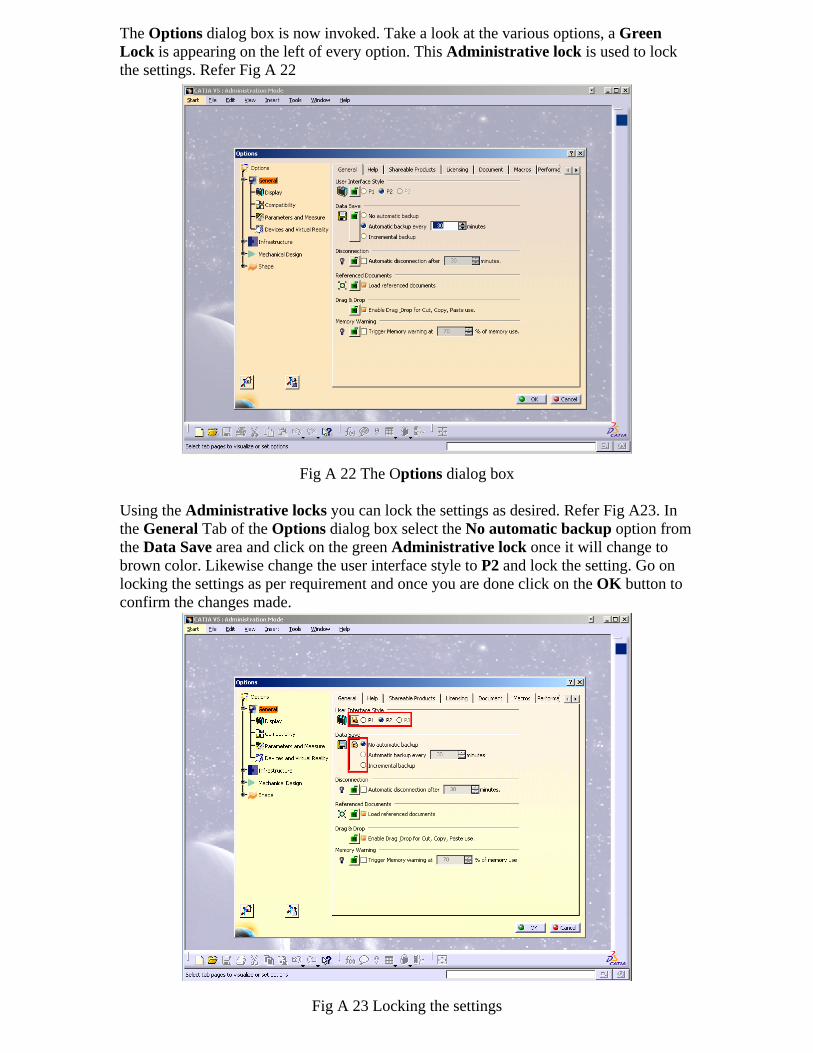
The Options dialog box is now invoked. Take a look at the various options, a Green Lock is appearing on the left of every option. This Administrative lock is used to lock the settings. Refer Fig A 22
Fig A 22 The Options dialog box
Using the Administrative locks you can lock the settings as desired. Refer Fig A23. In the General Tab of the Options dialog box select the No automatic backup option from the Data Save area and click on the green Administrative lock once it will change to brown color. Likewise change the user interface style to P2 and lock the setting. Go on locking the settings as per requirement and once you are done click on the OK button to confirm the changes made.
Fig A 23 Locking the settings

Next step is to set the Drafting Standards. To do so, go to Tools > Standards. Fig A24
Fig A 24 Invoking the Standard Definition dialog box
The Standard Definition dialog box is now invoked. Refer Fig A 25
Fig A 25 The Standard Definition dialog box

Select the Drafting option from the Category drop down menu of the Standard definition dialog box. Refer Fig A 26
Fig A 26 selecting the Drafting option
As we know that there are some predefined standards (e.g. ANSI, ISO…etc) in CATIA. To set our own standard you need to select a Reference Standard and then modify from that Reference Standard. In our case we are selecting the ISO.xml. To do so, select the ISO.xml option from the File drop down menu. Refer Fig A27
Fig A 27 Selecting the Reference Standard

The various Standards Settings are now displayed on the left hand side of the Standard Definition dialog box. Fig A 28
Fig A 28 The various Standards Settings
From the left hand side select the Thread standard. On the right hand side it will show you the default thread representation. You can now change the same to Circle. Likewise go on changing the standards for other parameters also like Text, Annotations, Dimensions etc….. Refer Fig A 29
Fig A 29 Modifying the Standards

Click on the Save As New option form the Standard Definition dialog box to save your standards in new XML file. Give the name of the file, as for now we are giving it as EDS. Refer Fig A 30
Fig A 30 Saving the standards in a new XML file
Copy the EDS.xml standard file from the location where it was saved and paste it to the following location: C:\Program Files\Dassault Systemes\B16\intel_a\resources\standard\drafting Refer Fig A 31.
Fig A 31 Pasting the EDS.xml standard file to the Drafting folder
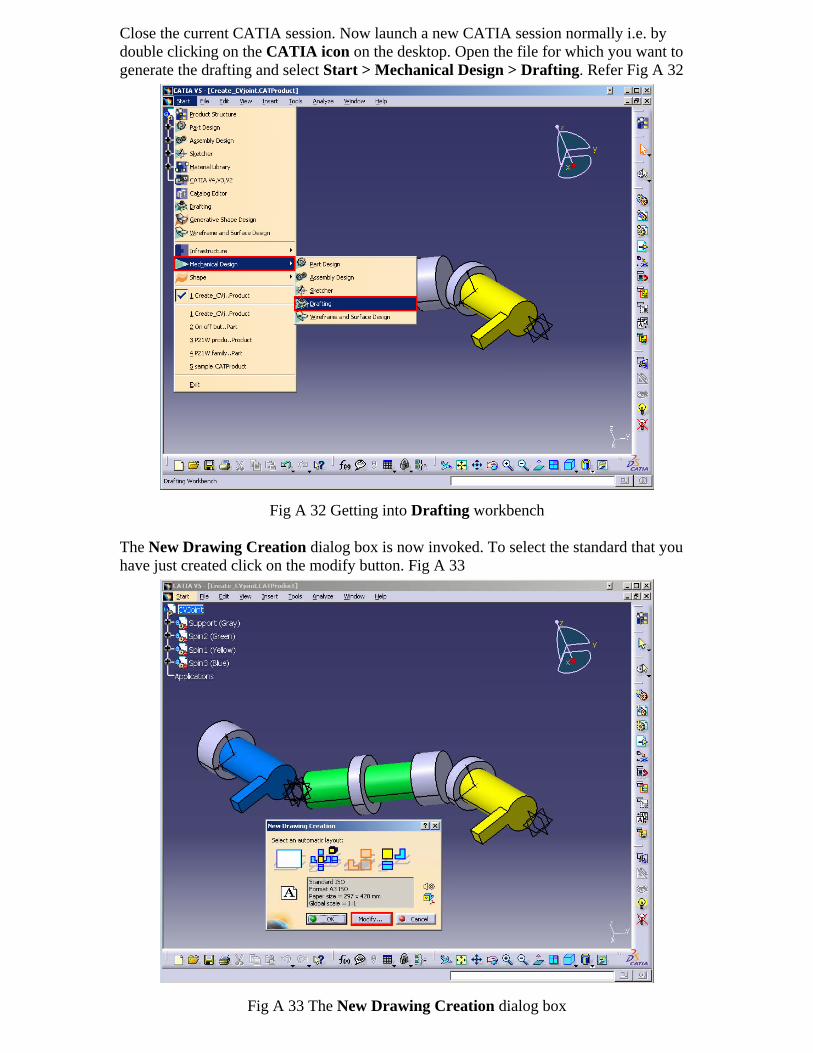
Close the current CATIA session. Now launch a new CATIA session normally i.e. by double clicking on the CATIA icon on the desktop. Open the file for which you want to generate the drafting and select Start > Mechanical Design > Drafting. Refer Fig A 32
Fig A 32 Getting into Drafting workbench
The New Drawing Creation dialog box is now invoked. To select the standard that you have just created click on the modify button. Fig A 33
Fig A 33 The New Drawing Creation dialog box

The New Drawing dialog box is now invoked. Select the EDS option form the Standard drop down menu. And choose the OK button. Refer Fig A34
Fig A34 The New Drawing dialog box
You can now see that the Standard with which you will create the drafting is EDS (i.e the one which we created just now). Refer Fig A 35
Fig A 35 Getting into drafting sheet with Cutomized Standards