
Section 2: Bearing Assembly 360 and 180 - reprap.org · Section 2: Bearing Assembly 360 and 180 The...
15
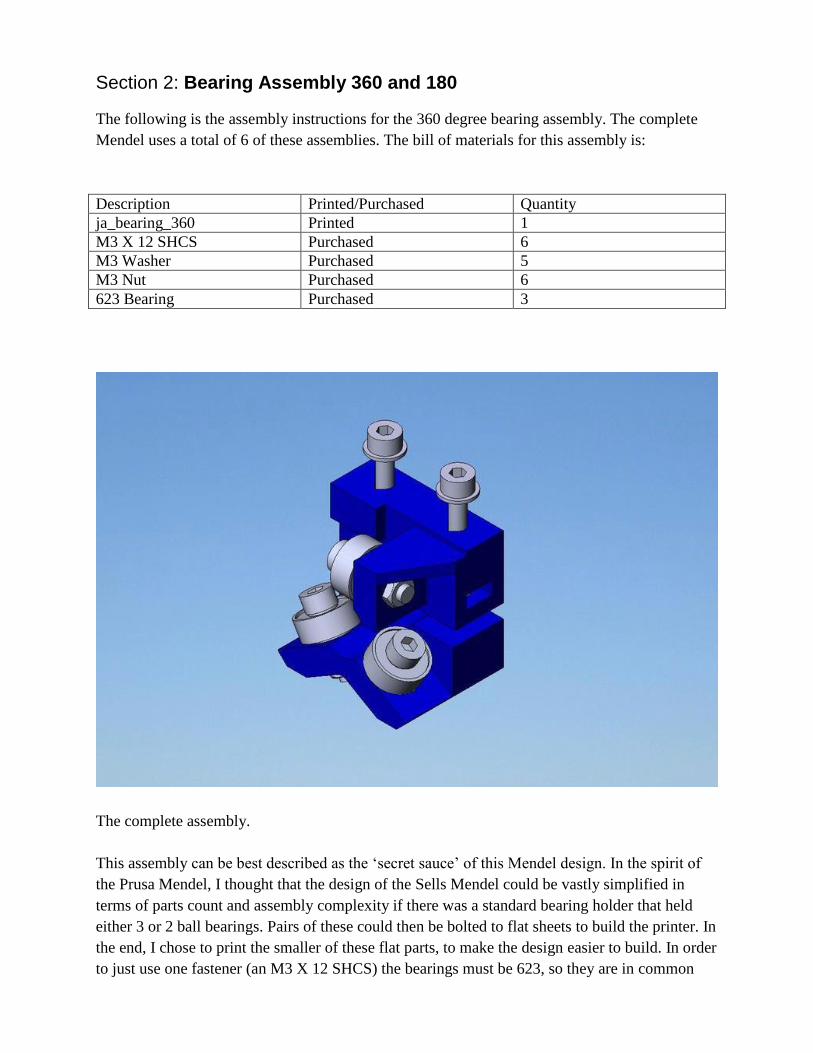
Section 2: Bearing Assembly 360 and 180 The following is the assembly instructions for the 360 degree bearing assembly. The complete Mendel uses a total of 6 of these assemblies. The bill of materials for this assembly is: Description Printed/Purchased Quantity ja_bearing_360 Printed 1 M3 X 12 SHCS Purchased 6 M3 Washer Purchased 5 M3 Nut Purchased 6 623 Bearing Purchased 3 The complete assembly. This assembly can be best described as the „secret sauce‟ of this Mendel design. In the spirit of the Prusa Mendel, I thought that the design of the Sells Mendel could be vastly simplified in terms of parts count and assembly complexity if there was a standard bearing holder that held either 3 or 2 ball bearings. Pairs of these could then be bolted to flat sheets to build the printer. In the end, I chose to print the smaller of these flat parts, to make the design easier to build. In order to just use one fastener (an M3 X 12 SHCS) the bearings must be 623, so they are in common
Transcript of Section 2: Bearing Assembly 360 and 180 - reprap.org · Section 2: Bearing Assembly 360 and 180 The...
Section 2: Bearing Assembly 360 and 180
The following is the assembly instructions for the 360 degree bearing assembly. The complete
Mendel uses a total of 6 of these assemblies. The bill of materials for this assembly is:
Description Printed/Purchased Quantity
ja_bearing_360 Printed 1
M3 X 12 SHCS Purchased 6
M3 Washer Purchased 5
M3 Nut Purchased 6
623 Bearing Purchased 3
The complete assembly.
This assembly can be best described as the „secret sauce‟ of this Mendel design. In the spirit of
the Prusa Mendel, I thought that the design of the Sells Mendel could be vastly simplified in
terms of parts count and assembly complexity if there was a standard bearing holder that held
either 3 or 2 ball bearings. Pairs of these could then be bolted to flat sheets to build the printer. In
the end, I chose to print the smaller of these flat parts, to make the design easier to build. In order
to just use one fastener (an M3 X 12 SHCS) the bearings must be 623, so they are in common
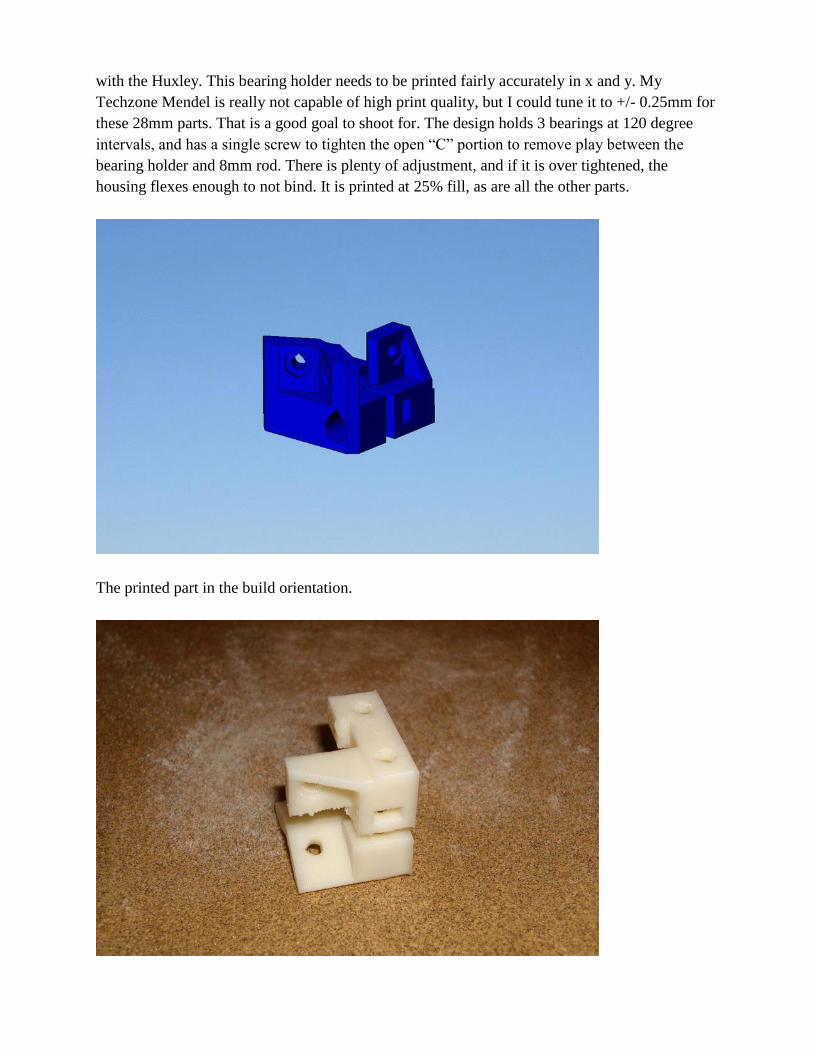
with the Huxley. This bearing holder needs to be printed fairly accurately in x and y. My
Techzone Mendel is really not capable of high print quality, but I could tune it to +/- 0.25mm for
these 28mm parts. That is a good goal to shoot for. The design holds 3 bearings at 120 degree
intervals, and has a single screw to tighten the open “C” portion to remove play between the
bearing holder and 8mm rod. There is plenty of adjustment, and if it is over tightened, the
housing flexes enough to not bind. It is printed at 25% fill, as are all the other parts.
The printed part in the build orientation.
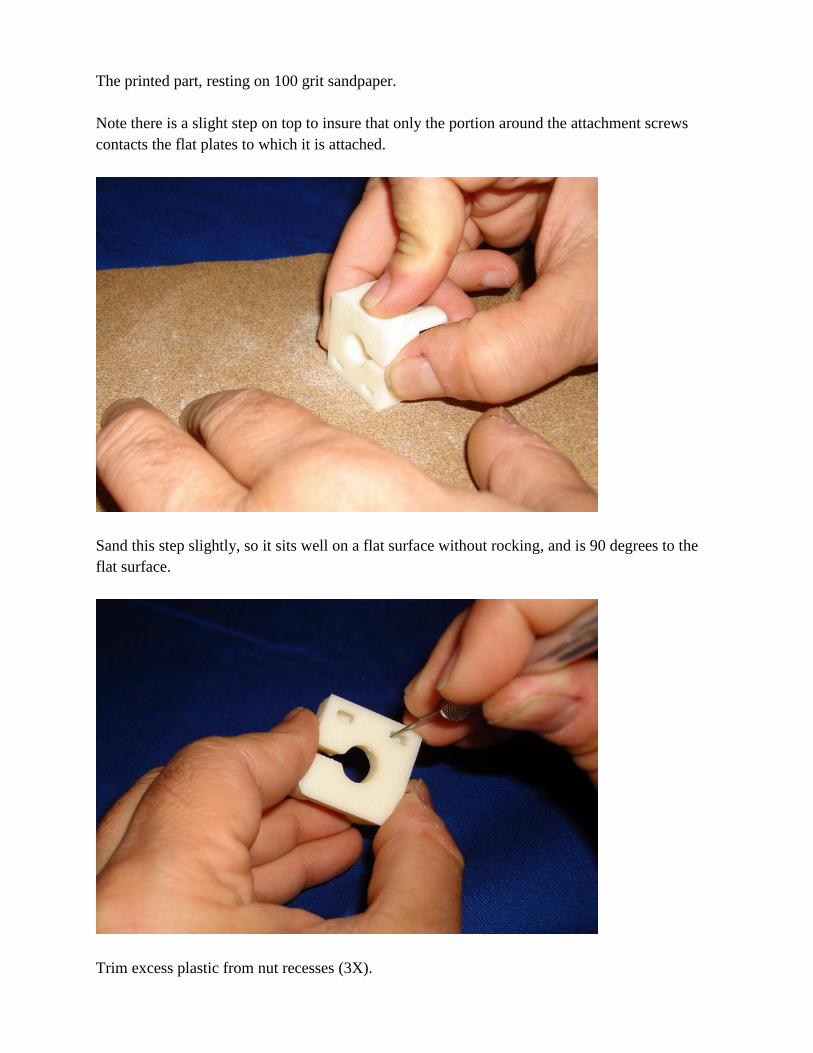
The printed part, resting on 100 grit sandpaper.
Note there is a slight step on top to insure that only the portion around the attachment screws
contacts the flat plates to which it is attached.
Sand this step slightly, so it sits well on a flat surface without rocking, and is 90 degrees to the
flat surface.
Trim excess plastic from nut recesses (3X).
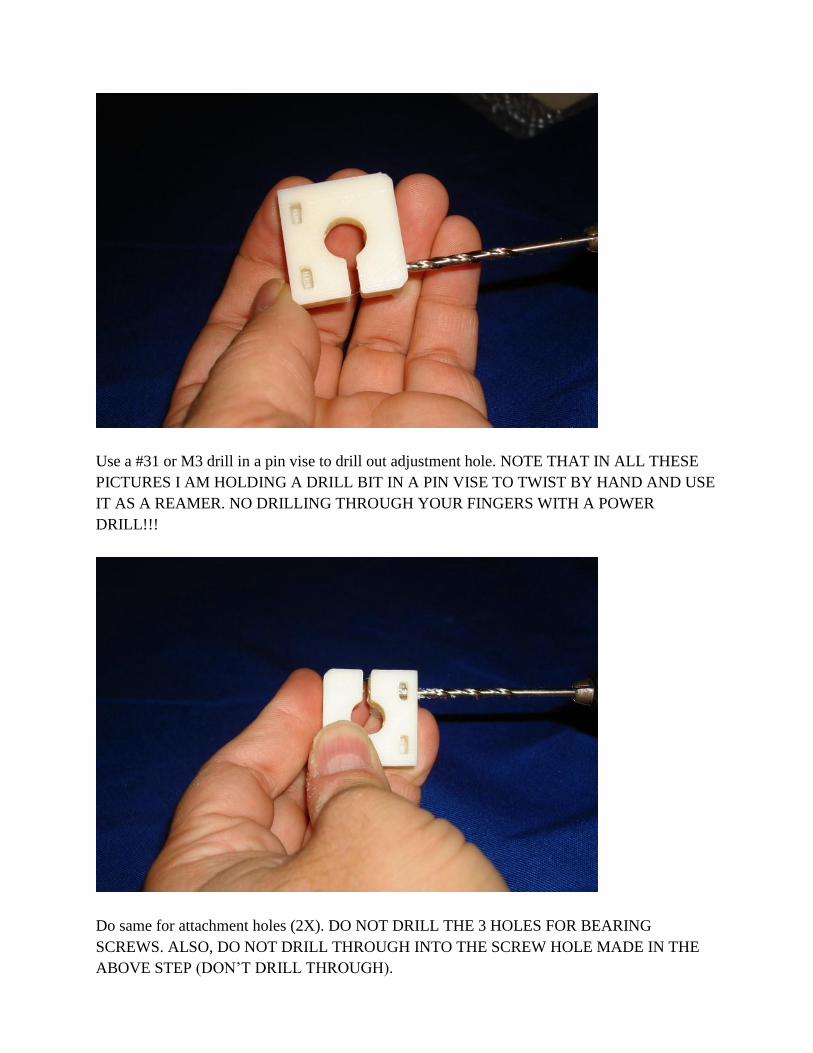
Use a #31 or M3 drill in a pin vise to drill out adjustment hole. NOTE THAT IN ALL THESE
PICTURES I AM HOLDING A DRILL BIT IN A PIN VISE TO TWIST BY HAND AND USE
IT AS A REAMER. NO DRILLING THROUGH YOUR FINGERS WITH A POWER
DRILL!!!
Do same for attachment holes (2X). DO NOT DRILL THE 3 HOLES FOR BEARING
SCREWS. ALSO, DO NOT DRILL THROUGH INTO THE SCREW HOLE MADE IN THE
ABOVE STEP (DON‟T DRILL THROUGH).
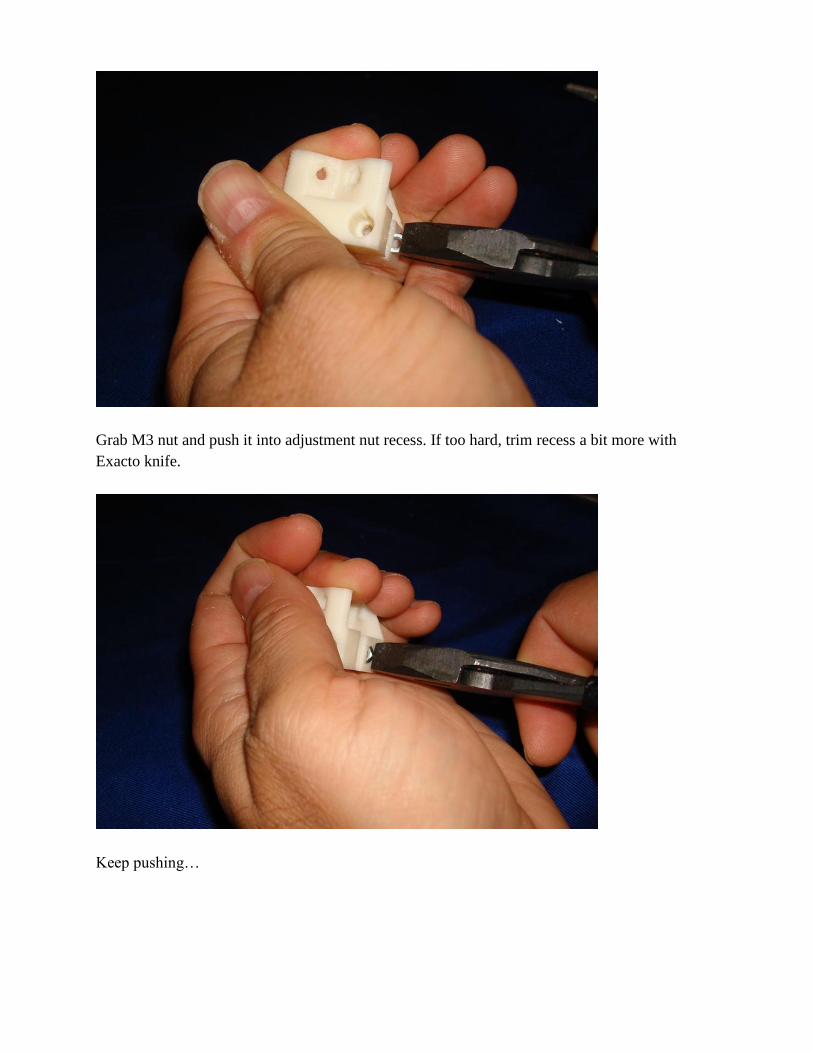
Grab M3 nut and push it into adjustment nut recess. If too hard, trim recess a bit more with
Exacto knife.
Keep pushing…

Push to bottom (changed pliers for access). Don‟t slip now!
Insert screw to engage nut, tighten to just bottom screw head in counterbore.
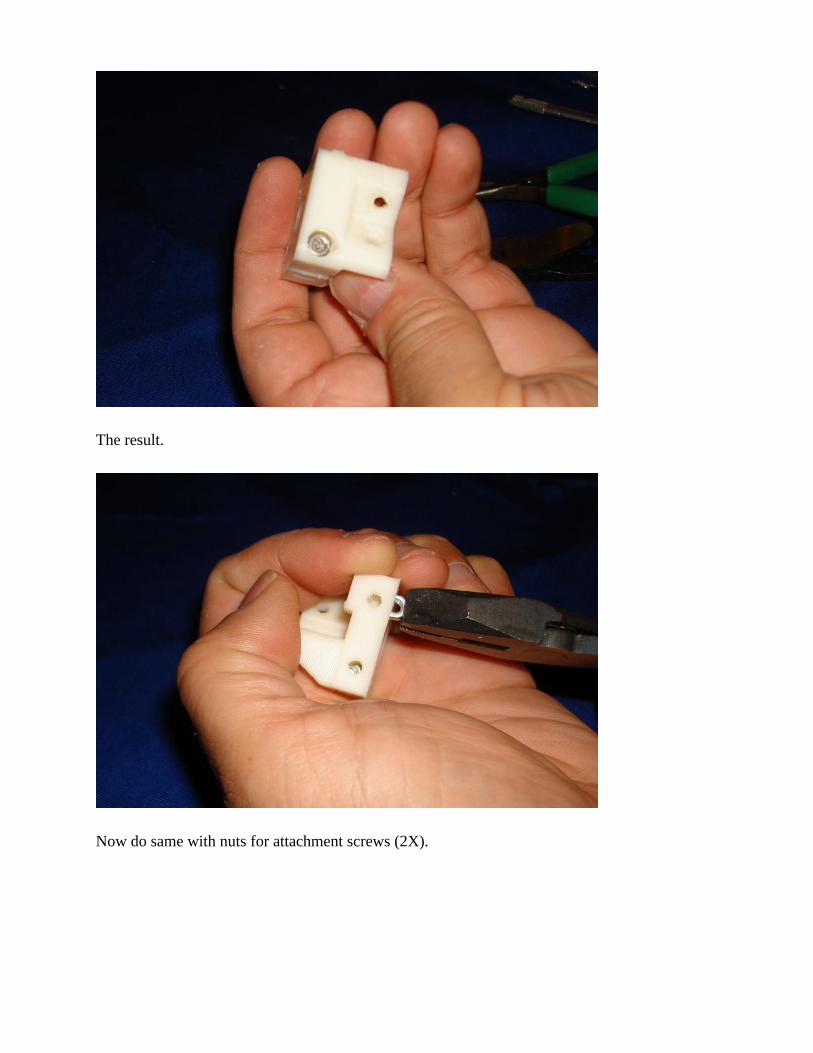
The result.
Now do same with nuts for attachment screws (2X).
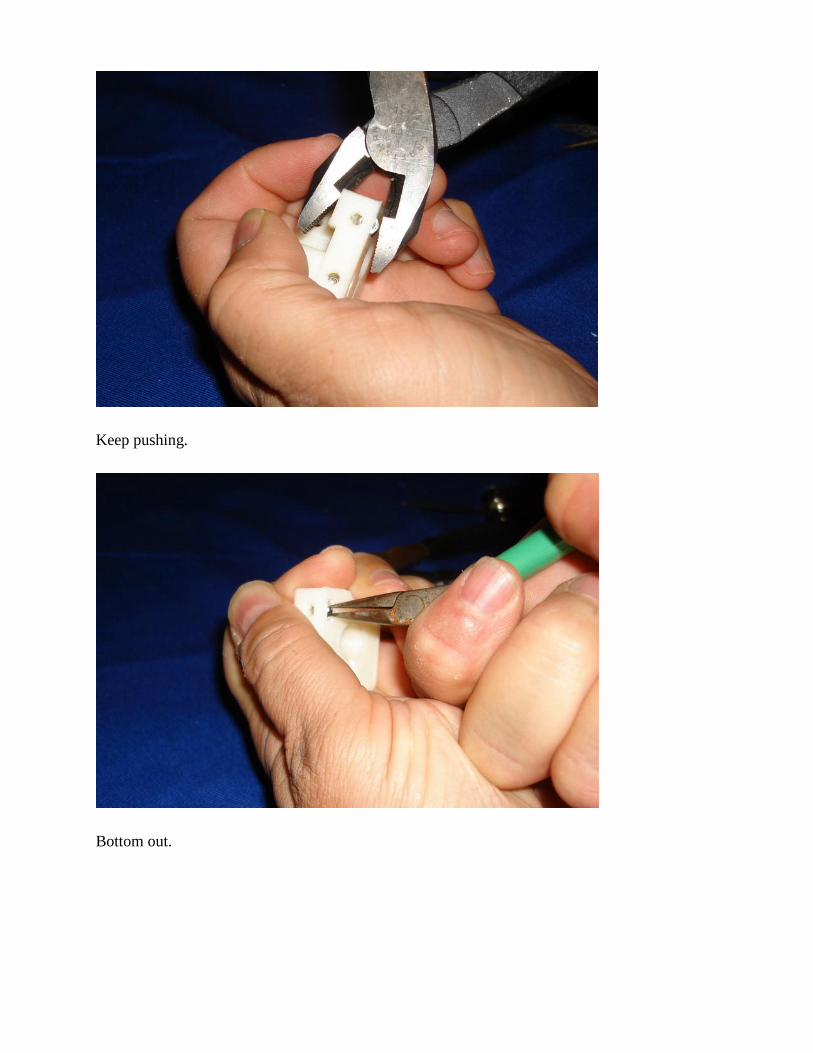
Keep pushing.
Bottom out.
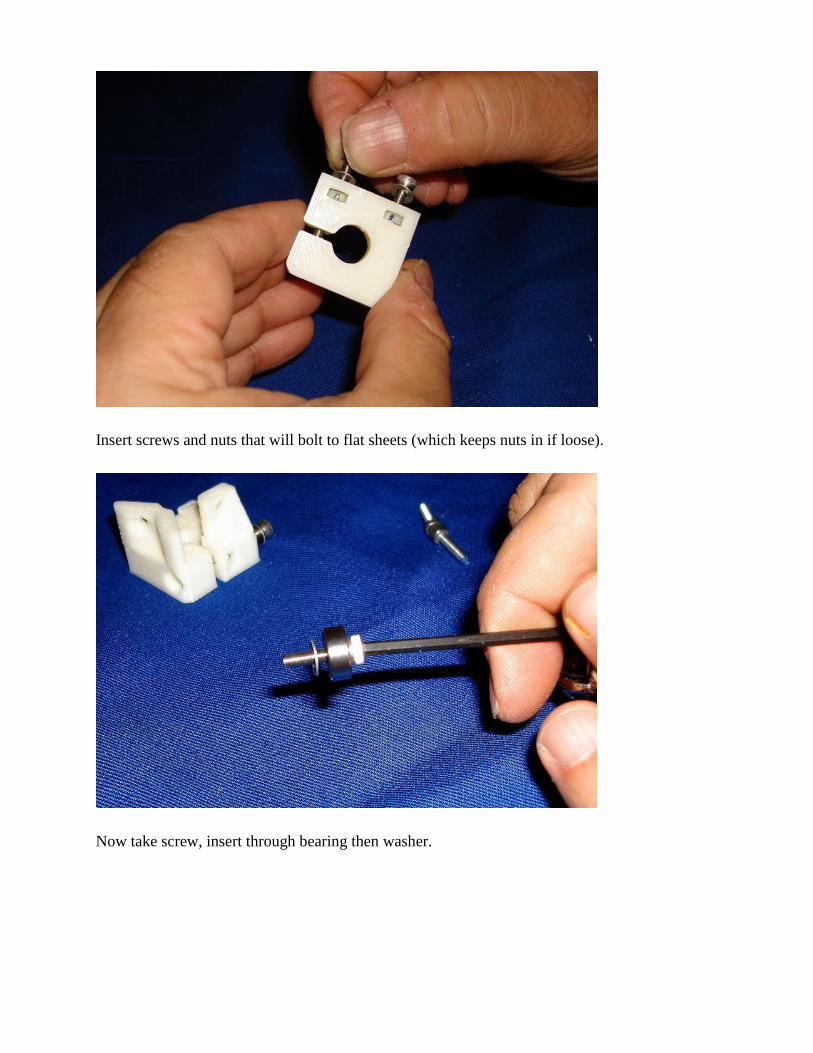
Insert screws and nuts that will bolt to flat sheets (which keeps nuts in if loose).
Now take screw, insert through bearing then washer.
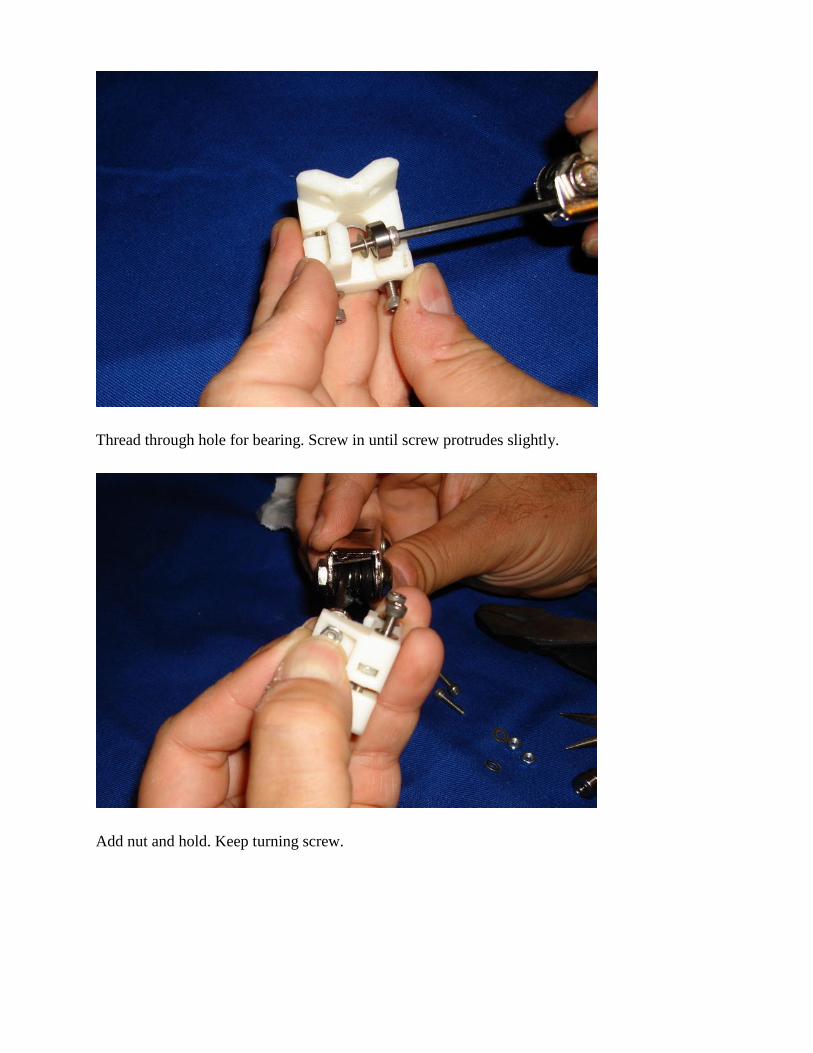
Thread through hole for bearing. Screw in until screw protrudes slightly.
Add nut and hold. Keep turning screw.
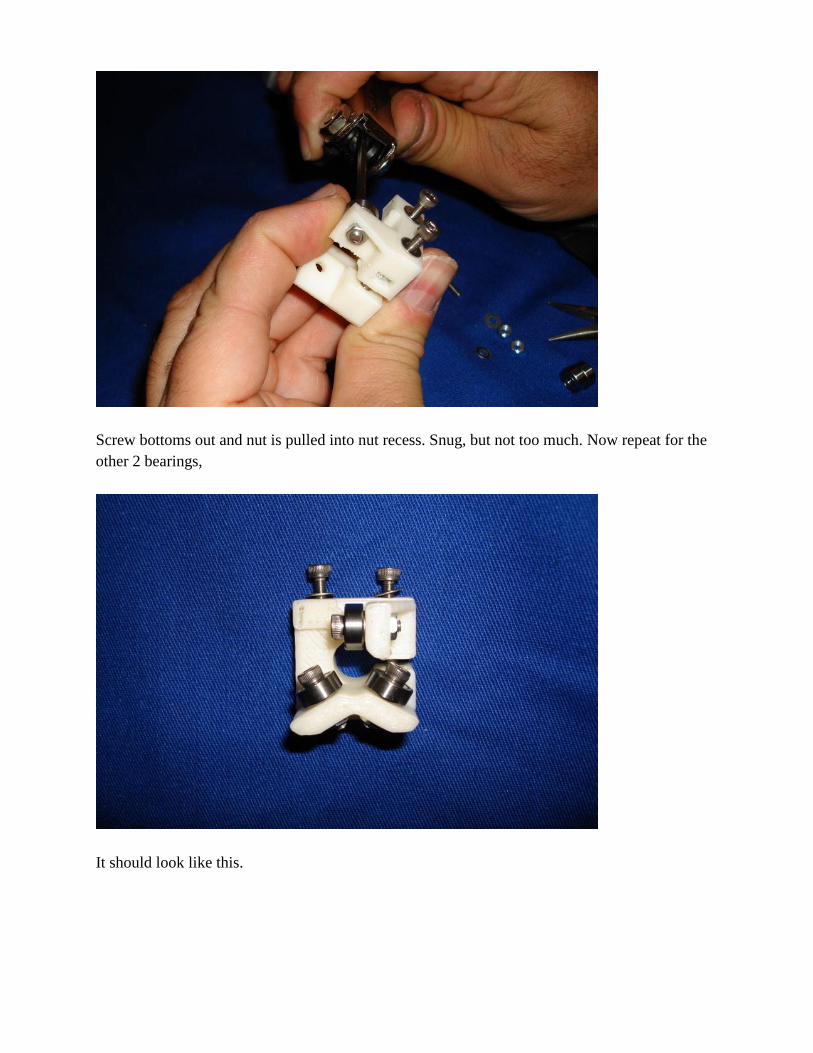
Screw bottoms out and nut is pulled into nut recess. Snug, but not too much. Now repeat for the
other 2 bearings,
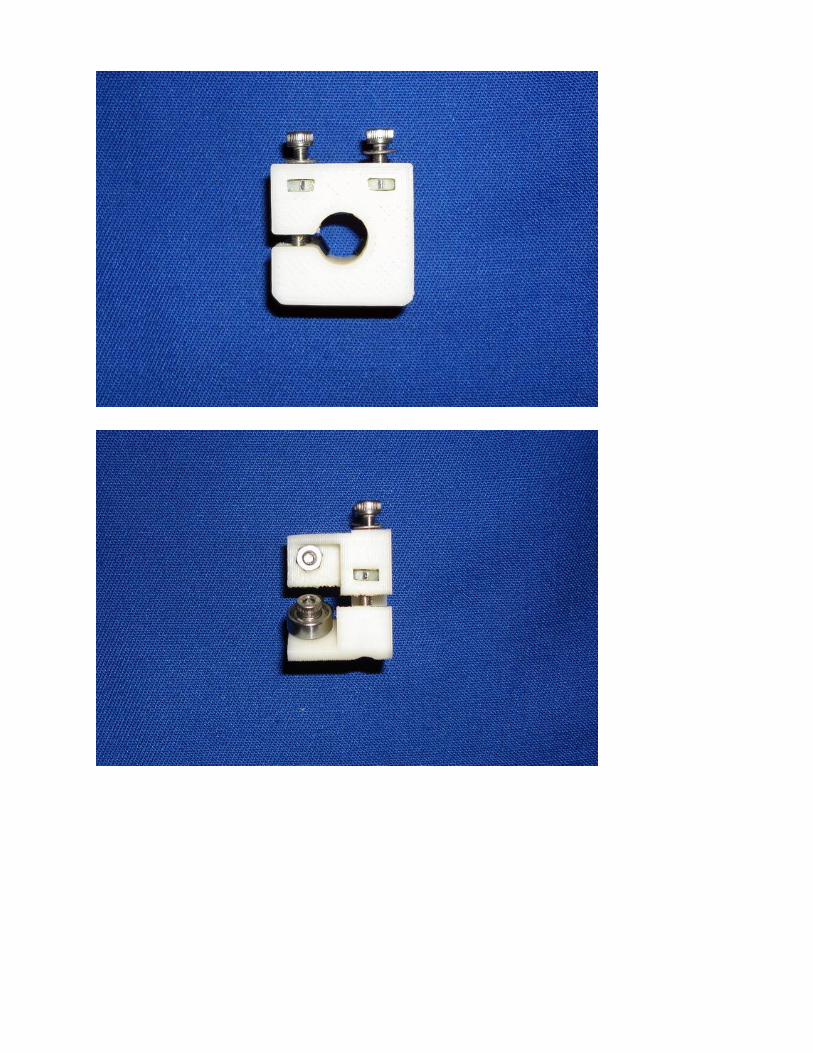
It should look like this.
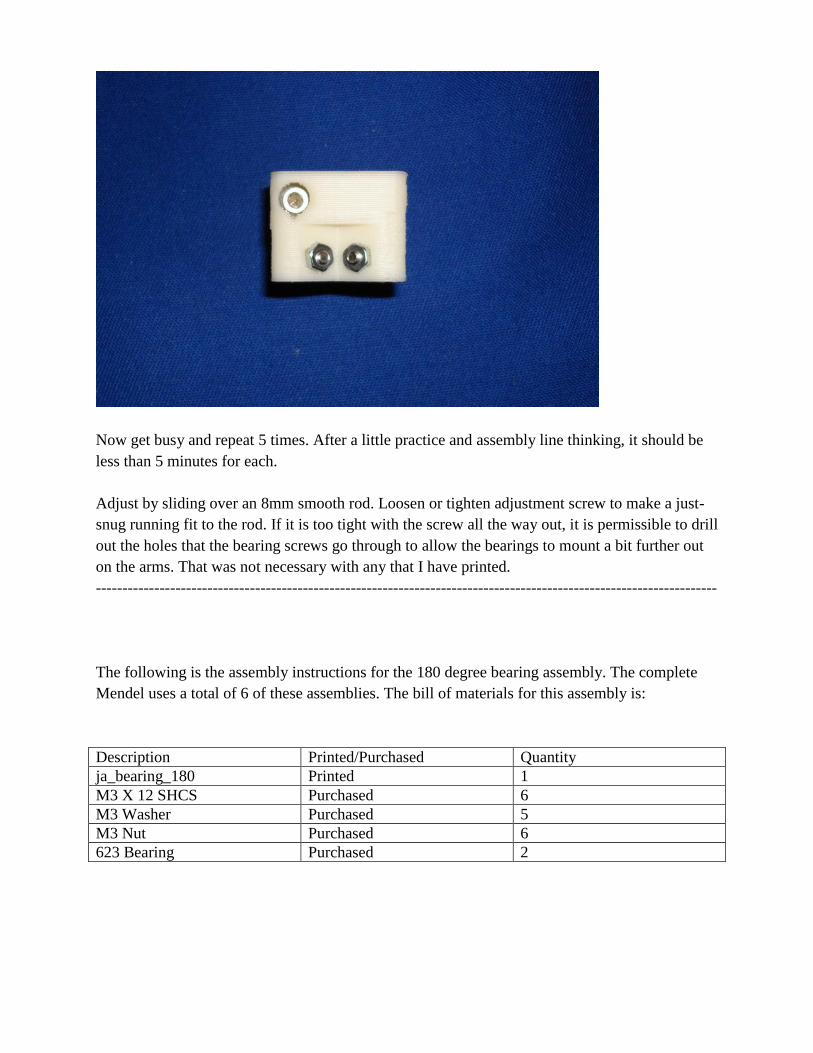
Now get busy and repeat 5 times. After a little practice and assembly line thinking, it should be
less than 5 minutes for each.
Adjust by sliding over an 8mm smooth rod. Loosen or tighten adjustment screw to make a just-
snug running fit to the rod. If it is too tight with the screw all the way out, it is permissible to drill
out the holes that the bearing screws go through to allow the bearings to mount a bit further out
on the arms. That was not necessary with any that I have printed.
---------------------------------------------------------------------------------------------------------------------
The following is the assembly instructions for the 180 degree bearing assembly. The complete
Mendel uses a total of 6 of these assemblies. The bill of materials for this assembly is:
Description Printed/Purchased Quantity
ja_bearing_180 Printed 1
M3 X 12 SHCS Purchased 6
M3 Washer Purchased 5
M3 Nut Purchased 6
623 Bearing Purchased 2
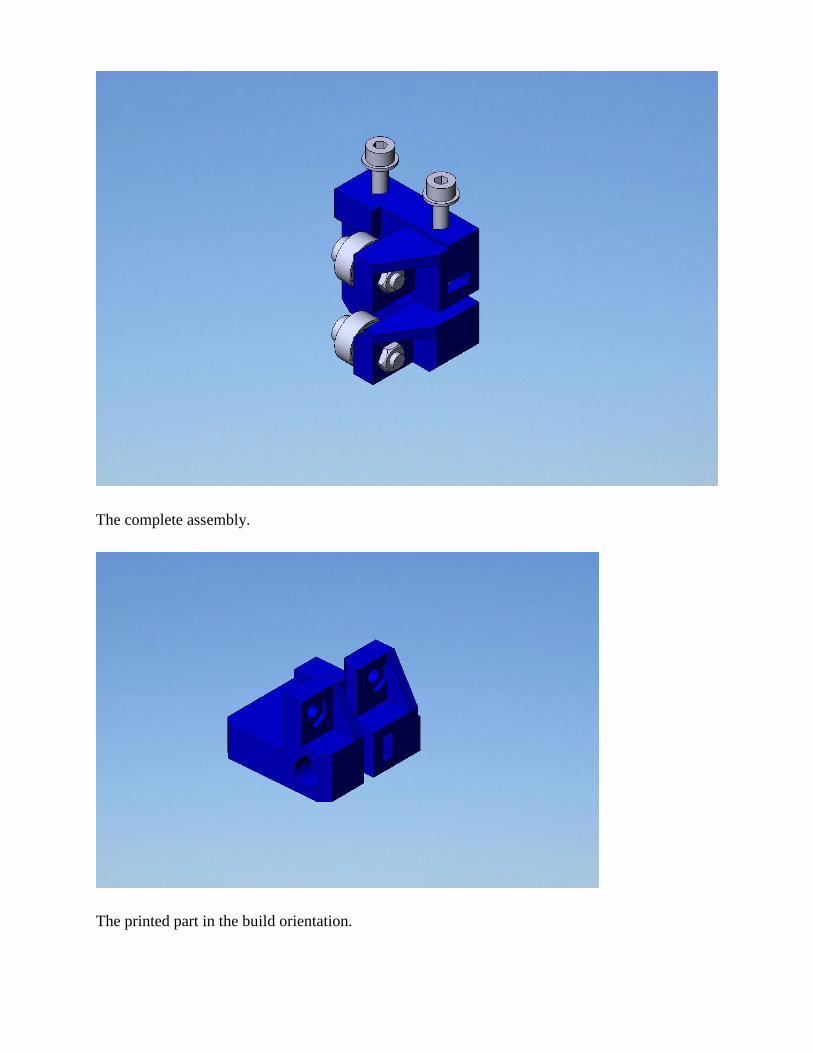
The complete assembly.
The printed part in the build orientation.
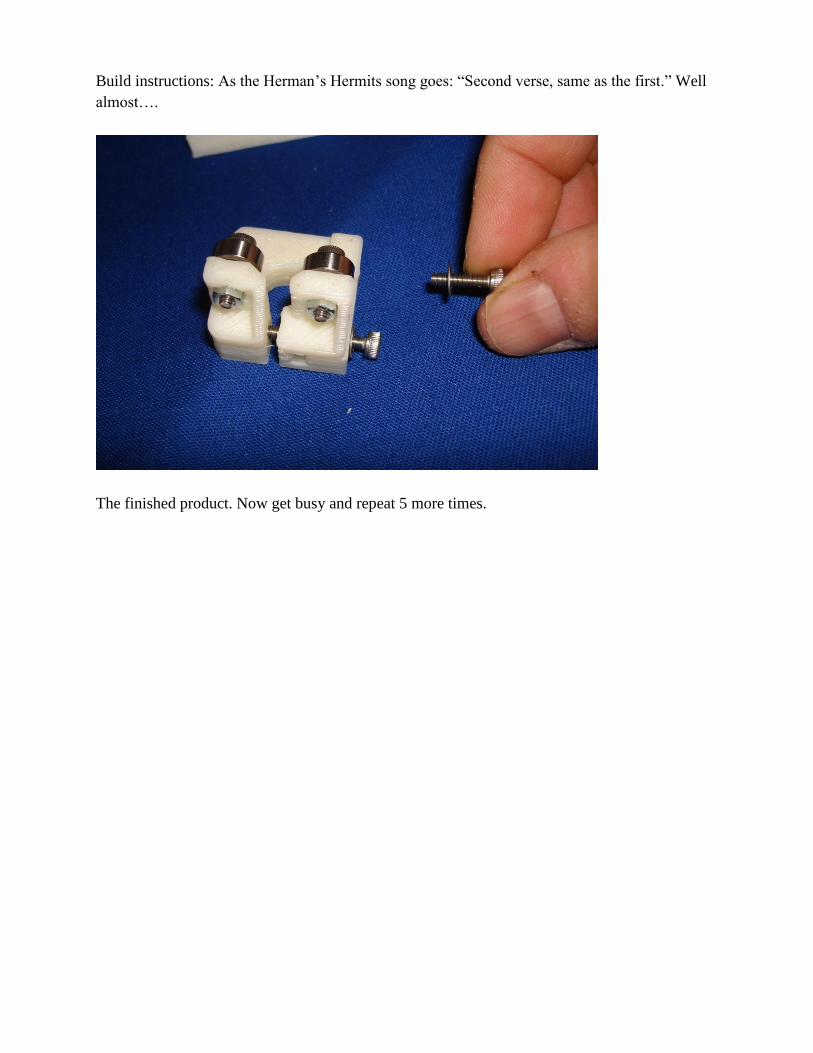
Build instructions: As the Herman‟s Hermits song goes: “Second verse, same as the first.” Well
almost….
The finished product. Now get busy and repeat 5 more times.


![On The Failure Of A Gas Foil Bearing: High Temperature ......failure (bearing seizure) while operating at a rotor speed of ... Bearing radial (assembly) clearance [mm] 0.076. 0.042:](https://static.fdocuments.us/doc/165x107/60e6f8086fbf910a2d6e333c/on-the-failure-of-a-gas-foil-bearing-high-temperature-failure-bearing.jpg)


